

Page 1

Getting Started
Even if you don’t like reading manuals, please read this section,
as well as
understand how to use some of the phone’s basic features and
functions.
In this section you will learn about:
• Battery Information
• Turning the Phone On and Off
• Placing and Receiving Calls
• The T elephone Display
• Using the Keypad
• Using Functions
Battery Information
Please read this section first in order to understand how to
prolong the life of your battery and prevent damage to your
telephone.
Installing and Removing the Battery
Insert the top of the battery into the recess on the back of the
phone. Push inward and upward from the bottom until the
locking catch snaps into place. Make sure the battery is secure.
To remove the battery, make sure the power is off. Push the
bottom upward and gently lift out from the bottom.
Commonly Used Features starting on page 8
, to
Getting Started
1
Page 2

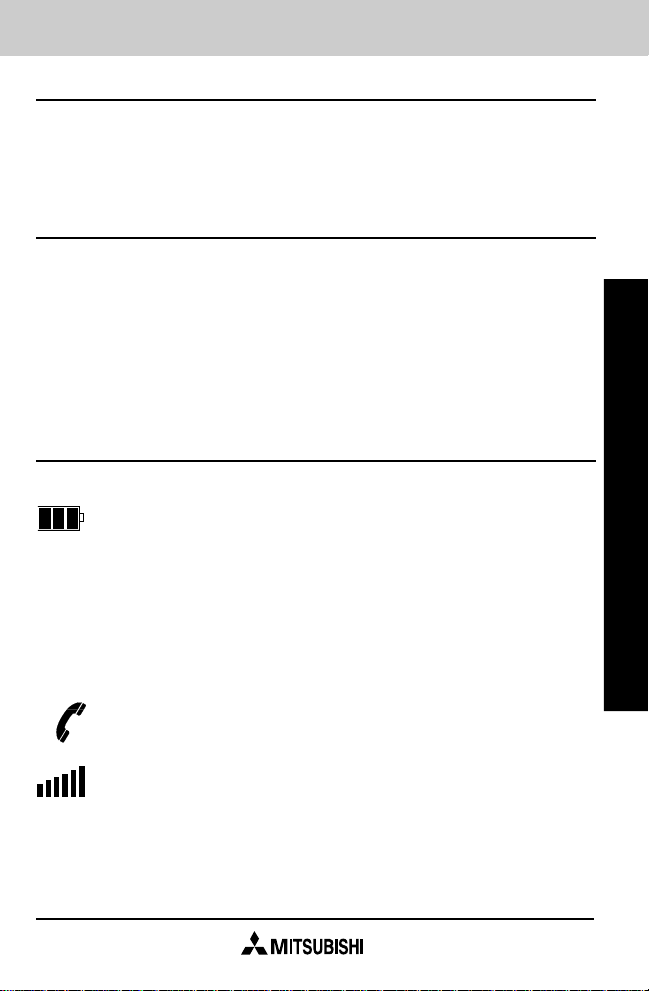
Battery Level Indicator
The Battery Level Indicator lets you know how much reserve
power remains in your rechargeable battery. It displays 3 levels
of reserve power. When the
charge. During fast charging, the entire indicator flashes.
NOTE: Temperature extremes, poor charging/discharging
practices, and improper storage reduce battery performance.
outline
flashes, it is time to re-
Charging the Battery
Make sure your battery is fully charged before using it for
the first time. Battery will operate at peak capacity after 3
full charge cycles. Discharge the battery completely between cycles.
To charge your phone's battery, connect the AC rapid charger to
the socket at the base of the phone and to a standard 120 volt
AC outlet. The Battery Level Indicator flashes.
To prolong the life of your battery, allow it to discharge fully once
a week. A charged battery discharges on its own in about a
month of no use. If you do not plan to use your phone for an
extended period (more than a month), remove the battery and
Getting Started
store it in a cool, dry place.
Important: Use of non-Mitsubishi batteries, chargers, antennas, or vehicle power adapters may damage your
Mitsubishi cellular telephone.
Charging Times
Recharging the NiMH battery with the AC rapid charging adapter
takes about 3.5 hours. The Standard NiCd battery charges in
about 2 hours, and the Extended Life NiCd battery takes about
2.5 hours. Charging is suspended while a call is in progress.
2
Page 3

Approximate Operation Times
Standard NiCd-S 700 mAh
Talk time: 100 minutes
Charge time: 2 hours
Standby time: 15 hours
Extended Life NiCd-L 1000 mAh
Talk time: 135 minutes
Charge time: 2.6 hours
Standby time: 21 hours
NiMH 1350 mAh
Talk time: 180 minutes
Charge time: 3.5 hours
Standby time: 28 hours
Getting Started
Do NOT dispose of batteries by fire.
3
Page 4

Turning the Phone On and Off
To turn your phone on, press PWR for at least half a second.
Press PWR for at least half a second to turn the phone off.
NOTE: Before turning your phone on for the first time, make
sure that the battery is fully charged.
Placing and Receiving Calls
Placing a Call
1. Turn the phone on. If Locked displays, unlock the phone
using your 3-digit Unlock code.
2. Extend the antenna fully.
3. Dial the number you wish to call (up to 32 digits). To
erase the last digit entered, press CLR. Press and hold
CLR to erase all digits.
4. Press TALK. Dialing and the Off-Hook Indicator display.
Ringing tones sound. If a busy tone sounds, press END. If
the phone establishes the call or gets the conversation
channel, the Talk T imer and IN USE display.
Getting Started
5. Press END when your call is finished.
Dial T one Calls
1. Turn the phone on. If Locked displays, unlock the phone
using your 3-digit code.
2. Press TALK. The Off-Hook Indicator displays and a dial
tone sounds.
3. Start dialing the number you wish to call within 15
seconds of pressing T ALK.
4. Press END for at least half a second to hang up when
your call is finished.
NOTE: Dial Tone Dialing is not available if you select Recall 1-
99, Recall 1-9, or Receive Only in Call Restriction settings.
4
Page 5
Dialing Notes and Error T ones
•
Busy tone
•
Reorder (fast busy) tone
•
Intercept (siren) tone
Press END and retry the call at a later time.
Retry.
Retry.
Receiving a Call
When you receive a call, the phone rings and CALL flashes.
1. Extend the antenna, then press T ALK or any key
END and PWR to answer the call.
2. Press END to terminate a call.
NOTE: You can press END while the phone is ringing to mute
the ring tone.
except
The T elephone Display
The Battery Level Indicator displays 3 levels of
power. When its outline flashes, the battery is
low. In fast charging, the entire indicator flashes.
▲
▼
α
The More Indicator displays when you can use
the ▲ and ▼ keys to scroll through menu selec-
tions or other data.
The Alphabet Mode Indicator displays when you
can enter alphanumeric characters.
The Off-Hook Indicator displays when a line is
engaged.
The Signal Strength Indicator shows the strength
of the connection in 6 levels.
Getting Started
5
Page 6

The Telephone Display (cont.)
No Displays when you are out of cellular service
Service
ROAM A/B Indicates whether you are using system A or B
IN USE Displays when the phone is in conversation mode.
MUTE Displays when the microphone is off.
FCN Displays after you press FCN. Enter the desired
-ON- Displays whenever the phone is on.
range.
when you are
function number.
roaming
.
Using the Keypad
▲ and ▼ When the More Indicator displays, use these keys
to scroll through menu selections or data. Otherwise, use to adjust Key Tone Volume or Conversation V olume.
CLR Deletes digits or characters. In sub-menus,
Getting Started
END Terminates calls. Also used as a Soft Key with
FCN Selects phone functions.
P Dials the One Touch dialing number.
PWR Turns the phone On and Off.
RCL Recalls phone numbers from memory locations.
TALK Places and receives calls. Also used as a Soft
STO Stores information in your phone’s memory
returns to the previous menu.
multiple functions.
Refer to Commonly Used Features on page 8.
Key with multiple functions.
locations.
Refer to Storing on page 13.
.
6
Page 7
Backlight
The backlight is off until you press a key (except PWR), then it
illuminates for 10 seconds.
Using Soft Keys
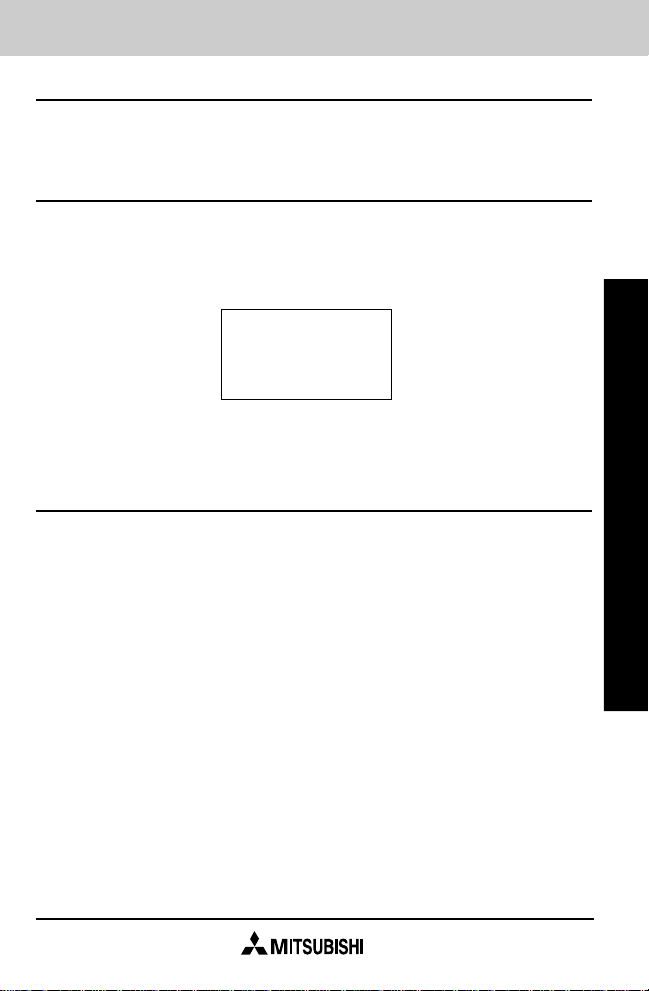
TALK and END are
ing to the options on the bottom line of the screen. For
example, the following screen displays for the Last Number
Redial function.
Press TALK (under
return to Standby.
soft keys
1st:
Dial
Dial
whose functions change accord-
1234567
Exit
) to dial; press END (under
Exit
) to
Using Functions
Press FCN, then enter the function number for the function you
want to use, or press END in Standby to access the Functions
menu. Move between functions using ▲ and ▼. Each menu
item in the Functions menu has a Sub Menu of related functions. Access these functions by pressing FCN or TALK, then
use ▲ and ▼ to scroll through them. Press CLR to return to a
previous menu.
NOTE: You must be in Standby to select most functions.
Getting Started
7
Page 8

Commonly Used Features
This section contains information on the features you use most
often:
• Special Dialing Features
• Using Call Mute Function
• Changing Volume Controls
• Adjusting Display Contrast
• Displaying Own Number
• Sending DTMF Tones
Special Dialing Features
One Touch Dialing
To dial the One Touch Dial number, press P for at least 1
Commonly Used Features
second.
NOTE: If the number is more than 12 digits long, press the RCL
key to view the first digits. If there is no One Touch number
programmed, Empty displays.
Super Speed Dialing
Dial any number stored in memory locations 1-09 by entering
the one digit memory address (1-9) and pressing TALK.
8
Page 9

Speed Dialing
1. Enter a memory address number from 01-99.
2. Press TALK. The number displays as the phone dials.
Refer to Storing on page 13 for information on assigning
numbers to memory locations.
Last Number Redial
Use Last Number Redial to display and dial any of the last 3
numbers dialed. To dial the last number dialed press TALK.
To choose from the last 3 numbers, do the following:
1. Press RCL twice (while in Standby) to access the last 3
numbers dialed. The most recently dialed number dis-
plays. If none exists, Empty displays.
NOTE: Only the last 12 digits of the number display. To view
earlier digits press RCL.
2. Use ▲ and ▼ to scroll through the last 3 numbers dialed.
3. Press TALK to dial the displayed phone number.
NOTE: You can add digits to the displayed phone number.
Automatic Redial
Automatic Redial redials a number when the phone is unable
to connect to the cellular system. If the call does not connect
after 10 tries, a
Reorder
tone sounds and you must dial again.
Commonly Used Features
1. Press FCN 21 while in Standby. Auto Redial (ON or
OFF) displays.
2. Press TALK to enable or disable this feature.
3. Press END to save the displayed setting and return to
Standby.
9
Page 10

Using Call Mute Function
During conversation, press FCN for more than 1 second to turn
your phone’s microphone off and put a call on hold. MUTE
displays. Press any key to return to the conversation.
Changing V olume Controls
Adjusting the Ringer Volume
1. Press FCN 41 while in Standby. Current volume displays.
2. Use # and * to adjust volume up and down. Adjust
ringer volume from 0 (off) to 7.
3. Press END to complete your setting and return to
Standby.
Adjusting the Speaker Volume
Use the Speaker Volume function to adjust the dial tone,
Reorder,
1. Press FCN 42. Speaker Vol. and the current volume
2. Use # and * to adjust speaker volume up and down
Commonly Used Features
3. Press END to complete your setting.
and
display.
from 1 to 7.
Intercept
tones.
Adjusting the Conversation Volume
In conversation, use ▲ and ▼ to adjust volume up and
down from 1 to 7.
Adjusting the Key Tone Volume
In Standby, use ▲ and ▼ to adjust volume up and down
from 0 (off) to 7.
NOTE: This function also sets Error, Retry Call Success, Low
Battery Alarm (min = 1), Wake-up, and Power Off tone levels.
10
Page 11

Adjusting the Display Contrast
1. While in Standby, press FCN 24.
2. Use TALK and END to adjust the display contrast.
3. Press P to complete your setting and return to Standby.
Displaying Your Phone Number
1. Press FCN 11. The screen displays your phone number.
2. Press END to return to Standby.
Sending DTMF Tones
You can store and transmit Dual Tone Multi-Frequency (DTMF)
tones—the sounds created when you press the keys on your
phone’s keypad. It is sometimes necessary to send DTMF
tones while communicating with computerized answering
systems.
Automatic DTMF
To enter a string of DTMF tones to send after you dial a phone
number, do the following:
1. Enter the desired phone number.
2. Press FCN, then press 0 to program a pause.
3. Enter the DTMF string on the keypad.
4. Repeat steps 2 and 3 as necessary to add additional
DTMF strings.
5. Press TALK to dial the phone number.
6. After the call connects, press TALK for each DTMF
string you want to send.
Commonly Used Features
11
Page 12

Storing DTMF Strings
Store DTMF strings the same way you store phone numbers.
You can recall these DTMF strings whenever you need to send
them.
See Storing on the next page.
Recalling DTMF Strings from Memory
1. Enter the telephone number of the party you wish to
call.
2. Press FCN, then press RCL. An M appears after the
phone number as a separating mark.
3. Enter the memory address of the DTMF string you want
to send.
4. If necessary, repeat steps 2 and 3 to add another
number to be sent.
5. Press TALK to dial the phone number. After the call
connects, press TALK once for each DTMF string.
Commonly Used Features
12
Page 13

Storing
You can store up to 99 phone numbers with identifying labels,
as well as 10 secret numbers and a One Touch number that
you can recall and dial. This section includes information on
the following:
• Storing Phone Numbers
• Recalling Phone Numbers
• Memory Edit Mode
Storing Phone Numbers
Alphanumeric Memory StoreStoring Names with Phone Numbers
1. Press STO. The Store Sub Menu displays.
2. Press FCN. The Alpha Indicator icon appears and Enter
Name displays.
3. Use the Alphanumeric keys to enter up to 12 characters
to identify the location.
a) Press the key with the character you want. The
first character for the key displays.
b) Press the key again to display its second character.
c) Press another key to advance to the next cursor
position. If you need to use the same character,
press and hold its key when that character displays.
d) Press CLR briefly to erase a character; press CLR
longer to erase the entire label.
e) Press TALK. Enter Number displays.
4. Enter the phone number you want to store and press
TALK.
Storing
13
Page 14

Alphanumeric Memory StoreStoring Names
with Phone Numbers (cont.)
5. Press STO to store the phone number and label information in the first available memory location, or manually key a memory address (any location 01-99). Stored
displays with the memory location address in which the
information is stored.
6. Press TALK to enter the Store Sub Menu to continue
storing data. Press END to return to Standby.
NOTE: If all locations are full, Memory Full!! displays.
Press TALK. The Store Sub Menu appears. Use Direct
Memory Store to enter a location and replace its contents.
Automatic Memory Store
1. Enter the phone number you want to store.
2. Press STO twice. The number is saved in the first available
memory location.
3. Press TALK to enter the Store Sub Menu to continue
Storing
storing. Press END to return to Standby.
Direct Memory Store
1. Enter the phone number you want to store.
2. Press STO, then key the first digit of the 2-digit memory
address (any location 01-99).
An Open Address Map for locations starting with that digit
displays. Dots indicate a location is full; numbers represent
the second digits of open locations. For example, if you
enter 1 as the first digit, and the Open Address Map reads . .
3 4 . . 7 . . ., locations 13,14, and 17 are open. Use ▲ and
▼ to display the Open Address Maps for ranges 20-29, 30-
39, etc.
3. Enter the second digit of the address for the location
you want to use.
14
Page 15

4.
If you select an open memory location...
Stored and the location address display. Press TALK to
enter the Store Sub Menu to continue storing, or press
END to return to Standby.
If you select a memory location that is already used...
A short warning tone sounds, then the information currently
stored in the location displays. Press STO to replace the
information. Press END to return to the previous menu
without replacing it
and the location address display.
5. Press TALK to enter the Store Sub Menu to continue
storing. Press END to return to Standby.
. If you replace information, Stored
Secret Number Store
Secret Memory locations *0-*9 are protected by security code.
1. Enter the number you want to store (up to 32 digits).
2. Press STO, then press
3. Enter Security Code. The Open Address Map displays to
indicate empty locations.
4. Enter the digit of the location to use.
5.
If you select an open secret memory location...
Stored and the information address display. Press TALK
to enter the Store Sub Menu to continue storing, or
press END to return to Standby.
If you select a secret location that is already used...
A warning tone sounds and the current contents of the
secret memory location display. Press STO to replace the
information, or END to return to the previous menu
without replacing it
display.
6. Press TALK to enter the Store Sub Menu to continue
storing. Press END to return to Standby.
Security Code displays.
.
*
. Stored and the information address
15
Storing
Page 16

One Touch Number Store
1. Enter the telephone number that you want to use as the
One Touch number.
2. Press STO, then press P.
3.
If the One Touch memory location is empty...
Stored displays. Press TALK to enter the Store Sub
Menu to continue storing. Press END to return to
Standby.
If the One Touch memory location is used...
A short warning tone sounds and the current contents of the
One Touch location display. Press STO to replace the
information. Stored displays.
4. Press TALK to enter the Store Sub Menu to continue
storing. Press END to return to Standby.
Recalling Phone Numbers
To enter the Recall Sub Menu in order to recall numbers, press
Storing
RCL. After you have recalled a phone number, you can select
from the following options:
• Use the keypad to add extra digits to a number before
• Press FCN to edit label and phone number.
• Press STO to erase the information from the address.
• Press TALK to dial the displayed number.
• Press END to return to Standby.
• Use ▲ and ▼ to scroll to neighboring locations.
dialing.
Refer to Erasing Memory Locations on page 19.
Alphabet Scan
1. Press RCL. The Recall Sub Menu Displays.
16
Page 17

2. Press FCN. The Alpha Indicator icon and cursor appear.
3. Enter the first letter of the label and press TALK.
The first label matching the selected character and its
location address display. If there is no match, the label
beginning with the next character of the alphabet displays.
If there are no labels, Empty displays.
4. Use ▲ and ▼ to scroll through the complete list of
memory location labels.
5. To dial the number for the displayed location, press
TALK.
6. To view the phone number for the displayed label, press
RCL. Press RCL again to display the location address,
the first 9 characters of the label, and the last 12 digits
of the phone number. Hold RCL to view the first digits
of the number if it is more than 12 digits. Press RCL a
third time to return to the full label display.
Memory Location Scan
1. Press RCL, then press ▼. The information for the last
recalled memory location displays.
2. Use ▲ and ▼ to scroll through all the locations in use.
3. To dial the displayed phone number, press TALK.
4. To view the memory label, press RCL. Press RCL again
to display the full number. Press RCL once more to
return to the label and number display.
Storing
17
Page 18

Direct Memory Recall
1. Press RCL.
2. Enter the
(01-99).
A Valid Address Map for the locations starting with that digit
displays. Dots indicate a location is empty; numbers represent the second digits of the used memory locations that start
with the digit you entered above. For example, if you enter 1,
and the Valid Address Map reads . . 3 4 . . 7 . ., locations
13,14, and 17 are in use and can be recalled. Use ▲ and ▼
to display the Valid Address Maps for ranges 20-29, 30-39,
etc.
3. Enter the second digit for the memory location you want
to recall. The information in that memory location displays.
If the location is empty, Empty displays.
first digit
of the 2-digit address for the location
One Touch Number Recall
1. Press RCL, then press P. Twelve digits of the One Touch
Storing
number display. If there is no One Touch number, Empty
displays.
2. If necessary, press RCL again to review the first digits of
the phone number.
Secret Number Recall
1. Press RCL, then press
2. Enter the Security Code. The Valid Address Map for Secret
Number locations displays.
above.
3. Enter the address of the location you want to recall.
Twelve digits of the Secret Number display. Press RCL to
view the first digits. If you select an empty location, Empty
displays.
18
. Security Code displays.
*
Refer to Direct Memory Recall
Page 19

Memory Edit Mode
Alphabet Name and Number Edit
1. Press RCL, then enter the address for the location you
want to change.
2. Press FCN. The current label and/or the cursor appears
and the Alpha Indicator Icon displays.
3. Use CLR to erase label characters. Add characters
using the Alphanumeric keys.
4. Press TALK to indicate the displayed label is correct
and display the phone number.
5. Use CLR to erase incorrect digits. Add digits on the
keypad.
6. Press TALK when you finish editing the label and
phone number.
7. Press STO to store the changes, or enter another
address to store them in.
8. Press TALK to edit another location or press END to
return to Standby.
Erasing Memory Locations
1. Press RCL, then enter the 2-digit memory location for
the phone number to erase.
2. Press STO.
3. Press TALK to remove the phone number and label
from memory. Press END to return to Standby
erasing
4. After you erase information and Erased displays, press
TALK to select another location to erase, or press END
to return to Standby.
this phone number.
without
Storing
19
Page 20

Features
Many of the features of the AH-350 provide security from
unauthorized use. This section includes information on the
following:
• Security Features
• Timers
• Keypad Lock
• Selectable Ringing Tones
• Status Monitor
• Multiple Language Selection
• Automatic Answer
• Call in Absence Indicator
Security Features
Features
Security Code
To access functions beginning with 6, press FCN 6, press
TALK, then enter the 4-digit Security Code. If you enter a
wrong code, Incorrect Security Code displays.
NOTE: The Security Code is pre-programmed You cannot
change the Security Code.
Creating an Unlock Code
1. Press FCN 62, then enter the Security Code. The current
Unlock Code displays.
2. To create a new Unlock Code, press TALK, enter 3 digits
and press TALK again.
NOTE: You can program a new Unlock Code even while the
phone is locked.
20
Page 21

Locking the Phone
1. Press FCN 51 while in Standby. Enter Unlock Code
displays.
2. Enter the 3-digit Unlock Code. Locked displays. If you
enter a wrong Unlock Code, Invalid Code!! displays.
NOTE: You can dial 911 while the phone is locked. DO NOT
use 911 as your Unlock Code.
Call Restriction
1. Press FCN 61 while in Standby, then enter the 4-digit
Security Code. Current Call Restriction status displays.
2. Press TALK to change Call Restriction. Select from the
following Call Restriction levels:
No Restriction
Local Only
Recall 1-99
Recall 1-9
Receive Only
All call features are enabled.
Disables long distance calls. Only 7-digit local
calls and toll-free calls allowed.
Disables numbers not stored in memory
locations 1-99. Also prevents entry of new
phone numbers into memory locations.
Disables numbers not stored in memory
locations 1-9. Also prevents the entry of new
numbers into memory locations.
Disables all calls except for emergency calls.
Features
3. Press END to save your selection and exit this mode.
Call Restriction Interaction
• 911 calls are always available.
• Manual DTMF is only available during
Local Only
• Dial Tone Dialing is unavailable during
1-9
, and
.
Receive Only
.
No Restriction
and
Recall 1-99, Recall
21
Page 22

Automatic PIN Number
If your service provider supports this feature, a PIN must be
sent whenever you make a call. Rather than entering it each
time, you can program the phone to send the PIN automatically.
Programming the PIN
1. Press FCN 65, followed by your Security Code. The
current PIN displays. If there is no current PIN, a line of
dashes displays.
2. To change the PIN, press TALK, then enter the desired
4-digit PIN and press TALK again. Use CLR to delete
digits. Press END to exit without changing the PIN.
Enabling Automatic PIN
With Automatic PIN enabled, the phone sends the PIN automatically when required by the cellular system.
1. Press FCN 66 followed by the Security Code. The
status of the PIN (ON or OFF) displays. If there is no PIN
Features
programmed, Enable N.A. displays.
2. Press TALK to change PIN status.
22
Page 23

Timers
Last Talk Time
Last Talk Time displays the total time for the most recent call.
1. Press FCN 31 while in Standby. 00m00s displays.
m is the total minutes
s is the total seconds
2. Press END to return to Standby.
Accumulated Talk Time
Accumulated Talk Time displays the total time for all calls for
the selected NAM phone number.
1. Press FCN 32 while in Standby. 000h00m displays.
h is the total hours
m is the total minutes
2. Press END to return to Standby.
Resetting The Talk Timer
1. Press FCN 63 while in Standby, then enter your 4-digit
Security Code.
2. Press TALK. Talk Time Reset!! displays.
3. Press END to return to Standby.
Features
Operating Timer
Operating Timer displays the total time for
for all NAMs and cannot be reset.
1. Press FCN 33 while in Standby. 000h00m displays.
h is the total hours
m is the total minutes
2. Press END to return to Standby.
all
calls. This time is
23
Page 24

Keypad Lock
Press END and ▲ simultaneously to enable. Key Locked
displays and all keys (including PWR) are disabled to prevent
accidental key presses. Press END and ▼ simultaneously
to disable. Key lock turns off automatically when you receive a
call.
Selectable Ringing Tones
1. Press FCN 43 while in Standby. The current ring tone
displays.
2. Press TALK to change the ring tone. Press TALK until
the desired ring tone displays.
3. Press END to save your selection and return to Standby.
Status Monitor
1. Press FCN 64, and enter the Security Code. Status
Mon (ON or OFF) displays.
Features
2. Press TALK to enable or disable the Status Monitor.
3. Press END to save your setting and to return to
Standby.
Status Monitor Messages
Status Monitor Messages display in the following formats:
Conversation Mode
LCCCC RRR
TPS AAAAA
24
Non-Conversation Mode
LCCCC RRR
T AAAAA
Page 25

Status Monitor messages (cont.)
Message... Description...
L Serving system support level for authentication
0=Not Supported, 1=Supported
CCCC Voice channel or control channel in Standby
RRR Received RSSI
T Operating mode
0=AMPS (External), *1=CAPCS (Internal)
P Transmit power level
0 - 9, A (A = power level 10, the highest)
S Received SAT frequency
0=5970 Hz, 1=6000 Hz, 2=6030 Hz, 3=no SAT
AAAAA Received SID
* This function applies to the AH-355 only.
Multiple Language Selection
1. Press FCN 25. The current language displays (English,
French, Spanish, or Portuguese).
2. Press TALK to view the next language in the list.
3. Press END to select the displayed language and to
return to Standby.
Automatic Answer
Features
Answers calls if you do not within 10 seconds.
1. Press FCN 23 while in Standby.
2. Press TALK to enable or disable Automatic Answer.
3. Press END to save your setting and return to Standby.
Call in Absence Indicator
When you receive a call, and are unable to answer it, the
message Called displays.
25
Page 26

Advanced Features
System A/B Selection
1. Press FCN 22. The current System A/B setting displays.
2. Press TALK to change the setting to one of the following:
Prefer A Phone scans System A
Prefer B Phone scans System B
Home Only Phone does not roam.
Only A Phone scans
Only B Phone scans
3. Press END to accept and save the displayed setting and
return to Standby.
NOTE: If Roam Inhibit is enabled in NAM, System A/B Select is
not available and Roam Inhibit displays. Press END.
only
only
*Cellular/CAPCS Dual Mode Operation
Cellular Auxiliary Personal Communications Service (CAPCS)
allows you to use your phone within a closed user group of
Advanced Features
limited geographical range. The following applies to CAPCS
mode:
• Internal displays in Standby instead of ON when phone is
in CAPCS (Internal) mode.
• External displays in Standby instead of ON when phone is
in cellular (External) mode.
• The ring for CAPCS mode sounds 2 rings for 1 second each
at 3 second intervals.
• In CAPCS multi-NAM, settings for System A/B, Call Restric-
tion, and Ring Tone are ignored.
NOTE: The functions that follow are not available if the CAPCS
NAM (NAM 3) has not been programmed by the dealer.
first
when it is scanning.
first
when it is scanning.
System A when it is scanning.
System B when it is scanning.
26
Page 27

*External Mode Enable/Disable
When External mode is enabled, you can use both Internal and
External modes; when External mode is disabled, you can only
use Internal mode.
1. Press FCN, then press *. Security Code displays.
2. Enter your Security Code. The status of External mode
(Enabled or Disabled) displays.
3. Press TALK to change the status of External mode.
4. Press END to accept and save the new setting and
return to Standby.
NOTE: When *External Mode is disabled, the status of FCN 26
will be automatically changed to "Only Int."
*CAPCS Mode Selection
1. Press FCN 26 while in Standby. The current mode
(Prefer Int., Only Int., or Only Ext.) displays.
2. Press TALK to change the displayed mode.
Preferred Int. Phone tries to access Internal service
before External service. If Internal service is not available,
the phone checks for it every 1-5 minutes depending on
dealer performed NAM programming.
Only Ext. Phone tries to access External service exclusively.
Only Int. Phone tries to access Internal service exclu-
sively.
3. Press END to accept and save your setting and return
to Standby.
*This function applies to the AH-355 only.
27
Advanced Features
Page 28

*External/Internal Mode Toggle
Use Toggle to manually switch between Internal and External
mode. The phone returns to the original mode if left idle for 1
minute. To use External/Internal Toggle, press FCN, then #.
• If the CAPCS telephone number is not programmed, an
error tone sounds.
• If External mode is disabled in FCN *, External mode
N.A. displays.
• FCN 26 must be set to Prefer Internal for External/
Internal Toggle to work.
*External Access Code
The External Access Code is automatically inserted when
dialing an External number in Internal mode.
1. Press FCN 27 while in Standby. The current External
Access Code displays. To change the code, press TALK.
2. Key the desired Code (1-4 digits), then press TALK.
*CAPCS Accumulated Talk Time
Advanced Features
1. Press FCN 34 while in Standby. 000h00m displays.
h is the total hours
m is the total minutes
2. Press END to return to Standby.
*This function applies to the AH-355 only.
28
Page 29

Dual NAM Selection
Choose between 2 NAMs for the cellular (External) mode if
phone is programmed with 2 NAMs.
1. Press FCN 12 while in Standby. Currently selected NAM
displays.
2. Press TALK to change the displayed NAM.
3. Press END to accept and save the displayed NAM
setting and return to Standby.
Advanced Features
29
Page 30

Quick Reference Guide
Messages and Prompts Glossary
*-External- Displays instead of -ON- when the phone is in
cellular (External) mode.
Features on page 26 for information on
CAPCS.
*-Internal- Displays instead of -ON- when the phone is
in CAPCS (Internal) mode.
Advanced Features on page 26 for information on CAPCS.
Auto Answer Displays with your phone number if Auto-
Guide
Quick Reference
CALL Displays when you receive a call. Press
Called Displays after an unanswered call.
Dialing Displays as the phone dials after you press
Quick Reference Guide
Empty Displays when you try to recall a phone
matic Answer is enabled.
TALK to answer the call.
TALK.
number from a location that is empty. Press
END to return to Standby.
Refer to Advanced
Refer to
Enter Name Displays during storage operations to
prompt you to enter a label for the memory
location.
Store on page 13.
Enter Number Displays during memory store operations.
Enter the number you want to store, then
press TALK.
*This function applies to the AH-355 only.
30
Refer to Alphanumeric Memory
Page 31

Enter Unlock Displays when you try to lock your phone
Code using FCN 51. Enter the Unlock Code,
and press TALK. If you have not pro-
grammed an Unlock Code, use FCN 62 to
do so before locking the phone.
Erase? Displays with a stored phone number
when you try to erase a memory location.
Press TALK to erase the number and
label.
Erased Displays to confirm erasure after you have
cleared a memory location. The address
of the cleared location also displays.
ERROR Displays when there is a problem with your
phone’s programming or circuitry. Write
down Error number and bring phone in for
service.
External Mode Displays when you attempt to access
*
N.A. External mode and Int Only is selected
in FCN *. Change the setting in FCN *.
FCN Displays after you press FCN. Enter the
desired function number.
IN USE Displays with the In-Call timer when phone
is in conversation mode.
Quick Reference Guide
Incorrect Displays when you enter an incorrect
Security Code security code. Press END, and begin
again.
Invalid Code!! Displays when you enter an Invalid Unlock
Code when you attempt to lock your
phone.
Key Locked Displays while the keypad lock is on.
Press END and ▼.
*This function applies to the AH-355 only.
31
Page 32

Key Tone Displays when you attempt to change the
key tone volume. Adjust the volume using
▲ and ▼, then press END to save your
setting.
Local Only Displays instead of your phone number if
Call Restriction level (FCN 61) is set to
Local Only
Locked Displays while your phone is locked. Enter
the 3-digit Unlock Code. If you forget your
unlock code, program a new one.
.
Creating an Unlock Code in the Features
section starting on page 20.
Memory Full!! Displays when you try to store information
Guide
Quick Reference
MUTE Displays when you turn your phone’s
No Service Displays when you are out of range of
Quick Reference Guide
using Automatic Memory Store and all
memory locations are full. Use Direct
Memory Store to overwrite previously
stored data.
microphone off during conversation by
pressing FCN. Press any key to turn it on.
cellular service. You cannot complete a call
until you return to the service area.
Refer to
ON Displays in standby when CAPCS NAM
(NAM3) is not programmed.
PIN Enable Displays when you try to enable the PIN
N.A. before programming one. Use FCN 65 to
select a PIN.
PIN N.A. Displays when you make a call with the PIN
enabled if your service provider does not
support the PIN feature.
32
Page 33

Recall 1-9 Displays instead of your phone number if
Call Restriction level (FCN 61) is set to
Recall 1-9
Recall 1-99 Displays instead of your phone number if
Call Restriction level (FCN 61) is set to
Recall 1-99
Receive Only Displays instead of your phone number if
Call Restriction level (FCN 61) is set to
Receive Only
ROAM (A or B) Indicates whether you are using system A
or B when
ROAM Displays when you select an alternate
INHIBIT system in System A/B Select and Roam
Inhibit is programmed in NAM.
Security Prompts for Security Code. Enter
Code---- Code, and press TALK.
Speaker Vol. Displays when you use FCN 42 to change
the speaker volume. Use # and * to
adjust speaker volume, then press END
to save.
Stored Displays with a memory address to
confirm a memory store.
.
.
.
roaming
.
Quick Reference Guide
Talk Timer Displays when you reset your phone’s
talk timers.
Voice Displays when you attempt to change
conversation volume. Adjust the volume
with ▲ and ▼, then press END to save
your setting.
33
Page 34

Functions List
Access functions by pressing END to enter the Primary Functions menu, or press FCN and the first digit of the function
number. Use ▲ and ▼ to move through Primary Functions.
Press TALK to select a function, then use ▲ and ▼ to move
through the secondary functions. When you know the function
number for the operation you wish to perform, you can skip the
above steps. Simply press FCN and enter the number.
TELEPHONE NUMBER FUNCTIONS
FCN 11 Display Own Number
FCN 12 Select NAM
GENERAL SETTINGS FUNCTIONS
Guide
FCN 21 Automatic Retry On/Off
FCN 22 System A/B Selection
Quick Reference
FCN 23 Automatic Answer
FCN 24 LCD Viewing Angle
FCN 25 Display Language
FCN 26 CAPCS Mode Selection
*
FCN 27 Program External Access Code
*
Quick Reference Guide
TIMERS
FCN 31 Last Talk Time
FCN 32 Accumulated Talk Time NAM 1
FCN 33 Total Operating Time
*
FCN 34 Accumulated Talk Time CAPCS NAM
VOLUMES/TONES
FCN 41 Ring Volume
FCN 42 Speaker Volume
FCN 43 Select Ringing Tone
*This function applies to the AH-355 only.
34
Page 35

Functions List (cont.)
LOCK
FCN 51 Lock
SECURITY FUNCTIONS (must enter 4-digit Security Code)
FCN 61 Call Restriction Setting
FCN 62 Program Unlock Code
FCN 63 Accumulated Talk Time Reset
FCN 64 Status Monitor On/Off
FCN 65 Program PIN Number
FCN 66 Automatic PIN Enable/Disable
OTHER FUNCTIONS
FCN * External Mode Enable/Disable
*
FCN # External/Internal T oggle
*
FCN RCL Add Memory Location as DTMF tones
FCN T ALK Auto DTMF
FCN 0 Pause
Quick Reference Guide
*This function applies to the AH-355 only.
35
Page 36

Accessories
To request product information, or to place an order
contact your service provider.
AC Rapid Charging Adapter
An AC Rapid Charging
Adapter is included for
battery charging. Plug the
adapter into a wall outlet
and into the jack on the
right side of the phone.
Charging is suspended
while a call is in progress.
Part Number ACP-P1
Batteries
Accessories
The following batteries are
available:
700 mAh NiCd Battery
Talk time: 100 minutes
Charge time: 2 hours
Standby time: 15 hours
Part Number SBT-P5
1350 mAh NiMH Battery
Talk time: 180 minutes
Charge time: 3.5 hours
Standby time: 28 hours
Part Number EBT-P5
36
1000 mAh NiCd Battery
Talk time: 135 minutes
Charge time: 2.6 hours
Standby time: 21 hours
Part Number EBT-P4
Page 37

Belt Clip
An optional Belt Clip provides
extra portability for your phone.
Carrying Case
Made of high grade leather, this
attractive Carrying Case protects
your phone.
Cigarette Lighter Adapter
One end of the Cigarette Lighter
Adapter plugs into the cigarette
lighter of any car; the other plugs
into the jack on the right side of
the phone. Charging is suspended while a call is in progress.
Part Number CLP-P1
Accessories
Part Number 250/350/355CSE
Part Number CIG-P4
37
Page 38

Desktop Rapid Charger
Handsfree Kit
Accessories
Headset
A Desktop Rapid Charger is
available for charging your
phone’s spare battery.
Part Number QCK-P5
The Handsfree Kit adds flexibility
and mobile phone convenience.
Part Number HFK-P4
A Headset is also available. The
Headset plugs into the left side of
the phone. It has an earphone
and microphone and can be used
in place of the Handsfree Kit.
38
Part Number HDS-P1
Page 39

Mobile Holder
Holds the phone securely and
conveniently in place in your
vehicle.
Part Number HLD-P3
Accessories
Product availability subject to change without notice.
39
Page 40

Rules, Regulations, and Precautions
First introduced in 1984, the handheld portable cellular telephone
is one of the most exciting and innovative electronic products
ever developed. With it you can stay in contact with your office,
home, emergency services, and others.
For the safe and efficient operation of your phone, observe the
following guidelines:
Exposure to Radio Frequency (RF) Energy
Your cellular telephone is a radio transmitter and receiver that
receives and sends radio frequency (RF) energy. The phone
operates on a frequency range of 824 MHz to 894 MHz using
commonly employed frequency modulation (FM) techniques.
The power level can range from 0.006 watts to 0.6 watts.
In 1991 the Institute of Electrical and Electronics Engineers
(IEEE) and in 1992 the American National Standards Institute
(ANSI) updated the 1982 ANSI Standard for safety levels with
respect to human exposure to RF energy. In March 1993, the
US Federal Communications Commission (FCC) proposed
adoption of the updated ANSI Standard. The design of your
phone complies with this Standard. If you want to limit RF
Rules, Regulations, and Precautions
exposure even further, you may choose to limit the duration of
calls and operate the phone in the most power efficient manner.
For your phone to operate at the lowest power level, consistent
with good call quality, please observe the following guidelines:
• If your phone has an extendible antenna, extend it fully.
• Hold the phone as you would any other telephone. Speak
directly into the mouthpiece.
• DO NOT hold the antenna while the phone is in use.
40
Page 41

Antenna Care
DO NOT use your phone with a damaged antenna. Use
manufacturer-approved antennas, and have authorized service
centers do the work. Non-manufacturer-approved antennas,
modifications, or attachments could impair call quality, damage
the phone, void your warranty, and violate FCC regulations.
Driving
Check the laws and regulations on the use of cellular telephones in the areas in which you drive. Always obey them.
While driving, follow these guidelines:
• Give full attention to driving.
• Use handsfree operation, if available.
• Pull off the road and park before making or answering a
call if driving conditions require it.
Electronic Devices
Most modern electronic equipment is shielded from RF energy;
however, RF energy from cellular telephones may affect
inadequately shielded equipment. Check with the manufacturer to determine if equipment is adequately shielded from
external RF energy. You should also check with the manufacturer of any equipment that has been added to a vehicle.
Consult the manufacturer of any personal medical devices
(such as pacemakers, hearing aids, etc.) to determine if they
are adequately shielded from RF energy.
Turn your phone OFF in health care facilities.
Aircraft
•
Turn your phone OFF before boarding any aircraft.
• Use it on the ground only with the crew’s permission.
• DO NOT use it in the air.
Rules, Regulations, and Precautions
41
Page 42

To prevent interference with aircraft navigation and communications systems, US Federal Aviation Administrations (FAA)
regulations require you to have permission from a crew member
to use your cellular phone while an aircraft is on the ground.
FCC regulations prohibit the operation of cellular phones in
flying aircraft.
Children
Do not allow children to play with your phone. It is not a toy.
Children could hurt themselves or others, damage the phone, or
place expensive accidental calls.
Blasting Areas
Turn your phone OFF whenever you are near a blasting area, or
whenever you see the sign,
tion crews use remote control RF devices to set off explosives.
Turn off two-way radio
. Construc-
Potentially Explosive Atmospheres
Turn your phone OFF when in any area with a potentially
explosive atmosphere. It is rare, but your phone or its accessories could generate sparks, which could cause an explosion or
fire.
Areas with potentially explosive atmospheres are often, but not
always, clearly marked. They include fueling areas such as gas
stations; below deck on boats; fuel or chemical transfer and
storage facilities; areas where the air contains chemicals or
Rules, Regulations, and Precautions
particles, such as grain, dust, or metal powders; and any areas
where you are advised to turn off your vehicle’s engine.
Do not transport or store flammable gas in the compartment of
your vehicle which contains your phone or its accessories.
Vehicles running on liquefied petroleum gas (propane or butane)
must comply with the National Fire Protection Standard (NFPA-
58). For a copy of this Standard contact the National Fire
Protection Association, One Batterymarch Park, Quincy, MA
00269, ATTN.: Public Sales Division.
42
Page 43

Index
A
AC Rapid Charging Adapter
36
Accessories
Batteries 36
Belt Clip 37
Carrying Case 37
Cigarette Lighter Adapter
37
Desktop Charger 38
Handsfree Kit 38
Headset 38
Mobile Holder 39
Accumulated Talk Time 23
Advanced Features
CAPCS Accumulated Talk
Time 28
CAPCS Mode Selection 27
Cellular/CAPCS Dual Mode
Operation 26
Dual NAM Selection 29
External Access Code 28
External Mode Enable/
Disable 27
External/Internal Mode
Toggle 28
System A/B Selection 26
Alphabet Name and Number
Edit 19
Alphabet Scan 17
Alphanumeric Memory Store
13
Antenna Care 41
Automatic Answer 25
Automatic DTMF 10
Automatic Memory Store 14
Automatic PIN Number
Enabling 22
Programming 22
Automatic Redial 9
B
Battery Information
Battery Level Indicator 2
Charging the Battery 2
General 1
Installing and Removing 1
Battery Level Indicator 2
Belt Clip 37
C
Call in Absence Indicator 25
Call Restriction
Setting 21
CAPCS Mode
CAPCS Accumulated Talk
Time 28
CAPCS Mode Selection 27
Dual Mode Operation 26
Index
43
Page 44

Dual NAM Selection 29
External Access Code 28
External Mode Enable/
Disable 27
External/Internal Mode
Toggle 28
Carrying Case 37
Cellular/CAPCS Dual Mode
Operation 26
Changing Volume Controls
10
Charging the Battery
Charging Times 2
General 2
Cigarette Lighter Adapter 37
Commonly Used Features
Adjusting the Display
Contrast 10
Automatic DTMF 10
Index
Changing Volume Controls
10
General 8
Special Dialing Features 8
Conversation Volume 10
25
Displaying Your Phone
Number 10
Driving 41
DTMF Tones
Automatic 10
Recalling DTMF Strings
from Memory 12
Sending 10
Storing DTMF Strings 12
Dual Mode Operation 26
Dual NAM Selection 29
E
Enabling Automatic PIN 22
Erasing Memory Locations 19
Error Tones 4
External Access Code 28
External Mode Enable/Disable
27
External/Internal Mode Toggle
28
F
D
Desktop Charger 38
Dial Tone Calls 4
Dialing Notes and Error Tones
4
Direct Memory Recall 18
Direct Memory Store 14
Display Contrast 10
Display Language Selection
44
Features
Automatic Answer 25
Call in Absence Indicator
25
General 20
Keypad Lock 24
Multiple Language Selec-
tion 25
Security Features 20
Page 45

Selectable Ringing Tones
24
Status Monitor 24
Functions List 34
G
Getting Started
Battery Information 1
The Telephone Display 4
Turning the Phone On and
Off 4
H
Handsfree Kit 38
Headset 38
I
Installing and Removing the
Battery 1
K
Key Tone Volume 10
Keypad Lock 24
L
Language Selection 25
Last Talk Time 23
Locking the Phone 21
M
Main Display 4
Memory.
See
Storing
Memory Location Scan 17
Messages and Prompts
Glossary 30
Mobile Holder 39
Multiple Language Selection
25
O
One Touch Dialing
General 8
One Touch Number Recall
18
Storing the One Touch
Number 16
Operating Timer 23
P
Placing and Receiving Calls
4
Dial Tone Calls 4
Placing a Call 4
Receiving a Call 4
Dialing Notes and Error
Tones 4
Programming the PIN 22
Q
Quick Reference Guide
Functions List 34
Messages and Prompts
Glossary 30
Index
45
Page 46

R
S
Radio Frequency (RF) Energy
40
Recalling DTMF Strings from
Memory 12
Recalling Phone Numbers 16
Alphabet Scan 17
Direct Memory Recall 18
Memory Location Scan 17
One Touch Number Recall
18
Secret Number Recall 18
Receiving a Call 4
Redial 9
Ringer Volume 10
Ringing Tones 24
Rules, Regulations and
Index
Precautions
Aircraft 41
Antenna Care 41
Blasting Areas 42
Children 42
Driving 41
Electronic Devices 41
Potentially Explosive
Atmospheres 42
Radio Frequency (RF)
Energy 40
Saving.
Secret Number
Security Code 20
Security Features
Selectable Ringing Tones 24
Sending DTMF Tones 10
Speaker Volume 10
Special Dialing Features
Speed Dialing 9
Status Monitor 24
Storing
See
Storing
Recalling 18
Storing 15
Automatic PIN Number 22
Call Restriction 21
Locking the Phone 21
Security Code 20
Automatic Redial 9
One Touch Dialing 8
Speed Dialing 9
Super Speed Dialing 8
Alphanumeric Memory
Store 13
Automatic Memory Store
14
Direct Memory Store 14
General 13
One Touch Number Store
16
Recalling Phone Numbers
16
Secret Number Store 15
46
Page 47

Storing Names with Phone
Numbers 13
Storing Phone Numbers
13
Super Speed Dialing 8
System A/B Selection 26
T
Telephone Display 4
Timers
Accumulated Talk Time 23
Last Talk Time 23
Operating Timer 23
Turning the Phone On and
Off 4
V
V olume Controls 10
Index
47
 Loading...