

Page 1
Getting Started
Even if you don’t like reading manuals, please read this section
as well as
understand how to use some of the phone’s basic features and
functions.
In this section you will learn about:
• The Telephone Display
• Using the Keypad
• Using Functions
• Turning the Phone On and Off
• Dialing Notes and Error Tones
• Placing and Receiving Calls
• Battery Information
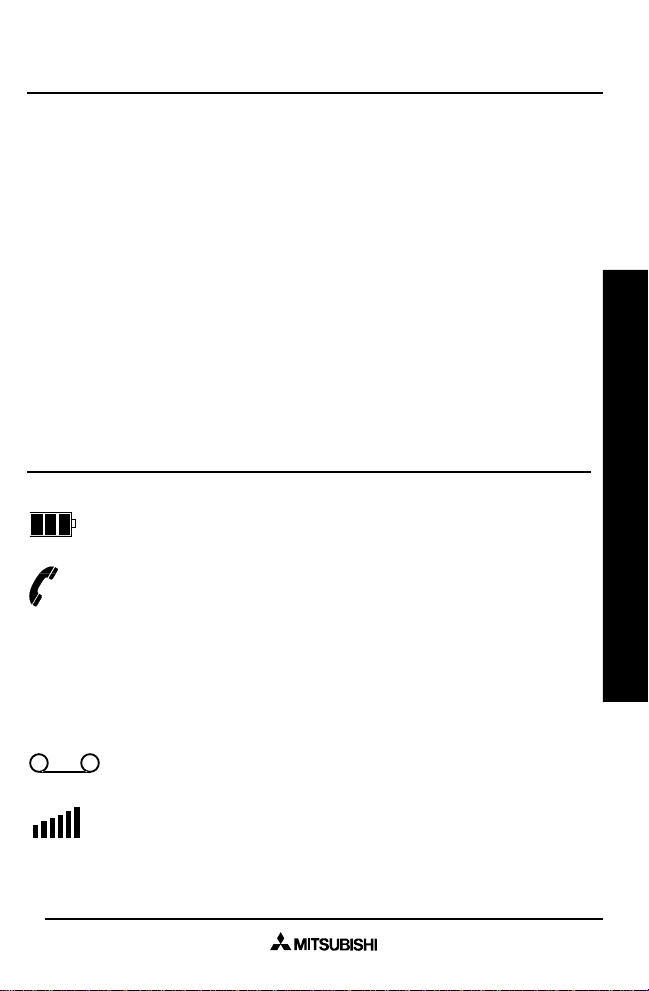
The T elephone Display
Commonly Used Features
The Battery Level Indicator displays 3 levels of
power. When its
In fast charging, the entire indicator flashes.
The Off-Hook Indicator displays when a line is
engaged.
outline
(beginning on page 7) to
flashes, the battery is low.
Getting Started
NS
Rm
The No Service indicator displays when the area
you are in has no cellular service.
A
B
The Roam A/B indicator indicates whether you are
using the A or B system when roaming.
The Message indicator displays if you have a
message waiting.
The Signal Strength Indicator shows the strength of
the connection in 6 levels.
1
Page 2

The Telephone Display (cont.)
-ON- Displays whenever the phone is on.
Loc'd Displays when the phone is locked.
CALL Displays when you are receiving a call.
CALLED Displays if you received a call but did not answer it.
Backlight
The backlight is off until you press a key (except PWR); then it
illuminates for 10 seconds.
Using the Keypad
▲ and ▼ Use these keys to scroll through function selections
or data. Otherwise, use to adjust Key Tone Volume
or Conversation Volume.
CLR Deletes digits or characters. In sub-menus, returns
to the previous menu. Also used to exit from any
function menu.
END Terminates calls. Also used to exit from any
Getting Started
FCN Selects phone functions.
P Dials the One-Touch dialing number.
PWR Turns the phone on and off.
RCL Recalls phone numbers from memory locations.
TALK Places and receives calls.
STO Stores phone numbers in your phone’s memory
function menu.
Refer to Commonly Used Features on page 7.
Refer to Storing on page 11.
locations.
Refer to Storing on page 11.
2
Page 3

Using Functions
Press FCN, then enter the function number for the function you
want to use. Move between functions using ▲ and ▼.
After entering the required information for a function, you can
press END, CLR, or STO, or use ▲ and ▼, to save the
information.
For some functions, pressing CLR clears the display so you
can re-enter the information, if needed.
NOTE: You cannot access any functions during Conversation
mode (except for Function 1 - Display Own Number).
Turning the Phone On and Off
To turn your phone on, press PWR for at least half a second.
Press PWR for at least half a second to turn the phone off.
NOTE: Before turning your phone on for the first time, make
sure that the battery is fully charged.
Dialing Notes and Error Tones
•
Busy tone
•
Reorder (fast busy) tone
•
Intercept (siren) tone
•
Low battery tone
indicates low battery.
Press END and retry the call at a later time.
Retry.
Retry.
Short, high tone every 20 seconds
Getting Started
Placing and Receiving Calls
Placing a Call
1. Turn the phone on. If Loc'd displays, unlock the phone
using your 3-digit Unlock code.
2. Dial the number you wish to call (up to 32 digits). To
erase the last digit entered, press CLR. Press and hold
CLR to erase all digits.
3
Page 4

3. Press TALK. The Off-Hook Indicator starts to blink. If a
busy tone sounds, press END. If the phone establishes the
call or gets the conversation channel, the Talk Timer displays and the Off-Hook Indicator stops blinking.
4. Press END when your call is finished.
Dial Tone Calls
1. Turn the phone on. If Loc'd displays, unlock the phone
using your 3-digit Unlock code.
2. Press TALK. The Off-Hook Indicator starts to blink and a
dial tone sounds.
3. Start dialing the number you wish to call within 15
seconds of pressing TALK.
4. Press END for at least half a second to hang up when
your call is finished.
NOTE: Dial Tone Dialing is not available if you select Recall 1-
19 or Receive Only in Call Restriction settings.
Receiving a Call
When you receive a call, the phone rings and CALL flashes.
1. Press TALK or any key
Getting Started
2. Press END to terminate a call.
except
PWR to answer the call.
Battery Information
Please read this section in order to understand how to
prolong the life of your battery and prevent damage to
your phone.
Installing and Removing the Battery
Insert the top of the battery into the recess on the back of the
phone. Push inward and upward from the bottom until the
locking catch snaps into place. Make sure the battery is
secure.
To remove the battery, make sure the power is off. Push the
bottom upward and gently lift out from the bottom.
4
Page 5

Battery Level Indicator
The Battery Level Indicator tells you how much reserve power
remains in your rechargeable battery. It displays 3 levels of
reserve power. When the
Additionally, a tone sounds every 20 seconds as a warning.
During fast charging, the entire indicator flashes.
NOTE: Temperature extremes, poor charging/discharging
practices, and improper storage reduce battery performance.
outline
flashes, it is time to recharge.
Charging the Battery
Make sure your battery is fully charged before using it for
the first time. Battery will operate at peak capacity after 3
full charge cycles. Discharge the battery completely
between cycles.
To charge your phone's battery, connect the AC rapid charger
to the socket at the base of the phone and to a standard 120
volt AC outlet. The Battery Level Indicator flashes.
To prolong the life of your battery, allow it to discharge fully
once a week. A charged battery discharges on its own in about
a month of no use. If you do not plan to use your phone for an
extended period (more than a month), remove the battery and
store it in a cool, dry place.
Important: Use of non-Mitsubishi batteries, chargers,
antennas, or vehicle power adapters may damage
your Mitsubishi cellular phone.
Getting Started
Charging Times
Approximate battery recharging times using the AC rapid
charging adapter are:
• 700 mAh NiCd battery - 2 hours
• 1000 mAh NiCd battery - 2.5 hours
• 1350 NiMH battery - 3.5 hours
NOTE: Charging is suspended while a call is in progress.
5
Page 6

Approximate Operation Times
NiCd-S 700 mAh
Talk time: 100 minutes
Charge time: 2 hours
Standby time: 15 hours
NiCd-L 1000 mAh
Talk time: 135 minutes
Charge time: 2.6 hours
Standby time: 21 hours
NOTE: NiCd battery performance will vary with the condition
and history of the battery.
NiMH 1350 mAh
Talk time: 180 minutes
Charge time: 3.5 hours
Standby time: 28 hours
Getting Started
6
Page 7

Commonly Used Features
This section contains information on the features you use most
often:
• Special Dialing Features
• Using Call Mute
• Changing Volume Controls
• Displaying Own Number
• Sending DTMF Tones
Special Dialing Features
One-T ouch Dialing
To dial the One-Touch Dial number, press P for at least 1
second.
NOTE: If the number is more than 14 digits long, press the RCL
key to view the first digits. If there is no One-Touch number
programmed, Empty displays.
Getting Started
Super Speed Dialing
Dial any number stored in memory locations 01-09 by entering
the one digit memory address (1-9) and pressing TALK.
Speed Dialing
1. Enter a memory address number from 1-19.
2. Press TALK. The number displays as the phone dials.
to Storing on page 11 for information on assigning numbers
to memory locations.
Refer
7
Page 8

Last Number Redial
Use Last Number Redial to display and dial any of the last 5
numbers dialed. To choose from the last 5 numbers, do the
following:
1. Press RCL twice (while in Standby) to access the last 5
numbers dialed. The most recently dialed number displays.
If none exists, Empty displays.
NOTE: Only the last 10 digits of the number display. To view
earlier digits press RCL.
2. Use ▲ and ▼ to scroll through the last 5 numbers dialed.
3. Press TALK to dial the displayed phone number.
NOTE: You can add digits to the displayed phone number.
Automatic Retry
Automatic Retry redials a number when the phone is unable to
connect to the cellular system. If the call does not connect after
10 tries, a
1. Press FCN 2 while in Standby. Retry (ON or OFF) displays.
2. Press ❊ / # to enable or disable this feature.
Getting Started
3. If Auto Retry is active, press END to save changes and
return to Standby.
Reorder
tone sounds and you must dial again.
Using Call Mute
During conversation, press FCN for more than 1 second to turn
off your phone’s microphone and put a call on hold. MUTE
displays. Press any key except PWR or END to return to your
conversation.
8
Page 9

Volume Controls
Adjusting the Ringer Volume
Press FCN ▲ or ▼ while in Standby to adjust volume up
and down. Adjust ringer volume from 0 (off) to 7. Current
volume is displayed.
Adjusting the Conversation Volume
In conversation, use ▲ and ▼ to adjust volume up and
down from 1 to 7.
Adjusting the Key Tone Volume
In Standby, use ▲ and ▼ to adjust volume up and down
from 0 (off) to 7.
NOTE: This function also sets Error, Retry Call Success,
Low Battery Alarm (min = 1), Wake-up, and Power Off tone
levels.
Displaying Your Phone Number
1. Press FCN 1. The screen displays your phone number.
2. Press END to return to Standby.
Sending DTMF T ones
Getting Started
You can store and transmit Dual Tone Multi-Frequency
(DTMF) tones—the sounds created when you press the keys
on your phone’s keypad. It is sometimes necessary to send
DTMF tones while communicating with computerized answering systems.
9
Page 10

Automatic DTMF
To enter DTMF tones after you dial a phone number, do the
following:
1. Call the desired phone number as you would normally.
2. During conversation, do one of the following:
To send single DTMF tones, press the digits for the DTMF
tones to send. Your phone sends a tone as you press each
number.
To send a stored string of DTMF tones (such as a credit
card number or PIN) recall the stored number, press FCN,
and then press TALK.
Using Pause With DTMF
To send a string or multiple strings of DTMF tones after you dial
a phone number, do the following:
1. Enter the desired phone number.
2. Press FCN, then press 0 to program a pause.
3. Enter the DTMF string on the keypad.
4. Repeat steps 2 and 3 as necessary to add additional
Getting Started
pauses and DTMF strings.
5. Press TALK to dial the phone number.
6. After the call connects, press TALK for each DTMF
string you want to send.
NOTE: A DTMF string cannot end with a pause. An error tone
will sound.
10
Page 11

Memory Features
You can store up to 19 phone numbers with Location Identification, as well as a One-Touch number that you can recall and dial.
This section includes information on the following:
• Storing Phone Numbers
• Recalling Phone Numbers
• Erasing Stored Phone Numbers
Storing Phone Numbers
Direct Memory Store
1. Enter the phone number to store.
2. Press STO.
3. Enter the 2-digit memory location for the location you
want to use (any location 01-19).
4.
If you select an open memory location...
Stored and the memory location display.
If you select a memory location that is already used...
A short warning tone sounds and the number currently stored
in the location displays.
Press 1 to replace the number with the new one. Stored
and the memory location is displayed.
Press 2 to enter a new location, or press CLR to return to
Standby mode.
5. If you pressed 2, enter the location number. Press CLR
to delete any digits.
Press END to return to Standby mode without storing the
phone number.
6. If you entered the 2-digit location to store the number,
press END to return to Standby mode.
Memory Featrures
11
Page 12

Automatic Memory Store
1. Enter the phone number to store.
2. Press STO twice. The number is saved in the first available
memory location.
3. Press END to return to Standby.
Note: If there are no free memory locations, FULL displays.
One-Touch Number Store
1. Enter the telephone number that you want to use as the
One-Touch number.
2. Press STO, then press P.
3.
If the One-Touch memory location is empty...
Stored Addr P displays.
If a One-Touch phone number already exists...
A short warning tone sounds, then the current One-Touch
number displays.
Press 1 to replace the current number with the new one.
Press 2 to enter a specific memory location for the
number, or press CLR to return to Standby mode.
Memory Featrures
4. If you stored a new One-Touch number, press END to
return to Standby.
Recalling Phone Numbers
Last Number Recall
1. Press RCL twice. The last number dialed displays.
2. Press TALK to dial the number.
12
Page 13

Memory Location Recall
1. Press RCL.
2. Enter the memory location. The memory address and the
phone number display.
• You can use the keypad to add extra digits to a number
before dialing.
• Use ▲ and ▼ to scroll through other phone numbers
stored in memory.
3. Press TALK to dial the displayed number.
4. Press END to return to Standby.
Memory Location Scan
1. Press RCL, then press ▼ or ▲. The memory location and
phone number for the last recalled memory location display.
2. Use ▲ and ▼ to scroll through all locations in use.
3. To dial the displayed phone number, press TALK.
One-Touch Number Recall
1. Press RCL, then press P. Ten digits of the One-Touch
number display. If there is no One-Touch number, Empty
displays.
Display Complete Number
Use the following steps to review the entire displayed phone
number if it contains more than 14 digits.
1. Recall or enter the desired phone number.
2. Press and hold RCL.
If the phone number contains more than 28 characters, the
characters greater than 28 display. One second later,
characters 15-28 display. When you release RCL, characters 1-14 display.
If the phone number contains more than 14 characters, but
less than 29, characters 15-28 display. When you release
RCL, characters 1-14 display.
Memory Featrures
13
Page 14

Erasing Stored Phone Numbers
1. Press and hold CLR to clear all digits from the display.
2. Press STO.
3. Enter the memory location for the number to erase. The
current number for the location displays.
4. Confirm the removal of the number.
Press 1 to erase the number. Press 2 to keep the number
and select another memory location to erase.
5. Press END to return to Standby.
Memory Featrures
14
Page 15

Features
Many of the features of the AH-250 provide security from
unauthorized use. This section includes information on the
following:
• Security Features
• Timers
• Keypad Lock
• Automatic Answer
• Call-In-Absence Indicator
• Network Service Features
Security Features
Security Code
1. To access functions beginning with 8, press FCN 8.
2. Enter the security function:
1 Call Restriction
2 Unlock Code
3 Status Monitor
4 PIN Number Programming
5 Automatic PIN Number Enable
3. Enter the 4-digit Security Code. If you enter a wrong code,
Code Error displays.
NOTE: The Security Code is pre-programmed You cannot
change the Security Code.
Features
15
Page 16

Call Restriction
1. Press FCN 81 while in Standby, then enter the 4-digit
Security Code. Current Call Restriction status displays.
2. Press ❊ / # to change the Call Restriction level. Select
from the following levels:
No Restriction
Local Only
Recall 1-19
Receive Only
3. Press END to save your selection and exit this mode.
Call Restriction Interaction
• 911 calls are always available.
• Manual DTMF is only available during
Local Only
• Dial Tone Dialing is unavailable during
Features
Receive Only
All call features are enabled.
Disables long distance calls. Only 7-digit
local calls and toll-free calls allowed.
Disables numbers not stored in memory
locations 1-19. Also prevents entry of new
phone numbers into memory locations.
Disables all calls except for emergency
calls.
No Restriction
.
Recall 1-19
.
and
and
Creating an Unlock Code
1. Press FCN 82, then enter the Security Code. The current
Unlock Code displays.
2. To create a new Unlock Code, enter 3 digits for the new
code. If you make a mistake, or if you do not want to use
the new Unlock Code, press CLR to use the original code.
Press CLR again to exit this mode.
If you did not make any changes, press CLR to exit this
mode.
3. Press END to save the new code and exit this mode.
NOTE: You can program a new Unlock Code even while
the phone is locked.
16
Page 17

Status Monitor
1. Press FCN 83, and enter the Security Code. Status
(ON or OFF) displays.
2. Press ❊ / # to enable or disable the Status Monitor.
3. Press END to save your setting and return to Standby.
Status Monitor Messages
Status Monitor Messages display in the following formats:
Non-Conversation Mode
Conversation Mode
CCCCRRR
A XXXXX
Message... Description...
CCCC Voice channel or control channel in Standby
RRR Received RSSI
A Serving system support level for authentica-
tion
0=Not Supported, 1=Supported
XXXXX Received SID
P Transmit power level 0-7
S Received SAT frequency
0=5970 Hz, 1=6000 Hz, 2=6030 Hz,
3=no SAT
CCCCRRR
PSXXXXX
Features
17
Page 18

PIN Number Programming
If your service provider supports this feature, a PIN must be
sent whenever you make a call. Rather than entering it each
time, you can program the phone to send the PIN automatically.
1. Press FCN 84, followed by your Security Code. The
current PIN displays. If there is no current PIN, a line of
dashes displays.
2. To change the PIN, enter the desired 4-digit PIN. If you
make a mistake, or if you do not want to use the new PIN,
press CLR to use the original PIN. Press CLR again to exit
this mode.
If you did not make any changes, press CLR to exit this
mode.
3. Press END to save the new PIN and return to Standby
mode.
Enabling Automatic PIN
With Automatic PIN enabled, the phone sends the PIN automatically when required by the cellular system.
Features
1. Press FCN 85 followed by the Security Code. The status
of the PIN (ON or OFF) displays. If there is no PIN programmed, No Pin displays.
2. Press ❊ / # to enable or disable Automatic PIN.
3. Press END to save the setting and return to Standby
mode.
Locking the Phone
1. Press FCN 5 while in Standby mode. Loc Code dis-
plays.
2. Enter the 3-digit Unlock Code. Loc'd displays, indicat-
ing the phone is locked. If you enter a wrong Unlock Code,
Code Error displays.
NOTE: You can dial 911 while the phone is locked. DO NOT
use 911 as your Unlock Code.
18
Page 19

Timers
Last Talk Time
Last Talk Time displays the total time for the most recent call.
1. Press FCN 6 while in Standby. MM-SS displays.
MM is the total minutes
SS is the total seconds
2. Press END to return to Standby mode.
Operating Timer
Operating Timer displays the total time for
cannot be reset.
1. Press FCN 7 while in Standby. HHH-MM displays.
HHH is the total hours
MM is the total minutes
2. Press END to return to Standby mode.
all
calls. This time
Keypad Lock
Press END and ▲ simultaneously to enable. button Loc
displays and all keys (including PWR) are disabled to prevent
accidental key presses. Press END and ▼ simultaneously
to disable. Keypad lock turns off automatically when you
receive a call.
Automatic Answer
Answers calls if you do not within 10 seconds.
1. Press FCN 4 while in Standby.
2. Press ❊ / # to enable or disable Automatic Answer.
3. Press END to save your setting and return to Standby
mode.
NOTE: Automatic Answer is disabled when the Keypad Lock
is enabled.
Features
19
Page 20

Call-In-Absence Indicator
When you receive a call, and are unable to answer it, the
message Called displays. If your service provider supports
Caller ID service and you subscribe to it, the caller's number
displays on the top line of your phone's display.
Network Service Features
If your service provider supports these features and you
subscribe to them, your phone displays Caller ID and Message
Waiting information.
Caller ID
When you receive a call, the caller's number displays on the
top line of your phone's display. Answer the call as you would
normally.
If you do not answer the call, your phone displays the Caller ID
information and Called until you press END or CLR. After
pressing END or CLR, you can return the call by pressing
TALK.
Features
If you have Call Waiting, the system may display Caller ID
information when another call comes in. You can press TALK
to switch between the two calls, or press CLR to ignore the
other call and exit the Caller ID display.
Message Waiting
When you have unchecked voice mail your phone displays the
Message Waiting icon. This icon displays until you listen to all
of your messages.
20
Page 21

System A/B Selection
1. Press FCN 3. The current System A/B setting displays.
2. Press ❊ / # to change the setting to one of the following:
Prefer A Phone scans System A
Prefer B Phone scans System B
Home Only Phone does not roam.
Only A Phone scans
Only B Phone scans
3. Press END to accept and save the displayed setting and
return to Standby.
NOTE: If Roam Inhibit is enabled in NAM, the System A/B
Select function is not available and Roam Inhibit displays.
Press END.
only
only
first
when it is scanning.
first
when it is scanning.
System A when it is scanning.
System B when it is scanning.
Features
21
Page 22

Quick Reference Guide
Functions List
Access functions by pressing FCN and then the desired function
number. Once you display a function prompt, you can use ▲
and ▼ to move through the other functions.
You can optionally press FCN twice to display the main function
menu prompt, and then use ▲ and ▼ to scroll through each
function. To select a function, press FCN again. You can then
use ▲ and ▼ to scroll through the function sub-menus.
Use ❊ and # to scroll through the available settings for most
functions.
TELEPHONE NUMBER FUNCTIONS
Guide
FCN 1 Display Own Number
Quick Reference
GENERAL SETTINGS FUNCTIONS
FCN Call Mute (hold down for 1 second)
FCN 0 Pause
FCN 2 Automatic Retry On/Off
FCN 3 System A/B Selection
Quick Reference Guide
FCN 4 Automatic Answer
FCN+Talk Automatic DTMF Transmit
TIMERS
FCN 6 Last Talk Time
FCN 7 Total Operating Time
VOLUMES/TONES
FCN ▲/▼ Ring Volume
LOCK
FCN 5 Lock
22
Page 23

Functions List (cont.)
SECURITY FUNCTIONS (must enter 4-digit Security Code)
FCN 81 Call Restriction Setting
FCN 82 Program Unlock Code
FCN 83 Status Monitor On/Off
FCN 84 Program PIN Number
FCN 85 Automatic PIN Enable/Disable
Default Function Settings
Function Default Setting
Automatic Retry (FCN 2) On
System A/B Selection (FCN 3) Preferred system in NAM
Auto Answer (FCN 4) OFF
Last Talk Time (FCN 6) Displays mm-ss
Restriction Level (FCN 81) No restriction
Status Monitor (FCN 83) Off
PIN Number (FCN 84) Null
PIN Status (FCN 85) Off
Quick Reference Guide
23
Page 24

Messages and Prompts Glossary
AutoAns Displays when you turn the phone on if
Automatic Answer is enabled (FCN 4).
Button Displays when the Keypad Lock function is
Loc enabled.
Call Flashes when you receive a call. Press
TALK to answer the call.
Called Displays after an unanswered call.
Code Displays if you enter the incorrect unlock
Error code.
Empty Displays when you try to recall a phone
number from a location that is empty.
Press END to return to Standby.
Enter Displays during storage operations. Enter
Guide
Addr the memory location for the phone number.
Erase Displays for you to confirm the deletion of a
Quick Reference
1-y 2-n stored number.
Erased Displays to confirm erasure after you have
cleared a memory location. The address of
the cleared location also displays.
Error Displays when there is a problem with your
Quick Reference Guide
Fcn Displays after you press FCN. Enter the
Full Displays if the phone's memory locations
Last Displays for the Last Talk Time (FCN 6).
Local Displays when you turn the phone on if the
phone’s programming or circuitry. Write
down Error number and bring phone in for
service.
desired function number.
are full when you try to store a number.
Call Restriction level (FCN 81) is set to
Local Only.
24
Page 25

Loc'd Displays while your phone is locked.
Enter the 3-digit Unlock Code.
Loc Enter your 3-digit Unlock Code.
Code
Mute Displays when you turn off your phone’s
microphone during conversation by
pressing FCN. Press FCN again to turn it
on.
No Pin Displays when you select PIN Enable
(FCN 85) and no PIN is currently programmed.
-On- Displays during Standby mode.
Oper Displays when you select Operating Timer
(FCN 7).
Pin Displays when you select PIN Enable
(FCN 85) and no PIN Number is currently
programmed.
Pin no Displays when you select PIN Number
- - - - Programming (FCN 84) and no PIN is
currently programmed.
Pin nA If you select PIN Enable (FCN 85) and the
system does not support the PIN feature,
this message will be displayed when you
make a call.
Rcl 1-19 Displays when you turn the phone on if the
Call Restriction level (FCN 81) is set to
Recall 1-19
RecOnly Displays when you turn the phone on if the
Call Restriction level (FCN 81) is set to
Receive Only
Replace Displays when you try to store a phone
1-y 2-n number into a memory location that
already contains a number. Confirm the
replace.
.
.
Quick Reference Guide
25
Page 26

Restr Displays when selecting the Call Restriction
level (FCN 81).
Retry Displays when you enable Automatic Retry
(FCN 2).
Ring Displays when you adjust the Ring Tone
volume. Use FCN + ▲ and ▼ during
Standby to adjust the Ring Tone volume.
Roam Displays when you select an alternate
Inhibit system in System A/B Select and Roam
Inhibit is programmed in NAM.
Secure Displays when you press FCN 8. Select the
1-5 security function 1-5.
Secure Displays when you try to use functions 81-
Code 85. Enter your 4-digit Security Code.
Status Displays when you select Status Monitor
Guide
Stored Displays with the memory address number
Quick Reference
Addr
Stored Displays after you store the One-Touch
Addr P Phone Number.
System Displays during System A/B Selection
Quick Reference Guide
Tel- Displays when you select Display Own
Tone Displays when you adjust the Key Tone
Unloc Displays when you select Program Unlock
xx
(FCN 83).
(xx) after you store a phone number in a
memory address.
(FCN 3).
Number (FCN 1).
volume. Use ▲ and ▼ during Standby to
adjust the Key Tone volume.
Code (FCN 82).
26
Page 27

Rules, Regulations, and Precautions
First introduced in 1984, the handheld portable cellular telephone is one of the most exciting and innovative electronic
products ever developed. With it you can stay in contact with
your office, home, emergency services, and others.
WARNING!! Please do not use your Mitsubishi wireless telephone if you may be distracted from another activity (such as
driving a motor vehicle or walking across the street) and create
a safety hazard to yourself and others. Use your wireless
telephone responsibly. Be alert to your surroundings whenever
you operate your wireless telephone.
For the safe and efficient operation of your phone, observe the
following guidelines:
Exposure to Radio Frequency (RF) Energy
Your wireless handheld portable telephone is a low power radio
transmitter and receiver. When it is ON, it receives and also
sends out radio frequency signals.
In August, 1996, the Federal Communications Commission
(FCC) adopted RF exposure guidelines with safety levels for
handheld wireless phones. Those guidelines are consistent
with the safety standards previously set by both U.S. and
international standard bodies:
ANSI C95.1 (1992)*
NCRP Report 86 (1986)*
ICNIRP (1996)*
* American National Standards Institute; National Council on
Radiation Protection and Measurements; International Commission on Non-Ionizing Radiation Protection.
Rules, Regulations and Precautions
27
Page 28

Those standards were based on comprehensive and periodic
evaluations of the relevant scientific literature. For example,
over 120 scientists, engineers, and physicians from universities,
government health agencies, and industry reviewed the available
body of research to develop the ANSI Standard (C95.1).
The design of your phone complies with the FCC guidelines (and
those standards).
Antenna Care
Use only the supplied or an approved replacement antenna.
Unauthorized antennas, modifications, or attachments could
damage the phone and may violate FCC regulations.
Phone Operation
NORMAL POSITION: Hold the phone as you would any other
telephone with the antenna pointed up and over your shoulder.
TIPS ON EFFICIENT OPERATION: For your phone to operate
most efficiently:
• Do not touch the antenna unnecessarily when the phone is
in use. Contact with the antenna affects call quality and may
cause the phone to operate at a higher power level than
otherwise needed.
Driving
Check the laws and regulations on the use of wireless tele-
Rules, Regulations and Precautions
phones in the areas in which you drive. Always obey them.
Also, if using your phone while driving, please:
• Give full attention to driving--driving safely is your first
responsibility;
• Use handsfree operation, if available;
• Pull off the road and park before making or answering a call
if driving conditions so require.
28
Page 29

Electronic Devices
Most modern electronic equipment is shielded from RF signals;
however, certain electronic equipment may not be shielded
against the RF signals from your wireless phone.
Pacemakers
The Health Industry Manufacturers Association recommends
that a minimum separation of six (6") inches be maintained
between a handheld wireless phone and a pacemaker to avoid
potential interference with the pacemaker. These recommendations are consistent with the independent research by and
recommendations of Wireless Technology Research.
Persons with pacemakers:
• Should ALWAYS keep the phone more than six inches from
their pacemaker when the phone is turned on;
• Should not carry the phone in a breast pocket;
• Should use the ear opposite the pacemaker to minimize the
potential for interference;
• If you have any reason to suspect that interference is taking
place, turn your phone OFF immediately.
Hearing Aids
Some digital wireless phones may interfere with some hearing
aids. In the event of such interference, you may want to consult
with the service provider (or call the customer service line to
discuss alternatives.)
Rules, Regulations and Precautions
29
Page 30

Other Medical Devices
If you use any other personal medical device, consult the manufacturer of your device to determine if they are adequately
shielded from external RF energy. Your physician may be able
to assist you in obtaining this information.
Turn your phone OFF in health care facilities when any regulations posted in these areas instruct you to do so. Hospitals or
health care facilities may be using equipment that could be
sensitive to RF energy.
Vehicles
RF signals may affect improperly installed or inadeqately
shielded electronic systems in motor vehicles. Check with the
manufacturer or its representative regarding your vehicle. You
should also consult the manufacturer of any equipment that has
been added to you vehicle.
Posted Facilities
Turn your phone OFF in any facility where posted notices so
require.
Aircraft
FCC regulations prohibit using your phone while in the air.
Switch your phone OFF before boarding an aircraft.
Blasting Areas
Rules, Regulations and Precautions
To avoid interfering with blasting operations, turn your phone
OFF when in a blasting area, or in areas posted
radio
. Obey all signals and instructions.
30
Turn off two-way
Page 31

Potentially Explosive Atmospheres
Turn your phone OFF when in any area with a potentially explosive atmosphere and obey all signs and instructions. Sparks in
such areas could cause an explosion or fire resulting in bodily
injury or even death.
Areas with a potentially explosive atmosphere are often, but not
always clearly marked. They include fueling areas such as
gasoline stations; below deck on boats; fuel or chemical transfer
or storage facilities; vehicles using liquefied petroleum gas (such
as propane or butane); areas where the air contains chemicals
or particles, such as grain, dust, or metal powders; and any
other area where you would normally be advised to turn off
your vehicle engine.
For Vehicles Equipped With an Air Bag
An air bag inflates with great force. DO NOT place objects,
including both installed or portable wireless equipment, in the
area over the air bag or in the air bag deployment area. If invehicle wireless equipment is improperly installed and the air
bag inflates, serious injury could result.
Rules, Regulations and Precautions
31
Page 32

Accessories
AC Rapid Charging Adapter
An AC Rapid Charging Adapter is included for battery charging.
Plug the adapter into a wall outlet and into the jack on the right
side of the phone. Charging is suspended while a call is in
progress. Part Number ACP-P1.
Batteries
The following batteries are available:
NiCd-S 700 mAh
Talk time: 100 minutes
Charge time: 2 hours
Standby time: 15 hours
Part Number SBT-P5
NiCd-L 1000 mAh
Talk time: 135 minutes
Charge time: 2.6 hours
Accessories
Standby time: 21 hours
Part Number EBT-P4
NiMH-1350 mAh
Talk time: 180 minutes
Charge time: 3.5 hours
Standby time: 28 hours
Part Number EBT-P5
Belt Clip
An optional belt Clip provides extra portability for your phone.
Part Number CLP-P1.
Carrying Case
Made of high grade leather, this attractive Carrying Case protects your phone. Part Number 250/350CSE.
32
Page 33

Cigarette Lighter Adapter
One end of the Cigarette Lighter Adapter plugs into the cigarette
lighter of any car; the other plugs into the jack on the right side
of the phone. Charging is suspended while a call is in progress.
Part Number CIG-P4.
Desktop Charger
A Desktop Charger is available for charging your phone’s spare
battery. Part Number QCK-P5.
Handsfree Kit
The Handsfree Kit adds flexibility and mobile phone convenience. Part Number HFK-P4.
Headset
A Headset is also available. The Headset plugs into the left side
of the phone. It has an earphone and microphone and can be
used in place of the Handsfree Kit. Part Number HDS-P1.
Mobile Holder
Holds the phone securely and conveniently in place in your
vehicle. Part Number HLD-P3.
Contact your service provider for accessories.
Accessories
Product availability subject to change without notice.
33
Page 34

Index
A
AC Rapid Charging Adapter
32
Accessories
Batteries 32
Beltclip 32
Carrying Case 32
Cigarette Lighter Adapter
33
Desktop Charger 33
Handsfree Kit 33
Headset 33
Mobile Holder 33
Index
Antenna Care 28
Automatic Answer 19
Automatic DTMF 10
Automatic Memory Store 12
Automatic PIN Number
Enabling 18
Programming 18
Automatic Retry 8
B
Battery Information
Installing and Removing 4
Operation Times 6
Battery Level Indicator 5
Belt Clip 32
C
Call-In-Absence Indicator 20
Call Restriction
Setting 16
Carrying Case 32
Charging the Battery
Charging Times 5
Cigarette Lighter Adapter 33
Commonly Used Features
Automatic DTMF 10
General 7
Special Dialing Features 7
Conversation Volume 9
D
Desktop Charger 33
Dial Tone Calls 4
Dialing Notes and Error Tones
3
Direct Memory Store 11
Displaying Your Phone Number
9
DTMF
Automatic DTMF 10
Using Pause With 10
Battery Level Indicator 5
Charging the Battery 5
General 4
34
Page 35

E
Enabling Automatic PIN 18
Erasing Stored Phone Num-
bers 14
Error Tones 3
F
Features
Automatic Answer 19
Call-In-Absence Indicator
20
General 15
Keypad Lock 19
Security Features 15
Functions List 22
G
Getting Started
Battery Information 4
The Telephone Display 1
Turning the Phone On and
Off 3
H
Handsfree Kit 33
Headset 33
Hearing Aids
Using With Phone
29
I
Installing and Removing the
Battery 4
K
Key Tone Volume 9
Keypad Lock 19
L
Last Talk Time 19
Locking the Phone 18
M
Memory.
Memory Location Recall 13
Memory Location Scan 13
Messages and Prompts
Mobile Holder 33
See
Storing
Glossary 24
O
One-Touch Dialing
General 7
One-Touch Number Recall
13
One-Touch Number Store
12
Operating Timer 19
P
Pacemakers
Using With Phone 29
Pause Function 10
Phone Operation 29
PIN Number Programming 18
Placing and Receiving Calls 3
Dial Tone Calls 4
Placing a Call 3
Receiving a Call 4
Index
35
Page 36

Q
Quick Reference Guide
Functions List 22
Messages and Prompts
Glossary 24
R
Recalling Phone Numbers 12
Memory Location Recall 13
Memory Location Scan 13
One-Touch Number Recall
13
Receiving a Call 4
Redial 8
Ringer Volume 9
Rules, Regulations and
Precautions 27
Index
Air Bags 31
Aircraft 30
Antenna Care 28
Blasting Areas 30
Driving 28
Electronic Devices 29
Hearing Aids 29
Pacemakers 29
Phone Operation 28
Potentially Explosive
Atmospheres 31
Radio Frequency (RF)
Energy 27
S
Saving.
Security Code 15
Security Features
Sending DTMF Tones 9
Special Dialing Features
Speed Dialing 7
Status Monitor 17
Status Monitor Messages 17
Storing
Super Speed Dialing 7
System A/B Selection 21
See
Storing
Call Restriction 16
Locking the Phone 18
Security Code 15
Automatic Retry 8
One-Touch Dialing 7
Speed Dialing 7
Super Speed Dialing 7
Automatic Memory Store
12
Direct Memory Store 11
One-Touch Number Store
12
Recalling Phone Numbers
12
Storing Phone Numbers 11
36
Page 37

T
Telephone Display 1
Timers
Last Talk Time 19
Operating Timer 19
Turning the Phone On and Off
3
V
Volume Controls 9
Index
37
 Loading...