

Page 1
B efore Use
A new battery must be fully charged before initial use.
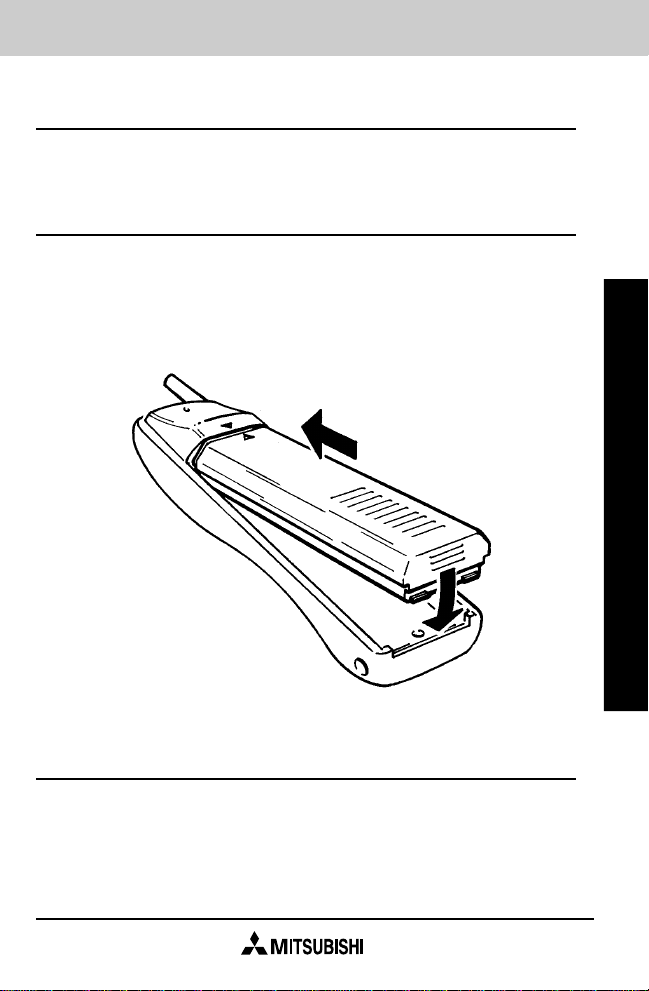
INSTALLING THE BATTERY
Insert the top of the battery into the recess on the back of the
phone. Attach it to the phone by pressing slightly upward on
the battery and in at the bottom until the locking catch snaps
into place. Make sure the battery is properly secured.
Getting Started
REMOVING THE BATTERY
Turn the power off before removing the battery. To remove
the battery, press the bottom upward and gently lift the
battery off the phone.
1
Page 2

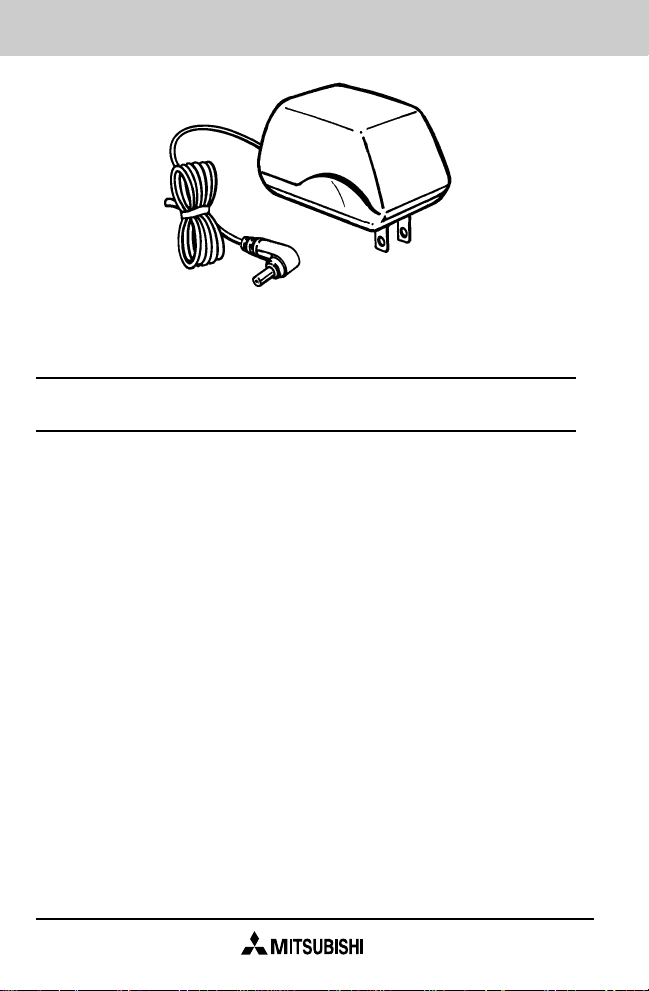
CHARGING THE BA TTERY
FOR THE FIRST TIME
Connect the AC rapid charging plug into the socket at the
base of the phone and plug it into a standard 120 volt AC
outlet. A red LED will appear to indicate charging is in
progress. The battery should be charged before using the
phone for the first time. Batteries last longer and perform
better when allowed to discharge fully at least once a week.
USING THE BATTER Y
GENERAL INFORMATION:
The phone is powered by a rechargeable
battery. To ensure maximum benefit from your new phone
and to get better talk and standby times, it is important that
you regularly charge and discharge the battery as instructed in this guide.
RECHARGING THE BATTER Y
Caution: Use only the Mitsubishi AC adapter that was
provided with your phone or the optional Mitsubishi Cigarette
Lighter Adapter, CIG-P4. Use of the wrong adapter may
cause damage.
The bars at the upper left of the display screen indicate the
battery charge level. The highest charge level is shown as a
series of three (3) bars. When the charge level falls to less
than 10%, the phone displays a warning message: LOW
BAT, this message will be repeated regularly along with an
audible beep.
Warning: Use of non-Mitsubishi batteries, chargers, antennas,
or vehicle power adapters may cause damage to your
Mitsubishi cellular phone.
2
Page 3
While charging is in progress, the word “Charge” will appear
on the display if the phone power is on.
A new battery should be charged before being used for
the first time.
If left unused, a fully charged battery will discharge itself in
about a month. More rapid discharge can occur, depending
on the ambient temperature.
When the battery is not in use, store it uncharged in a cool,
dark, and dry place.
Do not ‘short out’ the battery by directly connecting to the +
and - terminals on the battery.
Do not attempt to discharge the battery with any other
method or system other than described in this manual.
The battery is in a sealed unit with no serviceable parts. Do
not attempt to open the case.
3
Page 4
Do not dispose of the batteries by fire.
Cigarette Lighter charging adapters are available for your
phone. Refer to the Accessories section in this manual on
page 7.
CHARGING TIMES
Recharging the standard battery with the AC rapid charging
adapter takes about two hours; with the extended battery,
about two and one half hours.
You can use the phone during recharging, but the charging
process will be interrupted for the duration of the call.
DISCHARGING
Batteries last longer and perform better if allowed to discharge fully at least once a week.
OPERA TION TIMES
Typical operation times for fully charged new batteries are as
follows:
Standard 700 mAh, NiCd - SBT-P5
Talk time Standby time
105 minutes 14 hours
4
Page 5
Extended Life 1000 mAh, -NiCd - - EBT-P4
Talk time Standby time
150 minutes 20 hours
NiCd battery performance will vary with the condition and
history of the battery.
The following conditions will reduce battery performance:
temperature extremes, poor charging or discharging
practices, or improper storage.
ACCESSORIES
Accessories for your cellular phone can be purchased from
your local dealer.
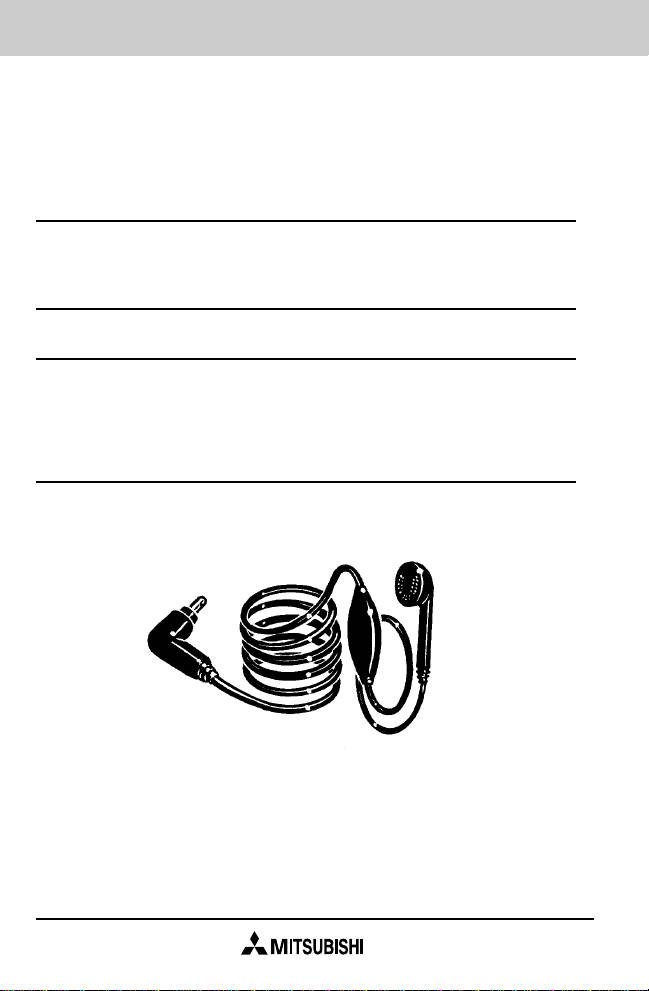
HANDS FREE HEADSET
You can talk and listen via this compact Headset Adapter
that plugs into your phone.
The earpiece fits comfortably in one ear. The microphone in
a tiny capsule on the cord picks up your voice, leaving both
hands free.
5
Page 6
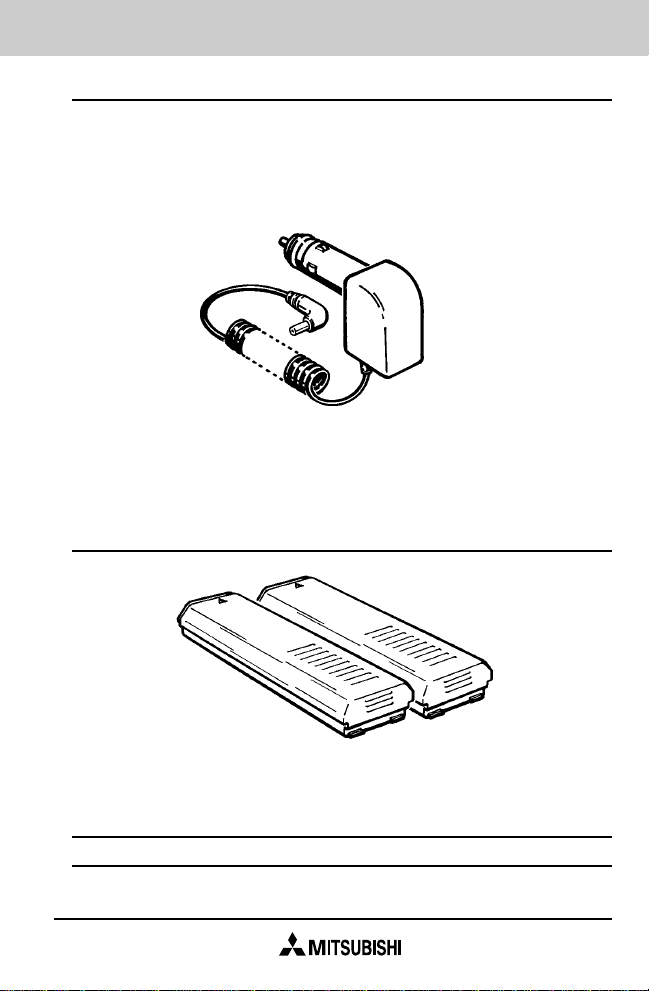
CIGARETTE LIGHTER ADAPTER
You can also charge the phone’s battery from a vehicle
battery using the DC charging adapter.
The charger connects to the side of the phone.
Note that the input voltage range is 13.8 (+/- 20%) volts DC.
The charging time for each battery option is the same as the
AC rapid charging adapter.
BATTERIES
Standard 700 mAh NiCd battery
Extended Life 1000mAh NiCd battery
Remember! Do not dispose of batteries in fire!
6
Page 7
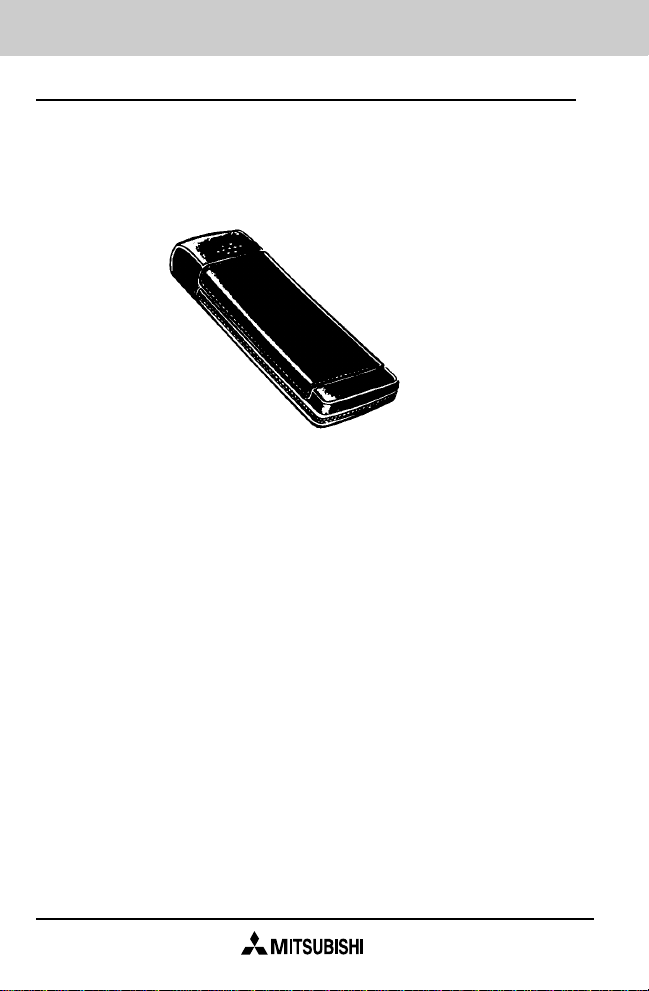
CARRYING CASE
Made of high grade leather, the carrying case protects the
phone’s finish from dirt and scratches. The carrying strap,
access flap and built-in belt clip make carrying and using the
phone safe and effortless.
BASIC OPERATING information (pages 9 through 24) will
get you started quickly. ADVANCED FEATURES informa-
tion (pages 25 through 64) details all the features built
into your phone
.
7
Page 8
Getting Started
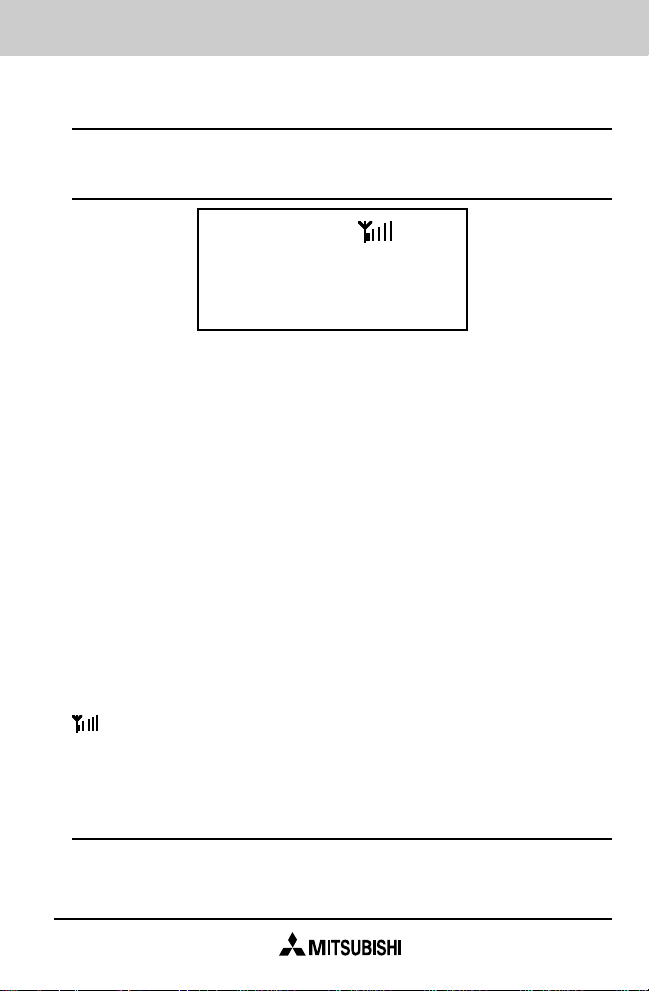
DISPLAY
■■■■■■■
■■■■■■■
ROAM
FCN ALPHA B NO SVC A B
Display Your cellular telephone features a
Description liquid crystal display (LCD). The two (2) line,
seven (7) character, 14 digit LCD shows
phone numbers and alphanumeric entries as
they are entered.
FCN Indicates that the “FCN” key has been
pressed. You may now press the digit corresponding to the function to be performed.
ALPHA Indicates that you can now program alphanu-
merics for storage of names/initials.
NOSVC Indicates that the phone is out of the cellular
service area.
IN USE Indicates the phone is in conversation mode.
ROAM A/B Indicates A or B system when Roaming.
B When flashing, charge thebattery.
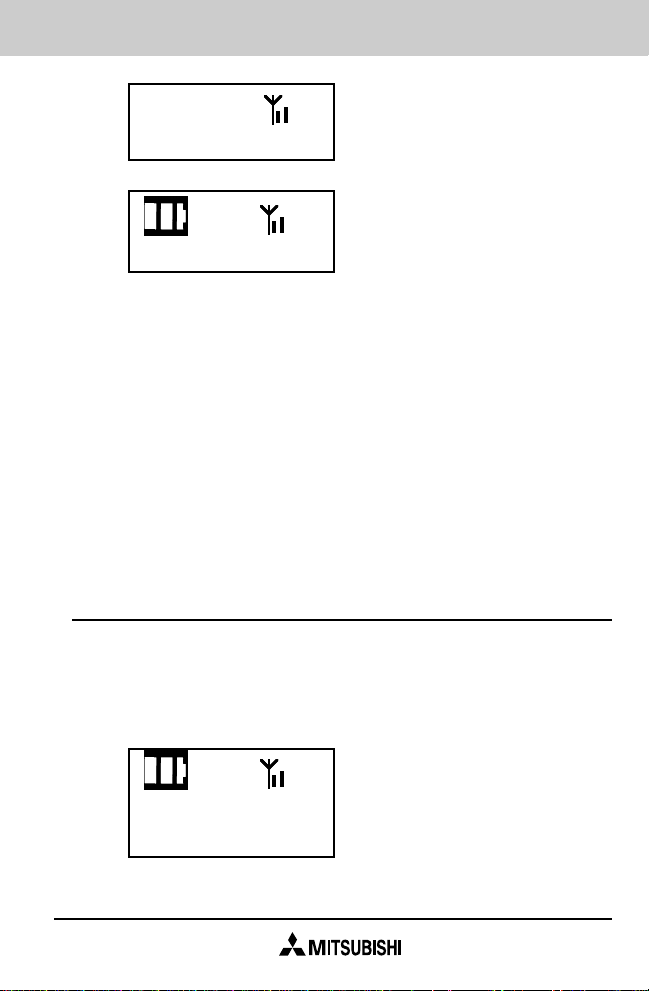
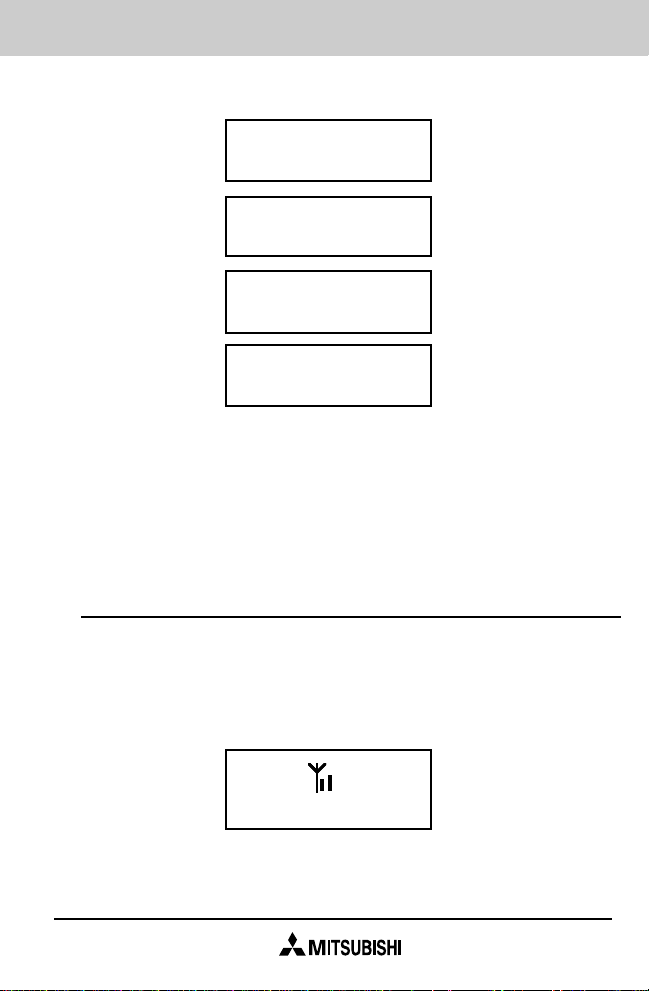
Indicates the received signal strength.
Note: “-ON-” appears in the display when no other information is shown. It will not appear when the phone is locked.
IN USE
AUDIBLE INDICATOR TONES
Wake-up: A short high tone indicates the phone has
been turned on.
8
Page 9

Power-off: A short high tone indicates the phone has
been turned off.
Ringing: Indicates an incoming call.
Reorder: A fast busy tone indicates that the system
has not accepted your call.
Intercept: A siren tone indicates an incorrect keying
sequence.
Battery warning: A short high tone generated every 20
seconds indicates that you must charge the
battery.
Incorrect key: Pressing an incorect key results in an error
tone.
See Volume Adjustments on page 23.
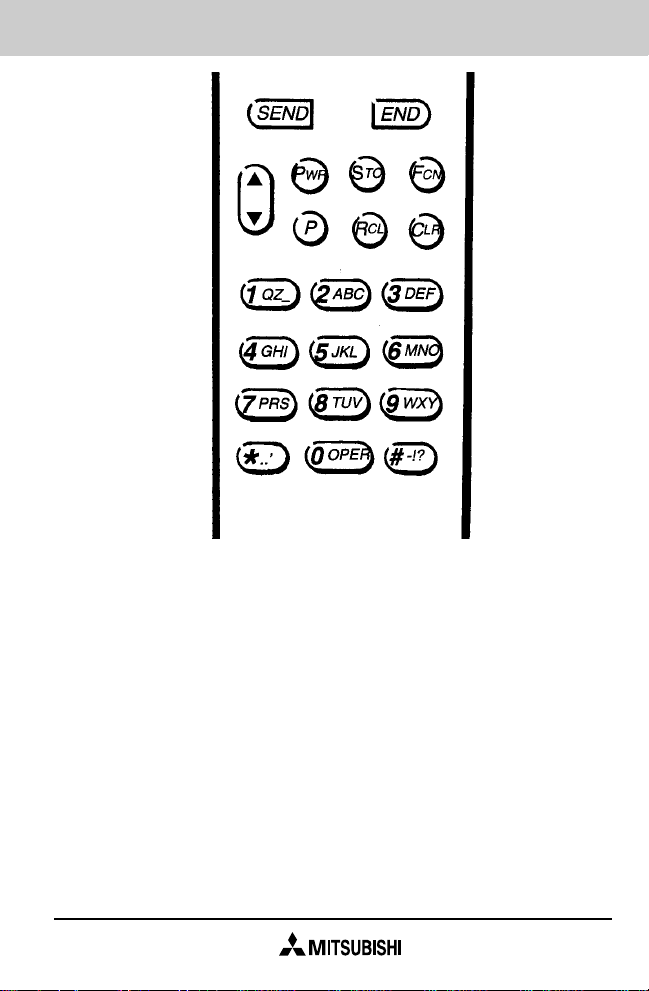
KEYPAD
PWR Turns the phone on and off.
SEND Initiates a phone call to the number in the display.
Answers the call when a ringing tone is heard. This
is a slow action key, which means it must be pressed
for over one (1) second.
Momentary pressing during a conversation acts as a
“hook-flash” request.
END Ends a call.
This is a slow action key to prevent accidental
termination. Press the key for about one (1) second.
If the phone is in the extended function mode, the
“END” key can be used to exit from any stage of the
function mode.
P This key is used for one touch dialing. A call can be
initiated to the number stored in the P (programmable) memory by pressing this key.
9
Page 10
This is a slow action key designed to prevent
accidental dialing. The key should be pressed and
held down for about one (1) second when one touch
dialing is desired.
FCN For five seconds after depression, various extended
functions can be engaged by entering a specific
digit. This function is described later in more detail.
CLR Momentary depression clears the last entered digit.
All digits are cleared by continuous depression.
If the phone is in the sub-function menu mode, the
user may use the “CLR” key to exit from any stage of
the function mode.
STO Stores up to 32 digits in one of 39 memory locations.
Press “STO” and a number (01 through 39).
10
Page 11

RCL Recalls the numbers stored in the 39 memory
locations. Press “RCL” and a number (01 through
39).
▲/▼ By using the ▲/▼ keys, the volume level can be
adjusted to one of seven (7) settings. The volume
level is stored until the user changes the volume
setting. The volume level can be adjusted depending on the phone’s mode:
Conversation mode: Conversation volume.
Non-conversation mode: Key tone volume.
Minimum level is tone “OFF”.
TURNING THE PHONE ON
Press the PWR key for one (1) second.
When the phone is turned on, all LCD indicators light momentarily, followed by an audible tone (“wake-up”). Your own
telephone number appears briefly. (If the phone is locked,
the auto answer function is active or the call restriction is on,
your own telephone number is not displayed.)
The “-ON-” message will be displayed to show that the
phone is on. (If you selected the status monitor mode,
status information will be displayed instead of the “-ON-”
message.)
If your telephone number is “1234567890”
8888888
8888888 IN USE
ROAM
FCN ALPHA B NO SVC A B
↓
123
4567890
11
Page 12
If the automatic answer mode is active, the following message will be displayed instead of the phone’s telephone
number.
AutoAns
Unless “No Restr” has been selected for the call, the selected restriction level message will appear instead of the
phone’s telephone number.
Restriction level “Local Only”
Local
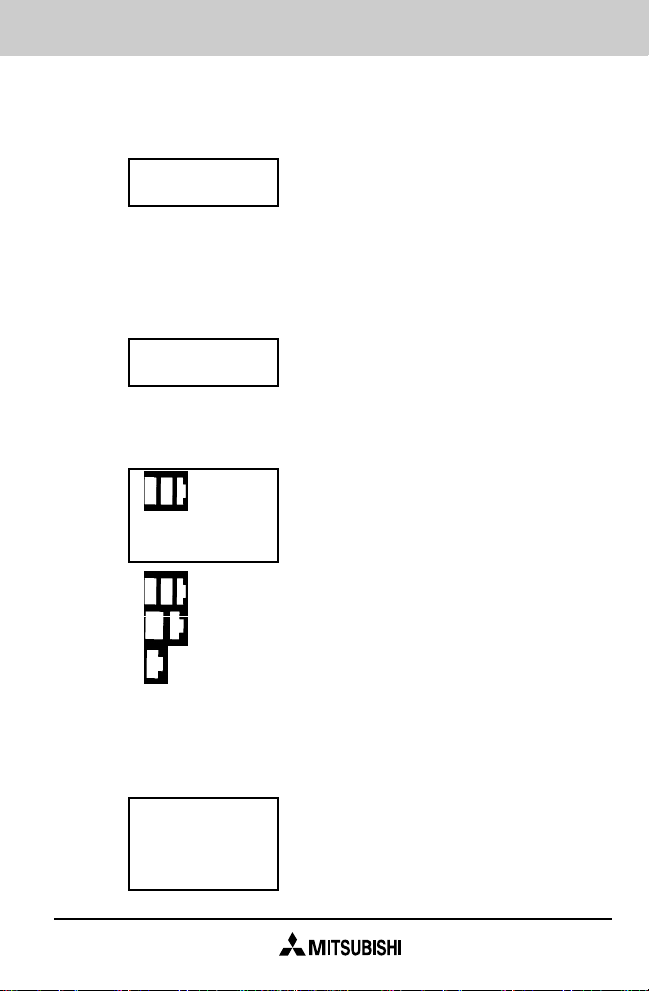
One second after displaying the telephone number the
battery indication in the upper left corner shows:
-ON-
: high level
: medium level
: low level
Low BAT : low battery
The message “Low BAT” means the battery must be charged
as soon as possible. The B indicator will also begin to flash.
Low BAT ← (Blinks)
-ON-
B ← (Blinks)
12
Page 13
The electronic lock is on when the “Locked” message
appears on the display. To unlock, enter your three (3) digit
unlock code. Once the phone is locked, the only call which
can be made is to emergency number 911 if your carrier
offers this emergency service.
Locked
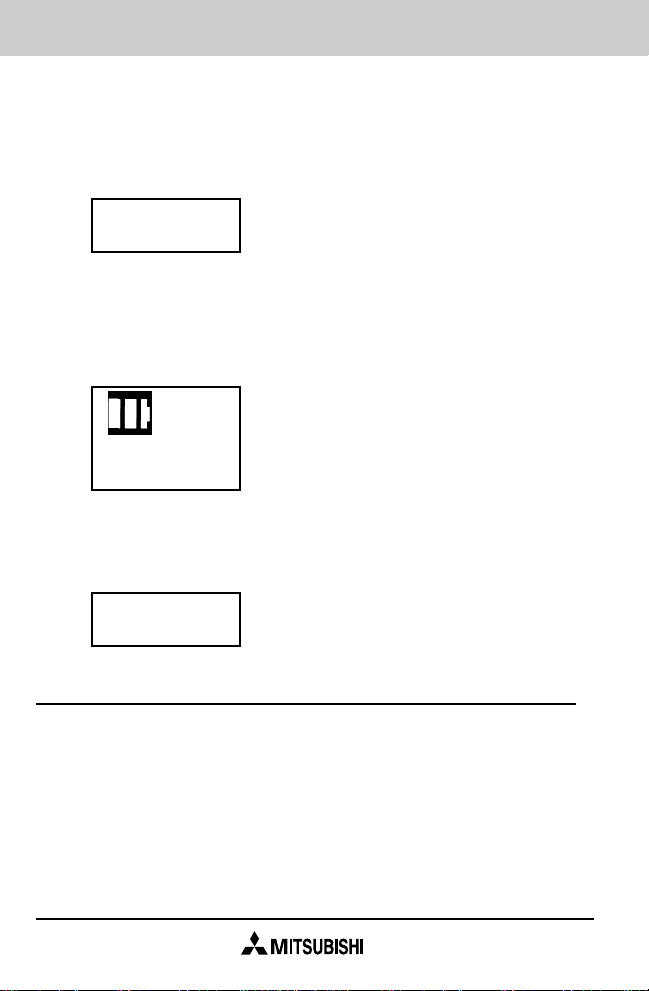
If the “NO SVC” indicator remains in the display or appears
at a later time after turning the phone on, it may indicate that
you are out of the cellular service area. Calls cannot be
initiated or received when “NO SVC” is displayed.
-ON-
NOSVC
If an error message such as “CHECK 3” appears in the
display, the phone should be taken back to your local dealer
for service.
Check 3
PLACING A CALL
1. Make sure your phone is turned on and unlocked.
2. Enter the telephone number. Each digit dialed will
appear on the display. Up to 32 digits may be dialed but
only the last 14 digits remain visible on the display.
3. Press the “SEND” key. The display will show the “IN
USE” message. Once the call is established, the dialed
telephone number disappears and the “TALK” timer
appears.
13
Page 14
7345634
IN USE
00:12 IN USE
Notes: • If a busy tone is heard, press the “END” key.
This is a slow action key.
• Press the “CLR” key to clear the last entered
digit.
• If a reorder (fast busy) tone is heard, press the
“END” key and the “SEND” key again.
• An intercept (siren) signal indicates you have
made an entry error.
4. When the called party answers, proceed with the conversation. “TALK” timer indicates the elapsed time of the
present call.
RECEIVING A CALL
When the phone is turned on and is in a service area, an
incoming call will result in a ringing tone and the flashing of
the “CALL” message. Press the “SEND” key or any key
except for the “PWR” key to answer the call.
14
CALL ROAM
B
Page 15

Note: • The “Any key” answer function is always active
when receiving a call.
• Escalating ringing tone function is always active
when receiving a call.
If an incoming call is left unanswered, the ringing
tone will automatically increase one volume level
per ring cycle, starting from the user’s setting
level until the maximum is reached. The maximum level will then be maintained until the call is
answered.
ENDING A CALL
Press the “END” key to terminate a call.
TURNING THE PHONE OFF
To turn off the phone, press the “PWR” key for one (1)
second. A short beep will sound from the beeper, indicating
that your phone is off.
Note: Press the “PWR” key for one (1) second to turn on
the phone.
LAST NUMBER REDIAL
The last number dialed is also stored in memory when the
“SEND” key is pressed. If for any reason the last number is
not in the display, you can recall it to the display by pressing
the “RCL” (RECALL) key twice. The ▲/▼ key can then be
used to scroll through the last three (3) numbers dialed.
For example, if a call results in a busy signal, the user may
turn off the phone and try later. Pressing the “RCL” key
twice recalls the last number.
15
Page 16
User action Display
RCL Enter
Addr.
RCL 1st:
9653465
2nd:
▲ 2233442
3rd:
▲ Empty
Note: It is possible to add extra digits to recalled phone
numbers.
If the present phone number is the same as the last
number dialed, the present phone number is not
stored into the last number memory.
ONE TOUCH DIALING
The telephone number stored in the one touch dial memory
can be dialed and called by pressing the “P” key for one (1)
second.
If one touch dial memory has a telephone number “123-4567890”:
16
123
4567890 IN USE
Page 17
AUTOMATIC RETRY
This function is a user selectable option (refer to FCN 3).
The phone will attempt a call every three (3) seconds for a
total of 10 times when unable to access the cellular system.
When the system is accessed, a short beep sounds. When
10 tries are unsuccessful, a reorder tone is heard, and a
beep sounds. During this automatic retry procedure the retry
message is displayed, as shown below. This procedure can
be canceled by pressing the “END” key.
Pause
Retry IN USE
ROAM
B
CALL IN ABSENCE INDICATOR
When an incoming call remains unanswered, the “Called”
message will be displayed when you return to your phone.
Called
ROAM
B
LOW BATTERY
When the battery needs charging the “Low BAT” message
will appear, the B indicator will start blinking, and a short
tone is heard every 20 seconds. If the phone is left on,
despite the low battery alarm, it will automatically turn itself
off to protect the battery from over-discharging.
17
Page 18

To prolong the battery life as long as possible, the battery
should be used until the phone turns itself off. If the status
monitor is on or digits are entered, only the B indicator will
be seen. This is also true in the conversation mode during
the Mute mode.
Low BAT ← (Blinks)
-ON-
B ← (Blinks)
MUTE
00:15
B
← (Blinks)
BACKLIGHT
The keypad and the LCD will be backlit for 10 seconds after
pressing any key, except for the “PWR” key. Further depression of any key (except the “PWR” key) will extend illumination for another 10 seconds.
LCD VIEW ANGLE CONTROL
light
*
dark #
When the “FCN” key is pressed for more than one second
during standby mode, the phone enters the LCD view angle
mode and shows the above message.
The LCD View Angle can be controlled by pressing the */# keys.
To complete your setting and exit from this mode, press the
“STO,” “END,” or “CLR” key. Your angle selection is stored
while the phone is turned off.
18
Page 19

VOLUME ADJUST
To adjust the volume level press the “▲/▼“ key. The volume
level of the phone increases or decreases through its seven
(7) settings. Continuous depression changes the present
level every half second and stops at the maximum or minimum level.
Three (3) independent volume adjustments are available:
ringing tone, key tone, and conversation levels. The selected volume level is stored in memory for each of the
settings, and preserved even if the battery pack is removed
from the phone.
The volume control mode displays the current volume level.
Ringing volume The ringing tone volume may be adjusted
by pressing FCN + “▲/▼”.
Ringing
>>>>
Conversation volume The conversation volume level can
be adjusted during conversation from the earpiece for a
comfortable listening level by pressing the “▲/▼” key.
Voice
>>>>
Key tone volume During standby mode the key tone
volume can be controlled by pressing the “▲/▼” key.
The minimum volume level is volume 0.
Key Key
>>>> OFF
Other tone volume The other tone volume levels - error
tone, retry call success tone, low battery alarm, wake-up
19
Page 20

tone and power off tone - are linked with key tone volume
level.
When the key volume is off only the low battery alarm is set
to the minimum volume level.
Note: • Reorder/Intercept Tone Volume is fixed.
• These volume levels are stored while
the phone is turned off.
STORING OFTEN-USED NUMBERS
Your phone allows storage of 39 frequently dialed telephone
numbers and names in the phone’s memory. The names can
contain up to 11 characters. The 39 memory locations are
numbered 01 to 39.
1. Enter the telephone number.
2 Press the “STO” (STORE) key. The following message is
shown:
Enter
Addr.
3. Enter a two (2) digit memory location (from 01 to 39).
a. If entered memory location is vacant, the telephone
number is then stored to this memory location. The
display will indicate:
Stored
Addr.01
b. If entered memory location has another telephone
number, the current telephone number is displayed
for two (2) seconds. The “overwrite warning tone”
will also be heard. The confirmation message will be
displayed:
20
Page 21

01:JOHN
3214567
↓ 2sec
Replace
∗:Y/#:N
If “∗” key is pressed, the new telephone number will replace
the existing number and the display will be changed as
indicated below.
If “#” key is pressed, the display will be changed to the
“Enter Addr.” message, allowing a different memory location
to be entered.
And if the “CLR” or “END” keys are pressed, the entered
telephone number is canceled and the phone will exit from
the store mode.
Any other key entries (except for “PWR” key) are ignored
and an error tone is heard.
Stored
Addr.01
Note: • When this storing procedure is used, the old
phone number’s corresponding alphabet name
is cleared.
RECALLING OFTEN-USED NUMBERS
Press “RCL” (RECALL) key. The following message appears:
Enter
Addr.
Enter the required memory location (01 to 39).
21
Page 22

The location number, the alphabet name (if used), and the
telephone number stored at that location will be displayed.
“RCL” and “11” will recall the number stored in location 11.
In this example, location 11 has an alphabet name (DAVID):
11:DAVI
9876543
Note: By pressing the “SEND” key the recalled number
can be dialed.
If the telephone number contains more than seven
(7) digits, only the lower seven (7) digits remain on
the display.
It is possible to add digits to recalled numbers.
DELETING NUMBERS FROM MEMORY
In order to delete the stored memory, the operation is as
follows:
1. Hold down the “CLR” key to clear any entered digits. (If
no digit is displayed, this action is not required.)
-ON-
2. Press the “STO” (STORE) key. The following message is
shown:
Enter
Addr.
3. Enter a two (2) digit memory location (01 to 39). The
current telephone number (if it exists) is displayed for
two (2) seconds. The “overwrite warning tone” will be
heard, and the confirmation message will be displayed.
(If entered memory location is vacant, the display will
show the “01: Empty” message.)
22
Page 23

01:JOHN
3214567
↓ 2sec
Erase
:Y/#:N
∗
If “∗” key is pressed, the current telephone number will be
deleted and the display will be changed as indicated
below.
If “#” key is pressed, the display will be changed to the
“Enter Addr.” message, allowing a different memory
location to be entered.
And if the “CLR” or “END” keys are pressed, the delete
procedure is canceled and the phone will exit from this
mode.
Any other key entries (except for “PWR” key) are ignored
and an error tone is heard.
Erased
Addr.01
SUPER SPEED DIALING
Super speed dialing allows you to place a call without
recalling the telephone number from memory. The telephone numbers stored in memory addresses 01 to 09 can
be dialed by entering the first digit of the memory address
number (1 to 9) and pressing “SEND”.
1 + SEND 312
1234567 IN USE
Note: The operation “0 + SEND” is an operator call.
23
Page 24

SPEED DIALING
The telephone number stored in memory addresses 01 to 39
can be dialed only by entering the two (2) digit memory
address number (01 to 39) and pressing “SEND”.
If memory address “10” has the telephone number “312-9876543”:
10 + SEND 312
9876543 IN USE
Note: The operation “00 + SEND” is an operator call.
DIALED NUMBER CHECK
The “RCL” key is used to review the remaining digits of the
telephone number containing more than 14 digits.
Press and hold the “RCL” key. When the “RCL” key is
released, the first 14 digits will be displayed again.
Number “7473-54689346803747-87467487368934”
8746748
7368934
RCL the most significant
(hold down) 7473 four (4) digits
One (1) 5468934
second 6803747 The middle 14 digits.
later
HOOK-FLASH REQUEST
The system operator will provide you with specific procedures concerning various services offered by your cellular
24
Page 25

system. Initiate Hook-Flash by pressing “SEND” in conversation mode.
A-KEY PROGRAMMING FOR
AUTHENTICATION
This phone supports the Authentication Function.
Authentication is a procedure used by the cellular network to
validate the phone’s identity at system access.
The A-KEY transmits proprietary data used in the phone
authentication process.
User action Display
Step 1: “2539” AKEY
+FCN+FCN
↓ 1sec
Step 2: NAM Tel:123
Select with ∗/# 4567890
The telephone number is displayed for the selected NAM.
Step 3: Enter A- 934
KEY (6∼26 digits) 6803747
Step 4: STO+STO -OK- If entered A-KEY is
valid.
↓ 2sec
Restart from Power ON sequence
Invalid If entered A-KEY is
invalid.
↓ Two (2) seconds
Return to Step 1
Function: When you enter the “2539” followed by “FCN”+
“FCN”, the phone enters “A-KEY programming mode” and
“Telephone number” is displayed.
25
Page 26

A-KEY is programmed by entering the six to 26 digit number
provided by your carrier. The display will show the digits of
the entered number. The “CLR” key can be used for editing.
Momentary depression clears the last entered digit, and all
digits are cleared by continuous depression.
When the complete digit sequence has been entered, the
“STO”+ “STO” key should be pressed to store the number.
At this point the phone will validate the A-KEY based on the
check sum. If the key is valid, the display shows “-OK-” for
approximately two (2) seconds and restarts the phone from
the Power-ON sequence. If the key is invalid, the display
shows “Invalid” for approximately two (2) seconds and
returns to the A-KEY re-entry state.
Note: During the A-KEY programming mode the “END” key
can be used to cancel and exit from this mode at any
time.
If the new A-KEY is entered, the existing A-KEY is overwritten by the new A-KEY.
Once the A-KEY is programmed, it may not be viewed
through the display or any device attached to the phone.
FUNCTION MENU (FCN FCN)
User action: FCN + FCN (Standby only)
Menu Action
▼ ↑ To RCL RCL
-Menu-
Push ▲/▼
▼ ↑ / ▲ ↓
FCN 1 FCN Tel:123
Own Tel 4567890
▼ ↑ / ▲ ↓
26
Page 27

FCN 2 FCN Alpha
Alpha Input
▼ ↑ / ▲ ↓
FCN 3 FCN Redial
Redial ON
▼ ↑ / ▲ ↓
FCN 4 FCN System
System Pref A
▼ ↑ / ▲ ↓
FCN 5 FCN AutoAns
AutoAns OFF
▼ ↑ / ▲ ↓
FCN 6 FCN Lock
Lock Code
▲ ↓ ▼ ↑
FCN 7 FCN Last
Last MMmSSs
▼ ↑ / ▲ ↓
FCN 8 FCN Oper
Oper HHHhMMm
▼ ↑ / ▲ ↓
FCN 91 FCN Security Restr.
Restr. Code NoRestr
▼ ↑ / ▲ ↓
FCN 92 FCN Security Unlock
Unlock Code 123
▼ ↑ / ▲ ↓
27
Page 28

FCN 93 FCN Security Status
Status Code ON
▼ ↑ / ▲ ↓
FCN 94 FCN Security PIN
PIN Code ON
▼ ↑ / ▲ ↓
FCN 95 FCN Secure PIN No.
PIN No. Code 1234
▲ ↓
DIRECT ACCESS FUNCTION
↓ ▼ ↑
FCN 0
Pause
▼ ↑ / ▲ ↓
FCN(1s)
Mute Conversation
▼ ↑ / ▲ ↓
FCN(1s)
View
▼ ↑ / ▲ ↓
FCN STO
AutoSto
▼ ↑ / ▲ ↓
FCNSEND
AutDTMF Conversation
▼ ↑ / ▲ ↓
FCN ▲/▼
RingVol
▼ ↑ / ▲ ↓
28
Page 29

RCL ▲/▼
MemScan
▼ ↑ / ▲ ↓
RCL RCL
Last No
▼ ↑ / ▲ ↓ Back to FCN 1
Note: The function menu is not available in conversation
mode.
In standby mode, the “STO” or “END” key can be used to
exit from the function mode.
FCN 1 : Telephone Number Function (Standby & Conversation)
Press “FCN” and “1”.
Tel:123
4567890
Function: When the user enters the “FCN” key followed by
“1”, the phone enters “Own Telephone Number Display
mode”. Your own telephone number is then displayed.
In standby mode, this function is also used to switch NAMs.
This may be done by pressing the “*” or “#” key. When first
pressing either key, it will display the current NAM number
and telephone number. Subsequent key presses will toggle
the NAM selection.
1: 123
4567890
↑ Press */# key
2: 321
7890456
In order to exit from this mode, press the “STO,” “END,” or
“CLR” key.
29
Page 30

If the phone is locked, this operation is ignored.
Note: This function operates even if the phone is in
conversation mode. NAM switching can only be
done in standby mode. To exit from conversation
mode, press “STO” or “CLR”.
FCN 2: Input/Edit Alphabet Name And Number
Direct Operation: (number) +FCN + 2 +(alphabet)+ STO
“FCN” + “STO” or “STO” + “XX” (01∼39 only)
in Standby mode only
Display: When FCN + 2 is pressed:
Alpha
Input is displayed.
Function: A maximum of 11 alphanumeric characters can be
stored into the name area and up to 32 digits can be stored
into the number area.
In the alphabet mode, digit keys are used for alphanumeric
entry. The characters table is:
KEY CHARACTERS
1QZ_ 1
2ABC2
3DEF 3
4GHI 4
5J KL 5
6MNO6
7PRS 7
8T UV 8
9WXY9
0O
,
.
*
#-
!
“
*
?#
30
Page 31

Example: Press “2” key once = “A”
Press “2” key twice = “B”
Press “2” key three times = “C”
Press “2” key four times = “2”
Press “2” key five times = “A”
To complete your selection, press the key for one (1) second
or press another key. If a key must be repeated, the user
must press the key for one (1) second in order to advance to
the next character. The alpha entry tone will be heard.
Example (a): Input new name and number
Name “DAVE” / Number “2133932111”
Operation Display
Enter number 213
3932111
FCN + 2 Alpha
Input
One second ??:
later ALPHA
3 D
once ALPHA
2 DA
once ALPHA
8 DAV
three times ALPHA
3 DAVE
twice ALPHA
FCN+STO or Stored
STO+XX (01 to 39) Addr.XX
31
Page 32

Note: • If a character is repeated, the key must be held for
one (1) second in order to advance to the next
character. A high tone will be heard.
• “ALPHA” indicates that the phone is in the Input/
Edit mode.
• The “CLR” key is used for editing. Momentary
depression clears the character. Continuous depression clears all characters.
• If the call restriction level is Recall 1-39 or Receive
Only, this function is not available. The following
message will appear on the display when call
restriction is selected:
Alpha
N.A.
Example (b): Add name to a stored number
Address 12 Number “7112340”
Add name “CEW”
Operation Display
RCL 12 12:
7112340
CLR to exit
RCL mode 7112340
FCN + 2 Alpha
Input
One second later 12:
ALPHA
Enter alphabet CEW
ALPHA
32
Page 33

7
STO 112340_
Stored
STO Addr.12
Example (c): Edit a stored name and number
Address 28 Number “4975646”
Name “MELCO”
Operation Display
RCL 28 28:MELC
4975646
CLR to exit
RCL mode 4975646
FCN + 2 Alpha
Input
One second 28:
later MELCO
ALPHA
Edit name M-CEW
ALPHA
STO 4
Edit Number 974656_
STO Stored
Addr.28
Function: A new character and number can be added to the
last character of the stored name and number in this mode.
33
Page 34

To delete the last character and number, press the “CLR” key.
All characters and numbers are cleared by continuous
depression.
Note: • During this editing mode no calls can be made.
• If all characters and numbers of the selected
address are deleted by the “CLR” key, press the
“STO” key to exit this mode. The following
message is displayed:
Erased
Addr.09
FCN 3: Automatic Redialing
Direct Operation: FCN + 3 (Standby only)
Redial
ON
↑ Press */# key
↓
Redial
OFF
Function: When you enter “FCN” followed by “3”, the phone
enters the “Automatic Redial ON/OFF” mode and shows the
current setting.
The ON/OFF setting can be selected by pressing the “*” or
“#” keys.
In case of “Redial ON”, the Automatic Redial function is
active. Automatic Retry continues trying to access the
system. The phone will attempt automatic retry 10 times
with a three (3) second interval between each try when
unable to access the cellular system.
In order to complete your selection and exit from this mode,
press the “STO,” “END,” or “CLR” key.
34
Page 35

Note: This mode selection is stored while the phone is
turned off.
FCN 4: System A/B Selection
Direct Operation: FCN + 4 (Standby only)
System
Pref A
↑ Press */# key
↓
System
Pref B
↑ Press */# key
↓
System
H only
↑ Press */# key
↓
System
Only A
↑ Press */# key
↓
System
Only B
Function: When you enter “FCN” followed by “4”, the phone
enters the “System A/B Selection” mode and shows the
current setting.
You may choose your operating system by pressing “*” / “#”
keys.
35
Page 36

Preferred System A:
Try to access system A for service before searching the
alternate system.
Preferred System B:
Try to access system B for service before searching the
alternate system.
Home Only:
Access the preferred-home system only. Ignore a preferredroam system and do not search the alternate system.
Only System A:
Access system A only. Do not search system B.
Only System B:
Access system B only. Do not search system A.
In order to complete your selection and exit from this mode,
press the “STO,” “END,” or “CLR” key.
Note: • If “ROAM INHIBIT OPTION” is selected in NAM,
this function is not accepted. The following
message will appear on the display when this
function is selected:
Roam
Inhibit
• This mode selection is stored while the phone is
turned off.
FCN 5: Automatic Answer
Direct Operation: FCN + 5 Standby only)
36
Page 37

AutoAns
ON
↑ Press */# key
↓
AutoAns
OFF
Function: When you enter “FCN” followed by “5”, the phone
enters the “Automatic Answer ON/OFF” mode and shows the
current setting.
The ON/OFF setting can be selected by pressing “*” / “#”
keys.
When this function is activated and an incoming call occurs,
the phone automatically answers the call after approximately
10 seconds.
In order to complete your selection and exit from this mode,
press the “STO,” “END,” or “CLR” key.
Note: This mode selection is stored while the phone is
turned off.
FCN 6: Lock Function
Press “FCN” and “6” (Standby only)
The phone displays the message for the Lock Function.
Lock
Code
↓ Three (3) digit unlock code is entered.
Locked
Function: When you enter “FCN” followed by “6”, the phone
enters the “Unlock code waiting state” and waits for the entry
37
Page 38

of the three (3) digit unlock code. If entered unlock code is
correct, the phone will be locked.
The “Locked” message will be displayed instead of the “-ON” message when the phone is locked.
In the lock mode no calls can be placed or received. The
exception is emergency calls (911).
To unlock the phone, enter the three (3) digit unlock code.
Note: • To avoid confusion, the number “911”
should not be used as an unlock code.
• If the entered unlock code is incorrect, the
phone exits from this mode and displays the following message:
Invalid
Code!!
• This locking status is stored while the phone is
turned off.
FCN 7: Last Talk Time
Direct Operation: FCN + 7 (Standby only)
Last
MMmSSs
Function: When you enter “FCN” followed by “7”, the “Last
Talk Time” is displayed.
“MM” represents 00 to 59 minutes and “SS” represents 00 to
59 seconds.
To exit from this mode, press the “STO,” “END,” or “CLR”
key.
FCN 8 : Operating Timer
Direct Operation: FCN + 8 (Standby only)
38
Page 39

Oper
HHHhMMm
Function: When you enter “FCN” followed by “8”, the
“Operating Timer (Non-resettable Timer)” is displayed.
Call time is cumulative per call and can not be reset by the
user.
“HHH” represents 000 to 999 hours and “MM” represents 00
to 59 minutes.
To exit from this mode, press the “STO,” “END,” or “CLR”
key.
Note: • The operating timer operates in 60 second
increments.
FCN 9: Security Function
Press “FCN” + “9”.
Secure
1-5
The phone prompts the user for the security function submenu number. By pressing 1-5, the phone enters the
Security Code Waiting State and waits for the entry of the
four digit security code. The following message is displayed:
Secure
Code
If the entered security code is correct, the phone will enter
the desired sub-function.
Otherwise, the phone will show the following message and
exit this mode:
Invalid
Code!!
39
Page 40

FCN 91: Call Restriction
Direct Operation: FCN + 9 + 1 + (Security Code) (Standby
only)
Restr.
NoRestr
↑ Press */# key
↓
Restr.
Local
Function: When you enter “FCN” followed by “9 + 1 +1
(Security Code)”, the phone enters the “Call Restriction”
mode and shows the current setting.
Other types of Call Restriction can be selected by pressing
the * / # keys.
No Restriction:
All calling procedures are enabled.
Local Only:
No long distance calls or operator calls can be made. Only
local calls (seven digit telephone number) and toll free calls
(1-800 + XXX...) are accepted.
Recall 1-39:
You can recall numbers from any of the 39 memory locations
and place calls to them. New telephone numbers cannot be
entered.
Receive Only:
No outgoing calls can be made.
In order to complete your selection and exit from this mode,
press the “STO,” “END,” or “CLR” key.
Note: • Pressing the “▲” or “▼” key at this stage will scroll
40
Page 41

through the secondary menu of the Security
Function.
• The emergency call (911) is always allowed at any
restriction level.
• Manual DTMF transmission is available while “No
restriction” or “Local only” modes are selected in
this function.
• This mode selection is stored while the phone is
turned off.
FCN 92: Programmable Unlock Code
Direct Operation: FCN + 9 + 2 + (Security Code)
(Standby only)
Unlock
123
Function: When you enter “FCN” followed by “9 + 2 +
(Security Code)”, the phone enters the “Programmable
Unlock Code” mode and shows the current unlock code.
In order to program the new unlock code, enter the new
three (3) digit code and press the “STO,” or “END,” key.
Note: Pressing the “▲” or “▼” key at this stage will scroll
through the secondary menu of the Security Function.
The new unlock code can be programmed even if
the phone is locked.
To avoid confusion, the number “911” should not be
used as an unlock code.
FCN 93: Status Monitor
Direct Operation: FCN + 9 + 3 + (Security Code) (Standby
only)
41
Page 42

Status
ON
↑ Press */# key
↓
Status
OFF
Function: When you enter “FCN” followed by “9 + 3 +
(Security Code)”, the phone enters the “Status Monitor ON/
OFF” mode and shows the current setting.
The ON/OFF setting can be selected by pressing the * / #
keys.
When this function is ON
(1) During non-conversation mode
The phone displays status information instead of the
“-ON-” message. Display format of the status
monitor is:
CCCCRRR
AAAAA
CCCC: Control channel
RRR: Received Signal Strength
AAAAA:Received System ID
(2) During conversation mode
The phone displays status information instead of Talk Time.
Display format of the status monitor is:
42
CCCCRRR
PSAAAAA
CCCC: Voice channel
RRR: Received Signal Strength
Page 43

P: Transmit power level
S: Received SAT frequency
0 = 5970 Hz, 1 = 6000 Hz,
2 = 6030 Hz, 3 = no SAT
AAAAA:Received System ID
In order to complete your selection and exit from this mode,
press the “STO,” “END,” or “CLR” key.
Note: • Pressing the “▲” or “▼” key at this stage will
scroll through the secondary menu of the
Security Function.
• This ON/OFF selection is stored while the phone
is turned off.
FCN 94: PIN Number Enable
Direct Operation: FCN + 9 + 4 + (Security Code) (Standby
only)
If a PIN number is programmed:
PIN
ON
↑ Press */# key
↓
PIN
OFF
If no PIN number is programmed:
PIN
N.A.
Function: When you enter “FCN” followed by “9 + 4 +
(Security Code)”, the phone enters the “PIN Number Enable
43
Page 44

ON/OFF” mode and shows the current setting.
The ON/OFF setting can be selected by pressing the * / #
keys.
When this function is ON the PIN number is automatically
sent to the base station. It can also be sent by using the
“Flash Request”.
In order to complete your selection and exit from this mode,
press the “STO,” “END,” or “CLR” key.
Note: • This PIN number complies with the AT&T
network systems method as detailed in the
Subscriber PIN Access (SPINA) document. The
Ericcson network systems method is not supported. Check with your carrier for more information.
• Pressing the “▲” or “▼” key at this stage will
scroll through the secondary menu of the
Security Function.
PIN Number Programming (FCN 95)
Direct Operation: FCN + 9 + 5 + (Security Code) (Standby
only)
If a PIN number is programmed:
PIN No.
1234
If no PIN number is programmed:
PIN No.
____
Function: When you enter “FCN” followed by “9 + 5 +
(Security Code)”, the phone enters the “PIN Number Pro-
44
Page 45

gramming” mode and shows the current programmed PIN
number.
A new PIN number may be programmed by entering a new
four (4) digit PIN number. The PIN number can be cleared
by pressing “CLR” after the digits are entered.
The PIN number can be erased by pressing “FCN”. The
phone will then return to the “-ON-” screen.
If the PIN number is erased, the PIN number enable state
will be set to “OFF” (FCN 94), and that screen will now read
“PIN N.A.”
To complete your selection and exit from this mode, press
the “STO” or “END” key.
Default settings for each function:
1) Automatic retry (FCN 1) .................OFF
2) System selection (FCN 4) ......... Pref.Sys.
3) Auto answer mode (FCN 5) .................OFF
4) Last talk time (FCN 7) ........... 00m00s
5) Restriction level (FCN 91) ......... No restr
6) Status monitor (FCN 93) ...............OFF
7) PIN status (FCN 94) ...............OFF
8) PIN number (FCN 95) ................ Null
FCN 0: Pause Function
User action:
1. Enter telephone number (xxxxx)
2. FCN + 0
3. Enter DTMF number (yyyyy)
4. FCN + 0
5. Enter DTMF number (zzzzz)
6. Press SEND (making a call with xxxxx)
45
Page 46

7. Press SEND after going to the voice
channel(yyyyy are transmitted as
DTMF signal)
8. Press SEND (zzzzz are transmitted asDTMF sig-
nal)
Display: xxxxxPyyyyyPzzzzz
Function: In this case, xx... is the dialed phone number. yy...
and zz... are transmitted as DTMF signal on the voice
channel.
F-C-N: Call Mute Function
Direct Operation: FCN (for more than one second) During
conversation mode
MUTE
00:59
Function: Calls may be placed “on hold” to allow you to
converse with people nearby. The call mute feature disables
the microphone of the phone, but keeps the phone connected to the called party. To restore the call to the normal
conversation mode, press any key and mute will be cancelled.
Note: • This function is valid during conversation and is
disabled after call termination.
MEMORY AUTO STORE
Direct Operation: (Telephone number) + FCN + STO
(Standby only)
Display:
Stored XX is stored memory
Addr.XX location. (01 ∼ 39)
46
Page 47

This feature automatically searches for the first free memory
from address 01 ∼ 39 and stores the displayed telephone
number there. When you enter “FCN” + “STO”, if there is no
free memory location available in the memory location
address 01 ∼ 39, an error tone is heard and the display will
show:
Memory
Full
AUTOMATIC DTMF
Direct Operation:FCN + SEND (Conversation only)
Function: Pressing digit keys during conversation transmits
the corresponding DTMF tones. The depression of “FCN”
then “SEND” during conversation sends any digits on the
display in DTMF form.
MEMORY SCAN
Direct Operation: RCL + ▲/▼
Display: Memory location, the first four (4) letters of the
name (if stored), and the last seven (7) digits of repertory
memory are displayed.
AA:NNNN
DDDDDDD
AA: Memory address location (01 ∼ 39)
NN: Name of repertory memory
DD: Digits of repertory memory
Function: When RCL + ▲/▼ are pressed, the last recalled
memory location is displayed. ▲/▼ key depression scans
forward or backward through memory location addresses 01
∼ 39. Free memory locations are bypassed. Continuous
depression changes the display every second. When the
47
Page 48

“SEND” key is pressed, all digits of repertory memory are
displayed and the phone initiates a call.
Note: (1) When using the memory scan function, the
display mode can be changed by pressing the
“FCN” key.
FCN (Full name display)
09:
CROSS
FCN (Full number display)
213
2239876
FCN (Name and number display)
09:CROS
2239876
(2) Call origination is possible in any display mode
by pressing the “SEND” key.
(3) The last recalled memory location is stored
while the phone is turned off.
ONE TOUCH DIAL NUMBER STORE/RECALL
(1) STORE
Direct Operation: (Telephone number) + STO + P
(Standby only)
Stored
Into P
Function: If you want to set or change the “One Touch
Dial Number”, enter the one touch dial number and
48
Page 49

depress the “STO” key followed by “P”. This memory
can hold up to 32 digits.
Note: (1) If the one touch dial memory has another
telephone number:
The current telephone number is displayed for
two (2) seconds. The “overwrite warning tone”
will be heard, and the confirmation message will
be displayed.
P:
3214567
↓ 2sec
Replace
∗:Y/#:N
If “∗” key is pressed, the new telephone
number will replace the existing number.
If “#” key is pressed, the display will be
changed to the above “Enter Addr.” message,
allowing a different memory location to be
entered.
And if the “CLR” key is pressed, the entered
telephone number is canceled and the phone
will exit from the store mode.
Any other key entries (except for the “PWR”
key) are ignored and an error tone will be heard.
(2) RECALL
Direct Operation: RCL + P (Standby only)
P:33456
7891234
Function: If you want to recall the “One Touch Dial Number”,
enter the “RCL” key followed by “P”. The current one touch
dial number will be displayed.
49
Page 50

NAM PROGRAMMABLE
EMERGENCY NUMBER
The emergency number (911) is already programmed in the
phone as the default number. A second emergency number
can be programmed in the NAM programming mode.
SELF-DIAGNOSIS
Each time the phone is turned on a Power On Self Test
(POST) is performed.
If an error occurs, one of the following errors will be displayed:
CHECK 1 ESN checksum is incorrect
CHECK 3 Synthesizer did not achieve lock
CHECK 4 RF power status did not indicate
an “on” condition
CHECK 8 STC Error
Program NAM checksum is incorrect
NAM Reprogram NAM !
Note: The display will show “CHECK” and the appropriate
number.
ELECTRONIC SERIAL NUMBER
The electronic serial number circuitry is isolated to prevent
fraudulent contact and tampering. Changing the serial
number circuitry is extremely difficult and could damage the
phone. Take your phone back to your local dealer or to a
facility operated by your cellular carrier if you have reason to
question this function.
50
Page 51

I M P O R T A N T
READ THIS INFORMATION BEFORE USING
YOUR HAND-HELD PORTABLE CELLULAR
TELEPHONE
First introduced in 1984, the hand-held portable cellular
telephone is one of the most exciting and innovative electronic products ever developed. With it you can stay in
contact with your office, your home, emergency services,
and others.
For the safe and efficient operation of your phone, observe
these guidelines
Your cellular telephone is a radio transmitter and receiver.
When it is ON, it receives and also sends out radio frequency (RF) energy. The phone operates in the frequency
range of 824 MHZ to 894 MHZ and employs commonly used
frequency modulation (FM) techniques. When you use your
phone, the cellular system handling your call controls the
power level at which your phone transmits. The power level
can range from 0.006 of a watt to 0.6 of a watt.
Exposure to Radio Frequency Energy
In 1991 the Institute of Electrical and Electronics Engineers
(IEEE), and in 1992 the American National Standards
Institute (ANSI) updated the 1982 ANSI Standard for safety
levels with respect to human exposure to RF energy. Over
120 scientists, engineers, and physicians from universities,
government health agencies, and industry, after reviewing
the available body of research, developed this updated
Standard. In March, 1993, the U.S. Federal Communications Commission (FCC) proposed the adoption of this
updated Standard.
51
Page 52

The design of your phone complies with this updated Standard. Of course, if you want to limit RF exposure even
further than the updated ANSI Standard, you may choose to
control the duration of your calls and operate your phone in
the most power efficient manner.
Efficient Phone Operation
For your phone to operate at the lowest power level, consistent with satisfactory call quality, please observe the following guidelines:
If your phone has an extendable antenna, extend it fully.
Some models allow you to place a call with the antenna
retracted. However, your phone operates more efficiently
with the antenna fully extended.
Hold the phone as you would any other telephone. While
speaking directly into the mouthpiece, position the antenna
up and over your shoulder.
Do not hold the antenna when the phone is “IN USE”.
Holding the antenna affects call quality and may cause the
phone to operate at a higher power level than needed.
Antenna Care and Replacement
Do not use the phone with a damaged antenna.
If a damaged antenna comes into contact with the skin, a
minor burn may result. Replace a damaged antenna immediately. Consult your manual to see if you may change the
antenna yourself. If so, use only a manufacturer approved
antenna. Otherwise, take your phone to a qualified service
center for repair.
Use only the supplied or approved antenna. Non-approved
antennas, modifications, or attachments could impair call
quality, damage the phone, and violate FCC regulations.
52
Page 53

Driving
Check the laws and regulations on the use of cellular telephones in the areas where you drive. Always obey them.
Also, when using your phone while driving, please:
• give full attention to driving,
• use hands-free operation, if available, and
• pull off the road and park before making or answering a
call if driving conditions so require.
Electronic Devices
Most modern electronic equipment is shielded from RF
energy. However, RF energy from cellular telephones may
affect inadequately shielded electronic equipment.
RF energy may affect improperly installed or inadequately
shielded electronic operating and entertainment systems in
motor vehicles. Check with the manufacturer or its representative to determine if these systems are adequately shielded
from external RF energy. You should also check with the
manufacturer of any equipment that has been added to your
vehicle.
Consult the manufacturer of any personal medical devices
(such as pacemakers, hearing aids, etc.) to determine if they
are adequately shielded from external RF energy.
Turn your phone OFF in health care facilities when any
regulations posted in the areas instruct you to do so. Hospitals or health care facilities may be using equipment that
could be sensitive to external RF energy.
Aircraft
Turn your phone OFF before boarding any aircraft.
• Use it on the ground only with crew permission.
• Do not use it in the air.
53
Page 54

To prevent possible interference with aircraft systems, U.S.
Federal Aviation Administration (FAA) regulations require you
to have permission from a crew member to use your phone
while the plane is on the ground. To prevent interference
with cellular systems, FCC regulations prohibit using your
phone while the plane is in the air.
Children
Do not allow children to play with your phone. It is not a toy.
Children cold hurt themselves or others (by poking themselves or others in the eye with the antenna for example).
Children also could damage the phone, or make calls that
increase your telephone bills.
Blasting Areas
To avoid interfering with blasting operations, turn your unit
OFF when in a “blasting area” or in areas posted: “Turn off
two-way radio”. Construction crews often use remote control
RF devices to set off explosives.
Potentially Explosive Atmospheres
Turn your phone OFF when in any area with a potentially
explosive atmosphere. It is rare, but your phone or its
accessories could generate sparks. Sparks in such areas
could cause an explosion or fire resulting in bodily injury or
even death.
Areas with a potentially explosive atmosphere are often, but
not always, clearly marked. They include fueling areas such
as gas stations; below deck on boats; fuel or chemical
transfer or storage facilities; areas where the air contains
chemicals or particles, such as grain, dust, or metal powders; and any other area where you would normally be
advised to turn off your vehicle engine.
Do not transport or store flammable gas, liquid, or explosives
54
Page 55

in the compartment of your vehicle which contains your
phone or accessories.
Vehicles using liquefied petroleum gas (such as propane or
butane) must comply with the National Fire Protection
Standard (NFPA-58). For a copy of this standard, contact
the National Fire Protection Association, One Batterymarch
Park, Quincy, MA 02269, Attn: Publication Sales Division.
55
 Loading...