

Page 1
www.mission.co.uk
m
3i series
m3i manual 05-07-04.qxd 08/07/2004 09:45 Page ii
T: +44 (0) 1480 447700
IAG House, Huntingdon
PE29 6XU
England
IAG is a trading name of IAG Commercial Macao Offshore Ltd. Dolby, Pro Logic & Dolby Digital are trademarks of Dolby Laboratories Licensing Corporation.
DTS is a registered trademark of Digital Theater Systems Inc.
Dolby, Dolby Pro Logic & Dolby Digital sont des marques enregistrées de Dolby Licensing Corporation. DTS est une marque enregistrée de Digital Theater Systems Inc.
F: +44 (0) 1480 431767
www.mission.co.uk
info@mission.co.uk
Page 2

Contents
Precauciones y Condiciones de garantía 26
Instrucciones de uso 27 - 32
Especificaciones 33
Bitte unbedingt beachten und Garantiebedingungen 18
Gebrauchsanleitung 19 - 24
Technische Daten 25
Cautions & Warranty Conditions 2
User Instructions 3 - 8
Technical Specifications 9
English
Deutsch
Español
Précautions et Conditions de Garantie 10
Manuel d’utilisateur 11 - 16
Caractéristiques 17
Français
m3i manual 05-07-04.qxd 08/07/2004 09:45 Page iv
Page 3
3
Cautions Before installing this product read all these instructions.
Warranty
Conditions
The warranty card enclosed should be completed and
returned to Mission or its Distributor within 8 days of purchase.
No Dealer or Distributor may vary the terms of this warranty
which is personal to the original purchaser and is not
transferable.
Please retain the sales receipt as proof of purchase.
Warranty claims must wherever possible be made through the
Dealer from whom the equipment was purchased.
This warranty excludes:
Damage caused through neglect, accident, misuse, wear and
tear, or through incorrect installation, adjustment or repair by
unauthorised personnel. Any unauthorised servicing will result
in loss of warranty.
Liability for damage or loss occurring in transit to or from the
purchaser.
Consequent damage, loss or injury, arising from or in
conjunction with this equipment.
Equipment for attention under warranty should be considered
return carriage paid. If equipment is found to comply with the
published specification, Mission reserves the right to raise a
charge.
The above conditions do not affect your statutory rights as a
consumer.
Clean only with dry cloth.
When making any connections, switch the amplifier off.
When you switch on your system or change sources, set the
volume control at minimum and turn the level up gradually.
DO NOT
use your amplifier at full volume.
Avoid extreme settings of tone controls or graphic equalisers.
Ideally, they should be set ‘flat’ or, if possible, bypassed. Ensure
that all loudspeakers in the system are correctly wired and are
in phase.
DO NOT
subject your loudspeakers to excessive cold, heat,
humidity or sunlight.
DO NOT
install near any heat sources such as radiators, heat
registers, stoves, or other apparatus (including amplifiers) that
produce heat.
DO NOT
place heavy objects on top of loudspeaker cabinets.
DO NOT
connect your loudspeakers to the mains supply,
except for subwoofers.
DO NOT
attempt to dismantle the loudspeaker. There are no user
serviceable parts inside and you will render the warranty void.
Site hi-fi electronics away from the loudspeakers on a rigid
stand or cabinet.
Loudspeakers should not be placed directly facing other hi-fi
units, or share the same shelf or cabinet.
Site conventional speakers and subwoofers at least 0.5m
away from TV sets, computers etc. Some manufacturers forbid
the placing of objects on top of their TV sets. Check your TV
handbook before installing the centre speaker directly on your
TV set. Consult your TV dealer if you are in any doubt.
Only use attachments/accessories specified by the manufacturer.
Use only with the cart, stand, tripod, bracket, or table specified
by the manufacturer, or sold with the apparatus. When a cart
is used, use caution when moving the cart/apparatus
combination to avoid injury from tip-over.
User Instructions
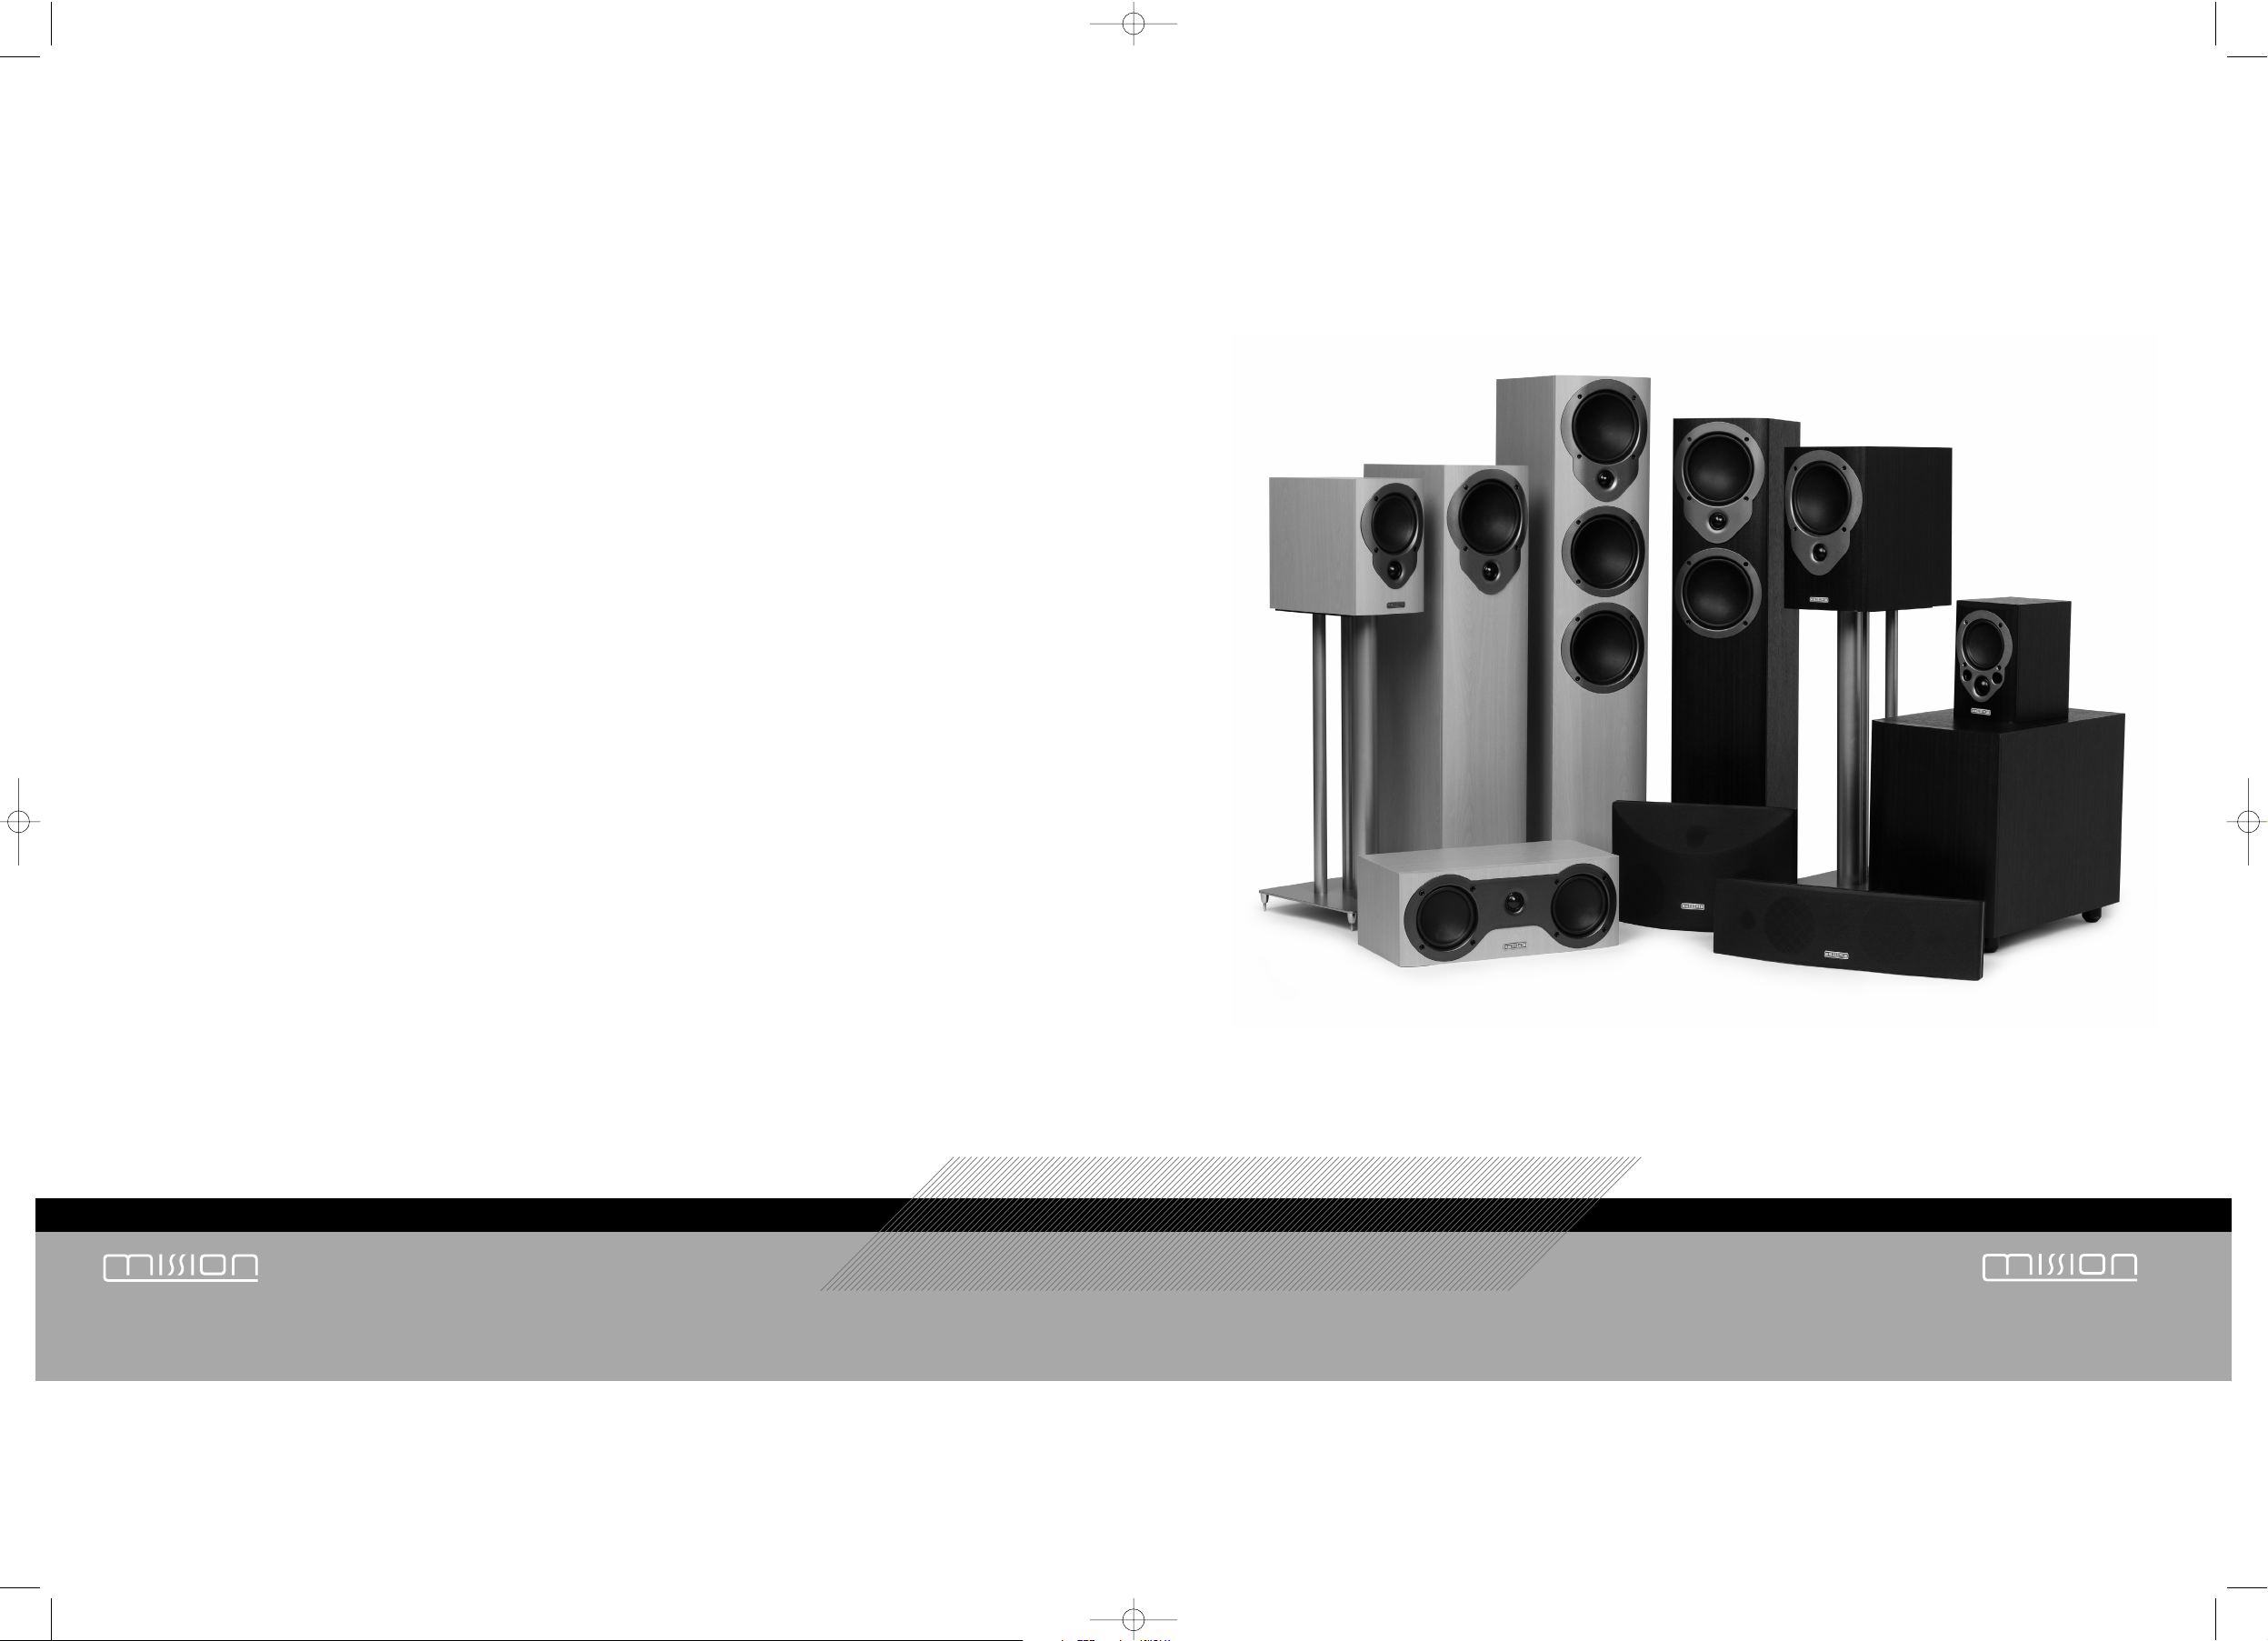
The m3i series is the latest in a long line of distinguished Mission loudspeakers.
These technologically advanced loudspeakers will complement the finest
electronics and decor. Bass drivers using DiaDrive cones with pressure balanced,
ventilated spiders and advanced Viotex laser trimmed pressure balanced tweeters
are used throughout the range. High purity gold-plated binding posts feature on
all models. Your Mission m3i loudspeakers will bring you great listening pleasure
for many years.
Welcome to Mission
Please read these instructions carefully before installing your loudspeakers.
A few minutes studying this manual will ensure superb performance from your
loudspeaker for many years.
Please pay attention to all cautions printed on the pages marked with
this symbol.
General Information
· Carefully unpack each loudspeaker.
· Retain all the packing materials so that your loudspeaker can be repacked and
shipped without damage.
· To ensure that your loudspeakers are protected during transportation, a protective
film has been inserted between the grille and the cabinet. Before using your
loudspeakers please remove the protective film by gently pulling the grille away
from the cabinet and discarding the film.
Unpacking Your
Loudspeakers
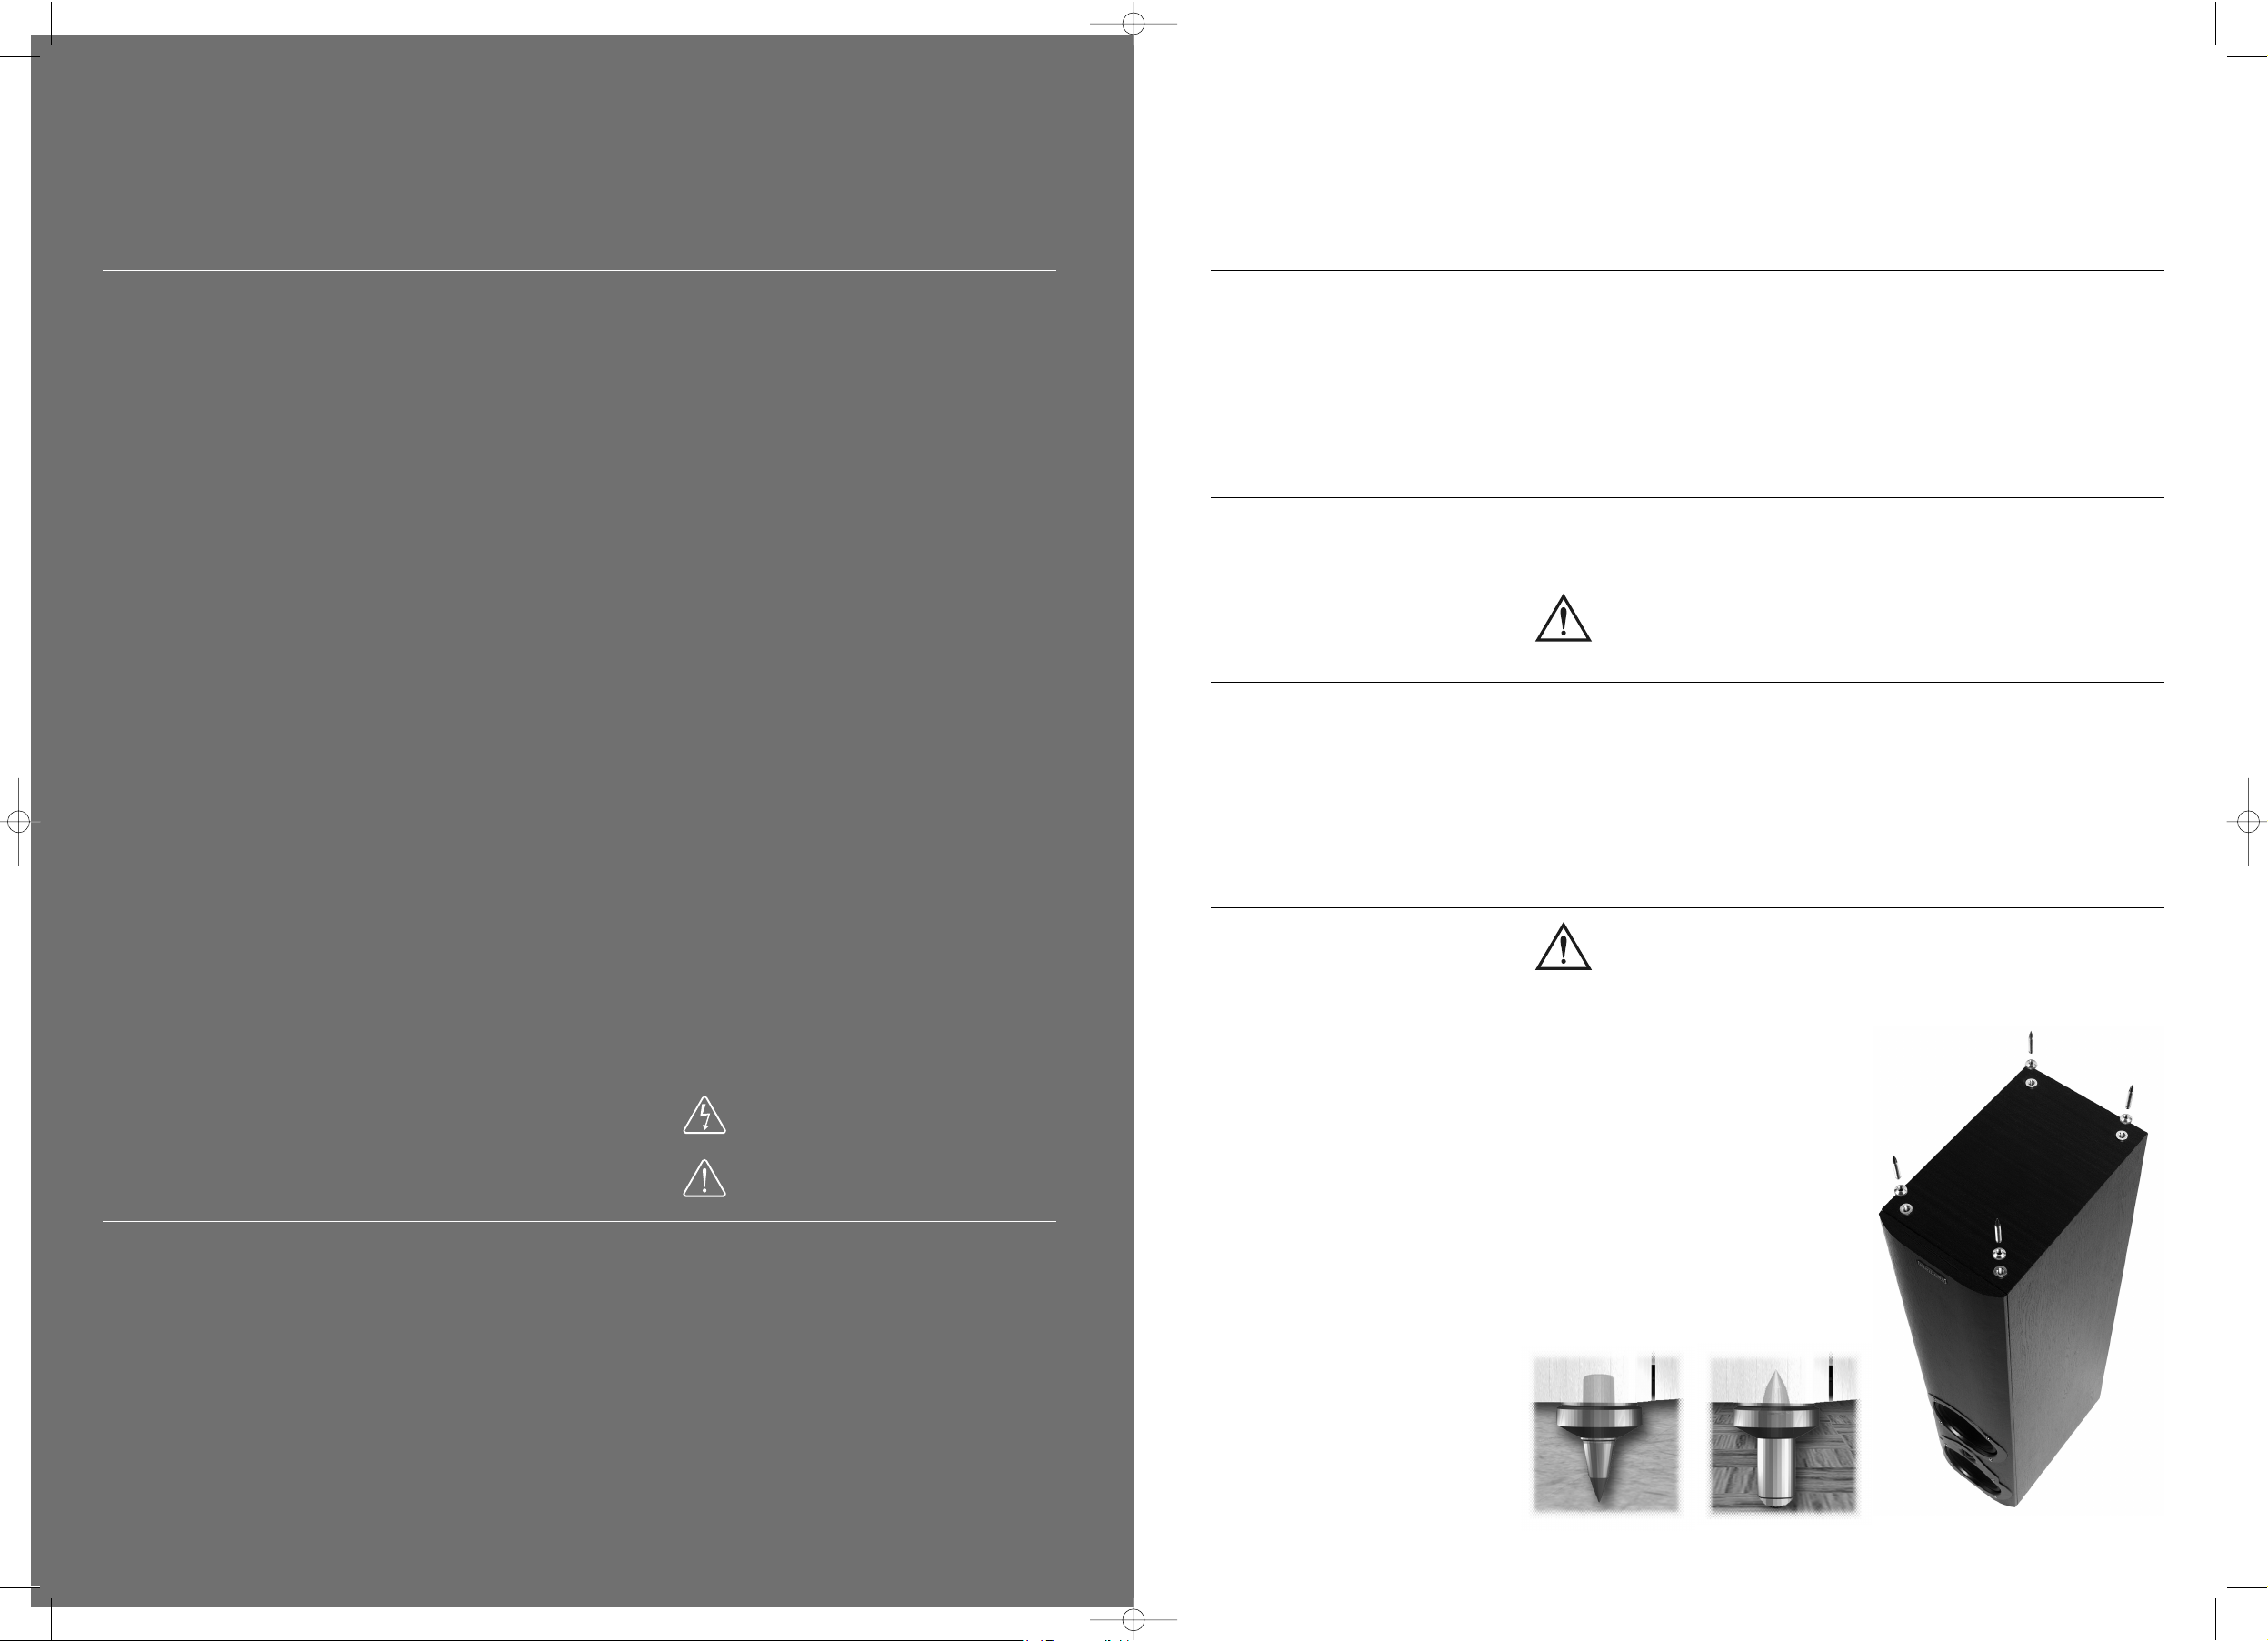
Fitting Spikes
m33i, m34i, m35i
Warning:
Be careful. Loudspeaker spikes are very sharp. When
positioning the speakers avoid piercing any electrical cables.
· Invert the loudspeaker and place the top on a soft surface.
· Screw a nut on each spike.
· Screw the spikes into the bushes fitted in the base of
the cabinet. Use the sharp end on carpet, or the
domed end on hard floors.
· Carefully return the loudspeaker to its
normal position.
· Ensure that spikes do not pierce cables
etc. under the carpet.
· Adjust the height by screwing in or out
one or more of the spikes until the
loudspeaker is stable and level.
2
English
m3as important safety instructions
DO NOT
block any ventilation openings.
DO NOT
defeat the safety purpose of the polarized or
grounding-type plug. A polarized plug has two blades with
one wider than the other. A grounding type plug has two
blades and a third grounding prong. The wide blade or the
third prong are provided for your safety. If the provided plug
does not fit into your outlet, consult an electrician for
replacement of the obsolete outlet.
WARNING:
If using spikes make sure that they do not pierce
mains cable etc. under/above the carpet.
Protect the power cord from being walked on or pinched
particularly at plugs, convenience receptacles, and the point
where they exit from the apparatus.
WARNING:
To reduce the risk of fire or electric shock, do not
expose this apparatus to rain or moisture.
DO NOT
use this apparatus near water.
The apparatus must not be exposed to dripping or splashing
and no objects filled with liquids, such as vases, should be
placed on the apparatus. Unplug this apparatus during
lightning storms or when unused for long periods of time.
Refer all servicing to qualified service personnel. Servicing is
required when the apparatus has been damaged in any way,
such as power-supply cord or plug is damaged, liquid has
been spilled or objects have fallen into the apparatus, the
apparatus has been exposed to rain or moisture, does not
operate normally, or has been dropped.
When this symbol is shown there is a risk of electrical
shock.
When this symbol is shown extreme caution should
be observed.
m3i manual 05-07-04.qxd 08/07/2004 09:46 Page 2
Page 4
Connect the red, positive (+) terminal of the Left loudspeaker to the corresponding
red, positive (+) amplifier terminal. Connect the black, negative (-) terminals
similarly. Repeat for the Right Channel.
Conventional Loudspeaker Connections
Loudspeaker cable is polarity coded along one edge. Split the cable to a depth of
about 25mm (1”) and strip 8mm (1/3”) of insulation from each wire. If the cable is
stranded, twist the strands together.
Terminal Panels
Your loudspeakers use two or four terminals. When single
wiring speakers use the connecting links as shown opposite.
Unscrew each terminal. Thread the bare end of the cable through the cross-hole
ensuring there are no loose strands. Tighten securely.
Connecting your
Loudspeakers
Most models in the Mission m3i series
can be bi-wired for improved
performance. Remove both pairs of
shorting links and connect a cable to
each pair of terminals, running them to a
common connection at the amplifier
output terminals. In the figure to the right,
the terminal panel on the left is bi-wired;
the panel on the right is conventionally
wired. Note the shorting links.
Bi-Wiring
By using separate amplifiers for LF and HF
drive units you can further improve
performance. This is known as bi-amping.
The illustration opposite shows one
channel of a bi-amped system. Note
that the amplifier inputs are linked.
Bi-Amping
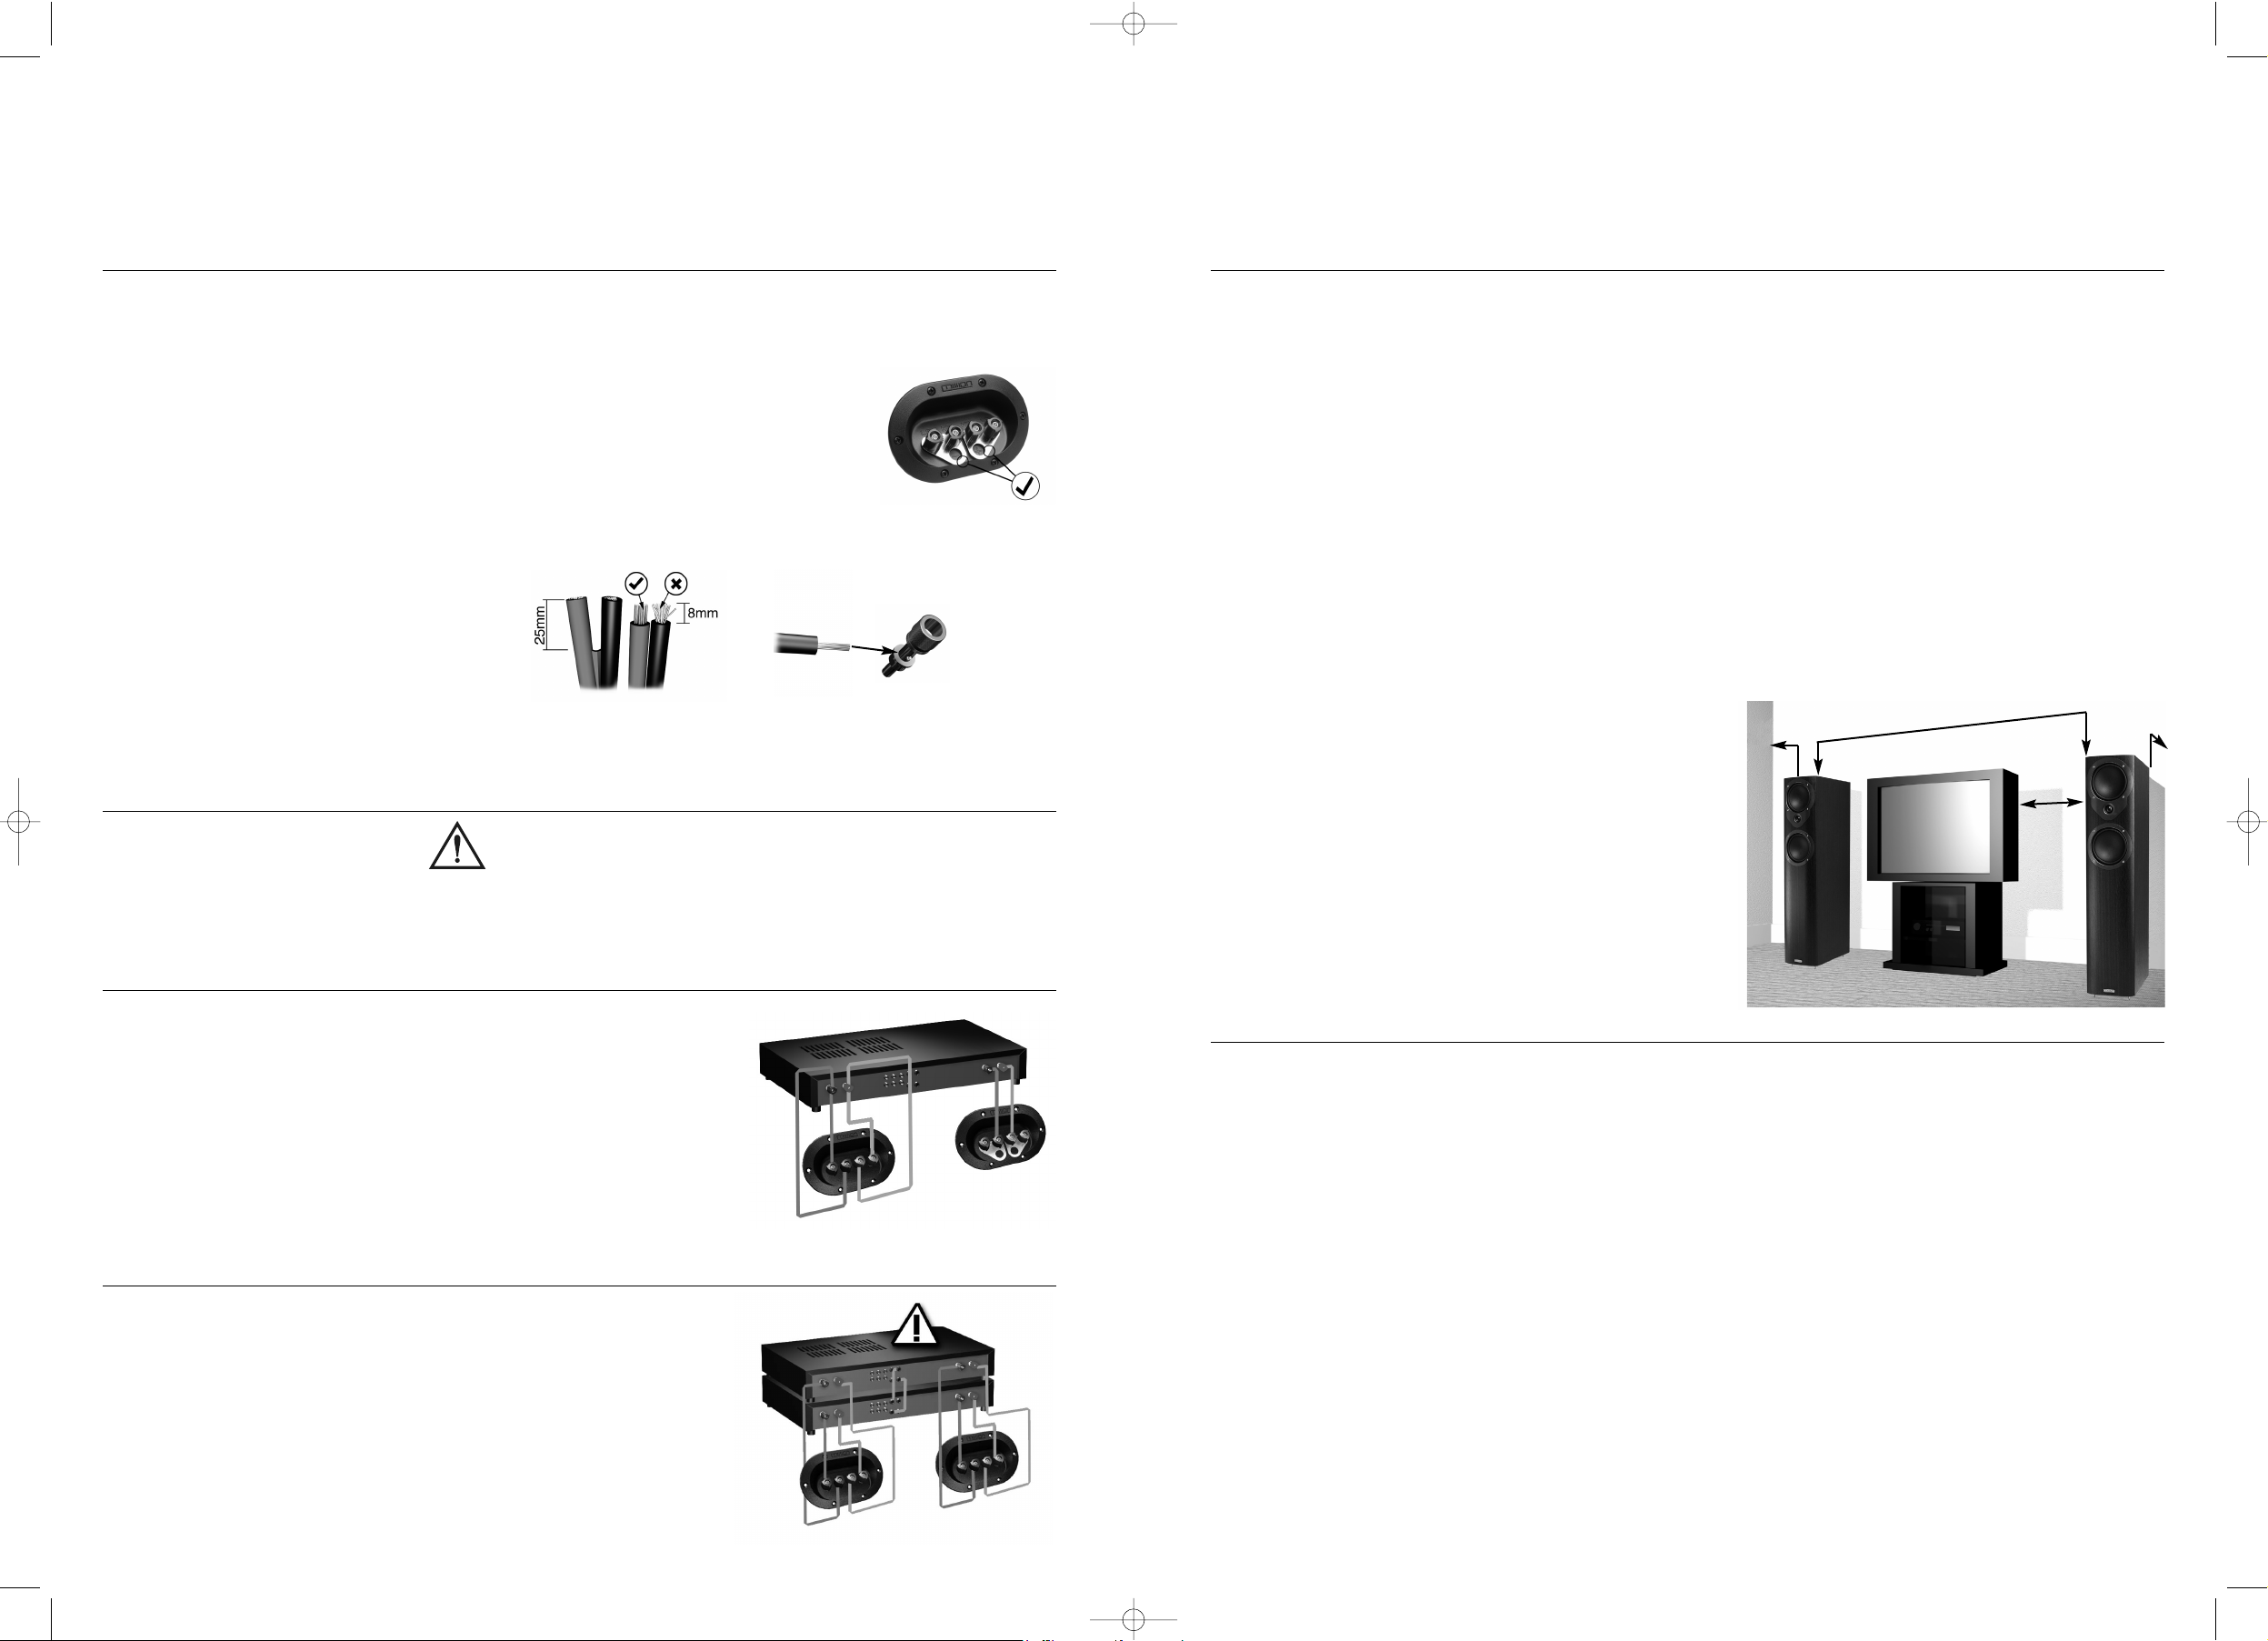
Positioning your
Loudspeakers
Mission m33i, m34i and m35i loudspeakers should be placed on the floor (ideally
on spikes). Mission m31i and m32i should be mounted on rigid stands, such as
Mission 'Stancette', ideally spike coupled to the floor. Mission m30i are designed
for shelf or wall mounting, using Mission’s wall bracket (not supplied).
Height is important: a stand should place the top of a speaker at ear level to a
seated listener. Shelf or bracket mounting is second best.
The distance from the rear wall can profoundly affect loudspeakers' sonic
performance. If your speakers are too close to the wall the bass will boom and
sound coloured. Moving them into the room may increase clarity but tends to
reduce bass output. When positioned correctly, the high frequency response is
smooth with well-defined, powerful bass.
Start with the speakers about 300mm (12”) from the wall and 1.8 metres (6’) apart. The
distance from each loudspeaker to the side wall should be at least 500mm (20”). Vary
the distance between the two loudspeakers and the distance from the wall until you
get a perfect stereo stage.
A few minutes optimising
your listening position will
be rewarded with a
soundstage limited only
by the quality of your
equipment.
If your loudspeakers are
wired correctly, the sound
should be full with clean
treble and a deep, rich
bass.
1.5m - 2.5m
0.2m
0.2m min
0.5m min
4
The Mission m3ci has been designed to reproduce dialogue in a Home Cinema
installation. It is magnetically shielded and may be placed close to a TV set without
causing interference. Your Centre loudspeaker will normally be sited on top of the
TV monitor, or on a shelf in a console below the TV set.
If you are placing the loudspeaker on top of the TV monitor, ensure that the
monitor cabinet can stand the weight and that the assembly is stable.
Some manufacturers forbid the placing of objects on top of their TV sets. Check
your TV handbook before installing the m3i series Centre speaker directly on your
TV set. Consult your TV dealer if you are in any doubt.
Attaching the Feet
Peel off the backing paper. Firmly attach each foot about 25mm (1”) in from the
corner of the base of the loudspeaker cabinet.
Connections and Phasing
Your Centre Channel loudspeaker must be connected to the Centre loudspeaker
terminals of your AV amplifier or receiver. Follow the instructions in the previous
sections for connections.
The Mission m3ci
Centre Channel
Speaker
5
Warning
When an amplifier is driven beyond its power output capabilities it will
produce distorted results which will quickly damage your speakers by overheating.
Make sure that your amplifier is not left unattended when playing, for example at
parties, and turn the volume control down at the first sign of audible distortion.
Power Handling
m3i manual 05-07-04.qxd 08/07/2004 09:46 Page 4
Page 5

6
Sound Level
It is important that the centre, front and rear speakers are set to the same sound
level as perceived from the listening position. Follow your AV processor handbook
instructions carefully, especially the section concerned with setting up relative
loudspeaker levels.
Setting up Audio
Visual Loudspeakers
To check that your loudspeakers are in phase, check the polarity of your speaker
wire at the terminal post on the loudspeakers and at the loudspeaker connector
on your amplifier.
The marked conductor should always be connected to the positive terminals.
If your loudspeakers are connected in the right way, you will hear a full sound with
clean midrange and deep and powerful bass.
Phase
Optional Sand Filling
m33i, m34i
Mission m33i and m34i
loudspeakers can be sand
filled to improve stability and
reduce cabinet resonance.
Use dry sand only in a
plastic bag.
Note: Sand and plastic bag not supplied.
Retain all packaging materials in case you need to return your subwoofer for
servicing.
Fit spikes supplied to the base of the subwoofer, if preferred.
Position subwoofer 300mm (12”) or more from room corners.
To connect a stereo hi-fi amplifier use an RCA phono lead (not supplied) from the
amplifier’s pre-amp output to the m3as line inputs.
or
To connect an AV amplifier in a 5.1 / 6.1 channel
home theatre system use an RCA phono lead (not
supplied) from the amplifier’s LFE OUT to the m3as
LOW LEVEL IN (LFE/R).
Adjust the crossover control to blend with, but not
overlap, your main speakers’ bass performance.
For small stand-mount or bookshelf speakers set
the CROSSOVER FREQUENCY control towards the
200 Hz setting.
For large or floorstanding speakers set the CROSSOVER
FREQUENCY control towards the 40 Hz setting.
Adjust the VOLUME control to match the m3as bass
output to the output level of your main speakers.
Consult your owner’s manual for the AV amplifier to access the setup menu for your
amplifier’s speaker configuration. Set the front, centre and rear channels to SMALL. If
you are using the LFE or subwoofer output, and have made the LFE connection to
the subwoofer, set SUBWOOFER to ON.
Adjust the control on the rear amplifier panel marked VOLUME to tune the bass
impact of Low Frequency Effects when playing Dolby Digital or DTS 5.1 / 6.1 channel
sources. Turning the control up will increase the level of bass effects; turn the control
down to avoid a boomy bass.
Adjust the control on the rear amplifier panel
marked PHASE to tune the blend between the
subwoofer and speakers. Depending on your
room acoustics the sound will be fuller and more
coherent with the switch in 0° or 180° position. Use
your judgement to set the switch to the best
sounding position. If you are unsure, set the switch
to the 0° position.
m
3as
setup
The m3dsi loudspeakers are supplied for wall mounting, ideally above seated
head height, with the Mission badge the correct way up. If you wish to fit the
speakers flush to the ceiling you can invert the speakers - a separate set of screw
slots are provided
for this. In this case
you may fit the
supplied selfadhesive Mission
logos over the
existing badges
(see image).
m
3ds
i positioning
7
m3i manual 05-07-04.qxd 08/07/2004 09:47 Page 6
Page 6

Technical Specifications
Recommended Amplifier: 15 - 75 W 25 - 75 W 25 - 100 W 25 - 100 W 25 - 150 W 25 - 150 W
(per channel)
Enclosure: 2-way reflex 2-way reflex 2-way reflex 2-way reflex 2-way reflex 3-way reflex
Effective Volume: 3.4 litres 7.0 litres 12.4 litres 17.7 litres 35.7 litres 47.7 litres
Frequency Response ±3dB: 68 Hz - 20 kHz 65 Hz - 20 kHz 52 Hz - 20 kHz 48 Hz - 20 kHz 44 Hz - 20 kHz 40 Hz - 20 kHz
Sensitivity SPL/M @ 2.83V: 86 dB 88 dB 90 dB 90 dB 92 dB 92 dB
Impedance: 8 Ohms 8 Ohms 8 Ohms 8 Ohms 8 Ohms 8 Ohms
compatible compatible compatible compatible compatible compatible
(minimum 4.0 Ohms) (minimum 4.0 Ohms) (minimum 4.0 Ohms) (minimum 3.6 Ohms) (minimum 3.8 Ohms) (minimum 3.6 Ohms)
Bass: 1 x 100 mm 1 x 130 mm 1 x 165 mm 1 x 165 mm 2 x 165 mm 3 x 165 mm
DiaDrive unit DiaDrive unit DiaDrive unit DiaDrive unit DiaDrive units DiaDrive units
Treble: Viotex fabric Viotex fabric Viotex fabric Viotex fabric Viotex fabric Viotex fabric
dome treble unit dome treble unit dome treble unit dome treble unit dome treble unit dome treble unit
Dimensions (H x W x D): mm 220 x 145 x 190 255 x 170 x 280 320 x 200 x 325 850 x 200 x 325 950 x 200 x 330 1030 x 260 x 375
Weight (per loudspeaker): 2.5 kg 4.3 kg 7.0 kg 14.7 kg 17.8 kg 22.8 kg
m30i m31i m32i m33i m34i m35i
Recommended Amplifier: 25 - 100 W 25 - 125 W 25 - 100 W Integrated 150 W
(per channel) active subwoofer
Enclosure: 2-way reflex 2-way reflex 2-way reflex reflex
Effective Volume: 5.2 litres 9.7 litres 4.5 litres 35.0 litres
Frequency Response ±3dB: 75 Hz - 20 kHz 56 Hz - 20 kHz 75 Hz - 20 kHz 30 Hz - 165 Hz
Sensitivity SPL/M @ 2.83V: 89 dB 91 dB 89 dB n /a
Impedance: 8 Ohms 8 Ohms 8 Ohms n /a
compatible compatible compatible
(minimum 4.7 Ohms) (minimum 4.2 Ohms) (minimum 5.6 Ohms)
Bass: 2 x 100 mm 2 x 100 mm 2 x 100 mm 1 x 250 mm
DiaDrive units DiaDrive units Coaxial units Pulp fibre unit
Treble: Viotex fabric Viotex fabric - -
dome treble unit dome treble unit
Dimensions (H x W x D): mm 135 x 500 x 130 165 x 430 x 230 230 x 360 x 110 410 x 280 x 500
Weight (per loudspeaker): 2.5 kg 6.7 kg 2.4 kg 17.5 kg
m3c1i m3c2i m3dsi m3as
Should a fault occur with your loudspeakers please return them as a pair, even if only
one unit appears to be faulty. Please pack them correctly, using the original packing.
Product for service should be returned to the appointed dealer from whom you
purchased the product. If you experience difficulties or there is no Mission dealer
in your area, contact the Mission distributor for your country or the Main Service
Centre for your region.
Product Service
Use a slightly dampened cloth to clean your cabinets and occasionally, a light spray
polish to protect their sheen. If necessary clean grilles carefully with a soft brush.
Loudspeaker
Maintenance
8
Mission reserves the right to change all specifications without notice. E & OE
9
m3i manual 05-07-04.qxd 08/07/2004 09:47 Page 8
Page 7

11
Précautions Avant d’installer ce produit, veuillez lire les instructions suivantes.
Conditions
de garantie
Le bon de garantie ci-joint doit être rempli et envoyé à la
société Mission ou à son distributeur dans un délai de 8 jours
à compter de la date d'achat. Aucun revendeur ou distributeur
n'est habilité à modifier les termes de cette garantie, qui
s'adresse uniquement à l'acheteur d'origine et qui n'est pas
transférable.Veuillez conserver la facture comme preuve
d'achat. Toute réclamation relative à la garantie doit être
effectuée, si possible, par l'intermédiaire du revendeur d'où
provient l'équipement.
Cette garantie exclut :
Les dommages résultant d'une négligence, d'un accident,
d'une mauvaise utilisation, d'une usure, ainsi que d'une
installation, d'un réglage ou de réparations incorrects
effectués par du personnel non autorisé. Toute réparation non
autorisée entraîne une perte de la garantie ;
La responsabilité relative aux dommages ou pertes se
produisant pendant le transport du produit chez l'acheteur ou
depuis celui-ci ;
Les dommages consécutifs, les pertes ou blessures
corporelles, découlant de ou associés à cet équipement.
En cas de retour, l'équipement sous garantie bénéficie du port
payé. Si l'équipement retourné est conforme aux spécifications
publiées, Mission se réserve le droit de facturer les frais de
réparation.
Les conditions susmentionnées n'affectent en aucune manière
vos droits statutaires en tant que consommateur.
Ne nettoyez l'appareil qu'au moyen d'un chiffon sec.
Avant d’installer les haut-parleurs, il est important que vous lisiez
l’ensemble des instructions qui accompagnent le matériel.
Avant de procéder à un raccordment quelconque, arrêtez
l’amplificateur. Lors de la mise en marche du système ou d’un
changement des sources, réglez la commande de volume au
minimum et augmentez graduellement le volume.
N’UTILISEZ PAS
votre amplificateur avec le volume à fond.
Évitez les réglages extrêmes des commandes de tonalité ou des
égaliseurs graphiques. De manière idéale, celles-ci devraient
être équilibrées ou dérivées.
Vérifiez que tous les haut-parleurs du système sont
correctement câblés et en phase.
N’EXPOSEZ PAS
vos haut-parleurs à un froid, une chaleur ou une
humidité excessive et conservez-les à l’abri des rayons solaires.
N'INSTALLEZ PAS
le matériel près de sources de chaleur telles
que des radiateurs, des bouches de chaleur, des poêles ou
autres appareils (y compris les amplificateurs) générant de la
chaleur.
NE PLACEZ PAS
d’objets lourds sur les enceintes des haut-parleurs.
NE BRANCHEZ PAS
les haut-parleurs à l’alimentation secteur.
N’ESSAYEZ PAS
de démonter les haut-parleurs. Ceux-ci ne
comportent aucune pièce réparable et leur démontage annule
la garantie.
Placez les appareils électroniques de haute fidélité à l’écart
des haut-parleurs et sur un socle ou un meuble rigide. Les
haut-parleurs ne doivent pas être placés directement en face
d’autres unités de haute fidélité, ni partager le méme meuble.
Écartez les haut-parleurs d’au moins 0.5m du caisson des
graves des postes de télévision, ordinateurs, etc. Certains
fabricants interdisent la pose d'objets sur leurs postes de
télévision. Vérifiez votre manuel de télévision avant d'installer
le haut-parleur central directement sur votre poste de
télévision. Dans le doute, contactez votre revendeur
télé.Utilisez uniquement les accessoires/éléments auxiliaires
spécifiés par le fabricant.
Utilisez uniquement avec le chariot, le support, le trépied, la
console ou la table spécifié par le fabricant ou vendu avec
l'appareil. Lorsqu'un chariot est utilisé, procédez avec précaution
lorsque vous déplacez l'ensemble chariot/appareil pour éviter
toute blessure corporelle résultant du renversement de l'appareil.
Manuel d’utilisateur
La m3i série est la dernière addition à la longue lignée réputée de haut-parleurs
Mission. D'une sensibilité telle qu'ils peuvent être pilotés par de modestes
amplificateurs, ces haut-parleurs sont le parfait complément de l'installation
électronique la plus sophistiquée.
Des drivers de graves à cône en tissu de fibre de verre nappé à pression régulée,
croisillons ventilés et haut-parleurs d'aigus à pression régulée ajustés au laser au
néodyme de pointe brevetés sont utilisés dans toute la gamme de produits. Tous
les modèles sont équipés de bornes de connexion plaquées or de grande pureté.
Nous espérons que votre ensemble de haut-parleurs m3i vous apportera
beaucoup de plaisir et justifiera pleinement votre investissement dans le matériel
Mission. Nous vous remercions de la confiance que vous nous avez témoignée en
choisissant nos produits.
Bienvenue chez
Mission
Avant d'installer les haut-parleurs, veuillez lire attentivement les présentes
instructions. Les quelques minutes que vous consacrerez à l'étude de ce manuel
vous permettront de tirer les meilleures performances de vos haut-parleurs pour
de nombreuses années à venir.
Nous attirons particulièrement votre attention sur tous les avertissements
signalés par ce symbole!
Informations générales
· Déballez précautionneusement chaque haut-parleur.
· Conservez l'ensemble de l'emballage pour pouvoir remballer et réexpédier les
haut-parleurs sans risquer de les endommager.
· Pour assurer la protection des vos enceintes durant le transport, un film de plastique
protecteur a été placé entre la grille et le cabinet. Avant d'utiliser les enceintes, veuillez
écarter le film de plastique, en retirant doucement la grille du cabinet, puis jetez le film.
Déballage des
haut-parleurs
Pose des Pointes
m33i, m34i, m35i
Avertissement:
Soyez prudent. Les pointes des haut-parleurs sont très
tranchantes. Lors du positionnement des enceintes, veillez à ne percez
aucun câble électrique.
· Retournez le haut-parleur en posant le dessus sur une surface douce.
· Vissez un écrou sur chaque pointe.
· Vissez les pointes dans les douilles montées dans la
base de l'enceinte. Utilisez l'extrémité affilée sur la
moquette, ou l'extrémité bombée sur le
carrelage.
· Redressez le haut-parleur avec précaution.
· Assurez-vous de ne percer aucun câble,
etc., sous la moquette.
· Réglez la hauteur en vissant ou dévissant
une ou plusieurs pointes jusqu'à ce que le
haut-parleur soit stable et à niveau.
10
Français
Mesures de sécurité importantes du m3as
N'OBSTRUEZ AUCUNE
ouverture d'aération.
NE CONTOURNEZ PAS
le dispositif de sécurité de la fiche
polarisée ou de la fiche de type mise à la terre. Une fiche
polarisée possède deux lames dont l'une est plus large que
l'autre. Une fiche du type mise à la terre possède deux lames
et une troisième broche de mise à la terre. La lame large ou la
troisième broche sont destinées à assurer votre sécurité. Si la
fiche fournie ne s'adapte pas à votre prise de courant,
consultez un électricien pour le remplacement de la prise
obsolète.
AVERTISSEMENT:
Si vous utilisez des pointes, veillez à ne pas
percer le câble de secteur, etc. sous/au-dessus de la moquette.
Protégez le cordon d'alimentation pour ne pas marcher dessus
ni le pincer, en particulier au niveau des fiches, des prises de
courant, et du point où il sort de l'appareil.
AVERTISSEMENT:
Pour réduire le risque d'incendie ou
d'électrocution, n'exposez pas cet appareil à la pluie ni à l'humidité.
N'UTILISEZ PAS
cet appareil près de l'eau.
L'appareil ne doit pas être exposé à l'égouttement ni à
l'éclaboussement, et aucun objet rempli de liquide, tel qu'un
vase, ne doit être placé sur l'appareil. Débranchez l'appareil
lors des orages ou lors de longues périodes d'inactivité.
Toute révision doit être confiée à un personnel qualifié en la
matière. La révision est nécessaire lorsque l'appareil a été
endommagé d'une quelconque façon, par exemple si le cordon
ou la fiche d'alimentation a été endommagé, si du liquide a été
renversé ou si des objets sont tombés sur l'appareil, si l'appareil
a été exposé à la pluie ou l'humidité, si l'appareil ne fonctionne
pas normalement ou si celui-ci est tombé.
Ce symbole indique un risque d'électrocution.
Ce symbole indique la nécessité d'observer des
précautions extrêmes.
m3i manual 05-07-04.qxd 08/07/2004 09:47 Page 10
Page 8

1312
Raccordez la borne rouge positive (+) du haut-parleur à la borne rouge positive (+)
correspondante de l'amplificateur. Raccordez les bornes noires négatives (-) de la
même façon. Répétez l'opération pour le canal droit.
Raccordement conventionnel
La polarité des câbles des haut-parleurs est indiquée sur le côté du câble. Fendez
le câble sur une longueur d'environ 25mm (1”) et dénudez chaque fil sur 8mm (1/3”).
Si le câble est à âme divisée, torsadez les extrémités ensemble.
Plaquettes de connexion
Les haut-parleurs utilisent deux ou quatre bornes. Pour le
câblage unifilaire des haut-parleurs, utilisez les liaisons
de connexion comme il est illustré ci-contre.
Dévissez chaque borne. Passez l'extrémité dénudée du câble à travers le trou
transversal en veillant à ne pas laisser de brins lâches. Serrez à fond.
Raccordement des
haut-parleurs
La plupart des modèles de la série Mission m3i peuvent être câblés par paires pour
de plus hautes performances. Retirez les deux paires de barrettes de mise en
court-circuit et raccordez un câble à
chaque paire de bornes, en amenant les
câbles à un point de raccordement
commun au niveau des bornes de sortie
de l'amplificateur. Sur la figure ci-dessous,
la plaquette de connexion de gauche
présente un câblage double, celle sur la
droite est câblée conventionnellement,
avec les barrettes de mise en court-circuit.
Câblage à paires
Il est possible d'améliorer encore les
performances en utilisant des
amplificateurs séparés comme unités de
commande des basses et hautes
fréquences. Cette technique a pour nom
bi-amplification. L'illustration en regard
montre un canal d'un système à biamplification. Remarquez la liaison des
entrées d'amplificateur.
Bi-amplification
Positionnement des
haut-parleurs
Les haut-parleurs Mission m33i, m34i et m35i doivent être posés sur le sol (de
manière idéale sur des pointes). Les Mission m31i et m32i doivent être montés sur
des socles rigides, au mieux couplés au sol par l'intermédiaire de pointes.
Le Mission m30i est conçu pour un montage mural ou sur étagères.
La hauteur est importante : Un socle doit être placé de façon à ce que le haut de
l'enceinte soit au niveau des oreilles d'une personne assise. A défaut d'une
installation sur le sol, un montage sur étagère ou support est alors préférable.
La distance par rapport au mur situé derrière les haut-parleurs peut grandement
affecter la performance acoustique de ceux-ci. Si les haut-parleurs sont trop
rapprochés du mur, les graves résonneront et le son sera altéré. En les avançant
dans la pièce, on peut augmenter la clarté du son mais ceci tend à réduire la
sortie des graves. Avec des haut-parleurs positionnés correctement, la réponse
haute fréquence est claire avec des sons graves bien définis et puissants.
Commencez par placer les haut-parleurs à environ 300mm (12”) du mur, en les
écartant de 1,8 mètres (6’) l'un de l'autre. La distance entre chaque haut-parleur et
le mur latéral doit être d'au moins 500mm (20”). Variez la distance entre les deux
haut-parleurs ainsi qu'entre eux
et le mur jusqu'à ce que vous
obteniez un parfait équilibre
stéréo.
Les quelques minutes que vous
passerez à optimiser votre
position d'écoute seront
récompensées par une phase
audio que seule la qualité de votre
matériel est susceptible de limiter.
Le Mission m3c
i a été conçu pour reproduire les effets de dialogue et les effets sur
écran d'une installation de cinéma à la maison. Il est doté d'un blindage
magnétique et peut être placé à proximité d'un poste de télévision sans causer
d'interférences. Le haut-parleur central se place normalement au-dessus de
l'écran de télévision ou bien sur une étagère dans une console au-dessous du
poste de télévision. Si le haut-parleur est placé au-dessus de l'écran de télévision,
vérifiez que le boîtier de l'écran peut en supporter le poids et que l'ensemble est
stable. Certains fabricants interdisent la pose d'objets sur leurs postes de
télévision. Vérifiez votre manuel de télévision avant d'installer le haut-parleur
central m3i directement sur votre poste de télévision. Dans le doute, contactez
votre revendeur télé.
Pose des pieds
Décoller le papier de protection placé sur le dos des pieds. Fixez fermement
chaque pied sur chaque coin de la base de l'enceinte du haut-parleur, à environ
25mm (1”) de l'intérieur de la base.
Raccordements et phase
Le haut-parleur de canal central doit être raccordé aux bornes de haut-parleur
central de l'amplificateur ou du récepteur audiovisuel. Pour cela, observez les
instructions des sections précédentes concernant les raccordements.
Le haut-parleur
de canal central
Mission
m3ci
1.5m - 2.5m
0.2m
0.2m min
0.5m min
Avertissement:
Lorsqu'un amplificateur est poussé au-delà de ses limites de puissance
de sortie, ceci va générer des distorsions qui vont rapidement endommager vos
haut-parleurs, à cause de la surchauffe. Veillez à ne pas laisser votre amplificateur
sans surveillance lorsque vous utilisez votre système, par exemple lors de soirées,
et baissez le volume au premier signe de distorsion audible.
Puissance admissible
m3i manual 05-07-04.qxd 08/07/2004 09:47 Page 12
Page 9

1514
Niveau sonore
Il est important que les haut-parleurs central, avant et arrière soient réglés sur le
même niveau sonore, tel que perçu depuis la position d'écoute. Pour cela, suivez
attentivement les instructions du manuel du processeur audiovisuel, particulièrement
la section concernant le réglage des niveaux relatifs des haut-parleurs.
Réglage des
amplificateurs
audiovisuels
Pour vérifier que tes haut-parleurs sont dans phase, vérifier la polarité du câblage
de ton haut-parleur aux connecteurs des haut-parleurs et aux connecteurs du
haut-parleur de ton amplificateur. Le conducteur marqué doit être connecté
toujours aux connecteurs positives.
Si les haut-parleurs sont raccordés correctement, le spectre sonore devrait être
complet avec des aigus clairs et des graves riches et profonds.
Phase
Remplissage au
sable en option
m33i, m34i
Les haut-parleurs Mission
m33
i et m34i peuvent être
remplis de sable pour
améliorer la stabilité et réduire
la résonance des enceintes.
Utilisez uniquement du sable
étuvé dans un sachet et
plastique.
Sable et sachet plastique non fournis.
Déballez soigneusement. Conservez tous les matériaux d'emballage au cas où
vous devriez retourner votre haut-parleur des graves pour une révision.
Montez les pieds fournis à la base du haut-parleur des graves.
Placez votre haut-parleur des graves à au moins 300mm (12”) des coins de la pièce.
Pour le branchement à un amplificateur hi-fi stéréo, utilisez les conducteurs phono
RCA (non fournis) de la sortie pré-amplification de l'amplificateur aux entrées de
ligne du m3as.
ou
Pour le branchement d'un amplificateur AV à un
système de cinéma à la maison à canal 5.1 / 6.1,
utilisez un conducteur phono RCA (non fourni), de
la sortie LFE OUT de l'amplificateur à l'entrée LOW
LEVEL (LFE/R) du m3as.
Ajustez la commande de transition pour mixer
avec, mais ne pas chevaucher, les performances
des graves de vos haut-parleurs principaux. Pour
des petits haut-parleurs montés en supports ou
sur des étagères, réglez la commande de
fréquence de transition vers les 200Hz.
Pour de gros haut-parleurs sur pieds, réglez la
commande de fréquence de transition vers les 40Hz.
Ajustez la commande VOLUME pour faire
correspondre la sortie des graves du m3as au
niveau de sortie de vos haut-parleurs principaux.
Consultez votre manuel d'utilisation de l'amplificateur AV pour accéder au menu
de configuration pour le réglage de votre haut-parleur d'amplificateur. Réglez les
canaux avant, central et arrière sur SMALL. Si vous utilisez la sortie LFE ou du
haut-parleur des graves, et avez effectué la connexion LFE au haut-parleur des
graves, réglez SUBWOOFER (haut-parleur des graves) sur ON (sous tension).
Ajustez la commande sur le panneau d'amplificateur arrière marqué VOLUME
pour accorder l'impact des graves des Effets de Basse Fréquence lorsque vous
utilisez le matériel à partir de sources de canal 5.1 / 6.1 DTS ou Dolby Digital.
Tournez la commande vers le haut pour augmenter le niveau des effets des
graves; tournez la commande vers la bas pour éviter le grondement des graves.
Ajustez la commande sur le panneau
d'amplificateur arrière marqué PHASE pour
accorder le mélange entre le haut-parleur des
graves et les satellites. Selon l'acoustique de votre
pièce, le son sera plus riche et cohérent avec le
commutateur sur la position 0° ou 180°.
Configuration du
m3as
Les haut-parleurs m3dsi sont destinés à un montage mural, idéalement au-dessus
de la hauteur d'homme assis, avec le badge Mission dans le bon sens. Si vous
désirez installer les haut-parleurs au niveau du plafond, vous pouvez retourner les
haut-parleurs - des fentes de vis séparées sont prévues à cet effet. Dans ce cas, vous
pouvez coller les
logos Mission
adhésifs fournis
par-dessus les
badges existants
(voir illustration).
Positionnement du
m3dsi
m3i manual 05-07-04.qxd 08/07/2004 09:48 Page 14
Page 10

1716
Mission se réserve le droit de modifier toutes les spécifications sans préavis. E & OE
Caractéristiques
Ampli recommandé: 15 - 75 W 25 - 75 W 25 - 100 W 25 - 100 W 25 - 150 W 25 - 150 W
(W/Canal)
Enceinte: A inversion de A inversion de A inversion de A inversion de A inversion de A inversion de
phase accordée phase accordée phase accordée phase accordée phase accordée phase accordée
2 voies 2 voies 2 voies 2 voies 2 voies 3 voies
Volume efficace: 3.4 litres 7.0 litres 12.4 litres 17.7 litres 35.7 litres 47.7 litres
Réponse de fréquence ±3dB: 68 Hz - 20 kHz 65 Hz - 20 kHz 52 Hz - 20 kHz 48 Hz - 20 kHz 44 Hz - 20 kHz 40 Hz - 20 kHz
Sensibilité SPL/M @ 2.83V: 86 dB 88 dB 90 dB 90 dB 92 dB 92 dB
Impédance: compatible compatible compatible compatible compatible compatible
avec 8 Ohm avec 8 Ohm avec 8 Ohm avec 8 Ohm avec 8 Ohm avec 8 Ohm
(4,0 Ohms minimum) (4,0 Ohms minimum) (4,0 Ohms minimum) (3,6 Ohms minimum) (3,8 Ohms minimum) (3,6 Ohms minimum)
Graves: 1 x 100 mm 1 x 130 mm 1 x 165 mm 1 x 165 mm 2 x 165 mm 3 x 165 mm
unité DiaDrive unité DiaDrive unité DiaDrive unité DiaDrive unités DiaDrive unités DiaDrive
Aigus: unité des aigus unité des aigus unité des aigus unité des aigus unité des aigus unité des aigus
à dôme en à dôme en à dôme en à dôme en à dôme en à dôme en
fibres Viotex fibres Viotex fibres Viotex fibres Viotex fibres Viotex fibres Viotex
Dimensions (H x L x P): mm 220 x 145 x 190 255 x 170 x 280 320 x 200 x 325 850 x 200 x 325 950 x 200 x 330 1030 x 260 x 375
Poids (par haut-parleur): 2.5 kg 4.3 kg 7.0 kg 14.7 kg 17.8 kg 22.8 kg
m30i m31i m32i m33i m34i m35i
Ampli recommandé: 25 - 100 W 25 - 125 W 25 - 100 W subwoofer 150W
(W/Canal) actif intégré
Enceinte: A inversion de A inversion de A inversion de A inversion de
phase accordée phase accordée phase accordée phase
2 voies 2 voies 2 voies
Volume efficace: 5.2 litres 9.7 litres 4.5 litres 35.0 litres
Réponse de fréquence ±3dB: 75 Hz - 20 kHz 56 Hz - 20 kHz 75 Hz - 20 kHz 30 Hz - 165 Hz
Sensibilité SPL/M @ 2.83V: 89 dB 91 dB 89 dB -
Impédance: compatible compatible compatible -
avec 8 Ohm avec 8 Ohm avec 8 Ohm
(4,7 Ohms minimum) (4,2 Ohms minimum) (5,6 Ohms minimum)
Graves: 2 x 100 mm 2 x 100 mm 2 x 100 mm 1 x 250 mm
unités DiaDrive unités DiaDrive unités coaxiales unité Fibre de pulpe
Aigus: unité des aigus unité des aigus - -
à dôme en à dôme en
fibres Viotex fibres Viotex
Dimensions (H x L x P): mm 135 x 500 x 130 165 x 430 x 230 230 x 360 x 110 410 x 280 x 500
Poids (par haut-parleur): 2.5 kg 6.7 kg 2.4 kg 17.5 kg
m3c1i m3c2i m3dsi m3as
Nettoyez vos enceintes à l'aide d'un chiffon doux à peine humidifié, et de temps à
autre, protégez leur brillant en les pulvérisant d'une légère couche de cirage
liquide. Retirez les grilles avant de les brosser à l'aide une brosse douce.
Entretien des
haut-parleurs
En cas de défaut de vos haut-parleurs, veuillez renvoyer la paire même si un seul
semble défectueux. Veuillez les emballer correctement en utilisant l'emballage
d'origine.
Les haut-parleurs à réparer doivent être renvoyés au concessionnaire agréé qui
vous les a vendus. En cas de problème, ou s'il n'existe pas de concessionnaire
Mission dans votre région, contactez le distributeur Mission de votre pays ou le
Centre principal de Réparation de votre région.
Service après-vente
m3i manual 05-07-04.qxd 08/07/2004 09:48 Page 16
Page 11

19
Gebrauchsanleitung
Die Mission m3i series ist die neueste Produktreihe in einer langen Kette
herausragender Lautsprecher von Mission. Sie eignen sich für den Betrieb an
Standard-Verstärkern, ergänzen aber auch feinste Elektronikgeräte wunderbar.
Baßtontreiber benutzen einen Konus aus verklebtem Glasfasergewebe mit
druckausgeglichenen, belüfteten Spinnen, und fortschrittliche mit Neodymlaser
justierte, druckausgeglichene Hochtonlautsprecher kommen in der ganzen Baureihe
zum Einsatz. Alle Modelle besitzen hochreine, vergoldete Verbindungsklemmen.
Wir hoffen, dass Ihre m3i Lautsprecher Ihnen sehr viel Freude machen und Ihnen
Ihre Investition in Mission lohnen wird werden.
Willkommen im Kreis
der Mission-Freunde
Lesen Sie diese Anleitung bitte vor dem Installieren der Lautsprecher sorgfältig
durch. Die wenigen Minuten, die Sie dafür aufwenden, werden sich durch
langjährige hervorragende Klangqualität bezahlt machen.
Beachten Sie bitte alle Warnhinweise, die auf den Seiten mit folgendem
Symbol erscheinen.
Allgemeine Angaben
· Jeden Lautsprecher vorsichtig auspacken.
· Die komplette Verpackung für einen möglichen späteren Transport und Versand
aufbewahren.
· Zum Schutz der Lautsprecher während des Transports ist zwischen dem Grill und
dem Gehäuse eine Schutzfolie eingelegt. Vor Inbetriebnahme der Lautsprecher
entfernen Sie diese Schutzfolie, indem Sie den Grill vorsichtigt vom Gehäuse weg
ziehen und die Folie wegwerfen.
Auspacken der
Lautsprecher
Anbringen der Spikes
m33i, m34i, m35i
Warnung:
Vorsicht ist geboten. Lautsprecherzacken sind sehr scharf.
Beim Positionieren der Lautsprecher ist das Durchstoßen elektrischer
Kabel zu vermeiden.
· Den Lautsprecher umdrehen und mit der Oberseite auf eine weiche Fläche stellen.
· Eine Mutter auf jeden Spike aufschrauben.
· Die Spikes in die Befestigungslöcher unten an der Box
einschrauben. Verwenden Sie das scharfe Ende auf
Teppichböden oder das gewölbte Ende auf
Fliesenböden.
· Den Lautsprecher wieder vorsichtig richtig
hinstellen.
· Achten Sie darauf, dass die Zacken keine
Kabel usw. unter dem Teppich durchstoßen.
· Mittels feiner Justage der eingeschraubten
Spikes, werden die Lautsprecher senkrecht
und stabil stehend aufgestellt.
18
Deutsch
Bitte
unbedingt
beachten
Vor Installation dieses Produkts lesen Sie bitte die folgenden
Anweisungen.
Garantiebedingungen
Sie sollten die beiliegende Garantiekarte ausfüllen und
innerhalb von acht Tagen ab Kaufdatum an Mission bzw. einen
Vertreiber schicken. Kein Händler oder Vertreiber darf die
Bedingungen dieser Garantie ändern, die nur für den
ursprünglichen Käufer gilt und nicht übertragbar ist.
Bewahren Sie die Quittung als Kaufbeleg auf.
Etwaige Garantieansprüche müssen möglichst über den
Händler geltend gemacht werden, von dem das Gerät
erworben wurde.
Diese Garantie schließt Folgendes aus:
Schäden, die durch Nachlässigkeit, Zufall, Missbrauch,
Verschleiß oder durch falsche Installation, Einstellung oder
Reparatur durch unbefugte Personen entstanden sind. Wartung
durch unbefugte Personen führt zu einem Verlust der Garantie.
Haftung für Schäden oder Verlust während des Transports zum
oder vom Käufer.
Folgeschäden, Verluste oder Verletzungen, die in
Zusammenhang mit diesem Gerät auftreten.
Im Garantiefall eingesandte Geräte sollten als frachtfrei
angesehen werden. Wird festgestellt, dass das Gerät den
veröffentlichten Eigenschaften entspricht, behält sich Mission
das Recht vor, eine Gebühr zu erheben.
Die oben genannten Bedingungen haben keinen Einfluss auf
Ihre Rechte als Verbraucher.
Den Verstärker ausschalten, wenn Sie Anschlüsse vornehmem.
Wenn Sie das System einschalten oder eine andere Klangquelle
wählen, stellen Sie die Lautstärke auf, minimal und drehen sie
allmählich auf.
Betreiben Sie Ihren Verstärker NICHT bei voller Lautstärke.
Vermeiden Sie extreme Einstellungen der Tonhöhenregler oder
Graphic-Equalizer-Regler. Diese sollten im idealfall auf 0 eingestellt
oder wenn möglich umgangen werden. Stellen Sie sicher, dass
alle Lautsprecher im System phasenrichtig und korrekt
angeschlossen sind.
Setzen Sie Ihre Lautsprecher NICHT extremer Kälte, Wärme,
Feuchtigkeit oder Sonneneinstrahlung aus.
NICHT in der Nähe von Wärmequellen wie Heizkörpern,
Heizungen, Öfen oder anderen Geräten (einschließlich
Verstärkern), die Wärme produzieren, installieren.
Stellen Sie KEINE schweren Gegenstände auf die
Lautsprecherboxen.
Schließen Sie Ihre Lautsprecher NICHT an eine Netzsteckdose an.
Versuchen Sie NICHT, den Lautsprecher auseinander zu nehmen.
Er enthält keine vom Benutzer zu wartenden Teile, und Ihre
Garantie wird hinfällig.
Hi-Fi-Elektronikgeräte sind in einiger Entfernung von den
Lautsprechern auf einem fasten Ständer oder Schrank aufzustellen.
Die Lautsprecher sollten nicht direkt gegenüber von anderen Hi-FiGeräten oder auf dem gleichen Regal oder Schrank aufgestellt
werden.
Stellen Sie herkömmliche Lautsprecher und Subwoofer mindestens
0.5m von Fernsehern, Computern usw. auf. Manche Hersteller
verbieten die Aufstellung von Gegenständen auf ihren
Fernsehgeräten. Prüfen Sie die Angaben im Handbuch für Ihren
Fernseher nach, bevor Sie den Mittenlautsprecher direkt auf Ihrem
Fernsehgerät installieren. Falls Sie unsicher sind, wenden Sie sich
an den für Ihren Fernseher zuständigen Händler.
Nur die vom Hersteller angegebenen Zusatzgeräte/ Zubehörteile
verwenden.
Nur mit den Wagen, Ständern, Stativen, Halterungen oder Tischen
verwenden, die vom Hersteller angegeben oder die mit dem Gerät
verkauft wurden. Wird ein Wagen verwendet,
ist Vorsicht geboten, um Verletzungen durch Umkippen der
Wagen-/Gerätekombination zu vermeiden.
m3as wichtige Sicherheitshinweise
Die Ventilationsöffnungen NICHT blockieren.
Die Sicherheitsfunktion des polarisierten oder geerdeten Steckers
NICHT umgehen. Ein polarisierter Stecker hat zwei Stifte, von denen
einer breiter als der andere ist. Ein Erdungsstecker besitzt zwei Stifte
und einen dritten Erdungsstift. Der breite Stift oder der dritte Stift sind
zu Ihrer Sicherheit vorgesehen. Wenn der mitgelieferte Stecker nicht
in Ihre Steckdose passt, wenden Sie sich an einen Elektriker, um die
veraltete Steckdose auswechseln zu lassen.
WARNUNG:
Wenn Spikes verwendet werden, ist darauf zu achten,
dass diese nicht das Netzkabel o. ä. unter oder über dem Teppich
durchbohren. Das Stromkabel vor Begehen oder Knicken
schützen, besonders in der Nähe des Steckers und der Steckdose
und am Ausgang vom Gerät.
WARNUNG:
Um die Gefahr von Feuer oder elektrischem Schlag zu
vermindern, darf dieses Gerät weder Regen noch Nässe
ausgesetzt werden.
Das Gerät NICHT in Wassernähe benutzen.
Das Gerät ist vor Wassertropfen oder -spritzern zu schützen. Mit
Flüssigkeit gefüllte Gegenstände wie zum Beispiel Vasen dürfen
nicht auf das Gerät gestellt werden. Bei Gewitter oder wenn das
Gerät längere Zeit nicht benutzt wird, den Stecker aus der
Steckdose ziehen.
Sämtliche Reparaturarbeiten sind qualifizierten Technikern
vorbehalten. Reparaturen sind erforderlich, wenn das Gerät auf
irgendeine Weise beschädigt wurde, d. h. wenn das Stromkabel
oder der Stecker beschädigt ist, wenn Flüssigkeit darauf verschüttet
wurde oder wenn Gegenstände in das Gerät gefallen sind, wenn
das Gerät Regen oder Nässe ausgesetzt wurde oder wenn es
nicht ordnungsgemäß funktioniert oder fallen gelassen wurde.
Dieses Symbol kennzeichnet die Gefahr eines
elektrischen Schlags.
Dieses Symbol weist darauf hin, dass äußerste
Vorsicht geboten ist.
m3i manual 05-07-04.qxd 08/07/2004 09:48 Page 18
Page 12

2120
Herkömmliche Lautsprecheranschlüsse
Auf einer Kante des Lautspreherkabels ist die Polarität angegeben. Das Kabel
etwa 25mm (1”) tief aufschitzen und 8mm (1/3”) Isolierung von jedem Draht
entfernen. Bei Litzen-Kabel die Enden verdrillen.
Anschlussbord
Ihre Lautsprecher besitzen zwei oder vier Anschlussklemmen.
Beim Verdrahten von Lautsprechern mit Einzelkabel sind die
Steckverbindungen wie gegenüber gezeigt zu verwenden.
Jede Anschlussklemme aufschrauben. Das freigelegte Kabelende durch die
Querbohrung führen und darauf achten, dass keine losen Litzen übrigbleiben.
Dann die Schrauben fest anziehen.
Anschließen der
Lautsprecher
Die meisten Modelle der Mission m3i Reihe können auch doppelt verkabelt werden,
um eine bessere Musikwiedergabe zu erzielen. Beide Kurzschlussbügelpaare
entfernen und an jedes Klemmenpaar ein
Kabel anschließen und dieses jeweils mit
einem gemeinsamen Anschluss an den
Verstärkerausgangsklemmen verbinden. In
der rechtsstehenden Abbildung ist das
Anschlussbord auf der linken Seite doppelt
verkabelt, und das Bord auf der rechten Seite
herkömmlich angeschlossen. Achten Sie auf
die Kurzschlussbügel.
Bi-Wiring
Bi-Amping
Die rote, positive (+) Klemme des linken Lautsprechers mit der entsprechenden
roten, positiven (+) Anschlussklemme des Verstärkers verbinden. Die schwarzen,
negativen (-) Klemmen in entsprechender Weise verbinden. Den Vorgang für den
rechten Kanal wiederholen.
Aufstellen der
Lautsprecher
Lautsprechermodelle Mission m33i, m34i und m35i sollten auf dem Boden
(möglichst auf Spikes aufgestellt werden). Modelle Mission m31i und m32i sollten
auf festen Ständern aufgestellt werden, die möglichst auch auf Spikes stehen
sollten, welche mit dem Boden verbunden sind. Mission m30i sind für die Regaloder Wandbefestigung konzipiert.
Die Höhe ist wichtig: ein Ständer ist zu verwenden, um die Oberseite eines
Lautsprechers auf Ohrenhöhe eines/einer sitzenden Zuhörers/Zuhörerin bringen.
Falls die Aufstellung auf Ständern nicht in Frage kommt, können diese Lautsprecher
auch ins Regal gestellt oder an der Wand befestigt werden.
Die Entfernung von der rückwärtigen Wand kann einen großen Einfluss auf die
Klangqualität haben. Wenn die Lautsprecher zu nahe an der Wand aufgestellt sind,
dröhnt der Bass und kann etwas verfärbt klingen. Wenn die Lautsprecher zu weit in
den Raum hineingestellt werden, wird der Ton klarer, aber die Bassausgabe ist
weniger stark. Bei richtiger Aufstellung ist die Wiedergabe der hohen Frequenzen
ausgewogen und der Bass kraftvoll und trocken.
Versuchen Sie zuerst, die Lautsprecher 1,8 m (6’) voneinander und 300mm (12”) von
der Wand aufzustellen. Der Abstand jedes Lautsprechers zur seitlichen Wand sollte
mindestens einen halben Meter (20”) betragen. Verändern Sie dann den Abstand
zwischen den Lautsprechern und zwischen Wand und Lautsprechern, bis Sie die
perfekte Stereoabbildung erreichen.
Wenn Sie sich einige Minuten Zeit für
die optimale Plazierung nehmen,
können Sie dafür einen Klang
genießen, der nur durch die Qualität
Ihrer Anlage eingeschränkt wird.
Wenn die Lautsprecher richtig
angeschlossen sind, ist der Sound voll
und hat saubere Höhen und einen
tiefen, satten Bass.
Das Modell Mission m3c
i ist zur Wiedergabe von Dialog in Heimkinoanlagen
ausgelegt. Der Lautsprecher ist magnetisch abgeschirmt und kann direkt an einem
Fernsehgerät aufgestellt werden, ohne dessen Bildqualität zu beeinflussen.
Normalerweise wird der Center-Lautsprecher auf dem Fernseher oder auf einem
Regal im Fernsehschrank unter dem Fernseher aufgestellt.
Wenn sie Lautsprecher auf das Fernsehgerät stellen, vergewissern Sie sich, dass
das Bildschirmgehäuse das Gewicht des Lautsprechers tragen kann und dass die
Aufstellung stabil ist.
Manche Hersteller verbieten die Aufstellung von Gegenständen auf ihren
Fernsehgeräten. Prüfen Sie die Angaben im Handbuch für Ihren Fernseher nach,
bevor Sie den m3ci Mittenlautsprecher direkt auf Ihrem Fernsehgerät installieren.
Falls Sie unsicher sind, wenden Sie sich an den für Ihren Fernseher zuständigen Händler.
Anbringen der Füße
Trägerpapier abziehen. Jeden Fuß ca. 25mm (1”) von der Ecke des
Lautsprechergehäusesockels fest anbringen.
Anschlüsse und Phaseneinstellung
Der Mittenkanallautsprecher muss an die (Center) Mittenlautsprecherklemmen
Ihres AV-Verstärkers oder Empfängers angeschlossen werden. B efolgen Sie die
Angaben zu Anschlüssen in den vorigen Abschnitten befolgen.
Der Mission m3ci
Mittenlautsprecher
(Center)
1.5m - 2.5m
0.2m
0.2m min
0.5m min
Warnung:
Wenn ein Verstärker über seine Leistungsausgabefähigkeit hinaus
beansprucht wird, produziert er verzerrte Ergebnisse, die durch Überhitzung schnell
zu Schäden an Ihren Lautsprechern führen. Sorgen Sie dafür, dass Ihr Verstärker
beim Abspielen nicht unbeaufsichtigt bleibt, zum Beispiel bei Partys, und vermindern
Sie die Lautstärke beim ersten Anzeichen einer hörbaren Verzerrung.
Verstärkerleistung
Wenn Sie separate Verstärker für Bass
und Hochton verwenden, können Sie
weitere Verbesserungen erreichen. Dies
wird als Bi-Amping bezeichnet.
Die gegenüberstehende Abbildung zeigt
einen Kanal eines doppelt verstärkten
Systems. Beachten Sie, dass die
Verstärkereingänge verbunden sind.
m3i manual 05-07-04.qxd 08/07/2004 09:49 Page 20
Page 13

2322
Um sicherzustellen, dass Ihre Lautsprecher phasenrichtig angeschlossen sind,
überprüfen Sie bitte das Lautsprecherkabel an den Anschlüssen der Lautsprecher und
des Verstärkers. Die markierte Ader sollte an beiden Geräten mit dem Pluseingang (+)
verbunden sein. Wenn die Lautsprecher richtig angeschlossen sind, sollten Sie einen
vollen Klang mit sauberen Mitten-Hochton und einem tiefen, kräftigen Bass hören.
Phase
Optionale Sandfüllung
m33i, m34i
Mission m33i und m34i
Lautsprecher können mit Sand
gefüllt werden. Dies dient zur
Verbesserung der Stabilität
und Reduzierung der
Gehäuseresonanz.
Nur trockenen Sand in einer
Plastiktüte verwenden.
Sand und Plastiktasche nicht angegeben.
Schallpegel
Es ist wichtig, Center-Lautsprecher und auch die vorderen und hinteren
Lautsprecher - in Bezug auf die Hörposition - auf die richtige Lautstärke
einzustellen. Befolgen Sie die Anweisungen in Ihrem-AV Prozessorhandbuch
genau; besonders den Abschnitt, in dem das Lautstärkeverhältnis der
Lautsprecher untereinander eingestellt wird.
Aufstellen der
audiovisuellen
Lautsprecher
Vorsichtig auspacken. Sämtliches Verpackungsmaterial aufbewahren, falls der
Subwoofer zur Reparatur eingeschickt werden muss.
Die im Lieferumfang enthaltenen Füße an der Basis des Subwoofers befestigen.
Den Subwoofer 300mm (12”) oder weiter von den Ecken des Raumes entfernt
aufstellen.
Zum Anschließen eines Stereo Hi-Fi-Verstärkers mittels RCA-Phonokabel (nicht im
Lieferumfang enthalten) den Vorverstärkerausgang des Verstärkers mit den LineEingängen des m3as verbinden.
oder
Zum Anschließen eines AV-Verstärkers in einer 5.1 /
6.1 Kanal-Heimkinoanlage mittels RCA-Phonokabel
(nicht im Lieferumfang enthalten) den Ausgang LFE
OUT des Verstärkers mit dem Eingang LOW LEVEL IN
(LFE/R) des m3as verbinden.
Den Übergangsfrequenzregler so einstellen, dass
er sich mit der Bassausgabe der Hauptlautsprecher
mischt und diese nicht überlappt. Für kleine
Lautsprecher, die auf einem Ständer oder in einem
Regal montiert sind, sollte die Übergangsfrequenz
auf etwa 200 Hz eingestellt werden.
Für große oder auf dem Boden stehende
Lautsprecher sollte die Übergangsfrequenz auf etwa
40 Hz eingestellt werden.
Stellen Sie den LAUTSTÄRKE-Regler so ein, dass die
Bassausgabe des m3as dem Ausgabepegel der
Hauptlautsprecher entspricht.
Lesen Sie in Ihrem Handbuch für den AV-Verstärker nach, wie Sie das
Einstellungsmenü für die Konfiguration der Verstärkerlautsprecher aufrufen. Stellen Sie
den vorderen, mittleren und hinteren Kanal auf SMALL ein. Wenn Sie den LFE- oder
Subwoofer-Ausgang benutzen und den LFE-Anschluss zum Subwoofer
vorgenommen haben, stellen Sie SUBWOOFER auf EIN.
Stellen Sie den mit VOLUME gekennzeichneten Regler an der Verstärkerrückwand so
ein, dass der Bassanteil von Niederfrequenzen beim Abspielen von Dolby Digital oder
DTS 5.1 / 6.1 Kanalquellen feineingestellt wird. Durch Hochdrehen des Reglers wird
der Pegel der Basseffekte erhöht, durch Herunterdrehen wird ein dröhnender Bass
vermieden.
Nehmen Sie mit dem mit PHASE gekennzeichneten
Regler an der Verstärkerrückwand die
Feineinstellung der Mischung von Subwoofer und
Satelliten vor. Je nach Raumakustik wird der Sound
voller und kompakter, wenn der Regler auf 0° oder
180° gedreht wird. Beurteilen Sie selbst, welche
Schalterstellung den besten Sound ergibt. Wenn Sie
sich nicht sicher sind, setzen Sie den Schalter auf
die Stellung 0°.
m
3as
Einstellung
Die m3dsi Lautsprecher werden für die Wandmontage geliefert. Im Idealfall werden
Sie über Kopfhöhe im Sitzen angebracht, wobei das Mission Schild richtig herum
ausgerichtet sein muss. Soll die Oberseite der Lautsprecher mit der Zimmerdecke
abschließen, können die Lautsprecher umgedreht werden. Für diesen Fall sind
gesonderte
Schraubschlitze
vorgesehen und Sie
können die
selbsthaftenden
Mission Logos über
die vorhandenen
Schilder kleben
(siehe Abbildung).
m
3ds
i Aufstellung
m3i manual 05-07-04.qxd 08/07/2004 09:49 Page 22
Page 14

2524
Technische Daten
Mission behält sich das Recht vor, alle technischen Spezfikationen ohne vorherige Ankündigung zu ändern.
Irrtümer und Auslassungen vorbehalten.
Empfohlener Verstärker: 15 - 75 W 25 - 75 W 25 - 100 W 25 - 100 W 25 - 150 W 25 - 150 W
(W/CH)
Ausführung: 2-weg Bassreflex 2-weg Bassreflex 2-weg Bassreflex 2-weg Bassreflex 2-weg Bassreflex 3-weg Bassreflex
Effektives Volumen: 3.4 litres 7.0 litres 12.4 litres 17.7 litres 35.7 litres 47.7 litres
Frequenzgang ±3dB: 68 Hz - 20 kHz 65 Hz - 20 kHz 52 Hz - 20 kHz 48 Hz - 20 kHz 44 Hz - 20 kHz 40 Hz - 20 kHz
Empfindlichkeit SPL/M bei 2,83V: 86 dB 88 dB 90 dB 90 dB 92 dB 92 dB
Impedanz: Kompatibel Kompatibel Kompatibel Kompatibel Kompatibel Kompatibel
für 8 Ohm für 8 Ohm für 8 Ohm für 8 Ohm für 8 Ohm für 8 Ohm
(mindestens 4,0 Ohm) (mindestens 4,0 Ohm) (mindestens 4,0 Ohm) (mindestens 3,6 Ohm) (mindestens 3,8 Ohm) (mindestens 3,6 Ohm)
Bass: 1 x 100 mm 1 x 130 mm 1 x 165 mm 1 x 165 mm 2 x 165 mm 3 x 165 mm
DiaDrive Einheit DiaDrive Einheit DiaDrive Einheit DiaDrive Einheit DiaDrive Einheiten DiaDrive Einheiten
Hochton: Kuppel-Hochtoner Kuppel-Hochtoner Kuppel-Hochtoner Kuppel-Hochtoner Kuppel-Hochtoner Kuppel-Hochtoner
mit Viotexgewebe mit Viotexgewebe mit Viotexgewebe mit Viotexgewebe mit Viotexgewebe mit Viotexgewebe
Abmessungen (H x B x T): mm 220 x 145 x 190 255 x 170 x 280 320 x 200 x 325 850 x 200 x 325 950 x 200 x 330 1030 x 260 x 375
Gewicht (je Lautsprecher): 2.5 kg 4.3 kg 7.0 kg 14.7 kg 17.8 kg 22.8 kg
m30i m31i m32i m33i m34i m35i
Empfohlener Verstärker: 25 - 100 W 25 - 125 W 25 - 100 W Integriertes 150 W
(W/CH) aktives subwoofer
Ausführung: 2-weg Bassreflex 2-weg Bassreflex 2-weg Bassreflex Bassreflex
Effektives Volumen: 5.2 litres 9.7 litres 4.5 litres 35.0 litres
Frequenzgang ±3dB: 75 Hz - 20 kHz 56 Hz - 20kHz 75 Hz - 20 kHz 30 Hz - 165 Hz
Empfindlichkeit SPL/M bei 2,83V: 89 dB 91 dB 89 dB -
Impedanz: Kompatibel Kompatibel Kompatibel -
für 8 Ohm für 8 Ohm für 8 Ohm
(mindestens 4,7 Ohm) (mindestens 4,2 Ohm) (mindestens 5,6 Ohm)
Bass: 2 x 100 mm 2 x 100 mm 2 x 100 mm 1 x 250 mm
DiaDrive Einheiten DiaDrive Einheiten Koaxial- Massenfaser
Einheiten Einheiten
Hochton: Kuppel-Hochtoner Kuppel-Hochtoner - -
mit Viotexgewebe mit Viotexgewebe
Abmessungen (H x B x T): mm 135 x 500 x 130 165 x 430 x 230 230 x 360 x 110 410 x 280 x 500
Gewicht (je Lautsprecher): 2.5 kg 6.7 kg 2.4 kg 17.5 kg
m3c1i m3c2i m3dsi m3as
Die Lautsprecherboxen mit einem nur wenig angefeuchteten weichen Tuch
reinigen und gelegentlich leicht mit Möbelpolitur einsprühen, um den Glanz zu
erhalten. Gfg. die Frontgrille der Boxen abnehmen und dann vorsichtig mit einer
weichen Bürste abbürsten.
Wartung der
Lautsprecher
Sollten Ihre Lautsprecher defekt sein, senden Sie bitte beide (auch wenn nur einer
defekt zu sein scheint) ein. Bitte verpacken Sie sie vorschriftsmäßig in der
Originalverpackung.
Produkte sollten zum Kundendienst an den Händler, bei dem Sie diese gekauft
haben, zurückgeschickt werden. Wenn Schwierigkeiten auftreten oder es in Ihrer
Umgebung keinen Mission-Händler gibt, wenden Sie sich an den Mission-Vertrieb
für Ihr Land oder das Hauptkundendienstzentrum für Ihre Region.
Kundendienst
m3i manual 05-07-04.qxd 08/07/2004 09:49 Page 24
Page 15

27
Instrucciones de uso
La m3i series es lo último de la extensa línea de los conocidos altavoces Mission.
Estos altavoces técnicamente avanzados serán el complemento ideal de los más
delicados aparatos electrónicos y decoración. Excitadores de bajos con conos
Paramid, y presión equilibrada, membranas flotantes ventiladas y altavoces de
agudos equilibrados con presión compensada y láser de neodimio avanzado en
toda la gama. Tornillos de conexión chapados en oro de alta pureza en todos los
modelos.
Gracias a los altavoces m3
i series de Mission podrá disfrutar de un gran sonido
durante muchos años.
Bienvenido al mundo
de Mission
Lea estas instrucciones con detenimiento antes de proceder a la instalación de los
altavoces. Sólo unos minutos leyendo este manual asegurarán resultados
impresionantes de sus altavoces durante muchos años.
Preste atención a todas las advertencias impresas en las páginas
marcadas con este símbolo.
Información general
· Desempaquete cada altavoz con cuidado.
· Conserve todo el material de embalaje de manera que pueda volver a embalar
los altavoces y trasladarlos sin dañarlos.
· Para asegurarse de que sus altavoces están protegidos durante el transporte, se
ha introducido una lámina plástica protectora entre la rejilla y la caja. Antes de
utilizar los altavoces, retire la lámina plástica protectora tirando suavemente de la
rejilla hacia fuera de la caja y desechando la lámina.
Desembalaje de los
altavoces
Colocación de espigas
m33i, m34i, m35i
Aviso:
Cuidado. Las espigas del altavoz son muy cortantes. Cuando
coloque los altavoces, procure no cortar ningún cable eléctrico.
· Invierta el altavoz poniendo la parte superior en una superficie suave.
· Enrosque una tuerca en cada una de las espigas.
· Enrosque las espigas en las entradas que se encuentran
en la base de la caja. Use la punta cortante para
moquetas o alfombras, o la punta redondeada para
pisos embaldosados.
· Con cuidado, vuelva a poner el altavoz derecho.
· Asegúrese de no perforar cables u objetos
de otro tipo que puedan estar debajo de
alfombras.
· Ajuste la altura enroscando o
desenroscando una espiga o más hasta
que el altavoz quede estable y nivelados.
26
Español
Precauciones Antes de instalar este producto lea las siguientes instrucciones.
Condicion
es de
garantía
Debe completar y enviar la tarjeta de garantía incluida a
Mission o a su distribuidor durante los 8 días posteriores a la
adquisición del producto.
Ningún representante o distribuidor podrá modificar los
términos de la garantía, que es personal e intransferible.
Conserve el recibo como prueba de compra.
Las reclamaciones de productos que se encuentran bajo
garantía deben realizarse, siempre que sea posible, a través
del distribuidor al que compró el equipo.
Esta garantía excluye:
Daños causados por negligencia, accidente, uso indebido,
desgaste o una instalación, ajuste o reparación incorrectas
por personal no autorizado. Las reparaciones realizadas por
personal no autorizado conllevarán a la pérdida de la
garantía.
Responsabilidad por daño o pérdida derivados del tránsito
entre comprador y vendedor.
Daño, pérdida o lesión resultantes derivados de este equipo o
conjuntamente con él.
El equipo que requiera asistencia técnica que se encuentre
bajo garantía se devolverá con portes pagados. Si el equipo
cumple con la especificación publicada, Mission se reserva el
derecho a cobrar una cantidad.
Las condiciones citadas anteriormente no afectan a sus
derechos como consumidor.
Lea estas instrucciones antes de proceder a la instalación del
producto.
Cuando efectúe una conexión, desconecte el amplificador.
Cuando conecte el sistema o cambie las fuentes, ajuste el control
de volumen al mínimo y aumente el nivel poco a poco.
NO
use el amplificador a todo volumen.
Evite ajustes extremos de controles de tono o ecualizadores de
gráficos. Preferentemente deberían ajustarse como ‘plano’ o si
es posible, pasarse por alto. Asegúrese de que todos los
altavoces del sistema están conectados correctamente y en fase.
NO
exponga los altavoces a temperaturas demasiado frías,
calientes, excesiva humedad o luz directa del sol.
NO
instale este aparato cerca de fuentes de calor como
radiadores, calentadores, hornos u otros aparatos (incluidos
amplificadores) que generan calor.
NO
coloque ningún objecto pesado encima de las cajas del
altavoz.
NO
conecte el altavoz a la red de alimentación.
NO
intente desmontar el altavoz. En su interior no hay piezas que
pueda reparar a el usuario y se invalidaría la garantía.
Coloque los equipos electrónicos de alta fidelidad lejos de los
altavoces en un soporte rígido o armario. Los altavoces no se
pondrán directamente de cara a otras unidades hi-fi, ni
compartirán el mismo estante o armario.
Coloque los altavoces convencionales y subwoofer al menos a
0,5m de distancia de TVs, ordenadores, etc. Algunos fabricantes
prohiben colocar objetos encima de sus televisores. Compruebe
el manual de su TV antes de instalar el altavoz central
directamente encima de su TV. En caso de duda, consulte con el
distrbuidor de su TV.
Emplee únicamente accesorios especificados por el fabricante.
Utilice el aparato exclusivamente con el carro, base, trípode,
soporte o mesa especificado por el fabricante o que acompañan
el aparato. Al usar un carro, tenga cuidado al mover la
combinación carro/aparato para evitar que vuelque y se lesione.
Instrucciones de seguridad importantes para el m3as
NO
cubra ni bloquee las aberturas de ventilación.
NO
anule el dispositivo de seguridad del enchufe polarizado o
con toma de tierra. Los enchufes polarizados tienen dos
contactos, uno más ancho que el otro. Los enchufes con toma de
tierra tienen dos patas y una tercera para la toma de tierra. El
contacto más ancho / la tercera pata está instalada a efectos de
seguridad. Si la clavija suministrada no cabe en el enchufe,
consulte a un electricista para sustituir el enchufe anticuado.
ADVERTENCIA:
Si emplea las púas, asegúrese de que no
perforen el cable de alimentación, etc. debajo/sobre la
alfombra. Proteja el cable de alimentación de ser pisado o
aplastado, en particular cerca de los enchufes, tomas de
corriente múltiples y del punto donde salen del aparato.
ADVERTENCIA:
Para evitar descargas eléctricas o peligro de
incendio, no exponga este aparato a lluvia ni humedad.
NO
utilice este aparato cerca del agua.
NO
exponga el aparato a goteos ni salpicaduras y evite
depositar recipientes con líquidos (jarrones, etc.) sobre el
aparato. Desenchúfelo de la red durante tormentas o cuando
deje de usarlo durante un tiempo prolongado.
Todo servicio técnico debe ser realizado por personal técnico
cualificado. Acuda a su servicio técnico cuando el aparato haya
sufrido daños de cualquier clase, tales como daños en el cable
o el enchufe, cuando se haya vertido líquido o hayan caído
objetos en el aparato, después de exponerlo a lluvia o
humedad, cuando no funcione correctamente o haya caído al
suelo.
Cuando se muestra este símbolo existe peligro de
descarga eléctrica.
Cuando se muestra este símbolo se debe proceder
con precaución.
m3i manual 05-07-04.qxd 08/07/2004 09:50 Page 26
Page 16

2928
Connexiones convencionales de los altavoces:
El cable del altavoz tiene marcada la polaridad en uno de los bordes. Corte el
cable a una profundidad de 25mm (1”) y retire unos 8mm (1/3”) del recubrimiento
aislante de cada alambre. Si el cable es trenzado, enrosque los extremos juntos.
Paneles de terminales:
Los altavoces utilizan dos o cuatro terminales. Si su altavoz
es del tipo que se conecta con un sólo cable, utilice los
acoples tal como se ilustra al frente.
Desenrosque cada terminal. Pase el extremo pelado del cable a través del
agujero cruzado asegurándose de que no haya hilos sueltos. Apriételo con
firmeza.
Conecte el terminal rojo positivo (+) del altavoz izquierdo al correspondiente
terminal rojo positivo (+) del amplificador y conecte los terminales negros
negativos (-) de igual forma. Repita lo mismo para el canal derecho.
Conexión de los
altavoces
La mayoría de los modelos de la m3i series Mission pueden conectarse por
duplicado para mejorar el rendimiento. Saque ambos pares de eslabones
cortocircuitantes de los terminales y conecte un cable a cada par de terminales,
llevándolos a una conexión común en los
terminales de salida del amplificador. En
la figura de la derecha, el panel de
terminales de la izquierda está conectado
por duplicado, mientras que el de la
derecha está conectado de manera
convencional. Fíjese en los eslabones
cortocircuitantes.
Conexión doble
Usando amplificadores diferentes para las
unidades activadoras de LF (baja
frecuencia) y HF (alta frecuencia) se puede
mejorar aún más el rendimiento. A esto se
le denomina biamplificación.
La ilustración de enfrente muestra un canal
de un sistema biamplificado. Fíjese que las
entradas del amplificador están enlazadas.
Biamplificación
Colocación de los
altavoces
Los altavoces Mission m33i, m34i y m35i se deben colocar en el suelo
(preferentemente en espigas). Los modelos Mission m31i y m32i se deben montar en
soportes rígidos, como los ‘Standar’ de Mission, preferentemente acoplados al suelo
en espigas. Mission m30i ha sido diseñado para su montaje en estantes o en pared.
La altura es importante: mediante el uso de una base, la parte superior del
altavoz debe quedar a la altura del oído de un oyente sentado. La segunda
mejor opción es un estante o soporte.
La distancia desde la pared trasera puede afectar en gran manera el
rendimiento acústico de los altavoces. Si los altavoces están situados demasiado
cerca de la pared, el tono grave retumbará y el sonido timbrará. Si los cambia de
posición en la habitación es posible que aumente la claridad, pero suele reducir
la salida de grave. Cuando estén correctamente colocados, la respuesta de alta
frecuencia es buena, con un tono grave fuerte y bien definido.
Empiece con los altavoces a unos 300mm (12”) de la pared y a 1,8 metros (6’) de
distancia entre sí. La distancia de cada altavoz a la pared lateral deberá ser de
500mm (20”) al menos. Varíe la distancia entre los dos altavoces y entre los
mismos y la pared hasta que se consiga un sonido estéreo perfecto.
Unos minutos mejorando
la posición de escucha le
compensará con una fase
de sonido limitada
únicamente por la calidad
del equipo.
Si los altavoces están
cableados correctamente,
el sonido debe ser
completo con agudos
limpios y un bajo
profundo y rico.
0.2m
Mission m3ci ha sido diseñado para reproducir el diálogo y los efectos de
pantalla en una instalación de Cine en Casa. Está protegido magnéticamente y
puede colocarse cerca de un TV sin causar interferencias. El altavoz central se
colocará normalmente encima del monitor del TV, o en un estante en una consola
debajo del TV.
Si coloca el altavoz encima del monitor del TV, asegúrese de que la caja del
monitor puede aguantar el peso y que es estable.
Algunos fabricantes prohiben colocar objetos encima de sus televisores. Compruebe
el manual de su TV antes de instalar el altavoz central m3i series directamente
encima de su TV. En caso de duda, consulte con el distrbuidor de su TV.
Colocación de los pies
Retire la hoja del reverso. Con firmeza fije el pie a unos 25mm (1”) de la esquina
de la base de la caja del altavoz.
Conexiones y sincronización
El altavoz del canal central ha de conectarse a los terminales del altavoz central
de su amplificador o receptor AV. Siga las instrucciones de las secciones
anteriores para realizar las conexiones.
El altavoz del canal
central Mission
m3ci
1.5m - 2.5m
0.2m
0.2m min
0.5m min
Aviso:
Cuando un amplificador se excita más allá de su capacidad de salida de
potencia, se producirán resultados distorsionados que dañarán rápidamente los
altavoces por recalentamiento. Asegúrese de no dejar solo el amplificador cuando
funciona, por ejemplo en fiestas, y baje el control de volumen al primer síntoma de
distorsión audible.
Manejo de potencia
m3i manual 05-07-04.qxd 08/07/2004 09:50 Page 28
Page 17

3130
Nivel de sonido
Es importante que los altavoces central, frontal y trasero estén ajustados al mismo
nivel de sonido según se perciba en las posiciones de escucha. Siga las
instrucciones del manual del procesador AV atentamente, especialmente la
sección relacionada con los ajustes de los niveles relativos de los altavoces.
Instalación de
los altavoces
audiovisuales
Para verificar que sus altavoces están en fase, verifique la polaridad del cable en
los conectores en los altavoces y a los conectores del altavoz de su amplificador.
Siempre se debe conectar el conductor marcado a los terminales positivos.
Si los altavoces están conectados correctamente, el sonido será completo con un
tono agudo claro y un tono grave profundo.
Fase
Relleno de arena
opcional
m33i, m34i
Los altavoces m33i y m34i de
Mission pueden estar llenos
de arena para mejorar su
estabilidad y reducir la
resonancia de la caja.
Utilice la arena seca sólo en
una bolsa de plástico.
Arena y bolsa de plástico no provistas.
Desembale el aparato con cuidado. Guarde el material de embalaje original de
su altavoz Subwoofer en caso de tener que enviarlo al servicio técnico.
Aplique los pies suministrados a la base del altavoz.
Coloque el altavoz a 300mm (12”) o más de las esquinas de la habitación.
Para conectar un amplificador estéreo de alta fidelidad utilice cables con
conectores RCA (no incluidos) y conéctelos a las salidas de preamplificador y a las
entradas de línea del m3as.
o
para conectar un amplificador de audio/vídeo en
un sistema Home Theatre canal 5.1 /6.1 utilice
cables RCA (no incluidos) y conéctelos a la salida
LFE OUT del amplificador y a las entradas LOW
LEVEL IN (LFE/R) del m3as.
Ajuste el control del crossover hasta que
armonice perfectamente con las frecuencias
bajas de sus altavoces principales, sin que los
domine. Para altavoces pequeños sobre soporte
o de estantería ajuste el control de frecuencias
del crossover cerca de los 200 Hz.
Para los altavoces grandes y de suelo el ajuste
recomendado es de aprox. 40 Hz.
Ajuste el control de VOLUMEN de la salida de
graves del m3as al nivel de salida de graves de
sus altavoces principales.
Consulte el manual de instrucciones de su amplificador de audio/vídeo para la
configuración de los altavoces del amplificador. Ajuste los canales frontal, central
y trasero a SMALL. Si utiliza la salida LFE o Subwoofer y ha conectado el altavoz
Subwoofer por LFE, active el Subwoofer (ON).
Con el control del panel trasero del amplificador marcado como VOLUME puede
ajustar el impacto de bajos de los Efectos de Bajas Frecuencias (LFE) al reproducir
fuentes con sonido Dolby Digital o DTS 5.1 / 6.1. Al subir el control se incrementa el
nivel de efecto de bajos y al bajarlo se evita un sonido retumbante.
Con el control del panel trasero del amplificador
marcado como PHASE puede ajustar la mezcla
de su altavoz Subwoofer y los satélites. El sonido
resultará más rico y coherente poniendo el
mando en la posición 0° o 180°, según la
acústica de su habitación. Juzgue Ud. mismo qué
posición del mando es la más adecuada en su
caso. En caso de duda, ponga el mando en la
posición 0°.
Montaje y disposición
m3as
Los altavoces m3dsi se suministran para ser montados en la pared. En este caso
es recomendable montarlos a una altura que supere a la de la cabeza de una
persona sentada, con la placa de Mission correctamente dispuesta. Si desea que
los altavoces apunten hacia el techo puede invertirlos - y fijarlos por los orificios
dispuestos para
este caso. También
puede aplicar los
adhesivos con el
logotipo de Mission
sobre las placas
originales (ver
figura).
Ubicación de los
m3dsi
m3i manual 05-07-04.qxd 08/07/2004 09:51 Page 30
Page 18

3332
Mission se reserva el derecho de cambiar las especificaciones sin previo aviso. E & OE
Especificaciones técnicas
Amplificador recomendado: 15 - 75 W 25 - 75 W 25 - 100 W 25 - 100 W 25 - 150 W 25 - 150 W
(W/Cana)
Caja: Sinton. doble Reflex Sinton. doble Reflex Sinton. doble Reflex Sinton. doble Reflex Sinton. doble Reflex Sinton. triple Reflex
Volumen efectivo: 3,4 litros 7,0 litros 12,4 litros 17,7 litros 35,7 litros 47,7 litros
Respuesta frec ±3dB: 68 Hz - 20 kHz 65 Hz - 20 kHz 52 Hz - 20 kHz 48 Hz - 20 kHz 44 Hz - 20 kHz 40 Hz - 20 kHz
Sensibilidad SPL/M @ 2.83V: 86 dB 88 dB 90 dB 90 dB 92 dB 92 dB
Impedancia: salidas de salidas de salidas de salidas de salidas de salidas de
8 ohmios 8 ohmios 8 ohmios 8 ohmios 8 ohmios 8 ohmios
compatible compatible compatible compatible compatible compatible
(mínimo 4.0 ohmios) (mínimo 4.0 ohmios) (mínimo 4.0 ohmios) (mínimo 3.6 ohmios) (mínimo 3.8 ohmios) (mínimo 3.6 ohmios)
Grave: 1 x 100 mm 1 x 130 mm 1 x 165 mm 1 x 165 mm 2 x 165 mm 3 x 165 mm
Unidad DiaDrive Unidad DiaDrive Unidad DiaDrive Unidad DiaDrive Unidades DiaDrive Unidades DiaDrive
Adugo: Unidad Viotex Unidad Viotex Unidad Viotex Unidad Viotex Unidad Viotex Unidad Viotex
fabric dome treble fabric dome treble fabric dome treble fabric dome treble fabric dome treble fabric dome treble
Dimensiones (Al x An x P): mm 220 x 145 x 190 255 x 170 x 280 320 x 200 x 325 850 x 200 x 325 950 x 200 x 330 1030 x 260 x 375
Peso (por altavoz): 2,5 kg 4,3 kg 7,0 kg 14,7 kg 17,8 kg 22,8 kg
m30i m31i m32i m33i m34i m35i
Amplificador recomendado: 25 - 100 W 25 - 125 W 25 - 100 W subwoofer activo
(W/Cana) 150 W integrado
Local: Sinton. doble Reflex Sinton. doble Reflex Sinton. doble Reflex Reflex
Volumen efectivo: 5,2 litros 9,7 litros 4,5 litros 35,0 litros
Respuesta frec ±3dB: 75 Hz - 20 kHz 56 Hz - 20 kHz 75 Hz - 20 kHz 30 Hz - 165 Hz
Sensibilidad SPL/M @ 2.83V: 89 dB 91 dB 89 dB -
Impedancia: salidas de salidas de salidas de -
8 ohmios 8 ohmios 8 ohmios
compatible compatible compatible
(mínimo 4.7 ohmios) (mínimo 4.2 ohmios) (mínimo 5.6 ohmios)
Grave: 2 x 100 mm 2 x 100 mm 2 x 100 mm 1 x 250 mm
Unidades DiaDrive Unidades DiaDrive Unidades Unidad Fibra
Coaxiales de la pulpa
Adugo: Unidad Viotex Unidad Viotex - -
fabric dome treble fabric dome treble
Dimensiones (Al x An x P): mm 135 x 500 x 130 165 x 430 x 230 230 x 360 x 110 410 x 280 x 500
Peso (por altavoz): 2,5 kg 6,7 kg 2,4 kg 17,5 kg
m3c1i m3c2i m3dsi m3as
Use un paño suave ligeramente húmedo para limpiar las cajas y, de vez en
cuando, use un producto para pulir a suave fin de mantener su brillo. Si es
necesario, limpie las rejillas con un cepillo suave.
Mantenimiento
del altavoz
Si se estropearan los altavoces, devuélvalos como un par, incluso cuando sólo se
haya estropeado una de las unidades. Embálelos correctamente, usando el
embalaje original.
Un producto que necesita un servicio se debe devolver al distribuidor
correspondiente al que compró el producto. Si tiene problemas o no hay un
distribuidor Mission en su zona, póngase en contacto con el distribuidor Mission
de su país o con el Centro Principal de Servicio de su región.
Servicio del producto
m3i manual 05-07-04.qxd 08/07/2004 09:51 Page 32
 Loading...