


Operating and Installation Instructions
Fridge-freezer Combination
To prevent accidents and machine damage, read these instructions be-
fore installation or use.
en - US, CA M.-Nr. 10 867 440

Contents
IMPORTANT SAFETY INSTRUCTIONS ................................................................ 5
Caring for the environment ................................................................................ 13
Saving energy ...................................................................................................... 14
Guide to the appliance........................................................................................16
Control panel......................................................................................................... 16
Display LEDs and symbols on the display ............................................................ 17
Accessories ......................................................................................................... 20
Accessories supplied ............................................................................................ 20
Optional accessories............................................................................................. 21
Before first use .................................................................................................... 22
Cleaning the refrigerator................................................................................... 22
Switching on and off ...........................................................................................23
Operating the machine.......................................................................................... 23
Switching on the refrigerator................................................................................. 23
Switching off the entire appliance......................................................................... 24
Turning off for longer periods of time .................................................................... 24
The correct temperature..................................................................................... 25
... in the refrigerator section .................................................................................. 25
Automatic cold air circulation (DynaCool) ........................................................ 25
...in the Freezer Zone............................................................................................ 25
Temperature display.............................................................................................. 26
Setting the temperature......................................................................................... 26
Temperature range ........................................................................................... 26
Using Automatic SuperCool and SuperFreeze ................................................. 27
SuperFrost function .......................................................................................... 27
Automatic SuperCool function .......................................................................... 27
Turning a function on or off ................................................................................... 28
Temperature and door alarm.............................................................................. 29
Temperature alarm................................................................................................. 29
Door alarm............................................................................................................. 29
Selecting additional settings.............................................................................. 30
Selecting additional settings ................................................................................. 30
Settings overview ............................................................................................. 30
Sabbath mode....................................................................................................... 30
Changing the temperature unit (°F/°C).................................................................. 32
Activating and deactivating the safety lock........................................................... 32
2

Contents
Changing the size of the ice cubes ....................................................................... 33
Storing food in the refrigerator section............................................................. 34
Different storage zones ......................................................................................... 34
Food which is not suitable for storage in the refrigerator section ......................... 35
Notes on buying food............................................................................................ 36
Storing food correctly............................................................................................ 36
Fruit and vegetables......................................................................................... 36
Protein-rich food............................................................................................... 36
Adjusting the interior fittings (refrigerator section) .........................................37
Moving the adjustable shelves .............................................................................. 37
Adjusting the bottle rack ....................................................................................... 37
Removing fruit and vegetable drawers on rollers.................................................. 38
Adjusting the door shelf/bottle shelf ..................................................................... 38
Adjusting the bottle holder .................................................................................... 39
Moving the carbon filter ........................................................................................ 39
Freezing and storing food................................................................................... 40
Maximum freezing capacity .................................................................................. 40
What happens when you freeze fresh food?......................................................... 40
Storing frozen food................................................................................................ 40
Home freezing ....................................................................................................... 41
Adjusting the interior fittings.................................................................................. 44
Using accessories ................................................................................................. 44
Making ice cubes ................................................................................................ 45
Turning on the ice cube maker.............................................................................. 45
Making a large quantity of ice cubes .................................................................... 46
Changing the size of the ice cubes ....................................................................... 46
Turning off the ice cube maker.............................................................................. 47
If the Ice Maker is going to be turned off for a long period of time ................. 47
Defrosting............................................................................................................. 48
Cleaning and care ............................................................................................... 49
Cleaning agents..................................................................................................... 49
Preparing the machine for cleaning....................................................................... 50
Cleaning the interior and accessories ................................................................... 51
Cleaning the machine front and the side panels................................................... 52
Cleaning the door seal .......................................................................................... 52
Starting up the appliance after cleaning ............................................................... 53
Replacing the carbon filters .................................................................................. 53
Frequently Asked Questions .............................................................................. 55
3

Contents
Causes of noises ................................................................................................. 65
Technical Service................................................................................................. 66
Contact in case of fault ......................................................................................... 66
Warranty ................................................................................................................ 66
Water connection ................................................................................................ 67
Information on the fresh water connection ........................................................... 67
Connecting the water supply line.......................................................................... 68
Electrical connection ..........................................................................................70
Installation............................................................................................................ 72
Side-by-side installation........................................................................................ 72
Installation location ............................................................................................... 72
Climate class .................................................................................................... 73
Ventilation.............................................................................................................. 73
Installing the appliance.......................................................................................... 73
Wall gap............................................................................................................ 73
Fitting the anti-tip device.................................................................................. 74
Aligning the machine........................................................................................ 75
Installing the appliance in a run of kitchen units ................................................... 76
Appliance dimensions ........................................................................................... 77
Changing the door hinges .................................................................................. 79
Aligning the machine doors................................................................................ 91
4
IMPORTANT SAFETY INSTRUCTIONS
This appliance complies with all statutory safety requirements.
Please note that inappropriate use can lead to personal injury and
damage to property.
To avoid the risk of accidents and damage to the appliance,
please read these instructions carefully before using it for the first
time. They contain important notes on installation, safety, use and
maintenance.
Miele cannot be held liable for non-compliance with these instructions.
Keep these instructions in a safe place and ensure that new users
are familiar with the contents. Pass them on to any future owner.
Danger of injury!
Due to the sheer size and weight of the appliance, it needs to be
ensured that it cannot tip forward when the door is open and fully
stocked.
Set up the appliance with the supplied anti-tip devices in accordance with the operating and installation instructions.
Appropriate use
This appliance is intended for use in the home and similar environ-
ments.
This appliance is not intended for use outdoors, in damp environments or in places exposed to rain.
This appliance is intended for domestic use only for cooling and
storing food and drink as well as for storing deep frozen food, freezing fresh food and for making ice.
Any other usage is not supported by the manufacturer and could be
dangerous.
5

IMPORTANT SAFETY INSTRUCTIONS
This appliance is not suitable for storing and keeping cool
medicines, blood plasma, laboratory preparations or other such materials or products. Incorrect use of the appliance for such purposes
can cause deterioration of the items stored. The appliance is not
suitable for use in areas where there is a risk of explosion.
Miele cannot be held liable for damage resulting from improper or incorrect use of the appliance.
Persons (including children) which lack physical, sensory or men-
tal abilities or experience with the machine should not use it without
supervision or instruction by a responsible person.
Safety with children
To reduce the risk of injury, do not allow children to play in, on or
near the appliance.
Ensure that any packing material is disposed of safely and kept
out of the reach of children. DANGER of suffocation!
6

IMPORTANT SAFETY INSTRUCTIONS
Technical safety
The refrigerant system is tested for leaks. This appliance complies
with statutory safety requirements.
This appliance contains the refrigerant Isobutane (R600a), a natu-
ral gas which is environmentally friendly. Although it is combustible,
it does not damage the ozone layer and does not increase the greenhouse effect.
The use of this refrigerant has, however, led to a slight increase in
the noise level of the appliance. In addition to the noise of the compressor, you might be able to hear the refrigerant flowing around the
system. This is unavoidable, and does not have any adverse effect
on the performance of the appliance.
Care must be taken during the transportation and setting up of the
appliance that no parts of the cooling system are damaged. Leaking
refrigerant can cause severe irritation to the eyes.
In the event of any damage:
– avoid open flames and anything that creates a spark,
– disconnect the appliance from the electrical power supply,
– ventilate the room where the appliance is located for several min-
utes, and
– contact Miele Technical Service.
The more coolant there is in an appliance, the larger the room it
should be installed in. In the event of a leakage, if the appliance is in
a small room, there is the danger of combustible gases building up.
For every 11g of coolant at least 1m3 of room space is required. The
amount of coolant in the appliance is stated on the data plate inside
the appliance.
To avoid the risk of damage to the appliance, make sure that the
connection data (fuse rating, frequency and voltage) on the data
plate corresponds to the household supply.
Check that this is the case before connecting the appliance. Consult
a qualified electrician if in any doubt.
7
IMPORTANT SAFETY INSTRUCTIONS
The electrical safety of the appliance can only be guaranteed
when correctly grounded. It is essential that this standard safety requirement is met. If in any doubt please have the electrical installation tested by a qualified electrician.
Reliable and safe operation of this appliance can only be assured
if it has been connected to the electricity supply.
If the power cord is damaged, it must be replaced by a Miele au-
thorized technician in order to protect the user from harm.
Do not connect the appliance to the electrical supply with a power
bar or extension cord. These are a fire hazard and do not guarantee
the required safety of the appliance.
If moisture gets into electrical components or into the power cord,
it could cause a short circuit. Therefore, do not operate the machine
in areas where there may be moisture or splashing water (e.g.,
garages, laundry rooms).
This appliance must not be installed and operated in mobile in-
stallations (e.g. on a ship).
Do not use a damaged appliance. It could be dangerous. Check
the appliance for visible signs of damage.
The machine must be disconnected from the power supply during
installation, maintenance, and repair work, and installation work on
the fresh water connection. The machine is only completely isolated
from the power supply when:
– the fuses have been switched off, or
– the circuit breaker has been removed completely, or
– the power cord has been unplugged. Pull on the plug and not on
the power cord when disconnecting it from the power supply.
8

IMPORTANT SAFETY INSTRUCTIONS
Unauthorized installation, maintenance, and repairs, or a faulty
fresh water connection can cause considerable danger for the user.
Installation, maintenance, and repairs, installation work on the fresh
water connection, and all repairs on the ice/water outlet must only
ever be carried out by a Miele authorized technician.
The ice cube maker must only be connected to a cold water line.
Miele cannot be held liable for damage caused by a faulty con-
nection to the fresh water supply.
Any manufacturer's warranty will be void if the appliance is not re-
paired by a Miele approved service technician.
Defective components should only be replaced by Miele original
parts. Only with these parts can the manufacturer guarantee the
safety of the appliance.
Correct use
The appliance is designed for use within a certain climate range
(ambient temperatures), and should not be used outside this range.
The climate range for your appliance is stated on the data plate inside the appliance. Installing it in a room with too low an ambient
temperature, e.g. a garage, will lead to the appliance switching off
for longer periods so that it cannot maintain the required temperature.
WARNING! DANGER of overheating! Do not cover or block the air
vents. This can impair the efficiency of the appliance, increase the
power consumption and cause damage to the appliance.
If storing food which contains a lot of fat or oil in the appliance,
make sure that it does not come into contact with plastic components as this could cause stress cracks or break the plastic.
Do not store explosive materials in the appliance or any products
containing propellants (e.g. spray cans). Electrical components could
cause flammable vapors to ignite.
DANGER of fire and explosion.
9

IMPORTANT SAFETY INSTRUCTIONS
Do not operate any electrical equipment (e.g. an electric ice cream
maker) inside the appliance.
DANGER of sparking and explosion.
Do not store cans or bottles containing carbonated drinks or liq-
uids which could freeze in the freezer section. The cans or bottles
could burst, causing injury or damage.
Never handle frozen food or the metal parts of the appliance with
wet hands. Your hands may freeze to the frozen food or to the metal.
DANGER of frost burn!
Do not take ice cubes out with your bare hands and never place
ice cubes or popsicles in your mouth straight from the freezer section. The very low temperature of the frozen ice or popsicles can
cause frost burn to the lips and tongue. DANGER of injury.
Do not refreeze partially or fully defrosted food. Consume de-
frosted food as soon as possible, as it will lose its nutritional value
and spoil if left for too long. Defrosted food may only be refrozen after it has been cooked.
When eating stored food, there is a danger of food poisoning.
Storage times will depend on several factors, including the freshness
and quality of the food, as well as the temperature at which it is
stored. Observe the manufacturer's “use-by” dates and storage instructions.
Use only genuine original Miele parts. If parts or accessories from
other manufacturers are used, the warranty may become invalid.
Stainless steel machines:
Adhesives will damage the coated stainless steel surface and
cause it to lose its dirt-repellent protective coating. Do not use sticky
notes, transparent adhesive tape, masking tape, or other types of
adhesive on the stainless steel surface.
The surface is easily scratched. Even magnets can cause scratch-
ing.
10

IMPORTANT SAFETY INSTRUCTIONS
Cleaning and maintenance
Do not use any oil or grease on the door seals.
They can cause the seals to deteriorate over time.
Never use a steam cleaner to clean the appliance.
The steam can reach the electrical components and cause a short
circuit.
Sharp edged or pointed objects will damage the evaporator, caus-
ing irreversible damage to the appliance. Do not use sharp edged or
pointed objects to
– remove frost or ice,
– separate frozen foods or remove ice trays.
Never place electric heaters or candles in the appliance to defrost
it. These can damage the plastic parts.
Do not use defrosting sprays or de-icers, as they could contain
substances which could damage the plastic parts or which might
cause the build-up of gases and pose a danger to health.
Transport
To avoid damage to the appliance, always transport it upright and
in its packaging.
DANGER of injury and damage. The appliance is very heavy and
must be transported by two people.
Disposal of your old appliance
Children could become trapped in the machine and could suffo-
cate.
– Remove the machine doors.
– Remove the drawers.
– Leave the adjustable shelves in the machine so children cannot
climb inside.
11
IMPORTANT SAFETY INSTRUCTIONS
DANGER of electric shock!
– Cut the plug off the power cord.
– Cut the power cord off the old appliance.
Dispose of them separately from the appliance.
Ensure that the appliance is not stored in the vicinity of gasoline or
inflammable gases and liquids during and after disposal.
Make sure that the coolant pipework is not damaged during dis-
posal to avoid uncontrolled leakage of oil and coolant (see data plate
for coolant type).
Splashes of coolant can cause damage to the eyes. Be careful not
to damage any part of the pipework while awaiting disposal, e.g. by
– puncturing the coolant channels in the evaporator,
– kinking any pipework,
– scratching the surface coating.
Symbol on the compressor (depending on model)
This information is only relevant for recycling. There is no risk during normal operation.
The oil in the compressor can be fatal if swallowed or if it pene-
trates the airways.
12
Caring for the environment
Disposal of packaging material
The packaging is designed to protect
the appliance from damage during
transportation. The packaging materials
used are selected from materials which
are environmentally friendly for disposal
and should be recycled.
Ensure that any plastic wrappings,
bags, etc. are disposed of safely and
kept out of the reach of children. Return
the packaging to your dealer.
Disposal of your old appliance
Electrical and electronic appliances
contain valuable materials. They also
contain certain substances, compounds
and components which were essential
for the proper functioning and safe use
of the equipment. Handling these materials improperly by disposing of them in
your household waste can be harmful to
your health and the environment. Therefore, please do not dispose of your old
appliance with regular household waste
and follow local regulations on proper
disposal.
Consult with local authorities, dealers or
Miele in order to dispose of and recycle
electrical and electronic appliances.
Miele assumes no responsibility for
deleting any personal data left on the
appliance being disposed.
Take care not to damage the pipework
at the back of your appliance before or
during transportation to an authorized,
environmentally friendly collection depot.
This way, coolant in the pipework and
oil in the compressor will be contained,
and will not leak into the environment.
Please ensure that your old appliance
does not pose a danger to children
while being stored prior to disposal.
See “IMPORTANT SAFETY INSTRUCTIONS” for more information.
13

Saving energy
Installation/Maintenance
Normal
energy consumption
In a well-ventilated room. In an enclosed, poorly venti-
Protected from direct sunlight.
Away from heat sources (radiator, range/oven).
Where the ideal room temperature is approx. 68°F
(20°C).
Ventilation gaps unobstructed and dusted regularly.
Compressor and metal grill
(heat exchanger) at the back
of the appliance dusted at
least once a year.
When the gap between the
back of the appliance and
the wall is at least
2" (51mm).
Increased
energy consumption
lated room.
In direct sunlight.
Near a heat source (radiator,
oven).
Where the ambient room
temperature is above 77°F
(25°C).
Where the ventilation gaps
are blocked and full of dust.
Dust build-up on the compressor and metal grill (heat
exchanger).
When the gap between the
back of the appliance and
the wall is less than
2" (51mm).
Temperature
setting
14
39°F to 41°F (4°C to 5°C) in
the refrigerator section
0°F (-18°C) in the freezer
section
The lower the temperature in
the appliance, the higher the
energy consumption.

Saving energy
Normal
energy consumption
Use The drawers, and shelves
are arranged as they were
when the appliance was delivered.
Only open the door when
necessary and for as short a
time as possible. Store food
in an organized way.
When shopping, use a
cooler bag and place the
food in the appliance as
soon as possible.
Replace any food removed
as quickly as possible, before it warms up too much.
Allow hot food and drinks to
cool down before placing
them in the appliance.
Store food well packaged or
covered.
Increased
energy consumption
Frequent opening of the
door for long periods will
cause a loss of coldness.
The appliance will try to cool
down and the compressor
will run for longer periods.
Hot food or food at room
temperature raises the temperature inside the refrigeration appliance. The appliance will try to cool down
and the compressor will run
for longer periods.
The evaporation or condensation of liquids in the refrigerator section will cause a
loss of coldness.
Place frozen food in the refrigerator section to defrost.
Do not overfill the appliance
in order to allow the air to
circulate.
Poor air circulation will
cause a loss of coldness.
15

Guide to the appliance
Control panel
Sensor buttons for the refrigerator
section settings area
a
For turning the ice cube maker on
and off
b
For turning the Automatic SuperCool
function on and off
c
For turning the refrigerator section on
and off
d
For setting the temperature
( for warmer)
e
For setting the temperature
( for colder)
f
Display LEDs (see “Display LEDs” table for explanation)
g
Display with temperatures and symbols (symbols only visible during use;
see “Symbols on the display” table
for explanation)
Sensor buttons for the freezer section settings area
h
For setting the temperature
( for warmer)
i
For setting the temperature
( for colder)
j
For turning the machine on and off
k
For turning the SuperFrost function
on and off
l
For turning the door or temperature
alarm off
16

Guide to the appliance
Display LEDs and symbols on the display
Display LED Meaning
Automatic SuperCool
(left)/SuperFrost (right)
Power failure Flashes in the event of a power failure
Safety lock Lock to stop the machine being turned off
Ice cube maker For turning the ice cube maker on and off
Alarm Flashes when the door or temperature alarm
Information on the display Meaning
DEMO Demo mode Demo mode has been activated (see “Fre-
Sabbath mode Turning Sabbath mode on and off
MENU Settings mode Lights up when settings are being adjusted
°F Temperature unit The default setting is °F; this can be
The function can be selected depending on
the section (see “Using Automatic SuperCool and SuperFrost”).
by mistake
and for setting the water quantity; flashes
when there is an error message relating to
the ice cube maker
is triggered
quently asked questions–Messages on the
display”).
switched to °C
17

Guide to the appliance
18

Guide to the appliance
a
Control panel with display
b
Fan
c
Interior lighting
d
Bottle rack
e
Egg tray/door shelf
f
Adjustable shelf
g
Fruit and vegetable drawers
h
Bottle shelf with bottle holder
i
NoFrost module
j
Ice cube drawer with automatic ice
cube maker
k
Freezer drawers
For easier installation, there are transport handles on the back at the top of
the machine and transport wheels underneath.
19
Accessories
Accessories supplied
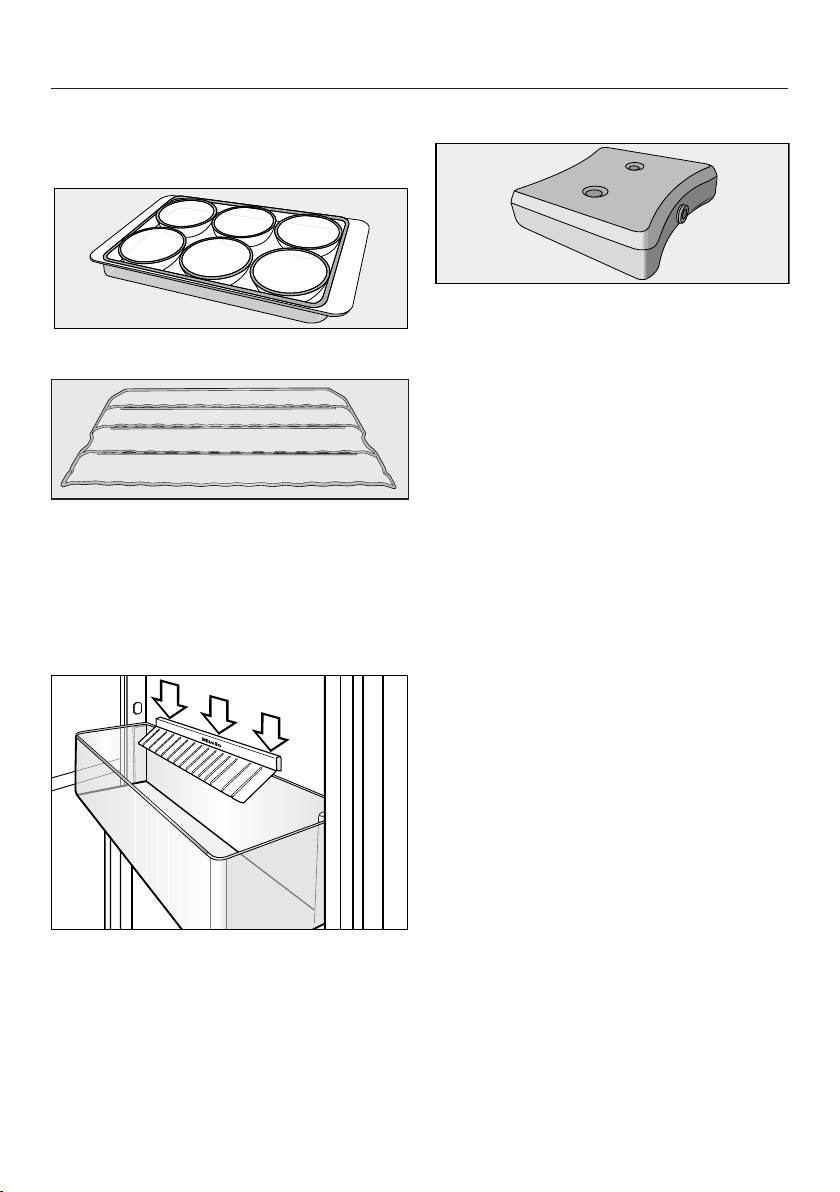
Egg tray
Bottle rack
Bottles can be stored horizontally in the
refrigerator section using the bottle rack
to save space.
The bottle rack can be placed at different positions in the refrigerator section.
Bottle holder
Cool pack
The cool pack prevents the temperature
in the freezer rising too quickly in the
event of a power outage. This can help
prolong the storage time.
The cool pack will be at its most effective after it has been in the freezer for
approx. 24hours.
The non-slip fins of the bottle holder jut
out into the bottle shelf and make bottles more secure when you open and
close the appliance door.
20

Optional accessories
A range of useful Miele accessories and
care products are available for your appliance.
KKF-RF
ActiveAirClean replacement filters
Replacement filters to fit the Active AirClean holder are available. We recommend replacing the carbon filters every
6months.
KKF-FF Active AirClean carbon filter with holder
Carbon filters neutralize unpleasant
odors in the refrigerator section for improved air quality.
Accessories
The carbon filter holder clips onto the
protective strip at the back of the shelf
and can be moved as necessary.
Accessories are available to order via
the Miele Webstore, from Miele directly (see back cover for contact details) or from your Miele dealer.
21

Before first use
Before first use
Packaging material
Remove all packaging material from
the inside of the appliance.
Removing the protective film
The stainless steel strips on the door
shelves and adjustable shelves have a
layer of protective film to prevent damage during transportation. The machine
doors, and side panels where applicable, have a layer of protective film too.
Do not remove the protective film un-
til the machine has been installed in
its final location.
Cleaning the refrigerator
Please refer to the relevant instructions in “Cleaning and care”.
Important! Each time it is used, the
Miele stainless steel conditioning
agent forms a water-repellant and dirtrepellant protective coating.
Treat the stainless steel strips and
stainless steel frame inside the machine with the Miele stainless steel
conditioning agent immediately after
removing the protective film (see
“Product description – Optional accessories”).
Clean the inside of the appliance and
the accessories.
22

Switching on and off
Operating the machine
A light touch of the finger on the sensor
buttons is all that is required to operate
this machine.
Switching on the refrigerator
The Freezer Zone and the Fridge Zone
can be switched on at the same time
using the two On/Off buttons.
To enable the temperature to get sufficiently cold inside the refrigerator, allow it to run for approx. 3–5hours (depending on the ambient temperature)
before placing food in it.
Do not place food in the Freezer Zone
until it has reached the required coldness (at least 0°F/-18°C).
Touch one of the two On/Off but-
tons until the temperature display
lights up.
The refrigerator will be switched on and
the interior lighting will come on in the
Fridge Zone.
The temperature display for the Fridge
Zone indicates the temperature in the
Fridge Zone.
– If the temperature in the Freezer Zone
is above 32°F (0°C), bars will flash in
the temperature display for the
Freezer Zone.
– As soon as the temperature drops
below 32°F (0°C), the temperature in
the Freezer Zone will flash on the display.
– The display LEDs will flash until
the set temperature has been
reached in the Freezer Zone.
The refrigerator will gradually reach the
pre-set temperatures:
– Temperature in the Fridge
Zone=37°F (3°C)
– Temperature in the Freezer Zone=
0°F (-18°C)
23

Switching on and off
Switching off the entire appliance
Touch the right-hand On/Off but-
ton until all of the displays go off.
If this does not work, the safety lock is
activated (see “Selecting additional settings – Activating and deactivating the
safety lock”). The refrigerator section interior lighting will go out and the cooling
process will be turned off.
Turning off the refrigerator section separately
The refrigerator section can be turned
off without having to turn off the freezer
section. The freezer section cannot be
turned off separately.
Touch the left-hand On/Off button
until the temperature display for the
refrigerator section goes off.
If this does not work, the safety lock is
activated (see “Selecting additional settings – Activating and deactivating the
safety lock”).
The refrigerator section will be turned
off. The temperature in the freezer section will still be shown on the display.
The refrigerator section interior lighting
will go out.
Turning off for longer periods of time
If you go away for a prolonged
period, there is a danger of mould
building up inside the appliance if
you leave it switched off with the
door shut without cleaning it first.
It is essential to clean the appliance.
If the appliance is not going to be used
for a prolonged period of time, e.g.
while on vacation:
turn the appliance off,
unplug the appliance or flick the cir-
cuit breaker to off,
empty the ice cube drawer,
close the shut-off valve in the water
supply line,
clean the appliance and
leave the door(s) ajar to air the appli-
ance and avoid odors building up inside the appliance.
It is also advisable to carry out the last
two instructions if you are switching
the refrigerator section off for a longer
period of time.
Turning the refrigerator section on separately (if previously turned off)
To turn the refrigerator section on,
touch the left-hand On/Off button.
The refrigerator section will be turned
on and will start to cool. It will reach the
temperature set. The interior lighting will
come on when the refrigerator section
door is opened.
24

The correct temperature
It is very important to set the correct
temperature for storing food in the appliance. Bacteria will cause food which
is not stored at the correct temperature
to deteriorate rapidly. Temperature influences the growth rate of these bacteria.
Reducing the temperature reduces their
growth rate.
The temperature in the appliance will
rise:
– The more often the door is opened
and the longer it is kept open
– The more food that is stored in it
– The warmer the food is which is be-
ing put into it
– The higher the ambient temperature
surrounding it. The appliance is designed for use within specific ambient temperatures (climate range). Do
not use in ambient temperatures for
which it is not designed.
... in the refrigerator section
We recommend a temperature of 39°F
(4°C) in the refrigerator section.
Automatic cold air circulation (DynaCool)
The fan automatically turns on when the
cooling system for the refrigerator section turns on. It distributes the temperature in the refrigerator section to all areas evenly so that all the food inside will
be chilled to about the same degree.
...in the Freezer Zone
To freeze fresh food and to store frozen
food for a long time, a temperature of
0°F (-18°C) is required. At this temperature the growth of bacteria is generally
halted. As soon as the temperature
rises above 14°F (-10°C), the bacteria
become active in the food again so it
cannot be kept as long. For this reason,
partially defrosted or defrosted food
must not be re-frozen. Food may be refrozen once it has been cooked (boiled
or roasted), as the high temperatures
achieved when cooking destroy most
bacteria.
25

The correct temperature
Temperature display
In normal operation, the upper temperature display shows the current
average refrigerator section temperature and the lower temperature
display shows the highest freezer
section temperature currently being
recorded within the machine.
Depending on the ambient temperature
and the temperature setting, it can take
the machine a few hours to reach the
temperature required and for this temperature to then be shown as a constant temperature on the display.
If the temperature in the freezer
remains above 0°F (-18°C) for a long
time, check that the frozen food has
not started to defrost.
If it has, use the food as soon as
possible or cook it before freezing it
again.
Setting the temperature
Use the two and sensor buttons
for the relevant section to set the
temperature higher or lower.
The following changes will be seen on
the display when the sensor buttons are
touched:
– With the first touch: The last temper-
ature set flashes.
– Each subsequent touch: The temper-
ature changes in 1° increments.
– Keeping your finger on the sensor
button: The temperature changes
continuously.
Approximately 5seconds after the last
time a sensor button was touched, the
actual temperature inside the appliance
will automatically be displayed.
Temperature range
– The temperature in the Fridge Zone
can be set between 36°F (2°C) and
45°F (7°C).
26
– The temperature in the Freezer Zone
can be set between 7°F(-14°C) and
-15°F (-27°C).
Tip: If you have adjusted the temperature, wait for approx. 6hours if the
machine is not very full and for approx. 24hours if the machine is full
before checking the temperature display. It will take this long for an accurate
reading to be given.
If, after this time, the temperature is
still too high or too low, adjust it
again.

Using Automatic SuperCool and SuperFreeze
The following functions are available
depending on the section:
– Refrigerator section
Automatic SuperCool
– Freezer section
SuperFrost
SuperFrost function
For best results, turn on the SuperFrost
function before putting fresh food into
the freezer. Fresh food will be frozen
quickly, so that the nutritional value, vitamin content, appearance, and taste
are maintained.
Exceptions:
– Placing food in the freezer that is al-
ready frozen.
– Only freezing up to 4.4lbs (2kg) of
fresh food daily.
SuperFrost should be turned on
6hours before placing food in the
freezer section.
When freezing the maximum amount
of food, SuperFrost should be turned
on 24hours beforehand.
When SuperFrost is turned on, the machine will work at full power to lower the
temperature inside.
SuperFrost turns off automatically after
approx. 65hours. The quantity of fresh
food placed in the freezer will determine
the duration before the SuperFrost
function turns off.
Tip: To save energy, you can manually
turn off SuperFrost once the freezer
reaches a constant freezer section
temperature of 0°F (-18°C) or colder.
Monitor the temperature in the freezer
section.
When the SuperFrost function is turned
off, the machine will run at normal
power again.
Automatic SuperCool function
The Automatic SuperCool function can
be used to rapidly reduce the temperature in the refrigerator section to its lowest setting (depending on the room
temperature).
Tip: Automatic SuperCool is particularly
recommended for the rapid chilling of
large amounts of fresh food or drink.
When Automatic SuperCool is turned
on, the machine will work at full power
to lower the temperature inside.
It turns off automatically after approx.
12hours.
Tip: To save energy, the Automatic SuperCool function can be turned off
manually once food and drink is sufficiently chilled.
When the Automatic SuperCool function is turned off, the machine will run at
normal power again.
27

Using Automatic SuperCool and SuperFreeze
Turning a function on or off
Touch the sensor button for the func-
tion you want.
– The display LED next to the corre-
sponding symbol will light up and the
function will be turned on.
– The display LED next to the corre-
sponding symbol will go out and the
function will be turned off.
After a power failure, any function that
was previously turned on will be
turned off.
28

Temperature and door alarm
Your machine is equipped with a warning system to ensure that temperature
increases in the freezer section do not
go unnoticed and it also prevents energy from being wasted when machine
doors are left open.
Temperature alarm
An alarm will sound if the temperature
in the freezer section becomes too
warm. The display LED flashes.
The audio and visual signals are triggered, for example:
– when the machine is turned on if the
temperature in a temperature zone
differs too significantly from the set
temperature,
– if a lot of warm room air enters the
freezer when food is being loaded,
rearranged, or taken out,
– when freezing large amounts of food
at once,
– when freezing fresh food which is still
warm,
– after a power failure,
Turning the temperature alarm off early
If the alarm disturbs you, it can be
turned off early.
Touch the sensor button.
The alarm will be silenced. The dis-
play LED will continue to flash until the
reason for the alarm has been resolved.
Door alarm
The machine is fitted with a warning
system to avoid energy being wasted
and food becoming warm if the machine door is left open.
An alarm will sound if the machine door
has been left open for longer than
180seconds.
As soon as the door is closed, the
alarm will be silenced and the display
will go out.
Turning the door alarm off early
If the alarm disturbs you, it can be
turned off early.
Touch the sensor button.
– if the machine has a fault.
The alarm will be silenced and the display will go out as soon as the reason
for the alarm has been resolved.
If the temperature in the freezer
remains above 0°F (-18°C) for a long
time, check that the frozen food has
not started to defrost.
If it has, use the food as soon as
possible or cook it before freezing it
again.
The alarm will be silenced.
29

Selecting additional settings
Selecting additional settings
In Settings mode, certain settings can
be adjusted and functions selected, allowing you to adjust the machine to suit
your requirements.
See the following pages for more information on these settings.
The door alarm and any other alarm
messages are automatically suppressed when you are in Settings
mode, and no alarm will sound. Exception: If there is a machine fault (F
+numbers), Settings mode will be exited automatically. The fault code will
be shown on the display and an alarm
will sound (see “Frequently asked
questions”) – Messages on the display“).
The freezer section control panel (to
the right-hand side of the display)
must be used to apply the desired settings.
Settings overview
Turning Sabbath mode on and
off
Setting the display brightness
Activating and deactivating
the safety lock
Changing the temperature unit
(°F/°C)
For the Service department
only!
Ice cube maker functional test
Changing the size of the ice
cubes
Sabbath mode
The appliance offers a Sabbath mode
for the purposes of religious observance.
The following are turned off:
– the interior lighting when the appli-
ance door is opened,
30
– all audio and visual signals,
– temperature displays,
– DynaCool, Automatic SuperCool, and
SuperFrost (if previously turned on).
To activate Settings mode, the SuperFrost button can continue to be selected.
The Sabbath mode function will turn off
automatically after approx. 120hours.

Selecting additional settings
Ensure that the appliance doors are
properly closed, as audio and visual
alarms are turned off.
Any power failure during this time will
not be shown on the display. After a
power failure, the appliance will start
up in Sabbath mode.
Danger of food contamination!
Any power failure during Sabbath
mode will not be shown on the display. After a power failure, the appliance will restart in Sabbath mode.
When power is restored, no notification of the power failure will appear
on the display.
If there is a power failure during Sabbath mode, check the quality of the
food. Do not consume any defrosted
food.
Turning Sabbath mode on and off
Touch the SuperFrost button to the
right-hand side of the display for approx. 5seconds.
MENU lights up on the display and
flashes.
Settings mode has now been activated.
Touch the SuperFrost button to ac-
cess the Sabbath mode function.
Available settings:
– : Sabbath mode is turned off
– : Sabbath mode is turned on
If Sabbath mode was previously turned
off, will be offered.
If Sabbath mode was previously turned
on, will be offered.
Touch the SuperFrost button to
confirm the setting.
MENU lights up on the display and
flashes.
Touch the On/Off button to exit
Settings mode.
When Sabbath mode has been activated, will be lit up on the display.
Turn off Sabbath mode after the Sab-
bath has passed.
31

Selecting additional settings
Changing the temperature unit (°F/°C)
The temperature can be displayed in either Fahrenheit (°F) or Celsius (°C).
Touch the SuperFrost button to the
right-hand side of the display for approx. 5seconds.
MENU lights up on the display and
flashes.
Settings mode has now been activated.
Touch one of the sensor buttons for
setting the temperature ( and ) repeatedly until appears on the dis-
play.
Touch the SuperFrost button to
confirm the selection.
Available settings:
–: degrees Celsius
–: degrees Fahrenheit
If was previously set, will now be
offered.
Activating and deactivating the safety lock
The safety lock can be activated to prevent the appliance being switched off
by mistake.
Touch the SuperFrost button to the
right-hand side of the display for approx. 5seconds.
MENU lights up on the display and
flashes.
Settings mode has now been activated.
Touch one of the sensor buttons for
setting the temperature ( and ) repeatedly until appears on the display.
Touch the SuperFrost button to
confirm the selection.
Available settings:
– : The safety lock is deactivated
– : The safety lock is activated
If the safety lock was previously deactivated, will be offered.
If was previously set, will now be
offered.
Touch the SuperFrost button to
confirm the setting.
MENU lights up on the display and
flashes.
Touch the On/Off button to exit
Settings mode.
The desired temperature unit will be set.
32
If the safety lock was previously activated, will be offered.
Touch the SuperFrost button to
confirm the setting.
MENU lights up on the display and
flashes.
Touch the On/Off button to exit
Settings mode.
The display LED lights up when the
safety lock is activated.

Selecting additional settings
Changing the size of the ice cubes
The size of the ice cubes depends on
the quantity of water being taken in.
You are able to set this quantity according to your wishes. To make larger ice
cubes, increase the amount of water
being taken in by the ice cube maker.
The amount of water is set to
(medium) at the factory.
Touch the SuperFrost button to the
right-hand side of the display for approx. 5seconds.
MENU lights up on the display and
flashes on the display.
Settings mode has now been activated.
Touch one of the sensor buttons for
setting the temperature ( and ) repeatedly until appears on the display.
Touch the SuperFrost button to
confirm your selection.
MENU lights up on the display and
flashes.
Touch the On/Off button to exit
Settings mode.
The most recently selected setting will
appear on the display.
The water volume set can then be al-
tered within the range of to by
touching one of the sensor buttons
for setting the temperature ( and
).
Only alter the water volume setting
by one level to start with and then
observe the result over the next few
days. If the water volume is set too
high, the ice cube tray in the ice
cube maker can overflow.
Touch the SuperFrost button to
confirm your selection.
33

Storing food in the refrigerator section
Do not load more than a maximum of
35lb (16kg) of food in the appliance
door.
Risk of fire from electrical appli-
ances.
Operating electrical devices in the
appliance can cause sparks to form.
Do not operate any electrical devices
inside the appliance.
Risk of explosion due to
flammable mixes of gases.
Electrical components can cause
flammable mixes of gases to ignite.
Do not store any explosive materials
or products containing flammable
propellants (e.g., spray cans) in the
appliance. The spray cans in question can be identified by the contents
printed on the can or by a flame
symbol. Electrical components can
cause escaping gases to ignite.
Different storage zones
Due to natural air circulation, there are
different temperature zones in the refrigerator section.
Cold, heavy air sinks to the lowest section of the refrigeration section. Make
use of the different zones when placing
food in the appliance.
Tip: To allow air to circulate efficiently,
do not pack food too closely together in
the refrigerator.
If there is insufficient air circulation,
the cooling performance will decrease and energy consumption will
increase.
Do not cover the fan in the rear wall
of the appliance.
Tip: Do not store food in such a way
that it touches the rear wall of the refrigerator section as it may freeze to the
rear wall.
Risk of damage due to greasy or
oily foods.
If storing food which contains a lot of
fat or oil in the appliance or the door,
make sure that it does not come into
contact with plastic components as
this could cause stress cracks or
break the plastic.
Make sure that no fat or oil leaks
onto the plastic parts of the appliance.
34
This appliance has DynamicCooling,
which helps to keep an even temperature when the fan is running. When
DynamicCooling is turned on, the difference between the various zones is
less pronounced.
Warmest area
The warmest area in the refrigerator
section is in the top section of the door.
Use this for storing butter so that it remains spreadable and cheese so that it
retains its flavor.

Storing food in the refrigerator section
Coldest area
The coldest area in the refrigerator section is directly above the fruit and vegetable drawers and at the back.
Use these areas to store all delicate and
highly perishable food, e.g.,
– fish, meat, poultry,
– cold cuts, ready-made meals,
– dishes or baked goods containing
eggs or cream,
– fresh dough, cake mixtures, pizza or
pie dough,
– raw milk cheese and other raw milk
products,
– pre-packed vegetables and other
fresh food whose best-before date
requires storage at a temperature of
at least 39°F (4°C).
Food which is not suitable for
storage in the refrigerator section
Not all food is suitable for refrigeration
at temperatures below 41°F (5°C) because it is sensitive to cold. Depending
on the type of food, the appearance,
consistency, flavor, and/or vitamin content may be altered if stored at too cold
a temperature.
Foods which are sensitive to cold include:
– Pineapples, avocados, bananas,
pomegranates, mangoes, melons,
papayas, passion fruit, citrus fruits
such as lemons, oranges, mandarins,
grapefruits
– Fruit (which is not yet ripe)
– Eggplants, cucumbers, potatoes,
peppers, tomatoes, zucchini
– Hard cheeses (e.g., Parmesan)
35

Storing food in the refrigerator section
Notes on buying food
The freshness of food when first placed
in the appliance is an important factor
in determining how long it stays fresh,
and how long it can be kept in the appliance.
Take into account the use-by date and
the correct storage temperature.
Time out of the refrigerator, e.g., transporting food in a warm car, should be
kept to a minimum.
Tip: Take a cool bag when shopping,
and load food in the appliance as soon
as possible.
Storing food correctly
Ensure that food stored in the refrigerator section is in packaging or covered
properly. This will prevent food smells
from affecting other foods, food from
drying out, and also any cross-contamination of bacteria. This is especially important when storing meat products.
By ensuring that the temperature settings are correct and by taking appropriate hygiene measures, you can prolong the storage life of your food considerably.
Fruit and vegetables
Fruit and vegetables can be stored
loose in the fruit and vegetable drawers.
Protein-rich food
Please note that foods rich in protein
deteriorate faster than others. Shellfish,
for example, deteriorates faster than
fish, and fish deteriorates faster than
meat.
36

Adjusting the interior fittings (refrigerator section)
Moving the adjustable shelves
The shelves can be adjusted according
to the height of the food.
Lift the shelf slightly at the front, pull
it forward a little, lift the recess over
the shelf supports, and move the
shelf up or down.
The raised edge on the protective strip
at the back must face upward to prevent food from touching the back of the
machine and freezing to it.
Stops prevent the shelves from being
dislodged by mistake.
Adjusting the bottle rack
The bottle rack can be placed at different positions in the appliance.
Lift the bottle rack slightly at the front,
pull it forward a little, lift the recess
over the shelf supports, and move the
shelf up or down.
The stop bar at the back must face upward to prevent the bottles from touching the back wall.
Stops prevent the bottle rack from being dislodged by mistake.
37

Adjusting the interior fittings (refrigerator section)
Removing fruit and vegetable drawers on rollers
The fruit and vegetable drawers are on
rollers and can be fully pulled out for filling and emptying.
The roller plates can be removed for
cleaning.
Adjusting the door shelf/bottle shelf
Danger of injury!
Only move the door shelves/bottle
shelves in the door when they are
empty.
Lift the clip-in container up and out of
the stainless steel frame to remove.
Push the stainless steel frame up and
remove it by pulling it forward.
Replace the stainless steel frame at
the required position. Ensure that it is
securely pushed back in the correct
position.
38
Some stainless steel frames are eas-
ier to remove and replace when you
take hold of them together with the
bar at the back and remove by pulling
upward.
Replace the clip-in container in the
stainless steel frame.
You can remove the clip-in containers
completely from the door shelves to fill
and empty them, and then replace
them. The clip-in containers can also
be taken to the table with the food still
in them and used as a serving tray.

Adjusting the interior fittings (refrigerator section)
Adjusting the bottle holder
The bottle holder can be moved left or
right. This way you can be sure that the
bottles will be more secure when the
machine door is opened and closed.
The bottle holder can be removed completely, for example for cleaning.
To do this, push the front edge of the
bottle holder up and disengage it.
Moving the carbon filter
When you are storing very strongsmelling food (e.g., cheese):
– Place the holder with the carbon fil-
ters on the adjustable shelf where this
food is being kept.
– Change the carbon filters sooner if
necessary.
– Use additional carbon filters (with
holders) in the appliance (see “Accessories – Optional accessories”).
The holder for the carbon filters sits on
the protective strip at the back of the
adjustable shelf.
Pull the carbon filter holder upward to
remove it from the protective strip.
Refit it on the protective strip of the
adjustable shelf you wish to use it on.
39

Freezing and storing food
Always observe USDA food safety
guidelines.
Risk of fire from electrical appli-
ances.
Operating electrical devices in the
appliance can cause sparks to form.
Do not operate any electrical devices
inside the appliance.
Maximum freezing capacity
To ensure that fresh food placed in the
freezer freezes through to the core as
quickly as possible, the maximum
freezing capacity must not be exceeded. The maximum freezing capacity for freezing within a 24-hour period
is given on the data plate: “Freezing ca-
pacity ....lbs/24 hrs.”
What happens when you freeze fresh food?
Fresh food should be frozen as quickly
as possible so that the nutritional value
of the food, its vitamin content, appearance and flavor are maintained.
reabsorb it during the defrosting
process, and very little water collects
around the defrosted food.
Storing frozen food
Never re-freeze partially or fully defrosted food. Defrosted food may only
be re-frozen after it has been cooked.
When buying frozen food to store in
your freezer, make sure to check:
– that the packaging is not damaged,
– the expiration date and
– the temperature at which the frozen
food is being stored in the store.
The length of time food can be kept
is reduced if it has been stored at a
temperature warmer than 0°F (-18°C).
Buy frozen food at the very end of
your shopping trip.
Store it in the freezer compartment as
soon as possible.
Food which takes a long time to freeze
will lose more water from its cells,
which then shrink. During the defrosting
process, only some of this water is reabsorbed by the cells. What this means
in practice is that the food loses more
moisture. You can see this in the large
amount of water that collects around
the food when it defrosts.
If food is frozen quickly, the cells have
less time to lose moisture, so they
shrink less. As there is not so much
moisture loss, it is easier for the food to
40

Freezing and storing food
Home freezing
Only freeze food that is fresh and in
good condition.
Tips for home freezing
– The following types of food are suit-
able for home freezing:
fresh meat, poultry, game, fish, vegetables, herbs, fresh fruit, dairy products, baked goods, leftovers, egg
yolks, egg whites, and a range of precooked meals.
– The following types of food are not
suitable for freezing:
lettuce, radishes, sour cream, mayonnaise, whole eggs in their shells,
onions, whole raw apples and pears.
– To retain color, taste, aroma, and vi-
tamin C, vegetables should be
blanched before they are frozen. To
do so, place them portion by portion
into boiling water for 2–3minutes.
Then, remove and plunge the vegetables into ice-cold water to cool
quickly. Leave the vegetables to
drain.
– Lean meat freezes better than fatty
meat and can be stored for considerably longer.
– Separate chops, steaks, cutlets, etc.
with a sheet of plastic freezer film. to
prevent them from freezing together
in a block.
– Do not season raw food or blanched
vegetables with herbs or salt before
freezing. Cooked food should only be
lightly seasoned. The flavor of some
herbs intensifies when frozen.
– Placing hot food or drink in the
freezer causes food that is already
frozen to partially thaw and increases
energy consumption. Allow hot food
and drink to cool down before placing it in the freezer.
Packaging food for freezing
Freeze food in portions.
–Suitable packaging
– Plastic films
– Freezer bags
– Aluminum foil
– Freezer containers
–Unsuitable packaging
– Packing paper
– Parchment paper
– Cellophane
– Garbage bags
– Plastic shopping bags
Remove as much air as possible from
the packaging before sealing.
Close the packaging tightly with
– rubber bands,
– bag clips,
– string or bag ties, or
– freezer tape.
Tip: Freezer bags and poly tubing may
also be sealed using home heat sealing
kits.
Label the packaging with the con-
tents and the date of freezing.
41

Freezing and storing food
Before placing food in the freezer
When freezing more than 4.4lbs
(2kg) of fresh food, turn on the SuperFrost function for some time before placing the food in the freezer
(see “Using SuperFrost, Automatic
SuperCool, and DynaCool – SuperFrost function”).
This helps food which is already stored
in the freezer to stay frozen.
Placing food in the freezer
The following maximum loads
must not be exceeded:
– freezer drawer = 55.1lbs (25kg)
– glass plate = 77.1lbs (35kg)
Unfrozen food should not touch
frozen food, as this will cause the
frozen food to begin to thaw.
When placing items in the freezer, en-
sure that the packaging and containers are dry to prevent them from
freezing together or to the walls of the
freezer.
–Freezing the maximum amount of
food (see data plate)
Ensure that the ventilation slots at
the back of the freezer section are always free from obstruction. If the
ventilation slots are obstructed, the
cooling performance will decrease
and energy consumption will increase.
When arranging food on the glass
plate, make sure that it does not
block the ventilation slots.
Remove the upper freezer drawers.
Place the food flat on the upper glass
plates so that it freezes through to the
middle as quickly as possible.
Once the freezing process is com-
plete, place the frozen food in the
freezer drawer and push it back in.
–Freezing small quantities of food
Place the food in the upper freezer
drawers.
Place the food flat in the bottom of
the freezer drawer so that it freezes
through to the middle as quickly as
possible.
42

Freezing and storing food
Storage time for frozen food
The storage life of food is very variable,
even at a constant temperature of 0°F
(-18°C). Decomposition processes also
take place in frozen food, albeit at a
very reduced speed. Fat can become
rancid from contact with oxygen in the
air, for example. This is why lean meat
can be stored approx. twice as long as
fatty meat.
The storage times quoted are guide values for the storage life of different food
groups in the Freezer Zone.
Food group Storage
time
(Months)
Ice cream 2to6
Bread, baked goods 2to6
Cheese 2to4
Fish, oily 1to2
Fish, lean 1to5
Sausage, ham 1to3
Game, pork 1to12
Poultry, beef 2to10
Vegetables, fruit 6to18
Herbs 6to10
Where the storage time given on the
packaging differs, follow the advice on
the packaging.
Defrosting frozen goods
Never re-freeze partially or fully defrosted food. Defrosted food may only
be re-frozen after it has been cooked.
Frozen food can be defrosted in different ways:
– In a microwave
– In an oven using “Convection” or the
“Defrost” setting
– At room temperature
– In the Fridge Zone (the cold given off
by the frozen food helps to keep the
other food cold)
– In a steam oven
Flat pieces of partially thawed meat
or fish can be placed directly into a hot
skillet.
Meat and poultry (e.g.,hamburgers,
chicken, fish) should not come into contact with other foods while defrosting.
Catch the defrosting liquid and dispose
of it carefully.
Fruit can be thawed at room temperature, either in the packaging or in a covered bowl.
Most vegetables can be cooked while
still frozen. Just put straight into boiling
water or hot grease. The cooking time is
slightly less than that of fresh vegetables due to changes in the cell structure.
43

Freezing and storing food
Cooling drinks quickly
Risk of injury from broken glass!
Bottles and cans of drinks, particularly carbonated drinks, can burst
when frozen.
Do not freeze any drinks in bottles or
cans.
Adjusting the interior fittings
Removing the drawers and glass plates from the freezer section
The drawers can be removed for filling,
emptying, or cleaning purposes.
You also have the flexibility to expand
the space available in the freezer section. If you wish to freeze large items,
such as turkey or game, you can remove the glass plates between the
freezer drawers.
Pull out the drawers as far as they will
go, and then lift them up and out.
Lift the glass plate slightly, and then
pull it forward and out.
Using accessories
Using the cool pack
The cool pack prevents the temperature
in the freezer zone from rising too
quickly in the event of a power outage.
This can help prolong the storage life.
Place the cool pack in the top drawer
of the freezer zone.
The cool pack will be at its most effective after it has been in the freezer for
approx. 24hours.
–In the event of a power outage
Place the frozen cool pack directly on
top of the frozen food in the front of
the top drawer.
Tip: When placing fresh food in the
freezer, use the cool pack to separate
the fresh food from the food which is already frozen so that the frozen food
does not begin to thaw.
Tip: The cool pack can also be used to
keep food or drink cool for a short period of time in a cool box or bag.
44

Making ice cubes
For the automatic ice maker to operate, it must be connected to a water
supply (see “Water connection”).
CAUTION
The first three batches of ice cubes
made after the ice maker is started
up must not be consumed, as the
water will have been used for the initial rinse through the water supply
line.
This applies to the initial commissioning as well as when using the
appliance again after it has been
turned off for a long while.
Turning on the ice cube maker
Only make normal domestic quantities
of ice cubes with the ice cube maker.
After the initial commissioning of the
machine, it can take up to 24hours for
the first ice cubes to drop out of the
ice cube maker and collect in the
drawer.
After the ice cube maker has been
turned off and on again, this process
lasts max. 6hours.
Check whether the non-return valve
in the water supply line is open.
Touch the sensor button.
The display LED will light up.
If it was not turned on before, the
freezer section now turns on automatically. As soon as the water is frozen, the
ice cubes drop out of the ice cube
maker into the ice cube container.
When a certain volume is reached, ice
cube production is automatically adjusted.
Ice cubes can only be made when the
ice cube drawer is completely closed.
If the ice cube maker indicator
light flashes, the ice cube maker has
an insufficient supply of water. Check
that the water inlet is open.
45

Making ice cubes
Making a large quantity of ice cubes
The amount of ice cubes made by the
machine depends on the temperature in
the freezer section. The lower the temperature, the more ice cubes are produced within a given time. With a set
temperature of 0°F (-18°C), around 100–
120 ice cubes will be produced within
24hours.
The ice cube maker automatically stops
making ice cubes when the ice cube
drawer is full.
Tip: If you require a large quantity of ice
cubes, replace the full ice cube drawer
with the drawer to the right of it.
The ice cube maker will start making ice
cubes again as soon as this drawer is
closed.
If you want to make the maximum
amount of ice cubes (up to 150 ice
cubes/24hours), turn on the SuperFrost function beforehand. Please
note, however, that this will increase
the energy consumption of the machine.
Changing the size of the ice cubes
The size of the ice cubes depends on
the quantity of water being taken in.
You are able to set this quantity according to your wishes. To make larger ice
cubes, increase the amount of water
being taken in by the ice cube maker.
The amount of water is set to medium
(E3) at the factory.
Instructions for how to set the water inlet time of the ice cube maker can be
found in the section on “Selecting additional settings – Changing the size of
the ice cubes”.
46

Turning off the ice cube maker
The ice cube maker can be turned off
independently of the freezer section if
you do not want to make any ice cubes.
Tip: If the ice cube maker is turned off,
the ice cube drawer can be used as an
extra drawer for freezing fresh food and
storing frozen food.
Touch the sensor button for turn-
ing the ice cube maker on and off so
that the display LED goes out.
If the Ice Maker is going to be turned off for a long period of time
Risk of damage!
If the water intake is blocked while
the Ice Maker is still in use, the water
intake pipe can freeze up.
Turn the Ice Maker off if the water intake is interrupted (e.g., while on vacation).
Making ice cubes
Close the non-return valve in the wa-
ter supply line.
If the display LED begins to flash,
this means that there is still water remaining in the Ice Maker.
Leave the Ice Maker turned on for an-
other day so that the remaining ice
cubes can be produced.
As soon as the remaining ice cubes
have been produced, touch the
sensor button for turning the Ice
Maker on and off so that the display LED for the Ice Maker goes out.
Take the remaining ice cubes out of
the ice cube container and dispose of
them.
47

Defrosting
WARNING! DANGER of injury
and damage!
Do not use any mechanical or other
types of aids which are not recommended by the manufacturer to accelerate the defrosting process.
Refrigerator section
The refrigerator defrosts automatically.
Condensate and frost can build-up on
the back wall of the refrigerator when
the compressor is running. There is no
need to remove it. The condensate
drains through a channel and drain pipe
into an evaporation system at the back
of the appliance and evaporates automatically with the warmth generated by
the compressor.
Freezer Zone
The appliance is equipped with a
“NoFrost” system. The freezer defrosts
automatically.
The moisture generated in the appliance collects on the condenser and is
automatically defrosted and evaporates
periodically.
This automatic defrosting system enables the freezer to remain permanently
ice-free. However, the food stored in
the freezer will not defrost.
48

Cleaning and care
WARNING! DANGER of electric
shock!
Unplug the appliance or trip the cir-
cuit breaker.
WARNING! Fire hazard!
Do not damage the coolant
pipework.
Do not let water get into the
electronic unit or the lighting.
Steam from a steam cleaning ap-
pliance could reach the electrical
components and cause a short circuit.
Do not use a steam cleaner!
Cleaning water must not get into the
drain hole.
The data plate located inside the appliance must not be removed. It contains information which is required in
the event of a service call.
Cleaning agents
Cleaning and conditioning agents
used inside the appliance must be
food safe.
To avoid damaging the surfaces of your
appliance, do not use
– cleaning products containing soda,
ammonia, acid, or chloride,
– lime scale removers,
– abrasive cleaning products, such as
scouring powder, scouring liquid, or
pumice stones,
– cleaners containing solvents,
– stainless steel cleaners,
– dishwasher detergent,
– oven sprays,
– glass cleaning agents,
– hard, abrasive sponges and brushes,
such as pot scrubbers,
– eraser sponges,
– sharp metal scrapers.
We recommend using a clean sponge,
lukewarm water with a little liquid dish
soap to clean the surfaces of the appliance.
The following pages contain important
information on cleaning.
49

Cleaning and care
Preparing the machine for cleaning
Turn the machine off.
appears on the display and the cooling function is turned off.
Unplug the machine or trip the fuse.
Take any food out of the machine and
store it in a cool place.
Remove the door shelves/bottle
shelves from the machine door.
Remove the freezer drawers and
glass plates.
Take out all other removable parts for
cleaning.
Dismantling an adjustable shelf
Before cleaning the adjustable shelf, remove the white protective strip at the
back of the shelf. Proceed as follows:
Place the shelf on a worktop covered
with a soft material (e.g., a tea towel).
Then pull the protective strip off.
After cleaning the shelf, reattach the
protective strip.
50

Cleaning and care
Cleaning the interior and accessories
Clean the appliance at least once a
month.
Clean up any spills, stains or food immediately. Do not allow them to dry
and stick to the appliance.
Clean the interior with a clean
sponge, lukewarm water and a little
liquid dish soap.
After cleaning, wipe with clean water
and dry with a soft cloth.
The stainless steel trim on the
door shelves is not suitable for
cleaning in a dishwasher.
Remove the trim from the door shelf
before putting the shelf in the dishwasher.
The following parts cannot be cleaned
in a dishwasher:
– the stainless steel trims or strips
– the protective strips at the back of
the adjustable shelves
The following parts can be cleaned in
the dishwasher:
The maximum temperature of the
dishwasher program selected must
not exceed 131°F (55°C).
Contact with natural dyes from carrots, tomatoes, and ketchup, etc.
may discolor the plastic parts in the
dishwasher. This discoloration does
not affect the stability of the parts.
– the bottle holder, butter dish, egg tray
(depending on model)
– the bottle shelves and door shelves
on the inside of the door (without
stainless steel trim)
– the adjustable shelves (without white
protective strips)
– the holder for the carbon filter (avail-
able as an optional accessory)
Leave the door open to air the ma-
chine sufficiently for a short while and
to prevent odor buildup.
– all drawers and drawer lids (depend-
ing on model)
– the bottle rack
– the roller plates under the fruit and
vegetable drawers
– the cool pack
Clean these accessories by hand.
51

Cleaning and care
Cleaning the machine front and the side panels
If soiling is allowed to sit for any
length of time, it may become impossible to remove.
Surfaces may be discolored or altered.
It is therefore best to remove soiling
from the machine front and side panels immediately.
All surfaces are easily scratched.
Contact with unsuitable cleaning
agents can alter or discolor the surfaces.
See the information on “Cleaning
agents” at the beginning of this section.
Clean the surfaces with a clean
sponge and a solution of warm water
and washing-up liquid. A clean, damp
microfiber cloth without cleaning
agent can also be used for cleaning.
After cleaning, wipe with clean water
and dry with a soft cloth.
Appliance front
The appliance front has a special highquality finish (Clean Touch Steel) which
is resistant to soiling and is very easy to
clean.
Do not use stainless steel
cleaning agent on these surfaces,
as it will damage the finish.
Do not use Miele stainless steel
conditioning agent on these sur-
faces. This will cause noticeable
smearing.
Cleaning the door seal
If the door seal is damaged or
has come out of the groove, the door
will not close properly and this will
affect cooling.
Condensation will form in the inside
and this can cause a build-up of ice.
Do not damage the door seal, and
make sure that it does not come out
of its groove.
Do not use any grease or oil on the
door seal as this will cause the seal
to deteriorate and become porous
over time.
52
The door seal should be cleaned reg-
ularly with clean water and then
wiped thoroughly dry with a cloth.

Cleaning and care
Starting up the appliance after cleaning
Replace all shelves and accessories
in the appliance.
Reconnect to the power supply and
switch the appliance back on.
Switch on the automatic SuperFreeze
function for a while so that the freezer
section can cool down quickly.
Switch on the automatic SuperCool
function for a while so that the refrigerator section can cool down quickly.
Put the food back in the appliance
and close the door.
Push the freezer drawers with the
frozen food back into the freezer section and close the door.
Switch off the automatic SuperFreeze
function as soon as the temperature
in the freezer section is a constant
0°F (-18°C) or colder.
Replacing the carbon filters
Replace the carbon filters in the holder
around every 6months.
Replacement KKF-RF carbon filters
can be obtained from the Miele Technical Service, from your dealer, or from
Miele's website.
Tip: The carbon filter holder is dishwasher safe.
Pull the carbon filter holder upward to
remove it from the adjustable shelf.
When in position, the carbon filters
must not touch the back wall of the
machine, as the moisture could
cause them to stick to it.
Insert the new carbon filters deep
enough in the holder to ensure that
they do not protrude over the edge
of the holder.
53

Cleaning and care
Remove both carbon filters and place
the new filters with the surrounding
edge pointing downward in the
holder.
Place the holder in the middle of the
raised edge at the back of any of the
adjustable shelves, so that it clicks
into position.
54

Frequently Asked Questions
With the help of the following guide minor faults in the performance of the machine, some of which may result from incorrect operation, can be remedied without contacting the Service Department.
This guide may help you to find the reason for the fault, and how to correct it.
To prevent cold from escaping, open the appliance doors as little as possible until the fault has been corrected.
Problem Possible cause and solution
The machine is not getting cold and the interior lighting does not
come on when the machine door is opened.
The compressor runs
continuously.
The compressor is turning on more frequently
and for longer periods
of time; the temperature
in the machine is too
low.
The machine has not been turned on.
Turn the machine on.
The plug is not inserted in the socket correctly or the
plug connector is not inserted into the socket at the
back of the machine correctly.
Insert the plug into the socket and the plug con-
nector into the machine socket.
The fuse has tripped. There could be a fault with the
machine, the household electrical wiring, or another
machine.
Contact a technician or the Service department.
Not a fault. To save energy, the compressor runs at
a lower speed when less cooling is required. This
increases the compressor run time.
The ventilation grille is obstructed or dusty.
Do not block the ventilation grille.
Clean the ventilation grille on a regular basis to re-
move any dust.
The machine doors have been opened too frequently
or a large amount of fresh food has been put in at
once for storage or freezing.
Only open the machine doors when necessary and
for as short a time as possible.
After a while, the temperature will return to normal by
itself.
The machine doors are not closed properly. A thick
layer of ice may have already formed in the freezer
section.
Close the machine doors.
55

Frequently Asked Questions
Problem Possible cause and solution
After a while, the temperature will return to normal by
itself.
If a thick layer of ice has already formed, this will affect
cooling and increase energy consumption.
Defrost the machine and clean it.
The ambient temperature is too high. The higher the
ambient temperature, the longer the compressor has
to run.
See the information in the section on “Installation –
Installation location”.
The temperature setting is too low.
Correct the temperature setting.
A large amount of food was put in for freezing at
once.
See the information in the section on “Freezing
and storing food”.
The Automatic SuperCool function is still turned on.
To save energy, you can turn Automatic SuperCool
off early yourself.
The SuperFrost function is still turned on.
To save energy, you can turn SuperFrost off early
yourself.
The compressor comes
on less and less often
and for shorter periods
of time. The temperature in the appliance
rises.
This is not a fault. The temperature setting is too
high.
Correct the temperature setting.
Check the temperature again after 24hours.
The food begins to thaw.
The room temperature is too low for this appliance.
If the room temperature is too low, the compressor
will run less frequently. This may cause the freezer to
become too warm.
See the “Installation location” section in the “In-
stallation information”.
Increase the room temperature.
56

Frequently Asked Questions
Problem Possible cause and solution
The door seal is damaged or needs to be replaced.
Ice or condensation has
built up inside the appliance.
No tools are required to change the door seal.
Change the door seal. A replacement is available
from Technical Service.
The door seal has come out of its groove.
Check that the door seal is correctly positioned in
the groove.
The door seal is damaged.
Check whether the door seal is damaged.
57

Frequently Asked Questions
Messages in the display
Message Possible cause and solution
DEMO is shown on the
display. The machine
does not get cold, but
the machine controls
are working.
The temperature display
is out and is shown on
the display.
The display LED is lit
up and the machine
cannot be used.
An alarm is sounding. The door alarm has been activated (see “Tempera-
Demo mode is activated. This allows the machine to
be presented in the showroom without the cooling
system being turned on. Do not activate this setting
for domestic use.
Contact the Service department.
Sabbath mode is turned on: The interior lighting is
turned off and the machine is cooling down.
You can turn Sabbath mode off at any time (see
“Selecting additional settings – Turning Sabbath
mode on and off”).
The safety lock has been activated.
Completely deactivate the safety lock (see “Select-
ing additional settings – Activating and deactivating the safety lock”).
ture and door alarm”, section “Door alarm”).
Close the appliance door.
The alarm will be silenced.
58

Frequently Asked Questions
Message Possible cause and solution
The display LED is lit
up and an alarm is also
sounding.
The temperature alarm has been activated (see also
“Temperature and door alarm”). The temperature in
the freezer section has risen above or fallen below
the temperature set.
This could be due to, e.g.:
– the freezer section door being opened too often or
being left open
– a large quantity of fresh food being placed in the
freezer at once without the SuperFrost function being turned on
– a power failure having occurred
– the machine having a fault
Rectify the cause of the alarm.
The display LED goes out and the alarm is silenced.
The temperature display will stop flashing as soon as
the temperature has dropped to the correct level.
Depending on the temperature displayed, you
should check whether food in the freezer has
started to thaw or has defrosted. If it has, cook it
before freezing it again.
59

Frequently Asked Questions
Message Possible cause and solution
The display LED is lit
up and an alarm is also
sounding. The temperature display for the
freezer section is flashing.
“F0to F9” appears on
the display.
There is a power failure: The temperature in the appliance over the last few days or hours has risen too
high because of a power failure or interruption to the
power supply.
The appliance will go back to the last temperature
setting when the power is back on.
Touch the sensor button.
The warmest temperature recorded in the freezer section will flash for about 1minute on the temperature
display for the freezer section.
Touch the sensor button.
The warmest temperature displayed will disappear. The
display will then revert to showing the current temperature in the freezer section.
Depending on the temperature displayed, you
should check whether food in the freezer has
started to thaw or has defrosted. If it has, cook it
before freezing it again.
There is a fault.
Contact the Service department.
60
There is a machine fault: This display always has immediate priority over any settings which have just been
selected.
A machine fault has priority over any current door and/
or temperature alarms displayed.

Frequently Asked Questions
Problems with the ice cube maker
Problem Possible cause and solution
You cannot turn the ice
cube maker on.
The ice cube maker is
not producing any ice
cubes.
The appliance is not connected to the power supply
or is not switched on.
Reconnect to the power supply and switch the ap-
pliance back on.
The machine and/or the ice cube maker is not
turned on.
Turn on the machine and/or the ice cube maker.
The drawer of the ice cube maker is not closed
properly.
Push the drawer all the way in.
The temperature in the freezer section is too high.
Select a lower temperature.
The machine door and/or freezer drawers have
been opened too frequently causing the compressor to turn on more often and the ice cube maker
has iced up.
Only open the machine door and freezer drawers
when necessary and for as short a time as possible.
The water supply line is not open.
Open the water inlet.
The water line has not been vented.
Have a qualified professional check that the wa-
ter line has been properly vented before calling
the Service department.
The water supply to the ice cube maker has been
interrupted.
Check the water connection and the hose.
The filter in the end of the water inlet hose or the filter in the connection at the machine is blocked.
Clean the filters.
Remember it can take up to 24hours to produce
the first ice cubes after initial commissioning.
61

Frequently Asked Questions
Problem Possible cause and solution
The ice cube maker is
producing only small
ice cubes.
The ice cubes have an
unpleasant odor or flavor.
Several household appliances connected to the fresh
water supply are in operation, which has reduced the
amount of water being taken in.
Avoid using the dishwasher, washing machine,
etc. at the same time.
The size of the ice cubes depends on the quantity of
water being taken in. You are able to set this quantity
according to your wishes.
To make larger ice cubes, increase the amount of
water being taken in by the ice cube maker.
The ice cube maker is seldom used. If you do not use
it very often, ice cubes that are stored for a long period can absorb the taste and smell of other items.
Empty the ice cube container if you are not going
to use the ice cube maker for a long time.
Clean the ice cube container.
There are unsealed packages in the freezer section.
Ice can absorb the taste and smell of unsealed food.
Store only sealed food in the freezer section.
The ice cube container is dirty.
Clean the ice cube container.
62

Frequently Asked Questions
The interior lighting is not working.
Problem Possible cause and solution
The interior lighting is
not working.
The machine has not been turned on.
Turn the machine on.
Sabbath mode is turned on: The temperature display
is out and is shown on the display.
You can turn Sabbath mode off at any time (see
“Selecting additional settings – Turning Sabbath
mode on and off”).
To avoid overheating, the interior lighting turns itself
off automatically after approx. 15minutes if the machine door is left open. If this is not the case, there is
a fault.
Danger of electric shock!
There are live electrical components under the lighting cover.
The LED lighting may only be repaired or replaced
by the Service department.
Danger of injury from LED lighting! Light inten-
sity corresponds to laser beam class 1/1M.
The lighting covers must not be removed or dam-
aged, or be removed due to damage. This could
cause injury to your eyes.
Do not look into the LED lighting (laser beam class
1/1M) with optical instruments (e.g., a magnifying
glass).
Contact the Service department.
63

Frequently Asked Questions
Other problems
Problem Possible cause and solution
Food has frozen together or to the wall.
The external walls of
the appliance feel
warm.
The food packaging was not dry when loaded in the
freezer.
Use a blunt instrument (such as a spoon handle) to
carefully pry them apart.
This is not a fault. The warmth created by the evaporator is used to prevent condensation.
64

Causes of noises
Normal
noises
Brrrrr... A humming noise is made by the motor (compressor). This noise
Blub, blub... A gurgling noise can be heard when the coolant circulates
Click... Clicking sounds occur whenever the thermostat switches the
Sssrrrrr... You can sometimes just hear the sound of the fan inside the ap-
Crack... A cracking sound can be heard when materials expand inside
Please bear in mind that a certain amount of noise is unavoidable (from the compressor and the coolant circulating through the system).
Noises Possible cause and solution
Rattling,
clinking
Cause
can get louder for brief periods when the motor switches on.
through the pipes.
motor on or off.
pliance.
the appliance.
The appliance is uneven. Realign the appliance using a spirit
level, by raising or lowering the screw feet underneath the appliance or place something underneath it.
The appliance is touching another appliance or piece of furniture. Move it away.
Drawers, baskets or shelves are unstable or sticking. Check all
removable items and refit them correctly.
Bottles or containers are touching each other. Separate them.
The transport cable clips are hanging loose at the back of the
appliance. Remove the cable clips.
65

Technical Service
Contact in case of fault
In the event of a fault which you cannot
remedy yourself, please contact your
Miele dealer or Miele Technical Service.
Contact information for Miele Technical Service can be found at the end of
this document.
Please quote the model and serial number of your appliance when contacting
Miele. Both pieces of information can
be found on the data plate.
You will find the data plate inside your
appliance.
Warranty
For more information about warranty
conditions, please contact Miele Technical Service.
66

Water connection
Information on the fresh water connection
The machine may only be connected
to the fresh water supply by qualified
technicians.
Disconnect the machine from the
power supply before connecting it to
the fresh water supply.
Turn off the water supply before connecting the water supply line for the
ice cube maker.
The water quality must comply with
the requirements for drinking water in
the country in which the machine is
being operated.
WARNING! Connect to potable water
supply only.
Connection to the household water
supply must comply with the applicable regulations in the country in
which the machine is being installed.
All units and systems used to supply
water to the machine must also comply with the applicable regulations in
the respective country.
The appliance is only suitable for connection to a cold water supply, which
– is directly connected to the water
supply in order to ensure a circulation
of the water in the cold water line.
Avoid using a water line in which the
water is allowed to pool. This can affect the taste of water and ice cubes.
– withstands the operating pressure.
– fulfills the hygiene regulations.
Water pressure on-site:
– Minimum: 21.76psi (1.5bar)
– Maximum: 87.02psi (6bar)
A shut-off valve must be provided between the water line and the water supply of the building to ensure that the
water supply can be cut off if necessary.
Make sure that the shut-off valve is
still accessible after the appliance
has been installed.
Risk of damage!
If the water supply is cut off while the
ice cube maker is still in use the water intake pipe can freeze up.
Turn the ice cube maker off if the water supply is interrupted (e.g. while
on vacation).
67

Water connection
Connecting the water supply line
Before establishing the fresh water
connection, ensure that the machine
is disconnected from the power supply.
Before the cold water line is used for
the first time, it must be vented by a
suitably qualified plumber.
The fresh water connection is at the
back of the machine, at the bottom.
The connection parts included with the
machine permit the connection of various water lines (water line not supplied).
Do not connect old water lines that
have been used before.
68
The solenoid valve has a has a 3/4"
BPT connection thread.
Remove the cap from the solenoid
valve.
Insert the adapter into the union
nut.
Risk of damage!
Do not insert the water filter the
wrong way around, as this can cause
damage.
Insert the water filter with the de-
pression facing downward toward the
adapter.

Water connection
Risk of damage!
Do not overtighten the union nut, as
this can cause damage.
Connect the union nut to the sole-
noid valve, and tighten it.
If you want to divert the water line by
90°, screw on the elbow.
In case of a 1/4" water line:
Connect the water line (e.g., cop-
per) to the adapter or elbow using the clamping ring and nut.
In case of a water line with a 7/16"-24
UNS thread:
Connect the water line directly to
the adapter or elbow (a clamping ring and nut are not required).
Secure the water line to the casing
using the retaining clip.
Slowly open the non-return valve in
the water supply line and check the
whole water system for leaks.
The machine can now be connected
to the power supply (see “Electrical
connection”).
When pushing the machine into the
niche, do not bend or damage the
water line.
Push the machine into its final posi-
tion.
69

*INSTALLATION*
Electrical connection
Danger of electric shock!
The appliance must only be switched
on when it has been installed in accordance with the installation instructions.
Ground the appliance.
The appliance must not be grounded
via a gas pipe.
If in doubt, have a suitably qualified
and experienced electrician check
that the installation complies with relevant regulations.
Do not install a fuse into neutral current or grounding electrical circuit.
Do not use extension cords or ungrounded (two prong) adapters.
Do not use a frayed or damaged
power cord.
Danger of electric shock!
For protection against electric shock
this appliance is equipped with a
pole-free plug which is protected
against reverse polarity. The plug
must be grounded in the usual way.
Do not remove the round grounding
connector pin from the plug.
Use only a grounded plug adapter.
Wait for 1hour after installation before
plugging the appliance into the power
supply. This allows coolant and refrigerator oil to settle in accordance with regulations.
Ensure that the voltage of the main
power supply corresponds with the
connection voltage of the appliance. A
power supply of 110 - 120 V, 60 Hz and
15 Amp (20 Amp for side-by-side installation) with a NEMA 5-15 molded plug,
which is protected by a main switch or
a fuse, is required to operate the appliance.
The manufacturer recommends operating the appliance on a separate circuit
to avoid overloading the electrical circuit.
All relevant legal electrical, fire and
building regulations must be observed
when installing the socket and/or the
appliance.
In certain countries appliances are required to be connected to the electrical
supply via a wall-mounted ON/OFF
switch.
To avoid the risk of fire, electric shock
or other injuries installation and connection of the appliance must be carried
out by a suitably qualified electrician in
accordance with all relevant local and
national regulations and standards, including fire prevention.
70

*INSTALLATION*
Electrical connection
The outlet must be easily accessible in
an emergency so that the appliance can
be quickly disconnected from the electrical supply in case of an emergency.
The socket must be located so that the
upper edge is a maximum
82" (2100mm) distance from the upper
edge of the base of the kitchen cabinet.
If the outlet is no longer accessible
once the appliance has been installed,
an all-pole disconnect device with a
contact opening of at least 1/8" (3mm)
must be present on site. The disconnect device may be circuit breaker, a
fuse, or a contactor (compliant with local regulations).
The plug and power cord must not
come into contact with the back of the
appliance as vibrations can cause damage to these components. This, in turn,
could result in a short circuit.
Do not plug in other devices behind this
appliance.
Do not connect the appliance to an inverter such as those used with an autonomous energy source e.g. solar
power. When switched on, peak loads
in the system can cause the safety
switch-off mechanism to be triggered.
This can damage the electronic unit.
The appliance must not be used with
so-called energy-saving devices either. These reduce the amount of energy supplied to the appliance, causing
it to overheat.
If the power cord needs to be replaced,
this must be done by a qualified technician.
71

Installation
Fire hazard and risk of damage!
Appliances which give off heat, such
as toasters, mini-ovens, or double
burner hobs, can catch fire.
Do not place them on top of this appliance.
Fire hazard and risk of damage!
Do not place any open flame, such
as a candle, on or next to this appliance.
WARNING!
An appliance that has not been secured may tip forward.
Install the appliance in accordance
with the installation instructions.
Side-by-side installation
As a general rule, refrigerators and
freezers should not be installed side
by side with other such machines so
as to avoid a build-up of condensation
between them and the damage this
can cause.
However, your machine can be part of a
“side-by-side” installation because it is
equipped with built-in heating units in
the side panels.
Please contact your dealer for specific
information about which combinations
will work with your machine.
Installation location
This appliance should be installed in a
dry, well-ventilated room.
When deciding where to install your appliance, please bear in mind that the
energy consumption will increase if installed near to a heater, a cooker, or
other appliance that gives off heat. Direct sunlight should also be avoided.
The higher the room temperature, the
longer the compressor has to run and
the higher the energy consumption is.
When installing the appliance, please
note:
– The socket must be easily accessible
in an emergency and not concealed
behind the appliance.
– The plug and cord must not touch
the back of the appliance as they
could be damaged by vibrations from
the appliance.
– Do not plug other appliances into
sockets behind this appliance.
In environments with high hu-
midity, condensation may appear on
the external surfaces of the machine.
This condensate can cause corrosion
on external machine panels.
For prevention, it is advisable to in-
stall the machine with sufficient ventilation in a dry and/or air-conditioned room.
After installation, make sure that the
machine doors close properly, the air
grille is not covered, and the machine has been installed in accordance with these installation instructions.
72

Installation
Climate class
The appliance is designed for use within
a certain climate range (ambient temperatures) and should not be used outside this range. The climate range of the
appliance is stated on the data plate inside the appliance.
Climate
class
SN 50°F to 90°F / 10°C to 32°C
N 60°F to 90°F / 16°C to 32°C
ST 60°F to 100°F / 16°C to
T 60°F to 109°F / 16°C to
Operating in a room which is too cold
will cause the compressor to turn off for
too long, causing the internal temperature in the appliance to rise, resulting in
damage.
Room temperature
38°C
43°C
Ventilation
WARNING! Fire hazard!
Operation of the machine is limited.
Keep the ventilation grille free from
obstruction.
Installing the appliance
Two people are required to install
the appliance.
The appliance must be empty
when it is installed.
Move the appliance carefully on
floors that are sensitive to scratching
to prevent damage.
For easier installation, there are transport handles on the back at the top of
the appliance and transport wheels
underneath.
Wall gap
The declared energy consumption will
be achieved if a wall gap of at least
2" (51mm) is maintained between the
back of the appliance and the wall.
A smaller wall gap will not affect the
functionality of the appliance, but it
will increase energy consumption
slightly.
Air at the back wall of the machine gets
warm.
Do not cover or obstruct the air
grille to allow for effective venting. It
must also be cleaned on a regular
basis to remove dust.
73

Installation
Fitting the anti-tip device
Danger of injury!
Due to the sheer size and weight of
the appliance, it needs to be ensured
that it cannot tip forward when the
door is open and fully stocked.
Set up the appliance with the supplied anti-tip devices as described
below.
Caution! The water line or power
supply could get damaged.
Please ensure that neither the water
line nor the power supply are located
in this area, as these could be damaged during installation e.g., by
screws.
The screws for fastening the anti-tip
device and the spacer (if required) are
not supplied with the appliance. Fasteners must be used that are suitable
for the wall and floor material (wood,
concrete, etc.).
Installation with wall gap
Installation with wall gap:
Before mounting the anti-tip devices,
you must use suitable screws to fasten a spacer that is as thick as the required wall gap (up to 2" [51mm]) to
the wall.
Installation right against the wall:
No spacer is required. The anti-tip de-
vices are fastened directly to the wall
using the suitable screws.
Mark the centerline of the appliance
on the wall. Align the anti-tip devices
parallel to this line on the left and
right.
74
Then use suitable screws to fasten
the anti-tip device to the spacer/directly to the wall and to the floor.

Prepare the refrigerator for installation
SW19/10
3
/16" (5)
as close as possible to its intended
installation location.
Release the power cord from the
back of the appliance.
Remove any cord clips from the back
of the appliance.
Connect the refrigerator to the house-
hold water supply as described in the
section on “Water connection”.
Connect the refrigerator to the power
supply as described in the section on
“Electrical connection”.
Move the refrigerator carefully to its
intended installation location.
Position the refrigerator with the back
right against the anti-tip device.
Aligning the machine
Installation
If necessary, also align the appliance's
rear feet using the two front adjusting
devices (located next to the front
feet).
Using a socket wrench, turn the ad-
justing device clockwise to raise
the appliance up at the back.
Leveling the machine door
To align the machine, adjust the front
feet using the wrench supplied, ensuring it is stable and level.
Ensure that you unscrew the ad-
justable foot from the lower hinge
plate until it sits on the floor. Then,
unscrew the foot by an additional
¼turn.
75

Installation
2 3/16“
(55 mm)
2“ (50 mm)
46“
2
(300 cm
2
)
Installing the appliance in a run of kitchen units
If the ventilation gaps are not left
unobstructed, the compressor will
turn on more often and will run for
longer periods.
This causes higher energy consumption and an increased compressor
operating temperature, which can result in damage to the compressor.
Do not block the ventilation gaps.
* When the appliance is installed with
the recommended wall gap of up to
2" (51mm), the depth of the appliance
increases accordingly. Please note
that a spacer will be required if anti-tip
devices are installed.
The appliance can be built into any run
of kitchen units and installed directly
next to a kitchen furniture housing unit.
The appliance front must protrude in
front of the kitchen furniture housing
unit front by at least 1 5/16“ (34mm)* at
the sides and by at least
23/16” (55mm)* in the middle. This enables the appliance door to be opened
and shut without being obstructed. To
match the height of the kitchen units in
the run, the appliance can be fitted with
a suitable top box.
When installed next to a wall, a distance of at least 2 3/16" (55mm) must
be maintained on the hinge side between the wall and the appliance.
Top box
Appliance
Kitchen cabinetry housing unit
Wall
76
The larger the ventilation gaps, the
more economically the compressor
will work.
– A ventilation gap with a depth of at
least 2" (50mm) must be provided at
the back of the appliance across the
whole width of the top box to allow
for venting.
– The ventilation gap under the ceiling
must be at least 46 1/2sq.in
(300cm2) to ensure that warm air can
escape without obstruction.

Appliance dimensions
9
Installation
77

Installation
A
[in (mm)]
B
[in (mm)]
C
[in (mm)]
KFN 13923 DE edt/cs 78 3/4" (2000) 79 3/16" (2012) 79 1/2" (2020)
* When the gap between the back of the appliance and the wall is less than 2" (51mm), the
energy consumption will increase. Please note that a spacer will be required if anti-tip devices are installed.
78

Changing the door hinges
The machine is supplied with right-hand
hinging. If left-hand hinging is required,
the hinges must be changed.
Always change the door hinging
with the assistance of another person.
If the door seal is damaged, the
machine door may not close properly
and cooling performance will be reduced.
Condensation will form in the inside
and this can cause a build-up of ice.
Do not damage the door seal.
Preparing to change the door hinging
To change the door hinging, you will
need the following tools:
Place a suitable cover on the floor in
front of the machine to protect the
machine doors and your floor from
damage while you are changing the
hinging.
Removing the door handles
When you pull the door handle, the
sidebar slides back.
Pull the sidebar firmly back and
out of the guide.
Now loosen the four screws (TX15) in
the mounting plate and remove the
handle.
Remove the cover caps from the op-
posite side and fit them into the
empty holes.
Remove the adjustable shelves/bottle
shelf from the machine door.
79

Changing the door hinges
Removing the upper soft-close mechanism
Open the upper machine door.
If the door seal is damaged, the
machine door may not close properly
and cooling performance will be reduced.
Condensation will form in the inside
and this can cause a build-up of ice.
Do not damage the door seal.
Loosen the panel from the soft-
close mechanism by inserting a flatheaded screwdriver into the gaps
from below and, taking care, gradually lifting the panel off.
Push the panel toward the ma-
chine and leave it hanging there between the door and machine to start
with.
Place the safety device (supplied
with the machine) on the soft-close
mechanism so that it engages.
The safety device prevents the hinge
from snapping shut.
Do not remove the red safety device
until instructed to do so.
Gently loosen the cover from the
latch by inserting a flat-headed
screwdriver from above and below.
80

Changing the door hinges
Push the pin up and out from be-
low using a flat-headed screwdriver.
Remove the cover.
Now the soft-close mechanism and the
machine are no longer connected.
Remove the panel.
Push the soft-close mechanism
bracket as far as it will go toward
the handle side.
Loosen the screw in the soft-close
mechanism and spacer.
Lever out the casing together with the
soft-close mechanism using a flatheaded screwdriver in the middle.
Then, lever the casing together with
the soft-close mechanism out of the
latch from the machine side.
Put the soft-close mechanism to one
side.
Push the spacer toward the hinge
side and out.
Place the spacer to one side.
81

Changing the door hinges
Removing the upper appliance door
Loosen the cover by carefully in-
serting a flat-headed screwdriver into
the gap from below and remove it.
Unscrew the hinge part, turn it
180°, and fit it on the opposite side. If
necessary, drill holes for the screws.
Remove the upper cover by sliding
it forward from the back and then lifting it up and off.
Remove the cover by lifting it up
and off.
Danger of injury when removing
the upper appliance door!
As soon as the hinge pin is located in
the upper appliance door rather than
in the middle hinge plate, the lower
appliance door is not secure and
could fall off.
Ensure that the hinge pin remains located in the middle hinge plate and
in the lower appliance door.
Carefully lift the upper appliance door
up and off, and put it to one side.
Fit the cover on the opposite side.
Attach the cover on the opposite
side.
Close the upper appliance door.
Danger of injury when removing
the appliance door!
As soon as the hinge plate has been
removed in the following instructions,
the appliance door is no longer secure.
The appliance door must be held by
a second person.
Loosen the screws in the upper
hinge plate and pull the hinge plate
up and off.
82

Removing the lower soft-close mechanism
Open the lower appliance door.
If the door seal is damaged, the
appliance door may not close properly and cooling performance will be
reduced.
Condensation will form in the inside
and this can cause a build-up of ice.
Do not damage the door seal.
Loosen the panel from the soft-
close mechanism by inserting a flatheaded screwdriver into the gaps
from above and, taking care, gradually lifting the panel off.
Changing the door hinges
Push the panel toward the appli-
ance and leave it hanging there between the door and appliance to start
with.
Place the safety device (supplied
with the appliance) on the soft-close
mechanism.
The safety device prevents the hinge
from snapping shut.
Do not remove the red safety device
until instructed to do so.
Use a flat-headed screwdriver to
carefully remove the cover from
the side.
83

Changing the door hinges
Tip the appliance back slightly, with
the help of another person if required.
Push the pin up and out from be-
low.
Now the soft-close mechanism and the
appliance are no longer connected.
Remove the panel.
Push the soft-close mechanism
bracket as far as it will go toward
the handle side.
Loosen the screw in the soft-close
mechanism and spacer.
Lever out the casing together with the
soft-close mechanism using a flatheaded screwdriver in the middle.
Then, lever the casing together with
the soft-close mechanism out of the
latch from the appliance side.
84
Put the soft-close mechanism to one
side.
Push the spacer toward the hinge
side and out.
Place the spacer to one side.

Changing the door hinges
Removing the lower appliance door
Close the lower appliance door.
Danger of injury when removing
the lower appliance door!
As soon as the hinge pin has been
removed from the lower appliance
door in the following instructions, the
door is no longer secure.
The appliance door must be held by
a second person.
Attach the cover on the opposite
side.
Lift the plugs for the two appliance
doors out of the door bushing and
reinsert them on the opposite side.
Remove the hinge pin from the
middle of the appliance by pulling it
up.
Tip: Please note that the gray plastic
cover on the middle hinge plate can
fall off when the door is being removed.
Carefully lift the lower appliance door
up and off, and put it to one side.
Pull the cover off.
Unscrew the hinge plate, turn it
180°, and screw it into place on the
opposite side.
Turn the plastic cap 180° and refit
it in the middle of the hinge plate.
85

Changing the door hinges
Refitting the lower appliance door
Pull the hinge pin complete with
washer and adjustable foot upward to remove.
Remove the plug.
Undo the screws and remove the
hinge plate.
Unscrew the hinge part from the
hinge plate, turn it 180°, and screw
it into the opposite hole in the hinge
plate.
Insert the plug into the other hole.
Remove the cover.
Remove the screw and screw it
into the outermost hole on the opposite side.
Important! Screw the adjustable
foot into the hinge pin as far as
it will go.
Reinsert the hinge pin complete
with washer and adjustable
foot.
Important! The lug on the hinge pin
must point to the back again.
Place the lower appliance door on the
hinge pin from above.
Close the lower appliance door.
In the middle of the appliance, insert
the hinge pin through the hinge
plate and into the lower appliance
door.
Turn the cover by 180° and refit it
in the holes on the opposite side.
Screw the hinge plate into place
on the opposite side, using the two
outer slots only. Do not use the screw
in the middle because otherwise you
will not be able to align the appliance
door with the outer slots later on.
86

Inserting the lower soft-close mechanism
Remove the cover from the
panel, turn it 180°, and reinsert it
on the other side.
Changing the door hinges
Use the screw to secure the
spacer and soft-close mechanism in
place.
Hook the spacer into the latch (A) on
the handle side.
Hook the soft-close mechanism into
the latch (B) on the appliance side.
Push both parts out so that they are
firmly engaged.
Attach the panel onto the soft-
close mechanism bracket.
Pull the soft-close mechanism
bracket toward the hinge plate and
insert the pin from above so that
the square sits in the depression.
Fit the cover back into place so
that it engages.
Make sure that the cover fits properly so that the door can be closed
without hindrance and the pin is secured.
Remove the safety device.
87

Changing the door hinges
0
2
3
Replace the panel onto the soft-
close mechanism from above, clicking it back into place first at the bottom and then at the top.
Close the lower appliance door.
Refitting the upper appliance door
Fit the upper appliance door onto the
hinge pin in the middle of the appliance.
Close the upper appliance door.
Fit the hinge plate on the opposite
side and secure it in place using the
screws.
Tip: Drill the holes for the screws.
Attach the cover on the opposite
side.
Align the appliance door with the ap-
pliance casing using the slots in the
lower hinge plate. Then tighten the
screws.
88

Inserting the upper soft-close mechanism
Remove the cover from the
panel, turn it 180°, and reinsert it
on the other side.
Changing the door hinges
Use the screw to secure the
spacer and soft-close mechanism in
place.
Hook the spacer into the latch (A) on
the handle side.
Hook the soft-close mechanism into
the latch (B) on the machine side.
Push both parts out so that they are
firmly engaged.
Attach the panel onto the soft-
close mechanism bracket.
Slide the cover on from the side so
that the openings for the pin are
aligned.
Pull the soft-close mechanism
bracket toward the hinge plate and
insert the pin from above so that
the square sits in the depression.
Snap the cover completely in
place.
Make sure that the cover fits properly
so that the door can be closed without
hindrance and the pin is secured.
Remove the safety device.
89

Changing the door hinges
Replace the panel onto the soft-
close mechanism from above, clicking it back into place first at the bottom and then at the top.
Close the upper machine door.
Refitting the handle
Risk of damage!
The door seal may be damaged if the
handle is fitted incorrectly.
Please make sure you follow the instructions below carefully when you
refit the handle.
Firmly tighten all 4 screws.
From the appliance side, slide the
sidebar into the guide on the
mounting plate until you hear it click
into place.
Make sure that the sidebar does
not come into contact with the door
seal when the door is opened. This
would cause permanent damage to
the door seal.
Loosely attach the door handle to the
opposite side with the two front
screws to start with.
The mounting plate must be positioned on the door casing so that when
the door is closed it is flush with the
outer wall of the appliance.
90

Aligning the machine doors
The machine doors can be aligned with
the machine casing after they have
been fitted.
In the following illustration, the machine door is not shown in the closed
position to make it easier to see what
you have to do.
To align the lower machine door, use
the outer slots in the lower hinge plate:
Remove the middle screw from the
hinge plate.
Slightly loosen both outer screws.
To align the upper machine door, use
the outer slots in the middle hinge plate:
Slightly loosen both screws.
Align the machine door by sliding the
hinge plate to the left or right.
Then, tighten the screws.
Align the machine door by sliding the
hinge plate to the left or right.
Then, tighten the screws. The
screw does not need to be refitted.
91


9 Independence Way
Princeton, NJ 08540
Phone:
Fax:
www.mieleusa.com
U.S.A.
Miele, Inc.
National Headquarters
Please have the model and serial number
of your appliance available when
contacting Technical Service.
Canada
Importer
Miele Limited
Headquarters and Miele Centre
800-843-7231
609-419-4298
Technical Service & Support
Phone:
Fax:
TechnicalService@mieleusa.com
161 Four Valley Drive
Vaughan, ON L4K 4V8
www.miele.ca
800-999-1360
888-586-8056
Customer Care Centre
Phone:
customercare@miele.ca
800-565-6435
905-532-2272
International Headquarters
Miele & Cie. KG
Carl-Miele-Straße 29
33332 Gütersloh
Germany

KFN 13923 DE edt/cs
M.-Nr. 10 867 440 / 04en - US, CA
 Loading...