

Page 1
Add-on module E 702/1
Items supplied:
Add-on module E 702/1 for E 701/2 and E 525/2 (H 160, W 530, D 560 mm)
Please read the Warning and Safety instructions in the Operating
,
Instructions for your washer-disinfector carefully. You should only process
instruments/medical products in this unit if they have been declared as suitable
for machine processing by the manufacturer. Please also observe the
manufacturer's care instructions. The programme selected must be suitable for
the materials from which the medical products to be processed are made.
Where possible the programme should include thermal disinfection. The final
rinse should, if possible, always be carried out with fully demineralised water.
If using automatic mobile unit recognition, please make sure that the coding is
correctly set.
Areas of application:
Additional mesh trays containing surgical instruments can be processed in mobile
units 701/2 and E 525/2 when the add-on module is attached.
This requires the add-on module to be connected to the water intake for the mobi
le unit.
-
Please also observe the mobile unit Operating instructions for surgical
,
instruments.
Before loading the machine and before starting a programme, please check:
that the spray arms rotate freely,
–
that the spray arm jets are clean and free of any blockages,
–
that the mobile unit is correctly fitted into the cabinet and that it has connected
–
correctly with the water intake.
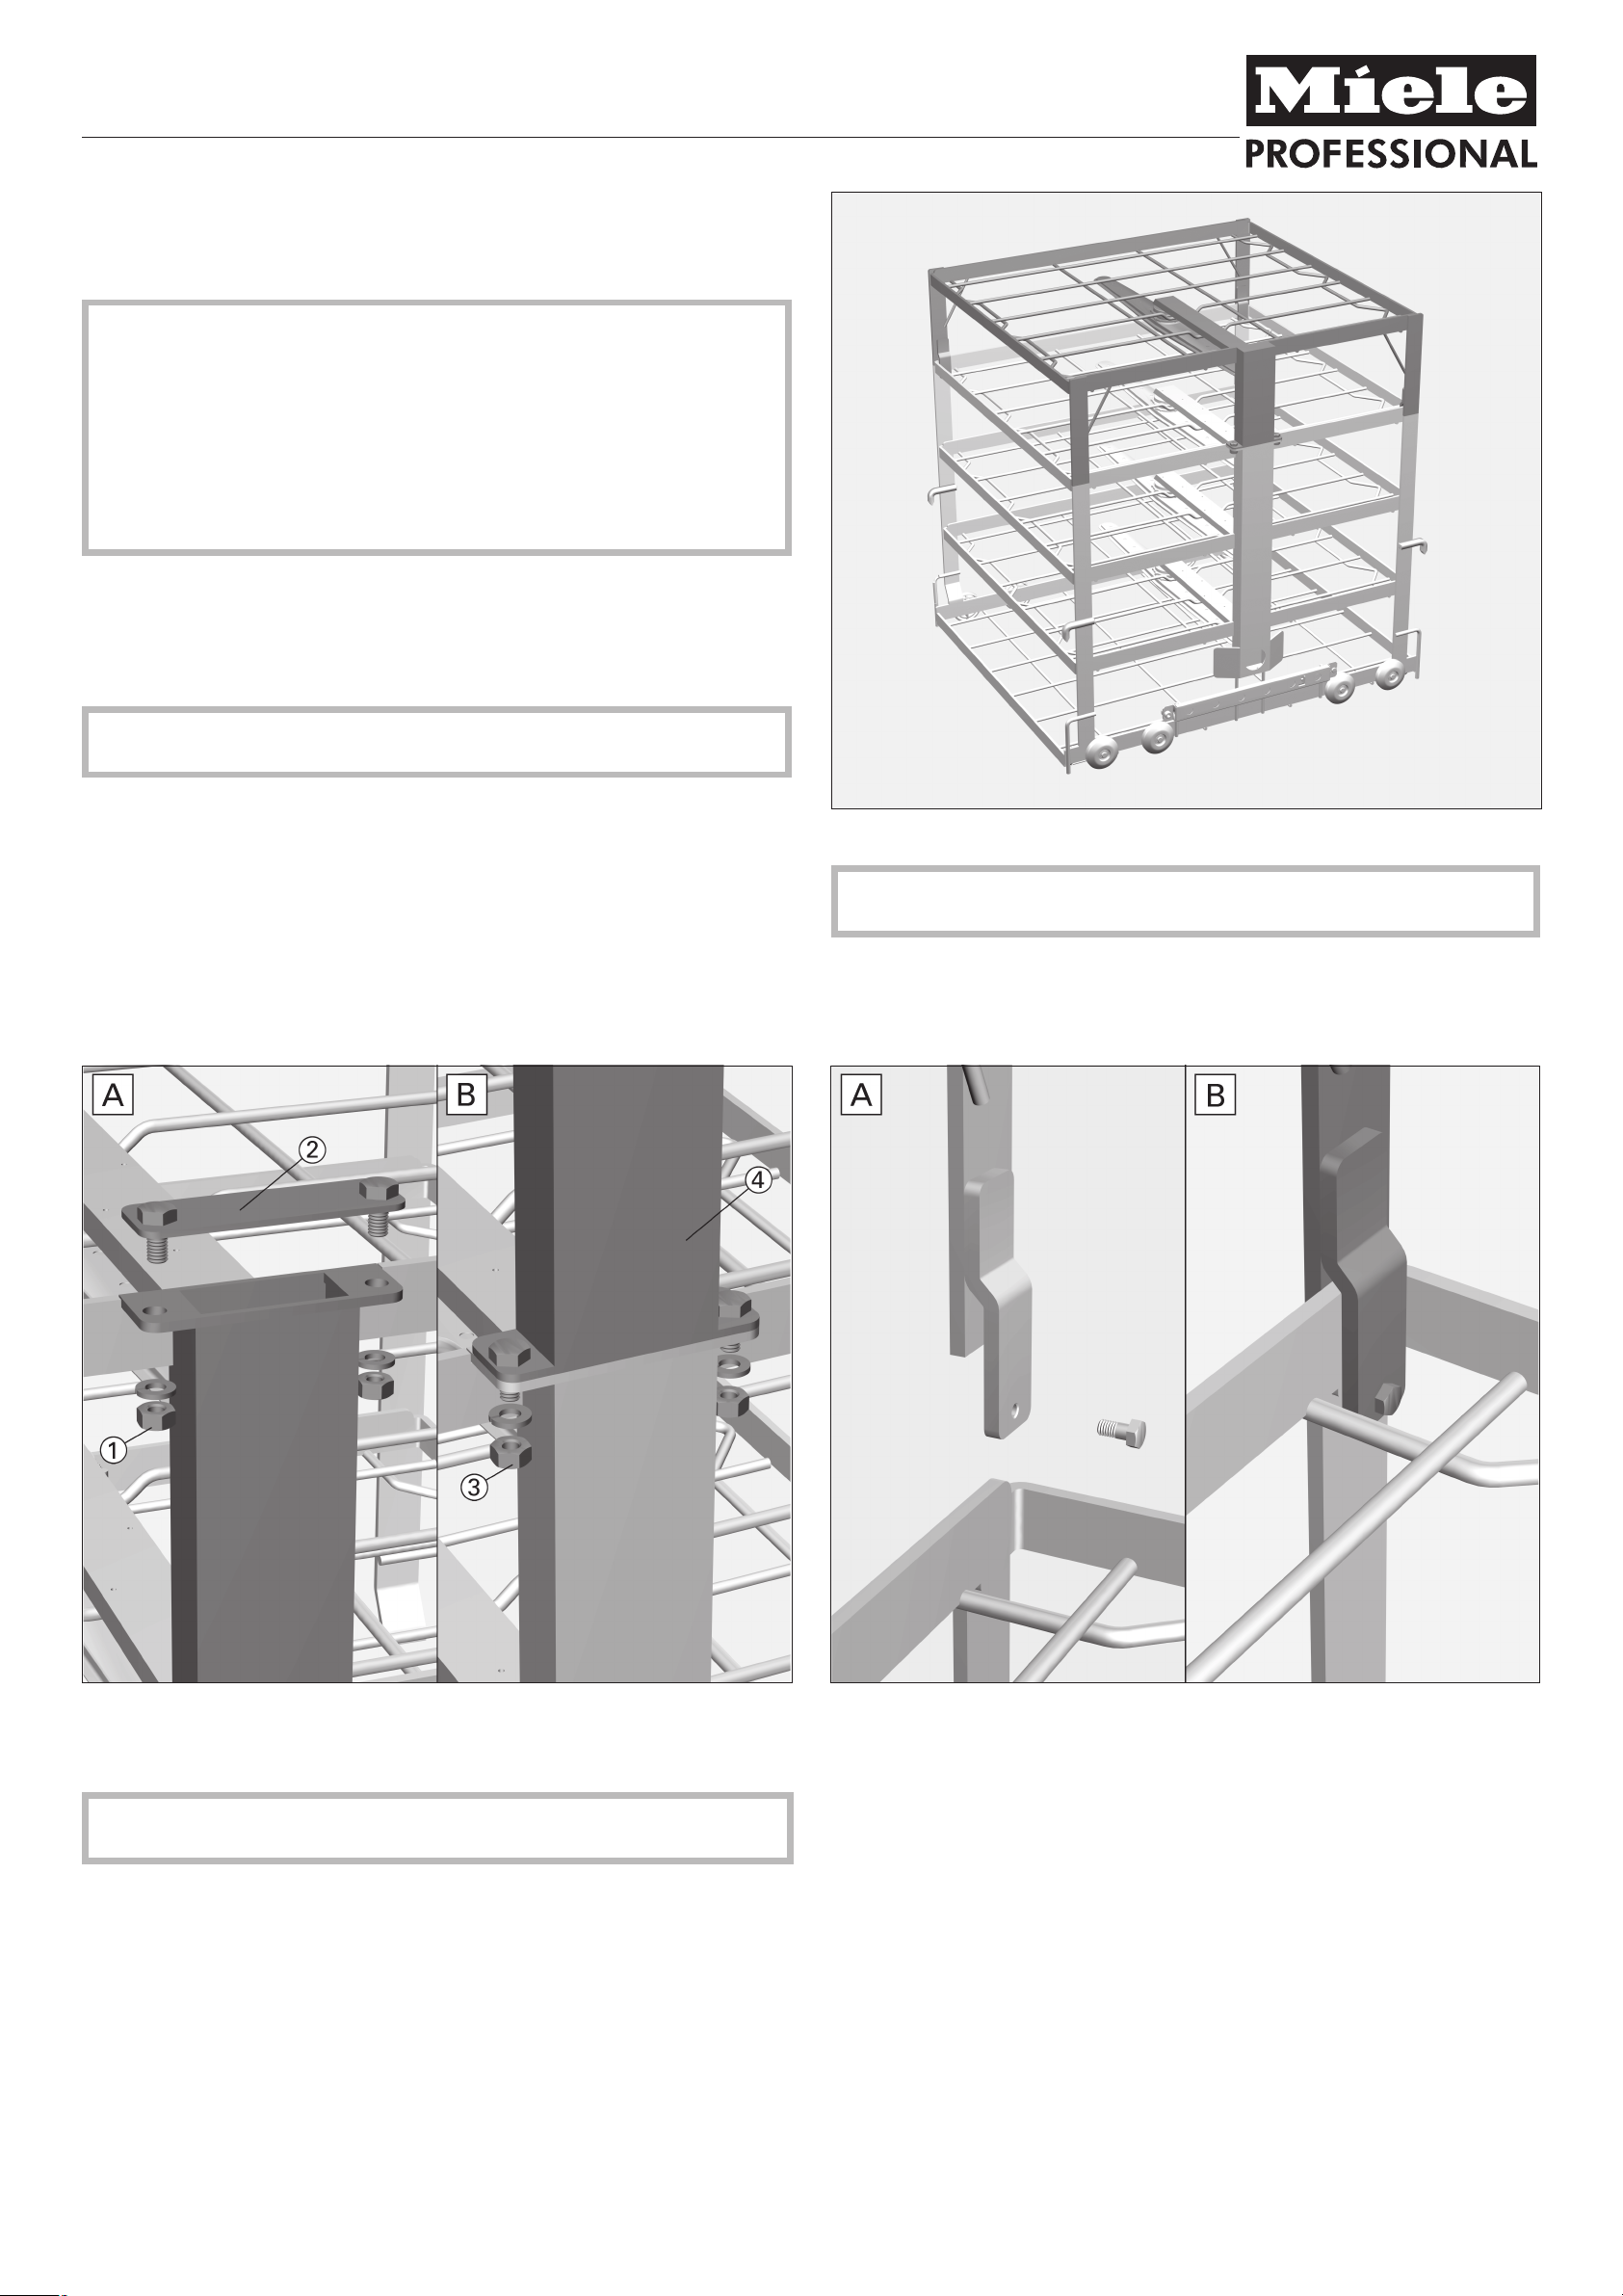
To fit the add-on module
E 701/2 fitted with E 702/1 add-on module
For validation purposes please make sure that you follow the loading
instructions given on the template.
^
Unscrew nuts a on the securing screws on the mobile unit with an SW 10
spanner, and remove the spring washers.
^
Remove blanking plate b from the water intake.
Keep blanking plate b, nuts a and the spring washers in case the add-on
module is removed at a later date.
^
To connect the add-on module, first unscrew nuts c from the fixing screws on
add-on module d with an SW 10 spanner, and remove the spring washers.
^
Place add-on module d on top of the mobile unit. See illustration above for
installation details.
After replacing the fixing screws:
^
Replace the spring washers on the fixing screws, and then nuts c, and tighten
with an SW 10 spanner.
Miele Company Ltd., Fairacres, Marcham Road, Abingdon, Oxon, OX14 1TW, Tel 0330 160 6600,
Internet: http://www.miele.co.uk / ! 0297 Alteration rights reserved / Publication date 2015-11-01
To tighten the fixing screws
A:
^
Slot the side hooks on the add-on module over the outer frame of the mobile unit
for surgical instruments.
^
Lower the add-on module onto the mobile unit, and secure to the mobile unit
through the drill holes using the fixing screws. See B in illustration above.
B:
^
Tighten fixing screws with an SW 7 spanner.
M.-Nr. 10 331 800 / 00 en
Page 2

Opzetmodule E 702/1
Geleverd:
Opzetmodule E 702/1 voor E 701/2 en E 525/2, H 160, B 530, D 560 mm
Houdt u zich aan de veiligheidsinstructies en waarschuwingen uit de
,
gebruiksaanwijzing van de reinigings-/desinfectieautomaat. Behandel alleen
instrumenten/medische producten die volgens de fabrikant van die producten
geschikt zijn voor machinale behandeling. Houdt u zich aan de specifieke
behandelingsvoorschriften van de fabrikant. Het te gebruiken programma, met
bij voorkeur thermische desinfectie, moet indien nodig op het materiaal van de
medische producten worden afgestemd. Gebruik voor het laatste spoelen bij
voorkeur gedemineraliseerd water.
Bij gebruik van de automatische wagenherkenning moet de codering worden
aangepast!
Toepassing:
Met de gemonteerde opzetmodule kunt u in de wagens E 701/2 en E 525/2 extra
zeefschalen met OK-instrumenten behandelen.
Hiertoe wordt de module aangesloten op de watertoevoer van de wagen.
Neem de instructies in acht uit de gebruiksaanwijzing van de wagen voor
,
OK-instrumenten.
Controleer bij het beladen/voor elke programmastart:
of de sproeiarmen vrij kunnen draaien.
–
of de openingen van de inspuiters van de sproeiarmen schoon/niet verstopt
–
zijn.
of de ingeschoven wagens goed op de watertoevoer van de reinigings-/
–
desinfectieautomaat zijn aangesloten.
Opzetmodule monteren
E 701/2 uitgebreid met E 702/1
Houdt u zich aan de beladingsvoorschriften die in het kader van de validatie
zijn vastgelegd.
^
Draai de moeren a van de bevestigingsschroeven met een sleutel 10 los en
verwijder de moeren met de ringen.
^
Verwijder het afdekplaatje b van de watertoevoer.
Bewaar het afdekplaatje b, de moeren a en de ringen voor het geval u de op
zetmodule op een later tijdstip weer wilt demonteren.
^
Voor de montage van de opzetmodule moet u eerst de moeren c van de be
vestigingsschroeven van de module d met een sleutel 10 losdraaien. Verwijder
de moeren en de ringen.
^
Positioneer de opzetmodule d op de wagen. Zie de afbeeldingen voor de mon
tagedetails.
Na het aantrekken van de fixatieschroeven:
^
Schroef de moeren c met de bijbehorende ringen op de bevestigingsschroe
ven van de opzetmodule en draai de moeren met een sleutel 10 vast.
Miele Professional, Postbus 166, 4130 ED Vianen, Telefoon (03 47) 37 88 84, Fax (03 47) 37 84 29,
Internet: http://www.miele-professional.nl / ! 0297 Wijzigingen voorbehouden / productiedatum 2015-11-01
-
-
-
Fixatieschroeven vastdraaien
A:
^
Zorg dat de haken van de module over de buitenste rand van de wagen voor
OK-instrumenten vallen (zie afbeeldingen).
^
Laat de module zakken. De bevestigingsschroeven van de opzetmodule moe
ten uiteindelijk door de boorgaten van de wagen steken, zie afbeelding B (hier
boven rechts).
B:
-
^
Draai de fixatieschroeven met een sleutel 7 vast.
-
-
M.-Nr. 10 331 800 / 00 nl
 Loading...