

Page 1

Features:.....................................................................................................................................................................2
Installing the back-Up Batteries:................................................................................................................................2
Connecting AC Power: .............................................................................................................................................. 2
Connecting an External Antenna: .............................................................................................................................. 3
Connecting the Weather Radio to an External System:..............................................................................................3
Location of the Weather Radio: ................................................................................................................................. 3
Operation: .................................................................................................................................................................. 4
Continuous Backlight ............................................................................................................................................ 4
Connecting to Head Phone or Amplifier ............................................................................................................... 4
Reviewing the Overlapping Alert Messages: ........................................................................................................ 4
Controls ................................................................................................................................................................. 4
PROGRAM key................................................................................................................................................4
ENTER key.......................................................................................................................................................4
ARROW key.....................................................................................................................................................4
STOP key..........................................................................................................................................................4
LAMP key......................................................................................................................................................... 4
RADIO key ....................................................................................................................................................... 4
SEARCH knob..................................................................................................................................................4
FM/WR Switch ................................................................................................................................................. 4
Volume control.................................................................................................................................................. 4
LCD Display.............................................................................................................................................................. 4
LED indicators........................................................................................................................................................... 5
PROGRAMMING.....................................................................................................................................................5
List of the menu & submenu .................................................................................................................................5
Selecting the Channel............................................................................................................................................5
Selecting “WEATHER ALERT ON” or “WEATHER ALERT OFF”...................................................................6
Program Weather Alert..........................................................................................................................................6
Automatic voice broadcast................................................................................................................................ 6
Setting Siren Level............................................................................................................................................ 7
Setting the Clock: .................................................................................................................................................. 7
Setting the FIPS code: ........................................................................................................................................... 8
Single or Multiple COUNTY code........................................................................................................................ 9
Using the Weather Radio’s All County code..................................................................................................... 9
Disable Watch Code Alert............................................................................................................................... 11
Append New SAME Event Codes........................................................................Error! Bookmark not defined.
Receive SAME Event Code..................................................................................................................................... 12
NWS Weather Alert Descriptions.......................................................................................................................... 9
FM Band Radio........................................................................................................................................................ 13
TROUBLESHOOTING:.......................................................................................................................................... 15
Specification : .......................................................................................................................................................... 16
SERVICE:................................................................................................................................................................17
ONE YEAR LIMITED WARRANTY..................................................................................................................... 18
1
Page 2

Features:
Alert Function:
Allows you set the Weather Radio to sound an alert when it receives a weather emergency broadcast from NOAA.
Users are required to enter the County Code(s) into the Weather Radio in order to be able to receive these alert
signals.
SAME Operation:
Allows you program up to 20 County Codes into the Weather Radio’s memory. Each County code identifies a
specific geographic area (defined by the NWS) Such that your Weather Radio will sound an alert when the weather
emergency is declared in your specific area.
3-lines Liquid Crystal Display:
Clearly displays weather alert message and emergency duration. The display also shows real time clock and your
selected FM radio station.
Alert Indicators:
LED indicators show you the degree of emergency alert received. Red is for a “WARNING”, Yellow is for a
“WATCH”, and Green is for a ‘”STATEMENT”.
7 Weather-Channels:
Allows you select a channel for your local NOAA weather broadcasts.
Display Backlight:
Makes the display easy to read in low light environments. You can set the light to turn on continuously by pressing
the LAMP key. Press the LAMP key again will turn off the backlight.
Real time clock:
Four digits and AM / PM icons displays real time.
FM Band Radio:
Allows you to listen to the FM radio in 87.5-108MHz band. When you tune to the FM station and at this time
weather emergency message is sent from NOAA station, the Weather Radio will sound an alert and stop the FM
radio until you press the “STOP” key. The weather message and the emergency duration are shown on the LCD.
Siren Volume Control:
Allows you set the alert sound level to make sure you hear it.
External Alarm Jack and Audio Out Jack:
Allows you connect an external audio power amplifier or other controlled systems to the Weather Radio. This is
useful for ensuring you can hear or see the alert in a location that might be some distance from where you installed
the Weather Radio.
External Antenna Jack:
Allows you connect an external antenna to your Weather Radio to have better signal reception. (Inside a vehicle,
for example)
Power Requirements:
Connecting Power: Your Weather Radio uses an AC/DC adapter for indoor use. For back-up power (when AC
power fails or is temporarily disconnected), your Weather Radio requires four 1.5 volt AA size batteries. For the
best performance and longest life, it is recommended that alkaline batteries be used. Rechargeable type batteries
are not recommended. This unit does not have charging capabilities.
Installing the back-up Batteries:
Cautions:
- Use only four 1.5 Volt ‘AA’ size alkaline batteries.
- DO NOT use rechargeable batteries.
1) Press in the tab on the battery Compartment cover and lift the cover up to remove it.
2) Insert the batteries as indicated by the polarity symbols (+ and -) marked inside the battery compartment.
3) Replace the battery compartment door.
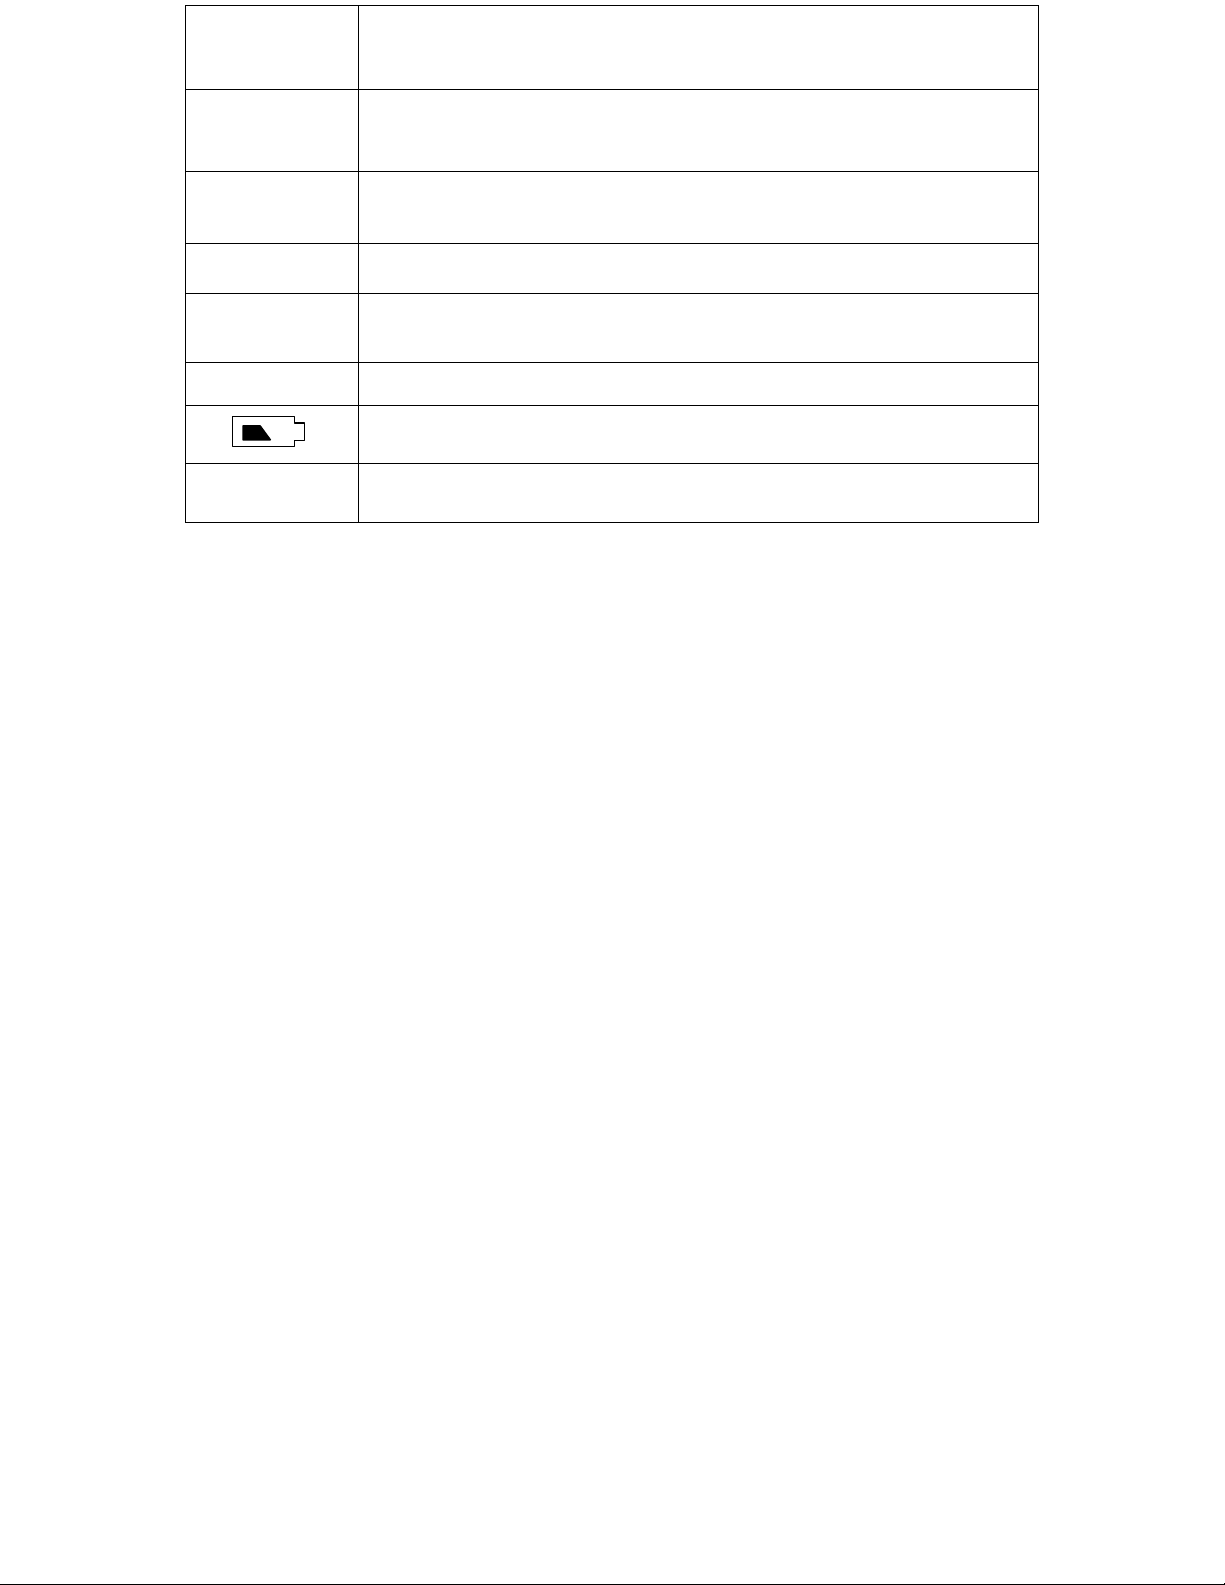
Note:
When the back-up batteries are low in power or no battery installed, the battery low icon will be
displayed.
Connecting AC Power:
1) Connect the AC/DC adapter DC output to the Weather Radio’s DC jack. Plug the AC/DC adapter into a
standard 115V AC outlet.
2
Page 3

Connecting an External Antenna:
You can connect an external antenna to the EXT. ANT Jack on the back of the Weather Radio to improve your
Weather Radio reception. This jack uses an RCA type connector.
Connecting the Weather Radio to an External System:
When your weather radio is set to ‘WEATHER ALERT ON’ and the Weather Radio receives a NWS weather
emergency alert broadcast, the Weather Radio sends 6V DC (the voltage will be less when used on the back up
batteries.) when connected to the ALARM OUT jack on the back of the radio.
You may need to turn on or off another device when an alert is received. The WR-30 provides a voltage to signal
other devices at the ALARM OUT jack when the radio receives an alert. The output is compatible with home
automation devices from suppliers like X-10 and others. Connect the positive lead of the interface to the + side of
the connector and the negative side of the interface to the – side of the connector. A DC powered device using 6
Volts or less and requiring less than 200mA of current can be switched directly using the EXT. ALERT jack. The
internal switch is closed when an alert is received. Pressing the STOP will open the switch. To test your remote
system, refer to Setting Siren Level.
Location of the Weather Radio:
You can put your Weather Radio on any flat surface (such as a shelf or desk top), or you can mount it on a wall
using the supplied wall mounting bracket and two screws (not supplied) with heads that fit the key-hole slots on
the wall mounting bracket. If possible, choose a location that is near a window that is facing the direction the NWS
broadcast is coming from. Extend the telescoping antenna as necessary for good reception of the NWS broadcast.
3
Page 4
Operation:
Continuous Backlight
Press “LAMP” key once to turn on the backlight continuously and press “LAMP” key again to turn off the
backlight.
Connecting to Head Phone or Amplifier
Plug your headphone jack into the AUDIO OUT jack. You can also connect the Weather Radio to your amplifier
by using a audio cable, one end connect to the AUDIO OUT of your Weather Radio and one end connect to the
audio in of your amplifier
.
Reviewing the Overlapping Alert Messages:
The Weather Radio can store 10 different alert messages (with overlapping emergency duration) in its memory.
When the Weather Radio receives a new alert message while a previous alert is still in effect, it automatically
displays the new alert message and sounds an alert for the new alert.
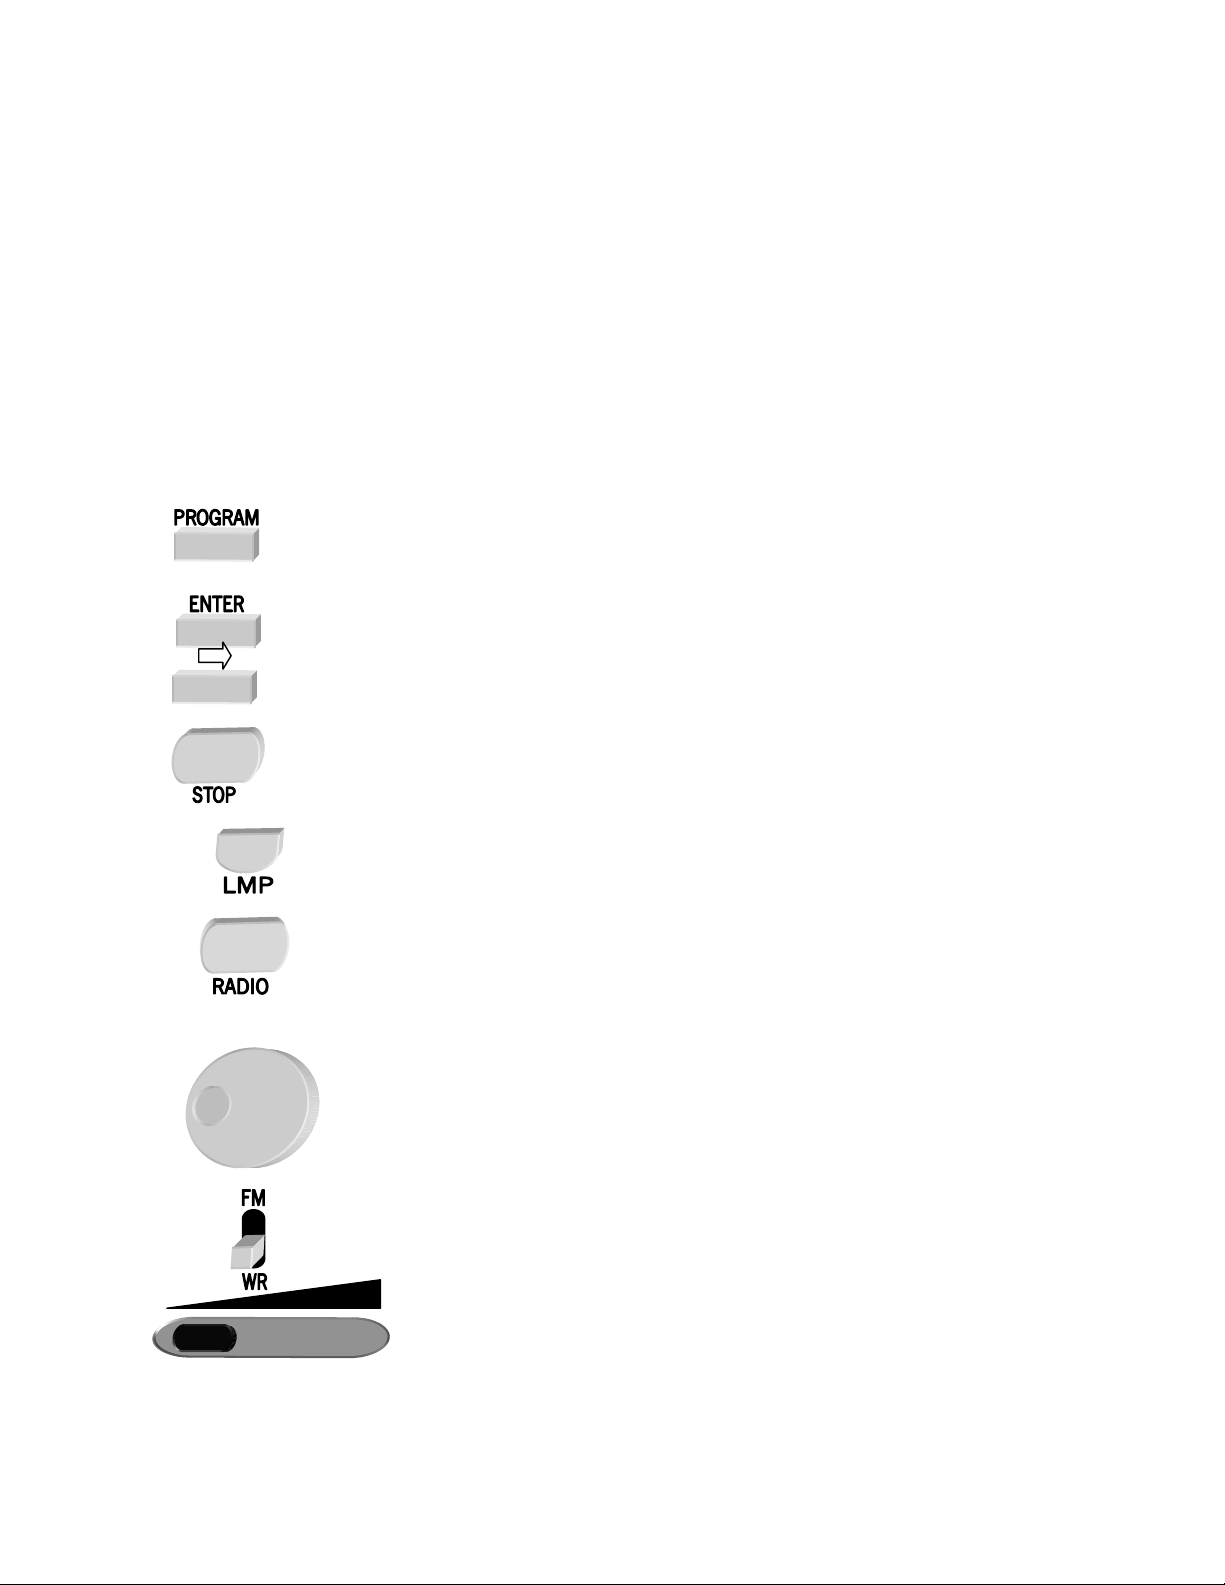
Controls
The Weather Radio function keys:
Before programming your new WR-30, please review the controls to make it easier to program.
PROGRAM key
Used to enter or exit the PROGRAM MODE.
ENTER key
Used to Confirm the selection you make in the PROGRAM MODE.
Search
ARROW key
Used to move the cursor to next position in PROGRAM MODE; or display real time clock
when receiving weather emergency messages.
STOP key
Used to turn off the alert when receiving SAME event code; or exit to previous menu in
PROGRAM MODE
LAMP key
Used to turn on / off the backlight.
RADIO key
Used to turn the radio on / off.
SEARCH knob
Used to scroll up / down the menu when in PROGRAM MODE; Scroll back through previous
alerts:Tune the FM station when listening to FM band radio.
FM/WR Switch
for selecting the FM band or the Weather Radio Band.
Volume control.
Located on side of radio.
LCD Display
The LCD displays the SAME message and weather alert duration when receiving a SAME code. It displays the
PROGRAM setting when reviewing in the PROGRAM MODE.
4
Page 5
LCD Display : Description :
WEATHER
ALERT ON
The radio will alert when receiving SAME event code.
WEATHER
ALERT OFF
PM
12:00
7CH
108.0MHz
NO COUNTY
CODE
The radio will NOT alert but display the weather message on the
LCD when receiving SAME event code.
The real time clock.
The channel number of NOAA weather radio.
The frequency of the FM radio.
Low battery indication of the back-up battery
Indicates there is no county code (FIPS code) set into the Weather Radio. Users MUST set
NOAA assigned county code(s) by entering the PROGRAM MODE / 6 DIGIT COUNTY.
LED indicators.
The LED indicators show the type of the SAME message, e.g. Green, for ‘Statement’ message; Yellow, for
‘Watch’ message; Red for ‘Warning’ message
PROGRAMMING
A program mode is offered to allow you to set the Weather Radio to respond to the weather alert and other
necessary functions. These settings and functions are arranged in menus and submenus.
List of the menu & submenu
WEATHER ALERT √;the “ √ “ = ON;
WEATHER ALERT Χ the “ X “ = OFF
LISTEN TO INFO √ the “ √ “= YES;
LISTEN TO INFO Χ the “ X “ = NO
SIREN LOW
SIREN HIGH
CHANNEL
Input the channel number
CLOCK SETTING
Setting minutes
Setting hours
SIX DIGITS COUNTYCODE
Enter memory number
COUNTY CODE
Enter 6-digit county code
MULTIPLE COUNTY CODE
SINGLE COUNTY CODE
DISABLE WATCH
Select the code to be disabled.
ADD NEW MESSAGE
Select the new MESSAGE number
Input the PIL code
Input the display message
Input the severity status
Selecting the Channel
Below is a list of the 7 channels and the corresponding frequencies for the NOAA weather broadcast.
5
Page 6

CHANNEL : 1 2 3 4 5 6 7
Frequency (MHz) 162.400 162.425 162.450 162.475 162.500 162.525 162.550
Set the FM/WR switch to WR position and press the “RADIO” key to turn on the Weather Radio. The channel
number is displayed on the LCD. Select the local weather channel following these steps.
To set the channel:
Press and hold the “Program” key for 2 seconds to enter the program mode. Rotate the “SEARCH” knob
1.
until
you see CHANNEL on the LCD.
CHANNEL
AM
12:00
Press the “ENTER” key. The channel number will be displayed.
2.
CHANNEL 1
AM
12:00
To select the channel for your local area, rotate the “SEARCH” knob until you see the channel you want to
3.
set. Refer to the enclosed booklet for channel number.
Press “ENTER” key to confirm.
4.
CHANNEL 1
AM
12:00 1CH
Press program to store your setting.
5.
Selecting “WEATHER ALERT ON” or “WEATHER ALERT OFF”
FM/WR switch must be in WR position.
This program allows you to choose how you are alerted when receiving weather alert messages.
a). “WEATHER ALERT” with the √ will display alert message and generate siren.
b). “WEATHER ALERT” with the X will display alert message without siren.
A “√” indicates the siren is on. An “X” indicates the siren is off.
Program Weather Alert
Press and hold the “Program” key for 2 seconds to enter program mode. The LCD displays the current alert
1.
status.
Press “ENTER” key to toggle WEATHER ALERT OFF or ON.
2.
WEATHER
ALERT √
AM
12:00
√ = ON
WEATHER
ALERT X
AM
12:00
Press the “PROGRAM” key to store your selection.
3.
Automatic voice broadcast
This allows you to program how the NWS broadcast is heard. The Weather Radio can be programmed to either,
a). Turn on the siren for 8 seconds and then automatically turn on the Weather Radio for 5 minutes to
listen to the voice broadcast about weather condition.
b). Will generate siren for 5 minutes or until you press the “STOP” key. You must press the radio key to
X = OFF
6
Page 7

hear the voice broadcast.
To program this function:
1. Press and hold the “Program” key for 2 seconds to enter program mode and select the 2nd menu by rotating
the “SEARCH” knob clockwise. The LCD will display the present selection.
A “√” indicates the voice is on. An “X” indicates the voice is off.
LISTEN
TO INFO √
AM
12:00
‘√ ’ = Yes
2. Press “ENTER” key, to toggle selection.
LISTEN
TO INFO X
AM
12:00
“X “ = No
3. Press “PROGRAM” to save setting.
Setting Siren Level
This allows you to adjust the siren level.
1. Press and hold the “Program” key for 2 seconds to enter program mode. Rotate the “SEARCH” knob until
you see “SIREN HIGH” or “SIREN LOW” on the LCD. The display will depend on previous programming.
SIREN
HIGH
AM
12:00
2. Press “ENTER” key to toggle to “SIREN LOW” or “SIREN HIGH”. The siren will sound for 5 seconds each
time you press enter to allow you to hear the level of the siren. External alerting devices will also be active
while the siren sounds.
SIREN
LOW
AM
12:00
Press the “PROGRAM” key to store your setting.
3.
Setting the Clock:
The Weather Radio displays the real time on the LCD. However, when the Weather Radio receives weather
emergency message, weather emergency duration will be displayed. You can review the real time clock by
pressing the “ARROW” key.
To set the clock:
1. Press and hold the “PROGRAM” key for 2 seconds to enter to program mode. Rotating “SEARCH” knob
until you see CLOCK SETTING
CLOCK
SETTING
AM
12:00
Press the “ENTER” key, the hour digits will flash. Rotate the “SEARCH” knob to change the hour digits to
the desired time.
CLOCK
SETTING
AM
12:10
7
Page 8

2. Press the “ARROW” key, the minute digits will flash. Rotate the “SEARCH” knob to change the minute
digits to the desired time.
Example:
CLOCK
SETTING
AM
10:10
3. Press “PROGRAM” key to store your setting.
Setting the FIPS code:
The NWS (National Weather Service) divides the United States by state and county, then assigns a 6-digit FIPS
(Federal Information processing System) code to identify each state and county for the purpose of broadcasting
weather conditions.
To obtain the ‘FIPS’ code (county code) for the location where you installed the Weather Radio, call the NWS toll
free at: 1-888-NWR-SAME (1-888-697-7263). The FIPS codes and much more information can be found by way
of the Internet at www.nws.noaa.gov/nwr/indexnw.htm
You can program up to 20 county codes into the Weather Radio’s memory. You might want to obtain the codes for
other local areas that you travel through. You can store those codes into the Weather Radio and receive the weather
emergency message covering those locations.
If there is no county code stored in the memory, the LCD will display “NO COUNTY CODE” in order to remind
you to store county code(s) to the Weather Radio.
To store your county code:
1. Press and hold the “Program” key for 2 seconds to enter program mode. Rotate the “SEARCH” knob until
you see 6 DIGITS COUNTY on the LCD.
6 DIGITS
COUNTY
AM
12:00
2. Press the “ENTER” key to select this menu. Rotate the “SEARCH” knob to select the county code memory
location. (1-20)
3. Press the “ENTER” key to begin selecting your desired county code entry, the first 2 county code digits will
flash on the LCD display.
CODE 1
000000
AM
12:00
4. Rotate the “SEARCH” knob until you reach the first two desired digit values.
Example:
CODE 1
120000
AM
12:00
5. Press the “ARROW” key, the next 2 digits will flash.
CODE 1
120000
AM
12:00
6. Repeat step 4 & 5 to change the other four digit values.
8
Page 9

7. Press the “ENTER” key to store your selection.
After you press enter the next memory location will be displayed. You can rotate the “SEARCH” knob to
go back to the previous memory location to view your entry.
Example:
CODE 1
123456
AM
12:00
8. When you have finished entering the necessary county codes, press the “Program” key to exit program mode.
Single or Multiple COUNTY code
Be sure not to skip this step if you entered more than one county.
,
You can program the Weather Radio to respond the weather alert either by
a). the county code that you stored in the first county code entry (CODE 1) or
b). all county codes you stored in the memory locations.
To program this function:
1. Press and hold the “Program” key for 2 seconds to enter program mode. Rotate the “SEARCH” knob until
you see “MULTIPLE COUNTY” on the LCD.
MULTIPLE
COUNTY √
PM
12:00
√ = Yes
2. Press “ENTER” key to toggle MULTIPLE county on or off.
MULTIPLE
COUNTY X
PM
12:00
Using the Weather Radio’s All County code
This Weather Radio is preset to use a default “all signals” code of 000099, which allows it to receive all weather
emergency broadcasts within a 50-mile radius. This code is unique to your Weather Radio—it is NOT a COUNTY
code. This ALL COUNTY CODE overrides all the county codes you may have entered. The Weather Radio will
display the weather message and sound the siren unconditionally when receiving weather alert messages.
To set the Weather Radio to use the ALL COUNTY CODE, follow Step 1 through 6 of “COUNTY code Setting ”,
and enter the ALL COUNTY CODE of 000099 in any county code memory location.
X = No
NWS Weather Alert Descriptions
This is what you will see and hear when the National Weather Service transmits one of these alert messages. The *
indicates an alert that can be defeated in the radio programming.
Weather/Alert LCD display LED indicator Alert tone
Description
Tornado Watch TORNADO WATCH Siren
Tornado Warning TORNADO WARNING Siren
Severe Thunderstorm Watch SEVERE WATCH Siren*
THUNDER
Severe Thunderstorm Warning SEVERE WARNING Siren
THUNDER
Flash Flood Statement FLASH STATEMENT Siren*
FLOOD
Flash Flood Watch FLASH WATCH Siren*
FLOOD
Flash Flood Warning FLASH WARNING Siren
FLOOD
Flood Statement FLOOD STATEMENT Siren*
Flood Watch FLOOD WATCH Siren*
Flood Warning FLOOD WARNING Siren
Winter Storm Watch WINTER WATCH Siren*
9
Page 10

STORM
Winter Storm Warning WINTER WARNING Siren
STORM
Blizzard Warning BLIZZARD WARNING Siren
High Wind Watch HIGH WATCH Siren*
WIND
High Wind Warning HIGH WARNING Siren
WIND
Hurricane Statement HURRICANE STATEMENT Siren*
Hurricane Watch HURRICANE WATCH Siren*
Hurricane Warning HURRICANE WARNING Siren
Tsunami Watch TSUNAMI WATCH Siren*
Tsunami Warning TSUNAMI WARNING Siren
Coastal Flood Watch COASTAL WATCH Siren*
FLOOD
Coastal Flood Warning COASTAL WARNING Siren
FLOOD
Special Marine Warning SPECIAL WARNING Siren
MARINE
Avalanche Watch AVALANCHE WATCH Siren*
Avalanche Warning AVALANCHE WARNING Siren
Volcano Watch VOLCANO WATCH Siren*
Volcano Warning VOLCANO WARNING Siren
Immediate Evacuation Warning IMMEDIATE WARNING Siren
EVACUATE
Evacuation Immediate EVACUATE WARNING Siren
IMMEDIATE
Shelter In Place Warning SHELTER WARNING Siren
IN PLACE
Weather/Alert LCD display LED indicator Alert tone
Description
Civil Danger Watch CIVIL WATCH Siren*
DANGER
Civil Danger Warning CIVIL WARNING Siren
DANGER
Civil Emergency Message TURN TV WARNING Siren
Local Area Emergency LOCAL WARNING Siren
EMERGENCY
Radiological Hazard Watch RADIOLOGI WATCH Siren*
HAZARD
Radiological Hazard Warning RADIOLOGI WARNING Siren
HAZARD
Hazardous Materials Watch HAZARDOUS WATCH Siren*
MATERIAL
Hazardous Materials Warning HAZARDOUS WARNING Siren
MATERIAL
Law Enforcement Warning LAW WARNING Siren
ENFORCE
Fire Warning FIRE WARNING Siren
Severe Weather Statement SEVERE STATEMENT Siren*
WEATHER
Special Weather Statement SPECIAL STATEMENT Siren*
WEATHER
Emergency Action Notification EMERGENCY WARNING Siren
ACTION
Emergency Action Termination EMERGENCY WARNING Siren
TERMINATE
National Information Center NATIONAL WARNING Siren
INFO
National Hazard Warning NATIONAL WARNING Siren
HAZARD
National Periodic Test NATIONAL
TEST
Network Message Notification TURN TV STATEMENT
Required Monthly Test MONTHLY
TEST Beeps*
Required Weekly Test WEEKLY
TEST Beeps*
System Demonstration DEMO
Unrecognized code ending in S TUNE TV STATEMENT Siren
Unrecognized code ending in W TUNE TV WARNING Siren
10
Page 11

Unrecognized code ending in A TUNE TV WATCH Siren
Unrecognized code ending in E EMERGENCY TUNE TV Siren
Disable Watch Code Alert
This function is to set the Weather Radio, when receiving some types of weather emergency messages, not to
generate siren but display the message on the LCD in order not to annoy you.
To program this function:
1. Press and hold the “Program” key for 2 seconds to enter program mode. Rotate the “SEARCH” knob until
you see ‘DISABLE WATCH’ on LCD.
DISABLE
WAT C H
AM
12:00
2. Press the “ENTER” key to select this menu, then rotate the “SEARCH” knob to select the type of the
weather emergency message.
Example:
SEVERE
THUNDER X
AM
12:00
3. Then press “ENTER” to set the Weather Radio not to generate siren when SEVERE THUNDER WATCH
message received. By doing so, the Weather Radio only displays the ‘SEVERE THUNDER’ message on the
LCD and watch LED.
SEVERE
THUNDER √
PM
12:00
‘ √ ’ = Defeat siren
‘ X ’ = Allow siren
4. Press “ENTER” key again, it will toggle back to step 2. Or, Press “STOP” key to exit this function setting.
The following weather emergency messages are included in this function setting.
FLOOD STATEMENT, FLOOD WATCH
HURRICANE STATEMENT, HURRICANE WATCH
TSUNAMI WATCH
AVALANCHE WATCH
VOLCANO WATCH
SEVER THUNDERSTORM WATCH
FLASH FLOOD STATEMENT, FLASH FLOOD WATCH
WINTERSTORM WATCH
HIGH WIND WATCH
COASTAL FLOOD WATCH
CIVIL DANGER WATCH
RADIOLOGICAL HAZARD WATCH
HAZARDOUS MATERIALS WATCH
SEVER WEATHER STATEMENT
SPECIAL WEATHER STATEMENT
REQUIRED WEEKLY TEST
REQUIRED MONTHLY TEST
Adding Future SAME Event Codes
If the NWS finds it necessary to add alert codes in the future your 74-210 will allow you to add
three (3) new SAME message codes. The new SAME message code is divided into three (3) categories. They are:
a). Event code (PIL code);
b). Display text message on LCD
c). Weather severity status.
You must enter all of them to make the new SAME message function correctly.
Remember that this is for future needs. No additional codes exist at press time.
,
To add the new SAME message code, follow the steps below:
1. Press and hold the “Program” key for 2 seconds to enter program mode. Rotate the “SEARCH” knob until
you see ADD NEW MESSAGE on the LCD.
ADD NEW
MESSAGE
AM
12:00
11
Page 12

2. Press the “ENTER” key to select this menu. Rotate the “SEARCH” knob to your desired message code
entry, e.g. MESSAGE 2; the 2
nd
entry for the new SAME message code.
MESSAGE
1
AM
12:00
3. Press “ENTER” to select it, then the LCD will display the SAME message code that you stored before. If
you never store the new SAME code before, the LCD will display ‘XXX’. The first character will flash, and
you can change to your desired character by Rotate the “SEARCH” knob.
XXX
AM
12:00
4. Press “ARROW” key to move the cursor to the next character.
Example:
AXX
AM
12:00
5. Repeat step 3 & 4 to store the character for the desired SAME message. Then, press “ENTER” key to
conform. Then, the LCD will display the weather emergency message.
Example:
XXXXXXXX
AM
12:00
6. Repeat step 3 & 4 to store the characters for the weather emergency message. Then press “ENTER” key to
confirm.
7. Then, you have to select the severity (weather status) for the new SAME message code, e.g. STATEMENT,
WAT C H o r WA R N IN G .
Example:
STATEMENT
AM
12:00
Rotate “SEARCH” knob to select the desired warning severity, then press “ENTER” key to confirm. Now
the new SAME message code is stored and saved into the Weather Radio.
Now, you can use the “STOP” key to exit to the main menu or press “ARROW” key to store another new
SAME message code.
Receive SAME Event Code
When the Weather Radio receives a SAME message code, it will check and match the stored code. If the received
COUNTY code matches to one of the stored COUNTY codes, then it will generate siren to alert and display the
corresponding emergency message and its duration on the LCD. Also, the LED indicator will light to show the
severity of the event, Red for Warning, Yellow for WATCH and Green for STATEMENT.
Example: Tornado Warning, Duration: 1 hour.
TORNADO
1:00
12
Page 13

The message on the LCD will stay for one hour as the above example.
If the Weather Radio is programmed to ‘WEATHER ALERT ON’ mode with automatic voice off, the siren will be
generated for 5 minutes or until you press the “STOP” key.
If you have set automatic voice broadcast in the program mode, the siren will last for about 8 seconds; then, the
Weather Radio will turn on the Weather Radio for 5 minutes.
The Weather Radio contains 10 memories for the SAME alert message. If the 10th memory is full and if a new
SAME message received, then it stores the new alert message and clears the oldest alert message from the
memory.
You can rotate the “SEARCH” knob counterclockwise to review the previous weather emergency message in the
memory.
FM Band Radio
Set the FM/WR switch to the FM position and press the ‘RADIO’ key to turn on the FM radio. The FM station
frequency is displayed on the LCD.
WEATHER
ALERT ON
AM
12:00 108.0
To tune the FM station, rotate the “SEARCH” knob to find a station you want to listen to.
When you have tuned to the desired radio station, you can save it to memory by the following steps:
Press the “PROGRAM” key, the LCD will display
1.
MHz
Example:
Rotate the “SEARCH” knob to see on the display:
2.
MEMORY
RECALL
AM
12:00 90.3
MHz
MEMORY
Example:
Press the “ENTER” key to see on the display:
3.
SAVE
AM
12:00 90.3
MHz
1 2 3 4 5
AM
12:00 90.3
The flashing number indicates the memory location to be programmed.
MHz
4. Rotate the “SEARCH knob to choose a memory location other than the one flashing.
The number will not flash if that memory location has been programmed. Press “ENTER” to store the
station in memory.
Recall the memory by the following steps
1. Press the “PROGRAM” key to see ‘RECALL MEMORY’ on the display.
RECALL
MEMORY
AM
12:00 98.0
MHz
2. Press the ”ENTER” key. The LCD will display the memory numbers. Rotate “SEARCH” knob to cause the
desired memory number to flash. The LCD will display the radio frequency in that memory.
13
Page 14

Example:
1 2 3 4 5
AM
12:00 96.3
MHz
14
Page 15

TROUBLESHOOTING:
Problem Solutions
No Power 1. May be loose connection, check the connection
between the Weather Radio and AC/DC adapter
2. Check the connection between the AC/DC adapter and
the wall outlet
3. Check the battery connection
No sound 1. Move the volume slide
No weather broadcast when you press ‘RADIO’ key - Make sure your weather radio channel is set to receive your
Local NOAA Broadcast Channel;
- Make sure the antenna is fully extended;
- When the Weather Radio is connected to external antenna,
make sure they have good connections.
County codes are stored in the memory, but the unit
responds to weather alert broadcasts for the counties not
covered by those county codes.
‘NO COUNTY CODE’ displays on the LCD The memory contains no county code (FIPS code). Store the
This device complies with Part 15 of the FCC Rules. Operation is subject to the following two conditions: (1)
This device may not cause harmful interference, and (2) This device must accept any interference received,
including interference that may cause undesired operation.
Warning: Changes or modifications to this unit not expressly approved by the party responsible for
compliance could void the user’s authority to operate the equipment.
NOTE: This equipment has been tested and found to comply with the limits for a Class B digital device,
pursuant to Part 15 of the FCC Rules. These limits are designed to provide reasonable protection against
harmful interference in a residential installation. This equipment generates, uses and can radiate radio
frequency energy and, if not installed and used in accordance with the instructions, may cause harmful
interference to radio communications.
However, there is no guarantee that interference will not occur in a particular installation. If this equipment
does cause harmful interference to radio or television reception, which can be determined by turning the
equipment off and on, the user is encouraged to try to correct the interference by one or more of the
following measures:
- Reorient or relocate the receiving antenna.
- Increase the separation between the equipment and receiver.
- Connect the equipment into an outlet on a circuit different from that to which the receiver is needed.
- Consult the dealer or an experienced radio/TV technician for help.
Ensure the ‘000099’ is not stored in any memory
county code(s) to the memory according to the ‘program
menu 6’ in program mode.
15
Page 16

Specification :
Power Supply : 10 - 12Volt DC, 3.7W
Back-up Battery : 6 Volt (4 “AA” batteries)
Antenna : Telescoping Rod Antenna
For Weather Band Receiver:
Frequency Coverage (MHz):
Channel 1 : 162.400
Channel 1 : 162.425
Channel 1 : 162.450
Channel 1 : 162.475
Channel 1 : 162.500
Channel 1 : 162.525
Channel 1 : 162.550
Receiving sensitivity @12 dB SINAD : 0.28uV
FIPS code sensitivity
@ +/- 3.0KHz Dev. / 95% Success Rate : 0.28uV
Channel selectivity (+/- 25KHz) : 50dB
Signal to noise ratio : 43dB
-6dB Audio Response : 2KHz
Audio Harmonic Distortion : 3%
Max output power : 250mW
For FM receiver :
Frequency Coverage : 87.5MHz – 108MHz
30dB Quieting Sensitivity
@90MHz, 98MHz and 106MHz : 12dBuV
Audio Harmonic Distortion @98MHz : 3 %
S/N Ratio @ 98MHz : 40dB
AM Suppression : 40dB
Minimum Volume Noise & Hum : 3mV
Max output power : 250mW
Dimensions (HWD) : 190mm X 135mm X 45mm
( 7.5 X 5.25 X 1.75 inches )
Specifications are typical; individual units might vary.
Specifications are subject to change and improvement without notice.
16
Page 17

SERVICE:
If it ever becomes necessary to return your WR-30 for service:
If you have a problem which you believe requires service, please call first and speak with a service technician.
Many problems can be remedied over the phone without returning the unit for service.
1. Pack the unit in its original box and packing. Pack the original box in a suitable shipping carton along with
the following. Improper packing may result in damage during shipment.
2. Include a full description of any problems and a daytime telephone number.
3. For warranty service include a photocopy of the bill of sale or other proof of purchase showing the date of
sale.
4. Include a money order for $7.50 to cover shipping and handling (this may not be required in some states).
You do not need to return accessory items (AC/DC Adapter, Owners Guide) unless they maybe directly related to
the problem.
A flat rate of $45.00 will apply to repairs not covered by warranty or units that are over one year old. Send only
cashiers check, money order or Master Card or Visa card number.
Midland Consumer Radio
1120 Clay St..
North Kansas City, Mo. 64116
Tele. 816-241-8500
17
Page 18

ONE YEAR LIMITED WARRANTY
Midland Consumer Radio Inc. will repair or replace, at its option without charge, your WR-30 weather alert
radio which fails due to a defect in material or workmanship within one year following the initial consumer
purchase.
This warranty does not include any antennas, which may be a part of or included with the warranted
product, or the cost of labor for removal or re-installation of the product in a vehicle or other mounting.
Performance of any obligation under this warranty may be obtained by returning the warranted product,
freight prepaid, along with a copy of the original sales receipt, to Midland Consumer Radio Inc., Warranty Service
Department, 1120 Clay St. North Kansas City, Missouri 64116, or to any “Midland Authorized Warranty Service
Station,” or to the place of purchase (if a participating dealer).
Warranty information and the location of the nearest “Midland Authorized Warranty Service Station,” may
be obtained by writing Midland Consumer Radio, Warranty Service Department.
This warranty gives you specific legal rights, and you may also have other rights, which vary, from state to state.
Note: The above warranty applies only to merchandise purchased in the United States of America or any of the
territories or possessions thereof, or from a U.S. Military exchange. For warranty coverage on
merchandise purchased elsewhere ask your dealer.
Midland Consumer Radio
1120 Clay St..
North Kansas City, Mo. 64116
Printed in China
E-mail: mail@midlandradio.com
URL: www.midlandradio.com
18
 Loading...