

Page 1
Surface 3
User Guide
With Windows 8.1
Published: 2015
Version 1.0
Page 2

© 2015 Microsoft. All rights reserved.
BlueTrack Technology, ClearType, Excel, Hotmail, Internet Explorer, Microsoft, OneNote, Outlook, PowerPoint, OneDrive, Windows,
Xbox, and Xbox Live are registered trademarks of Microsoft Corporation.
Surface and Skype are trademarks of Microsoft Corporation.
Bluetooth is a registered trademark of Bluetooth SIG, Inc.
Dolby and the double-D symbol are registered trademarks of Dolby Laboratories.
This document is provided “as-is.” Information in this document, including URL and other Internet website references, may
change without notice.
© 2015 Microsoft Page ii
Page 3

Contents
..................................................................................................................................................... 1
....................................................................................................................................... 3
.............................................................................................................................................................. 4
.................................................................................................................................... 5
......................................................................................................................................... 6
...................................................................................................................................... 9
....................................................................................................................... 11
............................................................................................................................. 12
Meet Surface 3
Surface 3 features 1
Set up your Surface 3
The basics
Power and charging 4
Get online: networking
Accounts and sign in
Sign in and sign out 6
Additional accounts 6
Get to know Windows
Start screen 9
Open an app 10
Charms 10
The familiar desktop 10
Learn more about Windows 11
Keep your Surface up to date
Install updates manually 11
View your update history 11
Make sure you have the latest Surface updates 12
Surface Pen and OneNote
Set up Surface Pen 12
Surface Pen features 13
Explore OneNote 14
Use Surface Pen in other apps 14
© 2015 Microsoft Page i
Page 4

......................................................................................................... 15
.................................................................................................................................................................. 17
.................................................................................................................... 17
................................................................................................................ 19
................................................................................................................................... 22
..................................................................................................................... 24
..................................................................................................................................... 26
Type Cover keyboard and touchpad
Touchpad 16
Storage
How much space do I have? 17
OneDrive: Your personal cloud
Save and open files 17
Get to your files from anywhere 18
Connect accessories and devices
Connect a TV, monitor, or projector 19
Connect a USB accessory (printer, mouse, and more) 21
Add a Bluetooth accessory 21
Add an audio accessory 21
Print or scan 22
Surface audio features
Adjust the volume 22
Record audio 23
Set the default audio device 23
Change which sounds play 24
Cameras and the Camera app
Take a photo 24
Take a panorama 24
Record a video 25
Take a photo or video from the lock screen 25
Adjust the focus 25
Apps on your Surface
Find and open an app 26
Switch between apps 26
© 2015 Microsoft Page ii
Page 5

......................................................................................................................... 35
........................................................................................................................................................ 38
............................................................................................................................................. 39
............................................................................................................ 40
............................................................................................................................................................. 41
Close an app 27
Change settings for an app 27
Built-in apps 28
Microsoft Office 32
More installed apps 32
Install more apps 34
Customization and settings
Personalize your lock screen 36
Personalize your Start screen 36
Adjust your touchscreen settings 37
Sync your settings 37
Add a language 37
Desktop settings 38
Accessibility
Ease of Access on the sign-in screen 39
Care and cleaning
Protect your Surface from viruses 39
Touchscreen care 40
Cover care 40
Battery care 40
Registration, repair, and warranty
Register your Surface 3 and Surface 3 Type Cover 40
Repair 41
Warranty 41
More help
© 2015 Microsoft Page iii
Page 6

Meet Surface 3
Surface 3 features
Power button
Press the power button to turn Surface 3 on. When Surface 3 is on, press
Windows button
The Windows button takes you to the Start screen, where you can open
Touchscreen
Use the 10.8” ClearType full HD Plus display, with its 3:2 aspect ratio and
Kickstand
Flip out the 3-position kickstand to work or play comfortably at your desk,
Wi-Fi and Bluetooth
Surface supports standard Wi-Fi protocols (802.11a/b/g/n/ac) and
Cameras
Surface 3 features an 8 megapixel rear-facing camera with autofocus, and
Microphone
A stereo microphone you can use for calls and recordings.
Stereo speakers and
Stereo speakers with Dolby® enhanced sound let you listen to music,
Meet Surface 3, the tablet that can replace your laptop. Use this guide to get started with your
Surface 3. For more Surface 3 details and how-to info, go online to Surface.com.
and hold the power button to shut down. You’ll also use the power button
to put Surface to sleep, and to wake it when you’re ready to start working
again.
your apps quickly, search your Surface or the web, and more. If you’re
already at the Start screen, the Windows button takes you back to the last
app you were using.
1920 x 1280 resolution display, to watch HD movies, browse the web, and
use your favorite apps.
10-point multi-touch lets you use your fingers to select, zoom, and move
things around.
on the couch, or while giving a hands free presentation.
Bluetooth® 4.0. Connect to a wireless network and use Bluetooth devices
such as keyboards, mice, printers, and headsets.
a 3.5 megapixel fixed focus front-facing camera Both cameras record
video in 1080p, with a 16:9 aspect ratio (widescreen). Front and back
privacy lights help make sure there are no surprises.
headset jack
© 2015 Microsoft Page 1
podcasts, and audio books. For a little more privacy, plug your favorite
headset into the headset jack.
Page 7

Ports and connectors
Surface 3 has the ports you expect in a full-feature laptop:
Software • Windows 8.1 operating system
your
Processor
The Intel® Quad Core Atom™ processor provides the speed and
Memory and storage
Choose from 2 GB RAM with 64 GB storage or 4 GB RAM with 128 GB
• Full-size USB 3.0 port
Connect a USB accessory—like a mouse, printer, Ethernet
adapter, USB drive, or smartphone.
• Micro USB charging port
Charge Surface 3 using the Micro USB charging port and
included Micro USB power supply. (The charging port is only
for charging Surface 3 and not for transferring data).
• MicroSD card slot
Use the microSD card slot for extra storage and transferring
files.
• Mini DisplayPort version 1.1
Share what’s on your Surface screen by connecting it to an
HDTV, monitor, or projector (video adapters are sold
separately).
• Cover connectors
Add a thin, backlit, click-in keyboard—Surface 3 Type Cover
(sold separately) also helps protect your touchscreen while
you’re on the go.
Windows 8.1 provides and endless array of options for
entertainment and productivity at school, home, or on the go.
• Apps
Use the variety of built-in apps featured on your Start screen,
and install tons more apps from the Windows Store.
Since Surface 3 runs Windows 8.1, you can install and use
favorite desktop apps.
power you need for smooth, fast performance.
storage. See Surface storage on Surface.com for info on formatted
storage capacity.
© 2015 Microsoft Page 2
Page 8

Sensors
Four sensors—compass, ambient light sensor, accelerometer, and
Set up your Surface 3
If you have a Surface 3
Grab the power supply, plug
Press the power button to turn
gyroscope—enable apps to do things like track motion and
determine location.
Type Cover, click it into place
and open the kickstand.
the Micro USB connector into
the Micro USB charging port,
and plug the other end of the
cable into an electrical outlet.
Surface 3 on.
Windows starts, and guides you
through the setup process.
Use the Surface 3 touchscreen or Surface 3 Type Cover to enter info during the setup process.
To set up Surface 3, you’ll also need:
• An Internet connection (recommended). Setup will automatically try to connect to a
network. If your network requires a password, you’ll need to have it handy. If you don’t
have an Internet connection, you can still set up your Surface, but you won’t get the
latest Windows and Surface updates until you’re online.
• An account name. If you have a Microsoft account, use it to set up your Surface 3. A
Microsoft account is an email address and password you use to sign in to other
Microsoft services like Xbox, Hotmail, Outlook.com, OneDrive, Skype, or Windows Phone.
If you don’t already have a Microsoft account, we recommend you can create one during
setup. If you prefer, create a local account. For more info, see Microsoft account or local
account?
For more info on getting set up, see Set up your Surface on Surface.com.
© 2015 Microsoft Page 3
Page 9

The basics
Power and charging
To charge Surface 3:
To check the battery level, open the desktop and select
Make your battery last
Touch, keyboard, pen, and mouse
1. Plug the Micro USB connector into the Micro USB
charging port on Surface 3.
2. Plug the full size USB connector on the other end
of the cable into the power supply.
3. Plug the power supply into an electrical outlet.
It takes 2-4 hours to charge Surface 3 fully from an
empty state, but can take more time if you’re actively
using Surface 3 for power intensive activities like gaming
or video streaming.
Note Be sure to use only the included power supply and
charging cables for charging your Surface 3. We don’t
recommend using any other chargers or charging cables
with Surface 3.
the battery status icon in the right side of the taskbar.
For info on how to conserver power and make your Surface battery last longer, see Surface Pro
and Surface 3 battery and power on Surface.com. To learn about settings that control how your
Surface uses power, see Power plans: Frequently asked questions on Windows.com.
With Surface, you can easily switch between using touch, a keyboard, mouse, or pen.
• Touch. You can use your fingers on the touchscreen, the same as you would on a
smartphone. For example, drag your finger across the screen to scroll. For demos of the
gestures you can use, see Touch: Tap, swipe, and beyond on Surace.com.
© 2015 Microsoft Page 4
Page 10

Get online: networking
Connect to a Wi-Fi network
Connect to a wired network
• Keyboard. Click in a Surface 3 Type Cover (sold separately) or use a full-size USB or
Bluetooth keyboard. There’s also a built-in on-screen keyboard you can use. For more
info, see How to use the Surface on-screen keyboard on Surface.com.
• Touchpad or mouse. Use the Type Cover touchpad, or connect a USB or Bluetooth
mouse. See Touchpad use and settings, Connect a USB mouse, printer, and more, and
Add a Bluetooth device on Surface.com more info.
• Surface Pen. Take notes, draw, and mark up documents using Surface Pen (sold
separately). You can jot a quick note in OneNote, even when you have Surface 3 locked.
Just click the pen and start writing. Your note will be in the Quick Notes section of
OneNote the next time you sign in. For more info, see Using Surface Pen on Surface.com.
1. Swipe in from the right edge of the screen, and select Settings > wireless network .
2. Select a network name, and select Connect. (If you want to connect to this network every
time it's in range, select Connect automatically).
3. If prompted, enter your network security key (network password), and select Next. If you
need help finding your wireless network password, see How to find your wireless
network password on Surface.com.
4. Choose whether to connect to other PCs and devices on the network. Choose No if
you’re connecting to a network in a public place like a café.
1. Plug a USB to Ethernet adapter (sold separately) into the USB port on your Surface.
2. Plug an Ethernet cable into the adapter, and plug the other end of the cable into your
router or an Ethernet network port.
3. Swipe in from the right edge of the screen, select Settings > wired network .
4. If prompted, enter your user name and password.
5. To see if you’re online, go to Start , and open Internet Explorer.
© 2015 Microsoft Page 5
Page 11

Disconnect from a network
Accounts and sign in
Sign in and sign out
Additional accounts
1. Swipe in from the right edge of the screen, select Settings > wireless network (or
wired network ).
2. Select the network with a Connected status, and choose Disconnect.
To sign in:
1. Turn on or wake Surface by pressing the power button.
2. Swipe up on the screen or tap a key on the keyboard.
3. If you see your account name and account picture, enter your password and select the
right arrow or press Enter on your keyboard.
4. If you see a different account name, select the left arrow. Then select your own account,
enter your password, and select the right arrow or press Enter on your keyboard.
To sign out:
• Go to Start , select your account name in the upper-right corner, and then select Sign
out.
Each person who uses your Surface should have his or her own account to sign in. When you set
up your Surface, your account is created based on the info you supply.
From this account, you can create, modify, or remove other accounts. If you want, you can give
other accounts these abilities too. For details, see Managing accounts.
First, though, think about whether any new account you create will be a local account that works
only on this one Surface, or a Microsoft account (an email address and password that you use to
sign in to Windows). A Microsoft account is provides the best experience.
Later, you can decide what level of control the account should have: Standard, Administrator, or
Child.
© 2015 Microsoft Page 6
Page 12
Microsoft account or local account?
Microsoft account
Local account
An email address and password you use to
A user name and password that only works on
You can keep your personal settings in sync
You need to personalize each computer
When you sign in to your Surface with your
You’ll need to sign on to services like
Documents, photos, and other files you create
Your files aren’t automatically saved to the
If you forget the password for a Microsoft
If you forget the password for your local
Here are some key differences between a Microsoft account and a local account:
sign in on computers running Windows 8.1 or
later, and to sign in to other Microsoft services
like Xbox, Hotmail, Outlook.com, OneDrive,
Skype, or Windows Phone.
with any other PC you have running Windows
8.1 or Windows RT 8.1 that you sign into with
your Microsoft account.
Microsoft account, you’re also connected to
your OneDrive, Skype, and Windows Store
accounts.
are saved to your OneDrive by default.
OneDrive is like a local folder that follows you
wherever you sign in with your Microsoft
account.
this one computer.
individually.
OneDrive, Skype, or Windows Store each time
you want to access them.
cloud.
account, you can go to
https://account.live.com/password/reset to
reset your password online.
If you’re not sure whether you have a Microsoft account, or you can't remember the email
address you used with those services, you can easily sign up for a new, free email address. See
Create a user account on Windows.com to learn how.
© 2015 Microsoft Page 7
account, Microsoft can’t help you reset your
password or access your files.
Page 13

Account types: Standard, Administrator, or Child
Manage accounts with an Administrator account
The account type determines what you can do using that account. These are the account types
you can assign to an account:
• Administrator. When you sign in with an administrator account, you can create, change,
or remove (delete) other accounts, and you can set the account type on other accounts
you create. You can also install apps.
The first account on your Surface is always an administrator account. To create a new
administrator account, you need to first create the new account, and then edit it to make
it an administrator account.
• Standard. People using a Standard account can create and edit files and personalize
their settings, but they can’t create, change, or remove any other accounts. They may not
be able to install some apps. When you create a new account, it’s a standard account
unless you edit the account to make it an administrator account, or you set it up as a
Child account.
• Child. Child accounts are controlled by the Family Safety settings you apply to the
account. See Keep your kids safer on the PC on Windows.com to learn how to turn on
Family Safety features.
When you sign in with an Administrator account, you can create, change, or remove other
accounts.
To create an account
1. Sign in with an Administrator account.
2. Go to Start , and select PC settings > Accounts > Other accounts > Add an account.
3. Enter the email address the new account will use to sign in to Windows, and select Next.
If you know the email address the new account user uses to sign into Microsoft services,
enter it. Or, you can sign up for a new email address, add a child’s account, or sign in
without a Microsoft account (not recommended).
To set an account type:
1. Sign in with an Administrator account.
2. Go to Start , and select PC settings > Accounts > Other accounts, and select the
account you want to change.
© 2015 Microsoft Page 8
Page 14

Get to know Windows
Start screen
Start is the heart of your Surface—it’s
3. Select Edit, and under Account type, choose the account type, and select OK.
To delete an account:
1. Sign in with an Administrator account.
2. Go to Start , and select PC settings > Accounts > Other accounts, and select the
account you want to remove.
3. Select Remove > Delete account and data.
For more on accounts, see All about accounts on Surface.com.
There are several ways to get to Start:
• Tap the Windows button on your Surface.
• Press the Windows logo key on your keyboard.
• Swipe in from the right edge of the screen, and select Start .
• Move your mouse to the lower-left corner of the screen, and select Start .
Customize Start by adding, removing, rearranging, and resizing tiles. For more info, see
Personalize your PC on Windows.com.
where you open apps, check your
calendar, mail, and more in live tiles,
and get to your favorite websites.
From Start you can search for files,
apps, and settings, and search the
web.
© 2015 Microsoft Page 9
Page 15
Open an app
Charms
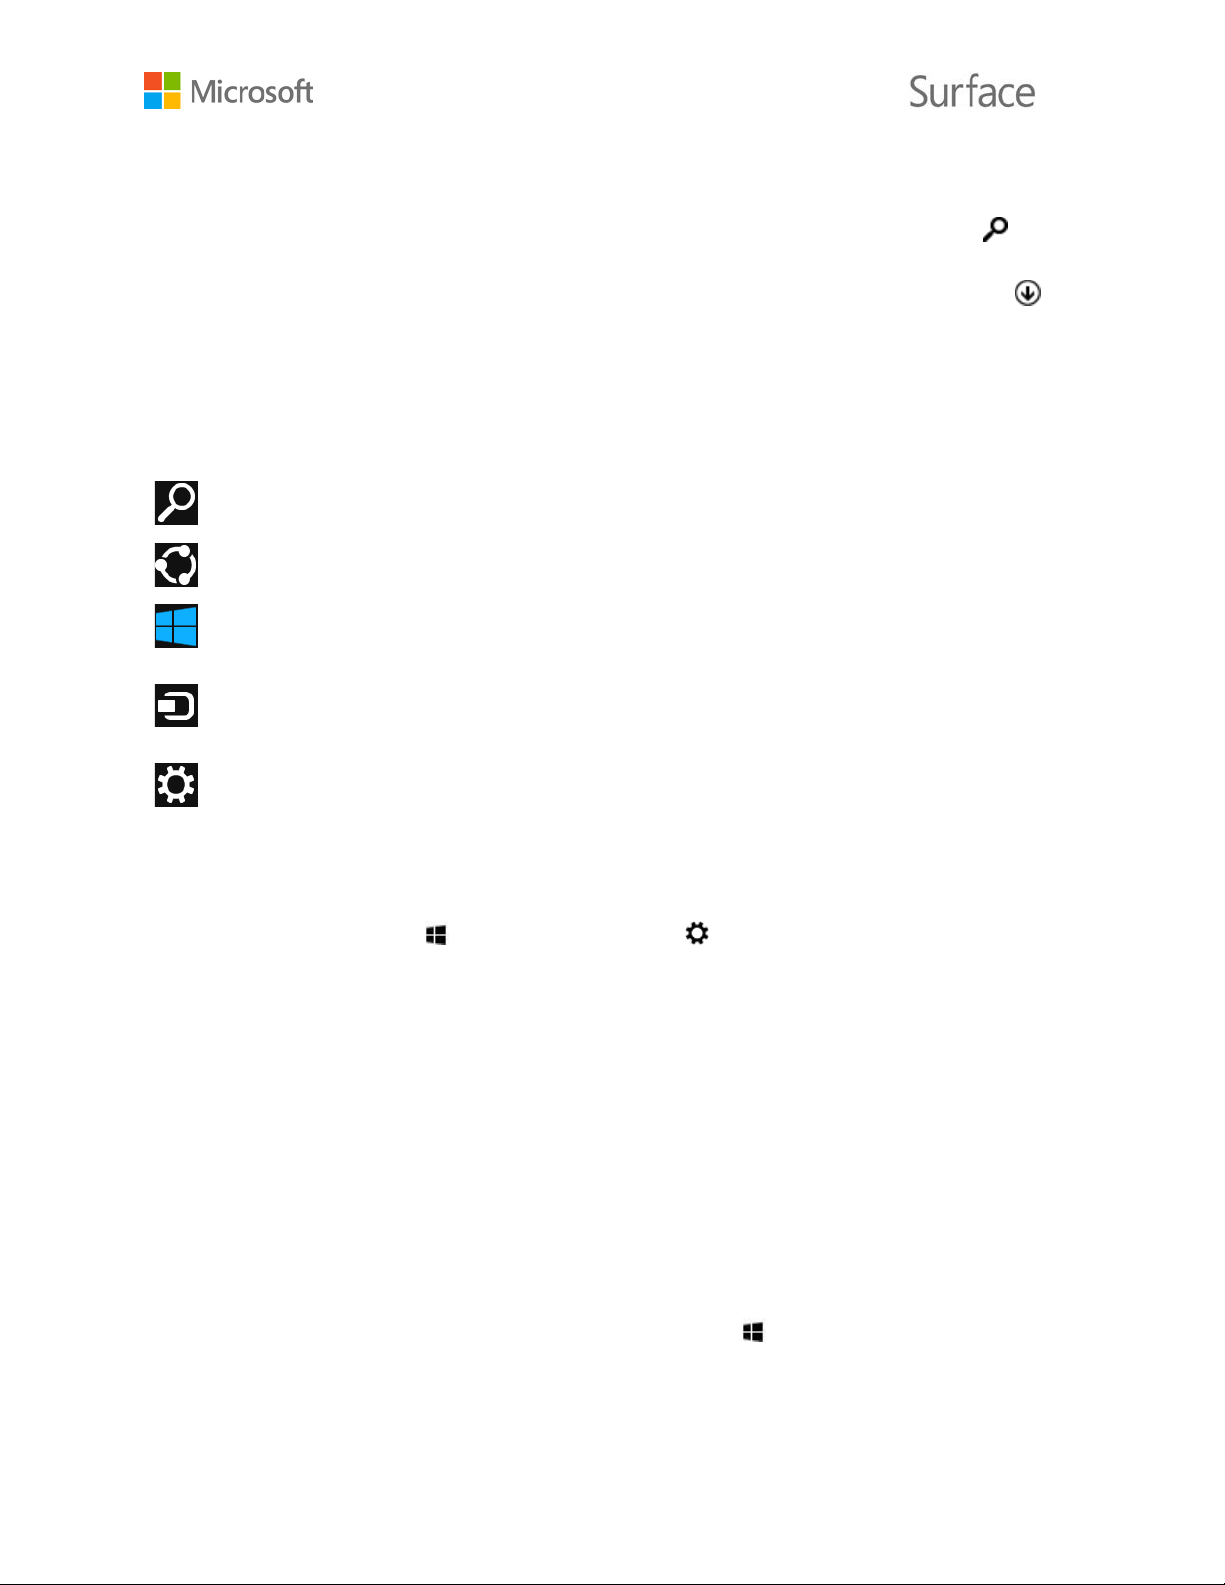
Search is how you find things on Surface, OneDrive, in apps, and on the web.
Share files, photos, or webpages from within a Windows Store app.
Start takes you to the Start screen. If you're already on Start, it takes you to the last
Devices is a quick way to send files and info to other devices that are connected to
Settings is the place to make changes to common settings, find settings for your
The familiar desktop
Select a tile on Start to open the app. If you don’t see the app you want, select Search , enter
the name of the app, and select it from the list. To see a full list of the apps on your Surface,
swipe up on the Start screen to get to Apps view. (If you’re using a mouse, click the arrow
near the lower-left corner of the screen.) For more info about apps, see Apps on your Surface.
Charms help you do the things you do most often:
app you were using.
your PC, like your printer, Xbox, phone, speakers, TV, or a projector.
Surface (like personalization, user accounts, and devices), and change settings for the
app you’re using.
Another quick way to get to settings:
• Go to Start , and select PC settings (it’s the tile with the gear on your
Start screen.)
To open the charms, swipe in from the right edge of the screen, and then select the charm you
want.
The Windows desktop—with its taskbar, folders, and icons—is still here, with a new taskbar and
streamlined file management. This is where you’ll use desktop apps like Microsoft Office and
Windows features like File Explorer. You can also pin Windows Store apps to the taskbar, so you
can launch them without leaving the desktop.
To open the desktop, just open a desktop app, or go to Start , and select Desktop.
© 2015 Microsoft Page 10
Page 16

Learn more about Windows
Keep your Surface up to date
Install updates manually
Get up to speed with Windows 8.1, see Get to know Windows on Surface.com, and check out
the Windows tutorial on Windows.com.
To learn how to customize and personalize your Surface, sync and change your settings, and
more, see Customization and settings.
Microsoft releases important updates to improve Windows software security and reliability, and
system and hardware updates (also known as firmware updates) to help improve the stability
and performance of your Surface hardware.
By default, your Surface is set to install updates automatically.
To check for and install updates manually:
1. Go to Start , and select PC settings > Update and recovery > Check now.
2. If there are updates available, select View details, select the updates you want to install,
and select Install.
See Install Surface and Windows updates on Surface.com for more info on keeping your Surface
up to date.
View your update history
To see which updates you already have, and the date each was installed:
• Go to Start , and select PC settings > Update and recovery > Windows Update
> View your update history.
Updates to your Surface hardware appear in your update history as either “System Firmware
Update - XX/XX/XX” or “System Hardware Update - XX/XX/XX”. (“XX/XX/XX” stands for the date
that Microsoft made the Surface update available.)
Surface updates are cumulative—if you have the latest Surface update installed, you’re up to
date.
For descriptions of the Surface updates released so far, see Surface update history.
© 2015 Microsoft Page 11
Page 17
Surface Pen and OneNote
Use Surface Pen (sold separately) to quickly open OneNote, take screenshots, mark
Set up Surface Pen
Make sure you have the latest Surface updates
To make sure you that you have all the latest Surface hardware updates successfully installed:
1. Go to the Surface 3 update history page on Surface.com and look in the table at the top
of the page to see the latest available System Update.
2. Compare that to the last System Firmware or System Hardware update you see when
you view your update history on your Surface 3.
If you have trouble with updates, see Trouble installing Surface and Windows updates? on
Surface.com.
up presentations, sign documents, and use and enjoy art apps.
Surface Pen has the heft and sensitivity of a pen, and thanks to Palm Block
technology, you can write naturally on your Surface 3 in any app that supports
inking.
If you have Surface Pen (sold separately), you’ll need to install its AAAA battery and pair it with
Surface 3. Here’s how:
To install the AAAA battery:
1. Unscrew the top of the pen from the bottom.
2. Insert the battery, wrapped in the label from the top of the pen, with the positive (+) end
of the battery pointing toward the writing tip.
3. Screw the top back on.
To pair Surface Pen to Surface 3:
1. Swipe in from the right edge of the screen, and select Settings > Change PC settings >
PC and devices > Bluetooth.
2. Hold down the top button of the pen for about seven seconds, until the light in the
middle of the pen clip starts to flash.
3. When Surface Pen appears in the list of Bluetooth devices, select it, and tap Pair.
© 2015 Microsoft Page 12
Page 18
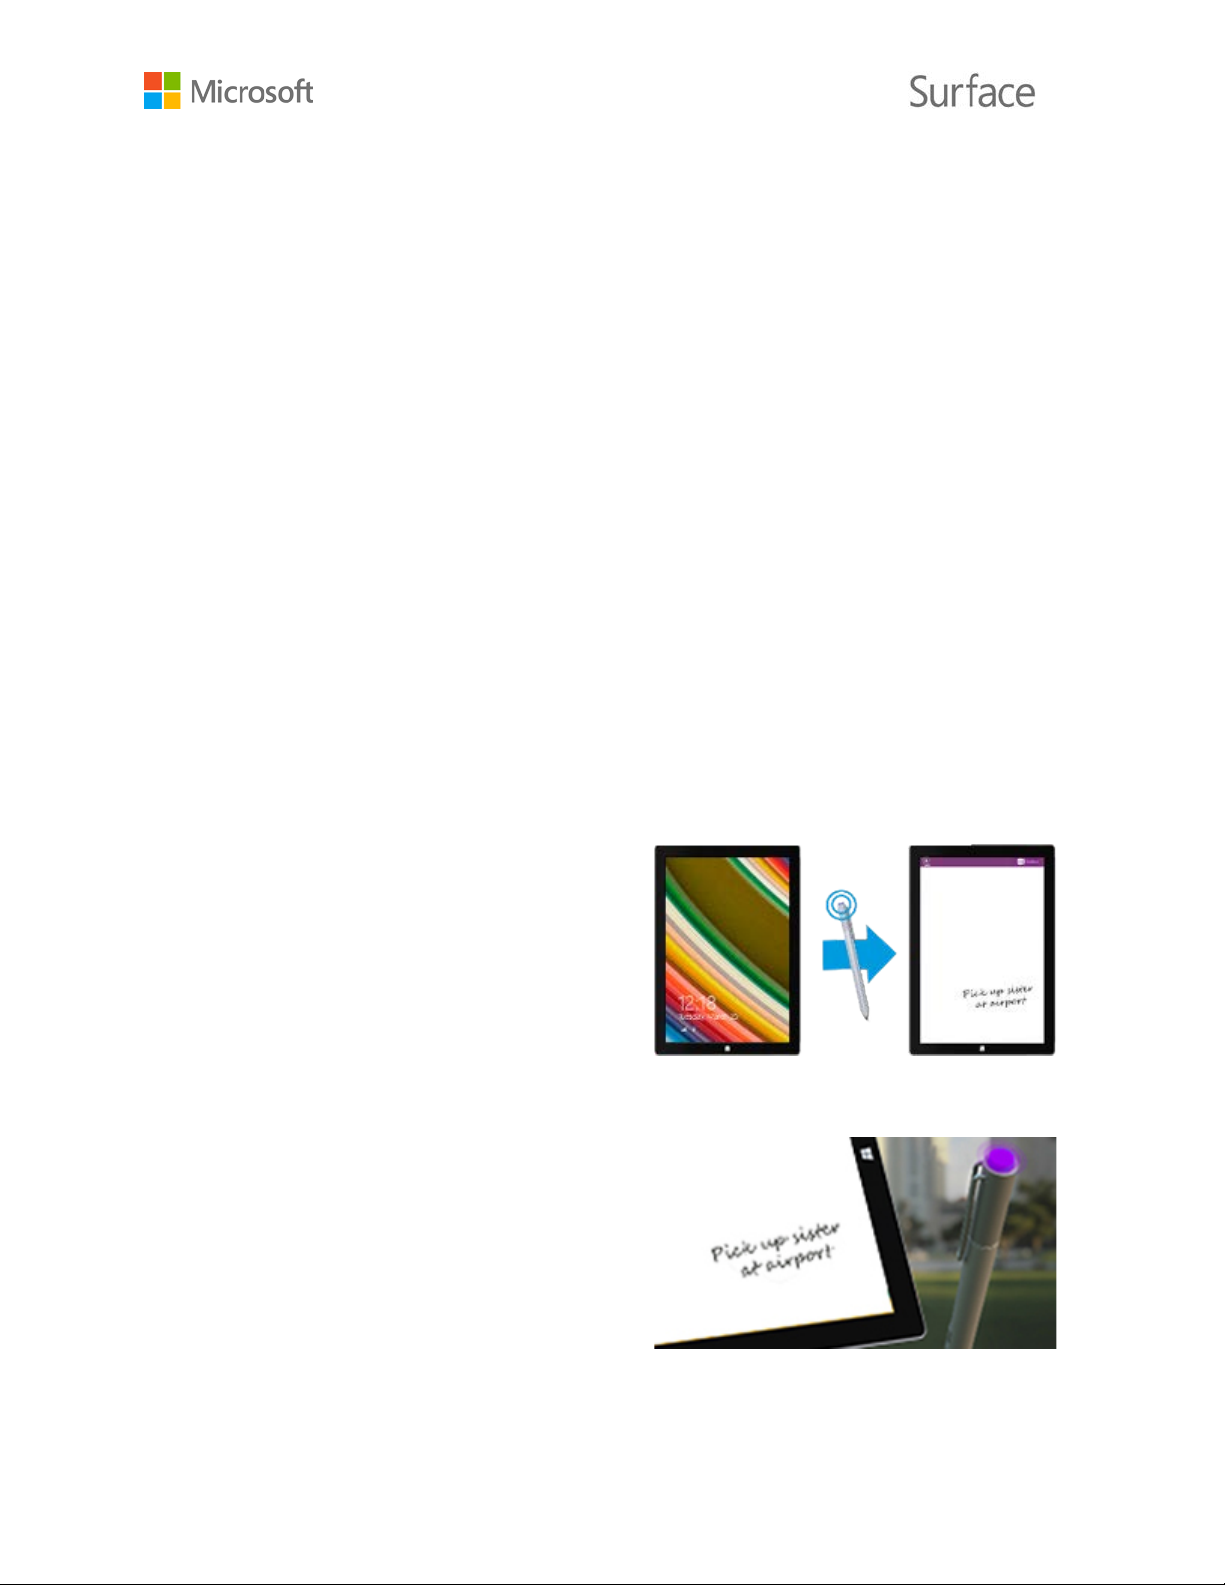
Surface Pen features
Top button
Right-click button
Eraser button
Tip
Click the top of the Surface Pen and start
Sign in to Surface, and click the top of the pen
Click the top button to open OneNote. Double-click to capture a
screenshot. Bluetooth technology links the top button of your Surface Pen
to your Surface 3.
This button acts like the right-click button on a mouse. Click it once in
apps like OneNote to open a menu to choose pen color, thickness, and
other options. You can also click and hold the button to select text.
Hold down the eraser button and move the tip over the area you want to
erase.
The fine tip, along with Palm Block technology and multi-point sensitivity
in your Surface lets you write and draw naturally.
Here are a few of the things you can do with the Surface Pen:
writing a Quick Note—like a yellow sticky that
you’ll never lose. You don’t even need to
unlock your Surface.
Click again to write another note, or press the
power button on your Surface to put Surface
to sleep.
to open your latest notes. Add a Quick Note,
write in any of your OneNote notebooks, or
review and organize the notes you wrote while
Surface was locked.
© 2015 Microsoft Page 13
Page 19

Double-click the top button on Surface Pen to
Explore OneNote
Note syncing
Use Surface Pen in other apps
take a screenshot. Then, select what you want
to capture in the screenshot by dragging the
tip of the pen from one corner of your
selection to the opposite corner. When you lift
the pen tip, your selection appears in a new
page in OneNote.
You can use the Surface app to adjust your pen’s pressure sensitivity, or change which version of
OneNote opens when you click the pen’s top button. By default, the Windows Store version of
OneNote opens when you click the top button.
For more info about using Surface Pen and OneNote, see Using Surface Pen and Using OneNote
on Surface. Both are on Surface.com.
Your Surface comes with both OneNote and OneNote 2013 pre-installed, and you can install
OneNote from OneNote.com on your other devices—it’s free. Create as many notebooks as you
need. Use sections, pages, and tags to make things easier to find. Share some notebooks, and
keep others private.
To learn more about OneNote features and menus, see Using OneNote on Surface on
Surface.com.
OneNote saves your notes, and syncs them to OneDrive (online cloud storage). With OneNote,
you can keep your notes, clippings, sketches, photos, and files organized and accessible from
anywhere. For more info, see Using OneDrive on Surface on Surface.com.
If you’re not connected to the Internet, OneNote saves your new and edited notes on your
Surface. They’ll sync automatically with your OneNote notebook the next time you’re online
using Surface.
You can use your Surface Pen to draw and write or highlight text in Office apps. To learn more
about using the pen in Office apps (called inking), see Use a pen to draw, write, or highlight text
on a Windows tablet on Office.com.
© 2015 Microsoft Page 14
Page 20
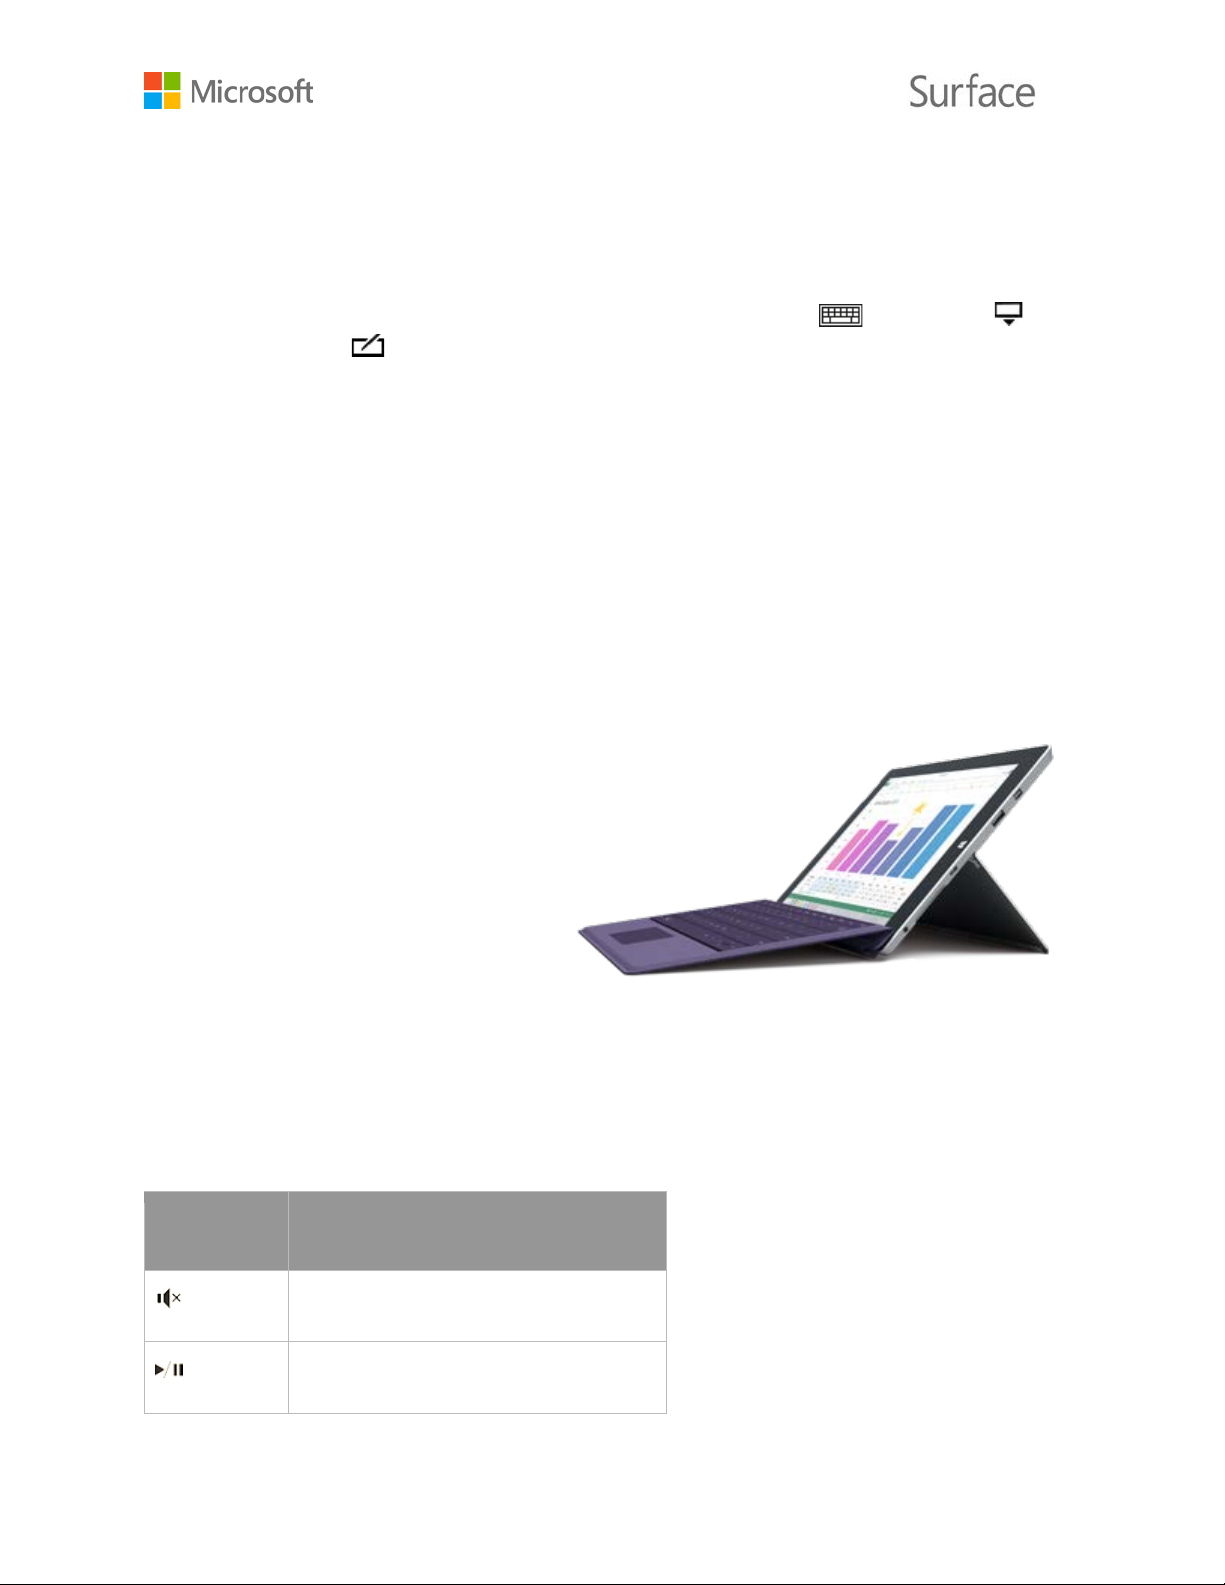
Type Cover keyboard and touchpad
Surface 3 Type Cover (sold separately)
Key icon
What is does
Turns audio muting on or off
Plays or pauses audio or video
You can use the Surface Pen in drawing apps, and many others—any app that supports ink. Even
if your app doesn’t support inking, you can use your Surface Pen to enter text using the
handwriting panel in the on-screen keyboard. Here’s how:
1. Swipe in from the right edge of the screen, and select Settings.
2. Select Keyboard > Touch keyboard and handwriting panel > Keyboard >
Handwriting .
3. Write something on the handwriting panel. Your words are automatically converted to
text.
4. Select Insert to insert your text.
The handwriting panel adapts to your writing over time, becoming more accurate the more you
use it. For more info, see How to use the on-screen keyboard on Surface.com.
clicks into place, giving you a standard
keyboard layout, backlit keys, gestureenabled touchpad, and protective
cover all in one slim package.
When you close the Cover, Surface 3
goes to sleep. When you fold the
Cover back, Surface won’t detect your
key presses.
Keys on the top row of the Surface 3 Type Cover make it easy to do common tasks.
© 2015 Microsoft Page 15
Page 21
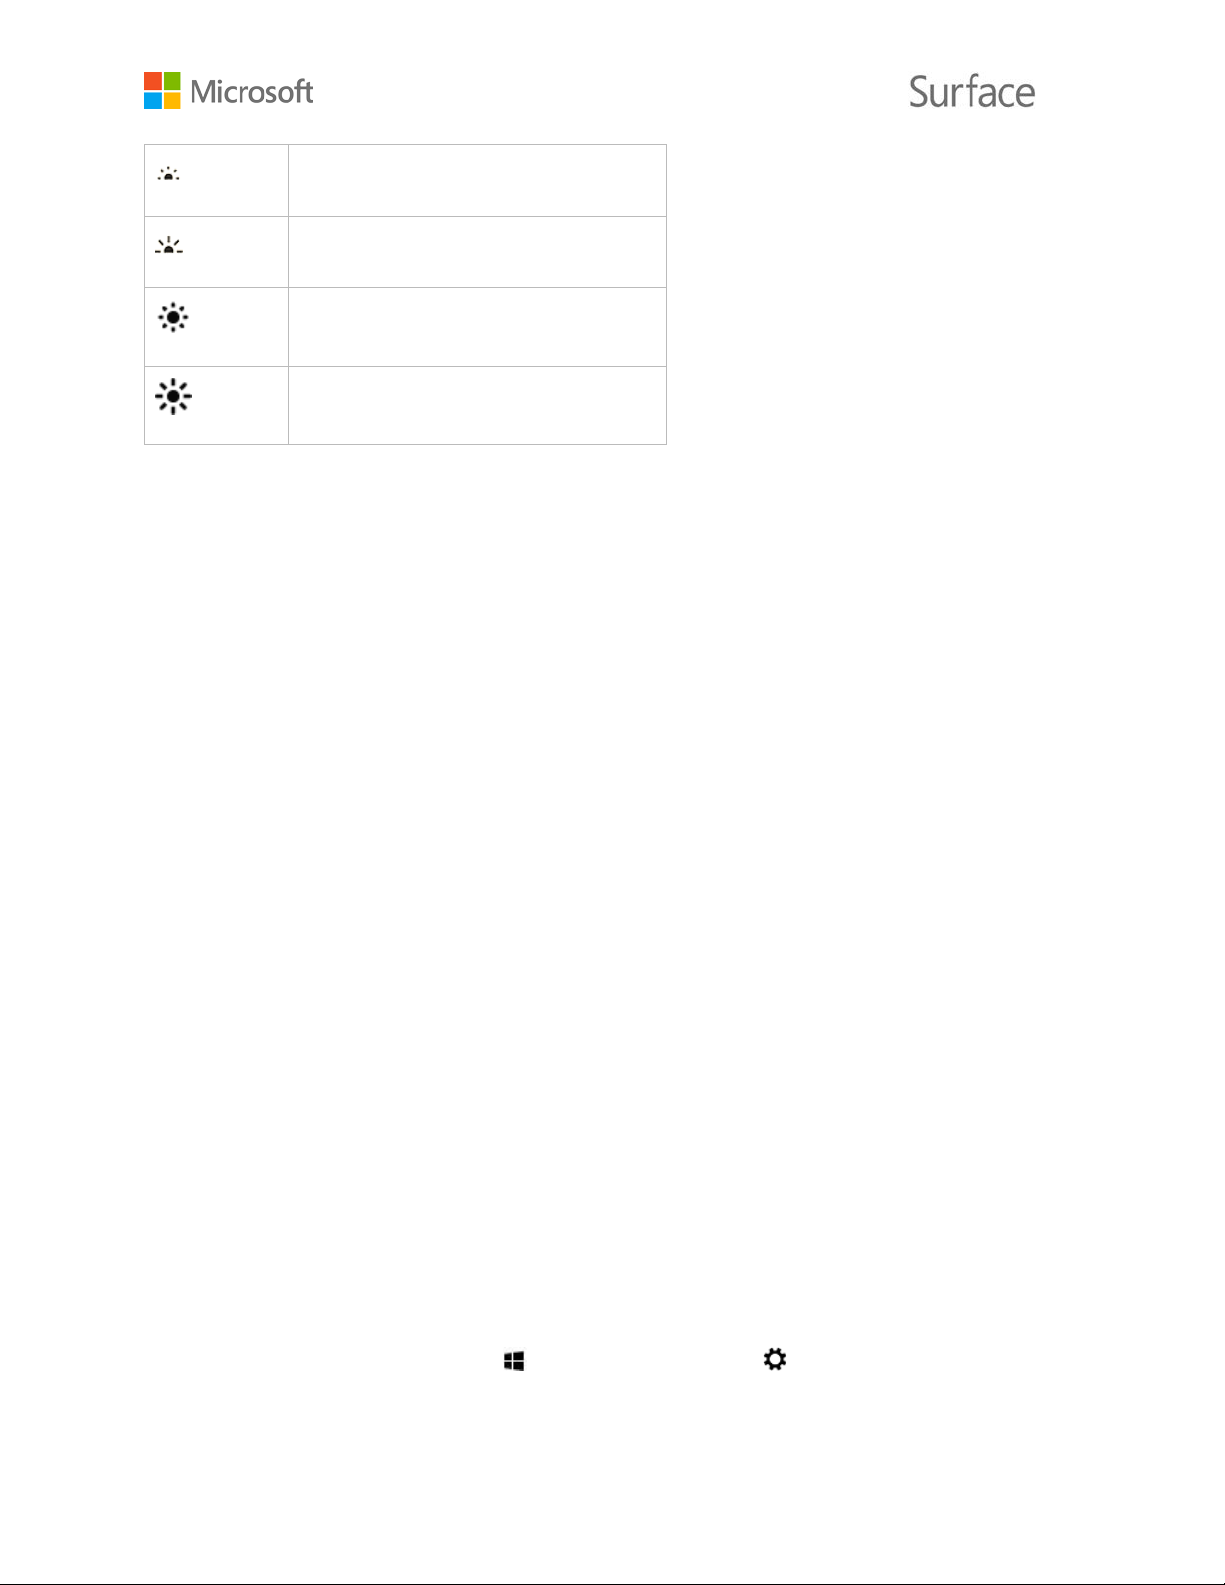
Decreases keyboard backlighting
Increases keyboard backlighting
Dims the screen
Brightens the screen
Touchpad
The touchpad on Surface 3 Type Cover has
Touchpad settings
To use function keys instead of the special key assignments, press the Fn key (in the bottom row
of keys on the keyboard). A light on the Fn key lets you know you’re in function key mode. Press
Fn again to leave function key mode.
For detailed info about adjusting keyboard backlighting, using the shortcut keys, function keys,
and more, see Type Cover on Surface .com.
right-click and left-click buttons that work
like a mouse. The left-click button area is
larger, while the right-click button is smaller.
The touchpad supports gestures like tap,
double-tap, drag, scroll, and zoom. To learn
how to use all the touchpad gestures and to
see them demonstrated, see Get started
with your Surface 3 on Surface.com.
If your cursor jumps while you type, or the touchpad seems to respond too quickly to accidental
touches, you can change touchpad settings to make it work the way you like. If you prefer, you
can turn the touchpad off altogether.
To change these and other settings:
Left-click and right-click touchpad buttons
• Attach the Cover, go to Start , and select PC settings > PC and devices > Mouse
and touchpad.
© 2015 Microsoft Page 16
Page 22
Storage
How much space do I have?
OneDrive: Your personal cloud
Save and open files
For more info, see Change touchpad settings in PC settings on Surface.com.
You have many storage options with Surface 3. In addition to the storage on the hard drive on
Surface 3, you have external storage options like OneDrive (cloud storage), USB drives, and
microSD cards.
The amount of storage space available on your hard drive depends on which version of Surface
3 you have, what apps you’ve installed, and how much data you’re storing already.
Here’s how to see how much available space you have on Surface:
• Go to Start , and select PC settings > PC and devices > Disk space.
At the top of the screen, you can see how much space you have available. You can also
see how much disk space is used by your apps, media, and files.
You may be able to free up space by selecting Empty my Recycle Bin to delete permanently
files you put into the recycle bin earlier. For more tips on how to free up space see Tips to free
up disk space on Windows.com.
OneDrive is online storage that comes with your Microsoft account. When you save
your documents, photos, and other files to OneDrive, they're available from any
web-connected device (for example, your smartphone or any PC). OneDrive is also
a great way to share files with other people.
If you use a Microsoft account to sign in to your Surface, your OneDrive folders are as easy to
use as the folders on the hard drive. You can browse, open, and edit your files in OneDrive even
when you're offline. See the Getting started with OneDrive tutorial on Windows.com to learn
how.
When you sign in to Surface with a Microsoft account, files you create from Office apps are
saved to OneDrive by default, so that you can access them from any of the devices you use..
Saving Office files on OneDrive also makes it easy to share and work with other people. For
more info, see Keep your Office documents in OneDrive on Windows.com.
© 2015 Microsoft Page 17
Page 23
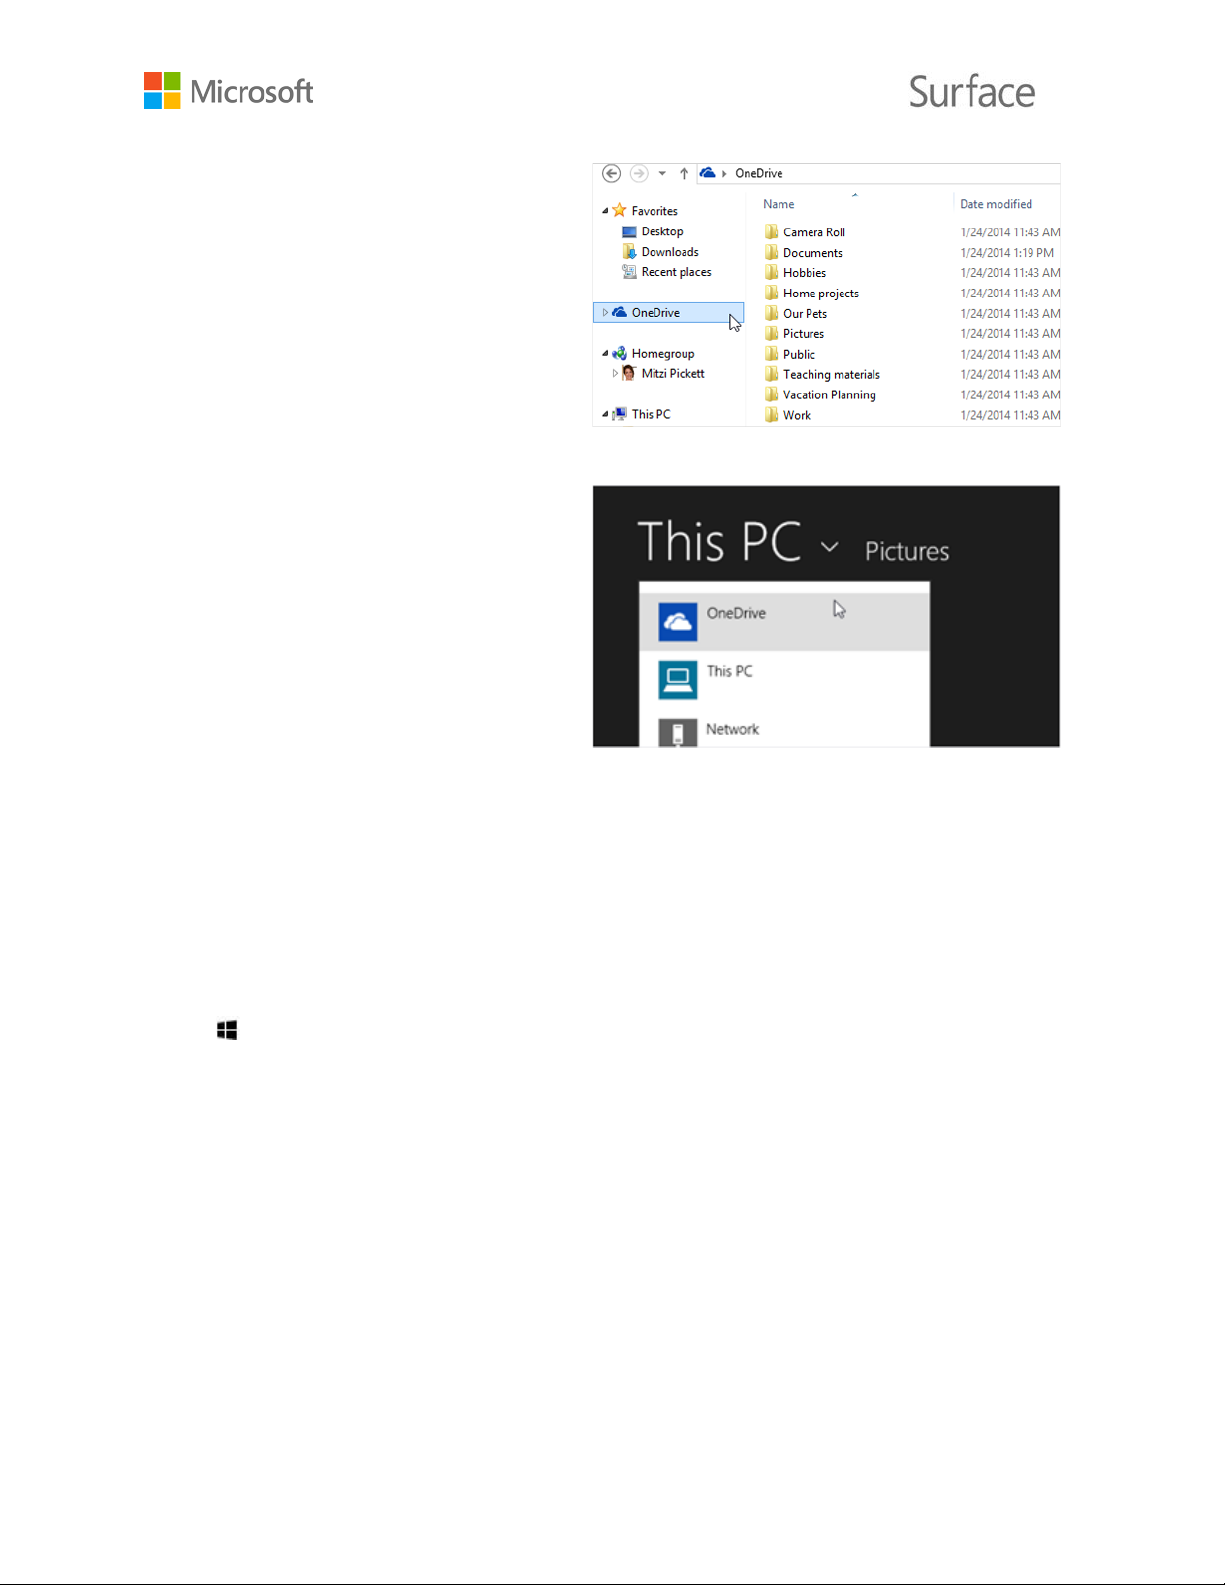
Save files from any desktop app to a
When you open or save files from a
Get to your files from anywhere
OneDrive folder by navigating to it when
you save.
Windows Store app, you can choose
OneDrive or This PC as the location.
Select the down arrow to choose your
location.
In the same way, you can open files from within an app.
There are several ways to get to your OneDrive folders and files:
• Sign in to any PC with the Microsoft account you use on your Surface. Then go to Start
, and open OneDrive, or navigate to the OneDrive folder in File Explorer
• Go to OneDrive.com.
• Use one of the OneDrive mobile apps. See Download OneDrive for Windows for more
info.
If you have files on another computer that you want to use on Surface, you can upload them to
OneDrive. Here’s how:
• From the computer with the files that you want to copy to Surface, go to OneDrive.com
and upload your files. (To find out how, see Upload photos and files on Windows.com.)
The files will sync to OneDrive on your Surface the next time you go online and sign in.
© 2015 Microsoft Page 18
Page 24

Use OneDrive to share files
Connect accessories and devices
Connect a TV, monitor, or projector
Connect to a wireless display
You can also copy files to Surface from a thumb drive or external hard drive, or by copying them
from the Internet or your local network.
You can use OneDrive to share photos, Office docs, and other files with your friends or
coworkers. They won’t need to install any special programs or sign up for a new account, and
they can use any web browser to get to the files you share with them.
1. Go to Start , open OneDrive and select the files or folders you want to share. (Swipe
down on a file or folder to select it. Or if you’re using a mouse, right-click it.)
2. At the bottom of the screen, select Share , and then decide how you want to share:
• Choose Invite People to share the drive with others. You’ll need to provide their
email addresses. Only those people will be able to access the files, and you’ll be able
to change permissions later if you want.
• Choose Get a link let people read the files or read and edit the files, or to make the
folder public. You’ll be able to paste the link into any email, document, or post. Or,
you can share it directly to a social media site like Facebook or Twitter. Anyone with
the link will be able to access the files.
To learn more about sharing files, see Share files and photos on Windows.com.
You can connect Surface 3 to a TV to watch movies on a big screen, to a projector to share a
presentation, or to a second monitor to make multi-tasking in several apps even easier.
If you have a wireless display, here’s how to connect it:
1. Go to Start , and select PC settings > PC and devices > Display.
2. At the bottom of the screen, select Connect to a wireless display.
3. Select Add a wireless display.
4. Choose the wireless display in the list of devices found, and follow the on-screen
instructions.
© 2015 Microsoft Page 19
Page 25

Connect with a cable and adapter
Set up your screens
To connect Surface 3 to another screen without wireless, you’ll need a compatible cable and
possibly an adapter. Look at the video ports on your TV, monitor, or projector to figure out
which adapter or cable you need:
• HDTV.
If your TV has an HDMI port, you’ll need an HDMI cable and a Mini DisplayPort to HD AV
adapter or an HDMI to Mini DisplayPort cable. (Both are sold separately).
• Projector or monitor.
If your monitor has a DisplayPort, you can connect it to Surface using a Mini DisplayPort
to DisplayPort cable (sold separately).
If your monitor doesn’t have a DisplayPort or HDMI port, use a VGA cable and the Mini
DisplayPort to VGA Adapter. A VGA adapter or cable is for video only. Audio will play
from your Surface speakers unless you’ve connected external speakers.
For more info about this, see Surface sound, volume, and audio accessories on
Surface.com.
Here’s how to hook it up:
1. Connect an HDMI or VGA cable to the HDMI, DisplayPort, or VGA port on your TV,
monitor, or projector.
2. Connect the other end of the cable to a Surface video adapter or the Mini DisplayPort on
your Surface.
3. If you’re using an adapter, plug the adapter into the Mini DisplayPort on your Surface or
your docking station.
Once you connect another screen or screens, you can choose what to display on each screen.
Here’s how:
1. Swipe in from the right edge of the screen, and select Devices.
2. Select Project, and then choose one of the following options:
• PC screen only. You’ll see everything on your Surface screen. (If you're connecting to
a wireless projector, this option changes to Disconnect.)
• Duplicate. You’ll see the same things on all screens.
© 2015 Microsoft Page 20
Page 26

Connect a USB accessory (printer, mouse, and more)
Surface 3 has a full-size USB 3.0 port that you
Add a Bluetooth accessory
Add an audio accessory
• Extend. You'll see everything spread over all screens, and you can drag and move
items between them.
• Second screen only. You’ll see everything on the connected screen or screens, and
your Surface screen will be blank.
For more info, see Connect Surface Pro or Surface 3 to a TV, monitor, or projector on
Surface.com.
can use to connect a USB accessory such as a
printer, camera, music player, smartphone,
mouse, or external hard drive.
The first time you plug in a USB accessory,
Windows installs the software it requires for
you.
For more info, see Connect a USB mouse,
printer, and more on Surface.com.
Full-size USB 3.0 port on Surface 3
To add (also called pair) a Bluetooth device with your Surface:
1. Turn on the Bluetooth device and make it discoverable. To learn how, check the info that
came with your Bluetooth device or the manufacturer’s website.
2. Go to Start , and select PC settings > PC and devices > Bluetooth.
3. Make sure Bluetooth is On, and wait while Windows searches for Bluetooth devices.
4. Follow the on-screen instructions to finish pairing your device.
If your accessory requires a pairing code, you’ll be prompted for it. If you don’t know the
code, check the info that came with your device or the manufacturer’s website.
The stereo speakers and microphone on Surface 3 let you listen to music and videos, make
phone calls, and record audio. You can also connect your favorite USB and Bluetooth accessories
like speakers, a mic, or a headset.
© 2015 Microsoft Page 21
Page 27

Print or scan
Surface audio features
Adjust the volume
For more info on connecting accessories, see Connect a USB mouse, printer, and more and Add
a Bluetooth device on Surface.com.
To learn how to use the audio features built-in to your Surface, see Surface audio features.
To learn how to connect a USB printer or scanner, see Connect a USB accessory (printer, mouse,
and more). For info on connecting a Bluetooth printer or scanner, see Add a Bluetooth
accessory.
To see if your printer is installed:
1. Go to Start , and select PC settings > PC and devices > Devices.
2. Look for your printer in the list of devices.
• If your printer is in the list, you’re ready to print something.
• If your printer isn’t listed, select Add a device, and select your printer to install it.
To print from a Windows Store app:
1. Open what you want to print. For example, open a web page in Internet Explorer, or an
email message in Mail.
2. Swipe in from the right edge of the screen, and select Devices.
3. Select your printer from the list.
4. Choose your printing options, and select Print.
To print from a desktop app (such as Notepad or an Office app):
• Find the Print command in the app, or press Ctrl+P.
For more info on setting up and using printers and scanners, see Print and scan from Surface on
Surface.com.
You can adjust the volume on your Surface in a few places:
• Volume button. Use the volume button on your Surface to adjust the volume up or
down.
© 2015 Microsoft Page 22
Page 28
Record audio
Two apps for recording sound are pre-
Sound Recorder app for Windows
Sound Recorder desktop app
Set the default audio device
• Settings. Swipe in from the right edge of the screen, select Settings > Speakers , and
adjust the volume up or down.
• Desktop taskbar. On the desktop taskbar (lower-right corner), select Speakers , and
adjust the volume up or down.
• Audio accessories. Adjust the volume on an audio accessory—like a headset, speakers,
or phone—using the volume control on the accessory, or in the software included with
the accessory. For more info, check the info that came with your accessory or visit the
manufacturer's website.
• Apps. Some apps have a volume control within the app.
installed on Surface 3:
To open either app:
1. Go to Start , select Search , and enter the phrase sound recorder.
2. In the search results, choose the sound recording app you want to use.
For info about the Sound Recorder app for Windows, see Sound Recorder app for Windows:
FAQ. To learn more about the Sound Recorder desktop app, see Recording audio in Sound
Recorder: FAQ. Both are on Windows.com.
1. Go to Start , select Search , enter sound, and then choose Sound from the list.
2. Next, do either or both of the following:
• Select the Playback tab, select the device you want to use for playback (for example,
the built-in speakers on Surface, external speakers, or a headset), and then select Set
Default.
• Select the Recording tab, select the device you want to use for recording (for
example, the built-in microphone, or an external microphone), and then select Set
Default.
© 2015 Microsoft Page 23
Page 29

Change which sounds play
Cameras and the Camera app
Take a photo
Take a panorama
After you've selected your default devices, select OK.
You can choose which sounds play for notifications and system events (for example, the sound
that plays when you get a new message.) Here's how:
1. Go to Start , select Search , enter sound, and then choose Sound.
2. Select the Sounds tab, and under Program Events, choose an event (for example,
Calendar Reminder).
3. Under Sounds, select the sound you want to play for that event. To hear the sound,
select Test.
4. Select Apply to change the sound for the event.
For more info about Surface audio features, see Surface sound, volume, and audio accessories
on Surface.com.
Surface has two integrated cameras that you can use to take pictures, record videos, and make
video calls. The built-in Camera app can help you get even more out of your cameras.
1. Go to Start , and open the Camera app. Optionally, tap the screen to focus on a spot.
2. Tap the on-screen Camera button to take a photo.
3. To exit, press the Windows button on your Surface.
1. Go to Start , open the Camera app, and tap Panorama.
2. Point the camera at your starting point for the panorama, and tap the screen to start.
3. Slowly tilt or rotate the camera in any direction. When you align the new image with the
existing images, the camera automatically takes the next image.
4. If you want to retake the last image taken, tap Undo.
Otherwise, tap the check mark when you’re done.
© 2015 Microsoft Page 24
Page 30

Record a video
Take a photo or video from the lock screen
Adjust the focus
1. Go to Start , and open the Camera app.
2. Tap the on-screen Video button.
3. Optionally, tap the screen to focus on a spot while you’re recording the video.
4. To exit, press the Windows button on your Surface.
The perfect shot might not wait for you to unlock your Surface, but you can set up Surface to let
you take photos and videos from the lock screen. Here’s how to set up and use this feature.
To turn the lock-screen camera feature on:
1. Go to Start , and select PC settings > PC and devices > Lock screen.
2. Scroll to the bottom of the screen, and under Camera, select On.
To take a photo or video from the lock screen:
1. If the screen is off, press the power button to turn Surface on.
2. Swipe down from the top edge of the lock screen.
3. Tap the Camera or Video button.
The rear-facing camera on Surface 3 has an autofocus lens that lets you focus on an object
before taking a picture or while recording a video.
• Before taking a photo, tap the screen to focus on a spot.
• While shooting a video, tap the screen to adjust the focus.
You can change the default setting on Surface 3 so that tapping the screen focuses on an area
and then takes a photo, or just takes a photo without focusing. See Using autofocus on Surface
3 for more info.
Note The front-facing camera on Surface 3 has a fixed focus lens. Autofocus is available only on
the rear-facing camera.
For more info about your Surface cameras and the camera app, to learn about viewing and
editing photos and videos, and to find out about changing camera options, see Surface cameras
and the Camera app on Surface.com.
© 2015 Microsoft Page 25
Page 31
Apps on your Surface
Find and open an app
Switch between apps
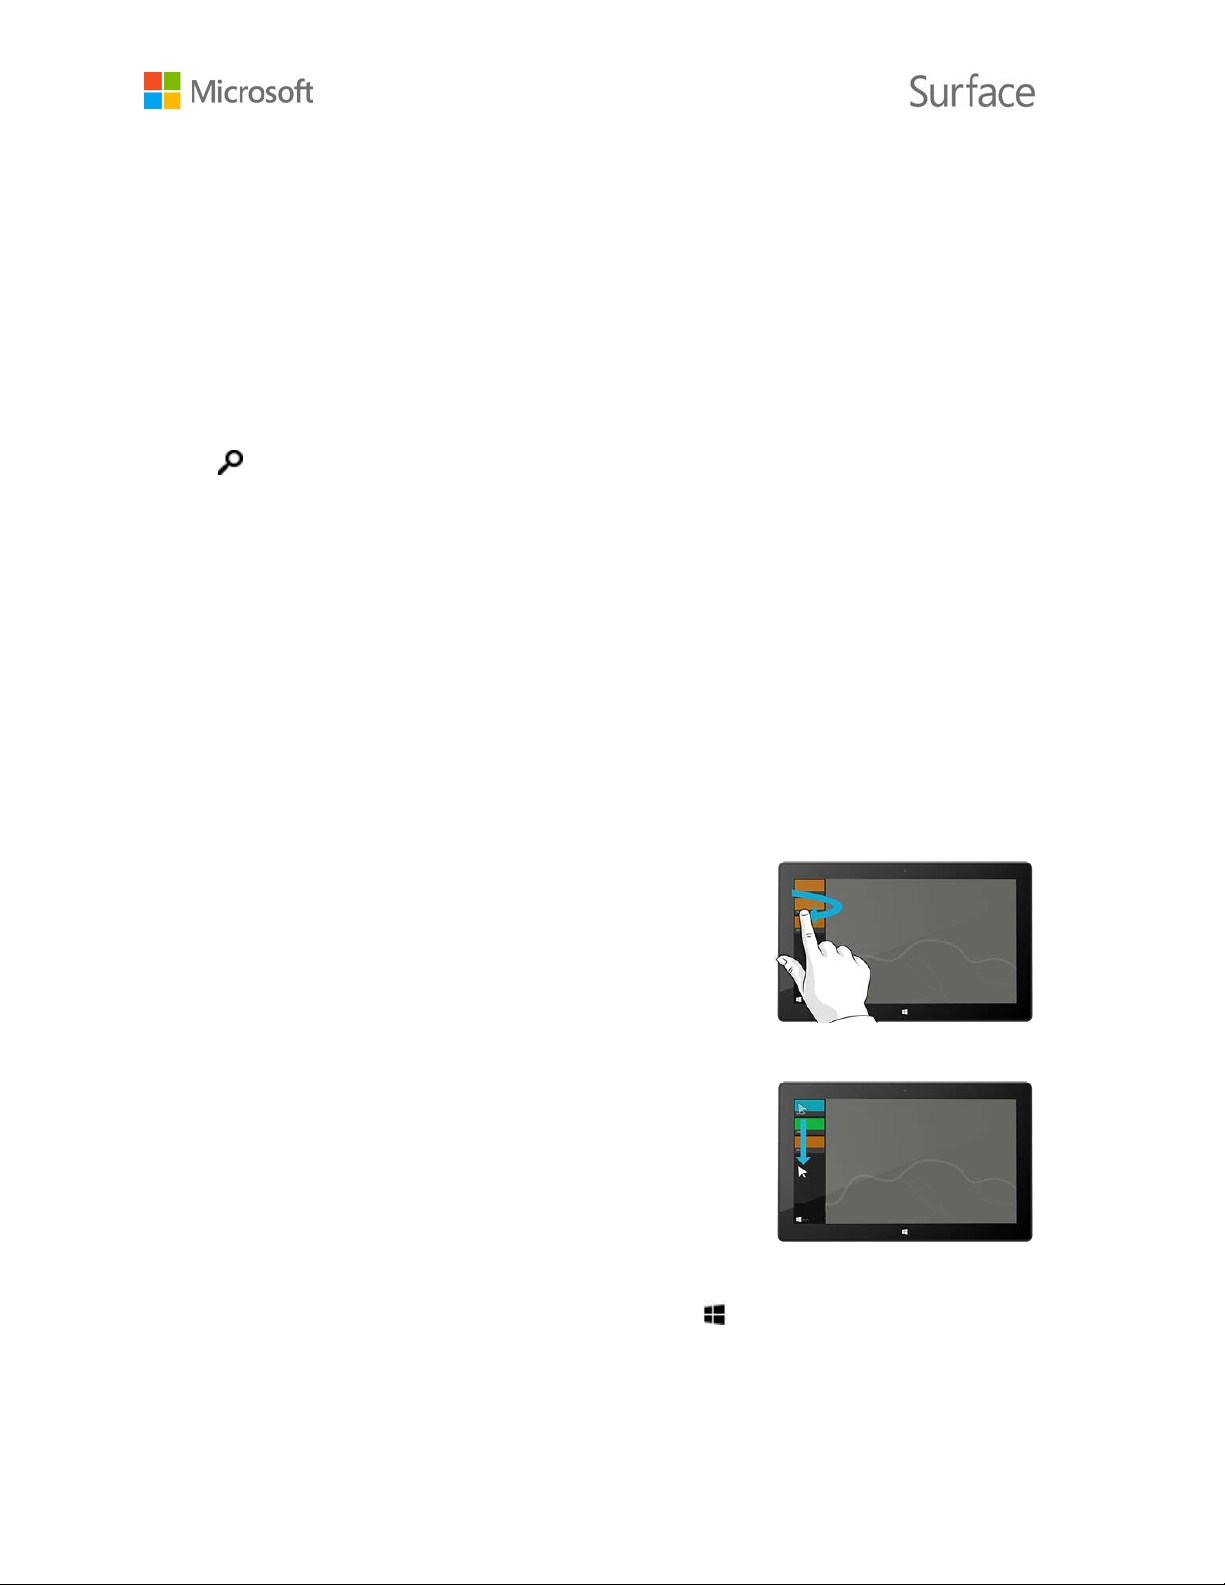
With touch, swipe in from the left edge of the screen
With a mouse, move the pointer into the upper-left corner
From the keyboard, hold down the Windows logo key
Apps to help you stay connected, entertained, informed, and productive come pre-installed and
ready to use on your Surface 3. Find more apps quickly and easily in the Windows Store, or
install your favorite desktop apps.
Tap a tile on the Start screen to open the app. If you don’t see the app that you want, select
Search , enter the name of the app, and select it from the list. Or, swipe up on the Start screen
to Apps view to see a full list of your installed apps.
To switch to the last app you were using:
• With touch, swipe in from the left edge of the screen.
• With a mouse, move your pointer into the upper-left corner, and then click the corner.
• From the keyboard, press Alt+Tab.
To switch to an app you were using recently:
without lifting your finger, and then push back toward the
left edge. You'll see the apps you've used recently. Tap the
app you want.
and move it down the left edge. You’ll see the apps you’ve
used recently. Select the one you want.
and press Tab. For more info, see Mouse and keyboard:
What’s new on Windows.com
© 2015 Microsoft Page 26
Page 32

Close an app
Close a Windows Store app
Close a desktop app
Change settings for an app
Default apps
See Use more than one app at the same time on Surface.com to learn how to open apps side by
side.
Apps that you install from the Windows Store don’t slow down your Surface when you’re using
them. If you want to close one of these apps, here’s how:
• Use touch. Swipe in from the left edge of the screen, and push back toward the left
edge. Press and hold (or right-click) the app you want to close, and then slide your finger
(or mouse pointer) all the way down the screen and hold it there until the app flips over.
• Use a mouse or touchpad. Move your mouse pointer to the top of the app and then
select the Close button in the title bar.
It’s still a good idea to close desktop apps when you're done using them, particularly before
shutting down your Surface.
• Select the Close button in the upper right corner of the app.
To change settings for a Windows Store app, open the app, swipe in from the right edge of the
screen, and select Settings.
To change settings for a desktop app, follow the instructions for that app.
A default app is the app that Windows automatically uses when you open a particular file type,
such as a song, movie, photo, or webpage. To set your default apps:
1. Go to Start , and select PC settings > Search and apps > Defaults. You can
choose a default app for the web, email, music, video, photos, calendar, or maps.
2. Select the one you want to set and choose an app.
To learn more about the apps Windows uses by default, see Choose the apps Windows uses by
default on Windows.com.
© 2015 Microsoft Page 27
Page 33
Built-in apps
Internet Explorer 11
Browse with touch-friendly Internet Explorer
Browse with Internet Explorer for the desktop
Surface comes with two versions of Internet Explorer—a touch-friendly version with
oversized tabs and tiles for easy tapping, and a version for the desktop.
1. Go to Start , and open Internet Explorer.
2. Swipe up from the bottom of the screen to open the address bar.
3. Tiles for your favorite sites and open tabs appear above the address bar (scroll to see all
the tiles).
4. Do any of the following:
• Enter a web address or search term in the Address bar
• Select a tab, pinned, or favorite web site.
• Select the New tab button to open a new browser tab. Then, enter a URL or
search term, or select one of your frequent or favorite sites.
• Select the three dots ( … ) to open an InPrivate tab or reopen a tab you’ve recently
closed.
The desktop version of Internet Explorer is also pre-installed. To start the Internet Explorer
desktop app:
1. Go to Start , and select Desktop (or press Windows logo key +D).
2. From the taskbar, open Internet Explorer.
For more info, including how to set your browser defaults, work with tabs and in multiple
windows, save and pin your favorite websites, and more, see Browse the web with Internet
Explorer on Surface.com.
The Mail app organizes your inbox and offers quick views of your favorite people,
flagged messages, folders, newsletters, and social updates.
© 2015 Microsoft Page 28
Page 34
People
Here are some tips to get you started. For more info, see Set up and use Mail on Surface.com
and the Mail app tutorial on Windows.com.
If you’ve signed in to Surface with a Microsoft account, your mail account is already set up. You
can then add other accounts, from Outlook, Gmail, AOL, Yahoo!, and even your work email
(Exchange ActiveSync).
After you add an email account, contacts from your email account appear in the People app and
appointments appear in the Calendar app.
Here’s how to add accounts:
1. Go to Start , and open the Mail app.
2. Swipe in from the right edge of the screen (or, with a mouse, point to the upper-right
corner of the screen), and select Settings.
3. Select Accounts > Add an account, choose the type of account you want to add, and
follow the on-screen instructions.
The Mail app has three panes:
• The left pane shows you your email folders and accounts (in the lower-left corner). Select
a folder or account to switch to it.
• The middle pane shows you messages for the selected email account.
• The right pane is the reading pane. It shows you the content of the selected email
message.
The People app is more than just an address book. The People app keeps you up
to date with your social networks and helps you stay in touch.
When you connect your accounts like Facebook, Twitter, and LinkedIn, you’ll get all the latest
updates, Tweets, and pictures, in one place. Comment on an update or retweet a Tweet without
switching apps. Here's how to add people from your existing contact lists and address books:
1. Sign in with your Microsoft account.
2. Go to Start , and open the People app.
3. Swipe in from the right edge of the screen (or, with a mouse, point to the upper-right
corner of the screen), and select Settings.
4. Select Accounts > Add an account, select the email or social networking account you
want to add, and then follow the on-screen instructions.
© 2015 Microsoft Page 29
Page 35
Calendar
Skype
Sign in to Skype
To learn how to add individual contacts, pin contacts to Start, use the People app to post
updates, and more see People app on Surface.com and People app help on Windows.com.
The Calendar app brings all your calendars together in one place. Reminders and
notifications help you remember what’s happening, so you never miss a thing.
To add a calendar:
1. Go to Start , and open the Calendar app.
2. Swipe in from the right edge of the screen (or, with a mouse, point to the upper-right
corner of the screen), and select Settings.
3. Select Accounts > Add an account, select the type of account you want to add, and
follow the on-screen instructions.
To view your calendars:
1. Go to Start , and open the Calendar app.
2. Swipe up from the bottom of the screen or down from the top of the screen.
3. Choose from the options at the top and bottom of the screen.
For more info, see Calendar app help and How to manage notifications for Mail, Calendar, and
People on Windows.com.
Skype helps you stay connected to your friends and family. Instant message, call, or
video call your Skype contacts and snap Skype to one side and chat while you’re
using a second app.
You can use Skype to contact landline and mobile phones with Skype credits or a subscription.
Here’s how to get started with Skype.
1. Go to Start , and open the Skype app.
2. Swipe in from the right edge of the screen (or, with a mouse, point to the upper-right
corner of the screen), and select Settings.
3. Select Accounts > Add an account, select the email or social networking account you
want to add, and then follow the on-screen instructions.
© 2015 Microsoft Page 30
Page 36
Add contacts
Start a call or chat
Photos
Video
Music
1. In Skype, swipe up from the bottom of the screen, select add contact, and search for
people by name, Skype name, or email address. If you can't find the person, select
search directory.
2. Select the person you want to add, select add to contacts, and follow the on-screen
instructions.
• Open Skype and select a contact name. Then do one of the following:
• Select call to make a voice call.
• Select video to make a video call.
• Enter a message in the chat window. To add more people or share files and photos
during the chat, select plus and choose an option.
For more info, see Skype on Surface.
Use the Photos app to view, edit, and organize the photos you have saved in your
Pictures library or on OneDrive.
Crop, enhance, and add effects to your images, or choose a photo to be your lock screen
background, or display one or more images on your Photos tile. Photos app on Windows.com
tells you how to do all this and more.
Xbox video brings you the latest movies and TV shows as well as featured hits. Get
recommendations based on what you’ve watched, and find something new to
watch.
Check out Watch TV shows, movies, and videos on Surface.com for info on playing videos from
your video library, finding new videos to buy or rent, and more.
Xbox Music lets you access your music collection, stream music, or buy music from
the Xbox store. Here are some tips to get you started.
© 2015 Microsoft Page 31
Page 37
Microsoft Office
More installed apps
Xbox Music can play any music in your music library. The library can include files in any folder on
your Surface, or even an external hard drive or removable media such as a USB drive or microSD
card, but it’s best to copy the music to your Surface.
Here’s how to add music to the library:
1. Go to Start , select Search , enter the phrase file explorer, and then choose File
Explorer.
2. Browse to the folder of music files that you want to add, and then press and hold (or
right-click) it.
3. Select Include in library, and then select Music.
Xbox Music options include opening a collection or radio station, browsing for new music,
opening playlists in your music library, and creating new playlists.
See Play music on Surface on Surface.com for more details.
Office 365 is a subscription service that lets you install fullfeatured Office apps on multiple computers and devices. It gives
you the most up-to-date versions of Office products, including
updates, for as long as you subscribe.
Depending on your region and Office 365 plan, it may include additional services like extra
OneDrive space or Skype minutes. Surface 3 includes a one-year subscription to Office 365
Home.
For more info, including info about how to activate your Office 365 subscription, see Install and
use Microsoft Office on Surface Pro or Surface 3 on Surface.com.
Lots more apps are available on you Surface 3. Here are a few:
© 2015 Microsoft Page 32
Page 38
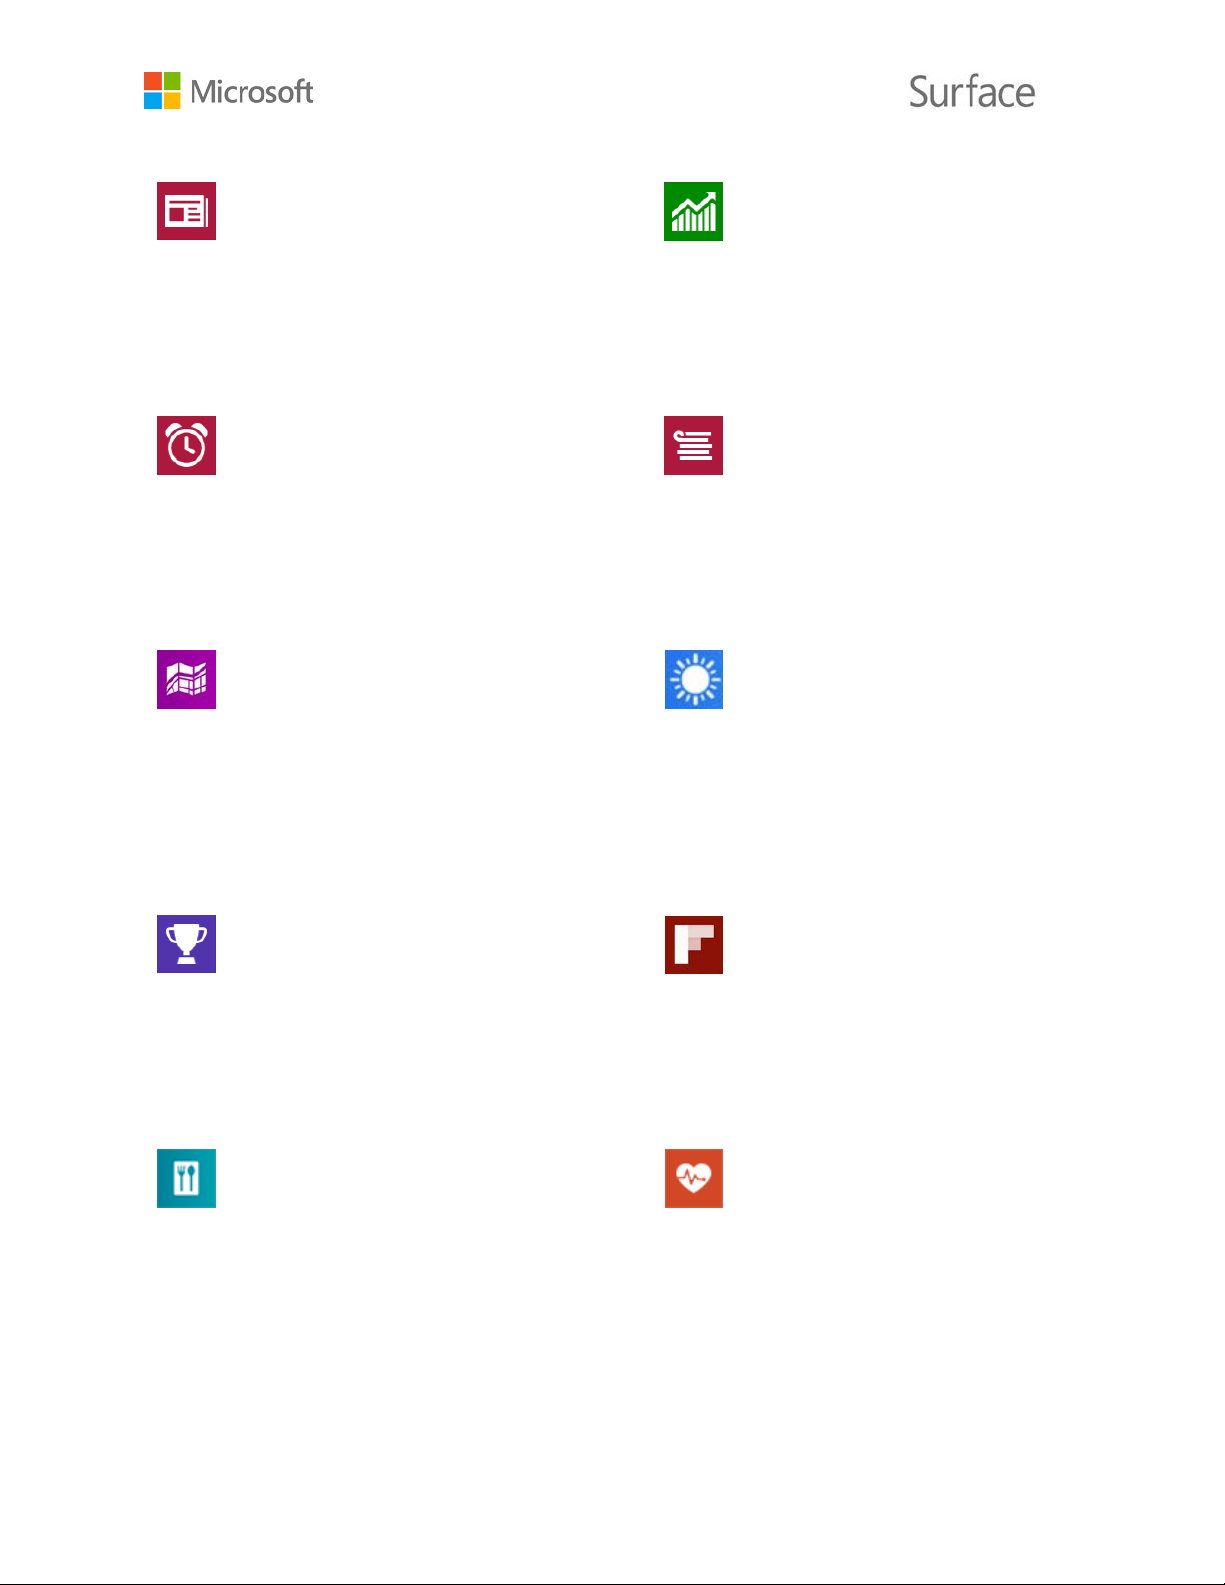
News
Finance
Alarms
Reading List
Maps
Weather
Sports
Flipboard
Food & Drink
Health & Fitness
Keep up to date with what’s happening in the
world using this photo-rich app. For more info,
see News app on Windows.com.
Manage and keep track of time by using alarms,
timers, or a stopwatch. For more info, see
Alarms app on Windows.com.
See your current location, zoom in for more
detail, zoom out for a bigger picture, and get
directions. See Maps app on Windows.com for
more info.
Stay on top of financial news and market data
from global sources. For more info, see Finance
app on Windows.com.
Keep track of content that you want to read
later. For more info, see Reading List app on
Windows.com.
See the latest conditions and forecasts. Get
weather reports from multiple providers. For
more info, see Weather app on Windows.com.
Keep up with all the sports and teams you care
about with Live Tile updates on your favorite
teams
Enjoy hands-free cooking mode, recipes, and
tips from celebrity chefs. For more info, see
Food & Drink app on Windows.com.
© 2015 Microsoft Page 33
Flipboard is your personal magazine. It collects
in a single place the news, stories, articles,
videos, and photos you care about.
This app has over 1,000 exercise videos, and
exercise and diet trackers. For more info, see
Health & Fitness app on Windows.com.
Page 39

Install more apps
Get apps from the Windows Store
Add or edit your payment method
Install apps that you installed on other PCs
You can also install apps on Surface 3 from the Windows Store, websites, CDs, or DVDs.
To find apps to install from the Windows Store, connect to the Internet and sign in using a
Microsoft account. Your Microsoft account keeps track of the apps you install, your preferences,
and your payment methods. Here’s how to find and install apps from the Windows Store:
1. Go to Start , and open the Windows Store.
2. Look for apps. You can:
• Browse featured apps and lists. Drag your finger across the screen to browse apps.
• Use the top menu to explore apps. For example, you can select Categories and
then select the category you want. Or, select Top charts to find popular apps.
• Search for apps. If you know the name of an app you want, or you’re looking for
apps by a specific publisher, enter that info in the search box.
3. Select an app to learn about it and read reviews. If you like it, select the option shown:
• Install is what you’ll see if the app is free or you’ve already bought it.
• Try means a free trial version of the app is available.
• Buy means that the app isn’t free and the price is shown.
Apps that you buy are charged to the payment method, such as a credit card, associated with
your Microsoft account. Here’s how to add or edit your payment method:
1. Go to Start , and open the Windows Store.
2. Select Account > My account.
3. Choose Add payment method or Edit payment method, edit any necessary info, and
then select Submit.
1. Go to Start , and open the Windows Store.
2. Select Account > My account > My apps.
© 2015 Microsoft Page 34
Page 40

Buy apps for kids
Install desktop apps
Customization and settings
3. Under Apps not installed on this PC, swipe down on (or right-click) the apps you want
to install on Surface.
4. Select Install to install the selected apps.
If your child uses their own account to sign in to Surface, they probably don’t have a payment
method attached to their account to buy apps. You can buy apps for your child, or install apps
that you already own for them. For more info, see How to buy apps for kids on Windows.com.
You can install programs from the Internet, a CD, or a network.
To install apps from the Internet:
1. Make sure the publisher or website that’s offering the app is one you trust.
2. In your web browser, select the link to the app.
• To install the app now, select Open or Run and follow the on-screen instructions.
• To install it later, select Save or Save as to download it. When you're ready to install
it, select the file and follow the on-screen instructions.
To install an app from a CD or DVD:
1. Connect an external optical disc drive to the USB port on your Surface Pro.
2. Insert the disc in the drive. Usually the app starts to install automatically.
If the app doesn't start installing from a CD or DVD automatically:
1. Go to Start , select Search , and enter computer.
2. Select Computer from the list.
3. Open the CD or DVD folder, then open the program setup file, usually called Setup.exe
or Install.exe.
For more info, see Install and uninstall apps on Surface Pro or Surface 3 on Surface.com.
Depending on the settings you want to make, you’ll use one of these options:
• PC settings. Go to Start , select PC settings , and choose a setting type.
© 2015 Microsoft Page 35
Page 41

Personalize your lock screen
Personalize your Start screen
Change color and background
Rearrange tiles
• Control Panel. Go to Start , select PC settings > Control Panel, and choose a
setting type.
• Settings. Swipe in from the right side of the screen, and select Settings > Change PC
settings, and choose a setting type.
• Search. Go to Start , select Search , and enter the name of the setting. Then choose
it from the list.
• Surface app. Open this app to adjust settings for the Surface Pen (sold separately), to
disable the Windows button on your Surface, and more.
See Customize Surface and app settings on Surface.com for more info.
Your lock screen can include a picture or slide show of pictures, and app notifications such as
your next calendar appointment. To change your lock screen:
• Go to Start , select PC settings > Lock screen (in the right pane under
Personalize.)
For more info, see Personalize your PC on Windows.com.
You can change the color and background on your Start screen to suit your mood, and you can
add, remove, resize, and rearrange tiles to suit the way you work.
• From the Start screen, swipe in from
the right edge of the screen, select
Settings > Personalization.
• Press and hold (or right-click) any tile to open app commands (a menu of options at the
bottom of the Start screen). With the commands in the menu, you can:
© 2015 Microsoft Page 36
Page 42

Adjust your touchscreen settings
Sync your settings
Choose which settings sync across PCs
Add a language
• Select one or more tiles and apply an action like Resize or Unpin from start to all of
them.
• Drag tiles to new positions.
• Swipe up to see all your apps in Apps view. Press and hold (or-right click) a tile to open
app commands, and choose an action like Pin to Start.
To calibrate your taps, flicks, to choose left- or right-handedness, and other touchscreen
settings:
• Go to Start , select Search , and enter the phrase tablet pc settings. Choose Tablet
PC Settings from the list.
To adjust screen brightness:
• Swipe in from the right edge of the screen and select Settings > Screen, and move the
slider. Or, you can use the screen brightness keys on your Surface 3 Type Cover.
To learn more about using the touchscreen and adjusting its settings, see The Surface
touchscreen on Surface.com.
When you use your Microsoft account to sign in to Surface and other PCs you use, many of the
settings, preferences, and apps associated with your account appear everywhere you go. This
includes stuff like your themes, language preferences, browser favorites and history, and content
for Microsoft apps and services, friends contact information, and more.
1. Go to Start , and select PC settings > OneDrive > Sync settings.
2. Turn on Sync your settings on this PC.
3. Turn on any personalization, app, or other settings that you want to sync.
You can set up Surface to use more than one language, and switch between languages.
Here’s how:
© 2015 Microsoft Page 37
Page 43

Desktop settings
Choose where you go when you sign in
Change the desktop background, colors, and sound
Accessibility
1. Go to Start , and select PC settings > Time and language > Region and
language > Add a language.
2. Select a language from the list to add it to your Languages list.
3. To make the new language your primary language, under Languages select the
language you want to make your primary language, and select Set as primary. You can
do this now or later.
After you’ve set up additional languages, you can switch between them in desktop mode by
selecting the keyboard icon in the taskbar.
By default, you see your Start screen when you sign in to Surface. However, you can start at the
desktop or the Apps view instead. To find out how, see Using the desktop on Surface.com.
1. From the desktop, swipe in from the right edge of the screen, select Settings >
Personalization.
2. Choose a desktop theme. You can also change the desktop background, colors, and
sounds separately.
For more info, see Get started with themes on Windows.com.
Ease of Access features let you use your Surface the way you want.
To set ease of access features:
1. Go to Start , and select PC settings > Ease of Access.
2. Choose among the settings you can make from the panel on the left:
• Narrator reads the text on your screen aloud. For more info, see Hear text read
aloud with Narrator on Windows.com.
• Magnifier enlarges your screen or parts of it to make words and images easier to
see. For more info, see Use Magnifier to see items on the screen on Windows.com.
© 2015 Microsoft Page 38
Page 44

Ease of Access on the sign-in screen
Care and cleaning
Protect your Surface from viruses
• High contrast lets you use a high contrast theme that makes items easier to read.
To use a High contrast theme, choose a high contrast theme from the drop-down
box, adjust the colors if you want to, and select Apply.
• Keyboard You can choose whether to control your Surface by using an on-screen
keyboard. This is also where you set sticky keys, filter out repeated keystrokes, and
set Surface to play a tone when you toggle Caps Lock, Num Lock, or Scroll Lock.
For more information, see Use the On-Screen Keyboard (OSK) to type on
Windows.com.
• Mouse. You can change the size and color of the mouse pointer and use the numeric
keypad to control the mouse. For more info, see Mouse and keyboard: What's new in
Windows on Windows.com.
• Other options. These options make Surface easier to use:
• Play animations in Windows.
• Show Windows background, or a black screen
• Choose how long notifications are visible.
• Cursor thickness.
• Show a grey animation wherever you touch the screen.
• See a larger, darker animation wherever you touch the screen.
On the sign-in screen, select the Ease of Access icon in the lower-left corner to choose ease
of access settings you want available every time Surface starts.
Windows Defender and Windows SmartScreen are built-into Windows 8.1 to help guard against
viruses, spyware, and other malicious software in real time. For more info, see Security checklist
for Windows and How can I help protect my PC from viruses? on Windows.com.
To scan Surface manually, use Windows Defender. See How do I find and remove a virus? on
Windows.com for how-to info.
© 2015 Microsoft Page 39
Page 45

Touchscreen care
Cover care
Battery care
Registration, repair, and warranty
Register your Surface 3 and Surface 3 Type Cover
Scratches, finger grease, dust, chemicals, and ultraviolet light can affect the performance of the
touchscreen. Here are a few things you can do to help protect the screen:
• Clean frequently. Wipe the touchscreen with a soft, lint-free cloth to clean it. You can
dampen the cloth with water or an eyeglass cleaner, but don’t apply liquids directly to
the touchscreen. Don’t use window cleaner or other chemical cleaners on the
touchscreen.
• Keep it covered. Close the Cover or use a sleeve when you’re in transit or not using
Surface.
• Keep it out of the sun. Don’t leave Surface in direct sunlight for an extended amount of
time. Ultraviolet light and excessive heat can damage the touchscreen.
The Type Cover requires minimum care to function well. Clean the keyboard frequently by
wiping it with a lint-free cloth dampened in mild soap and water, but don’t apply liquids directly
to the Cover.
If the spine or magnetic connections of your cover get dirty or stained, apply a small amount of
isopropyl alcohol (also called rubbing alcohol) to a soft, lint-free cloth to clean.
• Operating temperature. Surface is designed to work between 32°F and 95°F (or 0°C to
35°C). Lithium-ion batteries are sensitive to high temperatures, so keep your Surface out
of the sun and don’t leave it in a hot car.
• Recharge anytime. The battery doesn’t need to be empty or low before you recharge.
You can recharge the battery whenever you’d like. However, it’s best to let the battery
run to below 10 percent at least once per month before you recharge it.
If you haven’t already registered your Surface products, do so at
microsoft.com/surface/support/register. You’ll need your Microsoft account (the email address
© 2015 Microsoft Page 40
Page 46

Repair
Warranty
More help
and password that you use to sign in to your Surface and to download apps from Windows
Store), and the serial number of your Surface 3 or Surface 3 Type Cover.
For more info, see Find the serial number on Surface or Find the serial number on your Surface
Cover on Surface.com.
Before you send your Surface product in for service, you can check out the Surface
troubleshooting articles on Surface.com. If you can’t solve the problem with troubleshooting,
contact us through Surface.com.
If you continue to have a problem with your Surface, you can open a service request and send
your product in for service.
Before you send your Surface in for service, see How to prepare your Surface for service, and
then go to Send my Surface in for service on Surface.com, sign in with your Microsoft account,
and follow the on-screen instructions.
For warranty info, see Surface standard warranty and Microsoft Complete for Surface and
Surface warranty documents on Surface.com.
There’s lots more how-to info and help available online on www.surface.com/support.
© 2015 Microsoft Page 41
 Loading...