

Metz Spectral-72 MF 72TK80, Astral-72 MF 72TK81, Corum-72 MF 72TK86, Spectral-82 MF 82TK96, Astral-82 MF 82TK97 Operating Instructions Manual
...Page 1

04/13/22
603 47 2021.A2
Spectral-72 MF 72TK80
Astral-72 MF 72TK81
Corum-72 MF 72TK86
Spectral-82 MF 82TK96
Astral-82 MF 82TK97
Spectral-84 MF 84TK89
Operating instruction
Page 2

2
Contents
1. Installation . . . . . . . . . . . . . . . . . . . . . . . . . . . 3
2. Safety Notes . . . . . . . . . . . . . . . . . . . . . . . . . . 4
3. Remote Control Unit . . . . . . . . . . . . . . . . . . . . 6
4. General Operating Notes . . . . . . . . . . . . . . . 12
5. Daily Operation . . . . . . . . . . . . . . . . . . . . . . 14
5.1 Setting the operating mode . . . . . . . . . . . . . 15
5.2 Operating scope . . . . . . . . . . . . . . . . . . . . . 15
6. Setting language and country . . . . . . . . . . . . 17
7. Programming Stations . . . . . . . . . . . . . . . . . . 18
8. Station logo . . . . . . . . . . . . . . . . . . . . . . . . . 21
9. Sorting Stations. . . . . . . . . . . . . . . . . . . . . . . 22
10. Selecting stations. . . . . . . . . . . . . . . . . . . . . 23
11. Picture settings, general . . . . . . . . . . . . . . . . 24
11.1
Picture settings for a specific prog. position
. . . . 26
12. Sound settings, general . . . . . . . . . . . . . . . . 27
12.1
Sound settings for a specific prog.e position
. . . 29
12.2 HiFi output . . . . . . . . . . . . . . . . . . . . . . . . 30
12.3 Two-stage muting . . . . . . . . . . . . . . . . . . . 31
12.4 Centre loudspeaker . . . . . . . . . . . . . . . . . . 32
13. Colour standard . . . . . . . . . . . . . . . . . . . . . 33
14. Display configuration . . . . . . . . . . . . . . . . . 34
15. Chlidlock . . . . . . . . . . . . . . . . . . . . . . . . . . 35
16. Reminder . . . . . . . . . . . . . . . . . . . . . . . . . . 37
17. Timer control. . . . . . . . . . . . . . . . . . . . . . . . 38
18. Setting the time . . . . . . . . . . . . . . . . . . . . . . 39
19. Function keys . . . . . . . . . . . . . . . . . . . . . . . 40
20. Special functions . . . . . . . . . . . . . . . . . . . . . 41
21. Teletext . . . . . . . . . . . . . . . . . . . . . . . . . . . . 44
22. AV devices . . . . . . . . . . . . . . . . . . . . . . . . . 47
22.1 AV playback. . . . . . . . . . . . . . . . . . . . . . . 49
22.2 Copying recordings between AV devices. . . 51
23. EPG - NexTView . . . . . . . . . . . . . . . . . . . . . 52
23.1 EPG - Activating NexTView . . . . . . . . . . . . 53
23.2 Collecting NexTView Data . . . . . . . . . . . . . 54
23.3 Using NexTView.. . . . . . . . . . . . . . . . . . . . 55
24. Satellite system (only if fitted) . . . . . . . . . . . . 58
25. Automatic SAT station search . . . . . . . . . . . . 62
26. Specific SAT station search. . . . . . . . . . . . . . 63
27. One-touch SAT recording. . . . . . . . . . . . . . . 64
28. SAT timer recording . . . . . . . . . . . . . . . . . . 65
29. Initial programme position . . . . . . . . . . . . . . 66
30. Operation without the remote control unit . . . 67
31. Technical Data . . . . . . . . . . . . . . . . . . . . . . 68
32. Options . . . . . . . . . . . . . . . . . . . . . . . . . . . 69
33. Connecting headphones . . . . . . . . . . . . . . . 70
34. Cleaning the TV set . . . . . . . . . . . . . . . . . . . 70
35. Glossary. . . . . . . . . . . . . . . . . . . . . . . . . . . 71
Troubleshooting . . . . . . . . . . . . . . . . . . . . . 74
Connecting facilities at back-panal of TV-sets
. . . 76
Index. . . . . . . . . . . . . . . . . . . . . . . . . . . . . 77
Codetabel . . . . . . . . . . . . . . . . . . . . . . . . . 80
Foreword
Dear customer,
thank you for purchasing this
Metz product.
We have equipped this TV set
with a menu system which uses
"file cards" and believe that this
will provide you with a user
interface that is easy to understand.
If you have any problems, you
can press the "INFO" key to
display a help function that will
assist you in setting up your TV
set.
However, you should read at
least sections 1 to 7 of the Operating Instructions before putting
your new TV set into service.
Your METZ-WERKE
Page 3

3
• Take care that no bright artificial light or sunshine falls directly on the screen. This could cause
reflections which have a negative effect on the
brilliance of the picture.
• The optimum viewing distance is about
five times the screen diagonal dimension. For TV sets with a 70 cm screen, it
is thus about 3.5 metres.
• The antenna cable and any other components
(such as a video recorder) connected between
the antenna socket in the wall and the TV set
must comply with the European standard EN
60966-2-4.
• There may be no magnetic fields in the immediate vicinity of the TV set. Keep loudspeaker
boxes well away from the set.
• The antenna cable used for connecting the TV
set must have a screening attenuation of at least
75 dB.
• The use of non-approved cables will invalidate
the operating permission for the TV set.
• For details of how to connect peripheral devices
such as video recorders, DVD players, etc. press
the „INFO“ key to call the help function, select
„Connecting AV devices“ with the cursor and
press „OK“ to display the information.
1. Installation
y
cm
5 x cm
Page 4

4
2. Safety notes
• Always place the monitor on a solid, stable surface.
• If a cold TV set is moved to a warm room,
always allow any condensation on the screen to
evaporate before switching it on.
• The TV set is intended for use in a dry room. If,
in exceptional circumstances, you use it outdoors, take care that is protected against moisture (rain, splashed water, dew).
• TV sets need adequate ventilation. Never cover
the openings on the rear of the set with curtains,
doilies, newspapers, etc. Also take care that the
slits in the bottom of the case are freely accessible so that the intake of the cooling air is not
hindered.
• If you place the TV set in a wall unit,
leave sufficient space on all sides for the
circulation of cooling air.
• Do not place the TV set close to a radiator, since this would effect adequate
cooling.
• Do not place
burning candles or
vessels containing liquids (vases, etc.)
on top of the TV set, since any hot wax or water
dripping into the set could cause serious damage
to the electronic components and could also jeopardize the electrical safety of the set.
• Lightning can damage electrical equipment. A
lightning flash entering the power cable or the
aerial cable can damage the TV set even if it is
y
Page 5

5
2. Safety notes
switched off. You should therefore disconnect
the power cable and aerial cable from their outlets or from the TV set in the case of a thunderstorm.
• The monitor may be opened and repaired only
by a qualified person.
CAUTION! HIGH VOLTAGES CAN KILL!
If repairs should be necessary, consult your
local dealer.
• Always switch off the TV set before cleaning it.
• Do not hold the remote control directly in front
of your eyes and press a button. The remote
control emits infrared radiation!
• Do not place rechargeable batteries in the battery compartment of the remote control.
Use only two 1.5 V dry batteries of the type
LR03/AM4/AAA (Micro).
• The TV set is intended only for the reception and
reproduction of picture and sound signals.
• The TV set may be operated only
from a mains voltage of 230 VAC,
50/60 Hz.
240 VAC in Australia only
• Lay the power cable so that nothing
stands on it and no-one can trip
over it.
Page 6

6
The Metz remote control unit RG 12 can
be used to remotely control all Metz TV
sets with the type designation "TH" (see
the Operating Instructions of the TV set
or look at the label on the back of the
set) or later models (such as TK, TL, ...)
as well as video recorders VCR1 and
VCR 2, DVD players and HiFi equipment (such as radios, cassette players,
CD players, amplifiers, etc.) made by
Metz or various other manufacturers.
The remote control unit transmits commands to the TV set with the aid of infrared light. You should always point the
remote control unit directly at the TV set.
The remote control unit may possibly interfere with other infrared devices (such as
infrared headphones) within its range.
Sunlight falling directly on the TV
set may interfere with the operation
of the remote control unit, because
the TV set cannot detect the infrared signals from it. The TV set must
first be switched on with the main
switch before the remote control
unit can be used.
The remote control unit is programmed
as follows before it leaves the factory:
• TV Metz TV sets with the type designation "TH"
• VCR1 Metz video recorders with remote
control unit RH51
• VCR2 Metz video recorders with remote
control unit RF52
• DVD Metz DVD players with remote
control unit RG/RH374
• HiFi Metz HiFi CD receiver HE 11 with remote
control unit F11
☞
3. Remote control unit
21
22
Never load rechargeable batteries
into the battery compartment of the
remote control unit!
Only use two 1.5V LR03/AM4 batteries, size AAA.
Page 7

7
The most important keys in
normal use
ON:
the last station watched before the set
was switched off is selected.
OFF (standby)
Numeric keys (direct station selection)
P+ / P-: next/previous programme
position
Volume control
Also used to change settings in the
menu
Return to previously selected pro-
gramme position
Display the station table
Overview of key functions
Switch to satellite radio mode
Switch on from standby mode to
satellite radio mode
1)
(
1)
only if a SAT upgrade module is
fitted)
Function keys F1 ... F3
Cursor control key in the "Informa-
tion" and in the menus
OK - confirmation key
Change settings in the TV menu
Sound mute
Call the TV menu
In the menu: return to the previous
main menu item
Call Teletext
Call the „Information“
In the „Information“: return to the contents
Frame freeze
Delete key in the menus
Return to previously selected pro-
gramme position
In the TV menu: call „Configuration“
Display date and time
In the TV menu: call „Timer“
In the TV menu: call the „Station
table“ or display station attributes
Call the sound settings
In the TV menu: call „AV devices“
Call the picture settings
In the TV menu: call „Picture and
sound“
Return to the TV picture
Switch from satellite radio mode
1)
to
TV mode Switch on from
standby mode to TV mode (
1)
only if a
SAT upgrade module is fitted)
Call the AV menu for playback and
recording
Switch on from standby mode to AV
mode
Select key - used for switching the
operating level to AV devices
EPG (Electronic Program Guide)
= open NexTView
3. Remote control unit
21
22
Page 8

8
3. Remote control unit
1. Programming the remote control unit for control of your
equipment
In order to remotely control your consumer
electronics equipment, you must programme each of the various levels of the remote
control unit with a 3-digit code.
• TV (TV-Gerät)
The TV level is already programmed
for Metz TV sets with the type designation "TH". This programming cannot
be changed.
• VCR 1 (Video recorder 1)
VCR 2 (Video recorder 2)
DVD-Player
HiFi (e.g. amplifier, tuner, tape, etc.)
The remote control unit must be programmed with a code from the code
list for each level you want to use.
Note the factory settings (Page 6)
and the list of available codes at the
end of these Operating Instructions.
1.1 Programming the codes for
VCR and DVD
When you select the steps a)...c) ,you
have about 15 seconds to continue
with the next step. If you do not do so
within this time, the unit automatically
returns to the TV level
a) Use the Select key to select the desired
level. The coloured LED for the currently selected level lights.
b)
Press the keys and F1 together and
hold them until the LED blinks twice.
c) Enter the desired code (see the code
list) with the numeric keys. If this code
is accepted, the LED again blinks twi-
☞
☞
ce. If the code does not exist in the
table, the LED lights for about two
seconds.
1.2 Programming the codes for
CD Player, Tuner and Tape
When you select the steps a)...c) ,you
have about 15 seconds to continue
with the next step. If you do not do so
within this time, the unit automatically
returns to the TV level.
a) Use the Select key to select the HiFi
level. The coloured LED HiFi lights.
b) Press the key , release it and then
press the key: ...
...F1 for CD player
...F2 for Tuner (radio)
...F3 for Tape (cassette recorders)
der Fernbedienung drücken, bis die
until the LED blinks once.
c) Enter the desired code (see the code
list) with the numeric keys. If this code
is accepted, the LED again blinks twice. If the code does not exist in the
table, the LED lights for about two
seconds.
1.3 Programming the code for
HiFi amplifier
When you select the steps a)...d) ,you
have about 15 seconds to continue
with the next step. If you do not do so
within this time, the unit automatically
returns to the TV level.
a) Use the Select key to select the HiFi
level. The coloured LED HiFi lights.
b) Press the key , release it and then
press and hold the F3 key until the
LED blinks twice.
☞
☞
Page 9

9
3. Remote control unit
c) Press the F1 key: the LED blinks once.
d) Enter the desired code (see the code
list) with the numeric keys. If this code
is accepted, the LED again blinks twice. If the code does not exist in the
table, the LED lights for about two
seconds.
1.4 Station search
Follow the instructions for programming
the code for VCR, DVD, CD, tuner, tape
as far as the step where the code number is entered. Then enter the three-digit
code number "001" for the station
search. The LED blinks twice to acknowledge the input. Then press and hold the
"Station-search" key (which depends on
the operating level; see the table on
pages 10 and 11) until the device stops
or is switched off (a STOP or OFF command is issued automatically every 1.5
seconds).
Release the "Station search" key and
press the "Select" key to confirm that you
want to execute a station search (the
code which was found is saved).
After completion of the station search, or
when all code numbers have been interrogated, the corresponding LED blinks
five times.
2. Determining which code is
already programmed (readout mode)
When you select the steps a)...e) ,you
have about 15 seconds to continue
with the next step. If you do not do so
within this time, the unit automatically
returns to the TV level.
a) In order to determine which code is
☞
programmed for a level, first select the
level as described in section 1.1, steps
a) and b).
b) Enter
on the numeric keys. The
LED blinks twice to acknowledge your
input.
c) Press numeric key (for the first digit
of the code). The LED now blinks the
number of times corresponding to the
programmed digit (if, for example, the
LED blinks three times, the digit 3 is
programmed).
d) Press numeric key (for the second
digit of the code). The LED now blinks
the number of times corresponding to
the programmed digit (if, for example, the LED does not blink, the digit 0
is programmed).
e) Press numeric key
(for the third
digit of the code). The LED now blinks
the number of times corresponding to
the programmed digit (if, for example,
the LED blinks seven times, the digit 7
is programmed).
In this example, the currently programmed code is thus
If you lose count while reading out the
code, simply start again at step 2c).
Page 10

10
Key V C R 1 / 2
On / Standby
Record
a
Time in display
b
c
Numeric keys:programme selection
Programme +/–
Fast forward/Rewind
OK
TV volume +/–
Mute TV
MENU
On
R
F 1
F 2
F 3
0...9
P +/–
< >
OK
Vol.+/–
Mute
Menu
Text
TV-set INFO*
Pause
STOP / Statiom search
PLAY
Slow-motion
AV input
Select operating
Info
I I
red
green
white
yellow
blue
TV
AV
Select
EPG
Switching voltage on/off**
21
22
3. Remote control unit
21
22
* In preparation: If the TV set is switched on,
the current operating level is indicated.
** AV-Link with Panasonic VCR
Note:
The assignments of the operating levels to the
device functions apply only for the AV devices
preset in the factory. If other AV devices in accordance with the code table are used, some of
these assignments may differ or be restricted.
Station search:
Programme the code for VCR, DVD, CD, tuner or
tape and execute the steps up to the input of the
code number. Then enter "001" as the 3-digit
code for station search. The LED blinks twice to
acknowledge this input. Then press and hold the
Page 11

11
DVD
On / Standby
Return
Angle
Audio
Subtitle
Numeric keys: title selection
Cursor up / down
Cursor left/right
OK / Enter
TV volume +/–
Mute TV
MENU
Display
TV set INFO*
Pause
STOP / Station search
PLAY
EJECT
Skip +
Skip –
Repeat
Select operating level
Title
H i F i
C D ( F 1)
T U N E R ( F 2 )
T A P E ( F 3 )
ON: display time/track
ON + AV, ON: on/standby
ON: radiotext on/off
ON + AV, ON: on/standby
F1 & ON: CD F1 & ON: CD
F2 & ON: tuner F2 & ON: Tuner
F3 & ON: tape-input F3 & ON: tape input
Num.Keys: title selection
N.Keys: programme selection
Titel +/– Programme +/–
Frequency +/–
AMP volume +/– AMP volume +/– AMP volume +/–
TV set INFO* TV set INFO* TV set INFO*
PAUSE
STOP / OPEN-CLOSE / Station search
num. key =Station search
Station search
PLAY
AUX Input AUX input AUX input
Select operating level Select operating level Select operating level
3. Remote control unit
"Station search" key (depending on the operating level: see the
table) until the device stops running or switches off (an OFF or
STOP command is automatically transmitted every 1.5
seconds). Release the "Station search" key and start the search
with the "Select" key (the code you entered is saved). When the
station search has been completed or all code numbers have
been interrogated, the corresponding LED blinks five times.
Reset:
Programme the code for VCR, DVD, CD, tuner or tape and
execute the steps up to the input of the code number. Then enter
"000" as the 3-digit code for "Reset". The LED blinks twice to
acknowledge this input. This resets all codes to the factory settings.
The reset is executed for all operating levels, regardless of the
operating level from which it is executed.
Key
a
b
c
On
R
F 1
F 2
F 3
0...9
P +/–
< >
OK
Vol.+/–
Mute
Menu
Text
Info
I I
red
green
white
yellow
blue
TV
AV
Select
EPG
21
22
Page 12
12
When designing this TV set, we have tried to
make its operation as easy as possible so that
you will enjoy learning how to use it.
The TV set itself can provide the answers, with the
menu „Information“, to any questions you may
have during installation and switching on.
To use this function, simply press the „INFO“ key
to display the table of contents of the
„Information“ on the screen.
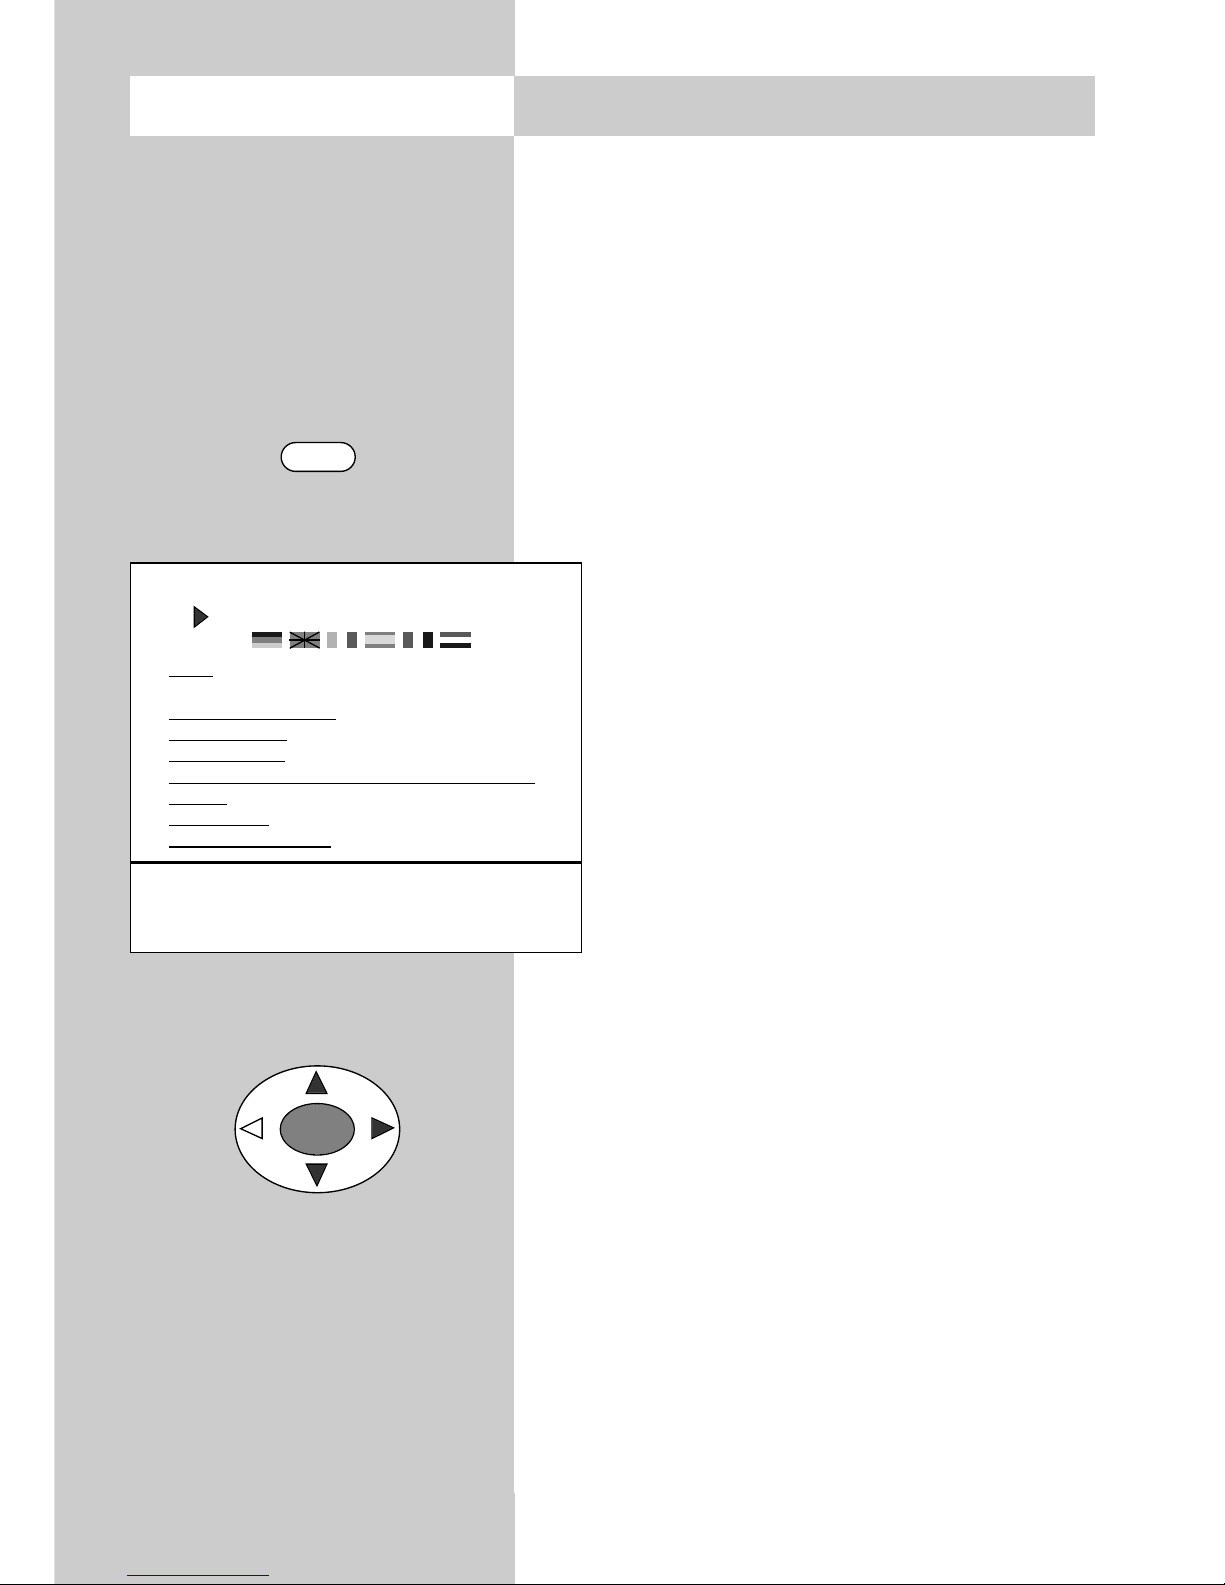
The menu „Information“ (help function)
In the table of contents, or in the index, you
can then select the information you need
with the cursor control key.
„Cursor right“ : move to next page of the
index.
„Cursor left“ : scroll backwards through
the index.
„Cursor up“ : select the previous underlined text or the arrow -->.
„Cursor down“ : select a line in the list.
Then press the „OK“ key to display this
information.
You can select any underlined words in the table
of contents, the index or the explanatory text with
the cursor and press „OK“ in order to display
further information about them.
You can scroll back and forth through previously
selected help pages with the aid of the red and
green keys.
4. General operating notes
OK
Call the menu
INFO
Information
Contents (1/2)
Index
Programme selection
Picture settings
Sound settings
AV playback / recording / satellite recording
Teletext
Function key
Satellite radio mode
-->
Use the cursor to select an underlined text.
OK: further information INFO: help index
Previously visited pages
: backwards forwards
Page 13
13
Using the menus
With the „TV menu“, we help you to find your
way through the many operating functions of
your TV set.
Do not hesitate to try out the options in the
various menus. Any changes you make become
permanently effective only if you save them by
pressing the „OK“ key. If you are not sure that
you want to retain a new setting, you
can simply exit from the menu by pressing the „TV“ key. The new setting is
then discarded.
While you are in the TV menu, you can
return to the main menu item
at any time
by pressing the „MENU“ key. If you do
not understand a menu item, press the
„INFO“ key for more information.
To return to the menu, press the „INFO“
key twice.
The five main sections of the menu can be opened
with the coloured keys. The help information is
shown in the form of two card files containing the
subjects
(blue) and the sections of the selected
subject (yellow). You can select the subjects and
sections with the aid of the red triangular cursor,
which is moved with the oval key.
Pressing the „OK“ key then moves you to
the setting window
below the file boxes.
The current setting is displayed here and
you can change it with the
-
+
key.
To save the new setting, press the „OK“
key. This also returns you to the file of
yellow section cards. If you do not want
to save the new setting, press the
„MENU“ key to return to the related
main menu item or press the „TV“ key to
exit from the menu.
You can delete your input by pressing the ll key.
4. General operating notes Call the menu
MENU
OK
Main menu items
Coloured keys:
call menü
TV: return to TV
picture
AV devices
Station table
Timer
Configuration
TV-Menü
Picture-Volume
Sound set.prog.po
Sound settings, gen.
Pict. set.,prog. posn.
Pict. settings, gen.
These settings apply to all programme position
: select,
OK: go to
settings.
AV devices
Station table
Timer
Configuration
Factory settings
Rotation*
Panorama*
CTI
Noise reduction
Picture sharpness
Colour intensity
Contrast
Luminance
TV-Menü
Picture-Volume
Subjects*
Sections*
Cursor Setting window
Page 14
14
5. Daily operation
Switching on
Switch on the TV set with the main switch. The red
standby indicator lights.
Then enter the desired programme position on the
numeric keys of the remote control unit.
Alternatively, simply press the key with the TV
set in standby mode to select the programme
position you were watching before the set was
switched off.
If you have defined an initial programme position
(see page 66), pressing the key with the TV
set in standby mode will select this programme
position.
Switching off
Press the key to switch the TV set to standby
mode or press the main switch on the TV set to
switch it off completely.
Station selection
You can select a station (programme position) with
the numeric keys, with the rocker key „P+/P-“ or from
the station table.
To call the station table, press the white key . Use
the cursor control key to select the desired station and
then press the
„OK“
key to confirm your selection.
Adjusting the volume
You can adjust the volume with the
-
+
key.
Adjusting picture and sound settings
Call the picture settings with the blue key or
the sound settings with the yellow key .
At the bottom left of the screen, you will then see
the setting box with the various functions. Select
the desired function with the rocker key „P+/P-“
and adjust the setting with the
-
+
key.
OK
OK
Ǽ
Page 15
Until we introduce Version 2.1 of the software, this
menu item is available only in the service menu. If
you wish to reduce the operating scope of your TV
set, please consult your local Metz dealer.
The operating scope of the TV set is indicated by
asterisks in the menus and can be reduced in two
stages in order to prevent inadvertent changing of
certain settings.
Programming the operating scope
(Software version V2.1 or higher)
• Press the "MENU" key to open the TV
menu.
• Press the red key to open the menu
"Configuration".
• Use the cursor control key to select
"Operation".
• Press the "OK" key and then use the
cursor control key to select "Operating".
•
Press the "OK" key and then, in the setting
window, select the desired operating scope
with the
-
+
key.
15
Call the menu
Call the menu
5.1 Setting the operating mode
5.2 Operating scope
TV AV R
The TV set can be switched on at the desired operating level with the keys "TV", "AV" and "R".
These keys can also be used to switch between the
operating levels.
When the TV set is switched on with one of these
keys, the station which was last selected at this
operating level is again set.
TV = television mode
AV = audio-visual mode for use with AV devices
R = radio mode
1)
(1)available only if a SAT receiver is installed)
MENU
OK
Operation
Function for AV*
Function for F3*
Function for F1*
EURO sockets*
Station search
Country*
Language*
Scope of operation full
Picture-Volume
AV devices
Station table
Timer
Scope of operation
EPG settings
Automatic zoom
Sound settings
HiFi output
Init. prog. position
Display configuration
TV-Menü
Configuration
: select,
OK: go to
settings.
Page 16

16
The full TV menu is displayed
A reduced TV menu is displayed. The follo-
wing functions are no longer available:
- Special picture settings such as panorama, CTI,
noise reduction, picture sharpness, etc.
- Special sound settings such as stereo wide, spatial sound, balance, tone settings, etc.
- Picture and sound settings for individual programme positions.
- Programming of the function keys.
- Settings for the EURO sockets.
- Special functions in the menu "Operation".
The TV menu cannot be opened, Only the stan-
dard functions of the remote control are available.
• Save the changed setting by pressing the "OK"
key.
If you want to open a menu although only the operating scope with one asterisk is active, then:
• Press and hold the "MENU" key for at least five
seconds to open the TV menu.
• The menu item "Operation" is automatically
selected.
• Use the
-
+
key to select the desired operating
scope and press the "OK" key to save the changed setting.
5.2 Operating scope
Page 17

17
6. Setting the language and country
In a menu with two asterisks (**), the settings for the menu items "Language" and
"Country" cannot be changed.
Setting the language for the TV menu
You can select one of the available languages for
the display of the TV menu. The text in the menu
and in the help function (Information) is then
displayed in the selected language.
Setting the country
After installing the TV set, you must select the
country where it is installed. This information is used by the TV set to make
certain basic settings (such as the channel spacing, the sorting sequence for the
stations, etc.).
Setting the language and country:
• Press the „MENU“ key to open the TV
menu.
• Press the red key to open the menu
„Configuration“.
• Press the „OK“ key and use the cursor
control key to set the desired language
or country.
• Press the „OK“ key to save the settings.
• Press the „TV“ key to close the menu.
The menu language can also be set
in the help function (Information)
by selecting the appropriate national flag.
☞
☞
Call the menu
MENU
OK
Operation
Function for AV*
Function for F3*
Function for F1*
EURO sockets*
Station search
Country*
Language*
Selected country Australia
: select,
OK: go to
settings.
Picture-Volume
AV devices
Station table
Timer
Italien
Großbritanien
Frankreich
Finnland
Deutschland
Dänemark
Belgien
Baltikum
Australien
TV-Menü
Configuration
Operation
Function for AV*
Function for F3*
Function for F1*
EURO sockets*
Station search
Country*
Language*
Selected language English
: select,
OK: go to
settings.
Picture-Volume
AV devices
Station table
Timer
Nederlands
Français
Español
Italiano
English
Deutsch
TV-Menü
Configuration
* The number of subjects and sections
displayed here depends on the operating scope setting.
Page 18

7. Programming stations
You can programme the TV stations in three different ways.
a) Automatic station search
The automatic station search function searches the
entire range of reception frequencies for TV stations.
All stations which are found are placed in the
station table, which is displayed at the end of the
search operation. If you are not satisfied with the
order in which the stations are stored, you can shift
or delete stations as described in the next section.
Executing an automatic station search
• Press the „MENU“ key to call the TV
menu
• Press the red key to open the
„Configuration“ menu.
• Move the cursor to „Automatic station
search“.
• Press the „OK“ key several times until
the message „Searching for stations“
is displayed.
• A station table containing all stations
which are found is displayed on the
left side of the screen.
• At the end of the search, all stations
which were found are sorted and
displayed.
• To delete any unwanted stations, select them
with the cursor and press the „II“ key.
• To save the stations, press the „OK“ key and
enter, with the numeric keys, the number of the
programme position where the first station is to
be saved. The remaining stations are saved in
the following programme positions.
b) Station search
The station search function permits you to search
for specific stations if you do not know their channel number or frequency.
18
Operation
Function for AV*
Function for F3*
Function for F1*
EURO sockets*
Station search
Country*
Language*
Station search (START)
: select,
OK: go to
settings.
Picture-Volume
AV devices
Station table
Timer
DataLogic
Terr. station search
TV-Menü
Configuration
Call the menu
MENU
OK
* The number of subjects and sections
displayed here depends on the operating scope setting.
Page 19

19
Call the menu7. Programming stations
Executing a station search
• Press the „MENU“ key to display the TV menu.
• Press the white key to display the station
table.
• Move the cursor to en empty programme position (or to a position containing a station you
wish to replace with the new station).
• Move the cursor to „Frequency/Channel“.
• Press the „OK“ key.
• In the setting window which is then displayed,
move the cursor to „Search“.
• Press the
-
+
key to start the search.
• The search stops when the first station
is found.
• If you want to save this station, press
the „OK“ key.
• If you do not want to save this station,
press the
-
+
key again to continue the
search.
c) Direct channel input
You can programme a station directly by
entering its channel number with the
numeric keys (you must, of course, know the
channel number of the desired station).
Executing direct channel input
• Press the „MENU“ key to display the TV menu.
• Press the white key to display the station
table.
• Move the cursor to en empty programme position (or to a position containing a station you
wish to replace with the new station).
• Move the cursor to „Frequency/Channel“.
• Press the „OK“ key.
009 MDR
008 SW 3
007 N24
006 PRO 7
005 RTL
004 SAT 1
003 Bayern 3
002 ZDF
001 ARD
Channel 6 Cable channel --
Frequency 182.31 MHz
Scan operation ARD
: select,
OK: go to
settings.
Picture-Volume
AV devices
Station table
Timer
Configuration
Decoder
Sound correction
Colour standard*
Picture corrections*
Picture quality*
Enter Logo
Frequency/channel
TV-standard 2)
TV-Menü
Station table
MENU
OK
OK
* The number of subjects and sections
displayed here depends on the operating scope setting.
2) Available only on TV sets
which are equipped with this
option.
Page 20

20
• In the setting window which is then displayed,
move the cursor to „Channel“ or „Special channel“.
• Enter the number of the channel or special
channel with the numeric keys.
• Press the „OK“ key to save the station.
• Press the „TV“ key to close the menu.
Fine tuning
When you programme stations, each channel is
automatically tuned to the centre frequency. This
is normally sufficient. If this automatic function
does not produce satisfactory results, you can
carry out fine tuning.
Executing fine tuning
• Select the desired programme position.
• Press the „MENU“ key.
• Press the white key to open the station table.
• Move the cursor to the subject card
„Frequency/Channel“.
• Press the „OK“ key to confirm your
selection.
• In the setting window, select „Frequency“ and use the
-
+
key to change the
frequency value until the picture is as
clear as possible.
• Save the new setting by pressing the „OK“ key.
• Press the „TV“ key to close the menu.
7. Programming stationsCall the menu
Channel 6 Cable channel --
Frequency 182.31 MHz
Scan operation ARD
Change value with
+ and Confirm with OK
Picture-Volume
AV devices
Station table
Timer
Configuration
TV-Menü
Station table
MENU
OK
OK
Page 21

21
8. Station logo
Each station which transmits VPS signals also
sends a station logo with up to eight characters,
which is automatically assigned to this station in
the station list. If this automatic function does not
work correctly, or if you want a different station
logo, you can overwrite the logo manually.
Setting the station logo
• Select the desired programme position.
• Press the „MENU“ key.
• Press the white key to open the station table.
• Move the cursor to the subject card „Logo“.
• Press the „OK“ key to confirm your selection. In
the setting window, you can now enter
the desired logo with the aid of the
numeric keys.
As long as the red cursor is selected,
you can enter the desired letters and
digits by pressing the numeric keys
(e.g. key : J-K-L-5). If you make a
mistake, you can delete the characters
before the red cursor, one at a time,
with the red key. To delete the entire
logo, press the ll key.
• When you are finished, press the
„OK“ key to save the new logo.
• Press the „TV“ key to close the menu.
Call the menu
MENU
OK
OK
009 MDR
008 SW 3
007 N24
006 PRO 7
005 RTL
004 SAT 1
003 Bayern 3
002 ZDF
001 ARD
: select,
OK: go to
settings.
Decoder
Sound correction
Colour standard*
Picture corrections*
Picture quality*
Enter Logo
Frequency/channel
TV-Menü
Picture-Volume
AV devices
Station table
Timer
Configuration
Station table
. , ABC DEF
GHI JKL MNO
PQRS TUV WXYZ
ARD
* The number of subjects and sections
displayed here depends on the operating scope setting.
Page 22

22
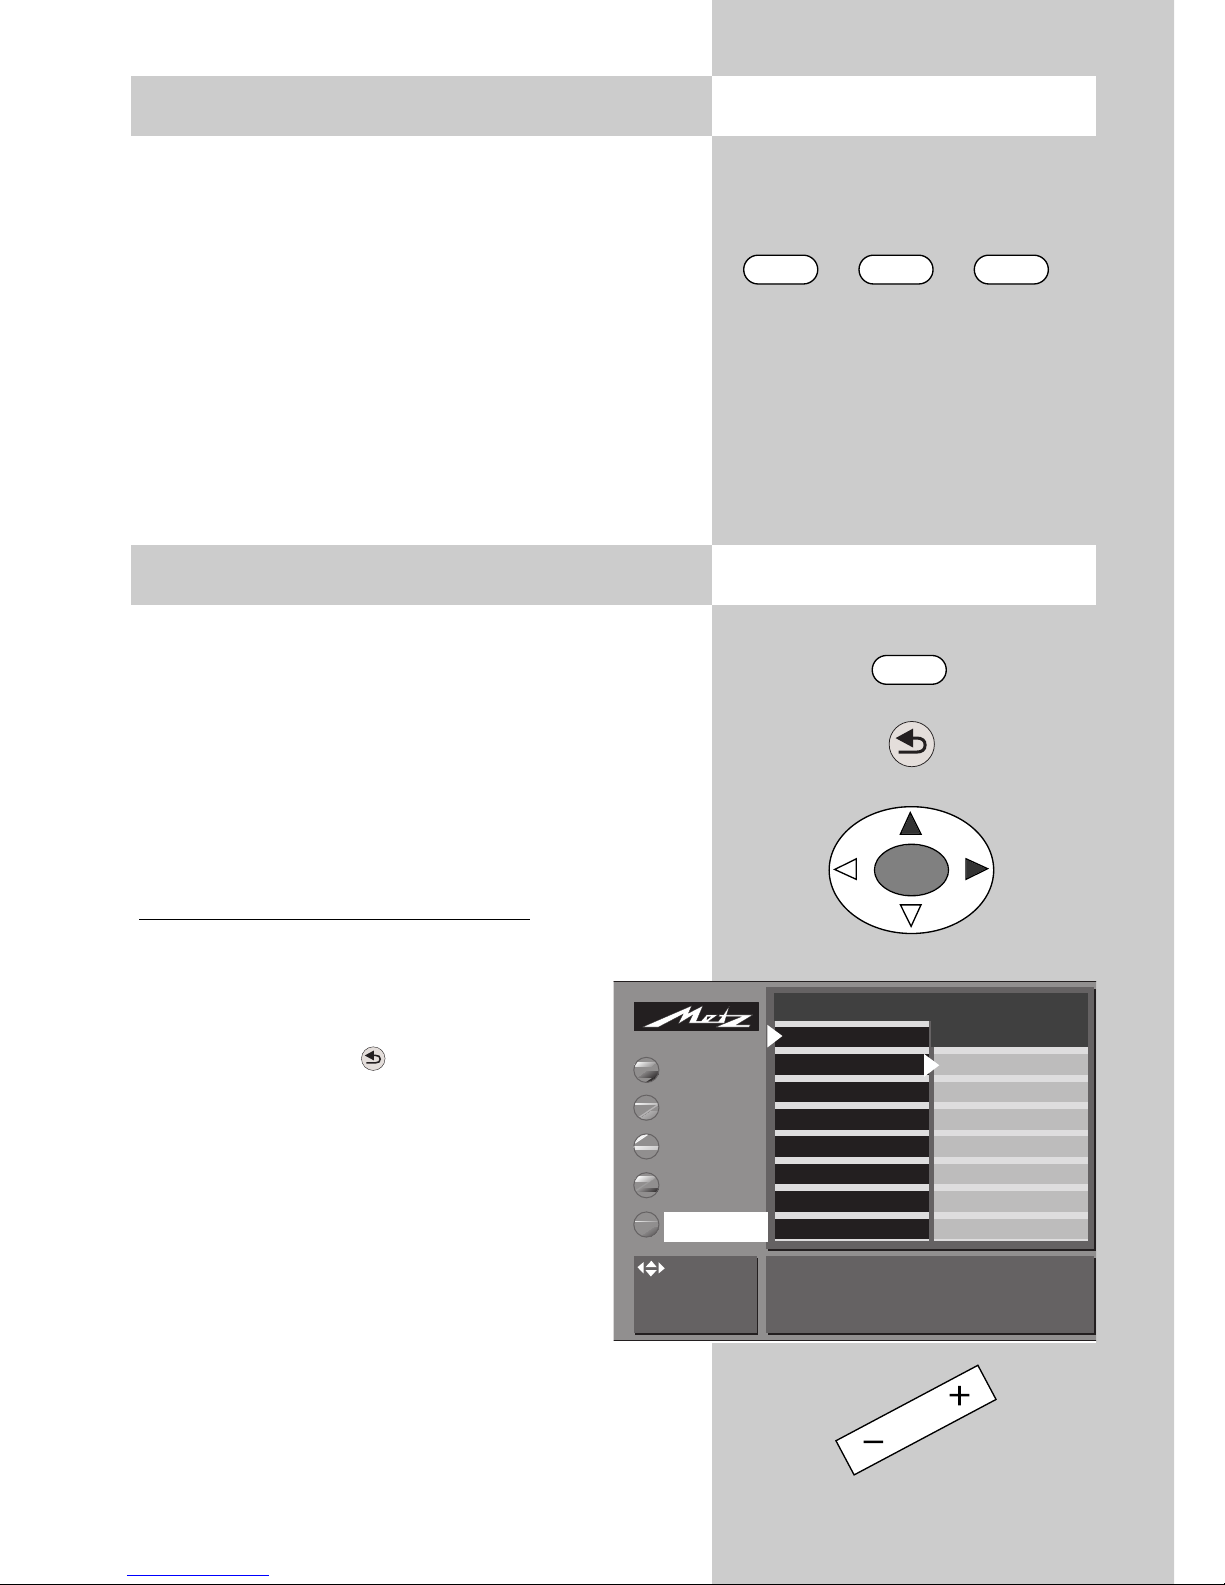
9. Sorting stations
In the station table, you can shift or copy one or
more stations to other programme positions. You
can also delete any unwanted stations.
Copying, shifting and deleting stations
• Press the „MENU“ key to call the TV menu.
• Press the white key to call the station table.
• Press the „F1“ key to enable editing of the station table.
• Use the cursor control key to select the programme position you want to copy, shift or
delete.
• Press the „OK“ key to mark this programme position: the text colour changes to orange and an asterisk is
displayed after the last digit of the
programme position number (in the
example on the left: position 007).
• To shift
or copy
this station, move the
cursor to the programme position
before or after which the selected station(s) is/are to be inserted. If these
stations originally had a lower position number than this position, it/they
will be inserted before this programme
position. Stations which originally had
a higher number will be inserted after
this programme position.
• Press the
-
+
key to copy (+) or shift (-) the
selected station(s).
• To delete a station, press the ll key.
• Press the „F1“ key to save the new settings
Call the menu
009 MDR
008 SW 3
007* N24
006 PRO 7
005 RTL
004 SAT 1
003 Bayern 3
002 ZDF
001 ARD
Move, copy, delete: Select one or more stationswith OK.
Move cursor to new position
+ = copy, - = move, II = delete
F1: End
White: Clear all
marks
Picture-Volume
AV devices
Station table
Timer
Configuration
Decoder
Sound correction
Colour standard*
Picture corrections*
Picture quality*
Enter Logo
Frequency/channel
TV-Menü
Station table
MENU
OK
F1
F1
* The number of subjects and sections
displayed here depends on the operating scope setting.
Page 23

23
10. Selecting stations Call the menu
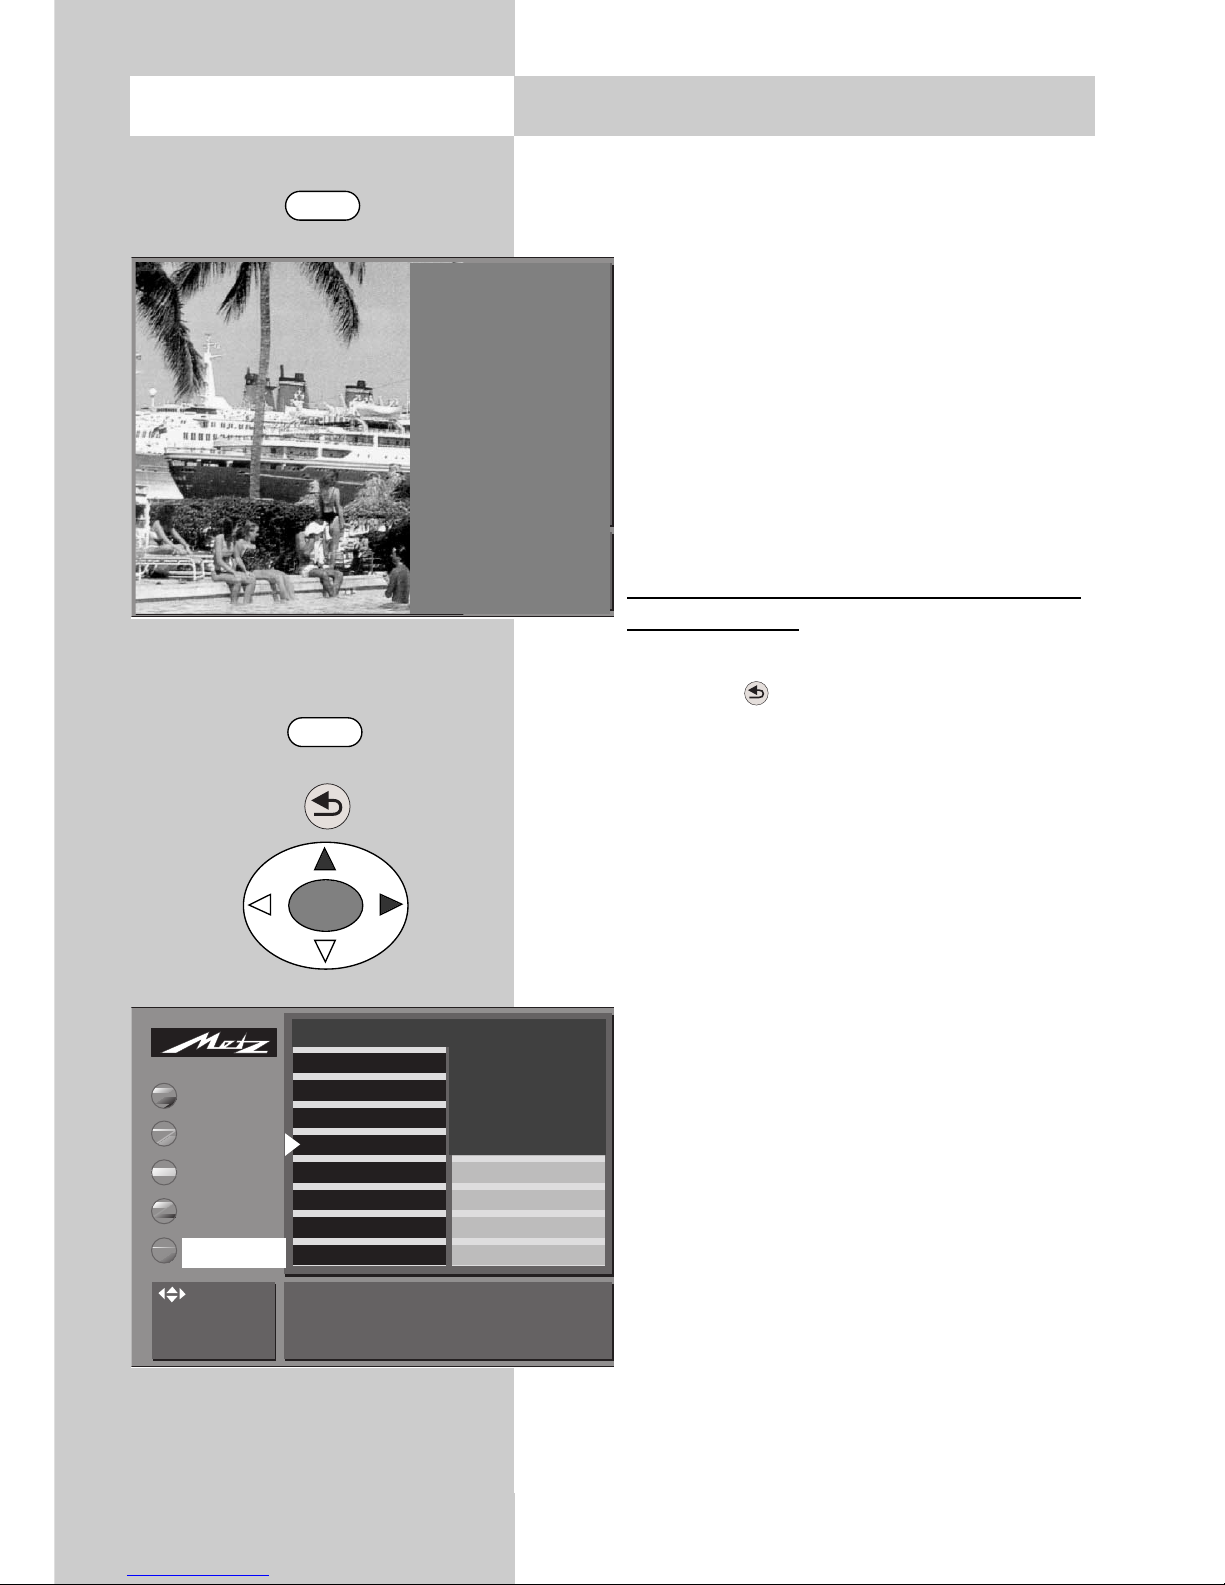
OK
Station selection and programme position management
Your TV set can manage up to 999 programme
positions in the station table. You can select these
programme positions with the numeric keys, with
the oval „P+/P-“ rocker key or via the station
table.
When you enter a position number on the numeric keys, the first digit you enter is the „hundreds“
digit. If there are less than 100 programme positions defined, this digit automatically moves to the
„tens“ position. If less than 10 programme positions exist, it automatically moves to the
„ones“ position.
After pressing any numeric key, you
have three seconds to enter further
digits.
Selecting programmes from the
station table
In normal TV mode, you can open the
station table with the white key . In
the table which is then displayed, you
can select a station with the oval „P+/P-“
rocker
key. Then press the „OK“ key to switch to this station.
If more than 20 stations are stored in the station
table, you can display the next 10 stations by
pressing the oval cursor control key.
Return to previous station
With the red key , you can switch back and
forth between the last two stations you selected.
14 MDR
13 Nord 3
12 RTL
11 SAT 1
10 Nord 3
9 SuperRTL
8 Kabel 1
7 PRO 7
6 West 3
5 Hessen 3
4 SW-BW
3 Bayern 3
2 ZDF
1 ARD
Page 24

24
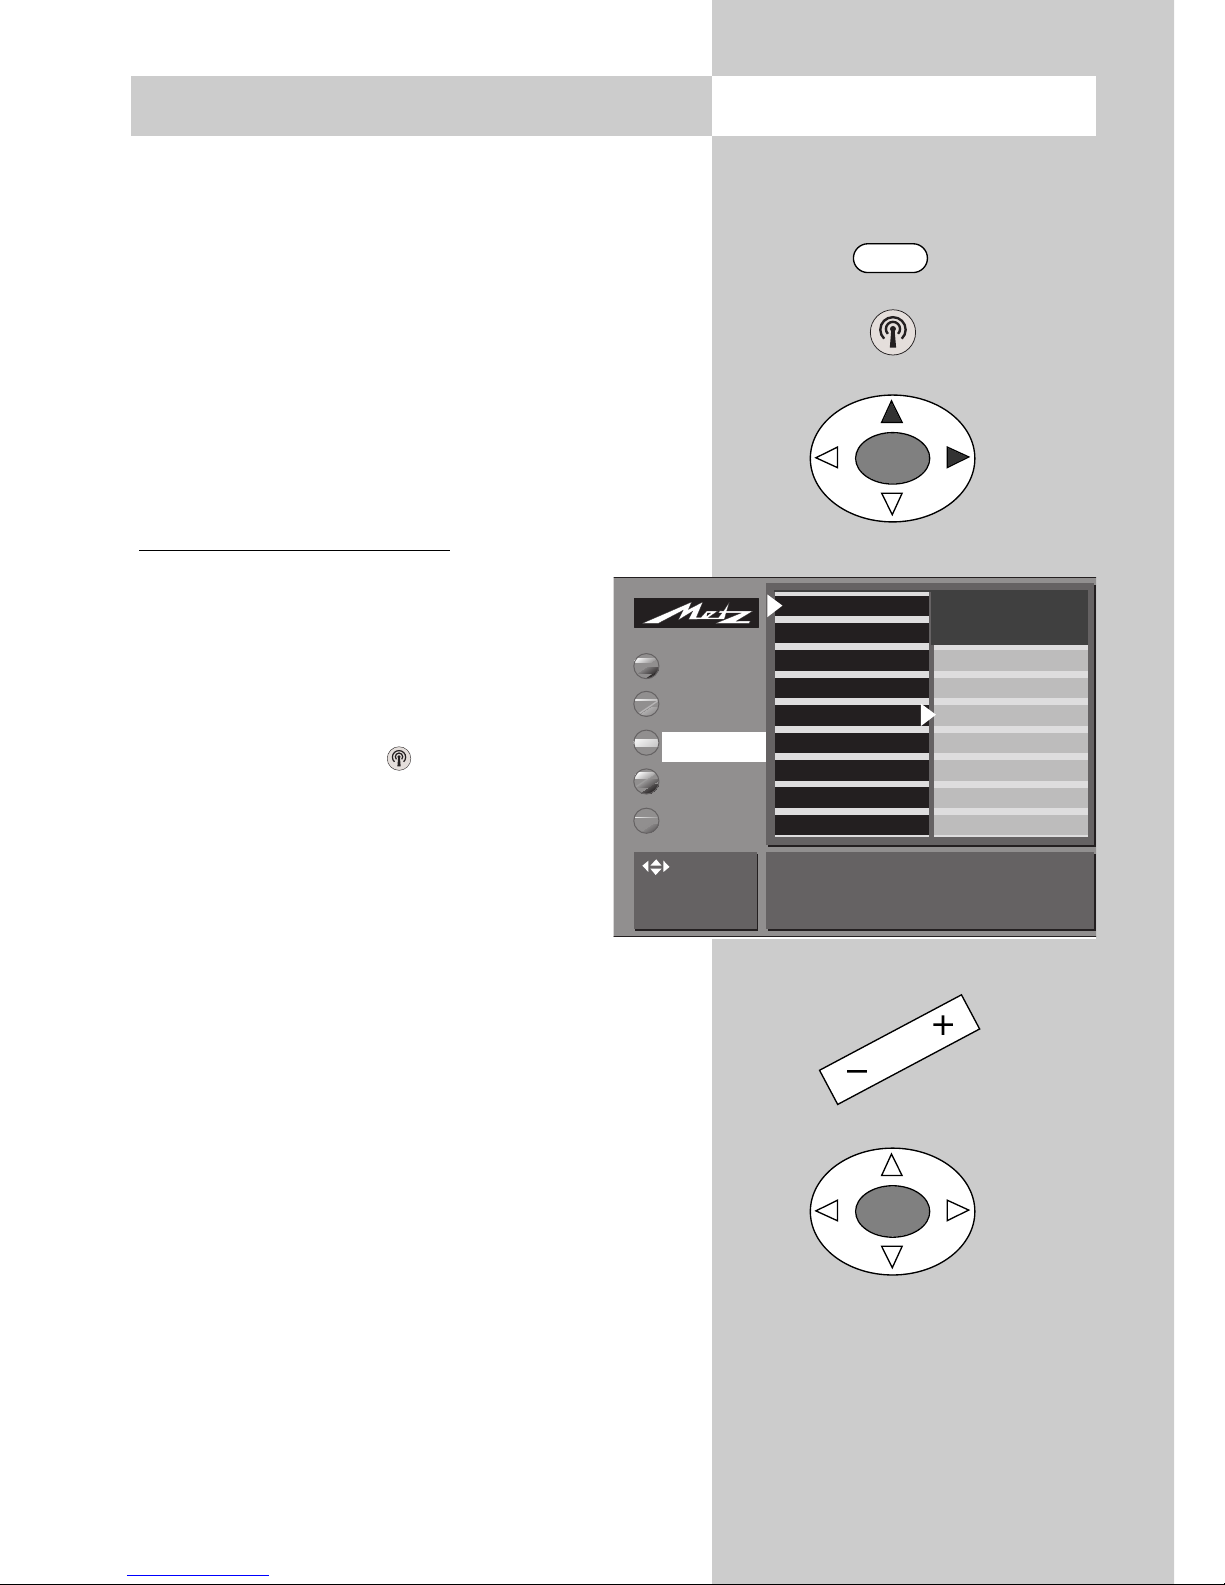
11. Picture settings, general
Call the menu
In a menu with two asterisks (**), the settings for certain menu items cannot be
changed.
You can adjust the picture settings (brightness,
contrast, chrominance, etc.) for all programme
positions and save these settings as the standard
values. These standard values can be recalled at
any time by pressing the „OK“ key.
Defining the picture settings:
• Press the „MENU“ key to open the TV menu.
• Press the „OK“ key to open the menu „Picture
and sound“.
• Use the cursor control key to select the
individual picture settings.
• Press the „OK“ key and then use the
-
+
key to change the setting in the set-
ting window.
• Use the cursor control key to select the
3rd line in the setting window "...
accept as a standard value: OK".
• Save the new setting as the standard
value by pressing the „OK“ key.
• Press the „TV“ key to close the menu
If these standard settings are unsatisfactory
for some programme positions, you can
define special individual settings for these
positions as described on the next page.
2) Rotation
This function can be used to compensate for any
tilting of the picture caused by the earth’s magnetic field. The function should be executed when the
set is first installed and if the set is subsequently
moved to a different position.
3) Film mode – see glossary.
2) Available only on TV sets which are equipped
with this option.
☞
☞
MENU
OK
OK
OK
Sound set.prog.po
Sound settings, gen.
Pict. set.,prog. posn.*
Pict. settings, gen.
Brightness 61
Standard value 50
Accept 61 as the standard value:
: select,
OK: go to
settings.
AV devices
Station table
Timer
Configuration
Picture pos.,vertic*
Film mode*
2)
CTI*
Comb filter
Noise reduction
Picture sharpness
Colour intensity
Contrast
Brightness
TV-Menü
Picture-Volume
* The number of subjects and sections
displayed here depends on the operating scope setting.
Page 25

25
11. Picture settings, general Call the menu
In a menu with two asterisks (**), the settings for certain menu items cannot be
changed.
Panorama function
2)
This setting can be made only on 16:9 TV
sets.
The panorama function can be used to expand
"normal" programmes in 4:3 format to the 16:9
format. This is done by increasing the width of the
picture to fill the complete width of the screen.
Setting Panorama
2)
mode:
• Press the "MENU" key to open the TV
menu.
• Press the "OK" key to open the menu
"Picture and sound".
• Use the cursor control key to select
"Panorama".
• Press the "OK" key and then, in the
setting window, use the
-
+
key to
change the setting for "Panorama".
• Use the cursor control key to select the menu
item "Mode" and use the
-
+
key to select either
"linear" or "non-linear".
• Press the "OK" key to save your changes.
The picture shows the factory setting.
• Press the "TV" key to close the TV menu.
The functions "Panorama
2)
" and "Zoom"
can also be used together.
2) Available only on TV sets which are equipped
with this option.
☞
☞
☞
* The number of subjects and sections
displayed here depends on the operating scope setting.
MENU
OK
OK
OK
Sound set.prog.po
Sound settings, gen.
Pict. set.,prog. posn.*
Pict. settings, gen.
Panorama On, zoom 1 Mode Non-linear
: select,
OK: go to
settings.
AV devices
Station table
Timer
Configuration
Rotation2)*
Picture pos., vertica
Panorama
2)
*
CTI*
Comb filter*
Noise reduction*
Picture sharpness*
Colour intensity
Contrast
TV-Menü
Picture-Volume
Page 26

26
11.1
Picture settings for a specific
programme posi
tion ...
Call the menu
In a menu with two asterisks (**), the picture settings for a specific programme position cannot be changed.
If the standard settings are not satisfactory for
certain programme positions, you can define different settings for these positions with the menu
item „Picture settings for Pr ...“. These settings
apply only to the selected programme position
and cannot be overwritten by the standard settings.
Defining dif
ferent picture settings for Pr.
xy:
• Select the programme position for
which you want to define different picture settings.
• Press the „MENU“ key to open the TV
menu.
• Press the „OK“ key to open the menu
„Picture and sound“.
• Use the cursor control key to select the
item „Picture settings for Pr. xy“.
• Press the „OK“ key and then select the setting
you want to change.
• Press the „OK“ key to confirm your selection
and then, in the setting window, use the
-
+
key
to change the setting.
• Press the „OK“ key to save the new setting.
• Press the „TV“ key to close the menu.
You can also define and recall the individual picture settings in the station table.
☞
☞
MENU
OK
OK
OK
Sound set.prog.po
Sound settings, gen.
Pict. set.,prog. posn.*
Pict. settings, gen.
These settings apply to the currently selected programme
position.
: select,
OK: go to
settings.
AV devices
Station table
Timer
Configuration
VCR
Colour standard
Colour offset
CTI
Comb filter
Noice reduction
Picture sharpness
Colour intensity
Contrast
TV-Menü
Picture-Volume
Page 27

27
Call the menu12. Sound settings, general
In a menu with two asterisks (**), the settings for certain menu items cannot be
changed.
You can adjust the sound settings (volume, treble,
bass, etc.) for all programme positions and save
these settings as the standard values. These standard values can be recalled at any time by pressing the „OK“ key.
Defining the sound settings:
• Press the „MENU“ key to open the TV
menu.
• Use the blue key to select the menu
„Picture and sound“ and press the
„OK“ key to open it.
• Use the cursor control key to select the
item „Sound settings, general“.
• Press the „OK“ key and then select the
setting you want to change.
• Press the „OK“ key to confirm your
selection and then, in the setting window, use
the
-
+
key to change the setting.
• Press the „OK“ key to save the new setting as
the standard value.
• Press the „TV“ key to close the menu.
If these standard settings are unsatisfactory for some programme positions, you can
define special individual settings for these
positions as described on the next page.
☞
☞
MENU
OK
OK
OK
Sound set.prog.po
Sound settings, gen.
Pict. set.,prog. posn.*
Pict. settings, gen.
Volume 55
Satandard value 46
Accept 55 as the standard value: OK
: select,
OK: go to
settings.
AV devices
Station table
Timer
Configuration
Stereo wide*
Spatial sound*
Balance*
Tone settings
Volume headphones
Bass
Treble
Volume control
Volume
TV-Menü
Picture-Volume
* The number of subjects and sections
displayed here depends on the operating scope setting.
Page 28

28
Call the menu 12. General sound settings
Automatic volume correction
Some stations transmit their commercials at a higher volume than the actual programme. In order to
avoid having to adjust the volume with the remote
control each time this happens, you can activate
the automatic volume correction function.
This function compensates, as far as possible, for
the differences in the sound volume.
The setting made here applies to all programme
positions.
Activating automatic volume correction:
• Press the "MENU" key to open the TV
menu.
• Press the "OK" key to open the menu
"Picture and sound".
• Use the cursor control key to select
"General sound settings".
• Press the "OK" key and then use the
cursor control key to select "Volume
correction".
• Press the "OK" key and then, in the setting window, use the
-
+
key to change
the setting.
* Press the "OK" key to save your changes.
* Press the "TV" key to close the TV menu.
The "Volume correction" function in the
menu "General sound settings" overrides
the "Volume correction" function in the
menu "Sound settings for Pr...".
☞
MENU
OK
Sound set.prog.po
Sound settings, gen.
Pict. set.,prog. posn.*
Pict. settings, gen.
Volume control on
: select,
OK: go to
settings.
AV devices
Station table
Timer
Configuration
Stereo wide*
Spatial sound*
Balance*
Tone settings
Volume headphones
Bass
Treble
Volume control
Volume
TV-Menü
Picture-Volume
OK
* The number of subjects and sections
displayed here depends on the operating scope setting.
Page 29

29
12.1 Sound settings for a specific
programme position ..
Call the menu
In a menu with two asterisks (**), the settings for certain menu items cannot be
changed.
If the standard settings are not satisfactory for certain programme positions, you can define different settings for these positions with the menu item
„Sound settings for Pr...“. These settings apply
only to the selected programme position and cannot be overwritten by the standard settings.
Defining dif
ferent sound settings for Pr. xy:
• Select the programme position for
which you want to define different
sound settings.
• Press the „MENU“ key to open the TV
menu.
• Use the blue key to select the menu
„Picture and sound“ and press the
„OK“ key to open it.
• Use the cursor control key to select the
item „Sound settings for Pr. xy“.
• Press the „OK“ key and then select the
setting you want to change.
• Press the „OK“ key to confirm your selection
and then, in the setting window, use the
-
+
key
to change the setting.
• Press the „OK“ key to save the new setting.
• Press the „TV“ key to close the menu.
You can also define and recall the individual sound settings in the station table.
☞
☞
MENU
OK
OK
OK
Sound set.prog.po
Sound settings, gen.
Pict. set.,prog. posn.*
Pict. settings, gen.
These settings apply to the currently selected programme
position.
: select,
OK: go to
settings.
AV devices
Station table
Timer
Configuration
Forced mono*
Tone settings*
Volume correction
TV-Menü
Picture-Volume
* The number of subjects and sections
displayed here depends on the operating scope setting.
Page 30

30
12.2 HiFi output
Audio sockets are provided on the back of the TV
set (see Page 76 of the Operating Instructions) and
can be used to connect the TV set to a HiFi system
If this is done, some changes must be made in the
menu "HiFi output".
If you wish to adjust the sound settings only on the
HiFi system, you must set the HiFi output to con-
stant.
If you do this, it is no longer possible to adjust the
sound with the Metz remote control (except for the
mute function .
If you want to be able to adjust the sound with the
Metz remote control, you must set the
HiFi output to variable.
Setting the HiFi output
•
Press the "TV" key to open the TV menu.
• Press the red key to open the "Configuration" menu.
• Use the cursor control key to select
"Operation" and then "HiFi output".
• Press the "OK" key and then, in the setting window, use the
-
+
key to set the
desired parameter.
• Press the "OK" key to save your changes..
• Press the "TV" key to close the TV menu.
In normal TV mode, the setting "Sound via..." can
be changed with the yellow key and the
-
+
key.
Call the menu
Operation
Function for AV*
Function for F3*
Function for F1*
EURO sockets*
Station search
Country*
Language*
: select,
OK: go to
settings.
Picture-Volume
AV devices
Station table
Timer
Scope of operation
EPG settings
Automatic zoom*
Sound settings*
HiFi output*
Init. prog. position*
Display configuration*
TV-Menü
Configuration
HiFi-Ausgang konstant
Ausgangspegel 40
MENU
OK
OK
* The number of subjects and sections
displayed here depends on the operating scope setting.
Page 31

In the menu "Sound settings" you can activate a
volume reduction (two-stage muting) function.
If this function is active, you can reduce the volume
in TV mode in two stages with the key "Mute" .
Activating the volume reduction function
• Press the "Menu" key to open the TV menu.
• Press the red key to open the menu "Configuration".
• Use the cursor key to select "Operation" and
"Sound settings".
• Press the "OK" key and then, in the settings window, use the
–
+
key to set "Mute (two-stage)" to
"On".
You can also select the desired sound output with the function "Sound via", where
you can choose one of the following
options with the
–
+
key: loudspeakers,
HiFi or Surround.
• Press the "OK" key to save the new settings.
• Press the "TV" key to close the TV
menu.
In normal TV mode,
• pressing the mute key once reduces the volume by 12 points on the scale;
• pressing it again within the next five seconds
reduces the volume to "00".
• You can subsequently restore the volume to the
default value by pressing the mute key
again.
31
Call the menu
MENU
OK
OK
Operation
Function for AV*
Function for F3*
Function for F1*
EURO sockets*
Station search
Country*
Language*
: select,
OK: go to
settings.
Picture-Volume
AV devices
Station table
Timer
Scope of operation
EPG settings
Automatic zoom
Sound settings
HiFi output
Init. prog. position
Display configuration
TV-Menü
Configuration
Mute (two-stage) on Sound via Loudsp.
12.3 Sound settings
Page 32

If you use a surround-sound system for playing
back the TV sound signal, the TV set acts as the
centre loudspeaker.
In normal TV mode, press the yellow key and
use the P+/P- key to select "Sound via". Then use
the
–
+
key to select the setting "Sound via sur-
round".
Setting the centre loudspeaker volume
• Press the "Menu" key to open the TV menu.
• Press the "OK" key to open the menu "Picture
and sound".
• Use the cursor key to select "Sound settings,
general" and then "Centre loudspeaker".
* Press the "OK" key and then, in the set-
tings window, use the
–
+
key to set the
desired volume.
• Press the "OK" key to save the new settings.
• Press the "TV" key to close the TV
menu.
In normal TV mode, you select the
"Sound via" options by pressing the yellow key and then using the
–
+
key.
32
MENU
OK
OK
Call the menu
Sound set.prog.po
Sound settings, gen.
Pict. set.,prog. posn.*
Pict. settings, gen.
Centre volume 55
Satandard value 46
Accept 55 as the standard value: OK
AV devices
Station table
Timer
Configuration
Factory settings
Volume headphones
Centre volume
HiFi output
TV-Menü
Picture-Volume
: select,
OK: go to
settings.
12.4 Centre loudspeaker
Page 33
33
Call the menu13. Colour standard
In a menu with two asterisks (**), the settings for the menu item "Colour standard"
cannot be changed.
Your TV set normally detects the colour standard
(PAL, SECAM, NTSC, NTSC44, PAL60, PAL M)
automatically. If this automatic function does not
work, you can select the colour standard manually.
The colour standard function is set in the factory
to „Automatic“.
Setting the colour standard
:
• Select the programme position for
which you want to set the colour standard.
• Press the „MENU“ key to open the TV
menu.
• Press the white key to open the
„station table“.
• Move the cursor to „Colour standard“.
• Press the „OK“ key to confirm your
selection and then, in the setting window, use the
–
+
key to select the
appropriate colour standard.
• Press the „OK“ key to save the new setting.
• Press the „TV“ key to close the menu.
2) Available only on TV sets which are equipped
with this option.
☞
MENU
OK
OK
009 MDR
008 SW 3
007 N24
006 PRO 7
005 RTL
004 SAT 1
003 Bayern 3
002 ZDF
001 ARD
Colour standard Automatic mode
: select,
OK: go to
settings.
Picture-Volume
AV devices
Station table
Timer
Configuration
Decoder
Sound correction
Colour standard*
Picture corrections*
Picture quality*
Enter Logo
Frequency/channel
TV-Menü
Station table
* The number of subjects and sections
displayed here depends on the operating scope setting.
Page 34

34
Call the menu 14. Display configuration
In a menu with two asterisks (**), the settings for the menu items "Display configuration" and "Automatic zoom" cannot be
changed.
The green display
2)
can be programmed to show
the time, the station logo or the programme position number.
Setting the display configuration:
• Press the „MENU“ key to open the TV
menu.
• Press the red key to open the menu
„Configuration“.
• Use the cursor control key to select
„Operation“ and then „Display configuration“.
• Press the „OK“ key.
• In the setting window, use the cursor
control key to select either „Display
brightness“ or „Permanent display“.
• Change the setting with the
–
+
key.
• Press the „OK“ key to save the new
setting.
• Press the „TV“ key to close the menu.
Setting the automatic zoom
If the automatic zoom function is activated, pictures in "widescreen" format,
such as 16:9 programmes, will be
expanded automatically to fill the full
height of the TV screen.
If the automatic zoom function is deactivated, the
picture will not be expanded automatically.
2) Available only on TV sets which are equipped
with this option.
☞
OK
OK
MENU
Operation
Function for AV*
Function for F3*
Function for F1*
EURO sockets*
Station search
Country*
Language*
Brightness of Display 3 Permanent display Time
: select,
OK: go to
settings.
Picture-Volume
AV devices
Station table
Timer
Configuration
Scope of operation
EPG settings
Automatic zoom*
HiFi output*
Init. prog. position*
Display configuration*
TV-Menü
Configuration
* The number of subjects and sections
displayed here depends on the operating scope setting.
Operation
Function for AV*
Function for F3*
Function for F1*
EURO sockets*
Station search
Country*
Language*
Brightness of Display 3 Permanent display Time
: select,
OK: go to
settings.
Picture-Volume
AV devices
Station table
Timer
Configuration
Scope of operation
EPG settings
Automatic zoom*
HiFi output*
Init. prog. position*
Display configuration*
TV-Menü
Configuration
Page 35
35
Call the menu15. Childlock
With this function, you can determine when the
TV set can be switched on and which programmes may be viewed at specific times. The childlock may be set:
a) for all programmes,
b) so that one to six programmes (Prog A ... Prog
F), called permitted programmes can still be
viewed,
c) so that all or all permitted programmes may be
viewed during a preset period (between the
specified start and end times).
After setting, the childlock must be saved with a
4-digit „Code“
Setting the childlock:
• Press the „MENU“ key to open the TV
menu.
• Press the green key to open the
menu „Timer“.
a)
Setting the childlock for all programmes:
Use the cursor control key to select
„Childlock“ and press the „OK“ key.
In the setting window, use the
–
+
key
to set the childlock to „Active“.
• Press the „OK“ key to save the new setting.
b) Permitted programmes
Activate the childlock as described in step a),
above.
Use the cursor control key to open the file card
„Permitted programmes“ and press the „OK“
key. In the setting window, use the numeric
keys to enter the numbers of the permitted programme positions or press the „AV“ key to permit use of the AV programme position.
• Press the „OK“ key to save the new setting.
MENU
OK
OK
Time settings
Timer control
Reminder*
Childlock
Activation off
: select,
OK: go to
settings.
Picture-Volume
AV devices
Station table
Timer
Configuration
End viewing time*
Start viewing time*
Code input
Permitted programmes*
Childlock
TV-Menü
Timer
É
Factory settings
Code: 0000
✂
Page 36

36
Call the menu 15. Childlock
OK
OK
c) Start and end times
Use the cursor control key to open the file card
„Start viewing time/End viewing time“„ and
press the „OK“ key. In the setting window, enter
the start and end times with the numeric keys.
Protecting the childlock settings with a code
• Use the cursor control key to open the
file card „Code input“ and press the
„OK“ key. In the setting window, enter
your personal code with the numeric
keys.
Make a note of the code, since the
childlock can be switched off only
by entering it again!
• Press the „OK“ key to save the code.
• Press the „TV“ key to close the menu.
• Switch off the TV set with the key.
The childlock is activated only when the TV
set is switched off.
Deactivating the childlock
If the childlock is active, this is indicated by the
display of a message when you switch the TV set
on. If you then enter the correct code, the childlock is temporarily deactivated and the TV set can
be operated „normally“ as long as it remains
switched on. If you wish to permanently deactivate the childlock, proceed as follows:
• Press the „MENU“ key to open the TV menu.
• Press the green key to open the menu
„Timer“.
• Use the cursor control key to select „Childlock“
and press the „OK“ key.
• In the setting window, use the
–
+
key to set the
childlock to „Inactive“.
• Press the „OK“ key to save the new setting.
☞
☞
Time settings
Timer control
Reminder*
Childlock
Code * * * *
: select,
OK: go to
settings.
Picture-Volume
AV devices
Station table
Timer
Configuration
End viewing time*
Start viewing time*
Code input
Permitted programmes*
Childlock
TV-Menü
Timer
* The number of subjects and sections
displayed here depends on the operating scope setting.
Page 37

37
16. Reminder
In a menu with two asterisks (**), the settings for the menu item "Reminder" cannot
be changed.
If you want to be reminded of something while
watching television, you can set a reminder time.
At this time, a box with the reminder appears on
the screen of the TV set.
Setting the reminder time
• Press the „MENU“ key to open the TV menu.
• Press the green key to open the
menu „Timer“.
• Use the cursor control key to select
„Reminder“.
• Press the „OK“ key twice and then, in
the setting window, enter the desired
time (four digits) with the numeric
keys.
• Press the „OK“ key to save the new
setting.
• Press the „TV“ key to close the menu.
At the specified time, a box with the reminder
appears on the screen of the TV set. You can clear
this display by pressing any key.
If you do not want the reminder to appear
each day, you must clear it in the menu by
pressing the ll key.
☞
☞
Call the menu
MENU
OK
OK
Time settings
Timer control
Reminder’
Childlock
Time - - : - -
: select,
OK: go to
settings.
Picture-Volume
AV devices
Station table
Timer
Configuration
Reminder time*
TV-Menü
Timer
* The number of subjects and sections
displayed here depends on the operating scope setting.
Page 38

38
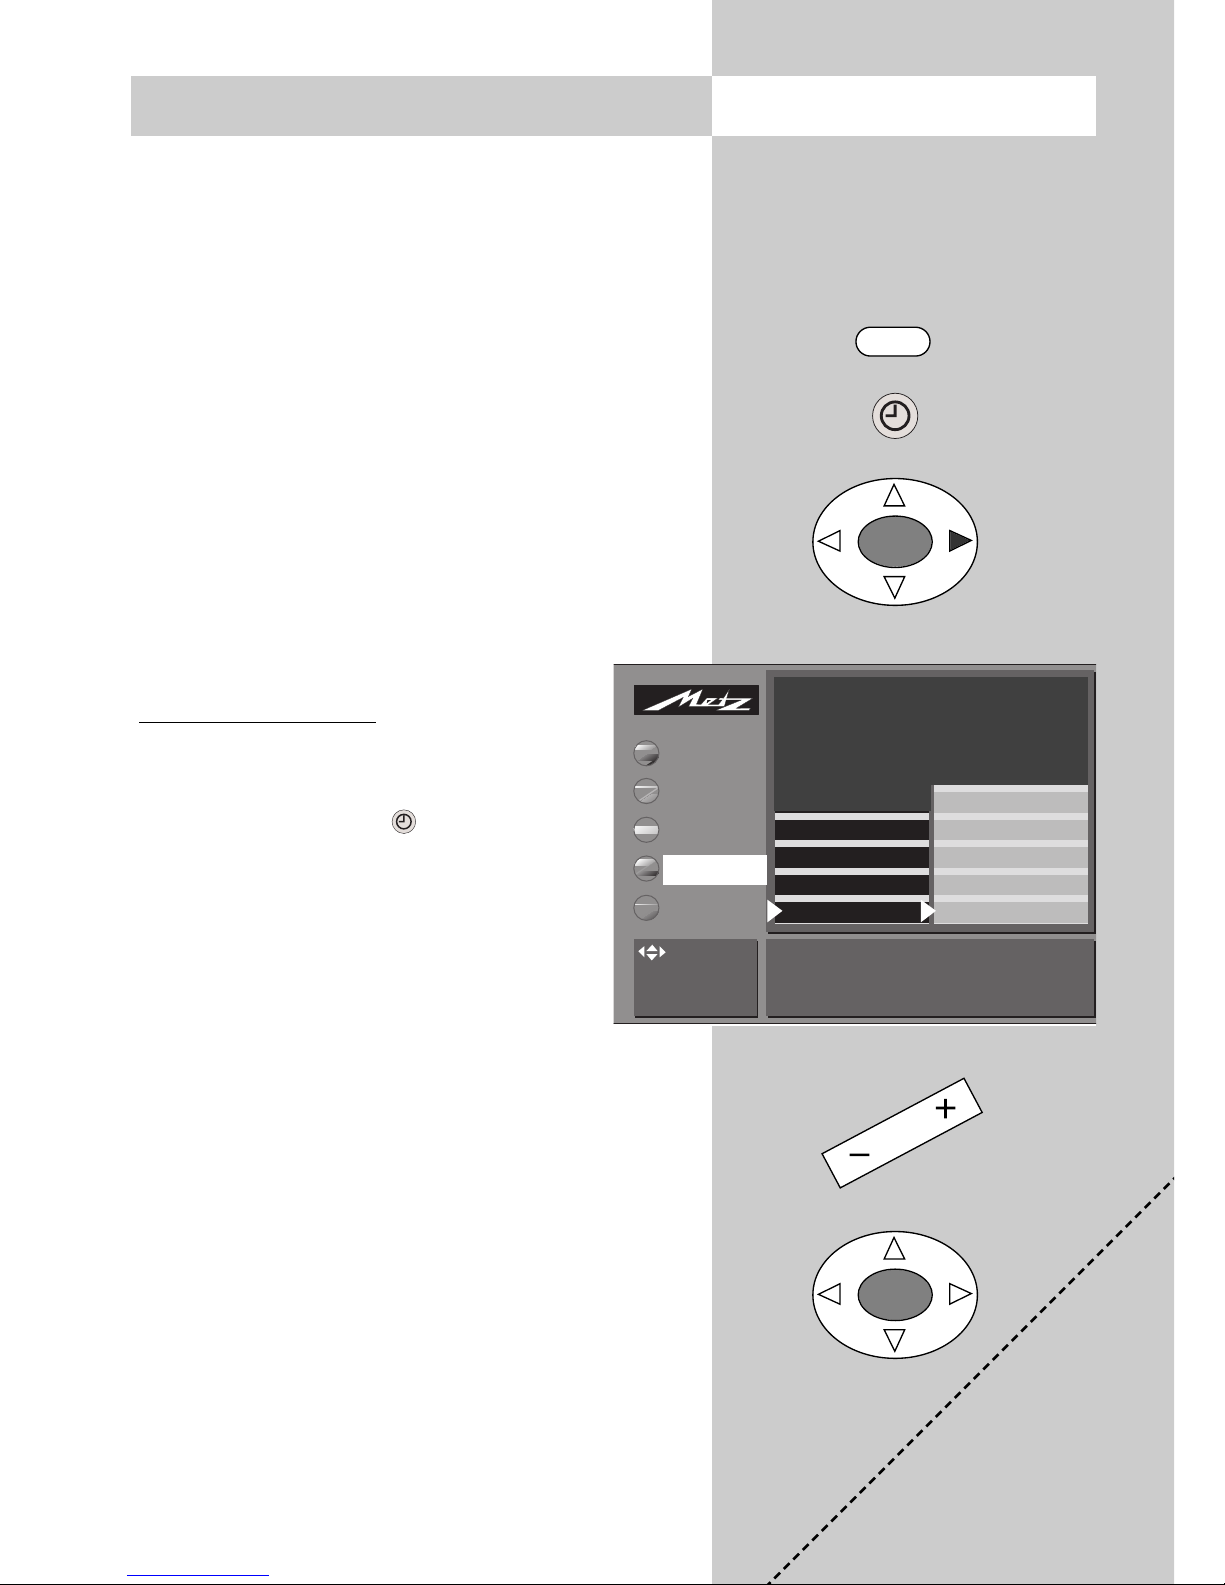
17. Timer control
In a menu with two asterisks (**), the settings for the menu items "Switch-on time"
and "Switch-off time" cannot be changed
In the menu item „Timer control“, you can programme a switch-on time, a switch-off time and a
sleep timer (switch off after ...).
Switch-on time: the TV set is switched on at the
specified time.
Switch-off time: the TV set is switched off at the
specified time.
Switch off after ...: (Sleep Timer): the TV set is
switched off after the period you specify
(in increments of 15 minutes).
Setting the times
• Press the „MENU“ key to open the TV
menu.
• Press the green key to open the
menu „Timer“.
• Use the cursor control key to select
"Timer control".
• Use the cursor control key to select
„Switch-on time“ or „Switch off time“.
• Press the „OK“ key twice and then, in the setting window, enter the desired time (four digits)
with the numeric keys.
• Press the „OK“ key to save the new setting.
• Press the „TV“ key to close the menu.
At the specified switch-on time, the TV set switches
from standby mode (red LED on) to normal TV
mode. If you do not press any key on the remote
control unit within 10 minutes, the TV set switches
back to standby mode. This ensures that the TV set
does not remain switched on if you are not at
home.
If you do not want the TV set to switch itself
on or off each day, you must clear the times
in the menu by pressing the ll key.
☞
☞
Call the menu
Time settings
Timer control
Reminder*
Childlock
Time - - : - -
Picture-Volume
AV devices
Station table
Timer
Configuration
Switch off after ...
Switch-off time
Switch-on time
TV-Menü
Timer
MENU
TV
OK
OK
: select,
OK: go to
settings.
Page 39

39
18. Setting the time Call the menu
When the TV set is switched on with the main
switch, it normally gets the date and time from the
data transmitted with the programme (if it is tuned
to a station which transmits Teletext).
If the data are not received correctly, or if the station you are watching does not send such data,
you can set the date and time manually.
Normally, this function is not needed: even the
changeover between summer and winter time is
executed automatically.
Setting the time and date
• Press the „MENU“ key to open the TV menu.
• Press the green key to open the
menu „Timer“.
• Use the cursor control key to select the
file card „Set time“.
• Press the „OK“ key twice.
• In the setting window, enter the current
time with the numeric keys.
• The clock starts running from this time
when you press the „OK“ key.
• Use the cursor control key to select the
file card „Current date“.
• Press the „OK“ key.
• In the setting window, enter the current date
with the numeric keys.
• Press the „OK“ key to save the new setting.
• Press the „TV“ key to close the menu.
The local time offset is the difference between
the local time and Greenwich Mean Time
(GMT). This time difference and any necessary
switching between summer time and winter
time are normally detected automatically by the
TV set.
They need to be set manually only if the TV set
does not detect them automatically.
MENU
OK
OK
Time settings
Timer control
Reminder*
Childlock
You can set the date and time manually if they have not
been set automatically.
: select,
OK: go to
settings.
Picture-Volume
AV devices
Station table
Timer
Configuration
Local time offset
Current date
Current local time
TV-Menü
Timer
i
Page 40
40
19. Function keys
The remote control has four functions keys: F1, F2
AV and F3. You can program function keys F1, AV
and F3 with any desired function.
The function keys F1 and F3 are programmed in the factory with the setting
"All functions", which means that all
available special functions are displayed
when you press one of these keys.
Programming function key F1, A
V or F3
with a desired
• Press the "MENU" key to open the TV menu.
• Press the red key to open the "Configuration" menu.
• Use the cursor control key to select "Function for
F1, AV or F3".
• Press the "OK" key and use the cursor control
key to select one of the available functions.
• Press the "OK" key and then, in the setting window, use the
-
+
key to set the selected function
to "On".
• Press the "OK" key to save your changes.
• Press the "TV" key to close the TV
menu.
Call the menu
F1
Operation
Function for AV*
Function for F3*
Function for F1*
EURO sockets*
Station search
Country*
Language*
The function key can be programmed with any desired
function.
: select
menu item
Picture-Volume
AV devices
Station table
Timer
All F1 functions
Picture format
9-programme
PIP
TV-Menü
Configuration
Special
Functions 1
PIP on
9-programme on
Picture format
Picture pos., vertical
OK
MENU
* The number of subjects and sections
displayed here depends on the operating scope setting.
Page 41
41
20. Special functions
Picture-in-picture (PIP)
Call the menu
The remote control unit has three function keys: F1
and F3. These keys are pre-programmed in the
factory.
The PIP picture can be used to display a second
TV station or the picture from an AV device.
Calling picture-in-picture (PIP) function:
• If "F1" is already programmed with
the function "Picture in picture", briefly
press the "F1" key; otherwise, hold the
"F1" key depressed until "Special functions 1" is displayed and then press
the key to display the PIP picture.
• You can shift the PIP picture with the
cursor control keys . The current
position is saved.
• With the "OK" key, you can switch the
PIP frame to active (red) or inactive
(white).
• The contents of the PIP picture can be changed
only when the PIP frame is active (red).
If this is the case, you can use the numeric keys
or the "P+/P-" rocker key to select another programme position for display in the PIP picture.
To display the picture from an AV device connected to the TV set, press the "AV" key and
then select the AV device with the numeric keys.
• Pressing the red key exchanges the two pictures.
• Pressing the green key causes the PIP picture
to be displayed as the large picture and terminates the PIP function.
• To remove the PIP picture from the screen, press
the „TV“ key.
If a recording has been programmed in the
timer menu, the program being recorded is
displayed in the PIP picture when the PIP
function is activated.
☞
F1
Special
Functions 1
PIP on
9-programme on
Picture format
1
OK
Page 42

42
20. Special functions
9-programme overview
Call the menu
With this function, you can open an overview of
the current programme position and the next eight
positions. The nine small programme windows are
updated at intervals. Each shows a snapshot of
the current programme.
Calling the 9 PRG. over
view:
• If "F1" is already programmed with the function
"9x multipicture", briefly press the "F1" key;
otherwise, hold the "F1" key depressed
until "Special functions 1" is displayed
and then press the key to display
the 9x multipicture.
• You can use the "P+/P-" rocker key to
select the previous or following nine
programme positions.
• To switch to one of the programmes
displayed in this function, simply press
the corresponding numeric key to
.
• To terminate the 9 Prg. overview, press the "TV"
key.
F1
2
ZDFARD BR 3
SAT 1
RTL DSF
MDRPRO 7 MTV
Not possible with an external satellite receiver!
Page 43

43
20. Special functions
Picture format
Call the menu
Calling the picture format function:
•
If "F1" is already programmed with the function
"Picture format ", briefly press the "F1" key;
otherwise, hold the "F1" key depressed until
"Special functions 1" is displayed and then press
the key and select the desired picture format.
• You can use the "P+/P-" rocker key to select the
various functions. You can also set the zoom
factor for the selected picture format within the
next five seconds.
• The settings made here (except for the auto-
matic zoom in the TV menu) remain stored
until you switch to another programme
position or switch off the TV set.
Zoom
After selecting the "Zoom" function, you can
adjust the zoom factor with the
–
+
key.
In addition to adjusting the zoom factor, you
can move the picture up or down on the
screen so that, for example, the station logo
or subtitles remain visible. To do this, press the F1 key
and then the key and move the picture with the
"P+/P-" rocker key.
Standard 4:3
This is the standard setting for all programmes
with the aspect ratio 4:3.
Panorama*
With the Panorama function, you can adjust the picture of
a programme in 4:3 aspect ratio to fill the 16:9 format of
the screen (only on sets with 16:9 screen). The picture is
expanded uniformly in the horizontal direction. You can
also zoom the picture. The Panorama function can be switched on and off in the menu "Picture and Sound" under the
heading "Picture settings, general".
16:9 full screen
This function is used to display the picture format
of external devices (such as 16:9 video recorders)
with the correct aspect ratio.
F1
3
Special
Functions 1
PIP on
9-programme on
Picture format
*The menu item "Panorama"
can be activated only on TV
sets which support the 16:9
aspect ratio.
Page 44

44
Teletext is a free information service provided
by many TV stations. Within this „electronic
newspaper“, you can scroll through the pages
in various ways.
Calling T
eletext:
• Press the „TEXT“ key.
If the station you are watching transmits „TOP“ teletext, two file-card
boxes are displayed (see the picture
on the left). Otherwise, page 100
appears (see the lower picture).
• In the case of „TOP“ stations, you can
select a file card with the cursor control key.
• After selecting a card, press „OK“ to
open it.
Controlling Teletext when the pages are displayed directly:
The blue key is used to preselect the
subject selection function.
The yellow key is used to preselect
the section selection function.
The white key is used to preselect
the page selection function.
After pressing one of these preselection
keys, you can step through the subjects,
sections or pages with the rocker switch
„P+/P-“.
You can also move directly to a page
by entering its number with the numeric
keys. If multiple sub-pages exist for the
selected page, their numbers are
displayed in black. In the example on
the left, there are five sub-pages.
You can scroll through the sub-pages
with the cursor control key.
21. TeletextCall the menu
TEXT
Blue preselection key
Yellow preselection key
White preselection key
Sub-pages
OK
i
TV Guide 2
FS-Sendungen
ARD morgen
ARD heute
TV Guide
Sport 1
Wetter
tagesschau
Übersicht
: select Subjects / Section.
OK: display page
Themen
Chapter
Pages
Next BookMark
Set
BookMark
Impressum
Inhalt
TV-Menü
Subjects
100 100 SAT.1 21.05.02 15:30:23
00 01 02 03 04 05 06 07 08 09
TopicsSections Seiten
next
mark
OK
Pages
OK
Page 45

45
21. Teletext
Double font size
When viewing Teletext pages, you can
switch to a larger font with the F1 key.
The first time you press this key, the
upper third of the page is displayed with
the large font. Pressing it again displays
the centre third of the page and pressing it a third time displays the bottom
third of the page. Pressing the key a
fourth time returns to the full-page
display with the normal font size.
Riddle solution key
Function key F2 is programmed to
display hidden text on a Teletext page,
such as the solutions to riddles.
Retur
n to last contents page
You can return directly to the last contents page at any time by pressing the
key.
Page stop
You can stop the automatic stepping
through a multiple page by pressing the
II key or the "OK" key. Pressing the same
key again restarts the automatic stepping.
Page selection with cursor
If your press the "OK" key, the page is
stopped and the cursor is displayed
at the top left corner of the screen. You
can then use the cursor keys
to move the cursor within the currently
displayed page. This function is useful
for selecting pages from an index page
(such as page 100, 200, etc.). When
the cursor is positioned on the desired
page number, press the "OK" key to
display this page.
Teletext: setting marks
3)
You will probably have your favourite
Teletext pages, such as stock exchange
reports, news, weather forecasts, which
you visit frequently.
To permit rapid access to such pages,
you can set so-called „marks“ on these
pages.
To do this, first go to the page on which
you want to set the mark.
• Then press the red key for „Set
mark“ to set a mark on this page. A
„paper-clip“ symbol appears at the top
left corner of the page. If the page has
sub-pages, the mark is always set and
displayed on the currently displayed
sub-page.
Up to 10 marks can be set on each
programme position. The total
number of marks (on all programme positions) is restricted to 120.
T
eletext: scrolling by marks
3)
With Teletext active, you can scroll
sequentially through all marked pages by
repeatedly pressing the green key
You can even view your favourite pages
directly from the TV mode with the
„TEXT“ key. Pressing the „TEXT“ key
opens Teletext and selects the first marked
page. You can then scroll through the
marked pages with the „TEXT“ key.
Pressing the „TEXT“ key with the last marked page displayed switches back to the
TV programme.
☞
3) Not possible with an external satellite receiver!
Page 46

46
Teletext: displaying active marks
3)
If marks are set for a programme position, pressing
the F3 key displays a list of all marks, showing
where they are set. Pressing F3 again hides the list.
With the list displayed, you can select any desired mark with the numeric keys.
T
eletext: deleting marks
3)
Call the teletext page whose mark you want to
delete and press the red key „Clear mark“ to
delete the mark.
T
eletext: subtitles
Your TV set can display subtitles transmitted on
Teletext together with the programme. If such subtitles are available, the station normally displays a
message at the beginning of the programme, telling you where to find the subtitles.
• Press the „TEXT“ key to open Teletext.
• In the case of „TOP“ stations, press the „OK“
key to open any page.
• Use the numeric keys to enter the number of the
page containing the subtitles.
21. Teletext
3) Not possible with an external satellite receiver!
Page 47

47
22. AV devices
Call the menu
MENU
OK
OK
AV (Audio/Video) devices are devices which
provide picture and/or sound signals for playback on your TV set (for example, video cas-
sette recorders, DVD players, etc.).
In the menu „AV devices“, the setting window
displays a list of all common AV units.
Always connect AV devices exactly as
shown in the connection diagram in the TV
menu of your TV set!
SVHS/Hi8 and Data Logic video recorders must
always be connected as „Video recorder 1“. A „normal“ VHS video recorder may be connected as
„Video recorder 1“ or „Video recorder 2“.
Connecting AV devices
• Press the „MENU“ key to open the TV
menu.
• Press the yellow key to open the
menu „AV devices“. Some of the
EURO sockets are pre-programmed in
the factory (see the picture on the
right). If you want to change these settings, you can select one of the AV
devices with the cursor control key and
delete it by pressing the ll key.
• Use the cursor control key to select the
device you wish to connect to the TV set.
• Press the „OK“ key to confirm your selection
and, in the setting window, set the parameters
„Signal OUT“ and „Signal IN“ to match the AV
device (see the operating instructions for the AV
device for details).
• Press the „OK“ key. The newly connected device
appears in the connection diagram.
Caution: connecting a new device may
cause an existing connection to be modified. If this happens, you will have to move
the cables for the affected AV device to the
correct positions.
☞
☞
i
Select a new device:
DVD/Videorec. 1 1 DVD Satellite / SetTop
DVD/Videorec. 2 Decoder
Camcorder/Photo
AV-Receiver / CD PC Other device
Picture-Volume
AV de
Station table
Timer
Configuration
TV-Menü
AV devices
Connect as follows:
Back of TV set
Front of TV set *
DVD player
Camcorder/Photo
Select device
with and
call device attributes with OK
SVHS/Hi8
RGB
DVD/Videorec. 1
FBAS
Euro1
Euro2
Euro3
Data Logic
Page 48
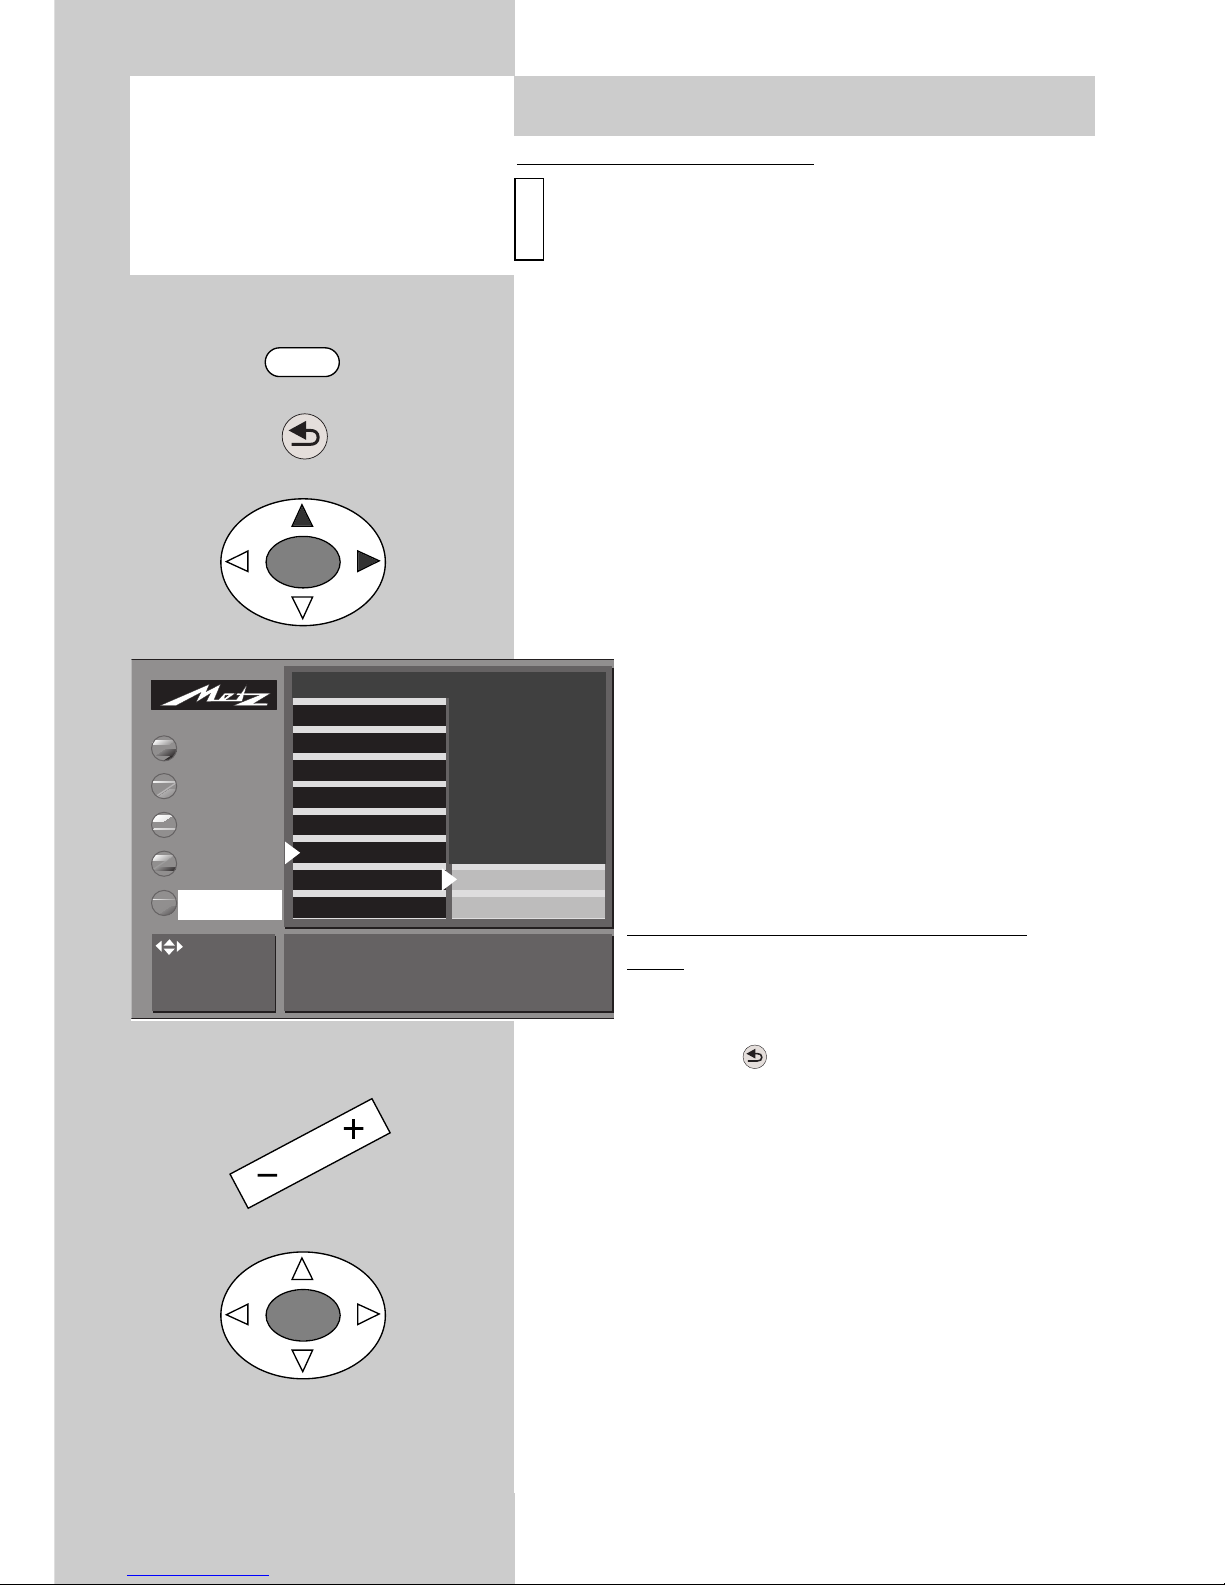
48
Call the menu
Data Logic video recorder
„Data Logic“ is a system which permits a dialogue
between the TV set and a video recorder. This
„intelligent“ system provides such functions as:
- Automatic transfer of the settings for terrestrial
and cable stations to the video recorder.
- One-touch recording: the video recorder records
the programme you are currently watching.
- Automatic switching to the AV programme position.
- Direct control of recording from the timer menu
of the TV set.
-Automatically switching off the video recorder
when the TV set is switched to standby mode.
Under "Video recorder 1" in the menu "AV devices", set the field "Data Logic" to "On" and con-
nect your video recorder to the EURO
socket as shown in the picture.
Other comparable dialogue systems:
Qlink (Panasonic), EasyLink (Philips),
Megalogic (Grundig, SMARTLINK (Sony).
Data Logic: transferring the station
table
• Press the „MENU“ key to open the TV
menu.
• Press the red key to open the menu
„Configuration“.
• Use the cursor control key to select „Automatic
station search“.
• Press the „OK“ key and then use the cursor con-
trol key to select „Data Logic“.
• Press the „OK“ key and then, in the setting win-
dow, select „Start data transfer: yes“ with the
–
+
key.
• Press the „OK“ key to transfer the stations table
from the TV set to the video recorder
• Press the „TV“ key to close the TV menu.
OK
OK
MENU
22. AV devices
i
Operation
Function for AV*
Function for F3*
Function for F1*
EURO sockets*
Station search
Country*
Language*
Data transfer start Yes
: select Subjects / Section.
OK: display page
Picture-Volume
AV devices
Station table
Timer
Configuration
DataLogic
Terr. station search
TV-Menü
Configuration
In a menu with two asterisks (**), the settings for
this menu item cannot be
changed.
☞
* The number of subjects and sections
displayed here depends on the operating scope setting.
Page 49

49
Call the menu
AV playback
(Devices with switching voltage)
AV playback is the term for playing back videocassettes, DVDs, etc. from an AV device for viewing them on a TV set.
In order to view the pictures, you must programme your TV set so that it automatically switches to
the AV programme position when a signal is
received at the EURO socket to which the AV
device is connected.
Programming automatic switching
In a menu with two asterisks (**),
the settings for this menu item cannot be changed.
Programme switching is set to
"On" in the factory for both EURO
sockets.
• Press the „MENU“ key to open the TV
menu.
• Press the red key to open the menu
„Configuration“.
• Use the cursor control key to select „EURO
socket“.
• Use the cursor control key to select "EURO 1"
"EURO 2" or "EURO 3".
• Press the „OK“ key and then, in the setting window, set „Programme switching“ to „ON“ with
the
–
+
key.
• Press the „OK“ key to save the new setting.
• Press the „TV“ key to close the TV menu.
When you subsequently start a playback operation on the connected AV device, the TV set switches to playback mode, regardless of the currently selected programme position.
☞
☞
22.1 AV playback
OK
OK
MENU
Operation
Function for AV*
Function for F3*
Function for F1*
EURO sockets*
Station search
Country*
Language*
Change station on
: select Subjects / Section.
OK: display page
Picture-Volume
AV devices
Station table
Timer
Configuration
EURO 3
EURO 2
EURO 1
TV-Menü
Configuration
* The number of subjects and sections
displayed here depends on the operating scope setting.
Page 50
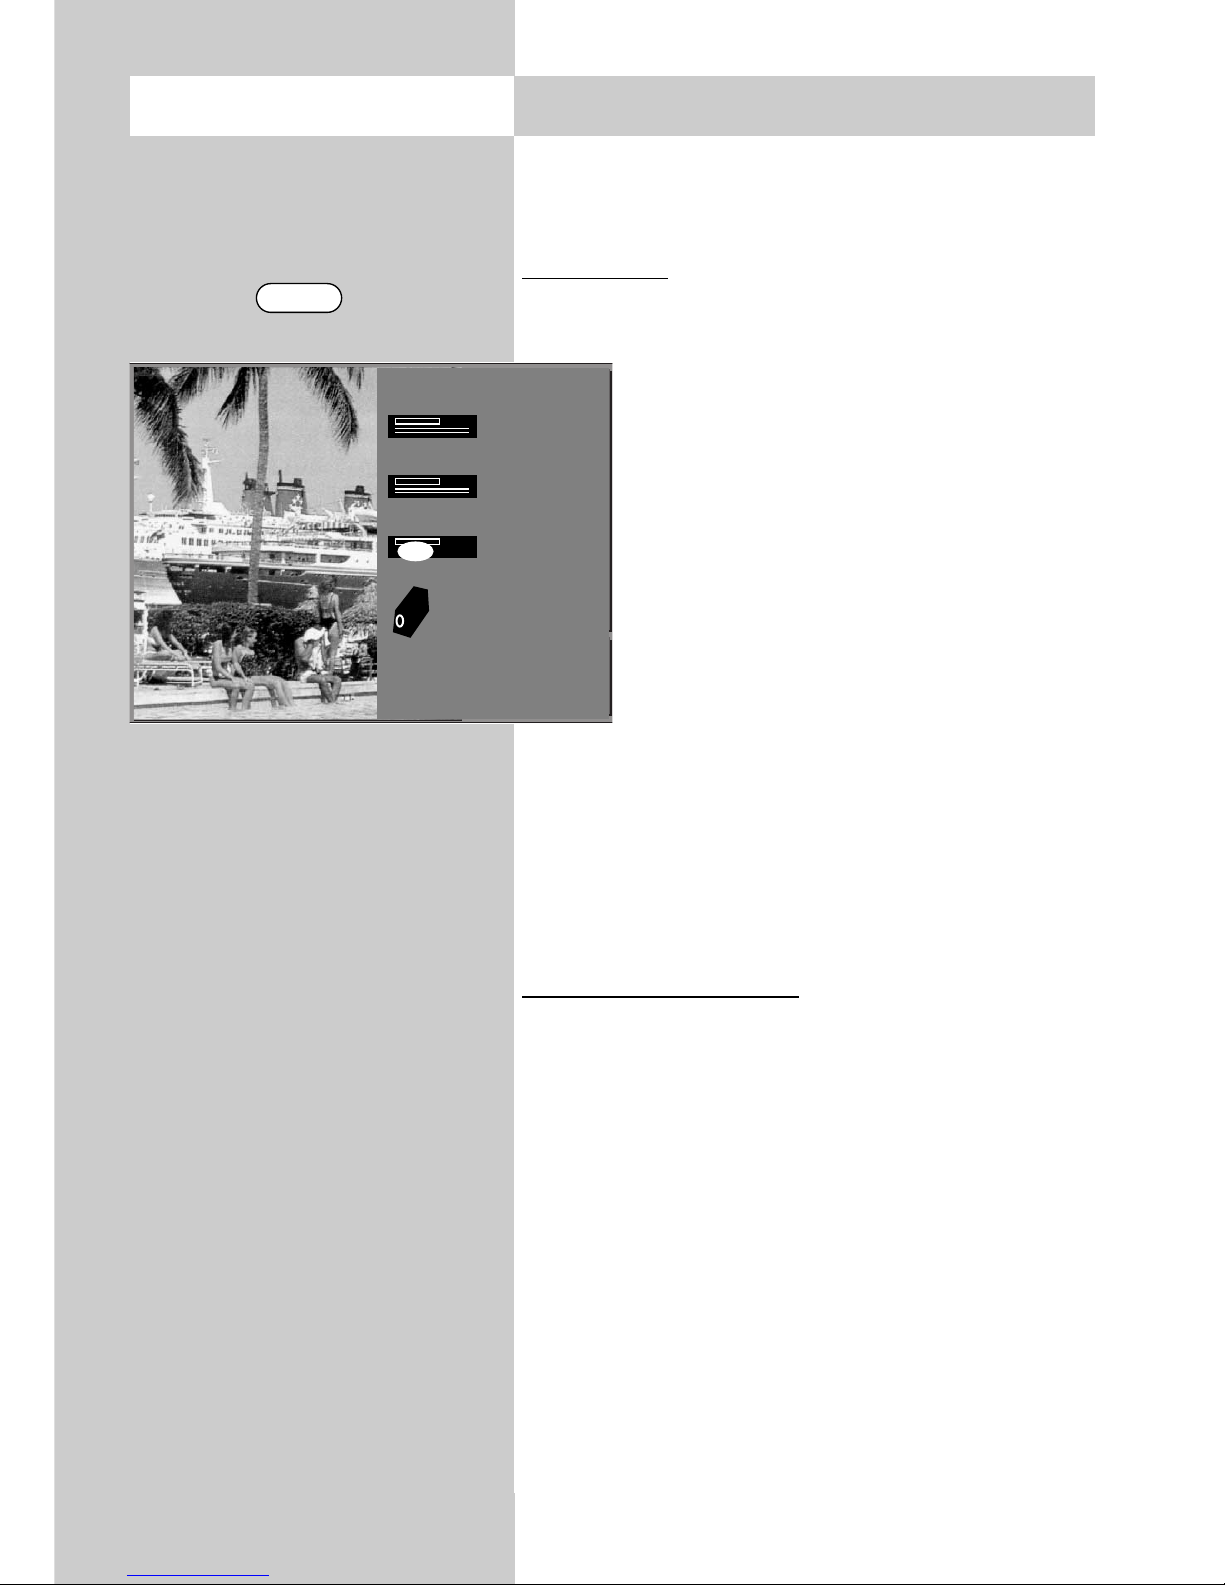
50
This mode remains active until the TV set is switched to another programme position.
A
V playback
(Devices without switching voltage)
In order to view the pictures, you must manually
switch your TV set to playback mode.
• Select any programme position.
• Press the „AV“ key.
•
Press the numeric key for the desired AV
device.
• The TV set now switches from the current programme to playback mode.
• Start the playback operation on the
AV device. Playback mode remains
active until you switch to another programme position.
Picture quality when playing back from
tape machines
The VCR function provides the best possible picture
quality when playing back recordings from a tape
machine, such as a camcorder or video recorder.
Setting the VCR function
• Select the appropriate programme position.
• Press the „MENU“ key to open the TV menu.
• Press the „OK“ key to open the menu „Picture
and sound“.
• Use the cursor control key to select „Picture settings for Pr xy“.
• Press the „OK“ key and then use the cursor
control key to select „VCR“.
• Press the „OK“ key for confirmation and use the
–
+
key to select „Opt. 1“. If this setting does
not produce a satisfactory picture quality,
switch to „Opt. 2“.
• Press the „OK“ key to save the new setting.
22.1 AV playback
Call the menu
AV
AV-menu Playback
Videorecorder 1
Videorecorder 3
DVD
Camcorder
Pr1 ARD
record?
Euro1
Euro3
Euro2
Front of TV set
In a menu with two asterisks (**), the settings for
the menu item "VCR" cannot be changed.
☞
Page 51

51
22.2 Copying between AV
devices
• Select any programme position.
• Press the „AV“ key to display the „AV menu
Playback“.
• Select the AV playback device with the numeric
keys.
•
The TV set switches from the current programme
to the selected playback device.
• Press the „AV“ key again.
• Then press the red key to select the recording device.
• Press the green key to lock the selected signal
connection. If a Data Logic video recorder is
connected, it will immediately start to record,
providing there is a cassette with a protection
tag inserted.
• Start recording with the recording AV device.
• Play back with the playback AV device.
Page 52

52
NexTView is an Electronic Program Guide (EPG)
for all important programme providers. This EPG is
transmitted by various stations and also contains
the programme data for the other stations.
The TV set needs about 20 minutes to collect the
large amount of data for the first time.
• On TV sets with two tuners (standard configuration) the data are collected by the second tuner
(see the next page) during normal operation of
the TV set. When the data have been collected,
the TV set stores the EPG in a special memory.
The EPG is updated regularly in this memory as
long as the TV set is not switched off with the
main switch.
• On TV sets with only one tuner (e.g. if your set
has been converted and has only one satellite
tuner):
- the set must be left tuned to the NeexTView pro-
gramme position for at least 20 minutes, or
- the data are collected during the night (between
02:30 - 03:00) while the set is in standby mode.
23. EPG - NexTView
Not possible with an external satellite receiver!
Page 53

53
The EPG function can be switched on and off as
desired. It is set to "On" in the factory.
On all programme positions where NexTView is
received, the TV set displays the following message
after a short delay:
This station is sending NexTView (EPG). Save it as
the EPG programme position?
• Yes • No
The TV set is asking you whether you want to use
this programme position for collecting the data for
the EPG NexTView.
Press the red key for "No" - this programme position is not used for receiving
the NexTView data. The message is still
displayed for all other programme positions where NexTView data are received.
Press the green key for "Yes" - this programme position will be used for receiving the NexTView data. The message is
then not displayed for other programme
positions where NexTView data are
received.
If you know the programme position for a
NexTView station, you can also enter its number
directly on the numeric keys.
You can overwrite any existing programme position number or delete the number by pressing the II
key.
23.1 Activating the EPG NexTView
Call the menu
OK
OK
Operation
Function for AV*
Function for F3*
Function for F1*
EURO sockets*
Station search
Country*
Language*
EPG on
EPG prog. position 6 RTL 2
Now showing on
Picture-Volume
AV devices
Station table
Timer
Scope of operation
EPG settings*
Automatic zoom*
HiFi output*
Init. prog. position*
Display configuration
TV-Menü
Configuration
: select menü
item
MENU
Not possible with an external satellite receiver!
EPG
* The number of subjects and sections
displayed here depends on the operating scope setting.
Page 54

54
The EPG NexTView is transmitted by
various stations and the information provided by each station may differ. You
thus have a choice between several different NexTView programme guides.
• On TV sets with only one tuner (e.g. if
your set has been converted and has
only one satellite tuner):
Switch to the NexTView programme
position.
Leave it on this programme position
for at least 20 minutes.
• TV sets with two tuners:
The TV set collects the NexTView data
with the aid of its second tuner.
Special notes:
Stations which are listed in the TV station
list of the TV set with an automatic logo
(set automatically by the TV set) are also
shown in the EPG. Stations which carry
two different programmes (such as a
children’s programme in the daytime
and another programme in the evening)
must be stored in two different programme positions.
The collection operation is interrupted or
cancelled if:
- you switch the programme position
from terrestrial to SAT or vice versa;
- you call the "Picture in Picture" func-
tion;
- you open the Teletext function;
- a recording is programmed in the
menu "AV recording";
- a "timer recording" is running or will
begin within the next hour;
- the Teletext function "Subtitles" is active.
If the TV set is switched to standby mode
during data collection, the text
"NexTView" appears on the green
display to remind you that the data-collection operation is still running.
23.2 Collecting NexTView data
Not possible with an external satellite receiver!
Page 55
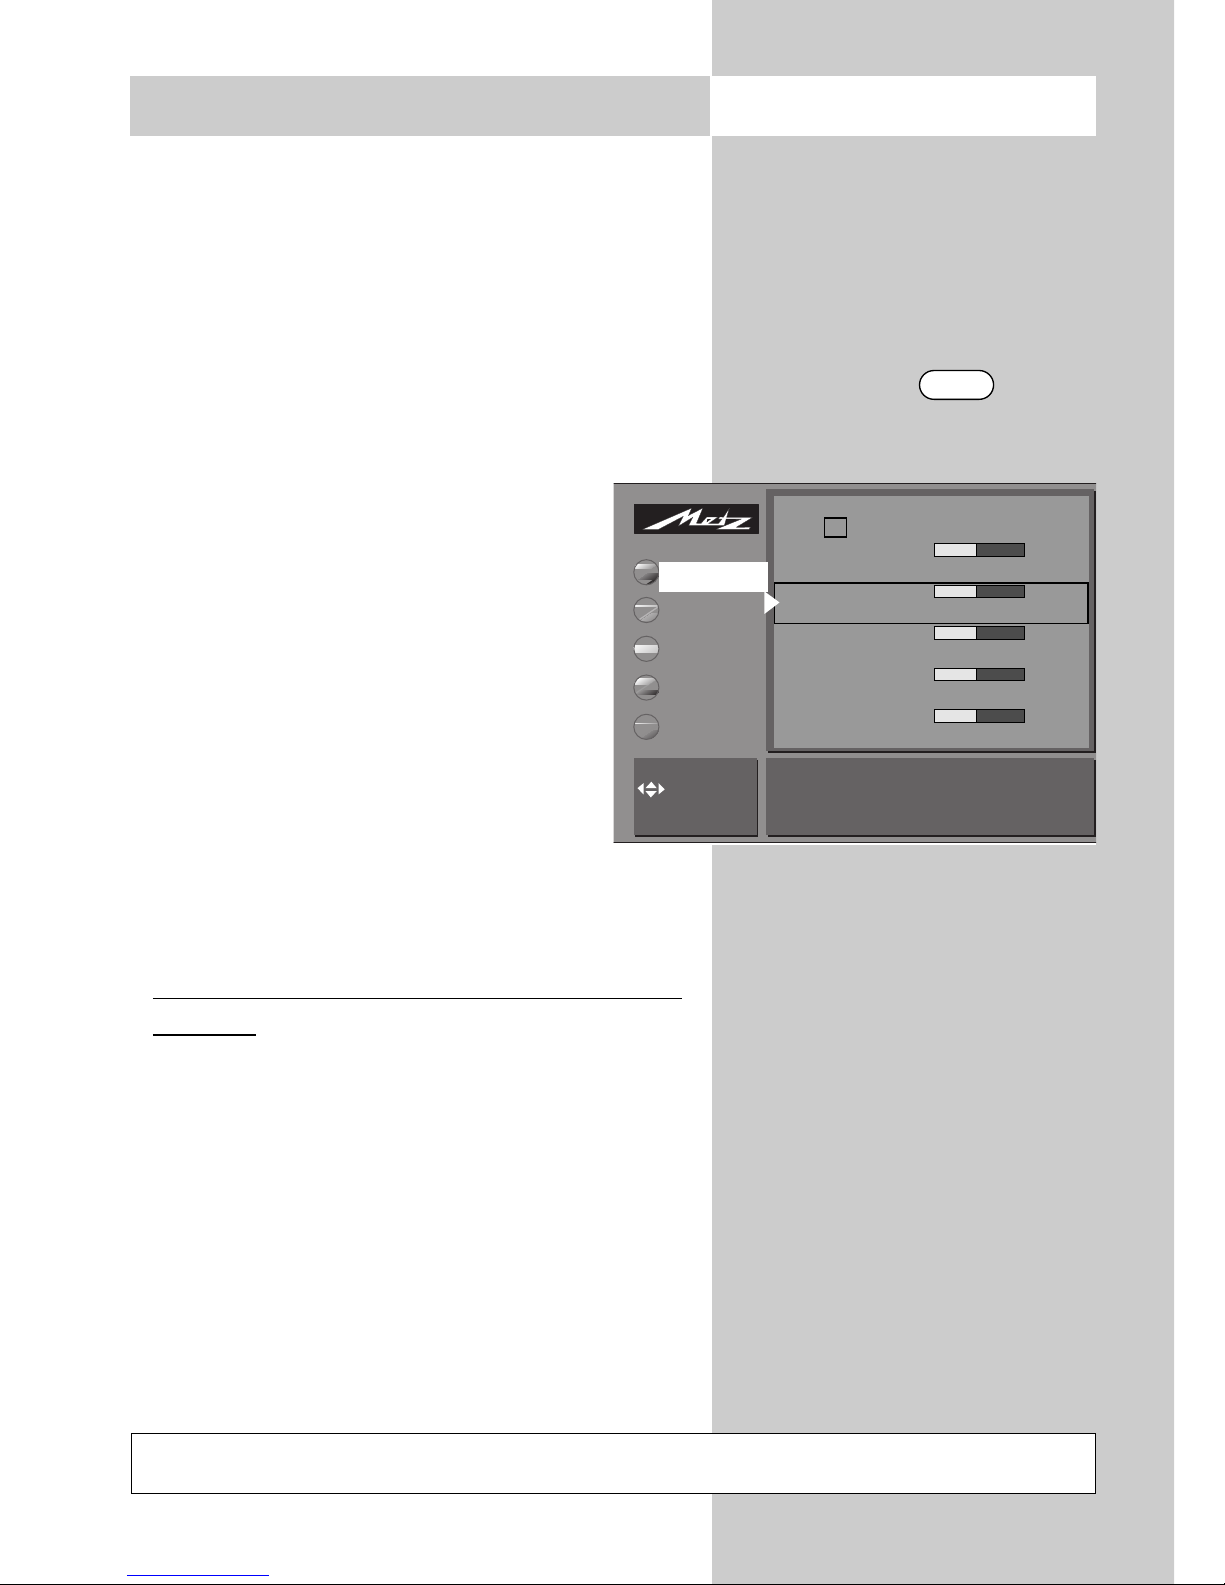
55
23.3 Using NexTView
Once all of the data have been collected, pressing the "EPG" key displays the NexTView programme guide, showing the programme currently running on this programme position.
The left column of the EPG shows the keys with
special functions in this mode:
P+/P- Select a programme
OK Watch the selected programme or set a
reminder for it
Cursor control key Scroll forward
or back through the programme times
0-9 Enter a time for which program-
mes are to be displayed
TV Return to the TV picture
blue Display all programme types
yellow Display only programme types
which match the current user
and their preferences
white Set user preferences
green Select a user (father, mother,
teenager, child)
red Selected programme is ready for recor-
ding (see Page 55)
Selecting and viewing a programme, setting a
reminder
In the EPG, you can select a programme with the
"P+/P-" rocker key.
• By pressing the "OK" key, you can
- watch the programme if it is already running or
- set a reminder for it if it starts later. In this case,
a green check mark appears after the start
time.
Heute 20:07
- Mo Di Mi Do Fr Sa So + 13.08
20:00 RTL 2 -20:15
RTL II News
20:00 ARD -20:15
Tagesschau
20:00 Nord 3 -20:15
Tagesschau
20:00 West 3 -20:15
Tagesschau
20:00 3 SAT -20:15
Tagesschau
News
Selection
Interest
Users
Record
NexTView
All programmes
0..9: enter time
:select
OK: view
EPG
Call the menu
Not possible with an external satellite receiver!
Page 56

56
23.3 Using NexTView
Setting the user
By repeatedly pressing the green key, you can set
the current user (father, mother, teenager, child)
for the NexTView programme guide.
Setting preferences
Each user can set the NexTView programme guide to reflect the personal
preferences.
• Press the white key .
• Use the "P+/P-" rocker key to select
one of the blue cards.
• Use the cursor control key to switch to
the yellow page.
• Use the "P+/P-" rocker key to select
the appropriate yellow cards and
mark each one by pressing the "OK"
key.
Up to eight preferences can be selected for
each user.
• You can remove the red check marks again by
pressing the "OK" key.
• Save the selected preferences by pressing the red key .
☞
All programmes
Selection
Interest
Users
Record
NexTView
Interest
Up to eight stations
can be selected
Music
Education
Children/School
Sport
Leisure
Shows
Current affairs
Feature film
Station selection
MDR
PRO 7
RTL 2
RTL
SAT 1
Bayern 3
ZDF
ARD
Display all stations
✓
✓
✓
✓
✓
✓
✓
✓
✓
✓
motor sports
✓
sport magazine
✓
team sports
✓
special events
✓
tennis/squash✓winter sports
✓
football/soccer✓local sports
All programmes
Selection
Interest
Users
Record
NexTView
Interest
Select subjects
with
and OK
Music
Education
Children/School
Sport
Leisure
Shows
Current affairs
Feature film
Station selection
water sports
motor sports
athletics
team sports
tennis/squash
football/soccer
sport magazine
special events
sport (general)
✓
✓
✓
✓
✓
✓
✓
✓
✓
Not possible with an external satellite receiver!
Page 57

57
23.3 Using NexTView
Recording a programme
If you have a Metz video recorder with dialogue
system, the NexTView programme guide permits
you to start a recording by pressing a single key.
• Open the NexTView programme guide.
• Use the "P+/P-" rocker key to select the programme you want to record.
If a video recorder with dialogue system is connected:
- Switch on the video recorder.
- Insert a cassette.
- Press the red key on the remote control of
the TV set.
If a normal video recorder is connec-
ted:
- Switch on the video recorder.
- Insert a cassette.
- Press the red key on the remote
control of the TV set - the TV timer is
programmed.
- On the video recorder programme
a timer with the date and time on
the AV programme position so that
the programme provided by the TV
timer will be recorded.
If you want to record a programme from a
terrestrial station (received via antenna or
cable), you must programme the video
recorder itself.
☞
Heute 20:07
- Mo Di Mi Do Fr Sa So + 13.08
20:00 RTL 2 -20:15
RTL II News
20:00 ARD -20:15
Tagesschau
20:00 Nord 3 -20:15
Tagesschau
20:00 West 3 -20:15
Tagesschau
20:00 3 SAT -20:15
Tagesschau
Nachrichten - News
Selection
Interest
Users
Record
NexTView
All programmes
0..9: Zeit wählen
:auswählen
OK: ansehen
EPG
OK
Call the menu
Not possible with an external satellite receiver!
Page 58

58
You must use the menu „SAT system“ to inform
the TV set of the settings for the SAT system.
These settings should always be made in the
order indicated by the yellow file cards, i.e. LNB
supply, DiSEqC control, etc.
LNB supply voltage
The LNB supply voltages for selecting the polarisation (horizontal H = 18 V, vertical V = 12 V) are
fixed and do not normally need to be changed.
If it should be necessary to change these
voltages, note the following setting
sequence.
Changing the settings
• Press the „MENU“ key to open the TV
menu.
• Press the red key to open the menu
„Configuration“.
• Use the cursor control key to select
„SAT system“.
• Use the cursor control key to select „LNB supply“ and press „OK“ to confirm your selection.
The cursor is now located before the entry „LNB
voltage H“ in the setting window.
• You can now adjust the voltage slightly up (+)
or down (-) with the
–
+
key.
• Press the „OK“ key to save the new setting.
If your TV set is connected to a community
satellite system, the LNB supply voltage
must always be set to „Off“.
☞
24. Sat system
Possible only if a satellite upgrade kit is installed!
Call the menu
MENU
OK
i
Operation
Function for AV*
Function for F3*
Function for F1*
EURO sockets*
Station search
Sat system
Country*
Language*
LNB voltage H 18V+ LNB voltage V 14VLNB supply voltage Ein
: select,
OK: go to
settings.
Picture-Volume
AV devices
Station table
Timer
Configuration
LNB freq., sat. A
22kHz signal
DiSEqC system
LNB supply voltage
TV-Menü
Configuration
Page 59
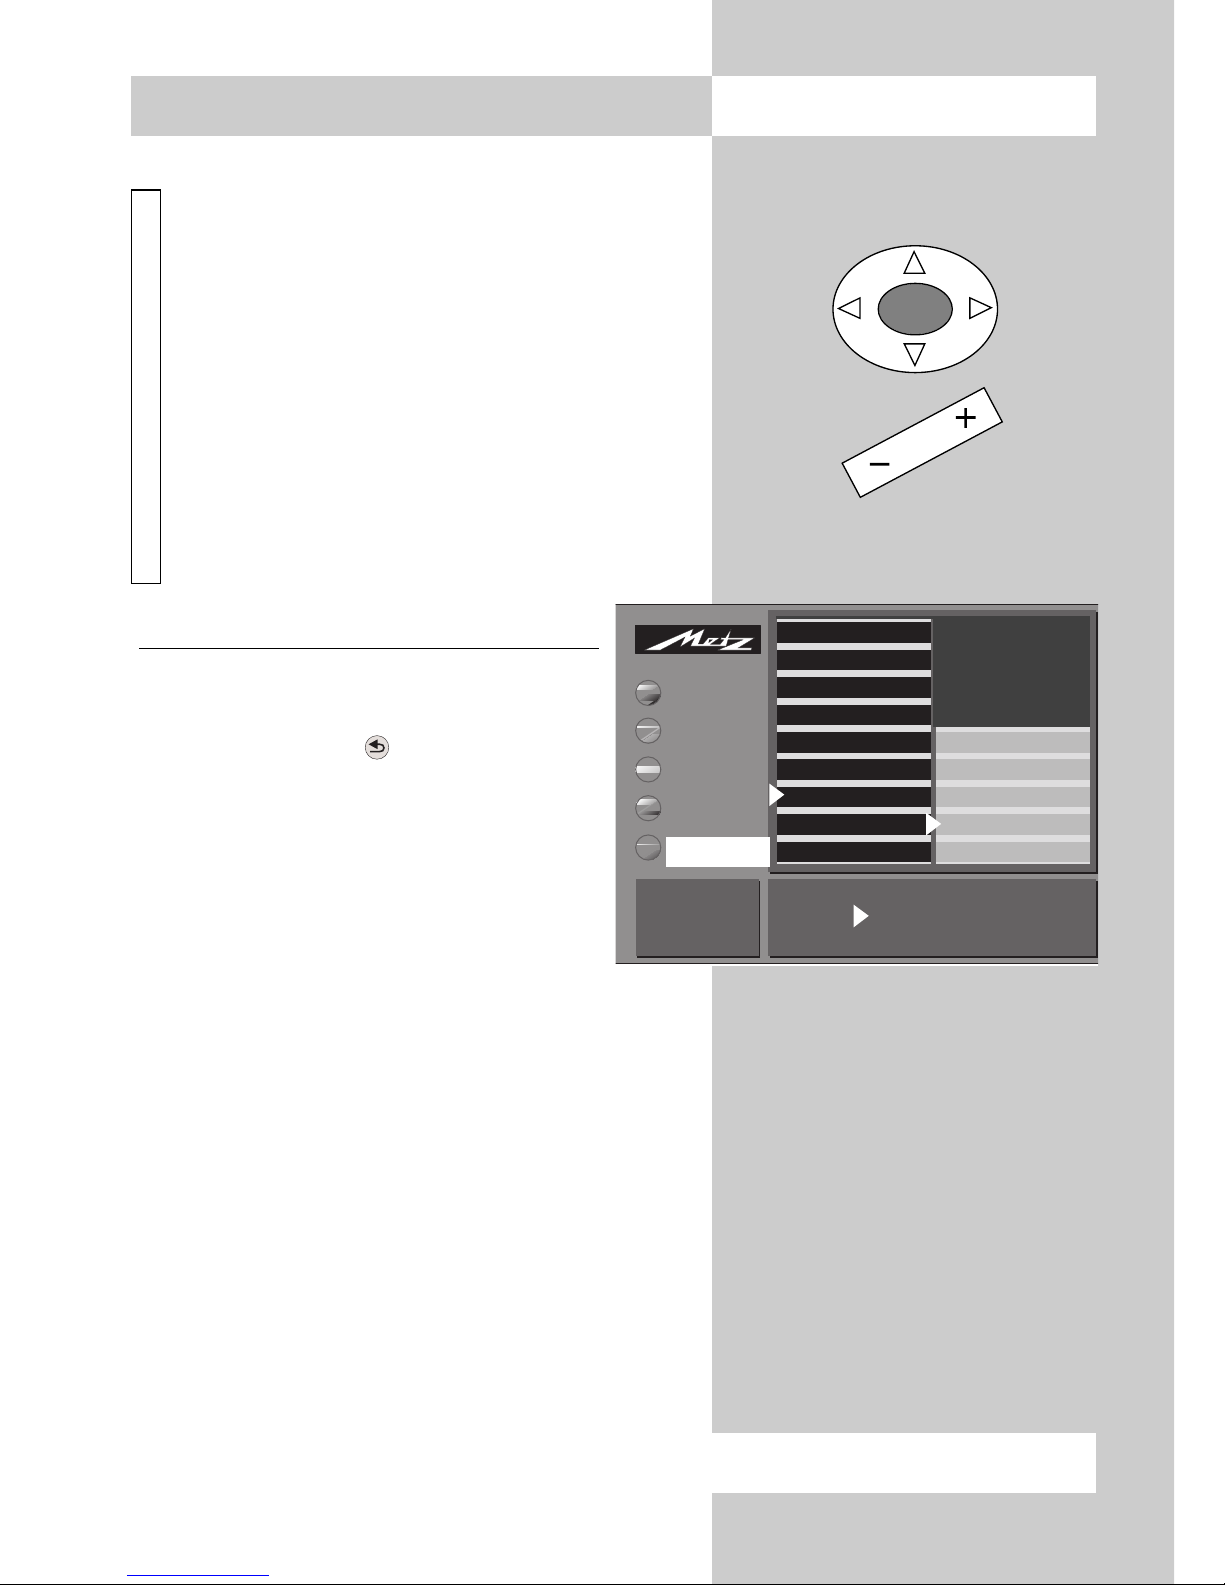
59
Call the menu
24. Sat system
OK
DiSEqC system
The DiSEqC system permits your TV set to control the SAT system via the existing antenna
cable. It is a prerequisite for reception from
more than two satellites (e.g. reception from
Astra, Eutelsat and Hotbird).
It is not yet necessary to upgrade SAT systems
which are used only for reception from Astra.
Control of the SAT system for reception from
three or more satellites (e.g. Astra on 19.2°
Eutelsat on 16° and Hotbird on 13°) is no longer possible without DiSEqC.
Switching the DiSEqC system on and of
f
• Press the „MENU“ key to open the TV
menu.
• Press the red key to open the menu
„Configuration“.
• Use the cursor control key to select
„SAT system“.
• Use the cursor control key to select
„DiSEqC system „ and press „OK“ to
confirm your selection. The cursor is
now located before the entry „DiSEqC system“
in the setting window.
• Use the
–
+
key to select „Yes“ or „No“.
• Press the „OK“ key to save the new setting.
• Press the „TV“ key to close the TV menu.
i
Possible only if a satellite upgrade kit is installed!
Operation
Function for AV*
Function for F3*
Function for F1*
EURO sockets*
Station search
Sat system
Country*
Language*
DiSEqC system Yes
Change value with
+ and Confirm with OK
Picture-Volume
AV devices
Station table
Timer
Configuration
LNB freq., sat. B
LNB freq., sat. A
22kHz signal
DiSEqC system
LNB supply voltage
TV-Menü
Configuration
Page 60

60
24. Sat systemCall the menu
22 kHz signal/toneburst signal
These two signals are needed only for Sat systems
equipped with a multiswitch.
The 22 kHz signal should be used for switching between the upper and lower frequency bands (called
the high band and the low band). The toneburst signal should be used for switching between satellites
(e.g. Astra and Eutelsat) in different positions.
The settings depend on the components
used in the Sat system and it may be
necessary to reverse the signal assignments.
Switching the 22 kHz and toneburst
signals on and off
• Use the cursor control key to select
„22 kHz signal“ and press „OK“ to
confirm your selection. The cursor is
now located before the entry „22 kHz
signal“ in the setting window.
• Use the
–
+
key to switch this signal „On“ or
„Off“.
• If you select „On“, you must specify, in the
second line, whether the 22 kHz signal is to be
used for the „Frequency band“ or the „Position“.
• You can then programme the toneburst signal in
a similar manner, selecting the other function.
• Press the „OK“ key to save the new settings.
i
MENU
OK
Possible only if a satellite upgrade kit is installed!
Operation
Function for AV*
Function for F3*
Function for F1*
EURO sockets*
Station search
Sat system
Country*
Language*
22 kHz signal On Tone burst signal On
22 kHz sign. for Freq.band
: select,
OK: go to
settings.
Picture-Volume
AV devices
Station table
Timer
Configuration
LNB freq., sat. B
LNB freq., sat. A
22kHz signal
DiSEqC system
LNB supply voltage
TV-Menü
Configuration
Page 61

61
24. Sat system
Call the menu
LNB frequencies for Sat A, Sat B, etc.
The LNB frequencies are used for switching between the high band and the low band. In the factory, these frequencies are set to the standard
values of 9.75 GHz for the low band and
10.60 GHz for the high band.
The settings depend on the components used in
the Sat system. Please consult the data sheets or
the label attached to the LNB(s) for details of the
correct settings.
Setting the LNB frequencies
• Use the cursor control key to select
„LNB freq. Sat A“ and press the „OK“
key to confirm your selection. The cursor is now located before the entry
„Low band“ in the setting window.
• Use the
–
+
key to set the frequency to
the correct value.
• Use the cursor control key to switch to
„High band“ and use the
–
+
key to
set the frequency to the correct value.
• Press the „OK“ key to save the new settings.
OK
Possible only if a satellite upgrade kit is installed!
Operation
Function for AV*
Function for F3*
Function for F1*
EURO sockets*
Station search
Sat system
Country*
Language*
Low band 9,75 GHz High band 10,60 GHz
: select,
OK: go to
settings.
Picture-Volume
AV devices
Station table
Timer
Configuration
LNB freq., sat. B
LNB freq., sat. A
22kHz signal
DiSEqC system
LNB supply voltage
TV-Menü
Configuration
Page 62

62
Most of the common Sat programmes are already
stored in the TV set. These programmes are divided into groups as shown in the right-hand
column of the picture on the left. Each of these
groups can be read in only in its entirety
Star
ting the station search
•
Use the cursor control key to select the desired Sat
station card (in the example on the left: Astra) and
press the „OK“ key to confirm your selection.
• Press the „OK“ key again to load the selected
Sat stations.
• After all stations have been loaded,
they are displayed in a station list.
• If desired, you can then select individual stations and delete them by pressing the ll key.
•
Press the „OK“ key to confirm that you
want to save the remaining stations.
• Use the numeric keys to enter the
number of the programme position in
which the first station in this list is to
be saved. The other stations in the list
will be saved in the programme positions following the selected position.
CAUTION! This will overwrite any stations currently in the specified and following positions!
• If you are not sure whether you want to save
the stations, you can cancel the operation by
pressing the „TV“ key.
• If you want to save the stations in the list, press
the „OK“ key.
If you are not satisfied with the order in which the
Sat stations are saved, see the section „Sorting
stations“.
25. Automatic Sat station search
Call the menu
MENU
OK
OK
Possible only if a satellite upgrade kit is installed!
Operation
Function for AV*
Function for F3*
Function for F1*
EURO sockets*
Station search
Sat system
Country*
Language*
Sation search (START)
: select,
OK: go to
settings.
Picture-Volume
AV devices
Station table
Timer
Configuration
DataLogic
Hotbird radio
Hotbird TV
ADR
Astra radio
Astra TV
Terr. station search
TV-Menü
Configuration
Page 63

63
In the menu „Station table“, you can search for
individual Sat stations or enter their parameters
manually.
Direct frequency input or star
ting the station
search
• Press the „MENU“ key to open the TV menu.
• Press the white key to open the station table.
• Use the cursor control key to select an empty
programme position or a programme position
which you want to change.
• Press the „OK“ key twice and then use
the
–
+
key to set the reception type to
„TV Sat“.
• Press the „OK“ key. The cursor is now
located before „Reception type“.
• Use the cursor control key to select
„Frequency“.
• Press the „OK“ key, use the cursor
control key to select „search“ and start
the station search with the
–
+
key. Or:
select the various menu items with the
cursor control key and then use the
–
+
key or
the numeric keys to set the individual parameters.
• Press the „OK“ to save the new station.
• Press the „TV“ key to close the TV menu.
26. Specific Sat station search
Possible only if a satellite upgrade kit is installed!
MENU
OK
OK
Call the menu
Polarisation V AFC Ein
Freq. Band Low Frequency 11.348 GHz
Satellit A Scan operation 3 Sat
Change value with
+ and Confirm with OK
Picture-Volume
AV devices
Station table
Timer
Configuration
TV-Menü
Station table
Page 64
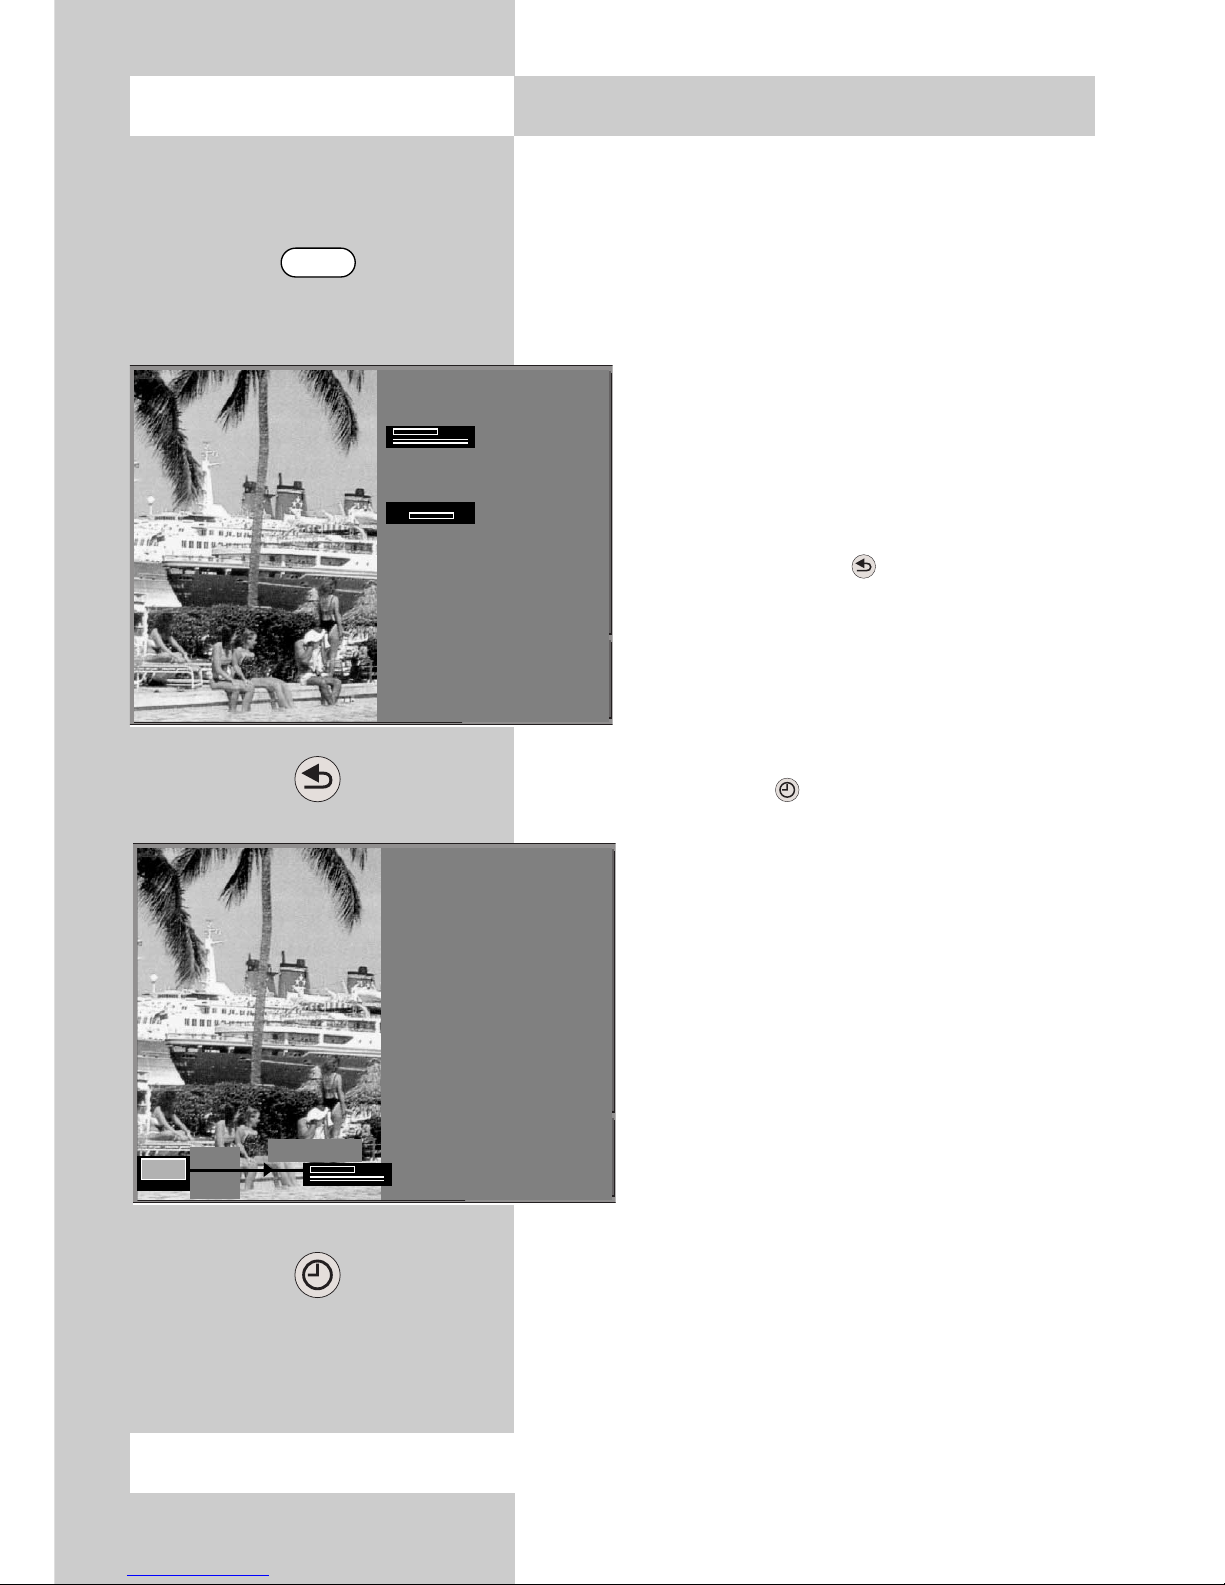
64
27. One-touch Sat recording
Most video recorders do not have a satellite receiver, which means that they cannot directly record
a programme from a satellite station.
However, you can record such a programme with
the aid of the OTR (one-touch recording) function
of your TV set.
• Select the programme position for the
Sat station whose programme you
want to record.
• Press the „AV“ key to open the menu
„AV playback“.
• Press the red key to make this Sat
station available for recording.
• The last signal connection you made is
now displayed. If this is not the one
you want, use the numeric keys to
select the correct connection.
• Press the green key to save the connection.
If you have a Data Logic video recor-
der, recording starts automatically (providing there is a cassette in the recorder).
If you have a standard video recorder,
switch to the AV programme position
and start a one-touch recording (OTR).
• Press the „TV“ key to close the menu.
Do not switch your TV set to a different programme position while
recording, since this will cause the
wrong programme to be recorded.
☞
Possible only if a satellite upgrade kit is installed!
Call the menu
AV
AV menu Playback
Videorecorder 1
EURO1
DVD / CD
EURO2
Pr 23 ARD
record ?
AV menu Record
The signal connection is protectedand remains active even in
standby mode. You cannot
select all of the available devices. Wuold you like to ...
save the connection?
change the recording device?
ARD
Pr 23
Videorecorder
Page 65

65
28. Sat timer recording
If your TV set is equipped with a satellite receiver,
you can use the“Sat timer recording“ menu in the
TV to.record satellite programmes on your video
recorder.
• Press the „MENU“ key to open the TV menu.
• Press the green key to open the menu
„Timer“.
• Use the cursor control key to select „Sat timer
recording“.
• Press the „OK“ key and then use the cursor
control key to select one of the timers.
• Press the „OK“ key and then, in the
setting window, use the numeric keys
to enter the programme position and
the start and end times*. Use the
–
+
key to select the recording device.
• Press the „OK“ key to save the settings.
• Press the „TV“ key to close the menu.
If you have a Data Logic video recorder,
the TV set will automatically start the
recording on the video recorder at the
specified time. If you have a standard video
recorder, you must also programme the recording
on the video recorder. In this case, specify as the
source the AV programme position (e.g. AV1) to
which your TV set is connected.
For VPS recordings, the TV set switches to the
recording state one hour before the specified start
time, so that it can react if the programme you
want to record starts earlier than planned. If you
have programmed a timer recording, do not
switch off the video recorder with its main switch.
Possible only if a satellite upgrade kit is installed!
Call the menu
MENU
OK
OK
* Please note, for VPS recor-
dings, that you must enter the
VPS start time as the start
time for the recording.
Time settings
Timer control
Reminder
Childlock
Sat timer recording
Program Date Time of day Device VPS
25 30.01. 20:15-21:00 Videorecorder
VOX
Change device
with + and -
Picture-Volume
AV devices
Station table
Timer
Configuration
Timer 8
Timer 7
Timer 6
Timer 5
Timer 4
Timer 3
Timer 2
Timer 1
TV-Menü
Timer
Page 66
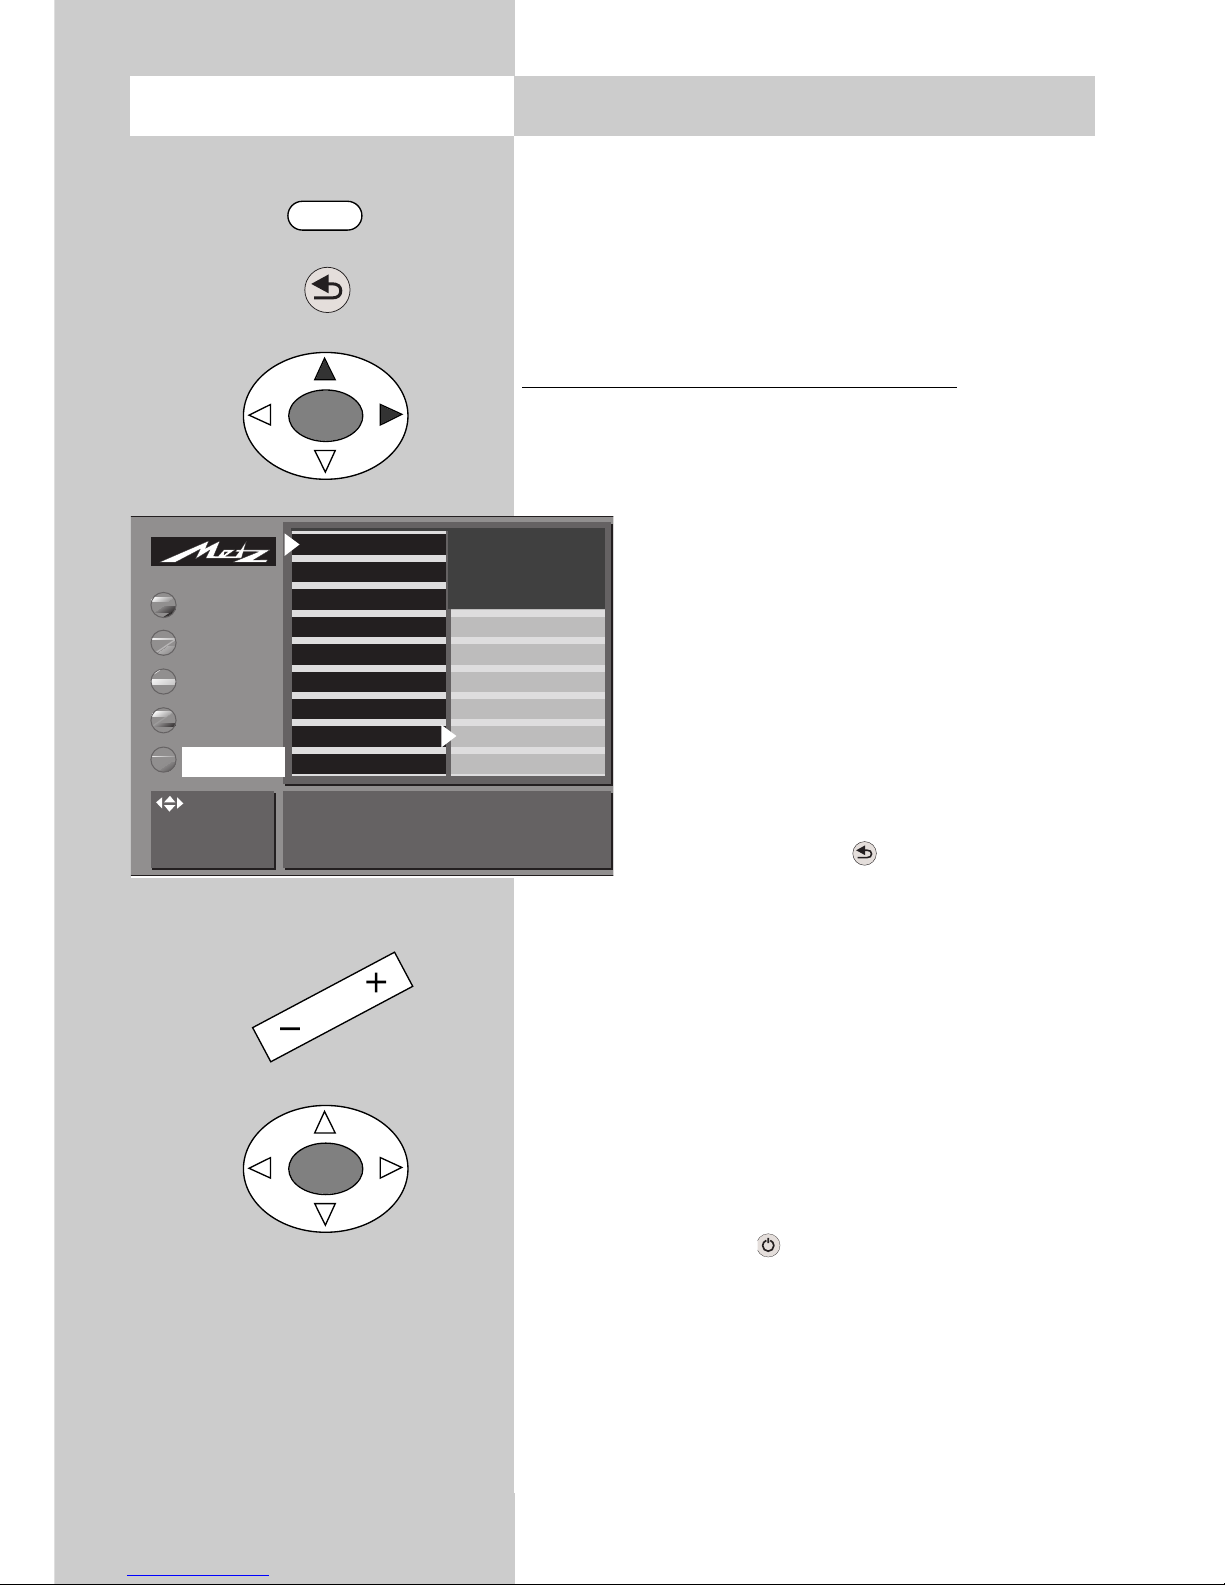
66
29. Initial programme position
You can define a so-called initial programme
position in this TV set. This is intended primarily
to enable you to switch to the AV programme
position when you are using an external Sat
receiver.
Setting the initial programme position
In a menu with two asterisks (**), the settings for this menu item cannot be changed.
In the menu „AV devices“ (see also section 22, „AV devices“), select and connect a Sat receiver (Sat/SetTop).
• Press the „AV“ key.
• In the „AV playback menu“, use the
numeric keys to select the position
„Sat/SetTop“.
• Press the „MENU“ key to open the TV
menu.
• Press the red key to open the menu
„Configuration“.
• Use the cursor control key to select „Operation“
and then „Initial programme position“.
• Press the „OK“ key and then, in the setting window, use the
–
+
key to select „Yes“.
• Press the „OK“ key to save the new setting.
After this, the AV programme position will
be selected automatically if you switch
your TV set on with the main switch and
then press the key on the remote control unit.
☞
☞
Call the menu
OK
OK
MENU
Operation
Function for AV*
Function for F3*
Function for F1*
EURO sockets*
Station search
Sat system
Country*
Language*
Switch on with this station? Yes
: select menu
item
Picture-Volume
AV devices
Station table
Timer
Scope of operation
EPG settings
Automatic zoom
HiFi output
Init. prog. position
Display configuration
TV-Menü
Configuration
Page 67
67
The following procedures are intended only for
cases where the batteries of the remote control
unit are exhausted or the remote control unit is
not available.
The TV controls are at the front of the set. Depending on the TV model, they are located underneath a cover which can be opened by pressing at
the marked position.
Switching on
Press the main switch on the TV set to switch the
set to standby mode. To switch the set on with programme position 1 selected, press and hold the F
key until the green display lights up.
You can also execute the following functions with
the controls on the front of the TV set. The preselected function remains active for 10 seconds.
Changing programme positions:
Press the
–
+
keys.
V
olume:
Press the preselection key F until the bar display
for volume appears on the screen. Then press the
- or + key to adjust the volume.
Contrast:
Press the preselection key F until the bar display
for contrast appears on the screen. Then press the
- or + key to adjust the contrast.
F
+
-
30. Operation without the
remote control unit
Page 68

68
Mains voltage:
230 V ˜ 50 / 60 Hz
240 V ˜ (Australia only)
Antenna input::
75 Ohms unbalanced
DIN 45325
Reception bands:
Standard channels 2 - 12,
21 - 69
Special channels S1 - S20,
S21 - S41,
S42 .. S46 (Belgium OIR channels)
Power
consumption:
Power consumption per hour:
See power consumption in Wh.
Standby mode: approx. 1.7 W
31. Technical data
Power consumption
(to CENELEC/TC
59 X)
Music output power
to DIN 45324
into 4Ω( at 1 kHz
(sinusoidal power
)
Spectral-72
Corum-72
ca. 140 W
2 x 20 + 40 W
(2x12 + 24 W)
Astral-72
ca. 140 W
2 x 20 + 40 W
(2x12 + 24 W)
Spectral-82
ca. 135 W
2 x 20 + 40 W
(2x12 + 24 W)
Spectral-84
ca. 170 W
2 x 20 + 40 W
(2x12 + 24 W)
Artos-82
ca. 135 W
2 x 20 + 40 W
(2x12 + 24 W)
Page 69

69
32. Options
• Satellite upgrade kit 081 NH 1017
for reception of satellite stations without the need
for a separate Sat receiver.
• Satellite upgrade kit 083 NH 1014
similar to the above, but also capable of receiving unencrypted ADR (Astra Digital Radio) stations.
• DVB-S upgrade kit 025 NK 1014 (CI)
or 025 NL 1138
for reception of analogue and digital satellite stations broadcasting TV and radio programmes
without the need for a separate Sat receiver.
• DVB-T upgrade kit 057 NH 1118 (CI)
for the reception of digitally transmitted terrestrial
TV and radio stations which can be received with
a rod antenna or a terrestrial house antenna
without the need for an separate receiver.
• TV-HDR upgrade kit 010 NK 1014
This kit is for installation of a hard disk on which
programmes can be recorded and managed. The
hard disk feature also permits time-shift operation
and the remote programming (at extra charge) of
your TV set.
For other upgrade kits, please consult your local
dealer.
Important note for users of the TV set:
Unauthorised modification of this TV set, in particular changing the high voltage or using a CRT of
a different type, can result in the emission of high
levels of X-ray radiation. TV sets modified in this
manner no longer conform to the official approval for operation and may not be used.
Page 70

70
33. Connecting headphones
The headphone socket is located on the front of
the TV set. On many models, you must first open
a cover by pressing at the marked location in
order to expose the socket.
We recommend using headphones with an impedance of at least 32 Ω. The use of headphones
with a lower impedance (about 8 Ω) will reduce
the dynamic range.
The headphone volume can be saved as one of
the standard settings. In the case of dual-language programmes, you can listen to either sound
channel 1 or 2 on the headphones, regardless of
the channel selected for the loudspeakers.
Always switch off the TV set with the main
switch before cleaning it!
Clean the case of the TV set only with a soft, dry
(or slightly moistened) cloth. Do not use aggressive detergents or scouring powders, since these
could damage the paintwork and/or remove the
inscriptions. Clean the screen with a moist window leather.
☞
34. Cleaning the TV set
Page 71

71
35. Glossary
AV programme position
AV devices have one or more sockets, depending
on the model. These sockets are labelled on the
device, for example with AV1.
These sockets can be selected on the AV device
and the selected socket is shown on the display of
the AV device, for example A1 for socket AV1.
Bandwidth (optional)
The bandwidth needs to be set for sound sub-carriers. For ASTRA stations, the bandwidth should
normally be set to 130 kHz.
Stereo wide
When receiving programmes with stereo sound,
the physical distance between the loudspeakers
can be increased artificially to improve the stereo
effect.
Code
The settings for the childlock are protected by a 4digit numerical code which you can set a desired.
Write down or remember the code you define. If
you forget the code, ask your local dealer for assistance
CTI
The CTI (Colour Transient Improvement) circuit is
an electronic circuit which ensures precise transitions between differently coloured parts of the picture, preventing the colour smearing which could
otherwise occur. The CTI function is active for programmes received via the antenna input and for
picture signals from AV devices.
De-emphasis (optional)
This is a method for reducing noise on the sound
channel of stations received via satellite. The
appropriate settings can be found in specialist
magazines.
For ASTRA stations, always select „Panda“.
Page 72

72
Tone settings
You can switch the tone settings between „Normal“ and „Speech“.
Volume correction
The sound signals from different stations may vary
considerably in their volume. You can correct the
volume of a particularly loud or soft station so that
it is similar to that of the other stations. The volume
correction remains active even when the standard
values are recalled.
Standard settings
Standard settings are all values (such as brightness, volume, chrominance, etc.) which are the
same for all programme positions.
Spatial sound
An artificial stereo effect can be generated for
mono transmissions.
Noise reduction
This setting can be used to improve the quality of
pictures with „snow“ or other noise resulting from
poor reception conditions. Depending on the
amount of interference, various correction facilities
are available and the noise reduction can be set
individually for each programme position.
VCR
The VCR function ensures optimum picture quality
when playing back recordings from tape devices
such as camcorders and video recorders.
Video level (optional)
The video level adjustment can be used to achieve
a uniform contrast for Sat stations with varying
modulation levels. However, this adjustment affects
only the signal at the EURO sockets and the correct setting must be determined by trial and error
(by making test recordings).
35. Glossary
Page 73

73
35. Glossary
Forced mono
In some cases, your TV set may switch from mono
to stereo during a programme, although the station is not transmitting a stereo signal. This is normally due to the local reception conditions. If you
activate „forced mono“ for the selected programme positions, all programmes will be reproduced
in mono, regardless of the received signal.
Film mode
The function "Film mode" improves the picture
quality when viewing black-and-white programmes and cinema films. Moving objects are
displayed more smoothly and the picture looks
more plastic. This function is set in the factory to
"Automatic". For normal TV programmes, the
automatic setting switches the film mode off. We
also recommend setting film mode to "Off" when
playing back "noisy" films from a video recorder.
Progressive Scan
This function improves the sharpness and contrast
of the picture, particularly when playing back
films from a DVD player which is connected via
YUV (see page 75). For watching normal TV programmes, the progressive scan function should be
set to "Automatic".
Page 74

74
Problem Possible cause Remedy
The TV set does not
react to commands
from the remote control unit.
• There is no visual contact between the remote control unit
and the TV set.
• Sunlight is falling directly on
the infrared of the TV set.
• The batteries in the remote
control unit are exhausted.
• The TV set has been switched
off with the mains switch.
• The microprocessor is faulty.
• Ensure that there are no
obstacles.
• Avoid direct exposure
to sunlight.
• Replace the batteries.
• Switch on the TV set
with the mains switch.
• Switch the TV set off
with the mains switch
and then switch it on
again.
Unnatural colours,
coloured spots on
the screen
• Strong magnetic fields in the
vicinity of the TV set (from
loudspeakers or other devices)
• Move the loudspeakers
away from the TV set.
• If the coloured spots persist, switch the TV set off
with the mains switch, wait
a few seconds and then
switch it on again.
After the TV set has
been switched on,
the message „Please
enter code“ is
displayed.
• The childlock function has
been programmed to prevent
selection of any station.
• Enter the code number
with which the childlock
function was programmed.
The TV set does not
switch to the selected
programme position.
Instead, a list of stations is displayed with
a teddy-bear symbol.
• The childlock function has
been programmed to permit
selection of only the stations
shown in the list.
• Enter the code number
with which the childlock
function was programmed.
You are playing back a
film from an AV device
in the aspect ratio
16:9, but the picture is
displayed in the 4:3
format.
• The picture format for the AV
programme position (e.g.
AV2) has not been set correctly in the TV menu.
• Select the AV programme position and set the
picture format to 16:9
or "Automatic" (see
Section 11.1).
Page 75

75
Immediate recording
of a terrestrial station (received via
your house antenna
or cable) with Data
Logic does not work.
• The Data Logic video recorder
is not connected to the house
antenna or cable outlet.
• Connect the Data Logic
video recorder to the
house antenna or cable
outlet with the aid of an
antenna cable.
Data Logic does not
work.
• The Data Logic video recorder
with data interchange has not
been set up correctly in the TV
set.
• The Data Logic video recorder
is not connected to the EURO
socket (see av Menu)
• The Euro-AV (Scart) cable
being used does not have all
21 pins connected.
• In the menu „AV devices“, define the Data
Logic video recorder as
video recorder 1 with
„Datalogic ON“.
• Connect the Data Logic
video recorder to the
EURO socket with a
Scart cable.
• Use a Euro-AV (Scart)
cable with all 21 pins
connected.
Problem
Possible cause Remedy
General problems
with an external AV
device connected to
the TV set.
• The AV device has not been
set up correctly in the TV set.
• In the menu „AV devices“, select the appropriate device with the
cursor, set the „Signal
OUT/IN“ accordingly
and press the „OK“ key.
Connect the AV device
only as shown in the
connection diagram.
Page 76
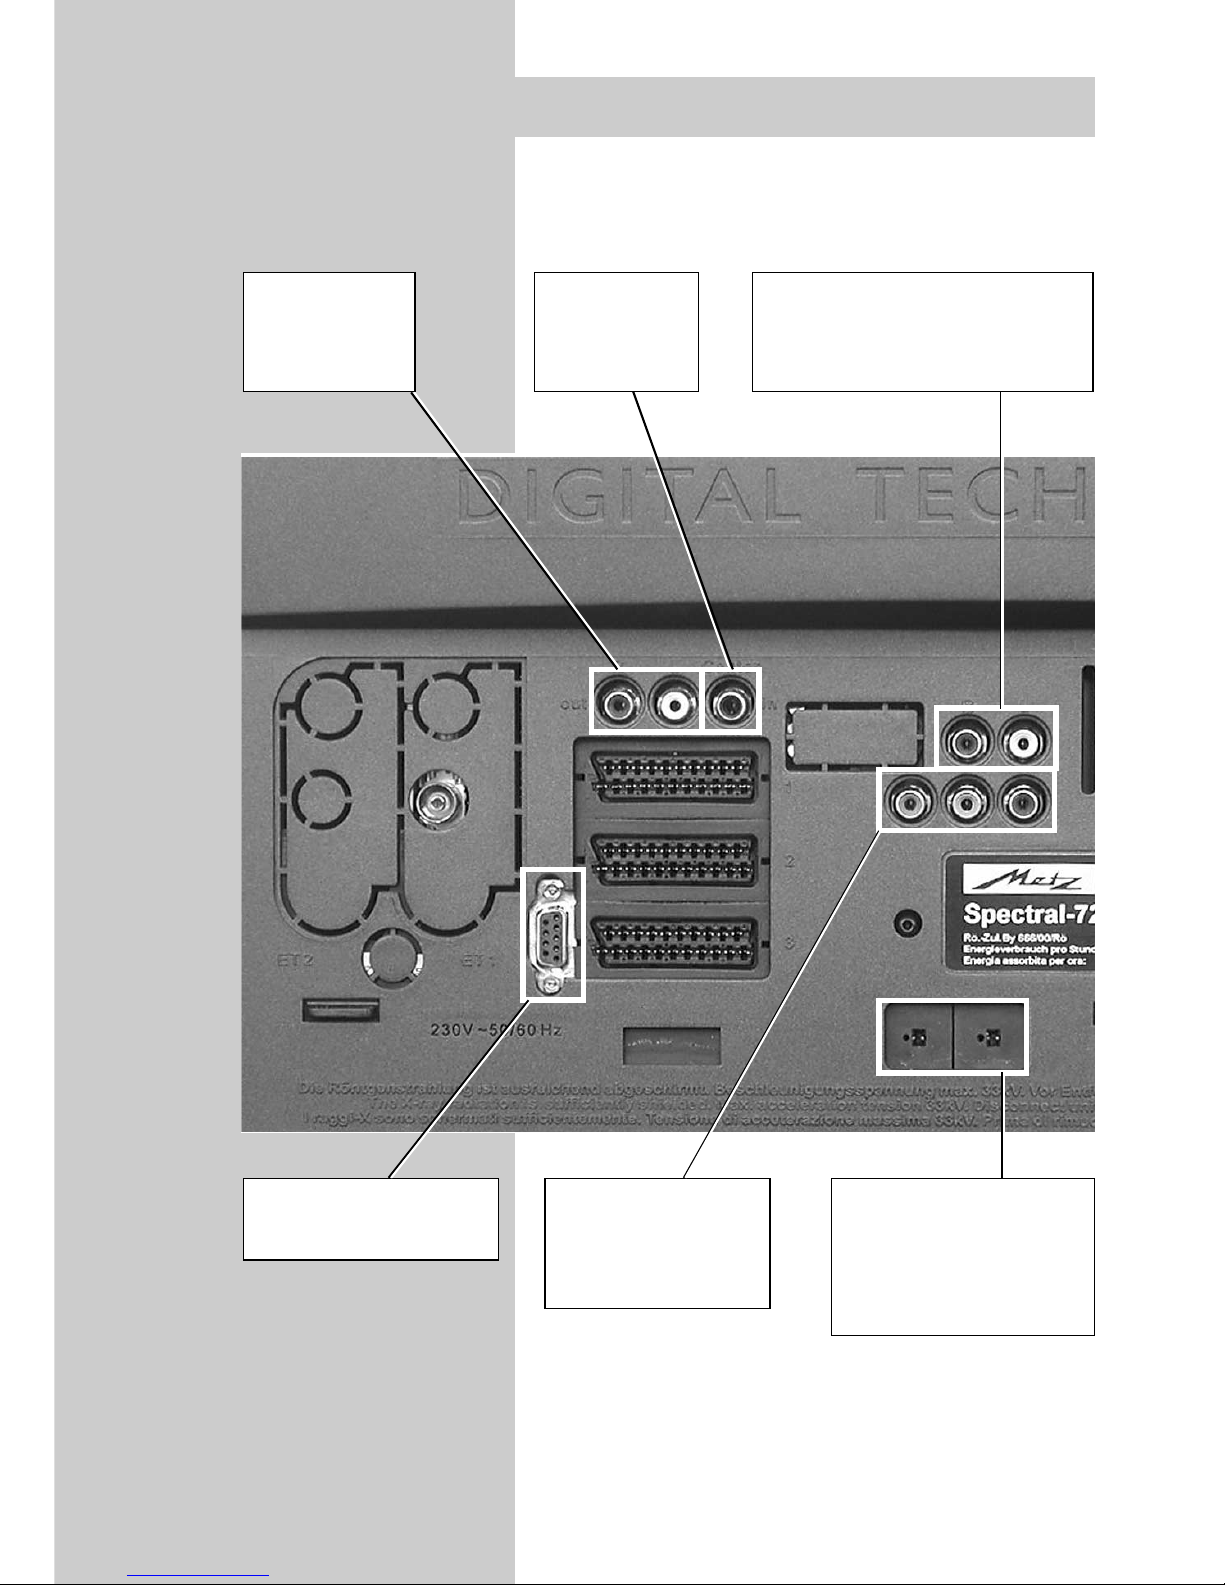
76
Connecting facilities at back-panal of TV-sets
HiFi out –
to connect an
HiFi-amplifier
Center in –
external Surround-set
Service-socket –
for service-technician
Speaker-sockets –
for external speakers,
impedance 4Ohm
(f.e. Metz 10LH10)
Video in –
component-signal
(f.e. DVD-player)
Audio in –
if cinch sockets are in use,
scart-socket 1 is switched of
Page 77

77
16:9 full sreen . . . . . . . . . . . . . . . . . . . . . .43
22 kHz signal . . . . . . . . . . . . . . . . . . . . . .60
9 PRG. overview . . . . . . . . . . . . . . . . . . . .42
Automatic Sat station search . . . . . . . . . . . .62
Automatic station search . . . . . . . . . . . . . . .18
AV devices, connecting . . . . . . . . . . . . . . . .47
AV programme position . . . . . . . .48,64,66,71
AV playback, devices with switching voltage .49
AV playback, devices without switching voltage .
50
Bandwidth . . . . . . . . . . . . . . . . . . . . . . . .71
Batteries for remote control unit . . . . . . . . . . .5
Camcorder, connecting . . . . . . . . . . . . . . . .47
Centre loudspeaker . . . . . . . . . . . . . . . . . .32
Childlock . . . . . . . . . . . . . . . . . . . . . . . . .35
Cleaning the TV set . . . . . . . . . . . . . . . . . .72
Code for childlock . . . . . . . . . . . . . . . . . . .36
Colour standard . . . . . . . . . . . . . . . . . . . .33
Connecting external devices . . . . . . . . . . . .47
Copying recordings . . . . . . . . . . . . . . . . . .51
Country . . . . . . . . . . . . . . . . . . . . . . . . . .17
CTI . . . . . . . . . . . . . . . . . . . . . . . . . . . . .71
Cursor . . . . . . . . . . . . . . . . . . . . . . . . .12,13
Data Logic video recorder . . . . . .47,48,57,65
Decoder, connecting . . . . . . . . . . . . . . . . . .47
Decoders (see AV devices) . . . . . . . . . . . . .47
De-emphasis . . . . . . . . . . . . . . . . . . . . . . .72
DiSEqC system . . . . . . . . . . . . . . . . . . . . .59
Display configuration . . . . . . . . . . . . . . . . .34
DVD player, connecting . . . . . . . . . . . . . . .47
EPG (NexTView) . . . . . . . . . . . . . . . . . . . .52
EPG activating . . . . . . . . . . . . . . . . . . . . . .53
EURO sockets . . . . . . . . . . . . . . . . . . . . . .49
External devices (playback) . . . . . . . . . . . . .49
External devices, connecting . . . . . . . . . . . .47
Fine tuning . . . . . . . . . . . . . . . . . . . . . . . .20
Font, double size . . . . . . . . . . . . . . . . . . . .45
Forced mono . . . . . . . . . . . . . . . . . . . . . . .73
Freeze frame . . . . . . . . . . . . . . . . . . . . . . .5
Glossary . . . . . . . . . . . . . . . . . . . . . . . . . .71
Funktion keys . . . . . . . . . . . . . . . . . . . . . .40
Headphones . . . . . . . . . . . . . . . . . . . . . . .71
Help function . . . . . . . . . . . . . . . . . . . . . . .70
HiFi output . . . . . . . . . . . . . . . . . . . . . . . .30
Index
Page 78

78
Initial programme position . . . . . . . . . . . . .66
Language for TV menu . . . . . . . . . . . . . . . .17
Large font . . . . . . . . . . . . . . . . . . . . . . . . .45
LNB frequencies . . . . . . . . . . . . . . . . . . . . .61
LNB supply voltage . . . . . . . . . . . . . . . . . .58
Low band . . . . . . . . . . . . . . . . . . . . . . . . .61
Marks in Teletext . . . . . . . . . . . . . . . . . . . .45
Marks, index . . . . . . . . . . . . . . . . . . . . . . .46
Marks, setting and deleting . . . . . . . . . .45,46
Menu language . . . . . . . . . . . . . . . . . . . . .17
Menus, menu control . . . . . . . . . . . . . . . . .13
Multiple pages, sub-pages . . . . . . . . . . . . .44
Mute function . . . . . . . . . . . . . . . . . . . . . .31
NexTView . . . . . . . . . . . . . . . . . . . . . . . . .52
NexTView activating . . . . . . . . . . . . . . . . .53
NexTView data collecting . . . . . . . . . . . . . .54
NexTView using . . . . . . . . . . . . . . . . . . . .55
NexTView, recording a programm . . . . . . . .57
Noise reduction . . . . . . . . . . . . . . . . . . . . .72
Numeric page selection . . . . . . . . . . . . . . .44
Operating scope . . . . . . . . . . . . . . . . . . . .15
Panorama . . . . . . . . . . . . . . . . . . . . . . . .43
Peripheral devices (see external devices) . . . .47
Picture format . . . . . . . . . . . . . . . . . . . . . .43
Picture in Picture (PIP) . . . . . . . . . . . . . . . . .41
Picture quality for video recorder . . . . . . . . .50
Picture settings . . . . . . . . . . . . . . . . .14,24,25
Picture sharpness . . . . . . . . . . . . . . . . .24,25
Programming Sat stations . . . . . . . . . . . .62,63
Recording Sat programmes . . . . . . . . . .64,65
Recording a programme with NexTView . . . .57
Reminder . . . . . . . . . . . . . . . . . . . . . . . . .37
Playing back from external devices . . . . .49,50
Riddle solution key . . . . . . . . . . . . . . . . . . .45
Sat programmes, recording . . . . . . . . . .64,65
Sat stations, programming . . . . . . . . . . .62,63
Sat system . . . . . . . . . . . . . . . . . . . . . . . .58
Scrolling by marks . . . . . . . . . . . . . . . . . . .46
Setting window . . . . . . . . . . . . . . . . . . . . .13
Signal type (EURO sockets) . . . . . . . . . . . . .49
Sleep timer . . . . . . . . . . . . . . . . . . . . . . . .38
Sound 1, sound 2 . . . . . . . . . . . . . . . . . . .14
Sound effects (see base width or spatial sound) . .
71
Sound settings . . . . . . . . . . . . . . . . . . .27,28
Index
Page 79

79
Index
Spatial sound . . . . . . . . . . . . . . . . . . . . . .72
Standard picture settings . . . . . . . . . . . . . . .24
Standard sound values . . . . . . . . . . . . . . . .26
Standard time . . . . . . . . . . . . . . . . . . . . . .40
Standard values . . . . . . . . . . . . . . . . . .24,26
Station logos . . . . . . . . . . . . . . . . . . . . . . .21
Station search . . . . . . . . . . . . . . . . . . . .18,19
Station search, automatic . . . . . . . . . . . . . .18
Stations, deleting . . . . . . . . . . . . . . . . . . . .22
Stations, selecting . . . . . . . . . . . . . . . . . . .19
Stations, shifting . . . . . . . . . . . . . . . . . . . .22
Stations: shifting, copying and deleting . . . . .22
Stereo wide . . . . . . . . . . . . . . . . . . . . . . . .71
Subtitles . . . . . . . . . . . . . . . . . . . . . . . . . .46
Summer time . . . . . . . . . . . . . . . . . . . . . . .40
Switching voltage, devices with . . . . . . . . . .49
Switching voltage, devices without . . . . . . . .50
Switch-off time . . . . . . . . . . . . . . . . . . . . .38
Switch-on time . . . . . . . . . . . . . . . . . . . . . .38
Teletext . . . . . . . . . . . . . . . . . . . . . . . . . . .44
Teletext, font size . . . . . . . . . . . . . . . . . . . .45
Thunderstorm . . . . . . . . . . . . . . . . . . . . . . .5
Timer control . . . . . . . . . . . . . . . . . . . . . . .38
Timer menu . . . . . . . . . . . . . . . . . . . . . . . .65
Timer recording . . . . . . . . . . . . . . . . . . . . .65
Toneburst . . . . . . . . . . . . . . . . . . . . . . . . .50
TV menu . . . . . . . . . . . . . . . . . . . . . . . . . .13
Two-stage muting . . . . . . . . . . . . . . . . . . . .31
Variable zoom . . . . . . . . . . . . . . . . . . . . .43
VCR function . . . . . . . . . . . . . . . . . . . . . . .50
Video level . . . . . . . . . . . . . . . . . . . . . . . .72
Video recorder programme position,
automatic selection . . . . . . . . . . . . . . . . . . .48
Video recorder, connecting . . . . . . . . . . .47,48
Videocassettes, playing back . . . . . . . . .49,50
Volume correction . . . . . . . . . . . . . . . . . . .28
Volume reduction function . . . . . . . . . . . . . .31
Winter time . . . . . . . . . . . . . . . . . . . . . . . .39
Zoom . . . . . . . . . . . . . . . . . . . . . . . . . . . .43
Zoomautomatic . . . . . . . . . . . . . . . . . . . . .34
Page 80

80
Codes Video
Metz VG61 532
VF21, VF44, VF46
VF61, VE21, VE43
VE44, VE45, VD21
VD43, VD44, VD45
VC21, VC43, VC44
VC62, 21VB11
42VB12, 21VA12
21VA13, 42VA11
64VA14, 9836,9837
9847, 9874, 9875
9876, 9877
Metz VF22, VF47 568
VF48, 9843, 9844
9849
Metz VH22, VH47 573
VH48
ACTION 468 481 547
ADMIRAL 481 487
ADVANTZ 481
ADVENTURA 468 481 547
ADYSON 487
AGHA 547
AIWA 481 505 562 572
477
AKAI 481 482 483 484
505 508 546 554
575 609 612
AKIBA 487
AKURA 487 505
ALBA 466 588 593
ALLORGAN 547
ALLSTAR 529
AMWAY 529
ANITECH 487 490 529
ART TECH 575
ASA 478 481 528
ASBERG 575
ASTRA 481 547
ASUKA 481 487
ASUKA 527
ASWO 528
AUDIO DYNAMICS 505
AUDIOSONIC 575 616
AUDIOTON 466
AUDIOVOX 481
AVIS 487 547
BAIRD 505
BANG & OLUFSEN 503 583
BASIC LINE 487
BAUR 513 547 565 599
607 609 612
BEAUMARK 547
BELL & HOWELL 468
BESTAR 466 616
BLACK PANTHER 616
BLAUPUNKT 491 496 502 507
508 527 530 532
607 609 610 612
614 621
BONDSTEC 466 487
BONDSTECBRANDT 505
BRANDT ELECTRONIQUE 503 504 505 524
574
BRAUN 570
BRIONVEGA 450 575
BROKSONIC 481
BRUNS 466 487 490
BUSH 588 590 593
CALIN 481
CALIX 481
CANDLE 481
CARRERA 547
CARVER 527
CGE 505
CIE 487
CIMLINE 487 481 487 547
CLARIVOX 606
CLASSIC 481
CLATRONIC 466
COLORTYME 547
COLT 487
CONDOR 466 616
CONTINENTAL EDISON 503 504 505
CRAIG 481 487 547
CROSLEY 481 507 527 547
CROWN 487
CROWN 490 575 616
CRYSTAL 575
CTC 466
CURTIS MATHES 505 547
CYBEREX 547
DAEWOO 466 468 553 616
DANSAI 487
DAWA 575
DAYTRON 466
DE GRAAF 529
DECCA 528
DECCAVIDEO 528
DENON 527
DIGITAL 477 481 505
DORIC 601
DTS 547
DUAL 503 504 505 527
530
DUEL 505
DUMONT 468 481 487 527
DYNATECH 487
ECONOMIC 510
EDISON 487
ELBE 616
ELCATECH 487
ELECTROHOME 481 547
ELECTROPHONIC 481
ELIN 547
ELTA 487 616
EMERSON 481
Codetabel
Page 81

81
EPC 505 586 598
ESC 466 510 616
ETZUKO 487
EUROPHON 586
EXPERT 604
FERGUSON 501 505 523 524
555 574 595 596
FIDELITY 487
FINLUX 468 477 478 528
FIRST LINE 477 481 487 575
FISHER 468 473
FUNAI 481 487 571
GAB 487
GBC 466
GE 547
GEC 528 601 603 604
GELOSO 466
GITEM 575
GOLDHAND 487 490
GOLDSTAR 468 481 547 552
556 575 610
GOODMANS 466 487 530 616
617 621
GRAETZ 468 505 600 603
GRANADA 468 474 477 532
542 557 565 575
601 605 606 616
GRANDIN 481 487 604
GRUNDIG 451 452 453 454
457 458 459 460
GRUNDIG 461 462 463 464
491 492 493 495
496 497 507 527
530 531 563 584
585 600 606 609
610 611 612 613
GUTTRONIC 602
HANSEATIC 481 575
HANTAREX 575
HARLEY DAVIDSON 481
HARVARD 481 487
HCM 466 487 490
HEADQUARTER 468
HINARI 487 509
HINARIHITACHI 475 476 477 478
HITACHI 481 485 503 505
530 535 601 603
604
HYPSON 487
IMPERIAL 510 575
INGERSOL 509
INNO HIT 510 547 575
INNO HIT 616
INTERBUY 481 487
INTERDISCOUNT 575
INTERFUNK 468 527 565 575
600 601 603 604
INTERVIDEO 466
INTERVISION 487
IRRADIO 481 487 575 606
ITT 450 468 483 505
ITV 466 481
JENSEN 505
JETPOINT 575
JVC 503 504 505 519
520 545
JVC_LCD 515 521
KAISER 575
KAISUI 487
KAPSCH 600 601 603
KARCHER 575
KENDO 483
KENWOOD 468 505
KLH 481 487
KLIT 487
KODAK 481
KORPEL 487
KUBA 473 504 505 510
LEYCO 487
LG 578
LIESENKOTTER 575 565
LLOYD 481 487 547
LLOYD’S 601 606
LOEWE 481 491 575
LOEWE OPTA 481 491 527
LOGIK 487 509 547
LUXOR 468 478 483 517
518 601
LXI 468 477 481
MAGNADYNE 575
M ELECTRONICS 547
MAGNASONIC 470 481 487 547
MAGNAVOX 481 507 527 547
MAGNIN 481 547
MAGNUM 581 582
MANESTH 487
MARANTZ 491 528 565 566
MARQUANT 487 490
MARTA 481
MATRIX 481
MATSUI 486 509 560 561
562 586 601 610
MATSUSHITA 527
MEDIATOR 527
MEMOREX 468 481 547
MEMPHIS 487
MGA 547
MGN 547
MINERVA 606 609 610 612
MINOLTA 477
MITSUBISHI 477 505 519 527
542 609 612
487 547 468 477
481
MULTITECH 466 481 487 575
MURPHY 601
NAD 547
NATIONAL 507
NEC 504 505 576
NECKERMANN 450 469 470 477
491 493 496 505
509 510 512 513
519 528 541 565
Codetabel
Page 82

82
575 610 611 616
NEI 575
NESCO 487
NIKKAI 466
NIKKO 481
NOBLIKO 606
NOKIA 450 468 470 483
488 489 503 504
505 510 516 517
518 547 551 553
554 557 567 600
601 603 604
500 503 504 505
515 521 524 574
602
NOVATRONIC 575
OCEANIC 483 489 601 604
OKANO 487
OLYMPIC 466
OLYMPUS 507
ORION 481 509 531 536
537 538 558 559
560 561 589 591
OTTO VERSAND 527 474 493 496
508 512 513 541
544 565 575 599
609 610 611 612
616 620 621
PAEL 606
PALLADIUM 481 487 491 505
PANASONIC 507 508 527 532
533 549 600 601
623
PATHE MARCONI 503 505
PAXSONIX 547
PENNEY 477 481 527 547
PENTAX 477
PERSHIN 606
PHILCO 481 507 527 547
PHILIPS 481 491 507 528
PHILIPS 529 530 547 548
PHILIPS 550 563 564 565
PHILIPS 568 575 620 621
PHILIPS 624 625
PHILIPS (F) 491 565 575
PHONOLA 527
PILOT 481
PIONEER 477 527 539 575
PRIMA 505 547
PROFEX 487 490 529
PROFILE 547
PROSCAN 477 481 483 547
PROTEC 487
PULSAR 481 547
PULSER 468 481 547
PYE 565 575
QTY1 592
QUARTER 468
QUARTZ 481 547
QUASAR 507 527
QUELLE 450 459 461 464
470 471 474 477
QUELLE 478 484 487 491
496 497 503 504
505 508 509 510
512 513 519 528
529 541 565 575
599 604 606 609
610 611 612 614
616 621
QUESTAR 466
RADIALVA 481 487 527
RADIOLA 527 575
RADIONETTE 601 604
RADIX 497
RANDEX 481
RANDIU 481
RANK/BUSH/MURPHY 601
RCA 477 481 483 547
REALISTIC 468 481 547
REDIFFUSION 601
REX 503 505
RICOH 481
ROADSTAR 481 487 547 617
ROYAL 466 487
SABA 499 503 504 505
SABA 515 521 524 540
SABA 574 601 603
SAISHO 486 509 575
SALORA 467 468 470 483
SALORA 516 517
SAMBERS 606
SAMEX 547
SAMSUNG 510 547 575 575
597
SANKY 487
SANSUI 487 505 575
SANWA 509
SANYO 468 469 470 471
551 577 586
SBR 527
SCHAUB LORENZ 450 468 483 505
SCHNEIDER 477 478 481 487
510 527 529 530
563 564 569 571
573 575 578 581
582 604
SCOTT 481
SEARS 468 477 481
SEG 487 490 510 547
SEI-SINUDYNE 509 528
SELECO 503 504 505 545
SENTRA 466
SETRON 466 487
SHARP 468 544
SHINTOM 487
SHIVAKI 481 575
SHOGUN 547
SHORAI 509
SICE 609 612
SIEMENS 459 461 462 464
468 469 470 472
479 480 481 486
491 492 493 494
Codetabel
Page 83

83
495 496 497 498
511 525 530 584
607 609 610 611
612 614
SILMA 575
SILVA 481
SINGER 487 547 575 616
SINUDYNE 509 513 527 575
599
SOLAVOX 466 604
SONOKO 575
SONOLOR 601
SONTEC 481
SONY 506 512 513 514
541 599 623
SR1000 547
STS 477
SUNWOOD 487
SYLVANIA 527
SYMPHONIC 481 487 527
TAISHO 509
TALENT 609 612
TANDBERG 623
TANDY 468
TASHIKO 528 529
TATUNG 505 527
TEAC 505
TEC 466
TECHLINE 487
TECHNICS 527 532
TECHNILAND 575
TECHNISAT 563
TEKNANT 575
TEKNIKA 481
TELEAVIA 503
TELEAVIA 505
TELEFUNKEN 500 503 504 505
515 521 524 574
579 594
TELEORDER 547
TELERENT 505
TELESERVICE 609 612
TELETECH 487
TENOSAL 487
TENSAI 481 487 490 509
575 593
THOMAS 547
THOMSON 499 500 503 504
505 524 574 594
60 6226
THORN 474 482 501 503
505 542 565 575
586 604 606 609
612
THORN-FERGUSON 501 503 504 505
575 601 604 606
609 612
TOKAI 481 487
TOSHIBA 474 481 505 527
547
TOTEVISION 481 547
TOWADA 487 490
TOWIKA 487
TRIAD 575
TRIX 481
TVA 466
UHER 466 477 481 503
505 510 543
ULTRAVOX 450 616
UMA 565 575 601 604
UMA 606 609 612 614
UNITECH 547
UNITED 560
UNIVERSUM 481 483 491 527
530 547 571 575
606 609 612 621
UNIVOX 604
VICTOR 505 545
VIDEOMASTER 466
VIDEOPLUS 554 562 589
VIDEOSONIC 547
VIEWMARK 481
VIEWMAX 481
WARDS 477 487 547
WEGAVOX 575
WELTBLICK 481
WHITE WESTINGHOUSE 450 565
WINSTON 575
WIZJA 528
WORLDVIEW 575
XR1000 487 547
YAMISHI 487
YOKAN 487
YOKO 466 481 487 490
510 547
ZENITH 481
Codes DVD-Player
METZ 204 239
AKAI 214
CYBER HOME 223
DENON 216 230
GRUNDIG 222 232 238
HARMAN/KARDON 206
HITACHI 205 210
JVC 212
KENWOOD 208 231
LABWAVE 200 201
LINN 215
LOEWE 219
MARANTZ 218 219 236
MEDION 221
NAD 207
NONAME 228
ONKYO 209 225 226
PANASONIC 216
PHILIPS 219 220 227 233
PHILIPS 234 235 236 237
PIONEER 203 204
SAMSUNG 210
SEG 201
Codetabel
Page 84

84
SHERWOOD 224
SONY 211 229
TECHNICS 216 217
THOMSON 213
TOSHIBA 202
YAMAHA 216
Codes HIFI - CD
AIWA 815 816 817 884
AKAI 856 857 872 921
AKKAI 856
AMSTARD 957
AMSTRAD 929 940 942 956
ARCAM 908
ASWO 909
BANG & OLUFSEN 808
BRAUN 975 976
BUSH 888
CAMBRIDGE 945
CAMBRIDGE AUDIO 945
CARVER 908
DAEWOO 876
DENON 801 812 845 846
853 899 900 901
961 962
DIORA 949
DUAL 822 832 859 994
FISCHER 830 831 920 953
GOLDSTAR 885
GOODMANNS 872
GOODMANS 888
GRUNDIG 908 911 912 913
HARMAN KARDON 905 931 934 935
HITACHI 853
INTERSOUND 960
ITT 937
JVC 844 848 849 902
903 904 992
KENWOOD 820 847 858 859
877 878 879 925
948 963
KRELL 908
LINN 908 964
LUXMAN 924 946 967
METZ HE11 882
MARANTZ 833 908
MATSUI 908
MEDION 955
MERIDIAN 908
MAGNAVOX 908
MICROMEGA 908
MINOWA 972
MISSION 908 909
MTC 955
NAD 947
NAIM 908
NAKAMICHI 930
NOKIA 938
NONAME 888
NSM 802 803 804 805
806 807
OKANO 869 871
ONKYO 819 827 861 881
PALLADIUM 810 851 866 870
PANASONIC 834 915 918
PHILIPS 833 908 909 911
965
PIONEER 824 825 826 850
862 863 864 922
923
PMG 906
PROTON 908
QUAD 908 965
RADIOTONE 958
RADMOR 911
REVOX 829
REVOX/STUDER 910
ROTEL 818 908
SABA 926
SAE 908
SAMSUNG 939 951 966 968
SANSUI 908
SANYO 852 860 919
SCHNEIDER 821 840 841 868
869 870 873 885
888 892 911 927
928 929 955 959
960 972 973 977
978 979 980 981
982 983 984 985
986 987 988 989
SHARP 799 800 813 847
SHERWOOD 936 943 944
SIEMENS 833 867 868 869
872 873 874 875
876 880 883 885
886 887 889 890
891 969 970 971
SINOTEC 892
SINOTEC
(PEPSI-DOSE)
892
SONY 842 843 893 895
896 897 898 932
990 991
SUPERTECH 888 945
SYLVANIA 908
T+A 882 974
Codetabel
Page 85

85
T+A ELECTROAKUSTIK 882
TECHNICS 809 916 917 918
950 993
TENSAI 954
THOMSON 823
UHER 814
UNIVERSUM 869 872 908 952
966 979
UNKNOWN 995
YAMAHA 828 854 855 933
941
Codes HIFI - Tape
AIWA 842 843 844 962
963
AKAI 845 849 913 933
934 945 951 987
AMSTRAD 916
ASWO 976
BANG & OLUFSEN 836
BRAUN 870
BUSH 835
DAEWOO 907
DENON 834 840 841 879
891 892 970 971
972
DIORA 899 900
DUAL 837 850 851 935
936
FISCHER 893 894 985 998
GOLDSTAR 964
GOODMANNS 833
GOODMANS 867
GRUNDIG 976 979 980
HARMAN KARDON 926 984
HITACHI 915 931
ITT 918 919
JVC 862 863 974 975
994 995 996 997
KENWOOD 848 917 935 936
957 958 990 993
LINN 888 889
LUXMAN 876 877 884 989
METZ HE11 961
MARANTZ 887 922 999
NAD 903 904 905 906
NAKAMICHI 927
NOKIA 920
OKANO 948 949
ONKYO 846 847 856 901
902
ONKYO 959 960
PALLADIUM 944
PANASONIC 928 929 982
PHILIPS 921 976 980 999
PIONEER 853 854 855 912
938 939 941 942
943 988
RADMOR 978
REVOX 860 861
REVOX/STUDER 977
SAMSUNG 883 885 886 896
897
SANY 985
SANYO 930 937 986
SCHNEIDER 866 867 868 869
872 873 874 878
918 919 947 964
976
SHARP 839 864 993
SHERWOOD 890 908 909 910
911 923
SIEMENS 880 881 882 946
947 950 951 952
953 954 955 956
964 976
SONY 865 925 965 966
967 968 969 991
992
T+A 871 961
T+A ELEKTROAKUSTIK 961
TECHNICS 838 898 981 983
THOMSON 852
UNIVERSUM 868 875 886 895
947 950
YAMAHA 857 858 859 914
924 932
Codes HIFI - Tuner
AIWA 376 377 745
AKAI 734 737 993
AMSTRAD 452 455 464 468
469
ASH 744
ASWO 427
BANG & OLUFSEN 369
BUSH 748
DAEWOO 458 739
DENON 371 372 423 424
445 471 991
DIORA 461
Codetabel
Page 86

86
Codetabel
DUAL 370 381 994
FISCHER 434 449
GOLDSTAR 746
GOODMANNS 737
GOODMANS 748
GRUNDIG 427 429 450
HARMAN KARDON 418 730
HITACHI 453 991
ITT 412
JVC 414 425 444 447
448
KENWOOD 417 439 446 740
741 994
LINN 472
LUXMAN 438 474
METZ HE11 743
MARANTZ 450
MINOWA 409
MISSION 426
NOKIA 410
NAD 459
NAKAMICHI 419
NONAME 748
OKANO 733 736
ONKYO 379 440 460 742
PALLADIUM 731 735
PANASONIC 371 432 451
PHILIPS 427 450
PIONEER 383 384 436 437
996 997 998 999
REVOX 386
REVOX/STUDER 427
RADMOR 428
ROTEL 378
SAMSUNG 411 463 465 473
475 476
SANYO 433 990 995
SCHNEIDER 374 380 388 390
391 392 393 394
395 396 397 398
399 400 401 402
403 404 407 408
409 412 441 442
443 469 470 732
733 735 746 748
749
SHARP 373 446
SHERWOOD 413 456 457
SIEMENS 426 427 477 478
479 480 732 733
737 738 739 746
747
SINOTEC 749
SINOTEC
(PEPSI-DOSE)
749
SONY 389 416 420 421
422
SUPERTECH 466
T+A 405 743
T+A ELEKTROAKUSTIK 743
TECHNICS 387 430 431 462
TENSAI 406
THOMSON 382
UHER 375
UNIVERSUM 403 467 473 733
737
YAMAHA 385 415 435 454
992
Codes HIFI - Amp
AIWA 777 985 986
AKAI 753 754 766
AMSTRAD 785 813 829 831
840
ASH 776
ASWO 793
BANG & OLUFSEN 996
BRAUN 960
BUSH 748 782
DAEWOO 770
DENON 751 789 790 791
817 988
DIORA 835
DUAL 952 981 995
FISCHER 750 820 839
GRUNDIG 794 795 804
GOODMANNS 749 766 782
GOLDSTAR 779
HARMAN KARDON 760 823
HITACHI 751
ITT 827
JBL 821 975
JVC 792 816 819
KENWOOD 755 771 818
LINN 794 795
LUXMAN 810 845 954 955
METZ HE11 774
MARANTZ 794 795 798
MEDION 785
MERIDIAN 795
Page 87

87
Codetabel
MINOWA 978
MISSION 799
NOKIA 826
NAD 834
NAKAMICHI 822
NIAM 795
NONAME 782
OKANO 763 765
ONKYO 772 982
PALLADIUM 761 783 991
PALLADIUM/OKANO 764
PANASONIC 805 808 994
PHILIPS 793 794 795 796
797 798 803 992
PIONEER 757 758 795
PRO-LOGIC 957
QUAD 795
RADIOTONE 841
RADMOR 801 802 803
REVOX 843 977
REVOX/STUDER 796 797 798
ROTEL 983 984
SABA 811
SAMSUNG 828 837 844 846
SANYO 750 756
SCHNEIDER 763 764 768 779
782 783 784 785
786 794 812 813
814 815 827 840
842 951 953 956
961 962 963 964
965 966 967 968
969 970 971 972
973 978
SHARP 818 990
SHERWOOD 825 832 833
SIEMENS 762 763 766 767
768 769 770 775
779 780 781 784
785 794 800 947
948 950
SINOTEC 786
SINOTEC
(PEPSI-DOSE)
786
SONY 787 788 974 991
SUPERTECH 782
T+A 774 959
T+A ELEKTROAKUSTIK 774
TECHNICS 805 806 836 976
993
TENSAI 958
THOMSON 980
UHER 987
UNIVERSUM 763 766 838 844
963
YAMAHA 752 809 824 830
979
Page 88

Metz-Werke GmbH & Co. KG
Postfach 1267, D-90506 Zirndorf
Fon: +49 911 - 97060
Fax: +49 911 - 9706340
www.metz.de
info@metz.de
Errors excepted. Subject to changes.
ķ Printed in Germany
Metz - allways first class.
Metz - Werke GmbH & Co. KG - Zirndorf near Nürnberg
Core competence in the areas of electronics and plastics
technology to form the basis of the excellent reputation of the
Metz Werke that has been built up throughout the world over
a period of many decades.
Metz offers quality made in Germany:
Consumer electronics, mecablitz flash units,
plastics technology and industrial electronics.
Service Centre
Training Centre
Administration and development
Storage/Dispatch
Mecablitz production
TV production
Plastics technology
 Loading...