

Page 1

de Originalbetriebsanleitung 4
en Original instructions 9
fr Notice originale 13
nl Oorspronkelijke gebruiksaanwijzing 18
it Istruzioni originali 23
es Manual original 28
pt Manual original 33
sv Bruksanvisning i original 38
fi Alkuperäiset ohjeet 42
no Original bruksanvisning 46
da Original brugsanvisning 50
pl Instrukcja oryginalna 54
el Πρωτότυπες οδηγίες χρήσης 59
hu Eredeti használati utasítás 64
ru Оригинальное руководство по
эксплуатации 69
RBE 15-180
Page 2
2
1
2
3
4
5
8
7
6
Page 3
3
RBE 15-180
B
B
mm (in)
40 (1
9
/16)
B
L
mm (in)
760 (29
15
/16)
D
max
mm (in)
180 (7
3
/32)
U ° 270
v
0
m/s 8,4 - 28
P
1
W 1550
P
2
W 940
m kg (lbs) 3,4 (7.5)
a
h/Kh
m/s
2
< 2,5/ 1,5
L
pA/KpA
dB(A) 94 / 3
L
WA/KWA
dB(A) 105 / 3
13.
*1) Serial-Number: 02243...
*2) 2014/30/EU, 2006/42/EC, 2011/65/EU
*3) EN 60745-1:2009+A11:2010, EN 60745-2-4:2009+A11:2011
2016-02-10, Volker Siegle
Direktor Produktentstehung & Qualität (Vice President Product Engineering & Quality)
*4) Metabowerke GmbH - Metabo-Allee 1 - 72622 Nuertingen, Germany
Page 4

ENGLISH en
9
Original instructions
We declare under our sole responsibility: These
tube belt sanders, identified by type and serial
number *1), comply with all relevant requirements of
the directives *2) and standards *3). Technical file
at *4) - see page 3.
The wraparound tube sander is for glazing,
tarnishing, texturing, polishing and smoothing pipes
without the use of water.
The user bears sole responsibility for any damage
caused by improper use.
Generally accepted accident prevention
regulations and the enclosed safety information
must be observed.
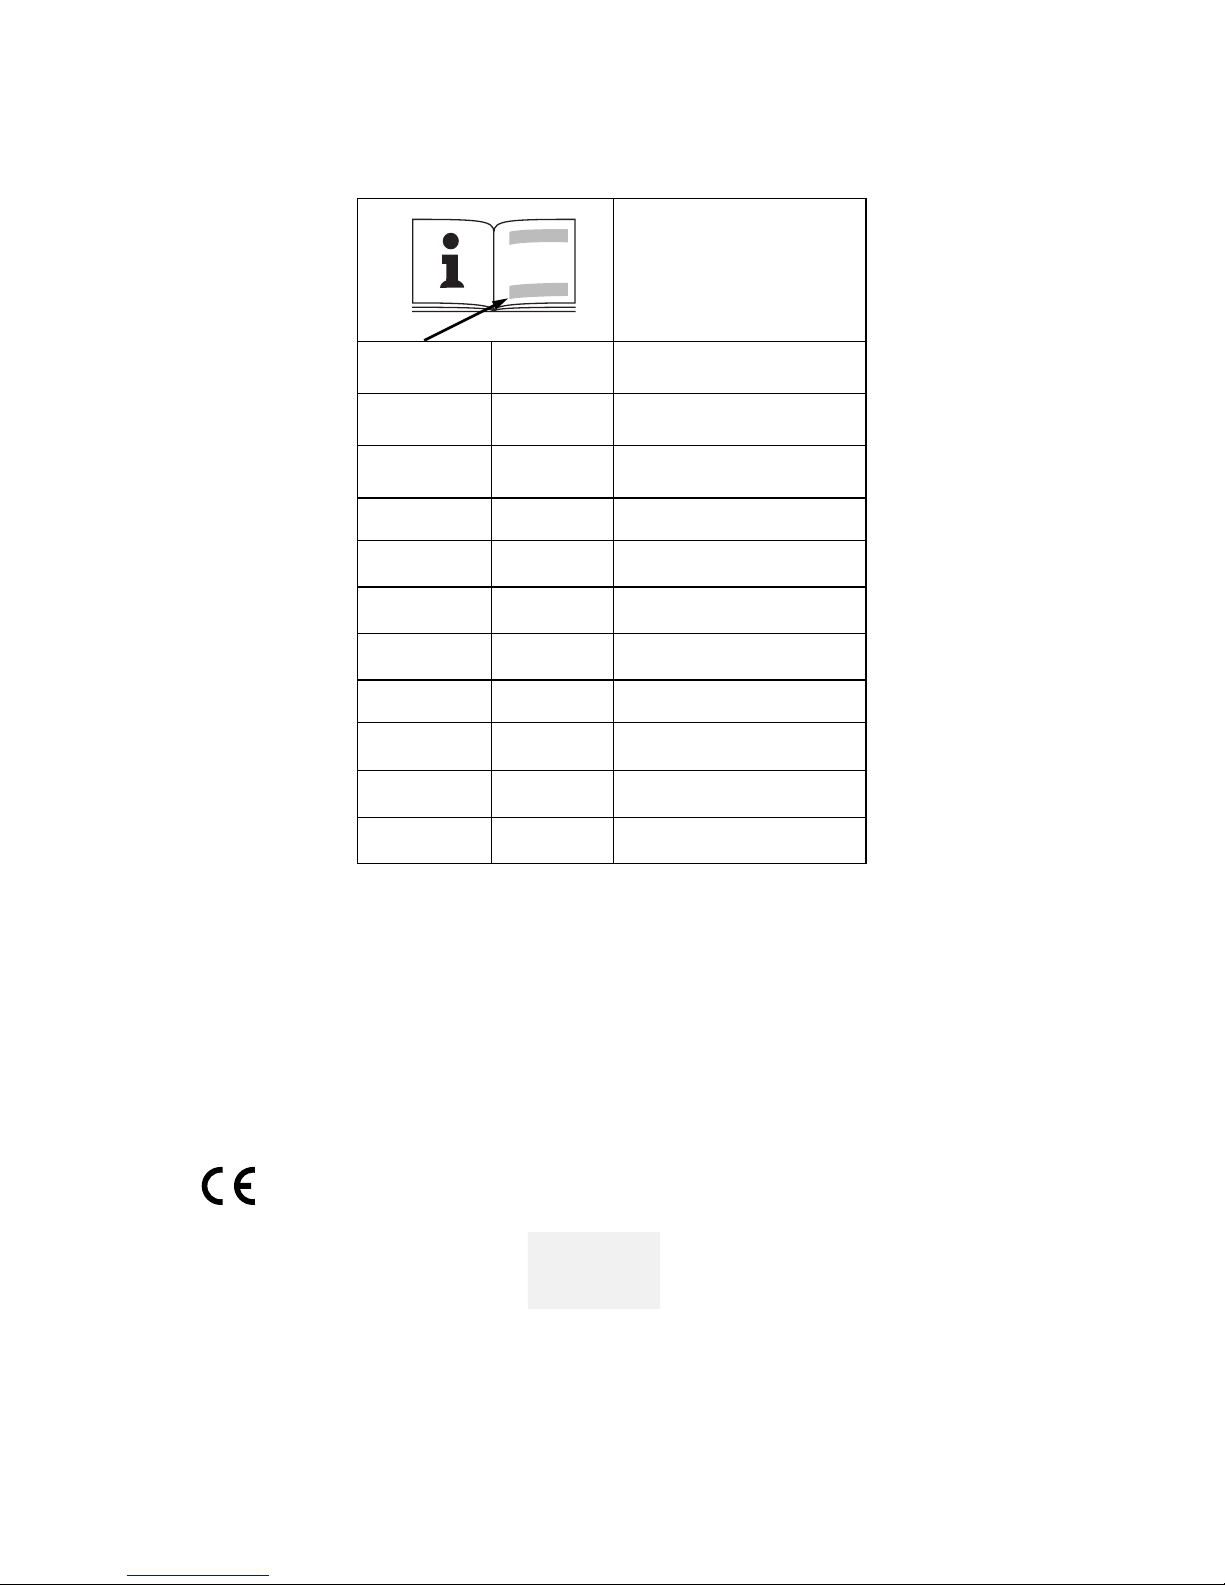
For your own protection and for the
protection of your electrical tool, pay
attention to all parts of the text that are
marked with this symbol!
WARNING – Reading the operating instructions will reduce the risk of injury.
Pass on your electrical tool only together with these
documents.
General Power Tool Safety Warnings
WARNING – Read all safety warnings and
all instructions. Failure to follow the warnings
and instructions may result in electric shock, fire
and/or serious injury.
Save all warnings and instructions for future
reference! The term "power tool" in the warnings
refers to your mains-operated (corded) power tool
or battery-operated (cordless) power tool.
3.1 Work area safety
a) Keep work area clean and well lit. Cluttered or
dark areas invite accidents.
b) Do not operate power tools in explosive
atmospheres, such as in the presence of
flammable liquids, gases or dust. Power tools
create sparks which may ignite the dust or fumes.
c) Keep children and bystanders away while
operating a power tool. Distractions can cause
you to lose control.
3.2 Electrical safety
a) Power tool plugs must match the outlet.
Never modify the plug in any way. Do not use
any adapter plugs with earthed (grounded)
power tools. Unmodified plugs and matching
outlets will reduce risk of electric shock.
b) Avoid body contact with earthed or
grounded surfaces, such as pipes, radiators,
ranges and refrigerators. There is an increased
risk of electric shock if your body is earthed or
grounded.
c) Do not expose power tools to rain or wet
conditions. Water entering a power tool will
increase the risk of electric shock.
d) Do not abuse the cord. Never use the cord
for carrying, pulling or unplugging the power
tool. Keep cord away from heat, oil, sharp
edges or moving parts. Damaged or entangled
cords increase the risk of electric shock.
e) When operating a power tool outdoors, use
an extension cord suitable for outdoor use.
Use of a cord suitable for outdoor use reduces the
risk of electric shock.
f) If operating a power tool in a damp location is
unavoidable, use a residual current device
(RCD) protected supply. Use of an RCD reduces
the risk of electric shock.
3.3 Personal safety
a) Stay alert, watch what you are doing and use
common sense when operating a power tool.
Do not use a power tool while you are tired or
under the influence of drugs, alcohol or
medication.
A moment of inattention while
opera
ting power tools may result in serious
personal injury.
b) Use personal protective equipment. Always
wear eye protection. Protective equipment such
as dust mask, non-skid safety shoes, hard hat, or
hearing protection used for appropriate conditions
will reduce personal injuries.
c) Prevent unintentional starting. Ensure the
switch is in the off-position before connecting
to power source and/or battery pack, picking
up or carrying the tool. Carrying power tools with
your finger on the switch or energising power tools
that have the switch on invites accidents.
d) Remove any adjusting key or wrench before
turning the power tool on. A wrench or a key left
attached to a rotating part of the power tool may
result in personal injury.
e) Do not overreach. Keep proper footing and
balance at all times. This enables better control of
the power tool in unexpected situations.
f) Dress properly. Do not wear loose clothing or
jewellery. Keep your hair, clothing and gloves
away from moving parts. Loose clothes, jewellery
or long hair can be caught in moving parts.
g) If devices are provided for the connection of
dust extraction and collection facilities, ensure
these are connected and properly used. Use of
dust collection can reduce dust-related hazards.
3.4 Power tool use and care
a) Do not force the power tool. Use the correct
power tool for your application. The correct
power tool will do the job better and safer at the rate
for which it was designed.
1. Declaration of Conformity
2. Specified Use
3. General Safety Instructions
Page 5

ENGLISHen
10
b) Do not use the power tool if the switch does
not turn it on and off. Any power tool that cannot
be controlled with the switch is dangerous and must
be repaired.
c) Disconnect the plug from the power source
and/or the battery pack from the power tool
before making any adjustments, changing
accessories, or storing power tools. Such
preventive safety measures reduce the risk of
starting the power tool accidentally.
d) Store idle power tools out of the reach of
children and do not allow persons unfamiliar
with the power tool or these instructions to
operate the power tool. Power tools are
dangerous in the hands of untrained users.
e) Maintain power tools. Check for
misalignment or binding of moving parts,
breakage of parts and any other condition that
may affect the power tool's operation. If
damaged, have the power tool repaired before
use. Many accidents are caused by poorly
maintained power tools.
f) Keep cutting tools sharp and clean. Properly
maintained cutting tools with sharp cutting edges
are less likely to bind and are easier to control.
g) Use the power tool, accessories and tool bits
etc. in accordance with these instructions,
taking into account the working conditions and
the work to be performed. Use of the power tool
for operations different from those intended could
result in a hazardous situation.
3.5 Service
a) Have your power tool serviced by a qualified
repair person using only identical replacement
parts. This will ensure that the safety of the power
tool is maintained.
Hold the power tool by the insulated gripping
surfaces because the abrasive belt may
contact its own cord. Damage to a "live" wire may
energise metal parts of the power tool and cause an
electric shock.
Flying sparks are created when sanding metal.
Ensure that no persons are in danger. Due to the
risk of fire, all combustible materials must be
removed from the work area (area affected by flying
sparks).
During machining, of metals in
particular, conductive dust can form
deposits inside the machine. This can lead to the
transfer of electrical energy onto the machine
housing. This can mean a temporary danger of
electric shocks. This is why it is necessary when the
machine is running to blow compressed air through
the rear ventilation slots of the machine regularly,
frequently and thoroughly. Here, the machine must
be held firmly.
We recommend using a stationary extractor system
and connecting a residual current circuit-breaker
(FI) upstream. When the machine is shut down via
the FI circuit-breaker, it must be checked and
cleaned. See chapter 8. Cleaning for more
information on cleaning the motor.
Wear ear protectors. Exposure to noise can cause
hearing loss.
Wear protective gloves.
WARNING – Always wear protective
goggles.
Secure the workpiece against slipping, e.g. with the
help of clamping devices.
Always guide the
machine with both hands on the
handles provided. Loss of control can cause
personal injury.
Never place your hand near rotating parts of the
device or near the rotating sanding belt.
Remove sanding dust and similar material only
when the machine is not in operation.
Pull the plug out of the plug socket before any
adjustments, conversions or servicing are
performed.
The rated speed of the sanding belt must be at least
equal to the belt speed in idling marked on the
power tool. A sanding belt running faster than its
rated speed can break and fly apart.
Check prior to each use that the sanding belt is
correctly attached and is completely on the rollers.
Carry out a trial run: Allow the machine to run at
idling speed for 30 seconds in a safe location. Stop
immediately if significant vibrations occur or if other
defects are noted. If such a situation occurs, check
the machine to determine the cause.
Reduce dust exposure:
Particles generated when working with this
machine may contain substances that can
cause cancer, allergic reactions, respiratory
diseases, birth defects or other propagation
defects. Some of these substances include: Lead
(in paint containing lead), mineral dust (from bricks,
concrete etc.), additives used for wood treatment
(chromate, wood preservatives), some wood types
(such as oak or beech dust), metals, asbestos.
The risk depends on for how long the user or nearby
persons are exposed to the substance.
This dust must not be allowed to enter your body.
Do the following to reduce exposure to these
substances: Ensure good ventilation of the
workplace and wear appropriate protective
equipment, such as respirators able to filter
microscopically small particles.
Observe the relevant guidelines for your material,
staff, application and place of application (e.g.
occupational health and safety regulations,
disposal).
Collect the generated particles at the source, avoid
deposits in the surrounding area.
Use suitable accessories for special work (see
chapter 10.), thus less particles enter the
environment in an uncontrolled manner.
Use a suitable extraction unit.
4. Special Safety Instructions
Page 6

ENGLISH en
11
Reduce dust exposure with the following measures:
- Do not direct the escaping particles and the
exhaust air stream at yourself or nearby persons
or on dust deposits.
- Use an extraction unit and/or air purifiers
- Ensure good ventilation of the workplace and
keep clean using a vacuum cleaner Sweeping or
blowing stirs up dust
- Vacuum or wash the protective clothing Do not
blow, beat or brush
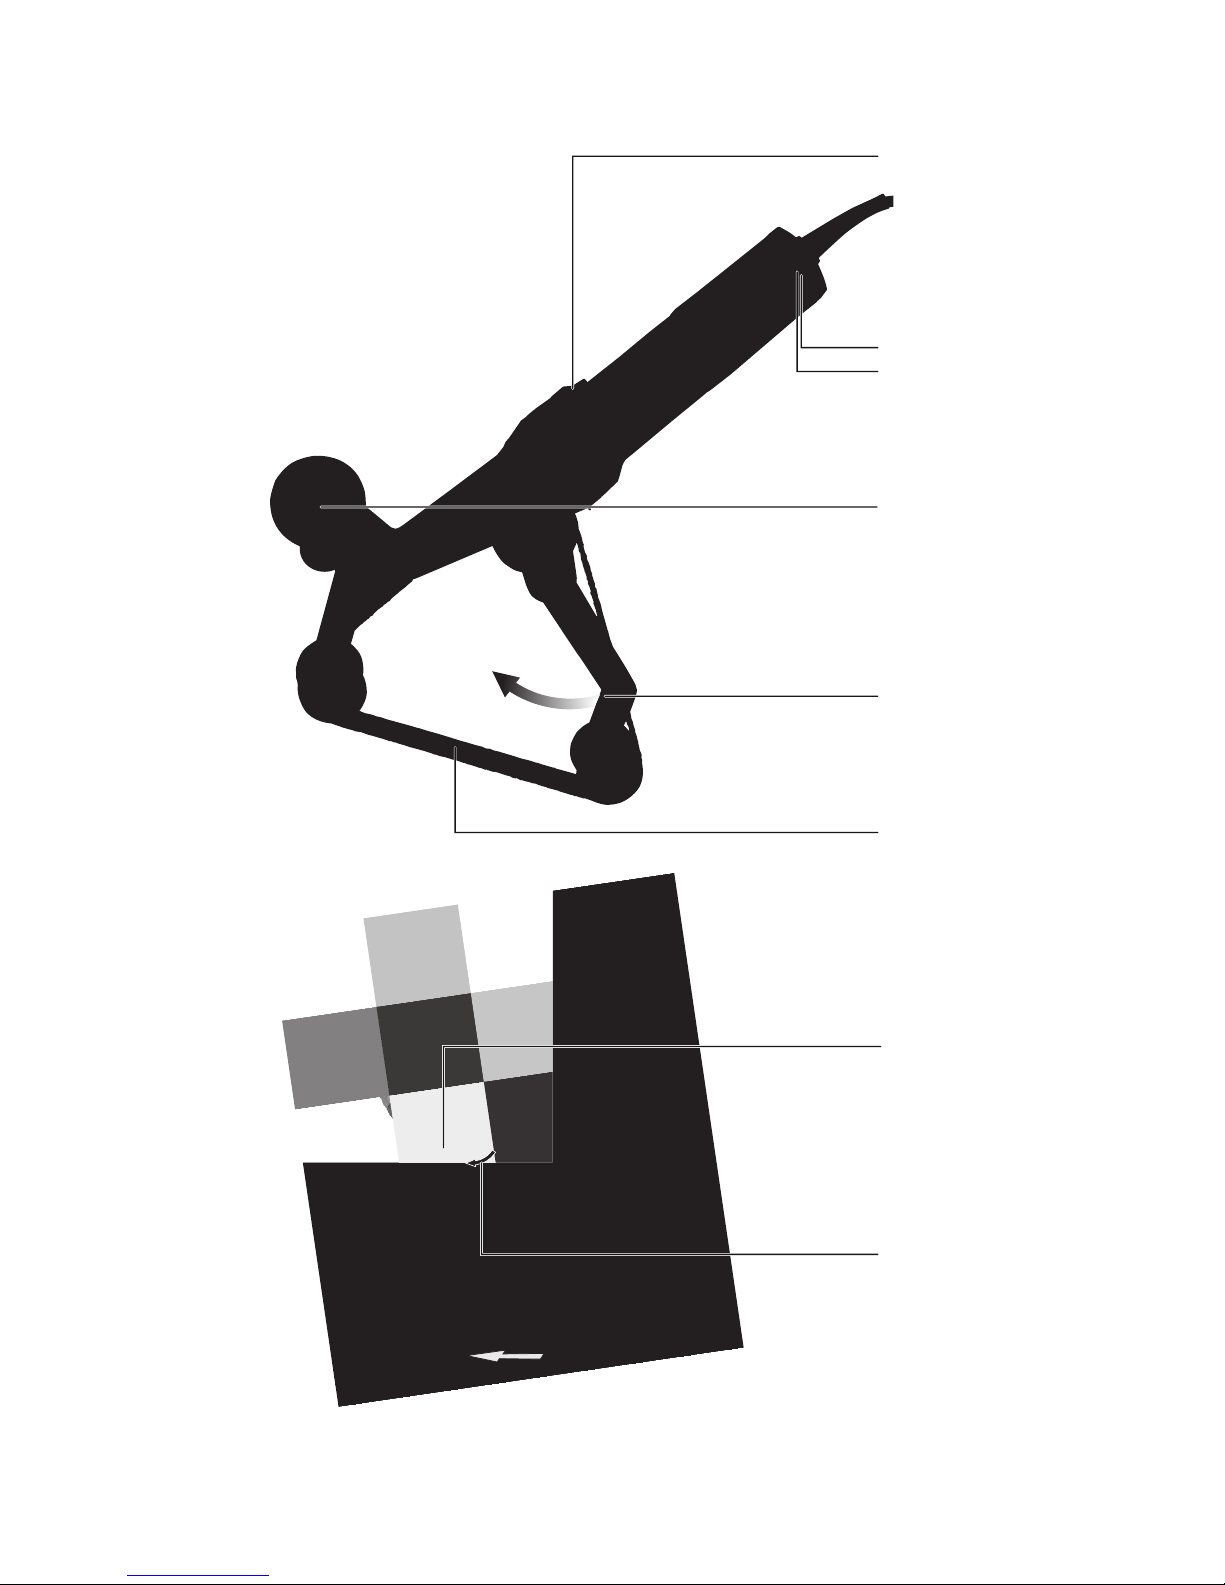
See page 2
1 Sliding switch
2
Adjusting wheel for
setting belt speed
3 Electronic signal indicator
4 Additional handle
5 Tensioner arm for replacing the sanding belt
6Sanding belt
7 Press in the spindle locking button only when
the spindle is stationary
8 Arrow (direction of rotation of
drive shaft
)
Before plugging in, check that the rated mains
voltage and mains frequency, as stated on the
rating label, match with your power supply.
Always install an RCD with a max. trip current
of 30 mA upstream.
Attaching the additional handle
Always work with the additional handle
attached (4)! Secure the additional handle by
screwing it tightly to the left or right.
7.1 On/Off switch, continuous activation
Always guide the machine with both hands.
The machine must not be allowed to draw in
additional dust and shavings. When switching
the machine on and off, keep it away from dust
deposits.
After switching off the machine, only place it
down when the motor has come to a standstill.
In continuous operation, the machine
continues running if it is forced out of your
hands. Therefore, always hold the machine using
the handles provided, stand in a safe position and
concentrate.
Switching on/
Continuous activation
: Push sliding
switch (1) forward. For continuous
activation, now tilt downwards until it
engages.
Switching off: Press the rear end of the slide
switch (1) and release.
7.2 Setting belt speed
The belt speed can be preset via the setting wheel
(2)and is infinitely variable.
Positions 1-6 correspond approximately to the
following belt speeds:
1 ........ 8,4 m/s 4 ....... 20,6 m/s
2 ........ 12,5 m/s 5 ....... 24,6 m/s
3 ........ 16,5 m/s 6 ....... 28,8 m/s
7.3 Sanding belt replacement
See illustration on page 3.
- Release the tensioner arm (5) and remove the
sanding belt (6).
- Place the new sanding belt on the rollers such that
its direction of circulation (arrows on the inside of
the sanding belt) matches the arrow (8) on the
gearbox.
- Release the tensioner arm (5).
- Ensure that the sanding belt is completely on the
rollers.
7.4 Sanding procedure
Place the machine on the material such that the
sanding belt is parallel to the surface of the
workpiece.
When working, please ensure that the machine is
operated at right angles to the pipe so that the belt
does not fall off the rollers.
Using the additional handle, the belt can be pressed
against the pipe and at same time placed around it.
The angle of contact and the cutting output may be
changed by the contact pressure.
Keep the machine in constant motion because
otherwise recesses could be produced in the
material.
Motor cleaning: blow compressed air through the
rear ventilation slots of the machine regularly,
frequently and thoroughly. Here, the machine must
be held firmly.
The electronic signal display (3) lights up
and the load speed decreases. There is too
much load on the machine! Run the machine
in idling until the electronics signal indicator
switches off.
The machine does not start. The
electronic signal display (3) flashes. The
restart protection is active. If the mains plug is
inserted with the machine switched on, or if the
power supply is restored following an interruption,
the machine does not start up. Switch the machine
off and on again.
5. Overview
6. Initial Operation
7. Use
0
I
1
8. Cleaning, Maintenance
9. Troubleshooting
Page 7

ENGLISHen
12
Use only genuine Metabo accessories.
If you need any accessories, check with your
dealer.
The dealer needs to know the exact model of your
power tool in order to select the correct accessory.
For a complete range of accessories, see
www.metabo.com or the main catalogue.
Repairs to electrical tools must be carried out
by qualified electricians ONLY!
If you have Metabo electrical tools that require
repairs, please contact your Metabo service centre.
For addresses see www.metabo.com.
You can download spare parts lists from
www.metabo.com.
Observe national regulations on environmentally
compatible disposal and on the recycling of disused
machines, packaging and accessories.
Only for EU countries: Never dispose of
power tools in your household waste! In
accordance with European Directive 2002/
96/EC on used electronic and electric equipment
and its implementation in national legal systems,
used power tools must be collected separately and
handed in for environmentally compatible recycling.
Explanatory notes on the specifications on page 3.
Changes due to technological progress reserved.
B
B
=Sanding belt width
B
L
=Sanding belt length
D
max.
=max. pipe diameter
U =max. angle of contact
v
0
* =Belt speed in idling
P
1
=Nominal power input
P
2
=Power output
m =Weight without mains cable
Measured values determined in conformity with
EN 60745.
Machine in protection class II
~ Alternating current
* Energy-rich, high-frequency interference can
cause fluctuations in speed. The fluctuations
disappear, however, as soon as the interference
fades away.
The technical specifications quoted are subject to
tolerances (in compliance with the relevant valid
standards).
Emission values
These values make it possible to assess the
emissions from the power tool and to compare
different power tools. Depending on the operating
conditions, the condition of the power tool or the
accessories, the actual load may be higher or lower.
For assessment purposes, please allow for breaks
and periods when the load is lower. Based on the
adjusted estimates, arrange protective measures
for the user e.g. organisational measures.
Vibration total value
(vector sum of three directions)
determined in accordance with EN 60745:
a
h
=Vibration emission value
(sanding surfaces)
K
h
= Uncertainty (vibration)
Typical A-effective perceived sound levels
:
L
pA
=Sound pressure level
L
WA
=Acoustic power level
KpA, KWA= Uncertainty
During operation the noise level can exceed
80 dB(A).
Wear ear protectors!
10. Accessories
11. Repairs
12. Environmental Protection
13. Technical Specifications
Page 8

 Loading...