

Page 1
É2225840901=ËÍ
2225840901
COMAND
Operating Instructions
Order no. 6515 7708 13 Part no. 222 584 09 01 Edition D-2014
COMAND Operating Instructions
Page 2

Symbols
In this manual, you will find the following
symbols:
WARNING
G
Warning notes draw your attention to hazards
that endanger your health or life, or the health
or life of others.
Environmental note
H
Environmental notes provide you with
information on environmentally aware actions
or disposal.
Publication details
Internet
Further information about Mercedes-Benz
vehicles and about Daimler AG can be found
on the following websites:
http://www.mbusa.com (USA only)
http://www.mercedes-benz.ca (Canada
only)
Editorial office
!
Notes on material damage alert you to
dangers that could lead to damage to your
vehicle.
i
Practical tips or further information that
could be helpful to you.
X
This symbol indicates an
instruction that must be followed.
X
Several of these symbols in
succession indicate an instruction
with several steps.
(Y page)
This symbol tells you where you
can find more information about a
topic.
YY
This symbol indicates a warning or
an instruction that is continued on
the next page.
DisplayDisplay
This font indicates a display in the
multifunction display/COMAND
display.
You are welcome to forward any queries or
suggestions you may have regarding this
Operator's Manual to the technical
documentation team at the following
address:
Daimler AG, HPC: CAC, Customer Service,
70546 Stuttgart, Germany
©
Daimler AG: Not to be reprinted, translated
or otherwise reproduced, in whole or in part,
without written permission from Daimler AG.
As at 27.02.2013
Page 3

Welcome to the world of Mercedes-Benz
First, familiarize yourself with your COMAND
system. Read these operating instructions,
particularly the safety and warning notes,
before you drive off.
This will help you to obtain the maximum
pleasure from your COMAND system and to
avoid endangering yourself and others.
The equipment level and functions of your
COMAND system may differ depending on:
R
model
R
order
R
country specification
R
availability
Mercedes-Benz therefore reserves the right
to introduce changes to the following:
R
design
R
equipment
R
technical features
The equipment in your vehicle may therefore
differ from that shown in the descriptions and
illustrations.
Consult an authorized Mercedes-Benz Center
if you have further questions.
The Operator's Manual and all supplements
are integral parts of the vehicle. You should
always keep it in the vehicle and pass it on to
the new owner if you sell the vehicle.
The technical documentation team at
Daimler AG wishes you safe and pleasant
motoring.
Mercedes-Benz USA, LLC
Mercedes-Benz Canada, Inc.
A Daimler Company
2225840901
É2225840901=ËÍ
Page 4

Page 5

Contents
3
Index ....................................................... 4
Operating safety ................................. 13
At a glance ........................................... 17
System settings .................................. 37
Vehicle functions ................................ 49
Navigation ........................................... 67
Telephone .......................................... 121
Online and Internet ........................... 157
Radio .................................................. 177
Media ................................................. 189
Sound ................................................. 229
Rear Seat Entertainment System .... 239
SIRIUS Weather ................................ 261
Page 6

Index
4
1, 2, 3 ...
360° camera
Displaying images ............................ 64
Switching on/off .............................. 64
911 emergency call .......................... 123
A
Acoustic locking confirmation
Activating/deactivating (COMAND) .52
Adding bookmarks ............................ 173
Address book
Assigning a favorites button .......... 152
Browsing ........................................ 148
Calling up ....................................... 148
Changing an entry .......................... 151
Connecting a call ........................... 151
Creating an entry ........................... 149
Deleting an entry ........................... 150
Deleting contacts ........................... 154
Details about an entry ................... 150
Entering characters ......................... 30
Importing contacts ........................ 153
Introduction ................................... 148
Receiving vCards ........................... 154
Searching for an entry ................... 149
Starting route guidance ................. 152
Voice tag ....................................... 152
Address entry menu ............................ 75
Adjusting the volume
COMAND ......................................... 23
Traffic announcements .................... 23
Alternative route ................................. 97
Ambient lighting
Setting (COMAND) ........................... 50
Audio CD/DVD and MP3 mode
Activating ....................................... 195
Gracenote®Media Database ......... 198
Playback options ........................... 195
Switching to (Rear Seat
Entertainment System) .................. 254
Automatic folding mirror function
Activating/deactivating (COMAND) .52
Automatic locking feature
Activating/deactivating (COMAND) .53
AUX (audio)
Notes/socket................................ 218
Switching to ................................... 218
AUX jacks
CD/DVD drive ............................... 244
Avoiding an area ................................ 114
B
Back button ......................................... 22
Bluetooth
Burmester®high-end 3D surround
sound system
Burmester®surround sound
system
®
Activating/deactivating ................... 45
Activating audio mode ................... 212
Conditions (telephone) .................. 123
Connecting another mobile phone .127
Connecting audio devices .............. 208
De-authorizing (de-registering) a
device ............................................ 211
Device list ...................................... 209
Entering the passcode ................... 125
External authorization .................... 127
External authorization (audio
device) ........................................... 210
Increasing the volume using
COMAND ....................................... 214
Interface ........................................ 122
Introduction ................................... 122
Reconnecting an audio device ....... 210
Searching for a mobile phone ........ 124
Starting playback if the
Bluetooth®audio device has been
stopped ......................................... 212
Telephone basic menu ................... 129
Telephony ...................................... 123
Telephony notes ............................ 122
Balance/fader ............................... 236
Calling up the sound menu ............ 234
Changing the loudspeaker source .236
Equalizer ........................................ 235
Equipment ..................................... 234
Setting the sound profile ............... 237
VIP & BAL selection ....................... 237
Balance/fader ............................... 233
Calling up the sound menu ............ 232
Page 7

Index
5
Changing the loudspeaker source .233
Equalizer ........................................ 233
Equipment ..................................... 232
Surround sound ............................. 234
Buttons and controller ........................ 22
C
Call
Accepting/ending/rejecting .......... 130
Connecting .................................... 131
see Telephone
Call lists
Displaying details ........................... 139
Opening and selecting an entry ..... 138
Saving an entry in the address
book .............................................. 139
Car pool lanes ...................................... 73
Category list (music search) ............ 201
CD
Inserting ........................................ 192
Inserting/loading (DVD changer) ... 193
Inserting/loading (Rear Seat
Entertainment System) .................. 254
Notes on discs ............................... 200
Removing/ejecting (Rear Seat
Entertainment System) .................. 254
Selecting a track ............................ 197
Sound settings (balance, bass,
fader, treble).................................. 230
Characters
Entering (address book, phone
book) ............................................... 30
Entering (navigation) ........................ 33
Climate control
COMAND ......................................... 59
Cooling with air dehumidification
(COMAND) ....................................... 60
Ionization (COMAND) ....................... 62
Perfume atomizer (COMAND) .......... 62
Rear-compartment climate
control (COMAND) ........................... 60
Setting the air distribution
(COMAND) ....................................... 61
Setting the airflow (COMAND) ......... 61
Setting the climate mode
(COMAND) ....................................... 61
Setting the departure time
(COMAND) ....................................... 62
Setting the footwell temperature
(COMAND) ....................................... 61
Setting the temperature
(COMAND) ....................................... 60
Switching on/off (COMAND) ........... 59
Switching the synchronizing
function on/off (COMAND) .............. 59
COMAND
Active multicontour seat.................. 56
Basic functions ................................ 23
Controller ......................................... 23
Display ............................................. 20
Multicontour seat ............................ 56
Seat functions .................................. 55
Settings ......................................... 175
Switching on/off .............................. 23
Telephone keypad overview ............. 22
COMAND display
Additional display area ..................... 39
Cleaning instructions ....................... 21
Setting ............................................. 38
Contacts
Deleting ......................................... 154
Importing ....................................... 153
Cordless headphones
Setting the volume ......................... 246
Country-specific information
(navigation) ........................................ 113
D
Date format, setting ............................ 40
Day design, setting ............................. 38
Delayed switch-off time
Setting (COMAND) ........................... 53
Deleting
Call lists ......................................... 140
Destination
Storing in the address book ........... 106
Destination (navigation)
Entering a destination using the
map ................................................. 85
Entering a point of interest .............. 81
Entering using geo-coordinates ....... 88
Entering using Mercedes-Benz
Apps ................................................ 88
Page 8

Index
6
Keyword search ............................... 79
Saving ............................................ 105
Selecting an address book
contact as a destination .................. 81
Selecting from the list of last
destinations ..................................... 80
Dialing a number (telephone) ........... 131
Display
Selecting the design ........................ 38
DVD
Inserting/loading (Rear Seat
Entertainment System) .................. 254
Notes on discs ............................... 200
Removing/ejecting (DVD changer) 194
Removing/ejecting (Rear Seat
Entertainment System) .................. 254
E
EASY-ENTRY/EXIT feature
Activating/deactivating (COMAND) .51
E-mail
Deleting ......................................... 148
Inbox .............................................. 144
Information and requirements ....... 142
Reading .......................................... 145
Saving the sender in the address
book .............................................. 148
Setting reception ........................... 143
Storing the sender as a new entry
in the address book ....................... 147
Entering the address (example) ......... 76
Entering the city .................................. 76
F
Factory setting (reset function) ......... 48
Favorites (Internet) ........................... 174
Favorites button .................................. 45
G
Google™ local search
Importing a destination/route ....... 162
Popular Searches........................... 162
Search ........................................... 161
Search history ............................... 163
Selecting a search position ............ 161
Selecting options for Local Search 163
Using as the destination ................ 162
GPS reception ...................................... 68
Gracenote®Media Database ............ 198
H
Heading up (navigation) ................... 108
Headphones
Changing batteries ........................ 247
Home
see Home address
Home address
Entering and saving ......................... 77
I
Incident (traffic report) ..................... 101
Indicator lamp
Remote control .............................. 243
Interior motion sensor
Activating/deactivating (COMAND) .54
Internet
Conditions for access .................... 158
Creating favorites .......................... 174
Entering the URL ............................ 170
Favorites manager ......................... 174
Favorites menu .............................. 174
Menu functions .............................. 172
Options menu ................................ 173
Selecting favorites ......................... 170
Internet radio
Calling up ....................................... 168
Searching for stations .................... 169
L
Lane recommendations
Explanation ...................................... 92
Presentation .................................... 92
Lights
Setting the ambient lighting
(COMAND) ....................................... 50
Locator lighting
Setting (COMAND) ........................... 53
Lumbar support
Adjusting (COMAND) ....................... 56
Page 9

Index
7
M
Map (navigation)
Adjusting the scale ........................ 108
Building images ............................. 112
Elevation modeling ........................ 113
Heading ......................................... 108
Map settings .................................. 108
Moving ............................................. 71
North orientation ........................... 108
Notes ............................................. 108
Rotating the 3D map ......................111
Updating ........................................ 116
Map functions ....................................108
Media Interface
Mode ............................................. 215
Playback options ........................... 217
Search ........................................... 216
Selecting music files ...................... 216
Switching to Media Interface ......... 215
Video function ............................... 217
Media Register
Basic display.................................. 204
Calling up memory space
information .................................... 207
Copying files.................................. 204
Deleting all files............................. 206
Renaming/deleting files................ 206
Selecting a playback mode ............ 207
Switching on .................................. 203
Media search
Category list.................................. 201
Current tracklist............................ 201
Keyword search ............................. 202
Music genres ................................. 202
Selecting by cover ......................... 201
Starting the media search .............. 200
Menu overview
CD/DVD audio and MP3 mode ...... 193
Mercedes-Benz Apps ......................... 167
Messages
Displaying ...................................... 144
Forwarding ..................................... 147
Replying ......................................... 147
Writing ........................................... 145
Microphone, switching on/off ......... 132
Mobile phone
Authorizing .................................... 125
Connecting (Bluetooth®interface) .124
De-authorizing ............................... 128
External authorization .................... 127
Registering (authorizing) ................ 125
MP3
Copyright ....................................... 200
Notes ............................................. 199
Safety notes .................................. 192
MP3 mode
Stop and playback function ........... 197
Multimedia system
see COMAND
Multi-Seat Entertainment System
Adjusting sound settings ............... 249
AUX mode ...................................... 260
Changing the picture format .......... 250
Cordless headphones .................... 246
Overview ........................................ 240
Picture settings .............................. 250
Replacing batteries ........................ 247
Setting the brightness ................... 250
Setting the color ............................ 250
Setting the contrast ....................... 250
System settings ............................. 248
Video DVD mode ........................... 256
My address (navigation system)
see Home address
N
Navigation
Adjusting the volume of the
navigation announcements .............. 23
Alternative route .............................. 97
Avoiding an area ............................ 114
Basic settings .................................. 72
Blocking a route section affected
by a traffic jam ............................... 100
Calling up the compass display..... 117
Calling up the menu ....................... 116
Drive Information ........................... 117
Entering a destination ...................... 75
Entering a destination using the
map ................................................. 85
Entering a point of interest .............. 81
Entering characters (character bar) .33
Page 10

Index
8
GPS reception .................................. 68
Important safety notes.................... 68
Info on navigation .......................... 118
Lane recommendation ..................... 92
Off-road/off-map (off-road
destination) ....................................100
Online map display........................ 117
Reading out traffic reports ............. 105
Repeating announcements .............. 94
Selecting a destination from the
list of last destinations ..................... 80
Setting options for destination/
route download.............................. 166
Setting route options (avoiding:
highways, toll roads, tunnels,
ferries) ............................................. 72
Setting the route type (short
route, fast route, dynamic route or
economic route) ............................... 72
Showing/hiding the menu ............... 70
Starting route calculation ................ 78
Switching announcements on/off ... 94
Switching to ..................................... 70
Navigation announcements
Switching off .................................... 24
North orientation (navigation) ......... 108
O
Off-road .............................................. 100
Online and Internet functions
Destination/routes download ........ 164
Ending the connection ................... 160
Establishing/ending a connection .159
Further Mercedes-Benz Apps ......... 167
General notes ................................ 158
Mercedes-Benz Mobile Website ..... 167
Options menu ................................ 166
Resetting settings .......................... 167
Setting options for destination/
route download.............................. 166
Specifying the ID for the download 166
P
Panel heating
Activating/deactivating (COMAND) .52
Parental control
Locking/unlocking rear
compartment displays ..................... 63
Switching the rear compartment
displays on/off ................................ 63
Pause function
Video DVD ..................................... 226
Perfume atomizer
Setting the perfume intensity
(COMAND) ....................................... 62
Phone book
Adding a number to an address
book entry ..................................... 137
Calling up ....................................... 134
Creating a new entry ..................... 137
Deleting an entry ........................... 136
Entering characters ......................... 30
Icon overview ................................. 135
Searching for an entry ................... 135
Picture viewer
Changing view ............................... 227
Displaying pictures ........................ 227
Exiting the picture viewer .............. 228
POI (navigation)
Category .......................................... 83
Defining the position for the POI
search .............................................. 82
Entering ........................................... 81
Previous destinations (navigation) .. 107
R
Radio
Overview ........................................ 178
Setting the waveband .................... 179
Sound settings (balance, bass,
treble) ............................................ 181
Storing stations ............................. 181
Tagging music tracks
(downloading/purchasing tracks
from the iTunes Store) ................... 180
Radio station
Storing ........................................... 181
Page 11

Index
9
Read-aloud function
Automatic ...................................... 105
Read-aloud function for e-mails ....... 145
Real-time traffic reports ................... 101
Rear-compartment screens .............. 241
Rear monitors
see Rear-compartment screens
Rear screens
see Rear-compartment screens
Rear Seat Entertainment System
Adjusting sound settings ............... 249
Adjusting the brightness ................ 250
Adjusting the color ........................ 250
Adjusting the contrast ................... 250
AUX jacks ...................................... 245
AUX mode ...................................... 260
Changing the batteries .................. 247
Changing the picture format .......... 250
Cordless headphones .................... 246
Overview ........................................ 240
Picture settings .............................. 250
System settings ............................. 248
Video DVD mode ........................... 256
Rear view camera
Displaying the image ........................ 64
Receiving vCards ............................... 154
Redialing (telephone) ........................ 131
Remote control
Button lighting ............................... 242
Multi-Seat Entertainment System .. 241
Rear Seat Entertainment System ... 241
Reserve fuel level
Switching the function on/off in
COMAND ......................................... 73
Resetting (factory settings) ............... 48
Route (navigation)
Selecting an alternative route .......... 97
Setting route options (avoiding:
highways, toll roads, tunnels,
ferries) ............................................. 72
Setting the route type (short
route, fast route, dynamic route or
economic route) ............................... 72
Starting calculation .......................... 78
Route guidance
Continue .......................................... 96
Freeway information ........................ 93
General notes .................................. 88
Lane recommendations ................... 92
Off-road ......................................... 100
Traffic reports ................................ 101
S
Safety notes
Audio CD/DVD and MP3 mode ..... 192
Using the telephone ....................... 122
Video DVD mode ........................... 220
Satellite radio
Channel list updates ...................... 187
Memory functions .......................... 186
Music and sports alerts ................. 186
Selecting a channel ....................... 185
Tagging music tracks ..................... 187
SatRadio
Displaying information ................... 187
Notes ............................................. 182
Registering .................................... 183
Selecting a category ...................... 184
Switching to ................................... 184
Screen
Selecting for remote operation ...... 242
SD memory card
Inserting ........................................ 195
Seat-belt adjustment function
Activating/deactivating (COMAND) .52
Seats
Adjusting the lumbar support
(COMAND) ....................................... 56
Balance (seat heating) ..................... 57
Massage function ............................ 57
Resetting settings ............................ 58
Seat functions (COMAND) ............... 55
Selecting for adjustment
(COMAND) ....................................... 55
Selecting stations
Radio ............................................. 179
Selecting the country .......................... 76
Sending DTMF tones ......................... 132
Settings
Sound settings ............................... 230
Setting the audio format
Multi-Seat Entertainment System .. 259
Rear Seat Entertainment System ... 259
Page 12

10
Index
Setting the language
COMAND ......................................... 45
Multi-Seat Entertainment System .. 259
Rear Seat Entertainment System ... 259
Setting the night design ..................... 38
Setting the text reader speed ............ 41
Setting the volume
Telephone calls................................ 23
SIRIUS weather display
5-day forecast ................................ 262
Daily forecast ................................. 262
Detail information .......................... 263
Information chart ........................... 262
Selecting the area for the weather
forecast ......................................... 263
Switching on/off ........................... 262
Weather map ................................. 265
Sirius weather map
Storm Guide .................................. 273
Storm Watch Box ........................... 272
Sound
Switching on/off .............................. 23
Sound settings
Balance/fader ............................... 231
Calling up the sound menu ............ 230
Changing the loudspeaker source .231
Equalizer ........................................ 230
Speed dial list
Deleting an entry/list .................... 142
Storing a phone book entry in the
speed dial list................................ 141
SPLITVIEW
Switching on/off .............................. 26
Transferring a destination to the
driver ............................................... 27
Station list ......................................... 180
Stop function
Video DVD ..................................... 226
Storing stations
Radio ............................................. 181
Switching between summer time
and standard time ............................... 41
Switching on media mode
Starting at a different seat............. 191
Using the Media button ................. 190
Via the device list .......................... 191
Via the main function bar ...............190
Via the number keypad .................. 191
Switching the hands-free
microphone on/off ............................ 132
System settings
Bluetooth®....................................... 44
Date ................................................. 40
Importing/exporting data ................ 47
Language ......................................... 45
Text reader speed ............................ 41
Time .................................................40
Time zone ........................................ 41
Voice Control System ...................... 41
T
Telephone
Accepting/ending a call ................ 130
Adjusting the volume for calls .......... 23
Calling (outgoing call).................... 131
Connecting a mobile phone
(general information) ..................... 124
De-authorizing a mobile phone ...... 128
E-mail ............................................. 142
Ending an active call ...................... 134
Entering a number ......................... 131
Entering phone numbers ................ 131
External authorization (Bluetooth®) 127
Function restrictions ...................... 123
General notes ................................ 122
Incoming call ................................. 130
Making a call ................................. 133
Making a call via speed dial........... 141
Operating options .......................... 123
Overview of functions .................... 132
Reconnecting a mobile phone
automatically ................................. 127
Rejecting/accepting a waiting call 133
Rejecting a call .............................. 130
Safety notes .................................. 122
Sending DTMF tones ......................132
Single call ...................................... 132
Switching hands-free microphone
on/off ............................................ 132
Text messages (SMS) .................... 142
Page 13

Index
11
Toggling ......................................... 134
Using the telephone ....................... 130
see Bluetooth
Telephone basic menu
Bluetooth®interface ...................... 129
Telephone keypad overview
COMAND ......................................... 22
Telephone mode
Redialing ........................................ 131
Telephone number
Entering ......................................... 131
Text messages (SMS)
Calling the sender.......................... 147
Deleting ......................................... 148
Inbox .............................................. 144
Information and requirements ....... 142
Reading .......................................... 145
Reading aloud ................................ 145
Setting reception ........................... 143
Storing sender in address book ..... 148
Storing the sender as a new
address book entry ........................ 147
Texts
see Text messages (SMS)
Time
Setting ............................................. 40
Setting summer/standard time ....... 41
Setting the format ............................ 40
Setting the time ............................... 40
Setting the time/date format.......... 40
Setting the time zone ....................... 41
Tow-away alarm
Arming/deactivating (COMAND) ..... 54
Track information .............................. 256
Traffic jam function ........................... 100
Traffic reports
Calling up a list.............................. 103
Reading out on route ..................... 105
Real-time traffic report .................. 104
Trunk lid opening height
restriction
Activating/deactivating (COMAND) .55
®
U
Updating the digital map .................. 116
USB audio mode
Selecting a track ............................ 197
USB devices
Connecting to the Media Interface 195
V
Vehicle
Data acquisition ............................... 14
Vehicle settings ................................... 50
Video
see Video DVD
Video-AUX
Connecting an external video
source ............................................ 219
Switching to ................................... 219
Video DVD
Control option ................................ 221
DVD's control menu ...................... 224
DVD functions ............................... 225
DVD menu ..................................... 225
Function restrictions ...................... 221
Menu options .................................223
Notes on discs ............................... 221
Operation ....................................... 220
Overview ........................................ 223
Pause function ............................... 226
Picture settings .............................. 224
Playing conditions .......................... 221
Safety notes .................................. 220
Selecting a scene/chapter ............ 226
Stop function ................................. 226
Switching to ................................... 222
Video menu ................................... 225
Voice Control
see Voice Control System
Voice Control System
Settings ........................................... 41
Volume, adjusting
Navigation messages ....................... 23
W
Waypoints
Accepting waypoints for the route ... 87
Creating ........................................... 86
Editing .............................................. 87
Page 14

Index
12
Entering ........................................... 85
Searching for a gas station when
the fuel level is low .......................... 88
Weather map (SIRIUS)
Calling up ....................................... 265
Legend ...........................................271
Moving ........................................... 265
Showing/hiding layers ................... 266
Showing/hiding the menu ............. 266
Time stamp .................................... 271
Weather memory (SIRIUS)
Selecting an area ........................... 265
Storing an area .............................. 265
WLAN
Activating .........................................42
Connecting the device ..................... 42
Page 15

Important safety notes
WARNING
G
Modifications to electronic components, their
software as well as wiring can impair their
function and/or the function of other
networked components. In particular,
systems relevant to safety could also be
affected. As a result, these may no longer
function as intended and/or jeopardize the
operating safety of the vehicle. There is an
increased risk of an accident and injury.
Never tamper with the wiring as well as
electronic components or their software. You
should have all work to electrical and
electronic equipment carried out at a qualified
specialist workshop.
If you make any changes to the vehicle
electronics, the general operating permit is
rendered invalid.
WARNING
G
If you operate information systems and
communication equipment integrated in the
vehicle while driving, you will be distracted
from traffic conditions. You could also lose
control of the vehicle. There is a risk of an
accident.
Only operate the equipment when the traffic
situation permits. If you are not sure that this
is possible, park the vehicle paying attention
to traffic conditions and operate the
equipment when the vehicle is stationary.
You must observe the legal requirements for
the country in which you are currently driving
when operating COMAND.
COMAND calculates the route to the
destination without taking account of the
following, for example:
R
traffic lights
R
stop and give way signs
R
merging lanes
R
parking or stopping in a no parking/no
stopping zone
Operating safety
R
other road and traffic rules and regulations
R
narrow bridges
COMAND can give incorrect navigation
commands if the actual street/traffic
situation does not correspond with the digital
map's data. Digital maps do not cover all
areas nor all routes in an area. For example,
a route may have been diverted or the
direction of a one-way street may have
changed.
For this reason, you must always observe
road and traffic rules and regulations during
your journey. Road and traffic rules and
regulations always have priority over the
system's driving recommendations.
Navigation announcements are intended to
direct you while driving without diverting your
attention from the road and driving.
Please always use this feature instead of
consulting the map display for directions.
Looking at the icons or map display can
distract you from traffic conditions and
driving, and increase the risk of an accident.
Bear in mind that at a speed of only 30 mph
(approximately 50 km/h) your vehicle covers
a distance of 44 feet (approximately 14 m)
per second.
This equipment complies with FCC radiation
exposure limits set forth for uncontrolled
equipment and meets the FCC radio
frequency (RF) Exposure Guidelines in
Supplement C to OET65.
This equipment has very low levels of RF
energy that is deemed to comply without
maximum permissive exposure evaluation
(MPE). But it is desirable that it should be
installed and operated with at least 8inches
(20cm) and more between the radiator and a
person's body (excluding extremities: hands,
wrists, feet and legs.)
13
Z
Page 16

Operating safety
14
Declarations of conformity
Vehicle components which receive
and/or transmit radio waves
i
USA only: The wireless devices of this
vehicle comply with Part 15 of the FCC
Rules. Operation is subject to the following
two conditions:
1) These devices may not cause
interference, and
2) These devices must accept any
interference, including interference that
may cause undesired operation of the
device.
Changes or modifications not expressly
approved by the party responsible for
compliance could void the user's authority
to operate the equipment.
i
Canada only: The wireless devices of this
vehicle comply with Industry Canada
license-exempt RSS standard(s). Operation
is subject to the following two conditions:
1) These devices may not cause
interference, and
2) These devices must accept any
interference, including interference that
may cause undesired operation of the
device.
malfunctions can seriously jeopardize the
operational safety of your vehicle.
i
Roof antenna functionality (telephone,
satellite radio, GPS) can be affected by the
use of roof carrier systems.
Attaching metalized retrofit film to the
windshield may affect radio reception and
have a negative impact on all other
antennas (e.g. emergency antenna) in the
vehicle interior.
i
Therefore, have all work on or
modifications to electronic components
carried out at a qualified specialist
workshop. This workshop should have the
necessary specialist knowledge and tools
to carry out the work required. MercedesBenz recommends that you use an
authorized Mercedes-Benz Center for this
purpose. In particular, work relevant to
safety or on safety-related systems must
be carried out at a qualified specialist
workshop.
i
Protection against theft: this device is
equipped with technical provisions to
protect it against theft. Further information
on protection against theft can be obtained
from an authorized Mercedes-Benz Center.
Correct use
Observe the following information when using
COMAND:
R
the safety notes in this manual
R
traffic rules and regulations
R
laws and safety standards pertaining to
motor vehicles
i
Work improperly carried out on electronic
components or systems (e.g. radio, DVD
changer) and associated software could
cause them to cease functioning. Even
systems that have not been modified could
be affected because the electronic
systems are connected. Electronic
Data stored in the vehicle
A wide range of electronic components in
your vehicle contain data memories.
These data memories temporarily or
permanently store technical information
about:
R
The vehicle's operating state
R
Incidents
R
Malfunctions
In general, this technical information
documents the state of a component, a
module, a system or the surroundings.
Page 17

Operating safety
15
These include, for example:
R
operating conditions of system
components, e.g. fluid levels
R
the vehicle's status messages and those of
its individual components, e.g. number of
wheel revolutions/speed, deceleration in
movement, lateral acceleration,
accelerator pedal position
R
malfunctions and defects in important
system components, e.g. lights, brakes
R
malfunctions in important system
components. e.g. lights, brakes
R
vehicle reactions and operating conditions
in special driving situations, e.g. air bag
deployment, intervention of stability
control systems
R
ambient conditions, e.g. outside
temperature
This data is of an exclusively technical nature
and can be used to:
R
assist in recognizing and rectifying
malfunctions and defects
R
assist in recognizing and rectifying
malfunctions
R
analyze vehicle functions, e.g. after an
accident
R
optimize vehicle function
The data cannot be used to trace the vehicle's
movements.
When your vehicle is serviced, technical
information can be read from the event data
memory and malfunction data memory.
Services include, for example:
R
repair services
R
service processes
R
warranties
R
quality assurance
It is read by employees of the service network
(including manufacturers) using special
diagnostic devices. More detailed
information is obtained from it, if required.
After a malfunction has been rectified, the
information is deleted from the malfunction
memory or is continually overwritten.
When operating the vehicle, situations are
conceivable in which this technical data, in
connection with other information (if
necessary, under consultation with an
authorized expert), could be traced to a
person.
Examples include:
R
accident reports
R
damages to the vehicle
R
witness statements
Further additional functions that have been
contractually agreed upon with the customer
allow certain vehicle data to be conveyed by
the vehicle as well. The additional functions
include, for example, vehicle location in case
of an emergency.
Qualified specialist workshop
Read the information on qualified specialist
workshops in the vehicle Operator's Manual.
Information on copyright
General information
Information on licenses for free and Open
Source software used in your vehicle and in
the electronic components can be found on
this website: http://www.mercedes-
benz.com/opensource.
Registered trademarks
Registered trademarks:
R
Bluetooth®is a registered trademark of
Bluetooth®SIG Inc.
R
DTS is a registered trademark of DTS, Inc.
R
Dolby, DolbyDigital and MLP lossless are
registered trademarks of DOLBY
Laboratories.
R
BabySmart™, ESP®and PRE-SAFE®are
registered trademarks of Daimler AG.
Z
Page 18

Operating safety
16
R
HomeLink®is a registered trademark of
Prince.
R
iPod®and iTunes®are registered
trademarks of Apple Inc.
R
Burmester is a registered trademark of
Burmester Audiosysteme GmbH.
R
Microsoft®and Windows media®are
registered trademarks of Microsoft
Corporation.
R
SIRIUS is a registered trademark of Sirius
XM Radio Inc.
R
HD Radio is a registered trademark of
iBiquity Digital Corporation.
R
Gracenote®is a registered trademark of
Gracenote, Inc.
R
ZAGATSurvey®and related brands are
registered trademarks of ZagatSurvey,
LLC.
R
Google™, Google™ Street View, Google™
Panoramio and Google™ maps are
registered trademarks of Google Inc.
R
facebook®is a registered trademark of
Facebook Inc.
R
yelp®is a registered trademark of Yelp Inc.
Function restrictions
For safety reasons, some COMAND functions
are restricted or unavailable while the vehicle
is in motion. You will notice this, for example
because either you will not be able to select
certain menu items or COMAND will display
a message to this effect.
Your COMAND equipment
These operating instructions describe all
standard and optional equipment available
for your COMAND system at the time of
purchase. Country-specific differences are
possible. Please note that your
COMAND system may not be equipped with
all the features described. This also applies to
safety-relevant systems and functions.
Therefore, the equipment on your COMAND
system may differ from that in the
descriptions and illustrations. Should you
have any questions concerning equipment
and operation, please consult an authorized
Mercedes-Benz Center.
Page 19

COMAND features ............................... 18
Overview .............................................. 19
Basic COMAND functions ................... 23
SPLITVIEW ........................................... 25
Multi-Seat Entertainment System ..... 28
Character entry (telephony) ............... 30
Character entry (navigation) .............. 33
17
At a glance
Page 20

COMAND features
18
COMAND features
These operating instructions describe all
standard and optional equipment available
for your COMAND system at the time of
purchase. Country-specific differences are
possible. Please note that your
COMAND system may not be equipped with
At a glance
all the features described. This also applies to
safety-relevant systems and functions.
Therefore, the equipment on your COMAND
system may differ from that in the
descriptions and illustrations. Should you
have any questions concerning equipment
and operation, please consult an authorized
Mercedes-Benz Center.
Page 21
Overview
Overview
Components
:
COMAND display
;
DVD changer/single DVD drive
=
Controller and buttons
COMAND consists of:
R
the COMAND display
The COMAND display has 1440 x 540 pixels.
R
the DVD changer/single DVD drive
R
the controller
R
the buttons
R
the touch-sensitive telephone keypad
R
ports in the center console (2 x USB, AUX)
An iPod®is connected via USB cable.
R
a universal telephone interface for the driver's mobile phone or equipment with SAP
telephone module
R
headphones for the front passenger (cordless or connected by means of a cable to the audio
jack in the footwell)
i
COMAND can be operated from the front-passenger side using the corresponding remote
control if your vehicle is equipped with the front-passenger entertainment system. The
COMAND display can show separate information for the driver and the front passenger. The
front passenger views the display in SPLITVIEW.
19
At a glance
Functions
R
Radio/DAB radio
Internet radio, see Communication
R
Media
-
Media support: audio CD, MP3 CD, DVD
video, 2 x USB, SD card, iPod®, Bluetooth
Page 22

Overview
20
audio, 10 GB Media Register on the hard
drive
-
Music search using all media
R
Sound system
You can select from three sound systems:
-
Standard sound system
-
Burmester®surround sound system
At a glance
-
Burmester high-end 3D surround sound
system for ultimate listening pleasure
R
Navigation system
-
Destination entry using keyword search
-
Realistic 3D map with textured city
models
-
Navitainment for passengers, e.g.
Driveshow, Google Maps
R
Communication
-
Telephony via Bluetooth interface/SAP
telephone module
-
Messaging functions (text messages,
email)
-
Address book
-
Internet browser
-
Mercedes-Benz Apps with Google™
Local Search, Destination Download,
Weather, Facebook, Google™ Street
View, Internet radio, stock prices, news
and much more
-
WLAN interface for the connection of a
smartphone to COMAND and the option
of remote control for the front passenger
(SPLITVIEW) and the Rear Seat
Entertainment System
-
WLAN hotspot functionality to connect a
tablet PC or laptop in order to enable
access to the Internet using the
customer's mobile phone
R
Vehicle functions
-
Setting the multicontour seat with new
massage program
-
Climate control functions
-
Controlling ambient lighting: several
color and brightness level options
-
360° camera
R
Favorites button
Faster access to up to twelve favorites
functions using the favorites button and the
number keys on the telephone keypad
R
Multi-Seat Entertainment System
-
All passengers have access to
entertainment options via COMAND
-
Business telephony in the rear
compartment
-
Digital remote control operation and
digital cordless headphones
COMAND display
General notes
!
Do not use the space in front of the
display for storage. Objects placed here
could damage the display or impair its
function. Avoid any direct contact with the
display surface. Pressure on the display
surface may result in impairments to the
display, which could be irreversible.
Wearing polarized sunglasses may impair
your ability to read the display.
The display has an automatic temperaturecontrolled switch-off feature. The brightness
is automatically reduced if the temperature is
too high. The display may temporarily switch
off completely.
Page 23
Overview
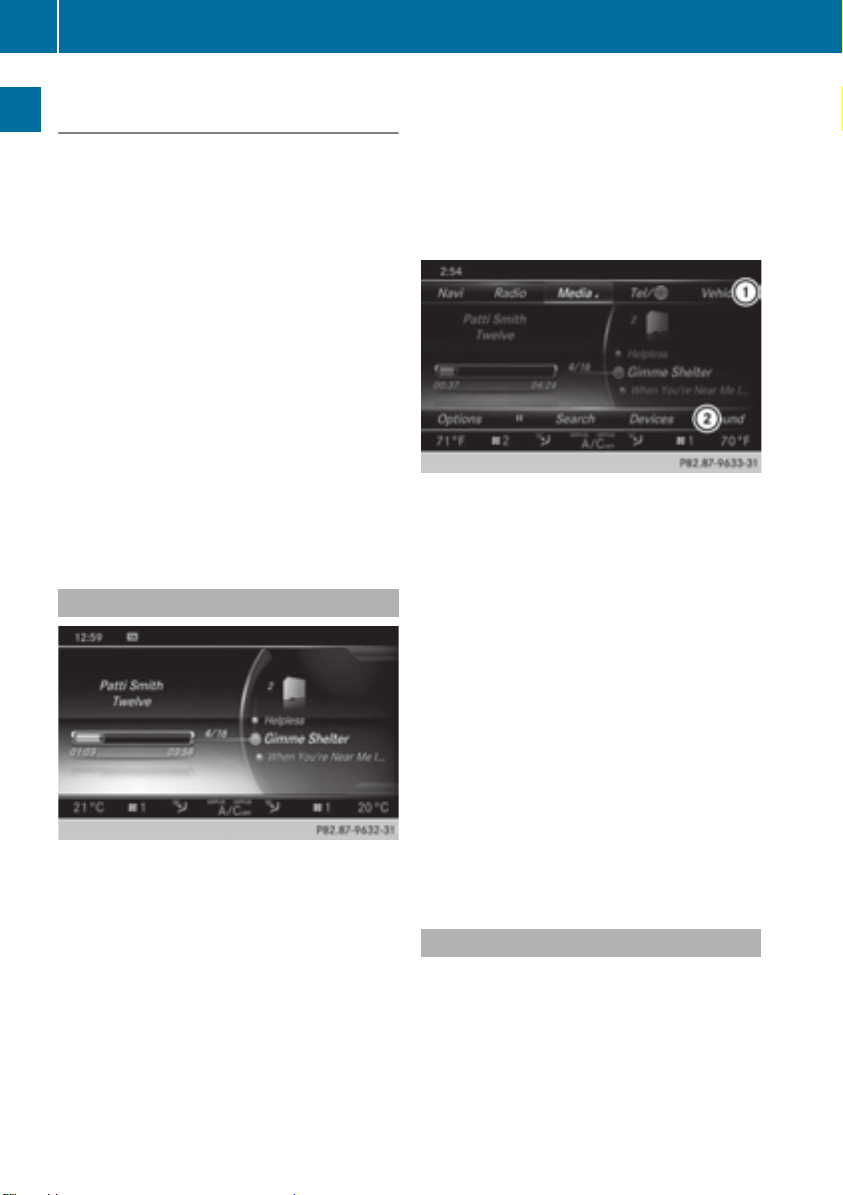
Example: audio CD mode basic display
:
Status bar with time, can show other displays
;
Main display field
=
Climate control status display
?
Context display in additional display area
Cleaning instructions
!
Do not touch the COMAND display. The
display has a very sensitive high-gloss
surface; there is a risk of scratching. If you
have to clean the screen, however, use a
mild cleaning agent and a soft, lint-free
cloth.
The COMAND display must be switched off
and have cooled down before you start
cleaning. Clean the display screen, when
necessary, with a commercially available
microfiber cloth and cleaning agent for TFT/
LCD displays. Do not apply pressure to the
display surface when cleaning it, as this could
cause irreversible damage. Then, dry the
surface with a dry microfiber cloth.
Avoid using alcoholic thinners, gasoline or
abrasive cleaning agents. These could
damage the display surface.
Overview
21
At a glance
Page 24
Overview
22
Buttons and controller
Overview
At a glance
:
Switches COMAND on/off
;
Adjusts the volume or mutes
=
Telephone keypad
?
Back button
A
Seat adjustment button
B
Navigation button
C
Radio button
D
Media button
E
Telephone, address book and Internet button
F
Vehicle and system settings button
G
Controller
H
g Favorites button
Back button
You can use the % button to exit a menu
or to call up the basic display of the current
operating mode.
X
To exit the menu: briefly press the %
button.
COMAND changes to the next higher menu
level in the current operating mode.
X
To call up the basic display: press the
% button for longer than two seconds.
COMAND changes to the basic display of
the current operating mode.
Telephone keypad
The telephone keypad is touch-sensitive: as
soon as one or several of the keys are gently
touched, the telephone keypad is shown in
the COMAND display. The key being touched
is highlighted.
Page 25

Basic COMAND functions
23
Controller
The controller is used to:
R
select menu items from the COMAND
display
R
enter characters
R
enter a destination on the map
R
save entries
The controller can be:
R
turned
R
slid left or right XVY
R
slid forwards or back ZVÆ
R
slid diagonally aVb
R
pressed briefly or pressed and held
Basic COMAND functions
Switching COMAND on/off
X
Press the u button on the center
console to the right of the controller.
When you switch on COMAND, a warning
message will appear. COMAND calls up the
previously selected menu.
If you switch off COMAND, playback of the
current media source will also be switched
off.
Adjusting the volume for traffic
announcements and navigation
announcements
During traffic or navigation announcements:
X
Turn the thumbwheel to the right of the
controller.
or
X
Press the W or X button on the
multifunction steering wheel.
i
You can set the volume for navigation
announcements to be different to the
volume of the respective media source.
Adjusting the volume for phone calls
You can adjust the volume for hands-free
mode during a telephone call.
X
Turn the thumbwheel to the right of the
controller.
or
X
Press the W or X button on the
multifunction steering wheel.
i
Setting the volume for the Voice Control
System voice output, see the separate
operating instructions.
At a glance
Adjusting the volume
Adjusting the volume for media sources
X
Turn the thumbwheel to the right of the
controller.
or
X
Press the W or X button on the
multifunction steering wheel.
The volume of the media source currently
selected changes.
Switching the sound on or off
Media source sound
X
Press the thumbwheel beside the
controller.
or
X
Press the 8 button on the multifunction
steering wheel.
i
When the sound is switched off, you will
see the , symbol in the status bar. If you
change the media source or change the
volume, the sound is automatically
switched on.
i
Even if the sound is switched off, you will
still hear navigation system
announcements.
Page 26
Basic COMAND functions
24
Switching navigation announcements
off and on again
X
To switch off navigation
announcements: press the thumbwheel
beside the controller during the
announcement.
The SpokenSpoken drivingdriving recommendationsrecommendations
At a glance
have been deactivatedhave been deactivated message
appears.
X
To switch navigation announcements
back on: switch COMAND off and then on
again (Y page 23).
or
X
Start a new route calculation
(Y page 78).
or
X
Select +: while route guidance is active,
show the menu and press the controller
(Y page 94).
Calling up functions and their menus
X
Press the Õ button or the ß, $,
%, or Ø button.
Media: the basic display for the last media
source set appears. In the example, SD
memory card mode is set.
Navigation: the map or the last navigation
menu called up appears.
Radio: the basic menu of the last radio
mode set appears.
Communication: the basic menu of the
last communication function set appears
(telephone, address book, Internet).
Vehicle functions: the basic display
appears.
X
For radio, media and telephone: press
the $, Õ or % button repeatedly.
The available radio modes, media sources
or communication functions are called up
one after another.
X
To show the menu: press the controller in
navigation.
The menu appears in the map. The marking
is in the lower menu bar.
Alternatively, in the other functions
X
Slide ZVÆ the controller.
The menu for the selected functions
appears. Depending on the operation, the
marking is shown in main function bar :
or menu bar ;.
X
To select a menu item: turn and press the
controller.
Once you have selected a menu item
in :, the last menu set for the selected
function appears.
Menu bar ; provides options in SD
memory card mode.
Function menu
You can call up available modes, sources or
functions for the functions of the main
function bar.
Example: in the communication menu, you
can:
R
switch to telephone mode
R
call up the address book
Page 27
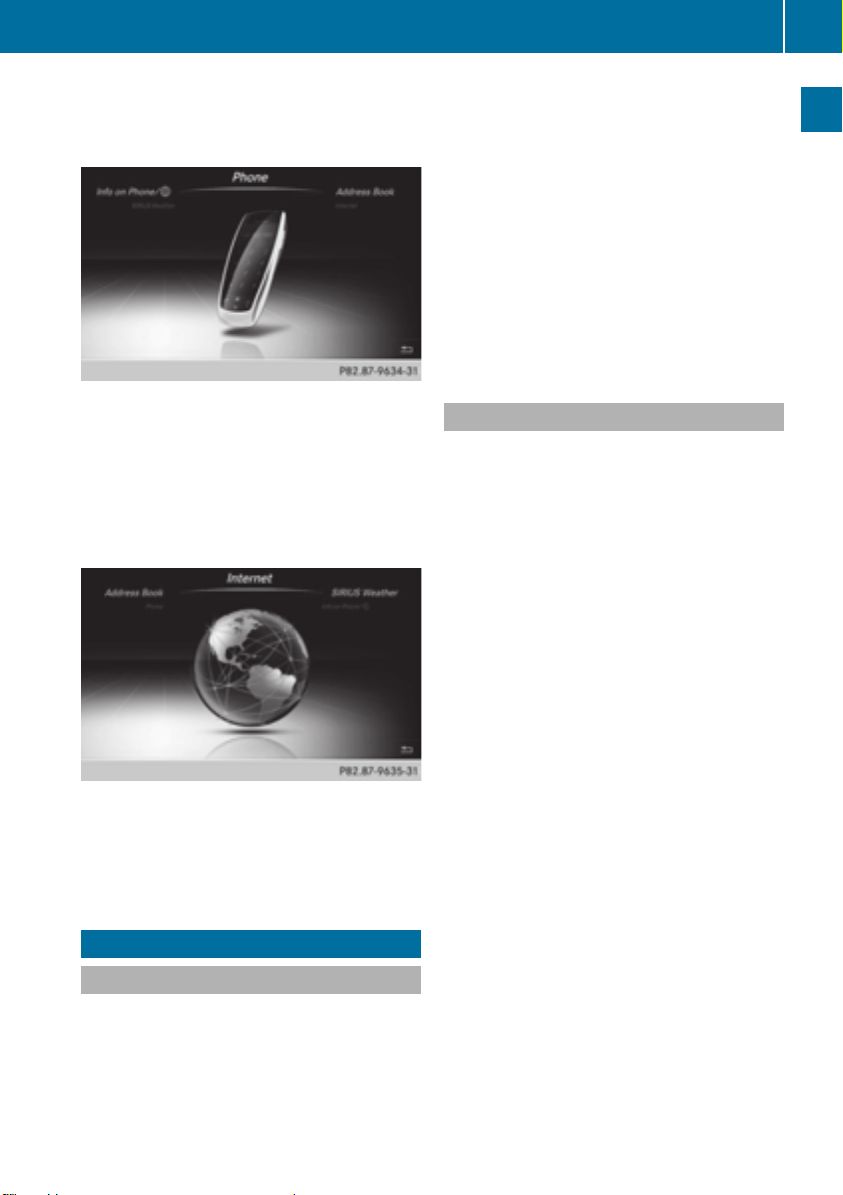
R
call up the Internet
R
call up the digital operating instructions for
the telephone/®
X
Press the % button.
If telephone mode was the last mode
selected, the last telephone display
selected will appear.
X
To select Tel/Tel/®: slide ZV and press the
controller.
The menu appears. PhonePhone is at the front.
X
Turn the controller until InternetInternet, for
example, is brought to the front.
X
Press the controller.
The Internet basic display appears.
SPLITVIEW
Method of operation
SPLITVIEW allows you to simultaneously use
different COMAND functions on the frontpassenger side and on the driver's side.
Different content is seen depending on your
perspective when viewing the display.
SPLITVIEW
The navigation function, for example, can be
used from the driver's side while a video is
watched from the front-passenger side.
SPLITVIEW is operated with the COMAND
remote control from the front-passenger
side.
To do so, use the special radio headphones.
Using the headphones on the correct sides
ensures an optimal sound.
You can connect your own headphones to a
special headphones jack. You can use the
COMAND remote control to operate them.
Points to remember
R
You can only adjust the volume for the
headphones supplied, directly on the
headphones.
R
Only entertainment functions, i.e. audio,
TV, video and Internet, for example, may be
used with SPLITVIEW.
R
Videos cannot be shown on the driver's
side while the vehicle is in motion.
R
If media from different sources are used,
these can be used separately from the
driver's and front-passenger sides.
Example: if a medium from the DVD
changer is being played on the driver's side.
then another medium that is also played
from the DVD changer cannot be played
separately on the front-passenger side.
However, other media can be used on the
front-passenger side at the same time,
including the radio, memory card, MEDIA
REGISTER, Media Interface, USB or AUX.
R
If you use the same medium on both sides,
you can both carry out the respective
settings. The "last one wins" principle
applies here, i.e. the last setting activated
is favored.
R
The Internet can be separately used by both
the driver and front passenger at the same
time.
R
Internet can only be used if it is set and
connected via a mobile phone on the
driver's side.
25
At a glance
Page 28
26
SPLITVIEW
R
The multifunction steering wheel can only
be used for functions which relate to the
driver's side.
R
The driver can lock/unlock the other
screens (override feature) (Y page 63).
Switching SPLITVIEW on/off
At a glance
From the driver's side
:
SPLITVIEW switched on
;
To switch SPLITVIEW on/off
Activating
X
Press the Ø button.
The Vehicle menu appears.
X
Slide V¬ the controller.
The menu bar is shown.
X
To select ù OnOn: turn and press the
controller.
SPLITVIEW symbol : appears. The ù
display changes to OffOff ;.
The front passenger sees the display of the
function last activated. If the switch-on
time was longer than 30 minutes
previously, the display from the driver's
side is shown.
Deactivating
X
To select ù OffOff in the menu bar: turn
and press the controller.
The ù display changes to OnOn.
ù is hidden in the status bar.
Locking/unlocking SPLITVIEW:
X
Proceed as described under "Locking/
unlocking the rear-compartment displays"
(Y page 63). Instead of selecting a rearcompartment display, select SplitViewSplitView.
From the front-passenger side
Activating
X
To select the SPLITVIEW display using the
COMAND remote control (Y page 241):
turn thumbwheel : until the SPLITVIEW
icon appears in the window.
X
Press the u button on the COMAND
remote control.
Deactivating
X
Press the u button on the COMAND
remote control again.
The ù display changes to OnOn.
The SPLITVIEW symbol is hidden in the
status bar.
The menu called up on the driver's side is
shown.
If COMAND is switched off by removing the
key from the ignition lock while SPLITVIEW is
activated and then switched on again within
30 minutes, SPLITVIEW is activated with the
last settings.
Page 29
SPLITVIEW
27
If COMAND is switched on again after more
than 30 minutes, SPLITVIEW is not activated.
If SPLITVIEW is activated on the frontpassenger side, the settings from the driver's
side will be used.
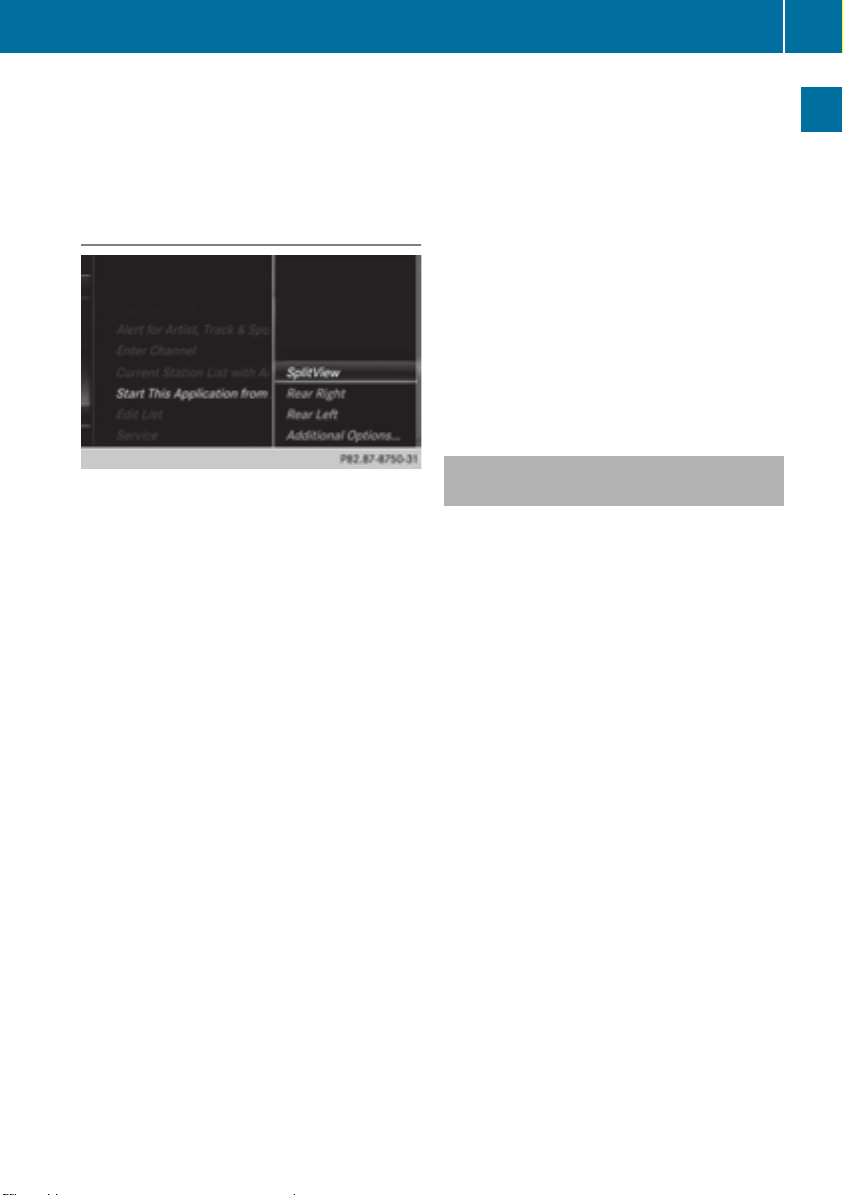
From media mode
SPLITVIEW can be switched on from any
media mode.
Activating
X
From any media mode, e.g. Media
Interface: slide V¬ the controller.
The menu bar is shown.
X
To select OptionsOptions: turn and press the
controller.
A menu appears.
X
Select Start this application inStart this application in
another locationanother location
A menu appears.
X
Select SplitViewSplitView.
A window with the message StartingStarting
Source in SplitView…Source in SplitView… appears.
SPLITVIEW switches on. The ù symbol
appears in the status bar.
To disarm
X
From the driver's side, use the Ø button
(Y page 26).
X
From the front-passenger side, use the
COMAND remote control.
Additional options
X
To select Additional Options...Additional Options... in the
menu: turn and press the controller.
A menu appears.
X
To switch SPLITVIEW on/off: proceed as
described under "Switching the rearcompartment displays on/off"
(Y page 63). Instead of selecting a rearcompartment display, select SplitViewSplitView.
X
To lock/unlock SPLITVIEW: proceed as
described under "Locking/unlocking the
rear-compartment displays" (Y page 63).
Instead of selecting a rear-compartment
display, select SplitViewSplitView.
Transferring a destination to the
driver
Using SPLITVIEW you can select a destination
from the front-passenger side and transfer
this to the driver's side.
X
Switch on SPLITVIEW (Y page 26)
X
To select ù OnOn in the menu bar: turn and
press the controller.
The SPLITVIEW symbol appears in the
display, and the ù display switches to
OffOff.
X
Select ® in the main function bar with the
COMAND remote control.
A menu appears.
X
Select Mercedes-Benz AppsMercedes-Benz Apps with the
COMAND remote control.
You see the selection of Mercedes-Benz
Apps.
X
Select Google Local SearchGoogle Local Search with the
COMAND remote control (Y page 161).
A menu appears.
X
Select a search position, such as AtAt
current locationcurrent location.
A menu appears.
X
Select a type of search inquiry, such as
Enter search termEnter search term.
An input field appears.
At a glance
Page 30
Multi-Seat Entertainment System
28
X
Enter the destination using the COMAND
remote control and press the b button.
The Google™ results list appears.
X
Select the destination using the COMAND
remote control.
A menu appears.
X
Select Set as DestinationSet as Destination.
At a glance
X
The prompt Accept the navigationAccept the navigation
data from Mercedes-Benz Apps?data from Mercedes-Benz Apps?
appears on the driver's side.
X
Select YesYes or NoNo.
If you select YesYes, the navigation data is
used for route guidance.
Multi-Seat Entertainment System
Media overview
applies here, i.e. the last setting activated
is favored.
R
The Internet can be used separately at all
operating positions.
R
The Internet can only be used if it is set up
and connected via a telephone
(Y page 158).
You can select from the following media:
Medium Function/location
AUX Devices that are
connected to the
AUX socket. The
AUX socket is
located under the
center console
armrest in the rear
compartment.
COMAND disc CDs or DVDs that
are inserted into
COMAND at the
front of the vehicle.
You can access various types of media from
all operating positions in the vehicle.
The media can be connected to any jack or
inserted into the various drives.
R
If media from different sources are used,
they can be used separately from each of
the operating positions. Example: a film
from the DVD drive is played on the rear
right-hand operating position. This means
that another film from the same DVD
cannot be played separately on the rear
left-hand operating position. However, it is
possible to use the radio, memory card,
MUSIC REGISTER, Media Interface, USB,
online and Internet functions or AUX.
R
If you use the same medium on both sides,
you can both carry out the respective
settings. The "last one wins" principle
COMAND memory
card
Memory card
inserted into
COMAND in the
front compartment.
COMAND Media
Interface
Devices inserted
into the USB ports at
the front of the
vehicle.
Disc CD or DVD inserted
into the CD/DVD
drive in the rear
compartment.
Media Register Media found in the
MEDIA REGISTER.
Media Interface 1
Media Interface 2
Devices connected
to USB ports 1 and
2. USB ports 1 and 2
are located under
the center console
armrest in the rear
compartment.
Page 31

Medium Function/location
Bluetooth Audio
R
Devices
connected with
COMAND via
Bluetooth®.
R
Devices
connected with
COMAND as a
business
telephone.
TV Television
Accessing media in the vehicle
Multi-Seat Entertainment System
29
At a glance
X
To show the menu: press the : button
on the remote control.
X
Using the :=; buttons on the
remote control, select DevicesDevices.
The discs/devices available are shown. The
# dot indicates the current setting.
X
Select the device/disc using the :
9 buttons and press the 9 button to
confirm.
If the device/disc contains music or video
files, these will be played.
Further information on media in the rear
compartment (Y page 241).
Page 32
Character entry (telephony)
30
Character entry (telephony)
Entering characters using the character bar
At a glance
:
Additional display area showing the telephone keypad
;
Input line with entry and cursor
=
Character bar
In the example, a new entry is added to the phone book (Y page 137). The new entry has
three input lines for entering the last name, first name and phone number.
X
To select a character: turn and press the controller.
The character selected in = is entered in ;.
X
Enter the complete last name.
i
Alternatively, you can also enter characters using the telephone keypad (direct entry).
X
To delete a character: slide VÆ and turn the controller, then press it after selecting F.
X
To delete an entire entry: slide VÆ and turn the controller; then after selecting F press
and hold down the controller until the entire entry is deleted.
i
Alternatively, you can also delete the entry using the telephone keypad.
X
To confirm an entry: slide VÆ and turn the controller, then press it after selecting¬.
:
Input line with cursor
Page 33
Character entry (telephony)
X
To select an input line: slide VÆ and turn the controller, then press it after selecting 4
or 5.
or
X
Slide ZV the controller repeatedly until the character bar disappears.
X
Turn and press the controller.
X
To move the cursor: select the input line.
X
Slide VÆ and turn the controller, then press it after selecting 2 or 3.
X
To change the character bar language: slide VÆ and turn the controller, then press it
after selecting B.
A menu appears.
X
To select the language: turn and press the controller.
The character bar entry functions are listed in the table.
31
At a glance
Symbol Function
Ä
*
B
F
To switch between digits and symbols
To switch the character bar to uppercase/lowercase letters
To change the character bar language
To delete a character/an entry
4, 5 To select the input line
2, 3 To move the cursor within the input line
¬
&
To confirm an entry
To cancel input
Page 34
Character entry (telephony)
32
Entering characters using the telephone keypad
At a glance
:
Selected number keys on the telephone keypad and their available characters
Alternatively, you can enter characters using the telephone keypad.
X
For example, to enter the letter cc: press the l number key briefly three times in
succession.
As soon as you touch the number key, the number is highlighted in the additional display
area.
The character appears at the bottom of the display the first time the key is pressed and
shows all the available characters. It switches to the next character each time the key is
pressed.
X
Wait until the character display goes out.
The selected character is entered in the input line.
X
To delete the character: press the $ button.
X
To delete the entire entry: press and hold the $ button until the entire entry is deleted.
Page 35
Character entry (navigation)
33
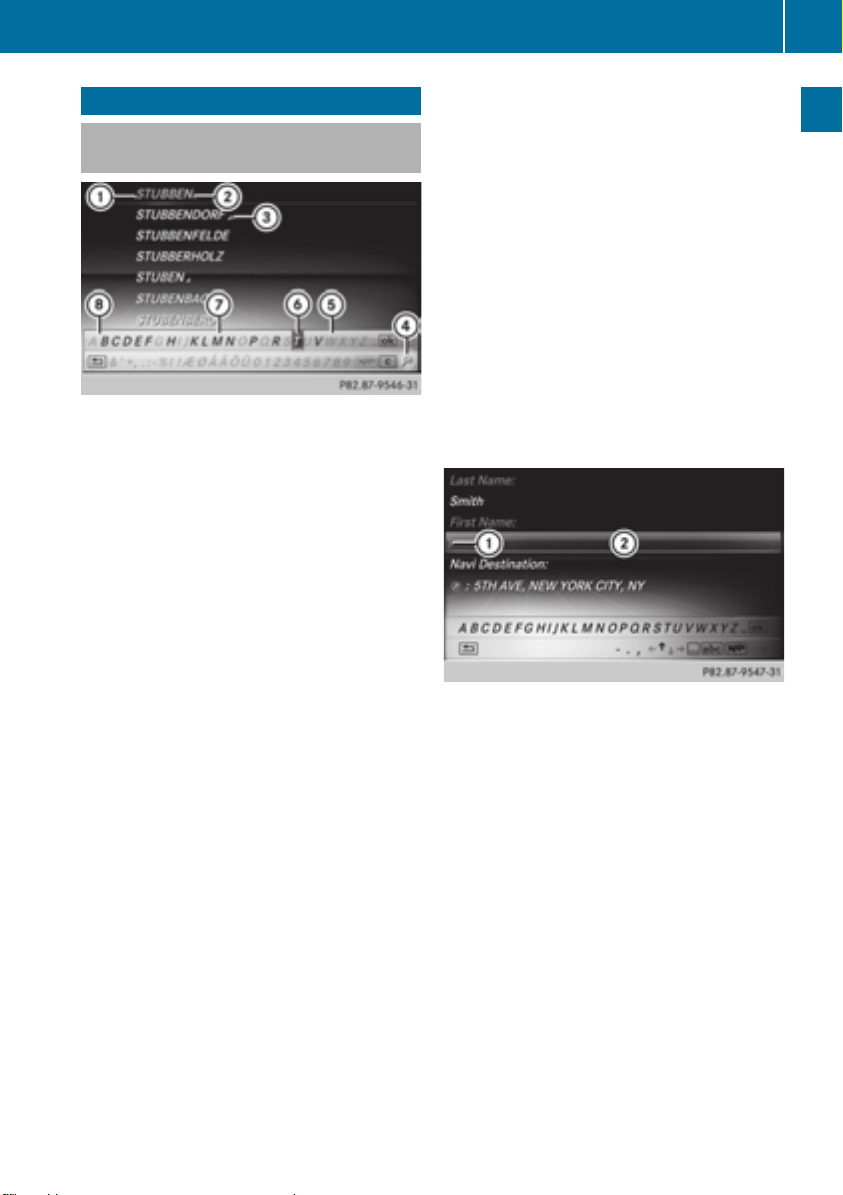
Character entry (navigation)
Entering characters using the
character bar
:
Characters STUSTU entered by the user
(orange)
;
Characters BBENBBEN automatically added by
COMAND
=
Multiple entries available for this city
?
To switch to keyword search
A
Characters not currently available
B
Currently selected character
C
Characters currently available
D
Character bar
The example shows the address entry
(Y page 76).
X
To select a character: turn and press the
controller.
Selected character : is entered in the
upper line. COMAND adds the missing
characters and shows the entry that best
matches the current input.
The characters are available C or not A,
depending on the characters already
entered and the data stored in the digital
map.
i
Alternatively, you can also enter
characters using the telephone keypad
(direct entry).
X
To delete a character: slide VÆ and turn
the controller, then press it after selecting
F.
X
To delete an entire entry: slide VÆ and
turn the controller; then after selecting
F press and hold down the controller until
the entire entry is deleted.
i
Alternatively, you can also delete the
entry using the telephone keypad.
X
To switch to keyword search: slide VÆ
and turn the controller, then press it after
selecting ?.
X
To confirm an entry: slide VÆ and turn
the controller, then press it after
selecting¬.
or
X
Slide ZV the controller repeatedly until the
character bar disappears.
The location selection list appears. The
selected entry is highlighted.
:
Cursor
;
Entry line
The example shows the character entry when
you save a destination as a navigable contact
in the address book (Y page 77).
X
To select an input line: slide VÆ and turn
the controller, then press it after selecting
4 or 5.
or
X
Slide ZV the controller repeatedly until the
character bar disappears.
X
Turn and press the controller.
X
To move the cursor: select the input line.
X
Slide VÆ and turn the controller, then
press it after selecting 2 or 3.
At a glance
Page 36
Character entry (navigation)
34
At a glance
The example shows the keyword search
during the destination entry.
X
To change the character bar language:
slide VÆ and turn the controller, then press
it after selecting B.
A menu appears.
X
To select the language: turn and press the
controller.
The character set for the selected language
is set.
The character bar entry functions are listed in
the table.
Symbol Function
Ä
*
B
F
è
4, 5 To select the input line
2, 3 To move the cursor within the
¬
&
To switch between digits and
symbols
To switch the character bar to
uppercase/lowercase letters
To change the character bar
language
To delete a character/an entry
To switch to keyword search
(Y page 79)
input line
To confirm an entry
To cancel input
Page 37
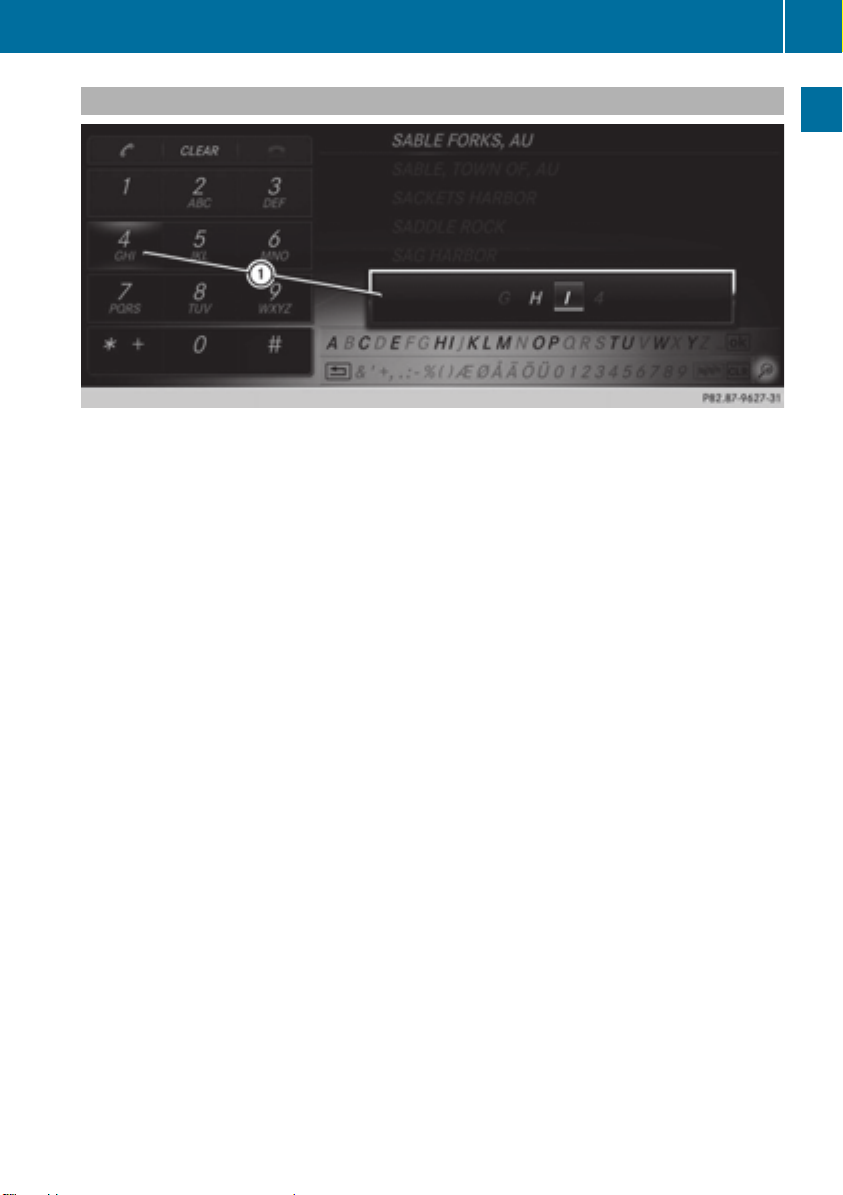
Character entry (navigation)
Entering characters using the telephone keypad
:
Selected number keys on the telephone keypad and their available characters
Alternatively, you can enter characters using the telephone keypad.
X
For example, to enter the letter II: press the n number key briefly three times in
succession.
As soon as you touch the number key, the number is highlighted in the additional display
area :.
The character appears at the bottom of display : the first time the key is pressed and
shows all the available characters. It switches to the next character each time the key is
pressed.
X
Wait until the character display goes out.
The selected character is entered in the input line.
X
To delete the character: press the $ button.
X
To delete an entire entry: press and hold the $ button until the entire entry is deleted.
35
At a glance
Page 38

36
Page 39

Your COMAND equipment .................. 38
Display settings .................................. 38
Time settings ....................................... 40
Text reader settings ............................ 41
Voice Control System settings .......... 41
WLAN ................................................... 42
Bluetooth®settings ............................ 44
Setting the system language ............. 45
Assigning a favorites button .............. 45
Importing/exporting data .................. 47
Reset function ..................................... 48
37
System settings
Page 40
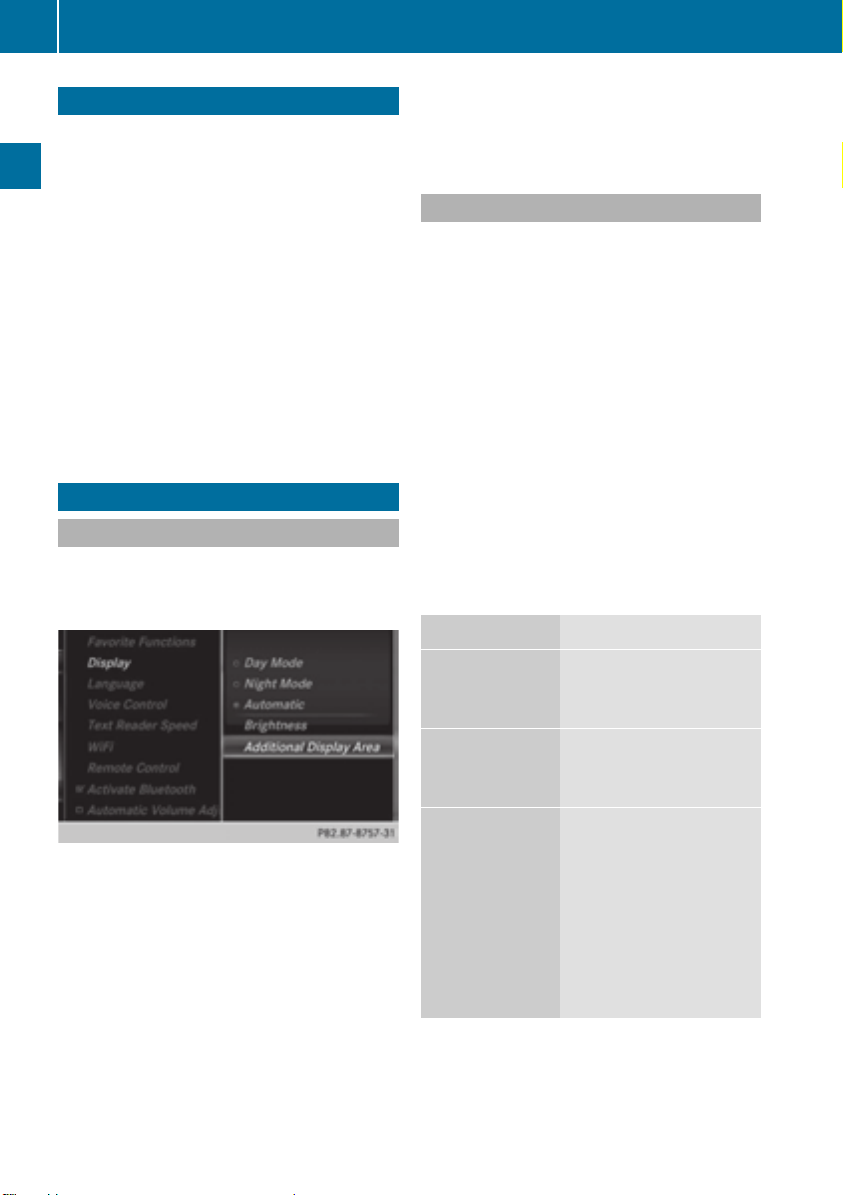
Display settings
38
Your COMAND equipment
These operating instructions describe all
standard and optional equipment available
for your COMAND system at the time of
purchase. Country-specific differences are
possible. Please note that your
COMAND system may not be equipped with
all the features described. This also applies to
safety-relevant systems and functions.
Therefore, the equipment on your COMAND
system may differ from that in the
descriptions and illustrations. Should you
System settings
have any questions concerning equipment
and operation, please consult an authorized
Mercedes-Benz Center.
Display settings
Setting the brightness
The brightness detected by the display light
sensor affects the setting options for this
function.
i
The display brightness can be adjusted
individually for the two COMAND displays
at night using the control.
Display design
The COMAND display features optimized
designs for operation during daytime and
night-time hours. You can set the design by
manually selecting day or night design or opt
for an automatic setting.
X
Press the Ø button.
The Vehicle menu appears.
X
To select System SettingsSystem Settings: slide V¬,
turn and press the controller.
A menu appears.
X
To select DisplayDisplay: turn and press the
controller.
A menu appears.
X
Select Day ModeDay Mode, Night ModeNight Mode or
AutomaticAutomatic.
The # dot indicates the current setting.
Design Explanation
X
Press the Ø button.
The Vehicle menu appears.
X
To select System SettingsSystem Settings: slide V¬,
turn and press the controller.
A menu appears.
X
To select DisplayDisplay: turn and press the
controller.
A menu appears.
X
Select BrightnessBrightness.
A control appears.
X
Select the desired brightness.
Day ModeDay Mode
The display is set
permanently to day
design.
Night ModeNight Mode
The display is set
permanently to night
design.
AutomaticAutomatic If the AutomaticAutomatic setting
is selected,
COMAND evaluates the
readings from the
automatic vehicle light
sensor and
automatically switches
between the display
designs.
Page 41
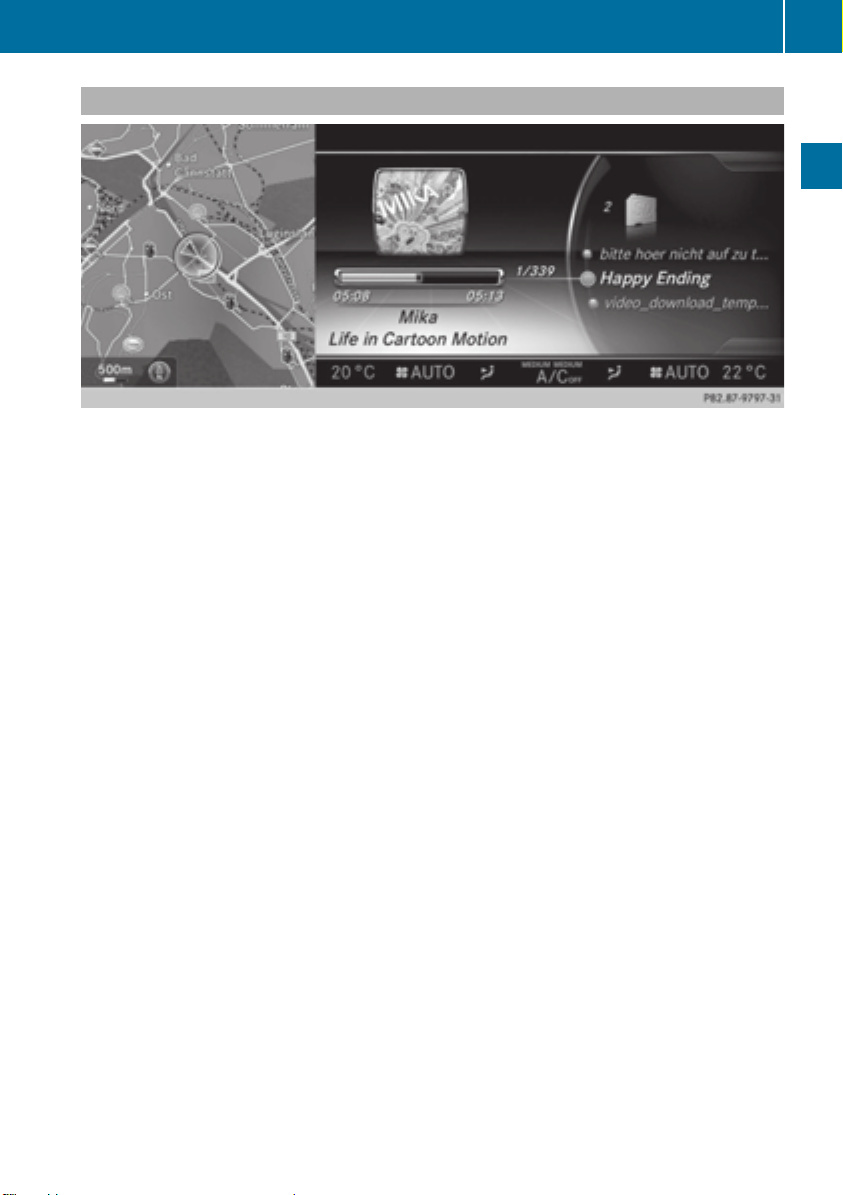
Display settings
Additional display area
The additional display area comprises the left-hand third of the COMAND display. You can
choose content information depending on the context. For instance, you can select an album
cover in media mode or a permanent display, such as a small navigation map, in the additional
area on the display.
X
Press the Ø button.
The Vehicle menu appears.
X
To select System SettingsSystem Settings: slide V¬, turn and press the controller.
A menu appears.
X
To select DisplayDisplay: turn and press the controller.
A menu appears.
X
Select Additional Display AreaAdditional Display Area.
A menu appears.
X
Select Context-dependentContext-dependent, Navigation MapNavigation Map, Entertainment InformationEntertainment Information, DataData
Connection InformationConnection Information, SIRIUS WeatherSIRIUS Weather or ConsumptionConsumption.
The # dot indicates the current setting.
R
Context-dependentContext-dependent
The additional area shows one of the following depending on the context, e.g. album cover
in media mode.
R
Navigation MapNavigation Map
The navigation map is shown in the additional area.
R
Entertainment InformationEntertainment Information
Entertainment information is shown in the additional area, e.g. album cover, artist and track.
R
Data Connection InformationData Connection Information
Data connection information is shown in the additional area.
R
SIRIUS WeatherSIRIUS Weather
SIRIUS weather information is shown in the additional area.
R
ConsumptionConsumption
39
System settings
Page 42

Time settings
40
Consumption information is shown in the additional area.
Time settings
General information
When there is GPS reception, COMAND sets
the time and date automatically. You can also
adjust the time yourself in minute
increments, but the date cannot be changed.
i
If you adjust the time in minute
increments, any time zone settings and
settings for changing between summer and
System settings
standard time are lost. The tick next to
Automatic TimeAutomatic Time is removed. Switching
between summer and standard time
(Y page 41).
i The following navigation system functions
require the time, time zone and summer/
standard time to be set correctly in order
to work properly:
R
route guidance on routes with timedependent traffic guidance
R
calculation of expected time of arrival
i
With this function, you can set the time
for every display in the vehicle.
Setting the time manually
X
To select Set Time ManuallySet Time Manually: turn and
press the controller.
X
Set the desired time.
The time is accepted.
Setting the time/date format
X
Press the Ø button.
The Vehicle menu appears.
X
To select TimeTime: slide V¬, turn and press
the controller.
A menu appears.
X
To select FormatFormat: turn and press the
controller.
The # dot indicates the current setting.
X
Select the desired format.
Abbreviation Meaning
DDDD . MMMM . YYYYYYYY
Day . Month . Year
(date format, four
digits)
YYYYYYYY/MMMM/DDDD
Year/Month/Day
date format, year (all
four digits)
DDDD/MMMM/YYYYYYYY
Day/Month/Year
date format, year (all
four digits)
X
Press the Ø button.
The Vehicle menu appears.
X
To select TimeTime: slide V¬, turn and press
the controller.
A menu appears.
HHHH : MM (24 hrs)MM (24 hrs)
HHHH : MM (AM/PM)MM (AM/PM)
Hours : Minutes
(24 hour time
format)
Hours : Minutes
(AM/PM time
format)
Page 43

Voice Control System settings
41
Adjusting the time zone and switching
to Daylight Savings Time (Summer)
X
Press the Ø button.
The Vehicle menu appears.
X
To select TimeTime: slide V¬, turn and press
the controller.
A menu appears.
X
To select Time ZoneTime Zone: turn and press the
controller.
A list of countries or time zones appears.
The # dot indicates the current setting.
X
Select a country or a time zone.
A time zone list may also be displayed,
depending on the country selected.
X
Select the desired time zone.
The entry for the Automatic TimeAutomatic Time is
accepted.
To activate/deactivate automatic time:
X
Press the Ø button.
X
To select TimeTime: slide V¬, turn and press
the controller.
A menu appears.
X
To select Automatic TimeAutomatic Time: press the
controller.
Checking the box switches the function on
O or off ª.
To switch on: the menu item is switched
on as the default setting. If AutomaticAutomatic
TimeTime is reactivated, the previous settings
for time zone and summer time changeover
are selected.
To switch off: the time zone is deselected
and the summer time is switched off. If
AutomaticAutomatic is set for the summer time
changeover, a prompt will appear asking
whether this should be maintained.
X
To select YesYes or NoNo: turn the controller and
press to confirm.
If you select YesYes, the settings will not be
changed.
If you select NoNo, the settings will be
switched OffOff.
i
You can set the time manually using
FormatFormat and Set Time ManuallySet Time Manually.
Subsequent operation depends on whether
the navigation system has GPS reception and
whether the changeover function to summer
time is available.
To switch manually:
X
To select OnOn or OffOff: turn and press the
controller.
The # dot indicates the current setting.
To switch automatically:
X
Select AutomaticAutomatic.
The entry for the Automatic TimeAutomatic Time is
accepted.
Text reader settings
X
Press the Ø button.
The Vehicle menu appears.
X
To select System SettingsSystem Settings: slide V¬,
turn and press the controller.
A menu appears.
X
To select Text Reader SpeedText Reader Speed: turn the
controller and press to confirm.
A list appears.
X
Select FastFast, MediumMedium or SlowSlow.
The # dot indicates the current setting.
Voice Control System settings
Opening/closing the help window
The help window also shows you information
on audible instructions:
R
during individualization
R
during subsequent operation of the Voice
Control System.
X
Press the Ø button.
The Vehicle menu appears.
X
To select System SettingsSystem Settings: slide V¬,
turn and press the controller.
A menu appears.
X
To select Voice ControlVoice Control: turn the
controller and press to confirm.
System settings
Page 44

WLAN
42
X
Select Help WindowHelp Window.
You have switched the help window on
O or off ª.
More information on the Voice Control
System is available in the separate operating
instructions.
Individualization
Using individualization, you can fine-tune the
Voice Control System to your own voice. This
will help improve voice recognition (see the
System settings
separate operating instructions).
WLAN
Overview
Conditions:
To establish a WLAN connection between
COMAND Online and a WLAN-enabled
device, such as a tablet computer or
smartphone:
R
WLAN must be activated at COMAND
Online and at the device to be connected.
If COMAND Online is to be used as a WLAN
hotspot:
R
COMAND Online must be connected to an
Internet-enabled mobile phone via
Bluetooth®or USB.
R
The Internet access data for the mobile
phone network provider must be selected
or set for COMAND Online.
R
There must be an Internet connection to
COMAND Online.
Activating WLAN
X
To select VehicleVehicle in the main function bar:
turn the controller and press to confirm.
X
To switch to the menu bar: slide V¬ the
controller.
X
Select System SettingsSystem Settings.
The system settings menu is shown.
X
Select WiFiWiFi.
The WLAN menu appears.
X
Select ActivateActivate.
X
Press the controller.
Switch the connection on O or off ª,
depending on the previous setting.
Connecting the device
General notes
i
The exact WLAN connection procedure
may vary depending on the device to be
connected. Follow the instructions that are
shown in the display. Further information
can be found on the operating instructions
for the device you wish to connect.
Page 45

WLAN
43
Connecting a device via WPS PIN
Prerequisite:
For this type of connection, the device to be
connected must support "Connect using WPS
PIN".
X
To select VehicleVehicle in the main function bar:
turn the controller and press to confirm.
X
To switch to the menu bar: slide V¬ the
controller.
X
Select System SettingsSystem Settings.
The system settings menu is shown.
X
Select WiFiWiFi.
The WLAN menu appears.
X
Select Connect Via WPS PINConnect Via WPS PIN.
X
Select the vehicle from the device to be
connected and "Connect using WPS PIN".
The vehicle is displayed with the SSID MBMB
WLAN XXXXXWLAN XXXXX.
The device to be connected generates a
PIN.
X
This PIN is also entered on COMAND.
Connecting the device by pressing a
button (push button)
Prerequisite:
For this type of connection, the device to be
connected must support "Connect via push
button".
X
To select VehicleVehicle in the main function bar:
turn the controller and press to confirm.
X
To switch to the menu bar: slide V¬ the
controller.
X
Select System SettingsSystem Settings.
The system settings menu is shown.
X
Select WiFiWiFi.
The WLAN menu appears.
X
Select Connect via WPS PBCConnect via WPS PBC.
X
Select the vehicle from the device to be
connected and "Connect via WPS PBC".
The vehicle is displayed with the SSID MBMB
WLAN XXXXXWLAN XXXXX.
X
Select ContinueContinue on COMAND.
Connecting the device via SSID and
security key
Example display
X
To select VehicleVehicle in the main function bar:
turn the controller and press to confirm.
X
To switch to the menu bar: slide V¬ the
controller.
X
Select System SettingsSystem Settings.
The system settings menu is shown.
X
Select WiFiWiFi.
The WLAN menu appears.
X
Select Connect Using Security KeyConnect Using Security Key.
X
Select the vehicle from the device to be
connected. The vehicle is displayed with
the SSID MB WLAN XXXXXMB WLAN XXXXX.
System settings
Page 46

44
Bluetooth®settings
X
Enter the security key that appears on the
COMAND display for the device to be
connected.
X
Confirm the entry.
Generating a new security key
System settings
Example display
X
To select VehicleVehicle in the main function bar:
turn the controller and press to confirm.
X
To switch to the menu bar: slide V¬ the
controller.
X
Select System SettingsSystem Settings.
The system settings menu appears.
X
Select WiFiWiFi.
The WLAN menu appears.
X
Select Generate Security KeyGenerate Security Key.
X
Select RegenerateRegenerate.
A dialog for entering the security key
appears.
X
Enter the new security key.
X
Select ¬.
X
Press the controller.
The new security key will now be displayed
and verified when a connection is
established via the security key.
i
Device connections established using the
previous security key will no longer work
after the security key is changed. You have
to reconnect these devices (Y page 42).
Changing the name of the SSID
Example display
X
To select VehicleVehicle in the main function bar:
turn the controller and press to confirm.
X
To switch to the menu bar: slide V¬ the
controller.
X
Select System SettingsSystem Settings.
The system settings menu is shown.
X
Select WiFiWiFi.
The WLAN menu appears.
X
Select Change SSIDChange SSID.
A dialog for entering the SSID appears.
X
Enter new SSID.
X
Select ¬.
X
Press the controller.
The vehicle with the new SSID will now be
shown on the device when a connection is
established.
i
Device connections established using the
previous SSID will no longer work after the
SSID is changed. You have to reconnect
these devices (Y page 42).
Bluetooth®settings
General information about
Bluetooth
®
Bluetooth®-capable devices, e.g. mobile
phones, have to comply with a certain profile
in order to be connected to COMAND. Every
Bluetooth®device has its own specific
Bluetooth®name.
Page 47

Bluetooth®technology is a standard for
short-range wireless data transmissions up to
approximately 10 meters. You can use
Bluetooth®to connect your mobile phone to
COMAND, to use the hands-free system,
establish an Internet connection, listen to
music using Bluetooth®Audio or to exchange
vCards, for example.
Bluetooth®is a registered trademark of
Bluetooth Special Interest Group (SIG) Inc.
Activating/deactivating Bluetooth
X
Press the Ø button.
®
The Vehicle menu appears.
X
To select System SettingsSystem Settings: slide V¬,
turn and press the controller.
A menu appears.
X
To select Activate BluetoothActivate Bluetooth: turn and
press the controller.
This switches Bluetooth®on O or off ª.
Setting the system language
This function allows you to determine the
language for the menu displays and the
navigation messages. The selected language
affects the characters available for entry.
i
The navigation announcements are not
available in all languages. If a language is
not available, the navigation
announcements will be in English.
i
When you set the system language, the
language of the Voice Control System will
change accordingly. If it is not supported
by the Voice Control System, English will be
selected.
X
Press the Ø button.
The Vehicle menu appears.
X
To select System SettingsSystem Settings: slide V¬,
turn and press the controller.
A menu appears.
Assigning a favorites button
X
To select LanguageLanguage: turn and press the
controller.
The list of languages appears. The # dot
indicates the current setting.
X
Select the desired language.
COMAND loads the selected language and
sets it.
Assigning a favorites button
X
Press the Ø button.
The system menu appears.
X
To select System SettingsSystem Settings: slide V¬
and press the controller.
A menu appears.
X
To select Favorite FunctionsFavorite Functions: turn and
press the controller.
A menu appears.
X
To select Assign FunctionAssign Function: press the
controller.
The list of predefined functions appears.
X
To select the desired function, e.g.
EntertainmentEntertainment: turn and press the
controller.
A menu appears.
X
Select the desired function, e.g. PlayPlay
More Like ThisMore Like This.
A menu with the prompt Please selectPlease select
a favorites button:a favorites button: appears.
X
To select the desired button, e.g. m:
turn and press the controller.
A message appears stating that the button
has been assigned the selected function.
i
A message appears for certain functions,
e.g. Assign station or media sourceAssign station or media source.
This explains how you can save the desired
station directly using the favorites function
menu in three steps.
i
If you are in the favorite functions menu,
you can assign a desired favorites button
by pressing and holding the relevant
number key, e.g. s, on the telephone
keypad (Y page 22) until you hear a tone.
45
System settings
Page 48

Assigning a favorites button
46
Overview of all current favorites:
X
Press the Ø button.
The system menu appears.
X
To select System SettingsSystem Settings: slide V¬
and press the controller.
A menu appears.
X
To select Favorite FunctionsFavorite Functions: turn and
press the controller.
A menu appears.
X
Select Overview of all currentOverview of all current
favoritesfavorites.
An overview of all the current favorites
System settings
appears.
To change the alias:
X
Press the Ø button.
The system menu appears.
X
To select System SettingsSystem Settings: slide V¬
and press the controller.
A menu appears.
X
To select Favorite FunctionsFavorite Functions: turn and
press the controller.
A menu appears.
X
Select Change AliasChange Alias.
A menu with the prompt Please selectPlease select
a favorites button:a favorites button: appears.
X
Select the desired favorites, e.g. n.
X
Enter the desired alias and select b.
The alias is changed.
i
Up to six characters are available for the
alias. An entry with fewer characters is also
possible.
To call up a favorite:
X
Press the g button.
You call up the favorites functions menu.
The g symbol lights up.
X
Press a favorites button, e.g. n.
This calls up the predefined function.
X
To exit the favorites function menu:
press the g button.
The favorite functions menu is closed.
i
If you have pressed the g button and
do not press any other buttons, the
favorites functions menu is exited
automatically after 16 seconds.
To reset favorite(s):
X
Press the Ø button.
The system menu appears.
X
To select System SettingsSystem Settings: slide V¬
and press the controller.
A menu appears.
X
To select Favorite FunctionsFavorite Functions: turn and
press the controller.
A menu appears.
X
Select Reset Favorite(s)Reset Favorite(s).
A menu with the prompt Please selectPlease select
a favorites button:a favorites button: appears.
X
Select the desired favorites, e.g. p or
Reset AllReset All.
A prompt appears asking whether you wish
to reset.
X
Select YesYes or NoNo.
If you select YesYes, the favorite is reset to its
pre-installed favorite function.
If you select NoNo, the process will be
canceled.
You can select the following predefined
functions in a menu, for example:
R
Off - Spoken DrivingOff - Spoken Driving
Recommendations On/OffRecommendations On/Off: you can
switch the current driving
recommendations on/off.
R
Sound - Sound MenuSound - Sound Menu: you can call up the
sound settings.
R
Apps - Mercedes-Benz AppsApps - Mercedes-Benz Apps: you can
call up the apps for online and Internet
functions.
i
You can also assign the favorites button
directly from a relevant function, such as in
the address book (Y page 152) or from the
radio menu (Y page 181).
Page 49
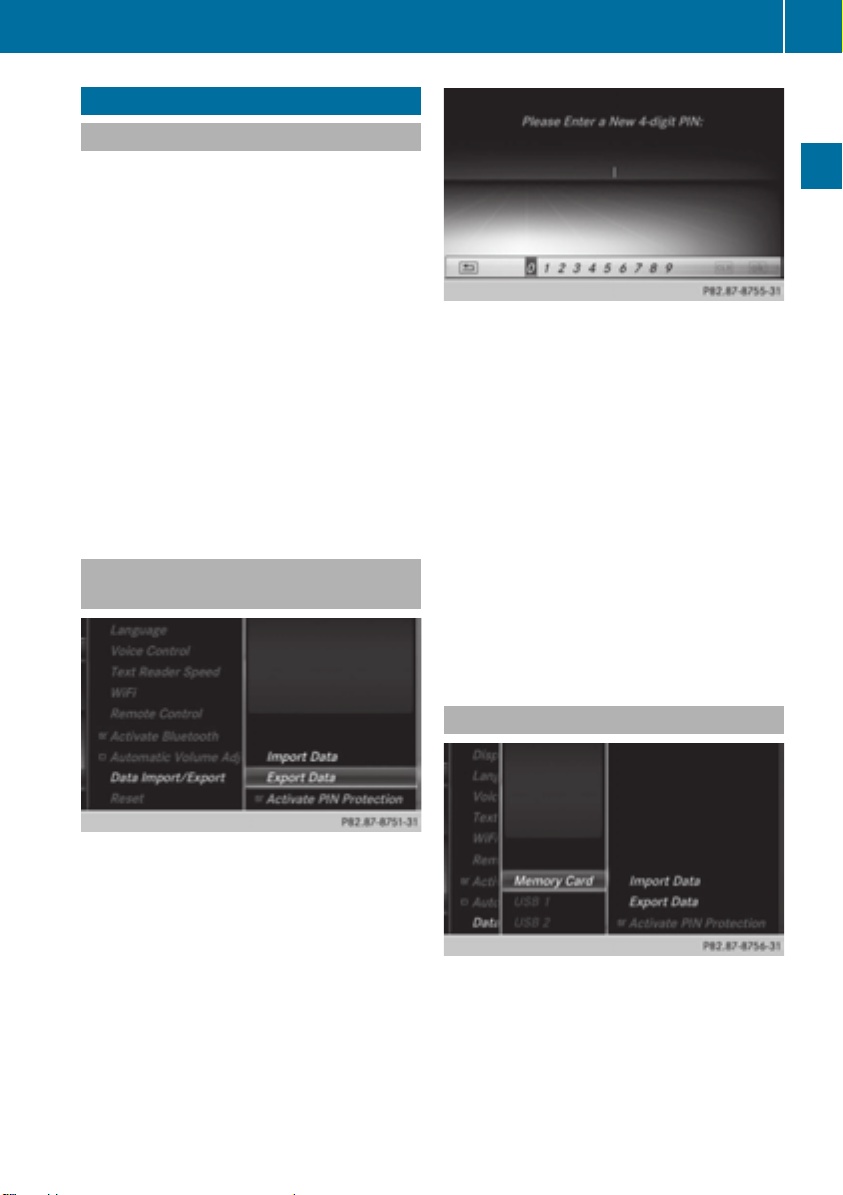
Importing/exporting data
General notes
!
Never remove the stick or card when
writing data to the USB stick or the memory
card. You may otherwise lose data.
Using this function, you can:
R
transfer your personal COMAND data from
one system/vehicle to another.
R
make a backup copy of your personal data
(export data) and load it again (import
data).
R
protect your data from unwanted export by
activating a pin prompt (presetting:
deactivated ª).
You can either use an SD memory card or a
USB storage device (e.g. a USB stick) as
temporary storage.
Activating/deactivating PIN
protection
Importing/exporting data
X
To enter the 4-digit PIN and select ¬:
turn and press the controller.
You will be prompted to enter the PIN
again.
X
Enter the PIN again and select ¬.
The PIN prompt now protects your personal
data from unwanted export.
i
If you deactivate your PIN protection, you
will first be prompted to enter your PIN. If
you have forgotten your PIN, an authorized
Mercedes-Benz Center can deactivate your
PIN protection for you. Alternatively, you
can deactivate PIN protection by resetting
your personal COMAND data
(Y page 48).
47
System settings
X
Press the Ø button.
The Vehicle menu appears.
X
To select System SettingsSystem Settings: slide V¬,
turn and press the controller.
A menu appears.
X
To select Data Import/ExportData Import/Export: turn and
press the controller.
X
Select Activate PIN ProtectionActivate PIN Protection.
Activate O or deactivate ª PIN
protection. When activating PIN protection,
you will be prompted to enter a PIN.
Importing/exporting data
X
Insert the SD memory card (Y page 195).
or
X
Connect a USB device (e.g. a USB memory
stick) (Y page 195).
X
Press the Ø button.
The Vehicle menu appears.
Page 50
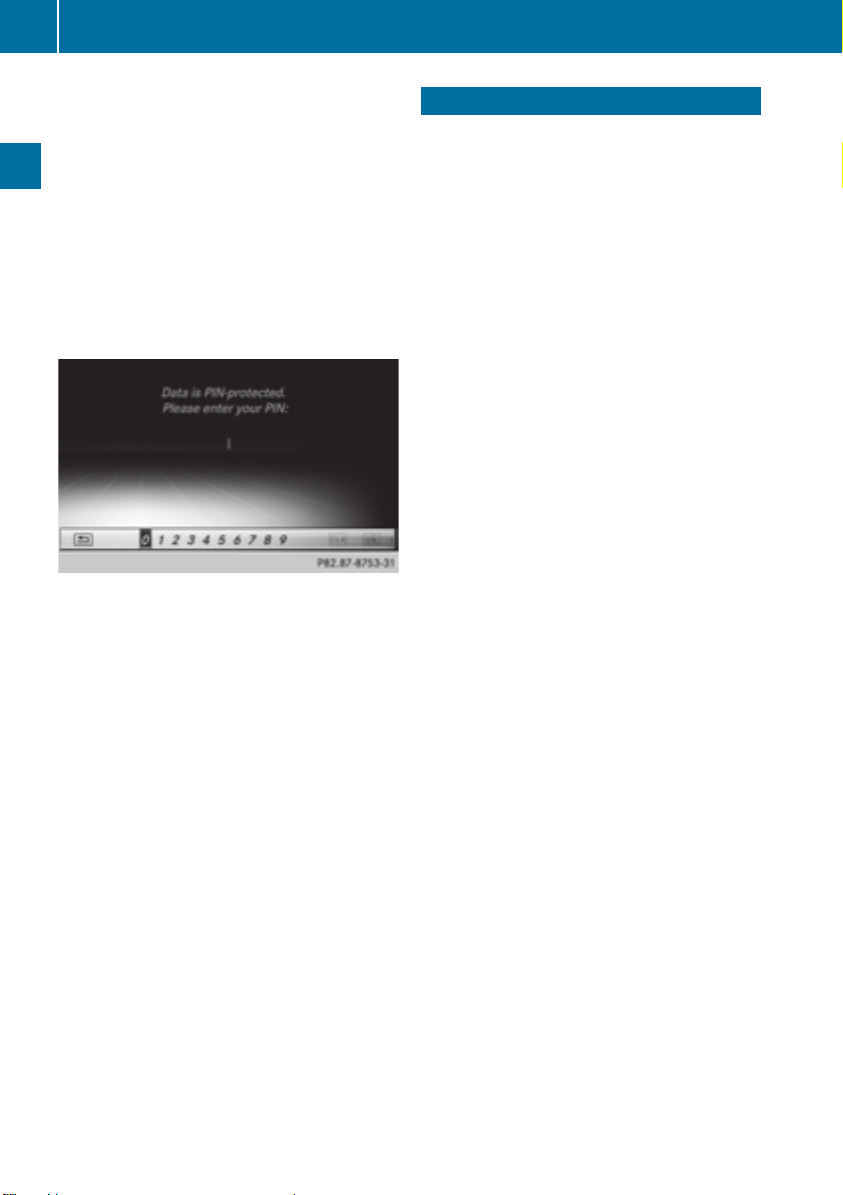
Reset function
48
X
To select System SettingsSystem Settings: slide V¬
and press the controller.
A menu appears.
X
To select Data Import/ExportData Import/Export: turn and
press the controller.
X
Select Import DataImport Data or Export DataExport Data.
i
If you import data such as address data,
the existing data on COMAND is
overwritten. You will see a message to this
effect. COMAND is restarted after the data
import.
System settings
If PIN protection is activated, a PIN prompt
appears when you select Export DataExport Data.
X
To enter the PIN: turn the controller and
press ¬.
PIN protection is deactivated.
X
To select Memory CardMemory Card, USB 1USB 1 or USB 2USB 2:
turn and press the controller.
This function exports all the data to the
selected disc.
A window appears with the message that
the data has been exported.
i
You can export address data, bookmarks,
system settings that you have made and
radio station lists, for example.
Personal music files in the MEDIA
REGISTER cannot be saved and imported
again using this function.
Mercedes-Benz is not liable for any loss of
data.
Reset function
You can completely reset COMAND to the
factory settings. Amongst other things, this
will delete all personal COMAND data. This
includes the station presets, entries in the
destination memory and in the list of previous
destinations in the navigation system and
address book entries. In addition, an
activated PIN protection, which you have
used to protect your data against unwanted
export, will be deactivated. Resetting is
recommended before selling or transferring
ownership of your vehicle, for example.
Data on the internal hard drive, e.g. music
files in the MEDIA REGISTER, will be deleted.
You can also delete music files from the
MEDIA REGISTER using the "Delete all media
files" function (Y page 206).
Mercedes-Benz is not liable for any loss of
data.
X
Press the Ø button.
The Vehicle menu appears.
X
To select System SettingsSystem Settings: slide V¬,
turn and press the controller.
A menu appears.
X
To select ResetReset: turn the controller and
press to confirm.
A prompt appears asking whether you wish
to reset.
X
Select YesYes or NoNo.
If you select NoNo, the process will be
canceled.
If you select YesYes, a prompt will appear again
asking whether you really wish to reset.
X
Select YesYes or NoNo.
If you select YesYes, a message will be shown.
COMAND is reset to the factory settings
and restarted.
If you select NoNo, the process will be
canceled.
Page 51

Your COMAND equipment .................. 50
Vehicle settings .................................. 50
Seats .................................................... 55
Climate control settings ..................... 59
Child-proof locks ................................. 63
360° camera ....................................... 64
Rear view camera ............................... 64
49
Vehicle functions
Page 52
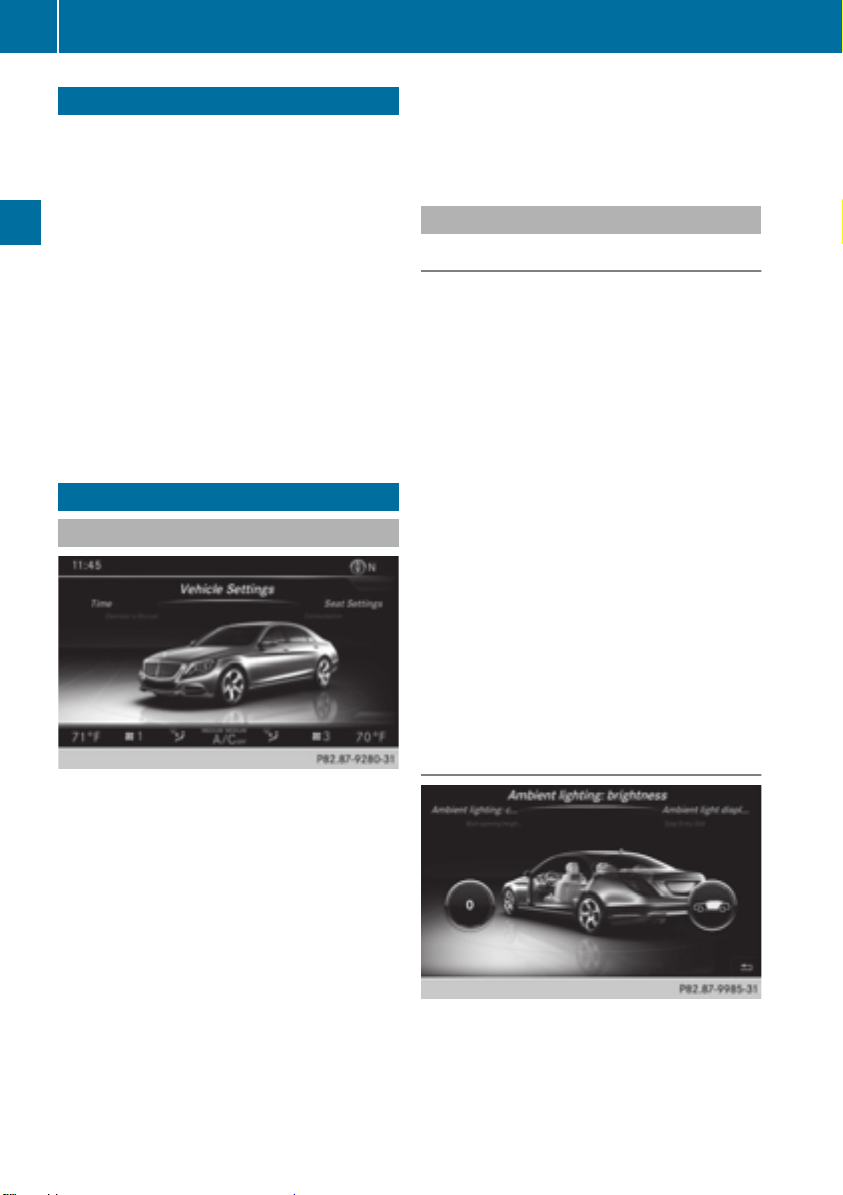
Vehicle settings
50
Your COMAND equipment
These operating instructions describe all
standard and optional equipment available
for your COMAND system at the time of
purchase. Country-specific differences are
possible. Please note that your
COMAND system may not be equipped with
all the features described. This also applies to
safety-relevant systems and functions.
Therefore, the equipment on your COMAND
system may differ from that in the
descriptions and illustrations. Should you
have any questions concerning equipment
and operation, please consult an authorized
Mercedes-Benz Center.
Vehicle functions
Vehicle settings
Calling up vehicle settings
Exiting the vehicle settings:
X
To select &: slide V¬ and press the
controller.
Ambient lighting
General notes
i You can set the following for the ambient
lighting:
R
Zone
The zone setting determines the area in
which the brightness setting is to be
applied. If the Complete zone is selected
for longer than 0.5 seconds, the
brightness of the Front zone is adopted
for the entire vehicle.
R
Brightness
This setting makes an additional change
to the brightness of the ambient lighting.
The brightness change is only effective
for the selected zone. For this reason, the
zone for which the brightness change is
to be active must be selected first.
R
Color
This setting changes the color of the
ambient lighting.
X
Press the Ø button on the controller.
The vehicle menu is displayed.
X
To select Vehicle SettingsVehicle Settings: turn and
press the controller.
The menu for the vehicle settings is active.
X
To select the desired vehicle setting: turn
and press the controller.
The main area with the setting element is
active.
Selecting a different vehicle setting:
X
To activate the menu for selecting the
vehicle setting: slide VZ the controller.
Setting the brightness of the zones
Page 53
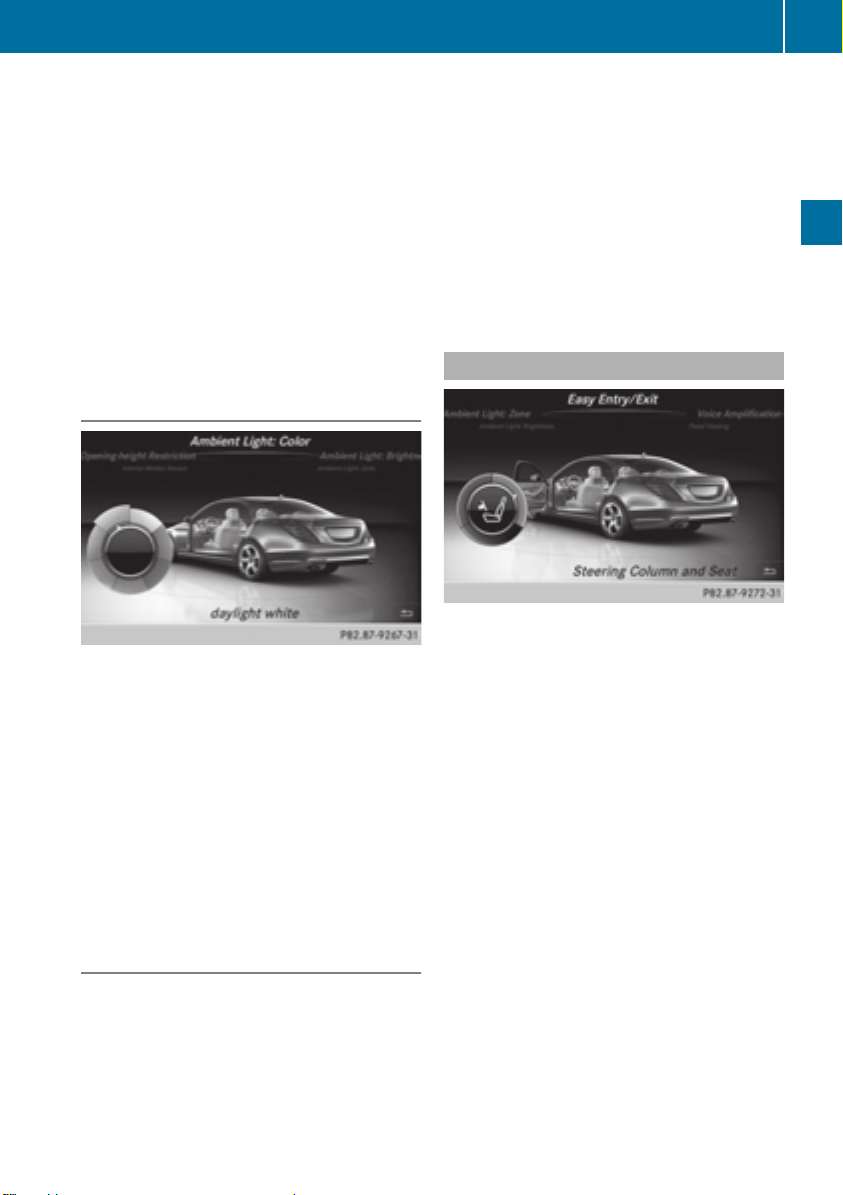
Vehicle settings
51
X
Call up vehicle settings (Y page 50).
X
To select Ambient Light: BrightnessAmbient Light: Brightness:
turn and press the controller.
The left-hand setting element is active. The
brightness value for the currently selected
zone is displayed.
X
To change the brightness value: turn the
controller.
X
To select a zone: slide VY and turn the
controller.
You can find further information in the vehicle
Operator's Manual.
Setting the color
i
Once a color is set, it is used for all zones.
The brightness of the color used can be set
separately for each zone.
X
Call up vehicle settings (Y page 50).
X
To select Ambient Light: ColorAmbient Light: Color: turn
and press the controller.
The setting element is active.
X
To select a color: turn the controller.
You can find further information in the vehicle
Operator's Manual.
X
Call up vehicle settings (Y page 50).
X
To select Ambient Light DisplayAmbient Light Display: turn
and press the controller.
The function switches on or off, depending
on the previous setting.
i
The brightness can be changed using the
control between the two displays.
You can find further information in the vehicle
Operator's Manual.
Setting the EASY-ENTRY/EXIT feature
The EASY-ENTRY/EXIT feature makes getting
in and out of your vehicle easier.
X
Call up vehicle settings (Y page 50).
X
To select Easy Entry/ExitEasy Entry/Exit: turn and
press the controller.
The setting element is active.
X
To change the setting: turn the controller.
You can find further information in the vehicle
Operator's Manual.
Vehicle functions
Activating/deactivating the ambient
lighting display
This display lighting adjustment function is
only available if the vehicle is not equipped
with the "Ambient lighting" package.
Page 54
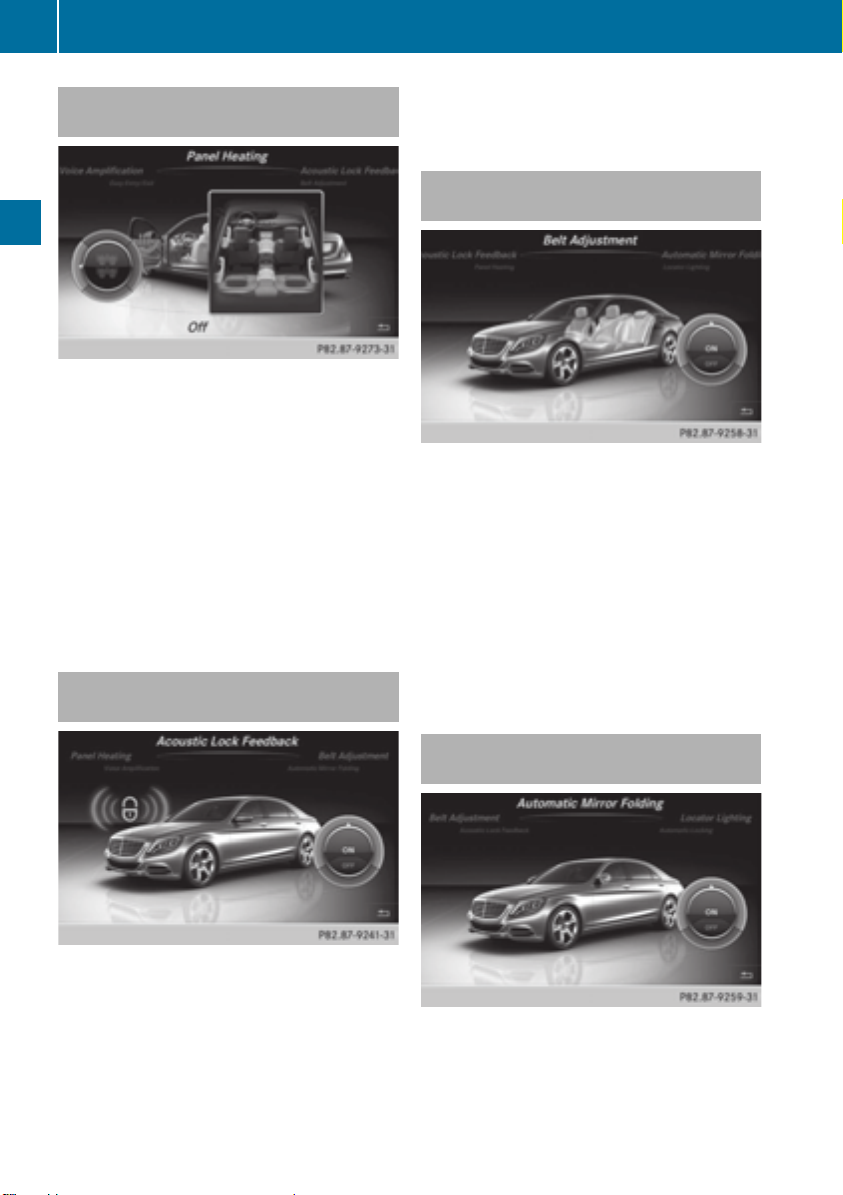
Vehicle settings
52
Activating/deactivating the panel
heating
The panel heating function warms the
surfaces with which the vehicle occupants
frequently come into contact. Activation of
Vehicle functions
the panel heating using COMAND as
described below only works if seat heating is
activated (see the vehicle Operator's
Manual).
X
Call up vehicle settings (Y page 50).
X
To select Panel HeatingPanel Heating: turn and press
the controller.
X
To change the setting: turn the controller.
Activating/deactivating the acoustic
locking confirmation
You can find further information in the vehicle
Operator's Manual.
Activating/deactivating the seat-belt
adjustment function
The seat-belt adjustment function adjusts the
driver's and front-passenger seat belt to the
upper body of the occupants.
X
Call up vehicle settings (Y page 50).
X
To select Belt AdjustmentBelt Adjustment: turn and
press the controller.
The function switches on or off, depending
on the previous setting.
You can find further information in the vehicle
Operator's Manual.
You can also set an audible signal to confirm
that the vehicle has been locked.
X
Call up vehicle settings (Y page 50).
X
To select Acoustic Lock FeedbackAcoustic Lock Feedback: turn
and press the controller.
The function switches on or off, depending
on the previous setting.
Activating/deactivating the
automatic folding mirror function
When the "Automatic mirror folding" function
is activated, the exterior mirrors fold in
automatically as soon as you lock the vehicle
from the outside. The exterior mirrors fold out
Page 55

Vehicle settings
53
automatically again as soon as you unlock the
vehicle.
X
Call up vehicle settings (Y page 50).
X
To select Automatic Mirror FoldingAutomatic Mirror Folding:
turn and press the controller.
The function switches on or off, depending
on the previous setting.
You can find further information in the vehicle
Operator's Manual.
Switching locator lighting on/off
If the locator illumination (surround lighting)
is switched on, as well as the turn signals, the
headlamps will also light up briefly when the
vehicle is unlocked.
X
Call up vehicle settings (Y page 50).
X
To select Locator LightingLocator Lighting: turn and
press the controller.
The function switches on or off, depending
on the previous setting.
You can find further information in the vehicle
Operator's Manual.
Switching the automatic locking
feature on/off
When the automatic locking feature is
activated, the vehicle is locked automatically
when the ignition is switched on and the
vehicle is traveling faster than walking pace.
X
Call up vehicle settings (Y page 50).
X
To select Automatic LockingAutomatic Locking: turn and
press the controller.
The function switches on or off, depending
on the previous setting.
You can find further information in the vehicle
Operator's Manual.
Setting the delayed switch-off time
Interior lighting delayed switch-off
Vehicle functions
The interior lighting is activated for the
duration of the delayed switch-off time when
the key is removed from the ignition lock.
Page 56
Vehicle settings
54
X
Call up vehicle settings (Y page 50).
X
To select Interior Lighting DelayedInterior Lighting Delayed
Switch-offSwitch-off: turn and press the controller.
The setting element is active.
X
To change the delayed switch-off time: turn
the controller.
You can find further information in the vehicle
Operator's Manual.
Exterior lighting delayed switch-off
Vehicle functions
The surround lighting is activated for the
duration of the delayed switch-off time when
the vehicle is unlocked using the remote
control key.
X
Call up vehicle settings (Y page 50).
X
To select Exterior Lighting DelayedExterior Lighting Delayed
Switch-offSwitch-off: turn and press the controller.
The setting element is active.
X
To change the delayed switch-off time: turn
the controller.
You can find further information in the vehicle
Operator's Manual.
Arming/deactivating the tow-away
alarm
An audible and visual alarm is triggered if your
vehicle's angle of inclination is altered while
the tow-away alarm is armed. This can occur
if the vehicle is jacked up on one side, for
example.
X
Call up vehicle settings (Y page 50).
X
To select Tow-away AlarmTow-away Alarm: turn and press
the controller.
The function switches on or off, depending
on the previous setting.
Arming/deactivating the interior
motion sensor
When the interior motion sensor is armed, a
visual and audible alarm is triggered if
movement is detected in the vehicle interior.
This can occur if someone reaches into the
vehicle interior without authorization, for
example.
Page 57
Seats
55
X
Call up vehicle settings (Y page 50).
X
To select Interior Motion SensorInterior Motion Sensor: turn
and press the controller.
The function switches on or off, depending
on the previous setting.
Activating/deactivating the trunk lid
opening height restriction
Activating the trunk lid opening height
restriction allows you to avoid bumping the
trunk lid on a low garage ceiling, for example.
X
Call up vehicle settings (Y page 50).
X
To select Trunk Opening-heightTrunk Opening-height
RestrictionRestriction: turn and press the
controller.
The function switches on or off, depending
on the previous setting.
Seats
Overview
Using the T button next to the controller
or the seat settings menu item in the vehicle
menu, you can call up the following
adjustment functions:
R
backrest side bolsters
R
lumbar
R
shoulder area
R
massage
R
dynamics
R
seat heating balance
i
You also can save and call up the current
settings of a seat function using the
memory button and the corresponding
memory position switch (see the vehicle
Operator's Manual).
The massage function cannot be started or
stopped using the memory button.
Selecting the adjustment function
and seat
X
Press the T button.
The seat settings menu is shown.
or
X
To select VehicleVehicle in the main function bar:
turn the controller and press to confirm.
X
To select Seat SettingsSeat Settings from the menu:
turn the controller and press to confirm.
The menu for selecting seat functions is
activated.
X
To select the required seat function: turn
and press the controller.
X
To switch between the DriverDriver and FrontFront
PassengerPassenger: slide XVY the controller.
Vehicle functions
Page 58

Seats
56
Adjustment functions
Adjusting the backrest side bolsters
X
Call up the seat functions (Y page 55).
X
To select Backrest SidesBackrest Sides: turn and press
the controller.
Vehicle functions
X
To select the seat: slide XVY the
controller.
X
To change the setting: turn the controller.
You will see the changes you have made in
the settings display.
X
To exit the menu: press the % button.
Adjusting the seat contour in the
lumbar region of the seat backrest
X
To activate the setting element: press the
controller.
X
To change the setting: slide ZV¬ or
XVY the controller.
The change will be visible in the setting
element.
X
To exit the menu: press the % button.
Adjusting the shoulder area
X
Call up the seat functions (Y page 55).
X
To select the ShouldersShoulders: turn the
controller and press to confirm.
X
To select the seat: slide XVY the
controller.
X
To change the setting: turn the controller.
You will see the changes you have made in
the settings display.
X
To exit the menu: press the % button.
This function allows you to adjust the air
cushions in the lumbar region of the backrest
(4-way lumbar support).
X
Call up the seat functions (Y page 55).
X
To select LumbarLumbar: turn the controller and
press to confirm.
X
To select the seat: slide XVY the
controller.
Adjusting the driving dynamics
X
Call up the seat functions (Y page 55).
X
To select the seat: slide XVY the
controller.
Page 59

X
To select Dynamic Multicontour SeatDynamic Multicontour Seat:
turn the controller and press to confirm.
You can select:
R
00: Off
R
11: Level 1 (weak)
R
22: Level 2 (strong)
X
To select the setting: turn the controller.
X
To exit the menu: press the % button.
Seat heating balance
The Balance function controls the distribution
of heat on the seat backrest and cushion.
The balance function influences the currently
set heating level of the seat heating (see the
vehicle Operator's Manual).
X
Call up the seat functions (Y page 55).
X
To select Seat Heating BalanceSeat Heating Balance: turn
and press the controller.
X
To select the seat: slide XVY the
controller.
X
To change the setting: turn the controller.
You will see the changes you have made in
the settings display.
The settings represent the following:
R
00 — the backrest and seat cushion are
evenly heated according to the setting
selected with the seat heating button.
R
11 to 33 —the heat output to the seat cushion
is reduced one level at a time.
R
-1-1 to -3-3 — the heat output to the backrest
is reduced one level at a time.
X
To exit the menu: press the % button.
Seats
Massage programs
Overview
You can select the following massage
programs:
R
1: Hot Relaxing Massage, Back1: Hot Relaxing Massage, Back
Relaxing massage program starting in the
pelvic area, warm pressure points can be
felt, full back massage, stretching the
pelvic area, ending with gentle soothing
movements
R
2: Hot Relaxing Massage, Shoulders2: Hot Relaxing Massage, Shoulders
Relaxing massage program starting in the
pelvic area, warm pressure points can be
felt, full back massage, stretching the
pelvic area, ending with gentle soothing
movements
R
3: Activating Massage3: Activating Massage
Activating massage through increasing
twin-waves and then soothing movements
R
4: Classic Massage4: Classic Massage
Massage with increasing waves, soothing
movements
R
5: Mobilizing Massage5: Mobilizing Massage
Mobilization of the spinal column and the
complete upper body by means of pressure
point mobilizing massage at chest height
R
6: Active Workout6: Active Workout
The Active Workout program requires your
active participation. It is suitable for
training your stomach muscles during a
traffic jam, for example, by means of
targeted tensing and relaxing. You can use
the program to be sporty in the vehicle.
57
Vehicle functions
Page 60

58
Seats
As soon as you feel a pressure point in the
backrest cushion, this indicates that you
should press against this point.
-
As soon as you feel pressure on your
back, press against it.
-
Keep the pressure under your feet even.
Do not wedge yourself against the
pedals.
-
You will feel how your stomach muscles
tense.
-
Continue to breath normally, do not hold
your breath.
-
When the pressure in the backrest
cushion stops, stop pressing against it
and relax briefly.
Vehicle functions
Selecting a massage program
Resetting all adjustments
X
Call up the seat functions (Y page 55).
X
Select a seat (Y page 55).
X
To select ResetReset: turn the controller and
press to confirm.
X
To select the seat: slide XVY the
controller.
X
To reset: press the controller.
A prompt appears.
X
To select YesYes or NoNo: turn the controller and
press to confirm.
If you select NoNo, the process will be
canceled.
After you select YesYes, all seat adjustments
are reset to the default values (factory
setting).
X
Call up the seat functions (Y page 55).
X
To select MassageMassage: turn the controller and
press to confirm.
X
To select the seat: slide XVY the
controller.
X
To select a massage program (1 to 6): turn
and press the controller.
The massage program runs for
approximately 15 to 25 minutes,
depending on the setting.
X
To change the massage intensity: turn the
controller to : and press to confirm.
The intensity changes between gentle and
vigorous each time the controller is
pressed.
X
To exit the menu: press the % button.
Page 61

Climate control settings
Basic settings
Climate control bar
Climate control settings
R
Airflow left and right, displayed as J and
the current setting, e.g. 1.
R
Air distribution left and right, displayed by
the current setting, e.g. O.
Switching climate control on/off
59
Climate control bar
:
Adjusts temperature, airflow and air
distribution, left, as well as displaying the
current setting
;
Calls up the climate control menu,
displays the current cooling and climate
mode setting (airflow setting)
=
Adjusts temperature, airflow and air
distribution, right, as well as displaying
the current setting
Calling up the climate control menu:
X
To switch to the climate control bar: slide
V¬ the controller.
X
To select from climate control bar ;: turn
and press the controller.
The menu for selecting climate control
functions is activated.
X
To select the desired climate control
function: turn and press the controller.
The selected climate control function
appears.
The following climate control functions can
also be called up directly from the climate
control bar:
R
Temperature, left and right, displayed as
the actual temperature, e.g. 20 †.
R
Temperature, left and right, displayed as
the actual temperature, e.g. 68 ‡ (20 †).
X
Call up the climate control menu
(Y page 59).
X
To switch to the footer: slide V¬ the
controller.
X
To select ClimateClimate CtrlCtrl OnOn: turn and press
the controller.
X
Switch the climate control function on O
or off ª. If climate control is switched off,
the adjustment functions are deactivated.
Synchronizing the climate control
settings
With the synchronize option, you can decide
whether you wish to activate the climate
control settings for all zones together or
separately.
X
Call up the climate control menu
(Y page 59).
X
To switch to the footer: slide V¬ the
controller.
X
To select Sync.Sync.: turn the controller and
press to confirm.
X
Switch the synchronization function on
O (left and right synchronized) or off ª
(left and right separate).
Vehicle functions
Page 62

Climate control settings
60
With the synchronization function switched
off, you can alternate between driver and
front passenger.
X
To switch from the footer to the main area:
slide VZ the controller.
X
To switch between left and right: slide
XVY the controller.
Not all climate control functions allow
switching between the driver and front
passenger.
i
The synchronize function can also be
deactivated by sliding the controller to the
left or right in the setting area. The setting
elements for the driver and front passenger
are then shown separately once again.
Vehicle functions
Further information (see the vehicle
Operator's Manual).
Switching to the rear-compartment air
conditioning setting
You can also set the rear-compartment air
conditioning from the front.
X
Call up the climate control menu
(Y page 59).
X
To switch to the footer: slide V¬ the
controller.
X
To select the Rear SettingRear Setting: turn and
press the controller.
X
You switch to the rear-compartment air
conditioning setting. The vehicle interior
display changes accordingly.
X
To switch the setting back to the front
again: select Return to FrontReturn to Front.
After a short time, COMAND automatically
switches the adjustment functions back to
the front.
X
Call up the climate control menu
(Y page 59).
X
To switch to the footer: slide V¬ the
controller.
X
To select A/CA/C: turn and press the controller.
X
Switch cooling with air dehumidification on
O or off ª.
i
The current status of the cooling function
is displayed in the climate control bar: AC
on – activated, AC off – deactivated
(Y page 59).
Setting the temperature
X
To select the current temperature in the
climate control bar on the left or right: turn
and press the controller.
The temperature setting scale appears.
X
To change the setting: turn the controller.
X
To close the temperature setting scale:
press the controller.
i
You can also set the temperature using
the climate control menu, i.e. as described
for setting the footwell temperature
(Y page 61).
Switching cooling with air
dehumidification on/off
Activating the cooling with air
dehumidification facilitates the cooling of the
vehicle interior even with high outside
temperatures.
Page 63

Climate control settings
61
Setting the airflow
X
To select J on the left or right in the
climate control bar: turn and press the
controller.
The airflow setting scale appears.
X
To change the setting: turn the controller.
X
To close the temperature setting scale:
press the controller.
i
You can also set the airflow using the
climate control menu, i.e. as described for
setting the footwell temperature
(Y page 61).
Setting the air distribution
for setting the footwell temperature
(Y page 61).
Further settings
Adjusting the footwell temperature
The footwell temperature can be lowered or
increased in comparison with the
temperature setting in the front.
X
Call up the climate control menu
(Y page 59).
X
To select Adjust FootwellAdjust Footwell: turn and
press the controller.
X
If necessary, change sides: slide XVY the
controller.
X
To change the setting: turn and press the
controller.
Exiting a menu
X
Press the % button.
Vehicle functions
X
To select the current air distribution display
on the left or right in the climate control bar,
e.g. O: turn and press the controller.
The air distribution setting scale appears.
X
To change the setting: turn the controller.
X
To close the temperature setting scale:
press the controller.
i
You can also set the air distribution using
the climate control menu, i.e. as described
Adjusting the climate mode settings
By setting the climate mode, you determine
the strength of the airflow based on the air
Page 64
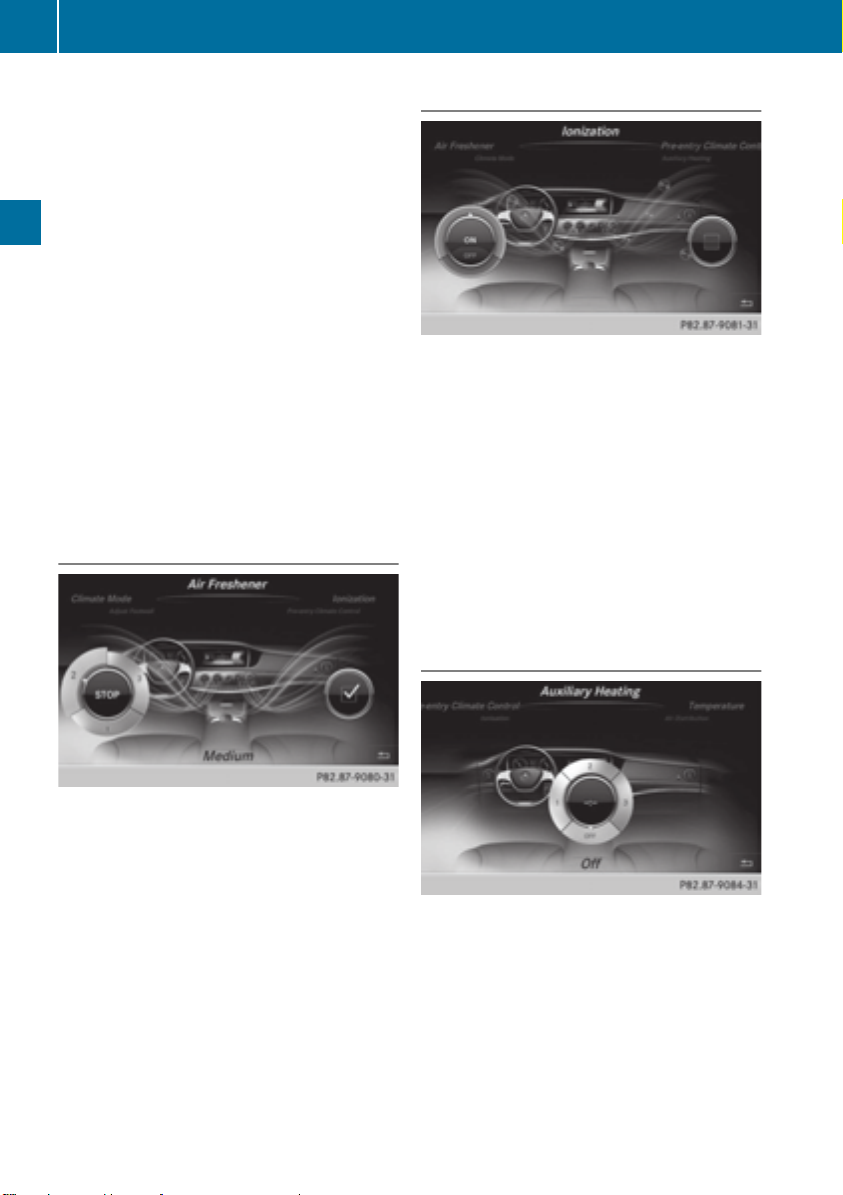
Climate control settings
62
distribution set. The setting is only active
when the air-conditioning system is set to
"AUTO".
X
Call up the climate control menu
(Y page 59).
X
To select Climate ModeClimate Mode: turn and press
the controller.
X
If necessary, change sides: slide XVY the
controller.
X
To change the setting: turn and press the
controller.
Exiting a menu
X
Press the % button.
i
The current climate mode setting is set in
Vehicle functions
the climate control bar: DIFFUSE, MEDIUM
or FOCUS (Y page 59).
Starting/stopping the perfume
atomizer
Switching the ionization on/off
The ionization has a cleansing effect on the
air in the vehicle interior. Further information
(see the vehicle Operator's Manual).
X
Call up the climate control menu
(Y page 59).
X
To select IonizationIonization: turn and press the
controller.
You switch it on or off, depending on the
previous status.
Exiting a menu
X
Press the % button.
Auxiliary heating
The perfume atomizer makes it possible to
scent the air in individual compartments in
the vehicle interior. Further information (see
the vehicle Operator's Manual).
X
Call up the climate control menu
(Y page 59).
X
To select Air FreshenerAir Freshener: turn and press
the controller.
Depending on the previous status, you start
or stop the perfume atomizer.
X
To set the intensity: turn the controller
when the atomizer is switched on.
Exiting a menu
X
Press the % button.
You can pre-set three departure times for
automatic activation of the auxiliary heating.
Selecting the pre-set time:
X
Call up the climate control menu
(Y page 59).
X
To select Auxiliary HeatingAuxiliary Heating: turn and
press the controller.
X
Turn the controller.
Page 65
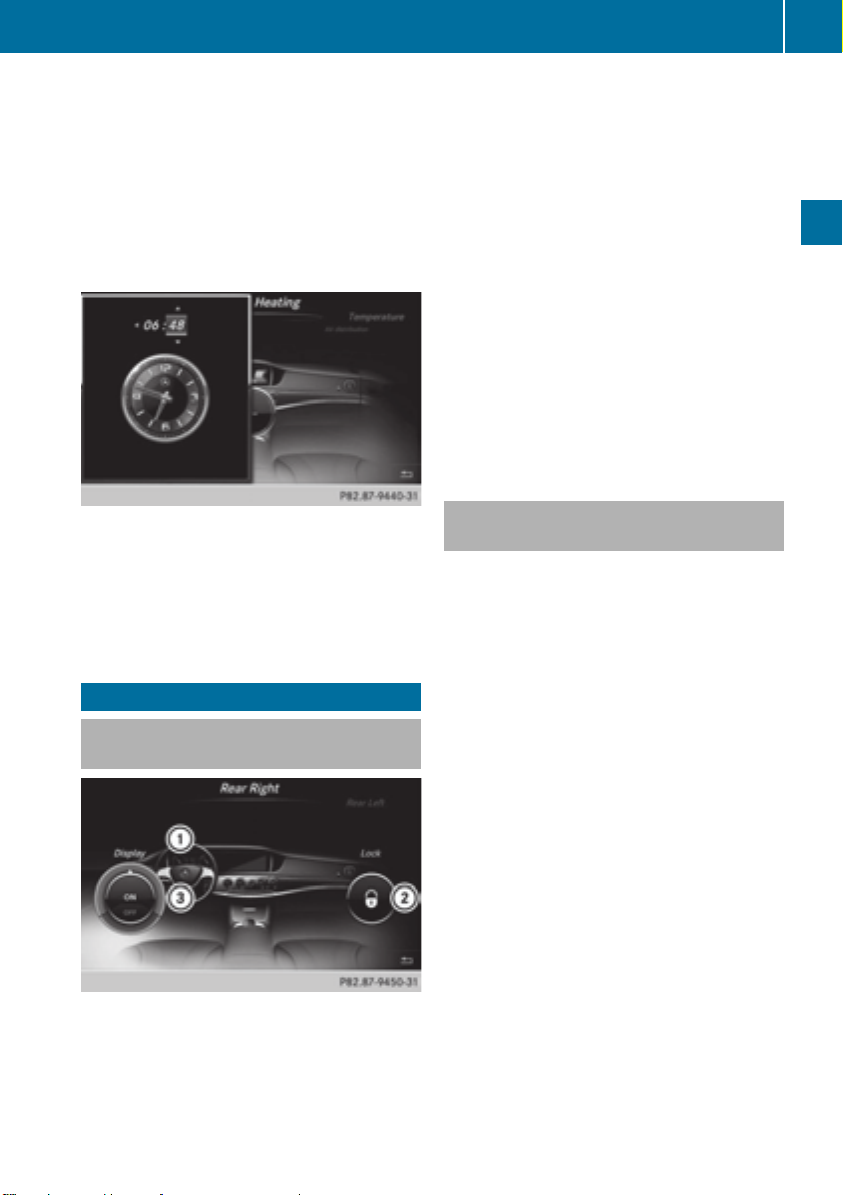
Child-proof locks
63
Changing the pre-set time:
X
Call up the climate control menu
(Y page 59).
X
To select Auxiliary HeatingAuxiliary Heating: turn and
press the controller.
X
To select the departure time that will be
changed: turn and press the controller.
A menu for changing the time opens.
X
To select the required setting element
(analog clock, hours or minutes): slide V
Z and VYthe controller.
X
To change the setting: turn the controller.
X
To exit the menu: press the controller.
Child-proof locks
Switching the rear compartment
displays on/off
The function serves to switch the rear
compartment display on/off as well as to
lock/unlock it.
X
Press the Ø button.
The Vehicle menu appears.
X
To select Parental ControlParental Control: turn and
press the controller.
The menu to select the side in the rear
compartment is activated.
X
Select Rear LeftRear Left or Rear RightRear Right.
X
To switch DisplayDisplay on/off: turn the
controller.
Exiting the vehicle settings:
X
To select &: slide V¬ and press the
controller.
Locking/unlocking rear
compartment displays
X
Press the Ø button.
The Vehicle menu appears.
X
To select Parental ControlParental Control: turn and
press the controller.
The menu to select the side in the rear
compartment is activated.
X
Select Rear LeftRear Left or Rear RightRear Right.
X
To select LockLock to lock/unlock the rear
compartment displays: slide VY and press
the controller.
The display is locked, a corresponding
message with & appears on the screen.
UnlockUnlock appears in the display.
Exiting the vehicle settings:
X
To select &: slide V¬ and press the
controller.
Vehicle functions
:
Unlocked left rear compartment display
;
Control to lock/unlock the display
=
Control to switch the display on/off
i
The volume can still be adjusted if you
have locked the rear compartment display.
It can also be switched on/off using the
integrated switch.
Page 66

Rear view camera
64
360° camera
Important notes
The 360° camera is only an aid. It is not a
replacement for your attention to your
immediate surroundings. You are always
responsible for safe maneuvering and
parking. Make sure that no persons or
animals are in the maneuvering range.
Overview
The 360° camera surveys the vehicle
surroundings and assists you, for example
when parking or at exits with reduced
visibility.
Vehicle functions
For a detailed description of the 360°
camera, see the separate vehicle Operator's
Manual.
Settings for the COMAND 360°
camera
Activating/deactivating using the reverse
gear:
X
Press the Ø button on the controller.
The vehicle menu is displayed.
X
To switch to the menu bar: slide V¬ the
controller.
X
To select SettingsSettings: turn and press the
controller.
X
Select 360° Camera360° Camera.
X
Select Activation by R gearActivation by R gear.
The function is switched on O or off ª,
depending on the previous status.
i
When you activate this function, the
image from the 360° camera is displayed
when you select reverse gear. The other
activation options are always available as
well.
Opening the camera cover:
X
To select Open Camera CoverOpen Camera Cover: turn and
press the controller.
Displaying the 360° camera image
The 360° camera image can be displayed if:
R
your vehicle is equipped with a 360°
camera and
R
COMAND is switched on (Y page 23) and
R
the 360° Camera360° Camera function is activated
Displaying the image of the 360° camera:
X
Press the Ø button on the controller.
A menu appears.
X
Select 360° Camera360° Camera.
The 360° camera image appears in splitscreen mode.
If the function is activated, the COMAND
display automatically switches back to the
previously selected display as soon as you
shift out of the forward or reverse gear, or if
the vehicle exceeds a speed of approx.
30 km/h.
Manually switching the display
X
To select &: slide V¬ and press the
controller.
Rear view camera
The rear view camera is only an aid. It is not
a replacement for your attention to your
immediate surroundings. You are always
responsible for safe maneuvering and
parking. When maneuvering or parking, make
sure that there are no persons, animals or
objects in the area in which you are
maneuvering.
The image from the rear view camera is
shown in the COMAND display when reverse
gear is engaged if:
R
your vehicle is equipped with a rear view
camera
R
COMAND is switched on
R
the Activation by R gearActivation by R gear function is
activated
If the function is activated, the COMAND
display will automatically switch back to the
Page 67

Rear view camera
65
previously selected display as soon as you
shift out of reverse gear.
You can find further information about the
rear view camera in the vehicle Operator's
Manual.
X
Switch on COMAND (Y page 23).
X
Press the Ø button.
The vehicle menu is displayed.
X
Slide VÆ the controller.
X
To select System SettingsSystem Settings: turn and
press the controller.
X
Select Rear View CameraRear View Camera.
The rear view camera menu appears.
X
Select Activation by R gearActivation by R gear.
The function is switched on O or off ª,
depending on the previous status.
When you start the vehicle and engage
reverse gear, the camera cover opens
automatically if the function is activated.
The area behind the vehicle is shown in the
COMAND display with guide lines (see the
vehicle Operator's Manual).
The rear view camera can detect moving and
stationary objects. If, for example, a
pedestrian or another vehicle is detected,
these objects are marked with bars. The
system is only able to detect and mark
stationary objects when your vehicle is
moving. By contrast, stationary objects will
always be detected and marked.
Switching object detection on/off
X
To select Object DetectionObject Detection in the rear
view camera menu: turn and press the
controller.
The function is switched on O or off ª,
depending on the previous status.
Opening the camera cover for cleaning
X
To select Open Camera CoverOpen Camera Cover in the rear
view camera menu: turn and press the
controller.
The PleasePlease Wait...Wait... message appears for
approximately three seconds.
The camera cover opens. The camera cover
closes automatically when you lock the
vehicle or pull away.
Vehicle functions
Page 68

66
Page 69

Your COMAND equipment .................. 68
Introduction ......................................... 68
Basic settings ...................................... 72
Destination input ................................ 75
Route guidance ................................... 88
Real-time traffic reports ................... 101
Storing destinations ......................... 105
Map functions ................................... 108
Navigation functions ........................ 116
Problems with the navigation sys-
tem ..................................................... 119
67
Navigation
Page 70

Introduction
68
Your COMAND equipment
These operating instructions describe all
standard and optional equipment available
for your COMAND system at the time of
purchase. Country-specific differences are
possible. Please note that your
COMAND system may not be equipped with
all the features described. This also applies to
safety-relevant systems and functions.
Therefore, the equipment on your COMAND
system may differ from that in the
descriptions and illustrations. Should you
have any questions concerning equipment
and operation, please consult an authorized
Navigation
Mercedes-Benz Center.
Introduction
Important safety notes
WARNING
G
If you operate information systems and
communication equipment integrated in the
vehicle while driving, you will be distracted
from traffic conditions. You could also lose
control of the vehicle. There is a risk of an
accident.
Only operate the equipment when the traffic
situation permits. If you are not sure that this
is possible, park the vehicle paying attention
to traffic conditions and operate the
equipment when the vehicle is stationary.
You must observe the legal requirements for
the country in which you are currently driving
when operating COMAND.
COMAND calculates the route to the
destination without taking account of the
following, for example:
R
traffic lights
R
stop and give way signs
R
merging lanes
R
parking or stopping in a no parking/no
stopping zone
R
other road and traffic rules and regulations
R
narrow bridges
COMAND can give incorrect navigation
commands if the actual street/traffic
situation does not correspond with the digital
map's data. Digital maps do not cover all
areas nor all routes in an area. For example,
a route may have been diverted or the
direction of a one-way street may have
changed.
For this reason, you must always observe
road and traffic rules and regulations during
your journey. Road and traffic rules and
regulations always have priority over the
system's driving recommendations.
Navigation announcements are intended to
direct you while driving without diverting your
attention from the road and driving.
Please always use this feature instead of
consulting the map display for directions.
Looking at the icons or map display can
distract you from traffic conditions and
driving, and increase the risk of an accident.
General notes
Operational readiness of the navigation
system
The navigation system must determine the
position of the vehicle before first use or
whenever operational status is restored.
Therefore, you may have to drive for a while
before precise route guidance is possible.
GPS reception
Among other things, correct functioning of
the navigation system depends on GPS
reception. In certain situations, GPS
reception may be impaired, there may be
interference or there may be no reception at
all, e.g. in tunnels or parking garages.
i
Using roof carriers may impair the correct
functioning of a roof antenna (phone,
satellite radio, GPS).
Page 71

Entry restriction
For vehicles in certain countries, there is a
data entry restriction.
The restriction is active from a vehicle speed
of above approximately 3 mph (5 km/h). As
soon as the speed falls below approximately
2 mph (3 km/h), the restriction becomes
inactive.
When the restriction is active, certain entries
cannot be made. This will be indicated by the
fact that certain menu items are grayed out
and cannot be selected.
The following entries are not possible, for
example:
R
entering the destination city and street
R
entering a destination via the map
R
entering POIs in the vicinity of a city or via
a name search
R
editing entries
R
using the number keypad for direct entry
Other entries are possible, such as entering
points of interest in the vicinity of the
destination or current position.
Introduction
69
Navigation
Z
Page 72
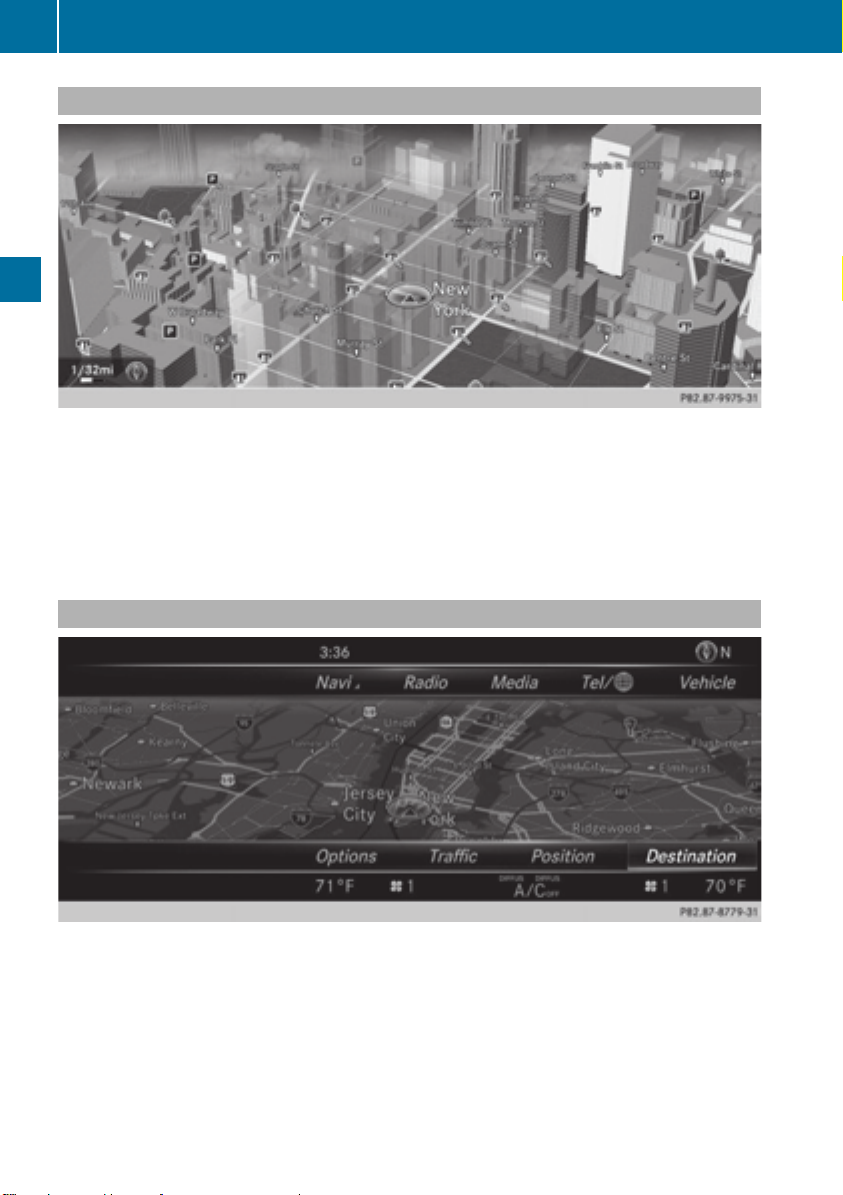
Introduction
70
Switching to navigation mode
Navigation
X
Press the ß button.
The map shows the vehicle's current position.
Additional activation option:
X
To activate the menu: slide ZV the controller (e.g. in radio mode).
X
To select NaviNavi: turn and press the controller.
Showing/hiding the menu
Using the menu, you can make a destination entry or select the navigation settings, for
example.
X
To show: press the controller when the map appears.
Route guidance not active: DestinationDestination is highlighted. Route guidance active: y is
marked.
i
Route guidance inactive: no destination has been entered yet and no route has been
calculated.
Page 73
Introduction
Route guidance is active: the destination has been entered, the route has been calculated.
The display shows the route, changes of direction and lane recommendations. Navigation
announcements guide you to your destination.
X
To hide: press the % button.
or
X
Slide ZV the controller.
Full screen symbol : appears.
X
Press the controller.
71
Navigation
Moving the map
Requirement: the map is in full screen mode, the menu is faded out (Y page 70).
X
Slide XVY, ZVÆ or aVb the controller.
The crosshair is shown. The map moves in the corresponding direction under the crosshair.
Z
Page 74

Basic settings
72
Basic settings
Setting route type and route options
X
To switch to navigation mode: press the
Ø button.
X
To show the menu: press the controller.
X
Select SettingsSettings: turn and press the
controller.
X
Select Route SettingsRoute Settings.
X
Select a route type.
A filled circle indicates the current
selection.
R
Active route guidance: COMAND
calculates a new route.
Navigation
R
Inactive route guidance: COMAND uses
the selection as the new setting.
i
Route guidance active: a destination has
been entered and the route has been
calculated.
Route guidance inactive: no destination
has been entered yet and no route has been
calculated yet.
Fast RouteFast Route
COMAND calculates a route
with a short journey time.
DynamicDynamic
TrafficTraffic
RouteRoute
Based on the Fast RouteFast Route
route type and includes
traffic reports on the route
for the route guidance.
EconomicEconomic
RouteRoute
COMAND calculates an
economical route. The
journey may take slightly
longer compared to taking
the fast route.
ShortShort
RouteRoute
X
To calculate alternative routes: select
COMAND calculates a
shorter route.
Calculate Alternative RoutesCalculate Alternative Routes.
Switch the function on O or off ª.
Function activated: after each route
calculation, route alternatives are offered
that correspond to the local conditions
(Y page 97).
i
If desired, you can have COMAND
calculate alternative routes even during
route guidance (Y page 97).
X
To avoid/use route options: select one
of the options.
O: using or avoiding route options is
enabled
ª: using or avoiding route options is
disabled
R
Avoid AreaAvoid Area(Y page 114)
COMAND enables you to avoid areas you
do not wish to drive through.
R
Avoid HighwaysAvoid Highways
R
Avoid FerriesAvoid Ferries
R
Avoid Auto TrainsAvoid Auto Trains
R
Avoid TunnelsAvoid Tunnels
R
Avoid Unpaved RoadsAvoid Unpaved Roads
The function is not available in all countries.
R
Use Vignette RoadsUse Vignette Roads
The function is not available in all countries.
R
Use Toll RoadsUse Toll Roads
R
Use Carpool LanesUse Carpool Lanes
If your vehicle meets the access conditions
for carpool lanes, you can use this function.
Navigation includes carpool lanes if the
carpool lanes option is activated.
i
Depending on local conditions, COMAND
may not always be able to include all route
options. A route may include a ferry, for
instance, even though Avoid FerriesAvoid Ferries is
enabled. COMAND will notify you of this
Page 75

Basic settings
73
visually as well as through a navigation
message.
i
To avoid routes requiring a special toll
sticker: the route calculation excludes
routes which require you to pay a timebased fee (vignette). A vignette allows
temporary use of the route network.
Example time limits are 10 days, 2 months
or 1 year.
To avoid toll roads: the route calculation
excludes routes which require you to pay a
usage fee (toll).
X
To exit a menu: slide VY the controller.
X
To use toll roads: turn and press the
controller.
A menu appears.
X
Select an option.
The options include using roads that
require cash payment or electronic billing,
or switching off the function.
Selecting announcements
X
To switch to navigation mode: press the
Ø button.
X
To show the menu: press the controller.
X
To select SettingsSettings: turn and press the
controller.
X
Select AnnouncementsAnnouncements.
X
Select an option.
Switch the option on O or off ª.
AnnounceAnnounce
StreetStreet
NamesNames
COMAND announces the
current street name.
i
The function is not
available in all countries.
AudioAudio
FadeoutFadeout
The volume of an active
media source is
automatically reduced during
a navigation announcement.
Gas onGas on
ReserveReserve
Once the reserve fuel tank
level is reached, a message
appears in COMAND to help
you find a gas station.
AttentionAttention
AssistAssist
If ATTENTION ASSIST
displays a warning in the
multifunction display, a
message appears in
COMAND to help you find a
rest stop.
For further information about
ATTENTION ASSIST, see the
separate operating
instructions.
Navigation
Using car pool lanes
You can include carpool lanes (HOV or car
sharing lanes) in the route calculation.
If you use HOV or carpool lanes, please
observe the applicable laws as well as the
local and time limitation conditions.
Carpool lanes may only be used under certain
conditions. Normally you can use these lanes
when two or more occupants are traveling in
the vehicle. However, there are lanes that can
only be used when three or four occupants
Z
Page 76

Basic settings
74
(e.g. in New York) travel in the vehicle. In
California, single drivers may also use the
carpool lanes if the vehicle's emission or
consumption values are below the prescribed
levels.
Carpool lanes may be reserved for specific
times (e.g. during the peak period).
Carpool lanes are indicated by a diamond
symbol on specific road signs and on the road
surface. The road signs may also include the
designation CARPOOL. The lanes are
arranged as a separate lane next to the others
or are built as a physically separate lane.
Depending on the setting under UseUse
Carpool LanesCarpool Lanes, COMAND uses carpool
Navigation
lanes when calculating the route. COMAND
then guides you in and out of carpool lanes
using visual and acoustic driving directions.
X
To switch to navigation mode: press the
ß button.
X
To show the menu: press the controller.
X
To select SettingsSettings: turn and press the
controller.
X
Select Route SettingsRoute Settings.
X
Select Avoid OptionsAvoid Options.
X
Select Use Carpool LanesUse Carpool Lanes.
Carpool lanes will either be used O or
avoided ª when calculating the route.
Page 77

Destination input
Destination input
Important safety notes
WARNING
G
If you operate information systems and communication equipment integrated in the vehicle while
driving, you will be distracted from traffic conditions. You could also lose control of the vehicle.
There is a risk of an accident.
Only operate the equipment when the traffic situation permits. If you are not sure that this is
possible, park the vehicle paying attention to traffic conditions and operate the equipment when
the vehicle is stationary.
You must observe the legal requirements for the country in which you are currently driving
when operating COMAND.
i
Destination entry may be blocked while driving, depending on the country specifications.
As an address
Calling up the address entry menu
75
Navigation
X
To switch to navigation mode: press the Ø button.
X
To show the menu: press the controller.
X
To select DestinationDestination: turn and press the controller.
X
Select Address EntryAddress Entry.
R
Address entry options
Examples of how you can enter an address:
R
city/zip code, street, house number
R
city/zip code, street
R
city/zip code, center
R
city/zip code, street, intersection
street, city/zip code, house number
R
street, city/zip code, intersection
i
Entering the street before the city is
useful if the address has an unusual street
name.
Z
Page 78

Destination input
76
While entering an address, you can also
switch to other destination entry options:
R
Keyword search (Y page 79)
R
Map (Y page 85)
R
Point of interest (Y page 81)
Entering the address
Navigation
The example shows you how to enter a city,
street and house number for an address, e.g.
for your home address.
X
To select StreetStreet in the address entry
menu: press the controller (Y page 75).
X
Enter BROADWAYBROADWAY. Character entry
(Y page 33).
Calling up a list
X
Slide ZV the controller repeatedly until the
character bar disappears.
or
X
To select OKOK: turn and press the controller.
X
To select CityCity: press the controller.
X
Enter the city or city, e.g. New YorkNew York. Then
call up the list and select an entry. Proceed
in the same way as when entering a street.
X
To select No.No.: press the controller.
X
Enter the house number. Then call up the
list and select an entry. Proceed in the
same way as when entering a street.
The address entry menu shows the
address. The adjacent map section shows
the destination.
i
You can enter any of the cities, streets,
zip codes, etc. which are stored in the
digital map. However, zip codes are not
available for some countries.
State/province and city are sufficient to
start navigating. You can enter either a city
or a zip code. The street and house number
complete the destination address.
Entering additional address data
You can enter additional address data:
R
State/province
You can use Last usedLast used to select the last
selected state (USA) or province (Canada).
You can also select Mexico and The
Bahamas.
R
Zip code
Entering a zip code will delete a previously
entered city.
R
Center
Entering a center will delete a previously
entered street.
R
Intersection
Page 79

Destination input
77
Entering an intersection will delete a
previously entered house number.
X
Select the address entry menu
(Y page 75).
X
To select CountryCountry, ZOIP CodeZOIP Code, CenterCenter or
IntersectionIntersection: turn, slide VÆ and press
the controller.
X
Select an entry (Y page 76).
Saving an address
You can store the address you have entered
either as your home address or as another
navigable contact in the address book
(Y page 148).
X
Call up the address entry menu
(Y page 75).
X
To select SaveSave: slide VÆ, turn and press
the controller.
X
To save as your home address: select
As "My Address"As "My Address".
COMAND stores your home address under
My AddressMy Address in the list of contacts.
X
To save as a contact: select As NewAs New
Address Book EntryAddress Book Entry.
X
Select Not ClassifiedNot Classified, HomeHome or WorkWork.
X
Enter a surname and first name
(Y page 30).
X
To select OKOK: turn and press the controller.
The destination address is saved in the
address book as a navigable contact.
Navigation
Z
Page 80
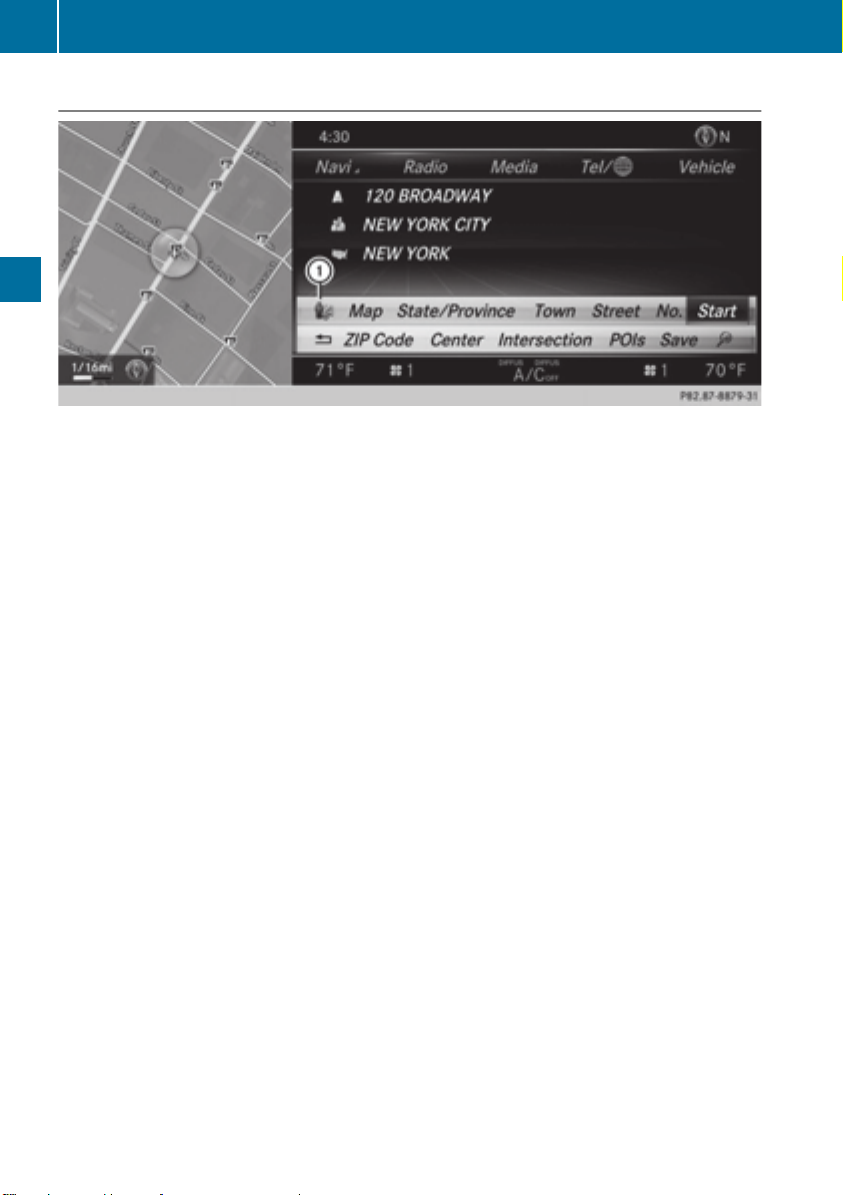
Destination input
78
Starting route calculation
The entered destination appears in the address entry menu.
Navigation
X
To confirm StartStart: press the controller.
The route is calculated. While route calculation is in progress, an arrow will indicate the
direction to your destination. Once the route has been calculated, route guidance begins.
If the vehicle is traveling on a non-digitized road, the system displays the linear distance to
the destination, the direction to the destination and the Road Off MapRoad Off Map message.
If route guidance has already been activated, a prompt will appear asking whether you wish
to end the current route guidance.
X
To select YesYes or Set as Intermediate DestinationSet as Intermediate Destination: turn and press the controller.
If you select YesYes, the current route guidance is stopped and route calculation to the new
destination is started.
Selecting Set as Intermediate DestinationSet as Intermediate Destination adds the new destination in addition to
the existing destination and opens the intermediate destinations list.
i
The route is calculated using digital map data. The calculation time depends on the
distance from the destination, for example.
The calculated route may differ from the ideal route, e.g. due to roadworks or incomplete
map data. Please also refer to the notes about the digital map (Y page 116).
Calling up the keyword search
X
To select the magnifying glass symbol: while in the address entry menu, slide VÆ, turn and
then press the controller.
Viewing the vicinity of the destination
X
To select symbol :: turn the controller and press to confirm.
You can explore the destination area.
i
Prerequisite:
mbrace must be activated for Internet access (Y page 158).
Page 81
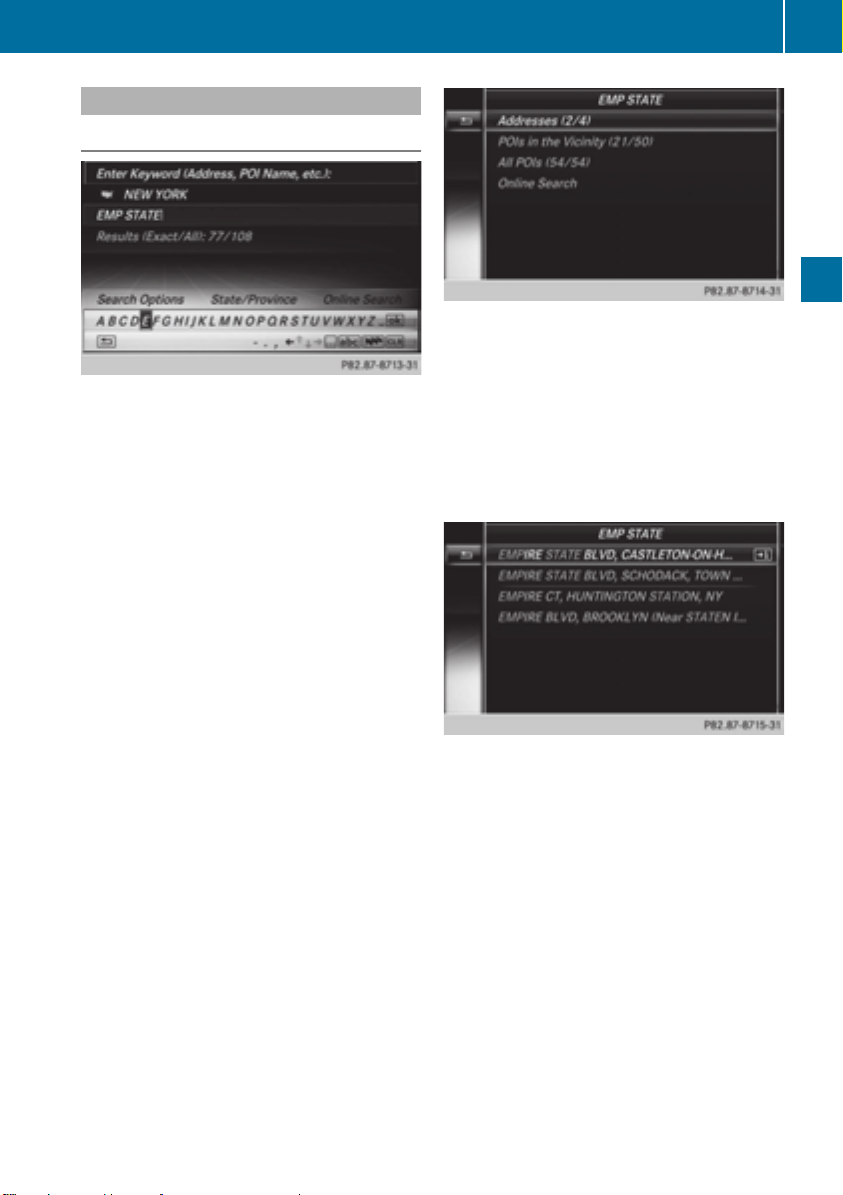
Keyword search
Entering keywords
The keyword search is used to help find
destinations using fragments of words. The
keyword search is tolerant of errors. It can be
used for an address or a POI. For example,
you can search for the Houses of Parliament
or Big Ben. The keyword search finds
geotolerant hits. If, for example, you are
searching for a street located on the edge of
a city, the search will also cover adjacent
smaller cities. The keyword search supports
languages using Latin characters.
X
To switch to navigation mode: press the
Ø button.
X
To show the menu: press the controller.
X
To select DestinationDestination: turn and press the
controller.
X
Select Keyword SearchKeyword Search.
X
Enter the first few letters of the city and
street, e.g. STUTSTUT and KÖNKÖN.
While entering the information, the number
of exact matches/all hits is shown.
---/------/--- is displayed if fewer than three
characters have been entered.
999+999+is displayed if there are too many hits.
X
Select OKOK.
Destination input
The search results are divided into
categories, such as addresses. The number
of exact/total hits is shown in brackets.
The search results will be displayed if POIPOI
SearchSearch and/or Automatic Online SearchAutomatic Online Search
are enabled in the search options.
Selecting an address
X
To select AddressesAddresses: press the controller.
Exact hits are shown at the very top of the list.
Hits are listed alphabetically. The search term
that you entered is highlighted in orange in
the entries.
X
Select an entry: turn and press the
controller.
The address entry menu appears, showing
the destination address.
X
To start route calculation: select StartStart.
Selecting a point of interest
X
To select POI in the vicinityPOI in the vicinity or AllAll
POIsPOIs: turn and press the controller.
A list appears.
X
Selecting a point of interest.
The POI is shown.
X
To start route calculation: select StartStart.
79
Navigation
Z
Page 82
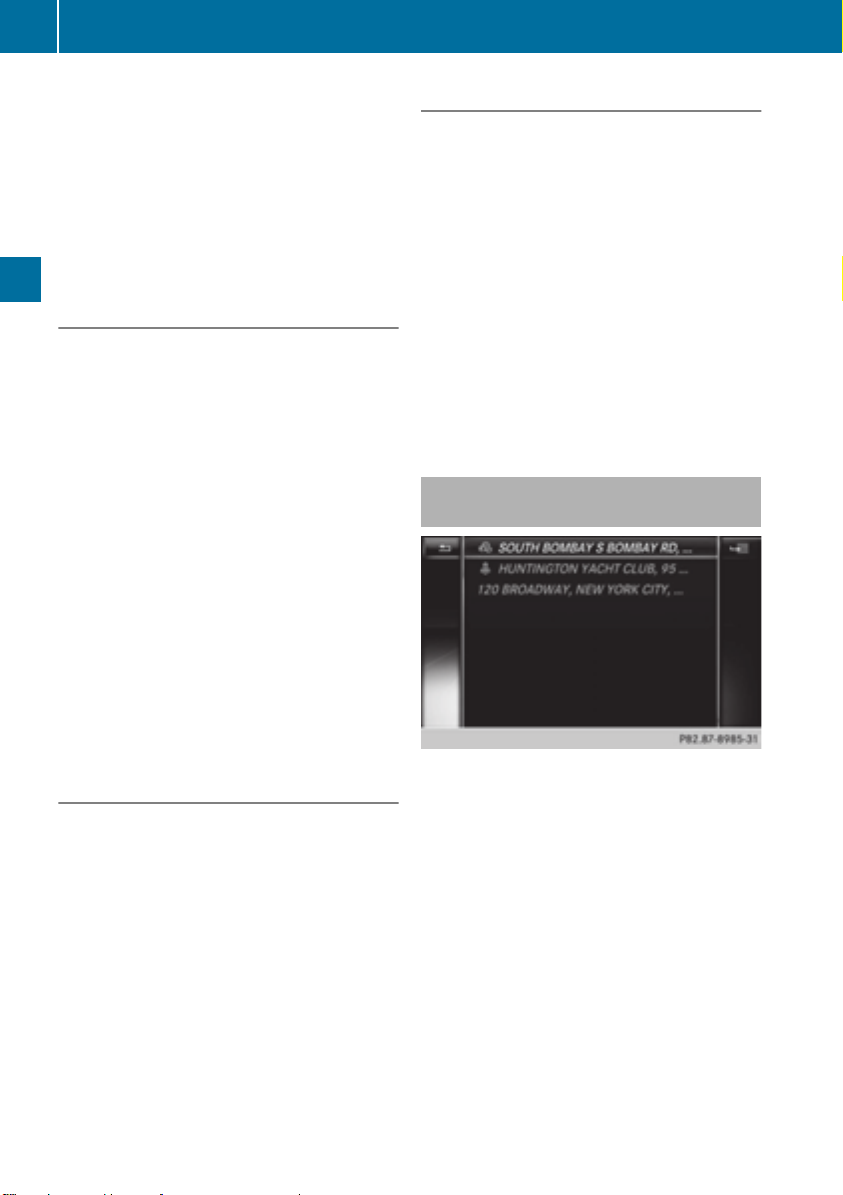
Destination input
80
Using online search
X
To select Automatic Online SearchAutomatic Online Search:
turn and press the controller.
The search switches to the online
functions.
i
Prerequisite:
mbrace must be activated for Internet
access (Y page 158).
Selecting search options
X
To switch to navigation mode: press the
Ø button.
X
To show the menu: press the controller.
X
To select DestinationDestination: turn and press the
Navigation
controller.
X
Select Keyword SearchKeyword Search.
X
To select Search OptionsSearch Options: slide ZV, turn
and press the controller.
X
Select Fuzzy SearchFuzzy Search, POI SearchPOI Search or
Automatic Online SearchAutomatic Online Search.
Switch the setting on O or off ª.
Fuzzy search: useful if parts of the address
are incomplete or the spelling is unclear.
POI search: points of interest are taken into
account in the search.
Online search: the search is performed via
the online functions.
Selecting the country
X
To switch to navigation mode: press the
Ø button.
X
To show the menu: press the controller.
X
To select DestinationDestination: turn and press the
controller.
X
Select Keyword SearchKeyword Search.
X
To select CountryCountry: slide ZV, turn and
press the controller.
The alphabetical list of countries is
displayed.
X
Select a country: turn and press the
controller.
Searching via COMAND
Requirement: a mobile phone with a data
package is connected to COMAND
(Y page 124).
X
To switch to navigation mode: press the
Ø button.
X
To show the menu: press the controller.
X
To select DestinationDestination: turn and press the
controller.
X
Select Keyword SearchKeyword Search.
X
To select Online SearchOnline Search: slide ZV, turn
and press the controller.
The search switches to the online
functions.
Selecting a destination from the list of
last destinations
COMAND automatically stores the last 100
destinations.
X
To switch to navigation mode: press the
Ø button.
X
To show the menu: press the controller.
X
To select DestinationDestination: turn and press the
controller.
X
Select From Previous DestinationsFrom Previous Destinations.
X
Select the destination.
The address entry menu appears, showing
the destination address.
X
To start route calculation: select StartStart.
Page 83

Selecting an address book contact as
a destination
You can select navigable address book
contacts as the destination. These are
identified by the L symbol. If you have
already entered and saved your home
address, you can select this as the
destination by using My AddressMy Address.
X
To switch to navigation mode: press the
Ø button.
X
To show the menu: press the controller.
X
To select DestinationDestination: turn and press the
controller.
X
Select From ContactsFrom Contacts.
X
Select the destination.
The address entry menu appears, showing
the contact and associated destination
address.
X
To start route calculation: select StartStart.
Destination input
X
To switch to navigation mode: press the
Ø button.
X
To show the menu: press the controller.
X
To select DestinationDestination: turn and press the
controller.
X
Select From POIsFrom POIs.
81
Navigation
Selecting a destination from POIs
Calling up the points of interest menu
Z
Page 84

Destination input
82
Defining the position for the point of interest search
Selection Instructions
X
Near DestinationNear Destination
(when route guidance is
active)
Current PositionCurrent Position
Search in the vicinity of
the current vehicle
Call up the POI menu (Y page 81).
X
To select Near destinationNear destination: turn and press the controller.
X
Select a POI category (Y page 83).
X
Call up the POI menu (Y page 81).
X
To select Current PositionCurrent Position: turn and press the controller.
X
Select a POI category (Y page 83).
position
Other CityOther City
After entering a city, the
search is performed
Navigation
within the city's
boundaries
Option 1
X
Call up the POI menu (Y page 81).
X
To select Other CityOther City: turn and press the controller.
X
Select the country, if desired (Y page 76).
X
Enter the city (Y page 76).
X
Select a POI category (Y page 83).
Option 2:
X
Enter a city in the address entry menu (Y page 76).
X
To select POIsPOIs: slide VÆ, turn and press the controller.
X
Select a POI category (Y page 83).
Page 85
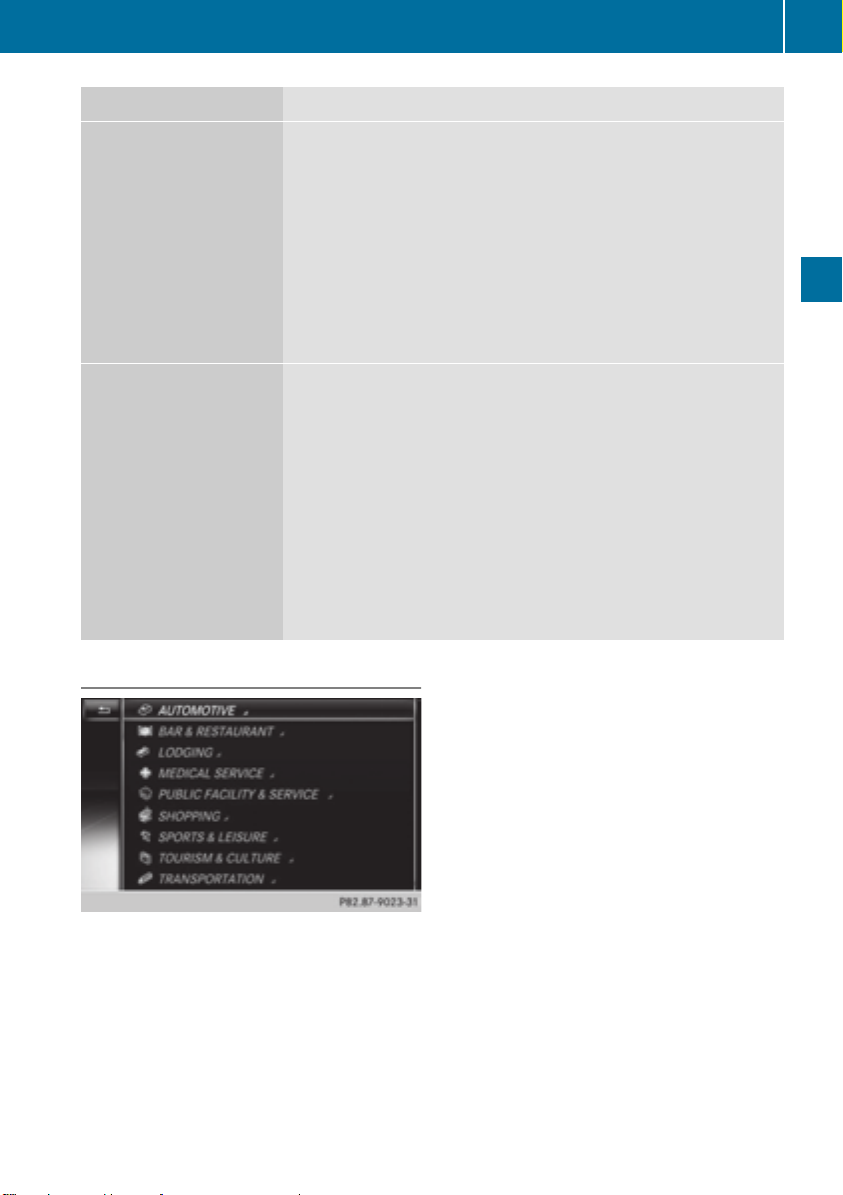
Selection Instructions
X
Search By NameSearch By Name
Search for all POIs on the
digital map or around
one of the three
previously specified
positions
Call up the POI menu (Y page 81).
X
To select Search By NameSearch By Name: turn and press the controller.
X
Select All POIsAll POIs or one of the three previously selected
positions.
The point of interest list with character bar appears.
X
Enter a name.
or
X
To select Mercedes-Benz ServiceMercedes-Benz Service: turn and press the
controller.
X
Search By PhoneSearch By Phone
NumberNumber
This function gives you
access to all points of
interest that have a
Call up the POI menu (Y page 81).
X
To select Search By Phone NumberSearch By Phone Number: turn and press the
controller.
You will see a list of phone numbers.
X
Enter the telephone number.
phone number.
i The telephone number consists of:
R
the country code (international dialing code)
R
the area code
When entering the area code, omit the leading "0".
R
the telephone number of the participating caller
Destination input
83
Navigation
Selecting a POI category
After entering a city, POI categories appear
after choosing the menu item NearNear
DestinationDestination, CurrentCurrent PositionPosition or OtherOther
CityCity.
X
Select a POI category: turn and press the
controller.
The G symbol after an entry shows that
further categories are available.
X
Select a sub-category.
The POI search covers a
240 mile (400 km) radius around the
selected position.
Once the search is completed, the POI list
is displayed.
The search results display the following
information:
R
an arrow that shows the linear direction
to the POI (search around vehicle
position)
R
the linear distance to the point of interest
R
the name of the point of interest
X
Selecting a point of interest.
The complete address of the POI is shown.
Z
Page 86
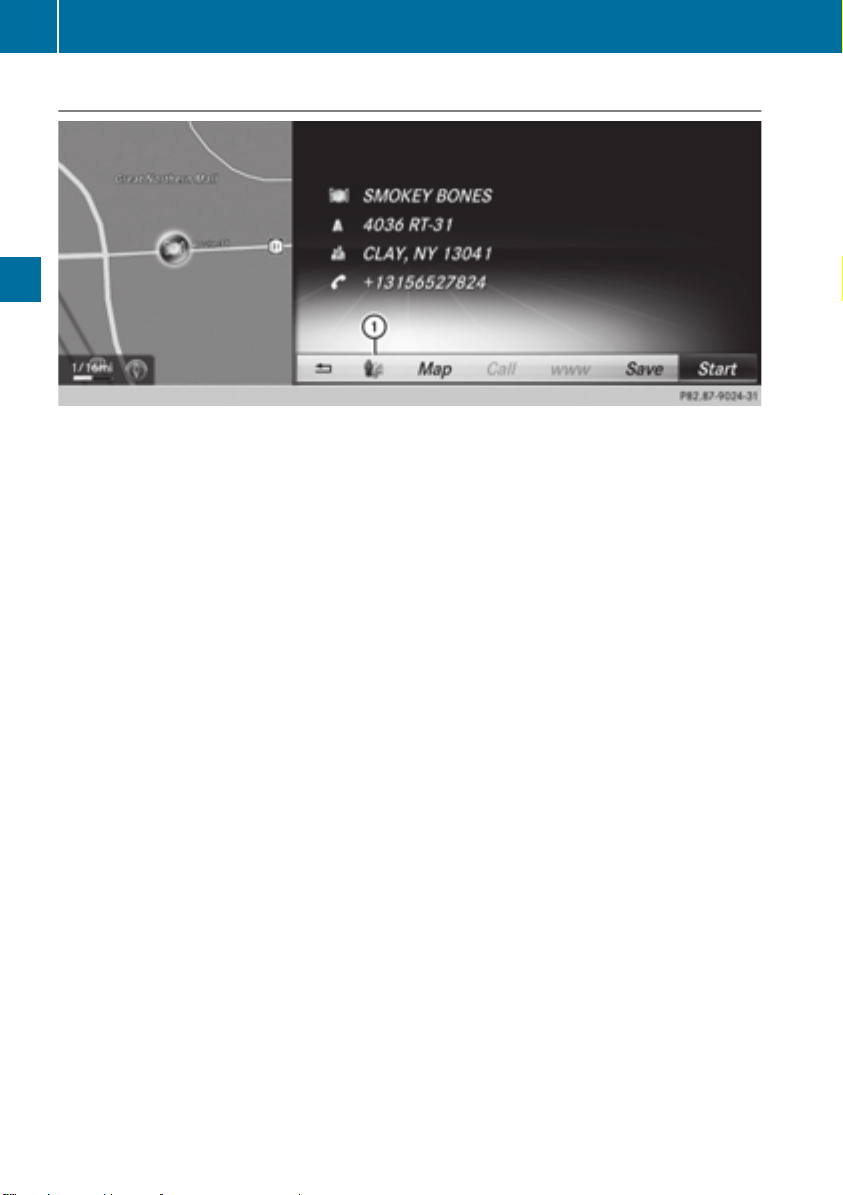
Destination input
84
Selecting a point of interest
The complete address of the POI is shown.
Navigation
Starting route calculation
X
To select StartStart: press the controller.
Saving a POI
X
To select SaveSave: turn and press the controller.
The POI can be saved as a navigable address book contact or as "My address".
Calling up the map
X
To select MapMap: turn and press the controller.
X
You can move the map, change the map scale and select POIs (Y page 85).
Requirements for the following functions:
mbrace must be activated for Internet access (Y page 158). The POI has a telephone number
and Internet address.
X
To call a POI: select CallCall.
COMAND switches to telephone mode .
X
To load data from the Internet: select wwwwww.
Available data are loaded from the Internet.
X
To view the vicinity of the destination: select symbol :.
The street in the vicinity of the destination address is shown.
Page 87
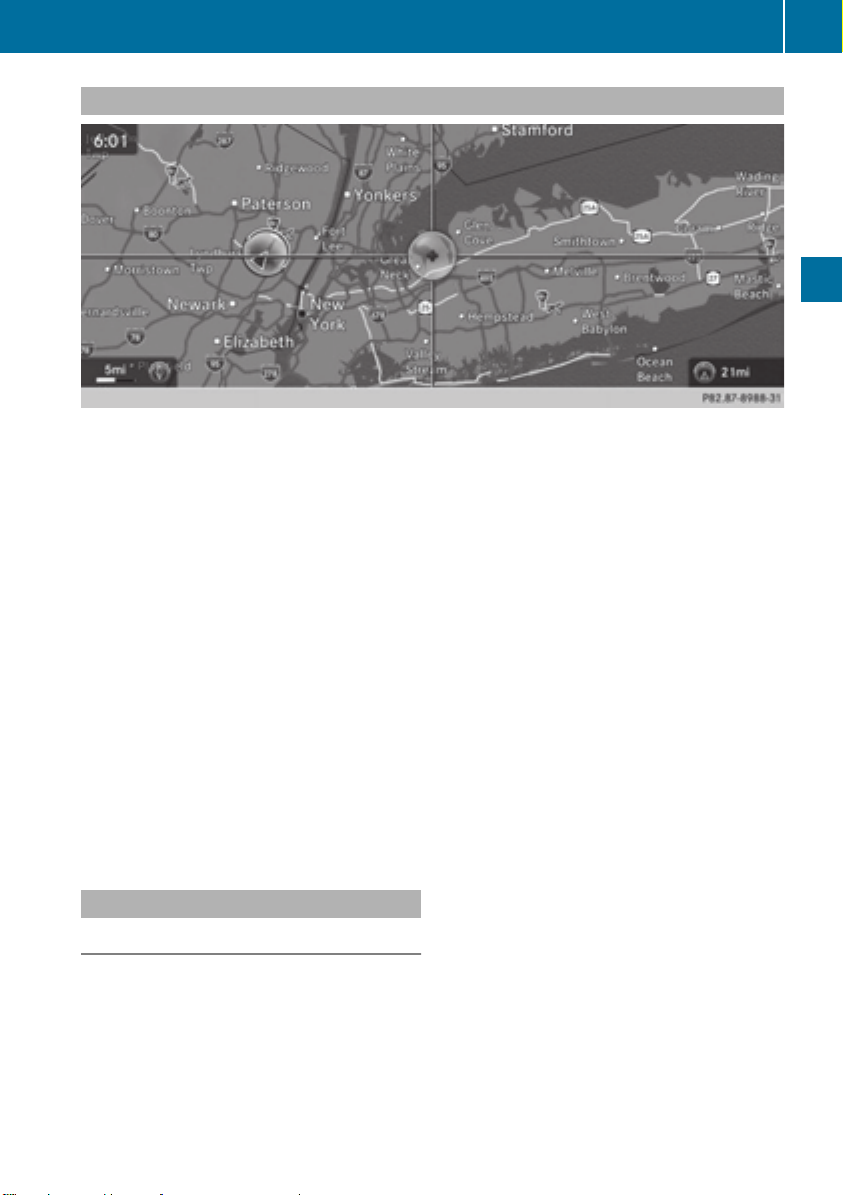
Destination input
Using map
:
Crosshair
;
Distance of crosshair position from current vehicle position
X
To switch to navigation mode: press the ß button.
X
To show the menu: press the controller.
X
To select DestinationDestination: turn and press the controller.
X
Select Using MapUsing Map.
The map with crosshair is shown.
X
To move the map: slide XVY, ZVÆ or aVb the controller.
X
To change the map scale: turn the controller until the desired map scale is selected.
The scale is displayed at the bottom. Turning clockwise zooms out from the map; turning
counter-clockwise zooms in.
X
To select a destination: press the controller.
If the digital map provides navigable address data, you will see the destination address in
the address entry menu. If not, the Destination from MapDestination from Map entry is shown.
If there are multiple destinations around the crosshair, a selection list will appear.
X
To select a destination from the selection list: turn and press the controller.
X
To start route calculation: select StartStart.
85
Navigation
Entering way points
Introduction
You can also map the route to the destination
yourself by entering up to four way points. The
sequence of the way points can be changed
at any time.
COMAND provides a selection of predefined
destinations in eight categories for this
purpose, e.g. GAS STATIONGAS STATION or COFFEE SHOPCOFFEE SHOP.
You can also use the destination entry
options to enter way points.
Z
Page 88
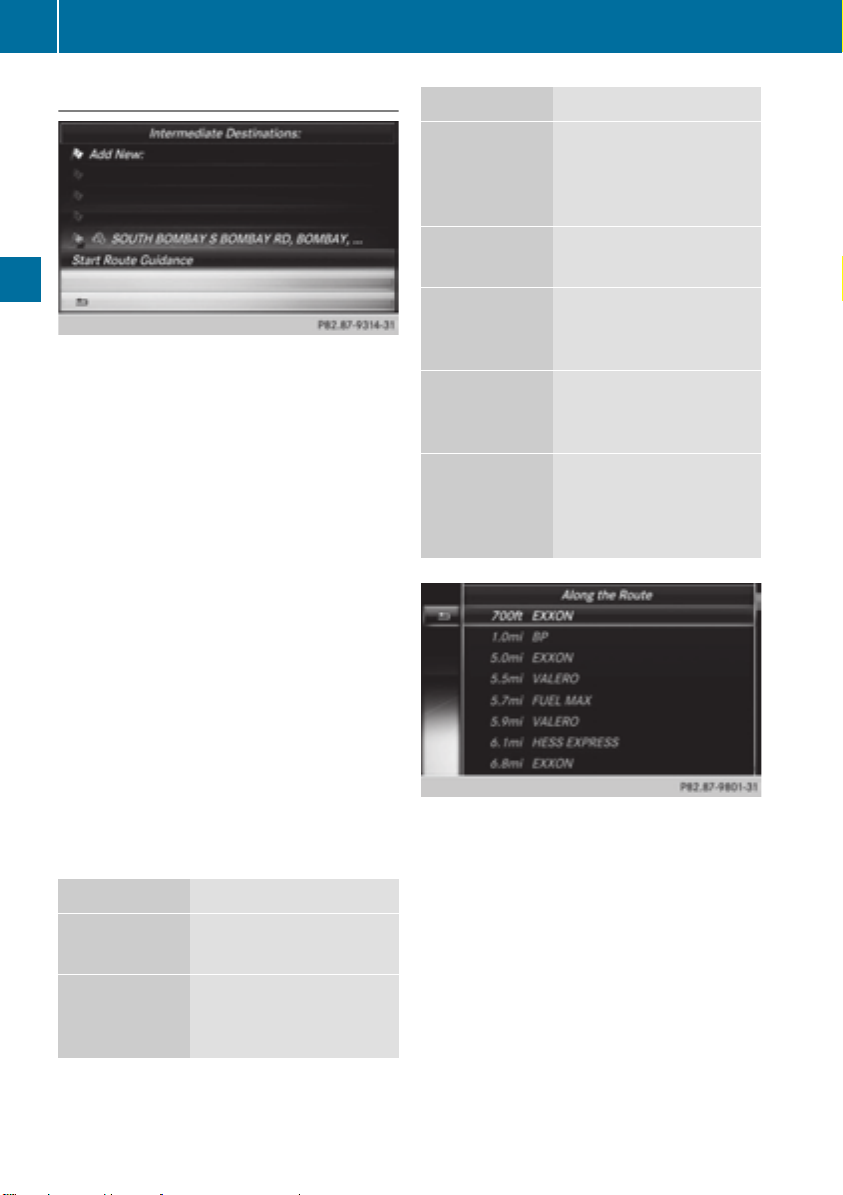
Destination input
86
Creating way points
X
To switch to navigation mode: press the
Ø button.
X
To show the menu: press the controller.
Navigation
X
To select DestinationDestination: turn and press the
controller.
X
Select Intermediate DestinationsIntermediate Destinations.
The destination is entered into the way
points menu. The way points are not yet
entered.
X
To select AddAdd: press the controller.
X
To select the category or OTHEROTHER: turn and
press the controller.
After selecting a category, the POIs which
are available along the route and in the
vicinity are displayed.
COMAND first searches for destinations
along the route. The search for destinations
is then initiated in the area around the
vehicle position.
X
After selecting OTHEROTHER, select one of the
destination entry options from the list.
Selection Action
X
AddressAddress
EntryEntry
KeywordKeyword
SearchSearch
Enter a destination by
address (Y page 76).
X
Select a destination by
means of a keyword
search (Y page 79).
Selection Action
X
From LastFrom Last
DestinationsDestinations
Select a destination
from the list of last
destinations
(Y page 80).
X
From POIsFrom POIs
Select a point of
interest (Y page 81).
X
Using MapUsing Map
Enter a destination
using the map
(Y page 85).
X
FromFrom
Mercedes-Mercedes-
Benz AppsBenz Apps
Using Geo-Using Geo-
CoordinatesCoordinates
Enter a destination
from Mercedes-Benz
Apps (Y page 88).
X
Enter a destination
using the geocoordinates
(Y page 88).
X
To select a POI: turn the controller and
press to confirm.
After selecting a POI or entering a
destination, the address of the way point is
displayed.
After entering a destination using the map,
the address entry menu is displayed.
StartStart is highlighted.
Page 89
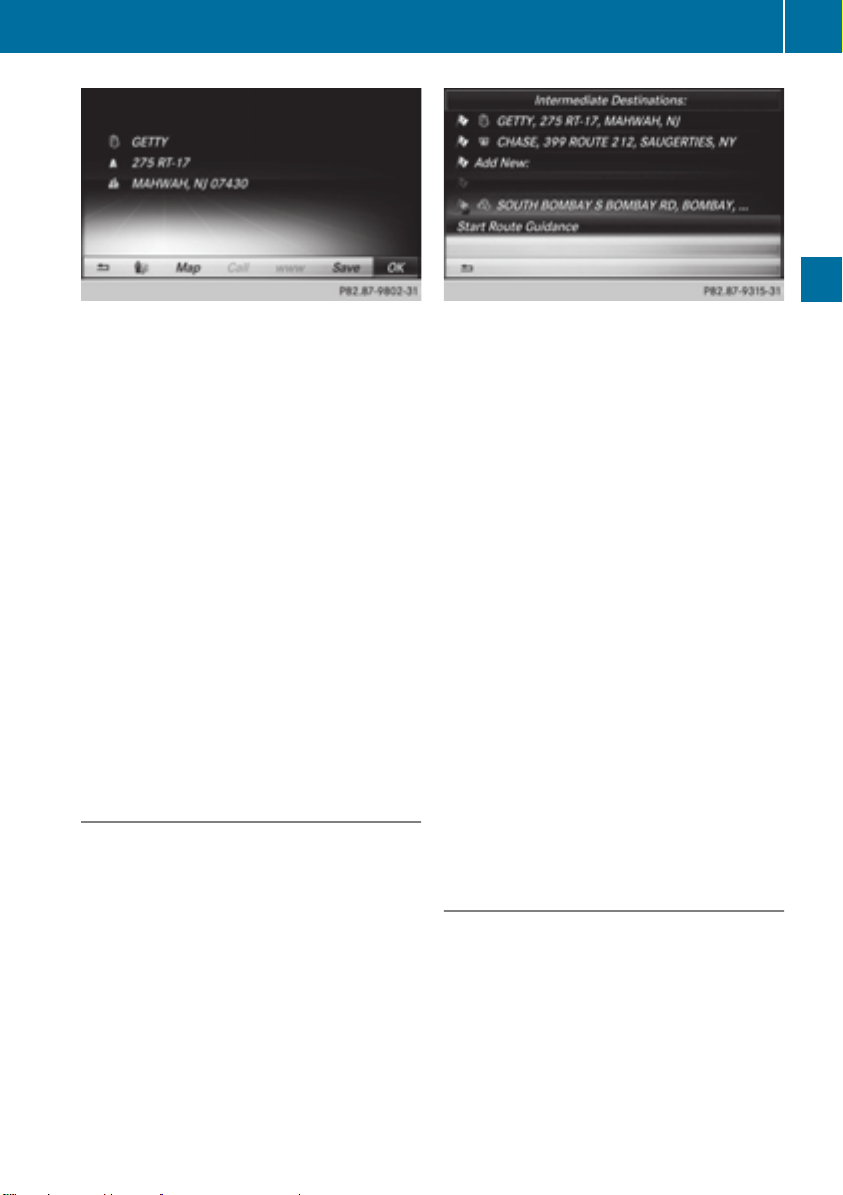
Destination input
87
Accepting a way point
X
To select StartStart: press the controller.
The way point is entered into the way point
menu.
X
To select details: turn and press the
controller.
X
To make a call: select CallCall.
i
COMAND switches to telephone mode
(Y page 131).
This menu item is available if the way point
has a telephone number and if a mobile
phone is connected to COMAND
(Y page 124).
X
To call up the map: select MapMap.
X
You can move the map and select the
destination.
X
To store a way point in the destination
memory: select SaveSave (Y page 106).
Editing way points
You can:
R
change way points
R
change the sequence in the way point
menu
R
delete way points
X
To select a way point in the way point menu:
turn the controller and press to confirm.
A menu appears.
X
To change the way point: in the menu,
select EditEdit.
i
You cannot edit POIs.
X
Change the address, e.g. the city and
street.
X
To select OKOK: turn and press the controller.
The way point menu appears and displays
the modified way point.
You can change the sequence of the way
points and the destination. To change the
sequence, at least one way point and the
destination must be entered.
X
To change the order: in the menu, select
MoveMove.
X
Turn the controller and move the way point
or destination to the desired position.
X
Press the controller.
X
To delete way points: In the menu, select
DeleteDelete.
Accepting way points for the route
X
To select StartStart from the way point menu:
press the controller.
The route is calculated with the entered
way points.
i
If Calculate Alternative RoutesCalculate Alternative Routes is
switched on in the basic settings, instead
of StartStart, the menu item Cont.Cont. is shown
(Y page 72).
Navigation
Z
Page 90

Route guidance
88
i
If a way point was passed during route
guidance, the way point will be displayed in
the way point menu with a green tick mark.
Once the route has been recalculated, the
way point is deleted from the way point
menu.
Searching for a gas station when the
fuel level is low
Requirement: the GasGas onon ReserveReserve setting is
switched on (Y page 73).
If the reserve fuel warning is displayed, you
will see the message: Fuel tank reserveFuel tank reserve
level. Do you want to start thelevel. Do you want to start the
search for gas stations?search for gas stations?.
Navigation
X
To select YesYes or NoNo: turn and press the
controller.
If you select YesYes, the gas station search
starts. When the search is complete, a list
of the gas stations available along the route
or in the vicinity is displayed.
If you select NoNo, the search is canceled.
X
Select the gas station.
The address of the gas station is displayed.
X
To select StartStart: press the controller.
The selected gas station is entered into
position 1 of the way points menu. Route
guidance begins.
If the way points menu already contains
four way points, a prompt will be displayed,
asking you whether you wish to enter the
gas station into position 1. If you select
YesYes, the gas station is transferred into the
list and way point 4 is deleted.
Entering a destination from
Mercedes-Benz Apps
Requirement: a mobile phone with a data
package is connected to COMAND
(Y page 124).
X
To switch to navigation mode: press the
Ø button.
X
To show the menu: press the controller.
X
To select DestinationDestination: turn and press the
controller.
X
Select From Mercedes-Benz AppsFrom Mercedes-Benz Apps.
A list shows the available destinations that
have been transmitted to the vehicle up to
this point (Y page 164).
Using Geo-Coordinates
X
To switch to navigation mode: press the
ß button.
X
To show the menu: press the controller.
X
To select DestinationDestination: turn and press the
controller.
X
Select Using Geo-CoordinatesUsing Geo-Coordinates.
Geo-coordinates are entered in degrees,
minutes and seconds.
Entering the latitude and longitude
coordinates
X
To change the value: turn the controller.
X
To move the selection within the line: slide
XVY the controller.
X
To move the selection between lines: slide
ZVÆ the controller.
X
To confirm the value: press the controller.
Save destination
X
To select SaveSave: turn and press the
controller.
The destination can be saved as a navigable
address book contact or as "My address".
Starting route calculation
X
To select Start Route GuidanceStart Route Guidance: turn
and press the controller.
Route guidance
Important safety notes
For this reason, you must always observe
road and traffic rules and regulations during
your journey. Road and traffic rules and
Page 91

Route guidance
89
regulations always have priority over system
driving recommendations.
COMAND calculates the route to the
destination without taking account of the
following, for example:
R
traffic lights
R
stop and give way signs
R
merging lanes
R
parking or stopping in a no parking/no
stopping zone
R
other road and traffic rules and regulations
R
narrow bridges
COMAND may give differing navigation
commands if the actual street/traffic
situation does not correspond with the digital
map's data. For example, if the road layout or
the direction of a one-way street has been
changed.
For this reason, you must always observe
road and traffic rules and regulations during
your journey. Road and traffic rules and
regulations always have priority over the
system's driving recommendations.
Route guidance begins once a route has been
calculated (Y page 78).
COMAND guides you to your destination by
means of navigation announcements in the
form of audible navigation announcements
and route guidance displays.
The route guidance displays can be seen if the
display is switched to navigation mode.
If you do not follow the navigation
announcements or if you leave the calculated
route, COMAND automatically calculates a
new route to the destination.
If the digital map contains the corresponding
information, the following applies:
R
during route guidance, COMAND tries to
avoid roads with restricted access. Those
roads, for example, that are closed to
through-traffic.
R
roads that have time restrictions (e.g.
closed on Sundays and public holidays) are
considered for route guidance on days
when they are open. For this purpose, the
relevant times must be correctly stored in
the database.
Navigation
Z
Page 92

Route guidance
90
Displays during route guidance
Change of direction
Changes of direction have three phases:
R
preparation phase
R
announcement phase
R
change-of-direction phase
i
Changes in direction are also shown in the multifunction display (see the vehicle Operator's
Manual).
Preparation phase: COMAND prepares you for the upcoming change of direction. Based on
the example display below, the change of direction is announced by the "Prepare to turn right
message", for instance. You see the full-screen map.
Announcement phase: COMAND announces the imminent change of direction. The change
Navigation
of direction is announced ahead of time, such as with the announcement "Turn right in
200 meters".
The display is now split into two sectors. The map is shown on the left side of the display, and
a detailed image of the intersection or a 3D image of the imminent change of direction is
shown on the right side of the display.
:
Next road
;
Point at which the change of direction takes place (white dot)
=
Change of direction (turn right here)
?
Distance to the next change of direction
Change-of-direction phase: COMAND announces the immediate change of direction. The
change of direction is announced ahead of time, such as with the announcement "Turn right
in 100 feet".
The display is split in two like in the announcement phase.
Page 93

Route guidance
The change of direction is performed when the light-color bar on the right drops down to
0 ft and the current vehicle position symbol has reached the white change-of-direction point.
When the change of direction is completed, the map will appear in full screen mode again.
91
Navigation
The image shows an example of route guidance at a freeway intersection when driving on a
freeway.
Z
Page 94

Route guidance
92
Lane recommendations
:
Lanes not recommended (dark gray)
Navigation
;
Possible lane (light gray)
=
Recommended lanes (white)
If the digital map contains the relevant data, COMAND can display lane recommendations on
multilane roads for the next change of direction.
Lane not recommended :: you will not be able to complete the next change of direction if
you stay in this lane.
Possible lane ;: you will be able to complete the next change of direction in this lane only.
Recommended lane =: in this lane you will be able to complete the next change of direction
and the one after that.
COMAND shows the lane recommendations for the next two changes of direction. The
multifunction display also shows lane recommendations (see the vehicle Operator's Manual).
:
Approaching new lane
During the change of direction, new lanes may be added. These will be shown in the display
of lane recommendations with a lower boundary line.
Page 95

Route guidance
Once the destination is reached, you will see the checkered flag. Route guidance is finished.
Highway information
Requirement: the Highway InformationHighway Information map content is switched on.
Display mode: while driving on the highway, gas stations, rest stops, rest areas and highway
exits are displayed along with their immediate distances from the current vehicle position.
93
Navigation
X
To call up the selection mode: while displaying the freeway information, slide VY the
controller.
The marker is on the freeway information. The associated position is marked on the map.
X
To select the desired rest stop/freeway exit: turn and press the controller.
Z
Page 96
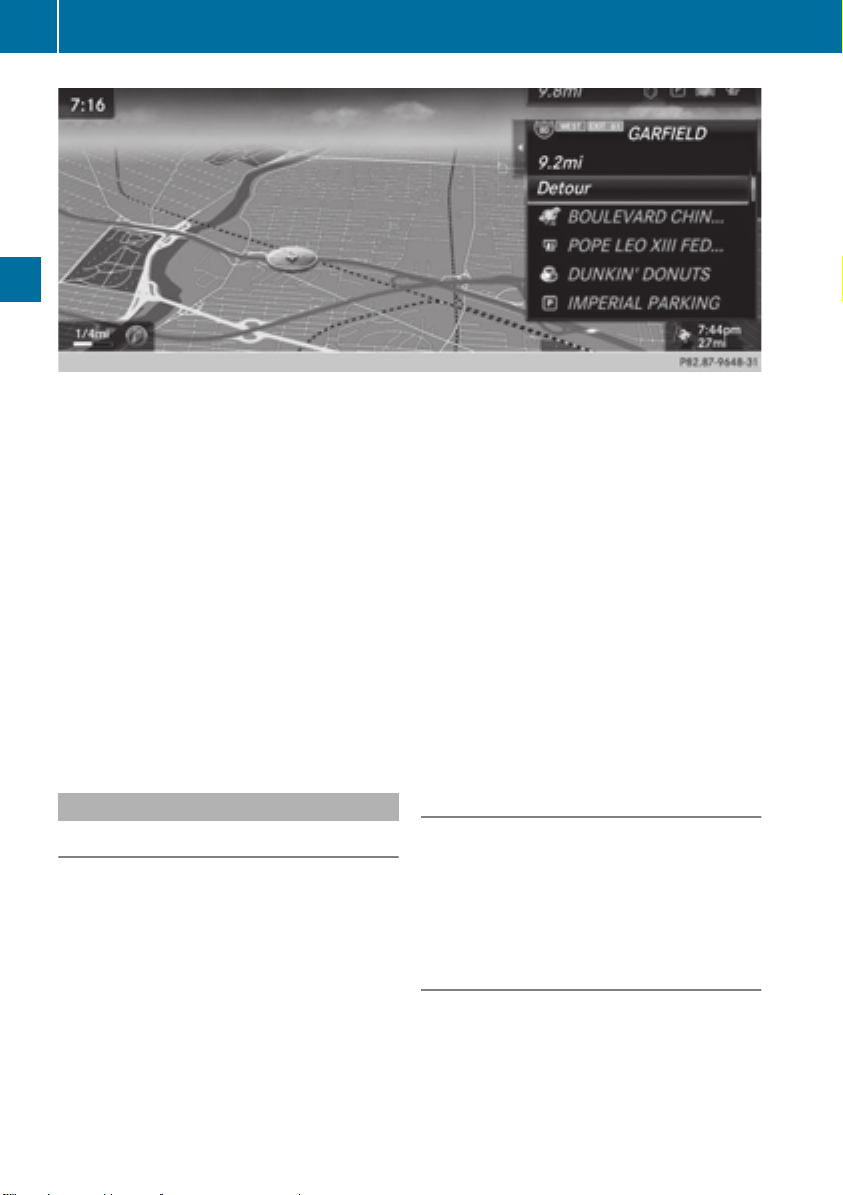
Route guidance
94
Highway information facilitates route guidance to a POI and use of the traffic jam function.
The remaining route on the highway in this case is blocked in the direction of travel from the
Navigation
selected exit.
Starting route guidance and using additional functions
X
To select a POI: turn the controller and press to confirm.
The POI details are displayed.
The POI can now be:
R
stored in the address book (Y page 106)
R
viewed on the map (Y page 112)
R
called if a phone is connected and a phone number is available (Y page 132).
R
selected for route guidance and a route to it calculated (Y page 78).
Using the traffic jam function
X
Select DetourDetour: turn and press the controller.
The traffic jam function appears (Y page 100).
Navigation announcements
Repeating navigation announcements
If you missed the current navigation
announcement, you can call it up again.
X
To switch to navigation mode: press the
Ø button.
X
To show the menu: press the controller.
X
Select +: turn and press the controller.
i
If you previously assigned the RepeatRepeat
Spoken Driving RecommendationsSpoken Driving Recommendations
function to the Favorites button, you can
select the function using the Favorites
button instead (Y page 45).
Setting the volume manually
X
Set the volume using the thumbwheel
during the navigation announcement.
i
When you start the engine, the volume will
be at its lowest setting.
Switching navigation announcements
on/off
X
To switch off navigation
announcements: during a navigation
Page 97

announcement, press the thumbwheel to
the right of the controller.
or
X
During a navigation announcement, press
the 8 button on the multifunction
steering wheel.
The message Spoken drivingSpoken driving
recommendations have beenrecommendations have been
deactivateddeactivated appears.
X
To switch navigation announcements
back on: press the controller.
X
Select +: turn and press the controller.
i COMAND automatically switches the
navigation announcements back on when:
R
you have a new route calculated.
R
you switch COMAND on again or start the
engine.
Route guidance
95
Navigation
Z
Page 98
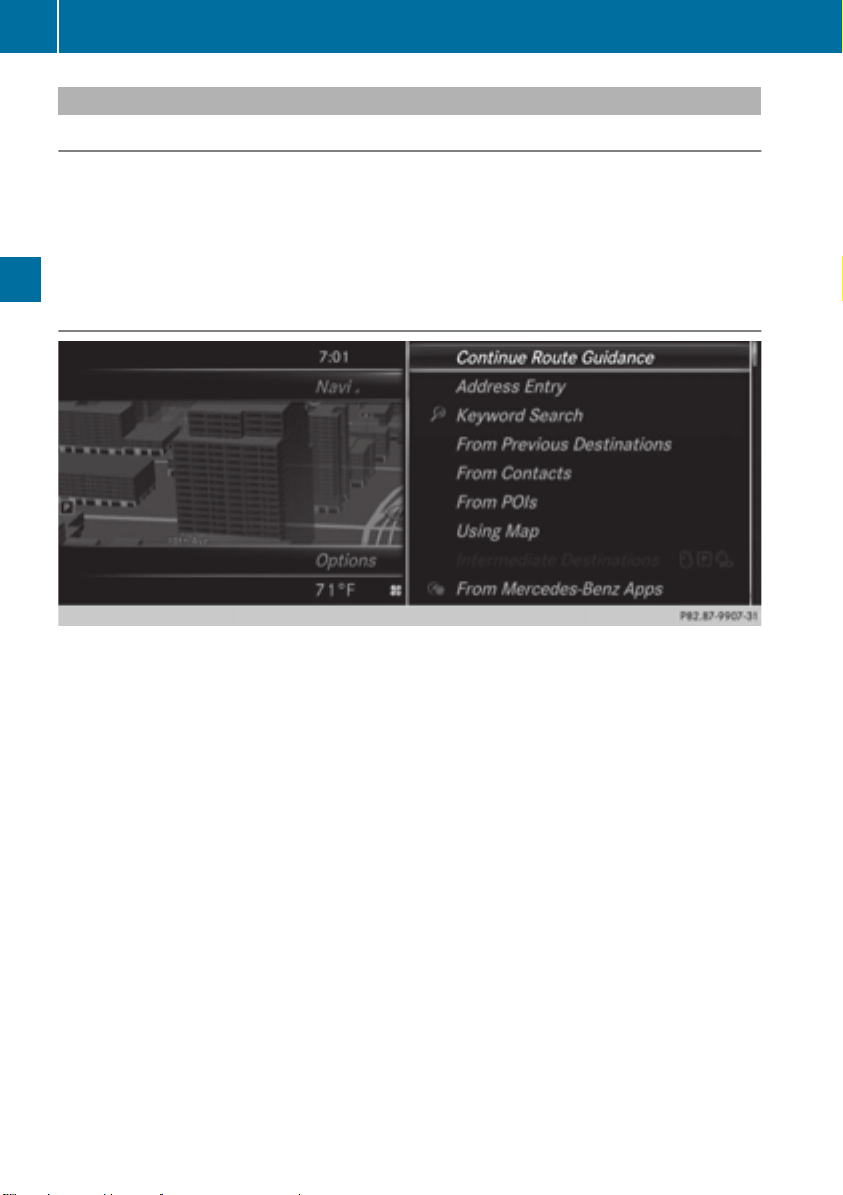
Route guidance
96
Canceling/continuing route guidance
Canceling route guidance
X
Press the controller.
The menu is shown.
X
To select DestinationDestination: turn and press the controller.
X
Select Cancel Active Route GuidanceCancel Active Route Guidance.
The blue route line is no longer shown on the map.
Continue route guidance
Navigation
X
Press the controller.
The menu is shown.
X
To select DestinationDestination: turn and press the controller.
X
Select Continue Route GuidanceContinue Route Guidance.
COMAND calculates the route.
Page 99
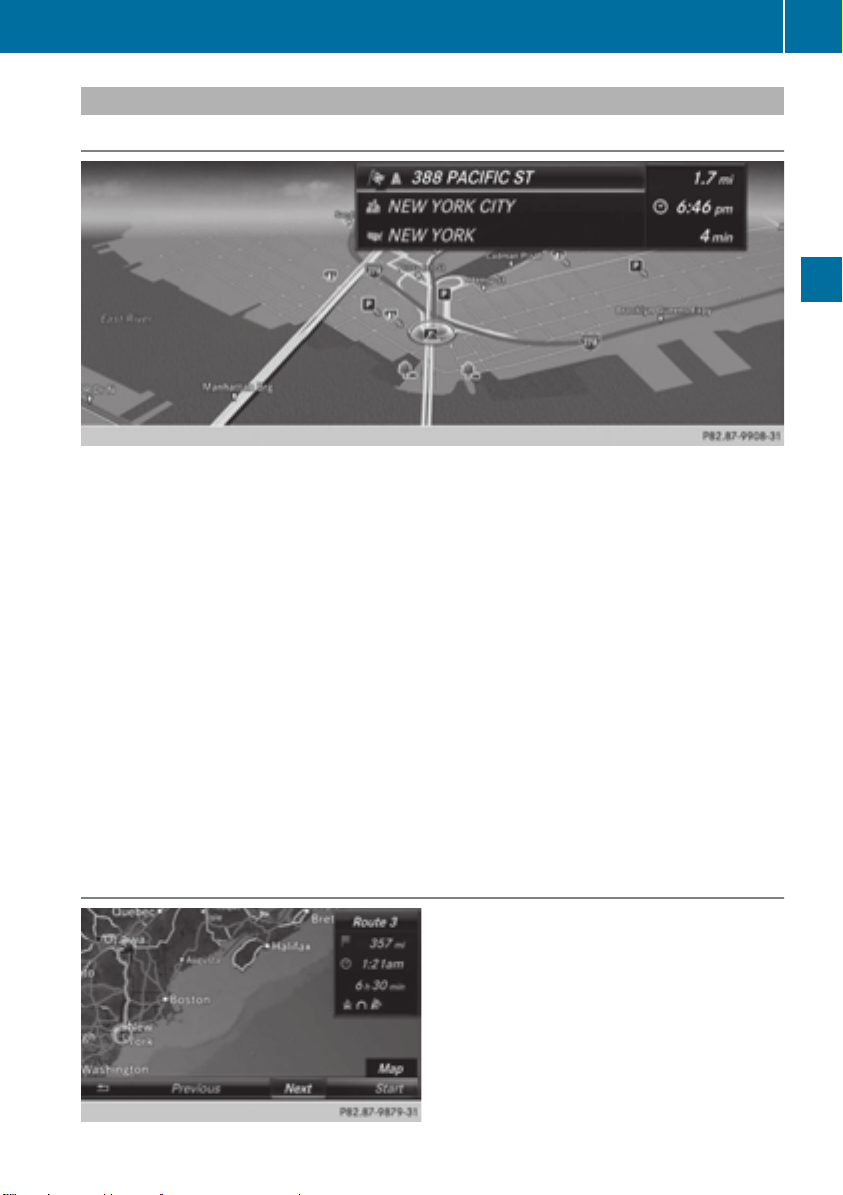
Route guidance
Route information
Destination information
X
To switch to navigation mode: press the Ø button.
X
To show the menu: press the controller.
X
To select RouteRoute: turn and press the controller.
X
Select Destination InformationDestination Information.
The destination and existing way points are displayed with distances, travel time and arrival
time.
X
To select a destination/way point: turn and press the controller.
The address appears.
X
Select SaveSave.
The destination/way point can be saved as a navigable address book contact or as "My
address".
X
To call up the map: select MapMap.
X
Move the map, change the map scale and select the destination/way point (Y page 85).
X
To call a destination/way point: select CallCall.
If a phone is connected and a phone number is available, COMAND switches to the
telephone function.
97
Navigation
Take alternate route
Z
Page 100
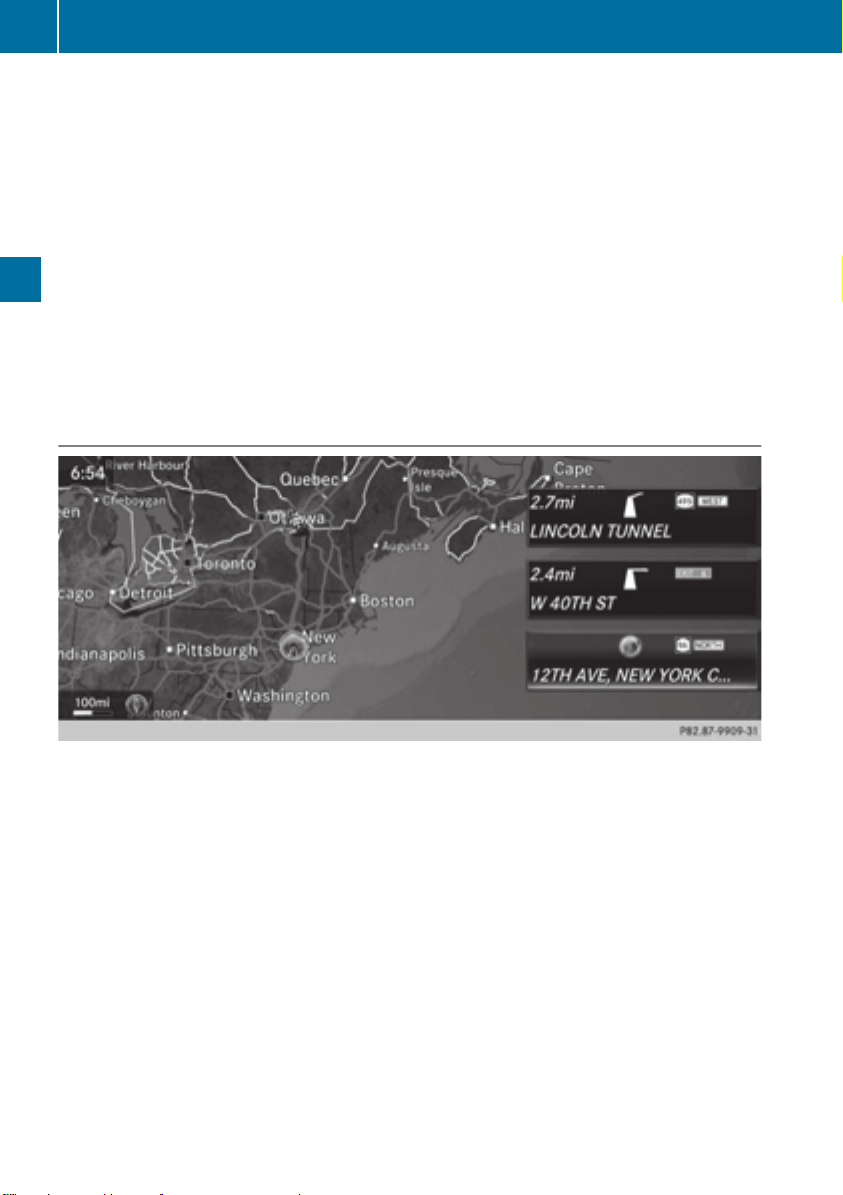
Route guidance
98
If the CalculateCalculate AlternativeAlternative RoutesRoutes setting is activated O, different routes will be offered
each time a route is calculated (Y page 72).
You can also view these for the current route any time from COMAND.
Routes 1, 2 and 4 are displayed with a dark blue line (Y page 72).
Route 3 is the most economic route and is displayed with a green line.
X
To switch to navigation mode: press the Ø button.
X
To show the menu: press the controller.
X
To select RouteRoute: turn and press the controller.
X
Select All Route MapAll Route Map.
Route 1 is shown.
X
To display additional routes: select NextNext or PreviousPrevious.
X
To start a new route guidance: select StartStart.
Navigation
Route list
X
To switch to navigation mode: press the Ø button.
X
To show the menu: press the controller.
X
To select RouteRoute: turn and press the controller.
X
Select Route ListRoute List.
The route list shows the next change of direction and the immediate distances from the
current vehicle position.
 Loading...