

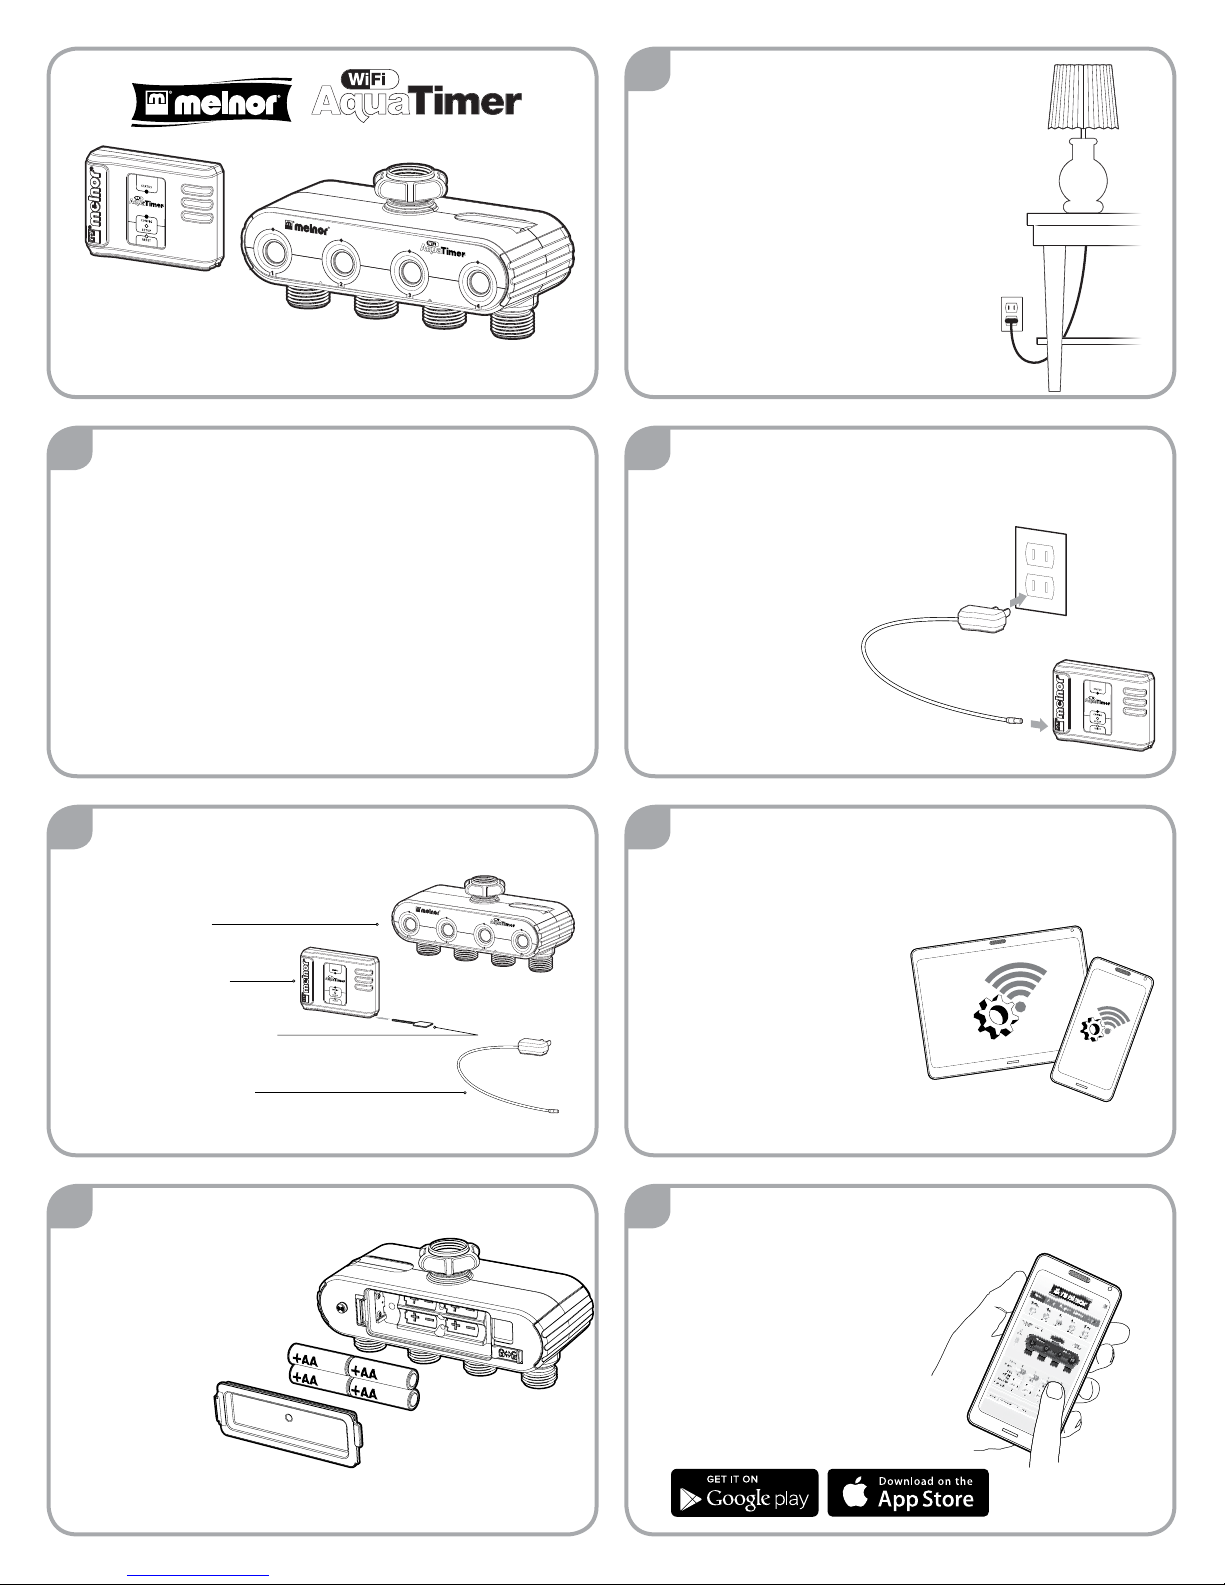
Melnor WiFi AquaTimer 15043C, WiFi AquaTimer Setup Manual
TM
TM
Setup Guide
4
Determine the best location for the
Control Unit. The Control Unit will
need to be plugged in at all times.
It needs to be located in an area that
has good WiFi signal as well as within
200 feet of the Valve Unit.
Walls, electrical equipment and other
materials may aect this range.
1
This guide will help you connect your
WiFi AquaTimer to your home WiFi network using a
smartphone or tablet.
After the initial setup, you can program your timer from
a smart phone, tablet or computer.
If at any time you need assistance, feel free to
contact our support toll-free at:
844-MELNOR1 (844-635-6671)
or by email at: wisupport@melnor.com
2
After opening the package, please ensure you
have all parts.
• Valve Unit
• Control Unit
• Yellow Setup Tool
• Power Adapter
If you discover that you are missing a part, please contact us:
844-MELNOR1 or wisupport@melnor.com
TM
5
Use the included power
adapter to connect the
Control Unit to an
indoor wall outlet.
You should see
ashing LED lights,
alternating between
“STATUS” and
“CONFIG”.
6
Ensure that your smartphone or tablet is connected
to the WiFi network you want to use
for your WiFi AquaTimer.
If not, switch your WiFi
network in the smart
device settings.
This is for setup only. Once
connected, you can control
your timer from anywhere.
3
Install batteries in the Valve Unit.
You will need to supply
4 alkaline AA batteries.
Ensure the battery
cover is locked.
7
On your smart device, download and
install the “Melnor AquaTimer
Conguration” app.
Before launching the app,
proceed to step 8.
The app is only used to
connect the timer to your home
WiFi network.
Note: Do not use lithium
or rechargable batteries in this product.
Copyright © 2015, Melnor, Inc. 15043_INS_E_00
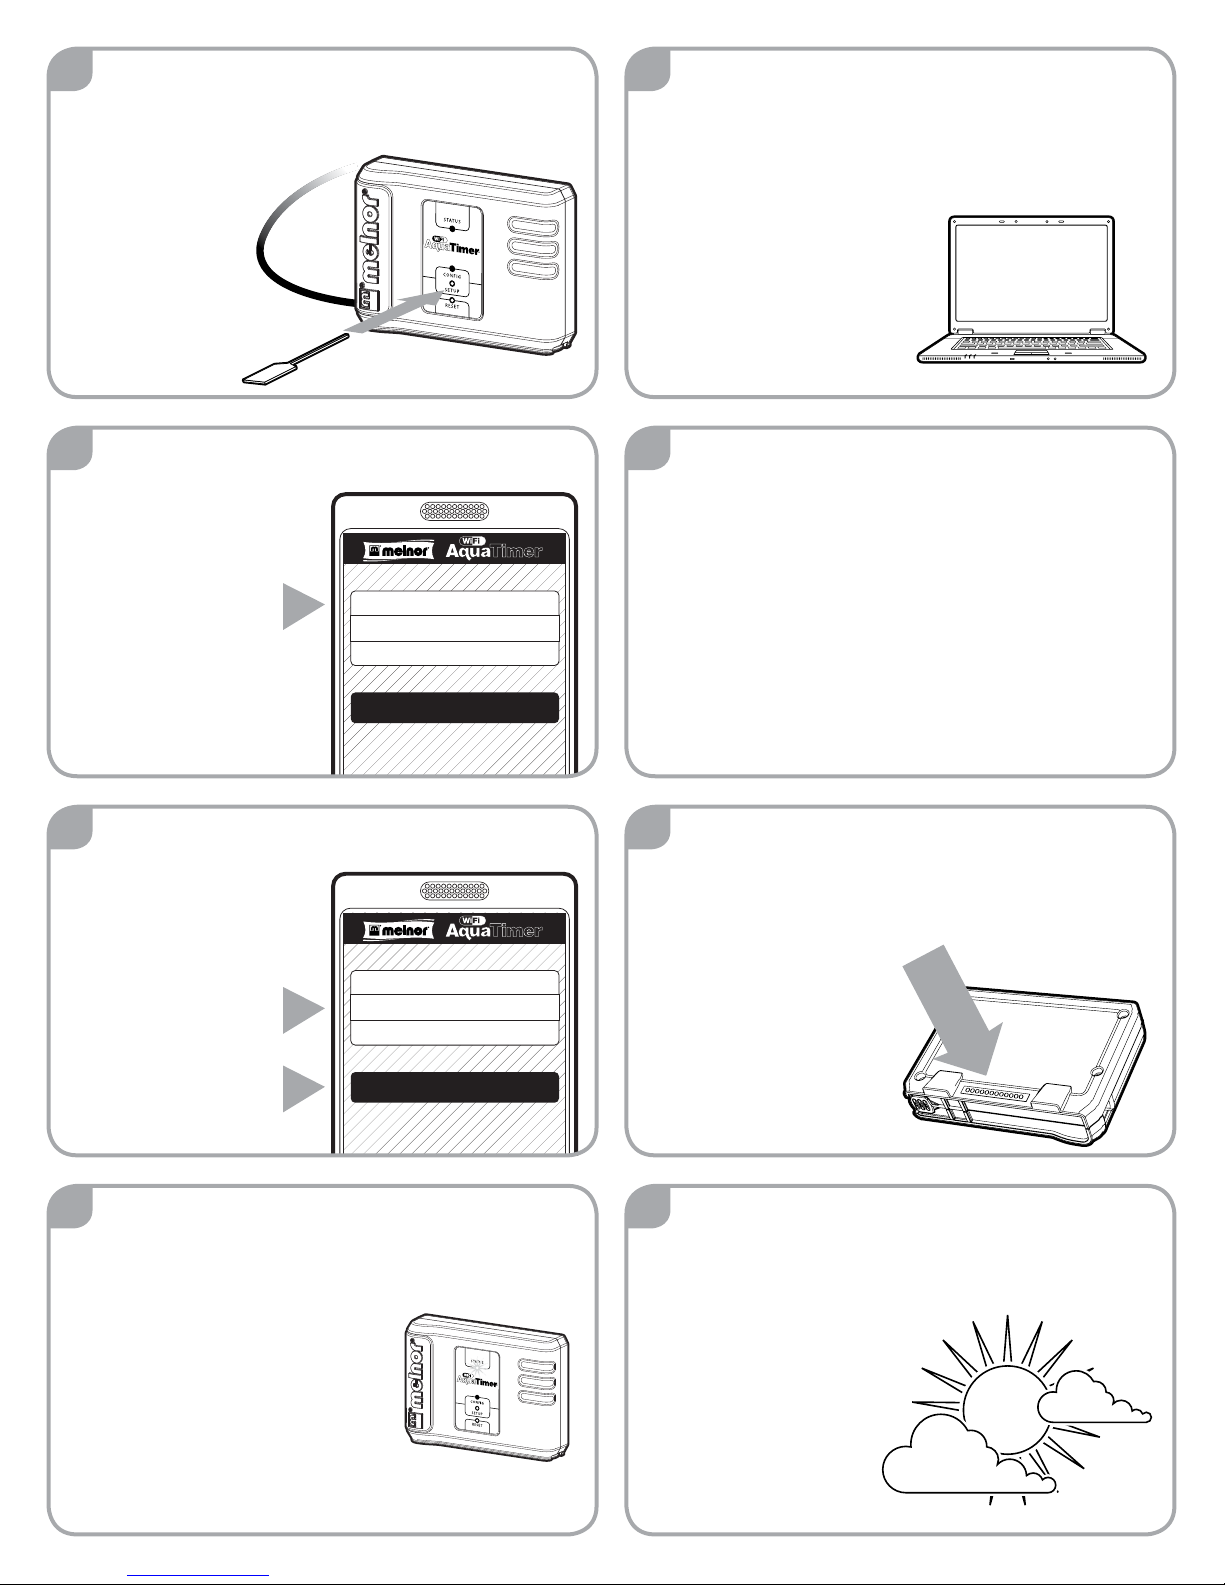
8
12
Remove the Yellow Setup Tool from the bottom
of the Control Unit and gently push it into the
“Setup” button until the
“CONFIG” light is lit solid
and the “STATUS”
light goes out.
9
Launch the app.
Beside “SSID” you should
see the name of your WiFi
home network.
If you don’t see the
correct network name,
your smart device is not
connected to the WiFi
network.
SSID Network Name
Password xxxxxx
Gateway IP Address 192.168.000.000
Start
You no longer need the Melnor AquaTimer
Conguration app. You can turn it o and uninstall it
at anytime. If you ever need to setup your timer on
another WiFi network, you can easily reinstall the app.
TM
Moving forward, everything
can be completed using
any web browser on a smart
phone, tablet or computer.
13
Go to: www.wiaquatimer.com
TM
Click on “Register” on the top menu bar.
Follow the prompts to setup your account.
Once registered, you will need to log in using the
password you just created.
Note: It is important for you to remember your login
information. You will need to access this website to
program and review your WiFi AquaTimer.
10
Enter the network
password for your WiFi
home network.
The app will use this
information to add your
WiFi AquaTimer to
your WiFi home
network.
SSID Network Name
Password xxxxxx
Gateway IP Address 192.168.000.000
Press “Start”.
11
On the Control Unit, watch for the Cong light to
go out and the Status light to begin ashing.
This process may take several minutes. Please be
patient.
Congratulations, the Control Unit
is now connected to your
home WiFi network.
Start
14
The website will then prompt you to enter the serial
number of your Control Unit.
TM
You can nd the 12-character serial number on the
back of the Control Unit.
15
Next, you enter your postal code.
This information is used to provide
local weather information.
TM
Note: Depending on your network,
the app may or may not conrm the
connection. If the Status light has started blinking,
the unit is connected.
Copyright © 2015, Melnor, Inc. 15043_INS_E_00
 Loading...