

Page 1

ÍNDICE
Aparato principal
Parte frontal 1. Piloto LED azul para el modo standby
ES
2. Compartimento para los discos
3. PLAY: Reproducción
4. OPEN/CLOSE: Abrir y cerrar el compartimento para los discos
5. STANDBY: Encender desde el modo standby y volver al modo
standby
6. STOP/RES: Parar la reproducción;
Pulsar repetidas veces: Seleccionar la resolución para HDMI y
Progressive Scan
7. IR : Receptor para el emisor del mando a distancia
8. USB: Piloto LED para el modo USB
9. Pantalla (ver más abajo)
10. Lectores para diferentes tarjetas de memoria
11. Con exi ón U SB
12. PHONES: Toma de auriculares
13. VOLUME: Regulador de volumen para los auriculares
Parte posterior 1. Interruptor de funcionamiento
2. Cable de red
3. HDMI: Salida HDMI (transmisión digital de imagen y sonido)
4. FRONT: Conexiones para los altavoces delanteros izquierdo/derecho
5. REAR: Conexiones para los altavoces traseros izquierdo/derecho
6. CENT: Conexión para el altavoz central
7. S-VIDEO: Salida S-VIDEO (transmisión de la imagen al televisor)
8. SUB: Conexión para subwoofer (altavoz de bajos)
9. VIDEO OUT: Salida VIDEO (transmisión de la imagen al televisor)
10. OPTICAL: Salida de audio digital
11. AV CONNECTOR (RGB) - TV: Euroconector para el televisor o el
aparato de vídeo
12. Y Pr Pb: Salidas de componentes
13. COAXIAL: Salida de audio digital
Pantalla 1. Medio: DVD
2. Reproducción
3. Pausa activada
4. Reproducción activada
5. Repetición activada
6. Disco en formato de sonido „dts”
7. Disco en formato de sonido Dolby Digital
8. Tiempo transcurrido en formato H:MM:SS
9. título actual / capítulo actual
10. PBC: Función Playback-Control activada (video-CD )
11. Med io: MP3
12. Medio: VCD
1
Page 2

Mando a distancia
Mando a distancia DVD y mando a distancia universal
En estas instrucciones están descritas las funciones de las teclas para el manejo
del reproductor DVD. No obstante, con este mando a distancia se podrá
manejar aún más aparatos. La funcionalidad del mando a distancia como
mando a distancia universal se describe en el capítulo “El mando a distancia
universal”, página 36.
Si acaso el reproductor DVD no reaccione al pulsar una tecla, pulse primero la
tecla de fuentes DVD.
1. Encender desde el modo standby y viceversa
2. TV: Gerätewahltaste: Bedienung eines anderen Gerätes (z. B. TV)
3. STB: Gerätewahltaste: Bedienung eines anderen Gerätes (z. B. SatReceiver, Set-Top-Box)
4. DVD: Control del reproductor DVD
5. VCR: Gerätewahltaste: Bedienung eines anderen Gerätes (z. B.
Videorecorder)
6. AUX: Gerätewahltaste: Bedienung eines anderen Gerätes (z. B.
Verstärker)
7. CODE: Introducir el código para otros tipos de aparatos, véase página 36
8. SUBTITLE: Seleccionar el idioma de los subtítulos;
abrir el teletexto en el modo TV, véase página 36
9. TITLE: Acceder al menú título (DVD);
EPG: „Electronic Program Guide“, véase página 36
10. Teclas de dirección: Navegar dentro de los menús
11. ENTER: Confirmar la selección
12. RETURN/EXIT: Volver en el menú
13. MENU: Acceder al menú
14. DIGEST: avance de imágenes
15. PROGRAM: Programar el orden de los títulos
16. BOOKMARK: Función marca de lectura
17. SEARCH: Seleccionar título/tiempo
18. AUDIO: Selección directa del idioma (DVD)
19. ZOOM: Ampliar la imagen
20. USB/CARD: Seleccionar el modo USB o el modo de tarjeta
21. CARD SELECT: Tecla sin función en este modelo
22. Indicador LED para la confirmación de la pulsación de una tecla
23. 0-9: Teclas numéricas, p. ej., para la selección directa del título y capítulo
24. CLEAR / -/--: Cancelar selección (menús) / Operación TV: Entrada de
numeros de programa (1-2 cifras)
25. SETUP/AV: Abrir el menú de configuración /
Control de otros aparatos, véase página 36
26. : Saltar título hacia delante/atrás (SKIP);
P+/P–: Selección de programa en el TV; véase página 36
27. : Selección función sin sonido en el TV; véase página 36
28. +/–: Subir/bajar volumen en el TV; véase página 36
29. : Retroceso rápidos
30. : Reproducción
31. : Avance rápidos
32. / KEY LOCK: Empezar grabación / Bloqueo de las teclas en la
parte frontal del aparato
2
Page 3

33. : Parar la reproducción
34. : Interrumpir la reproducción
35. OPEN/CLOSE: Abrir y cerrar el compartimento para los discos
36. SLOW/F: Avance lentos
37. SLOW/R: Retroceso lentos
38. REPEAT: Repetición
39. REPEAT A-B: Repetición de un fragmento definido
40. RANDOM: Reproducir el título de forma aleatoria
41. ANGLE: Posición de cámara (ángulo de vista)
42. 3D: Función surround virtual
43. DISPLAY:Indicación título actual / tiempo transcurrido
ES
3
Page 4

ÍNDICE
Índice . . . . . . . . . . . . . . . . . . . . . . . . . . . . . . . . . . . . . . . . . . 1
Aparato principal . . . . . . . . . . . . . . . . . . . . . . . . . . . . . . . . . . . . . . . . . 1
Mando a distancia . . . . . . . . . . . . . . . . . . . . . . . . . . . . . . . . . . . . . . . . 2
Índice. . . . . . . . . . . . . . . . . . . . . . . . . . . . . . . . . . . . . . . . . . 4
Advertencias de seguridad . . . . . . . . . . . . . . . . . . . . . . . . 6
No permita que los niños toquen aparatos eléctricos . . . . . . . . . . . . . 6
Coloque el aparato de forma segura . . . . . . . . . . . . . . . . . . . . . . . . . . 6
Conexión a la red . . . . . . . . . . . . . . . . . . . . . . . . . . . . . . . . . . . . . . . . . 6
Nunca efectúe Usted mismo la reparación del aparato . . . . . . . . . . . . 7
El reproductor de CDs . . . . . . . . . . . . . . . . . . . . . . . . . . . . . . . . . . . . . 7
Auriculares . . . . . . . . . . . . . . . . . . . . . . . . . . . . . . . . . . . . . . . . . . . . . . 7
En caso de problemas de funcionamiento . . . . . . . . . . . . . . . . . . . . . . 7
Manejo seguro de las pilas . . . . . . . . . . . . . . . . . . . . . . . . . . . . . . . . . . 8
Limpiar el aparato . . . . . . . . . . . . . . . . . . . . . . . . . . . . . . . . . . . . . . . . . 8
Aspectos generales . . . . . . . . . . . . . . . . . . . . . . . . . . . . . . . 9
Acerca de los DVDs . . . . . . . . . . . . . . . . . . . . . . . . . . . . . . . . . . . . . . . . 9
Otros formatos reproducibles . . . . . . . . . . . . . . . . . . . . . . . . . . . . . . 10
Formatos de sonido surround disponibles . . . . . . . . . . . . . . . . . . . . 10
Preparación . . . . . . . . . . . . . . . . . . . . . . . . . . . . . . . . . . . . .11
Desembalar el aparato . . . . . . . . . . . . . . . . . . . . . . . . . . . . . . . . . . . . 11
Colocación de las pilas en el mando a distancia . . . . . . . . . . . . . . . . 11
Conexiones y posibilidades de conexión . . . . . . . . . . . 12
Colocación del aparato . . . . . . . . . . . . . . . . . . . . . . . . . . . . . . . . . . . 12
Posibilidades de conexión entre el reproductor DVD y el televisor . . 12
Conexión TV con función Progressive Scan . . . . . . . . . . . . . . . . . . . . 14
Conexión home cinema con transmisión analógica de sonido . . . . . 16
Transmisión de sonido digital . . . . . . . . . . . . . . . . . . . . . . . . . . . . . . 17
Conexión a la red . . . . . . . . . . . . . . . . . . . . . . . . . . . . . . . . . . . . . . . . 17
Opcional: Conectar auriculares . . . . . . . . . . . . . . . . . . . . . . . . . . . . . 17
Funciones de las teclas . . . . . . . . . . . . . . . . . . . . . . . . . . 18
Control en el aparato o desde el mando a distancia . . . . . . . . . . . . . 18
Standby/Encender/Apagar . . . . . . . . . . . . . . . . . . . . . . . . . . . . . . . . . 18
Colocar el disco . . . . . . . . . . . . . . . . . . . . . . . . . . . . . . . . . . . . . . . . . 18
Leer tarjetas de memoria o Memory Sticks USB . . . . . . . . . . . . . . . . 19
Bloqueo de teclas – KEY LOCK . . . . . . . . . . . . . . . . . . . . . . . . . . . . . . 19
Funciones de reproducción . . . . . . . . . . . . . . . . . . . . . . . . . . . . . . . . 20
Funciones de búsqueda . . . . . . . . . . . . . . . . . . . . . . . . . . . . . . . . . . . 20
Funciones de repetición . . . . . . . . . . . . . . . . . . . . . . . . . . . . . . . . . . . 21
Programación del orden de reproducción – PROGRAM . . . . . . . . . . 22
Selección directa de título/tiempo – SEARCH . . . . . . . . . . . . . . . . . . 23
Marcar un „punto de localización” – BOOKMARK . . . . . . . . . . . . . . 23
Seleccionar síntesis – DIGEST (DVD y VCD) . . . . . . . . . . . . . . . . . . . 24
RANDOM e INTRO (sólo CD Audio) . . . . . . . . . . . . . . . . . . . . . . . . . . 25
Funciones de imagen . . . . . . . . . . . . . . . . . . . . . . . . . . . . . . . . . . . . . 25
Funciones de sonido . . . . . . . . . . . . . . . . . . . . . . . . . . . . . . . . . . . . . . 26
TITLE MENU, DVD MENU . . . . . . . . . . . . . . . . . . . . . . . . . . . . . . . . . . 27
MENU AUDIO y SUBTITLE . . . . . . . . . . . . . . . . . . . . . . . . . . . . . . . . . . 27
Función PBC (sólo VCD 2.0) . . . . . . . . . . . . . . . . . . . . . . . . . . . . . . . . 27
Navegar en los soportes de datos MP3 y JPEG . . . . . . . . . . . . . . . . . 28
4
Page 5

Ajustes en el menú SETUP . . . . . . . . . . . . . . . . . . . . . . . . . 29
Menú AJUSTES DE SISTEMA . . . . . . . . . . . . . . . . . . . . . . . . . . . . . . . .30
Menú ALTAVOCES . . . . . . . . . . . . . . . . . . . . . . . . . . . . . . . . . . . . . . . .32
Menú DOLBY DIGITAL . . . . . . . . . . . . . . . . . . . . . . . . . . . . . . . . . . . . .33
Menú PREFERENCIAS . . . . . . . . . . . . . . . . . . . . . . . . . . . . . . . . . . . . . .34
El mando a distancia universal . . . . . . . . . . . . . . . . . . . 36
Advertencias de seguridad . . . . . . . . . . . . . . . . . . . . . . . . . . . . . . . . .36
Aplicaciones . . . . . . . . . . . . . . . . . . . . . . . . . . . . . . . . . . . . . . . . . . . . .36
Programar códigos de aparatos . . . . . . . . . . . . . . . . . . . . . . . . . . . . .36
Búsqueda manual de códigos . . . . . . . . . . . . . . . . . . . . . . . . . . . . . . .37
Búsqueda automática . . . . . . . . . . . . . . . . . . . . . . . . . . . . . . . . . . . . .37
Búsqueda de códigos por marcas . . . . . . . . . . . . . . . . . . . . . . . . . . . .38
Identificación del código . . . . . . . . . . . . . . . . . . . . . . . . . . . . . . . . . . .38
Funcionamiento normal . . . . . . . . . . . . . . . . . . . . . . . . . . . . . . . . . . .39
Función „Apagar todo” . . . . . . . . . . . . . . . . . . . . . . . . . . . . . . . . . . . .39
EPG – Programación electrónica . . . . . . . . . . . . . . . . . . . . . . . . . . . . .39
Funciones universales ("Punch Through") . . . . . . . . . . . . . . . . . . . . .40
Solución de problemas . . . . . . . . . . . . . . . . . . . . . . . . . . . . . . . . . . . .41
Características técnicas del mando a distancia universal . . . . . . . . . . 41
En caso de problemas . . . . . . . . . . . . . . . . . . . . . . . . . . . . 42
Eliminación . . . . . . . . . . . . . . . . . . . . . . . . . . . . . . . . . . . . 43
Especificaciones técnicas . . . . . . . . . . . . . . . . . . . . . . . . . 44
ES
5
Page 6

ADVERTENCIAS DE SEGURIDAD
Acerca de las presentes instrucciones
Antes de la puesta en marcha, lea atentamente las presentes advertencias de seguridad. Preste
atención a las advertencias que aparecen en el propio aparato y en las instrucciones de
funcionamiento.
Mantenga siempre a su alcance las instrucciones de funcionamiento. Si vende o cede el aparato
a otra persona,
No permita que los niños toquen aparatos eléctricos
Los niños desconocen los peligros que pueden surgir del uso de aparatos
eléctricos. No deje los aparatos eléctricos al alcance de niños pequeños sin
vigilancia.
Mantenga también los embalajes alejados de los niños. Existe peligro de
asfixia.
Coloque el aparato de forma segura
entréguele sin falta también las presentes indicaciones.
Coloque el aparato sobre una superficie firme y lisa. No está diseñado para
funcionar en espacios con un alto nivel de humedad (como, por ejemplo, el
cuarto de baño).
Procure siempre que el espacio esté suficientemente ventilado. No se
debe bloquear la ventilación tapando los orificios de ventilación con
objetos como revistas, manteles, cortinas, etc..
No permita que el aparato esté expuesto a fuentes directas de calor
(p.ej., la calefacción).
Preste atención a que el aparato no esté expuesto a la luz solar directa.
No exponga el aparato a gotas de agua o salpicaduras y no coloque
recipientes llenos de líquido, p.ej., floreros, sobre el aparato.
No instale el aparato cerca de campos magnéticos
(p.ej., televisores o altavoces).
No se deben colocar fuentes de fuego (p. ej., velas encendidas) encima
del o junto al aparato.
Preste atención a las siguientes condiciones ambientales:
Conexión a la red
Conecte el aparato sólo a una toma de corriente bien accesible (230 V ~
50 Hz) cercana al lugar de emplazamiento. Para que el aparato pueda
desconectarse rápidamente de la corriente, el enchufe debe permanecer
accesible.
No ponga en marcha el aparato cuando éste o el cable de conexión
presenten daños visibles o si el aparato se ha caído. En caso de
desperfectos en la clavija, en el cable de conexión o en el aparato,
desenchúfelo inmediatamente.
Preste atención para que el cable de conexión no pueda ser causa de
tropiezos. El cable de conexión no debe ser doblado o aplastado.
6
Page 7
Si el aparato es trasladado de un lugar frío a un lugar caliente, espere un
rato antes de conectarlo a la red. El agua condensada que se forma podría
dañar el aparato. Cuando el aparato haya alcanzado la temperatura
ambiental, se lo podrá poner en funcionamiento sin ningún peligro.
Tormenta
En caso de ausencia prolongada o de tormenta, desconecte el aparato de
la red eléctrica y de la antena.
Nunca efectúe Usted mismo la reparación del aparato
No intente en ningún caso abrir y/o arreglar Usted mismo el aparato.
¡Existe el peligro de recibir una descarga eléctrica! Tampoco manipule el
cable de red del aparato.
Con el fin de evitar accidentes, en caso de mal funcionamiento del aparato
diríjase a nuestro servicio de reparación o a otro taller especializado.
El reproductor de CDs
El reproductor de CDs es un producto láser de Clase 1. El aparato está
equipado con un sistema de seguridad que impide la salida de los
peligrosos rayos láser durante su uso normal. Para evitar lesiones en los
ojos, no manipule o dañe nunca el sistema de seguridad del aparato.
ES
Auriculares
Un volumen alto al usar auriculares puede causar la pérdida del sentido
auditivo.
¡Antes de ponerse los auriculares, asegúrese de ajustar el volumen al
mínimo! Su oído puede dañarse si se mantiene el volumen muy alto o si
el oído se expone de golpe a un volumen alto.
En caso de problemas de funcionamiento
Si el aparato mostrara problemas de funcionamiento es posible que se
haya producido una descarga electroestática. Para ello desenchufe la
clavija de red y extraiga las pilas. A continuación vuelva a poner las pilas y
vuelva a enchufar el aparato a la toma de corriente. De ese modo se
reinicializa el aparato.
7
Page 8

Manejo seguro de las pilas
El mando a distancia del aparato necesita pilas. Para ello, observe las
siguientes indicaciones:
Mantenga las pilas alejadas de los niños. Las pilas pueden representar
un peligro de muerte si se tragan. En caso de ingestión accidental de
una pila hay que avisar inmediatamente a un médico.
No arroje las pilas al fuego, no las cortocircuite y no las abra.
Antes de colocarlas, limpie los contactos de las pilas y del aparato, en
caso de que sea necesario.
Cambie siempre todas las pilas al mismo tiempo.
Utilice solamente pilas del mismo tipo. No utilice tipos diferentes; no
mezcle pilas usadas con nuevas.
Al colocar las pilas tenga en cuenta su polaridad (+/–).
Si no va a utilizar el aparato durante algún tiempo, extraiga las pilas.
¡Retire inmediatamente del aparato las pilas gastadas! ¡Existe un alto
peligro de derrame!
No exponga las pilas a condiciones extremas. ¡No coloque el aparato
por ejemplo sobre radiadores! ¡Existe un alto peligro de derrame!
¡No intente jamás recargar pilas normales! ¡Existe peligro de explosión!
Retire inmediatamente del aparato las pilas que derramen líquido.
Limpie los contactos antes de introducir pilas nuevas. ¡Existe peligro de
causticación por el ácido de las pilas!
¡En caso de que hubiera salido ácido de las pilas, evite en todo caso que
el líquido entre en contacto con la piel, los ojos y las mucosas! Si el
ácido hubiera entrado en contacto con la piel, enjuague
inmediatamente las zonas afectadas con abundante agua limpia y
acuda a un médico.
Limpiar el aparato
Antes de proceder a limpiar el aparato, desconéctelo de la toma de
alimentación.
Para limpiarlo, emplee un paño seco y suave. Evite emplear detergentes y
productos químicos de limpieza, puesto que podrían dañar las superficies
y/o las inscripciones del aparato.
8
Page 9
ASPECTOS GENERALES
Acerca de los DVDs
El DVD - Digital Versatile Disc (inglés para „disco digital versátil”) es un
medio de almacenamiento digital de información. Los DVDs están
señalizados con uno de los símbolos que aparecen en el margen.
Dependiendo de cómo ha sido grabada la información, existen diferentes
tipos de DVD con diferentes capacidades de almacenamiento.
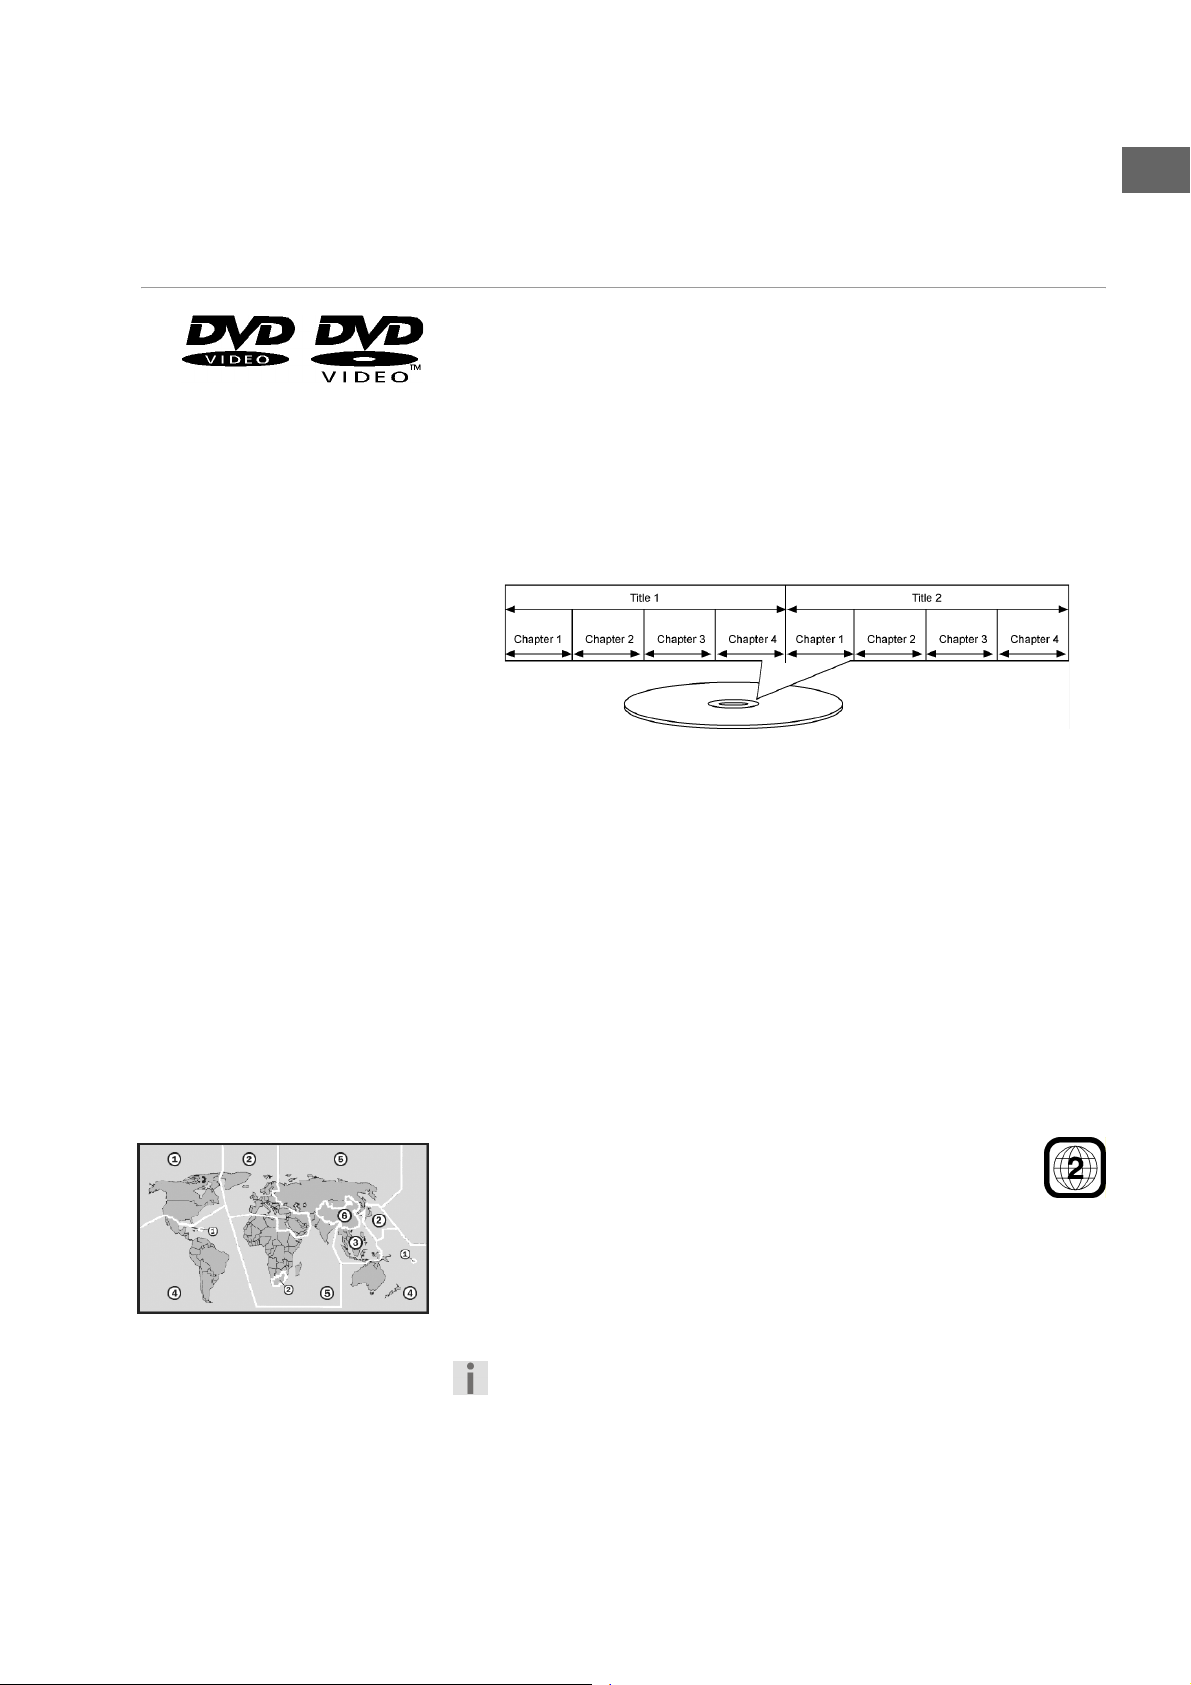
Estructura de un DVD
Los DVDs de vídeo están divididos en títulos y capítulos. Un DVD puede
tener varios títulos que a su vez pueden tener varios capítulos. Los títulos
y capítulos están numerados consecutivamente:
ES
Normalmente el primer título de un DVD contiene indicaciones legales e
información sobre el fabricante. El siguiente título suele ser la película
misma. Los siguientes títulos pueden ser p. ej. reportajes sobre el "makingof", avances de películas o información sobre los actores.
Idiomas y subtítulos En los DVDs se pueden almacenar hasta ocho idiomas de audio y 32
idiomas de subtítulos. Durante la reproducción se pueden combinar el
idioma hablado y los subtítulos según se desee.
Ángulo visual En algunos DVDs también se puede cambiar de perspectiva, siempre y
cuando la película se haya rodado con diferentes posiciones de cámara.
Códigos regionales
Debido a estrategias de distribución a escala mundial, se ha desarrollado
un código para los DVD que sólo permite la reproducción en aparatos que
han sido adquiridos en determinadas regiones.
Este código se basa en un sistema que divide el mundo en seis
regiones. Europa pertenece a la zona 2. Por tal motivo, su
reproductor DVD puede reproducir DVDs que lleven el código
regional 2. El código regional se encuentra impreso en el embalaje del
DVD (véase el logotipo que aparece en el margen).
Además de DVDs con el código regional 2, con este aparato sólo se
pueden reproducir DVDs con el código regional 0 (apto para cualquier
reproductor DVD).
En caso de producirse algún problema durante la reproducción de
ciertos DVDs, asegúrese de que el DVD tenga el código de país 2 ó 0.
9
Page 10

Otros formatos reproducibles
MP3 y WMA
Los formatos MP3 y WMA son formatos de compresión para datos de
audio. WMA significa „Windows Media Audio“ y es más reciente que el
formato MP3.
Para ser reconocidos, los archivos MP3/WMA deben estar almacenados
con la correspondiente extensión de archivo *.mp3 o *.wma.
MPEG4, Nero Digital
MPEG4 es una tecnología de compresión para datos de vídeo y
multimedia ("MPEG" = "Moving Picture Experts Group").
Nero Digital es un nombre de marca para tecnologías de compresión y
descompresión de vídeo basadas en el formato MPEG4.
Formatos de sonido surround disponibles
Los títulos en formato WMA
están señalizados en pantalla
con el siguiente símbolo.
El aparato puede leer dos formatos de sonido surround.
Dolby Digital 5.1
Con el formato de sonido Dolby-Digital el material de audio se memoriza
en forma digital. Se almacenan por separado hasta cinco canales de audio
de plena frecuencia (delantero izquierdo y derecho, central, trasero
izquierdo y derecho), así como un canal de efectos y de bajos (5.1) por
separado. Los soportes de sonido del formato Dolby-Digital están
señalizados con el símbolo de la marca registrada que aparece en el
margen.
Por el hecho de que cada canal es completamente independiente, se crea
un campo de sonido realista con una sensación de audición
”tridimensional” lo que da al sonido distancia, movimiento y una posición
relativa dentro del espacio.
Su equipo es capaz de leer o decodificar estos datos de audio y emitirlos
por las salidas 5.1. Por otra parte, la señal original puede ser transmitida a
un decodificador /amplificador externo por las salidas digitales.
dts (Digital Theatre Systems)
La abreviatura dts hace referencia a un formato de sonido, hasta la fecha
menos conocido, con el que también se pueden almacenar hasta seis (5.1)
canales por separado en un único soporte de sonido. Los soportes de
sonido del formato dts están señalizados con el símbolo de la marca
registrada que aparece en el margen.
Su aparato puede leer estos datos de audio y los transmite para su
descodificación a las salidas digitales ("DIGITAL OUT").
Marcas registradas
„Dolby”, „Pro Logic” y el
símbolo de la D doble son
marcas registradas de los
Dolby Laboratories.
El término ”dts” es una marca
registrada de DTS
Technology, LLC.
10
Page 11

PREPARACIÓN
Desembalar el aparato
ES
Retire la totalidad del material de embalaje, incluidas las láminas plásticas
en la parte frontal del aparato.
¡ATENCIÓN!
No permita que los niños pequeños jueguen con el plástico.
¡Existe peligro de asfixia!
Compruebe el volumen de suministro
Cuando desembale la caja, asegúrese de que están incluidos los
siguientes artículos:
Reproductor DVD
Cable euroconector
Mando a distancia
2 pilas micro (1,5 V; tamaño AAA/LR03)
Instrucciones de funcionamiento y documentos de garantía
Colocación de las pilas en el mando a distancia
Con el mando a distancia se incluyen dos pilas micro de 1,5 V (tamaño
AAA/LR03).
` Retire la tapa del compartimento de las pilas en la parte posterior del
mando a distancia, empujándola en dirección de la flecha.
` Coloque las pilas de tal modo que el polo negativo esté en contacto con
los muelles.
` Vuelva a colocar la tapa del compartimento de las pilas.
¡ATENCIÓN!
Las pilas incluidas en el volumen de suministro no pueden
recargarse ni abrirse ni ser arrojadas al fuego ni ser puestas en
cortocircuito .
Las pilas pueden representar un peligro de muerte si se tragan.
Mantenga por ello las pilas y el mando a distancia fuera del
alcance de niños pequeños. En caso de ingestión accidental hay
que avisar inmediatamente a un médico.
Idioma de la pantalla
Estas pantallas aparecen en las presentes instrucciones en inglés.
No obstante, también se pueden ajustar los idiomas español, alemán, francés, italiano y
holandés
.
11
Page 12
CONEXIONES Y POSIBILIDADES DE CONEXIÓN
El aparato puede conectarse de muchas formas distintas con otros
aparatos de entrada o salida.
Apague todos los aparatos antes de conectarlos. No conecte los
aparatos a la red hasta que no haya realizado todas las conexiones.
Colocación del aparato
Coloque el aparato sobre una superficie firme y lisa. Para ello observe
también las indicaciones de seguridad en página 6.
Algunos barnices agresivos pueden dañar los pies de goma del aparato.
Para evitar este efecto puede colocar el aparato sobre una base.
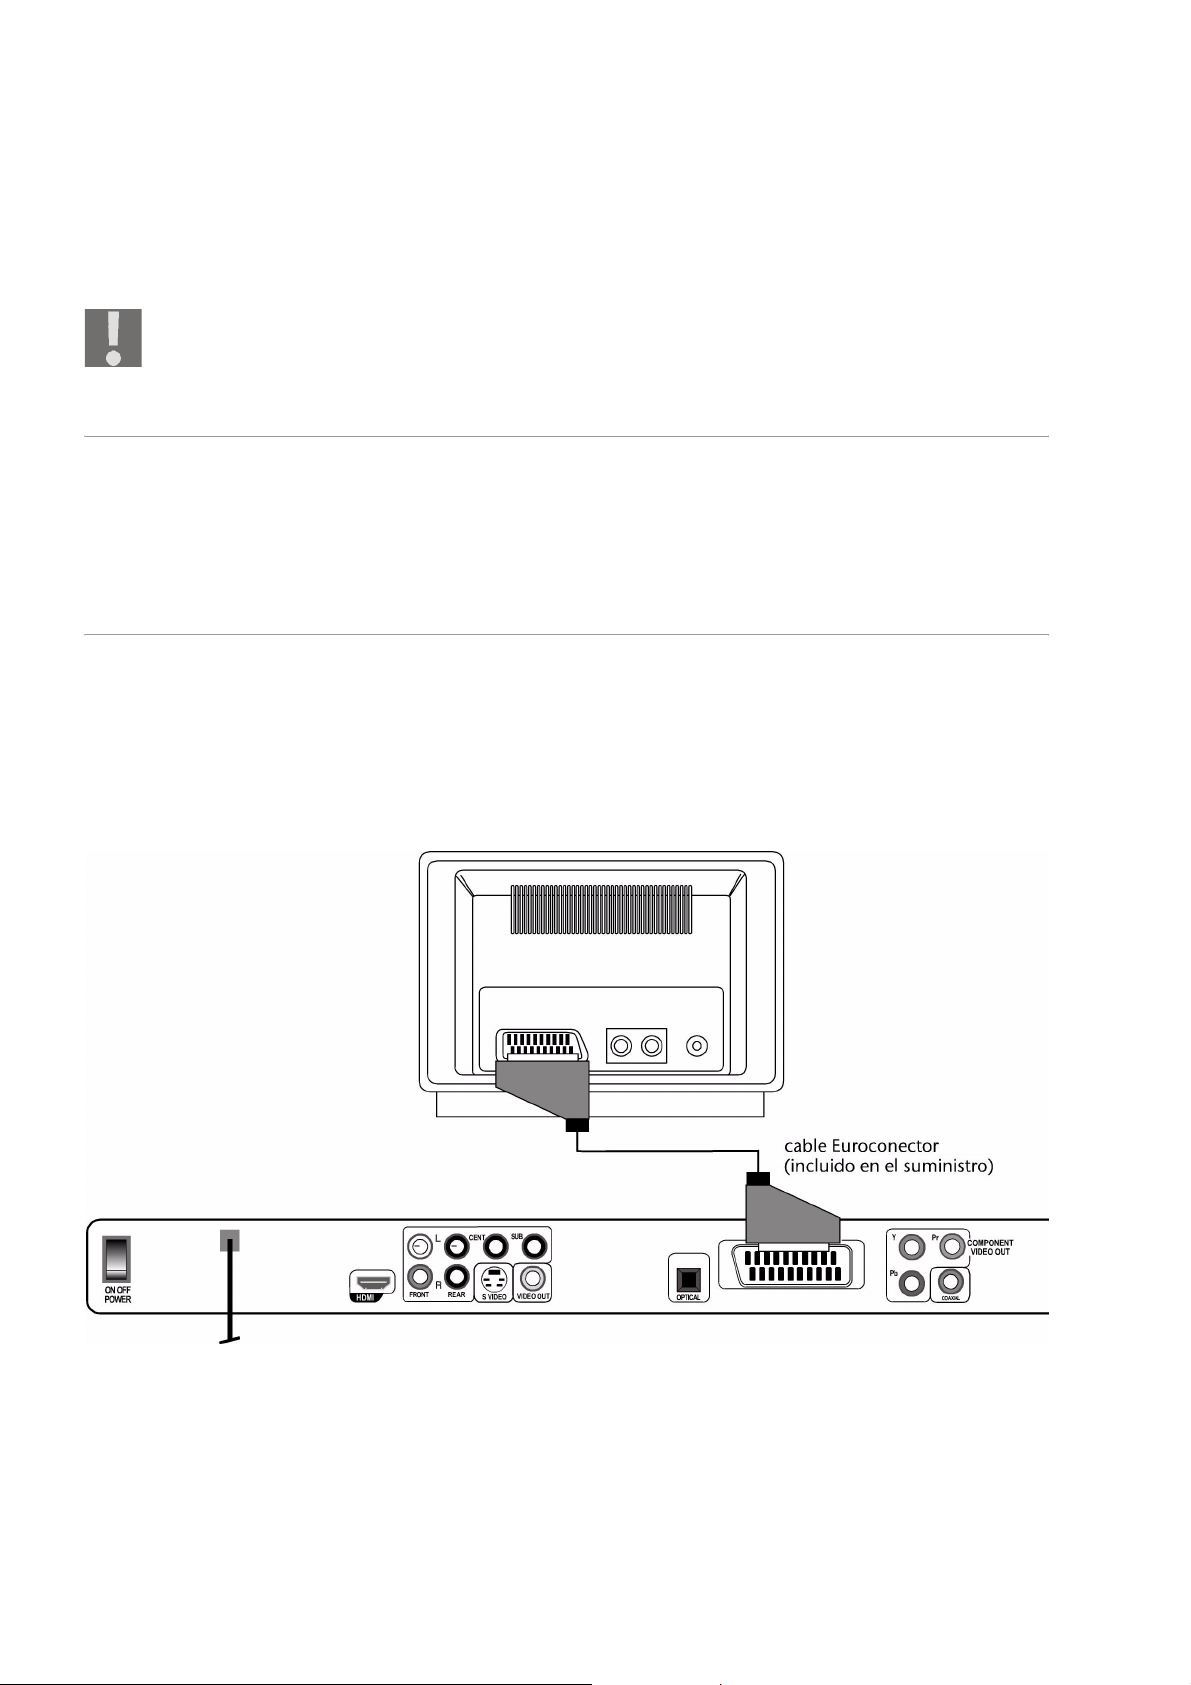
Posibilidades de conexión entre el reproductor DVD y el televisor
Conexión con el televisor a través del cable euroconector
El cable euroconector es la forma más sencilla de conexión entre el
reproductor DVD y el televisor.
Con esta opción logrará una excelente calidad de imagen, siempre y
cuando su televisor pueda procesar señales RGB.
12
Page 13
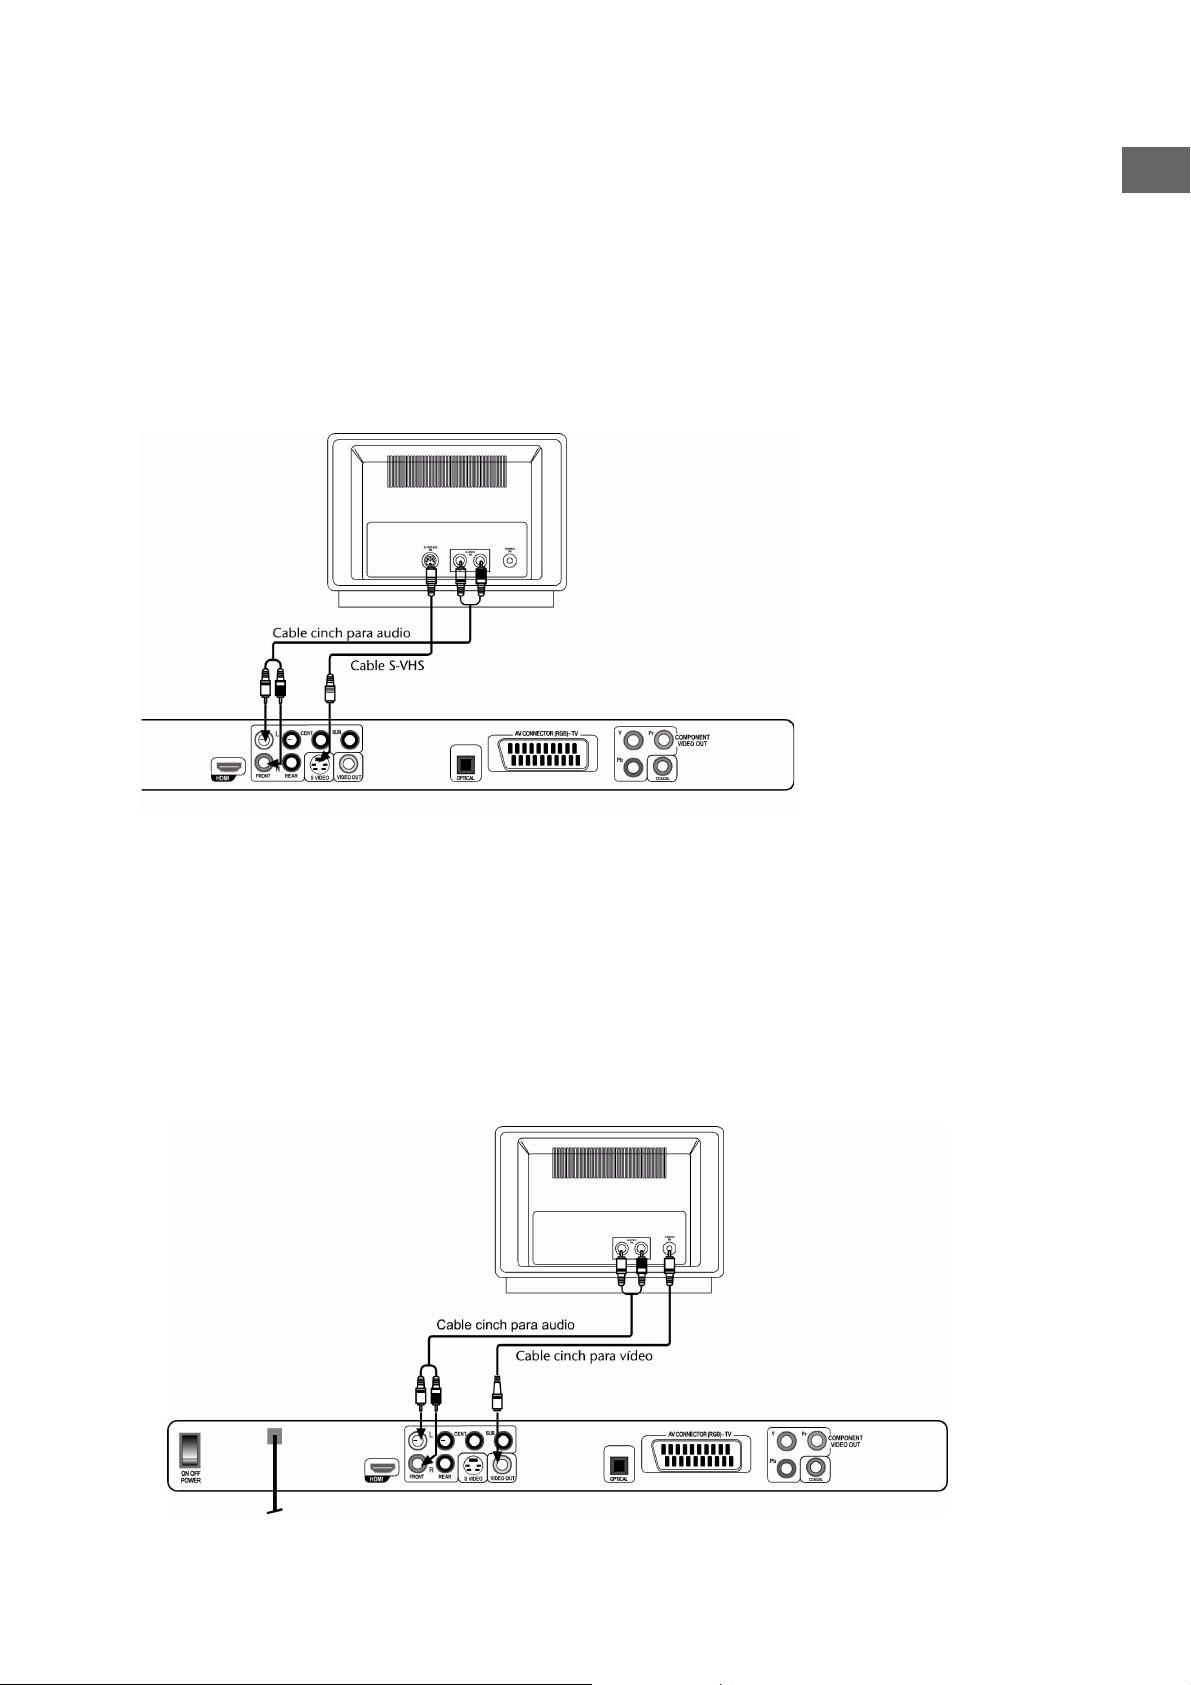
Conexión con el televisor a través de un cable S-VHS.
En caso de que su televisor no disponga de una conexión de
Euroconector, puede utilizar un cable S-VHS para conectarlo al aparato
(enchufe S-VIDEO) . De este modo conseguirá una buena calidad de
imagen.
Adicionalmente se deberá conectar un cable cinch de audio. Tenga en
cuenta los colores de las clavijas cinch que indican izquierda y derecha.
Para la reproducción del sonido estéreo coloque la opción Downmix en el
Speaker Setup del menú AUDIO en STEREO.
Advertencia:
El cable cinch de audio,
además de con el televisor,
también puede conectarse
con un equipo DolbySurround (equipo
estereofónico).
ES
Conexión con el televisor a través de un cable cinch de
vídeo
En caso de que su televisor no disponga ni de una conexión de
Euroconector ni de un enchufe S-VÍDEO, también puede conectarlo al
aparato mediante un cable cinch de vídeo.
Adicionalmente se deberá conectar un cable cinch de audio. Tenga en
cuenta los colores de las clavijas cinch que indican izquierda y derecha.
Para la reproducción del sonido estéreo coloque la opción Downmix en el
Speaker Setup del menú AUDIO en STEREO.
13
Page 14
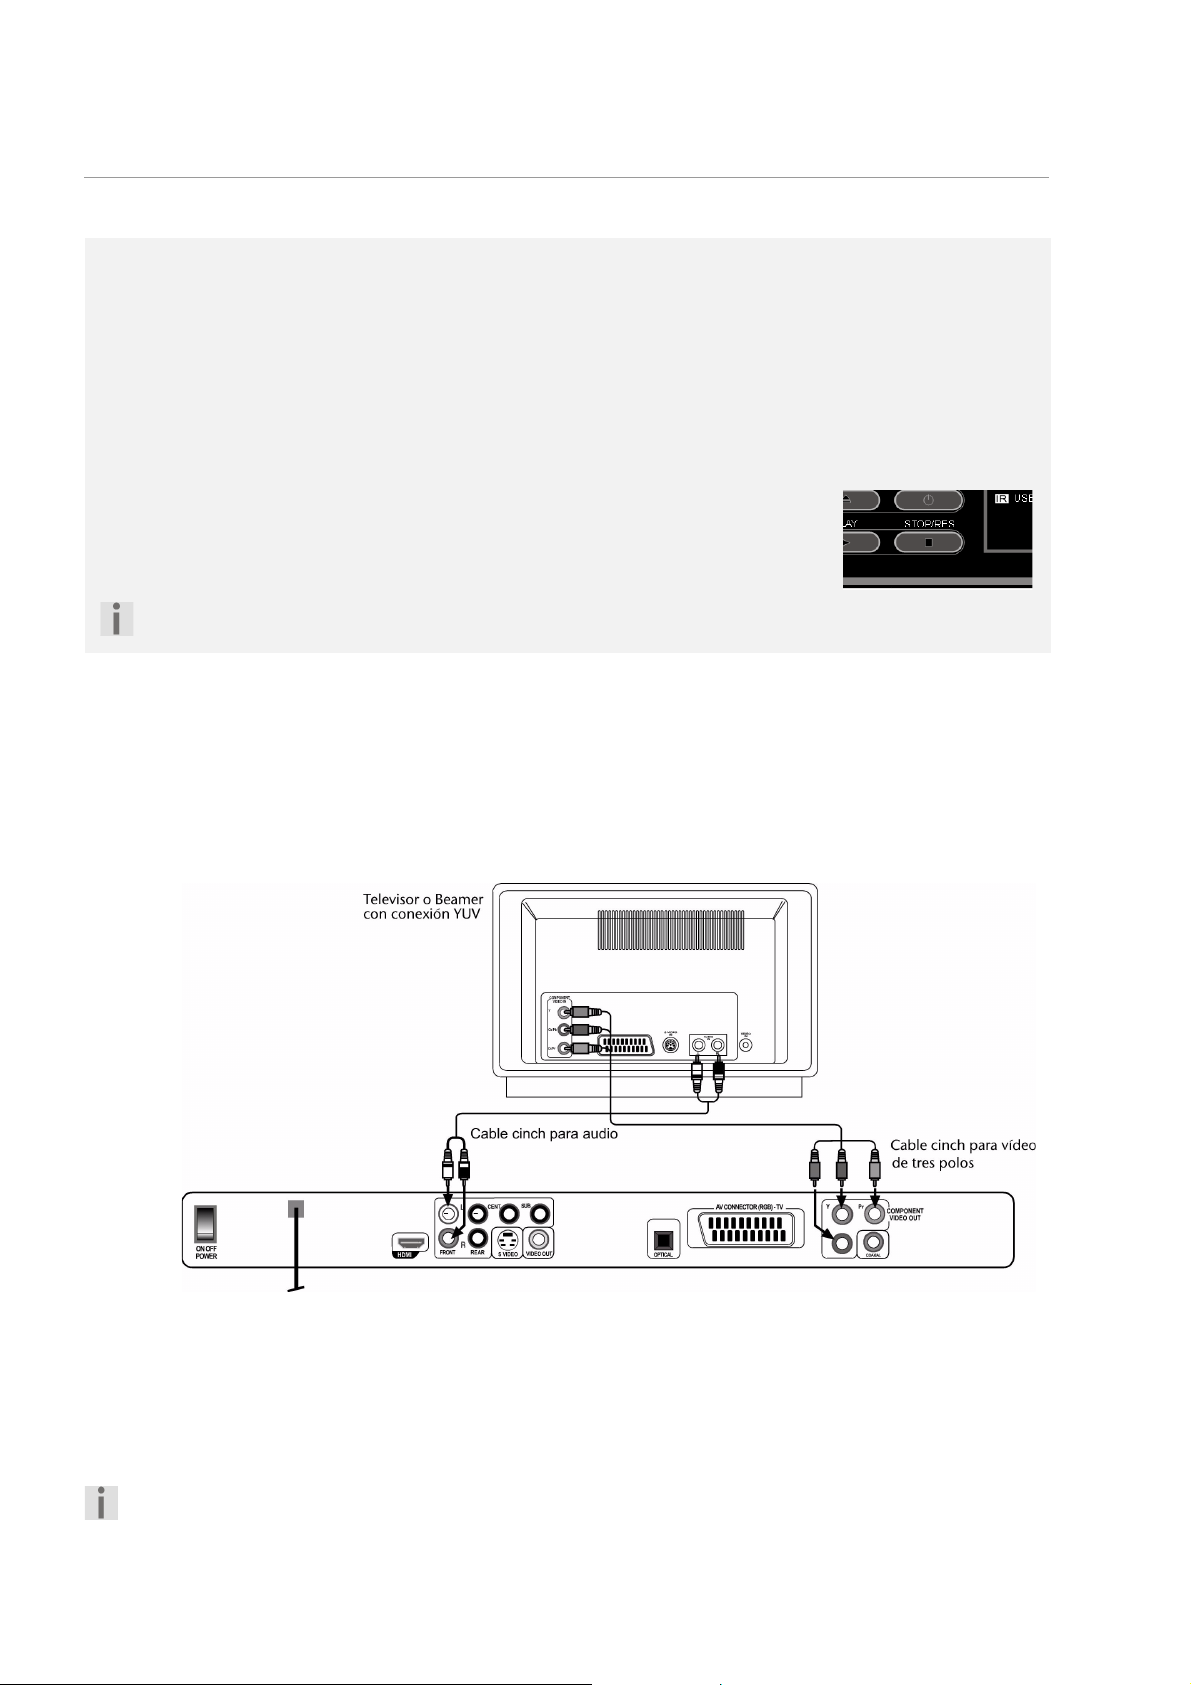
Conexión TV con función Progressive Scan
Progressive Scan
A través de las conexiones de componentes y la conexión HDMI el aparato puede transmitir las señales de
vídeo en el formato PROGRESSIVE SCAN y por ello alcanzar una muy buena calidad de imagen. Esto
presupone, por supuesto, que su televisor (o proyector) también pueda procesar este formato.
Con este formato Progressive-Scan la imagen se emite, en lugar de en 50 semiimágenes, en 50 imágenes
completas. De este modo se reduce al mínimo el parpadeo de la imagen y los movimientos se presentan
de forma mucho más fluida.
Resoluciones „p” e „i”
Con la tecla STOP/RES y en el menú Setup General Setup Page > Setup
HDMI se pueden seleccionar las resoluciones para el formato de imagen
Progressive-Scan („p“) y el formato de imagen estándar („i“ = „interlaced).
Conecte la función Progessive Scan, seleccionando una resolución con „p“.
Desconecte la función Progessive Scan (resolución con „i“), si no se ha conectado el televisor a
través de las tomas de componentes o de las tomas HDMI.
Conexiones para componentes
Si su televisor dispone de entradas de componentes (Y, Cb/Pb, Cr/Pr), se
puede conectar el aparato a través de estas conexiones con el televisor o
también con un proyector. Estas conexiones realizan el así llamado
„formato de color YUV“.
Para la transmisión de imagen conecte los enchufes Y, Pb y Pr del aparato
mediante un cable cinch de vídeo tripolar con los correspondientes
enchufes del televisor o del proyector.
Adicionalmente, para la transmisión de sonido conecte un cable cinch de
audio.
Para la conexión a través de tomas de componentes para la realización de la función Progressive-Scan seleccione la resolución 576p.
14
Page 15
HDMI, el logotipo HDMI y High
Definition Multimedia Interface
son marcas comerciales o
marcas registradas de HDMI
licensing LLC.
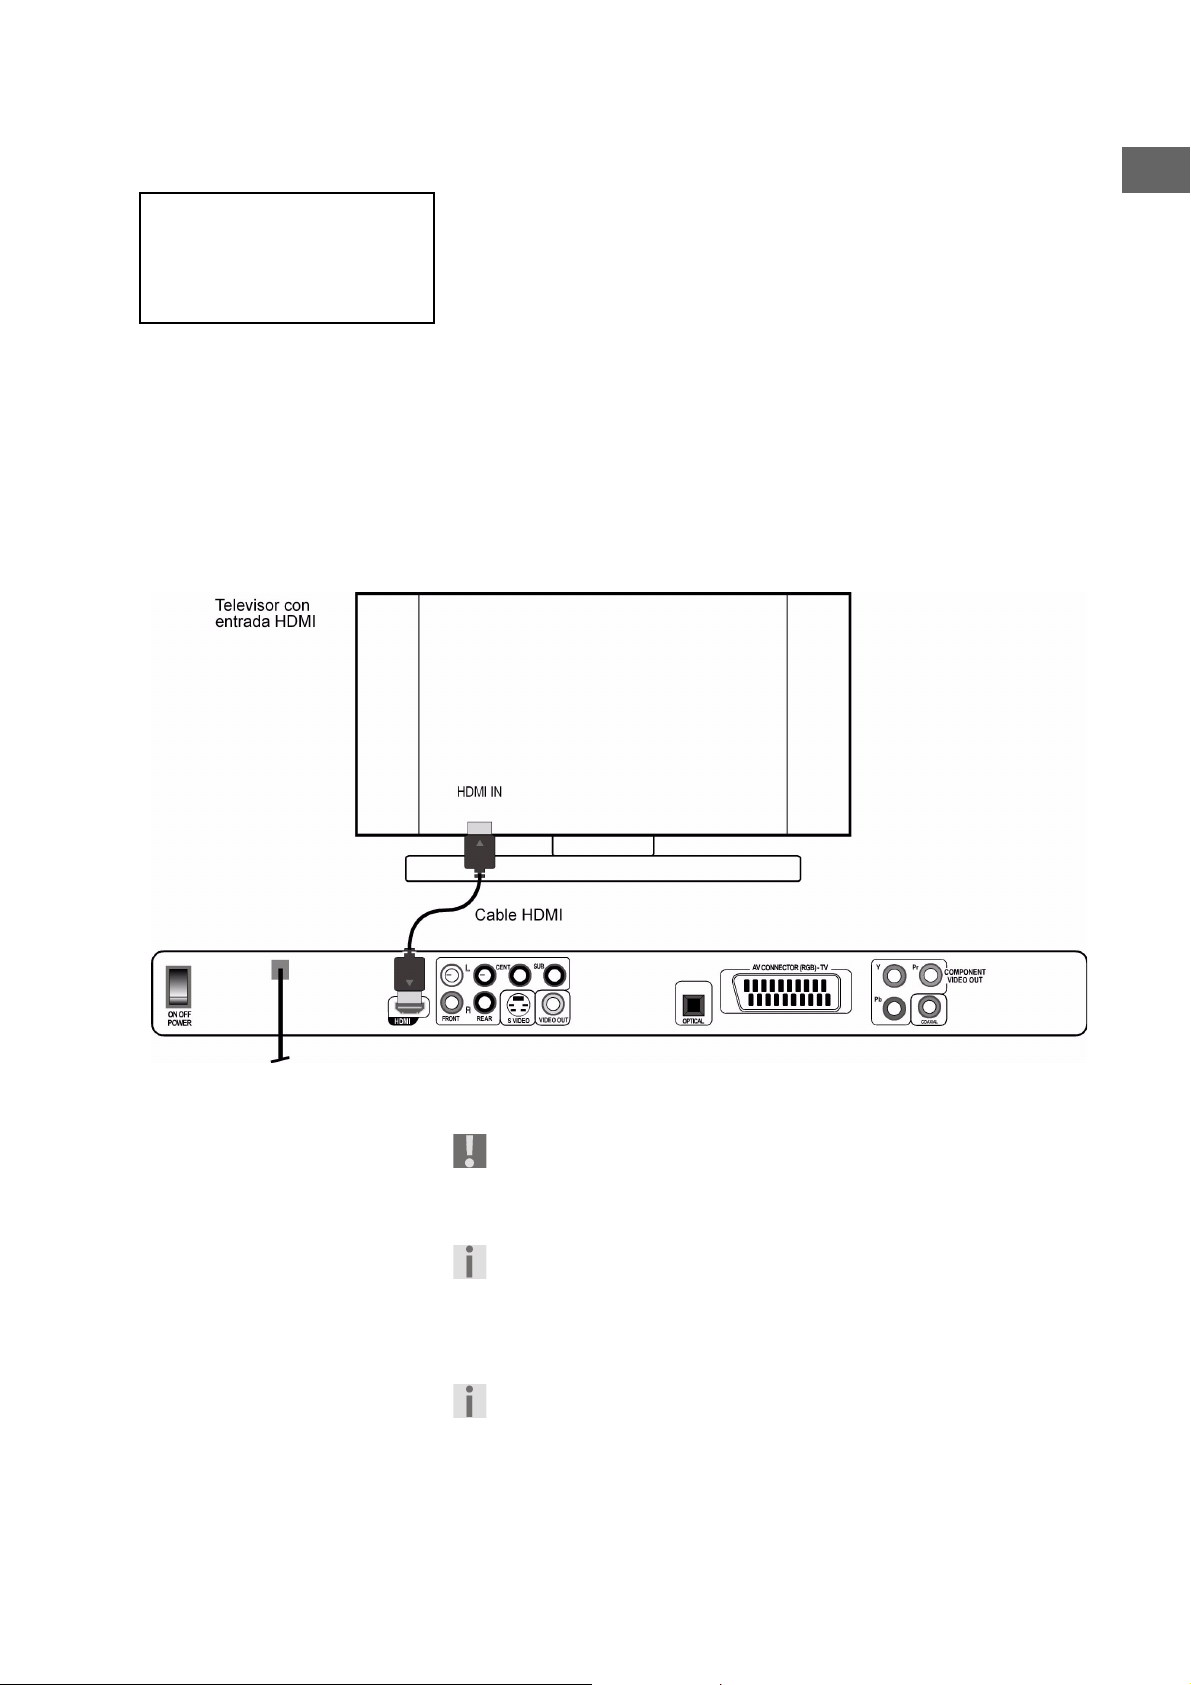
Transmisión digital de imagen y sonido: HDMI
Su reproductor DVD dispone de una toma HDMI (OUT). HDMI („High
Definition Multimedia Interface“) es, dentro de la gama de la electrónica
recreativa, el único interfaz capaz de transmitir simultáneamente datos de
audio y de vídeo. Procesa todos los formatos de imagen y de sonido
conocidos en la actualidad, incluido HDTV (High Definition Television) y
por ello es también capaz de representar actualmente las resoluciones
más altas de 1080p sin pérdida de calidad.
Puede conectar el reproductor DVD a un televisor con HDMI, así como
también con entrada DVI (HDMI es retrocompatible con DVI, „Digital
Visual Interface”). Para la conexión a una entrada HDMI solamente se
necesita un cable HDMI. En caso de que su televisor disponga de una toma
DVI, necesitará Usted, además, un adaptador (HDMI – DVI) que puede
adquirir en un comercio especializado.
ES
Cuando ya tenga conectado el aparato HDMI o DVI, encienda en
primer lugar solamente ese mismo aparato. A continuación espere
aprox. 30 segundos y solamente entonces conecte el reproductor
DVD.
Para la conexión a través de HDMI para la realización de la función
Progressive-Scan seleccione las resoluciones 480P, 720P (60Hz),
1080P (60Hz), 576P, 720p (50Hz), 1080p (50Hz), según la
resolución con la que es compatible su televisor (compare
“Progressive Scan”, página 14).
Por favor, tenga en cuenta que:
La salida HDMI ha sido certificada según el estándar HDMI actual. No
obstante, puede darse el caso de que la conexión con una toma DVI
o HDMI de otro aparato no sea compatible y por ello puedan
producirse transmisiones no exentas de fallos. No obstante, en este
caso no se trata de un fallo de su reproductor DVD.
15
Page 16

Conexión home cinema con transmisión analógica de sonido
Una de las ventajas del DVD es el almacenamiento y la reproducción de
sonido multicanal: Para reproducir el sonido 5.1, el reproductor DVD pone
a su disposición las señales en la salida Dolby Digital 5.1.
16
Page 17
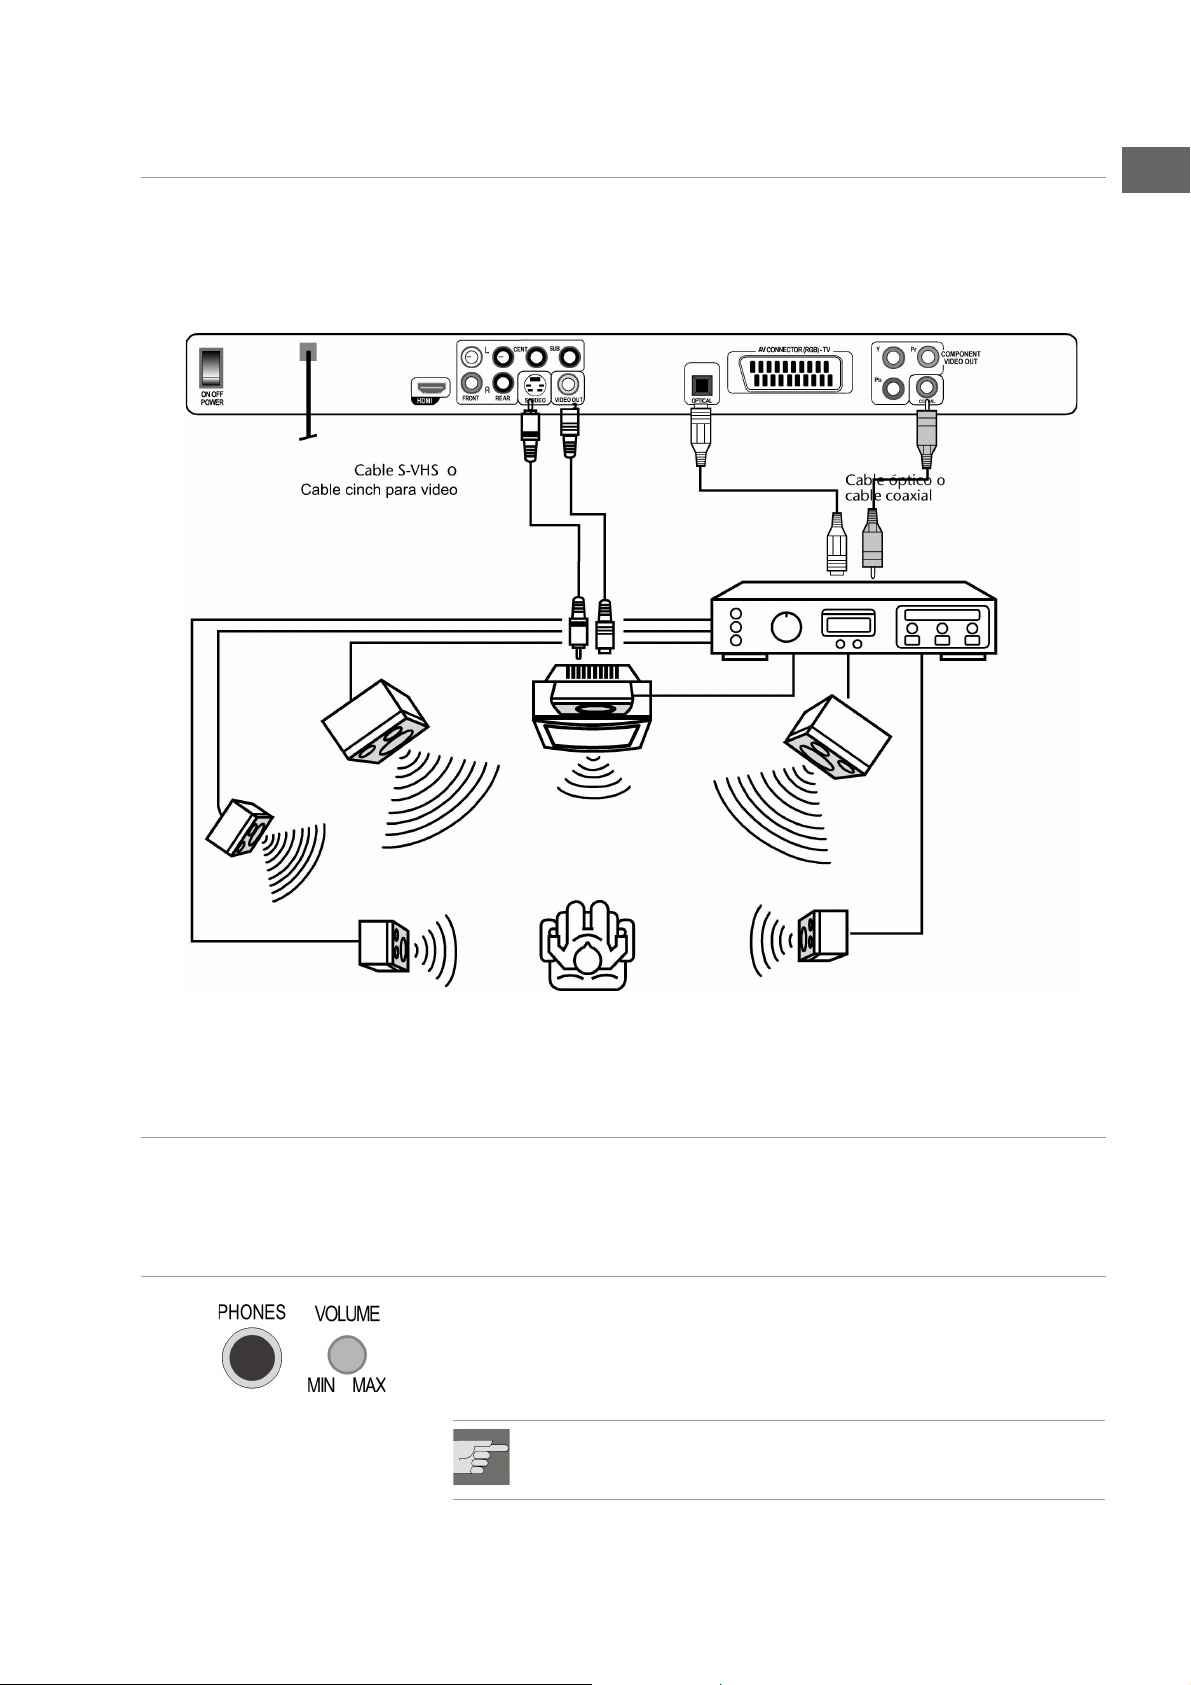
Transmisión de sonido digital
Conecte un cable coaxial o un cable óptico con la salida COAXIAL o
OPTICAL del reproductor DVD y con la entrada correspondiente del
amplificador. Para la transmisión de la imagen también puede emplear un
cable S-Video o un cable cinch de vídeo:
ES
Conexión a la red
Cuando ya haya efectuado todas las conexiones, enchufe el aparato con
una toma de corriente (230 V ~ 50 Hz).
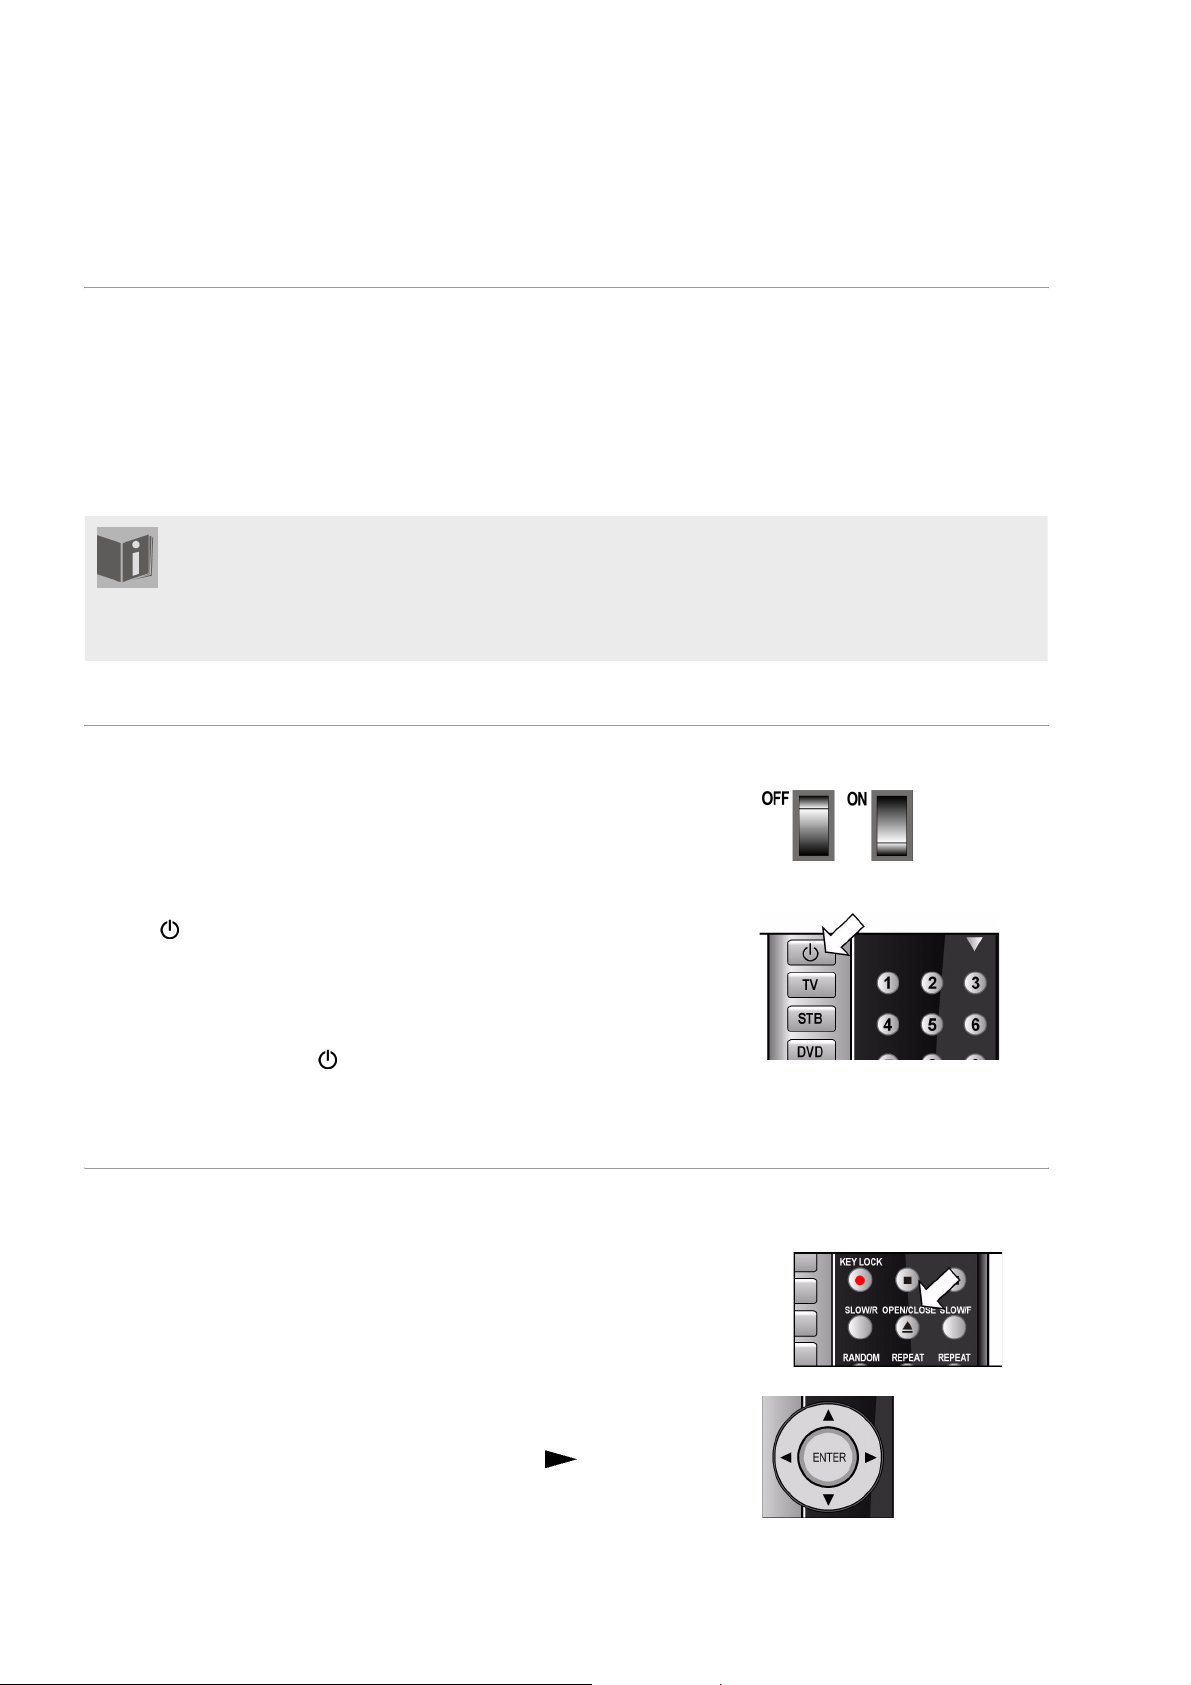
Opcional: Conectar auriculares
En la cara frontal del aparato se encuentra la toma para auriculares
(PHONES). Puede conectar unos auriculares con una clavija jack de 6,3
mm.
Los auriculares disponen de un control de volumen propio.
¡ATENCIÓN!
¡Antes de ponerse los auriculares, ajuste el volumen al mínimo!
17
Page 18
FUNCIONES DE LAS TECLAS
Control en el aparato o desde el mando a distancia
Las teclas en la parte frontal del aparato le permiten activar las funciones
de reproducción esenciales de su aparato.
otros elementos de control para la plena funcionalidad del aparato. En
particular, sólo podrá navegar por los menús que aparecen en la pantalla
del televisor a través del mando a distancia.
En las presentes instrucciones de funcionamiento, siempre que hablamos de las teclas de función
hacemos referencia a las del mando a distancia,
ya que el mando a distancia abarca todas las funciones del aparato (con excepción del
conmutador de alimentación). Para referirse a las teclas que hay en el aparato mismo, se
mencionará explícitamente.
Standby/Encender/Apagar
Modo Standby
Pulsando el interruptor POWER en la parte posterior del aparato el
equipo entrará en modo standby y/o se volverá a desconectar. En el modo
standby se enciende el indicador LED azul del aparato.
Encender
` Pulse (STANDBY) para encender el aparato. Se enciende la pantalla.
El tipo de las indicaciones en la pantalla depende del medio de
reproducción.
Teclas de función en la parte
frontal del aparato
Las teclas del mando a distanciaAdemás de estas funciones básicas, el mando a distancia le ofrece muchos
Desconectar
` Vuelva a pulsar la tecla (STANDBY) para volver a poner el aparato
en el modo Standby. La pantalla se apagará.
Colocar el disco
Tenga en cuenta que delante del aparato debe haber un espacio mínimo
de 15 cm para no bloquear la bandeja de discos al abrirse.
` Cuando el aparato esté encendido, pulse OPEN/CLOSE.
` Coloque un disco en el compartimento con la cara impresa hacia arriba.
Preste atención a que el disco se encuentre en el centro de la bandeja,
a fin de evitar que se encalle al cerrar el compartimento.
` Pulse la tecla OPEN/CLOSE. El compartimento se cerrará.
En el caso de los DVDs, transcurridos unos segundos la reproducción del
disco se inicia automáticamente. La indicación en la pantalla depende del
tipo del disco. Eventualmente deberá pulsar PLAY o aparecerá
menú en el que, con la ayuda de las teclas de navegación, deberá seleccionar
una opción..
18
un
Page 19
Leer tarjetas de memoria o Memory Sticks USB
Su reproductor DVD dispone de un lector de tarjetas de memoria para
tarjetas SD, tarjetas multimedia y un Memory Stick, así como una
conexión para un Memory Stick USB u otro reproductor USB.
Tarjeta de memoria
` Introduzca una tarjeta de memoria con los contactos hacia abajo y la
parte biselada hacia delante y a la derecha dentro del lector de tarjetas
de memoria del frontal del aparato.
` Si la tarjeta está completamente introducida, esta sobresale un poco del
lector. De esta manera podrá volver a retirarla.
No introduzca la tarjeta de memoria bajo ningún concepto con
violencia. Si no se puede colocar la tarjeta, tal vez haya sido
introducida incorrectamente o no se trata de una adecuada para este
lector.
Reproductor USB
` Introduzca el aparato USB en el puerto de conexión USB.
En el modo USB, el LED de control USB en la parte frontal del aparato se
enciende.
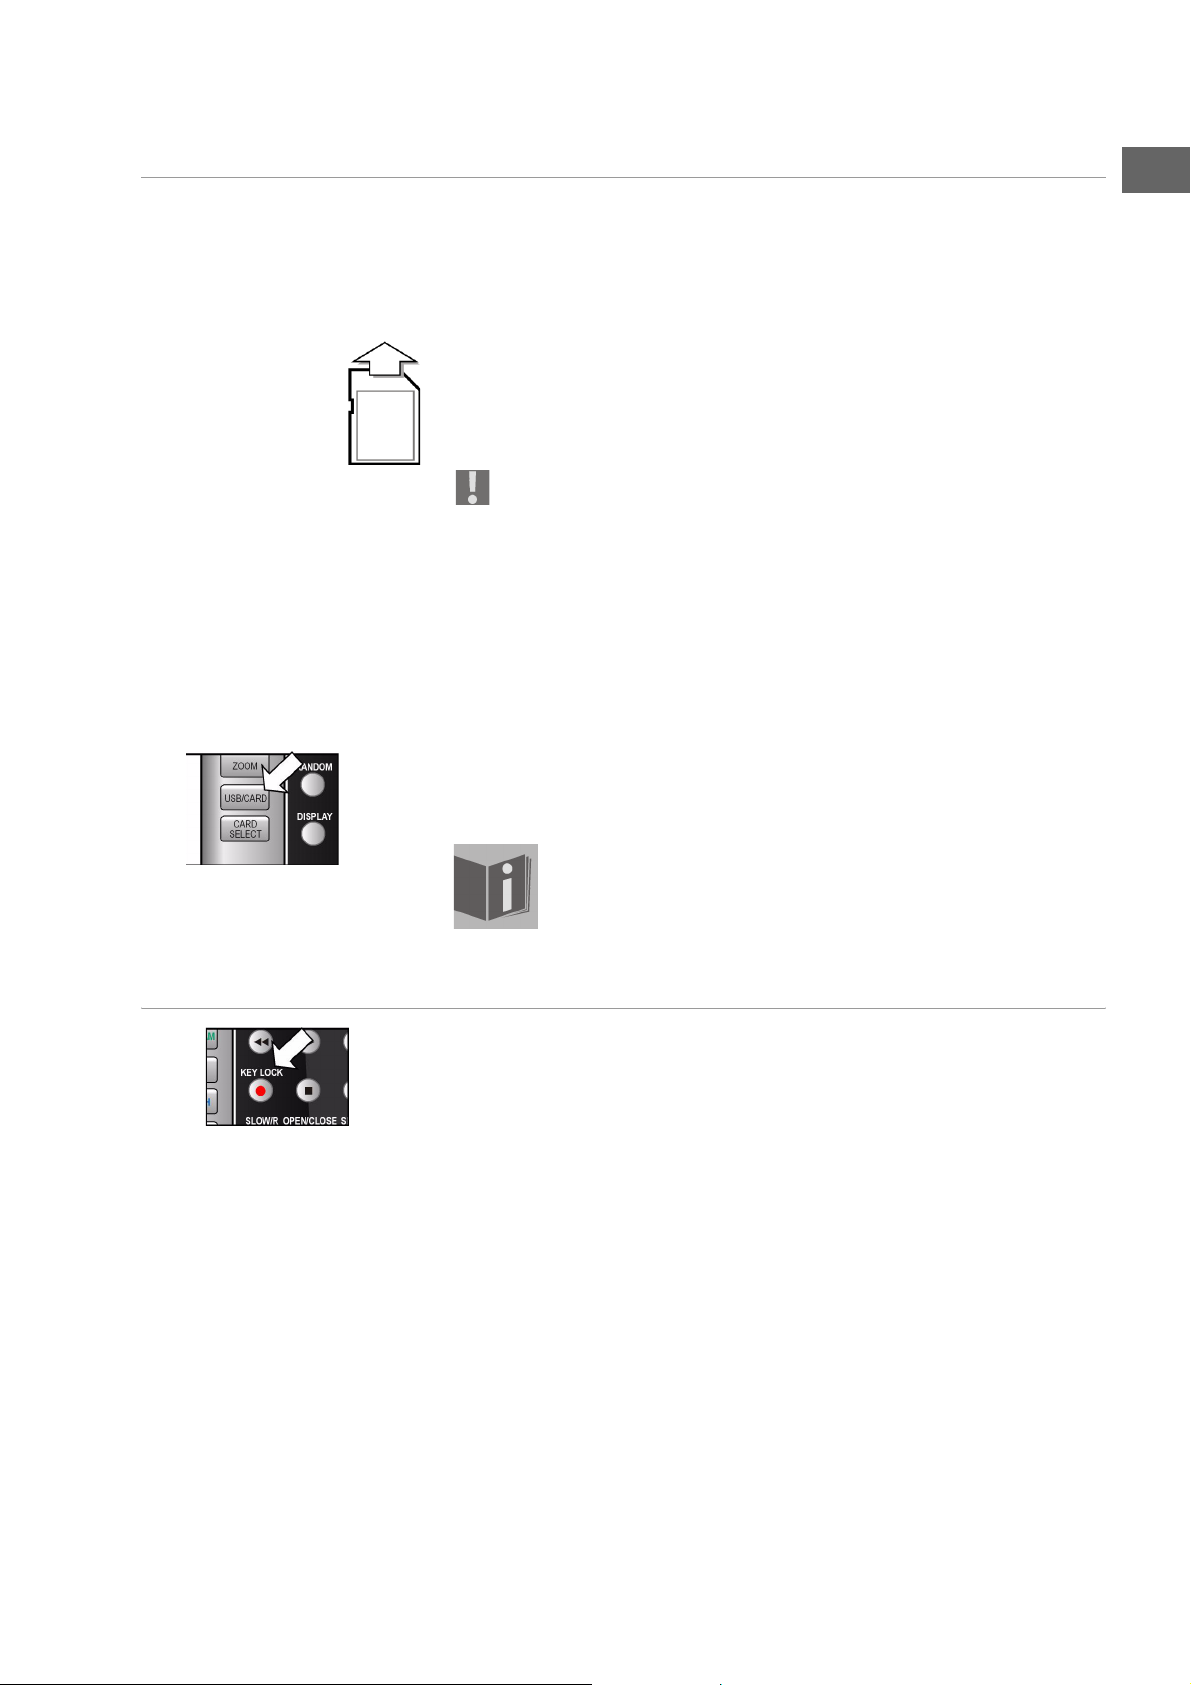
Seleccionar el lector
` Con la tecla USB/CARD se puede seleccionar el lector de tarjetas, el
lector USB o el lector de discos. En caso necesario, pulse la tecla
repetidas veces.
La reproducción de los datos de la tarjeta de memoria y del
stick USB funciona igual que la de los discos (DVD, CD audio,
CD JPEG, etc.). La siguiente descripción para discos también es
válida para las tarjetas de memoria y el Memory Stick USB.
ES
Bloqueo de teclas – KEY LOCK
` Mientras el aparato está encendido, pulse la tecla KEY LOCK. Todas
las teclas en la parte frontal del aparato quedarán bloqueadas, excepto
la tecla POWER.
` Vuelva a pulsar KEY LOCK otra vez, para volver a desbloquear las
teclas.
19
Page 20
Funciones de reproducción
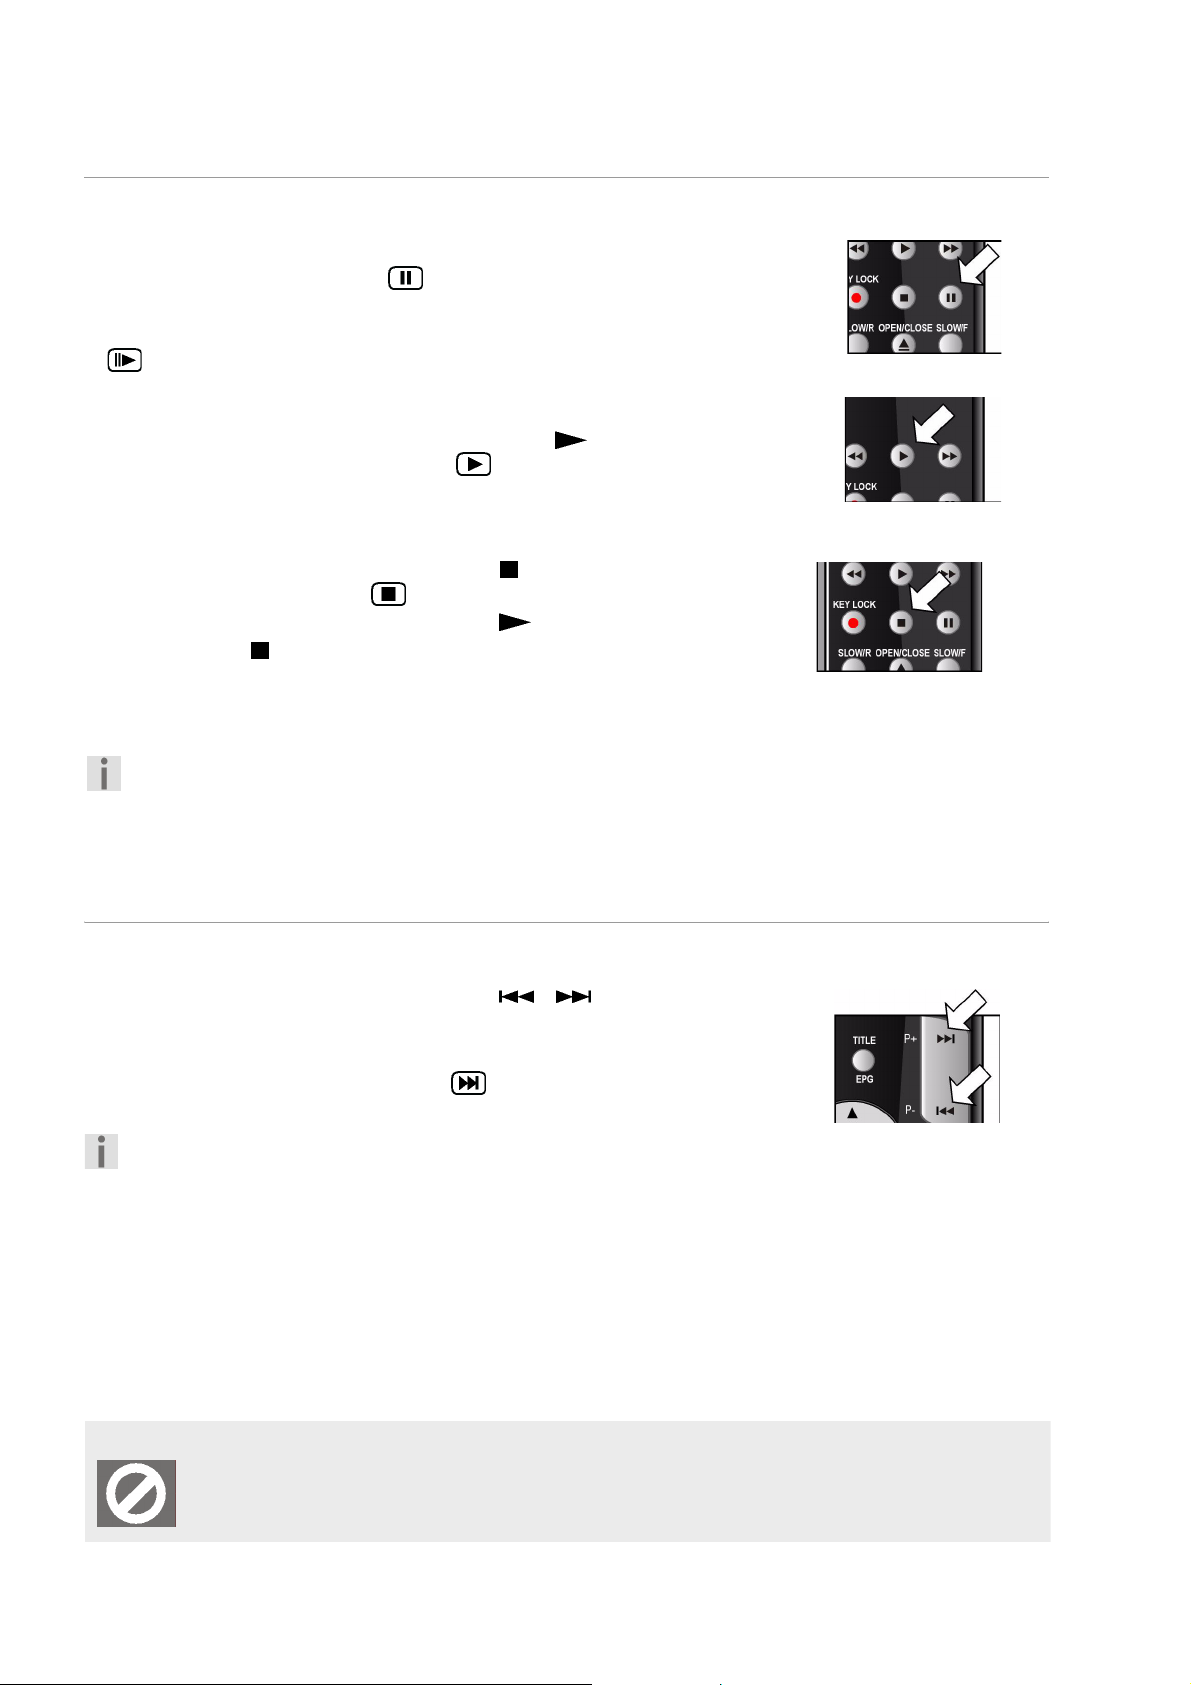
PAUSE/STEP (reproducción imagen a imagen)
` Para interrumpir la reproducción, pulse PAUSE/STEP. En pantalla
aparecerá el símbolo de pausa: .
` Pulse PAUSE/STEP repetidas veces, para avanzar imagen a imagen.
En pantalla aparecerá el símbolo de la reproducción imagen a imagen:
.
PLAY
` Para continuar con la reproducción, pulse PLAY . En pantalla
aparecerá el símbolo de reproducción: .
STOP/RES
` Para detener la reproducción, pulse STOP una vez. En pantalla
aparecerá el símbolo de Stop . En este modo puede reanudar la
reproducción en este mismo sitio pulsando .
` Vuelva a pulsar para finalizar la reproducción definitivamente. El
aparato se encuentra ahora en modo Stop.
` If you press STOP/RES again, you change the image setting.
Depending on your connection, the image may turn black and
white or disappear completely. Keep pressing STOP/RES until the
previous resolution is displayed, or configure this in the SETUP
menu.
Funciones de búsqueda
SKIP
` Durante la reproducción pulse la tecla SKIP o , para avanzar o
retroceder (en DVDs: de capítulo a capítulo; en caso contrario: de título
a título).
En pantalla aparecerá el símbolo de Skip: . Además se indicará en qué
posición se encuentra actualmente.
Por favor, tenga en cuenta que en muchos DVDs, no es posible
saltarse los títulos/capítulos antes del inicio de la película (las
advertencias sobre el copyright).
Indicaciones especiales en pantalla
Si selecciona una función de la que no dispone el medio colocado o que no se puede activar en
el modo actual, aparecerá en pantalla el símbolo de „no válido“ representado en el margen. Tras
algunos segundos desaparece el símbolo.
20
Page 21
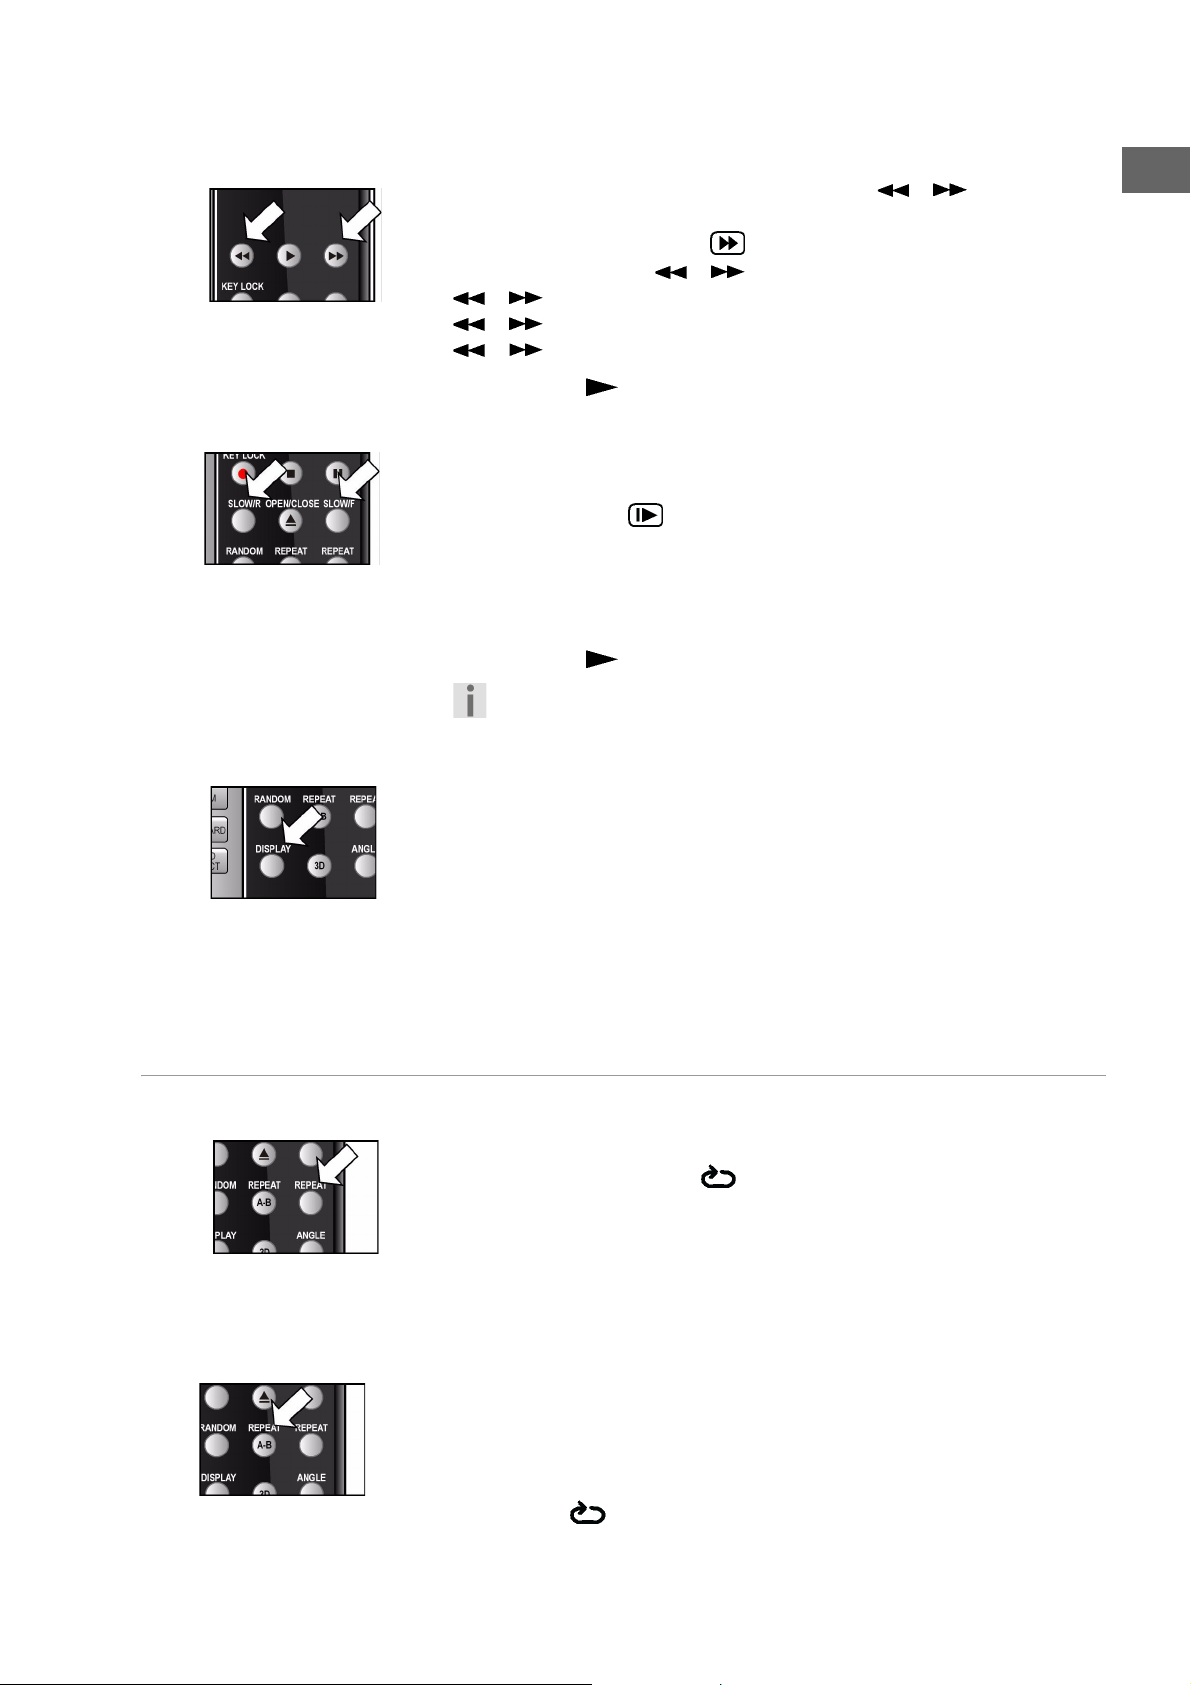
Avance y retroceso rápidos
` Durante la reproducción pulse la tecla FAST o para iniciar el
avance o el retroceso rápidos. En pantalla aparecerá el símbolo de
avance/retroceso rápidos así como la velocidad:
Pulsando una sola vez o : doble velocidad (2x)Pulsando
o dos veces: velocidad por cuatro (4x)Pulsando
o tres veces: velocidad por ocho (8x)Pulsando
o cuatro veces: velocidad por dieciséis (16x)
Si pulsa PLAY volverá a la velocidad normal de reproducción.
Cámara lenta – SLOW
` Durante la reproducción pulse la tecla SLOW/R o SLOW/F para
avanzar o retroceder a cámara lenta. En pantalla aparecerá el símbolo
de cámara lenta así como la velocidad de la cámara lenta:
Pulsando SLOW una vez: 1/2 de velocidadPulsando
SLOW dos veces: 1/4 de velocidadPulsando
SLOW tres veces: 1/8 de velocidadPulsando
SLOW cuatro veces: 1/16 de velocidad
Si pulsa PLAY volverá a la velocidad normal de reproducción.
Tenga en cuenta que en discos de audio, en discos VCD y Xvid no
está disponible la función SLOW/R.
ES
Funciones de repetición
DISPLAY
Con la tecla DISPLAY puede mostrar durante la reproducción, pulsando
repetidas veces consecutivamente, el tiempo transcurrido y el restante.
Cada vez que pulse la tecla, se modifica la indicación del siguiente modo:
DVD: Título reproducido > Título pendiente > Capítulo reproducido >
Capítulo pendiente >Desactivar pantalla.
CD/VCD: Título reproducido > Título pendiente > Total reproducido >
Total pendiente >Desactivar pantalla.
MP3/Xvid: Título reproducido >Título pendiente > Desactivar pantalla.
Repetición – REPEAT
` Durante la reproducción pulse la tecla REPEAT. En pantalla aparecerá
el símbolo de repetición y, con cada pulsación, el fragmento a
repetir (la entrada desaparece transcurridos unos segundos):
DVD: Capítulo > Título > Desactivar ;
CD audio: Título > Todos > Desactivar;
MP3: Repetir título > Repetir álbum > Álbum > .... .
Con los CDs de vídeo y los CDs Xvid no es posible activar la función
REPEAT-.
REPEAT A - B (DVD, CD audio)
Puede activar la repetición de un fragmento definido por Usted.
` Durante la reproducción pulse la teclaA - B para definir el punto de
inicio de la secuencia a repetir. En pantalla aparecerá el símbolo de
repetición más un A.
21
Page 22
` Vuelva a pulsar la tecla A - B para definir el punto final de la secuencia
a repetir. En la pantalla aparece A B. El fragmento definido se
repetirá ahora ininterrumpidamente.
` Pulse A - B una tercera vez para finalizar la repetición de la secuencia.
Con los CDs MP3 y los CDs Xvid no es posible activar la función REPEAT
A-B.
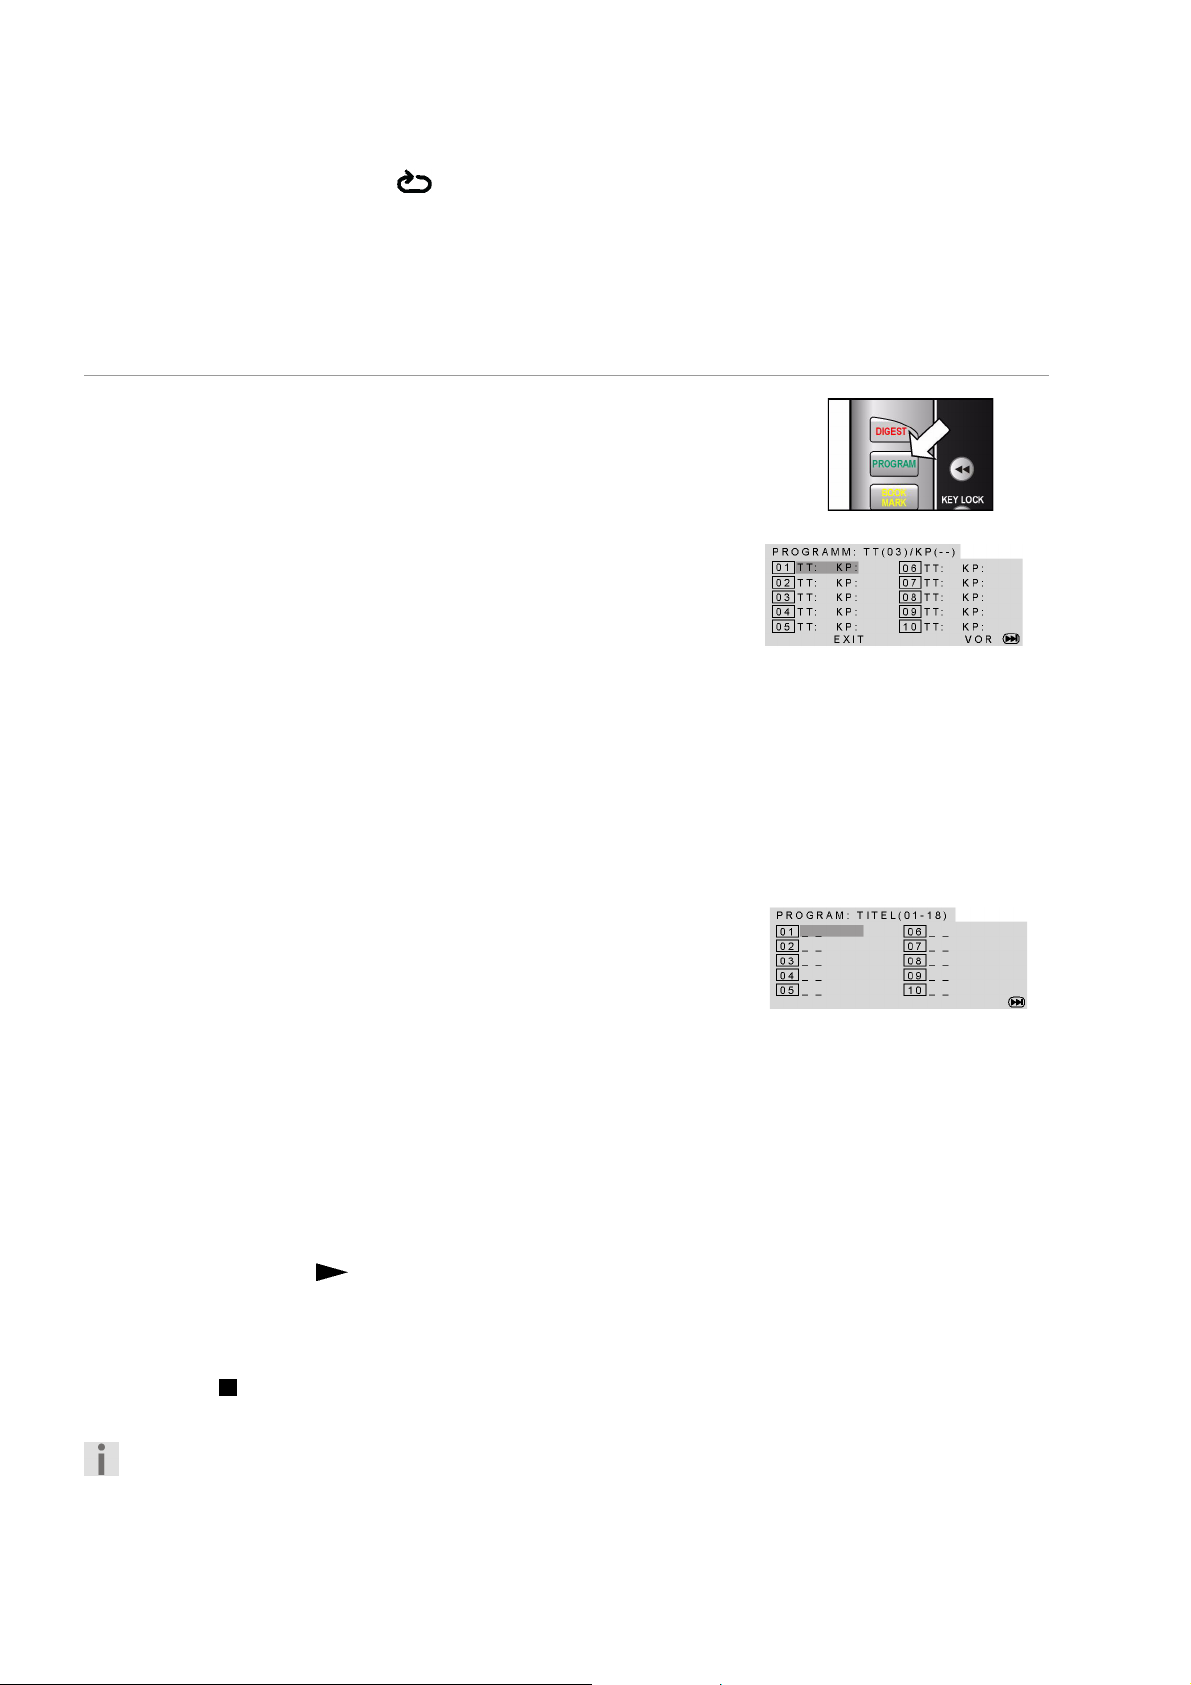
Programación del orden de reproducción – PROGRAM
La función de programación le permite reproducir hasta 20 capítulos
(DVD) o títulos (Audio) en un orden definido por Usted mismo.
En los medios MP3 no se puede efectuar ninguna programación.
DVDs
` Pulse PROGRAM. En pantalla aparece una tabla con posiciones de
programación. La tabla contiene títulos y capítulos. El número de
títulos contenidos en el DVD aparece en la línea superior.
` Indique a través del teclado numérico del mando a distancia el título
deseado para la posición de programación 01 . Los números de una
sola cifra tienen que ir precedidos por un 0. – Cuando se haya definido
el título, en la línea superior aparecerá el número de capítulos
contenido en este título.
` Indique con el teclado numérico del mando a distancia el número del
capítulo. Los números de una sola cifra tienen que ir precedidos por un
0. El cursor salta a la posición de programación 02.
` Si lo desea, indique otras posiciones de programación procediendo de
la misma forma.
CDs audio / VCD
` Pulse la tecla PROGRAM. En pantalla aparece una tabla con posiciones
de programación. En el encabezamiento aparece el número de títulos
que contiene el CD. La posición de programación 01 aparece sobre un
trasfondo en color.
` Indique a través del teclado numérico del mando a distancia el título
deseado para la posición de programación 01 . Los números de una
sola cifra tienen que ir precedidos por un 0.
Iniciar la lista
Tan pronto como haya programado el primer número, en el margen
inferior del menú aparece la entrada START.
` Con las teclas de navegación mueva el cursor sobre la indicación
START y pulse PLAY o ENTER.
En pantalla aparecerá por unos instantes
programada. Mediante
modificarla.
` Pulse STOP dos veces para borrar la lista.
Finalizada la reproducción, el reproductor DVD cambia al modo standby.
La lista programada no se almacena.
PROGRAM
PROGRAMM
puede acceder de nuevo a la lista y
. Se inicia la lista
22
Page 23

Selección directa de título/tiempo – SEARCH
Con la tecla SEARCH puede acceder directamente a la reproducción de
un capítulo, un título o un momento determinado del disco. Cada vez
que pulse la tecla, irá modificando la selección. La reproducción se iniciará
en el mismo lugar.
También puede seleccionar un título directamente mediante el
teclado numérico sin antes pulsar SEARCH. Pulse ENTER, para
iniciar la reproducción.
DVD
Pulsando SEARCH una sola vez: „Título” ... „Capítulo“ ... – Indique un
capítulo deseado contenido en el título correspondiente.
PulsandoSEARCH dos veces: „Título” ... „Hora” ... – Indique el
momento deseado a buscar en el título en el formato h:mm:ss.
PulsandoSEARCH tres veces: „Capítulo” … „Hora” ... – Indique el
momento a buscar en el capítulo en el formato h:mm:ss.
CD audio/VCD
Pulsando SEARCH una sola vez: „Hora disco” – Indique el momento a
buscar en el CD en el formato MM:SS.
PulsandoSEARCH dos veces: „Título disco” – Indique el momento en el
título en el formato MM:SS.
PulsandoSEARCH tres veces: „A título” – Indique el título deseado. Los
números de una sola cifra tienen que ir precedidos por un 0.
ES
MP3
Pulsando SEARCH una sola vez: Indique el título deseado introduciendo
un número en el campo de tres cifras (eventualmente precedido por 0 ó
00).
Marcar un „punto de localización” – BOOKMARK
Tiene la opción de crear „ marcas de lectura", para volver a iniciar la
reproducción en un punto determinado.
` Durante la reproducción pulse la tecla BOOKMARK. En pantalla
aparecerá el menú BOOKMARK con doce casillas.
Para cancelar esta función, vuelva a pulsar BOOKMARK .
` Para definir la primera „marca de lectura“ pulse PLAY . Quedará
marcado el punto en el que está el disco en ese mismo momento (en el
siguiente ejemplo en el título no 01, capítulo no 4, a los 15 minutos y
23 segundos).
` Para que la reproducción se vuelva a iniciar a partir de este momento,
vuelva a pulsar PLAY .
` Si quiere borrar la marca de lectura, pulse CLEAR.
` Si quiere cerrar el menú y volver a la reproducción de la película vuelva
a pulsar BOOKMARK .
` Si quiere definir más marcas de lectura vuelva al menú BOOKMARK
y vaya a la próxima casilla libre mediante la tecla de navegación .
Vuelva a pulsar PLAY para definir una marca de lectura.
23
Page 24
` Para seleccionar una marca de lectura diferente, vaya a la casilla
correspondiente con las teclas de navegación y pulse PLAY .
Las marcas de lectura se conservan si pulsa dos veces STOP
(modo Stop). En el modo standby o si apaga el aparato por
completo, no obstante, las marcas de lectura se perderán.
Con algunos formatos no funciona la función Bookmark.
Encontrará un resumen de las marcas de lectura con un avance de la
imagen en el punto quinto del menú DIGEST (véase apartado
siguiente).
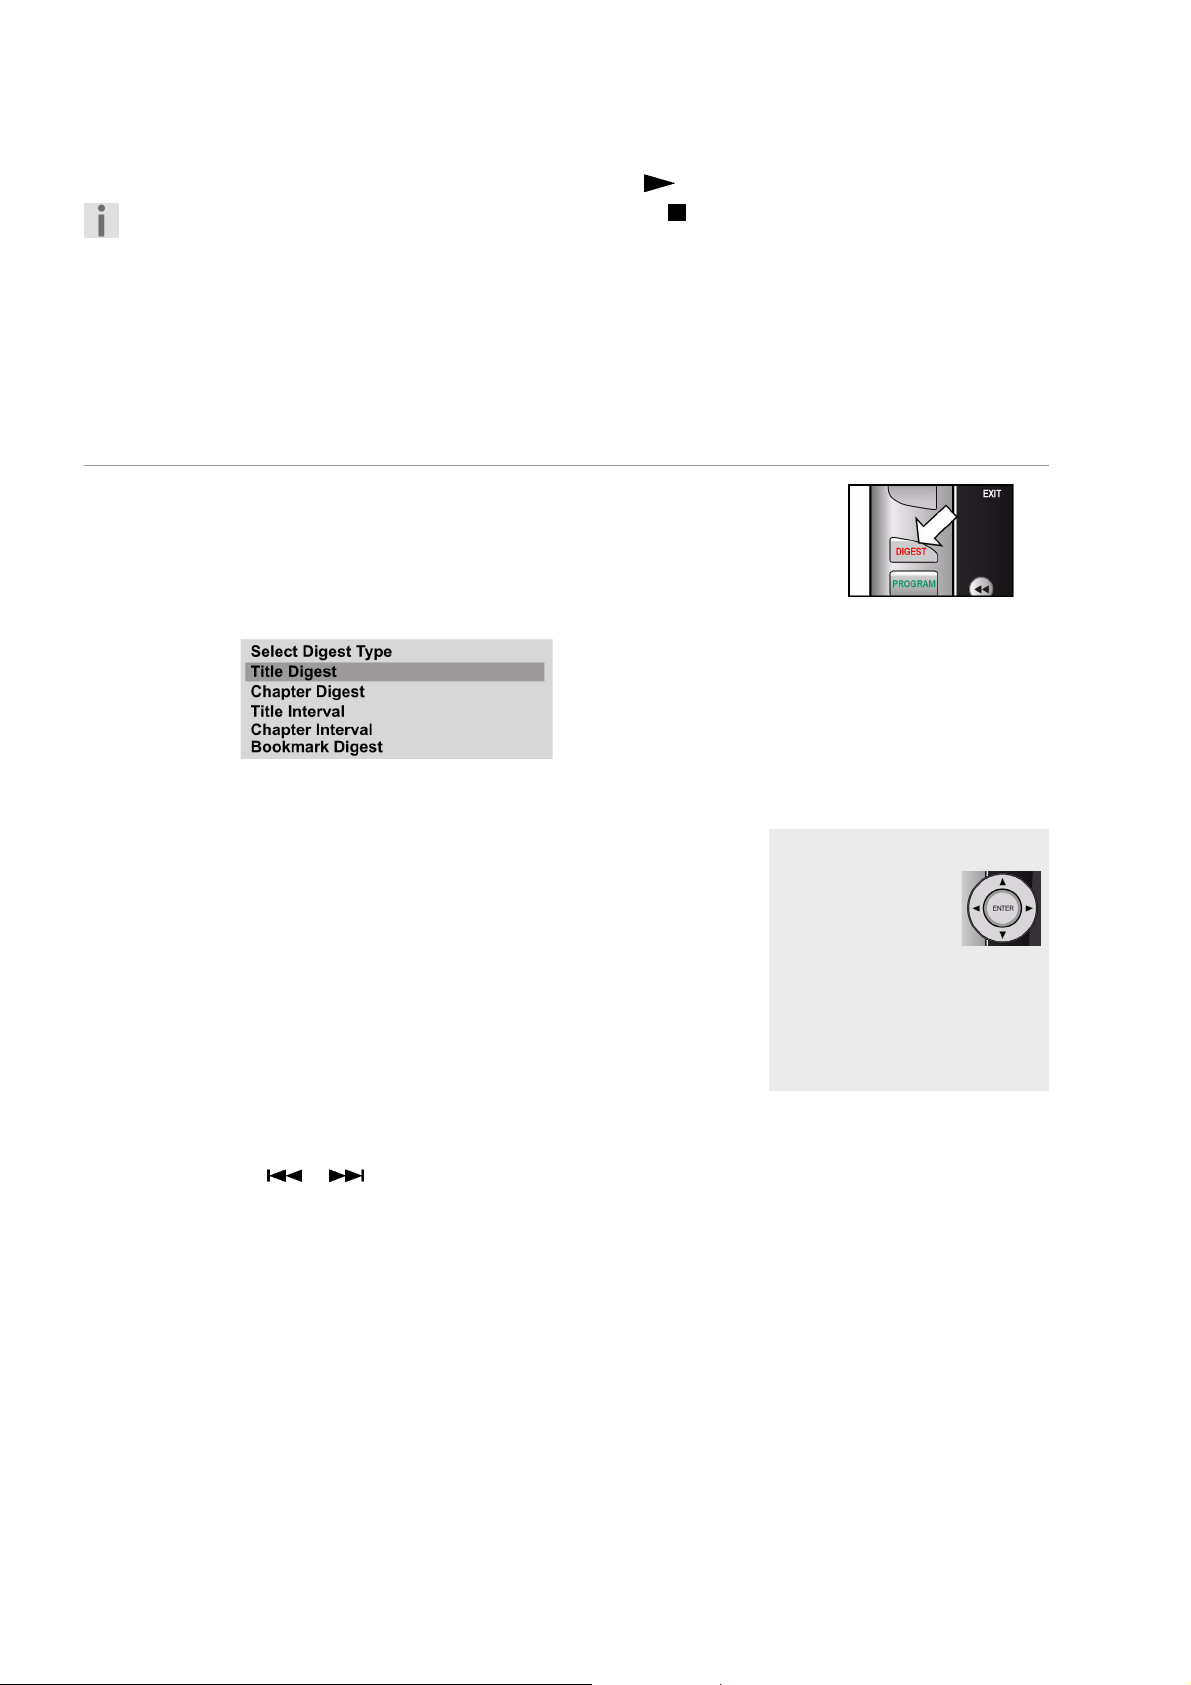
Seleccionar síntesis – DIGEST (DVD y VCD)
Con la función DIGEST puede navegar por su DVD mediante un avance
de imágenes.
` Durante la reproducción pulse la tecla DIGEST. Aparecerá el menú
DIGEST con las siguientes opciones (BOOKMARK DIGEST sólo si
ha definido marcas de lectura, ver más abajo):
Sinopsis de títulos
` Confirme Title Digest pulsando ENTER. Después de unos momentos
en los que se cargan las imágenes, aparecen las imágenes iniciales de
todos los títulos existentes en el DVD. Se muestran hasta seis imágenes
por pantalla.
En el menú debajo de las imágenes se indica detrás del punto Select el
número total de títulos.
` Seleccione un título marcando una imagen inicial con las teclas de
navegación o introduciendo el número de la imagen inicial mediante
las teclas numéricas del mando a distancia (los números de una sola
cifra precedidos por un 0).
` A continuación, pulse ENTER para iniciar la reproducción del título
seleccionado.
Con las teclas SKIP y puede navegar entre las páginas en
pantalla. Seleccione EXIT para volver a la reproducción de la escena
original. A través de la entrada Menú vuelve al menú DIGEST.
Sinopsis de capítulos
` Vaya al menú Digest, seleccione la opción Chapter Digest y
confirme con ENTER. Después de unos momentos en los que se
cargan las imágenes, aparecen todos los capítulos del título actual en
pequeñas ventanas. Se muestran hasta seis capítulos por pantalla.
` Seleccione el capítulo de la misma forma que seleccionaría un título
(ver más arriba).
Seleccionar los puntos
Con las teclas de
navegación puede
desplazarse por las
imágenes y los textos
del menú. Los puntos activos
aparecen sobre un trasfondo
de color.
Para seleccionar un punto,
ENTER.
pulse
24
Page 25
Intervalo de tiempo
` Vaya al menú Digest, seleccione la opción Title Interval y confirme
con ENTER. Verá un avance de las escenas del título en un intervalo
preajustado de diez minutos. Si aparece sólo una imagen, es que el
título tiene menos de diez minutos.
Intervalo de capítulos
` Vaya al menú Digest, seleccione la opción Chapter Interval y
confirme con ENTER. Verá un avance de las escenas del capítulo en un
intervalo preajustado de diez minutos. Si aparece sólo una imagen, es
que el capítulo tiene menos de diez minutos.
Si pulsa la tecla DIGEST en el modo Stop, el menú Digest aparece
sólo con la entrada Title Digest y eventualmente Bookmark
Digest.
Sinopsis de marcas
Si ha definido marcas de lectura en este submenú podrá ver un resumen
de las marcas de lectura (véase apartado anterior) y también podrá
seleccionar las respectivas marcas.
RANDOM e INTRO (sólo CD Audio)
ES
Funciones de imagen
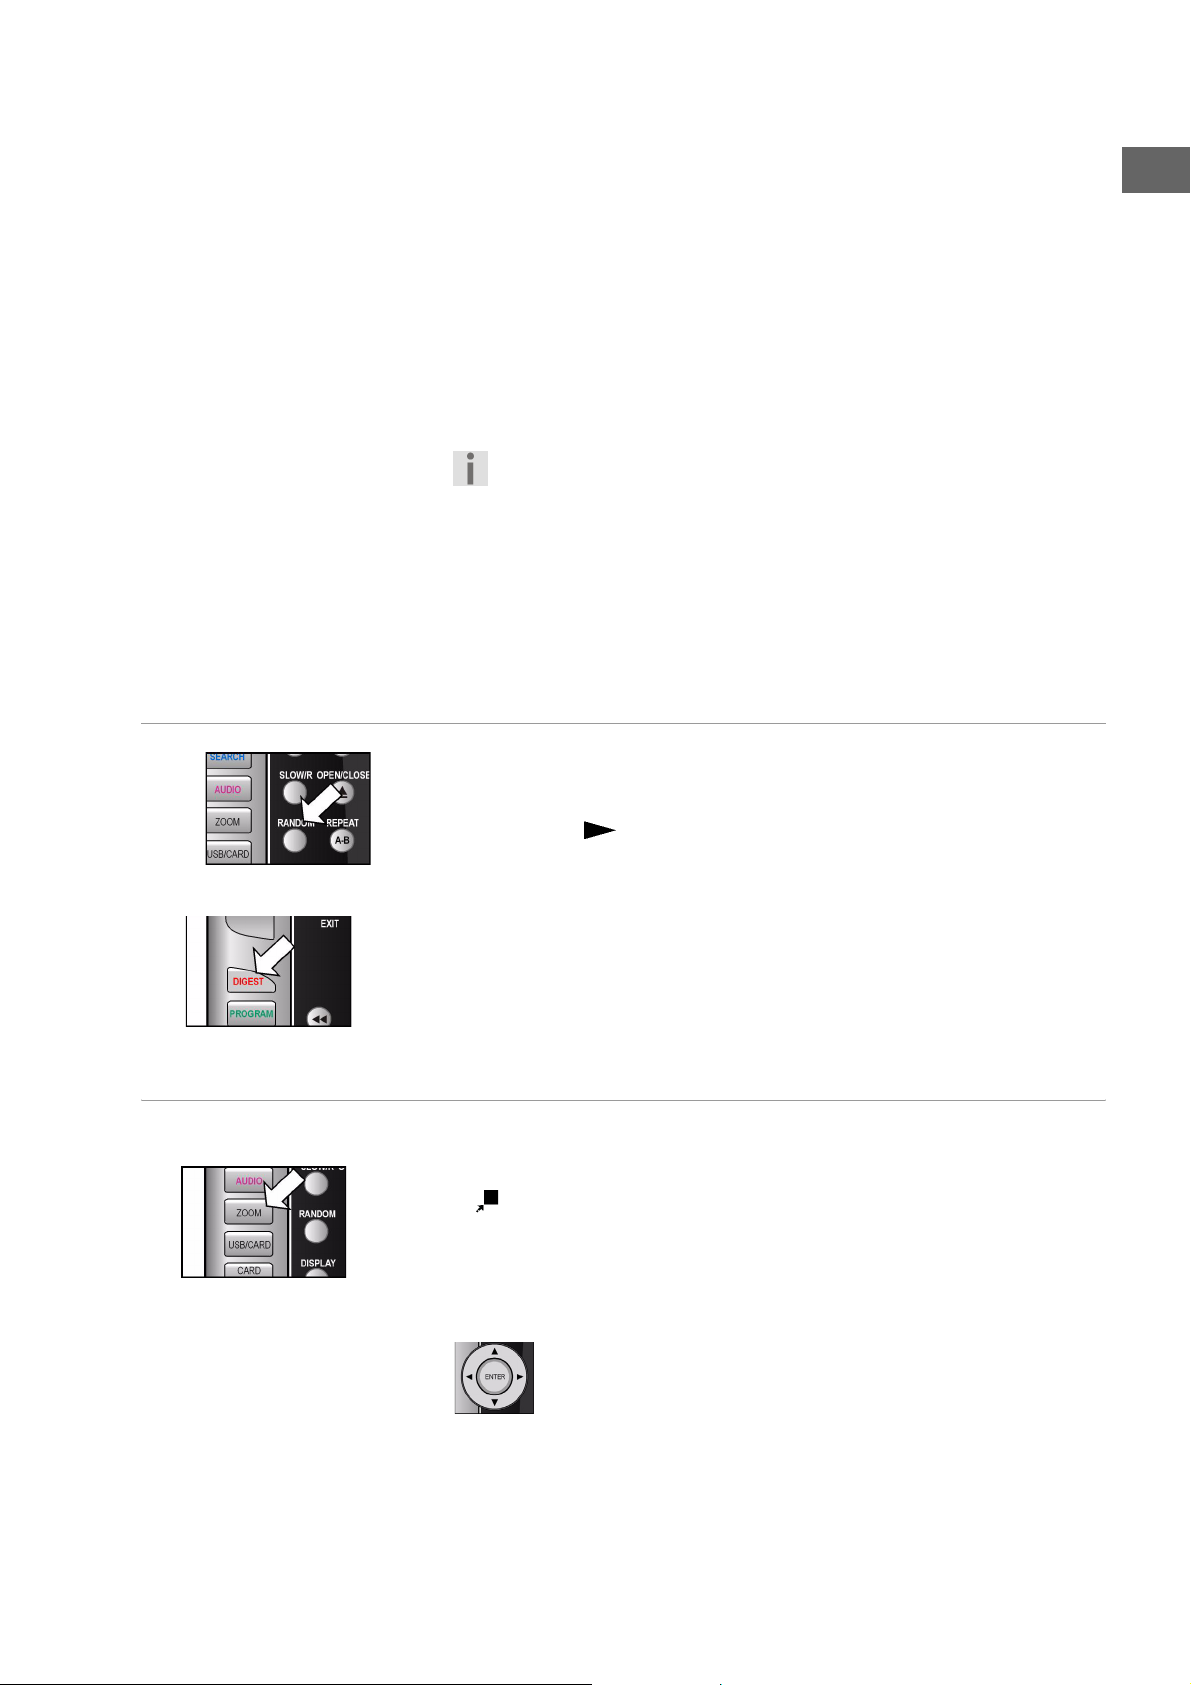
Reproducción aleatoria
` Pulse la tecla RANDOM.
` Pulse PLAY para iniciar la reproducción en orden aleatorio (a partir
del título siguiente). Después de 20 títulos la reproducción se detiene.
` Vuelva a pulsar RANDOM para volver a la reproducción normal.
Función Intro
` Pulse la tecla DIGEST. Se reproducen los primeros seis segundos de
cada título.
` Vuelva a pulsar DIGEST para volver a la reproducción normal.
Ampliar una imagen – ZOOM
` Pulse la tecla ZOOM. En pantalla aparecerá el símbolo de ampliación
más el factor de ampliación. La imagen se amplía desde el centro.
Pulsando ZOOM una vez: Factor de ampliación 2xPulsando
ZOOM una vez: Factor de ampliación 3xPulsando
ZOOM una vez: Factor de ampliación 4x.
Si pulsa ZOOM una cuarta vez, volverá a la reproducción normal.
Con las teclas de navegación puede seleccionar una sección de
imagen dentro de la imagen ampliada.
25
Page 26
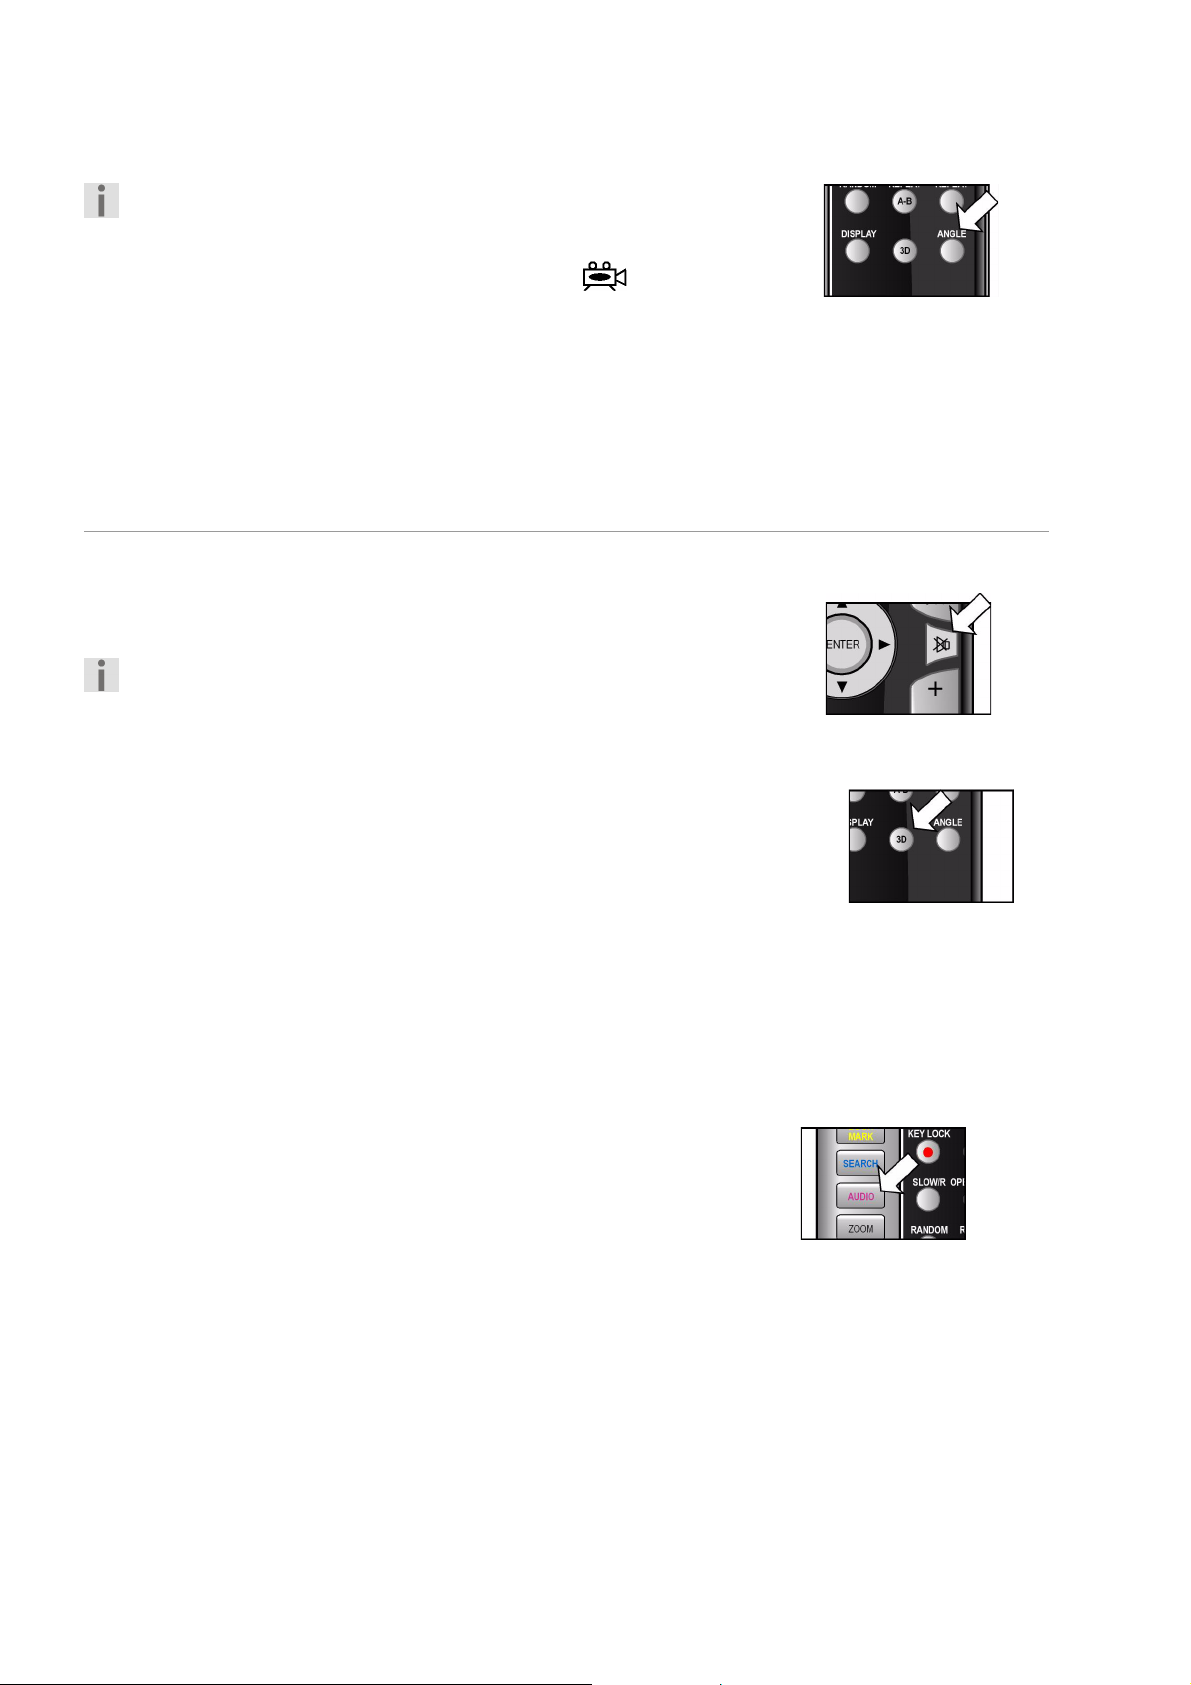
Posición de la cámara – ANGLE (sólo DVD)
Algunos DVDs disponen de escenas especiales grabadas con
distintas posiciones de cámara.
` Pulse la tecla ANGLE, para activar la función. Si la escena dispone de
distintas posiciones de cámara, aparecerá el símbolo así como la
posición de cámara actual/el número total de posiciones de cámara.
` Vuelva a pulsar ANGLE para pasar a la siguiente posición de cámara.
Tras unos segundos, cambiará la imagen.
El símbolo aparecerá automáticamente durante las escenas
correspondientes, si en el menú General Setup Page > Angle Mark
> ha seleccionado ON .
Funciones de sonido
Función MUTE
` Pulse MUTE, para desactivar el sonido por completo.
` Vuelva a pulsar MUTE , para activar otra vez el sonido.
Tenga en cuenta que la función MUTE permanece activada si sube
o baja el volumen y el cambio de volumen se indica en pantalla.
Sonido 3D
Los CDs que hayan sido codificados con los formatos Dolby Pro Logic,
Dolby Digital o dts, le permitirán reproducir un sonido con efecto 3D o
surround, siempre y cuando tenga conectados dos altavoces.
Pulse varias veces la tecla 3D , para acceder a uno de los siguientes efectos
de sonido: Surround: Rock > Pop > Live > Dance > Techno >
Classic > Soft > Off.
No utilice esta función,
– si tiene conectados más de dos altavoces,
– si para el sonido digital emplea un cable coaxial o un conector óptico
digital,
– si uno de los aparatos conectados a su aparato, tiene ya activado un
efecto surround.
Modo audio (sólo CDs audio)
Pulse varias veces la tecla AUDIO MENU , para seleccionar una de estas
formas de reproducción: Mono left, Mono right, Mix-Mono y Stereo.
En función del medio también pueden aparecer otras indicaciones.
26
Page 27
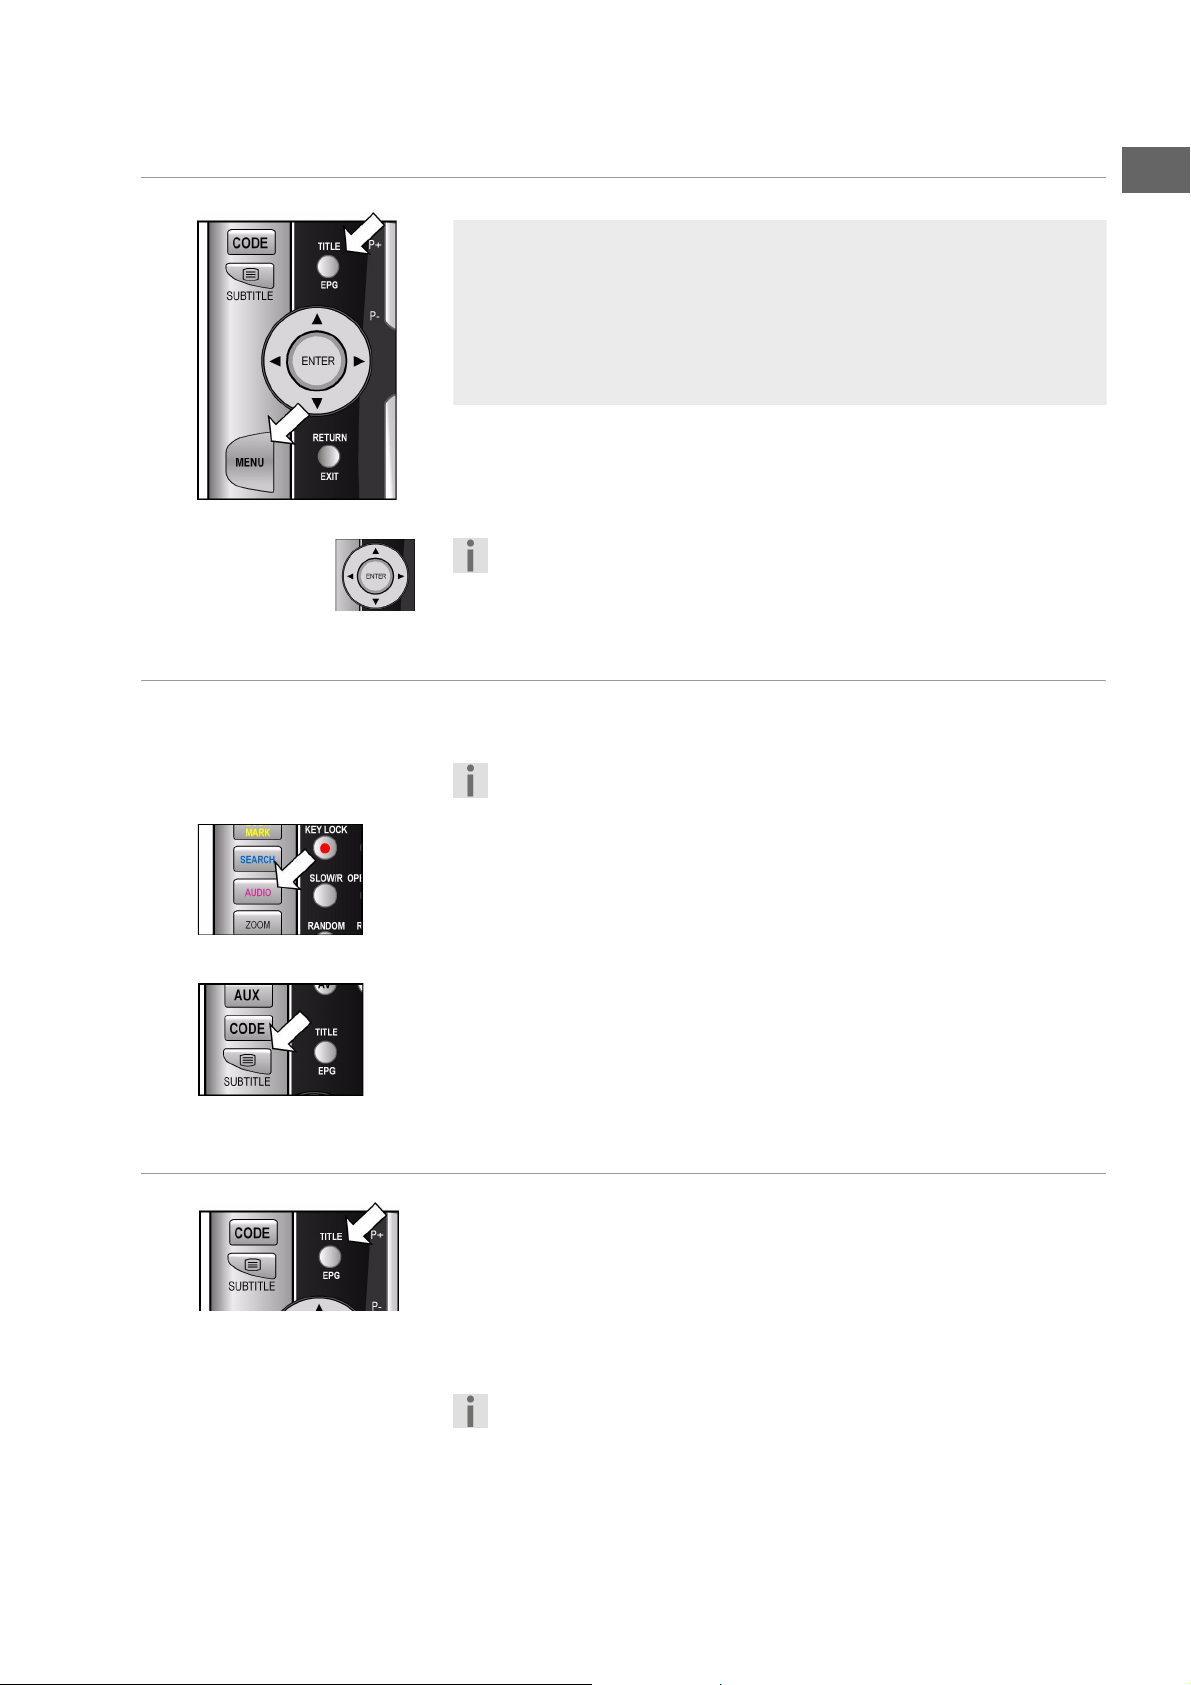
TITLE MENU, DVD MENU
Con las teclas TITLE y DVD MENU accederá a los menús grabados en el
disco DVD.
Con las teclas de navegación puede acceder a las distintas opciones del
menú del DVD. Confirme cada selección pulsando ENTER.
MENU AUDIO y SUBTITLE
Estas teclas son el método más rápido para seleccionar otros idiomas,
siempre y cuando el DVD disponga de ellos.
Los menús del DVD
Normalmente los DVDs disponen de uno o varios menús mediante los que
puede navegar por ellos. Los nombres de dichos menús dependen de cada
DVD; pueden denominarse, por ejemplo, "Menú DVD", "Menú Disco",
"Menú Principal", "Menú Título", "Root Menu" o "Menú Raíz".
Si, en cambio, desea acceder al menú de su reproductor de DVDs (menú
SETUP) pulse la tecla
Tenga en cuenta que depende del DVD qué menús aparecen con
qué selección. P. ej. algunos DVDs sólo tienen un único menú que
aparece en pantalla.
Pero rogamos que tenga en cuenta que muchos DVDs no disponen
de esta función.
SETUP.
ES
Seleccionar el idioma hablado
` Vuelva a pulsar AUDIO para poder escoger otro de los idioma de los que
dispone el DVD. Este ajuste se activa inmediatamente; no es necesario
confirmarlo.
Seleccionar el idioma de los subtítulos
` Pulse varias veces SUBTITLE para escoger uno de los idiomas de
subtítulos de los que dispone el DVD. Este ajuste se activa
inmediatamente; no es necesario confirmarlo.
Tras algunos segundos desaparece la indicación.
Función PBC (sólo VCD 2.0)
Algunos VCDs del tipo 2.0 que poseen una estructura de títulos/capítulos
ofrecen la posibilidad del Playback Control (PBC).
Con la tecla TITLE MENU se activa el Playbackcontrol (tecla TITLE
MENU). Dispondrá de algunas funciones ampliadas para el control de
títulos/capítulos, como, por ejemplo,
– Selección directa de títulos/capítulos
– Funciones SKIP
Por favor, tenga en cuenta que el número exacto de funciones a
disposición dependerá de cada VCD.
27
Page 28
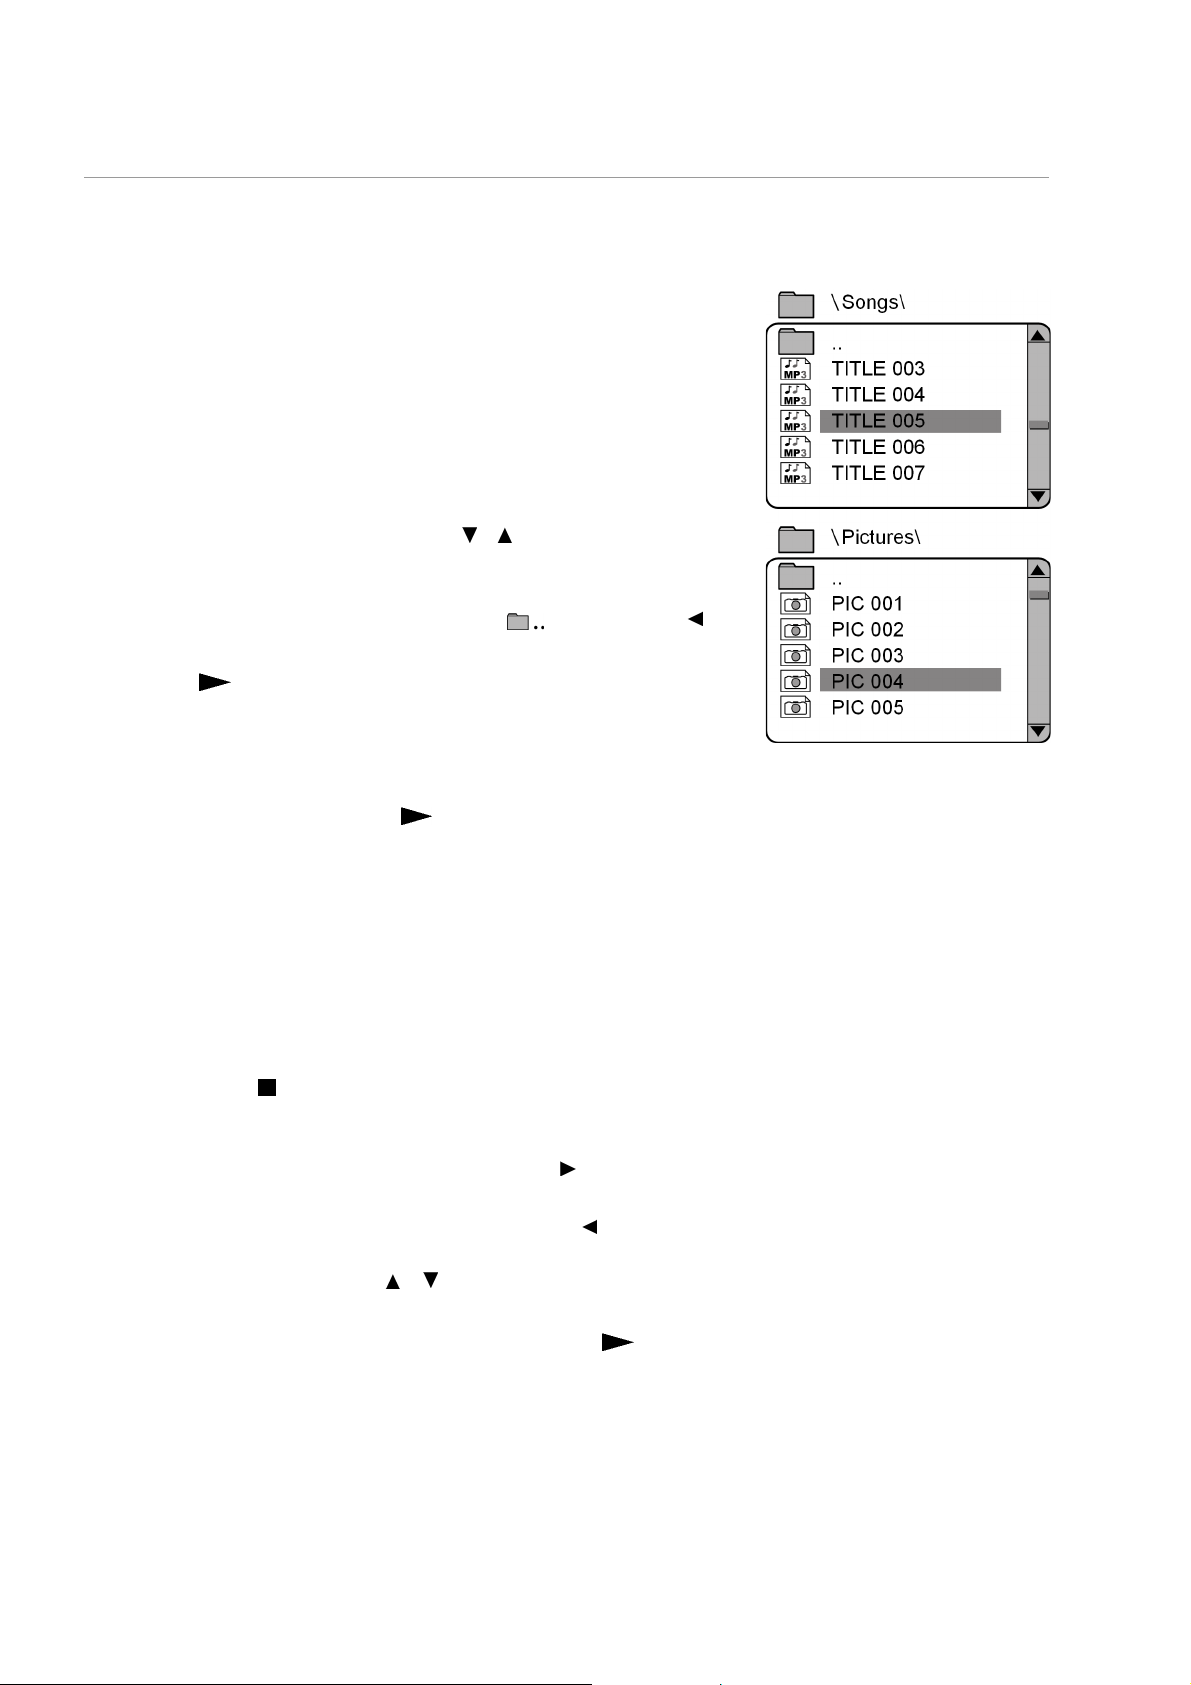
Navegar en los soportes de datos MP3 y JPEG
En los soportes de datos MP3 y JPEG los títulos de música y las imágenes
se almacenan en carpetas, como en un medio de datos.
` Coloque un medio de reproducción MP3 o JPEG en el reproductor. En
pantalla aparece un menú con la estructura superior de carpetas del
CD.
Si el soporte de datos tiene carpetas, estas aparecerán en la parte
izquierda del menú (ver la ilustración al margen).
El título aparecerá con un símbolo MP3 o un símbolo de imagen.
La superficie de la carpeta activa o del archivo activo aparece sobre un
trasfondo naranja.
En pantalla aparecerá el número total de archivos, p.ej. 105 FILES.
` Desplácese con las teclas de navegación o hasta una de las carpetas
y confirme con ENTER.
Puede abrir otras subcarpetas. En dicho caso, puede regresar al menú
superior a través del punto superior del menú ( ) o con la tecla .
` Para escuchar un título o ver una imagen, selecciónelo/la y confirme
con PLAY o ENTER.
MP3: Selección directa a través del teclado numérico
` Introduzca el número del título deseado. Introduzca los números de
varias cifras rápidamente uno tras otro.
` Confirme la selección con PLAY o ENTER.
` Ahora se puede seleccionar un número dentro del archivo activado. En
caso necesario, cambie de archivo.
Imágenes JPEG
En caso de imágenes JPEG aparecerá una vista previa de la imagen en el
lado derecho del menú.
Seleccione una imagen y confirme pulsando ENTER, para poder ver la
imagen en tamaño grande. Aparecen todas las imágenes de la carpeta
activa, una tras otra comenzando por la imagen seleccionada ("DiaShow"). Con STOP se vuelve al menú.
Si pulsa las teclas de navegación durante la reproducción, cambiará la
orientación de la imagen actual:
Si pulsa varias veces la tecla de navegación derecha : la imagen girará
cada vez 90º en el sentido de las agujas del reloj;
Si pulsa varias veces la tecla de navegación izquierda : la imagen
girará cada vez 90º en sentido contrario a las agujas del reloj.
Si pulsa la tecla de navegación o : la imagen se invertirá.
La imagen permanecerá parada en pantalla en este estado de rotación o
inversión. Para continuar con la reproducción, pulsePLAY o ENTER..
28
Page 29
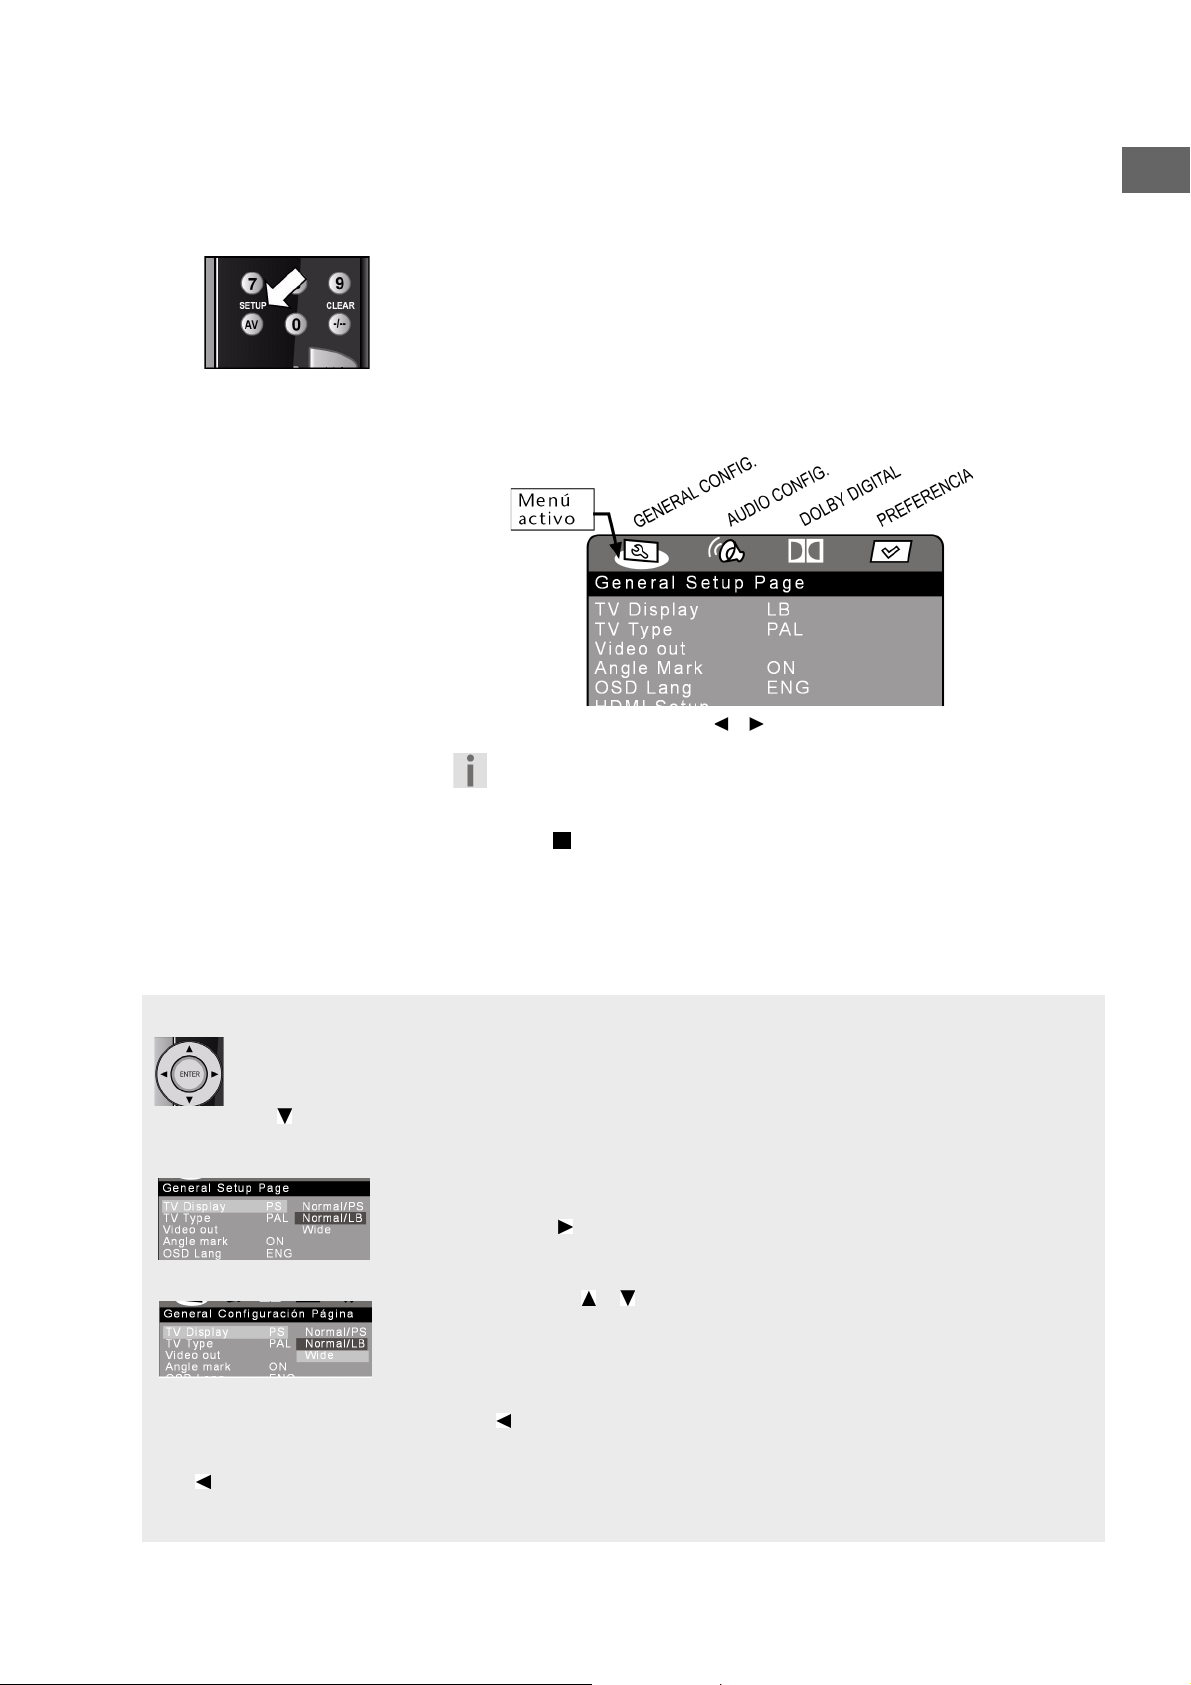
AJUSTES EN EL MENÚ SETUP
En el menú SETUP, al que se accede pulsando la tecla SETUP , pueden
efectuarse todos los ajustes. Tales como, por ejemplo, los formatos de
imagen, los ajustes de sonido o el bloqueo infantil.
` Pulse SETUP. En la pantalla aparece la página principal del menú
SETUPcon los cuatro menús General Setup Page, Audio
Setup Page, Dolby Digital Setup asi como Preference Page.
El menú activo está siempre marcado por un trasfondo color naranja.
ES
Navegar en los menús
Mediante las teclas de navegación puede desplazarse por los menús. Los puntos activos aparecen sobre
un trasfondo de color. En el margen inferior del menú aparecen las explicaciones relativas a cada menú
seleccionado.
Con seleccionará el primer punto del menú.
Submenús y menús de selección
En la mayoría de los submenús, se abre un menú de selección en el lado derecho de
la pantalla. La selección actual aparecerá sobre un trasfondo de color. Desplácese
hacia la derecha con
aparece marcado.
Escoja otro punto con
aparece sobre un trasfondo de color. El trasfondo de la selección anterior
NORMAL/LB) permanece de momento.
(
Con las teclas de navegación
Si no se puede acceder al menú Preference Page, es debido a que
ha abierto el menú SETUP durante la
SETUP mediante la tecla
STOP) y vuelva a activar el menú SETUP
. El punto activo (en la ilustración al margen: NORMAL/LB)
o . Ahora la nueva selección (en el ejemplo: Wide)
o puede seleccionar un menú diferente.
reproducción. Salga del menú
SETUP
, detenga la reproducción (2 x
.
Pulse
ENTER para confirmar la nueva selección (en el ejemplo: WIDE). El trasfondo de la selección anterior
NORMAL/LB) desaparece. Pulsando regresará al lado izquierdo del menú.
(
Abandonar el menú
Con puede regresar al nivel superior del menú.
Pulsando
SETUP puede abandonar el menú SETUP en cualquier momento.
29
Page 30
Menú AJUSTES DE SISTEMA
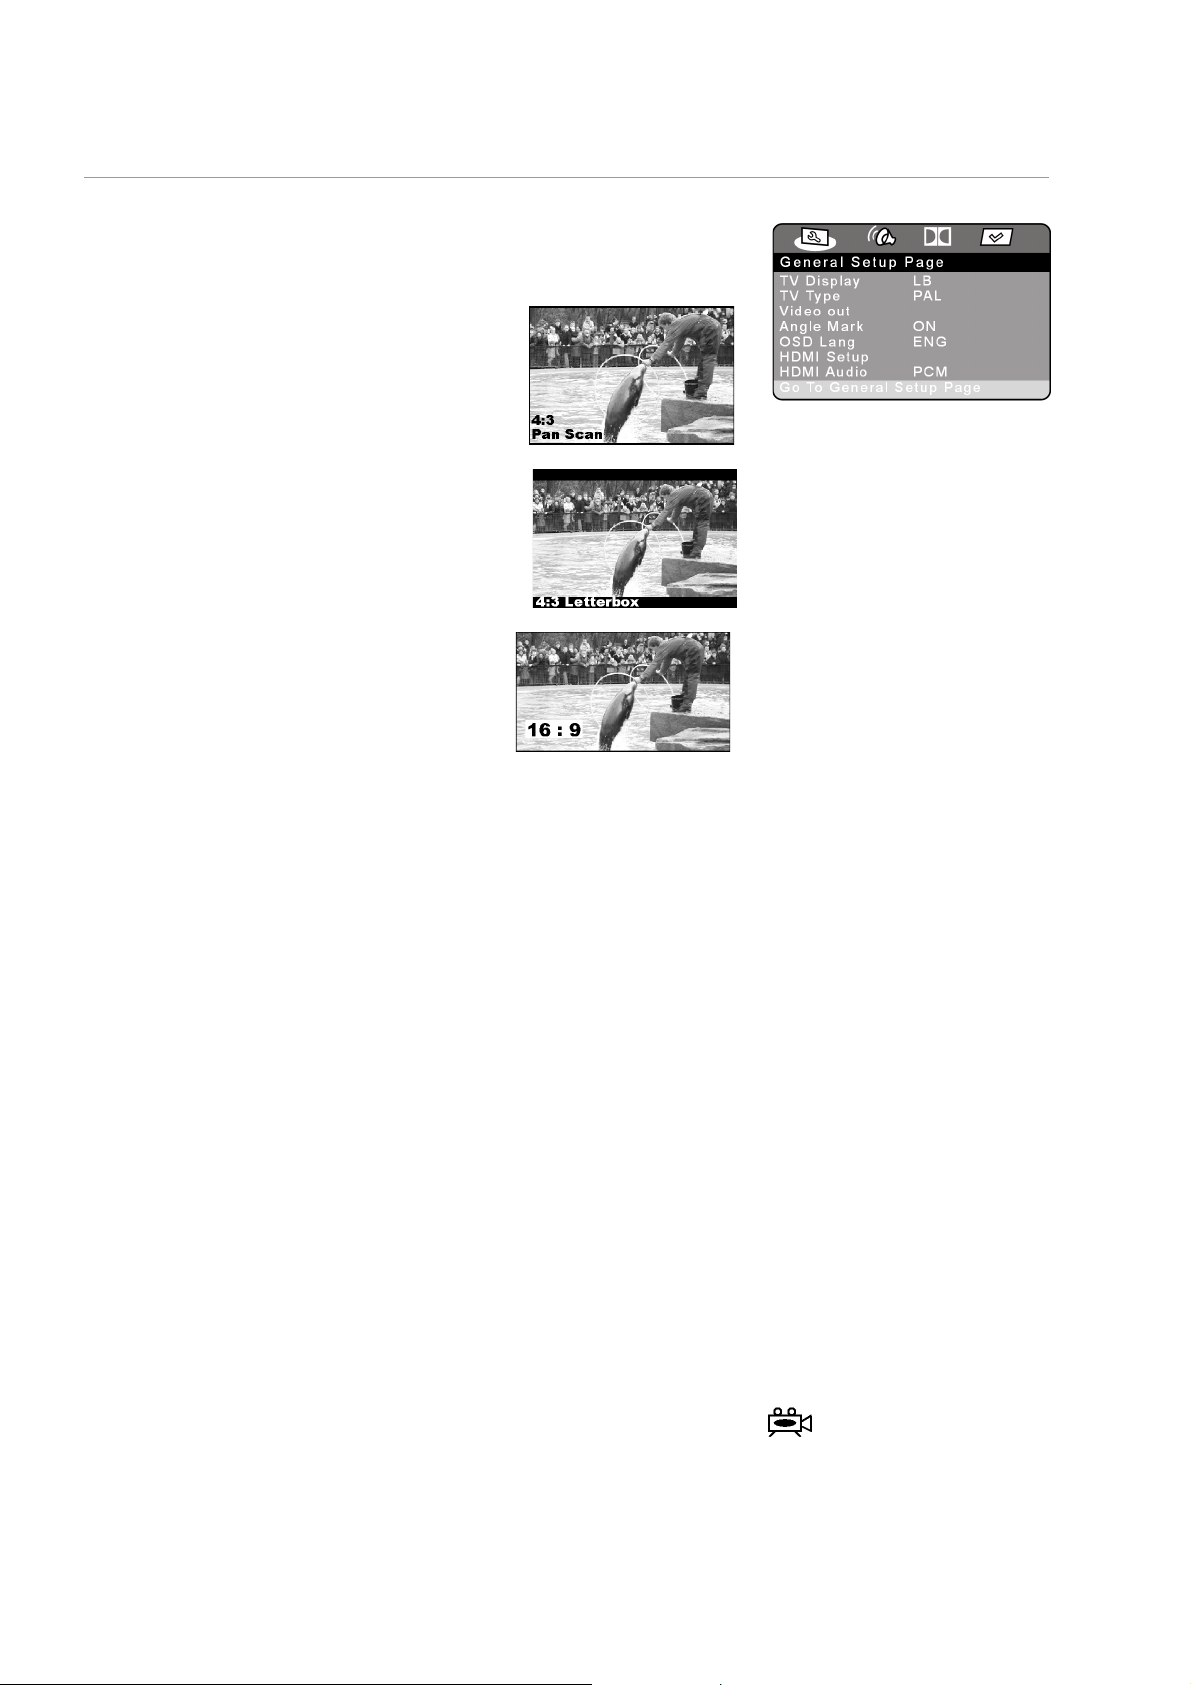
Formato TV
En este submenú puede ajustar el aparato al formato de imagen de su
televisor.
PS: Selección para televisores con
formato 4:3. El formato Pan Scan
presenta las películas en formato
16:9 en su altura íntegra; los dos
laterales quedan recortados.
LB: Selección para televisores con
formato 4:3. El formato Letterbox
reduce los formatos de película
16:9 al ancho de pantalla.
Wide Selección para televisores con
formato 16:9.
` Para modificar un ajuste, desplácese hasta el
ajuste deseado y confírmelo pulsando
ENTER.
Sistema TV
Seleccione aquí el sistema de color de su televisor:
NTSC: formato de color habitual en Norteamérica.
También hay que seleccionar este formato si quiere utilizar
la función de escaneado progresivo.
PAL: formato de color habitual en muchos países europeos.
Salida de vídeo
Aquí puede seleccionar el formato de color para la conexión por su salida
Euroconector o la salida para componentes:
Este punto solamente está activado si la función Progressive-Scan está
apagada. Para ello se deberán realizar los ajustes en el HDMI-Setup
(véase abajo) 480i, 576i ó 1080i.
Fbas Signal: La señal de vídeo se emite por la conexión FBAS (estándar).
RGB Signal:La señal de vídeo se emite por la conexión RGB. Este
formato de color es de mayor calidad pero no es compatible
con todos los televisores.
YUV: La mejor calidad de imagen se consigue con el formato YUV,
siempre y cuando su televisor pueda procesar dicho
formato (si puede recibir señales Progressive Scan).
Posición de la cámara
On: Siempre y cuando el DVD disponga de escenas grabadas
con distintas posiciones de cámara, en dichas escenas
aparecerá automáticamente un símbolo en pantalla.
Off: Con este ajuste, no aparecerá dicho símbolo.
30
Page 31

Idioma OSD
Aquí puede ajustar el idioma del OSD („ On-Screen-Display”), es decir, el
idioma de los menús del reproductor DVD. Puede escoger entre inglés,
español, alemán francés, italiano y neerlandés.
Cuando seleccione uno de los idiomas, el menú cambiará también
inmediatamente de idioma.
HDMI-Setup
Para realizar la función Progressive Scan, seleccione la resolución
adecuada a su televisor HDMI o DVI 480p, 720p, 576p ó 1080p (p =
„progressive“).
Tenga en cuenta que para el estándar PAL debe escoger un ajuste
con 50 Hz, y para el estándar NTSC, un ajuste con 60 Hz.
Para una conexión a través de las conexiones de componentes YPbPr
seleccione la resolución 576p.
Si no se utiliza la conexión HDMI, seleccione 480i (i = „interlaced“).
También se puede cambiar la resolución con la tecla STOP/RES.
Compare para ello con el capítulo “Conexión TV con función
Progressive Scan”, página 14.
HDMI Audio
SPDIF: Si su receptor HDMI dispone de un descodificador Dolby
Digital o MPEG, ponga la opción en SPDIF.
PCM: Si su receptor HDMI no dispone de un descodificador Dolby
Digital o MPEG, ponga la opción en PCM.
ES
31
Page 32

Menú ALTAVOCES
Configuración de los altavoces
Downmix:
En caso de que utilice la salida analógica 5.1, en este menú puede realizar
los correspondientes ajustes.
LT/RT: Se emite el sonido a través de los canales izquierdo y derecho.
Estéreo: El sonido se emite en estéreo. Escoja esta opción si no utiliza
la salida analógica 5.1.
Los puntos del menú Center, Rear y Testtone
necesitan en este caso y por esta razón están desactivados
Off: Activación de las salidas analógicas 5.1.
Front Speaker, Center Speaker, Rear Speaker, Subwoofer:
Según el tamaño de los altavoces frontales, central y posteriores puede
escoger una de las siguientes opciones:
Large: Seleccione este ajuste, si la membrana de su altavoz frontal
tiene más de 12 cm de diámetro..
Small: Seleccione este ajuste para altavoces más pequeños.
Off: Puede seleccionar para los altavoces central y posteriores el
ajuste Off si quiere utilizar el aparato exclusivamente con
altavoces frontales.
.
no se
.
Sonido de prueba:
Para comprobar un sonido de prueba, no debe estar
colocado ningún medio.
En esta opción escuchará una señal de prueba
sucesivamente en cada uno de los altavoces. Utilice esta
función para ajustar el tamaño y el retardo.
32
Page 33

Retardo del canal
Si conecta altavoces independientes, la forma ideal de colocarlos es en
disposición circular (ver el lado izquierdo de la ilustración). Si eso no es
posible, en esta opción puede compensar las desviaciones de la línea
circular.
En el ejemplo que aparece más abajo (ver el lado derecho de la
ilustración), el valor para el altavoz trasero izquierdo se desplazaría unos
50 cm; y para el altavoz trasero derecho, 40 cm.
ES
Menú DOLBY DIGITAL
` Con la tecla de navegación , desplácese a la casilla que hay al lado de
la entrada Channel Delay. Seleccione otro altavoz con o .
Mediante las teclas o puede aumentar o disminuir el valor de
desviación en pasos de 10 centímetros. La desviación máxima es de
600 cm. Confirme pulsando ENTER y abandone el menú con .
La línea circular se define a partir de los altavoces frontales. Por eso no
puede seleccionar los altavoces frontales.
Dinámico
El formato de sonido Dolby Digital es compatible con un ajuste dinámico
que le permite equilibrar el volumen de sonido entre los pasajes más
silenciosos y los más ruidosos en una escala de nueve pasos entre OFF y
FULL.
OFF: El sonido permanece inalterado; es decir, los pasajes de
mayor volumen y con más graves, se reproducen a más
volumen; y los pasajes silenciosos, se reproducen
silenciosos ("sonido cine"). Este ajuste sólo es apropiado si
sabe que no va a molestar a nadie.
FULL: La diferencia de sonido se minimiza; es decir, en los pasajes
fuertes se reduce el volumen; y en los pasajes silenciosos, se
sube. Esta opción es apropiada, por ejemplo, durante la
noche.
` Para modificar este ajuste, desplácese con hasta la escala que hay en
la derecha y seleccione con o el valor deseado. Confírmelo con
ENTER.
33
Page 34

Menú PREFERENCIAS
Únicamente podrá acceder al menú Preferences cuando el aparato esté
en modo Stop. Si el aparato está reproduciendo, pulse dos veces STOP
.
En este menú podrá realizar los ajustes de los idiomas, el control para
padres así como la contraseña.
Seleccionar idiomas
Por favor, tenga en cuenta que en la selección de idiomas:
Sólo se pueden reproducir aquellos idiomas que realmente existan
en el DVD. Si selecciona un idioma inexistente en el DVD, el
reproductor DVD reproducirá el primer idioma grabado en el disco.
Normalmente el menú de cada DVD le indicará los idiomas grabados
en el disco entre los que puede elegir.
Audio
Aquí se preselecciona uno de los idiomas hablados en el DVD.
Puede escoger entre inglés, francés, español, alemán, italiano, neerlandés
y japonés.
Subtítulos
Aquí se preselecciona uno de los idiomas para los subtítulos grabados en
el DVD.
Puede escoger entre inglés, francés, español, alemán, italiano, neerlandés
y japonés.
Selección Off: No se muestran los subtítulos.
Disc-Menu
Aquí puede seleccionar uno de los idiomas disponibles para los menús
(véase “TITLE MENU, DVD MENU”, p. 27) grabados en el DVD.
Puede escoger entre inglés, francés, español, alemán, italiano, neerlandés
y japonés.
Bloquear
Aquí puede ajustar la autorización para los DVDs ( control para padres).
Algunos DVDs y CDs van marcados con los códigos establecidos por la
Motion Picture Association para indicar el nivel de autorización. Estos son
los ocho niveles de autorización:
1 KID SAF: ("kid safe") también apto para niños pequeños;
2 G: ("General") para todas las edades;
3 PG: ("Parental Guidance") se recomienda la supervisión
de los padres;
4 PG 13: se recomienda absolutamente la supervisión
de los padres;
algunas escenas no son aptas para menores de 13 años;
5 PGR: ("Parental Guidance Restriction") para menores
de 17 años se recomienda la supervisión de los padres;
6 R: ("Restriction") para menores de 17 años se recomienda
absolutamente la supervisión de los padres;
Tecla AUDIO
Con la tecla AUDIO puede
cambiar el idioma
seleccionado durante la
reproducción del DVD actual.
Los ajustes efectuados
anteriormente en el menú
Preferences permanecerán
inalterados.
Sin embargo, no con todos los
DVD se puede activar la
función AUDIO.
34
Page 35

7 NC 17: no es apta para menores de 17 años;
8 ADULT: únicamente para adultos.
Si un DVD ha sido codificado, por ejemplo, con el nivel de autorización 7
(NC 17) u 8 (Adult) y Usted ha seleccionado uno de los niveles entre 1 y
6 aparecerá un aviso solicitando la contraseña. También es posible que
sólo partes del DVD, es decir determinadas escenas de la película, estén
codificadas con uno u otro nivel de autorización.
` Para poder modificar el nivel de autorización se debe introducir la
contraseña (véase el párrafo siguiente).
Contraseña
Aquí puede introducir una contraseña para controlar el acceso de otras
personas.
` Para cambiar la contraseña, confirme el punto Change (modificar). Se
abrirá un nuevo menú:
Old Password: [Contraseña antigua] Indique con el teclado
numérico del mando a distancia la contraseña
actual. Se compone exactamente de cuatro cifras.
Si todavía no ha introducido ninguna contraseña,
aún tiene validez la contraseña de fábrica: 1234.
– Si ha introducido la contraseña correcta, se
activará el siguiente campo.
New Password: [Contraseña nueva] Indique con el teclado
numérico del mando a distancia un número de
cuatro cifras. El cursor saltará al siguiente campo.
ES
Confirm PW: [Confirmar la contraseña]
número de cuatro cifras.
` Pulse ENTER para confirmar la nueva contraseña.
En caso de que haya olvidado su contraseña, introduzca la contraseña
maestra: 1369.
Vuelva a introducir el
35
Page 36

EL MANDO A DISTANCIA UNIVERSAL
Advertencias de seguridad
¡Jamás trate de reparar el mando a distancia usted mismo!
El mando a distancia universal dispone de un diodo de infrarrojos de la
clase 1M. ¡No mire jamás el láser a través de instrumentos ópticos!
No exponga el mando a distancia a polvo, luz solar intensa, humedad,
altas temperaturas o sacudidas fuertes.
No utilice productos de limpieza corrosivos o agresivos.
Aplicaciones
Este mando a distancia universal es utilizable para los siguientes tipos de
dispositivos:
TV Televisor
DVD Reproductor DVD MD 82333
SAT, AUX Otros aparatos (p. ej. receptor de satélite analógico, otros
reproductores DVD, amplificador, sintonizador, etc.). La
inscripción indica el tipo de aparato que no se puede
programar. Sirve para una orientación más cómoda.
Programar códigos de aparatos
Aspectos generales
Programming of the remote control does not work in DVD mode.
Tiene que programar un código de dispositivo de cuatro dígitos para cada
aparato que desee controlar mediante el mando a distancia universal en
una de las teclas de selección de fuente (TV, SAT, AUX). Puede asignar
cualquier aparato a cualquier tecla („Modo Flex”) a excepción de la tecla
TV a la que se puede asignar exclusivamente un televisor.
Grabadora de vídeo: introduzca una cinta de vídeo antes de iniciar la
búsqueda de códigos.
Introducir el código de aparato de la lista de códigos
Los códigos de los dispositivos correspondientes están listados en la lista
de códigos adjunta a estas instrucciones de funcionamiento. Proceda de la
siguiente forma:
1. Encienda manualmente el aparato correspondiente.
2. Mantenga pulsada la tecla CODE durante 3 segundo aprox. hasta
que la LED roja se encienda permanentemente después de haber
parpadeado brevemente.
3. Pulse brevemente la tecla de fuentes (TV, SAT, AUX).
4. Introduzca el código de cuatro dígitos correspondiente de la tabla de
códigos.
36
Page 37

Para confirmar cada una de sus pulsaciones la iluminación del teclado se
apagará durante un instante.
Si ha introducido un código válido, la iluminación de la tecla de selección
de fuentes se apagará en cuanto haya introducido el último dígito. Si ha
introducido un código incorrecto, la LED roja parpadeará durante tres
segundos antes de apagarse.
Si el aparato no reaccionara debidamente, repita el proceso de
programación con otro código del fabricante. Seleccione el
que la mayoría de comandos disponibles en su mando a distancia reaccionen
debidamente.
Si con ello tampoco tiene éxito, inténtelo con uno de los métodos de
búsqueda indicados en los siguientes apartados.
Búsqueda manual de códigos
Así puede buscar los códigos de forma manual:
1. Encienda manualmente el aparato correspondiente.
2. Mantenga pulsada la tecla CODE durante 3 segundo aprox. hasta
que la LED roja se encienda permanentemente después de haber
parpadeado brevemente.
3. Pulse brevemente la tecla de fuentes (TV, SAT, AUX).
4. Pulse repetidamente (hasta 350 veces) la tecla POWER, P+ o P–, o
(sólo para VCR), hasta que el dispositivo que desea controlar se
apague, cambie de canal o reaccione debidamente.
5. La búsqueda de códigos se iniciará con el número almacenado
actualmente.
6. Pulse brevemente la tecla ENTER para almacenar el código.
Debido a la gran cantidad de números de códigos diferentes por tipo de
dispositivo hay preprogramados hasta 350 códigos diferentes. En algunos
casos puede suceder que sólo estén disponibles las funciones principales
más usuales. En el caso de algunos modelos especiales puede suceder que
el procedimiento descrito anteriormente no tenga éxito.
ES
código con el
Búsqueda automática
Si su aparato no reaccionara al mando a distancia aunque haya probado
con todos los códigos indicados para su tipo de dispositivo y la marca
correspondiente, también puede activar la búsqueda automática. De este
modo podrá encontrar los códigos de aquellas marcas que no aparezcan
en el listado de códigos de dispositivos.
1. Encienda manualmente el aparato correspondiente.
2. Mantenga pulsada la tecla CODE durante 3 segundo aprox. hasta
que la LED roja se encienda permanentemente después de haber
parpadeado brevemente.
3. Pulse brevemente la tecla de fuentes (TV, SAT, AUX).
4. Oriente el mando a distancia hacia el aparato y pulse una vez
brevemente la tecla P+.
5. Si el dispositivo no dispusiera de funciones de programas, en vez de
pulsar P+ pulse la tecla POWER.
6. Después de 6 segundos, el mando a distancia iniciará la búsqueda de
códigos y emitirá todos los códigos uno a uno cada segundo (véase
37
Page 38

también el apartado siguiente). Cada vez que se emita un código, la
tecla de selección de fuentes se iluminará.
7. En cuanto el aparato reaccione al mando a distancia, pulse la tecla
ENTER . – Si no logra pulsar la tecla ENTER a tiempo, puede
retroceder paso a paso pulsando la tecla P– hasta llegar al código
ante el que ha reaccionado el dispositivo.
Para interrumpir la búsqueda, pulse EXIT.
Emisión cada segundo o cada tres segundos
Si desea que el mando a distancia emita un código nuevo cada tres
segundos en vez de cada segundo, proceda de la siguiente forma:
Vuelva a pulsar en un plazo de 6 segundos, después de haber pulsado la
tecla P+ (o POWER), como se describe en el punto 4, la tecla P+ o P– .
Ahora el mando a distancia emitirá un código nuevo cada tres segundos.
Así tendrá más tiempo para reaccionar, pero también tardará más.
Búsqueda de códigos por marcas
Esta función le ofrece la posibilidad de buscar por marcas (véase listado de
códigos). Proceda como sigue:
1. Encienda manualmente el aparato correspondiente.
2. Mantenga pulsada la tecla CODE durante 3 segundo aprox. hasta
que la retroiluminación de la tecla de fuentes se ilumine
permanentemente después de haber parpadeado brevemente.
3. Pulse brevemente la tecla de fuentes (TV, SAT, AUX).
4. Introduzca el código de un dígito según la siguiente tabla:
Tecla 1 = Medion, Tchibo
Tecla 2 = Philips, Radiola, Philco, Erres, Pye
Tecla 3 = Sony, Akai, Panasonic, JVC, Sharp, Toshiba, Daewo
Tecla 4 = Thomson, Brandt, Fergusson
Tecla 5 = Saba, Nordmende, Telefunken
Tecla 6 = Grundig, Blaupunkt
Tecla 0 = todas las marcas.
5. Pulse repetidamente la tecla P+ (o, en el caso de grabadoras de vídeo,
POWER o PLAY), hasta que el dispositivo reaccione debidamente.
Proceda rápidamente antes de que se inicie la búsqueda automática.
6. Almacene el código pulsando la tecla ENTER.
Cuando se hayan probado todos los códigos, la tecla de selección de
fuentes parpadeará durante 3 segundos aproximadamente.
Identificación del código
Mediante la identificación del código puede ver los códigos que ya están
almacenados en el mando a distancia. Proceda de la siguiente forma:
1. Encienda manualmente el aparato correspondiente.
2. Mantenga pulsada la tecla CODE durante aprox. 3 segundos hasta
que la LED roja se encienda permanentemente después de haber
parpadeado brevemente.
3. Pulse brevemente la tecla de fuentes (TV, SAT, AUX).
4. Pulse brevemente la tecla CODE. La tecla de selección de fuentes se
apagará durante un instante al pulsar la tecla.
38
Page 39

Funcionamiento normal
5. Para encontrar el primer número, pulse las teclas numéricas de 0 a 9.
Si la tecla de fuentes se apaga brevemente, entonces se trata del
primer número memorizado.
6. Para determinar el segundo número, vuelva a pulsar las teclas
numéricas de 0 a 9. Repita el proceso para el tercer número.
7. La tecla de selección de fuentes se apagará en cuanto haya pulsado la
tecla del tercer dígito.
Con ello la identificación de códigos ha terminado.
Controlar aparatos por separado
Cuando haya concluido la programación del mando a distancia para sus
aparatos de audio y vídeo, el mando a distancia controlará las funciones
principales más usuales, igual que el mando original del respectivo
aparato.
Oriente el mando a distancia hacia el dispositivo que desea controlar y
pulse la tecla de selección de fuentes correspondiente. La tecla se
iluminará durante un instante, pero no seguirá iluminada.
A continuación, puede activar las funciones pulsando las teclas
correspondientes de su mando a distancia universal. Con cada pulsación,
la respectiva tecla de selección de fuentes se iluminará durante un
instante.
Por favor, tenga en cuenta lo siguiente:
ES
- eventualmente no todas las funciones del mando a distancia original
están directamente disponibles en el mando a distancia universal.
- especialmente, en el caso de aparatos más modernos, puede suceder
que las funciones no estén asignadas a las teclas en las que se espera
encontrarlas o que no estén disponibles.
Función „Apagar todo”
Puede apagar todos los aparatos preprogramados a la vez. Proceda como
sigue:
1. Pulse brevemente la tecla (STANDBY). El dispositivo seleccionado
se apaga y la tecla de selección de fuentes respectiva se ilumina.
2. Enseguida, pulse otra vez (STANDBY) y mantenga la tecla pulsada
durante 3 segundos. Ahora se apagarán todos los aparatos
preprogramados uno tras otro. Este proceso dura unos 3 segundos.
Si un aparato preprogramado ha estado desconectado, se lo conecta con
la función „Apagar todo”.
EPG – Programación electrónica
La tecla EPG („EPG“ = „Electronic Program Guide“) tiene varias funciones
según con qué código se ejecute:
En el caso de códigos de DVD, la tecla abre el menú de títulos.
En el caso de códigos de SAT ó VCR, con esta tecla puede programar el
aparato, siempre que su vídeo disponga de la función „EPG”.
39
Page 40

Funciones universales ("Punch Through")
Las funciones universales (también denominadas funciones „Punch
Through“) le permiten ejecutar algunas funciones para un tipo de aparato
diferente del que tenga seleccionado actualmente. Estas son las funciones
volumen, MUTE, así como las funciones de reproducción.
Si su mando a distancia se encuentra en uno de los modos VCR, DVD, SAT
o CBL, las teclas de volumen y mute controlarán el televisor (siempre que
los otros aparatos no dispongan de un control de volumen propio);
si el mando a distancia está en el modo TV u otro modo sin funciones de
reproducción, las teclas de reproducción, pausa, stop y, eventualmente,
grabación controlarán una grabadora de vídeo, o DVD o un reproductor
DVD conectado. Siempre se controla el último aparato que se haya
seleccionado.
Asignar la función universal volumen / MUTE a un tipo de
dispositivo diferente
De fábrica, el mando a distancia universal está ajustado de tal forma que
las funciones de volumen y MUTE controlen automáticamente el televisor
siempre que haya pulsado una tecla de selección de fuentes asignada a un
dispositivo que reproduzca imágenes (DVD, vídeo, etc.).
También puede programar el mando a distancia universal de tal forma
que las funciones universales volumen y MUTE controlen otro tipo de
aparatos que no sea el televisor.
1. Mantenga pulsada la tecla CODE durante aprox. 3 segundos hasta
que la tecla de selección de fuentes aparezca retroiluminada después
de haber parpadeado brevemente.
2. Pulse la tecla Mute hasta que la tecla de selección de fuentes se
apague durante un instante.
3. Pulse la tecla de selección de fuentes del dispositivo al que desea
transferir las funciones de volumen y MUTE. La iluminación de esta
tecla de selección de fuentes sigue encendida.
4. Pulse la tecla Mute; la iluminación de la tecla de selección de fuentes
se apaga. Si hubiera seleccionado un aparato que dispone de control
de volumen propio, la tecla de selección de fuentes parpadeará
durante 3 segundos.
Asignar la función universal volumen / MUTE a un
dispositivo determinado
Puede programar el mando a distancia universal de tal forma que para un
determinado dispositivo sólo se utilice el control de volumen y MUTE
propio. En este caso, la función universal queda desactivada para este
modo o este tipo de dispositivo.
1. Mantenga pulsada la tecla CODE durante aprox. 3 segundos hasta
que la tecla de selección de fuentes aparezca retroiluminada después
de haber parpadeado brevemente.
2. Pulse la tecla Mute hasta que la iluminación de la tecla de selección
de fuentes se apague brevemente.
3. Pulse la tecla de selección de fuentes del aparato que debe utilizar
únicamente su propio control de volumen,
4. Pulse la tecla de volumen. La iluminación de esta tecla de selección de
fuentes sigue encendida.
40
Page 41

Solución de problemas
5. Vuelva a pulsar la tecla Mute; la iluminación de la tecla de selección de
fuentes se apaga.
Volver a activar la función universal de volumen / MUTE
En caso de que haya modificado las funciones universales de volumen y
MUTE como se describe en los dos apartados anteriores, puede volver a
restablecer los ajustes de fábrica para volver a disponer del efecto „PunchThrough”.
1. Mantenga pulsada la tecla CODE durante 3 segundos aprox. hasta
que la tecla de selección de fuentes aparezca retroiluminada después
de haber parpadeado brevemente.
2. Mantenga pulsada la tecla Mute hasta que la iluminación de la tecla
de selección de fuentes se apague durante un instante.
3. Vuelva a pulsar Mute. La iluminación de las teclas de selección de
fuentes se apaga definitivamente. Las funciones de volumen y MUTE
se encuentran ahora ajustadas como en su estado original.
El mando a distancia no funciona:
Compruebe si sus dispositivos están correctamente conectados y
encendidos.
Compruebe si las pilas del mando a distancia están colocadas
correctamente teniendo en cuenta su polaridad +/– .
ES
Si las pilas estuvieran demasiado gastadas, cámbielas por pilas nuevas.
Para la marca de mi aparato hay listados varios códigos de
dispositivo. ¿Cómo puedo averiguar el código correcto?
Para encontrar el código correcto para su dispositivo, pruebe todos los
códigos uno tras otro, hasta que la mayoría de las funciones del aparato
funcionen debidamente.
Los aparatos sólo reaccionan a algunos de los comandos del mando a
distancia:
Pruebe con otros códigos, hasta que los aparatos reaccionen debidamente
a los comandos.
Si no ha tenido éxito ni con la indicación manual de códigos ni con la
búsqueda automática, en algunos casos muy especiales puede ser que su
aparato no sea compatible con su mando a distancia universal.
Características técnicas del mando a distancia universal
Pilas: 2 x 1,5 V Micro (LR03/AAA) -
se recomiendan pilas alcalinas
Clase LEDr: 1M
41
Page 42

EN CASO DE PROBLEMAS
En caso de que se produzca algún problema, compruebe primero si
puede solucionarlo Usted mismo. La siguiente tabla puede ayudarle a ello.
En ningún caso trate de arreglar Usted mismo el aparato. Si fuera
necesario reparar el aparato, diríjase a nuestro servicio de
reparación o a un taller especializado.
PROBLEMA POSIBLES CAUSAS / MEDIDAS A ADOPTAR
CARACTERÍSTICAS GENERALES
No se enciende el piloto del
modo standby
Ninguna función Pulse POWER en el aparato y a continuación STANDBY ON/OFF en el
El disco no gira, a pesar de haber
pulsado PLAY , o se para
inmediatamente.
El aparato no reacciona al mando
a distancia.
Ninguna imagen
Imagen distorsionada Compruebe si el DVD está sucio y, si fuera necesario, límpielo
Compruebe la conexión a la red eléctrica: ¿El aparato está bien
enchufado?
mando a distancia.
En caso de que el aparato tenga un problema que haya surgido debido
a una tormenta, una carga electroestática u otro factor externo, intente
lo siguiente:
Pulse POWER en el aparato (modo Standby). Desenchufe el aparato y
vuelva a enchufarlo.
¿Ha colocado el disco con el lado impreso hacia arriba?
Compruebe si el disco está dañado introduciendo otro disco en el
reproductor. En caso de que el disco esté sucio, límpielo
cuidadosamente con un paño suave y seco desde el centro hacia afuera.
DVD: ¿Tiene el DVD el código regional correcto (2)?
Si se ha formado agua de condensación, deje que el aparato se seque
durante de una a dos horas.
Compruebe que las pilas no están gastadas y que han sido colocadas
correctamente. Si fuera necesario, retire los obstáculos existentes entre el
emisor de infrarrojos del mando a distancia y el sensor del aparato.
¿Se ha alejado demasiado del aparato (más de 7 metros)?
¿Ha pulsado una tecla de fuentes correcta (p. ej. DVD para el
reproductor DVD)?
¿Se han efectuado correctamente las conexiones entre el reproductor DVD
y el televisor y están los cables en buen estado?
¿Está encendido el televisor?
¿Ha seleccionado el canal de vídeo en el televisor?
¿Ha escogido la salida de vídeo correcta del reproductor DVD?
Si ha realizado una conexión sin la función PROGRESSIVE SCAN (p. ej.
SCART), compruebe si se ha seleccionado una resolución Interlaced. En
caso necesario ajuste la resolución 480i, 576i o 1080i (Tecla STOP/RES
en el frontal del aparato).
cuidadosamente con un paño suave y seco desde el centro hacia afuera.
Pequeños defectos de imagen son normales.
42
Page 43

Imagen muy distorsionada
Imagen sin colores
Imagen defectuosa
Formato de imagen erróneo (4:3,
16:9)
No hay sonido ¿Está activada la función MUTE (MUTE)?
ESPECÍFICOS DEL DVD
Eventualmente la norma de su DVD no coincide con la norma de su
televisor (PAL – NTSC, menú SETUP> General Setup Page > TV
Type).
Ha seleccionado una señal de salida de vídeo que no es compatible con
el televisor (Menú SETUP > General Setup Page> Video-Out).
Compruebe en el menú SETUP > General Setup Page >TV
Display si el formato seleccionado corresponde al televisor.
ES
Idioma erróneo
Subtítulos erróneos
No es posible efectuar las
funciones SKIP
No es posible cambiar la posición
de cámara.
Ha olvidado su contraseña.
ELIMINACIÓN
Modifique los ajustes de idioma en el menú SETUP a través de la tecla
AUDIO o en el menú DVD (Tecla DVD MENU o TITLE).
Compruebe en la caja del DVD o en el menú del DVD, si el disco dispone
del idioma seleccionado.
Algunos DVDs tienen títulos/capítulos con la función SKIP bloqueada.
Las distintas posiciones de cámara sólo existen en muy pocos DVDs y,
por regla general, únicamente en algunas escenas.
Emplee la contraseña maestra 1369.
Embalaje
Su reproductor DVD está embalado para protegerlo contra
eventuales daños durante el transporte. Los embalajes son
materias primas y por ello son reutilizables o aptos para ser
devueltos al ciclo de reciclaje de materias primas.
Aparato
Al final de la vida útil del reproductor DVD no lo tire bajo ningún
concepto a la basura doméstica normal. Consulte en su
ayuntamiento o autoridad local la posibilidad de una eliminación
apropiada y respetuosa con el medio ambiente. Elimine el
aparato y las pilas por separado.
Pilas
No tire las pilas usadas a la basura doméstica. Las pilas deben ser
depositadas en un punto de recogida para pilas usadas.
43
Page 44

ESPECIFICACIONES TÉCNICAS
Alimentación: 230 V ~ 50 Hz
Potencia: 15 vatios
Consumo de energía en standby: 3 W
Pilas para el mando a distancia: 2 x 1,5 V - AAA/LR03
Sistema de color del televisor: PAL/NTSC
Potencia del láser: Láser clase 1
Formatos de disco compatibles: DVD (Digital Versatile Disc), DVD+R, DVD+RW, DVD-R, DVD-RW;
VCD, SVCD, CD-Audio; CD-R, CD-RW, CD-JPEG, CD-MP3; WMA; XVID.
Tarjetas de memoria compatibles: tarjetas SD, tarjetas multimedia, Memory Sticks, Memory Stick PRO
Si emplea CDs de audio, preste atención a que tengan el siguiente sello
Por favor, tenga en cuenta que: en la actualidad existen muchas formas no estandarizadas de grabación
y protección contra copias de CDs, así como diversos tipos de CD-R y CD-RW vírgenes. Por ello, cabe la
posibilidad de que en algunos casos se produzcan retrasos o errores de lectura. Dichos fallos no
implican un defecto del aparato.
Vídeo
Formatos de vídeo: 4:3 / 16:9
Señal de salida de vídeo: 1 Vp-p
Descodificador: MPEG 2
Conversor digital-analógico: 12 Bit
Audio
Descodificador: MPEG; Dolby Digital (AC-3)
dts únicamente con un descodificador externo complementario
Conversor digital-analógico: 24 Bit / 96 kHz
Codificación MP3
Formato ISO 9660
Frecuencia de muestreo (sampling): MPEG 1: 32, 44.1, 48 kHz
Bit-Rate: 32 - 320 kbps
Codificación WMA
Frecuencia de muestreo (sampling):32, 44.1, 48 KHz
Codificación MP4-(DiVX)
Resolución de imagen: 720 x 480 @ 30 fps; 720 x 576 @ 25fps
Bit-Rate: 4000 kbps; Peak max. 10.000 kbps; MPEG 4 ASP Level 5
¡Las especificaciones técnicas están sujetas a cambios sin previo aviso!
44
Page 45

OVERVIEW
Main device
EN
Front view 1. Blue LED light for standby mode
2. Disc compartment
3. PLAY: Play
4. OPEN/CLOSE: Open and close disc compartment
5. STANDBY: Switch standby mode on and off
6. STOP/RES: Stop playback;
Press repeatedly: Select resolution for HDMI and Progressive Scan
7. IR: Receiver field for the remote control
8. USB: LED light for USB mode
9. Display (see below)
10. Drives for various memory cards
11. USB con nect ion
12. PHONES: Ear/headphone connection
13. VOLUME: Volume control for ear/headphones
Rear 1. Operating switch
2. Power cable
3. HDMI: HDMI output for (digital image and audio transmission)
4. FRONT: Front loudspeaker connections left/right
5. REAR: Rear loudspeaker connections left/right
6. CENT: Centre loudspeaker connection
7. S-VIDEO: S-VIDEO output (image transfer to television set)
8. SUB: Subwoofer (bass loudspeaker) connection
9. VIDEO OUT: VIDEO output (image transfer to television set)
10. OPTICAL: Digital audio output
11. AV CONNECTOR (RGB) - TV: SCART connection to television or
video recorder
12. Y Pr Pb: Component outputs
13. COAXIAL: Digital audio output
Display 1. Medium: DVD
2. Playback
3. Pause active
4. Playback active
5. Repeat active
6. Disc in dts sound format
7. Disk in Dolby Digital sound format
8. Expired time in H:MM:SS format
9. Current title/chapter
10. PBC: Playback control active (video CD)
11. Med ium : MP 3
12. Medium: VCD
1
Page 46

Remote control
DVD remote control and universal remote control
This view describes the button functions on the remote control. The remote
control can be used for other units devices. The use of the remote control as
a universal remote control is described in the“The universal remote control”,
page 36 section.
If the DVD player fails to react to a button press the source button DVD.
1. Switching on from standby mode and vice-versa
2. TV: Source key for selecting the device (i. e. TV)
3. STB: Source key for selecting the device (i. e. Set-Top-Box, SAT-
Receiver)
4. DVD: Controlling the DVD player
5. VCR: Source key for selecting the device (i. e. video recorder)
6. AUX: Source key for selecting the device (i. e. amplifiers etc.)
7. CODE: Enter code for other device types; s. page 36
8. SUBTITLES: Select sub-title language;
open Teletext in TV mode; s. page 36
9. TITLE: Call up title menu (DVD);
EPG: „Electronic Program Guide“; s. page 36
10. Arrow buttons: Navigate within menus
11. ENTER: Confirm selection
12. RETURN/EXIT: Return to menu
13. MENU: Call up DVD menu
14. DIGEST: Preview function
15. PROGRAM: Programme order of titles
16. BOOKMARK: Bookmark function
17. SEARCH : Title/time direct selection
18. AUDIO: Direct language selection (DVD)
19. ZOOM: Enlarge image
20. USB/CARD: Select USB operation or card operation
21. CARD SELECT: Button has no function in this model
22. LED-display for confirming button selection
23. 0-9: Number buttons, e. g. for direct track and title selection
24. CLEAR: Delete selection (menus)
TV use: Enter two-digit numbers
25. SETUP/AV: Open setup menu, controlling other devices, s. page 36
26. : Skip tracks (SKIP);
P+/P–: Television programme selection; s. page 36
27. : Television mute mode; s. page 36
28. +/–: Television volume high/low; s. page 36
29. : Fast rewind
30. : Play
31. : Fast forward
32. / KEY LOCK: Start recording / Key lock for the buttons on the
front of the player
33. : Stop playback
34. : To pause playback
35. OPEN/CLOSE: Open and close disc compartment
2
Page 47

36. SLOW/F: Slow forward
37. SLOW/R: Slow rewind
38. REPEAT: Repeat functions
39. REPEAT A-B: Repeat a defined section
40. RANDOM: Play tracks in random order
41. ANGLE: Camera position (perspective)
42. 3D: Virtual surround function
43. DISPLAY:Display current title/lapsed time
EN
3
Page 48

TABLE OF CONTENTS
Overview . . . . . . . . . . . . . . . . . . . . . . . . . . . . . . . . . . . . . . . 1
Main device . . . . . . . . . . . . . . . . . . . . . . . . . . . . . . . . . . . . . . . . . . . . . 1
Remote control . . . . . . . . . . . . . . . . . . . . . . . . . . . . . . . . . . . . . . . . . . . 2
Table of contents . . . . . . . . . . . . . . . . . . . . . . . . . . . . . . . . 4
Safety instructions . . . . . . . . . . . . . . . . . . . . . . . . . . . . . . 6
Keep electrical equipment out of reach of children . . . . . . . . . . . . . . . 6
Setting the appliance up safely . . . . . . . . . . . . . . . . . . . . . . . . . . . . . . 6
Power connection . . . . . . . . . . . . . . . . . . . . . . . . . . . . . . . . . . . . . . . . . 6
Never undertake your own repairs . . . . . . . . . . . . . . . . . . . . . . . . . . . . 7
CD player . . . . . . . . . . . . . . . . . . . . . . . . . . . . . . . . . . . . . . . . . . . . . . . 7
Headphones . . . . . . . . . . . . . . . . . . . . . . . . . . . . . . . . . . . . . . . . . . . . . 7
In the event of functional damage . . . . . . . . . . . . . . . . . . . . . . . . . . . . 7
Safe handling of batteries . . . . . . . . . . . . . . . . . . . . . . . . . . . . . . . . . . . 8
Cleaning the unit . . . . . . . . . . . . . . . . . . . . . . . . . . . . . . . . . . . . . . . . . 8
General information . . . . . . . . . . . . . . . . . . . . . . . . . . . . . 9
About DVDs. . . . . . . . . . . . . . . . . . . . . . . . . . . . . . . . . . . . . . . . . . . . . . 9
Other playable formats . . . . . . . . . . . . . . . . . . . . . . . . . . . . . . . . . . . . 10
Available surround sound formats . . . . . . . . . . . . . . . . . . . . . . . . . . . 10
Preparation . . . . . . . . . . . . . . . . . . . . . . . . . . . . . . . . . . . . .11
Unpacking the device . . . . . . . . . . . . . . . . . . . . . . . . . . . . . . . . . . . . . 11
Inserting the batteries into the remote control . . . . . . . . . . . . . . . . . 11
Connections and connection options . . . . . . . . . . . . . 12
Setting up the unit . . . . . . . . . . . . . . . . . . . . . . . . . . . . . . . . . . . . . . . 12
Connection options between the DVD player and television . . . . . . 12
TV connection with progressive scan function . . . . . . . . . . . . . . . . . 14
Home cinema connection with analogue sound transmission . . . . . 16
Digital sound transfer . . . . . . . . . . . . . . . . . . . . . . . . . . . . . . . . . . . . . 17
Power connection . . . . . . . . . . . . . . . . . . . . . . . . . . . . . . . . . . . . . . . . 17
Optional: Connecting headphones . . . . . . . . . . . . . . . . . . . . . . . . . . 17
Button functions . . . . . . . . . . . . . . . . . . . . . . . . . . . . . . . 18
Operating the player using the controls on the player
or remote control . . . . . . . . . . . . . . . . . . . . . . . . . . . . . . . . . . . . . . . . 18
Standby/Switching on/Switching off . . . . . . . . . . . . . . . . . . . . . . . . . 18
Inserting a disc . . . . . . . . . . . . . . . . . . . . . . . . . . . . . . . . . . . . . . . . . . 18
Reading the memory card and USB Memory Stick. . . . . . . . . . . . . . . 19
KEY LOCK. . . . . . . . . . . . . . . . . . . . . . . . . . . . . . . . . . . . . . . . . . . . . . . 19
Playback functions. . . . . . . . . . . . . . . . . . . . . . . . . . . . . . . . . . . . . . . . 20
Search functions . . . . . . . . . . . . . . . . . . . . . . . . . . . . . . . . . . . . . . . . . 20
Repeat functions . . . . . . . . . . . . . . . . . . . . . . . . . . . . . . . . . . . . . . . . . 21
Program playback sequence - PROGRAM. . . . . . . . . . . . . . . . . . . . . . 22
Direct title/time – SEARCH . . . . . . . . . . . . . . . . . . . . . . . . . . . . . . . . . 23
Setting bookmarks – BOOKMARK . . . . . . . . . . . . . . . . . . . . . . . . . . . 23
Select section – DIGEST (DVD and VCD) . . . . . . . . . . . . . . . . . . . . . . 24
RANDOM and INTRO (audio CD only) . . . . . . . . . . . . . . . . . . . . . . . . 25
Picture functions . . . . . . . . . . . . . . . . . . . . . . . . . . . . . . . . . . . . . . . . . 25
Sound functions . . . . . . . . . . . . . . . . . . . . . . . . . . . . . . . . . . . . . . . . . 26
TITLE MENU, DVD MENU . . . . . . . . . . . . . . . . . . . . . . . . . . . . . . . . . . 27
AUDIO and SUBTITLE MENU . . . . . . . . . . . . . . . . . . . . . . . . . . . . . . . 27
PBC function (VCD 2.0 only) . . . . . . . . . . . . . . . . . . . . . . . . . . . . . . . 27
Locating tracks or pictures on MP3 and JPEG data carriers . . . . . . . . 28
4
Page 49

Settings in the SETUP menu . . . . . . . . . . . . . . . . . . . . . . . 29
SYSTEM SETTINGS menu . . . . . . . . . . . . . . . . . . . . . . . . . . . . . . . . . .30
SPEAKERS menu . . . . . . . . . . . . . . . . . . . . . . . . . . . . . . . . . . . . . . . . .32
DOLBY DIGITAL menu . . . . . . . . . . . . . . . . . . . . . . . . . . . . . . . . . . . . .33
PREFERENCES menu . . . . . . . . . . . . . . . . . . . . . . . . . . . . . . . . . . . . . .34
The universal remote control . . . . . . . . . . . . . . . . . . . . 36
Safety instructions . . . . . . . . . . . . . . . . . . . . . . . . . . . . . . . . . . . . . . . .36
Scope of application . . . . . . . . . . . . . . . . . . . . . . . . . . . . . . . . . . . . . .36
Programming device codes . . . . . . . . . . . . . . . . . . . . . . . . . . . . . . . . .36
Manual code search . . . . . . . . . . . . . . . . . . . . . . . . . . . . . . . . . . . . . .37
Automatic search . . . . . . . . . . . . . . . . . . . . . . . . . . . . . . . . . . . . . . . . .37
Code searching by brand name . . . . . . . . . . . . . . . . . . . . . . . . . . . . .38
Code identification . . . . . . . . . . . . . . . . . . . . . . . . . . . . . . . . . . . . . . .38
Normal operation . . . . . . . . . . . . . . . . . . . . . . . . . . . . . . . . . . . . . . . .38
“All off” function . . . . . . . . . . . . . . . . . . . . . . . . . . . . . . . . . . . . . . . . .39
EPG – Electronic Programme Guide . . . . . . . . . . . . . . . . . . . . . . . . . .39
Universal functions (“Punch Through”) . . . . . . . . . . . . . . . . . . . . . . .39
Troubleshooting . . . . . . . . . . . . . . . . . . . . . . . . . . . . . . . . . . . . . . . . .40
Universal remote control technical specifications . . . . . . . . . . . . . . . .41
Troubleshooting . . . . . . . . . . . . . . . . . . . . . . . . . . . . . . . 42
Disposal . . . . . . . . . . . . . . . . . . . . . . . . . . . . . . . . . . . . . . . 43
Technical data . . . . . . . . . . . . . . . . . . . . . . . . . . . . . . . . . 44
EN
5
Page 50

SAFETY INSTRUCTIONS
About these instructions
Please read these instructions carefully before using the device. Note the warnings on the device
and in the operating instructions
Always keep the operating instructions close to hand. If you sell
ensure that you also pass on these instructions.
Keep electrical equipment out of reach of children
Children can be injured by electrical devices. Never allow children to use
electrical appliances unattended.
Keep plastic packaging out of the reach of children. There is a risk of
suffocation.
Setting the appliance up safely
Place the device on a sturdy, level surface. It is not designed for use in rooms
that are very humid (e.g. bathrooms).
installation conditions:
Please observe the following
or give the unit away, please
Ensure that ventilation is adequate. The ventilation unit should not be
obstructed by placing objects such as newspapers, table cloths,
curtains, etc. on the vents.
Do not place the device near heat sources (e.g. heaters) that could affect
the unit.
Do not place the unit in direct sunlight.
Avoid contact with water droplets or spray and do not place
anything containing water on the unit.
Never set up the appliance near magnet fields.
(e.g. television sets or speakers).
Naked flames, such as lit candles, must not be placed on or near the
device.
vases or
Power connection
Only connect the appliance to a power socket (230 V ~ 50 Hz) that is easy
to reach and is close to the place where you have set up the appliance. The
power socket must be freely accessible so that you can unplug the
appliance quickly, if necessary.
Do not use the device if the mains plug, cable or device itself has been
dropped. If the plug, cable or appliance is damaged, immediately remove
the plug from the power supply.
Ensure the mains cable is out of harms way and will not trip people up.
There should be no kinks or folds in the power cable.
Do not connect the device immediately to the mains if the unit has been
moved from a cold to a warm room. Any condensation which forms could
6
Page 51

damage the unit. The device can be operated as soon as the unit has
reached room temperature.
Thunder storms
Unplug the device and pull out the aerial if you are away for a long period
of time or there is a storm.
Never undertake your own repairs
Never try to open and/or repair the device yourself. There is a risk of
electric shock! Do not interfere with the unit’s power cable.
If there is a fault contact our Service Centre or other suitable specialist
workshop.
CD player
The CD player is a class 1 laser product. The device has a safety system that
prevents dangerous laser rays escaping during normal use. In order to
avoid injury to the eyes, never interfere with or damage the unit's security
system.
Headphones
Listening to the unit at a high volume with headphones or ear phones can
damage your hearing.
Lower the volume before putting on head/earphones Your hearing can be
damaged if you listen at high volumes over a long period or if the volume
is increased too suddenly.
EN
In the event of functional damage
If the unit is malfunctioning there might have been a electrical discharge.
If this is the case unplug the unit from the power source and remove the
batteries. Insert the batteries again and re-attach the unit to the power
source . This will reset the unit.
7
Page 52

Safe handling of batteries
The remote control is battery operated. Please note the following:
Keep the batteries out of reach of children. They can be fatal if
swallowed. If a battery is swallowed, please obtain immediate medical
assistance.
Do not throw batteries into a fire, do not short-circuit them and do not
dismantle them.
If necessary clean the battery and device contacts before insertion.
Always change all batteries at the same time.
Only use batteries of the same type. Do not use different types of
batteries; do not use a mix of used and new batteries.
Please take note of the polarity (+/-) when inserting the batteries.
Remove the batteries if the unit is not going to be used for long periods.
Remove the empty batteries immediately from the unit! There is an
increased risk of leakage.
Do not expose batteries to extreme conditions; for example, do not
place the unit on top of radiators. There is an increased risk of leakage.
Never try to recharge non-rechargeable batteries. There is a risk of an
explosion!
Remove leaking batteries from the device immediately. Clean the
contacts before inserting new batteries. There is a risk of skin irritations
from battery acid!
If battery acid leaks out it is essential to avoid contact with the skin, eyes
and mucous membranes! If the acid does come into contact with skin,
immediately rinse the affected areas with plenty of clear water and
contact a doctor immediately.
Cleaning the unit
Remove the mains plug from the socket before cleaning.
Use a dry, soft cloth to clean the appliance. Avoid the use of chemical
solutions and cleaning products because these may damage the unit's
surface and/or inscriptions.
8
Page 53

GENERAL INFORMATION
About DVDs
A DVD – Digital Versatile Disc – is a digital medium for storing information.
DVDs are marked with one of the symbols shown here.
There are different types of DVD with different storage capacities
depending on how the information is stored.
DVD structure
Video DVDs are divided into titles and chapters. A DVD can have several
titles,
which may, in turn, consist of several chapters. The titles and chapters are
each numbered sequentially:
EN
The first title of a DVD usually comprises licence details and
manufacturer's information. The next title is usually the film itself. Other
titles may include such items e. g. as "making of" documentaries, film
previews or information on the actors.
Languages and subtitles Up to eight languages and subtitles in as many as 32 different languages
can be stored on DVDs. Any combination of languages and subtitles can
be selected for playing back discs.
Camera angle Some DVDs even allow the viewer to select multiple camera angles,
provided that the film was recorded from different camera positions.
Regional codes
For reasons connected with global DVD sales strategy, a code has been
developed for DVDs that allows the recording to be played only on devices
purchased in a particular region.
This code is based on a system that divides the world into six
regions. As Europe is in Zone 2, your DVD player will only play
DVDs that have the regional code 2. The regional code is printed
on the DVD packaging. (See the logo shown here.)
Apart from DVDs with regional code 2, the unit will only play DVDs with
the regional code 0 (suitable for any DVD player).
If you have problems when playing certain DVDs make sure that the
DVD has the regional code 2 or 0.
9
Page 54

Other playable formats
MP3s and WMA files
MP3 and WMA formats are compression formats for audio data. WMA
stands for ”Windows Media Audio” and was introduced more recently
than the MP3 format.
MP3 and WMA files have to be saved with the file extension *.mp3 or
*.wma in order to be recognised.
MPEG4, Nero Digital
MPEG4 is a compression technology for multimedia/video data ("MPEG" =
"Moving Picture Experts Group").
Nero Digital ist a brand name for a video compression-decompression
technique based on MPEG4 format.
Available surround sound formats
WMA tracks are shown on the
screen with the following
symbol:
The unit recognises two different surround sound formats.
Dolby Digital 5.1
In Dolby Digital sound format the audio material is saved digitally. In this
instance, up to five separate full-frequency audio channels (front left and
front right, centre, rear left and rear right) as well as an effect or depth
channel (5.1) are stored separately. Discs and media recorded in the Dolby
Digital format are marked with the trademarks shown here.
Because each channel is completely independent, a realistic, almost
"three-dimensional" effect is produced, creating the impression of
distance, movement, and relative position in the room.
Your unit can read and decode this audio data and outputs to the 5.1
outputs. On the other hand the original signal can be sent to an external
decoder/amplifier via the digital outputs.
dts (Digital Theatre Systems)
The dts abbreviation is used for a less frequently used sound format in
which up to 6 (5.1) separate channels are saved to a sound medium. Discs
and media recorded in the dts format are marked with the trademarks
shown here.
Your unit can read this audio data and sends it to the digital outputs
("DIGITAL OUT") for decoding.
Trademarks
"Dolby", "Pro Logic", and the
"DD" symbol are registered
trademarks of Dolby
Laboratories.
"dts" is a trademark of DTS
Technology, LLC.
10
Page 55

PREPARATION
Unpacking the device
Remove all packaging materials including the film on the front of the unit.
WARNING!
Do not let children play with the plastic wrapping. There is a risk of
suffocation.
Check package contents
When unpacking, ensure that the following parts are included:
DVD player
SCART cable
Remote control
2 x batteries (AAA/LR03 type, 1.5V)
Instructions and guarantee documents
Inserting the batteries into the remote control
EN
Two 1.5 V batteries (AAA/LR03 type) are supplied for the remote control.
` Open the battery compartment by sliding the panel on the back of the
remote control in the direction of the arrow.
` Insert the batteries so that the negative end is placed next to the springs.
` Close the battery compartment.
WARNING!
The batteries supplied should not be charged, disassembled,
thrown into a fire or short-circuited.
If swallowed, batteries may endanger life. For this reason keep the
batteries and remote control out of reach of children. If a battery is
swallowed, please obtain immediate medical assistance.
11
Page 56

CONNECTIONS AND CONNECTION OPTIONS
The unit can be connected in various ways to other input and output
devices.
Switch off all devices before connecting them. Only connect the
units to the mains when the other connections are complete.
Setting up the unit
Place the unit on a sturdy, level surface. Please take note of the safety
instructions on page 6.
Some aggressive furniture paints can weaken the device’s rubber feet. If
necessary, place the devices on a suitable underlay.
Connection options between the DVD player and television
Connection with the television via the SCART cable
The SCART cable is the simplest connection between the DVD player and
the television.
As long as your television can process RGB signals you will get a very good
quality image from this option.
12
Page 57

Connection with the television via the S-VHS cable
If your television does not have a SCART connection you can connect with
the unit via the S-VHS cable (S-VIDEO socket). This will provide good
image quality.
An audio cinch cable must also be connected. Please note the colour codes
for left/right on the cinch plugs.
To p lay in S TER EO s et t he dow nmi x op tio n i n the Speaker Setup section
of the audio menu to STEREO.
Note:
Instead of connecting
the audio cinch cable to
the television it can also
be connected with a
Dolby Surround Sound
(stereo) system.
EN
Connection with the television using the video cinch
cable
If your television does not have a SCART connection or an S-VIDEO socket
you can also connect the unit via the video cinch cable.
An audio cinch cable must also be connected. Please note the colour codes
for left/right on the cinch plugs.
To p lay in S TER EO s et t he dow nmi x op tio n i n the Speaker Setup section
of the audio menu to STEREO.
13
Page 58

TV connection with progressive scan function
To Progressive Scan
The unit can transmit video signals in PROGRESSIVE SCAN format via the component connections and the
HDMI connection, which gives good image quality. It goes without saying that your TV (or data projector)
must be able to process this format.
In the progressive scan format the image is transmitted in 50 half and 50 full images. This reduces flickering
images to a minimum and displays movements in a more fluid manner.
p- and i-resolutions
With the button STOP/RES and in the setup menu General Setup Page >
HDMI Setup you can select the resolution for the progressive scan image format
(„p“) and the standard image format („i“ = „interlaced). Switch on the progressive
scan function by selecting a resolution with „p“ .
Switch off the progressive scan function (resolution with „i“), if you have not connected the
television set via the component or HDMI sockets.
Component connections
If your unit has so-called component connections (Y, Cb/Pb, Cr/Pr), you
can also connect the unit to the television or data projector using theses
connections. These connections use the so-called „YUV colour format“.
Connect the unit’s Y, Pb and Pr socket to the corresponding socket via a
three-pole video-cinch cable with the corresponding sockets on the
television set or image projector.
For sound transmission also connect the audio-cinch cable.
For connection via the component sockets for genersating the
progressive scan function select the resolution 576p.
14
Page 59

HDMI, the HDMI logo and High
Definition Multimeadia
Interface are registered
trademarks of HDMI licensing
LLC.
Digital image and sound: HDMI
Your DVD player has a HDMI (OUT) connection. HDMI (”High Definition
Multimedia Interface“) is the only interface in the consumer entertainment
electronics sector that can digitally transmit audio and video data
simultaneously. It can process all current picture and sound formats,
including HDTV (High Definition Television), and can do this at the highest
current resolution of 1080p without losing quality.
You can connect the device to the television set with HDMI and DVI inputs
(HDMI is downwards compatible to DVI – “Digital Visual Interface”). You
will also need a HDMI cable for connecting to a HDMI input. If your
television set has a DVI socket, you will also need an adapter (HDMI – DVI),
which is also available is specialist stores.
EN
Once you have connected the HDMI or DVU unit then switch on this
unit only. Wait approximately 30 seconds and then switch on the
DVD player.
To establish the progressive scan function for the HDMI connection
select the resolution 480P, 720P (60Hz), 1080P (60Hz),
576P, 720p (50Hz), 1080p (50Hz), depending on the
resolution of you television set (see “To Progressive Scan”, page 14).
Please note:
The HDMI output has been certified according to the valid HDMI
standard. It may happen in certain cases that the connection is not
compatible with the DVI or HDMI connection on another device,
which will make error-free transmission impossible. The fault in this
case has nothing to do with the DVD itself.
15
Page 60

Home cinema connection with analogue sound transmission
One of the advantages of DVD technology is that multi-channel sound can
be saved and used for playback: To play back 5.1 sound the DVD player
transmits signals to the 5.1 Dolby Digital output.
16
Page 61

Digital sound transfer
Connect either a coaxial cable or an optical cable to the COAXIAL or
OPTICAL output on the DVD/ player and the corresponding input on the
amplifier. For image transfer you can use either an S-Video cable or a video
cinch cable:
EN
Power connection
Once you have made all the connections, connect the plug to the mains
(230 V ~ 50 Hz).
Optional: Connecting headphones
There is a headphone connection on the front of the unit (PHONES).
Connect the headphones with a 6.3 mm ratchet plug.
The headphones have their own volume control
WARNING!
Before putting on headphones set the volume to minimum!
17
Page 62

BUTTON FUNCTIONS
Operating the player using the controls on the player or remote control
You can activate the main play functions of the player using the buttons
on the front of the unit.
numerous additional options for using all functional elements of your
DVD player. You can, for instance, use the remote control to navigate
through the menus, which are then displayed on the television screen.
In this manual we are describing the remote control buttons.
as the remote control (with the exception of the power switch) includes all the functions of the
unit. If reference is made to the controls on the DVD player itself, this will be clearly indicated.
Standby/Switching on/Switching off
Standby mode
Use the POWER button on the rear of the unit to switch off the unit
completely. The blue LED comes on when the device is in standby mode.
Switching on
` Press (STANDBY), to switch the unit on. The display lights up. The
type of display depends on the type of recording medium.
Buttons on the front of the
player
Buttons on the remote controlIn addition to these basic controls the remote control also provides
Switching off
` Press (STANDBY) again to switch the device into standby mode. The
display will go out.
Inserting a disc
Make sure that there is about 15 cm of space in front of the disc
compartment so that it can open without hindrance.
` Switch the unit on and press OPEN/CLOSE.
` Insert a disc into the disk compartment with the title side upwards.
Make sure that you place the disc in the middle of the disc holder so that
it does not stick when you close the compartment.
` Press the OPEN/CLOSE button. The disc compartment closes.
DVDs start playing automatically after a few seconds. The type of display
depends on the type of disc. You may need to press PLAY , otherwise
a menu may appear in which you need to make a selection using the arrow
keys.
18
Page 63

Reading the memory card and USB Memory Stick.
Your DVD player has a special memory card drive for SD cards, multimedia cards and a memory stick, as well as a connection for a USB Memory
Stick or other USB
Memory card
` Insert a memory card into the memory drive at the front of the unit with
the contacts facing down and the bevelled corners on the front righthand side.
` The card will stick out somewhat when it has been inserted fully. This
way it can be removed again.
Do not use force to insert the memory card. If you are unable to
insert the card, you may have inserted it incorrectly or it may not be
the correct size for this drive.
USB player
` Insert the USB device into the USB connection interface.
The hard disk indicator on the front of the device lights up during USB
mode.
Select the drive
` You can use the button USB/CARD to select the card drive, USB drive
or the disc drive. Press the button several times if required.
Data on the memory cards and USB stick is played in the same
way as discs (DVD, Audio-CD, JPEG-CD etc.). The following
description for discs also applies to memory cards and the USB
Memory Stick.
EN
KEY LOCK
` While the unit is switched on press the KEY LOCK button. All buttons
on the front of the player are now locked.
` Press KEY LOCK again to remove the lock.
19
Page 64

Playback functions
PAUSE/STEP (plays a single image)
` You can interrupt the play mode by pressing PAUSE/STEP. The pause
icon is displayed on the screen: .
` Press PAUSE/STEP repeatedly to move from image to image. The icon
for the single image display appears on the screen: .
PLAY
` To continue playing press PLAY . The play icon is displayed on the
screen: .
STOP/RES
` Press STOP once to stop playing. The stop symbol is displayed on
the screen . In this mode you can continue on from the same point
with .
` Press again to stop the DVD. The unit is now in stop mode.
` If you press STOP/RES again, you change the image setting.
Depending on your connection, the image may turn black and
white or disappear completely. Keep pressing STOP/RES until the
previous resolution is displayed, or configure this in the SETUP
menu.
Search functions
SKIP
` During playback press the SKIP or button to skip backwards
or forwards (for DVDs: from chapter to chapter; for CDs: from title to
title).
The skip icon is displayed on the screen: . The display also shows
which point you are on now.
Please note that on many DVDs it is not possible to skip over the
titles/chapters before the actual film starts (license notes).
Fast forward
` During playback, press the FAST or button repeatedly to fast-
forward or rewind to a particular section. The fast forward symbol
and level are displayed on the screen.
or press once: double speed (2x):
or press twice: 4 x speed (4x):
or press three times: 8 x speed (8x)
or four times: 16 x speed (16x)
Press PLAY to return to the normal playback speed.
Special screen message
If you select a function which does not start or cannot be accessed in the current mode, the ‘notvalid’ sign as shown here will appear on the screen. The sign disappears after a few seconds.
20
Page 65

Slow motion – SLOW
` During playback press the SLOW/R or SLOW/F to play forward or
backwards in slow motion. The slow motion symbol and level are
displayed on the screen.
SLOW press once: 1/2 Speed
SLOW press twice: 1/4 Speed
SLOW press three times: 1/8 Speed
SLOW press four times: 1/16 Speed
Press PLAY to return to normal playback speed.
Please note that with audio CDs, VCD discs, and also Xvid discs the
SLOW/R function cannot be used.
DISPLAY
You can press DISPLAY repeatedly during playback to display the elapsed
and remaining time. The display changes each time you press the button:
DVD: Title elapsed> Title remaining > Chapter elapsed> Chapter
remaining > Display off.
CD/VCD: Title elapsed> Title remaining > Total elapsed> Total
remaining > Display off.
MP3/Xvid: Title elapsed >Title remining > Display off.
EN
Repeat functions
REPEAT
` Press the REPEATduring playback. The repeat symbol appears
and, each time the button is pressed, the section to be repeated (the
entry disappears after a few seconds):
DVD: To move to the previous title or chapter
Audio-CD: Title> All > out;
MP3: Repeat title > Repeat album > Album > .... .
The REPEAT-function is not possible for Video CDs and Xvid.
REPEAT A - B (DVD, Audio-CD)
You can repeat a section you have defined yourself.
` During playback press the A-B button to set the start of the repeat
sequence. The repeat symbol appears with the addition A.
` Press A - B again to set the end of the repeat sequence. The display will
show A B. The defined sections will be repeated endlessly.
` Press the A-B button a third time to end the repeat sequence.
It is not possible to use the REPEAT A-B function for MP3 and Xvid.
21
Page 66

Program playback sequence - PROGRAM
The program function allows you to play up to 20 chapters (DVD) or titles
(audio) in your own, defined sequence.
Programming is not possible with MD3 media.
DVDs
` Press PROGRAM. A table with spaces for programs appears on the
screen. The table contains titles and chapters. The title number on the
DVD appears in the header.
` Use the remote control buttons to enter the number of the title selected
for the program place01 . Please place a 0 in front of single-digit
numbers. – When a title has been entered the number of chapters in this
title will appear in the header.
` Use the remote control buttons to enter the desired chapter. Please
place a 0 in front of single-digit numbers. The cursor jumps to the
program position 02.
` Enter additional program places in the same way.
Audio CDs/VCD
` Press the PROGRAM button. A table with spaces for programs appears
on the screen. The number of titles on the CD is displayed in the table
header. The program position 01 is coloured.
` Use the remote control buttons to enter the number of the title selected
for the program place01 . Please place a 0 in front of single-digit
numbers.
Start list
As soon as the first program place has been entered the word START
appears in the lower edge of the table.
` Use the navigation buttons to move the cursor to the START and press
PLAY or ENTER.
The word
list starts to play. You can use the button
the list.
` Press the STOP button twice to delete the list.
After the unit has finished playing, the DVD player switches to standby
mode.
PROGRAM
The programmed list is not saved.
is displayed briefly on the screen. The programmed
PROGRAM
to access and change
22
Page 67

Direct title/time – SEARCH
You can use the SEARCH button to jump to a chapter, title or time. You
change the selection each time the button is pressed. Playback starts at the
selected spot.
PressSEARCH once: „Titel“ ... „Chapter“ ... – Enter the desired chapter
within the title.
PressSEARCH twice: „Titel“ ... “Time” ... – Enter the desired time within
the title in the format H:MM:SS.
PressSEARCH twice: “Chapter” ... “Time” ... – Enter the desired time
within the chapter in the format H:MM:SS.
Audio-CD/VCD
PressSEARCH once: “Disc time” – Enter the desired time point on the CD
in the format H:MM:SS.
PressSEARCH twice: “Title time” – Enter the desired time within the title
in the format H:MM:SS.
PressSEARCH twice: “Go to title” – Enter the desired title. Please place a
0 in front of single-digit numbers.
EN
You can enter a title directly via the numbered buttons without
previously pressing SEARCH . Press ENTER to start playback.
DVD
MP3
PressSEARCH once: Enter the desired title in the three-digit field (put 0 or
00 in front if necessary).
Setting bookmarks – BOOKMARK
You can set “bookmarks” to start playback from a particular point.
` During playback press the BOOKMARK button. The
BOOKMARKmenu with 12 positions is displayed.
If you want to cancel the function press BOOKMARK again.
` To set the first bookmark press PLAY . A marker is placed at this
point (in the example shown here in title 01, chapter 4, 15 minutes and
23 seconds).
` To start the film from this point press PLAY .
` To delete the bookmark press CLEAR.
` If you want to hide the menu and play the film press BOOKMARK
again.
` If you want to set more bookmarks invoke the BOOK MARKmenu
again and move to the next available position using the navigation
buttons. Press PLAY to set a bookmark.
` To select another bookmark use the navigation buttons to move to the
appropriate field and press PLAY .
23
Page 68

The bookmarks remain stored after pressing STOP twice (stop
mode). However, the bookmarks are deleted if the unit goes in to
standby mode or is switched off.
The bookmark function will not work with some formats
An overview of the bookmarks with a preview can be found under
the fifth menu item of the DIGEST menu. See next section.
Select section – DIGEST (DVD and VCD)
You can use the DIGEST function with the help of image preview to
navigate through your DVD.
` Press the button DIGEST during playbeck. You can invoke the
DIGEST menu using the following options (BOOKMARK DIGEST
only if bookmarks have already been set , see below):
List of titles
` Confirm Title Digest with ENTER. After a brief pause while the
images are loading, the screen displays the initial screens of all titles
contained on the DVD. Up to six images are shown at a time.
The full titles are displayed under the Select menu item.
` Select a title by using the navigation buttons to select a start image or
enter the number of the start image using the numbered buttons on the
remote control (place 0 before single-digit numbers).
` The press ENTER to play the selected title.
Use the SKIP buttons and to navigate through the screen pages.
Select EXIT to return to the original position and play. You can return to
the Digest menu with Menu .
List of chapters
` Select the Chapter Digest option from the digest menu and confirm
with ENTER. After a short pause where the images imformation is
loaded, all chapters of the current title are displayed as thumbnails and
brief sections of the tracks are played. Up to six chapters are displayed
at a time.
` Select the chapter in the same manner as you selected the title (see
above).
Select point
You can move
between the image
and text entries in the
menu using the
navigation keys. The active
points are highlighted.
To select an item press
ENTER.
Time interval.
` Select the Title interval option from the digest menu and confirm
with ENTER. A preview of the scenes within the title will be played for
a default interval of 10 minutes If only one image is displayed, the title
is shorter than 10 minutes.
24
Page 69

Chapter interval
` Select the Chapter interval option from the digest menu and confirm
with ENTER. A preview of the scenes within the chapter will be played
for a default interval of 10 minutes If only one image is displayed, the
chapter is shorter than 10 minutes.
If you press DIGESTin the STOP mode the gigest menu will appear
with the entry Title Digest and possibly also Bookmark Digest.
Marker overview
Any previously set bookmarks will be listed under this menu item (see
previous section). You can select the bookmarks from here.
RANDOM and INTRO (audio CD only)
Random playback
` Press the RANDOM button.
` Press PLAY to start random playback. Playback stops after 20
minutes.
` Press RANDOM again for normal playback.
Intro function
` Press the DIGEST button. This plays the first six seconds of each title.
` Press DIGEST again for normal playback.
EN
Picture functions
Enlarge image – ZOOM
` Press the ZOOM key. The zoom symbol appears with the zoom
factor.
Press ZOOM once: Zoom factor 2xPress
ZOOM once: Zoom factor 3xPress
ZOOM once: Zoom factor 4x
When you press ZOOM for the fourth time you return to the normal view.
You can use the navigation keys to select the section of the
enlarged image that you wish to view.
25
Page 70

Camera position – ANGLE (DVD only)
On some DVDs certain scenes have been recorded from multiple
camera angles.
` Press ANGLEto activate this function. If the scene has various camera
angles the symbol and the current perspective/total number of
camera angles are displayed.
` Press the ANGLE key again to switch to the next camera position. The
image changes after a few seconds.
The symbol appears in certain scenes if General Setup Page > Angle
Mark > On is selected in the menu.
Sound functions
Switch sound off – MUTE
` Press MUTE to switch the sound off completely.
` Press MUTE again to switch the sound on.
Please note that the sounds remains switched off if you change the
volume and the volume is displayed on screen.
3D sound
You can achieve a 3D or surround effect for CDs that are coded in Dolby
Pro Logic, Dolby Digital or dts formats if two loudspeakers are connected.
Press the 3D button repeatedly to call up one of the following sound
effects: Surround: Rock > Pop > Live > Dance > Techno >
Classic > Soft > Off.
Do not use the functions.
– if more than two loudspeakers are connected,
– if you are using coaxial or optical digital out for digital sound,
–if a surround effect is switched on in one of the connected units.
Audio Mode (audio CDs only)
Press the AUDIO MENU buttons repeatedly to select one of the following
playback modes: Mono left, Mono right , Mix-Mono und Stereo.
Depending on the disk other messages may also be displayed.
26
Page 71

TITLE MENU, DVD MENU
DVD menus
DVDs usually have one or more menus stored on them and you can use
these to navigate through the DVD. The names of these menus depend on
the DVD; they may be called "DVD menu", "Disc menu", "Main menu", "Title
menu", "Root menu" or "Master menu".
You DVD player menu (SETUP menu) can be called up with the
button.
You can call up the menus stored on the DVD using the TITLE and DVD
MENU buttons.
You navigate to the items in the DVD menu using the navigation keys.
Confirm each entry with ENTER.
AUDIO and SUBTITLE MENU
If other languages are available on the DVD this is the quickest method of
selecting them.
EN
SETUP
Please note that the menus that are available when you press a
button will depend on the DVD. E. g. some DVDs only have one
menu that appears for the two call-up methods.
Please note, however, that this function has not been implemented
on many DVDs.
Select audio language
` Press AUDIO repeatedly to select another available language. The
change is made immediately and does not need to be confirmed.
Select sub-title language
` Press the SUBTITLE key repeatedly to select another sub-title language
stored on the DVD. The change is made immediately and does not need
to be confirmed.
The message disappears after a few seconds.
PBC function (VCD 2.0 only)
Some type-2.0 VCDs that have a title/chapter structure, have a playback
control (PBC) option.
Use TITLE MENU to activate playback control (Taste TITLE MENU).
Additional functions for controlling the title/chapter are available, such as
–Direct selection of titles/chapters
– SKIP functions
Please note that the precise functions available depend on the VCD.
27
Page 72

Locating tracks or pictures on MP3 and JPEG data carriers
The music titles on MP3 and JPEG data carriers may be organised into
folders just like on data carriers.
` Insert an MP3 or JPEG CD into the player. A menu showing the top-level
folders saved on the CD appears on the screen.
Provided that the data carrier actually contains folders, they are listed on
the left-hand side of the menu (see diagram).
Titles are displayed with an MP3 symbol or image symbol.
The active folder or file is highlighted in orange.
The display also shows the total number of files on the CD, for example
105 FILES.
` Use the navigation buttons or to select one of the files and confirm
your selection with ENTER.
The other sub-folders may also be opened if required. In this case you can
use the highest menu item ( ) or the button to return to the menu
item above.
` To hear a title or view an image, select it and confirm with PLAY
or ENTER.
MP3: Direct selection using the number keys
` Enter the number of the title you want. Enter multi-digit numbers
rapidly in sequence.
` Confirm with PLAY or ENTER.
` You can only select one number within the selected folder. Change
folder where required.
JPEG images
With JPEG images you will see a preview of the image on the right-hand
side of the menu.
Select an image and confirm with ENTER to view a large image. All
images within the active folder can be displayed in succession (slide
show). Press STOP to return to the menu.
You can change the orientation of the current image by pressing the
navigation buttons during playback.
Pressing the right navigation key repeatedly: rotates the image by 90°
clockwise each time;
Pressing the left navigation key repeatedly: rotates the image by 90°
anticlockwise each time;
Pressing the navigation key or : produces a mirror image.
The image stays on the screen even when rotated or reflected. Press PLAY
or ENTER to resume playback.
28
Page 73

SETTINGS IN THE SETUP MENU
All settings are made in the SETUP menu, which you can open using the
SETUP key. These settings relate to such items as image format, sound
settings and child protection.
` Press SETUP. The main page of the SETUPmenu appears on the
screen with the four main General Setup Page, Audio Setup
Page, Dolby Digital Setup and Preference Page. The active
menu is highlighted in orange.
EN
Navigating in the menus
You can move through the menus using the navigation keys. The active points are highlighted. An
explanation of each menu selected is given at the lower edge of the menu.
Use to select the first menu item.
Sub- and selection menus
Select a different menu using the
different menu.
If you are unable to access the Preference Page menu, this means
you have opened the SETUP menu during playback
menu via the
upSETUP again
A selection menu on the right-hand side of the screen opens for most sub-menus. The
current selection is highlighted. Move right with
below:
Use
highlighted. The bar underlining the previous selection (
visible initially.
NORMAL/LB) is marked.
or to select another item. The new selection (here: Wide) is now
SETUP
.
button, stop playback (2 x
or navigation buttons or select a
. Exit the SETUP
STOP ) and call
. The active item (in the diagram
NORMAL/LB) remains
ENTER to confirm the selction (here: Wide). The bar underlining the previous selection (NORMAL/LB)
Press
disappears. With
Exit menu
Press to return to the superior menu level.
With
SETUP you can leave the SETUP menu at any time.
you can return to the left-hand side of the menu.
29
Page 74

SYSTEM SETTINGS menu
TV format
Here you set the unit's display format to match that of the television.
PS: Selection for televisions with 4:3
format. The Pan Scan format
depicts 16:9 film formats in full
height, the sides of the image will
be cropped.
LB: Selection for televisions with 4:3
format. The letterbox format
reduces the 16:9 film format to the
size of the screen.
Wide: Selection for televisions with
16:9 format.
` To change a setting navigate to the desired
setting and confirm by pressing ENTER.
TV Standard:
Select the colour standard of your television here:
NTSC: Usual colour format for North America.
You have to select this format if you use the progressive scan
selection.
PAL: Usual colour format for many European countries.
Video output
Select the colour format on which the SCART socket or component output
should be based.
This point is only active when the progressive scan function is switched off.
To do this: in the HDMI-Setup (s. b.) select 480i, 576i or 1080i .
Fbas Signal: The video signal is output via the FBAS connection
(standard).
RGB Signal: The video signal is output via the RGB coknnection. The
colour format is higher-ranking, but is not supported by all
television sets.
YUV: The best image quality is achieved in YUV format
assuming, of course, your television can process this
format (can receive progressive scan signals).
Camera position
On: If scenes on the DVD ahave been shot from various camera
angles ansd stored, an icon will appear on the screen to
indicate this .
Off: The symbol does not appear with this setting.
30
Page 75

OSD Language
This sets the OSD (On-Screen-Display) language, i.e. the language for the
DVD player menus. You can choose between English, Spanish, German,
French, Italian or Dutch.
When selecting a language the menu changes immediately.
HDMI-Setup
To use the progressive scan functions select the corresponding resolution
for your HDMI or DVI television 480p, 720p, 576p or 1080p (p =
“progressive”).
Please note that for TV standard PAL you have to select 50 Hz, for
TV standard NTSC you have to select 60 Hz .
For a connection via component connection YPbPr select a resolution of
576p.
If you are using the HDMI connection select 480i (i = “interlaced”).
You can set the resolution using the STOP/RES button. See section
“TV connection with progressive scan function”, page 14.
HDMI Audio
SPDIF: If your HDMI receiver has a Dolby Digital or MPEG decoder
set the option to SPDIF.
EN
PCM: If your HDMI receiver does not have a Dolby Digital or MPEG
decoder set the option to PCM.
31
Page 76

SPEAKERS menu
Speaker configuration
Downmix:
If you use the analogue 5.1 output you can change the loudspeaker
settings from this menu.
LT/RT: The left and right audio channels are used.
Stereo: This option produces stereo sound. Select this setting if you
are not using the analogue 5.1 outputs.
The menu items Center, Rear and Sound test
required here and are therefore not active
Off: Activating the analogue 5.1 outputs.
Front Speaker, Center Speaker, Rear Speaker, Subwoofer:
You can make a selection for the size of the Front, Center and Rear
speakers:
Large: Choose this setting if the cover of the front speaker is larger
than 12 cm in diameter.
Small: Choose this setting for smaller loudspeakers.
Off: You can set the Center, Rear speakers and Subwoofer Off if
you want to operate your unit with the front loudspeakers
only.
.
are not
.
Sound test:There must be no disk in the unit if you are listening to the
sound test.
The sound test consists of a buzzing sound from each
individual loudspeaker. Use this function to set the volume
and delay individually.
32
Page 77

Channel delay
If you connect separate loudspeakers they should ideally be set up in a
circle (refer to left side of the diagram). If this is not possible you can
compensate for differences in the circle shape here.
In the example below (see the right side of the illustration) the left and rear
left loudspeakers are moved by 50 cm and by 40 cm for the rear right
loudspeakers.
EN
DOLBY DIGITAL menu
` Use the navigation button to enter the graphical fields next to the
Channel Delayentry. Select one of the loudspeakers by pressing
or . Using the or buttons to increase or reduce the value in units
of 10 cm. The maximum distance that can be set between speakers is
600 cm. Confirm with ENTER and exit the menu with .
The circle is defined by the front loudspeakers. That is why you cannot
select the front loudspeakers.
Dynamics
The Dolby Digital sound format supports a dynamic setting, which you
can use to set the volume difference between quiet and loud passages
with a scale of OFF to FULL in nine steps.
Off: The sound is reproduced without changes, i. e. loud
passages and bass sounds are loud and quiet passages are
quiet (cinema sound). This setting is only appropriate if
nobody will be disturbed.
FULL: The volume difference is minimised, i. e. loud passages are
quieter and quiet passages are louder. This setting is
appropriate, for example, at night.
` To change the setting use to access the scale on the right hand side
and then use or to selected the desired value. Confirm with
ENTER.
33
Page 78

PREFERENCES menu
You can only access the Preferences menu in stop mode. If playback is
in progress press STOP twice.
In this menu you choose the settings for the language, parental control
and password.
Select language
Please note, for every language selection:
It is only possible to playback a language that is actually on the DVD.
If you select a different language the DVD player will instead play the
first language stored on the DVD.
The languages that you can select for a specific DVD are normally
listed in the DVD's disc menu.
Audio
One of the audio languages in on the DVD is programmed as a default.
You can choose between English, French, Spanish, German, Italian, Dutch
and Japanese.
Subtitles
You can use this to preset one of the sub-title languages on the DVD.
You can choose between English, French, Spanish, German, Italian, Dutch
and Japanese.
Selection Off: No sub-titles are displayed.
Disc menu
Here you can choose the language for the menus stored on the DVD, (see
“TITLE MENU, DVD MENU”, p. 27) if the disk supports them.
You can choose between English, French, Spanish, German, Italian, Dutch
and Japanese.
Block
You can set the authorisation level for DVDs (parental control) here.
Some DVDs and CDs are encoded with encryption signals in line with the
authorisation classes established by the Motion Picture Association. The
eight authorisation classes are:
ButtonAUDIO
With the AUDIO buttonyou
can change the language for
the current DVD during
playback.
The default settings which
you saved in the
Preferences menu remain
intact.
However, the AUDIO function
is not available for every DVD.
1 Kid Saf: (“kid safe”) suitable for small children;
2 G: (“General”) For all age groups;
3 PG: (“Parental guidance”) Parental guidance recommended
4 PG 13: Parental guidance strongly recommended;
Some scenes not suitable for children under 13;
5 PGR: (“Parental Guidance Restriction”) for young people
under-17s parental guidance recommended;
6 R: (“Restriction”) for young people under 17 parental
Parental guidance strongly recommended;
7 NC 17: Not suitable for young people under 17;
8 Adult: For adults only.
For example , if you have inserted a DVD that is coded with authorisation
class 7 (NC 17) or 8 (Adult) and you have selected authorisation classes
34
Page 79

1 to 6, a message appears and the viewer must enter a password. Parts of
a DVD – certain scenes, for example – may also be encoded with an
authorisation class or a range of authorisation classes.
` You have to enter the password to change the authorisation class.
Password
With this option a password can be entered so as to restrict access to the
player by others.
` To change the password, confirm the Change item. A new menu
opens:
Old Password: [Old password] Enter the existing password with
the number keys on the remote control. It
comprises exactly four digits. If no password has
been entered, the default password is valid:
1234.
– The next entry field becomes active when you
enter the correct password.
New Password: [New password] Enter a four-digit password
unsing the number keys on the remote control.
The bar moves to the next field.
Confirm PW: [Confirm password]
again.
Enter the four-digit number
EN
` Press ENTER to confirm the new password.
If you forget the new password, enter the master password 1369.
35
Page 80

THE UNIVERSAL REMOTE CONTROL
Safety instructions
Do not repair the device yourself
The universal remote control has a class 1M infrared diode. Do not
examine the laser with optical instruments!
Do not subject your remote control to dust, strong sunlight, moisture,
high temperatures or strong vibrations.
Do not use any corrosive or aggressive cleaning products.
Scope of application
This universal remote control can operate the following types of devices:
TV Television
DVD DVD player MD 82333
SAT, AUX Other devices (e. e. analogue satellite receivers, other DVD
players, loudspeakers, tuners, etc.). The label indicates the
device type to be programmed. It is used to provide an
easier overview.
Programming device codes
General information
Programming of the remote control does not work in DVD mode.
For every device that you would like to operate using the universal remote
control, you must program a three-digit device code to a source key (TV,
SAT, AUX). You can assign any key to any device (”flex mode”) with the
exception of the TV button, which can only be assigned one television.
Video recorder: Perform the code search when a video is in the machine.
Enter the device code according to the code list
The codes of the corresponding devices can be found in the Code List
enclosed with these operating instructions. Proceed as follows:
1. Switch the relevant device on manually.
2. Keep the CODE key pressed for approx. 3 seconds until the red LED
remains solid.
3. Briefly press the required souce key(TV, SAT, AUX).
4. Enter the four-digit code from the Code Table.
The key lighting will extinguish briefly each time the key is pressed.
If the entered code was valid, the light of the source key will extinguish
after the last digit has been entered. If an invalid code was entered, the red
LED flashes for three seconds before extinguishing.
36
Page 81

Manual code search
If the device does not respond as expected, repeat the programming, or
try a different manufacturers code. Select the
remote control commands react correctly.
If this is also unsuccessful, the try one of the search methods described in
the following sections.
Carry out a manual search as follows:
1. Switch the relevant device on manually.
2. Keep the CODE key pressed for approx. 3 seconds until the red LED
remains solid.
3. Briefly press the required souce key (TV, SAT, AUX).
4. Keep pressing the (up to 350 times) POWER, P+ or P– or (VCR only)
until the device that is to be controlled switches off, changes
channels, or responds accordingly.
5. The code search begins at the currently stored number.
6. Briefly press ENTER to save the code.
Due to the considerable quantity of different code numbers, up to 350
different codes are pre-programmed per device type. In individual cases it
may be possible that only the most common main functions are available.
The process described here may not work for some special models.
code to which most of the
EN
Automatic search
If your device does not respond to the remote control, even though you
have tried all of the codes listed for your device type and the relevant
brand, then try using the automatic search. This will enable you to find
codes for brands that were not listed in the device Code List.
1. Switch the relevant device on manually.
2. Keep the CODE key pressed for approx. 3 seconds until the red LED
remains solid.
3. Briefly press the required souce key(TV, SAT, AUX).
4. Point the remote control at the device and briefly press the button P+
once.
5. If the device has no program function, press P+ or POWER instead.
6. The remote control starts the code search after 6 seconds and
transmits all codes consecutively at 1-second intervals (see also next
section). The source key will light up for each transmission.
7. As soon as the device responds to the remote control, press ENTER .
– If you did not press ENTER at the right time, you can return to the
code to which the device responded step by step by pressing P– key.
To cancel the search, press EXIT.
1 second or 3 second intervals
If you want the remote control to transmit a new code every 3 seconds
instead of every second, proceed as follows:
Within 6 seconds of pressing the P+ (or POWER) key as described in Point
4 press the P+ or P– key again. The remote control will now only transmit
a new code every 3 seconds. This gives you more time, but the procedure
will also take longer.
37
Page 82

Code searching by brand name
This function gives you the option of searching by brand name (see code
list). This is done as follows:
1. Switch the relevant device on manually.
2. Keep the CODE key pressed down for approx. 3 seconds until the
background lighting of the source key briefly flashes and then
remains on.
3. Briefly press the required source key (TV, SAT, AUX).
4. Enter the one-digit code according to the following table:
Key 1 = Medion, Tchibo
Key 2 = Philips, Radiola, Philco, Erres, Pye
Taste 3 = Sony, Akai, Panasonic, JVC, Sharp, Toshiba, Daewo
Key 4 = Thomson, Brandt, Fergusson
Key 5 = Saba, Nordmende, Telefunken
Key 6 = Grundig, Blaupunkt
Key 0 = all brands.
5. Continue pressing the P+ key (or for video recorders POWER or
PLAY), until the device responds accordingly. Proceed quickly,
otherwise the automatic code search will start.
6. Save the code by pressing ENTER .
If all the codes have been searched, the source key will flash for approx. 3
seconds.
Code identification
Code identification gives you the opportunity to determine codes that
have already been entered and stored in the remote control. Proceed as
follows:
1. Switch the relevant device on manually.
2. Keep the CODE key pressed for approx. 3 seconds until the red LED
remains solid.
3. Briefly press the required source key (TV, SAT, AUX).
4. Briefly press the CODE button. The source key will briefly extinguish
after the key has been pressed.
5. To find the first number, press the number keys from 0 to 9. If the
source key extinguishes briefly, then it is the first stored number.
6. To determine the second number, press the number keys again from
0 to 9. Repeat the procedure for the third number.
7. The source key will extinguish as soon as the button for the third
number has been pressed.
Code identification has now been completed.
Normal operation
Operating individual devices
After you have finished programming your remote control for your audio/
video devices, the remote control will work in the common main functions
just like the original remote control of the respective device.
Point your remote control at the desired device and press the relevant
source key. The key will light up briefly but will not remain lit.
38
Page 83

“All off” function
Activate the functions by pressing the corresponding function key of your
universal remote control. The source key will light up briefly each time the
key is pressed.
Please note:
- In certain circumstances, not every function of your original remote
control may be directly available on the universal remote control.
- Especially for newer devices, it might be possible that the functions are
stored to different keys than expected or may not even be available at all.
You can switch off all pre-programmed devices at the same time. This is
done as follows:
1. Briefly press the (STANDBY) key. The selected device switches off
and the relevant source key will light up.
2. Immediately press the (STANDBY) key again and keep it pressed
for 3 seconds. Now all pre-programmed devices will be switched off
consecutively. This takes about 3 seconds.
If a default device was switched off, it can be switched on via the “All off”
function.
EN
EPG – Electronic Programme Guide
The EPG ("Electronic Programme Guide") key has various functions
depending on which code has been used:
For DVD codes the button opens the title menu.
For SAT- or VCR codes you can use the button for programming, if your
device has an EPG function.
Universal functions (“Punch Through”)
The universal functions (also called “Punch Through” functions) enable
you to carry out certain functions on a different device type than the
programmed one. These are the volume, mute and playback functions.
If the remote control is in VCR, DVD, SAT or CBL mode, the volume and
mute keys control the TV set (provided the other devices do not have their
own volume control);
if the remote control is in TV mode or in another mode without playback
function, the Play, Pause, Stop and perhaps Record will actuate any video
recorder, DVD player or DVD recorder which is connected. The last
selected device is actuated.
Programming the volume/mute universal functions for
another type of unit
In its delivered state, the universal remote control is programmed in such
a way that the volume and mute functions automatically control the TV set
if a source key for a device with image transmission (DVD, video recorder)
is pressed.
39
Page 84

You can program the universal remote control so that the universal
functions “Volume” and “Mute” will actuate another device type than the
TV set.
1. Keep the CODE key pressed down for approx. 3 seconds until the
background lighting of the source key briefly flashes and then
remains on.
2. Keep the MUTE key pressed down until the source key goes off.
3. Press a source key for the device for which you want to control the
volume and mute functions. The light for this source key will remain
lit.
4. Press the Mute key; the source key light will go out. If you
accidentally selected a device that does not have its own volume
control, the source key will flash for 3 seconds.
Programming the volume/mute universal functions to a
particular device
You can program the universal remote control in such a way that it will use
only that particular device’s own volume and mute functions. The
universal function for this mode or device type is therefore switched off.
1. Keep the CODE key pressed down for approx. 3 seconds until the
background lighting of the source key briefly flashes and then
remains on.
2. Press the Mute key until the source key light goes out.
3. Press the source key for the device that is only to have its own volume
and mute functions.
4. Press a volume key. The light of the source key remains lit.
5. Press the Mute key again, and the source key light will go out.
Restoring the universal volume/mute functions
If you have changed the universal volume and mute functions, as
described in the previous two sections, you can reset the functions back to
the factory settings and thus restore the “Punch Through” effect.
1. Keep the CODE key pressed down for approx. 3 seconds until the
background lighting of the source key briefly flashes and then
remains on.
2. Press the Mute key until the source key light goes out.
3. Press the Mute key again. The source key light will extinguish
completely. The volume and mute functions are now restored to their
factory defaults.
Troubleshooting
The remote control does not work:
Check whether your devices have been properly connected and are
switched on.
Check whether the remote control batteries have been correctly inserted
and have matching +/– polarity.
If the batteries are too weak then replace them with new ones.
There are several device codes listed under the brand name of my
device. How do I determine the correct device code?
To determine the correct device code for your device, try each consecutive
code until most of the functions of the device function properly.
40
Page 85

The devices only respond to a few remote control commands:
Continue testing further codes until the devices respond to the commands
accordingly.
If manual code entry and automatic code search are unsuccessful, it may
be that the device is not compatible to your universal remote control.
Universal remote control technical specifications
Batteries: 2 x 1,5 V Micro (LR03/AAA) – alkaline recommended
LED class: 1M
EN
41
Page 86

TROUBLESHOOTING
If errors occur, check first whether you can correct the problem yourself.
The following overview may help you.
Never try to repair the device yourself. Contact our service centre
or other qualified personnel if a repair is necessary.
PROBLEM POSSIBLE CAUSE / REMEDY
GENERAL
No standby display Check the mains connection: Is the plug firmly inserted in the mains
socket?
The player does not work Press the POWER button on the player then STANDBY ON/OFF on the
remote control.
If the unit has been affected by a storm, static charging or other external
factor, try the following procedure:
Press the POWER button on the player (standby mode). Then pull out
the mains cable and plug it back in.
The disc does not play even
though PLAY has been
pressed, or stops again
immediately
The device does not respond to
the remote control
No picture
Distorted picture Check whether the DVD is dirty and if necessary clean it carefully, wiping
Very distorted picture
Image has no colours
Poor image
Is the disc inserted with the title (printed) side facing upwards?
Check whether the disc has been damaged by trying another disc. If the
disc is dirty, clean it carefully, wiping it from the centre to the edge with
a soft, dry cloth.
DVD: Does the DVD have the correct regional code (2)?
If condensation has formed: give the player one to two hours to dry off.
Check whether the batteries need changing and have been inserted
correctly. Remove anything which may be blocking the signal between
the infrared transmitter, the remote control and the unit's sensor.
Is the distance between the remote control and the player too great (over
7 m)?
Did you press the correct source key (e. g. DVD for the DVD player)?
Are the cable connections between the DVD and television correct and
undamaged?
Is the television switched on?
Have you selected the video channel on the television?
Have you selected the correct video output on the DVD player?
If you have established a connection without the PROGRESSIVE SCAN
function (e. g. SCART), ensure an Interlaced Resolution is selected. If
required, set the resolution to 480i, 576i or 1080i (button STOP/RES at
the front of the unit).
it from the centre to the edge with a soft, dry cloth. Slight picture
distortion is not a malfunction.
Your DVD standard may not match your television set standard (PAL –
NTSC, SETUP menu > General Setup Page > TV Type).
You have set a video output signal which is not supported by the
television set (SETUP menu > General Setup Page > Video Out).
42
Page 87

Incorrect image format (4:3, 16:9) In the SETUP menu > General Setup Page > TV Display check
whether the selected format matches that of the TV set.
No sound Has the sound been switched off (MUTE)?
DVD-RELATED PROBLEMS
EN
Wrong language
Wrong subtitle language
SKIP function does not work Some DVDs disable the SKIP function for certain titles or chapters.
The camera angle cannot be
changed.
You have forgotten the password.
Change the language settings in the SETUP menu by using the AUDIO
button to in the DVD menu (button DVD MENU or TITLE).
Check on the DVD cover or DVD menu whether the selected language is
actually on the DVD.
Only a few discs allow camera angles to be selected and usually only for
selected scenes on any one DVD.
Use the master password 1369.
DISPOSAL
Packaging
Your DVD player is wrapped in packaging to protect it from
damage during transport. Packaging is a raw material and can be
re-used or added to the recycling system.
Appliance
At the end of its life, the DVD player must not be disposed of in
household rubbish. Seek the advice of your local authority on
correct, environmentally-friendly disposal. Dispose of the unit
and the batteries separately.
Batteries
Do not put used batteries in the household rubbish. Batteries
should be deposited at a collection point for used batteries.
43
Page 88

TECHNICAL DATA
Voltage supply: 230 V ~ 50 Hz
Power consumption: 15W
Standby power consumption: 3W
Batteries for remote control: 2 x 1,5 V AAA/LR03
Colour TV system: PAL/NTSC
Laser output: Class 1 laser product
Compatible disc formats: DVD (Digital Versatile Disk), DVD+R, DVD+RW, DVD-R, DVD-RW;
VCD, SVCD, CD-Audio; CD-R, CD-RW, JPEG-CD, MP3-CD; WMAs
Compatible memory cards: SD cards, multimedia cards, Memory Sticks, Memory Stick PRO
When playing audio CDs please check the label:
Please note: These days there are many non standard CD recording and copy protection procedures as
well as various blank CD-R and CD-RW discs. This can occasionally lead to read errors or delays. This
does not mean the device is faulty.
Video
Video Formats: 4:3 / 16:9
Video signal output: 1 Vp-p
Decoder: MPEG 2
Digital analogue converter: 12 bit
Audio
Decoder: MPEG; Dolby Digital (AC-3)
dts only possible with additional external decoder
Digital analogue converter: 24 Bit / 96 kHz
MP3 coding
ISO 9660 format
Sampling frequency: MPEG 1: 32, 44.1, 48 kHz
Bit rate: 32 -320 kbps
WMA coding
Sampling frequency : 32, 44.1, 48 KHz
MP4 (DiVX) coding
Video resolution: 720 x 480 @ 30 fps; 720 x 576 @ 25fps
Bit rate: 4000 kbps; Peak max. 10.000 kbps; MPEG 4 ASP Level 5
Subject to technical changes.
44
Page 89

ÜBERSICHT
Hauptgerät
Vorderseite 1. Blaue LED-Leuchte für Standby-Modus
DE
2. Diskfach
3. PLAY: Wiedergabe
4. OPEN/CLOSE: Diskfach öffnen und schließen
5. STANDBY: Vom Standby-Modus ein- und wieder in Standby schalten
6. STOP/RES: Wiedergabe stoppen;
Wiederholt drücken: Auflösung für Progressive Scan wählen
7. IR: Empfangsfeld für den Sender der Fernbedienung
8. USB: LED-Leuchte für USB-Modus
9. Display (siehe unten)
10. Laufwerke für verschiedene Speicherkarten
11. US B- An sc hl uss
12. PHONES: Ohr-/Kopfhöreranschluss
13. VOLUME: Lautstärkeregler für Ohr-/Kopfhörer
Rückseite 1. Betriebsschalter
2. Netzkabel
3. HDMI: HDMI-Ausgang (digitale Bild- und Tonübertragung)
4. FRONT: Anschlüsse vordere Lautsprecher links/rechts
5. REAR: Anschlüsse hintere Lautsprecher links/rechts
6. CENT: Anschluss Center-Lautsprecher
7. S-VIDEO: S-VIDEO-Ausgang (Bildübertragung zum Fernsehgerät)
8. SUB: Anschluss Subwoofer (Basslautsprecher)
9. VIDEO OUT: VIDEO-Ausgang (Bildübertragung zum Fernsehgerät)
10. OPTICAL: Digitaler Audio-Ausgang
11. AV CONNECTOR (RGB) - TV: SCART-Anschluss zum Fernsehgerät o.
Videorecorder
12. Y Pr Pb: Komponentenausgänge
13. COAXIAL: Digitaler Audio-Ausgang
Display 1. Medium: DVD
2. Wiedergabemodus
3. Pause aktiv
4. Wiedergabe aktiv
5. Wiederholung aktiv
6. Disk im dts-Tonformat
7. Disk im Dolby Digital-Tonformat
8. Ablaufende Zeit im Format H:MM:SS
9. Aktueller Titel / aktuelles Kapitel
10. PBC: Playback-Control aktiv (Video-CD)
11. Med ium : MP 3
12. Medium: VCD
1
Page 90

Fernbedienung
DVD-Fernbedienung und Universal-Fernbedienung
In dieser Übersicht sind die Tastenfunktionen für die Bedienung des DVD-Players
beschrieben. Mit dieser Fernbedienung können Sie jedoch noch weitere Geräte
bedienen. Die Funktionalität der Fernbedienung als Universalfernbedienung
wird im Kapitel “Die Universalfernbedienung”, Seite 36, beschrieben.
Falls der DVD-Player nicht auf einen Tastendruck reagiert, drücken Sie ggf. vorher die Quellentaste DVD.
1. Vom Standby-Modus anschalten und umgekehrt
2. TV: Gerätewahltaste: Bedienung eines anderen Gerätes (z. B. TV)
3. STB: Gerätewahltaste: Bedienung eines anderen Gerätes (z. B. SATReceiver, Set-Top-Box)
4. DVD: Gerätewahltaste: Bedienung des DVD-Players
5. VCR: Bedienung eines anderen Gerätes (z. B. Videorecorder)
6. AUX: Bedienung eines anderen Gerätes (z. B. Verstärker)
7. CODE: Code für andere Gerätetypen eingeben; s. Seite 36
8. SUBTITLE: Untertitelsprache auswählen;
im TV-Betrieb Teletext öffnen; s. Seite 36
9. TITLE: Titelmenü (DVD) aufrufen;
EPG: „Electronic Program Guide“ im TV-Betrieb; s. Seite 36
10. Pfeiltasten: In Menüs navieren
11. ENTER: Auswahl bestätigen
12. RETURN/EXIT: Zurück im Menü/Menü verlassen
13. MENU: Menü aufrufen
14. DIGEST: Sonderfunktionen aufrufen
15. PROGRAM: Titelreihenfolge programmieren
16. BOOKMARK: Lesezeichen-Funktion
17. SEARCH: Titel/Zeit direkt anwählen
18. AUDIO: Direkte Sprachauswahl (DVD)
19. ZOOM: Bild vergrößern
20. USB/CARD: USB-Betrieb oder Kartenbetrieb wählen
21. CARD SELECT: Taste bei diesem Modell ohne Funktion
22. LED-Anzeige zur Bestätigung eines Tastendrucks
23. 0-9: Zifferntasten, z. B. für Direktauswahl von Titel und Kapitel
24. CLEAR / -/--: Auswahl löschen (Menüs),
TV-Betrieb: Eingabe von 1- bzw. 2-stelligen Programmnummern
25. SETUP/AV: Setup-Menü öffnen / AV: Steuerung anderer Geräte, s.
Seite 36
26. : Titel vor-/zurückspringen (SKIP);
P+/P–: Programmwahl am TV; s. Seite 36
27. : Stummschaltung am TV; s. Seite 36
28. +/–: Lautstärke am TV hoch/runter; s. Seite 36
29. Schneller Rücklauf
30. : Wiedergabe
31. : Schneller Vorlauf
32. / KEY LOCK: Aufnahme beginnen / Tastensperre
33. : Wiedergabe stoppen
34. : Wiedergabe unterbrechen
35. OPEN/CLOSE: Diskfach öffnen und schließen
36. SLOW/F: Langsamer Vorlauf
2
Page 91

37. SLOW/R: Langsamer Rücklauf
38. REPEAT: Wiederholfunktionen
39. REPEAT A-B: Wiederholung eines definierten Abschnitts
40. RANDOM: Titel in zufälliger Reihenfolge abspielen
41. ANGLE: Kameraposition (Blickwinkel)
42. 3D: Virtuelle Surround-Funktion
43. DISPLAY:Anzeige aktueller Titel/ abgelaufene Zeit
DE
3
Page 92

INHALTSVERZEICHNIS
Übersicht . . . . . . . . . . . . . . . . . . . . . . . . . . . . . . . . . . . . . . . . . . . . . . . . . . . . . . . . . . . . 1
Hauptgerät . . . . . . . . . . . . . . . . . . . . . . . . . . . . . . . . . . . . . . . . . . . . . . . . . . . . . . . . . . . . . . . . . . . . . . . . 1
Fernbedienung . . . . . . . . . . . . . . . . . . . . . . . . . . . . . . . . . . . . . . . . . . . . . . . . . . . . . . . . . . . . . . . . . . . . . 2
Inhaltsverzeichnis . . . . . . . . . . . . . . . . . . . . . . . . . . . . . . . . . . . . . . . . . . . . . . . . . . . . 4
Sicherheitshinweise . . . . . . . . . . . . . . . . . . . . . . . . . . . . . . . . . . . . . . . . . . . . . . . . . . . 6
Elektrische Geräte nicht in Kinderhände . . . . . . . . . . . . . . . . . . . . . . . . . . . . . . . . . . . . . . . . . . . . . . . . . 6
Das Gerät sicher aufstellen . . . . . . . . . . . . . . . . . . . . . . . . . . . . . . . . . . . . . . . . . . . . . . . . . . . . . . . . . . . . 6
Netzanschluss . . . . . . . . . . . . . . . . . . . . . . . . . . . . . . . . . . . . . . . . . . . . . . . . . . . . . . . . . . . . . . . . . . . . . . 6
Niemals selbst reparieren . . . . . . . . . . . . . . . . . . . . . . . . . . . . . . . . . . . . . . . . . . . . . . . . . . . . . . . . . . . . . 7
Der CD-Spieler . . . . . . . . . . . . . . . . . . . . . . . . . . . . . . . . . . . . . . . . . . . . . . . . . . . . . . . . . . . . . . . . . . . . . 7
Kopfhörer . . . . . . . . . . . . . . . . . . . . . . . . . . . . . . . . . . . . . . . . . . . . . . . . . . . . . . . . . . . . . . . . . . . . . . . . . 7
Im Falle von Funktionsstörungen . . . . . . . . . . . . . . . . . . . . . . . . . . . . . . . . . . . . . . . . . . . . . . . . . . . . . . . 7
Sicherer Umgang mit Batterien . . . . . . . . . . . . . . . . . . . . . . . . . . . . . . . . . . . . . . . . . . . . . . . . . . . . . . . . 8
Das Gerät reinigen . . . . . . . . . . . . . . . . . . . . . . . . . . . . . . . . . . . . . . . . . . . . . . . . . . . . . . . . . . . . . . . . . . 8
Allgemeines . . . . . . . . . . . . . . . . . . . . . . . . . . . . . . . . . . . . . . . . . . . . . . . . . . . . . . . . . . 9
Über DVD . . . . . . . . . . . . . . . . . . . . . . . . . . . . . . . . . . . . . . . . . . . . . . . . . . . . . . . . . . . . . . . . . . . . . . . . . 9
Andere spielbare Formate . . . . . . . . . . . . . . . . . . . . . . . . . . . . . . . . . . . . . . . . . . . . . . . . . . . . . . . . . . . 10
Verfügbare Surround-Tonformate . . . . . . . . . . . . . . . . . . . . . . . . . . . . . . . . . . . . . . . . . . . . . . . . . . . . . 10
Vorbereitung . . . . . . . . . . . . . . . . . . . . . . . . . . . . . . . . . . . . . . . . . . . . . . . . . . . . . . . . . 11
Gerät auspacken . . . . . . . . . . . . . . . . . . . . . . . . . . . . . . . . . . . . . . . . . . . . . . . . . . . . . . . . . . . . . . . . . . . 11
Batterien in die Fernbedienung einlegen . . . . . . . . . . . . . . . . . . . . . . . . . . . . . . . . . . . . . . . . . . . . . . . . 11
Anschlüsse und Anschlussmöglichkeiten . . . . . . . . . . . . . . . . . . . . . . . . . . . . . . . . 12
Gerät aufstellen . . . . . . . . . . . . . . . . . . . . . . . . . . . . . . . . . . . . . . . . . . . . . . . . . . . . . . . . . . . . . . . . . . . 12
Anschlussmöglichkeiten zwischen DVD-Player und Fernsehgerät . . . . . . . . . . . . . . . . . . . . . . . . . . . . 12
TV-Anschluss mit Progressive Scan-Funktion . . . . . . . . . . . . . . . . . . . . . . . . . . . . . . . . . . . . . . . . . . . . . 14
Heimkino-Verbindung mit analoger Tonübertragung . . . . . . . . . . . . . . . . . . . . . . . . . . . . . . . . . . . . . . 16
Digitale Tonübertragung . . . . . . . . . . . . . . . . . . . . . . . . . . . . . . . . . . . . . . . . . . . . . . . . . . . . . . . . . . . . 17
Netzanschluss . . . . . . . . . . . . . . . . . . . . . . . . . . . . . . . . . . . . . . . . . . . . . . . . . . . . . . . . . . . . . . . . . . . . . 17
Optional: Kopfhörer anschließen . . . . . . . . . . . . . . . . . . . . . . . . . . . . . . . . . . . . . . . . . . . . . . . . . . . . . . 17
Tastenfunktionen . . . . . . . . . . . . . . . . . . . . . . . . . . . . . . . . . . . . . . . . . . . . . . . . . . . . . 18
Steuerung am Gerät oder über die Fernbedienung . . . . . . . . . . . . . . . . . . . . . . . . . . . . . . . . . . . . . . . . 18
Standby/Einschalten/Ausschalten . . . . . . . . . . . . . . . . . . . . . . . . . . . . . . . . . . . . . . . . . . . . . . . . . . . . . 18
Disk einlegen . . . . . . . . . . . . . . . . . . . . . . . . . . . . . . . . . . . . . . . . . . . . . . . . . . . . . . . . . . . . . . . . . . . . . 18
Speicherkarte und USB Memory Stick einlesen . . . . . . . . . . . . . . . . . . . . . . . . . . . . . . . . . . . . . . . . . . . 19
Tastensperre – KEY LOCK . . . . . . . . . . . . . . . . . . . . . . . . . . . . . . . . . . . . . . . . . . . . . . . . . . . . . . . . . . . . 19
Wiedergabefunktionen . . . . . . . . . . . . . . . . . . . . . . . . . . . . . . . . . . . . . . . . . . . . . . . . . . . . . . . . . . . . . . 20
Suchfunktionen . . . . . . . . . . . . . . . . . . . . . . . . . . . . . . . . . . . . . . . . . . . . . . . . . . . . . . . . . . . . . . . . . . . 20
Wiederholungsfunktionen . . . . . . . . . . . . . . . . . . . . . . . . . . . . . . . . . . . . . . . . . . . . . . . . . . . . . . . . . . . 21
Abspielreihenfolge programmieren – PROGRAM . . . . . . . . . . . . . . . . . . . . . . . . . . . . . . . . . . . . . . . . . 22
Direktanwahl Titel/Zeit – SEARCH . . . . . . . . . . . . . . . . . . . . . . . . . . . . . . . . . . . . . . . . . . . . . . . . . . . . .23
„Lesezeichen“ setzen – BOOKMARK . . . . . . . . . . . . . . . . . . . . . . . . . . . . . . . . . . . . . . . . . . . . . . . . . . . 23
Auszug wählen – DIGEST (DVD und VCD) . . . . . . . . . . . . . . . . . . . . . . . . . . . . . . . . . . . . . . . . . . . . . .24
RANDOM und INTRO (nur Audio-CD) . . . . . . . . . . . . . . . . . . . . . . . . . . . . . . . . . . . . . . . . . . . . . . . . . . 25
Bildfunktionen . . . . . . . . . . . . . . . . . . . . . . . . . . . . . . . . . . . . . . . . . . . . . . . . . . . . . . . . . . . . . . . . . . . . 25
Klangfunktionen . . . . . . . . . . . . . . . . . . . . . . . . . . . . . . . . . . . . . . . . . . . . . . . . . . . . . . . . . . . . . . . . . . . 26
TITLE MENU, DVD MENU . . . . . . . . . . . . . . . . . . . . . . . . . . . . . . . . . . . . . . . . . . . . . . . . . . . . . . . . . . . . 27
AUDIO und SUBTITLE MENU . . . . . . . . . . . . . . . . . . . . . . . . . . . . . . . . . . . . . . . . . . . . . . . . . . . . . . . . . 27
PBC-Funktion (nur VCD 2.0) . . . . . . . . . . . . . . . . . . . . . . . . . . . . . . . . . . . . . . . . . . . . . . . . . . . . . . . . . 27
Navigieren auf MP3- und JPEG-Datenträgern . . . . . . . . . . . . . . . . . . . . . . . . . . . . . . . . . . . . . . . . . . . . 28
4
Page 93

Einstellungen im SETUP-Menü . . . . . . . . . . . . . . . . . . . . . . . . . . . . . . . . . . . . . . . . . . 29
Menü SYSTEMEINSTELLUNGEN . . . . . . . . . . . . . . . . . . . . . . . . . . . . . . . . . . . . . . . . . . . . . . . . . . . . . . . 30
Menü LAUTSPRECHER . . . . . . . . . . . . . . . . . . . . . . . . . . . . . . . . . . . . . . . . . . . . . . . . . . . . . . . . . . . . . . 32
Menü DOLBY DIGITAL . . . . . . . . . . . . . . . . . . . . . . . . . . . . . . . . . . . . . . . . . . . . . . . . . . . . . . . . . . . . . . 33
Menü PRÄFERENZEN . . . . . . . . . . . . . . . . . . . . . . . . . . . . . . . . . . . . . . . . . . . . . . . . . . . . . . . . . . . . . . . 34
Die Universalfernbedienung . . . . . . . . . . . . . . . . . . . . . . . . . . . . . . . . . . . . . . . . . . . 36
Sicherheitshinweise . . . . . . . . . . . . . . . . . . . . . . . . . . . . . . . . . . . . . . . . . . . . . . . . . . . . . . . . . . . . . . . . 36
Anwendungsumfang . . . . . . . . . . . . . . . . . . . . . . . . . . . . . . . . . . . . . . . . . . . . . . . . . . . . . . . . . . . . . . . 36
Gerätecode programmieren . . . . . . . . . . . . . . . . . . . . . . . . . . . . . . . . . . . . . . . . . . . . . . . . . . . . . . . . . 36
Manueller Code-Suchlauf . . . . . . . . . . . . . . . . . . . . . . . . . . . . . . . . . . . . . . . . . . . . . . . . . . . . . . . . . . . 37
Automatischer Suchlauf . . . . . . . . . . . . . . . . . . . . . . . . . . . . . . . . . . . . . . . . . . . . . . . . . . . . . . . . . . . . . 37
Codesuche nach Handelsname . . . . . . . . . . . . . . . . . . . . . . . . . . . . . . . . . . . . . . . . . . . . . . . . . . . . . . . 38
Code-Identifizierung . . . . . . . . . . . . . . . . . . . . . . . . . . . . . . . . . . . . . . . . . . . . . . . . . . . . . . . . . . . . . . . 38
Normaler Betrieb . . . . . . . . . . . . . . . . . . . . . . . . . . . . . . . . . . . . . . . . . . . . . . . . . . . . . . . . . . . . . . . . . . 39
„Alles-aus“-Funktion . . . . . . . . . . . . . . . . . . . . . . . . . . . . . . . . . . . . . . . . . . . . . . . . . . . . . . . . . . . . . . . 39
EPG – Elektronisches Programm . . . . . . . . . . . . . . . . . . . . . . . . . . . . . . . . . . . . . . . . . . . . . . . . . . . . . . 39
Universal-Funktionen („Punch Through“) . . . . . . . . . . . . . . . . . . . . . . . . . . . . . . . . . . . . . . . . . . . . . . . 40
Fehlerbehebung . . . . . . . . . . . . . . . . . . . . . . . . . . . . . . . . . . . . . . . . . . . . . . . . . . . . . . . . . . . . . . . . . . . 41
Technische Daten Universal-Fernbedienung . . . . . . . . . . . . . . . . . . . . . . . . . . . . . . . . . . . . . . . . . . . . . 41
Wenn Störungen auftreten . . . . . . . . . . . . . . . . . . . . . . . . . . . . . . . . . . . . . . . . . . . . 42
Entsorgung . . . . . . . . . . . . . . . . . . . . . . . . . . . . . . . . . . . . . . . . . . . . . . . . . . . . . . . . . . 43
Technische Daten . . . . . . . . . . . . . . . . . . . . . . . . . . . . . . . . . . . . . . . . . . . . . . . . . . . . . 44
DE
5
Page 94
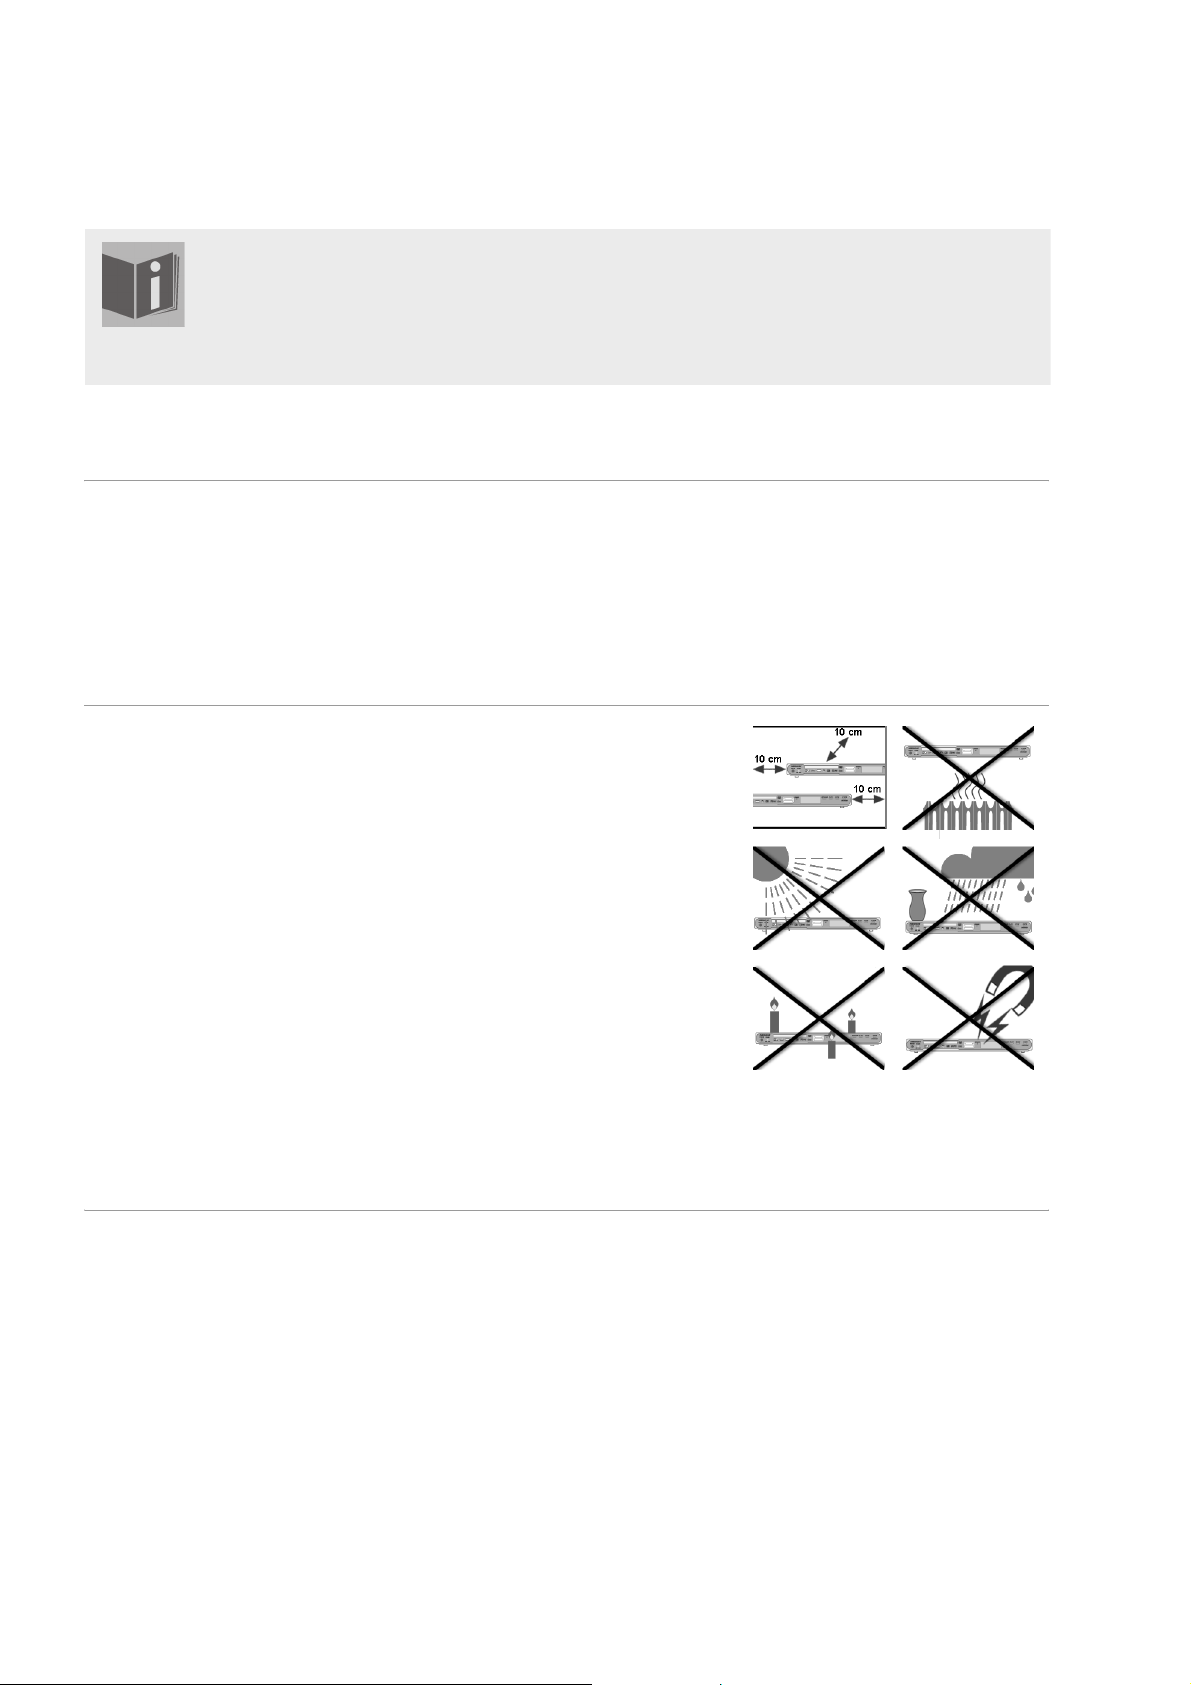
SICHERHEITSHINWEISE
Zu dieser Anleitung
Lesen Sie vor Inbetriebnahme die Sicherheitsvorschriften aufmerksam durch. Beachten Sie die
Warnungen auf dem Gerät und in der Bedienungsanleitung.
Bewahren Sie die Bedienungsanleitung immer in Reichweite auf. Wenn Sie das Gerät verkau
oder weitergeben, händigen Sie unbedingt auch diese Anleitung aus.
Elektrische Geräte nicht in Kinderhände
Kinder können Gefahren, die von elektrischen Geräten ausgehen, nicht erkennen. Lassen Sie Kinder daher niemals unbeaufsichtigt elektrische Geräte benutzen.
Halten Sie auch die Verpackungsfolien von Kindern fern. Es besteht Erstickungsgefahr.
Das Gerät sicher aufstellen
Stellen Sie das Gerät auf eine feste, ebene Oberfläche. Es ist nicht für den Betrieb in Räumen mit hoher Luftfeuchtigkeit (z. B. Badezimmer) ausgelegt.
Achten Sie auf folgende Umgebungsbedingungen:
Gewährleisten Sie immer eine ausreichende Belüftung. Die Belüftung
darf nicht durch Bedecken der Lüftungsöffnungen mit Gegenständen
wie Zeitschriften, Tischdecken, Vorhängen usw. behindert werden.
Lassen Sie keine direkten Wärmequellen (z. B. Heizungen) auf das Gerät
wirken.
Achten Sie darauf, dass kein direktes Sonnenlicht auf das Gerät trifft.
Setzen Sie das Gerät nicht Tropf- oder Spritzwasser aus und stellen Sie
keine mit Flüssigkeit gefüllten Gegenstände – z. B. Vasen – auf das Gerät.
Stellen Sie das Gerät nicht in unmittelbarer Nähe von Magnetfeldern
(z. B. Fernsehgeräten oder Lautsprechern) auf.
Offene Brandquellen, wie z. B. Kerzen, dürfen nicht in die Nähe des Ge-
räts oder auf das Gerät gestellt werden.
fen
Netzanschluss
Schließen Sie das Gerät nur an eine gut erreichbare Steckdose (230 V ~
50 Hz) an, die sich in der Nähe des Aufstellortes befindet. Für den Fall, dass
Sie das Gerät schnell vom Netz nehmen müssen, muss die Steckdose frei
zugänglich sein.
Nehmen Sie das Gerät nicht in Betrieb, wenn Gerät oder Anschlussleitungen sichtbare Schäden aufweisen oder das Gerät heruntergefallen ist. Ziehen Sie bei Beschädigungen des Steckers, der Anschlussleitung oder des
Geräts sofort den Stecker aus der Steckdose.
Achten Sie darauf, dass die Anschlussleitung nicht zur Stolperfalle wird.
Die Anschlussleitung darf nicht geklemmt und gequetscht werden.
6
Page 95
Warten Sie mit dem Anschluss an das Stromnetz, wenn das Gerät von einem kalten in einen warmen Raum gebracht wird. Das dabei entstehende
Kondenswasser kann unter Umständen das Gerät zerstören. Wenn das Gerät Zimmertemperatur erreicht hat, kann das Gerät gefahrlos in Betrieb genommen werden.
Gewitter
Bei längerer Abwesenheit oder Gewitter ziehen Sie den Stecker und das
Antennenkabel ab.
Niemals selbst reparieren
Versuchen Sie auf keinen Fall, das Gerät selber zu öffnen und/oder zu reparieren. Es besteht die Gefahr des elektrischen Schlags! Manipulieren Sie
auch nicht am Netzkabel des Geräts.
Wenden Sie sich im Störungsfall an unser Service Center oder eine andere
geeignete Fachwerkstatt, um Gefährdungen zu vermeiden.
Der CD-Spieler
Der CD-Spieler ist ein Laserprodukt der Klasse 1. Das Gerät ist mit einem
Sicherheitssystem ausgerüstet, das das Austreten von gefährlichen Laserstrahlen während des normalen Gebrauchs verhindert. Um Augenverletzungen zu vemeiden, manipulieren oder beschädigen Sie niemals das Sicherheitssystem des Geräts.
DE
Kopfhörer
Hohe Lautstärke bei der Verwendung von Ohrhörern oder Kopfhörern
kann zum Verlust des Hörsinns führt.
Bevor Sie einen Ohr- Kopfhörer aufsetzen, stellen Sie die Lautstärke auf ein
Minimum! Ihr Gehör kann Schaden nehmen, wenn es zu lange oder zu
plötzlich hohen Lautstärken ausgesetzt wird.
Im Falle von Funktionsstörungen
Sollte das Gerät Funktionsstörungen zeigen, kann es sein, dass eine elektrostatische Entladung stattgefunden hat. Ziehen Sie in diesem Fall das
Netzkabel ab und nehmen Sie die Batterien heraus. Legen Sie dann die Batterien wieder ein und nehmen Sie das Gerät wieder ans Netz. Das Gerät
wird auf diese Weise zurückgesetzt.
7
Page 96

Sicherer Umgang mit Batterien
Die Fernbedienung des Geräts benötigt Batterien. Beachten Sie hierzu folgende Hinweise:
Halten Sie Batterien von Kindern fern. Sie können bei Verschlucken le-
bensgefährlich sein. Wurde eine Batterie verschluckt, muss sofort medizinische Hilfe in Anspruch genommen werden.
Werfen Sie die Batterien nicht ins Feuer, schließen Sie sie nicht kurz und
nehmen Sie sie nicht auseinander.
Reinigen Sie die Batterie- und Gerätekontakte vor dem Einlegen bei Be-
darf.
Tauschen Sie immer alle Batterien gleichzeitig aus.
Setzen Sie nur Batterien des gleichen Typs ein. Verwenden Sie keine un-
terschiedlichen Typen; mischen Sie keine gebrauchten und neue Batterien.
Beachten Sie beim Einlegen der Batterien die Polarität (+/–).
Wenn Sie das Gerät längere Zeit nicht verwenden, nehmen Sie die Bat-
terien heraus.
Erntfernen Sie erschöpfte Batterien umgehend aus dem Gerät! Es be-
steht erhöhte Auslaufgefahr!
Setzen Sie die Batterien keinen extremen Bedingungen aus; stellen Sie
das Gerät z. B. nicht auf Heizkörpern ab ! Es besteht erhöhte Auslaufgefahr!
Versuchen Sie niemals, normale Batterien wieder aufzuladen! Es besteht
Explosionsgefahr!
Nehmen Sie ausgelaufene Batterien sofort aus dem Gerät. Reinigen Sie
die Kontakte, bevor Sie neue Batterien einlegen. Es besteht Verätzungsgefahr durch Batteriesäure!
Sollte Batteriesäure ausgelaufen sein, vermeiden Sie unbedingt den
Kontakt mit Haut, Augen und Schleimhäuten! Falls die Säure doch mit
Haut in Kontakt gekommen ist, spülen Sie die betroffenen Stellen sofort
mit reichlich klarem Wasser und suchen Sie umgehend einen Arzt auf.
Das Gerät reinigen
Ziehen Sie vor der Reinigung den Netzstecker aus der Steckdose.
Für die Reinigung verwenden Sie ein trockenes, weiches Tuch. Verwenden
Sie keine chemischen Lösungs- und Reinigungsmittel, weil diese die Oberfläche und/oder Beschriftungen des Geräts beschädigen können.
8
Page 97

ALLGEMEINES
Über DVD
DE
Die DVD - Digital Versatile Disc (englisch für „vielseitige digitale Scheibe“)
ist ein digitales Speichermedium für Informationen. DVDs sind durch eins
der nebenstehenden Symbole gekennzeichnet.
Abhängig davon, wie die Informationen aufgebracht sind, ergeben sich
verschiedene DVD-Typen mit unterschiedlichen Speicherkapazitäten.
DVD-Aufbau
Video-DVDs sind in Titel und Kapitel unterteilt. Eine DVD kann mehrere
Titel haben, die wiederum aus mehreren Kapiteln bestehen können. Titel
und Kapitel sind jeweils fortlaufend nummeriert:
Normalerweise besteht der erste Titel einer DVD aus Lizenzhinweisen und
Informationen zum Hersteller. Der nächste Titel ist meist der Film selbst.
Weitere Titel können z. B. „Making-Of“-Reportagen, Filmvorschauen oder
Informationen zu den Schauspielern enthalten.
Sprachen und Untertitel Auf DVDs können bis zu acht Sprachen und Untertitel in bis zu 32 Spra-
chen gespeichert werden. Sprache und Untertitel können bei der Wiedergabe beliebig kombiniert werden.
Blickwinkel Bei manchen DVDs kann sogar der Blickwinkel geändert werden, sofern
der Film mit unterschiedlichen Kamerapositionen aufgenommen wurde.
Regionalcodes
Aufgrund weltweiter Vertriebsstrategien wurde für die DVD ein Code entwickelt, der das Abspielen nur auf Geräten erlaubt, die in bestimmten Regionen erworben wurden.
Dieser Code basiert auf einem System, das die Welt in sechs Regionen einteilt. Europa gehört zur Zone 2. Auf Ihrem DVD-Player
lassen sich daher DVDs abspielen, die mit dem Regionalcode 2
versehen sind. Der Regionalcode ist auf der Verpackung der DVD aufgedruckt (siehe nebenstehendes Logo).
Außer DVDs mit dem Regionalcode 2 lassen sich nur DVDs mit dem Regionalcode 0 (geeignet für jeden DVD-Player) auf dem Gerät wiedergeben.
Sollten beim Abspielen bestimmter DVDs Probleme auftreten, versichern Sie sich, dass die DVD den Ländercode 2 oder 0 hat.
9
Page 98

Andere spielbare Formate
MP3 und WMA
Das MP3- und WMA-Format sind Kompressionsformate für Audio-Daten.
WMA steht für „Windows Media Audio“ und ist jünger als das
MP3-Format.
MP3-/WMA-Dateien müssen zur Erkennung mit den entsprechenden Dateierweiterung *.mp3 bzw. *.wma abgespeichert sein.
MPEG4, Nero Digital
Bei MPEG4 handelt es sich um eine Kompressionstechnologie für Multimedia-/Video-Daten („MPEG“ = „Moving Picture Experts Group“).
Nero Digital ist ein Markenname für eine Video-Komprimierung-Dekomprimierung-Technologie, die auf dem MPEG4-Format basiert.
Verfügbare Surround-Tonformate
WMA-Titel werden auf dem
Bildschirm mit folgendem Symbol gekennzeichnet:
Das Gerät kann zwei Surround-Tonformate lesen.
Dolby Digital 5.1
Beim Dolby-Digital-Tonformat wird das Audiomaterial digital gespeichert.
Dabei werden bis zu fünf separate Vollfrequenz-Audiokanäle (vorne links
und rechts, Mitte, hinten links und rechts) sowie ein Effekt- bzw. Tiefenkanal (5.1) separat gespeichert. Tonträger im Dolby-Digital-Format sind mit
nebenstehendem Warenzeichen gekennzeichnet.
Da jeder Kanal vollkommen unabhängig ist, wird ein realistisches Klangfeld mit einem „dreidimensionalen“ Hörgefühl geschaffen, wodurch der
Ton Distanz, Bewegung und eine relative Position im Raum erhält.
Ihr Gerät kann diese Audiodaten lesen oder dekodieren und gibt sie an den
5.1-Ausgängen aus. Andererseits kann das Originalsignal über die Digital-
ausgänge an einen externen Dekoder/Verstärker geführt werden.
dts (Digital Theater Systems)
Hinter der Abkürzung dts verbirgt sich ein bisher weniger verbreitetes Tonformat, mit dem ebenfalls bis zu sechs (5.1) getrennte Kanäle auf einem
Tonträger gespeichert werden. Tonträger im dts-Format sind mit nebenstehendem Warenzeichen gekennzeichnet.
Ihr Gerät kann diese Audiodaten lesen und leitet sie zur Dekodierung an
die digitalen Ausgänge weiter („DIGITAL OUT“).
Markenzeichen
„Dolby“, „Pro Logic“ und das
Doppel-D-Symbol sind Markenzeichen der Dolby Laboratories.
Der Begriff „dts“ ist ein Warenzeichen von DTS Technology,
LLC.
10
Page 99

VORBEREITUNG
Gerät auspacken
DE
Entfernen Sie sämtliches Verpackungsmaterial, auch die Folien an der
Gerätefront.
ACHTUNG!
Lassen Sie kleine Kinder nicht mit Folie spielen. Es besteht Erstickungsgefahr!
Lieferumfang prüfen
Vergewissern Sie sich beim Auspacken, dass folgende Teile mitgeliefert
wurden:
DVD-Player
SCART-Kabel
Fernbedienung
2 Batterien (1,5 V; Typ AAA/LR03)
Bedienungsanleitung mit Garantiedokumenten
Batterien in die Fernbedienung einlegen
Für die Fernbedienung sind zwei 1,5 V-Batterien (Typ AAA/LR03) mitgeliefert.
` Schieben Sie den Batteriefachdeckel auf der Rückseite der Fernbedie-
nung in Pfeilrichtung ab.
` Legen Sie die Batterien so ein, dass der Minuspol der Batterien an den
Federn anliegt.
` Schieben Sie den Batteriefachdeckel wieder auf.
ACHTUNG!
Die beiliegenden Batterien dürfen nicht geladen, nicht auseinander genommen, in Feuer geworfen oder kurzgeschlossen werden.
Batterien können bei Verschlucken lebensgefährlich sein. Bewahren Sie Batterien und Fernbedienung daher für Kleinkinder unzugänglich auf. Wurde eine Batterie verschluckt, muss sofort ärztliche Hilfe gesucht werden.
11
Page 100

ANSCHLÜSSE UND ANSCHLUSSMÖGLICHKEITEN
Das Gerät kann auf vielseitige Weise mit anderen Eingangs- und Ausgangsgeräten verbunden werden.
Schalten Sie alle Geräte aus, bevor Sie sie anschließen. Nehmen Sie
die Geräte erst ans Netz, wenn die Anschlüsse vorgenommen wurden.
Gerät aufstellen
Stellen Sie das Gerät auf eine ebene, feste Oberfläche. Beachten Sie hierzu
auch die Sicherheitshinweise auf Seite 6.
Einige aggressive Möbellacke können die Gummifüße des Geräts angreifen. Stellen Sie das Gerät ggf. auf eine Unterlage.
Anschlussmöglichkeiten zwischen DVD-Player und Fernsehgerät
Verbindung mit dem Fernseher über das SCART-Kabel
Das SCART-Kabel stellt die einfachste Verbindung zwischen DVD-Player
und Fernseher dar.
Sofern Ihr Fernsehgerät zur Verarbeitung von RGB-Signalen in der Lage ist,
erreichen Sie über diese Option eine sehr gute Bildqualität.
12
 Loading...