


Mini Videocámara
de acción
MEDION® LIFE® S49002 (MD 86643)
Manual de instrucciones

Índice
Sobre las presentes instrucciones ....................3
Los símbolos y palabras de advertencia utilizados en
este manual de instrucciones ................................ 3
Uso conforme a lo prescrito .................................4
Indicaciones de seguridad ...............................5
Generales .............................................................. 5
Advertencias ......................................................... 5
Medidas de precaución .........................................6
No haga nunca reparaciones por su cuenta .......... 8
Esquema del aparato .......................................9
Puesta en funcionamiento ............................. 11
Paquete de suministro ......................................... 11
Cargar la batería por USB .................................... 12
Montar la correa de muñeca ............................... 13
Colocar y retirar la tarjeta SD ............................... 14
Primeros pasos ............................................... 15
Conectar/desconectar la cámara ......................... 15
Fijar la cámara en el soporte ................................ 15
Grabar vídeos ................................................. 16
Tomar fotografías .......................................... 17
Transmitir las grabaciones
a un ordenador ............................................. 18
Transmisión por adaptador de tarjeta .................. 18
Transmisión por cable USB .................................. 19
Transmitir los datos
a un ordenador ................................................... 20
Conectar cable USB ............................................. 20
Estándar de memoria DCF ................................... 21
Localización de fallos .......................................... 22
ES
1

Mantenimiento y limpieza .............................24
Eliminación .................................................... 25
Especificaciones técnicas ............................... 26
Instalar
ArcSoft Media Impression .............................27
2

Sobre las presentes instrucciones
Antes de la puesta en marcha, lea atentamente las indicaciones de seguridad. Tenga en
cuenta las advertencias en el aparato y en el
manual de instrucciones.
Mantenga siempre a su alcance las instrucciones de funcionamiento. Si vende o cede el
aparato a otra persona, entréguele sin falta
también las presentes instrucciones y la tarjeta de garantía.
Los símbolos y palabras de advertencia utilizados en este manual
de instrucciones
¡PELIGRO!
¡Advertencia de inminente peligro de
muerte!
¡ADVERTENCIA!
¡Advertencia de un posible peligro de
muerte y/o graves lesiones irreversibles!
¡ATENCIÓN!
¡Observe las indicaciones para evitar lesiones y daños materiales!
¡ATENCIÓN!
¡Observe las indicaciones para evitar daños
materiales!
ES
3
¡INDICACIÓN!
Información adicional para el uso del aparato.
¡INDICACIÓN!
¡Observe las indicaciones del manual de
instrucciones!
¡ADVERTENCIA!
¡Advertencia de peligro de descarga
eléctrica!
•
Indicación de una acción a realizar
Signo de enumeración / información sobre eventos durante la operación
Uso conforme a lo prescrito
Este aparato es apropiado para la grabación de fotografías y vídeos en formato digital.
No haga funcionar el aparato cuando haga calor o frío
extremos.
Este aparato no es adecuado para el funcionamiento en
condiciones extremas.
Este aparato está concebido para el uso privado y no
para fines comerciales.
4

Indicaciones de seguridad
Generales
Este aparato no ha sido concebido para ser utilizado por
personas (niños incluidos) con discapacidad física, sensorial o psíquica, o por aquéllas que no tengan la suficiente experiencia o conocimientos, a no ser que sean
supervisadas por una persona responsable de su seguridad o reciban de ésta las correspondientes instrucciones
sobre su utilización..
Para estar seguro de que los niños no juegan con el aparato, vigílelos. No se debe permitir que los niños utilicen
el aparato sin que sean vigilados.
Guarde el aparato y los accesorios en un lugar fuera del
alcance de los niños.
¡PELIGRO!
Mantenga también los embalajes alejados
de los niños. ¡Existe peligro de asfixia!
Advertencias
Para evitar lesiones rogamos que durante el uso del producto observe las siguientes advertencias:
• No abra o desmonte el aparato.
• Al desmontar el aparato existe el peligro de electrocución por alta tensión. Las comprobaciones de
componentes internos, modificaciones y reparaciones solamente deben ser realizadas por técnicos expertos. Lleve el producto para su comprobación a un
servicio de reparación autorizado.
ES
5

• No coloque tampoco objetos llenos de líquido (p. ej.
jarrones) cerca del aparato, podría penetrar líquido
en el interior del aparato.
Medidas de precaución
Rogamos que observe las siguientes medidas de precaución para evitar daños en su cámara y para mantenerla
siempre en perfecto estado.
• Guardarla en lugares secos
Esta cámara no es impermeable al agua y se puede
dañar si se sumerge en agua o si penetran líquidos
en el interior de la cámara.
• Mantenerla alejada de humedad, sal y polvo.
Quite la sal y el polvo con un paño suave ligeramente húmedo si ha utilizado la cámara en la playa o en
el mar. A continuación seque la cámara cuidadosamente.
• Mantenerla alejada de fuertes campos magnéticos
No acerque nunca su cámara a aparatos que producen fuertes campos magnéticos, por ejemplo, motores eléctricos. Los fuertes campos electromagnéticos
pueden causar disfunciones de la cámara y perturbar
las grabaciones de datos.
• Tener en cuenta la seguridad eléctrica
La toma de corriente debe estar cerca del aparato y
ser fácilmente accesible.
No se deben exponer la cámara ni la fuente de alimentación por USB a gotas de agua o salpicaduras.
No coloque tampoco objetos llenos de líquido (p. ej.
jarrones) sobre el aparato.
• En caso de no utilizar el aparato y en caso de tor-
6

mentas, desenchufe la red de la fuente de alimentación por USB.
• Evitar demasiado calor.
No utilice o guarde la cámara bajo radiación solar o
altas temperaturas. Semejante carga puede provocar
que las pilas derramen líquidos tóxicos o una deformación de la carcasa.
• Evitar fuertes variaciones de temperatura.
Si se lleva el aparato rápidamente desde un ambiente frío a un ambiente caluroso o viceversa, por dentro o por fuera del aparato pueden condensar gotas
de agua que pueden causar problemas de funcionamiento y daños en el aparato. Antes de ponerla en
funcionamiento espere hasta que la temperatura del
aparato se haya adaptado a la temperatura ambiente. El uso de una bolsa de transporte o de plástico
ofrece una protección limitada contra variaciones de
temperatura.
• No deje caer el aparato.
Sacudidas o vibraciones fuertes causadas por caídas pueden causar disfunciones. Coloque la correa
de transporte alrededor de su muñeca si lleva la cámara.
• Tratar la lente y todos los componentes móviles con
sumo cuidado.
ES
No toque la lente ni el tubo del objetivo. Tenga cuidado al manejar la tarjeta de memoria. Estas piezas
no están diseñadas para soportar cargas fuertes.
• Tarjetas de memoria
7

Desconecte la alimentación de corriente antes de colocar o retirar la tarjeta de memoria. En caso contrario la tarjeta de memoria puede inestabilizarse.
Durante su uso las tarjetas de memoria pueden calentarse. Retire siempre con cuidado las tarjetas de
memoria de la cámara.
• Cargar las pilas internas
Utilice solamente la fuente de alimentación por USB
TR-08EU-1A suministrada para cargar las pilas por la
red.
No haga nunca reparaciones por su
cuenta
¡ADVERTENCIA!
No intente en ningún caso abrir o reparar
Usted mismo el aparato. ¡Existe riesgo de
descarga eléctrica!
• Con el fin de evitar accidentes, en caso de mal funcionamiento del aparato diríjase al Medion Service
Center o a otro taller especializado.
8

Esquema del aparato
Parte superior
12345
1) Tecla REC/PLAY/STOP
2) LED de funcionamiento
3) Tecla POWER
4) LED de grabación
5) Lente
ES
9

Parte posterior
910
6) Ranura para tarjetas microSD/SDHC
7) Apertura de RESET
8) Conexión micro USB
9) Selector de función
10) LED de carga
6
7
8
10

Puesta en funcionamiento
Paquete de suministro
Compruebe que el suministro está completo, y, si no
fuera este el caso, avísenos dentro de un plazo de 14
días después de su compra.
Con el producto adquirido ha recibido:
• Cámara
• Fuente de alimentación por USB TR-08EU-1A
• Cable USB
• Tarjeta de memoria microSDHC de 2 GB con adap-
tador
• Correa de muñeca
• Bolsa de transporte
• Soporte de cámara
• Sujeción para el montaje en el manillar con arande-
las de adaptación
• Sujeción con pie adherente
• Correa de sujeción para el montaje en el casco de ci-
clista
• Software en CD-ROM:
• este manual de instrucciones y la tarjeta de garantía
¡PELIGRO!
Mantenga también los embalajes alejados
de los niños. ¡Existe peligro de asfixia!
ES
11

Cargar la batería por USB
Puede cargar la batería mediante la fuente de alimentación por USB suministrada (TR-08EU-1A) o la conexión
USB de su ordenador.
Dado el caso, apague la cámara.
Desatornille la tapa de la parte posterior de la cáma-
ra.
Conecte el cable USB a la cá-
mara (1).
Conecte el otro extremo a la
fuente de alimentación por
USB (2) o a la toma de corriente (3).
Alternativamente, puede co-
nectar la cámara con el cable
USB al puerto USB de su ordenador:
Conecte la cámara con el cable USB al puerto USB de
su ordenador:
12

Durante el proceso de carga, el LED de carga se ilumina
de color verde. Cuando el LED de carga verde se extinga, la batería está cargada al completo.
¡NOTA!
Cuando compre la cámara, la batería no está
cargada. Deberá cargar la batería antes de poder utilizar la cámara.
Una batería completamente descargada tarda
unas 2 horas en cargarse al completo.
Montar la correa de muñeca
Para un mejor manejo de la cámara y por razones de
seguridad fije la correa de muñeca. Deslice el lazo
corto por el ojal.
Pase el otro extremo de la correa de muñeca por el
lazo del cordón fino y apriete la correa de muñeca.
¡ATENCIÓN!
Si transporta la cámara con la correa de muñeca preste atención a que la cámara no choque
contra ningún obstáculo. Para colocar la correa
de muñeca, coloque la cámara sobre una superficie fija para que no se pueda caer y no se
dañe.
ES
13

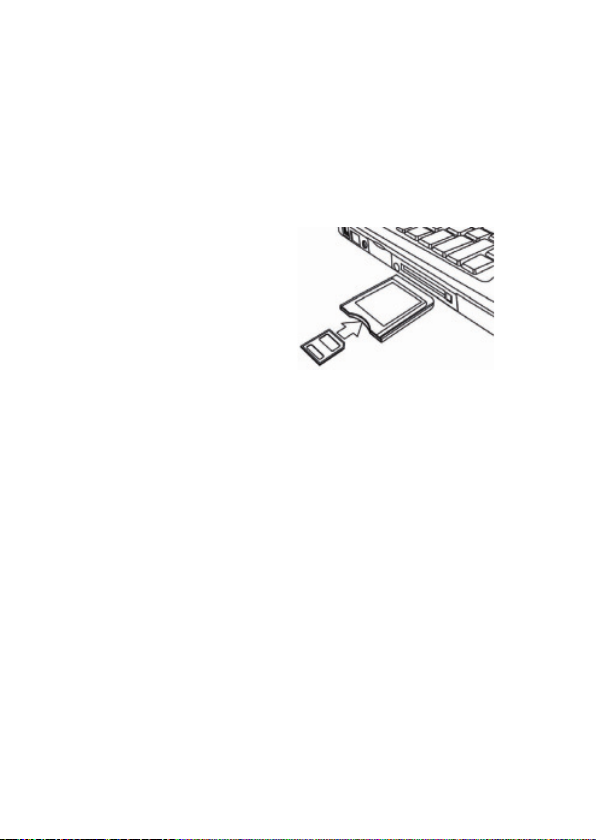
Colocar y retirar la tarjeta SD
La cámara solo funciona con una tarjeta de memoria. Si
no se ha introducido ninguna tarjeta, el LED de carga se
ilumina en rojo.
Introducir la tarjeta
Dado el caso, apague la cámara.
Desatornille la tapa de la parte posterior de la cáma-
ra.
Introduzca la tarjeta con los contactos mirando hacia
abajo en la ranura para tarjetas y asegúrese de que
se oiga cómo encaja.
Vuelva a atornillar la tapa en la cara posterior de la
cámara.
Retirar la tarjeta
Para retirar la tarjeta, empuje la tarjeta brevemente
hacia dentro para desbloquearla. La tarjeta saldrá un
poquito y se la puede retirar.
14

Primeros pasos
Conectar/desconectar la cámara
Mantenga pulsada la tecla POWER durante por lo
menos 2 segundos. La cámara vibrará 3 veces brevemente para indicar que el aparato está encendido.
Cuando la cámara esté encendida, el LED de funcionamiento se ilumina en azul.
Para apagar la cámara, mantenga pulsada la tecla
POWER otra vez. La cámara vibrará 1 vez brevemente, para indicar que el aparato está apagado. El
LED de funcionamiento se apaga.
¡NOTA!
Si la cámara no se enciendo, controle si la batería está cargada.
Fijar la cámara en el soporte
Enganche la cámara en el soporte de cámara.
Cierre el soporte de cámara moviendo la palanca ha-
cia abajo.
Seleccione la sujeción adecuada al empleo de la cá-
mara e inserte el soporte de cámara en el hueco correspondiente hasta que se oiga que encaja.
ES
15

Grabar vídeos
Ponga el selector de función en la
posición .
Mantenga pulsada la tecla POWER
durante por lo menos 2 segundos. La
cámara vibrará 3 veces brevemente
para indicar que el aparato está encendido.
Cuando la cámara esté encendida, el LED de funcionamiento se ilumina en azul.
Pulse la tecla RECORD. La cámara vibrará 3 veces
brevemente, para indicar que está grabando. Durante la grabación, el LED de funcionamiento se ilumina de color rojo.
Vuelva a pulsar RECORD. La cámara vibrará 1 vez
brevemente, para indicar que la grabación está concluida y guardada.
¡NOTA!
El LED de grabación solo se ilumina cuando
haya una tarjeta de memoria en el aparato.
Si no hay tarjeta de memoria en el aparato o si
esta está mal colocada, el LED de carga en la
parte posterior del aparato parpadeará.
16

Tomar fotografías
Ponga el selector de función en la
posición .
Mantenga pulsada la tecla POWER
durante por lo menos 2 segundos. La
cámara vibrará 3 veces brevemente
para indicar que el aparato está encendido.
Cuando la cámara esté encendida, el LED de funcionamiento se ilumina en azul.
Pulse la tecla RECORD. La cámara vibrará 2 veces
brevemente, y captará automáticamente el motivo
correspondiente.
Vuelva a pulsar la tecla RECORD otra vez para to-
mar una fotografía más.
¡NOTA!
El LED de grabación solo se ilumina cuando
haya una tarjeta de memoria en el aparato.
Si no hay tarjeta de memoria en el aparato o si
esta está mal colocada, el LED de carga en la
parte posterior del aparato parpadeará.
ES
17
Transmitir las grabaciones
a un ordenador
Transmisión por adaptador de tarjeta
Dado el caso, apague
la cámara.
Desatornille la tapa de
la parte posterior de la
cámara.
Apriete la tarjeta bre-
vemente hacia dentro
para que desencaje. La
tarjeta saldrá un poquito y se la puede retirar.
Inserte la tarjeta de memoria en el adaptador de tar-
jeta suministrado y podrá utilizar la tarjeta de memoria como una tarjeta SD/SDHC convencional.
18

Transmisión por cable USB
Dado el caso, apague la cámara.
Desatornille la tapa de la parte posterior de la cáma-
ra y conecte la toma micro USB del cable USB a la cámara.
Conecte la cámara con el cable USB al puerto USB de
su ordenador:
ES
Vuelva a encender la cámara. La cámara se reconoce
como soporte de datos extraíble y se pueden trasmitir los datos.
19

Transmitir los datos
a un ordenador
Se pueden copiar las grabaciones en un ordenador.
Sistemas operativos compatibles:
• Windows XP SP3
• Windows Vista SP1
• Windows 7
Conectar cable USB
Apague la cámara.
Cuando el ordenador esté encendido, conecte el ca-
ble USB suministrado con la toma USB de la cámara
y con un puerto USB del ordenador.
Encienda la cámara.
El ordenador reconocerá la cámara como soporte de datos (dispositivo extraíble).
Con Windows XP, Windows Vista y Windows 7 podrá acceder inmediatamente al contenido de la memoria de la
cámara o de la tarjeta de memoria.
Con otras versiones de Windows, deberá abrir el explorador de Windows o abrir con un doble clic de ratón el
"Escritorio" (en Vista y Windows 7: "Ordenador").
Haga doble clic en el símbolo de medios para la cá-
mara.
Navegue a la carpeta “DCIM” y en caso dado a las
carpetas que se encuentran en ella para mostrar los
archivos(*.jpg = fotografías; *.mp4 = grabaciones de
vídeo). Véase también el capítulo Estructura de las
carpetas en la memoria.
Ahora desplace el archivo deseado, utilizando la tecla
izquierda del ratón, a la carpeta prevista del PC, p.
20

ej. a la carpeta “Mis Documentos”. También se puede seleccionar los archivos y utilizar los comandos de
Windows “Copiar” y “Pegar”.
Los archivos se transmiten al PC donde serán memorizados. Se pueden mostrar, reproducir y editar los archivos
con una aplicación apropiada.
Estándar de memoria DCF
Las tomas en su cámara se administran, memorizan, denominan, etc., según el denominado estándar DCF de
cámaras (DCF= Design Rule for Camera File System). Se
pueden reproducir en su cámara las grabaciones de tarjetas de memoria de otras cámaras DCF.
ES
21

Localización de fallos
Si la cámara no funciona perfectamente compruebe los
siguientes puntos. Si el problema persiste rogamos que
se dirija al servicio de MEDION.
La cámara no reacciona.
Se ha colgado el sistema operativo de la cámara. Introduzca un objeto fino y puntiagudo (como, por ejemplo,
la punta de un bolígrafo o un clip) en la apertura RESET
y presione.
No se puede encender la cámara.
La batería está descargada. Cargue la batería.
La cámara no graba fotografías.
La memoria está llena.
No se ha introducido la tarjeta SD.
La tarjeta SD no está formateada correctamente o es de-
fectuosa.
La cámara se apaga sola.
La batería está descargada, cárguela.
La cámara se apaga después de un tiempo preajustado
para ahorrar energía. Vuelva a iniciar la cámara.
La grabación no ha sido memorizada.
Se ha apagado la cámara antes de poder memorizar la
grabación.
La tarjeta de memoria está llena.
22

No se pueden transmitir las grabaciones
a través del cable USB al PC.
La cámara no está encendida.
Al conectar la cámara al PC por primera vez no se encuentra ningún hardware
nuevo.
La conexión USB del PC está desactivada.
El sistema operativo no es compatible.
ES
23

Mantenimiento y limpieza
Limpie la carcasa y la lente del modo siguiente:
Limpie la carcasa de la cámara con un paño suave y
seco.
No utilice ningún disolvente o detergente que contenga
aceite. La cámara podría dañarse.
Para limpiar la lente, elimine primero el polvo con un
pincel soplador. A continuación límpiela con un paño
suave.
No utilice para la carcasa y la lente ningún producto de
limpieza fuerte (diríjase a su comerciante si no se puede
eliminar alguna suciedad).
24
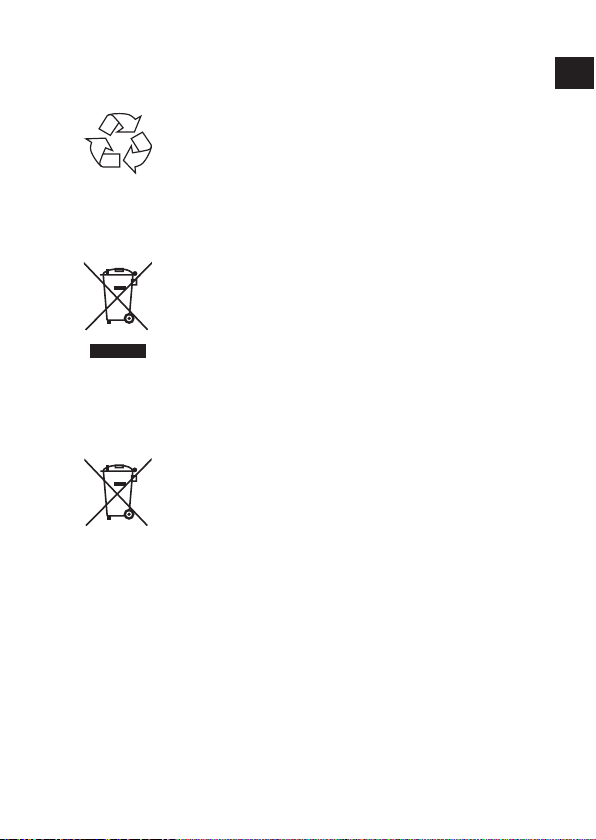
Eliminación
Embalaje
Su cámara digital se encuentra embalada para
su protección contra daños durante el transporte; los embalajes son materias primas y reciclables y pueden ser entregados al circuito
de reciclaje.
Aparato
No tire bajo ningún concepto el aparato al final de su vida útil a la basura doméstica normal. Elimínelo de forma respetuosa con el
medio ambiente a través de un punto de recogida local para aparatos viejos. Infórmese
en su ayuntamiento local acerca del lugar del
punto de recogida.
Baterías
No tire las pilas usadas a la basura doméstica.
Las pilas deben ser depositadas en un punto
de recogida para pilas usadas.
ES
25

Especificaciones técnicas
Cámara
Píxeles: CCD de 5 mega píxeles
Diafragma: F = 3,0
Distancia focal: f = 2,3mm
Formato de archivo: JPEG (EXIF 2.2), MP4
Resoluciones máximas:
Modo de cámara: 1280 x 960 píxeles
Modo de vídeo: 640 x 480 píxeles
Memoria de imagen:
externa: tarjeta microSDHC (de
hasta 16 GB)
Conexión: Mini-USB 2.0
Dimensiones: 90 x 30 x 27 cm (ancho x
altura x profundidad)
Alimentación: DC 5V
(por puerto USB)
Fuente de alimentación por USB
Fabricante: SAMYA, China
Número de modelo: TR-08EU-1A
Tensión de entrada: 100 - 240 V ~ 50/60 Hz 0,2A
Tensión de salida: 5,0 V
500 mA
1.000 mA
Nos reservamos el derecho a efectuar modificaciones técnicas y ópticas así como eventuales
errores de impresión.
26

Instalar
ArcSoft Media Impression
En el CD incluido en el suministro se encuentra "Media
Impression", un programa para la edición de sus imágenes
Así se instala Media Impression:
Inserte el CD de instalación en la unidad de DVD/
CD.
El CD se ejecutará automáticamente. Haga clic en
ArcSoft Media Impression.
Siga las instrucciones para llevar a cabo la instala-
ción.
En caso de que el CD no se ejecute automáticamente,
siga los siguientes pasos para instalar el software:
Haga un doble clic en Escritorio.
Mueva el cursor del ratón hasta la unidad de DVD/
CD.
ES
27

Haga clic con la tecla derecha del ratón, y luego se-
leccione Abrir.
Haga un doble clic en Setup.exe.
Aparecerá un asistente que le guiará por la instala-
ción.
Siga las instrucciones para llevar a cabo la instala-
ción.
Después de finalizada la instalación, vuelva a iniciar
el programa mediante el enlace en el fondo de escri-
torio.
Aparecerá la página de entrada.
Para transmitir imágenes de la cámara a su ordena-
dor de sobremesa o su portátil, pulse en el icono
„IMPORTAR“.
28

Llegará a la vista previa de importación donde pue-
de seleccionar las imágenes para su importación.
En la barra izquierda puede definir las opciones de
importación. La cámara será reconocida automáticamente como soporte de datos extraíble y aparecerá en el menú desplegable „TRANSMITIR MEDIOS
DE:“ .
Seleccione una carpeta de destino en la que se guar-
darán sus datos.
También puede ajustar otras opciones de importa-
ción en la barra lateral
Puede activar una ayuda completa sobre el uso del pro-
grama ArcSoft Media Impression pulsando la tecla F1.
Allí encontrará información adicional sobre la importa-
ción, la edición y el almacenamiento de imágenes.
ES
29

30

Content
About these instructions .................................. 3
Symbols and key words used in these instructions 3
Proper use ............................................................ 4
Safety instructions ...........................................5
General ................................................................. 5
Warnings .............................................................. 5
Safety precautions ................................................. 6
Never carry out repairs yourself ............................. 8
Overview of the device ..................................... 9
Initial operation ............................................ 11
Package contents ................................................ 11
Charging the battery via USB .............................. 12
Attaching the wrist strap ..................................... 13
Inserting and removing SD cards ........................ 14
First steps ....................................................... 15
Switching the camera on/off ............................... 15
Fixing the camera in the mount........................... 15
Recording videos ........................................... 16
Taking photos ................................................ 17
Transferring
photos or videos to a PC ................................. 18
Transferring via a card adapter ............................ 18
Transferring via a USB cable ................................ 19
Transferring data to a
computer ............................................................ 20
Connecting the USB cable ................................... 20
DCF memory standard ........................................ 21
Troubleshooting.................................................. 22
EN
1

Maintenance and care ................................... 24
Waste disposal ............................................... 25
Technical Data ...............................................26
Installing
ArcSoft Media Impression ..............................27
2

About these instructions
Read these operating instructions carefully before using the device for the first time. Note
the warnings on the device and in the operating instructions.
Always keep the operating instructions close
to hand. If you sell the unit or give it away,
make sure you also hand over these instructions and the guarantee card.
Symbols and key words used in
these instructions
DANGER!
Warning: immediate mortal danger!
WARNING!
Warning: possible mortal danger and/
or serious irreversible injuries!
CAUTION!
Please follow the guidelines to avoid injuries
and/or property damage!
PLEASE NOTE!
Please follow the guidelines to avoid property damage!
EN
PLEASE NOTE!
Additional information on using the device
3

PLEASE NOTE!
Please follow the guidelines in the operating instructions!
WARNING!
Warning: danger of electric shock!
•
Tasks to be performed
Bullet point/information on operating
steps and results
Proper use
The device is suitable for recording digital images and
videos.
Do not operate the device either in extreme heat or extreme cold.
The camera is not suitable for operation in extreme conditions.
The device is intended for private use only and is not
suitable for commercial purposes.
4

Safety instructions
General
This device is not intended for use by people (including
children) with reduced physical, sensory or mental abili-
ties or for those without experience and/or knowledge,
unless they are supervised by a person responsible for
their safety or they have been instructed in its use.
Children should be supervised to ensure that they do
not play with the device. Children should not be al-
lowed to use this device without supervision.
Keep the device and its accessories out of reach of chil-
dren.
DANGER!
Keep plastic packaging out of the reach of
children. There is a risk of suffocation.
Warnings
In order to avoid injury, please heed the following warn-
ings while using the product:
• Do not open or dismantle the camera.
• Dismantling the camera could lead to a risk of highvoltage electric shock. Tests on internal components,
modifications and repairs should be carried out by
specialists only. Take the device to an authorised
Service Centre for testing.
EN
5

• Do not place any objects filled with liquids (e.g. vases) near to the device as the liquids could penetrate
into the interior of the device.
Safety precautions
Take the following safety precautions to avoid damage
to your camera and to keep it in good condition.
• Store in a dry place
This camera is not watertight and will not function
properly if it is immersed in water or if liquids penetrate to the inner workings.
• Keep away from damp, salt and dust
Wipe off salt and dust with a light, damp cloth if you
have been using the camera on the beach or at the
seaside. Carefully dry the camera afterwards.
• Keep away from strong magnetic fields
Never place the camera too close to appliances
which generate strong electromagnetic fields, such
as electric motors. Strong electromagnetic fields may
result in camera malfunctions or corrupt data recordings.
• Pay close attention to electrical safety
The socket must be close to the device and easy to
access.
The camera and the USB mains adapter must not be
exposed to water in drip or spray form. Do not place
any objects filled with liquids (e.g., vases) on the device.
• Remove the USB mains adapter from the socket
when the device is not in use or if there is a thunder
storm.
• Avoid excessive heat
6

Do not use or store the camera in direct sunlight or
at high temperatures. This can cause the battery to
leak or the case to become misshapen.
• Avoid extreme fluctuations in temperature
If you take the camera quickly from a cold environment into a warm one, or vice versa, drops of water can form outside and inside the camera, which
can cause malfunctions and can damage the camera.
Wait until the camera has reached room temperature
before switching it on. Use of a carrying case or plastic case offers a certain amount of protection against
fluctuations in temperature.
• Do not drop the device
Severe shocks or vibrations caused by dropping the
device can cause malfunctions. Loop the carrying
strap around your wrist when you carry the camera.
• Treat the lens and all moving parts carefully
Do not touch the lens or the lens barrel. Be careful
when handling the memory card. These parts are
not designed for high levels of stress.
• Memory cards
Turn off the power supply before you insert or remove the memory card. Otherwise the memory card
may become unstable. Memory cards may warm
up during use. Always take care when removing the
memory cards from the camera.
• Charging the internal battery
Use only the supplied USB mains adapter
TR-08EU-1A if you want to charge the battery from
the mains
EN
7

Never carry out repairs yourself
WARNING!
Never try to open or repair the camera
yourself. There is a risk of electric shock.
• If there is a fault, contact the MEDION
Service Centre or other suitable specialist workshop.
8

Overview of the device
Top
12345
1) REC/PLAY/STOP button
2) Operating LED
3) POWER button
4) Recording LED
5) Lens
EN
9

Rear
910
6) Card slot for microSD/SDHC
7) Reset opening
8) Micro USB connection
9) Function selection switch
10) Charging LED
6
7
8
10

Initial operation
Package contents
Please check your purchase to ensure all items are included. Contact us within 14 days of purchase if the delivery is incomplete.
The following items are supplied with your product:
• Camera
• USB mains adapter TR-08EU-1A
• USB cable
• 2 GB microSDHC memory card with adapter
• Wrist strap
• Carrying case
• Camera mount
• Mount for fixing to handlebars (with adapter ring)
• Mount with adhesive pad
• Strap for fixing to a bicycle helmet
• Software CD-ROM
• These operating instructions and guarantee docu-
ments
DANGER!
Keep plastic packaging out of the reach of
children. There is a risk of suffocation.
EN
11

Charging the battery via USB
You can charge the battery either using the supplied
USB mains adapter (TR-08EU-1A) or via the USB connection on your PC.
Ensure the camera is switched off.
Unscrew the cover from the rear of the camera.
Connect the USB cable to the
camera (1).
Connect the other end of
the cable to the USB mains
adapter (2) and plug the
adapter into the mains socket (3).
Alternatively, you can use the
USB cable to connect the camera to the USB connection on your PC:
Use the USB cable to connect the camera to the USB
connection on your PC.
The charging LED lights up green during the charging
12

procedure. When the battery is fully charged, the green
charging LED light will go out.
NOTE!
The battery is not charged when purchased. You
must charge the battery before you can use the
camera.
A completely discharged battery requires approx. 2 hours until it is fully charged.
Attaching the wrist strap
For better handling of the camera and for safety rea-
sons, attach the wrist strap supplied. Feed the short
strap through the eye.
Pull the other end of the wrist strap through the thin
loop of the strap and pull tight.
CAUTION!
If you carry the camera by the wrist strap, make
sure that it does not bang into anything. While
attaching the wrist strap, place the camera on
a stable surface so that it cannot fall down and
break.
EN
13

Inserting and removing SD cards
The camera can only be operated if a memory card has
been inserted. If no card has been inserted, the charging
LED will light up red.
Inserting a card
Ensure the camera is switched off.
Unscrew the cover from the rear of the camera.
Insert a card in the card slot with the contacts facing
down and ensure that it audibly clicks into place.
Screw the cover back onto the rear of the camera.
Removing the card
To remove the card, press it in briefly to release it.
The card will then protrude slightly and can be removed.
14

First steps
Switching the camera on/off
Hold down the POWER button for 2 seconds. The
camera will vibrate briefly 3 times to signal that the
device is now switched on.
The operating LED will light up blue when the device is switched on.
In order to turn the camera off again, hold down the
POWER button once again. The camera will vibrate briefly once to signal that the device has been
switched off. The operating LED will go out.
NOTE!
If the camera does not switch on, check if the
battery is charged.
Fixing the camera in the mount
Clamp the camera into the camera mount.
Lock the camera mount by pulling the clamping le-
ver downwards.
Depending on the type of use, select a suitable
mount and push the camera mount into the slot until it audibly clicks into place.
EN
15

Recording videos
Slide the function selection switch to
the desired position .
Hold down the POWER button for
2 seconds. The camera will vibrate
briefly 3 times to signal that the device is now switched on.
The operating LED will light up blue when the device is switched on.
Press the RECORD button. The camera will vibrate
briefly 3 times to signal that the camera is recording.
The recording LED will light up red during recording.
Press the RECORD button again. The camera will
vibrate briefly once to signal that the recording has
ended and it has been saved.
NOTE!
The recording LED only lights up if a memory
card has been inserted into the device.
If there is no memory card inserted in the device or the card has been incorrectly inserted,
the charging LED on the rear of the device will
blink.
16

Taking photos
Slide the function selection switch to
the desired position .
Hold down the POWER button for
2 seconds. The camera will vibrate
briefly 3 times to signal that the device is now switched on.
The operating LED will light up blue when the device is switched on.
Press the RECORD button. The camera will vibrate
briefly 2 times and then automatically takes the photo of the desired subject.
Press the RECORD button again to take another
photo
NOTE!
The recording LED only lights up if a memory
card has been inserted into the device.
If there is no memory card inserted in the device or the card has been incorrectly inserted,
the charging LED on the rear of the device will
blink.
EN
17

Transferring
photos or videos to a PC
Transferring via a card adapter
Ensure the camera is
switched off.
Unscrew the cover
from the rear of the
camera.
Press the card into its
slot a short way to unlock it. The card will
then protrude slightly and can be removed.
Insert the memory card into the supplied card adapt-
er and then use it like a standard SD/SDHC memory card.
18

Transferring via a USB cable
Ensure the camera is switched off.
Unscrew the cover from the rear of the camera and
connect the Micro-USB plug on the USB cable to the
camera.
Use the USB cable to connect the camera to the USB
connection on your PC.
EN
Switch the camera on again. The camera will be rec-
ognised as a removable storage medium and the
data can be transferred to the computer.
19

Transferring data to a
computer
You can copy your photos and videos to a computer.
Supported operating systems:
• Windows XP SP3
• Windows Vista SP1
• Windows 7
Connecting the USB cable
Switch the camera off.
With the computer switched on, connect the USB ca-
ble supplied to the USB port on the camera and a
USB port on the PC.
Switch on the camera.
The camera will be detected by the computer as a mass
storage device (removable storage medium).
In Windows XP, Windows Vista and Windows 7 you can
immediately access the content of the camera memory
or the memory card.
In other Windows versions, open Windows Explorer or
double-click on "My Computer" (in Vista and Windows
7: on “Computer”).
Double-click on the media icon for the camera.
Navigate to the “DCIM” directory and, where appli-
cable, to the relevant subdirectories in order to display the files (*.jpg = photos; *.mp4 = video recordings). See also the directory structure in the memory.
Press down the left mouse button and drag the rel-
evant files to the directory provided on the computer, e.g. in the folder “My Documents”. You can also
highlight the files and use the Windows commands
20

“Copy” and “Paste”.
The files are transferred to the computer and stored
there. You can display and process the files with a suitable software application.
DCF memory standard
The recordings on your camera are managed (saved,
named, etc.) in accordance with the DCF standard (DCF
= Design rule for Camera File system). Photos or recordings on memory cards from other DCF cameras can also
be played back on your camera.
EN
21

Troubleshooting
Use the following checklist if the camera does not function correctly. If the problem persists, consult MEDION
Service.
The camera does not work.
The camera’s internal operating system has crashed. Use
a thin, pointed object (ballpoint pen refill or paper clip)
to reset the camera by pressing it into the reset opening.
The camera will not switch on.
The battery is flat. Recharge it.
The camera will not take any photos.
The memory is full.
The SD card has not been inserted.
The SD card is not correctly formatted or is defective.
The camera switches itself off.
The battery is flat. Recharge it.
After a preset period, the camera switches itself off to
save the battery charge. Switch the camera back on.
The shot has not been saved.
The camera was switched off before the shot could be
saved.
The memory card is full.
22

The shots cannot be transferred to the PC
via the USB cable.
The camera is not switched on.
When the camera is connected to the
computer for the first time, no new
hardware is found
The USB connection of the computer is deactivated.
The operating system is not compatible.
EN
23

Maintenance and care
Clean the housing and the lens as follows:
Clean the camera housing using a soft, dry cloth.
Do not use thinners or detergents that contain oil, This
could damage the camera.
To clean the lens, firstly remove any dust with a blower
brush. Then wipe the lens and display with a soft cloth.
Do not use strong cleaning agents for the housing and
lens (if there is dirt that cannot be removed, contact
your dealer).
24

Waste disposal
located.
Packaging
Your camera is packaged to protect it from
transportation damage. Packaging is raw material and can be reused or added to the recycling system.
Device
At the end of its service life, the device should
not be disposed of with the household rubbish. Dispose of it in an environmentally
friendly manner via a local collection point for
old devices. Contact your local authority to
find out where your nearest collection point is
Batteries
Used batteries do not belong with household
rubbish. Batteries must be taken to a collection point for used batteries.
EN
25

Technical Data
Camera
Pixels: 5 megapixel CCD
Aperture: F = 3.0
Focal length: f = 2.3 mm
File formats: JPEG (EXIF 2.2), MP4
Max. resolutions:
Camera mode: 1280 x 960 pixels
Video mode: 640 x 480 pixels
Memory:
External: microSDHS card (up to 16
GB)
Port: Mini USB 2.0
Dimensions: 90 x 30 x 27 cm (W x H x
D)
Power supply: DC 5V
(via USB interface)
USB mains adapter
Manufacturer: SAMYA, China
Model number: TR-08EU-1A
Input voltage: 100–240 V ~ 50/60 Hz 0.2 A
Output voltage: 5.0 V
500 mA
1000 mA
Subject to technical and optical changes as well
as printing errors.
26

Installing
ArcSoft Media Impression
On the CD supplied, you will find “Media Impression”,
a program for editing your pictures.
Install Media Impression as follows:
Insert the installation CD in the DVD/CD drive.
The CD will run automatically. Click on ArcSoft Me-
dia Impression.
Follow the instructions to complete the installation.
If the CD does not run automatically, follow the steps
shown below to install the software:
Double-click on “My Computer”.
Move the mouse cursor to the DVD/CD drive.
EN
27

Right click, then click on Open.
Double-click on Setup.exe.
A wizard will be displayed that leads you through
the installation.
Follow the instructions to complete the installation.
After successful installation, start the programme via
the shortcut on the desktop.
The startup screen will be displayed.
In order to transfer photos from the camera to your
desktop or notebook PC, click on the “IMPORT” but-
ton.
28

The import preview screen will open and you can
then select the photos here for the import process.
You can define the import options using the side
menu bar on the left. The camera will be automatically recognised as a removable storage medium and
“OBTAIN MEDIA FROM:” will be shown in the drop-
down menu.
Select a target folder where you would like to save
the data.
You can define other import options using the side
menu bar.
You can call up a complete help function for ArcSoft Me-
dia Impression by pressing the F1 button.
There you will find additional information on importing,
editing and protecting photos.
EN
29

30

Inhaltsverzeichnis
Zu dieser Anleitung ......................................... 3
In dieser Anleitung verwendete Symbole und Signal-
wörter ................................................................... 3
Bestimmungsgemäßer Gebrauch ......................... 4
Sicherheitshinweise ......................................... 5
Allgemein ............................................................. 5
Warnungen ........................................................... 5
Vorsichtsmaßnahmen ...........................................6
Niemals selbst reparieren ...................................... 8
Geräteübersicht ............................................... 9
Inbetriebnahme ............................................. 11
Lieferumfang ...................................................... 11
Laden des Akkus über USB .................................. 12
Handschlaufe anbringen ..................................... 13
SD-Karten einsetzen und herausnehmen ............ 14
Erste Schritte ................................................. 15
Kamera einschalten/ausschalten ......................... 15
Kamera in Halterung befestigen .......................... 15
Videos aufnehmen ......................................... 16
Fotos aufnehmen ........................................... 17
Aufnahmen an einen PC
übertragen .................................................... 18
Übertragung via Kartenadapter ........................... 18
Übertragung via USB-Kabel ................................. 19
Daten auf einen Computer
übertragen .......................................................... 20
USB-Kabel anschließen ........................................ 20
DCF-Speicherstandard ........................................ 21
Fehlersuche ......................................................... 22
DE
1

Wartung und Pflege ......................................24
Entsorgung .................................................... 25
Technische Daten ........................................... 26
ArcSoft Media Impression
installieren .................................................... 27
2

Zu dieser Anleitung
Lesen Sie vor Inbetriebnahme die Sicherheitshinweise aufmerksam durch. Beachten Sie die
Warnungen auf dem Gerät und in der Bedienungsanleitung.
Bewahren Sie die Bedienungsanleitung immer in Reichweite auf. Wenn Sie das Gerät
verkaufen oder weiter geben, händigen Sie
unbedingt auch diese Anleitung und die Garantiekarte aus.
In dieser Anleitung verwendete
Symbole und Signalwörter
GEFAHR!
Warnung vor unmittelbarer Lebensge-
fahr!
WARNUNG!
Warnung vor möglicher Lebensgefahr
und/oder schweren irreversiblen Verletzungen!
VORSICHT!
Hinweise beachten, um Verletzungen und
Sachschäden zu vermeiden!
ACHTUNG!
Hinweise beachten, um Sachschäden zu vermeiden!
DE
3

HINWEIS!
Weiterführende Information für den Gebrauch des Geräts.
HINWEIS!
Hinweise in der Bedienungsanleitung beachten!
WARNUNG!
Warnung vor Gefahr durch elektrischen
Schlag!
•
Auszuführende Handlungsanweisung
Aufzählungspunkt / Information über Ereignisse während der Bedienung
Bestimmungsgemäßer Gebrauch
Das Gerät ist für Aufnahmen von Bildern und Videos im
Digitalformat geeignet.
Betreiben Sie das Gerät weder bei extremer Hitze oder
Kälte.
Das Gerät ist nicht für den Betrieb bei extremen Bedingungen geeignet.
Das Gerät ist nur für den privaten Gebrauch bestimmt
und nicht zur gewerblichen Nutzung geeignet.
4

Sicherheitshinweise
Allgemein
Dieses Gerät ist nicht dafür bestimmt, durch Personen
(einschließlich Kinder) mit eingeschränkten physischen,
sensorischen oder geistigen Fähigkeiten oder mangels
Erfahrung und/oder mangels Wissen benutzt zu wer-
den, es sei denn, sie werden durch eine für Ihre Sicher-
heit zuständige Person beaufsichtigt oder erhielten von
Ihnen Anweisungen, wie das Gerät zu benutzen ist.
Kinder sollen beaufsichtigt werden, um sicherzustellen,
dass sie nicht mit dem Gerät spielen. Kinder darf der Ge-
brauch des Geräts nicht ohne Aufsicht erlaubt werden.
Bewahren Sie das Gerät und das Zubehör an einem für
Kinder unerreichbaren Platz auf.
GEFAHR!
Halten Sie auch die Verpackungsfolien von
Kindern fern. Es besteht Erstickungsgefahr!
Warnungen
Um Verletzungen zu vermeiden, beachten Sie bitte beim
Gebrauch des Produkts die folgenden Warnungen:
• Öffnen oder zerlegen Sie das Gerät nicht.
• Beim Zerlegen des Geräts besteht die Gefahr eines
Hochspannungsstromschlags. Prüfungen interner
Bauteile, Änderungen und Reparaturen dürfen nur
von Fachkräften vorgenommen werden. Bringen Sie
das Produkt zur Prüfung zu einem autorisierten Service Center.
DE
5

• Stellen Sie auch keine mit Flüssigkeit gefüllten Gegenstände (z. B. Vasen) in der Nähe des Geräts ab, es
könnte Flüssigkeit in des Geräteinnere gelangen.
Vorsichtsmaßnahmen
Beachten Sie bitte die folgenden Vorsichtsmaßnahmen,
um Schäden an Ihrer Kamera zu vermeiden und sie stets
in einwandfreiem Zustand zu halten:
• Trocken lagern
Diese Kamera ist nicht wasserdicht und funktioniert
daher nicht einwandfrei, wenn sie ins Wasser getaucht wird oder wenn Flüssigkeiten in das Innere
der Kamera gelangen.
• Von Feuchtigkeit, Salz und Staub fern halten
Wischen Sie Salz und Staub mit einem leicht feuchten, weichen Tuch ab, wenn Sie die Kamera am
Strand oder an der See verwendet haben. Trocknen
Sie die Kamera danach sorgfältig ab.
• Von starken Magnetfeldern fern halten.
Bringen Sie die Kamera niemals in zu große Nähe
von Geräten, die starke elektromagnetische Felder erzeugen, beispielsweise Elektromotoren. Starke elektromagnetische Felder können zu Fehlfunktionen der Kamera führen oder die Datenaufzeichnung
stören.
• Elektrische Sicherheit beachten
Die Steckdose muss sich in der Nähe des Gerätes befinden und ohne Schwierigkeiten erreichbar sein.
Die Kamera oder das USB-Netzteil dürfen weder
Tropf- noch Spritzwasser ausgesetzt werden. Stellen
Sie auch keine mit Flüssigkeit gefüllten Gegenstände
(z. B. Vasen) auf dem Gerät ab.
6

• Ziehen Sie bei Nichtgebrauch und bei Gewittern das
USB-Netzteil aus der Steckdose.
• Zu starke Wärme vermeiden
Verwenden oder lagern Sie die Kamera nicht unter Sonneneinstrahlung oder hohen Temperaturen.
Eine solche Belastung kann zum Auslaufen des Akkus
oder zur Verformung des Gehäuses führen.
• Starke Temperaturschwankungen vermeiden
Wenn Sie das Gerät schnell aus einer kalten Umgebung in eine warme Umgebung oder umgekehrt
bringen, kann sich im und am Gerät Kondenswasser
bilden, das zu Funktionsstörungen und Schäden am
Gerät führen kann. Warten Sie mit der Inbetriebnahme, bis sich die Temperatur des Gerätes an die Umgebungstemperatur angeglichen hat. Die Verwendung einer Transport- oder Kunststofftasche bietet
begrenzten Schutz gegen Temperaturschwankungen.
• Gerät nicht fallen lassen
Starke, beim Fallen hervorgerufene Erschütterungen oder Vibrationen, können Fehlfunktionen verursachen. Legen Sie die Trageschlaufe um Ihr Handgelenk, wenn Sie die Kamera tragen.
• Linse und alle beweglichen Teile vorsichtig behan-
deln
Berühren Sie nicht die Linse und den Objektivtubus.
Seien Sie vorsichtig beim Umgang mit der Speicherkarte. Diese Teile sind nicht auf starke Belastungen
ausgelegt.
• Speicherkarten
Schalten Sie die Stromversorgung aus, bevor Sie die
Speicherkarte einsetzen oder entnehmen. Andernfalls wird die Speicherkarte eventuell instabil. Spei-
DE
7

cherkarten können während der Verwendung warm
werden. Nehmen Sie die Speicherkarten immer vorsichtig aus der Kamera.
• Aufladen des internen Akkus
Verwenden Sie nur das mitgelieferte USB-Netzteil
TR-08EU-1A, wenn Sie den Akku über das Stromnetz
aufladen wollen
Niemals selbst reparieren
WARNUNG!
Versuchen Sie auf keinen Fall, das Gerät
selbst zu öffnen oder zu reparieren. Es besteht die Gefahr des elektrischen Schlags!
• Wenden Sie sich im Störungsfall an das Medion Service Center oder eine andere geeignete Fachwerkstatt, um Gefährdungen zu vermeiden.
8

Geräteübersicht
Oberseite
12345
1) REC/PLAY/STOP-Taste
2) Betreibs-LED
3) POWER-Taste
4) Aufnahme-LED
5) Linse
DE
9

Rückseite
910
6) Kartenschacht für microSD/SDHC
7) Reset-Öffnung
8) Mikro-USB-Anschluss
9) Funtkionswahlschalter
10) Lade-LED
6
7
8
10

Inbetriebnahme
Lieferumfang
Bitte überprüfen Sie die Vollständigkeit der Lieferung
und benachrichtigen Sie uns innerhalb von 14 Tagen
nach dem Kauf, falls die Lieferung nicht komplett ist.
Mit dem von Ihnen erworbenen Produkt haben Sie erhalten:
• Kamera
• USB-Netzteil TR-08EU-1A
• USB-Kabel
• 2 GB microSDHC-Speicherkarte mit Adapter
• Handschlaufe
• Tragetasche
• Kamerahalterung
• Halterung zur Befestigung an der Lenkstange mit
Adapterringen
• Halterung mit Klebefuß
• Haltegurt zur Befestigung am Fahrradhelm
• Software CD-ROM
• diese Bedienungsanleitung und Garantiedokumente
GEFAHR!
Halten Sie auch die Verpackungsfolien von
Kindern fern. Es besteht Erstickungsgefahr!
DE
11

Laden des Akkus über USB
Sie können den Akku entweder mit dem mitgelieferten
USB-Netzteil (TR-08EU-1A) oder über den USB-Anschluß
Ihres PCs laden
Schalten Sie ggf. die Kamera aus.
Schrauben Sie den Deckel von der Rückseite der Ka-
mera ab.
Schließen Sie das USB-Kabel
an die Kamera an (1).
Schließen Sie das andere
Ende an das USB-Netzteil an
(2) und stecken Sie es in die
Steckdose (3).
Alternativ schließen Sie die Ka-
mera mit dem USB-Kabel an
den USB-Anschluss Ihres PC
an:
Verbinden Sie die Kamera mit dem USB-Kabel und
dem USB-Anschluss Ihres PC.
12

Während des Ladevorgangs leuchtet die Lade-LED grün.
Wenn die grüne Lade-LED erlischt ist der Akku vollständig geladen.
HINWEIS!
Beim Kauf ist der Akku nicht geladen. Sie müssen den Akku aufladen bevor Sie die Kamera benutzen.
Ein vollständig entladener Akku benötigt etwa 2
Stunden bis er vollständig geladen ist.
Handschlaufe anbringen
Befestigen Sie zur besseren Handhabung der Kamera
und aus Sicherheitsgründen die Handschlaufe. Führen Sie die kurze Schlaufe wie durch die Öse.
Ziehen Sie das andere Ende der Handschlaufe durch
die Schlaufe der dünnen Schnur, und ziehen Sie die
Handschlaufe fest.
ACHTUNG!
Wenn Sie die Kamera mit der Handschlaufe tragen, achten Sie darauf, dass die Kamera nirgends anstößt. Wenn Sie die Handschlaufe anbringen, legen Sie die Kamera auf eine feste
Oberfläche, damit sie nicht herunterfallen kann
und beschädigt wird.
DE
13

SD-Karten einsetzen und herausnehmen
Die Kamera kann nur mit einer eingelegten Speicherkarte betrieben werden. Wenn keine Karte eingelegt ist
leuchtet die Lade-LED rot.
Karte einsetzen
Schalten Sie die Kamera ggf. aus.
Schrauben Sie den Deckel von der Rückseite der Ka-
mera ab.
Stecken Sie die Karte mit den Kontakten nach unten
in das Kartenfach und vergewissern Sie sich, dass sie
hörbar einrastet.
Schrauben Sie den Deckel wieder auf die Rückseite
der Kamera.
Karte herausnehmen
Um die Karte zu entnehmen, drücken Sie die Kar-
te kurz ein, um sie zu entriegeln. Die Karte wird ein
Stück heraus geschoben und kann entnommen werden.
14

Erste Schritte
Kamera einschalten/ausschalten
Halten Sie die Taste POWER 2 Sekunden lang ge-
drückt. Die Kamera vibriert 3 mal kurz, um zu signalisieren, das das Gerät nun eingeschaltet ist.
Im eingeschalteten Zustand leuchtet die Betriebs-LED
blau.
Um die Kamera wieder auszuschalten, halten Sie die
Tas te POWER erneut gedrückt. Die Kamera vibriert
1 mal kurz, um zu signalisieren, das das Gerät nun
ausgeschaltet ist. Die Betriebs-LED erlischt.
HINWEIS!
Wenn sich die Kamera nicht einschaltet, überprüfen Sie, ob der Akku geladen ist.
Kamera in Halterung befestigen
Spannen Sie die Kamera in die Kamerahalterung ein.
Verriegeln Sie die Kamerahalterung indem Sie den
Spannhebel nach unten legen.
Je nach Nutzung wählen Sie eine passende Halte-
rung und schieben Sie die Kamerahalterung in die
Aussparung bis sie hörbar einrastet.
DE
15

Videos aufnehmen
Schieben Sie den Funktionsschalter in
die Position .
Halten Sie die Taste POWER 2 Se-
kunden lang gedrückt. Die Kamera
vibriert 3 mal kurz, um zu signalisieren, das das Gerät nun eingeschaltet ist.
Im eingeschalteten Zustand leuchtet die Betriebs-LED
blau.
Drücken Sie die Taste RECORD. Die Kamera vib-
riert 3 mal kurz, um zu signalisieren, das die Aufnahme läuft. Während der Aufnahme leuchtet die Aufahme-LED rot.
Drücken Sie die Taste RECORD erneut. Die Kame-
ra vibriert 1 mal kurz, um zu signalisieren, das die
Aufnahme beendet und gespeichert ist.
HINWEIS!
Die Aufnahme-LED leuchtet nur, wenn sich
eine Speicherkarte im Gerät befindet.
Wenn sich keine Speicherkarte im Gerät befindet oder diese falsch eingelegt ist, blinkt die
Lade-LED an der Rückseite des Geräts.
16

Fotos aufnehmen
Schieben Sie den Funktionsschalter in
die Position .
Halten Sie die Taste POWER 2 Se-
kunden lang gedrückt. Die Kamera
vibriert 3 mal kurz, um zu signalisieren, das das Gerät nun eingeschaltet ist.
Im eingeschalteten Zustand leuchtet die Betriebs-LED
blau.
Drücken Sie die Taste RECORD. Die Kamera vib-
riert 2 mal kurz, nimmt dann automatisch das gewünschte Motiv auf.
Drücken Sie die Taste RECORD erneut, um ein
weiteres Foto aufzunehmen
HINWEIS!
Die Aufnahme-LED leuchtet nur, wenn sich
eine Speicherkarte im Gerät befindet.
Wenn sich keine Speicherkarte im Gerät befindet oder diese falsch eingelegt ist, blinkt die
Lade-LED an der Rückseite des Geräts.
DE
17

Aufnahmen an einen PC
übertragen
Übertragung via Kartenadapter
Schalten Sie ggf. die
Kamera aus.
Schrauben Sie den De-
ckel von der Rückseite
der Kamera ab.
Drücken Sie die Karte
kurz ein, um sie zu entriegeln. Die Karte wird
ein Stück heraus geschoben und kann entnommen
werden.
Schieben Sie die Speicherkarte in das mitgelieferte
Kartenadapter und verwenden Sie die Speicherkarte
dann wie eine gewöhliche SD/SDHC-Speicherkarte.
18

Übertragung via USB-Kabel
Schalten Sie ggf. die Kamera aus.
Schrauben Sie den Deckel von der Rückseite der Ka-
mera ab und schließen Sie den Micro-USB Stecker
des USB-Kabels an die Kamera an.
Verbinden Sie die Kamera mit dem USB-Kabel und
dem USB-Anschluss Ihres PC.
DE
Schalten Sie die Kamera wieder ein. Die Kamera wird
als Wechseldatenträger erkannt und die Daten können übertragen werden.
19

Daten auf einen Computer
übertragen
Sie können die Aufnahmen auf einen Computer überspielen.
Unterstützte Betriebssysteme:
• Windows XP SP3
• Windows Vista SP1
• Windows 7
USB-Kabel anschließen
Schalten Sie die Kamera aus.
Verbinden Sie das mitgelieferte USB-Kabel bei ein-
geschaltetem Computer mit dem USB-Anschluss der
Kamera und einem USB-Anschluss am PC.
Schalten Sie die Kamera ein.
Die Kamera wird vom Computer als Massenspeichergerät (Wechselmedium) erkannt.
Unter Windows XP, Windows Vista und Windows 7 können Sie sofort auf den Inhalt des Kameraspeichers oder
der Speicherkarte zugreifen.
Unter anderen Windows-Versionen öffnen Sie den Windows Explorer oder doppelklicken Sie auf „Arbeitsplatz“
(unter Vista und Windows 7: „Computer“).
Doppelklicken Sie auf das Mediensymbol für die Ka-
mera.
Navigieren Sie zum Ordner „DCIM“ und ggf. auf die
darin enthaltenen Ordner, um die Dateien anzuzeigen (*.jpg = Fotos; *.mp4 = Videoaufnahmen). Vgl.
auch Ordnerstruktur im Speicher.
Ziehen Sie die gewünschten Dateien nun bei ge-
drückter linker Maustaste in den dafür vorgesehenen
20

Ordner auf dem PC, z. B. in den Ordner „Eigene Dateien“. Sie können die Dateien auch markieren und
die Windows-Befehle „Kopieren“ und „Einfügen“
verwenden.
Die Dateien werden auf den PC übertragen und dort gespeichert. Sie können die Dateien mit einer geeigneten
Anwendungssoftware anzeigen, wiedergeben und bearbeiten.
DCF-Speicherstandard
Die Aufnahmen auf Ihrer Kamera werden nach dem so
genannten DCF-Standard auf der Kamera verwaltet (gespeichert, benannt etc.; DCF = Design Rule for Camera File System). Aufnahmen auf Speicherkarten anderer
DCF-Kameras können auf Ihrer Kamera wiedergegeben
werden.
DE
21

Fehlersuche
Wenn die Kamera nicht einwandfrei funktioniert, überprüfen Sie die folgenden Punkte. Wenn das Problem bestehen bleibt, wenden Sie sich bitte an den MEDIONService.
Die Kamera reagiert nicht.
Das interne Betriebssystem der Kamera ist abgestützt.
Drücken Sie mit einem spitzen, dünnen Gegenstand
(Kugelschreibermine oder Büroklammer) in die ResetÖffnung.
Die Kamera lässt sich nicht einschalten.
Der Akku ist leer. Laden Sie ihn auf.
Die Kamera nimmt keine Fotos auf.
Der Speicher ist voll.
Die SD-Karte ist nicht eingelegt.
Die SD-Karte ist nicht korrekt formatiert oder defekt.
Die Kamera schaltet sich aus.
Der Akku ist leer, laden Sie den Akku auf.
Die Kamera schaltet sich nach einer voreingestellten Zeit
aus, um Akkuladung zu sparen. Starten Sie die Kamera neu.
Die Aufnahme wurde nicht gespeichert.
Die Kamera wurde ausgeschaltet, bevor die Aufnahme
gespeichert werden konnte.
Die Speicherkarte ist voll.
22

Die Aufnahmen können über das USBKabel nicht auf den PC übertragen werden.
Die Kamera ist nicht eingeschaltet.
Beim erstmaligen Anschluss der Kamera
an den PC wird keine neue Hardware gefunden
Der USB-Anschluss des PCs ist deaktiviert.
Das Betriebssystem ist nicht kompatibel.
DE
23

Wartung und Pflege
Reinigen Sie das Gehäuse und die Linse folgendermaßen:
Reinigen Sie das Kameragehäuse mit einem weichen,
trockenen Tuch.
Verwenden Sie keine Verdünner oder Reinigungsmittel,
die Öl enthalten. Dadurch kann die Kamera beschädigt
werden.
Um die Linse zu reinigen, entfernen Sie den Staub zuerst
mit einem Staubblasepinsel. Reinigen Sie sie anschließend mit einem weichen Tuch.
Verwenden Sie für das Gehäuse und die Linse keine starken Reinigungsmittel (wenden Sie sich an Ihren Händler,
wenn sich Schmutz nicht entfernen lässt).
24

Entsorgung
Verpackung
Ihre Digitalkamera befindet sich zum Schutz
vor Transportschäden in einer Verpackung,
Verpackungen sind Rohmaterialien und können wiederverwertet werden oder dem Recycling-Kreislauf zugeführt werden.
Gerät
Werfen Sie das Gerät am Ende seiner Lebenszeit keinesfalls in den normalen Hausmüll. Entsorgen Sie es umweltgerecht über eine örtliche Sammelstelle für Altgeräte. Erkundigen Sie
sich bei der örtlichen Verwaltung nach dem
Standort der Sammelstellen.
Akkus
Verbrauchte Akkus gehören nicht in den Hausmüll. Die Akkus müssen bei einer Sammelstelle für Altbatterien abgegeben werden.
DE
25

Technische Daten
Kamera
Pixel: 5 Mega Pixel CCD
Blende: F = 3,0
Brennweite: f = 2,3mm
Dateiformat: JPEG (EXIF 2.2), MP4
Max. Auflösungen:
Kamera Modus: 1280 x 960 Pixel
Video Modus: 640 x 480 Pixel
Bildspeicher:
Extern: microSDHC- Karte (bis 16
GB)
Anschluss: Mini-USB 2.0
Abmessungen: 90 x 30 x 27 cm (B x H x T)
Spannungsversorgung: DC 5V
(über USB-Schnittstelle)
USB-Netzteil
Hersteller: SAMYA, China
Modellnummer: TR-08EU-1A
Eingangsspannung: 100 - 240 V ~ 50/60 Hz 0,2A
Ausgangsspannung: 5,0 V
500 mA
1000 mA
Technische und optische Änderungen sowie
Druckfehler vorbehalten!
26

ArcSoft Media Impression
installieren
Auf der mitgelieferten CD befindet sich „Media Impression“, ein Programm zur Bearbeitung Ihrer Bilder
So installieren Sie Media Impression:
Legen Sie die Installations-CD in das DVD-/CD-Lauf-
werk ein.
Die CD wird automatisch ausgeführt. Klicken Sie auf
ArcSoft Media Impression.
Befolgen Sie die Anweisungen zum Abschließen der
Installation.
Falls die CD nicht automatisch ausgeführt wird, befolgen Sie die nach-stehenden Schritte zu Installation der
Software:
Doppelklicken Sie auf Arbeitsplatz.
Bewegen Sie den Mauszeiger auf das DVD-/CD-Lauf-
werk.
DE
27

Rechtsklicken Sie mit der Maus, klicken Sie dann auf
Öffnen.
Doppelklicken Sie auf Setup.exe.
Ein Assistent erscheint und führt Sie durch die Instal-
lation.
Befolgen Sie die Anweisungen zum Abschließen der
Installation.
Nach erfolgreicher Installation starten Sie das Pro-
gramm über die Verknüpfung auf dem Desktop.
Es erscheint der Startbildschirm.
Um Bilder von der Kamera auf Ihren Desktop- oder
Notebook-PC zu übertragen klicken Sie auf die
Schaltfläche „IMPORTIEREN“.
28

Sie gelangen in die Import-Vorschau und können
hier Bilder für den Import auswählen.
In der linken Seitenleiste können Sie die Import-Op-
tionen festlegen. Die Kamera wird automatisch als
Wechseldatenträger erkannt und im Dropdown-Menü „MEDIEN HOLEN VON:“ angezeigt.
Wählen Sie einen Zielordner in dem die Daten ge-
speichert werden sollen.
Sie können weitere Import-Optionen in der Seiten-
leiste einstellen
Eine komplette Hilfe zur Nutzung des Programms
ArcSoft Media Impression können Sie mit der Taste F1
aufrufen.
Dort finden Sie weiterführende Information zum Im-
port, zur Bearbeitung und Sicherung von Bildern.
DE
29

30

V/11/11
Medion Service Center
Visonic S.A.
c/ Miguel Faraday, 6
Parque Empresarial „La Carpetania“, N-IV Km. 13
28906 Getafe, Madrid
España
Hotline: 902196437
Fax: 914604772
Internet
www.medion.es/
E-mail Support
service-spain@medion.com
 Loading...