

Page 1
Welcome to Darbuka
The overwhelming success of our first virtual musician - the Virtual Guitarist – proved that there’s a huge
demand for intelligent music tools that put you in the producers’ rather than the musicians’ chair; tools that
produce professional, authentic tracks based on real performances from skilled musicians. Why waste a lot of
time trying to imitate a Darbuka player with a MIDI track and some multisamples? Why not just hire the best
guys for the job?
Thanks to the proprietary FlexGroove engine Wizoo’s Virtual percussionists deliver nothing less than real
performances recorded by real musicians, with you in full control. Everything from the groove, the arrangement,
the timing and the tempo to the mix is in your hands, ready to make your song special.
The grooves of “Darbuka” were performed by Suat Borazan and Mohamed Zaki, two of the best MiddleEastern percussion players in the world and definitely big stars in their countries. Whether you’re into MiddleEastern music or just want to add the flavor to your tracks – these guys deliver with cultural credibility and
musical performances like nothing that was affordable for any of us – in the pre-Darbuka era that is.
Best regards,
System Requirements & Installation
System Requirements
< Minimum System Requirements PC
• Pentium® III 500 MHz or AMD7. (Pentium 4 / Athlon 1 GHz or faster recommended).
• 256 MB RAM.
• 2 GB free hard disk space.
• Windows® XP.
• VST 2.0 compatible host software.
• MIDI Interface.
• DVD-ROM drive for installation.
• Internet connection for software certification.
< Minimum System Requirements Mac
• Power Macintosh® G3 500 MHz.
(G4 or faster recommended)
• 256 MB RAM.
• 2 GB free hard disk space.
• Mac® OS X Version 10.3.2 or higher.
• VST 2.0, AU or RTAS compatible host software.
• MIDI Interface.
• DVD-ROM drive for installation.
• Internet connection for software activation.
(The actual performance of virtual instruments depends on the performance of the computer you use.)
English
Darbuka • User Guide
4
3
Page 2

To install Darbuka on a PC:
1. Power up your computer and launch Windows XP.
2. Insert the Darbuka DVD into the computer’s DVD drive.
3. The installer should start automatically, simply follow the instructions on the screen.
If the installer does not start automatically, open the Explorer or the Desktop window and double-click the
Darbuka DVD icon.
To uninstall Darbuka on a PC:
1. Open the Control Panel of your windows system.
2. Double Click ‘Add or Remove Programs’.
3. Select ‘Darbuka’ from the list.
4. Click ‘Remove’ and follow the instructions.
To install Darbuka on a Macintosh:
1. Power up your computer launching Mac OS X.
2. Insert the Darbuka DVD into the computer’s DVD drive. If the installer does not start automatically
double-click the Darbuka DVD icon.
3. Double-click the Installer icon and follow the instructions on the screen.
4. If your host platform supports Audio Unit or RTAS formats, then run the appropriate additional installer.
To uninstall Darbuka on a Macintosh:
1. Delete the Darbuka Data folder /Library/Audio/Plug-Ins/VST/Wizoo/Darbuka Data/
If you have installed the Darbuka content somewhere else on your Macintosh and are not sure where, use
the OSX Find feature ([Command][F]) and search for ‘Darbuka Data’
and
2. delete whichever Plug-ins you have installed:
• VST/Library/Audio/Plug-Ins/VST/Wizoo/Darbuka.vst
• Audio Unit/Library/Audio/Plug-Ins/Components/Darbuka.component
• RTAS/Library/Application Support/Digidesign/Plug-Ins/Darbuka.rtas
Product Certification
Product Certification is a fast and easy process that certifies your purchased Wizoo product for unlimited legal
use on your system. All Wizoo products – demo and full versions – require a certification.
The certification process is integrated into your Wizoo product and can be executed using a standard web
browser and email client – there is no need to install additional applications or hardware.
To certify your Wizoo product, proceed as follows:
1. Open your Wizoo plug-in in your host application (sequencer).
2. Click the “Setup” button on the user interface.
3. Enter the Product Certification Code provided on the card inside the Darbuka box into he field labelled
“Product Certification”.
Now you have two options. If your music computer is connected to the internet, proceed with “On-line
Certification”, if not refer to the “Off-line Certification” instructions below.
4
3
English
Page 3

< On-line Certification
1. Make sure you have established an internet connection.
2. Click the button “Certify Online”
3. The plug-in retrieves the Wizoo Certification form from the server and opens it in your web browser.
4. Enter the required information into all fields if possible, at least fill out the ones marked with an asterisk
(*). The #“Product Certificate”# field will automatically get filled out by the certification server.
5. Click the #“Submit”# button to send your certification request. Your certificate will be emailed to the
address you provided.
6. Receive your email and double-click the file attached to it. Your Wizoo product will be certified and
enabled for permanent use. As a confirmation, the “Product Certification” field in the Setup page will
read “Product certified ...”.
If your email gets received on a computer other than your music workstation, then please transfer the attached
file to your music computer and double-click it there to complete the certification process.
< Off-line Certification
If your music computer is not connected to the Internet, you can carry out certification on any other computer
with an internet connection – e.g. your office or home computer.
1. Click the button “Certify Off-line”.
2. Check your desktop folder for a html file named after the product. Transfer this file to your internetconnected computer.
3. On your internet computer, establish a connection and double-click the html file. It will be opened in
your web browser and take you to the Certification form on the Wizoo server.
4. Fill out all fields if possible, the fields marked with an asterisk are obligatory. The #“Product Certificate”#
field will be filled out automatically.
5. Click the “Submit” button to complete your certification request. Your certificate will be emailed to the
address you provided.
6. Open your email and transfer the attached file to the computer where the Wizoo product is installed.
7. Here, double-click the file to complete certification. As a confirmation, the “Product Certification” field in
the Setup page will read “Product certified ...”.
Demo Licences
Included on your product installer DVD you will find other demo versions of our products. A demo version
allows you to test the full product over a period of 30 days.
To activate a Wizoo demo version simply follow the procedure described above but do not enter any Certification
code in the Product Certification dialog.
English
General Overview
Darbuka is a very easy to use yet sophisticated virtual percussion instrument that plays real Arabic and Middle
Eastern multi-track percussion recordings at any tempo, and gives you the freedom to edit numerous aspects
of every instrument’s performance and sound.
Let’s take a quick tour of Darbuka and check out the most important general features.
What Is A Style
A Style is a full authentic percussion arrangement, complete with up to fourteen individual Tracks, up to sixtyone Patterns (or arrangements), fills, mixer settings and a lot of other important information. When you save
or load a Style you are basically saving or loading every parameter in Darbuka .
Darbuka • User Guide
4
5
Page 4
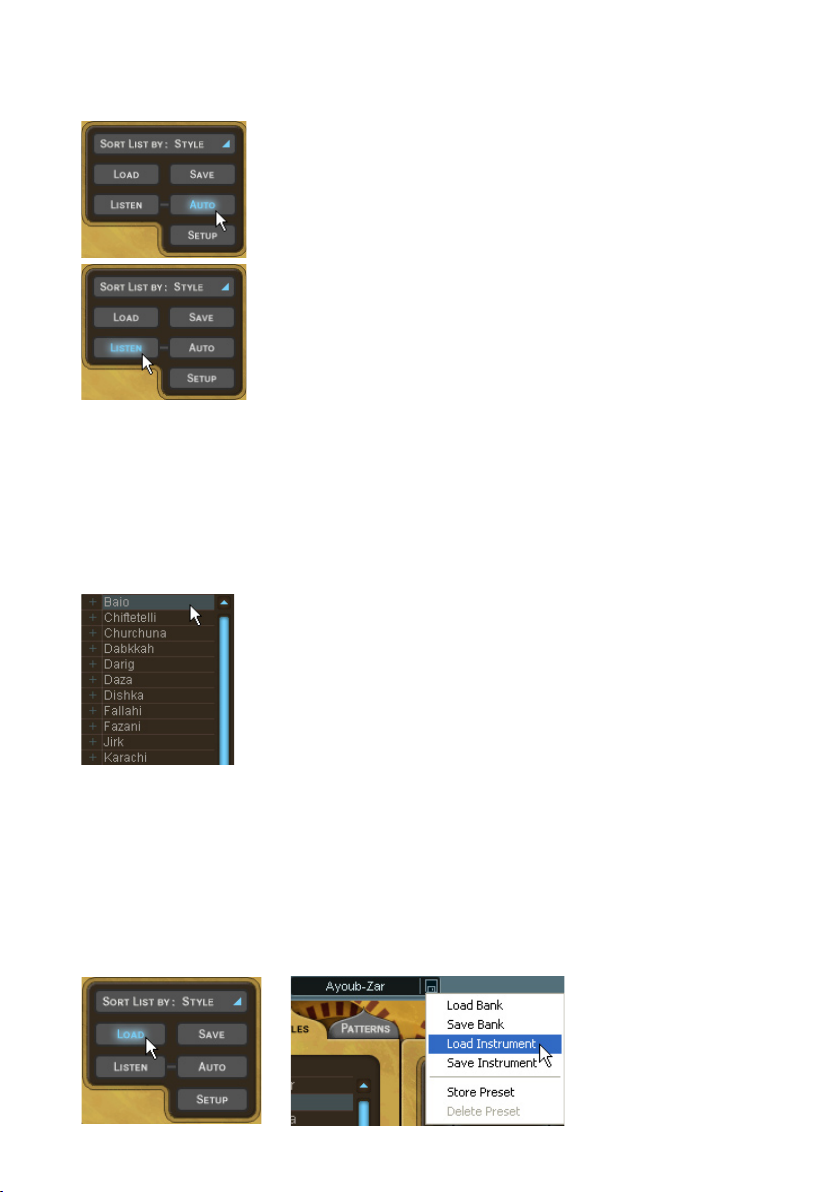
< Previewing Styles
Before loading a Style you might like to hear what it sounds like. A short example of every Style (played at it’s
original tempo) can be heard by simply choosing one in the Styles Selector and clicking Listen.
If you would like to hear a preview every time you click a Style in the Styles
Selector then click Auto.
Listen is disabled when Darbuka is playing.
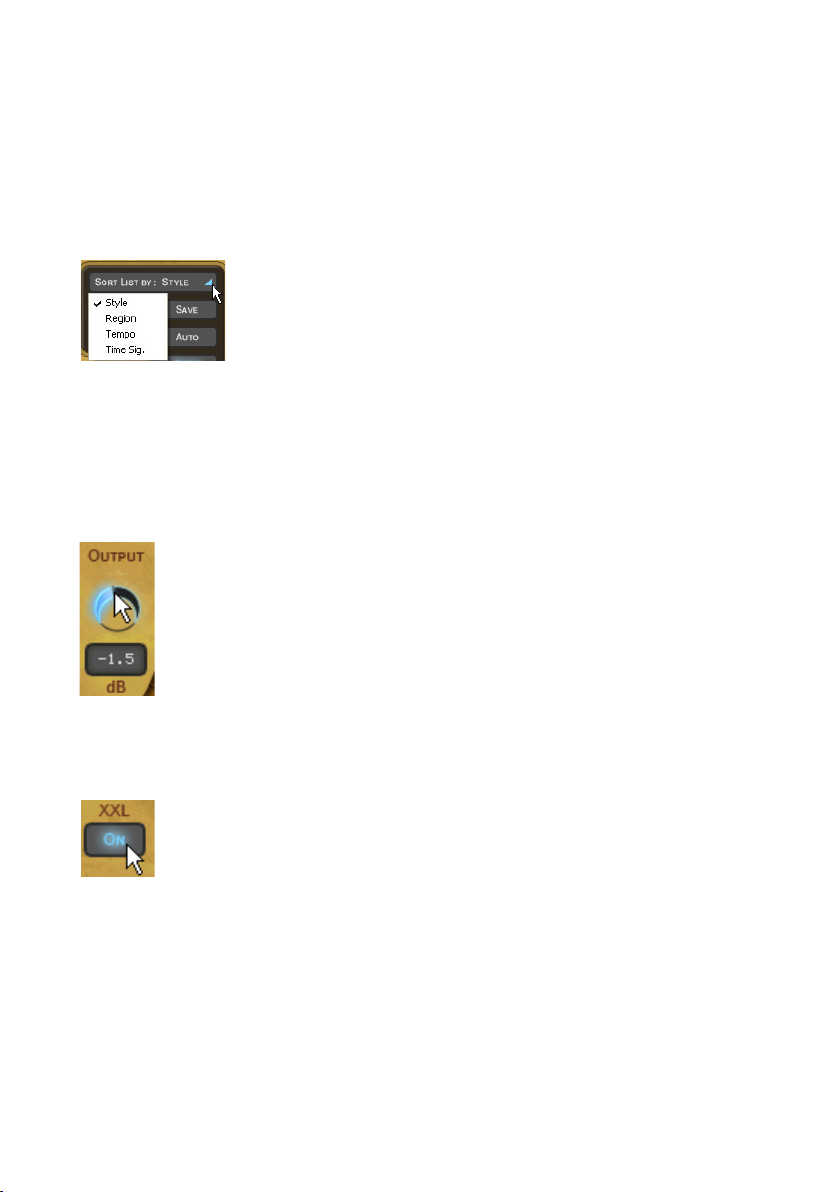
< Style Info
When you click a Style in the Styles Selector, information such as tempo and time signature is displayed in the
info display in the top center of Darbuka. You can sort Styles by tempo and time signature by using the Sort List
option below the Styles Selector.
< Loading Styles
There are four easy ways to load a Style:
1. By double clicking in the Styles Selector menu on the left of Darbuka.
The Styles Selector.
2. Using Drag and Drop: Click the Style you want from the Styles Selector with your left mouse button, drag
it anywhere to the right of the Styles Selector, and release your mouse button.
When using Drag and Drop a ‘+’ symbol is displayed next to your mouse pointer.
3. Highlighting a Style in the Styles Selector and clicking Load.
4. Using the usual Load Instrument menu provided by your host application.
The last option will probably be the slowest since you will have to navigate to the folder containing the
Styles.
6
3
English
Page 5
< Playing Styles
Now that you’ve loaded a Style, just play a note on your MIDI keyboard (try C2) and Darbuka will start to play
at the tempo of your host application, even if it is currently stopped. Try playing another note (C#2 for example),
Darbuka will change to another variation of the rhythm.
If you want Darbuka to stop, play C6 on your MIDI keyboard.
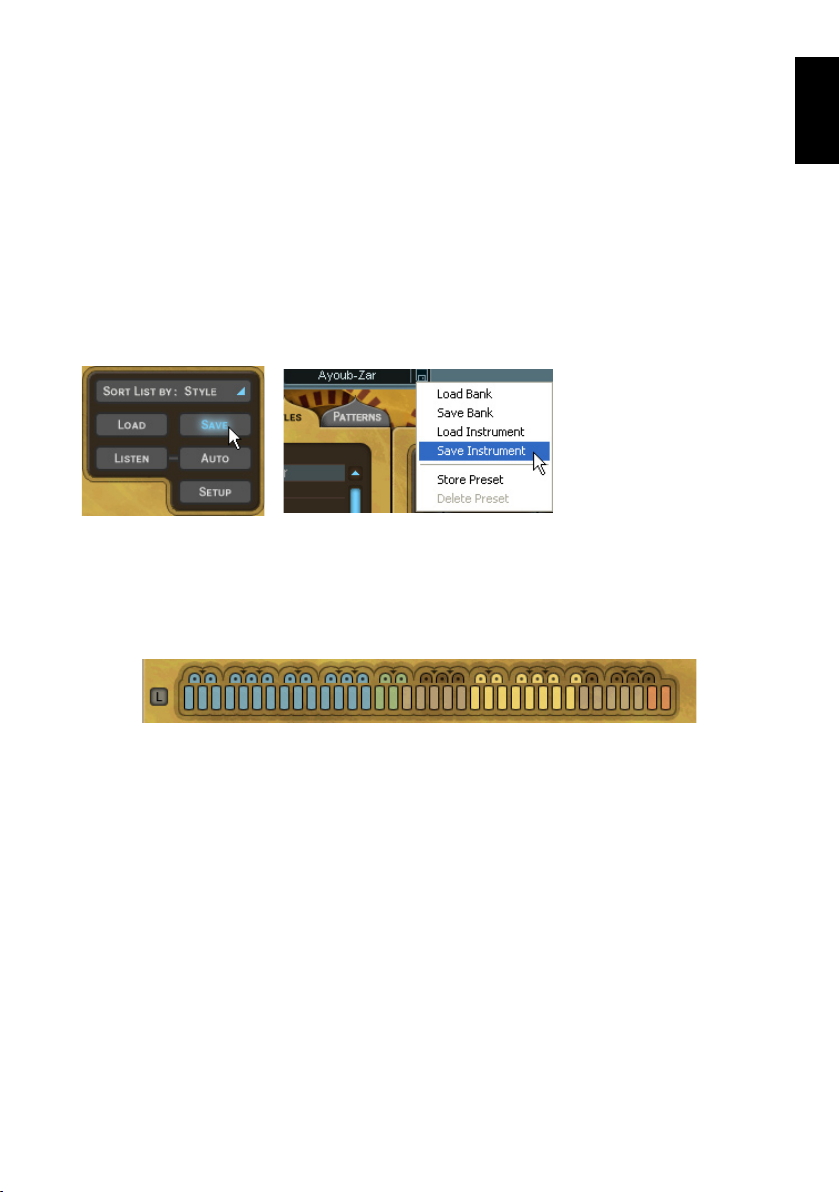
< Saving Styles
If you are using Darbuka in a sequencer project you don’t need to save the Style you have been working on;
all settings in Darbuka are saved with your song. If you’ve customized or created your own Styles and want to
save them, there are two ways:
1. Click the Save button (bottom left) and you’ll be presented with a familiar Save dialog
or
2. choose Save Instrument from the usual Save/Load menu provided by your host application.
When you save a Style in Darbuka it will automatically be included in the Styles Selector listing.
The Color Keyboard
The funky looking kyboard at the bottom of Darbuka is not just a fine example of modern interface design,
you can also play it by clicking your mouse on any key. The first key at the left of the Color Keyboard is MIDI
note C1 (36).
English
The Color Keyboard.
Our GUI programmer chose his favorite food colors for the keyboard display, not only are they mouth watering
but they also provide a lot of useful information about what Darbuka will do when you play a MIDI key or click
the Color Keyboard.
• Blue: The blue keys show normal rhythm grooves. The light blue color is for lighter grooves (with less
instruments), the dark blue for fuller grooves.
The color shading can be changed by you to help you find the rhythms you want more quickly, particularly
useful in a live situation (see Color Coding in the Performing With Darbuka chapter of this manual).
• Green: Green keys are for fills. Light green is for light fills or solos and dark green for fuller fills.
• Yellow: The yellow keys are Mute Keys. When played they will mute or unmute Tracks for easy arranging
“on the fly”. For more info check out the Performing With Darbuka chapter of this manual.
• Red: The red keys are the Stop and End keys for Darbuka. Whenever you press a blue or green key
Darbuka will play, so there is no need for a start key. The first of the red keys will play a rhythm ending
and the second will stop Darbuka instantly.
All color keys can be assigned to any MIDI note (see the chapter The Edit Page.
Darbuka • User Guide
4
7
Page 6

Latch
The small blue square to the left of the Color Keyboard is the Latch Mode Selector.
When Latch mode is active Darbuka plays continuously from the moment you play the first
key until it receives a Stop or End. When Latch mode is off Darbuka will only play while you
are holding a key down.
What Is A Track
A Track is the performance of a single percussionist, complete with all of the
variations, fills and solos he has played for a Style. All Tracks in Darbuka can be
loaded independently, added to an already loaded Style, or replace any loaded
Track.
To see the Tracks available in a Style just click the small ‘+’ arrow to the left of the
Style name in the Styles Selector.
< Track Tabs
All Tracks loaded into Darbuka (up to fourteen) are displayed using Track Tabs.
The Track Tabs.
Track Tabs are shown on all pages of Darbuka and display each Track’s name, a level meter and the Track’s
Solo and Mute status.
Every Track can be independently edited in a multitude of ways. To select a Track for editing, just click it’s tab;
all other Track Tabs become unselected (gray).
The Darbuka is selected.
Your computer’s [arrow left] and [arrow right] keys select Tracks to the left and right. The [Home] and [End] keys
take you to the first and last Track Tabs.
< Scrolling Track Tabs
Darbuka displays up to eight Track Tabs at a time but a Style may have as many as fourteen Tracks. There are
two ways to see Tracks not currently displayed:
• Place your mouse pointer above any Track Tab and use your mouse wheel.
or
• Click the scroll arrows at the right of the Track Tabs.
The Track scroll arrows.
8
3
English
Page 7
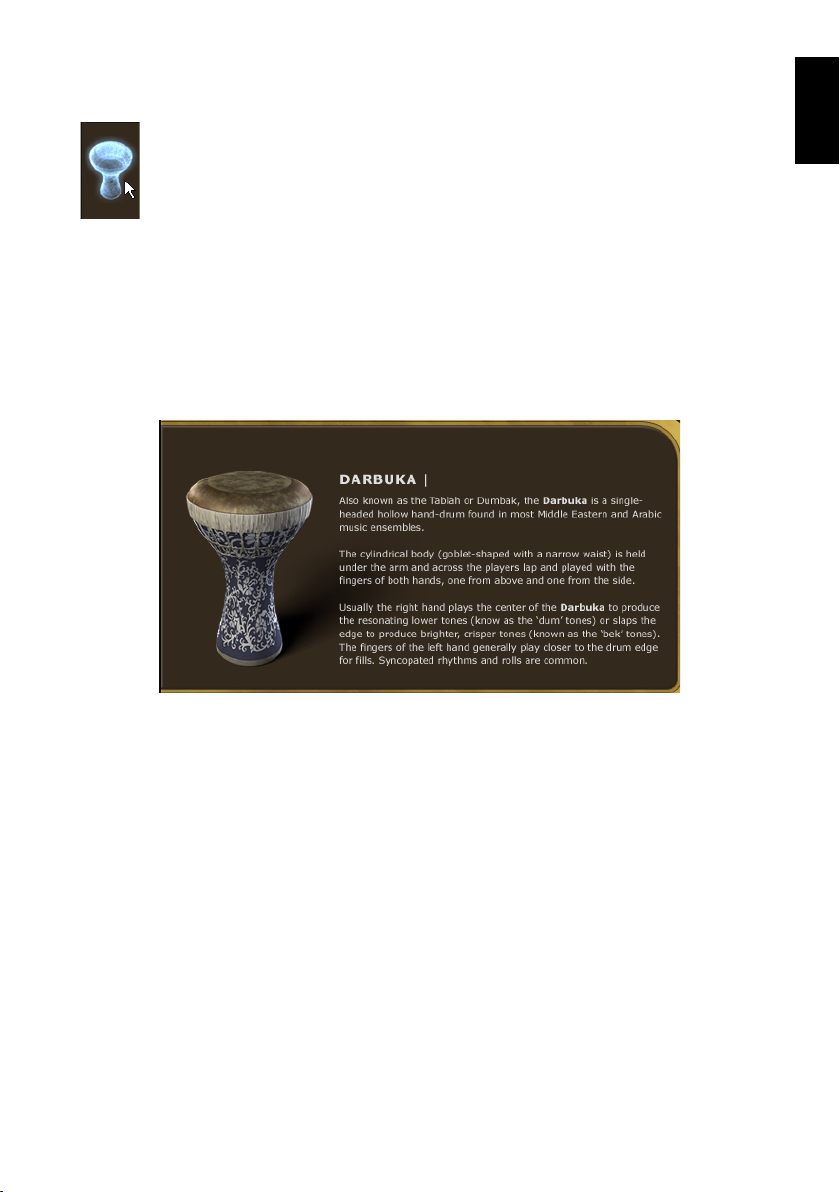
< The Instrument Symbols
Below the Track Tabs is a dark rectangular area containing a colored symbol for the percussion instrument
played by a Track. This area also contains a few functions that are worth mentioning.
The Instrument Symbols area.
• Track Volumes: Although most of your mixing will happen on Darbuka’s Mix Page we’ve hidden a
handy little feature that no-one except you guys who read manuals will know about. Using your mouse
wheel in the instrument symbol area allows you to control Track volumes on the Play Page. Give it a try,
it’s pretty useful.
Hold [Shift] for fine adjustment.
• Track Info: Right clicking (Mac: [Ctrl]-Click) in the instrument symbol area will open an information box
with a picture and description of the instrument played on that track. This information is always displayed
in English but is also available in other languages in “The Instruments” chapter of this manual.
English
• Track Mute Status: When a track is muted the instrument symbol changes from colored to grey. This
way you always have an overview of all muted instruments.
< Adding Tracks
When you load or add a Track to a Style, you are adding all of the properties it formerly had, including
information about what is played by which MIDI keys and sound edit settings.
To add a Track either:
• Double click it in the Styles Selector menu
or
• drag and drop the Track anywhere to the right of the Styles Selector (except onto an existing Track Tab)
and release your mouse button
or
• select the Track in the Styles Selector and click Load.
< Replacing Tracks
To replace a Track simply drag and drop the new Track onto the tab of the Track you wish to replace. This works
for Tracks listed in the Styles Selector as well as for Track Tabs.
< Copying Tracks
To make a copy of a Track click and drag the Track Tab to an empty place in the Track Tabs display.
Darbuka • User Guide
4
9
Page 8
< Moving Tracks
To move a Track to a different Tab position hold [Shift] and drag and drop the Tab.
< Deleting Tracks
To delete or remove an already loaded Track click it’s Track Tab, drag it above or below the Tabs strip and
release your mouse button.
Sorting Styles In The Styles Selector
To help you find the Style you need quickly and easily Darbuka has three sorting modes.
• Name: With this option selected Styles are displayed in alphabetical order.
• Darbuka Region: All of the percussion grooves in Darbuka come from particular
geographical regions. When you choose Sort List By Region you can view Styles
according to their area of origin.
• Type: Choosing Sort List By Type, displays Styles according to their cultural
• Tempo: Although Darbuka plays Styles at any tempo, sometimes you might like to choose a Style that
was recorded at something close to your song tempo, or play a Style at it’s traditional tempo. The Tempo
option collects all Styles of a similar original tempo and groups them into folders by bpm (beats per
minute).
• Time Signature: When this option is selected all Styles are sorted and displayed in their recorded
traditional time signatures.
origin.
Changing Darbuka’s Master Volume
All of the percussion Tracks in Darbuka have been mixed and Darbuka’s output level optimized
for all Styles, but you still may find it occasionally useful to turn the whole percussion instrument
up or down in volume. Just use the Output knob in the lower right hand corner.
XXL Mode
All of the percussion performances in Darbuka have been recorded and processed in extremely high audio
quality, This also means large file sizes and this is XXL Mode.
To save you loading time and RAM we’ve provided a very efficient professional quality Normal
playback mode (which uses a “lossless” form of data compression) and a full quality XXL
mode. The difference between these modes is virtually inaudible. Darbuka defaults to playing
in Normal mode but if loading time and RAM are no issue for you just click the XXL On
feature.
If you would like Darbuka to operate always in XXL mode, then choose XXL On and click the Save As Defaults
feature on the Setup Page.
10
3
English
Page 9

The Play Page
The first page you’ll see when you start Darbuka is the
Play Page. On this page you will find most of the general
controls for the whole percussion instrument, the types of
controls that affect all or most Tracks being played in a
Style. Let’s take a deeper look at what’s possible and what
might be useful when making music with Darbuka .
Speed
The Speed control allows you to run Darbuka at normal,
half or double your song tempo. This can be very useful
in some situations:
Maybe you’re working on a slow groove masterpiece that’s 80 beats per minute but running your host
application at 160, you’ve been working for months and you realize that the last thing you need is some
Darbukas Congas in the middle eight, you load a Style in anticipation and your lovely delicate middle eight is
now full of drummers on Guarana, the cat gives birth, light bulbs explode..... Never fear, we at Wizoo value
our cats and our light bulbs, with a casual flick of the Speed switch to Half the world will become normal again
and hey the Darbukas sound pretty good in there too.
Speed control can also be quite a useful creative tool, allowing you the flexibility to play a nice syncopated 80
BPM groove over a 160 bpm Drum’n’Bass track or an interesting half time groove over a 110 bpm pop song. It’s
up to you, Darbuka has no tempo limits.
Variance
Variance is a sophisticated feature with a very simple control. What it does is replace percussion hits within
each Track with other percussion hits that sound similar from within the Style, in effect adding variation to each
Track. A setting of Max replaces a lot of hits with similar hits and the Off setting plays the groove exactly as the
original percussionists played it.
English
Timing
The Timing control might also be called humanize or even quantize. Setting Timing to the center value of fifty
percent plays the percussion grooves with all the natural anticipations and feel of the real players, increasing
the value towards Tight quantizes the timing to strict machine like precision, and decreasing towards Loose
exaggerates the natural live timing.
Quantize
Quantize sets a maximum musical timing resolution. Any percussion hits that fall outside of this timing grid
are removed. For example you may like a particular Style but there are a lot of 32nd and 64th note rolls and
fills and what you’d really like is for the groove to be simpler. Try setting Quantize to a value of 1/16th, all of the
busy fills are removed and only the notes that fall close to a 16th note in the bar remain, in effect simplifying
the groove. Of course you can simplify Styles quite a lot, right down to a1/4 note value.
Experimenting with combinations of the Tempo and Quantize features can lead to interesting and useful
rhythmic variations.
Swing
Swing is a feature most are familiar with. This control pushes the timing of all Tracks in a Style from their original
position in a groove towards a triplet timing. In some cases a Style is already naturally playing a triplet feel in
which case the Swing control pushes the triplet beats to an even later position in the bar.
Darbuka • User Guide
4
11
Page 10

Muting Track Types
The Tracks activation section is a handy time saving feature and useful in many
situations. All Tracks have been grouped together by type, the Bass, Mid and High
buttons allow you to quickly activate or deactivate families of Tracks. This can be
useful when previewing Styles or Patterns, when mixing, or maybe you only want to
use particular percussion instruments in your composition.
Using the Tracks activation section will definitely save you time.
Group Tracks Assigned
High Riqq, Sagat, Tura, Shaker, Claps
Mid Darbuka, Bendir, Bongos
Bass Douhola, Reverse
Complexity
Despite it’s name, Complexity is easy to use and might even be called “simplicity”. What it does is remove the
least important percussion hits played by each Track in the Style. A setting of Mid removes some hits and the
Low setting removes all but the most essential hits in the groove.
Master Ambience
Ambience is a very high quality surround compatible reverb. Each percussion Track in a Style has it’s own
Ambience send amount, set in the Track Mix on the Mix Page (See the Track Mix section of this manual).
All Styles have a light natural Ambience setting already.
< Ambience In Stereo
When Darbuka is used in Stereo mode (set in the Main Outputs section of the
Setup Page) the dry percussion mix is sent to stereo output 1 and the Ambience
signal is sent to stereo output 2 in your host application so you can easily mix .
Support for additional outputs in AudioUnit and RTAS hosts currently depends on
the version of the host application being used. To ensure maximum compatibility,
the initial version of Darbuka only provides a stereo output in AudioUnit or RTAS
hosts, and as a result the Front/Rear and Output controls on the Mix page will
not function. As soon as AudioUnit and RTAS host updates are available, this
functionality will be implemented in Darbuka and an update will be released on
the Wizoo website.
< Ambience In Surround
In Surround mode (Main Outputs section of the Setup Page) the dry percussion
mix and Ambience outputs are combined. Front left and right (wet and dry) go
to the first stereo output, and rear left and right (wet and dry) go to the second
stereo output.
Because the Master Ambience is a true surround reverb you will notice that when you move Tracks within the
surround panorama, the sound character of the Ambience will change just like in a natural room. For example,
if you pan a Track to the left rear corner, the Ambience level and early reflections of the Ambience will be more
pronounced for that Track in the left rear corner.
12
3
English
Page 11

All Styles already have a light Ambience but there’s nothing to stop you from adjusting the Ambience to
whatever you like. Just select an Ambience type from the drop down list, set the Ambience output level using
the Mix control and adjust the length of your Ambience with the Time parameter.
< Ambience Controls
Ambience has three simple and effective parameters.
• Choose the Ambience character from the drop down menu at the bottom of the Ambience feature.
• Set a balance between Ambience and direct signal with the Mix knob.
• Set an Ambience length with the Time parameter.
Master Equalizer
The Master Equalizer is a two band EQ, useful for sweetening your overall mix. As with the Master Dynamics
and Ambience, the Master Equalizer is a four channel surround compatible effect.
The Master Equalizer is also applied to the Ambience signal.
Master Dynamics
The Master Dynamics is a high quality compressor that can be applied to control
the dynamic range of the stereo and surround channels. To use the Master
Dynamics just select one of the three presets from the drop down menu and use
the Density control to set the compression amount you would like.
• Fast: The Fast preset maximizes the volume of Tracks while suppressing their
attacks.
• Tight: Tight controls the dynamic range of the attack and main body of the
percussion instruments in the track equally.
• Slow: Slow accentuates instrument attacks while minimizing un-natural
sounding compression artefacts.
English
< Stereo And Surround
In stereo mode the dry percussion mix output and the Ambience stereo output are linked, meaning that when
the compressor is reacting to a loud signal in the dry output (for example) the compression character is also
reflected in the Ambience output.
In surround mode the Dynamics affect all four channels simultaneously, meaning that if the compression
reacts to a loud Track in the rear right channel then all other surround channels are also affected.
Support for additional outputs in AudioUnit and RTAS hosts currently depends on the version of the host
application being used. To ensure maximum compatibility, the initial version of Darbuka only provides a stereo
output in AudioUnit or RTAS hosts, and as a result the Front/Rear and Output controls on the Mix page will not
function. As soon as AudioUnit and RTAS host updates are available, this functionality will be implemented in
Darbuka and an update will be released on the Wizoo website.
Darbuka • User Guide
4
13
Page 12

The Mix Page
Mixing Tracks
The Mix Page offers all you need to balance, pan,
equalize and add effects to any of the Tracks in your
percussion groove, as well as a few other handy
features.
The Mix Page parameters affect a Track for all
Patterns used in the Style. If you want to tweak a
Track just for particular Patterns check out the Part
Parameters section of this manual).
Mixing Tracks Using The Stage
The fastest and easiest way to mix or balance Tracks
is by using the Stage feature at the top of the Mix
Page.
The Stage allows you to mix Tracks visually by simply
clicking their instrument symbols and dragging
them.
• Instrument symbols of muted tracks appear grey but are still fully functional, i.e. can be selected and
moved.
• Limiting movement: By holding [Shift]/[Alt] you can limit dragging to horizontal/vertical direction.
< Vertical Movement
To choose which mix parameter is changed when moving a Track vertically on the Stage click in the upper left
corner of the Stage and make a selection from the drop down menu. Alternatively you can also go to the Mix
Page Vertical Axis menu in the Setup Page and make a selection from the drop down menu there.
• Off: When Off is chosen, vertical movement of a Symbol in the Stage has
no effect on the Track.
• Level: When Level is selected, vertical movement in the Stage controls
individual Track volumes.
• Ambience Send: This option allows you to visually mix Ambience Send
amounts for each Track via the Stage.
• Front/Rear: This may be the fastest and most intuitive setting for creating a
surround panorama. The top of the Stage becomes the front left and right,
the bottom becomes the rear left and right.
• Room Mode: Just imagine you’re in a room, surrounded by percussion
instruments. Simply put, that’s what we call “Room Mode”.
While in all other modes the Stage is a X/Y coordinate system, here the Stage represents a top view on a real
recording room with the listener in the center and the instruments around him. The borders of the Stage acting
like real walls.
Of course, the Room Mode is most realistic in Surround Mode, because only there are the front and rear
positions reflected in the resulting audio signal.
14
3
English
Page 13

In Room Mode, Level, Ambience and Pan controls are linked together to emulate the natural acoustic behaviour
of a room. I.e. when you move an instrument away from the center (listener’s position) to the top right corner,
the following things happen at the same time:
• Level slightly decreases.
• Ambience increases in level (less direct signal, more reflections from the walls) and changes in character
to match the surround position as well as the exact distances between listener, instrument and walls.
• Pan moves all the way to the right.
• Front/Rear moves all the way to the front.
You can regard the listener – which in fact is the audio output – as being a surround microphone setup at the
listener position.
< Horizontal Movement
Horizontal movement of Tracks on the Stage will always affect the panning of the Tracks.
Occasionally Tracks may obscure each other on the stage, to select and bring a Track to the front simply click
it’s Track Tab.
Anytime a Track is moved on the Stage the relevant parameter knobs will move to reflect the changes.
The Track Mixer
Each Track used in a Style has it’s own Track Mixer containing the most common and useful features you’ll
need to set your Track mix.
To choose a Track to mix just click it’s Track Tab.
The Track Mixer for the snare is displayed.
English
• You might find the Track Solo and Mute buttons useful when balancing your mix.
• Most of the Track Mixer features are just like what you would find on a mixing console or in your host
application mixer.
< EQ
Each Track has it’s own three band equalizer. To EQ a Track simply click and hold your left mouse button over
any of the three blue handles in the EQ display. Moving your mouse horizontally adjusts the center frequency
of the equalizer band, vertical movement controls the volume of the frequency area.
Holding the [Alt] key and moving horizontally allows you to define the Q setting (or range of frequencies
affected) for the middle band of the equalizer.
Control Clicking a blue handle(Mac: [Cmd]-Click) resets the Equalizer band
level to zero.
The EQ On/off button (top left corner) could be useful for comparing the effect
of your equalization on the original signal.
Darbuka • User Guide
4
15
Page 14

< Punch
Punch is a very powerful and creative control, allowing you to change the shape of an instrument’s attack
and body. Darbuka This could be used for example to subtly emphasize the attack of a Douhola, to make the
dynamic range of a Sagat less extreme or to make a Bendir sound more processed and electronic.
Punch has four modes, each with a distinctive character and sound shaping quality. To emphasize the effect
of the Punch feature just turn the knob clockwise, gain reduction is displayed by the meter surrounding the
Punch knob.
• Power: As it’s name suggests Power will make a Track sound more powerful by
controlling the volume of the attack portion of the instruments in a Track and raising the
level of the body of the instruments.
• Snap: Snap is useful to accentuate the attack of instruments, to make them poke out
of the mix.
• Hard: Hard mode is a very strong compression setting that really forces the quieter
aspects of each percussion hit to become very loud.
• Soft: or a gentle amount of Punch control over a Track use the Soft mode, this affects
the attack and the body in equal amounts but doesn’t have the force of the other Punch
modes.
Using extreme amounts of Punch can lead to some surprising and interesting results.
< Level
The Level control in the Track Mixer allows you to set the general volume of each Track in the Style. This control
(as with all others in the Track Mixer) affects the whole Track for all Patterns used in a Style.
To change the volume of a Track for a particular Pattern, take a look at the Part Parameters section of this
manual.
< Pan
Places a Track within the stereo image and controls the left/right position when working in surround mode.
Graphical stereo panning and surround position placement is possible using the Darbuka Stage.
< Ambience
To set the send amount for any Track to the Master Ambience, use the Ambience Send feature in the Track
Mixer.
The controls for the Master Ambience are found on the Play Page.
< Assigning Tracks To Outputs
If you would like to send Tracks to individual outputs for a special EQ, effect or to simply have them on their own
channels in your host application or mixer, no problem, there are up to fourteen extra outputs available.
Support for additional outputs in AudioUnit and RTAS hosts currently depends on the
version of the host application being used. To ensure maximum compatibility, the initial
version of Darbuka only provides a stereo output in AudioUnit or RTAS hosts, and as a
result the Front/Rear and Output controls on the Mix page will not function. As soon as
AudioUnit and RTAS host updates are available, this functionality will be implemented
in Darbuka and an update will be released on the Wizoo website.
To assign a Track to an individual output simply select it’s Track Tab and choose an
output from the Indiv. Output drop down menu.
16
3
English
Page 15

There are no individual outputs available by default. To change this, go to the Individual Outputs menu on the
Setup page and make a selection from the drop down menu.
For the new outputs to become available you must close and restart Darbuka .
Working In Surround
Darbuka can be used just as easily in multi-channel surround as in
the stereo world. Not only is it fast and flexible to place Tracks within
a surround panorama but the Equalizer, Dynamics and Ambience
features on the Play page are all real multi-channel surround
effects.
< Enabling Surround Mode
To use four channel surround just select the Setup Page (bottom left of the instrument) and choose Surround
from the Main Outputs drop down menu.
< Placing Tracks In The Surround Panorama
By far the easiest and most intuitive way to place Tracks in the surround mix is to
use the Front/Rear option of the Stage described earlier in this manual.
If you don’t want to use the Stage for editing surround panorama then use the
Pan control in the Track Mixer to set a Track’s left/right position and the Rear
control for the front/rear position.
The multi-channel surround Ambience adjusts automatically to the panorama
position of each Track.
English
The Edit Page
Whether you want to become the master
arranger of the percussion group or simply
want to alter the performances of a player
for a groove or two, getting to know the Edit
Page will be worth your while: this is your
conductor’s baton.
What Is A Part?
A Part is a single block or entry in the Pattern
Arranger which allows you to determine
which percussion groove each Track will
play in a Pattern.
A Part.
Each Part has a drop down menu of percussion grooves or fills that can be individually edited and modified
via the Part Parameters described later in this chapter.
Darbuka • User Guide
4
17
Page 16

What Is A Pattern?
A Pattern is an arrangement of grooves, a collection of Parts, assigned to your MIDI keyboard.
A Pattern.
A Pattern can contain up to fourteen Tracks, each playing any groove available in it’s Part menu.
Arranging With Darbuka
Arranging with Darbuka is fast, intuitive and easy. Probably the best way to get familiar with the Pattern
Arranger is to do a fast tutorial. We’ll even try a simple edit so you get an idea of what’s possible along the
way.
1. First load the Style ‘Malfuf’ by double clicking it in the Styles Selector.
2. Click the Edit Tab to see the Edit Page (top right of Darbuka).
3. Play C2 on your MIDI keyboard (or click the second C note on the Color Keyboard). The percussion
Pattern and it’s Parts will become highlighted with a white border and play.
4. Right click (Mac: [Ctrl]-Click) on the Darbuka 1 Part “Dar 01” in the second column of the highlighted row
of Parts and select “Dar 03” from the drop down list. You will hear that the Darbuka rhythm is less busy
now.
The listing at the top of the menu shows all available performances for the Track.
5. Let’s add some Sagat. Right-click (Mac: [Ctrl]-Click) in the same Pattern row in the Sagat column and
select “Sag 01”. Now we have a Sagat playing quite busily. Let’s simplify it.
6. Click the “Sag 01” Part so that only it has the white border highlight and select Low from the Complexity
menu in the Part Parameters below. Now the Sagat is playing a simpler 8th note groove.
This tutorial shows just how simple it is to change, arrange or add Parts in the Pattern Arranger.
18
3
English
Page 17

The Pattern Selector
The list you see at the left of Darbuka on the Edit Page is the Pattern Selector.
The Pattern Selector displays the MIDI note used to play a Pattern (in the left
column) and it’s name. When clicked, a Pattern and all of it’s Parts become
highlighted for editing.
< Naming A Pattern
To name or rename a Pattern simply double click the name, type in the new
name and hit [Enter] or [Return] on your computer keyboard.
< Moving Patterns
Patterns in the Pattern Selector can be moved, copied or removed using the
cut, copy and paste buttons displayed directly below the Pattern Selector.
Simply select a Pattern, click Cut or Copy, select a destination Pattern, and
choose Paste.
Setting Play Modes
Every pattern (or MIDI key) in a Style has a definition that tells it how to play, whether it
be a normal pattern, a fill, the ending or stop. To choose the Play Mode right-click (Mac:
[Ctrl]-Click) a Pattern in the Pattern Selector and a drop down menu appears with the
following options:
The play modes are color coded in the Pattern Selector, Part Arranger and on the Color
Keyboard and are explained below.
• Normal (Blue): Normal Patterns play repetitively until another Pattern or the Stop and End keys are
played.
All of the Patterns in the factory Styles assigned between C1 and B2 on your MIDI keyboard have a Normal
setting.
English
• Fill/Short Fill (Green): Fills only play for one bar in length and then return to the last Normal Pattern that
was playing. Short Fill is exactly the same as Fill but only two beats in length.
• End (Bright Red): Assigns the global Ending command to the Pattern. When the Ending key is played
Darbuka plays until the end of it’s current bar and then stops. Some Endings have an extra hit on the
first beat of the next bar, these Styles end this way when played traditionally.
When Darbuka is stopped Endings can be played via MIDI or clicking the Color Keyboard.
• Stop (Full Red): Assigns the global Stop command to the Pattern. Darbuka will stop playing instantly
after receiving a Stop.
Color Shading
In the Play Mode menu you will also find an option to highlight patterns for easier identification.
• Highlight: Allows you to highlight a color key (brighter shading). This can be useful for tagging important
Patterns for a live performance or for labeling favorite Patterns in a studio project.
In the factory presets, lighter variations are usually highlighted.
Arranging in the Pattern Arranger
The Pattern Arranger is the matrix on the Edit Page showing Patterns in the horizontal axis and Tracks in the
vertical axis. In the following section you will find all of the functions to need to work quickly and easily in the
Pattern Arranger.
Darbuka • User Guide
4
19
Page 18

< Using The Mouse Wheel
Using a Mouse wheel will allow you to scroll or navigate quickly through the Patterns and Parts.
• The Mouse Wheel scrolls the Pattern Selector and Pattern Arranger vertically.
• When used above the Track Tabs the Mouse Wheel scrolls the Tabs left and right.
< Using Key Commands
• [Arrow Left] and [Arrow Right]: Select the previous or next Track.
• [Arrow Up] and [Arrow Down]: Select the previous or next Pattern.
• [Home] and [End] keys: Move the Track Tabs to the first or last Track.
• [M] key: Mute/Unmute the current Track.
• [S] key: Solo/Unsolo the current Track.
Using [Shift][M] or [Shift][S] clears all mutes or solos.
< Choosing All Parts In A Pattern
There are three easy ways to select all Parts in a Pattern:
• Clicking in the Pattern menu.
• Clicking a key on the Color keyboard.
• Playing a note on your MIDI keyboard or host application.
< Choosing A Whole Track
To choose a whole Track click the Track Tab.
All Parts for a Track have been selected for editing.
< Choosing A Single Part
To choose a single Part click it in the Pattern Arranger.
20
3
English
Page 19
Selecting Parts
A similar drop down menu to the one in the Pattern Arranger is used to select Parts within a Track.
Right click (Mac: [Ctrl]-Click) a Part to open the menu and choose from the list.
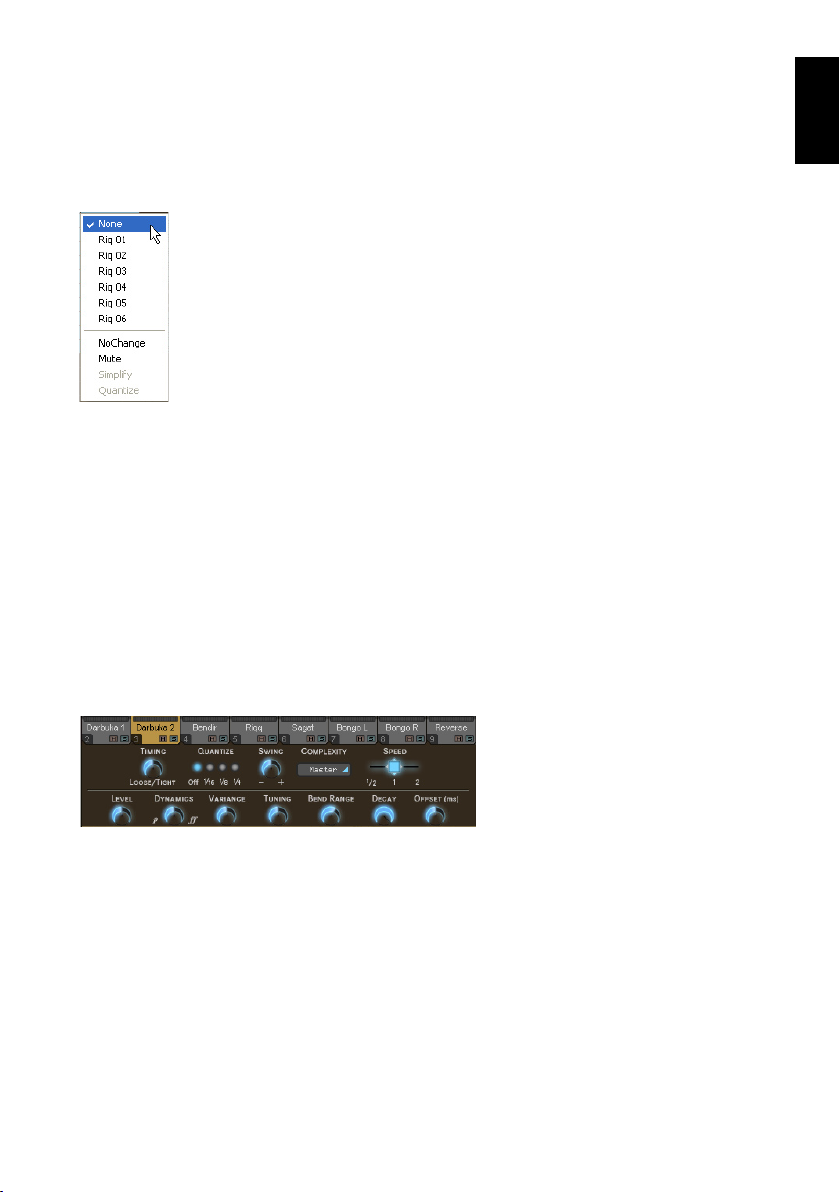
< Special Options In The Part Menu
Included in the Part Menu are some special options.
• None: Choosing None in the Part menu means that nothing will be played in the Track
for that Pattern.
• Default: Restores the part that was selected when you entered the Edit Page. This is
useful if you have made changes to a pattern that you want to take back.
This option can only remember changes and restore default settings until you leave the
Edit Page.
•
No Change: No Change means that the Track will continue to play the previously playing
Pattern chosen.
• Mute: Any key in every Style can be assigned to mute any Tracks. These are called Track Mute Keys and
are colored yellow on the Color Keyboard. Using this option in the Part Menu will mute the chosen Track
for that Part. Mute Keys are particularly useful for arranging and performing and you can very easily
arrange favorite Track mute groups.
Mute Keys for each Track (from 1-14) are assigned to notes C4-C#5 by default.
• Simplify: Simplify is only available for Fill Patterns. When active the Part is automatically thinned out,
allowing you to use the same fills to create variations.
• Quantize: Quantize is also only available for Fill Patterns and works in the same way as the Quantize
feature on the Play Page. Technically Quantize removes all percussion hits busier than an 1/8th note
timing.
< The Part Parameters
The same global features for the whole instrument found on the Play Page are also available for individual
Parts, Patterns and Tracks, as well as a few more. You may be surprised at just how much you can shape and
mould each performance in every Style.
English
To edit Part Parameters you must first select the Parts, Tracks or Patterns you wish to change.
The first row of features in the Part Parameters should already be quite familiar to you since a lot of them exist
on the Play page as global controls.
• Timing: Timing governs the tightness of the playing of the selected Parts. The default setting of 50
percent leaves the original percussion player’s performance unchanged, increasing towards the Tight
setting gradually quantizes the timing until all hits are precisely in time and decreasing towards Loose
exaggerates the natural feel.
• Quantize: Quantize sets the highest possible note value, all percussion hits outside of this value are
removed. For example when 1/8 is set all 16th notes are removed, they don’t fall within the 8th note
timing grid.
• Swing: Swing pushes the timing of the selected Tracks towards a triplet feel. In the situation where an
Track is already naturally playing a triplet feel, the Swing control will push the triplet beats to an even
later position in the bar.
Darbuka • User Guide
4
21
Page 20

• Complexity:This parameters thins out the Part removing the less important percussion hits. An algorithm
automatically evaluates the most important percussion hits based on volume and bar position.
Coupled with Quantize, the Complexity feature allows a lot of flexibility for making variations of grooves
while arranging.
Complexity has a default setting of Master, meaning that the Track is governed by the master Complexity
setting on the Play Page. When an Track is assigned a Complexity value in the Part Parameters the master
Complexity setting is ignored.
• Speed: As with the Play Page Speed control this plays the selected Parts at double or half the speed
they would naturally play.
• Level: The Level control sets the volume of the currently selected Parts relative to main Level control
found on the Mix page.
• Dynamics: This applies a sophisticated algorithm to emulate the playing dynamics of the performing
musician (the knob range goes from piano to fortissimo). It is very useful for taking back or bringing up
an instrument within the pattern.
• Variance: Variance replaces percussion hits for the selected Parts with similar sounding hits, adding
variation. The Off setting plays the groove exactly as it was originally played, a setting of Max replaces
a lot of hits.
• Tuning: Tuning adjusts the pitch of the selected Parts, this could be useful when matching a tracks
tuning to other musical instruments or even as a creative control since the percussion Tracks can sound
quite interesting at extreme Tuning settings.
Extreme Tuning settings will sound better when using XXL On.
• Bend Range: Darbuka responds to pitch wheel information from your MIDI keyboard or Host Application,
the amount any Track will bend is controlled by this parameter.
The Bend Range setting is global for a Track, meaning that it affects the Track for all Parts in the Style.
• Decay: Adjusting the Decay parameter will reduce the length of time each percussion hit takes to fade
out. The natural length of each hit is played when set to 100 percent.
• Offset (ms): The Offset control moves selected Parts forward or backward in milliseconds, allowing you
to subtly change the way the percussion groove feels. Turning Offset to the left advances the Track’s
performance ahead of the beat, to the right delays it.
Performing with Darbuka
In this chapter we’ll look at some of the features that will help you get the most out of Darbuka when performing
both live and in the studio.
Using MIDI Controller CCs
By far the most flexible way to shape and control a performance is by using MIDI controllers. MIDI Controllers
are standard commands that can be sent from the Mod Wheel, pedals or knobs of your keyboard (or from
your Host Application) and can be assigned to a multitude of parameters, allowing you to play, edit, tweak or
record all kinds of variation in a track.
Most features in Darbuka (except those found in the Edit Page) can be assigned MIDI Controllers, simply right
click (Mac: [Ctrl]-Click) a feature and a menu like this will appear.
• The top line of the menu displays the name of the feature you’ve selected (in
this case the Ambience Mix).
• The second line shows the MIDI Controller number assigned to the feature, in
this case Controller number 46.
If no MIDI Controller is assigned “No CC” will be displayed.
22
3
English
Page 21

• The third line displays the Learn option. Many keyboards these days have the possibility to output
MIDI Controller information via their knobs etc. When you select Learn, Darbuka waits for you to send
Controller information, this is usually a matter of turning a knob or pushing a pedal. Darbuka assigns
this Controller to the feature you have selected and now your knob controls it, fast and simple.
• The last menu option is Forget. When you click this option any Controller assignment linked to a feature
will be removed.
Default MIDI Controller Settings
The following table describes the default MIDI Controller assignments. These can be changed at any time and
saved/loaded or reset via the Default MIDI CC Assignments feature on the Setup Page (For more information
see the Setup Page section of this manual).
CC Default Assignment
1 Master Complexity
2 Master Variance
7 Master Volume
12 Master Ambience Time
13 Master Dynamics Density
16 Master Quantize
17 Master Swing
18 Master Timing
19 Master Tempo
91 Master Ambience Mix
English
MIDI Channels 2-15
MIDI channels 2 to 15 can be used to play individual Tracks. Notes played on channel 2 select the current
Pattern for Track 1, channel 3 selects Patterns for Track 2, and so on.
This provides an alternative method of “conducting” the playback using MIDI channels to control each Track
independently, rather than controlling all Tracks at once using MIDI channel 1.
MIDI Controllers for channels 2-15
As well as having many assignable MIDI Controller parameters, there are some parameters permanently
“hard wired” to MIDI channels 2-15 (Tracks 1-14).
CC Default Assignment
7 Track Level
8 Track Front/Rear Balance
10 Track Pan
91 Track Ambience Amount
Using Track Mutes
Whether in a live situation or in the studio, using Track Mute keys gives you a lot of versatility to arrange your
performance in real time on the fly. In the factory library all Tracks are assigned their own individual Mute keys,
Darbuka • User Guide
4
23
Page 22

starting with Track one on MIDI note C4, Track two on MIDI note C#4 and so on. As well as the default settings
every Pattern (MIDI Key) can be set by you to mute or unmute any Track (s) just check out the Part Menu Options
section of this manual.
Color Coding
To help you visually locate the Patterns you want in a performance situation, all Color Keys can be highlighted
or not. Simply right-click the Pattern in the Pattern Selector and select or deselect Highlight.
The Setup Page
The Setup Page is the home of all the general parameters and features that govern how Darbuka responds
to your commands.
Main Outputs
This option determines if you’re working in stereo or
surround.
The choice of stereo or surround alters how the stereo
outputs are handled. For more information see the
Working in surround section of this manual.
24
3
Individual Outputs
Up to fourteen individual outputs are available in
addition to the two main stereo outs. By default, four
individual outputs are active.
After changing the number of outputs you must restart
Darbuka for them to become available. To do this:
• Save your work, then uninstanciate Darbuka and
reinstanciate it
or
• if you are already working on a project in your host
application, just save your project and reopen it.
English
Page 23
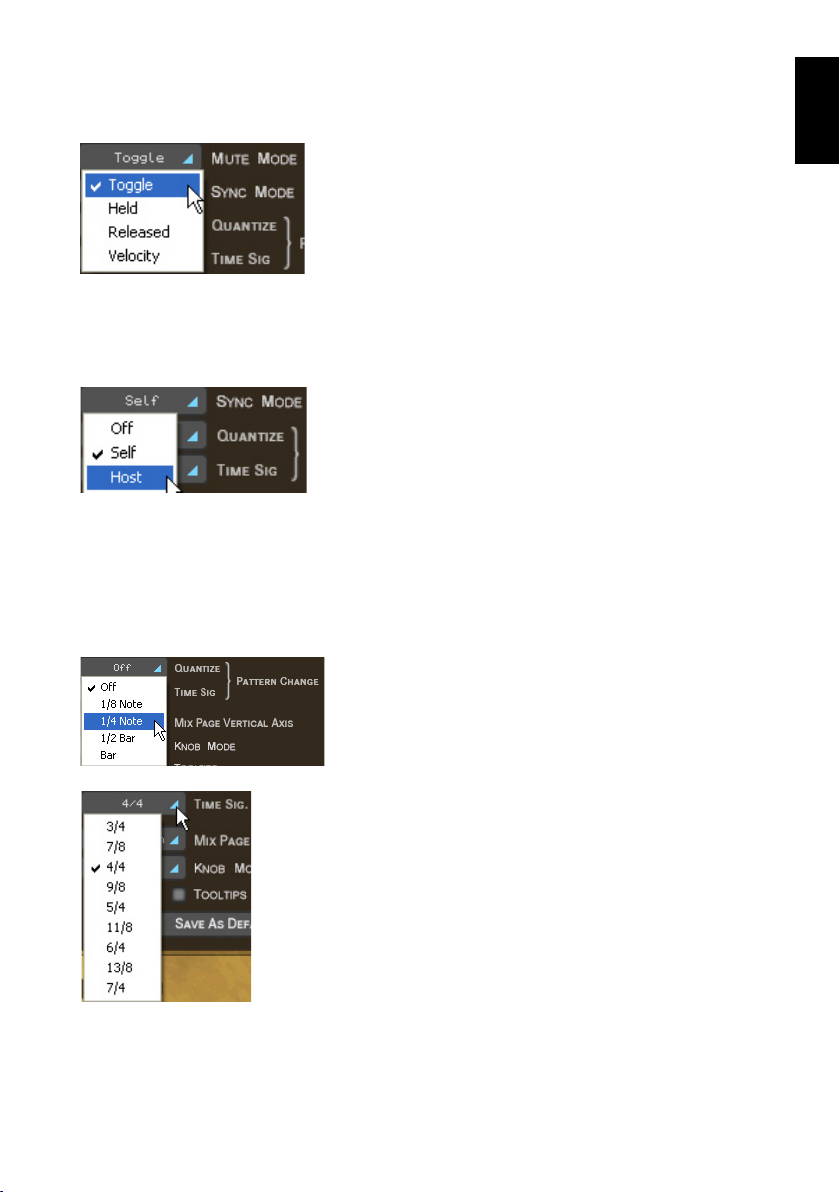
Mute Mode
The Mute Keys (the yellow keys on the Color Keyboard) are very valuable performance and mixing tools and
can behave in various ways.
• Toggle: In Toggle mode Tracks are alternately muted and unmuted
each time a Mute Key is played.
• Held: In Held mode Tracks are only muted for the length of time that
a Mute Key is depressed and held.
• Released: All Tracks are muted by default and only play when a
Mute Key is depressed and held.
• Velocity: When a Mute Key is played via your MIDI keyboard with a
velocity of less than 64 the Track is muted and remains muted until
a value of more than 64 is played on that Mute Key.
Sync Mode
The Sync Mode setting determines how Darbuka responds to your host application and MIDI notes played.
• Off: Darbuka immediately plays from beat one at your host
application tempo when a MIDI note or Color Keyboard note is
received. Although your host application and Darbuka run at the
same tempo their song and beat positions are not in sync.
• Self: As in the Off mode, Darbuka syncs to your host application
tempo but not to it’s bar position. Once Darbuka is playing, sync
between Patterns is maintained, rather than triggering from the
start of each note received.
• Host: Darbuka syncs to the host application’s tempo and bars/
beats.
Pattern Change
The two options under this headline determine how Darbuka changes patterns and places fills.
English
< Quantize
This option determines how quickly Darbuka will change Patterns
when you “play” a pattern change – i.e. by sending a MIDI note or
click the Color Keyboard. With a setting of 4th Darbuka will wait
until the next quarter note of the bar before continuing with the
new Pattern.
< Bar Length
It’s theoretically possible - and can by the way yield very interesting results
– to combine parts of different time signatures. In such a case, Darbuka
needs to know which time signature it is supposed to use globally – it uses
this information for operations such as pattern changes or determining length
of fills.
By changing this parameter, you can define one of the available time signatures
as the global time signature, this way forcing all above mentioned operations
to the signature you’ve set.
The Bar Length setting applies for the current style only – when you load a new
style, it will be updated with this styles’ setting.
This parameter is “hidden away” on the Setup page because it is a very sensitive parameter that you should
leave unchanged unless you perfectly know what you’re doing and only when you create your own user
styles.
Darbuka • User Guide
4
25
Page 24

Mix Page Vertical Axis
This option determines which parameter you change by moving an instrument symbol vertically in the Mix
Page. You find the same parameter in the Mix page too, but the setting here gets saved as a default setting
when you click “Save as defaults”..
• Off: When Off is chosen, vertical movement of a Symbol in the
Stage has no effect on the Track.
• Level: When Level is selected, vertical movement in the Stage
controls individual Track volumes.
• Ambience Send: This option allows you to visually mix Ambience
Send amounts for each Track via the Stage.
• Front/Rear: This may be the fastest and most intuitive setting for creating a surround panorama. The
top of the Stage becomes the front left and right, the bottom becomes the rear left and right.
• Room Mode: Just imagine you’re in a room, surrounded by percussion instruments. Simply put, that’s
what we call “Room Mode”.
While in all other modes the Stage is a X/Y coordinate system, here the Stage represents a top view on a real
recording room with the listener in the center and the instruments around him. The borders of the Stage acting
like real walls.
Of course, the Room Mode is most realistic in Surround Mode, because only there are the front and rear
positions reflected in the resulting audio signal.
In Room Mode, Level, Ambience and Pan controls are linked together to emulate the natural acoustic behavior
of a room. I.e. when you move an instrument away from the center (listener’s position) to the top right corner,
the following things happen at the same time:
• Level slightly decreases.
• Ambience increases in level (less direct signal, more reflections from the walls) and changes in character
to match the surround position as well as the exact distances between listener, instrument and walls.
• Pan moves all the way to the right.
• Front/Rear moves all the way to the front.
You can regard the listener – which in fact is the audio output – as being a surround microphone setup at the
listener position.
Knob Mode
This option simply tells how you would prefer to turn your knobs.
• Linear: To move a knob, click on it and drag up or down with the
mouse button pressed, like a vertical slider.
• Circular: Knobs are moved by clicking and dragging in a circular
motion. A knob’s value can be set instantly by clicking anywhere along
it’s circular edge.
• Host: Darbuka uses your host application’s preference if available.
Tooltips
Tooltips are common in many computer applications and simply display information about a feature when
your mouse pointer is hovering above it. When Tooltips are switched off this information is displayed in the
Style Name display area at the top of Darbuka.
26
3
English
Page 25

Save As Defaults
When you have chosen the Setup Page settings that best suit the way you like to work, just click this button and
these settings will be used in all future songs and when you load factory Styles.
• XXL and Auto Listen settings are also included when using Save As
Defaults.
• The default settings are not applied to previously saved projects or user
saved Styles.
Default MIDI CC Assignments
Using MIDI Controllers (CC’s) will give you a lot of performance possibilities. Once you have assigned Controllers
to parameters this feature allows you to save them as a default set for all future projects. Default Controller
assignments do not affect your previously saved songs, they are only applied when starting a new project.
• Save: Saves your current MIDI Controller settings as default set for
future songs and for the factory Styles.
• Load: Loads the default MIDI Controller settings into the currently
loaded Style, replacing any custom settings.
• Reset: Loads the factory default settings (listed in the Performing With Darbuka section of this manual)
into the current Style. Clicking the Save option after Reset will restore the factory settings as the default
settings for future songs and factory Styles.
The Producer and Percussionists
The recordings for Darbuka were produced by Lothar Krell and recorded by Stempel (one of Germany’s best
known engineers) over a period of four months at Klangwelt Studios in Frankfurt. Prior to recording Lothar and
Ethnomusicologist Basem Darwisch-Schürmann researched and discussed the project with many Arabic and
Turkish musicians and musicologists and resourced all available recorded traditional music archives.
English
Lothar Krell
(Producer)
As a musician, producer, keyboard player and composer, Lothar Krell is regarded as one of the most innovative
professionals in Germany. Since recording his first album in 1978, Lothar has toured and recorded exhaustively
with many of Germany’s biggest artists and established his own record label ‘Music Of One World’ in 1997.
Lothar is considered to be one of the most knowledgeable and experienced producers of world music in
Europe.
http://www.oneworld-media.com/english/index.htm
Suat Borazan
(Darbuka, Douhola, Bendir)
Born and raised in Istanbul (Turkey), after completing his Masters degree in Percussion, Suat Borazan collected
a wealth of live playing experience not only in Turkey, but also in Greece, Egypt and other Arabic countries. Suat
ranks today as one of the most famous virtuosos of eastern percussion instruments and has very extensive
knowledge of Arabic, Turkish, Egyptian and Afro-Nubian rhythms. A much in demand studio musician, Suat
has recorded with the best known artists in Turkey (such as Nurai Hafiftac, Ibrahim Tetlisis, Tarkan) and Egypt
(with artists like Samira Saiid , Latifa, Mohamed Fouad) as well as with his own percussion group Harem who
have sold in excess of 5 million units world wide. Suat lives today between Istanbul, Cairo and Frankfurt.
Darbuka • User Guide
4
27
Page 26

Mohammed Zaki
(Bendir, Riqq, Sagat, Tura, Bongos)
Originating from Alexandria (Egypt), Mohamed Zaki began drumming at the age of six and was already
working with dancers by the age of ten. Through his varied career Mohamed has worked in Egypt with it’s best
known musicians and dancers (such as Dandash and Hindela or Hanan and Mustapha Amar), in Germany
(with artists like Mohamed Askari, Sharazad, Rita Sherif, Beata and Horacio Cifuentes, Zahrah, Nabila and
Sabina Zaida) in Poland with the Philharmonia of Opole and Hannè, in Paris with Natasha Atlas and in 2001
he accompanied the world renowned author Günther Grass’ project “Novemberland” as it toured through
Germany.
Basem Darwisch-Schürmann
(Co-ordination and research)
Born in Egypt, Basem studied Ethnomusicology in Cairo. Since moving to Germany 17 years ago he has been
very active as a studio musician and adviser to labels and production companies for Arab and Afro Nubian
music. Among Basem’s clients are Arabic news station Al Jazeera, Arabic radio Largoland Frankfurt, Günther
Baby Sommer, Günther Grass, Matthias Frey, Büdi Siebert und Lothar Krell . In Egypt he was co-founder of the
group Rahalah, worked as an advisor for the Free Music label and as Soloist with artists such as Mohamed
Mounier, Mohamed Mohey, Fathy Salama and the Sharkiat Group.
The Instruments
Darbuka
Also known as the Tablah or Dumbak, the Darbuka is a singleheaded hollow hand-drum found in most Middle Eastern and
Arabic music ensembles. The cylindrical body (goblet-shaped
with a narrow waist) is held under the arm and across the players
lap and played with the fingers of both hands, one from above
and one from the side. Usually the right hand plays the center of
the Darbuka to produce the resonating lower tones (know as the
‘dum’ tones) or slaps the edge to produce brighter, crisper tones
(known as the ‘bek’ tones). The fingers of the left hand generally
play closer to the drum edge for fills. Syncopated rhythms and rolls
are common.
The Darbuka was traditionally made from fired clay and the head
from goat, calf, or fish skin, stretched and glued to the body. A
modern Darbuka is likely to have a cast iron body and a Mylar
head with adjustable skin tension. These plastic heads are favored
in contemporary performances because they are louder and cut
through.
Darbukas are almost always ornately decorated with wood, tile or bone inlays, etched metal, or Middle
Eastern paintings and designs.
28
3
English
Page 27

Douhola
Also known as Bass Darbuka or Dallukah, the Douhola is a slightly
larger and deeper version of the Darbuka. Although looking quite
similar to the Darbuka, the Douhola is tuned lower and it’s function in
the group is to act as the bass drum pulse.
Bendir
The Bendir, known in Turkey as the Târ, is a narrow bodied circular
drum with a diameter of between 10 and 24 inches and has a string
snare running across the head under the frame. The Bendir is held in
front of the player with both hands, the skin side away from the body
and is played using the fingertips. Traditionally the head was made
from goatskin, but modern drums also use plastic. Bendir drums are
traditionally used for religious music and wedding processions.
Riqq
The Riqq, or Daff in Turkish, is a small Tambourine style frame drum
of around 8 or 9 inches in diameter and 2 or 3 inches deep. The Riqq
usually has five double pairs of brass cymbals spaced evenly around
its curved edge and was traditionally covered with goat or fish skin.
Modern instruments may be constructed from aluminum or wood and
have a Mylar head. The riqq can produce a large variety of sounds
by tapping the skin with the fingers, shaking, tapping the cymbals
themselves or any combination.
English
Sagat
Sagat are small brass finger-cymbals, ranging in size from 11⁄2 to 4 inches
in diameter. Fastened to the middle finger and thumb of both hands,
Sagat are traditionally used for religious and dance ceremonies.
Tura
Tura are a much larger version of the Sagat, roughly double the
size. Although played in a similar manner to the Sagat, the Tura are
traditionally used only for rituals and ceremony and not as a street
instrument.
Bongos
A pair of small single headed wooden hand drums yoked together,
Bongos are usually held between the knees and played in a sitting
position. Typically these high-pitched drums are about 6 and 8 inches
in diameter and 6 inches tall. Bongos are typically tuned at an interval
of a fourth and are played with a combination of finger and open
hand techniques.
Darbuka • User Guide
4
29
Page 28

Shaker
Shakers come in many shapes and forms and can be constructed
from plastic, metal tubing, hard wood and even bone. The filling is also
varied; anything from seeds, steel shot, beans or pebbles can be used.
Reversed
The Reversed instrument is a backwards Douhola or Darbuka which you may find useful in your tracks. The
reversed instrument plays at different bar positions depending on which part you select in the Scene Editor.
Style Information
“Iqaà” means rhythm and rhythms play a very important role in the Arab, Turkish and Nubian cultures. Whether it’s work,
celebration, mourning, dancing, praying, religious rites or ceremonies everything in everyday life has a connection with rhythm.
Style Region Original Tempo Additional Info
Karachi Algeria 100 A rhythm originating from India and Pakistan.
Rai Algeria 095 Probably the most popular Algerian rhythm, well known outside of northern Africa.
Wahrani Algeria 090 A traditional rhythm originating from the city of Wahran in Algeria.
Baio Persian Gulf 105 2/4 rhythm from the Persian Gulf.
Daza Persian Gulf 100 Traditional Persian Gulf rhythm.
Rumba Khaligi Persian Gulf 085 Persian Rumba.
Sufi Persian Gulf 100 A mystical rhythm with purely religious use played in the fasting month of
Ayoub/Zar Egypt 100 Named Hiob in the Koran and a synonym for patience and religious dedication.
Darig Egypt 100 A classic ancient Egyptian spiritual rhythm used with religious songs.
Fallahi Egypt 110 Meaning farmer rhythm. Originates from the Nile Delta and Fayoum Oasis. Often
Maksum Egypt 130 One of the most popular rhythms in the modern Arab music and a standard in
Malfuf Egypt 120 Means Rondo or rhythm.
Masmoudy Kebir Egypt 120 Meaning the big Masmoudy, an important religious rhythm.
Rumba Masri Egypt 100 Egyptian Rumba.
Saidi Egypt 110 Meaning upper-Egyptian. Played in the south of Egypt, this rhythm expresses
Samai Thakil Egypt 120 Meaning hearing, the feature instrument is the Riqq.
Wahda Egypt 090 Meaning one. A classic Arabic rhythm used in ancient Egyptian music.
Zafa Egypt 090 The traditional wedding rhythm. It is played by large groups of Bendir players who
Zorofat Egypt 120 A rarely played ancient Arabic rhythm, one of the most difficult rhythms to play.
Dabkkah Lebanon 105 Typical Lebanese traditional rhythm often used for weddings.
Sudasi Lebanon 120 Lebanese 6/8 rhythm used for traditional dancing.
Libi Libya 105 Typical traditional rhythm of Libya originating from the nomadic Bedouin.
Ramadan in contemplation of the pilgrimage to Mecca. Tura and Bendir play an
important role.
This rhythm is played to drive evil spirits away and has deeply rooted religious
elements.
performed for female ceremonies, the night before a wedding, births etc.
nearly all contemporary Arab recordings.
originality and tradition and comes from the deepest Al Saieed.
accompany the bridal pair on their traditional parade.
30
3
English
Page 29

Style Region Original Tempo Additional Info
Maghrebi Morocco 095 The most typical Moroccan traditional rhythm.
Jirk Nubia 125 Traditional Nubian rhythm from West Asswan.
Nubian Reggae Nubia 078 Nubian Reggae.
Nubian Samba Nubia 115 Nubian Samba.
Dishka Sudan 075 Nubian-Sudanese rhythm from northern Sudan.
Mambo Sudani Sudan 120 A Sudanese interpretation of the Latin Mambo rhythm.
Tom Tom Sudan 080 A west Sudanese rhythm from Kordofan.
Fazani Tunisia 095 A typical Tunisian traditional rhythm.
Chiftetelli Turkey 090 Turkish traditional rhythm.
Churchuna Turkey 090 Turkish traditional rhythm.
Laz Havasi Turkey 130 Turkish traditional rhythm.
Roman Havasi Turkey 125 Turkish traditional rhythm.
Wals Turkey 125 Waltz rhythm.
Credits
English
Producer
< Peter Gorges
Head of Development
< Paul Kellett
Percussion Recordings
Producer:
< Lothar Krell
Engineer:
< Stempel
Co-ordinator:
< Basem Darwisch-Schürmann
Percussion Artists:
< Suat Borazan, Mohamet Zaki
Virtual Instrument
Audio Engine:
< Paul Kellett
Interactive Playback Algorithms:
< Mario Reinsch
User Interface:
< Benjamin Wendelstein
Ambience & Dynamics:
< Klaus Piehl, Matthias Klag
Audio Preparation
Sound Design:
< Mark Ovenden
Editors:
< Malte Bieler, Sascha Haske,
Wilhelm-Paul de Gast, Jan Schmidt
User Interface Design
& 3D Rendering
< Schmidtdesign, Hamburg
Darbuka • User Guide
4
31
Page 30

Support
080806_Darbuka_UG_EN01
For additional help, technical support is available on our website at www.m-audio.com, where you can fill out
our technical support form.
Alternatively, you can email us at support@m-audio.com, or contact us by phone at:
(626) 633-9055.
Technical support is available by telephone from 7am - 7pm PST.
Trademarks
Wizoo and Darbuka are trademarks of Wizoo Sound Design GmbH. VST is a registered trademark of Steinberg
Media Technologies GmbH. The Audio Units logo and the Audio Units symbol are trademarks of Apple
Computer Inc. RTAS is a registered trademark of Avid Technology, Inc. and its subsidiaries and divisions.
Pentium is a registered trademark of Intel Corporation in the U.S. and other countries. AMD is a trademark of
Advanced Micro Devices Inc. The Mac logo is a trademark used under license. Macintosh, Power Macintosh
and Mac OS are registered trademarks used under license. Microsoft and Windows XP are either registered
trademarks or trademarks of Microsoft Corporation in the United States and/or other countries. All other
product and company names are TM or ® of their respective holders. Unauthorized copying, hiring and lending
of this software is strictly prohibited. All specifications are subject to change without notice.
Made in Germany.
© Wizoo Sound Design GmbH 2004
developed by
an M-Audio partner
32
3
English
052305_Darbuka_UG_EN01
 Loading...