

Page 1

Table of Contents
The Oddity odyssey . . . . . . . . . . . . . . . . . . . . . . . . . . . . . . . . . . . . . . . . . . . . . . . . . . . . . . . . . . . . . . . . . . . . . . . . . . . . . . . . . . . . . . . . . . . . . . . . . . . . . . . . . . . . . . . . . . . . . . . . . . . . . . . . . . . . . . . . . . . . . . . . . . . . . . . . . . . . 3
Overview . . . . . . . . . . . . . . . . . . . . . . . . . . . . . . . . . . . . . . . . . . . . . . . . . . . . . . . . . . . . . . . . . . . . . . . . . . . . . . . . . . . . . . . . . . . . . . . . . . . . . . . . . . . . . . . . . . . . . . . . . . . . . . . . . . . . . . . . . . . . . . . . . . . . . . . . . . . . . . . . . . . . . . . 5
Understanding the Oddity . . . . . . . . . . . . . . . . . . . . . . . . . . . . . . . . . . . . . . . . . . . . . . . . . . . . . . . . . . . . . . . . . . . . . . . . . . . . . . . . . . . . . . . . . . . . . . . . . . . . . . . . . . . . . . . . . . . . . . . . . . . . . . . . . . . . . . . . . . . . . . . . . . . . 5
Installing the Oddity . . . . . . . . . . . . . . . . . . . . . . . . . . . . . . . . . . . . . . . . . . . . . . . . . . . . . . . . . . . . . . . . . . . . . . . . . . . . . . . . . . . . . . . . . . . . . . . . . . . . . . . . . . . . . . . . . . . . . . . . . . . . . . . . . . . . . . . . . . . . . . . . . . . . . . . . . . 6
Registration . . . . . . . . . . . . . . . . . . . . . . . . . . . . . . . . . . . . . . . . . . . . . . . . . . . . . . . . . . . . . . . . . . . . . . . . . . . . . . . . . . . . . . . . . . . . . . . . . . . . . . . . . . . . . . . . . . . . . . . . . . . . . . . . . . . . . . . . . . . . . . . . . . . . . . . . . . . . . . . . . . . . 6
Quick Guide . . . . . . . . . . . . . . . . . . . . . . . . . . . . . . . . . . . . . . . . . . . . . . . . . . . . . . . . . . . . . . . . . . . . . . . . . . . . . . . . . . . . . . . . . . . . . . . . . . . . . . . . . . . . . . . . . . . . . . . . . . . . . . . . . . . . . . . . . . . . . . . . . . . . . . . . . . . . . . . . . . . .6
Common Controls . . . . . . . . . . . . . . . . . . . . . . . . . . . . . . . . . . . . . . . . . . . . . . . . . . . . . . . . . . . . . . . . . . . . . . . . . . . . . . . . . . . . . . . . . . . . . . . . . . . . . . . . . . . . . . . . . . . . . . . . . . . . . . . . . . . . . . . . . . . . . . . . . . . . . . . . . . . . . 8
Voltage Controlled Oscillator 1 (VCO1) . . . . . . . . . . . . . . . . . . . . . . . . . . . . . . . . . . . . . . . . . . . . . . . . . . . . . . . . . . . . . . . . . . . . . . . . . . . . . . . . . . . . . . . . . . . . . . . . . . . . . . . . . . . . . . . . . . . . . . . . . . . . . . . . . . . . . . 9
Voltage Controlled Oscillator 2 (VCO2) . . . . . . . . . . . . . . . . . . . . . . . . . . . . . . . . . . . . . . . . . . . . . . . . . . . . . . . . . . . . . . . . . . . . . . . . . . . . . . . . . . . . . . . . . . . . . . . . . . . . . . . . . . . . . . . . . . . . . . . . . . . . . . . . . . . . . 11
Low Frequency Oscillator (LFO) . . . . . . . . . . . . . . . . . . . . . . . . . . . . . . . . . . . . . . . . . . . . . . . . . . . . . . . . . . . . . . . . . . . . . . . . . . . . . . . . . . . . . . . . . . . . . . . . . . . . . . . . . . . . . . . . . . . . . . . . . . . . . . . . . . . . . . . . . . . . . 12
S/H Mixer (Sample and Hold) . . . . . . . . . . . . . . . . . . . . . . . . . . . . . . . . . . . . . . . . . . . . . . . . . . . . . . . . . . . . . . . . . . . . . . . . . . . . . . . . . . . . . . . . . . . . . . . . . . . . . . . . . . . . . . . . . . . . . . . . . . . . . . . . . . . . . . . . . . . . . . . 13
Audio Mixer . . . . . . . . . . . . . . . . . . . . . . . . . . . . . . . . . . . . . . . . . . . . . . . . . . . . . . . . . . . . . . . . . . . . . . . . . . . . . . . . . . . . . . . . . . . . . . . . . . . . . . . . . . . . . . . . . . . . . . . . . . . . . . . . . . . . . . . . . . . . . . . . . . . . . . . . . . . . . . . . . . . 14
Voltage Control Filter (VCF) . . . . . . . . . . . . . . . . . . . . . . . . . . . . . . . . . . . . . . . . . . . . . . . . . . . . . . . . . . . . . . . . . . . . . . . . . . . . . . . . . . . . . . . . . . . . . . . . . . . . . . . . . . . . . . . . . . . . . . . . . . . . . . . . . . . . . . . . . . . . . . . . . 15
High-pass Filter . . . . . . . . . . . . . . . . . . . . . . . . . . . . . . . . . . . . . . . . . . . . . . . . . . . . . . . . . . . . . . . . . . . . . . . . . . . . . . . . . . . . . . . . . . . . . . . . . . . . . . . . . . . . . . . . . . . . . . . . . . . . . . . . . . . . . . . . . . . . . . . . . . . . . . . . . . . . . . 16
Voltage Controlled Amplifier (VCA) . . . . . . . . . . . . . . . . . . . . . . . . . . . . . . . . . . . . . . . . . . . . . . . . . . . . . . . . . . . . . . . . . . . . . . . . . . . . . . . . . . . . . . . . . . . . . . . . . . . . . . . . . . . . . . . . . . . . . . . . . . . . . . . . . . . . . . . . .16
Envelope Generators (AR and ADSR) . . . . . . . . . . . . . . . . . . . . . . . . . . . . . . . . . . . . . . . . . . . . . . . . . . . . . . . . . . . . . . . . . . . . . . . . . . . . . . . . . . . . . . . . . . . . . . . . . . . . . . . . . . . . . . . . . . . . . . . . . . . . . . . . . . . . . . . 17
Preset and Morph section . . . . . . . . . . . . . . . . . . . . . . . . . . . . . . . . . . . . . . . . . . . . . . . . . . . . . . . . . . . . . . . . . . . . . . . . . . . . . . . . . . . . . . . . . . . . . . . . . . . . . . . . . . . . . . . . . . . . . . . . . . . . . . . . . . . . . . . . . . . . . . . . . . . 18
Tutorials . . . . . . . . . . . . . . . . . . . . . . . . . . . . . . . . . . . . . . . . . . . . . . . . . . . . . . . . . . . . . . . . . . . . . . . . . . . . . . . . . . . . . . . . . . . . . . . . . . . . . . . . . . . . . . . . . . . . . . . . . . . . . . . . . . . . . . . . . . . . . . . . . . . . . . . . . . . . . . . . . . . . . . 20
MIDI Continuous Control Messages . . . . . . . . . . . . . . . . . . . . . . . . . . . . . . . . . . . . . . . . . . . . . . . . . . . . . . . . . . . . . . . . . . . . . . . . . . . . . . . . . . . . . . . . . . . . . . . . . . . . . . . . . . . . . . . . . . . . . . . . . . . . . . . . . . . . . . . .21
Contact . . . . . . . . . . . . . . . . . . . . . . . . . . . . . . . . . . . . . . . . . . . . . . . . . . . . . . . . . . . . . . . . . . . . . . . . . . . . . . . . . . . . . . . . . . . . . . . . . . . . . . . . . . . . . . . . . . . . . . . . . . . . . . . . . . . . . . . . . . . . . . . . . . . . . . . . . . . . . . . . . . . . . . . . 22
2
Page 2

The Oddity odyssey
Synthesizer mythology tells it that back at the dawn of time, (well, at least the 1970’s), any self-respecting keyboard player proudly
displayed one of two synthesizers when called upon to fulfil the demands of any synth duties. Those two synthesizers were the
MiniMoog and the ARP Odyssey and as you would expect, the debate as to which was the better instrument raged equally as hard
back then as the analogue vs digital and Mac vs PC debates rage today.
Fortunately, to those more enlightened musicians of that period, and those who’ve revisited these instruments in recent years,
while it was clear there were distinct differences between the tones and timbres of each, it’s impossible to claim an outright winner
as each excelled at specific sounds. They were, quite simply, wonderfully different.
So why was the Odyssey occasionally considered the poorer relation of the two? Well, as self-certified Odyssey addicts we have
our own theories:
Firstly and significantly, the name Moog is as synonymous with synthesizers as the name Hoover is with vacuum cleaners.
Secondly there was cost. It’s easy to forget in these days of cost effective plug-ins that synth technology was very expensive and
in the majority of cases a keyboard player was limited to one synth simply by budget constraints: a new Odyssey cost $1500 in
1972!
Thirdly, there were the operational differences between each synth, which surely, must have been influenced by both Pearlman
and Moogs’ backgrounds. Bob Moog had a firm grounding in electronic musical applications such as his Theremin kits, whereas
ARP founder Alan R Pearlman, despite playing piano from the age of three, came from a background that included designing
amplifiers for the Apollo and Gemini space programs. He is also on record as saying that the world of musicians was alien to him,
so perhaps that’s why the MiniMoog had a musician-friendly feel about it, while the Odyssey appeared on the surface to be much
more ‘techie’.
Certainly the Odyssey’s strangely calibrated, color-coded ‘tic-tac’ like sliders were not as conducive to quick and accurate tweaking
in the same way the MiniMoog’s rotary knobs were. And with this control method, the techie-looking front panel and the obvious
lack of patch storage, it’s been noted more than once that it was almost impossible to get the same sound twice - even with the
aid of front panel overlays. Compounding the issue, the oscillator tunings were marked in hertz and there was no A=440 tone for
tuning reference, which ultimately meant that using an Odyssey live and changing sounds while keeping it in tune was not for the
fainthearted.
Finally, there was the much debated tonal differences. Popular myth has it that Moog’s were warm and mellow whereas ARPs were
thin and bright, and whilst there’s an element of truth in this, only the terminally idiotic would malign these differences. After all,
surely it’s these tonal distinctions and contrasts which account for why sounds from an ARP, Moog, Sequential or Oberheim are as
welcome and recognisable now as they were in those halcyon days?
Opinions and speculation notwithstanding, the ARP sound combined with all its unique and quirky attributes added such enormous
character to the instrument that it quickly became a classic in its own right with artists as diverse as Joe Zawinul, Herbie Hancock,
Stevie Wonder, Jean-Michel Jarre, Ultravox, Pete Townsend, Jimmy Page, George Duke, Tom Costa and countless others embracing
it wholeheartedly. Similarly, if you watched TV or saw any films in the 70’s you’ll also have heard the famous ARP sound on Planet
of the Apes, McCloud, Enter the Dragon, The Taking of Pelham 1-2-3, as well as Columbo, Kojak and Cannon, courtesy of West Coast
synth wizards Clark Spangler and Jerry Goldsmith.
So what exactly was that sound? Well, anyone claiming it was exclusively thin must have had heavily retarded programming skills edgy is perhaps a more suitable adjective. But with minimal effort it’s easy to extract warm, fat tones too. However, one area where
the Odyssey stood head and shoulders over its rivals was when creating sound effects. Wind, seashores, bombs, sirens and ‘sample
and hold’ rhythms simply fall out of this machine and those with the patience to tinker and experiment were richly rewarded with
all manner of unique soundscapes that couldn’t have been achieved by any of Tom or Bob’s babies. In short, the Odyssey had balls,
bite and an aggressive quality, lacking in all the majority of its contemporaries - not dissimilar to a lot of plug-in synths really!
But why isn’t the Odyssey seen as regularly as its arch-rival on and in todays stages and studios?
Well, as a performance synth it’s problematic: Those sliders have a habit of breaking and it’s very difficult to find replacements.
For live use its lack of memories is a real drawback and as we mentioned earlier changing sounds in real-time is fairly traumatic,
even though ARP’s oscillator stability was considered superior to its rivals. Plus, despite the fact that in the mid 70’s ARP held a
phenomenal 40% share of the US synthesizer market, there were reportedly only about 3,000 Odyssey’s made, (as opposed to the
MiniMoog’s 13,000), and as such, good examples are becoming increasingly difficult to find. Finally, to add further confusion to
prospective Odyssey hunters, there were several filter revisions across three marques, distinctive by either their white face, black
face with gold lettering or black face with orange lettering.
3
Page 3

Purists argue to this day as to which version is the best, but we won’t go into that here as there are a host of web resources
dedicated to this question and more. However, we at GMEDIA Music fell in love with the Odyssey several years ago after buying
a MkII (a black one with gold lettering, 2813 with PPC and a 4075 filter) in perfect condition. Sure, the calibration of the sliders
was an interesting contrast to most modern synthesizers and the keyboard action was flabby - but it had... that sound! That sharp,
searing, yet funky tone which was once described (admittedly by ARP) as taking the ultimate musical trip. And the more we used
it, the more we thought about how, in much the same way as with the M-Tron, we would love to introduce this sound to a whole
new audience and a whole new working environment.
Enter Ohm Force, one of the premier plug-in developers with similar attitudes to those early synth pioneers - namely inventive,
adventurous and not afraid to deliver something different, so long as it’s inspiring. And at Frankfurt 2002 the Oddity was born (at
least on paper anyway) as a joint venture between GMEDIA Music and Ohm Force under our GForce banner.
The Oddity name was coined because of it’s unique character, tonal possibilities and operational slant. This synth, revisited as a
plug-in, is truly singular, one of a kind. And while we have done everything within our grasp to faithfully recreate the essence of
the original, naturally we have added new features that we hope will help turn a vintage classic into a modern master as well as
enhance the creative process.
The creation of the Oddity has been a true labour of love and we hope anyone who purchases it will understand and appreciate
just how unique the original was, and why, in these enlightened times of plug-in technology, all of those comparisons of old are
finally redundant.
Odyssey web resources:
www.overacker.com/ody/directory.html
www.keyboardmuseum.org/ar/a/arp/arp.html
www.synthmuseum.com/arp/index.html
www.synthfool.com
www.vintagesynth.com/
www.physicsenterprises.andrews.edu/diy_archive/manuals/arp/index.html#Ody
www.sonicstate.com/synth/arpodyssey.cfm
Odyssey book resources;
A-Z of Analogue Synthesisers (Part One. A - M) - Pete Forrest
Vintage Synthesisers - Mark Vail.
Without whom dept:
Alan R Pearlman and all those responsible for the Odyssey.
The magnificent Ohm Force team: Laurent de Soras, Jérôme Noël,
Raphaël Dingé, Franck Bacquet, Vincent Frison, Eric Cestari,
Gregory Makles, Vincent Birebent and Ian Finney.
Angus Hewlett, Jim Wintermyre, Nick Thompson and Jason Field.
Sound Design: Dave Spiers and Dave Blakely
This Manual: Dave Spiers, Ian Legge and Chris Macleod.
4
Page 4

Overview
Polyphony Monophonic: . . . . . . . .VCO1 and VCO2 – High and Low note priority.
Duophonic: . . . . . . . . . . . . . . . . . . . .VCO1 – Low note priority. VCO2 – High note priority.
Oscillators . . . . . . . . . . . . . . . . . . . . . 2 VCO’s: saw, square, pulse, PWM (can be modulated by: sine LFO or ADSR envelope), white/
pink noise; oscillator-sync modulated by: ADSR, square/saw LFO, Sample-and-Hold.
LFO . . . . . . . . . . . . . . . . . . . . . . . . . . .Sine/Square; Sample-and-Hold.
VCF . . . . . . . . . . . . . . . . . . . . . . . . . . . Four-pole resonant 24dB lowpass filter, highpass filter; can be modulated by: kybd track,
Sample-and-Hold, sine LFO, ADSR, AR, ring modulator.
VCA . . . . . . . . . . . . . . . . . . . . . . . . . . . EG 1: AR.
. . . . . . . . . . . . . . . . . . . . . . . . . . .EG 2: ADSR
Flying sliders and mouse movements.
Although we’ve endeavored to stay true to the original instrument, obviously it made sense to add some
additional features. Most of these are self-evident and are covered at the appropriate points within this
manual. However, one of the functions that you should be aware of at this stage is the ability to ‘throw’ the
sliders via the mouse.
If you want to throw the slider from bottom to top, first position your mouse pointer about half a centimeter
above the slider, directly over the slider recess. Then, while holding the mouse button down, drag the arrow
along the slider recess releasing the mouse button as you throw the slider. You’ll see that the slider moves
until it reaches the very top. To throw a slider from top to bottom, repeat the process only this time start about half a centimeter
below the slider and click and throw downwards. The quicker you move the mouse, the faster the slider will move. All movements
can be recorded within your host application.
The Oddity’s sliders respond to horizontal mouse movements. Placing the mouse pointer next to a slider and moving it horizontally
allows very accurate changes in parameter values, the exact value being shown in the Current Parameter window.
Understanding the Oddity
Although the Oddity is not a true modular synth, the key to understanding it is to consider each section as a module into which
you feed another ‘source’ or ‘signal’. The color-coded sliders are also crucial to understanding much
of the internal routing and relationship between many of the parameters.
For example, the Coarse and Fine tune sliders on VCO1 are colored blue, so too is the slider that determines the amount of VCO1 fed
into the Audio Mixer. Additionally, provided the waveform of VCO1 is switched to square wave, (set using the switch underneath
the blue VCO1 Audio Mixer slider), the blue Pulse Width slider back in the VCO1 module becomes the controller to change the Pulse
Width.
To avoid confusion with the second oscillator you’ll notice that the VCO2 Coarse and Fine tune sliders are colored green, as are the
appropriate matching Audio Mixer Level and Pulse Width sliders. Once you get your head around these relationships, operating the
Oddity becomes very intuitive.
WARNINGS:
The Oddity is a wild beast and capable of extreme sounds. Occasionally, you’ll also find that it not only requires all the audio
headroom on your sound card, it may exceed it too. Please be mindful of this and always keep an eye on your sequencer’s audio
instrument level.
We’ve tried to keep the CPU load of the Oddity to a minimum and in normal use it shouldn’t take up too much host processing
power. Because of the way the Sample and Hold Mixer module operates, whenever a modulation using the Sample and Hold Mixer
output is enabled there can be a marked increase in CPU load. This is due to the fact that in order to make it work as per the original
instrument, we’ve had to bypass several optimizations. When programming your own sounds try to be mindful of this, if you don’t
need to use it optimize performance by turning it off.
5
Page 5
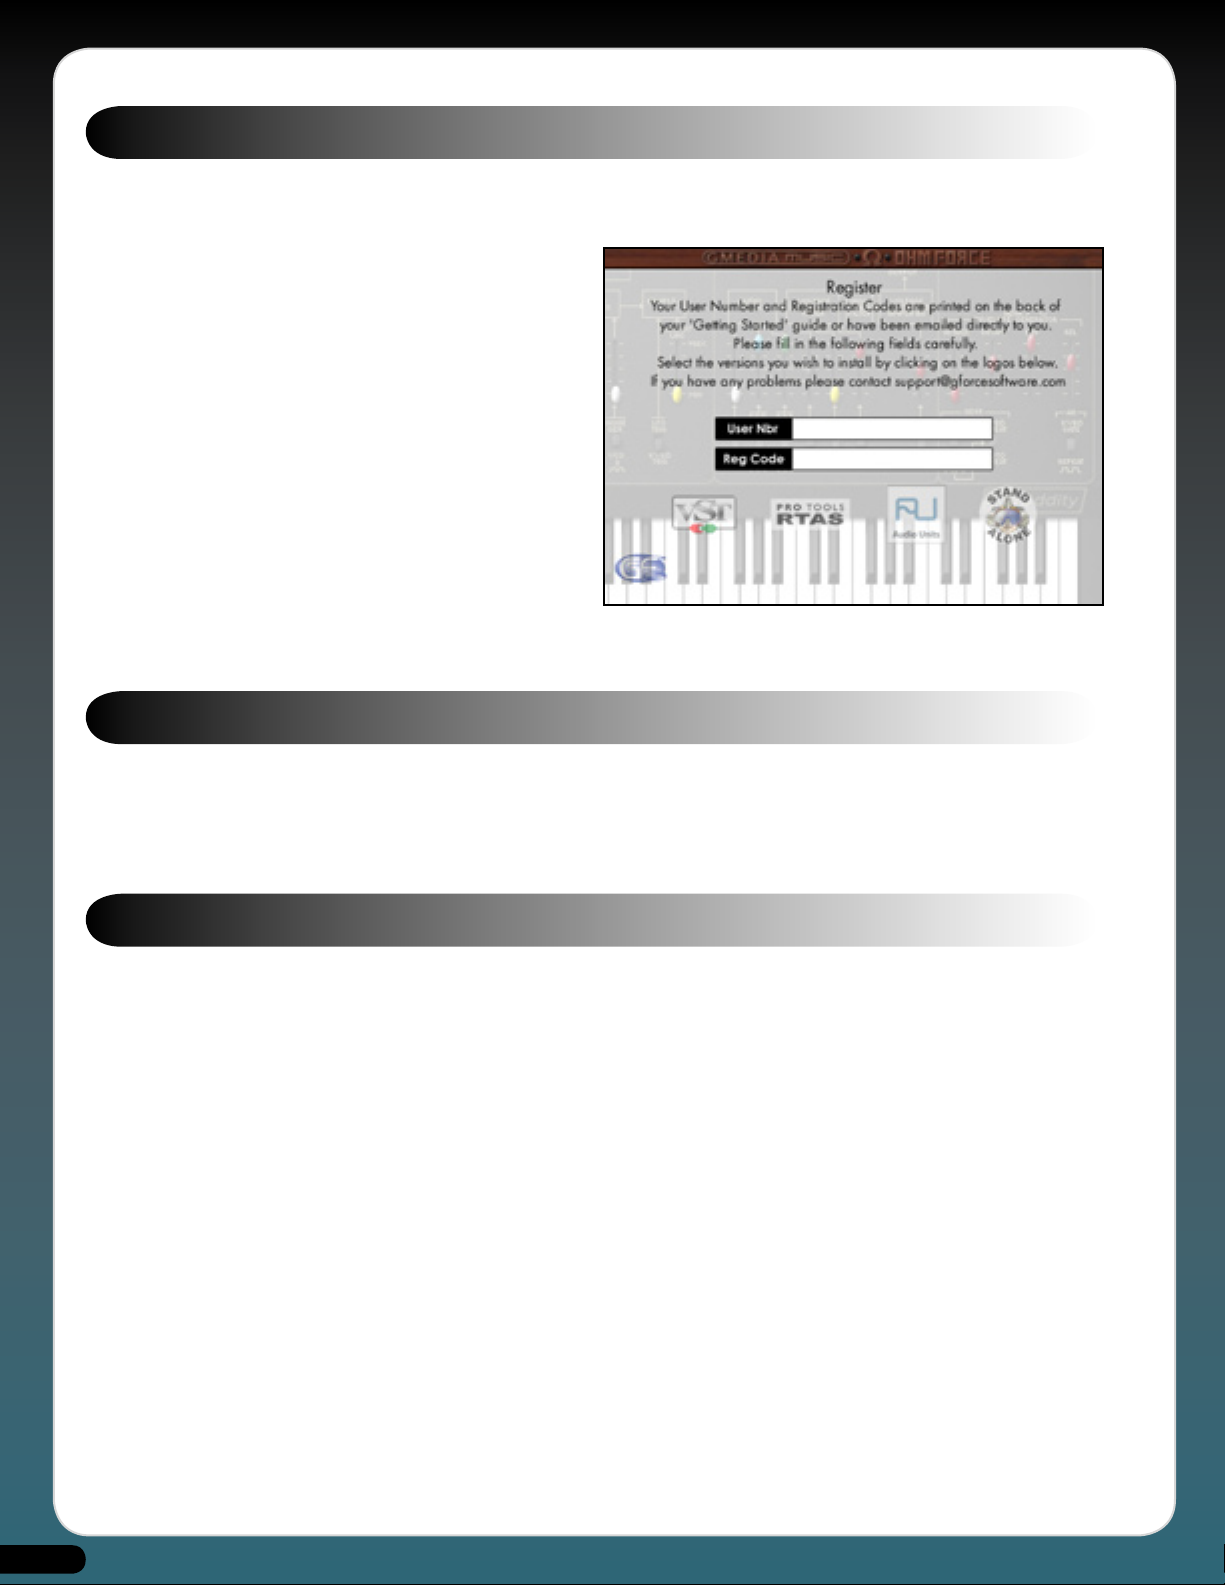
Installing the Oddity
Included on the Master CD are multiple versions of the Oddity. The Oddity installer allows you to install any or all versions via a
single installer, one for Mac and one for PC.
PC -
Insert the Oddity Master CD into your CD-ROM
drive. From the setup window, select the “Install”
option and follow the onscreen instructions, carefully
entering your unique User Name and Registration
codes EXACTLY as you find them printed within this
Getting Started guide.
Mac -
Insert the Oddity Master CD into your CD-ROM
drive. Double-click on the GForce Oddity disc icon to
open the disc. Double-click on the Oddity.dmg file and
then run the Oddity Installer, following the onscreen
instructions and carefully entering your unique User
Name and Registration codes EXACTLY as you find
them printed within this Getting Started guide.
During installation, be sure to click on the Next button
until the installation routine is complete.
Mac installer shown
Registration
Please take time to register your Oddity on-line at:
http://www.gmediamusic.com/registration/
Registration is required to receive free technical support.
Quick Guide
Having installed the Oddity, select it as an instrument within your host application and open the Oddity’s edit window, its main
screen. The Oddity uses two specific file types; Presets, individual sounds, and Preset Banks (.pbk), groups of up to 64 Presets. Preset
Banks can be used within the Oddity on either PC or Mac platforms. If a .pbk file is created within a Windows host these files can
be utilized by an Oddity operating on a Mac host, and vice versa. For specific details of each module parameter please refer to their
section within this manual.
Sound Formats: Mac and PC
The Oddity uses it’s own cross-platform file structure in the form of Preset Banks. However, most host applications offer their own
sound saving methods which you may be more familiar with. On this Oddity Master CD you will find a folder called ‘The Oddity
- Sounds’ which contains several variations of Oddity sounds in formats applicable either to the Oddity itself (.pbk files), Emagic’s
Logic (settings) or Steinberg’s Cubase (instruments).
6
Page 6
Preset Banks
Once the Oddity has been successfully installed, six Preset Banks (each containing 64 preset allocations) will have also been
installed to your host application’s VSTPlugIns/GMEDIAMusic/Oddity folder. The sounds in the first four of these have been
designed specifically around the Oddity. The fifth one, named OdysseyBank.pbk, actually contains 64 sounds reconstructed from
the Odyssey’s original patch templates for those old retro tones. Finally, there’s an empty Preset Bank named ‘Template.pbk’ which
is a great place to start when creating and saving your own Presets and, in turn, Preset Banks.
Of course, it is possible to save Presets to any of the Preset Banks, over-writing an original Preset(s) in the process. If you need to
recover a original sound that has been over-written, simply copy the original Preset Banks to your hard-disk and navigate to this
folder using the red ‘Load’ button found on the Oddity’s front panel.
Logic Settings
If you are a Logic user and wish to load individual Oddity Presets as a ‘setting’, open the ‘The Oddity - Sounds’ folder followed by
the ‘Individual Sounds’ folder. Next, open the folder applicable to your computer’s operating system and copy the ‘Logic Settings’
folder to your hard-disk.
Using the ‘Load Settings’ command within Logic, you can now navigate to this folder to load any of the individual sounds. This is a
good method of rearranging your Preset Banks to suit your own needs, or simply recovering individual sounds that may have been
overwritten by mistake.
Cubase Instruments
If you are a Cubase user and wish to load individual Oddity Presets open the ‘The Oddity -Sounds’ folder followed by the ‘Individual
Sounds’ folder. Next open the folder applicable to your computer’s operating system and copy the ‘Cubase Instruments’ folder to
your hard-disk. From within Cubase navigate to this folder and load any of the individual Oddity instruments.
Finally...
Loading an Oddity sound as either a Logic ‘setting’ or a Cubase ‘instrument’ will change the Oddity’s parameters to those associated
with the new sound but you will see no change to the name in the Oddity ‘Current Preset’ window. Remember also that this new
sound will only become permanently stored once it’s saved as a Preset and, in turn, as part of a Preset Bank.
Product Demos
Included on this CD are product demos from GForce and Ohm Force, please take a little time to check these out. These can be found
in the GForce Demos folder.
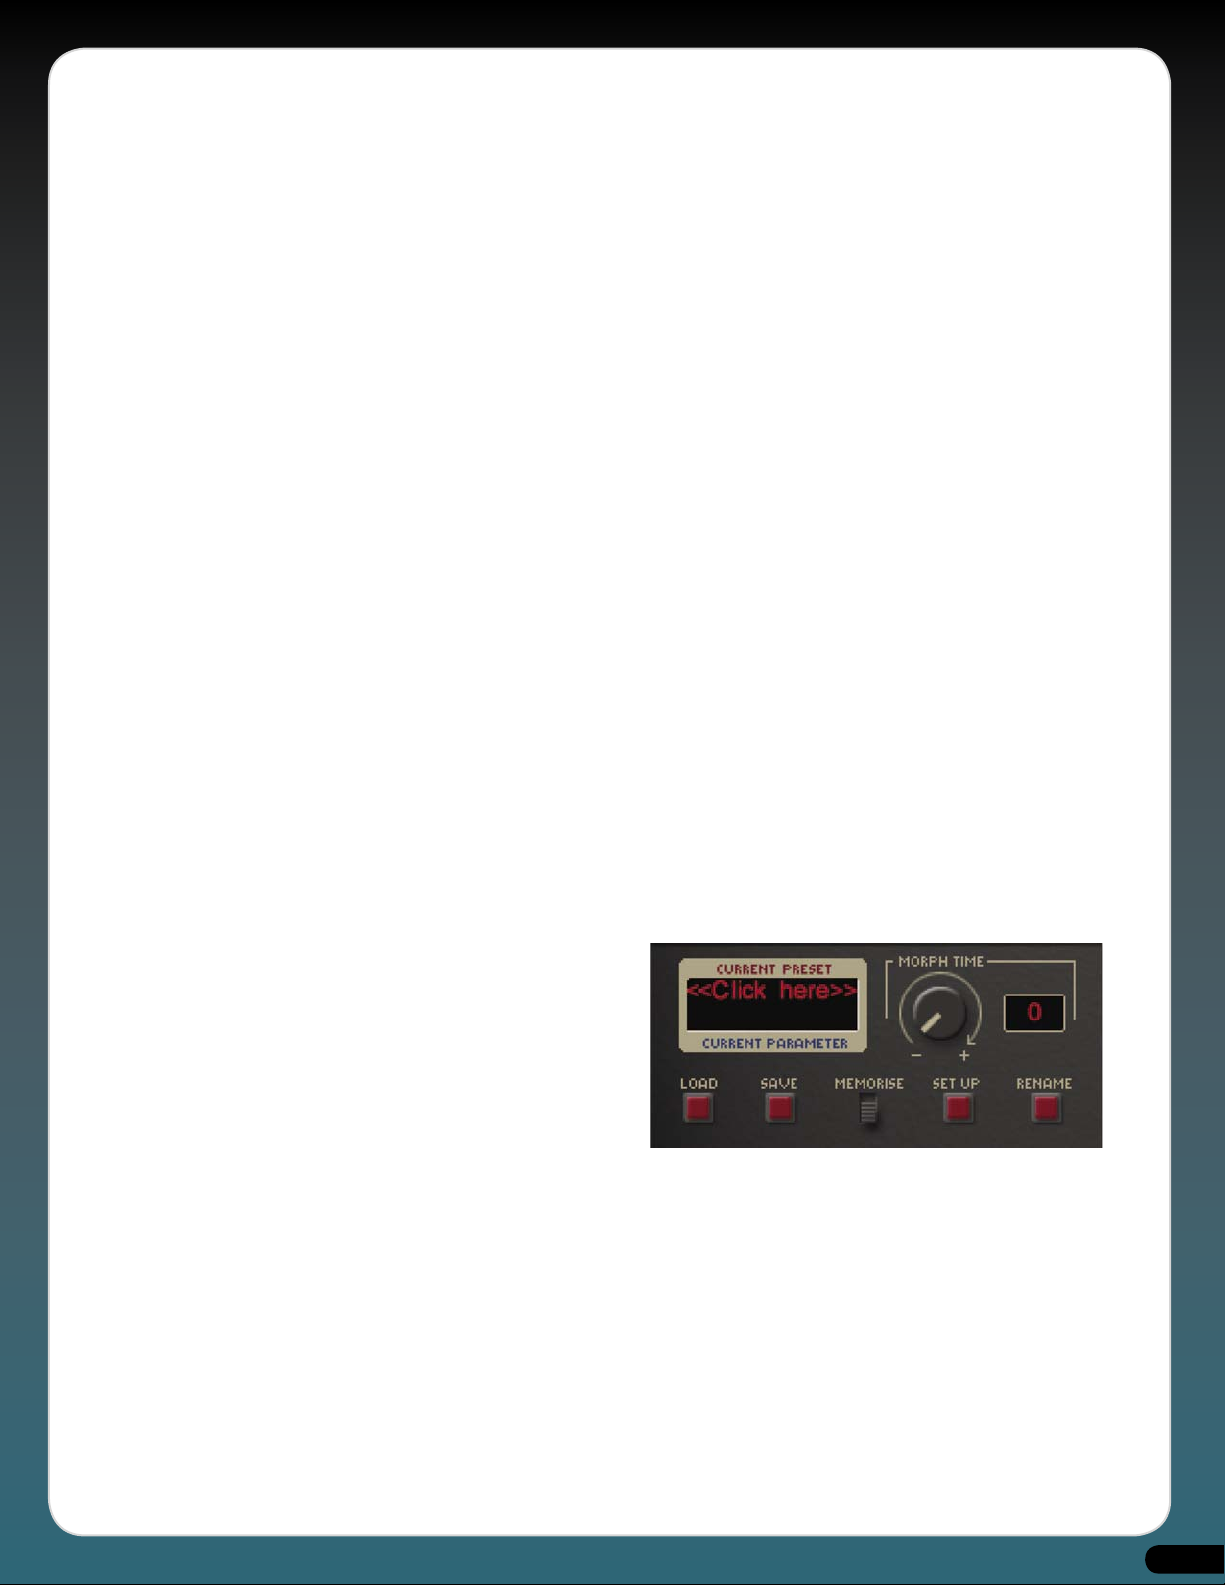
Loading Preset Banks
When an Oddity is first opened the default sound “80’s Bass”
will be loaded but initially you will see “<<Click Here>>” in
the ‘Current Preset’ window. Clicking on this text will open a
drop-down menu from where you can select any one of the
64 Presets from the default set, ‘OddityBank01.pbk’. Having
opened the drop-down menu, a tick will appear next to the
selected Preset.
To load a Preset Bank (.pbk) simply click on the ‘Load’ button
and navigate to your host application’s VstPlugIns/GMEDIAMusic/Oddity folder where you will find the six installed Preset Bank
files. Select the bank you wish to load and then audition the Presets using the method shown above.
Understanding and saving edited Presets and Preset Banks.
The Oddity uses two file types, Presets and Preset Banks (.pbk files). Presets are individual sounds and Preset Banks are groups of
upto 64 Presets. Presets must be saved as part of a Preset Bank to hard-disk.
7
Page 7
Saving an edited Preset in a new Preset Bank:
1. Click on the the ‘Load’ button and select the ‘Template.pbk’. This loads the ‘Template.pbk’ into the Oddity’s background
memory, your edited Preset remains the active Preset and still appears in the ‘Current Preset’ window.
2. Move the ‘Memorize’ switch to it’s upper position.
3. Click on the Preset name in the ‘Current Preset’ window to open the Preset drop-down menu. Now select the position you
wish to save your Preset in.
4. Click on the ‘Rename’ button to rename your new Preset. The new name will now appear in the drop-down menu in the
position you saved your new Preset and in the ‘Current Preset’ window.
5. VERY IMPORTANT. Presets are only saved to volatile RAM and must be saved as part of a Preset Bank (pbk) to hard-disk.
Click on the ‘Save’ button to save your current set of Presets as a Preset Bank. If you do not save edited Presets in a Preset
Bank to hard-disk they will be lost when you quit your host application. Name your new set with a name of your choice and
then use this as the basis for any new Presets you create. Using this method you can create various Preset Banks, basses,
effects, leads, etc.
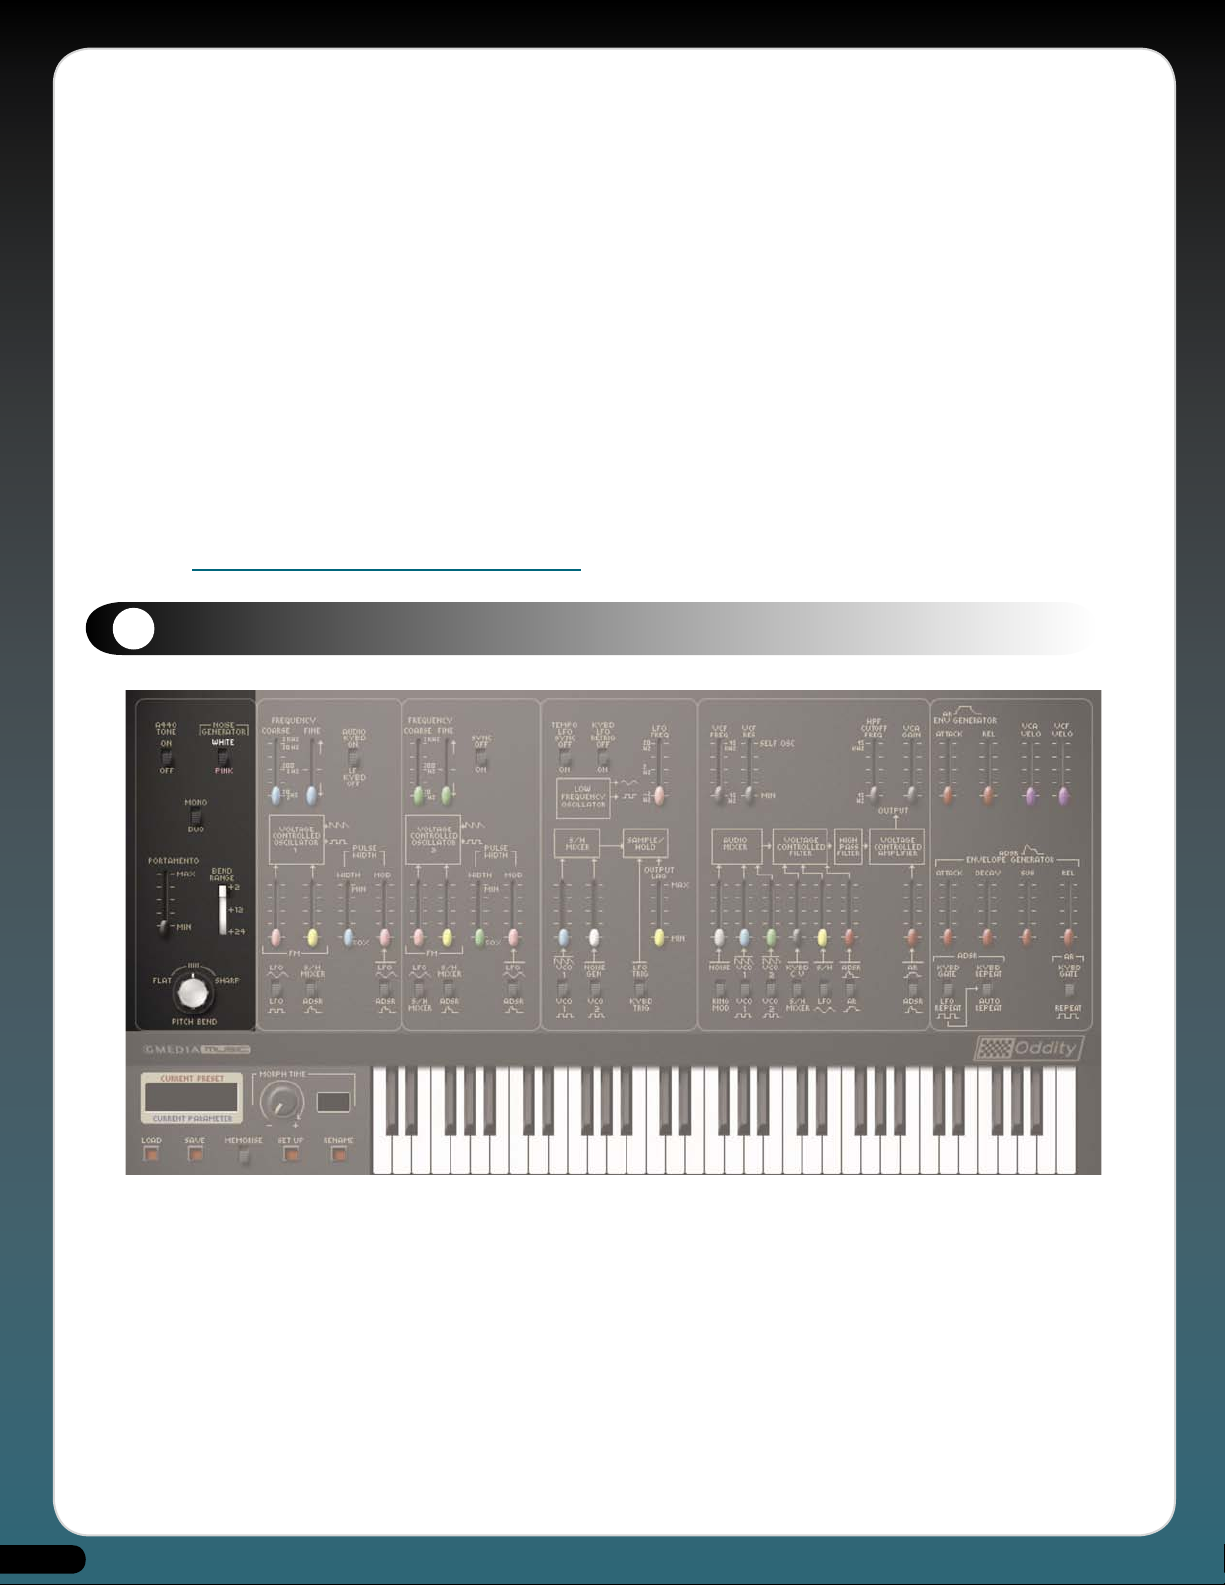
The Oddity Modules
1
Common Controls
8
Page 8

1. A=440Hz tone switch.
A useful guide for tuning the oscillators – not included on the original instrument.
2. Pink/White Noise switch.
White noise contains all the frequencies in the audio spectrum in equal amounts. Pink noise
is more useful in musical terms because it contains equal energies of each frequency and
as a result doesn’t sound too low and rumbling nor too high and hissy. Useful for creating
wind and thunder noises or adding ‘grit’ to drum sounds.
3. Mono/Duo switch
Use this to change between monophonic and duophonic modes. Using mono mode can
help speed up the tracking of notes and allow for cleaner note triggering. However, the duo
mode, particularly when used with the ring modulator, is great for playing monophonic
parts where adding a second note can introduce some wonderful harmonic overtones.
4. Pitch-Bend Range selector.
Selects the amount of semitones that the pitch-bend wheel works across (switchable
between +2, +12 or +24 semitones).
5. Pitch-Bend knob.
Frequency shift. Responds to external pitch-bend controller information.
6. Portamento slider.
Determines the amount of ‘glide’ between one note and the next played. Ranges between
zero and 1500 milliseconds.
2
Voltage Controlled Oscillator 1 (VCO1)
9
Page 9

1. Low Frequency or Keyboard Trigger switch.
Normally set to AUDIO KYBD ON to allow you to trigger VCO1 via the keyboard. However,
selecting LF KYBD OFF lowers the frequency of VCO1 to below the human hearing range.
When a note is played you’ll hear a clicking sound instead of a tone, the speed of which
can be changed by adjusting the (blue) Coarse and Fine tuning sliders. With LF KYBD OFF,
VCO1 can be used as a second LFO via the S/H module.
2. VCO1 pitch control (blue) Coarse and Fine tune sliders.
Unlike many synths which used knobs with fixed increments from which to select predefined octaves, the Oddity has two variable sliders. The first slider controls the Coarse
tuning and covers a range of six octaves. The second determines the Fine tuning amount
which has a range of + or - one semitone. The best way to deal with tuning issues is to
use the Coarse tune slider to find the approximate range before using the Fine tune for
more precision.
3. Frequency Modulation (FM) slider (pink) and LFO Modulation
source switch.
The pink FM slider governs the depth of modulation introduced by either of the two
waveforms selected by the switch underneath. With the switch set to the upper position
the LFO is set to a sine wave and altering the pink FM slider introduces a greater or lesser
vibrato depth. With the switch set to the square wave, moving the slider will modulate
VCO1 between the note played on the keyboard and a second note. Moving the slider
will alter the pitch of the second note up to a maximum of one octave. Using this, it’s
easy to create an effect similar to that of a trill. Use the LFO Freq slider (pink) to change
the speed of the trill.
4. Frequency Modulation slider (yellow) and S/H Mixer (Sample and Hold) or ADSR modulation
source switch.
The yellow FM slider governs the depth of modulation introduced by one of two sources selected by the switch underneath. With
the switch set to the upper position, the pitch of VCO1 is modulated by the output of the S/H Mixer (or Sample and Hold Mixer). For
an example of how this works, first raise the blue slider in the S/H Mixer to the top. Then select VCO1 square wave with the switch
underneath. Finally, open the yellow slider in the VCO1 module making sure you’ve selected S/H on the switch underneath. What you
should hear now is a series of different random pitches, the speed of which is determined by the pink LFO Freq slider. Try changing
the S/H Mixer source underneath the blue slider from VCO1 Square Wave to VCO1 Sawtooth and listen to the difference.
Changing the switch position from S/H to ADSR allows the ADSR envelope generator to modulate the pitch of VCO1. The depth
of this modulation is determined by the yellow slider. One of the secrets to making the Oddity sound ‘fat’ is by opening this slider
by a few percent and compensating for the resultant change in pitch by re-tuning VCO1. This way it’s possible to introduce very
subtle pitch modulation.
5. Pulse Width slider (blue)
The square wave on the Oddity can also be turned into a variable pulse wave with the help of the Pulse Width slider. You’ll notice
that this slider is marked between 50% and minimum. The normal square wave at 50% has a ‘hollow’ sound to it. However, when
you move the slider towards the minimum mark, as the pulse becomes thinner, the sound becomes more buzzy. Play a note and
move the Pulse Width slider up and down and you’ll hear the difference.
6. Pulse Width Modulation slider (pink) and LFO sine wave or ADSR modulation source
switch.
You can also modulate the pulse width with either an LFO-generated sine wave, or by the Envelope Generator. With the switch set
to ADSR it’s possible to sweep the pulse width in much the same way you would sweep the filter. Alternatively, if you select the
sine wave, the pulse width will modulate according to the depth set by the Pulse Width Modulation slider and the speed governed
by the LFO Frequency slider.
10
Page 10

3
Voltage Controlled Oscillator 2 (VCO2)
1. Sync On/Off switch
With this switch in the OFF position VCO2 behaves in the same manner as VCO1 and contains
largely the same controls and functions. However, when this switch is changed to ON this phase
synchronizes VCO2 to VCO1. Regardless of whether the selected waveform shape is sawtooth or
square, sync causes the waveform of VCO2 to restart whenever VCO1 is triggered. The resulting
effect is that the harmonic sound of VCO2 will change as the Coarse and Fine tune sliders for
this oscillator are altered.
For further explanation of phase synchronization see the tutorial on page 30.
2. VCO2 pitch control (green) Coarse and Fine tune sliders.
The VCO2 Frequency sliders behave in exactly the same way as the VCO1 Frequency sliders. The
first slider controls the Coarse tuning and covers a range of six octaves. The second determines
the Fine tuning amount which has a range of about one tone. If you want to ‘fatten’ up a sound
using two oscillators, try tuning the first one slightly sharp and the second one slightly flat.
3. Frequency Modulation slider (pink) and LFO or S/H Mixer switch.
As per VCO1 the pink FM slider governs the depth of modulation introduced by either of two
waveforms selected by the switch underneath. With the switch set to the upper position the LFO
is set to a sine wave and altering the pink FM slider introduces a greater or lesser vibrato depth.
With the switch set to S/H Mixer you can use the slider to introduce the settings as specified in
the S/H Mixer Module (see S/H Mixer on page 19).
4. Frequency Modulation slider (yellow) and Sample/Hold or ADSR
modulation source switch.
In the same way as with VCO1, the yellow FM slider governs the depth of modulation introduced
by one of two sources determined by the switch underneath. With the switch set to the upper
position the pitch of VCO2 is modulated by a source in accordance with the S/H Mixer. With the switch in ADSR position, the ADSR
Envelope Generator now modulates the pitch of VCO2.
11
Page 11

5. Pulse Width slider (green)
Again, as per VCO1, the square wave of VCO2 can be turned into variable pulse waves via the Pulse Width slider. Try tuning both
oscillators to the same octaves and then setting different pulse widths for VCO1 and VCO2.
6. Pulse Width modulation slider (pink) and LFO sine wave or ADSR Modulation source
switch.
You can modulate the pulse width of VCO2 with either an LFO generated sine wave, or by the ADSR Envelope Generator as per
VCO1.
4
Low Frequency Oscillator (LFO)
1. LFO Frequency slider (pink)
This slider controls the rate or speed of the LFO.
The LFO outputs a sinewave and a squarewave.
The sinewave helps produce vibrato effects while the squarewave is useful for things
such as trills. The LFO can also be routed to the Envelope Generators via the ADSR
and AR repeat switches.
2. Tempo LFO Sync On/Off switch
The LFO can be synchronized to the host tempo by switching this ON. With it ON,
moving the pink LFO slider allows you to choose one of several LFO templates
including: 1/4 beat, 1/3 beat, 1/2 beat, 1 beat, 10 beat etc... The value of your LFO template is indicated in the blue Current
Parameter display box. If a different value to the ones given by the slider are required, use horizontal mouse movements or enter
them manually in the Current Parameter window.
In the OFF position the LFO rate is set using the pink LFO slider and its value can be seen in the Current Parameter display window
in Hz. Note: It’s important to note that not all VST host application’s transmit tempo information to plug-in instruments. If Tempo
LFO Sync doesn’t work please check your host application’s manual.
12
Page 12

3. KYBD LFO Retrig On/Off switch
When set to the ON position, the Oddity LFO is retriggered each time a key is pressed. Although this is the same as on the original
instrument, occasionally it’s useful to switch this function OFF, particularly when the LFO is intended to slowly modulate the sound
over a long musical passage. Changing the position to OFF allows the LFO to continue without being retriggered by a note-on
event.
5
S/H Mixer (Sample and Hold)
The only two sliders on the Oddity that don’t have dedicated names are the blue and white sliders within
the S/H Mixer module. However, underneath each slider is a switch that gives us an indication as to what’s
being fed into this module. Underneath the blue slider is the switch marked VCO1 and indicates a Sawtooth
in the upper position and a Squarewave in the Lower position. Underneath the white slider is a switch
that indicates Noise Generator at the top (Pink or White as selected in the Noise Generator) and VCO2
Squarewave at the bottom. As with similar functions on the Oddity, these switches essentially govern what
is fed into the S/H Mixer and the sliders apply the relative amount.
This section is one of the Oddity’s more complex. Spending time experimenting with this can lead to some
unexpected and inspiring sounds; from grainy through to metallic, to full-on syncopated funk grooves.
In basic technical terms, the signals from the blue and white sliders are mixed together to produce the “S/H
Mixer” output. This is an audio signal which then enters the S/H module. This module samples a value from
the S/H Mixer output at LFO rate, (or keyboard events if this is selected by the switch marked LFO Trig at the
top and KYBD Trig at the bottom). It gives random steps, which are smoothed by the Lag Parameter (yellow
slider) acting a bit like portamento or ‘glide’. This becomes the ‘S/H’ output.
The difference between S/H and S/H Mixer is the rate of the changes. S/H is a slow modulation, whereas
S/H Mixer modulates signal at audio rate. Applied to the Oscillator Frequency, it produces analog-based
FM sounds, not dissimilar to a Yamaha DX-7 operator (although the DX-7 is digital and uses Phase Modulation, not Frequency
Modulation). Applied to the Filter Cutoff the result is less obvious but interesting nonetheless.
13
Page 13

6
Audio Mixer
1. Noise Generator or Ring Modulation source switch and Audio Mixer slider
(white).
This switch selects either Noise (white or pink) or Ring Modulation with the white slider being used to
feed the appropriate level into the Audio Mixer.
Ring Modulation
Along with the S/H Modules, the Ring Modulator is one of the Oddity’s more esoteric features. Essentially,
the Ring Modulator intermodulates VCO1 and VCO2 and produces a single complex waveform that
contains the sums and differences of the two oscillator frequencies. Experiment with applying different
VCO tunings, pulse width and sync settings to create a host of tones such as bells, chimes, gongs, metallic
and percussive sounds.
A favorite musical use of the Ring Modulator is to set up a straightforward lead or bass sound with
the ring mod slider also opened. Make sure the sound is set to duophonic mode but when playing, use
it monophonically. Now, by adding an occasional second note (fifth’s work well) you’ll get some neat
harmonic overtones and distorted textures.
For more info on Ring Modulation see the tutorial on page 31.
2. VCO1 Sawtooth or Square Waveform switch and Volume slider for VCO1 Level (blue).
Using this switch you select the basic waveform for VCO1 before using the blue slider to apply the level of VCO1 sent into the
Audio Mixer.
3. VCO2 Sawtooth or Square Waveform switch and Volume slider for VCO2 Level (green)
In the same way as with VCO1, use this switch to select the basic waveform for VCO2 and using the green slider apply the required
level of VCO2 into the Audio Mixer.
14
Page 14

7
Voltage Control Filter (VCF)
1. KYBD CV or S/H Mixer switch and Amount slider of
selected VCF source (black)
This switch selects between Keyboard Tracking and the S/H Mixer. Selecting
Keyboard Tracking and feeding this signal into the VCF, via the black slider, allows
you vary the keyboard tracking as it relates to the filter. Choosing a slider position
towards the bottom of the scale opens the filter more on the lower keys of your
keyboard and decreases this effect as you play up the keyboard. Setting a slider
position towards the top of the scale has the opposite effect.
Selecting S/H Mixer and feeding this signal into the VCF in conjunction with the
S/H Mixer module sliders, allows for various effects as outlined in the Sample and
Hold section on page 19.
2. S/H or LFO Sine Wave switch and Amount slider of selected
VCF source (yellow).
This switch selects between Sample and Hold and a Sinewave LFO source. Selecting
S/H and feeding this signal into the VCF allows you to apply the sample and hold
effect, as governed by the waveform shapes selected and applied in the S/H Mixer,
to the VCF.
Selecting LFO allows you to apply a sinewave to the filter and modulate it at a
speed determined by the LFO Frequency.
3. ADSR or AR switch and slider to control amount of either
ADSR or AR (Red)
The Oddity has two Envelope Generators which can be used to shape either the VCF or VCA. Here it’s possible to assign either to the
VCF and use the red slider to feed varying amounts of the selected envelope generator to the VCF.
4. VCF Frequency slider (black)
Arguably the most commonly used parameter on any synth, this changes timbre by subtracting harmonics or frequencies by
moving the slider down from its top position. The Oddity filter is modeled on the famous 4075 low-pass filter which, for the techies
amongst you, had a frequency range of between 16Hz to 16Khz.
15
Page 15

5. VCF Resonance slider (black)
Adds emphasis at the cutoff point and causes the filter to ‘self-oscillate’ when pushed towards the top of its range.
High-pass Filter
8
HPF Cutoff Frequency slider (black)
Use this slider to remove low frequencies thus creating thinner sounding textures. When used in conjunction with the VCF Freq
slider it’s possible to create band-pass filter effects.
9
Voltage Controlled Amplifier (VCA)
16
Page 16

1. VCA Gain slider (black)
Used to add additional gain to the signal path and particularly useful for boosting level after overzealous use of the High-pass
Filter. It’s also worth noting that with the Low-pass Filter open, or partially open, increasing the VCA gain can cause a sound to
sustain continuously.
2. ADSR or AR switch and slider to control amount of ADSR or AR to VCA (Red)
As explained in the VCF section, the Oddity has two envelope generators either of which can be assigned to the VCF or VCA. Here
we select one for the VCA and use the red slider to adjust the amount.
10
Envelope Generators (AR and ADSR)
1. AR Envelope Generator Attack slider (Red)
Used to alter the Attack time of the AR Envelope Generator
2. AR Envelope Generator Release slider (Red)
Used to alter the Release time of the AR Envelope Generator
3. Keyboard Gate Triggering or LFO Repeat switch for AR
generator.
When set to KYBD Gate this allows a keyboard event to trigger the AR Envelope
Generator. When set to Repeat the AR Envelope Generator is triggered by the LFO.
As you would expect, the speed of the LFO triggering can be altered by the pink LFO
Frequency slider.
4. ADSR Envelope Generator Attack slider (Red)
Used to alter the Attack time of the ADSR Envelope Generator.
5. ADSR Envelope Generator Decay slider (Red)
Used to alter the Decay time of the ADSR Envelope Generator.
17
Page 17

6. ADSR Envelope Generator Sustain slider (Red)
Used to alter the Sustain level of the ADSR Envelope Generator.
7. ADSR Envelope Generator Release slider (Red)
Used to alter the Release time of the ADSR Envelope Generator.
8. Keyboard Gate Triggering or LFO Repeat switch for ADSR generator.
When set to KYBD Gate a keyboard event will trigger the ADSR Envelope Generator. When set to LFO Repeat the ADSR Envelope
Generator is triggered by the LFO. The speed of the LFO triggering can be altered by the pink LFO Frequency slider.
9. Keyboard Repeat or Auto Repeat switch
When LFO Repeat is selected on the adjacent switch, selecting KYBD Repeat allows the sound to be continuously re-triggered for
the duration the note is pressed. However when set to AUTO Repeat, it will sound continuously regardless of whether a key is
pressed. Again the speed of the re-triggering depends on the LFO frequency slider.
10. VCA Velocity slider (Purple)
Use this slider to add varying degrees of keyboard touch-sensitivity to VCA dynamics.
11. VCF Velocity slider (Purple)
Use this slider to add varying degrees of keyboard touch-sensitivity to VCF dynamics.
Preset and Morph section
11
This section enables you to manage your sound settings. A Preset Bank (.pbk) contains up to 64 presets and in this section you can
memorize your settings and save them to your hard disk. These Preset Banks are cross-platform, allowing their use with either PC
or Mac systems.
18
Page 18

1. Current Preset and Current Parameter
display
The red lettering of the display indicates the name of the
currently selected Preset. Clicking on this part of the display
opens the Preset list drop-down menu.
The blue section of the display indicates the value of the slider
or switch currently being edited. Clicking on this part of the
display allows you to type in a value for the currently selected
parameter.
2. Morph Time knob and Morph Time display
A unique feature of the Oddity, is its ability to ‘Morph’ between two Presets. Morph Time is the transition-time it takes the sliders
to move from their current position to the ones appropriate to the next Preset.
The Morph Time knob enables you to vary the time taken, in seconds, to go from the Current Preset to the next selected from the
Preset drop-down menu. The time is measured in seconds and displayed in the adjacent box. This defaults to 0 seconds but you can
change the transition length up to 99 seconds.
The sonic possibilities of this section are endless. For example you can Morph between mellow and aggressive versions of the same
sound. Or Morph between radically different sounds and create extreme transitions, Morphing is activated as soon as the new
Preset is selected in the Preset drop-down menu.
3. Memorize
To memorize a Preset, move the Memorize button to its upper position. Click on the top line of the display and navigate to one of
the 64 Preset allocations to temporarily store it. Note: To permanently store a Preset it must be saved as part of a Preset Bank.
To recall a Preset, make sure the Memorize button is off (or in the lower position). Now, click on the top line of the display and click
on one of the 64 Presets you want to recall.
4. Rename
This relates to the currently selected Preset and allows you to rename it.
5. Save
Allows you to save your Presets permanently within a Preset Bank (.pbk) to your hard-disk.
6. Load
Used to load your Preset Banks (.pbk) from your hard-disk.
7. Set Up
Selecting MIDI devices.
Depending on your host, your MIDI devices and your system settings, you may have one or more available MIDI ports for input and
for output. It is possible to select the virtual ports for receiving and sending MIDI events.
To choose the input port (the one on which MIDI data is received by the plug-in), go to the MIDI>Input device menu and select the
one you want. Similarly, to select the output port simply go to MIDI>Output device and select the one you want. The selected MIDI
ports will now have a tick against them.
Note: It is possible to choose only one MIDI port for input and one for output.
19
Page 19

12
Binding parameters to MIDI continuous control messages. (MIDI CC’s)
Although each parameter of the Oddity has its own pre-assigned MIDI CC number (see page 32), the easiest way to link a parameter
to a specific MIDI CC (knob, slider, etc.) is to use the Auto-Bind feature.
To use this, click on the Set Up button and enter the Auto-Bind mode by checking MIDI > Auto-bind in the Setup menu, a tick will
appear next to the Auto-Bind text. Now move the required slider or switch on the Oddity. and follow this by turning or moving the
physical controller you wish to control that slider or switch. This sends the MIDI CC to the Oddity and as soon as the CC event is
received, the connection is made and this will remain associated with the parameter. As a useful aid, if you have already selected a
parameter before, its name will be displayed in the menu, between brackets, for example:
Auto-bind [target: Cutoff Freq].
Each of the Oddity’s parameters can be bound to different MIDI CC messages, and you can also save various configurations in Set
Up using the ‘Save’ option. Saved configurations can be recalled using the Set Up ‘Load’ option. To leave the Auto-Bind mode simply
un-check it in the Set Up menu and all your previously bound MIDI CC’s will control the relevant parameters.
Enhanced Mouse Mode
Selecting this mode makes the mouse cursor disappear when a slider is moved. It’s more comfortable for editing because it allows
you to move the sliders accurately despite their small size. There is an option to deactivate this mode because it may not work
correctly with some trackballs and graphic tablets on Mac.
Tutorials
Phase Synchronization
Please start this tutorial by loading the default Oddity Preset Bank, OddityBank01.pbk, and
selecting the first sound in the Preset list “80’s Bass”.
Look at the part of the panel marked VOLTAGE CONTROLLED OSCILLATOR 2. As mentioned
previously this is exactly like VCO1 except for the Low-Frequency switch has been replaced
by a SYNC ON/OFF switch.
When this switch is ON, the audio signal from VCO2 is forced to conform to the frequency
of VCO1. This is done by causing the waveform of VCO2 to begin again, or restart whenever
VCO1 is triggered.
Because of this synchronization the harmonic sound of VCO2 will change as the COARSE
and FINE frequency sliders for VCO2 are changed, although the basic frequency of the
waveform remains the same as VCO1.
You can hear this effect in its raw form by setting VCO1 to around the 100Hz mark and
slowly moving the coarse tuning control of VCO2 through its entire tuning range while
playing the keyboard. The result is one of the classic Oddity sounds.
In the FM section of VCO2, and with the S/H and ADSR switch set to ADSR, it’s possible to
alter the position of the yellow FM slider (located above the switch) and use the ADSR to
sweep the sync. Experiment with different envelope settings (slow attack, long release) and
the VCF ADSR slider (red) set about 75% open to achieve some interesting results.
20
Page 20

Ring Modulation
Please start this tutorial by loading the default Oddity Preset
Bank, OddityBank01.pbk, and selecting the first sound in the
Preset list “80’s Bass”.
Lower the blue and green sliders under the AUDIO MIXER box,
and raise the white slider. Make sure the position of the switch
under the white slider is set to RING MOD. Also ensure that
the PHASE SYNC switch for VCO2 is off. Play a few notes on
the keyboard and listen to the Ring Modulator. While you are
listening to it move the sliders of VCO1 Coarse tune and VCO2
Coarse tune. The raw sound produced from the Ring Modulator
depends entirely on the tuning of VCO1 and VCO2; and to a
lesser extent on the Pulse Width settings for each one. You’ll
notice that sounds from the Ring Modulator do not necessarily
have to relate to the standard musical pitch produced by either
oscillator, (Unless they are synchronized by the SYNC switch on
VCO2). Similarly, the overtones of the Ring Modulator signal do
not necessarily conform to the standard harmonic series and as
mentioned previously are like those of a bell, chimes, gongs, and
other metallic or percussive sounds.
MIDI Continuous Control Messages
13
Each of the Oddity’s parameters responds to a standard MIDI Continuous Control message (MIDI CC’s) as listed below.
MIDI CC Parameter MIDI CC Parameter MIDI CC Parameter
1 VCF Mod 2 Amount 24 VCF Mod 1 Amount 85 Noise Type
2 Mixer Source 1 Level 25 VCF Mod 1 Source 86 VCO1 Coarse Tune
3 Mixer Source 2 Level 26 VCF Mod 2 Source 87 VCO2 Coarse Tune
4 Mixer Source 3 Level 27 VCF Mod 3 Source 88 VCO1 Fine Tune
5 Portamento 28 S/H Trig 89 VCO2 Fine Tune
7 VCA Mod Source 29 Mono/Duo Mode 90 VCO1 Pulse Width
8 LFO Freq Q 30 Velocity to VCA 91 VCO2 Pulse Width
9 HPF Cutoff Freq Q 31 Velocity to VCF Cutoff 102 S/H Lag
11
12 VCO1 PW Mod Source 72 AR Release 104 S/H Mixer Source1 Level
13 VCO2 PW Mod Source 73 AR Attack 105 S/H Mixer Source 2
14 VCO1 PW Mod Level 74 VCF Cutoff Frequency 106 S/H Mixer Source 2 Level
15 VCO2 PW Mod Level 75 ADSR Attack 107 Mixer Source 1
16 VCO1 FM1 Source 76 ADSR Decay 108 Mixer Source 2
17 VCO2 FM1 Source 77 ADSR Sustain 109 Mixer Source 3
18 VCO1 FM2 Source 78 ADSR Release 110 VCA Level
19 VCO2 FM2 Source 80 ADSR LFO Repeat 111 VCA Mod Level
20 VCO1 FM1 Level 81 ADSR Auto Repeat 112 A440
21 VCO2 FM1 Level 82 AR LFO Repeat 113 LFO Sync
22 VCO1 FM2 Level 83 VCO2 Sync 114 LFO Trig
23 VCO2 FM2 Level 84 VCO1 Source
VCF Mod 3 Amount 71 VCF Resonance 103 S/H Mixer Source1
21
Page 21

14
Contact
We at M-Audio have worked diligently to ensure that the Oddity is an optimal piece of software for your studio. However, due to
the wide variety of host computers and configurations, you may encounter unexpected behavior from your software. If you feel
that Oddity is not working properly, you can contact M-Audio Technical Support for assistance.
(626) 633-9055 – Tech Support phone lines are open from 7AM to 7PM PST, Monday through Friday.
techsupt@m-audio.com – E-mail Tech Support whenever it’s convenient for you. You will usually receive a response within one
business day.
www.m-audio.com – Check the M-Audio website for any news, FAQs, or updates related to your product. Often, you will find
solutions to your problems here that will save you a phone call to Tech Support.
M-AUDIO U.S. -
5795 Martin Road, Irwindale, CA 91706-6211, U.S.A.
Sales Infor mation: . . . . . . . . . . . . . . . . . . . . . . . . . . . . . . . . . . . . . . . . . . .626- 633-9050
Sales (fax) : . . . . . . . . . . . . . . . . . . . . . . . . . . . . . . . . . . . . . . . . . . . . . . . . . .626-633-9070
Sales Infor mation (email): . . . . . . . . . . . . . . . . . . . . . . . . . . . . . . . info@m-aud io.com
Tech Supp ort ( emai l): . . . . . . . . . . . . . . . . . . . . . . . . . . . . . . . . techsupt @m-audio.com
Tech Supp ort ( fax): . . . . . . . . . . . . . . . . . . . . . . . . . . . . . . . . . . . . . . . . . .626-633-9060
Internet Ho me Page : . . . . . . . . . . . . . . . . . . . . . . . . . . . . . .h ttp://www.m- audio.com
M-AUDIO U.K. -
Floor 6, Gresham House, 53 Clarendon Road, Watford, WD17 1LA, United Kingdom
Sales Infor mation (phone): . . . . . . . . . . . . . . . . . . . . . . . . . . . . . . . 44 (0) 1923 204010
Sales Infor mation (fax ): . . . . . . . . . . . . . . . . . . . . . . . . . . . . . . . . . .44 ( 0) 1923 204039
Sales Infor mation (email): . . . . . . . . . . . . . . . . . . . . . . . . . . . . . . . info@maudio.co.uk
Technical Support ( PC): . . . . . . . . . . . . . . . . . . . . . . . . . . . . . . . . . . .44 (0 ) 1309 671301
Technical Support ( Mac): . . . . . . . . . . . . . . . . . . . . . . . . . . . . . . . . . 44 ( 0) 1765 650072
Technical Support ( email): . . . . . . . . . . . . . . . . . . . . . . . . . . . .support@maudio.co.uk
Internet Ho me Page : . . . . . . . . . . . . . . . . . . . . . . . . . . . . . .ht tp://www.maudio.co.uk
M-AUDIO France -
Floor 6, Gresham House, 53 Clarendon Road, Watford, WD17 1LA, United Kingdom
Assi stance Techni que (a ucune q uest ions reliées aux ventes)
courr iel (a ssistance PC ): . . . . . . . . . . . . . . . . . . . . . . . suppor t@m-audio-f rance.co m
courr iel (a ssistance Ma c): . . . . . . . . . . . . . . . . . . . . . . . . . mac@m-audio-france.com
téléphone ( assistance PC): . . . . . . . . . . . . . . . . .0820 000 731 (0,12 Euros par minute )
téléphone ( assistance Mac): . . . . . . . . . . . . . . . 0820 391 191 (0,12 Euros par mi nute )
télécopieu r/fax: . . . . . . . . . . . . . . . . . . . . . . . . . . . . . . . . . . . . . . . . . . . . .01 72 72 90 52
Ventes ( aucun appels d’ass ista nce tec hnique)
téléphone : . . . . . . . . . . . . . . . . . . . . . . . . . . . . . . . . . . . . . 0810 0 01 105 (Nu mero Azur)
courr iel: . . . . . . . . . . . . . . . . . . . . . . . . . . . . . . . . . . . . . . . . info @m-audio -fran ce.com
télécopieu r/fax: . . . . . . . . . . . . . . . . . . . . . . . . . . . . . . . . . . . . . . . . . . . . .01 72 72 90 52
M-AUDIO Deutschland (Germany ) -
Kuhallmand 34, D-74613 Ohringen, Germany
Sales Infor mation: . . . . . . . . . . . . . . . . . . . . . . . . . . . . . . . . . . . . . . + 49 (0)7941 987000
Sales Infor mation (email): . . . . . . . . . . . . . . . . . . . . . . . . . . . . . . . . .in fo@m-aud io.de
Technical Support : . . . . . . . . . . . . . . . . . . . . . . . . . . . . . . . . . . . . . +49 (0)7941 9870030
Technical Support ( email): . . . . . . . . . . . . . . . . . . . . . . . . . . . . . support@m-a udio.de
Technical Support ( fax): . . . . . . . . . . . . . . . . . . . . . . . . . . . . . . . .+49 ( 0)7941 98 70070
Internet Ho me Page : . . . . . . . . . . . . . . . . . . . . . . . . . . . . . . . . ht tp://www.m-a udio.de
M-AUDIO Canada -
1400 St-Jean Baptiste Ave. #150, Quebec City, Quebec G2E 5 B7, Canada
Technical Support ( e-mail): . . . . . . . . . . . . . . . . . . . . . . . techcanada @m-audi o.com
Technical Support ( PC): . . . . . . . . . . . . . . . . . . . . . . . . . . . . . . . . . . . . . (418) 872-0444
Technical Support ( Mac): . . . . . . . . . . . . . . . . . . . . . . . . . . . . . . . . . . . 1-800-638-2120
Technical Support ( fax) : . . . . . . . . . . . . . . . . . . . . . . . . . . . . . . . . . . . . . ( 418) 872-0034
Sales (e-mail): . . . . . . . . . . . . . . . . . . . . . . . . . . . . . . . . . . .infocanada@ m-audio.com
Sales (phon e): . . . . . . . . . . . . . . . . . . . . . . . . . . . . . . . . . . . . . . . . . . . . .(866) 872-0444
Sales (fax) : . . . . . . . . . . . . . . . . . . . . . . . . . . . . . . . . . . . . . . . . . . . . . . . . .(514) 396-7102
Internet Ho me Page . . . . . . . . . . . . . . . . . . . . . . . . . . . . . . . . ht tp://www.m-a udio.ca
M-AUDIO Japan -
(株式会社エムオーディオジャパン)
テクニカルサポート :.................................
テクニカルサポート
(Macintosh ):
テクニカルサポート
(Win dows):
Fax:............................................
ホームページ : ......................... ht tp://www.m-audio.co.jp
........................mac-support@m-audio.co.jp
..........................win-suppor t@m-audio.co.jp
460-0 002
愛知県名古屋市中区丸の内
052-218-0859
052-218-0875
2-18-10
050426_ODDITY_UG_EN01
22
Page 22

23
 Loading...