

Page 1
Page 2
Introduction
Thank you for choosing GrooveLab from M-Audio. GrooveLab is a complete, integrated
hardware and software solution that provides you with a powerful set of musical composition
and production tools, assembled in an easy-to-use package to get you started making music
right away.
Your GrooveLab package includes:
• GrooveLab Transit – a compact, mobile, professional 24-bit/96kHz audio interface for your
Windows or Macintosh computer
• GrooveLab CD-ROM – contains GrooveLab Transit Driver software that allows your
computer to communicate with your GrooveLab Transit, and Grooves Demo Loops, an
assortment of sample loops to get you started
• Ableton Live Delta CD-ROM – a special introductory version of Ableton’s digital audio workstation
• Compact stereo headset with microphone
This Quick Start Guide will give you an overview of your GrooveLab. It is not intended to replace
the included user guides for GrooveLab Transit, or Live Delta, which we strongly recommend
reading in order to get the most out of your purchase.
Installing GrooveLab Transit
On Windows systems, the GrooveLab Transit is capable of
pplluugg--aanndd--ppllaayy
installation, which
means that you can simply connect it to your computer using the supplied USB cable, so that
your system will detect the GrooveLab Transit as a “USB Audio Device,” and you can start using
it right away. However, we recommend that you use the supplied driver, which will give you the
additional functionality of a device control panel, low-latency ASIO drivers and audio resolution
up to 24-bit/96kHz (explained below).
Windows Note: In this quick start, we’ll install the GrooveLab Transit’s driver, rather than
just using plug-and-play installation, so do not connect the GrooveLab Transit to your
computer until after you have installed the driver software.
Our ASIO driver allows faster response (lower latency) than standard audio drivers, so this, in
addition to
ssuuppeerriioorr 2244--bbiitt//9966kkHHzz ssoouunndd qquuaalliitty
y
, is why you’ll definitely want to use the
GrooveLab Transit instead of a standard soundcard or laptop audio port.
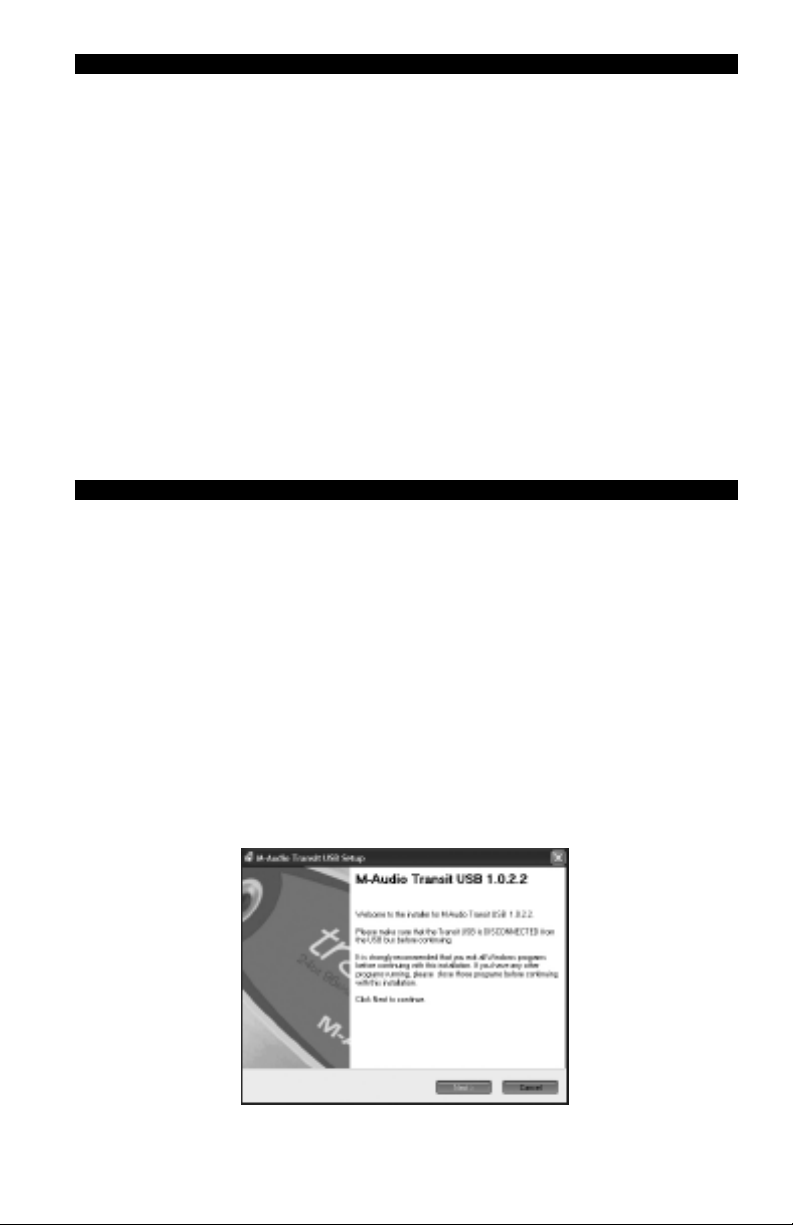
Begin by installing the GrooveLab Transit drivers to your Windows or Macintosh computer. Insert the
GrooveLab Transit drivers/Grooves CD-ROM and run the GrooveLab Transit installation programs.
1
Page 3
After running the installation programs, reboot your computer. For a more detailed guide on
installing the GrooveLab Transit USB’s drivers, refer to the Users Manual included in the
GrooveLab Transit drivers/Grooves CD-ROM.
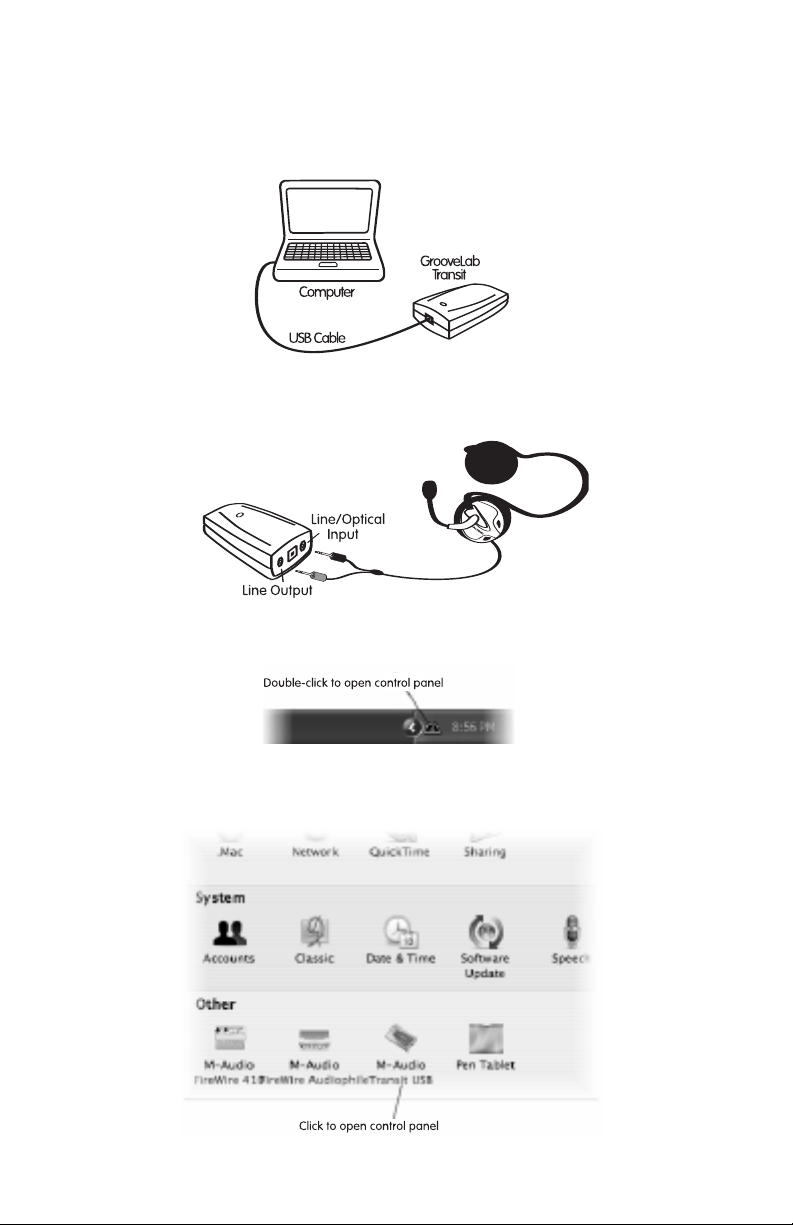
Once your computer has rebooted, connect the GrooveLab Transit to your computer with the
included USB cable, and complete any remaining software installation windows if necessary.
Now connect your headset to the GrooveLab Transit’s inputs. Connect the green (headphone) plug to the
GrooveLab Transit’s green
LLiinnee//OOppttiiccaall IInnppuut
t
.
LLiinnee OOuuttppuut
t
, and the red (microphone) plug to the GrooveLab Transit’s
Open the GrooveLab Transit’s control panel. To do this on PC, double-click the M icon located in
the System Tray at the bottom-right corner of your screen.
If using Mac OS X, click the System Preferences option in the Apple menu, and then click the
GrooveLab Transit icon.
2
Page 4
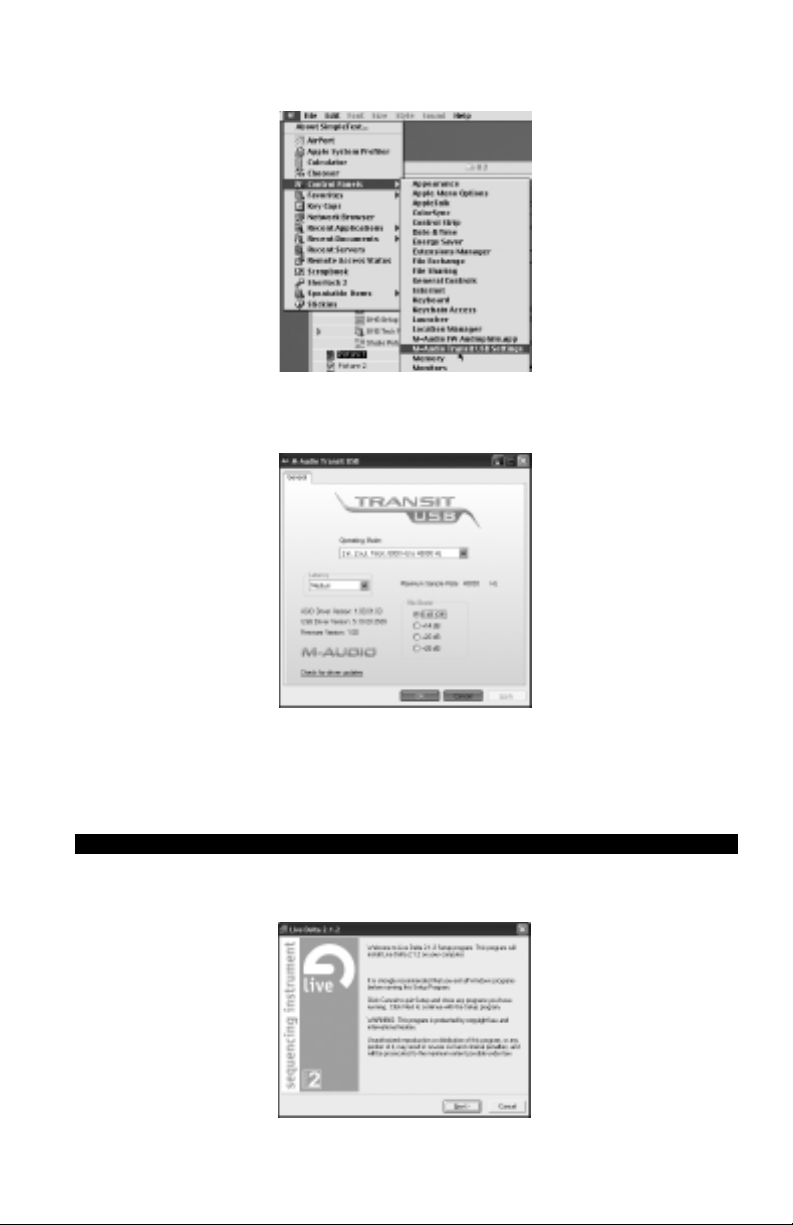
If using Mac OS 9, open the Control Panel from the Apple menu, and click the GrooveLab
Transit icon.
The control panel menu shows the default settings as 2 inputs/outputs, 16-bit, sample rates up
to 48000 Hz, Medium Latency, and 0dB Mic Boost.
We recommend leaving these settings for the moment. You may wish to experiment with mic
levels and latency settings once you’ve got familiar with your setup.
Refer to the GrooveLab
Transit manual for additional information on the control panel and these settings.
Installing Live Delta
PC Users:
Insert the Live Delta CD-ROM, run the installer, and follow the installation procedures.
3
Page 5
Once you’ve successfully installed Live Delta, we suggest you have a look at the manual, which
you will find in your Start/Programs menu under the newly installed Ableton menu.
Mac OS Users:
Insert the Live Delta CD-ROM into your computer. The CD will appear as an icon on your
desktop. Double-click the CD icon to view its contents.
On the CD, you’ll find a Live Delta folder. Click and drag this folder into the Applications folder on
your computer. The computer will copy the program from the CD onto your hard drive. Once
you’ve successfully installed Live Delta, we suggest you have a look at the manual, which can
be found in the “Docs” folder inside the Live Delta folder.
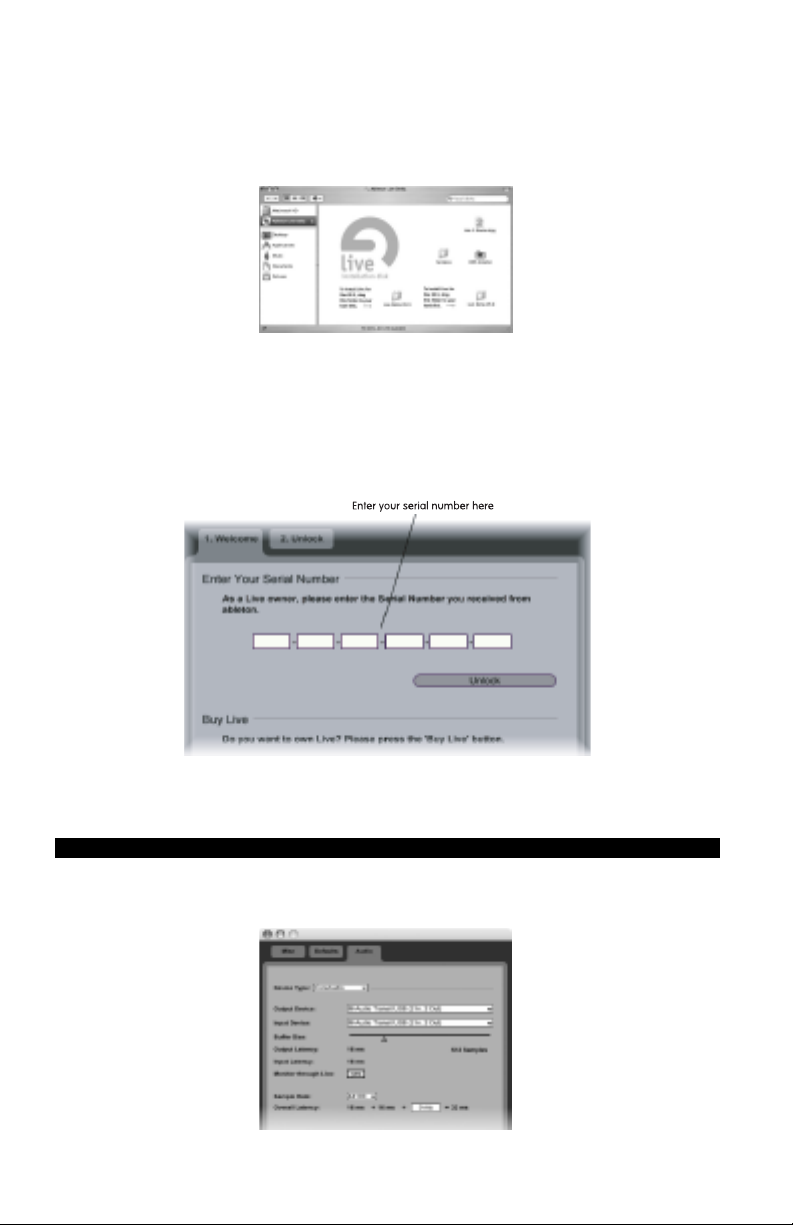
The first time you open Live Delta, you will be required to enter your serial number. You will find
the serial number on the CD-ROM jacket.
DDoo nnoott lloossee tthhiiss nnuummbbeer
r
, as you will need it if you ever need to reinstall the program.
Getting to Work
The first time you use Live Delta, you will need to select GrooveLab Transit as your audio device.
Select Preferences from the Options menu if on a PC, or from the Live Delta menu if on a Mac.
4
Page 6

Click the
AAuuddiio
o
tab. Under
DDeevviiccee TTyyppe
e
, select the ASIO driver (or Core Audio if on Mac OS X).
NOTE: Our ASIO drivers allow faster response than standard audio drivers, so this, in addition to
high 24-bit/96kHz audio resolution, is why you’ll definitely want to use the GrooveLab Transit
instead of a standard soundcard or laptop audio port. Under Device, select
TTrraannssiit
t
. If using a Mac, select
MM--AAuuddiioo GGrroooovveeLLaabb TTrraannssiitt ((22 iinn,, 22 oouutt)
MM--AAuuddiioo GGrroooovveeLLaab
)
for both input and output.
b
Also under the Preferences menu, select the Misc tab. The
where Live Delta will save your audio files. Press the
BBrroowwsse
AAuuddiioo RReeccoorrdd FFoollddeer
e
button and select a folder for this
r
is the location
purpose. If you want to run VST plug-ins, then select the hard drive location for your VST plug-ins
by clicking
bbrroowwsse
BBrroowwssee
e
to that program’s path in a similar fashion. You can close the Preferences window after
VVSSTT pplluugg--iinn ffoollddeer
for the
r
. If you wish to use an
eexxtteerrnnaall ssaammppllee eeddiittoor
you’ve made these settings.
r
,
Next, select the tempo and time signature for your song. The
TTeemmppo
o
and
TTiimmee SSiiggnnaattuurre
settings are located at the top left of the screen just below the program menus. Simply click
5
e
Page 7

within the field, type a value, and press Enter (or Return if on a Mac).
BBrroowwsseer
To the left of the
FFiillee BBrroowwsseerr 1
on the
r
window (which is located on the left side of the program), click once
1
icon (Of the 6 vertical circular icons, this is the fourth icon from the top, with
a file folder image displaying a number ‘1’ in the center) to view the list of loops and audio files
included in the Live Delta package. You can then drag and drop audio loops on to the Live Delta
tracks to load the loops.
Let’s create a simple song by loading sample loops and adding a vocal recording. Currently,
you are working under the Session view. We’ll change views by selecting Arranger from the
View menu. Unlike the previous Session view, which displayed tracks vertically, you’ll notice that
tracks are now displayed horizontally in the Arranger view. As mentioned above, selecting the
FFiillee BBrroowwsseerr 1
1
icon displays a list of available sample loops from the
DDeellttaa DDeemmoo SSoouunndds
s
folder.
Use your mouse to click on the ”120dbox” loop and drag it in to the left most blank square of
track 1. Upon releasing the mouse button, you should see your sample loop displayed in the
track area where you dropped it. You will also find the waveform of your loop displayed at the
bottom of the screen, which you can use for further editing (Refer to the GrooveLab Transit
manual for additional information on editing).
Use this drag-and-drop technique to load the “atmo” loop into Track 2. You should now see two
6
Page 8

loops displayed in the Arranger
.
You can lengthen each loop by clicking the end (right side) of any loaded loop and dragging
your mouse to the right. You can listen to your arrangement by using your mouse to press the
Play button (triangular icon) located at the top of the program. You can easily go back to the
beginning of your song by double-clicking the Stop button (square icon).
Using the included headset mic, you can also record your own audio. Full details on recording
audio can be found in the Live Delta manual, and we strongly recommend you read them, but
here’s a brief overview to get you started. We are assuming you’ve selected the GrooveLab
Transit’s ASIO drivers (or Core Audio on OS X) as described above. To add vocals to your loop
arrangement, select a track for recording by clicking a track number located to the right of a track.
In this case, use track 3 since you currently have loops on tracks 1 and 2.
7
Page 9

Enable the channel’s Monitoring (microphone icon) and Arm Session Recording (right-most icon)
buttons. You must select “Live In” as your input source. To view this option, you must first browse
to the View menu and select In/Out. This will display a drop-down menu of your in/out options
in the first column to the right of the track number labels within your track. By default, it is set to
None. Click this field and select Live In.
Now you are ready to record, so locate your transport controls at the top of the program
window, and enable the Record button (circular icon).
Finally, enable the Play button (triangular icon). At this point, the record button will be highlighted
in red, and the Play button will be highlighted in green. You will also see the song position
pointer scrolling.
Speak into the microphone to record your voice. Now click the Stop button (square icon). You will
see a new bar representing your recording within the track. Now change your input source from
Live Input to none, so that you can hear your audio when played back. Finally press play to play
back what you’ve recorded. You can record additional tracks in a similar manner.
8
Page 10

If you find that you’re not getting enough level from the microphone for your tracks, open the
GrooveLab Transit control panel (as described above), and increase the Mic Boost setting. The
default setting is 0 dB (no gain), but you can select one of three higher gain settings. We
recommend using +14dB, but don’t let that stop you from experimenting on your own. Refer to
the Live Delta manual for full details on recording.
You can add effects, EQ and VST plug-ins to your composition, and then mix it using Live Delta’s
onboard automation and mixdown function. For this example, we’ll add EQ to the rhythm in
Track 1. Click the Solo icon (button with an ‘S’ to the left of the Monitoring button described above)
of Track 1, to solo the rhythm track so that you won’t hear the other tracks when placing EQ on
Track 1. Now double-click the name, “Track 1.” The Track View window at the bottom of the
program states to “Drop Effects Here.”
Click the Live Effects chooser icon (of the 6 vertical circular icons to the left of the Browser
, this is the second icon from the top with a file folder image icon displaying the Ableton
window
9
Page 11

logo). This displays a list of Ef
fects in the Browser window. From this list, double-click EQ Four.
This will display an EQ Four graphic within the Track View window. Note the numbers 1 through
4 on the EQ display. These act as EQ handles to grab and move with your mouse.
Press Play. As you listen, grab the number 1 and raise it to the top of the display (+12). You can hear
the bass drum become louder because you just raised the bass frequencies. Now press stop.
Let’s add a delay effect to the vocals. This is similar to the EQ we added above. First, click the Solo
button of Track 1 to de-select it, and click the Solo button of Track 3 to solo Track 3. Now click Track
3 to select and highlight the track. The Track View and Browser windows remain unchanged, so
double-click the Ping Pong Delay to add it to the Track View window for Track 3.
Notice that the Ping Pong Delay image has a circular green ring for movement similar to the EQ
PPllaay
y
handles mentioned above. Press
the delay on your vocal to find the desired setting. Click the
and move the green ring to hear how you can change
SSoollo
o
button of T
rack 3 to de-select it,
and hear all of your tracks play back together.
10
Page 12

Y
ou can raise or lower individual track volumes. For this example, we’ll raise the volume of the
vocal track. Click the
ddoowwnn--aarrrroow
w
to the left of Track 3. Notice that Track 3 has expanded to show
more available options. Press Play to hear all tracks play simultaneously. Click within the white
box below Track 3’s
AArrmm SSeessssiioonn RReeccoorrddiinng
MMoonniittoorriinngg
g
&
buttons and drag upward so that the
number ‘0’ increases. Be careful to guard your ears because this can get loud. You should hear
SSttoop
p
a noticeable volume increase on your vocal track (You can press
now).
At this point, you can save your arrangement by choosing “Save Live Set As…” from the File
menu. A new Save window will display. Here, you can name your song and choose where on
your hard drive to save your song. Make note of this so that you can remember where to
browse if you later want to open this song. The easiest location for saving is the Desktop.
You can export your arrangement in order to burn your mix to CD using
third-party CD burning software. For this example, choose Render to
Disk from the File menu. You will see a window that displays various
setting options. For now, leave these set to the defaults of WAV, 16-bit,
44100 Hz sample rate, Create analysis enabled, Convert to Mono
disabled, and click OK.
A new Save window will display. Here, you can name your song and
choose where on your hard drive to save your song. Make note of this
so that you can remember where to browse if you later want to burn
this song to an audio CD using a separate CD burning program. The
easiest location for saving is the Desktop.
Finally, you can play back your rendered WAV file using your computer’s default media player.
Assuming the rendered WAV was saved to your desktop, simply double-click the file to open it
automatically in your computer’s default media player.
In order to further familiarize yourself with Live Delta’s features and operation, we recommend you
run the Delta demo file. You’ll find it in the
BBrroowwsseer
r
section of the program, in the
11
CCoonntteennt
t
directory.
Page 13

Loading this file defaults to the Session view. Notice the Master track, which is the farthest track
to the right. Within this track, you’ll find Start, Theme A, Bvariation, and Fin. You can click the
triangle icons located to the left of each of these names to play each part.
Working with the demo song and referring to the First Steps section of the Live Delta manual will
further acquaint you with Live Delta’s operation and features.
The GrooveLab CD-ROM also contains a selection of loops and samples you can work with in
Live Delta to create your own tracks. You will need to copy the source files you want to use over
to your hard drive, as Live Delta will not play them from the CD-ROM. To do this, browse to your
CD-ROM drive to view its contents (using Windows Explorer or My Computer if on PC, or the
Desktop CD-ROM icon if on Mac). Browse to and open the CD-ROM’s
is the location of the sample loops. Copy the
easiest way on PC is to single-click the
GGrroooovveess LLoooopps
GGrroooovveess LLoooopps
s
s
folder to your hard drive (The
folder to highlight its name. Then choose
GGrroooovveess LLoooopps
s
folder. This
Copy from the Edit menu. Minimize your windows to view your Desktop. Then right-click on your
Desktop to display a Desktop menu. Choose Paste from this menu. If using a Mac, simply drag
GGrroooovveess LLoooopps
the
s
folder to your Desktop. Now you will see a copy of the
GGrroooovveess LLoooopps
s
folder
on your desktop).
12
Page 14

T
o demonstrate how to import the included
BBrroowwsseer
located at the top of Live Delta’s
r
GGrroooovveess LLoooopps
window (mentioned earlier) to browse to your computer
s
in Live Delta, use the
drives, and then browse to the location where you copied your
GGrroooovveess LLoooopps
UUpp--AArrrroow
s
folder.
w
button
Open the
GGrroooovveess LLoooopps
s
folder. Notice that the loops have been organized into sub-folders by
instrument types. Browse to any of these sub-folders to view their audio loops. You can drag and
drop these loops as previously described.
Conclusion
As you can see, we’ve barely scratched the surface of what you can accomplish with your
GrooveLab. We suggest you spend some time browsing the documentation for Live Delta and
GrooveLab Transit. The more familiar you become with the advanced functions of your system,
the more fun you’ll have making music.
13
 Loading...