

Page 1
Heating Element Replacement Instruction for
20070710, 20070810, 20070910 Electric Smokers
Required Tools: Short Phillips head Screwdriver
Wire Stripper
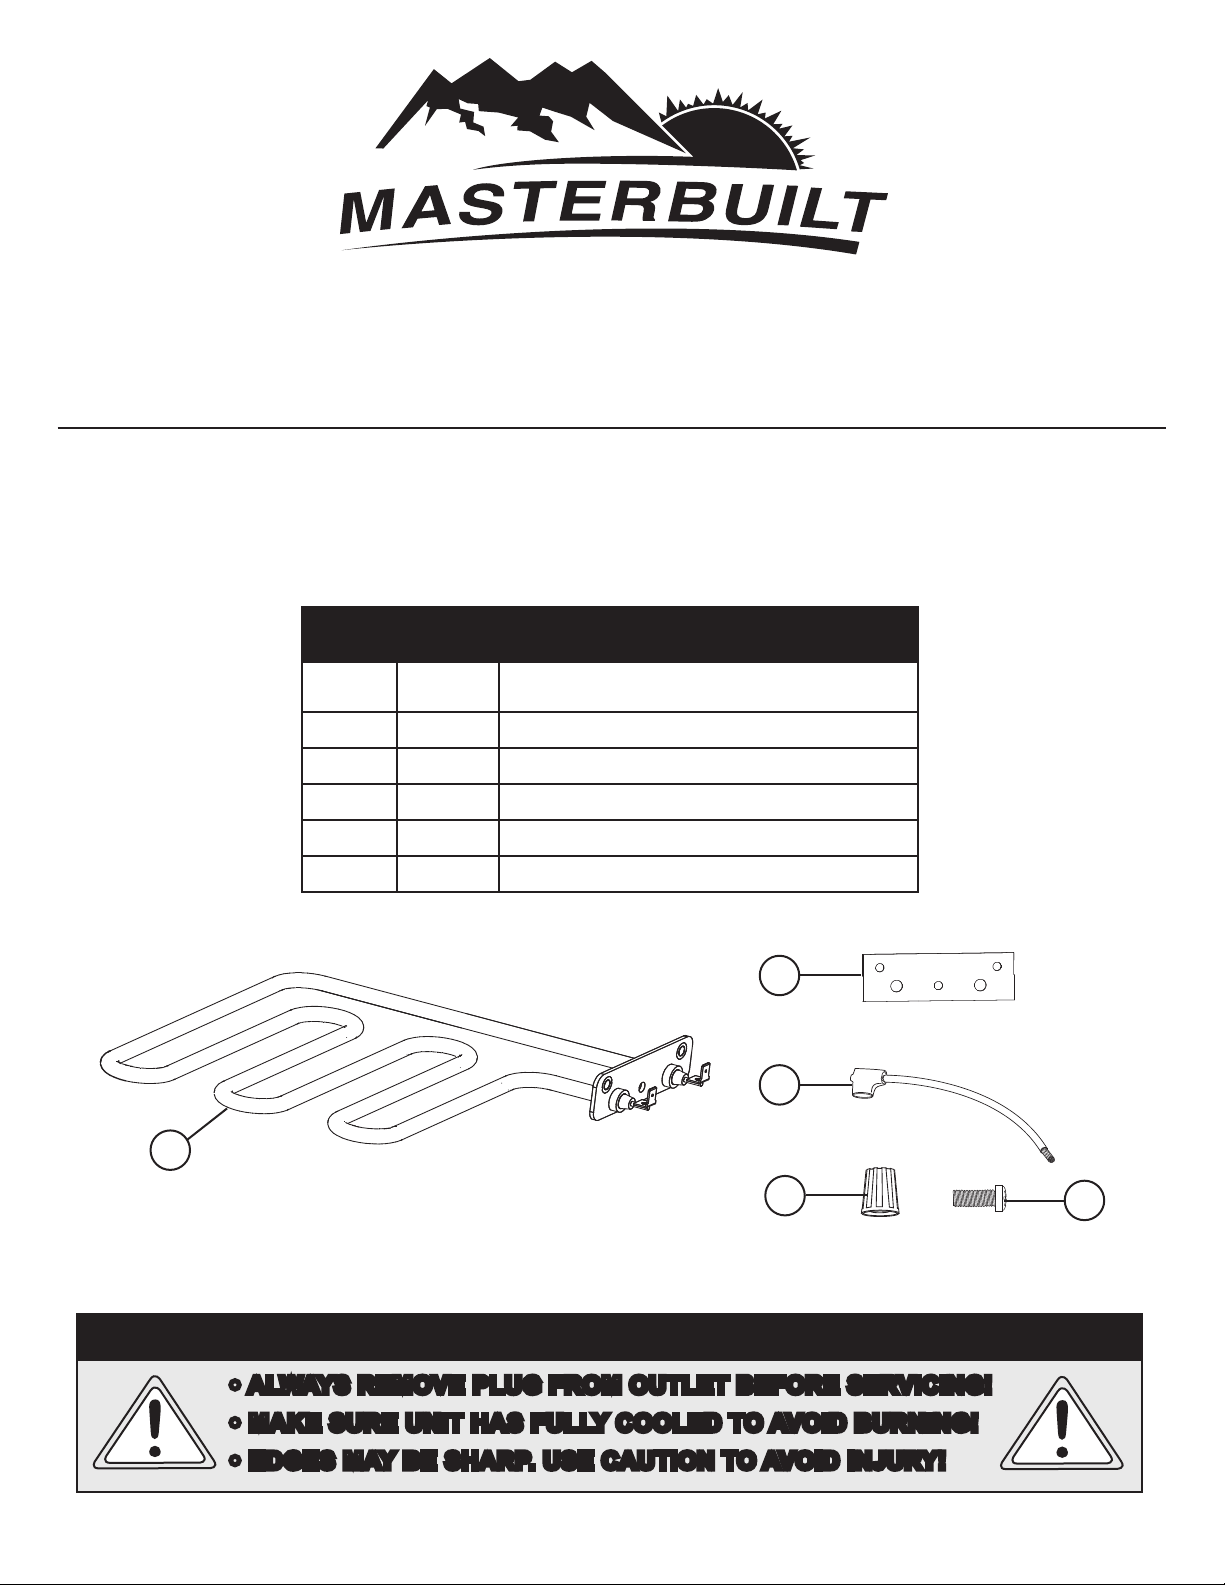
PARTS AND HARDWARE
1
ITEM
NUMBER
1 1 Replacement Element
2 1 Gasket
3 2 Replacement Wire Assembly
4 2 Wire Nuts
5 2 Element Screws
QUANTITY
DESCRIPTION
2
3
4
5
!CAUTION!
• ALWAYS REMOVE PLUG FROM OUTLET BEFORE SERVICING!
• MAKE SURE UNIT HAS FULLY COOLED TO AVOID BURNING!
• EDGES MAY BE SHARP. USE CAUTION TO AVOID INJURY!
090126-04SS
Page 2
*Disconnect from power source and allow unit to fully cool before replacing heating element.
Step 1:
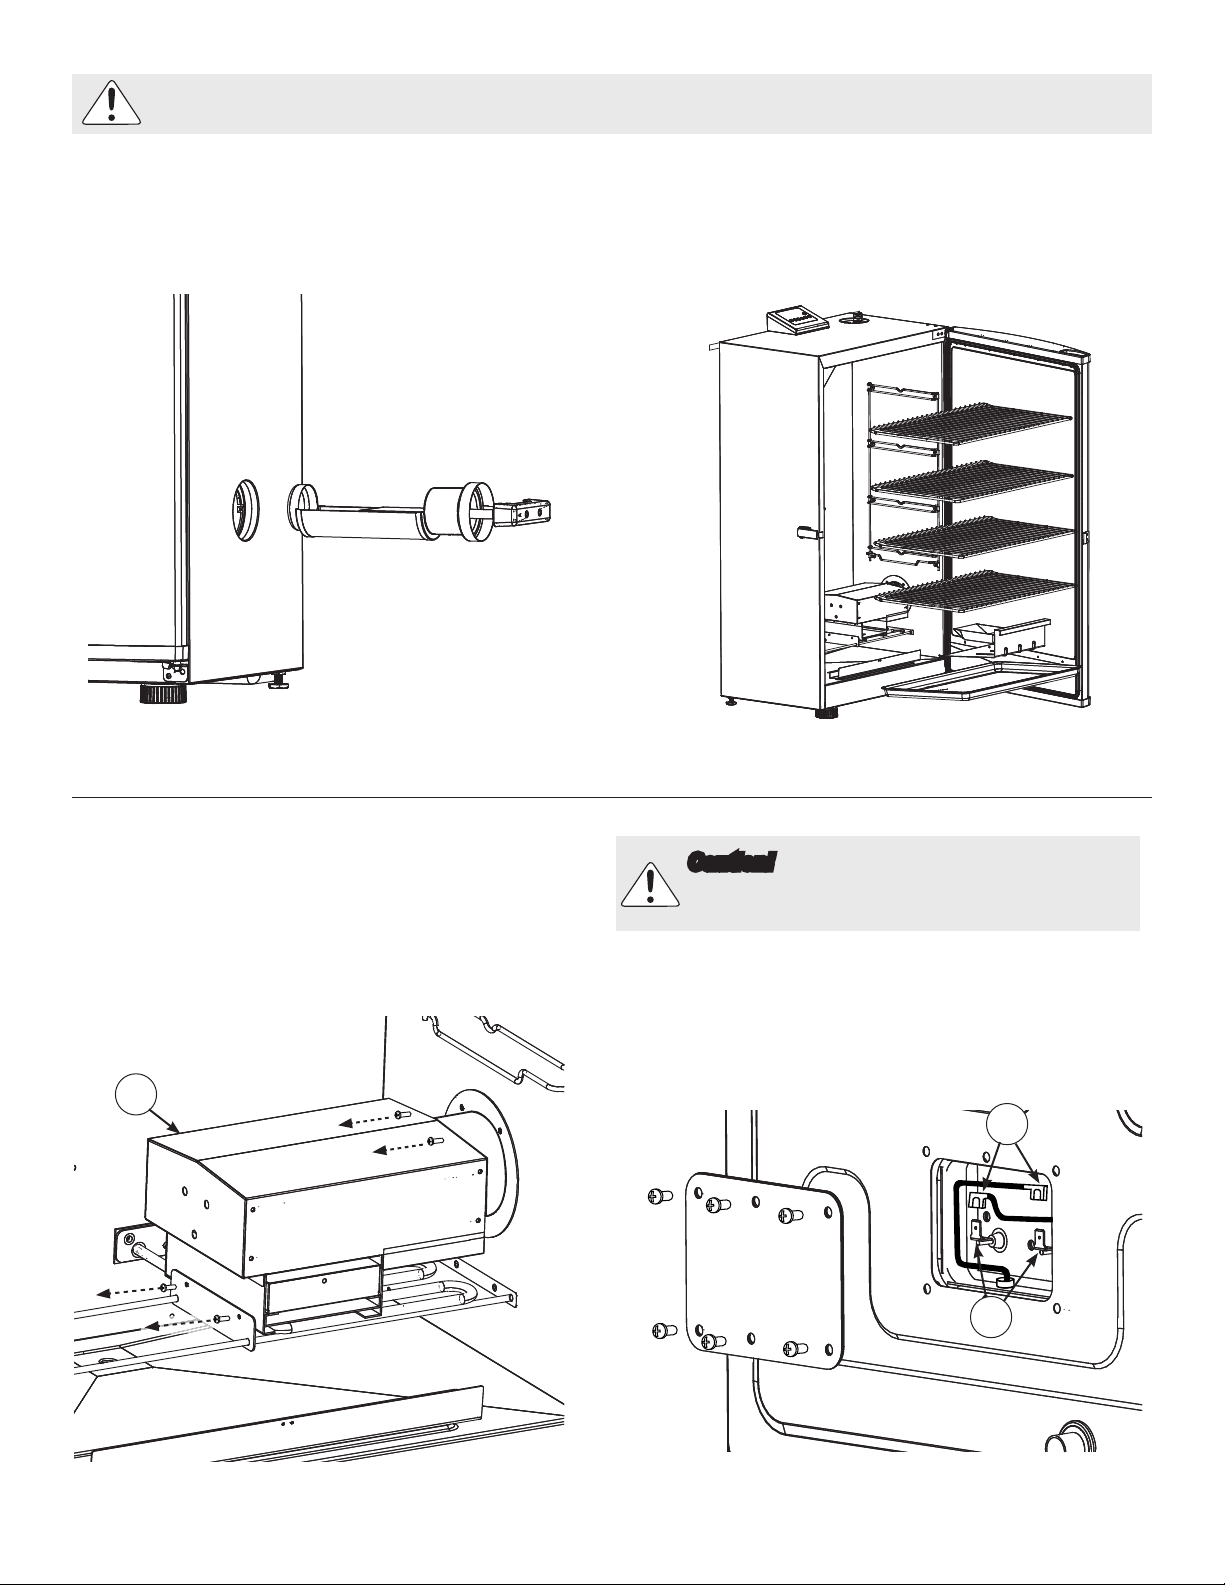
Remove woodchip loader from unit
Step 2:
Remove cooking grates, woodchip holder
and drip pan out of smoker.
Step 3:
Remove 4 screws from the woodchip
housing (A) and detach from inside smoker
to expose heating element as illustrated.
A
Caution! Sharp edges may cause injury!
Before continuing, be sure to note that edges of
thin sheet metal in this step could cause injury.
Step 4:
Remove back plate from rear of smoker
exposing leads for heating element.
Carefully remove heat shrink from female
leads (B) and disconnect from male spades
(C) of heating element.
B
C
Page 3
Step 5:
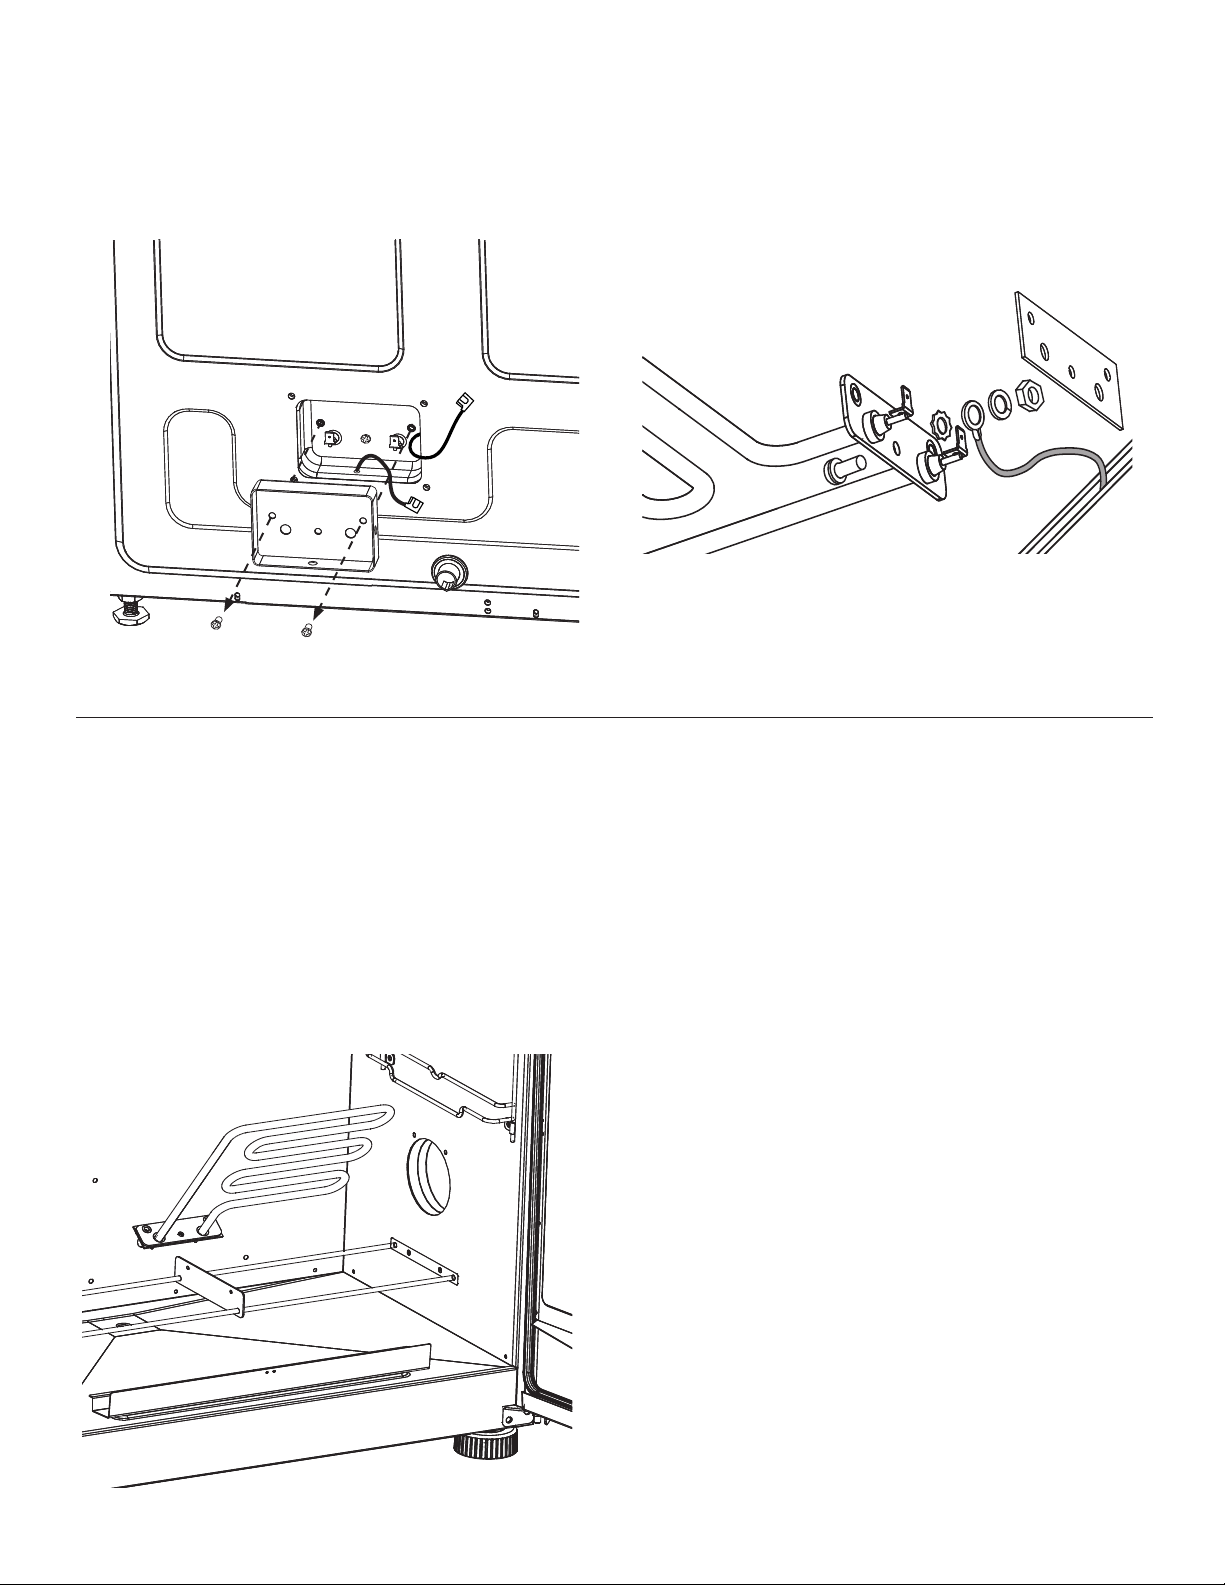
Unscrew heating element support screws
and detach rubber housing from rear
enclosure.
Step 6:
Inside unit, pull heating element from back
of unit, pulling away gasket from element
bracket and exposing ground wire. Remove
ground wire from heating element as shown.
Step 7:
Connect ground wire to new heating element in reverse order of step 6.
*Steps 8-9 require assistance.
Step 8:
Align male spades of heating element with
holes on back wall, inserting them at a slight
angle as shown in illustration while making
sure ground wire does not get lodged
between the element bracket and housing.
Step 9:
Following step 5 in reverse, hold element in
place while having someone secure element
to housing.
Step 10:
If existing female leads are clear of
corrosion, reattach leads in reverse order as
in steps 5-1. However, if there is clear
damage or corrosion to female leads they will
need to be replaced as shown in steps 11-13
on the following page.
Page 4
Step 11:
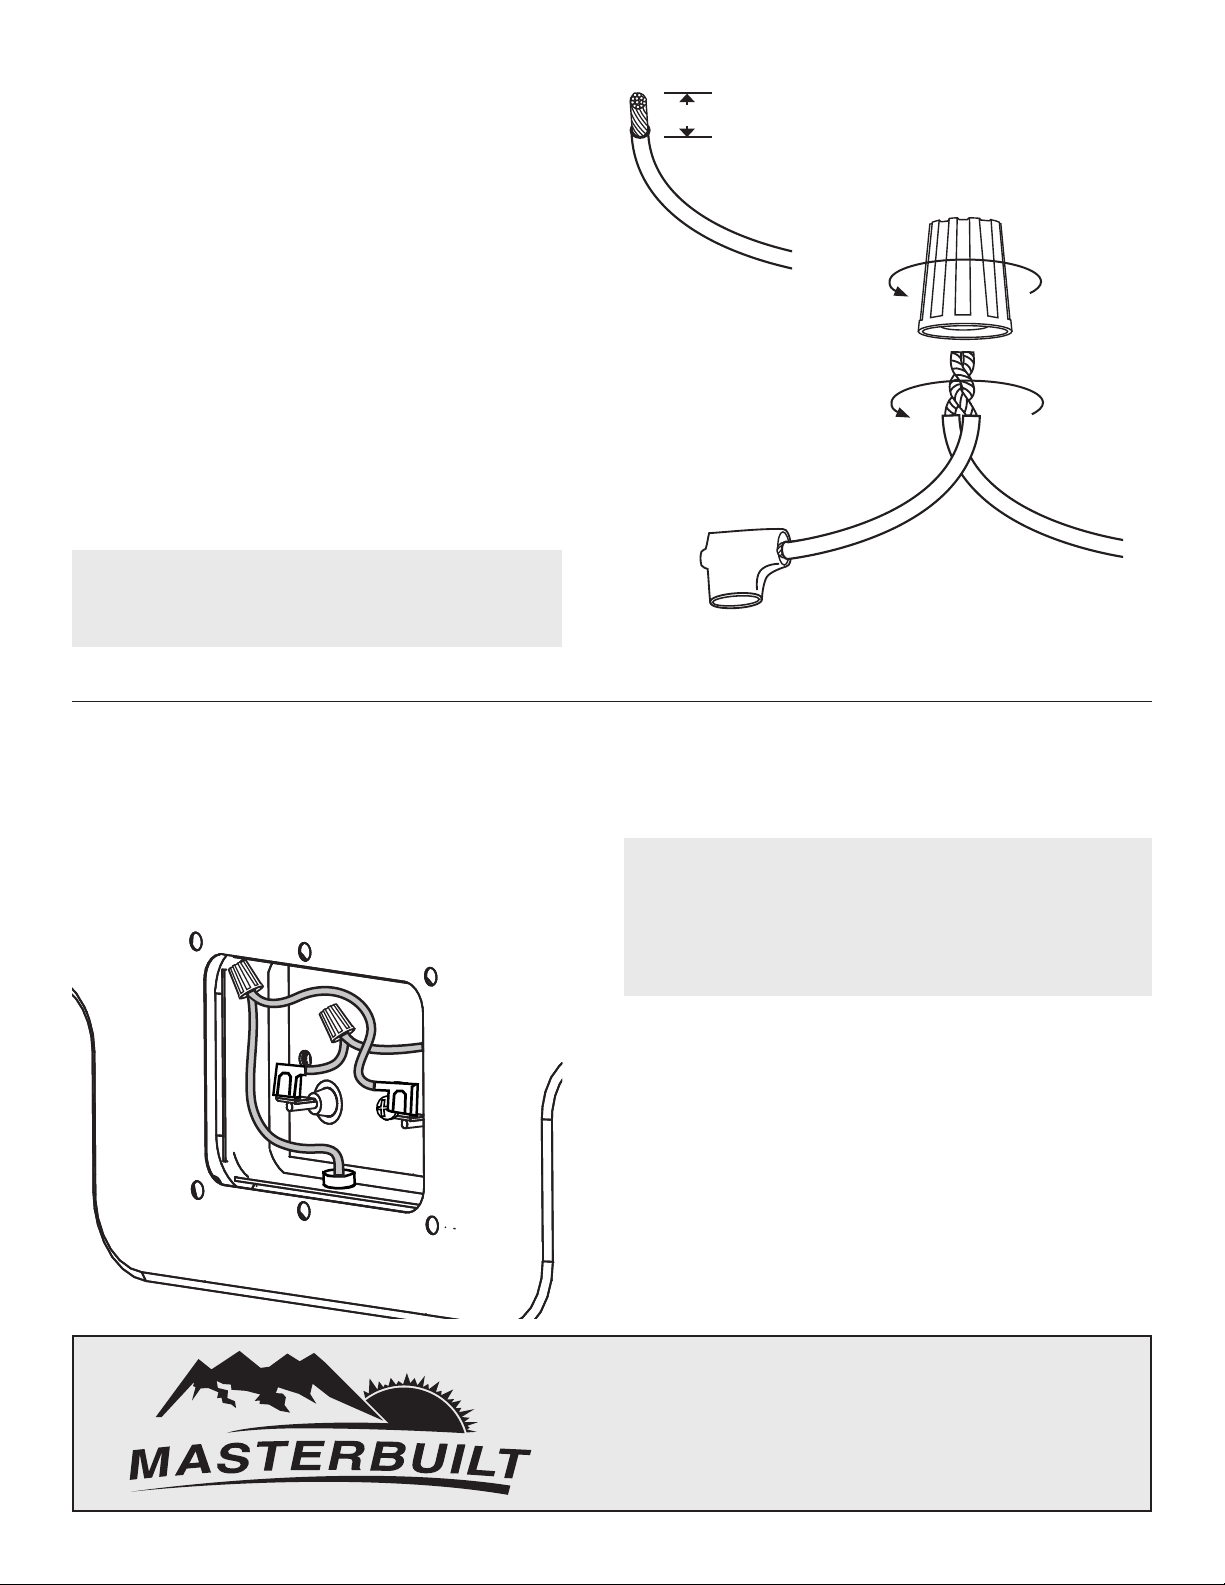
If female spades need to be replaced, cut
the existing spade off, then strip insulation
back 3/8” using wire stripper.
Step 12:
Attaching bare replacement wiring
assembly to existing wire from body, join
the two bare ends of wire together and twist
until wires are held securely to each other.
Place wire not over the two wires and twist
wirenut until secure on both wires.
*A small piece of electrical tape wrapped
around wirenut and wires adds security.
3/8
E
X
I
S
T
I
N
G
W
I
R
E
E
X
I
S
T
I
N
G
W
I
R
E
Step 13:
Insert replacement wire leads onto element terminals as shown.
*Before reinstalling woodchip housing, plug unit
into outlet and test element to ensure correct
operation. Once unit checks out, unplug unit and
allow smoker to fully cool.
Step 11:
Reassemble smoker following steps 5-1 in
reverse order. Unit is now operational. Enjoy!
Masterbuilt Manufacturing, Inc.
1 Masterbuilt Court
Columbus, Georgia 31907
Customer Service 1-800-489-1581
 Loading...