

Marmitek Gigavideo 50 Owner's Manual
GIGAVIDEO
50
OWNER’S MANUAL
BETRIEBSANLEITUNG
MODE D’EMPLOI
GEBRUIKSAANWIJZING
REV 2
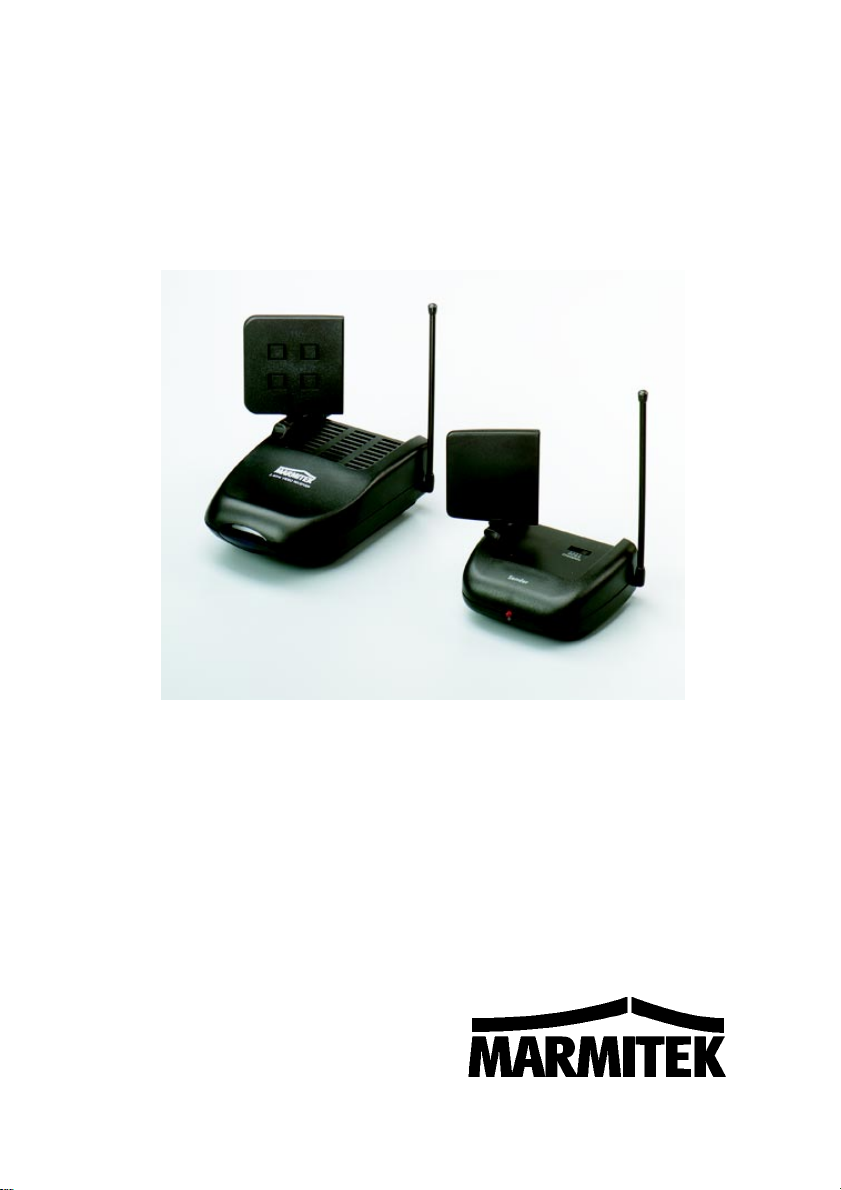
MARMITEK GIGAVIDEO 50
J*
H I I E F*C D D E
* Optional
B
J*
B
2

OWNER’S MANUAL
READ THIS FIRST!
Caution: to reduce risk of electric shock, do not disassemble any part of the
videosender system. No user-serviceable parts are inside. If you spill liquid on it,
disconnect the unit from the AC outlet to prevent possible fire or shock hazard
and consult authorized service personnel.
Use only the supplied powersupplies. Defective parts must be replaced by
original spareparts only.
Powerline operated equipment or accessories connected to the unit should bear
the CE certification mark and should not be modified in any way that might defeat
the safety features.
Warning: to prevent electric shock hazard, do not expose any part of the video
Sender to rain or moisture. Do not use near a bath tub, swimmingpool, etc.
Disconnect the unit during thunderstorms from mains and other connected
equipment to avoid damage.
No guarantee or liability will be accepted for any damage caused due to incorrect
use of the equipment supplied, other than indicated in this owner’s manual.
APPLICATIONS:
The Marmitek GigaVideo 50 is designed to transmit audio and video signals,
without running wires.
In some models there is a second radio transmission system providing a infra-red
return path enabling you to control your VCR or Satellite Receiver from a remote
location.
- Watch a movie on any TV in Your home without moving your VCR or
- Watch satellite programs on any TV anywhere in your house.
- Watch DVD movies from your PC on your TV in a remote location
- Listen to MP3 audio from your PC on your Hifi system in the livingroom
- Monitor your sleeping baby, eldery or disabled on your TV by using
your videocamera or CCD camera.
- Make perfect demonstrations without wiring TV’s during trade-shows,
seminars, etc.
1. SETTING UP THE MARMITEK GIGAVIDEO TRANSMITTER:
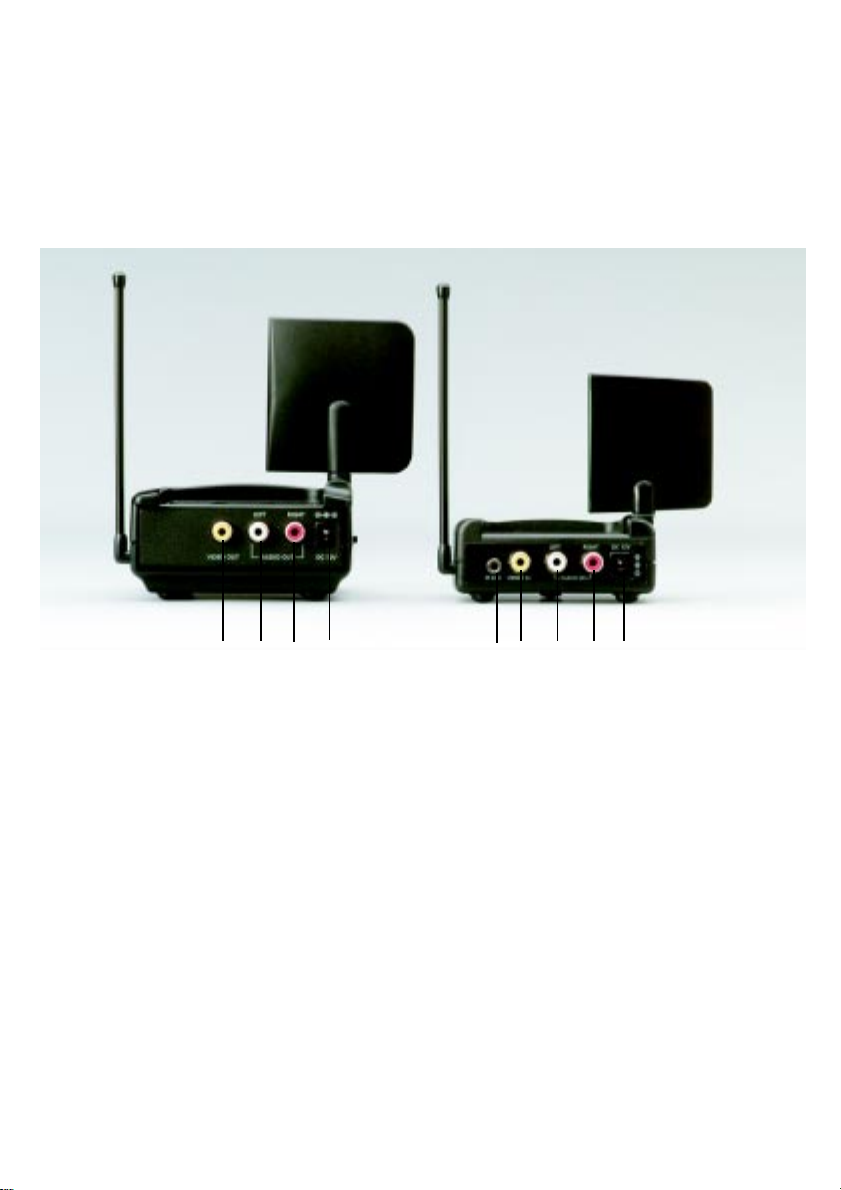
1. Connect one set of Audio/Video cables to the VIDEO [C] and AUDIO [D] jacks
of your Marmitek GigaVideo Transmitter. Take care to match the colors of the
plugs on the cable with the jacks on the GigaVideo Transmitter.
2. Connect the other end of the cable to the Audio/Video OUT jacks of your VCR,
Satellite receiver or TV. If a scart connection is provided, use the scart adaptor
labelled “Transmitter”. Connecting the transmitter to your VCR or Satellite
receivers, allows you to choose channels independent from your main TV. If the
jacks are colored differently, connect the yellow plug on the jack VIDEO, the red
plug on the jack AUDIO RIGHT and the white plug to the jack AUDIO LEFT.
3. . Switch the Power slide switch on the side into the “OFF” position
running cables.
3

4. Plug the supplied mains adaptor, labelled Sender/Transmitter 200mA, into a
230Volt -50Hz wall outlet and connect the jack to the 12V jack at the rear side of
the transmitter. Only use the supplied mains adaptor!
5. Switch the Power switch to the ON position.
6. Set the Channel-switch [A] on A.
7. Position the transmitter in a convenient location and orient the antenna [K]
If you have several A/V components:
If you have two or more A/V components (e.g. VCR, Cable box, Laserdisc or
satellite receiver) that you want to watch in another room, they will probably
already been hooked up to the local TV in series. To connect the GigaVideo
Transmitter you just need to indentify the last component in the chain and
connect the Line OUT or scart to the GigaVideo Transmitter IN jacks.
If the last component does not have spare LINE OUT jacks or a spare Scart
connector, you may connect the local TV using the antenna (VHF/UHF) output,
while connecting the Videosender to the A/V output. You may use a Scart splitter
cable, available through your local dealer, to create a extra output on your
equipment.
2. SETTING UP THE MARMITEK GIGAVIDEO RECEIVER:
1. Connect a set of Audio/Video cables to the LINE OUT jacks [H+I] of
your GigaVideo Receiver. Connect the other end to your TV. If your TV
has a Scart connector, you may use the Scart adaptor provided;
labelled: “Receiver”.
2. On some models a so called modulator is provided (RF Output).
Connect the receiver to the antenna or RF input of your TV (pre-set at
channel 36 or 48). You will need a short male/female ‘aerial converter’
lead, available from your dealer.
3. Switch the Power slide switch on the side into the “OFF” position
4. Plug the supplied mains adaptor, labelled Receiver 500mA, into a
230Volt -50Hz wall outlet and connect the jack [E] to the 12V jack at
the backside of the receiver. Only use the supplied mains adaptor!
5. Switch the Power switch [B] to the ON position.
6. Set the Channel-switch [A] on A.
7. Put the side antenna [on some models only [J] of the remote control
extender in an upright position
4

3. FINE TUNING YOUR MARMITEK GIGAVIDEO SET:
Make sure your A/V equipment is switched on. Switch the receiving TV on and
select the A/V channel (normally found on the “0” or “AV” button. The picture
should now automatically be there, no tuning is required.
The wireless GigaVideo usually works best with the indented faces of the
antennas [K] on the Transmitter and Receiver unit look at one another.
Sometimes however distance, reflections and other effects in the home may
affect the signal so that some adjustment of either Transmitter or Receiver
antenna may be necessary to get the best signal.
If still experiencing difficulty, try changing the “ABCD” channel selector and
change channels. Remember though both the receiver and transmitter must be
on the same channel.
If you are not getting any signal at all:
Check that the units are connected to mains and that the Power-switch is in the
ON position. Check that the Channel slide switch (labelled A-D) on both
GigaVideo units is set at the same number. Check if the receiving TV is on the
correct A/V channel.. If the unit is supplied with an infrared returnpath (some
models only) : Raise the small black side antenna [J] to an upright position.
4. THE REMOTE EXTENDER FEATURE (on some models):
If an Infrared Extender is provided, your Marmitek VideoSender has the ability to
transmit infrared signals from your own remote control from your receiving TV
back to the equipment connected to videosender. For example, you can change
channels on your satellite receiver while viewing in another room. Simply point
your original remote control to the IR window on the front of your GigaVideo
Receiver. The IR signal is now transmitted by radio to the GigaVideo
Set up is simple, ideally with 2 people. Locate the mini IR emitter (the only item
left now) and connect the small jack plug on the back of the Receiver (IR) The
thin cable contains two IR emitters that have a self adhesive back surface. This
must be placed over the IR receiving eye on front of your VCR and/or Satellite
receiver. Normally this area is to be recognized by a smoked or dark plastic
window. Remove the small paper protective label and affix the emitter very lightly
on the facia of your equipment.
transmitter.
Now with your own remote control go to the VideoReceiver and point your
remote at the front of the receiver and press the channel change buttons in the
normal way.
Now the channel changes, if not, go back to the transmitter and move the sticky
back emitter. The position sometimes is critical. Once satisfied press the emitter
firmly on the suface (this will not damage your equipment).
If you have problems with the range, try to move the receiver and/or transmitter
away from your connected equipment. This can greatly increase performance of
the radio transmission.
Copyright Marmitek X-10
The right is reserved to make technical modifications
Marmitek 10-2000 Rev2
5

BETRIEBSANLEITUNG
ACHTUNG:
Der GigaVideo ist für den Einsatz in trockenen Räumen konzipiert.
Die Stromversorgung wird über zwei 230V Netzteile hergestellt. Defekte Teile
nicht Öffnen und nur durch orginal Ersatzteile tauschen.
Das gesamte Produkt darf nicht verändert oder umgebaut werden.
Das Gerät ist CE-geprüft und entspricht den Niederspannungs- und EMCRichtlinien.
Die Sicherheits- und Montagehinweise sind immer zu beachten. Für Schäden, die
durch Nichtberücksichtigung der Bedienungsanleitung verursacht werden,
erlöscht der Garantieanspruch. Für daraus entstehende Folgeschäden
übernehmen wir keine Haftung.
EINSATZMÖGLICHKEITEN
Das Marmitek GigaVideo-Set besteht aus einem Sender- und einem
Empfängerteil. Die Übertragungsfrequenz der Daten erfolgt im 2.4 Ghz-Bereich
und geht somit durch Decken und Wände.
Es können somit z.B. die Signale eines SAT-Empfängers, PC- DVD Spielers,
einer Videokamera, einer ÜberwachungsKamera, einer Stereoanlage oder eines Videorecorders übertragen werden.
Abhängig von der Ausfürung können am Videosender angeschlossene Geräte
mit der eigenen Fernbedienung drahtlos vom Empfänger TV gesteuert werden
(Infrarotverlängerung).
1. ANSCHLUSS DES MARMITEK GIGAVIDEO-SENDERS (transmitter)
Das Audio- und Videosignal zur Funkübertragung wird über die Cinch-Buchsen
an der Rückseite des GigaVideo-Senders eingespeist C+D (s.Schema Seite 2)
Mit dem entsprechenden Adapterkabel kann jedes beliebige Endgerät
angeschlossen werden. Im Lieferumfang enthalten sind Cinchkabel und
Scartadapter.
ANSCHLUSS
1. Stecken Sie den Cinch-Stecker des Verbindungskabels in die A/V-
2. Verbinden Sie nun den Stecker am anderen Kabelende mit dem
3. Stellen Sie am Kanalschalter (A) den Kanal A ein. Hinweis:
4. Stellen Sie den Schalter B auf OFF (aus).
5. Stecken Sie das Netzteil mit der Aufschrift Transmitter 200mA/
6. Stellen Sie den Schalter B auf ON (ein).
7. Bringen Sie den GigaVideo-Sender in eine günstige Position (z.B.
8. Stellen Sie die Seitenantenne der Infrarotverlängerung (j)
Buchse (C*D) des GigaVideo-Senders (transmitter). Beachten Sie,
daß Stecker- und Buchsenfarbe gleich sind.
Gerät, dessen Signal gesendet werden soll (z.B. Videorecorder).
Achten Sie bei dem mitgelieferten Scart-Adapter auf die richtige
Polung. Verbinden Sie das Kabel mit SCART OUT (Sender). Beim
Einstecken nicht gewaltsam vorgehen!
Sender und Empfänger müssen immer auf den gleichen Kanal
eingestellt sein.
Sender in eine 230V Steckdose und den 12V-Stecker in die
vorgesehende Buchse des Senders (transmitters).
auf das TV-Gerät) und richten Sie die Vorderseite der 2.4GhzAntenne (K) in Richtung des GigaVideo-Empfängers (receiver).
senkrecht (Modell abhängig).
6
 Loading...