

AV Surround Receiver
SR7011
ENGLISH
FRANÇAIS
ESPAÑOL
Quick Start Guide
Guide de démarrage rapide /
Guía de inicio rápido
Read Me First....
Lisez-moi en premier.... /
Lea esto primero....
Please do not
return this unit to
the store.
If you need help…
Check our AVR setup tips online
Us.Marantz.com/SetupTips
Ca.Marantz.com/SetupTips
Call for Assistance
1-855-ONE-Marantz (USA)
1-855-663-6272
1-800-668-0652 (Canada)
Monday – Friday 10:00AM to 10:00PM E.S.T
Saturday 12:00PM to 8:00PM E.S.T
Welcome Before You Begin
Thank you for choosing a Marantz AV
receiver. This guide provides step-bystep instructions for setting up your AV
receiver.
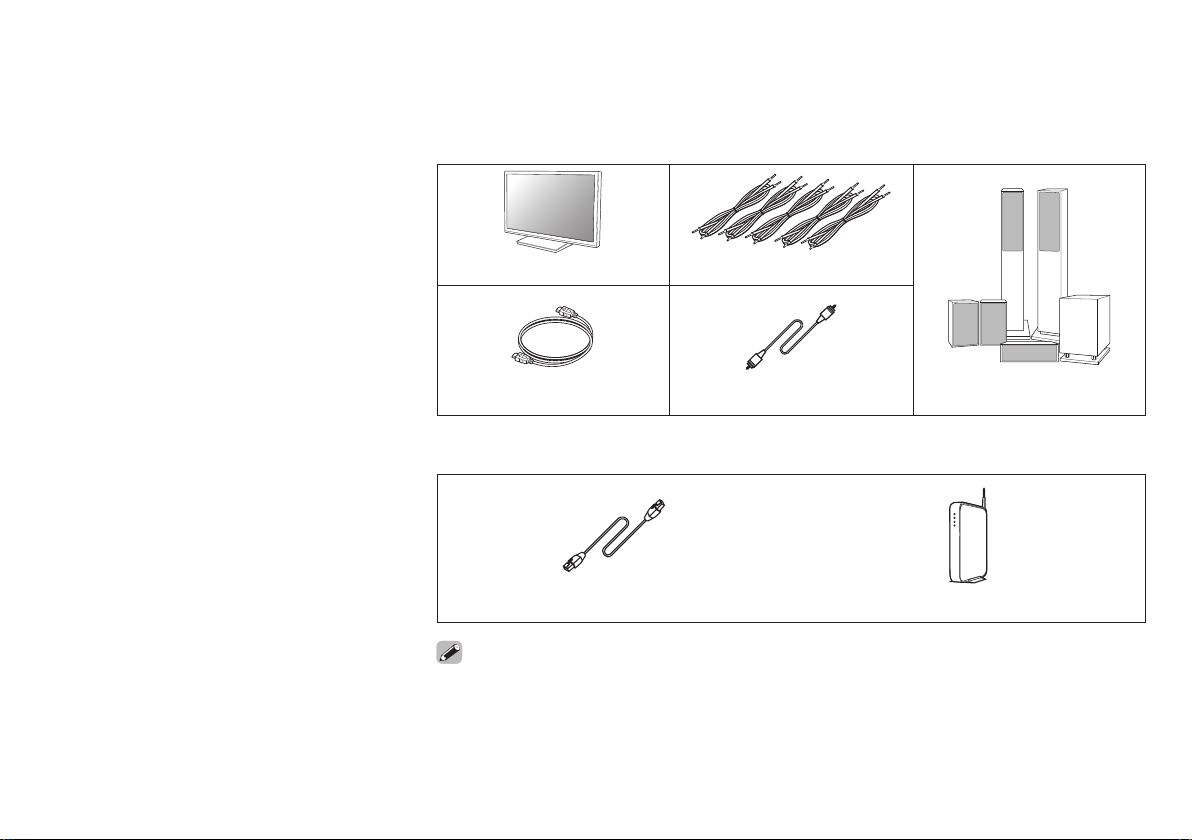
Required for Setup
TV Speaker cables
HDMI cable Subwoofer cable Speakers
Optional
or
LAN cable Wi-Fi router
• When connecting this unit to a device that is compatible with the Deep Color, 4K and ARC
functions, use a “High Speed HDMI cable with Ethernet” that displays the HDMI logo.
• These drawings are for illustrative purposes only and may not represent the actual product(s).
1
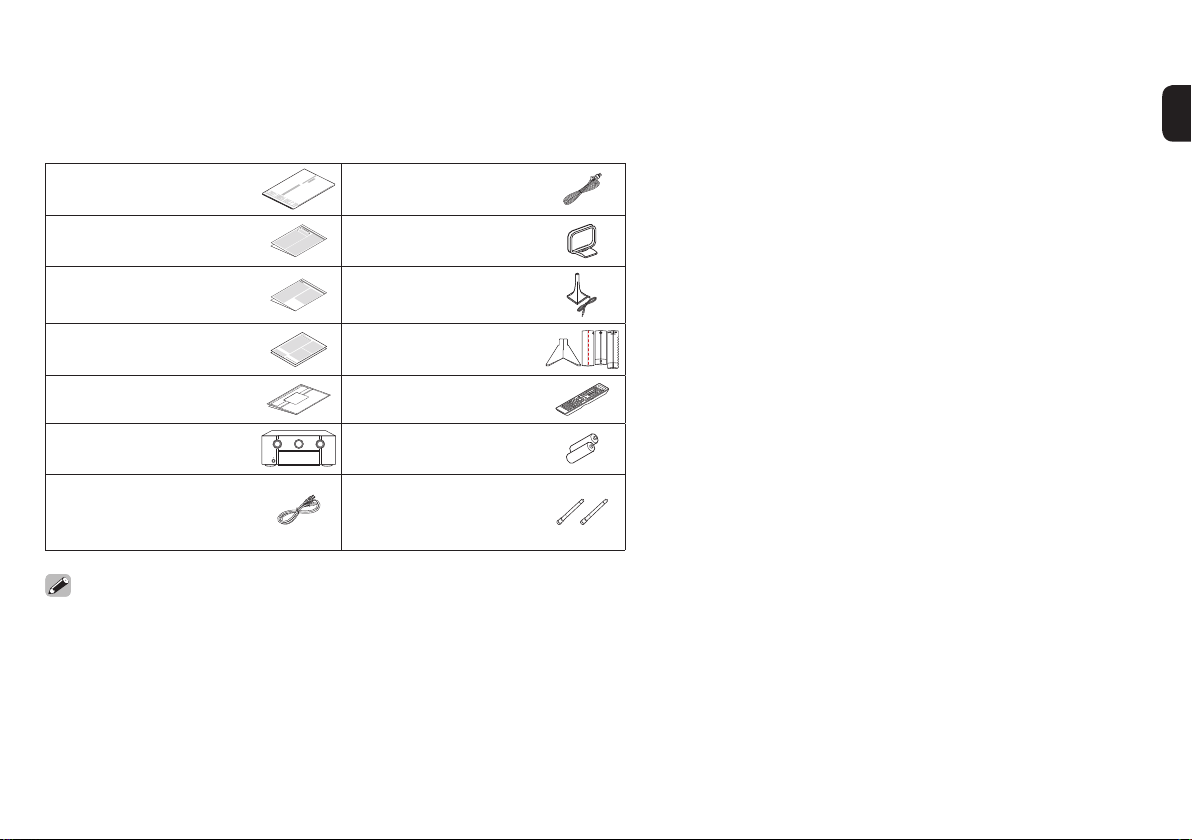
What’s In the Box
Quick Start Guide FM indoor antenna
Safety Instructions AM loop antenna
Notes on radio Sound calibration
microphone
Warranty
(for USA/for CANADA)
Cable labels Remote control unit
Receiver R03/AAA batteries
Power cord External antennas
• The included sound calibration microphone stand is convenient for use when
performing Speaker Calibration. Using your own tripod or the supplied Sound
calibration microphone stand enables settings to be automatically configured to
the optimum listening environment, providing exceptionally high performance.
Sound calibration
microphone stand
for Bluetooth/
wireless connectivity
2
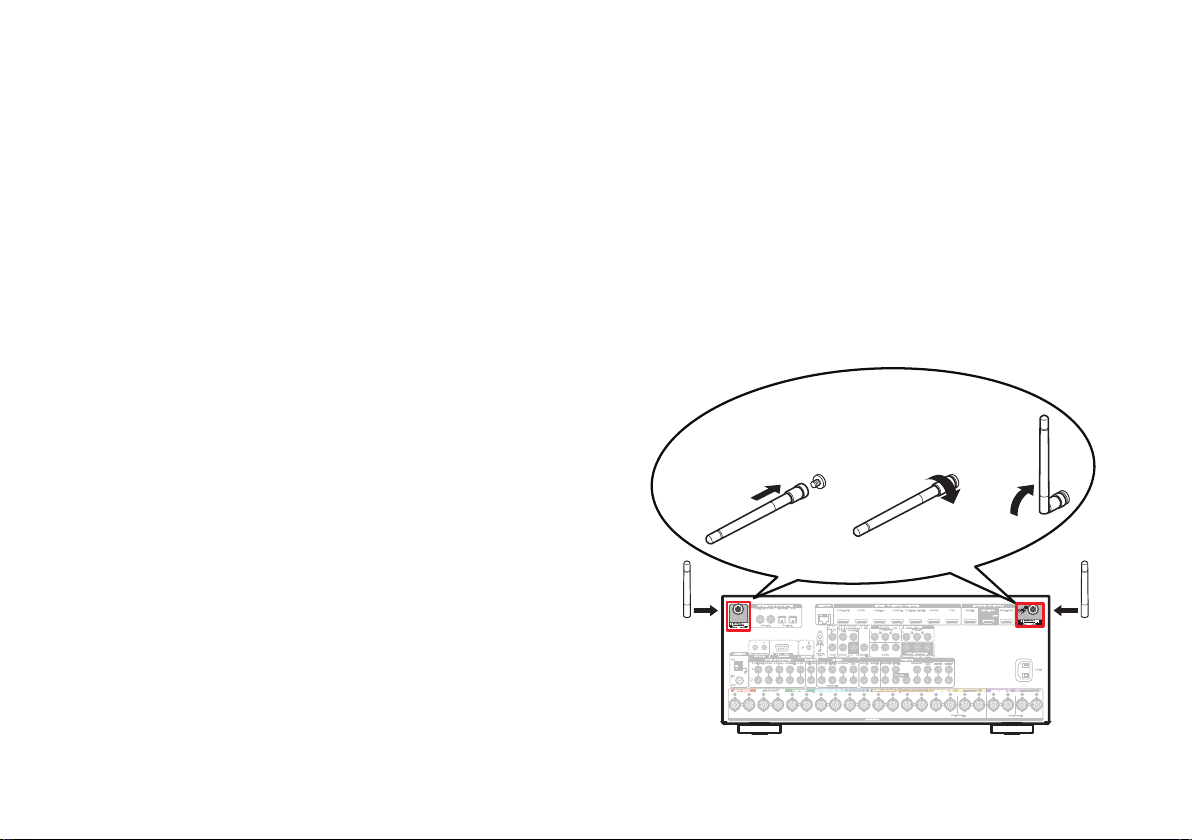
Important: External Antennas
The removable external antennas are required for both
Bluetooth and Wireless network connectivity. Please make
sure to connect the antennas before attempting to use the
Bluetooth or Wi-Fi features of the SR7011.
n Connecting the external antennas for
Bluetooth/Wireless connectivity
For each of the two antennas:
q
Place the antenna evenly over the antenna terminal
located at the upper left or right corner of the rear panel.
w
Turn the antenna clockwise until it is fully connected. Do
not over tighten.
e Rotate the antenna upwards for the best possible reception.
q w e
3
Setup
There are three steps to the setup
process.
Installing batteries in the remote control unit
1
Connecting the receiver
2
Following the On-Screen Setup Assistant
3
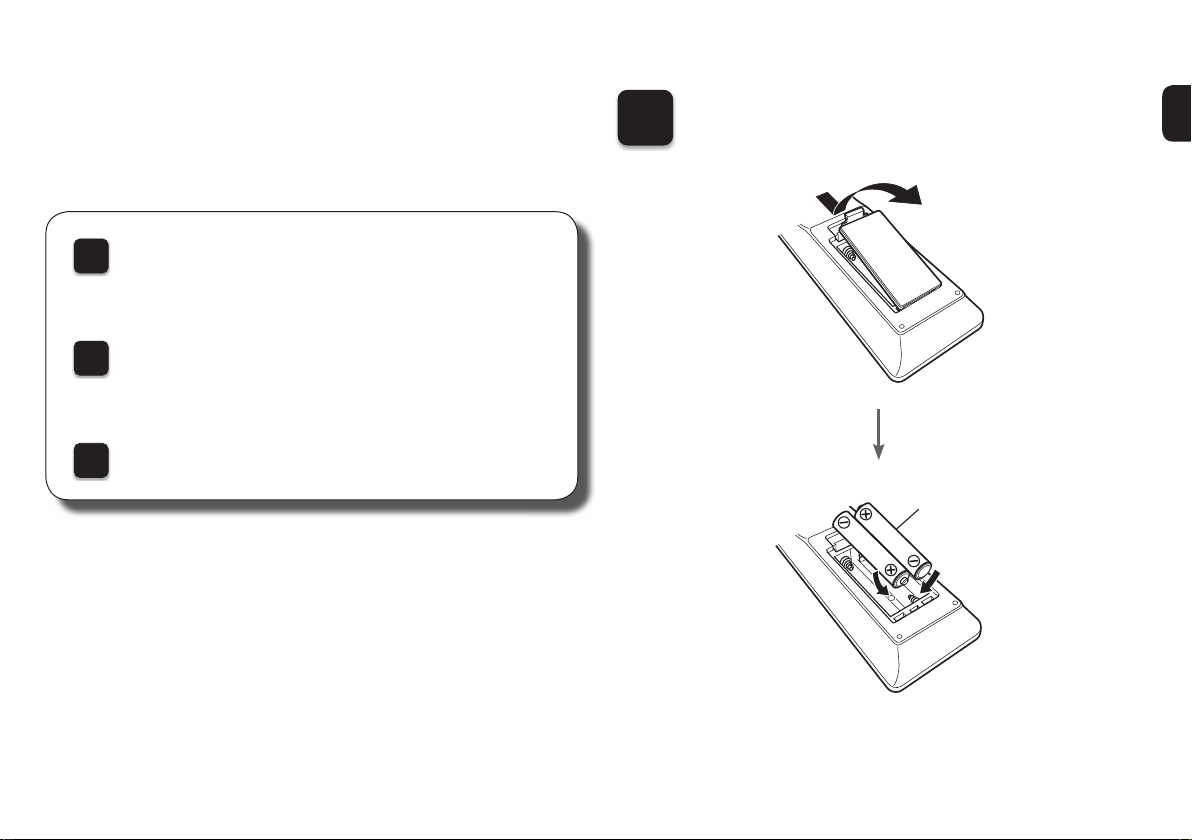
Installing batteries in the
1
remote control unit
Batteries
4
 Loading...