

Page 1

Model IS201 User Guide
Universal Dock
Page 2
CAUTION
RISK OF ELECTRIC SHOCK
DO NOT OPEN
CAUTION: TO REDUCE THE RISK OF ELECTRIC SHOCK,
DO NOT REMOVE COVER (OR BACK)
NO USER-SERVICEABLE PARTS INSIDE
REFER SERVICING TO QUALIFIED SERVICE PERSONNEL
The lightning flash with arrowhead symbol within an
equilateral triangle is intended to alert the user to the
presence of uninsulated “dangerous voltage” within the
product’s enclosure that may be of sufficient magnitude to
constitute a risk of electric shock to persons.
The exclamation point within an equilateral triangle is
intended to alert the user to the presence of important
operating and maintenance (servicing) instructions in the
literature accompanying the product.
WARNING
TO REDUCE THE RISK OF FIRE OR ELECTRIC SHOCK, DO NOT EXPOSE THIS
APPLIANCE TO RAIN OR MOISTURE.
NOTE:
This equipment has been tested and found to
comply with the limits for a Class B digital
device, pursuant to Part 15 of the FCC Rules.
These limits are designed to provide
reasonable protection against harmful
interference in a residential installation. This
equipment generates, uses and can radiate
radio frequency energy and, if not installed
and used in accordance with the instructions,
may cause harmful interference to radio
communications. However, there is no
guarantee that interference will not occur in a
particular installation. If this equipment does
cause harmful interference to radio or
television reception, which can be determined
by turning the equipment off and on, the user
is encouraged to try to correct the interference
by one or more of the following measures:
– Reorient or relocate the receiving antenna.
– Increase the separation between the
equipment and receiver.
– Connect the equipment into an outlet on a
circuit different from that to which the
receiver is connected.
– Consult the dealer or an experienced
radio/TV technician for help.
NOTE:Changes or modifications may
cause this unit to fail to comply with Part
15 of the FCC Rules and may void the
user's authority to operate the equipment.
This Class B digital apparatus
complies with Canadian ICES-003.
Cet appareil numerique de la Classe
B est conforme a la norme NMB-003
du Canada.
Page 3

IMPORTANT SAFETY
INSTRUCTIONS
READ BEFORE OPERATING EQUIPMENT
This product was designed and manufactured to meet strict quality and safety standards.
There are, however, some installation and operation precautions which you should be
particularly aware of.
1. Read these instructions.
2. Keep these instructions.
3. Heed all warnings.
4. Follow all instructions.
5. Do not use this apparatus near water.
6. Clean only with dry cloth.
7. Do not block any ventilation openings. Install in accordance with the manufacture's
instructions.
8. Do not install near any heat sources such as radiators, heat registers, stoves, or other
apparatus (including amplifiers) that produce heat.
9. Do not defeat the safety purpose of the polarized or grounding-type plug. A polarized plug
has two blades with one wider than the other. A grounding type plug has two blades and a
third grounding prong. The wide blade or the third prong are provided for your safety. If the
provided plug does not fit into your outlet, consult an electrician for replacement of the
obsolete outlet.
10. Protect the power cord from being walked on or pinched particularly at plugs, convenience
receptacles, and the point where they exit from the apparatus.
11. Only use attachments/accessories specified by the manufacturer.
12. Use only with the cart, stand, tripod, bracket, or table specified by the manufacturer, or sold
with the apparatus. When a cart is used, use caution when moving the cart/apparatus
combination to avoid injury from tip-over.
13. Unplug this apparatus during lightning storms or when unused for long periods of time.
14. Refer all servicing to qualified service personnel. Servicing is required when the apparatus
has been damaged in any way, such as power-supply cord or plug is damaged, liquid has
been spilled or objects have fallen into the apparatus, the apparatus has been exposed to
rain or moisture, does not operate normally, or has been dropped.
Additional Safety Information!
• This product should not be placed in a built-in installation such as a bookcase or rack
unless proper ventilation is provided or the manufacturer’s instructions have been adhered
to.
• Apparatus shall not be exposed to dripping or splashing and that no objects filled with
liquids, such as vases, shall be placed on the apparatus.
• The AC adaptor shall be installed near the Socket-Outlet and shall be easily accessible.
Page 4

ENGLISH
WARRANTY
For warranty information, contact your local Marantz
distributor.
RETAIN YOUR PURCHASE RECEIPT
Your purchase receipt is your permanent record of a
valuable purchase. It should be kept in a safe place
to be referred to as necessary for insurance
purposes or when corresponding with Marantz.
IMPORTANT
When seeking warranty service, it is the
responsibility of the consumer to establish proof and
date of purchase. Your purchase receipt or invoice
is adequate for such proof.
FOR U.K. ONLY
This undertaking is in addition to a consumer's
statutory rights and does not affect those rights in
any way.
FRANÇAIS
GARANTIE
Pour des informations sur la garantie, contacter le
distributeur local Marantz.
CONSERVER L'ATTESTATION D'ACHAT
L'attestation d'achat est la preuve permanente d'un
achat de valeur. La conserver en lieu sur pour s'y
reporter aux fins d'obtention d'une couverture
d'assurance ou dans le cadre de correspondances
avec Marantz.
IMPORTANT
Pour l'obtention d'un service couvert par la garantie,
il incombe au client d'établir la preuve de l'achat et
d'en corroborer la date. Le reçu ou la facture
constituent des preuves suffisantes.
DEUTSCH
GARANTIE
Bei Garantiefragen wenden Sie sich bitte an Ihren
Marantz-Händler.
HEBEN SIE IHRE QUITTING GUT AUF
Die Quittung dient Ihnen als bleibende Unterlage für
Ihren wertvollen Einkauf Das Aufbewahren der
Quittung ist wichtig, da die darin enthaltenen Angaben
für Versicherungswecke oder bei Korrespondenz mit
Marantz angeführt werden müssen.
WICHTIG!
Bei Garantiefragen muß der Kunde eine
Kaufunterlage mit Kaufdatum vorlegen. Ihren Quittung
oder Rechnung ist als Unterlage ausreichend.
NEDERLANDS
GARANTIE
Voor inlichtingen omtrent garantie dient u zich tot uw
plaatselijke Marantz.
UW KWITANTIE, KASSABON E.D. BEWAREN
Uw kwitantie, kassabon e.d. vormen uw bewijs van
aankoop van een waardevol artikel en dienen op
een veilige plaats bewaard te worden voor evt,
verwijzing bijv, in verbend met verzekering of bij
correspondentie met Marantz.
BELANGRIJK
Bij een evt, beroep op de garantie is het de
verantwoordelijkheid van de consument een
gedateerd bewijs van aankoop te tonen. Uw
kassabon of factuurzijn voldoende bewijs.
ESPAÑOL
GARANTIA
Para obtener información acerca de la garantia
póngase en contacto con su distribuidor Marantz.
GUARDE SU RECIBO DE COMPRA
Su recibo de compra es su prueba permanente de
haber adquirido un aparato de valor, Este recibo
deberá guardarlo en un lugar seguro y utilizarlo
como referencia cuando tenga que hacer uso del
seguro o se ponga en contacto con Marantz.
IMPORTANTE
Cuando solicite el servicio otorgado por la garantia
el usuario tiene la responsabilidad de demonstrar
cuándo efectuó la compra. En este caso, su recibo
de compra será la prueba apropiada.
ITALIANO
GARANZIA
L’apparecchio è coperto da una garanzia di buon
funzionamento della durata di un anno, o del
periodo previsto dalla legge, a partire dalla data di
acquisto comprovata da un documento attestante il
nominativo del Rivenditore e la data di vendita. La
garanzia sarà prestata con la sostituzione o la
riparazione gratuita delle parti difettose.
Non sono coperti da garanzia difetti derivanti da uso
improprio, errata installazione, manutenzione
effettuata da personale non autorizzato o,
comunque, da circostanze che non possano riferirsi
a difetti di funzionamento dell’apparecchio. Sono
inoltre esclusi dalla garanzia gli interventi inerenti
l’installazione e l’allacciamento agli impianti di
alimentazione.
Gli apparecchi verranno riparati presso i nostri
Centri di Assistenza Autorizzati. Le spese ed i rischi
di trasporto sono a carico del cliente.
La casa costruttrice declina ogni responsabilità per
danni diretti o indiretti provocati dalla inosservanza
delle prescrizioni di installazione, uso e
manutenzione dettagliate nel presente manuale o
per guasti dovuti ad uso continuato a fini
professionali.
SVENSKA
GARANTI
För information om garantin, kontakta Marantz
lokalagent.
SPAR KVITTOT
Kvittot är ett inköpsbevis på en värdefull vara. Det
skall förvaras sä kert och hänvisas till vid
försäkringsfall eller vidkorrespondens mod Marantz.
VIKTIGT
Fö att garantin skall gälla är det kundens sak att
framställa bevis och datum om köpet. Kvitto eller
faktura är tillräokligt bevis fö detta.
Page 5

CE MARKING
English
The IS201 is in conformity with the EMC directive and low-voltage directive.
Français
Le IS201 est conforme à la directive EMC et à la directive sur les basses tensions.
Deutsch
Das Modell IS201 entspricht den EMC-Richtlinien und den Richtlinien für
Niederspannungsgeräte.
Nederlands
De IS201 voldoet aan de EMC eisen en de vereisten voor laag-voltage.
Español
El IS201 está de acuerdo con las normas EMC y las relacionadas con baja tensión.
Italiano
Il IS201 è conforme alle direttive CEE ed a quelle per i bassi voltaggi.
Svenska
IS201 är tillverkad i enlighet med EMC direktiven och direktiven för lågvoltsutrusning.
English
WARNINGS
- The AC adaptor shall be installed near the Socket-Outlet and
shall be easily accessible.
- Do not handle the AC adaptor with wet hands.
- Do not cover the ventilation with any items such as
tablecloths, newspapers, curtains, etc.
- No naked flame sources, such as lighted candles, should be
placed on the equipment.
Français
AVERTISSEMENTS
- L'adaptateur secteur doit être installé à proximité de la prise
secteur et doit être facilement accessible.
- Ne pas manipuler l'adaptateur secteur avec les mains
humides.
- Ne pas recouvrir les ouïes de ventilation avec un objet
quelconque comme une nappe, un journal, un rideau, etc.
- Ne placer aucune source de flamme nue, comme une bougie
allumée, sur l'appareil.
Deutsch
WARNHINWEISE
- Der Netzadapter muss in der Nähe der Steckdose angebracht
werden und leicht zugänglich sein.
- Berühren Sie den Netzadapter nicht mit nassen Händen.
- Decken Sie die Lüftungsöffnungen nicht mit einem Tischtuch,
einer Zeitung, einem Vorhang usw. ab.
- Es dürfen keine Gegenstände mit offener Flamme, wie etwa
brennende Kerzen, auf dem Gerät aufgestellt werden.
Español
ADVERTENCIAS
- El adaptador de CA debe instalarse cerca del tomacorriente y
debe ser fácilmente accesible.
- No toque el adaptador de CA con las manos húmedas.
- No cubra la ventilació n con objetos como manteles,
periódicos, cortinas, etc.
- No deben colocarse sobre el equipo elementos con fuego,
por ejemplo velas encendidas.
Italiano
AVVERTENZE
-L’adattatore CA deve essere installato vicino alla presa di
corrente e deve essere facilmente accessibile.
- Non toccare l’adattatore CA con le mani bagnate.
- Non coprire le fessure di ventilazione con tovaglie, giornali,
tende od oggetti analoghi.
- Non posare sull'apparecchio sorgenti di fiamme scoperte
quali candele accese.
Svenska
VARNINGAR
-Nätadaptern ska vara installerad i närheten av vägguttaget
och vara lätt att nå.
- Hantera inte nätadaptern med våta händer.
-Täck inte för ventilationsöppningarna med några föremål som
till exempel bordsdukar, dagstidningar, gardiner e.d.
- Inga fö remål med öppen låga, som till exempel tä nda
stearinljus, bör placeras på utrustningen.
Nederlands
- Je moet de wisselstroomadapter in de buurt van het
stopcontact plaatsen en je moet er gemakkelijk bij kunnen.
- Raak de wisselstroomadapter niet aan met natte handen.
- Bedek de ventilatieopeningen niet met enige voorwerpen,
zoals tafelkleden, kranten, gordijnen, enz.
- Plaats geen brandende voorwerpen, zoals kaarsen, op het
apparaat.
WAARSCHUWINGEN
Page 6
A NOTE ABOUT RECYCLING
This product’s packaging materials are recyclable and can be reused. This product and the
accessories packed together are the applicable product to the WEEE directive except batteries.
Please dispose of any materials in accordance with your local recycling regulations.
When discarding the unit, comply with your local rules or regulations.
Batteries should never be thrown away or incinerated but disposed of in accordance with your local
ENGLISHFRANÇAISDEUTSCH
regulations concerning chemical wastes.
REMARQUE CONCERNANT LE RECYCLAGE
Le matériel d’emballage de cet appareil est recyclable et peut être réutilisé. Cet appareil et les
accessoires qui sont emballés avec celui-ci sont conformes, à l’exception des piles, à la directive
DEEE (relative aux déchets d’équipements électriques et électroniques).
Jetez ce matériel conformément aux réglementations de recyclage locales.
Pour mettre l’appareil au rebut, respectez les règles ou réglementations locales.
Les piles ne doivent jamais être jetées ou incinérées, mais être mises au rebut conformément aux
réglementations locales concernant les déchets chimiques.
RECYCLING-HINWEIS
Das Verpackungsmaterial dieses Produkts ist für Recycling geeignet und kann wiederverwendet
werden. Dieses Produkt und das in seinem Verpackungskarton enthaltene Zubehör mit Ausnahme der
Batterien entsprechen der WEEE-Direktive.
Bitte beachten Sie bei der Entsorgung irgendwelcher Materialien die örtlichen Recycling-Bestimmungen
Bei der Entsorgung des Gerätes sind die einschlägigen Umweltschutzauflagen sorgfältig zu befolgen.
Batterien dürfen nicht weggeworfen oder verbrannt werden, sondern müssen gemäß den örtlichen
Vorschriften zur Entsorgung von chemischem Abfall entsorgt werden.
RECYCLING VAN APPARATUUR EN VERPAKKINGSMATERIAAL
De verpakking van dit product is geschikt voor recycling. Dit product en de accessoires, als geheel
verpakt, zijn het relevante product volgens de WEEE-richtlijn, behalve de batterijen.
Gooi materialen bij het afval volgens de gemeentelijke voorschriften voor recycling.
Gooi dit apparaat bij het afval volgens de gemeentelijke wetten of voorschriften.
Batterijen mogen nooit bij het normale afval en mogen nooit worden verbrand, maar moeten worden
weggegooid volgens de gemeentelijke voorschriften voor chemisch afval.
NEDERLANDS
NOTA SOBRE EL RECICLADO
Los materiales de embalaje de este producto son reciclables y pueden ser reutilizados. En este
producto y sus accesorios incluidos es aplicable la directiva europea sobre residuos de aparatos
eléctricos y electrónicos (RAEE), excepto en lo referente a las pilas.
Se ruega eliminar cualquiera de esos materiales de acuerdo con las normas locales de reciclado.
Cuando deseche esta unidad, cumpla con las normas o reglamentaciones locales.
Las pilas no deben tirarse ni incinerarse, sino que deben eliminarse de acuerdo con las normas
ESPAÑOLITALIANOPORTUGUÊSSVENSKA
locales sobre residuos químicos.
NOTA SUL RICICLAGGIO
I materiali di imballaggio di questo prodotto sono riciclabili e possono essere riutilizzati. Questo
prodotto e gli accessori in dotazione con esso, eccettuate le batterie, rappresentano il prodotto
applicabile per la direttiva RAEE (rifiuti di apparecchiature elettriche ed elettroniche).
Smaltirli seguendo le proprie normative locali sul riciclaggio.
Quando si desidera eliminare l’apparecchio, attenersi alle indicazioni e alle normative locali.
Non gettare via le batterie e non bruciarle, ma smaltirle in conformità alle normative locali relative ai
rifiuti chimici.
OBSERVAÇÃO SOBRE RECICLAGEM
Os materiais de embalagem deste produto são recicláveis e podem ser reutilizados.
Este produto bem como os acessórios embalados juntos, exceto as pilhas, estão em conformidade
com a diretiva WEEE (resíduos de equipamentos elétricos e eletrônicos).
Favor descartar os materiais de acordo com as normas e regulamentos locais sobre reciclagem.
Obedeça as normas e regulamentos locais quando for descartar o produto.
As pilhas não devem ser jogadas no lixo nem incineradas, mas sim descartadas de acordo com as
normas e regulamentos locais relativos a resíduos químicos.
OM ÅTERVINNING
Den här produktens förpackningsmaterial är återvinningsbart och kan återanvändas. Den här
produkten och de med produkten levererade tillbehören, förutom batterierna, överensstämmer med
WEEE-direktivet.
Kassera allt material i enlighet med lokala miljöföreskrifter.
När enheten ska kasseras ska du följa lokala miljöföreskrifter.
Batterier får aldrig slängas i hushållsavfall eller brännas. Dom ska hanteras i enlighet med lokala
miljöföreskrifter för kemiskt avfall.
.
Page 7
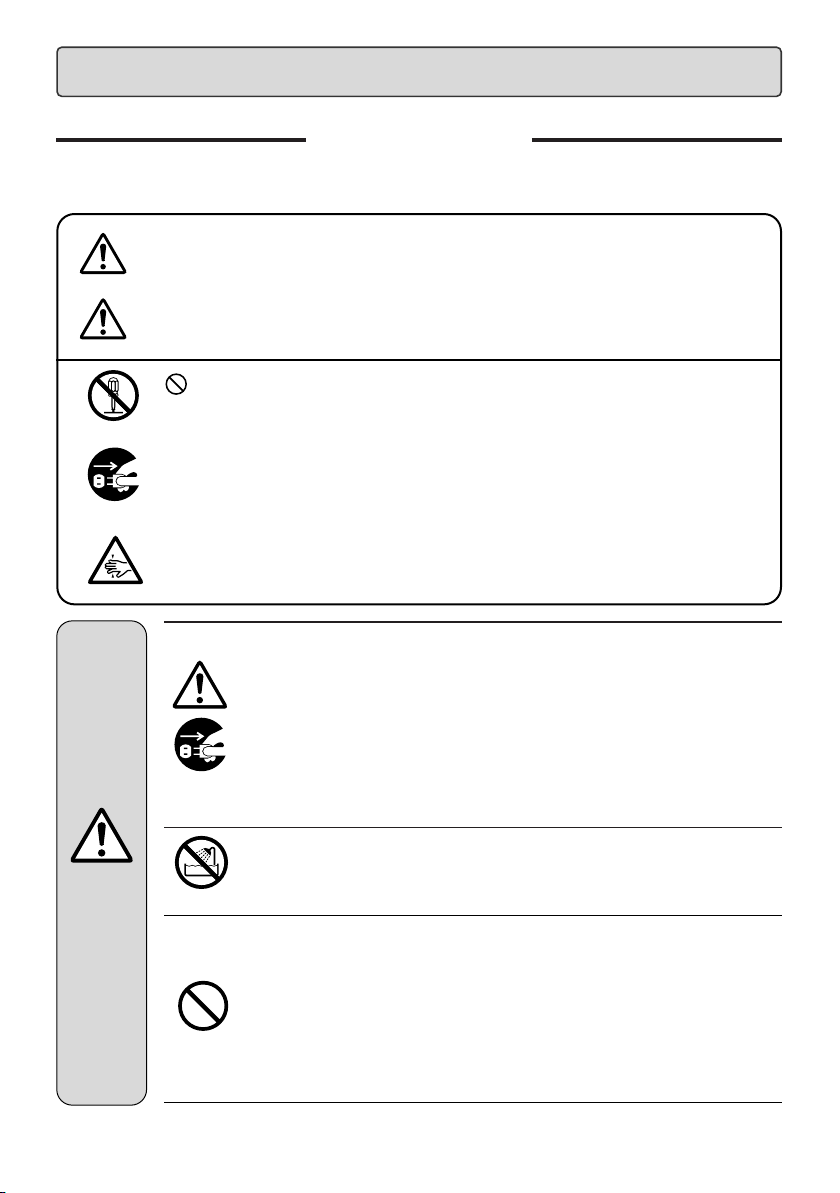
安全上のご注意
絵表示について
この「安全上のご注意」は、製品を安全に正しくお使いいただき、あなたや他の人々への危害や財産への損害
を未然に防止するため、いろいろな絵表示をしています。内容をよく理解してから本文をお読みください。
警告
注意
図の中や近傍に具体的な禁止内容(左図の場合は分解禁止)が描かれています。
●
図の中に具体的な指示内容(左図の場合は電源プラグをコンセントから抜く)が描か
れています。
△
図の中に具体的な注意内容(左図の場合は指をはさまれないように注意)が描かれて
います。
コンセントから抜く
この表示を無視して、誤った取り扱いをすると、人が死亡または重傷を負
う可能性が想定される内容を示しています。
この表示を無視して、誤った取り扱いをすると、人が傷害を負う可能性が想
定される内容および物的損害のみの発生が想定される内容を示しています。
記号は禁止の行為であることを告げるものです。
記号は行為を強制したり指示したりする内容を告げるものです。
記号は注意を促す内容があることを告げるものです。
● 万一、煙が出ている、変なにおいや音がするなどの異常状態のまま使用すると火
災・感電の原因となります。すぐにACアダプターをコンセントから抜いてくださ
い。煙が出なくなるのを確認して販売店に修理をご依頼ください。
● 万一、内部に水などが入った場合は、まずACアダプターをコンセントから抜いて
販売店にご連絡ください。そのまま使用すると火災・感電の原因となります。
● 万一、機器の内部に異物が入った場合は、まずACアダプターをコンセントから抜
いて販売店にご連絡ください。そのまま使用すると火災・感電の原因となります。
電源プラグを
● 万一、この機器を落したり、キャビネットを破損した場合は、ACアダプターをコ
ンセントから抜いて販売店にご連絡ください。そのまま使用すると火災・感電の
原因となります。
警告
1
● 風呂場では使用しないでください。火災・感電の原因となります。
水場での使用禁止
● 表示された電源電圧(交流100ボルト)以外の電圧でACアダプターを使用しない
でください。火災・感電の原因となります。
● この機器を使用できるのは日本国内のみです。船舶などの直流(DC)電源には接
続しないでください。火災の原因となります。
● この機器の上にろうそく等の炎が発生しているものを置かないでください。火災
の原因になります。
● この機器の上に花びん、植木鉢、コップ、化粧品、薬品や水などの入った容器や
小さな金属物を置かないでください。こぼれたり、中に入った場合火災・感電の
原因となります。
Page 8

接触禁止
● 雷が鳴り出したら、ACアダプターには触れないでください。感電の原因となりま
す。
● この機器に水が入ったり、ぬらさないようにご注意ください。火災・感電の原因
となります。雨天、降雪中、海岸、水辺での使用は特にご注意ください。
警告
注意
分解禁止
電源プラグを
コンセントから抜く
● この機器の裏ぶた、キャビネット、カバーは絶対外さないでください。内部には
電圧の高い部分があり、感電の原因となります。内部の点検・整備・修理は販売
店にご依頼ください。
● この機器を改造しないでください。火災・感電の原因となります。
● オーディオ機器を接続する場合は、各々の機器の取扱説明書をよく読み、ACアダ
プターをコンセントに接続する前に、説明に従って接続してください。また、接
続は指定のコードを使用してください。指定以外のコードを使用したり、コード
を延長したりすると発熱しやけどの原因となることがあります。
● 製品に同梱しているACアダプターのみ使用してください。製品に同梱していな
いACアダプターは使用しないでください。火災・感電の原因となります。
● 旅行などで長期間、この機器をご使用にならないときは安全のため必ずACアダプ
ターをコンセントから抜いてください。
● お手入れの際は安全のためACアダプターをコンセントから抜いて行ってくださ
い。
● 移動させる場合は、ACアダプターをコンセントから抜き、機器間の接続コードな
ど外部の接続コードを外してから行ってください。ACアダプターが傷つき、火
災・感電の原因となることがあります。
● 調理台や加湿器のそばなど油煙や湯気が当たるような場所に置かないでくださ
い。火災・感電の原因となることがあります。
● ぐらついた台の上や傾いた所など不安定な場所に置かないでください。落ちたり、
倒れたりしてけがの原因となることがあります。
● ACアダプターを熱器具に近づけないでください。コードの被ふくが溶けて、火
災・感電の原因となることがあります。
● 窓を閉めきった自動車の中や直射日光が当たる場所など異常に温度が高くなる場
所に放置しないでください。キャビネットや部品に悪い影響を与え、火災の原因
となることがあります。
● 湿気やほこりの多い場所に置かないでください。火災・感電の原因となることが
あります。
● 濡れた手でACアダプターを抜き差ししないでください。感電の原因となることが
あります。
● 5年に一度くらいは機器内部の掃除を販売店などにご相談ください。機器の内部
にほこりがたまったまま、長い間掃除をしないと火災や故障の原因となることが
あります。特に、湿気の多くなる梅雨期の前に行うと、より効果的です。なお、
掃除費用については販売店などにご相談ください。
2
Page 9

CONTENTS
FEATURES................................................................................................2
PACKAGE CONTENTS.............................................................................2
SUPPORTED iPod ....................................................................................2
PART NAMES ...........................................................................................3
UPPER SIDE ....................................................................................................3
REAR SIDE.......................................................................................................3
CONNECTOR PART ........................................................................................4
REMOTE CONTROLLER (RC201IS) ...............................................................4
OPERATION OF REMOTE CONTROLLER .....................................................5
CONNECTION ..........................................................................................7
CONNECTING TO OUTLET ............................................................................7
WALL SETTING ...............................................................................................8
PUTTING YOUR iPod IN IS201 DOCK CONNECTOR ...................................9
HOOKING UP THE DOCK CONNECTOR ....................................................12
SETTING .................................................................................................14
MODE SETTING ............................................................................................14
VIDEO OUTPUT MODE SWITCH .................................................................14
TROUBLESHOOTING.............................................................................15
SPECIFICATIONS...................................................................................15
ENGLISH
OTHERS..................................................................................................16
1
Page 10

ENGLISH
FEATURES
With this dock connector, you can connect your iPod with Marantz products or mini system
components.
• Easily attach and detach your iPod
• Two types of set-up available (desktop type and on wall type)
• With your iPod docked, you can control your iPod with the supplied remote controller
• Play the stereo sound on your iPod with the dock connector’s AUDIO OUT L/R jacks
connected to your audio amp
• You can watch the play list, artist names, song titles, image data, photo data and
slideshows stored on your iPod on a TV connected to the dock connector
• Charge your iPod battery
PACKAGE CONTENTS
Make sure you have the following items:
¶ IS201 Dock Connector....................1 pce
¶ RC201IS Remote Controller ...........1 pce
¶ AC adapter......................................1 pce
¶ AC plug adapters (3 types)
• for UK ...........................................1 pce
• for Europe ....................................1 pce
• for U.S.A./Japan...........................1 pce
¶ iPod adapters
Type A (attached to the dock connector
•
with shipment)
• Type B..........................................1 pce
• Type C .........................................1 pce
• Type D .........................................1 pce
..............................1 pce
SUPPORTED iPod
• iPod Video (5th Generation)
• iPod nano
• iPod (U2 Edition)
• iPod mini
• iPod Photo (4th Generation)
• 4th Generation iPod with Click Wheel
• 3rd Generation iPod with Touch Wheel
¶ S-Video cable .................................1 pce
¶ RCA audio pin cable .......................1 pce
¶ Remote cable..................................1 pce
¶ Wall setting screws .........................2 pcs
¶ Instruction manual ..........................1 pce
¶ Warranties
• For Japan .....................................1 pce
• For Canada ..................................1 pce
• For U.S.A. ....................................1 pce
¶ Registration card for Europe...........1 pce
Note
• Before using the dock connector,
update your iPod with the latest
software, available from the Apple
Website.
2
Page 11

PART NAMES
q
e
r
w
t
w
e
r
q
t
y
UPPER SIDE
Desktop type
On Wall type
q Dock connector
Connects to your iPod’s dock connector.
w iPod slot
Insert the appropriate type of adapter to
put your iPod.
• Be sure to use the appropriate adapter
(
p.9)
☞
e Red indicator
Lights up when connected to AC power
source and blinks when receiving IR
signal from the remote controller.
r Blue indicator
Lights up when the dock connector is
connected to your iPod.
t Remote IR Receiver
When using this IR receiver make sure
this area in unobstructed.
ENGLISH
REAR SIDE
y
Remote control INT./EXT. switch
Remote control switching. See page 13
for more information.
• Set it to INT. when remote control
cable is not connected.
3
Page 12

ENGLISH
z x c vbnm
!2
!3
q
e
w
r
t
y
u
i
!4
!1
!5
o
!0
CONNECTOR PART
c REMOTE jack
Connect to your Marantz product with
remote control jack (RC-5).
v RS-232C jack
Used to connect to an external control
system.
b FLASHER IN jack
Used to control equipment with key pad,
etc.
z AUDIO OUT L/R jacks
Connect to your AV amp’s/receiver’s
audio input jack.
x S-VIDEO OUT jack
Connect to your AV amp’s/TV monitor’s
video input jack.
REMOTE CONTROLLER (RC201IS)
n AC adapter connect jack
Connect the supplied AC adapter.
m Magnet rubber
Attach the connector part temporally on
metallic surface of wall, etc.
Be careful fixation may not be secured
enough depending on the condition of
attached surface.
q POWER button
Turns power on and off your iPod.
w MODE button
Switches IS201’s mode setting
(OSD/LCD). (
e
SORT button (in OSD mode only)
Sorting of Song/Artist/Album stored on
your iPod in sequence, not operative in
LCD mode.
r ALBUM 34button
(in LCD mode only)
Selects the next and previous album on
the iPod.
t PLAY LIST 34button
(in LCD mode only)
Selects the next and previous play list on
the iPod.
☞
p.14)
4
Page 13

y REPEAT button
Sets the iPod’s Repeat function to:
One, All, Off.
u SHUFFLE button
Sets the iPod’s Shuffle function to:
Songs, Albums, Off.
i 38 (PLAY/PAUSE) button
Same function as iPod’s click wheel 38.
o ¢ (SKIP) button
Presses the button once to select the
next contents.
!0 4 (BACK SKIP) button
Presses the button once to restart the
current iPod contents, press it twice in a
row to select the previous contents.
!1 MENU button
Same functions as the iPod’s click
wheel menu.
!2 SELECT button
Same functions as the iPod’s click
wheel select button.
OPERATION OF
REMOTE CONTROLLER
Please make sure the below instructions
are followed when operating your remote
controller.
• Do not spill water or any other liquid on
your remote controller.
• Do not drop, apply excessive impact on
your remote controller.
• Do not leave your remote controller in a
place such as;
- At high humidity/temperature
(near heater, bathroom)
- At extremely low temperature
- Dusty
7 Before using your remote
controller
Note that your remote controller is provided
with lithium battery and can be operative
after removing insulation sheet.
ENGLISH
!3 34 button
Same functions as the iPod’s click wheel
counterclockwise(
• Except for the iPod’s volume control.
3) and clockwise (4).
!4 INPUT button
Switches the input of connected your
Marantz amp/receiver (some models
are not operative).
!5 VOLUME +-button
Please to adjust the volume control of
your marantz amplifier / AV receiver.
insulation
sheet
5
Page 14

ENGLISH
5 m
1
2
3
7 Handling battery
7 Battery replacement
Improper handling of lithium battery may
cause heat generation, ignition or bursting,
so be sure to follow the below instructions
when handling the lithium battery.
• The supplied battery is provided to
check the functionality of your remote
controller.
• Use only battery type CR2025.
• Do not recharge your battery.
• Do not handle roughly or disassemble
your battery.
• When you replace your battery, be sure
to insert the battery with polarity (+)(-)
correctly.
• Do not place your battery in any place
where it will be subjected to direct
sunlight or high temperature.
• Keep your battery out of the reach of
children. In case of accidental ingestion,
immediately consult a doctor.
• Leaky battery should be disposed
immediately. If the liquid is spilt on your
skin or cloth, you can get a skin burn,
so be sure to handle leaky battery
carefully. When the solution adheres to
the skin and/or clothes, wash it with
water and consult a doctor.
• At disposal of used batteries, insulate
terminal parts by winding with tape.
Dispose the battery away from fire in
accordance with applicable local
regulations.
If you find that the remote control must be
used closer to the main unit than usual, the
battery is weak. Replace the battery new
one.
1. Slide out the battery holder from the
remote control by pushing into the hole
in the holder with a ball-point pen ,etc.
2. Replace the battery from the battery
holder, and then place new one in the
holder, positive side upward.
3. Slide the holder into the remote control.
a ball-point pen ,etc.
Lithium battery
Battery holder
7 Remote-controllable range
The distance between the transmitter of the
remote control and the IR SENSOR of the
IS201 should be less than 5 meters. If the
remote control is pointed in a direction
other than the IR SENSOR or if there is an
obstacle between them, use of the remote
control may not be possible.
6
Page 15

CONNECTION
CONNECTING TO OUTLET
1. Fit the appropriate AC plug adapter to the AC adaptor as shown below.
• For UK • For Europe
• For U.S.A./Japan
ENGLISH
2. Connect the AC adapter to the IS201’s
DC IN jack.
3. Plug the AC adapter into a suitable wall
outlet.
7
Page 16

ENGLISH
WALL SETTING
• Please note that supplied wall setting
screws are used for wooden wall.
• Make sure that screws are firmly
secured to the wall (poll).
• Make sure that there is no electric
wiring or piping inside the wall.
Note
• Do not mount the dock connector on
plaster board, ALC (autoclaved
lightweight concrete), concrete block or
plywood less than 10mm thick as the
intensity is insufficient (If the dock
connector falls from the wall, it may
cause an injury).
1. Disconnect the adapter.
3. Install the supplied screws in the dock
connector and fasten it on the wall.
Screws
Wall
4. Attach the cover.
Cover
2. Remove the cover.
Adapter
Cover
Wall
5. Connect the adapter
Adapter
Wall
Notes
• Be sure that the cover is attached or
removed in the direction of arrow shown
on the side.
Do not leave the cover and adapter
•
removed while using the dock connector
as it may cause a malfunction.
8
Page 17

PUTTING YOUR iPod IN IS201 DOCK CONNECTOR
1. Make sure that IS201 Dock Connector is plugged into a
wall outlet.
2. Depending on the type of iPod, insert the applicable iPod
adapter into the dock connector slot, as shown below.
• There are four types of iPod adapters; Types A, B, C & D.
Be sure to insert one of the supplied iPod adapters.
• Do not insert wrong iPod adapter as it may cause a
malfunction.
7 iPod Adapters (“A”, “B”, “C” are indicated on the rear side)
• Type A • Type B • Type C • Type D
(inserted in the dock
connector with shipment)
7 iPods & their supporting iPod Adapters:
¶ iPod Video (5th Generation)
30GB 60GB
(In case of type B+D)
ENGLISH
¶ iPod nano
Type D
1GB / 2GB / 4GB
Type B
Type D
Type B+D Type C+D
Type A
Type C
9
Page 18

ENGLISH
¶ iPod (U2 Edition)
¶ iPod mini
4GB / New 4GB / 6GB
¶ iPod Photo (4th Generation)
20GB 60GB
Type B Type C
Type B
30GB 40GB / 60GB
¶ iPod (4th Generation)
¶ iPod (3rd Generation)
10
Type B Type C
20GB 40GB
Type B Type C
10GB / 15GB / 20GB 30GB / 40GB
Type B Type C
Page 19

3. Fit your iPod dock connector port securely onto the dock connector.
When you insert your iPod, the dock connector’s blue power indicator will light up.
Blue power indicator
lights up
Notes
• Marantz bears no responsibility whatsoever for any loss or damage to data on your
iPod that may occur when the iPod is used connected to the dock connector.
• Be sure to use the correct adapter for your type of iPod. If the wrong adapter is used, it
may not operate correctly even if the blue power indicator lights up.
• If your iPod is inserted into the IS201 with the power off, or if you plugged the AC
adapter into a wall outlet with your iPod inserted in the IS201, it may take some time for
your iPod power to switch on and become operable.
• To prevent dock connector damage, don’t twist your iPod when inserting or removing it.
Be careful not to knock over the iPod when inserted to prevent dock connector damage.
•
• Don’t use with any other iPod accessories, such as FM transmitters and microphones,
because they may cause a malfunction.
ENGLISH
11
Page 20

ENGLISH
MUTEMUTE
RECORDERRECORDER
2211
AUX/DVDAUX/DVDTUNERTUNERPHONOPHONO CDCD
STANDBYSTANDBY
SPEAKERSSPEAKERS
OFFOFF
ONON
INTEGRATED AMPLIFIER PM7001INTEGRATED AMPLIFIER PM7001
TREBLETREBLE BALANCEBALANCE
POWER ON/OFFPOWER ON/OFF
PHONESPHONES
BASSBASS
RECORDER2RECORDER2
INPUT SELECTORINPUT SELECTOR
RRLL
VOLUMEVOLUME
++
--
++
--
1 21 2
2 12 1
RECORDERRECORDER
TUNERTUNER
PHONOPHONO
MAXMAXMINMIN
11
SOURCE DIRECTSOURCE DIRECT
22
COPYCOPY
OFFOFF
REC SELECTORREC SELECTOR
CDCD
AUX/DVDAUX/DVD
ONON
OFFOFF
S-VIDEO
IN
SURROUND
AV SURROUND RECEIVER SR4600
DOWN
UP
VOLUME
INPUT SELECTOR
POWER ON/OFF PHONES
STANDBY
MUTE
7.1CH INPUT
S. SPEAKER B
ATT
PURE
SETUP
DIRECT
SIMPLE
AUTO
HT-EQ
MENU
ENTER
DISPLAY
MEMORY
CLEAR
T-MODE
EXIT
BAND
MODE
DISP MULTI AUTO TUNED ST V — OFF NIGHT PEAK ANALOG
DIGITAL
ATT
SLEEP
SURR
AUTO
DIRECT DISC 6.1 MTX 6.1 EQ
DIGITAL
SURROUND
PCM
LCR
SL S SR
LFE
HOOKING UP THE DOCK CONNECTOR
7 Connecting to AV receiver
To Analog Audio output
(red) (white)
Left
speaker
TV Monitor
Right
speaker
7 Connecting to Amp, Monitor
(red) (white)
To S-video
output
Audio cable
To audio input
terminals on
AV receiver
To Analog Audio output
Audio cable
12
TV Monitor
To audio input
Right speakerLeft speaker
terminals on
amplifier
Page 21

7 Connecting to Marantz product’s remote control jack (RC-5)
SPEAKER SYSTEMS : MINIMUM 6 OHMS
FRONT CENTER SURROUND SURROUND BACK
M. SPEAKER B
MULTI
OUT
DVD
C
IN OUT
S-VIDEO
DVD
DSS/VCR2
C
RS-232C
RC
MULTI
OUT
DSS/VCR2
OUT
OUT
VCR1
VCR1
L
SBR
SBL
OUT
PRE
SLL
SRR
DSS/VCR2
DVDTVTV
R
IN
RSW
RC-5
IN
SR
AUDIO
7.1CH
IN
OUT
IN
LSL
SBR
SBL
CD
OUTSWOOUT
DCDR/MD
TAPE
OUTININ
IIN OUT
VIDEO
MONITOR
VCR1
TV OUT
(
AUX2
)
MONITOR
DIGITAL IN
DIGITAL OUT
3
1
OPT.
2
4
COAX.
RL LRRL
SWITCHED UNSWITCHED
1A 120W MAX 1A 120W MAX
MODEL NO. ZR6001
FM
(
Ω
)
ANTENNA
GNDAMAM
TCOMPONENT VIDEO
C
B
/
P
B
C
R
/
P
R
C
R
/
P
R
C
R
/
P
R
C
B
/
P
B
C
BB
/
P
B
INPUT-1
YY
MONITOR OUT
PINPUT-2
Y
UOUT
AC OUTLETS
120V 60Hz
AC IN
IR EMITTER OUT
R
1L234
AUX PLC OUTPUT
IN
FLASHER
ININ
OUTOUT
• When the dock connector is used without connecting any other Marantz product’s
remote control jack, set the switch to “INT”.
• By connecting the dock connector’s remote jack to the remote jack on other Marantz
product, the dock connector can act as a remote control signal receiver for the other
Marantz product. In order to do this, set the dock connector’s switch to “INT.”, and set
the remote jack on the connected Marantz product to “EXT.”.
ENGLISH
(
)
FM
7575Ω
GND
VIDEO
TVTVDVD
DIGITAL IN
3
4
1
2
DVD
L
R
• If IR remote of other Marantz product is used instead of the dock
connector’s remote, set the switch to “EXT.” dock connector.
VCR1
ININOUT
VCR1
IN
ANTENNA
COAX.
OPT.
OUT
DIGITAL OUT
DSS/VCR2
ININOUT
DSS/VCR2
COMPONEN
INPUT-1
IN
C
B
C
R
/
P
B
ININOUT
S-VIDEO
TAPE
C
Y
/
P
R
DVD
TV
MULTI
RC-5
RC
IN
O
CDR/M
IN
Y
MONITOR
OUT
RS-232C
CD
OUT
AUDIO
13
Page 22

ENGLISH
SETTING
MODE SETTING
You can operate your iPod with this dock
connector in two modes, OSD mode and
LCD mode, and mode selection can be
available by pressing MODE button.
Note
• Note that in case of removing AC
adapter or blackout occurrence after
mode setting, the dock connector is set
to OSD mode(default setting).
7 OSD Mode
(On Screen Display Mode)
Only remote controller can control your
iPod. “marantz” is shown on your iPod’s
display. The connected TV’s screen shows
the Control Menu to control your iPod.
Notes
• Depending on the type of iPod, some
settings are not supported. In this case,
please update your iPod to the latest
firmware.
The Control Menu supports only English.
•
If the set language is non-English, “#”
may be displayed on the screen.
• The LCD mode is used to playback
video contents or photograph data.
• Leaving the iPod’s Control Menu
displayed on an LCD or plasma TV for a
long period of time may result in
afterimages on the screen. To prevent
that, press the remote controller’s
ALBUM
more to turn off the OSD menu when it
does not need to be displayed. The
menu will display again when
PLAY/PAUSE or other operation
buttons are pressed.
3 button for two seconds or
14
7 LCD Mode
• Operation can be available by both your
iPod and the remote controller.
• Your iPod’s LCD (liquid crystal) displays
normally.
• The iPod’s Control Menu is not
displayed on the connected TV screen.
MODE
button
ALBUM
button
3
VIDEO OUTPUT MODE
SWITCH
Press MODE button for more than three
seconds, then control display’s output
mode is switched to PAL/NTSC. The
default mode is set to NTSC.
Notes
• Note that in case of removing AC
adapter or blackout occurrence after
video mode setting, it is set to NTSC
mode(default setting).
• Set your iPod’s TV signal and TV out on
your iPod.
Page 23

TROUBLESHOOTING
7 There’s no sound
Check your IS201 dock connector.
• Make sure the iPod is inserted properly in the dock connector.
• Make sure your iPod is playing.
• Make sure the cable plugs are pushed in all the way.
• Make sure the AC adapter is connected to a suitable wall outlet and connected to
IS201 dock connector.
Check the receiver or amp connected to IS201 dock connector.
• Make sure the power is turned on.
• Make sure the input is selected on the jack connected to your iPod.
• Make sure the volume control is not set too low.
7 The remote controller doesn’t control the iPod
Check your IS201 dock connector
• Make sure the iPod is inserted properly in the dock connector.
• Make sure there is nothing to block the infrared radiation between IS201 dock
connector and remote controller.
• Make sure you’ve selected the right mode for the remote mode switch on the rear of
IS201 dock connector.
• Make sure the remote control cable is connected properly.
7 There’s no control display on TV screen
Make sure the display mode (OSD/LCD) is set properly, or the selected mode is
suitable for the TV type. (
☞
p. 14)
ENGLISH
SPECIFICATIONS
Power Supply ...........................................................................DC IN12V (AC ADAPTER)
Net weight (DOCK PART, CONNECTOR PART, including mains cord) ....................350g
Dimensions ........................................................................DOCK PART: 95
..........................................................CONNECTOR PART: 102
Terminals ......................S-video output
AC Adapter (Supplied)
Power Supply ............................................................AC100V – 240V (50Hz / 60Hz) 0.4A
Specifications subject to change without prior notice.
× 1, Analog Audio output × 1, Remote output × 1,
RS232C terminal
× 1, FLASHER IN terminal × 1
× 49 × 84mm
× 34 × 54mm
15
Page 24

ENGLISH
OTHERS
The section describes the care and
maintenance tasks that must be performed
to optimize the operation of your Marantz
equipment.
7
Cleaning of equipment external
surfaces
The exterior finish of your unit will last
indefinitely with proper care and cleaning,
Never use scouring pads, steel wool,
scourging powders or harsh chemical
agents (e.g., lye solution), alcohol, thinner,
benzine, insecticide or other volatile
substances as these wil mar the finish of
the equipment. Likewise, never use cloths
containing chemical substances. If the
equipment get dirty, wipe the external
surfaces with a soft, lint-free cloth.
If the equipment becomes heavily soiled:
• dilute some washing up liquid in water,
in a ratio of one part detergent to six
parts water.
• dip a soft, lint-free cloth in the solution
and wring the cloth till it is damp.
• wipe the equipment with the damp
cloth.
• dry the equipment by wiping it with a dry
cloth.
7 Repairs
Only the most competent and qualified
service technicians should be allowed to
service the factory-trained warranty station
personnel have the knowledge and special
facilities needed for repair and calibration of
this precision equipment. After the warranty
period has expired, repairs will be
performed for a charge if the equipment
can be returned to normal operation.
In the event of difficulty, refer to your dealer
or write directly to the nearest location to
you that is listed on the Marantz Authorized
Service Station list. If writing, please
include the model and serial number of the
equipment together with a full description of
what you think is abnormal about the
equipment's behaviour.
16
Page 25

DIMENSIONS
95.0
49.0
)
3 3/4
(
)
1 15/16
(
84.0
(
3 3/8
)
54.0
2 3/16
(
1300.0
)
(51)
102.0
(
4 1/16
)
)
34.0
1 5/16
(
Unit: mm (inch)
Page 26

www.marantz.com
You can find your nearest authorized distributor or dealer on our website.
U.S.A. Marantz America, Inc. 100 Corporate Drive, Mahwah, NJ, 07430, U.S.A.
EUROPE Marantz Europe B.V. P.O. Box 8744, 5605 LS Eindhoven, The Netherlands
is a registered trademark.
Printed in China 04/2006 00M17CW851010 mzh-d
 Loading...