

Page 1
Model CDR420 User Guide
Recordable
®
CLASS 1 LASER PRODUCT
Page 2
CAUTION
Page 3
Changes or modifi cations may cause this unit to
Page 4

Page 5

.........................................................................................................................................
...............................................................................................................................
.....................................................................................................................
MP3 (.mp3)
..................................................................................................
WAVE (.wav)
...........................................................................................................................
MP3 Stereo
.........................................................................................................
MP3 Mono
..............................................................................................................
......................................................................................................................................
.....................................................................................................................
......................................................................................................................
Type
..................................................................................................................
¼” T-R-S phone jack
Input sensitivity/Impedance
................................................................................................
Signal-to-Noise ratio (IEC-A weighted)
.....................................................................................................
Total Harmonic Distortion (0dB, PCM)
.....................................................................................................
Input Sensitivity/Impedance
....................................................................................................
Signal-to-Noise ratio (IEC-A weighted)
.....................................................................................................
Total Harmonic Distortion (0dB, PCM)
.......................................................................................................
Input Sensitivity/Impedance
.....................................................................................................
Signal-to-Noise ratio (IEC-A weighted)
.....................................................................................................
Total Harmonic Distortion (0dB, PCM)
.....................................................................................................
Type
.......................................................................................................................................................
Standard level/Impedance
..........................................................................................................
Type
.......................................................................................................................................................
Standard level/Impedance
..........................................................................................................
Type
.......................................................................................................................................................
Standard output level/Impedance
.............................................................................................
Sampling frequency
................................................................................................................................
........................................................................................................................................................
.........................................................................................................................................................
........................................................................................................
......................................................................................................................................
.......................................................................................................................................
.............................................................................................................
.................................................................................................................
Page 6

(If recording is done directly to a CD-R a disc error can inter-
the common procedures used
Width
...........................................................................................................................................
Height
............................................................................................................................................
Depth
.............................................................................................................................................
...........................................................................................................................................
AC adapter
...........................................................................................................................................................
Stereo audio cable
...............................................................................................................................................
User Guide
...........................................................................................................................................................
Rechargeable Lead Acid battery system
..................................................................................................
Additional rechargeable Lead Acid battery pack
Carrying bag
............................................................................................................................................
Attaché carrying case
................................................................................................................................
www.d-mpro.com
for details.
Page 7

.........................................
Laser Safety
.....................................................
..............................
.......................................................
..........................................................
.................................................
...................................................
....................................................
..............................................................
........................................................
Connect Microphones or Instruments
............
Connect computer
..........................................
Connect analog equipment
.............................
Connect digital equipment
.............................
Connect keyboard
..........................................
.............................................
1 Speaker
.....................................................
2 Built-in microphone
....................................
3 Tone controls
............................................
4 Control buttons
4a FILE DIR button
..................................
4b INFO button
........................................
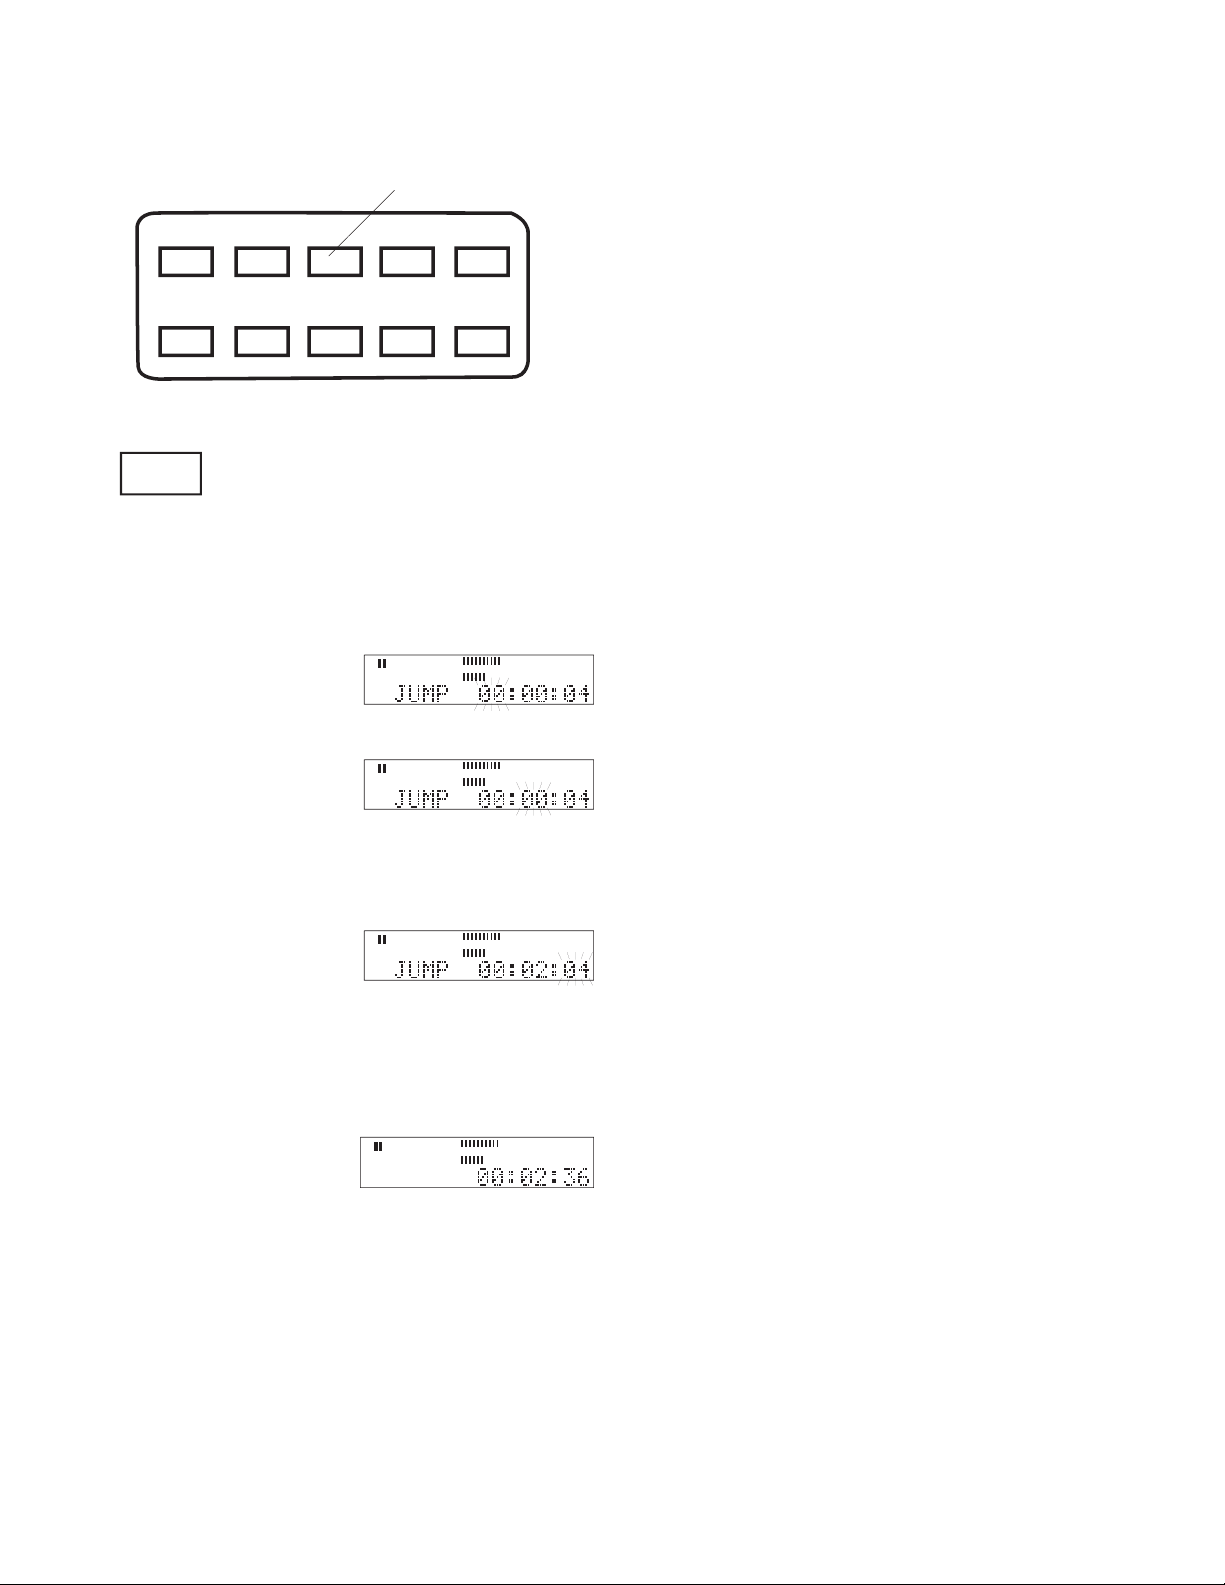
4c JUMP button
.......................................
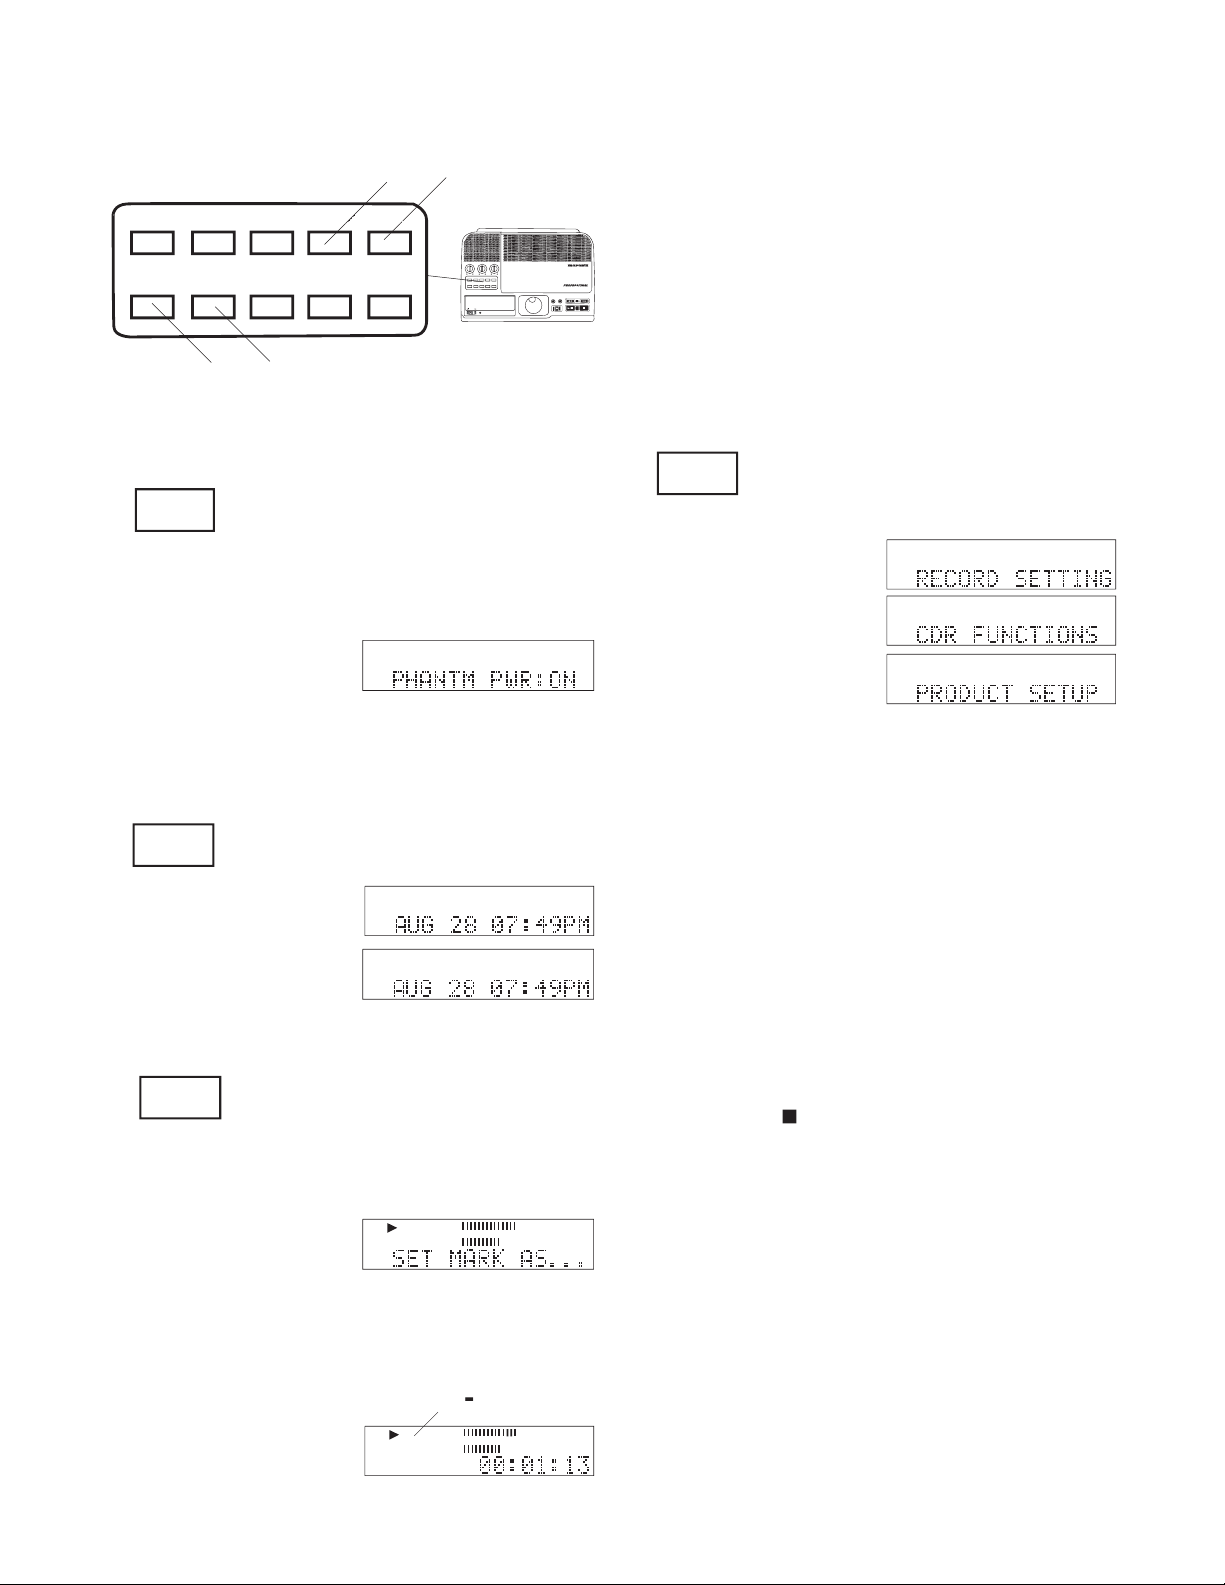
4d PHANTOM button
...............................
4e CD/HD button
.....................................
4f MARK button
.....................................
4g UTILITY MENU button
.....................
4h UNDO button
......................................
4i REDO button
........................................
4j EDIT MENU button
............................
5
.....................................................
a Record icon
.......................................
b Pause icon
..........................................
c Play icon
..........................................
...........................................
e EDIT label
.............................................
f MENU label
..........................................
g BUILD label
.........................................
h IN label
.................................................
i OUT label
.............................................
j UTILITY label
......................................
k Level meter scale
..................................
l L (left) level meter
................................
m R (right) level meter
...............................
n ? label
....................................................
o MP3 label
..............................................
p PCM label
.............................................
q Working label
.......................................
r HD label
................................................
s CD label
.................................................
t REC label
...............................................
u Timer label
............................................
v Total label
.............................................
w Select label
............................................
x Elapsed label
.........................................
y Remaining label
....................................
z Alphanumeric display
...........................
6 POWER switch
..........................................
7 STANDBY light
........................................
8 Jog Wheel (SELECT, PUSH ENTER)
......
9 IN button
...................................................
How to jump to an IN mark
.......................
10 OUT button
................................................
How to jump to an OUT mark
...................
11 REC button light
.....................................
12 Fast Reverse button
.............................
13 Fast Forward button
.............................
14 Play/Pause button
................................
15 Stop button
.............................................
1 PHONE/SPEAKER LEVEL control
.........
2 PHONE SELECTOR
.................................
3 MIC/LINE controls and input jacks
.........
.................
..........................
...................................
...................................
..........
.....................................
5
...............................
.........................
8 EJECT button
.............................................
9 Eject button
................................................
10 CD light
.....................................................
11 CD slot
.......................................................
12 PHONES jack
13 LINE OUT level control
.............................
1 MIX OUT jacks
.........................................
2 LINE OUT jacks
........................................
3 AUX IN jacks
............................................
4 DIGITAL IN and OUT jacks (SPDIF)
.......
5 I/O jack (computer)
.....................................
6 KEYB jack (keyboard)
..............................
7 DC IN
.........................................................
8 DCIN pinout
...............................................
.....................................
..................................................
How to set or change the
REC FORMAT to be recorded
......................
...................................
How to set or change the
CHANNEL to be recorded
.............................
.................................................................
How to set or change the
BITRATE to be recorded
...............................
........................................
How to set or change
A. TRK INC HD
...........................................
.....................................................
How to set the
RECORD TIMER
.........................................
Page 8
..........
How to do a CD project
...................................
AUDIO
.......................................................
.........................................................
EXTRA
......................................................
Add all tracks
.............................................
How to add a track to a CD Project
............
How to delete a track from a CD Project
....
How to change a track in a CD Project
......
How to burn your CD Project to a CD
......
Display messages during CD burning
.......
.............................................
How to RIP an Entire CD
................................
How to RIP a single track
...............................
.....................................................
How to SET DATE/TIME
...............................
..................................................................
How to set Filters
............................................
..........................................
How to set the Playback Mode
.......................
.............................................
AUTO MAKE CD
...........................................
AUTO TRK INC CD
.......................................
A. TRK TIME
.................................................
CD TYPE
.........................................................
ALLOW FORMAT
.........................................
COPY B4 EDIT
...............................................
LOCK EDITING
.............................................
LOCK REC. SET
...........................................
PRE-ROLL TRK
.............................................
REQ.CONFIRM
..............................................
RST DEFAULTS
...........................................
FORMAT HDD
...............................................
........................................
How to navigate within the track
....................
How to mark an audio segment
......................
Precise Editing (navigation)
............................
Clipboard play
.................................................
How to Insert Silence
.....................................
How to Cut, Copy or Delete
............................
How to Exit Edit Execute Mode
......................
...........................................
DELETE TRACK
............................................
........................................
COPY TRACK
................................................
SPLIT TRACK
................................................
CONVERT TO MP3
.......................................
...............................................
............................................................
........................................
.......................................
...................................
IN
OUT
REC
SELEC T
PUSH ENTER
POWER STANDBY
TREBLE
MID
BASS
FILE DIR INFO JUMP PHANTOM CD/HD
MARK UNDO REDO EDIT MENUUTILITY MENU
HD/CD RFECORDER CDR420
(3’ 3”, 100cm)
IN
OUT
DIGITAL
MIX LINE
AUX
R
L
R
L
INOUT
OUT
DC IN
KEYB
I / 0
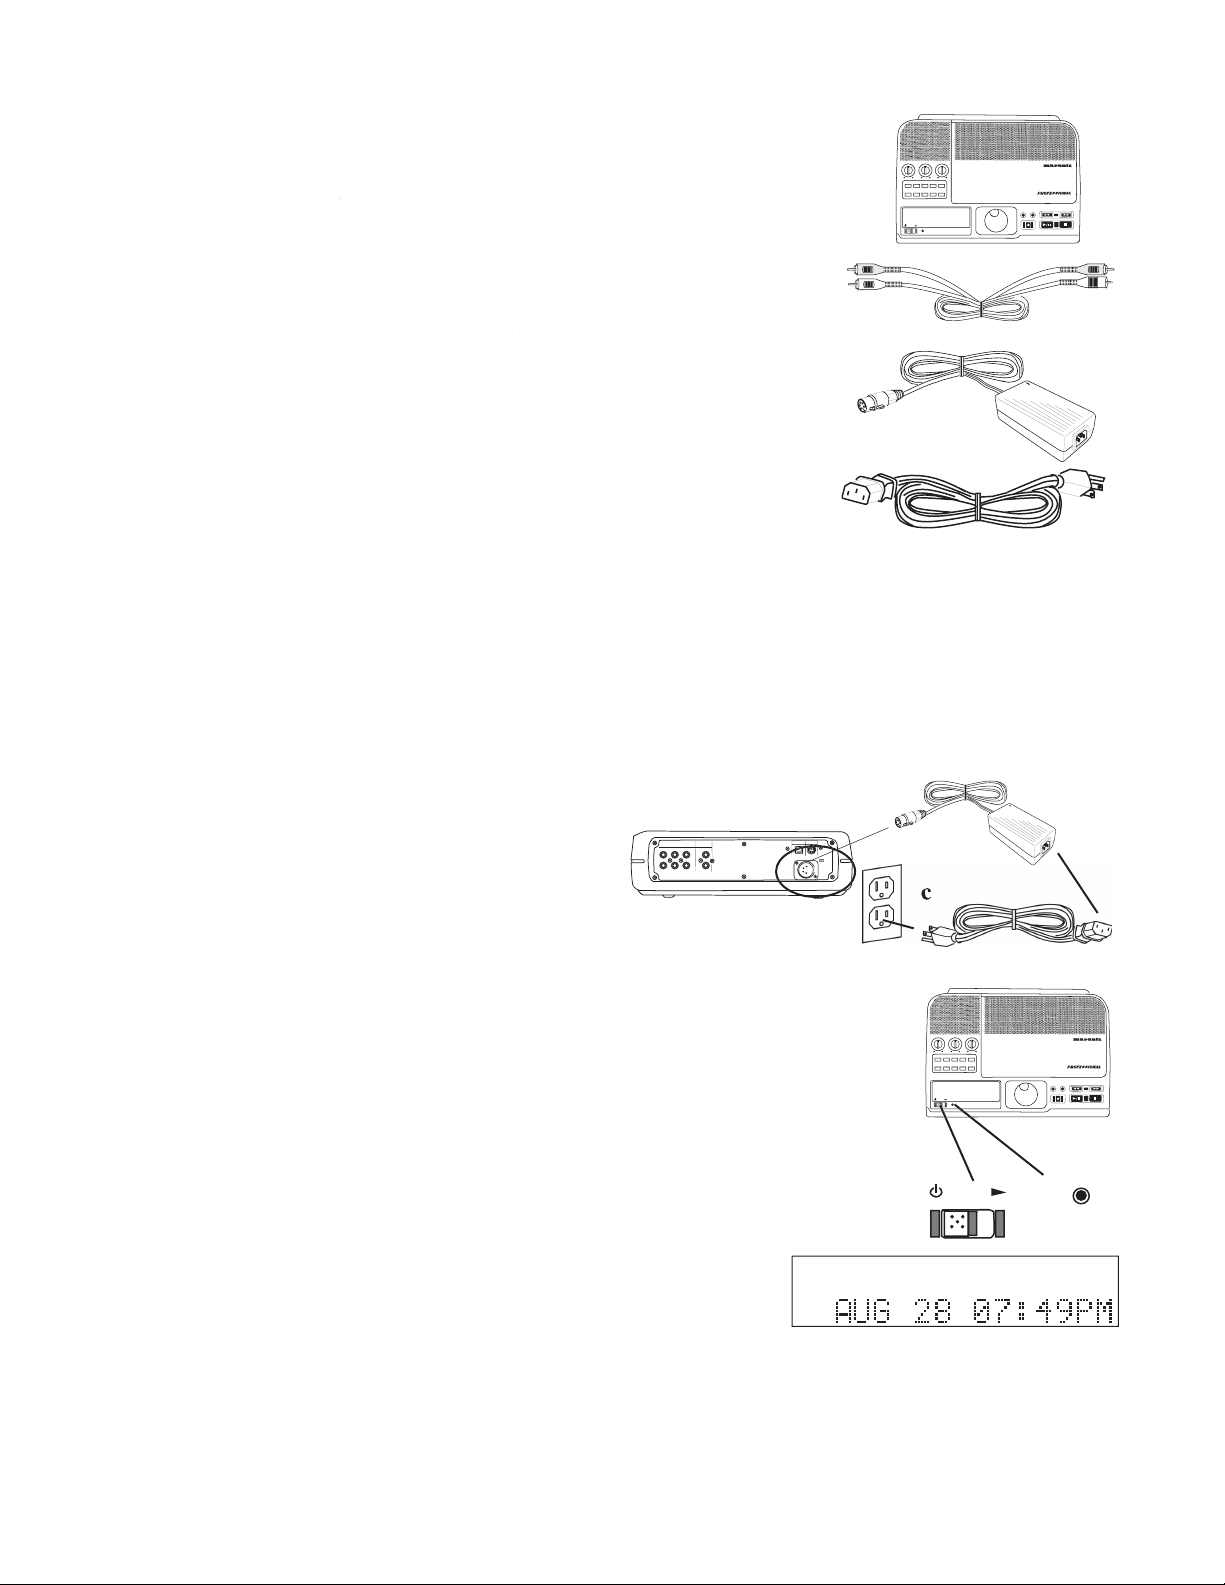
a, b, c.
d.
Slide the POWER
IN
OUT
REC
SELEC T
PUSH ENTER
POWER STANDBY
TREBLE
MID
BASS
FILE DIR INFO JUMP PHANTOM CD/HD
MARK UNDO REDO EDIT MENUUTILITY MENU
HD/CD RFECORDER CDR420
STANDBY
POWER
Plug in.
Page 9
IN
OUT
REC
SELEC T
PUSH ENTER
POWER STANDBY
TREBLE
MID
BASS
FILE DIR INFO JUMP PHANTOM CD/HD
MARK UNDO REDO EDIT MENUUTILITY MENU
HD/CD RFECORDER CDR420
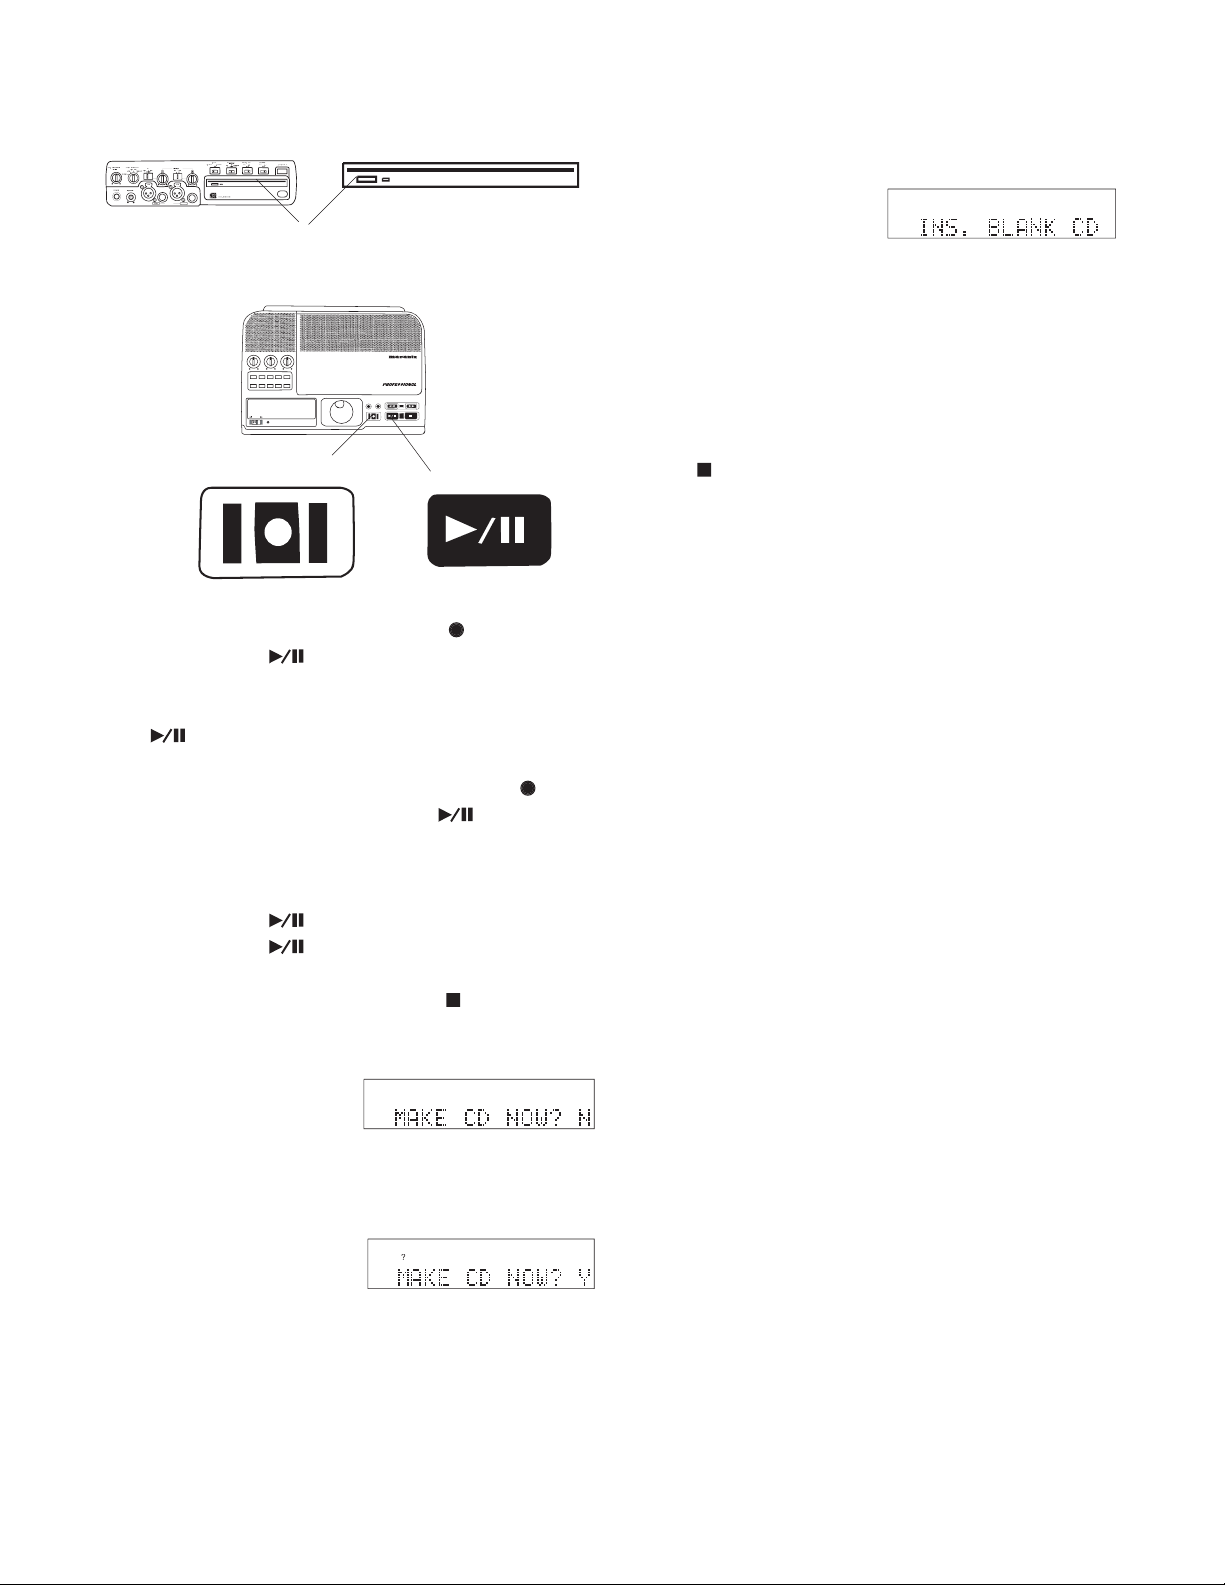
Insert a blank (8x or greater) CD (optional).
Press and release the REC button
(5) will be fl ashing.
Press and release the fl ashing Play/Pause button
to begin recording.
While recording both the red REC button
are lit and
To pause recording press and release the Play/
again to resume recording.
Press and release the Stop button
to stop re-
The CDR420 will ask
If not, INS. BLANK
If a non-blank CD is in the drive it is ejected.
When you insert a blank CD it is automatically
Answer N (no), or press and release the Stop but-
to exit.
The CDR420 checks for a blank CD in the CD
REC
Page 10

(CD-R disc errors can interrupt recording.)
Mono: 32, 40, 64, 80, 128, 160
Stereo: 64, 80, 128, 160, 256, 320
Page 11
L R
L + R
L/R
MIC/LINE
PUSH
MIC/LINE RIGHT
PUSH
LEFT
INT
LINE
MIC
Set the LINE MIC INT switch to LINE for line level input(s)
Set the L/R L+R switch to L/R for stereo recording. Set to
level controls to adjust left and/or
(optional)
IN
OUT
DIGITAL
MIX LINE
AUX
R
L
R
L
INOUT
OUT
DC IN
KEYB
I / 0
I / 0
IN
OUT
DIGITAL
MIX LINE
AUX
R
L
R
L
INOUT
OUT
DC IN
KEYB
I / 0
L
R
INPUT
Amp, Mixer/Pre-Amp, CD-R, etc.
LINE
OUT
MIX
OUT
R
L
L
R
INPUT
Amp, Mixer/Pre-Amp, CD-R, etc.
AUX
IN
L
R
OUTPUT
Amp, Mixer/Pre-Amp, CD-R, etc.
R
L
(optional)
Connect Right and Left RCA audio cables to
Connect Right and Left RCA audio cables to
IN
OUT
DIGITAL
MIX LINE
AUX
R
L
R
L
INOUT
OUT
DC IN
KEYB
I / 0
Page 12

IN
OUT
DIGITAL
MIX LINE
AUX
R
L
R
L
INOUT
OUT
DC IN
KEYB
I / 0
DIGITAL
OUTPUT
digital device
IN
OUT
INPUT
The CDR420 can only receive and record a 16 bit,
The CDR420 is only capable of playing back fi les
The CDR420 is not capable of monitoring audio by
IN
OUT
DIGITAL
MIX LINE
AUX
R
L
R
L
INOUT
OUT
DC IN
KEYB
I / 0
KEYB
IN
OUT
DIGITAL
MIX LINE AUX
R
L
R
L
INOUT
OUT
DC IN
KEYB
I / 0
DC IN
1
2
3
IN
OUT
REC
SELEC T
PUSH ENTER
POWER STANDBY
TREBLE
MID
BASS
FILE DIR INFO JUMP PHANTOMCD/HD
MARK UNDO REDO EDIT MENUUTILITY MENU
HD/CD RFECORDER CDR420
POWER
2 4 4
STANDBY
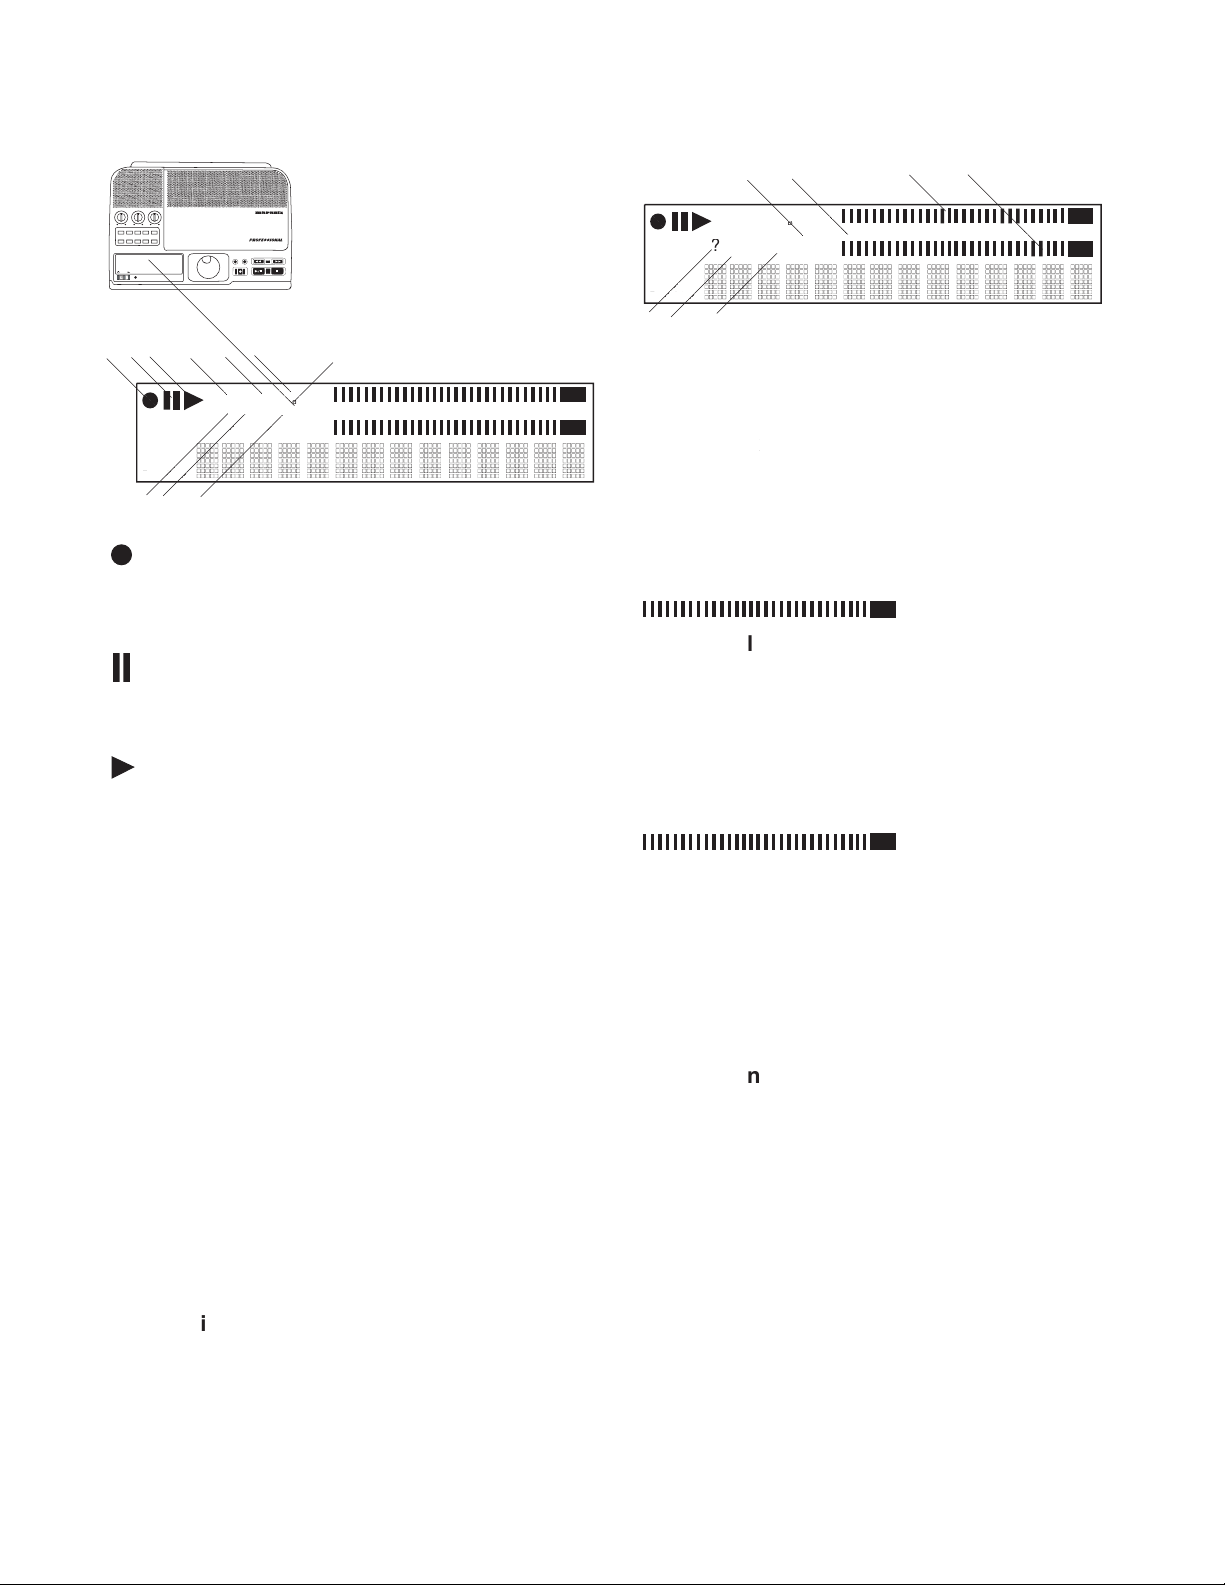
All elements of the
All elements of the
-3
Page 13

Page 14
FILE DIR INFO JUMP PHANTOM CD/HD
MARK UNDO REDO EDIT MENUUTILITY MENU
IN
OUT
REC
SELEC T
PUSH ENTER
POWER STANDBY
TREBLE
MID
BASS
FILE DIR INFO JUMP PHANTOM CD/HD
MARK UNDO REDO EDIT MENUUTILITY MENU
HD/CD RFECORDER CDR420
TREBLE
MID
BASS
press and release the Jog
'Select' tells you to turn the Jog Wheel to select the
The fi le name is displayed.
while the track name
press and release the INFO
press and release the EDIT MENU
FILE DIR
FILES is displayed
The audio fi le format
to play
to exit the File Directory.
Page 15
INFO
In the example the full track name is "SEP 06
FILE DIR INFO JUMP PHANTOM CD/HD
MARK UNDO REDO EDIT MENUUTILITY MENU
press and release the INFO button
you can also press and hold the
-3
-3
Elapsed Remaining
Page 16
FILE DIR INFO JUMP PHANTOM CD/HD
MARK UNDO REDO EDIT MENUUTILITY MENU
-3
JUMP
-3
-3
-3
Page 17
IN
OUT
REC
SELEC T
PUSH ENTER
POWER STANDBY
TREBLE
MID
BASS
FILE DIR INFO JUMP PHANTOMCD/HD
MARK UNDO REDO EDIT MENUUTILITY MENU
HD/CD RFECORDER CDR420
FILE DIR INFO JUMP PHANTOM CD/HD
MARK UNDO REDO EDIT MENUUTILITY MENU
PHANTOM
CD/HD
MARK
-3
-3
UTILITY MENU
to exit the UTILITY MENU.
..................................
...................
......................
......................................
(auto track increment)
..................................
.......................................
Page 18

IN
OUT
REC
SELEC T
PUSH ENTER
POWER STANDBY
TREBLE
MID
BASS
FILE DIR INFO JUMP PHANTOMCD/HD
MARK UNDO REDO EDIT MENUUTILITY MENU
HD/CD RFECORDER CDR420
FILE DIR INFO JUMP PHANTOM CD/HD
MARK UNDO REDO EDIT MENUUTILITY MENU
...............................................
..............................................
.................................................
........................................
....................................
............................................
............................................
....................................
UNDO
REDO
EDIT MENU
.....................................
....................................
....................................................
36
.........................................................
....................................
........................................
.....................................
....................................
.......................................
...................................
........................................
.........................................
.................................................
.................................
.......................................
......................................
.........................................
......................................
.......................................
....................................
........................................
-3
-3
Page 19
j UTILITY label
-3
Record icon
Pause icon
Play icon
FILES label
EDIT label
MENU label
IN- label
OUT label
IN
OUT
REC
SELEC T
PUSH ENTER
POWER STANDBY
TREBLE
MID
BASS
FILE DIR INFO JUMP PHANTOM CD/HD
MARK UNDO REDO EDIT MENUUTILITY MENU
HD/CD RFECORDER CDR420
-3
-3
L (left) level meter
R (right) level meter
? label
MP3 label
PCM label
Level meter scale
Page 20

CD label
REC label
Timer label
Total label
Select label
Elapsed label
Remaining label
Working label
will cancel some
HD label
q
Alphanumeric display
IN
OUT
REC
SELEC T
PUSH ENTER
POWER STANDBY
TREBLE
MID
BASS
FILE DIR INFO JUMP PHANTOM CD/HD
MARK UNDO REDO EDIT MENUUTILITY MENU
HD/CD RFECORDER CDR420
POWER
STANDBY
Page 21

IN
OUT
REC
SELEC T
PUSH ENTER
POWER STANDBY
TREBLE
MID
BASS
FILE DIR INFO JUMP PHANTOM CD/HD
MARK UNDO REDO EDIT MENUUTILITY MENU
HD/CD RFECORDER CDR420
SELEC T
PUSH ENTER
IN
OUT
-3
-3
-3
-3
Page 22

IN
OUT
REC
SELEC T
PUSH ENTER
POWER STANDBY
TREBLE
MID
BASS
FILE DIR INFO JUMP PHANTOM CD/HD
MARK UNDO REDO EDIT MENUUTILITY MENU
HD/CD RFECORDER CDR420
11
REC
(red)
and the green Play/Pause
are lit and steady during recording.
is lit and
fl ashes.
again
fl ashes during a CD Project to
-3
Page 23

-3
-3
-3
IN
OUT
REC
SELEC T
PUSH ENTER
POWER STANDBY
TREBLE
MID
BASS
FILE DIR INFO JUMP PHANTOM CD/HD
MARK UNDO REDO EDIT MENUUTILITY MENU
HD/CD RFECORDER CDR420
REC
IN
OUT
during play or edit play.
during play or edit play.
to cancel the function and return the
does not exit edit
then pressing the Play/Pause button
and
and
-3
-3
-3
Page 24

L R
L + R
L/R
MIC/LINE
PUSH
MIC/LINE RIGHT
PUSH
LEFT
INT
LINE
MIC
1 2 3
PHONE/SPEAKER
LEVEL
PHONE SELECTOR
MIC/LINE
MIX OUT
LINE OUT
AUX
– Audio available at the MIX OUT output
jacks.
jacks or via XLR connectors are
jack
jack
records the Left input onto the
records Left and Right inputs
INT
LINE
MIC
L + R
L/R
Page 25

4 5 6 7 8
– the signal(s) is not attenuated.
– Overdrive of the signal is attenuated (limited).
INPUT
ANALOG DIGITAL
MANUAL
ALC
LIMITER
REC LEVEL
MIC/LINE ATT
OFF ON
SPEAKER
OFF ON
PHONES
LINE OUT
9 10 11
(yellow)
9 10 11
Page 26

IN
OUT
DIGITAL
MIX LINE
AUX
R
L
R
L
INOUT
OUT
DC IN
KEYB
I / 0
1 2 3 4 5 6
8 7
MIX
R
L
OUT
MIX LINE AUX
R
L
OUT
AUX
R
L
IN
DIGITAL
IN
OUT
(computer)
I / 0
KEYB
DC IN
EXT BATT(-)
DC IN (+)
DC IN (-)
EXT BATT(+)
1
2
3
4
1
2
3
4
Page 27

fl ashing).
-3
-3
When correct press and release the Jog Wheel to
The display switches
Changes will be stored.
IN
OUT
REC
SELEC T
PUSH ENTER
POWER STANDBY
TREBLE
MID
BASS
FILE DIR INFO JUMP PHANTOM CD/HD
MARK UNDO REDO EDIT MENUUTILITY MENU
HD/CD RFECORDER CDR420
SELEC T
PUSH ENTER
UTILITY MENU
Page 28

L + R
L/R
IN
OUT
REC
SELEC T
PUSH ENTER
POWER STANDBY
TREBLE
MID
BASS
FILE DIR INFO JUMP PHANTOM CD/HD
MARK UNDO REDO EDIT MENUUTILITY MENU
HD/CD RFECORDER CDR420
SELEC T
PUSH ENTER
UTILITY MENU
While CHANNEL is
When correct, press and release the Jog Wheel.
The display switches
Page 29

bitrate choices are: 32, 40, 64, 80, 128, or
IN
OUT
REC
SELEC T
PUSH ENTER
POWER STANDBY
TREBLE
MID
BASS
FILE DIR INFO JUMP PHANTOM CD/HD
MARK UNDO REDO EDIT MENUUTILITY MENU
HD/CD RFECORDER CDR420
SELEC T
PUSH ENTER
UTILITY MENU
Changing KBPS is not applicable for PCM.
When correct press and release the Jog Wheel.
The display switches
is recorded (a new
2
.........................
3
. .
80
Page 30
To change the setting,
The display switches
IN
OUT
REC
SELEC T
PUSH ENTER
POWER STANDBY
TREBLE
MID
BASS
FILE DIR INFO JUMP PHANTOM CD/HD
MARK UNDO REDO EDIT MENUUTILITY MENU
HD/CD RFECORDER CDR420
SELEC T
PUSH ENTER
UTILITY MENU
Page 31

IN
OUT
REC
SELEC T
PUSH ENTER
POWER STANDBY
TREBLE
MID
BASS
FILE DIR INFO JUMP PHANTOM CD/HD
MARK UNDO REDO EDIT MENUUTILITY MENU
HD/CD RFECORDER CDR420
SELEC T
PUSH ENTER
UTILITY MENU
"?" appears in the dis-
To change the setting, turn the Jog Wheel so the
Press and release the Jog Wheel to confi rm the
To change the setting, turn the Jog Wheel to select
To change the setting, turn the Jog Wheel to select
To change the setting, turn the Jog Wheel to se-
To change the setting, turn the Jog Wheel to select
To change the setting, turn the Jog Wheel to select
Page 32
(continued)
To change the setting, turn the Jog Wheel to select
To change the setting, turn the Jog Wheel to select
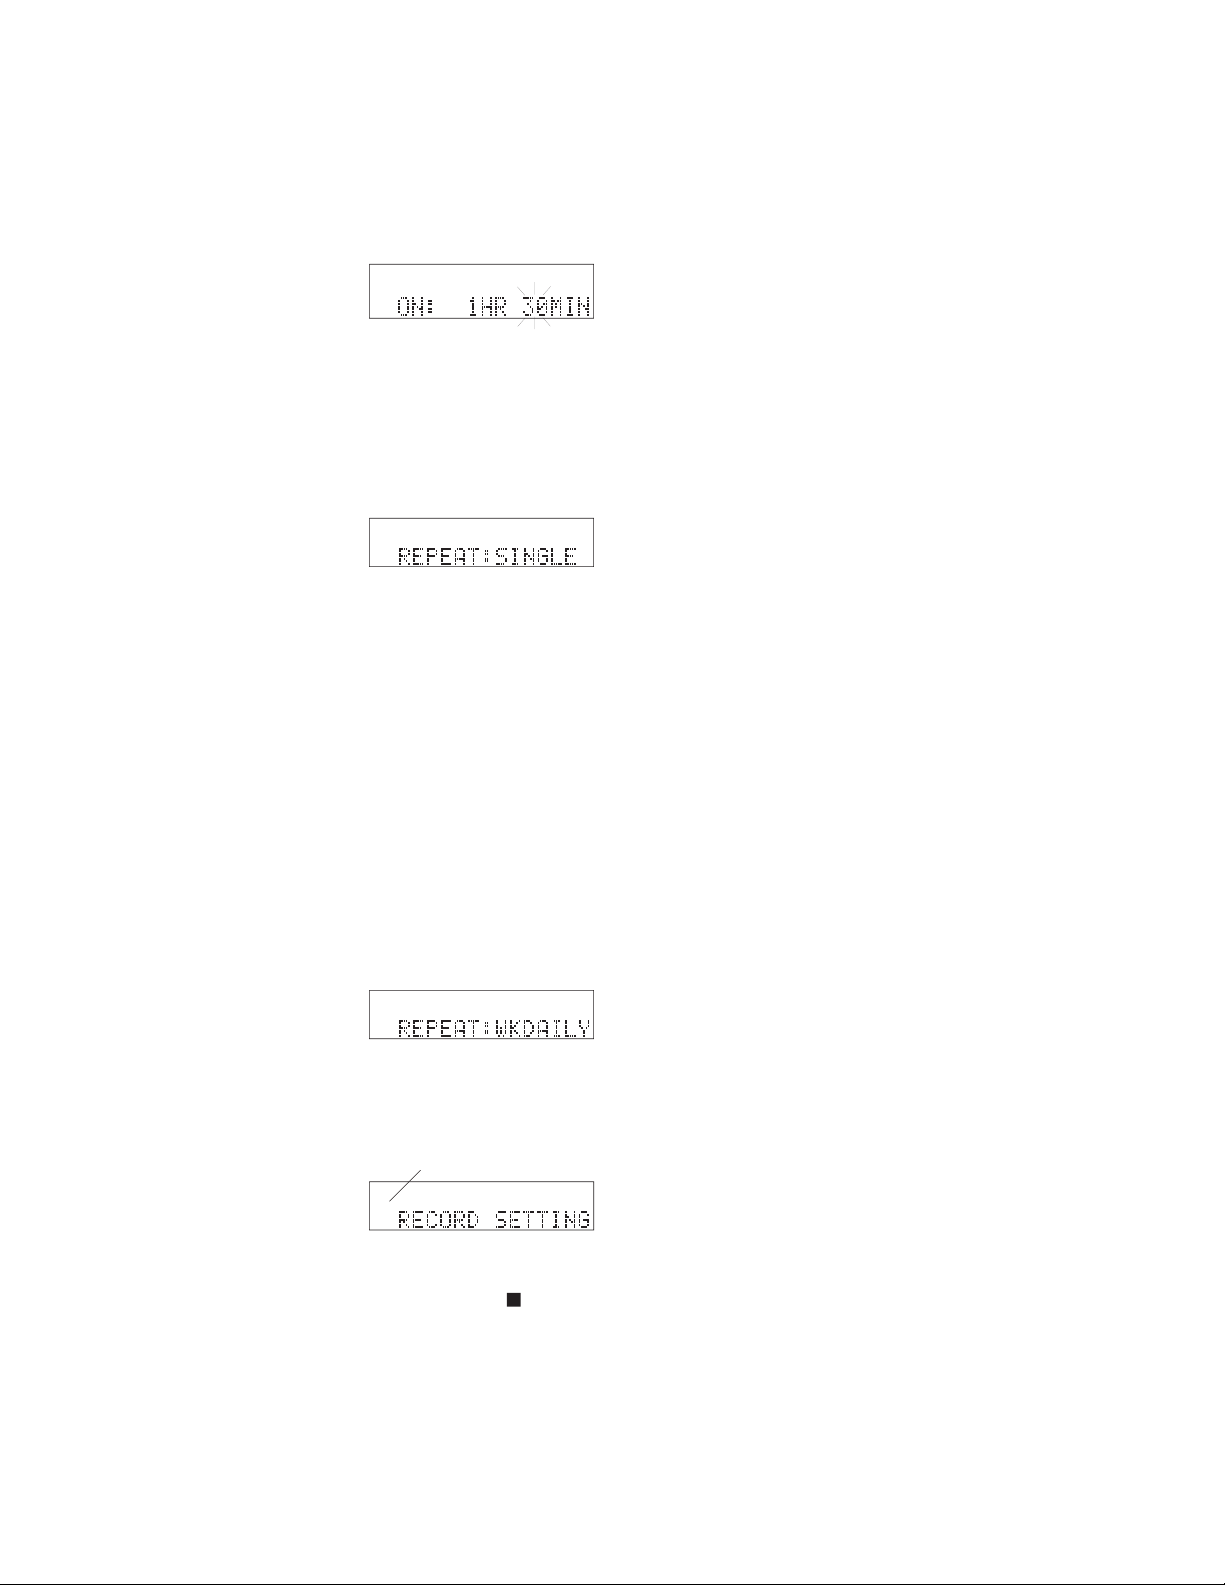
after the timer recording, RECORD TIMER
after the fi rst timer recording, timer recording
after the fi rst timer recording, timer re-
after the fi rst timer recording, timer
Turn the Jog Wheel to
When correct, press and release the Jog Wheel.
The display switches
Page 33

RECORD SETTING is displayed.
NEW CD PROJECT is displayed.
CD TYPE: AUDIO is displayed. "?" appears in the
If you choose ADD
Turn the Jog Wheel
The fi rst fi le name in
Page 34

Double click the Jog
That gives you an opportunity to review your
Press and release the
Click the Jog Wheel to
Repeat steps 10 and 11 to construct your CD Proj-
Page 35

34%" might appear.
If the track is long enough
Page 36

When done the new CD copy is automatically
To make another
then press and release
ARE YOU SURE: N
INSERT ORIG CD is
BUILDING CD is
WRITING TRACK 1
The percentage of the
...
..............
....................
.............................
.................
....................
......................
............................................
CD ejected
................................
...............................................
CD ejected
................................
Page 37

(or INSERT CD will be prompted)
....
.................................
.........................
....................
.....
........................
Turn Jog Wheel to select .
....................
Press Jog Wheel
.........................
Click Jog Wheel
.........................................
Turn Jog Wheel
............................................
...................................................
.....................
Turn Jog Wheel
...................................................
Press Jog Wheel
...............................................
j.
...............................................................
Press Jog Wheel to enter........ CDR FUNCTIONS
then press and release
RIP: ENTIRE CD is displayed.
NOTE:
The CDR420 cannot convert MP3 fi les to PCM.
If Stereo turn the Jog Wheel to tab through 64, 80,
If Mono turn the Jog Wheel to tab through 32, 40,
Then press and release the Jog Wheel.
Press and release the Jog Wheel to begin renaming
Page 38

Press and release the
ARE YOU SURE: N
As each track is ripped to the CDR420 HD prog-
To cancel ripping in progress, press and release
When done ripping the CDR420 returns to Idle
/EDIT TAGS / TRACK NAME to rename the track
(or INSERT CD will be prompted)
....
Press Jog Wheel to enter........ CDR FUNCTIONS
.................................
.........................
................................
...................................
..................
Turn Jog Wheel to select MP3 or PCM
.....
j. Press Jog Wheel
IF PCM
........................................................
If MP3
.....................................................
Turn Jog Wheel to select bitrate then press Jog
.............................................
Press Jog Wheel
...........................................
Turn Jog Wheel
.........................
Click Jog Wheel
...........................................
...................................................
.....................
Turn Jog Wheel
...................................................
Press Jog Wheel
...............................................
...............................................................
The date and time (name) of the folder will be dis-
Page 39

then press and release
RIP: ENTIRE CD is displayed.
NOTE:
The CDR420 cannot convert MP3 fi les to PCM.
If Stereo turn the Jog Wheel to tab through 64,
Press and release the Jog Wheel to begin renaming
The date and time (name) of the folder will be dis-
Press and release the Jog Wheel.
ARE YOU SURE: N is
As the track is ripped
To cancel ripping in progress, press and release the
Page 40

............
..............................
.....................
Turn Jog Wheel
.......................
Press Jog Wheel
.......................
.................................................
When correct push and
When correct, press
The display returns to
Page 41

adjustable microphone
unwanted high frequency noise, such as wind, hums,
unwanted noise, such as rumble from heating systems,
fi lters.
HIGH PASS ON "passes" high frequencies
unwanted noise, such as rumble from heating systems,
When the display
LOW PASS ON "passes" low frequencies and
unwanted noise, such as wind, hums, clicks and
HIGH PASS ON and LOW PASS ON is
fi lter.
press and release the
press and release the
......
b. Press Jog Wheel
.........................
......................
...................................
...........................
Press Jog Wheel
...........................
Turn Jog Wheel
................
Press Jog Wheel
......................
go to next fi lter, e.; after last go to c.
.....................
5 While RECORD
press and release the
Turn the Jog Wheel to tab to MIC EQ LO, HIGH
Page 42

Press and release the
? appears in the display.
Press and release the
? appears.
Turn the Jog Wheel to
Press and release the
? appears.
Turn the Jog Wheel to
to exit the Util-
Page 43

At the end of
At the end of the
beginning of the same track
ues playback. Press the Play/Pause button to pause or
to exit.
At the end
back. At the end of the fi le directory, the CDR420
button to pause or the Stop button
to exit.
..........
............................
........................
..................................
Turn Jog Wheel
.......................
Press Jog Wheel
.................
..............................................
press and release the
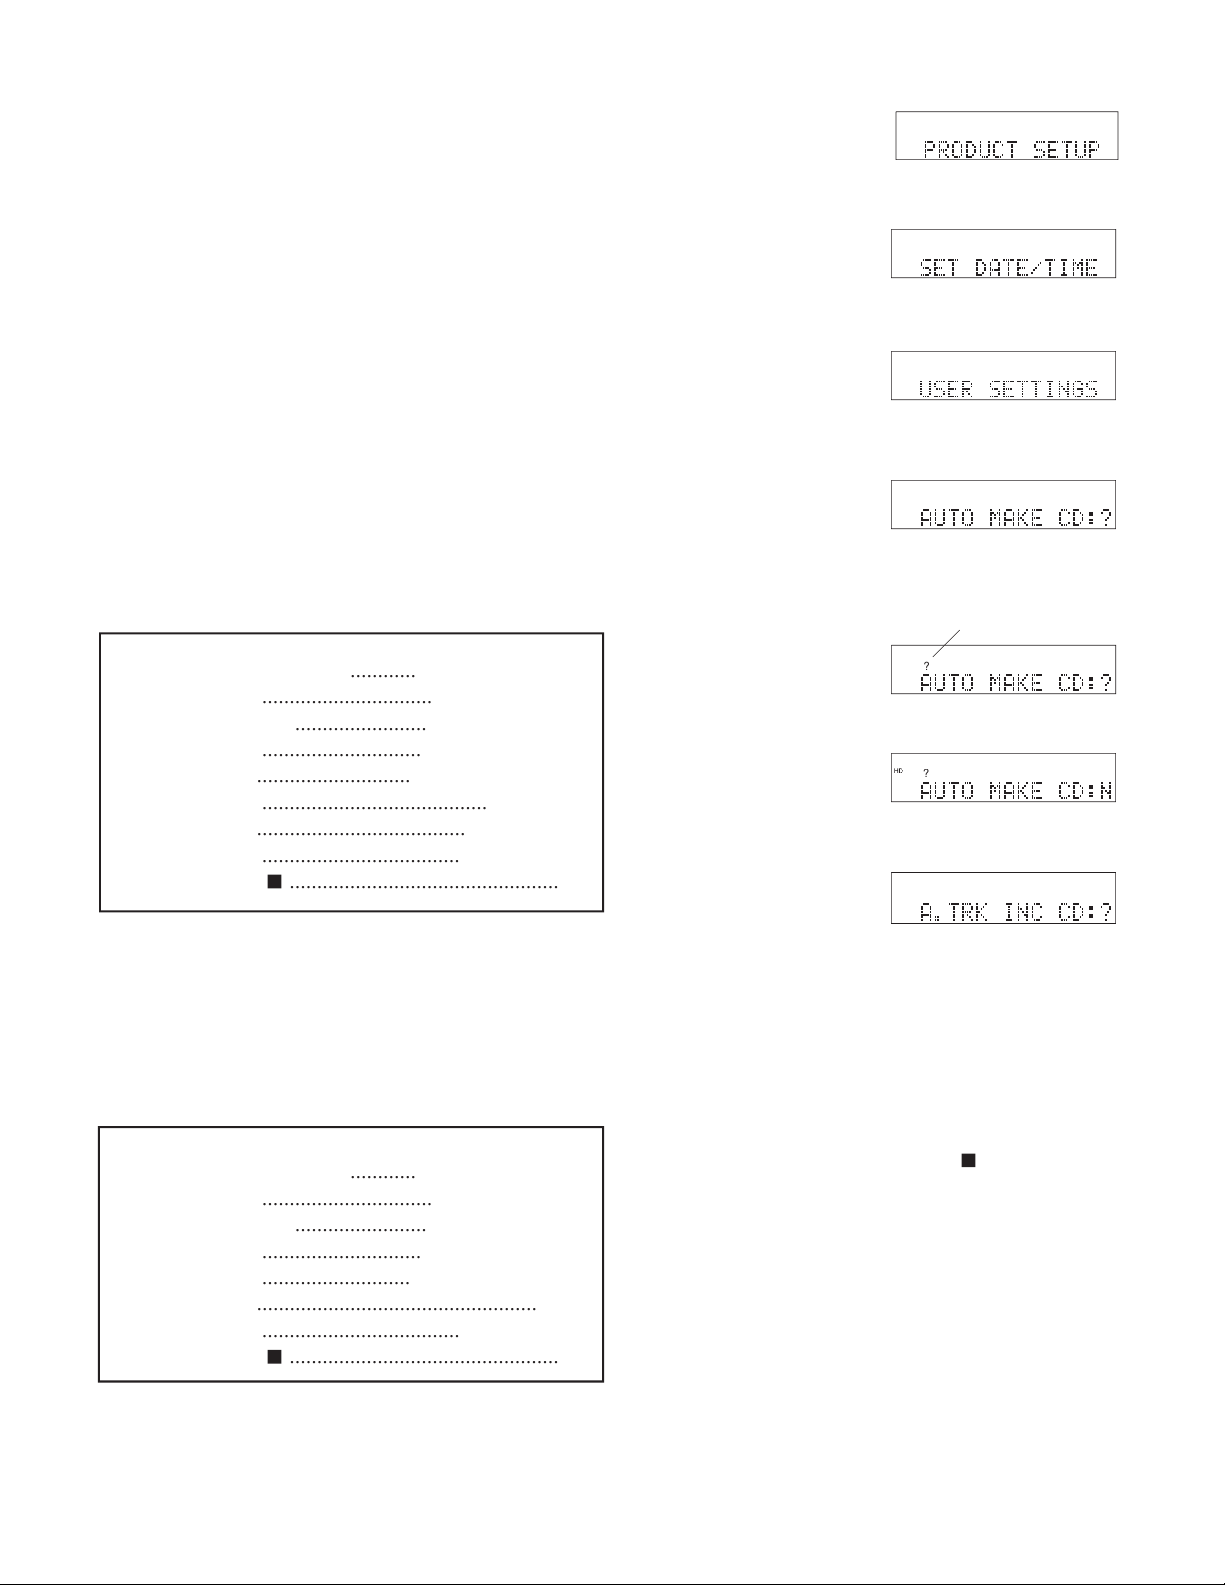
until PRODUCT SETUP is displayed.
press and release the
press and release the
back Modes. When cor-
to exit the
Page 44
by mistake.
are: AUTO MAKE CD,
............
...............................
........................
.............................
............................
.........................................
......................................
....................................
.................................................
(?, Y, N)
............
...............................
........................
.............................
...........................
...................................................
....................................
.................................................
press and release the
press and release the
N choices. When cor-
to exit the Util-
Page 45

(?, Y, N)
press and release the
press and release the
(01, 02, 05, 10M)
............
...............................
........................
.............................
......................................
...................................
.....................
....................................
..................................................
to exit the Util-
............
...............................
........................
.............................
...................................
...............................
...................................................
....................................
.................................................
press and release the Jog Wheel. SET DATE/
Page 46

press and release the
press and release the
(?, AUDIO, DATA, EXTRA)
burn before every burn.
players (CDDA). PCM fi les are burned. MP3 fi les are
press and release the
to exit the Util-
............
...............................
........................
.............................
............................................
.........................................
.....................
....................................
.................................................
Page 47

to exit the Util-
press and release the
press and release the
press and release the
N. When correct, press
to exit the Util-
before editing a track. That saves you time by not hav-
............
...............................
........................
.............................
.............................
..........................
......................................................
....................................
.................................................
............
...............................
........................
.............................
...................................
...............................
......................................................
....................................
.................................................
Page 48

N. When correct, press
to exit the Util-
press and release the
until USER SETTINGS is displayed.
press and release the
press and release the
press and release the
N. When correct, press
............
...............................
........................
.............................
.................................
.............................
......................................................
....................................
.................................................
Page 49

to exit the Util-
(N, Y)
press and release the
............
...............................
........................
.............................
.................................
.............................
......................................................
....................................
.................................................
press and release the
N. When correct, press
to exit the Util-
(N, Y)
............
...............................
........................
.............................
.................................
.............................
......................................................
....................................
.................................................
press and release the
Page 50

press and release the
N. When correct, press
to exit the Util-
(Y, N)
............
...............................
........................
.............................
.................................
.............................
......................................................
....................................
.................................................
press and release the
press and release the
press and release the
N. When correct, press
Page 51

press and release the
until USER SETTINGS is displayed.
press and release the
press and release the
N. When correct, press
to exit the Util-
(N, Y)
............
...............................
........................
.............................
.................................
.............................
......................................................
if N
.............................................
if Y
.............................................
Press Jog Wheel
.....................
Turn Jog Wheel
.............................................
Press Jog Wheel
......................
.................................................
Press and release the
pears.
Turn the Jog Wheel so
to exit the Util-
appears. If REQ. CONFIRM is set to N go to 8c.
Page 52

ARE YOU SURE is
Formatting the HDD erases all the tracks
NOTE:
............
...............................
............................
...............................
..........................................................
...........................
.............................
The CDR420 automatically turns off.
Slide the POWER switch to turn on.
b. From Idle mode press
Turn the Jog Wheel
until the track you
played.
-3
b
The display shows
the time within the track (the
a graphic of time within
Navigate to an edit point. You can do your edit opera-
NOTE:: To exit, see How to Exit Edit Execute Mode on page 56.
continues
Page 53

-3
b
the cursor advances across the graphic.
the Scrub Reverse button
or
the Scrub Forward button
to reverse or
Navigation is complete when the cursor is at your
IN
OUT
REC
SELEC T
PUSH ENTER
POWER STANDBY
TREBLE
MID
BASS
FILE DIR INFO JUMP PHANTOM CD/HD
MARK UNDO REDO EDIT MENUUTILITY MENU
HD/CD RFECORDER CDR420
REC
IN
OUT
b
This example shows
play.
IN- is displayed to in-
An IN point marker
b c
IN-OUT is displayed to indicate that IN and OUT
points are present.
An OUT point marker appears in the graphic.
Play continues with the playback position indi-
then press
-3
SET MARK AS . . . is displayed and playback
-3
button.
-3
Play continues with the playback position indi-
button.
SET MARK AS . . . is displayed and play contin-
ues.
The example shows the
-3
Page 54

-3
buttons to fi nd and
pause at the approxi-
-3
precisely locate the IN
point.
SET MARK AS . . . is
-3
-3
-3
-3
-3
Display with both
board play.
point set, from stop or pause, press and hold the EDIT
pint and stop at the OUT point.
board play, see below.
Select the track (fi le) you wish to edit. Play the
press and release
b Turn the Jog Wheel
until the track you
played.
-3
The display shows
the time within the track (at
a graphic of time within
Example navigation by playing to the approximate edit point
b
Page 55

Play to approximately
Pause near the desired
-3
SILENCE is displayed
-3
-3
-3
point.
CUT replaces the track
-3
-3
Press and release the Jog wheel.
-3
-3
The display returns to
beginning of the track.
-3
-3
NOTE:
-3
bar indicates
CUT replaces track
-3
moves the marked selection to a new
position.
leaves the marked selection and cop-
removes (clears) the marked selection.
CUT2 CLIPBOARD is
b and editing returns to
NOTE:
Navigate to your paste
position, then click the
CUT replaces the track
Turn the Jog Wheel
-3
-3
-3
played.
-3
-3
Page 56

Press and release the
briefl y. The marked audio segment is pasted at
beginning of the track
-3
-3
Go to b above.
-3
-3
-3
-3
played.
COPY 2 CURSOR is
press and release the
The CDR420 returns
NOTE:
-3
bar indicates one edit
-3
-3
click the Jog Wheel.
From within Edit
The example shows editing at pause. The click
Turn the Jog Wheel
To exit Edit Mode
press and release
-3
-3
Turn the Jog Wheel to tab through the choices:
If you press and
you return to editing
If you press and
-3
-3
-3
-3
-3
ARE YOU SURE is
Turn the Jog Wheel
Page 57

If you press and release
-3
NOTE:
NAME, GENRE, and COMMENTS.
press and release F1.
As you type the typed
-3
-3
-3
-3
play the name scrolls. If/when you replace all the
The name length is not
When the name is
NOTE:
until the track you
played.
NAME is displayed.
NAME, ARTIST, GENRE and COMMENTS.
The current tag is displayed with the fi rst charac-
Page 58

NOTE:
present, and the Jog Wheel.
NOTE:
or forward through the tag
by pressing and releasing the Scrub Forward button
The CDR420 returns to step 5.
NOTE:
any time during tag edit-
to exit the
until the track you
played.
NOTE:
Page 59

ARE YOU SURE is displayed.
press and release the
The CDR420 returns to idle mode.
NING HD . . . is
The CDR420 returns to
button, NO VALID FILES is displayed.
The proposed track
_2 is added to the original's name, and edit name is
plete, or if you don't
Then press and release the Jog Wheel.
PLEASE WAIT is dis-
played while the copy
SCANNING HD . . .
The CDR420 returns to idle mode.
Page 60

NOTE:
(see page 53).
-3
The name (the original
press and release the
SCANNING HD . . .
NOTE:
NEL is displayed.
The bitrate is displayed in KBPS (Kilo Bytes Per
NOTE:
When correct, press and release the Jog Wheel.
press and release the
Page 61

update your CDR420 to the latest operating procedures
previous fi rmware versions.
The normal start-up
If there is no new fi rmware on the CDR420 Hard
INSERT F/W CD is
briefl y displayed, and
copy to CDR420 System folder
If new fi rmware on CD
insert CD
......................................................
b. Power off
CDR 420 does the rest, wait
Automatically powers off
NEW F/W FOUND is
briefl y displayed, and
UPDATING F/W ... ...
A fi rmware updated
played.
The CDR420 switches to STANDBY MODE.
4. If a newer version of the fi rmware fi le is detected
On a CD the fi rmware fi le has to be in a folder
After 100% conver-
briefl y.
The CDR420 returns to idle mode.
Page 62

IN
OUT
DIGITAL
MIX LINE
AUX
R
L
R
L
INOUT
OUT
DC IN
KEYB
I / 0
KEYB
(not supplied)
Press and release F1 during recording to enter a
Same as pressing the IN button on the CDR420.
Same as pressing the OUT button on the
Same as pressing the INFO button on the
Press and hold to work the same as the Fast Re-
on the CDR420.
Same as the Play/Pause button
on the
Same as pressing the Stop button
on the
Press and hold to work the same as the Fast For-
on the CDR420.
Press and release to work the same as turning the
Press and release to work the same as turning the
Press and release to work the same as the MARK
button on the CDR420.
Press and release to work the same the REC but-
on the CDR420.
Page 63

Recordable
Recordable
(record once)
CD-R discs are only able to be recorded onto a
CD-R discs can be recognized by the following
(multiple recording)
CD-RW discs are able to be recorded onto many
CD-RW discs can be recognized by the following
NOTE::
use both Audio and Data discs. When using Data
below.
Page 64

paper or sticker to the label
When a disc has a piece of plastic tape or rental
power the display will switch to "BAD BATTERY"
put.
battery system. It includes the RB4200 battery (also an
by sliding the POWER switch to the right.
NOTE:
Page 65

parts and labor.
a) Accidents, acts of nature, misuse, abuse, neglect or unau-
b) Improper installation, removal or maintenance, or failure
c) Repair or attempted repair by a non-Marantz authorized
d) Any shipment (claims must be presented to the carrier).
e) Any cause other than a defect of manufacturing.
by the warranty.
by the warranty, we will pay return shipping charges to your
Page 66

®
 Loading...