

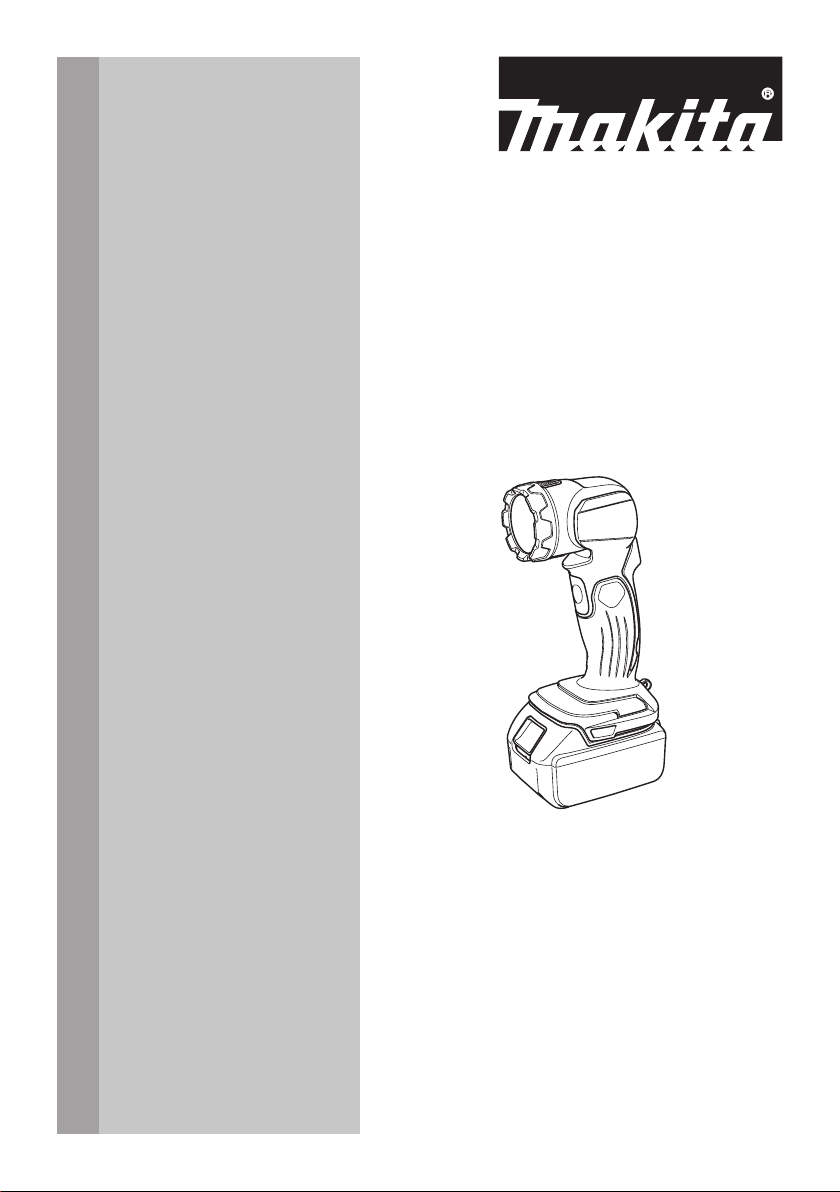
Makita DML815 Instruction Manual
INSTRUCTION MANUAL
MANUEL D'INSTRUCTION
MANUAL DE INSTRUCCIONES
Cordless Flashlight
Lampe Torche à Batterie
Linterna Inalámbrica
DML815
IMPORTANT: Read Before Using.
IMPORTANT : Lire avant usage.
IMPORTANTE: Lea antes de usar.
ENGLISH (Original instructions)
SPECIFICATIONS
Model: DML815
LED 0.5 W x 4
Dimensions
(L x W x H)
Rated voltage D.C. 14.4/18 V
Net weight 0.56 - 0.93 kg (1.23 - 2.05 lbs)
• Due to our continuing program of research and development, the specications herein are subject to change
without notice.
• Specications may differ from country to country.
• The weight may differ depending on the attachment(s), including the battery cartridge. The lightest and heaviest combination, according to EPTA-Procedure 01/2014, are shown in the table.
Applicable battery cartridge
BL1430B / BL1815N / BL1820B / BL1830 / BL1830B / BL1840B / BL1850B / BL1860B
• Some of the battery cartridges listed above may not be available depending on your region of residence.
WARNING: Only use the battery cartridges listed above. Use of any other battery cartridges may cause
injury and/or re.
227 mm x 79 mm x 116 mm (8-15/16″ x 3-1/8″ x 4-9/16″)
Operating time
Battery cartridge Operating time
BL1430B 17 hours
BL1815N 13.5 hours
BL1820B 18 hours
BL1830 / BL1830B 24.5 hours
BL1840B 35 hours
BL1850B 45 hours
BL1860B 54 hours
• The operating times in the above table are a rough
guideline. They may differ from actual operating
times.
• Operating times may differ depending on battery
type, charging status, and usage condition.
• Battery cartridge may differ from country to
country.
SAFETY WARNINGS
IMPORTANT SAFETY
INSTRUCTIONS
WARNING: When using electric tools, basic
safety precautions should always be followed to
reduce the risk of re, electric shock, and personal injury, including the following:
READ ALL INSTRUCTIONS.
1. Do not look into the light, or do not expose the
light to eyes. Eyes may be damaged.
2. Do not cover or clog the lit tool with cloth or
carton, etc. Covering or clogging it may cause a
ame.
3. The tool is not waterproof. Do not use it in
damp or wet locations. Do not expose it to rain
or snow. Do not wash it in water.
4. Do not touch the inside of the ashlight head
with tweezers, metal tools, etc.
5. Do not give the tool a shock by dropping,
striking, etc.
6. When the tool is not in use, always switch off
and remove the battery cartridge from the tool.
7. Battery tool use and care
• Prevent unintentional starting. Ensure
the switch is in the off-position before
connecting to battery pack, picking up
or carrying the machine. Carrying the
appliance with your nger on the switch or
energizing appliance that have the switch on
invites accidents.
•
Disconnect the battery pack from the
appliance before making any adjustments,
changing accessories, or storing machine.
Such preventive safety measures reduce the
risk of starting the appliance accidentally.
• Recharge only with the charger specied
by the manufacturer. A charger that is suitable for one type of battery pack may create
a risk of re when used with another battery
pack.
• Use appliance only with specically des-
ignated battery packs. Use of any other
battery packs may create a risk of injury and
re.
2 ENGLISH

• When battery pack is not in use, keep it
away from other metal objects, like paper
clips, coins, keys, nails, screws or other
small metal objects, that can make a
connection from one terminal to another.
Shorting the battery terminals together may
cause burns or a re.
• Under abusive conditions, liquid may be
ejected from the battery; avoid contact.
If contact accidentally occurs, ush with
water. If liquid contacts eyes, seek medical help. Liquid ejected from the battery may
cause irritation or burns.
• Do not use a battery pack or appliance
that is damaged or modied. Damaged or
modied batteries may exhibit unpredictable behaviour resulting in re, explosion
or risk of injury.
• Do not expose a battery pack or appli-
ance to re or excessive temperature.
Exposure to re or temperature above
130°C (265°F) may cause explosion.
• Follow all charging instructions and do
not charge the battery pack or appliance outside of the temperature range
specied in the instructions. Charging
improperly or at temperatures outside of the
specied range may damage the battery and
increase the risk of re.
• Have servicing performed by a quali-
ed repair person using only identical
replacement parts. This will ensure that the
safety of the product is maintained.
• Do not modify or attempt to repair the
appliance or the battery pack except as
indicated in the instructions for use and
care.
• Do not dispose of the battery(ies) in
a re. The cell may explode. Check with
local codes for possible special disposal
instructions.
• Do not open or mutilate the battery(ies).
Released electrolyte is corrosive and may
cause damage to the eyes or skin. It may be
toxic if swallowed.
• Do not charge battery in rain, or in wet
locations.
• Do not handle charger, including charger
plug, and charger terminals with wet
hands.
• Do not charge the battery outdoors.
Important safety instructions for
battery cartridge
1. Before using battery cartridge, read all instructions and cautionary markings on (1) battery
charger, (2) battery, and (3) product using
battery.
2. Do not disassemble battery cartridge.
3. If operating time has become excessively
shorter, stop operating immediately. It may
result in a risk of overheating, possible burns
and even an explosion.
4. If electrolyte gets into your eyes, rinse them
out with clear water and seek medical attention right away. It may result in loss of your
eyesight.
5. Do not short the battery cartridge:
(1) Do not touch the terminals with any con-
ductive material.
(2) Avoid storing battery cartridge in a con-
tainer with other metal objects such as
nails, coins, etc.
(3) Do not expose battery cartridge to water
or rain.
A battery short can cause a large current
ow, overheating, possible burns and even a
breakdown.
6. Do not store the tool and battery cartridge in
locations where the temperature may reach or
exceed 50 °C (122 °F).
7. Do not incinerate the battery cartridge even if
it is severely damaged or is completely worn
out. The battery cartridge can explode in a re.
8. Be careful not to drop or strike battery.
9. Do not use a damaged battery.
10.
The contained lithium-ion batteries are subject to
the Dangerous Goods Legislation requirements.
For commercial transports e.g. by third parties,
forwarding agents, special requirement on packaging and labeling must be observed.
For preparation of the item being shipped, consult-
ing an expert for hazardous material is required.
Please also observe possibly more detailed
national regulations.
Tape or mask off open contacts and pack up the
battery in such a manner that it cannot move
around in the packaging.
11. When disposing the battery cartridge, remove
it from the tool and dispose of it in a safe
place. Follow your local regulations relating to
disposal of battery.
12. Use the batteries only with the products
specied by Makita. Installing the batteries to
non-compliant products may result in a re, excessive heat, explosion, or leak of electrolyte.
13. If the tool is not used for a long period of time,
the battery must be removed from the tool.
SAVE THESE INSTRUCTIONS.
CAUTION: Only use genuine Makita batteries.
Use of non-genuine Makita batteries, or batteries that
have been altered, may result in the battery bursting
causing res, personal injury and damage. It will
also void the Makita warranty for the Makita tool and
charger.
Tips for maintaining maximum
battery life
1. Charge the battery cartridge before completely
discharged. Always stop tool operation and
charge the battery cartridge when you notice
less tool power.
2. Never recharge a fully charged battery cartridge. Overcharging shortens the battery
service life.
3 ENGLISH
3. Charge the battery cartridge with room temperature at 10 °C - 40 °C (50 °F - 104 °F). Let
a hot battery cartridge cool down before
charging it.
4. Charge the battery cartridge if you do not use
it for a long period (more than six months).
FCC caution
For United States
This device complies with Part 15 of the FCC Rules.
Operation is subject to the following two conditions:
(1) this device may not cause harmful interference, and
(2) this device must accept any interference received,
including interference that may cause undesired
operation.
Changes or modications not expressly approved by
the party responsible for compliance could void the
user’s authority to operate the equipment.
Note: This equipment has been tested and found
to comply with the limits for a Class B digital device,
pursuant to part 15 of the FCC Rules. These limits are
designed to provide reasonable protection against
harmful interference in a residential installation. This
equipment generates, uses and can radiate radio
frequency energy and, if not installed and used in
accordance with the instructions, may cause harmful
interference to radio communications. However, there is
no guarantee that interference will not occur in a partic-
ular installation. If this equipment does cause harmful
interference to radio or television reception, which can
be determined by turning the equipment off and on, the
user is encouraged to try to correct the interference by
one or more of the following measures:
— Reorient or relocate the receiving antenna.
— Increase the separation between the equipment
and receiver.
— Connect the equipment into an outlet on a cir-
cuit different from that to which the receiver is
connected.
— Consult the dealer or an experienced radio/TV
technician for help.
ICES-005 standard
CAN ICES-005(B)/NMB-005(B)
FUNCTIONAL
DESCRIPTION
CAUTION: Always be sure that the tool is
switched off and the battery cartridge is removed
before adjusting or checking function on the tool.
Installing or removing battery
cartridge
CAUTION: Always switch off the tool before
installing or removing of the battery cartridge.
CAUTION: Hold the tool and the battery car-
tridge rmly when installing or removing battery
cartridge. Failure to hold the tool and the battery
cartridge rmly may cause them to slip off your hands
and result in damage to the tool and battery cartridge
and a personal injury.
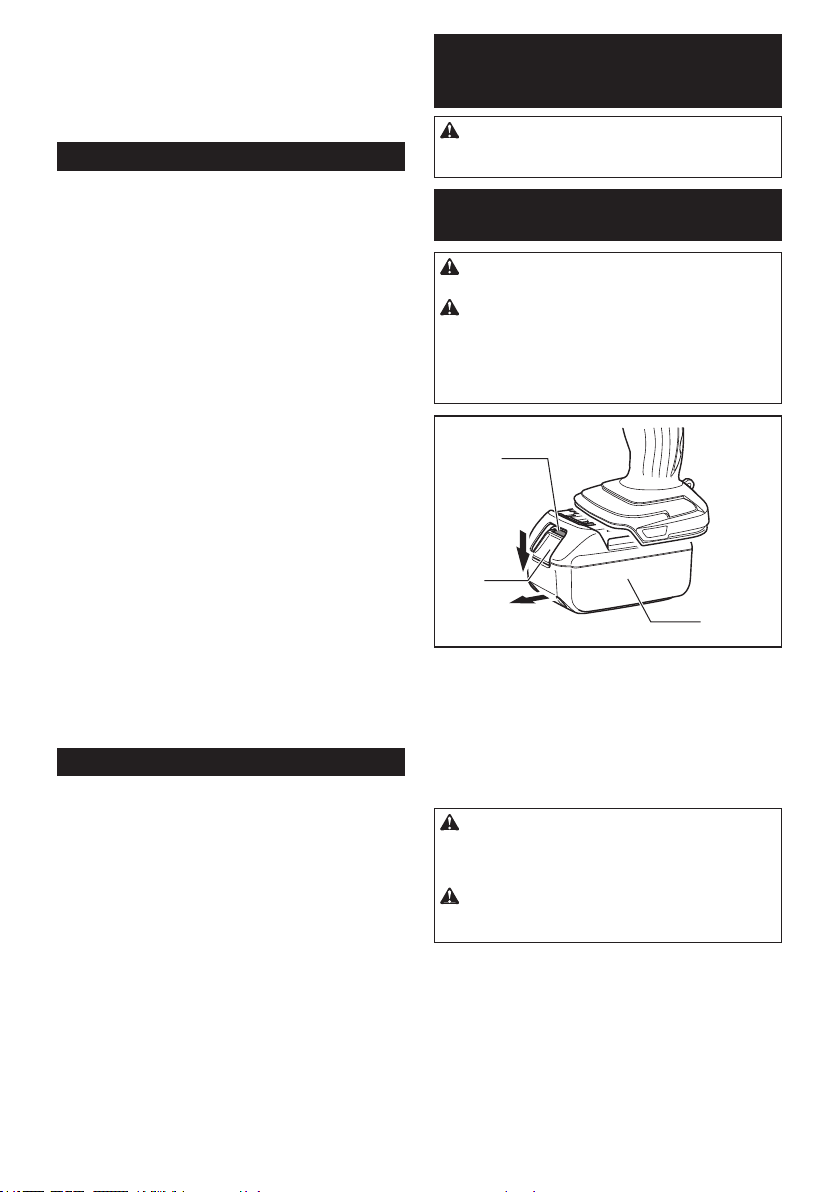
1
2
3
► 1. Red indicator 2. Button 3. Battery cartridge
To remove the battery cartridge, slide it from the tool
while sliding the button on the front of the cartridge.
To install the battery cartridge, align the tongue on the
battery cartridge with the groove in the housing and slip
it into place. Insert it all the way until it locks in place
with a little click. If you can see the red indicator on the
upper side of the button, it is not locked completely.
CAUTION: Always install the battery cartridge
fully until the red indicator cannot be seen. If not,
it may accidentally fall out of the tool, causing injury to
you or someone around you.
CAUTION: Do not install the battery cartridge
forcibly. If the cartridge does not slide in easily, it is
not being inserted correctly.
4 ENGLISH
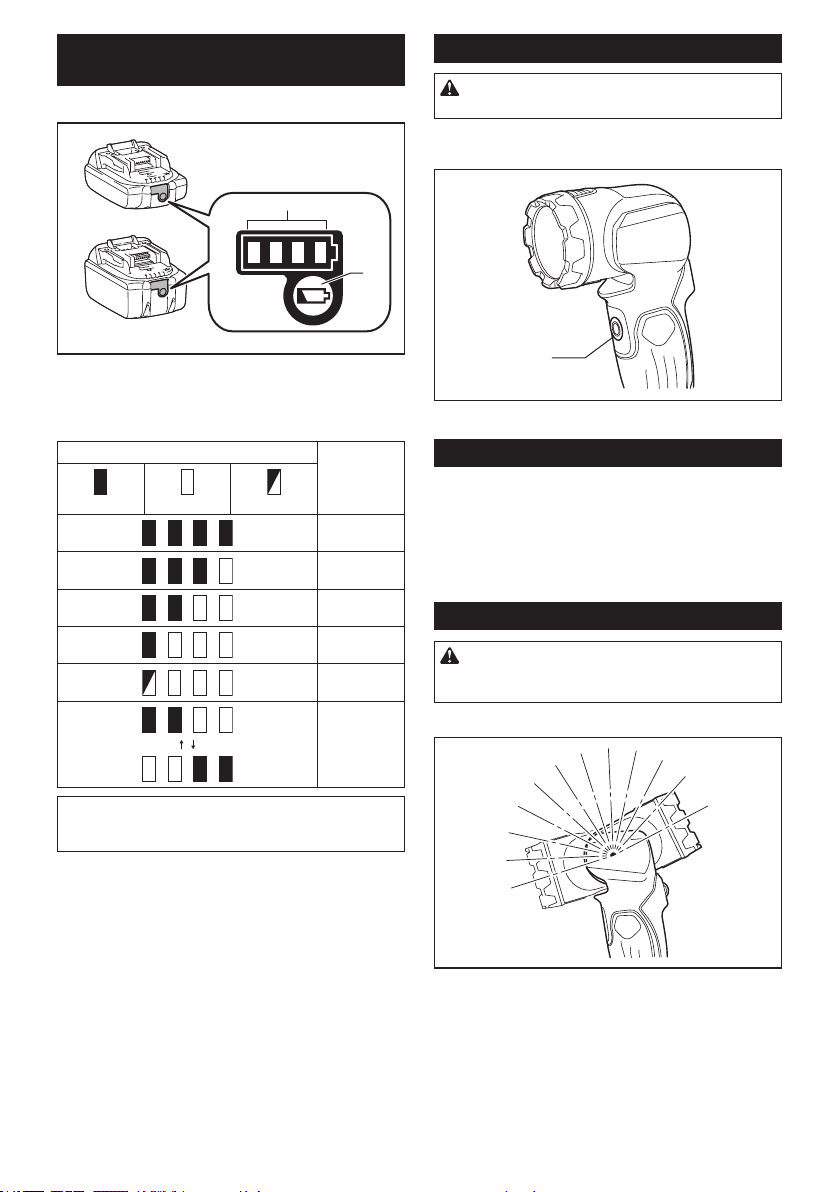
Indicating the remaining battery
capacity
Only for battery cartridges with the indicator
1
Lighting up the light
CAUTION: Do not look in the light or see the
source of light directly.
Push the power button to light up the light. To turn off
the light, push the power button again.
2
► 1. Indicator lamps 2. Check button
Press the check button on the battery cartridge to indicate the remaining battery capacity. The indicator lamps
light up for a few seconds.
Indicator lamps Remaining
Lighted Off Blinking
NOTE: Depending on the conditions of use and the
ambient temperature, the indication may differ slightly
from the actual capacity.
capacity
75% to 100%
50% to 75%
25% to 50%
0% to 25%
Charge the
battery.
The battery
may have
malfunctioned.
1
► 1. Power button
Battery protection system
The tool is equipped with the protection system, which
automatically cuts off the output power for long ser-
vice life. The light goes off during operation when the
remaining battery capacity gets low. This is caused by
the activation of the protection system and does not
show trouble. Remove the battery cartridge from the
tool and charge it.
Head angle
CAUTION: When changing the head angle,
be careful not to pinch your ngers between the
head and the tool body.
The head angle can be adjusted in 12 stages.
5 ENGLISH

Hook
The hook is convenient for temporarily hanging the tool.
The strap of the hook can be installed on the upper or
lower ring in accordance with usage.
1
2
► 1. Hook 2. Ring
1
2
OPTIONAL
ACCESSORIES
CAUTION: These accessories or attachments
are recommended for use with your Makita tool
specied in this manual. The use of any other
accessories or attachments might present a risk of
injury to persons. Only use accessory or attachment
for its stated purpose.
If you need any assistance for more details regarding these accessories, ask your local Makita Service
Center.
• Makita genuine battery and charger
NOTE: Some items in the list may be included in the
tool package as standard accessories. They may
differ from country to country.
MAKITA LIMITED WARRANTY
Please refer to the annexed warranty sheet for the
most current warranty terms applicable to this product.
If annexed warranty sheet is not available, refer to the
warranty details set forth at below website for your
respective country.
United States of America: www.makitatools.com
Canada: www.makita.ca
Other countries: www.makita.com
► 1. Hook 2. Ring
MAINTENANCE
CAUTION: Always be sure that the tool is
switched off and the battery cartridge is removed
before attempting to perform inspection or
maintenance.
NOTICE: Never use gasoline, benzine, thinner,
alcohol or the like. Discoloration, deformation or
cracks may result.
To maintain product SAFETY and RELIABILITY,
repairs, any other maintenance or adjustment should
be performed by Makita Authorized or Factory Service
Centers, always using Makita replacement parts.
6 ENGLISH
 Loading...