

Page 1

Adobe® InDesign® CC
Help
June 2014
Page 2

Legal notices
Legal notices
For legal notices, see http://help.adobe.com/en_US/legalnotices/index.html.
Last updated 6/14/2014
Page 3

Contents
Chapter 1: What's New
New features summary
Chapter 2: Workspace and workflow
Create new documents
Sync Settings using Adobe Creative Cloud
Saving documents
Understanding a basic managed-file workflow
Workspace basics
Default keyboard shortcuts
Working with files and templates
Customize menus and keyboard shortcuts
Recovery and undo
Converting QuarkXPress and PageMaker documents
Toolbox
Sharing content
PageMaker menu commands
Assignment packages
Adjusting your workflow
Working with managed files
Viewing the workspace
Creating and saving your own workspace
Working with Tools
Setting preferences
Toolbox
. . . . . . . . . . . . . . . . . . . . . . . . . . . . . . . . . . . . . . . . . . . . . . . . . . . . . . . . . . . . . . . . . . . . . . . . . . . . . . . . . . . . . . . . . . . . . . . . . . . . . . . . . . . . . . 63
. . . . . . . . . . . . . . . . . . . . . . . . . . . . . . . . . . . . . . . . . . . . . . . . . . . . . . . . . . . . . . . . . . . . . . . . . . . . . . . . . . . . . . . . . . . . . . . . . . . . . . . . . . . . . . 99
. . . . . . . . . . . . . . . . . . . . . . . . . . . . . . . . . . . . . . . . . . . . . . . . . . . . . . . . . . . . . . . . . . . . . . . . . . . . . . . . . . . . . . . . . . . . . . . . .1
. . . . . . . . . . . . . . . . . . . . . . . . . . . . . . . . . . . . . . . . . . . . . . . . . . . . . . . . . . . . . . . . . . . . . . . . . . . . . . . . . . . . . . . . . . . . . . . . .7
. . . . . . . . . . . . . . . . . . . . . . . . . . . . . . . . . . . . . . . . . . . . . . . . . . . . . . . . . . . . . . . . . . . . . . . . . . . . 10
. . . . . . . . . . . . . . . . . . . . . . . . . . . . . . . . . . . . . . . . . . . . . . . . . . . . . . . . . . . . . . . . . . . . . . . . . . . . . . . . . . . . . . . . . . . . . . . . . . . 13
. . . . . . . . . . . . . . . . . . . . . . . . . . . . . . . . . . . . . . . . . . . . . . . . . . . . . . . . . . . . . . . . . . . . . . . . 18
. . . . . . . . . . . . . . . . . . . . . . . . . . . . . . . . . . . . . . . . . . . . . . . . . . . . . . . . . . . . . . . . . . . . . . . . . . . . . . . . . . . . . . . . . . . . . . . . . . . . . 25
. . . . . . . . . . . . . . . . . . . . . . . . . . . . . . . . . . . . . . . . . . . . . . . . . . . . . . . . . . . . . . . . . . . . . . . . . . . . . . . . . . . . . . . . . . . 35
. . . . . . . . . . . . . . . . . . . . . . . . . . . . . . . . . . . . . . . . . . . . . . . . . . . . . . . . . . . . . . . . . . . . . . . . . . . . . . . . . . . . . 49
. . . . . . . . . . . . . . . . . . . . . . . . . . . . . . . . . . . . . . . . . . . . . . . . . . . . . . . . . . . . . . . . . . . . . . . . . . . . 54
. . . . . . . . . . . . . . . . . . . . . . . . . . . . . . . . . . . . . . . . . . . . . . . . . . . . . . . . . . . . . . . . . . . . . . . . . . . . . . . . . . . . . . . . . . . . . . . . . . . 57
. . . . . . . . . . . . . . . . . . . . . . . . . . . . . . . . . . . . . . . . . . . . . . . . . . . . . . . . . . . . . . . . . . . . . . . . . . . . . . . . . . . . . . . . . . . . . . . . . . . . . . 72
. . . . . . . . . . . . . . . . . . . . . . . . . . . . . . . . . . . . . . . . . . . . . . . . . . . . . . . . . . . . . . . . . . . . . . . . . . . . . . . . . . . . . . . . . 78
. . . . . . . . . . . . . . . . . . . . . . . . . . . . . . . . . . . . . . . . . . . . . . . . . . . . . . . . . . . . . . . . . . . . . . . . . . . . . . . . . . . . . . . . . . . . . . . . 84
. . . . . . . . . . . . . . . . . . . . . . . . . . . . . . . . . . . . . . . . . . . . . . . . . . . . . . . . . . . . . . . . . . . . . . . . . . . . . . . . . . . . . . . . . . . . . . 87
. . . . . . . . . . . . . . . . . . . . . . . . . . . . . . . . . . . . . . . . . . . . . . . . . . . . . . . . . . . . . . . . . . . . . . . . . . . . . . . . . . . . . . . . . . 89
. . . . . . . . . . . . . . . . . . . . . . . . . . . . . . . . . . . . . . . . . . . . . . . . . . . . . . . . . . . . . . . . . . . . . . . . . . . . . . . . . . . . . . . . . . . . . . . 94
. . . . . . . . . . . . . . . . . . . . . . . . . . . . . . . . . . . . . . . . . . . . . . . . . . . . . . . . . . . . . . . . . . . . . . . . . . . . . 98
. . . . . . . . . . . . . . . . . . . . . . . . . . . . . . . . . . . . . . . . . . . . . . . . . . . . . . . . . . . . . . . . . . . . . . . . . . . . . . . . . . . . . . . . . . . . . . . . . . . 99
. . . . . . . . . . . . . . . . . . . . . . . . . . . . . . . . . . . . . . . . . . . . . . . . . . . . . . . . . . . . . . . . . . . . . . . . . . . . . . . . . . . . . . . . . . . . . . . . . . . 99
iii
. . . . . . . . . . . . . . . . . . . . . . . . . . . . . . . . . . . . . . . . . . . . . . . . . . . . . . . . . . . . . . . . . . 59
Chapter 3: Layout and design
Generate QR codes
Footnotes
Creating type on a path
Linked content
Add basic page numbering
About pages and spreads
Liquid Layouts and Alternate Layouts | CC, CS6
Aligning and distributing objects
Create new documents (Chinese, Japanese, and Korean only)
Creating text and text frames
Creating book files
Creating an index
Creating a table of contents
Creating documents
Clipping paths
Linking Content
. . . . . . . . . . . . . . . . . . . . . . . . . . . . . . . . . . . . . . . . . . . . . . . . . . . . . . . . . . . . . . . . . . . . . . . . . . . . . . . . . . . . . . . . . . . . . . . . . . . . . . . . . . . 103
. . . . . . . . . . . . . . . . . . . . . . . . . . . . . . . . . . . . . . . . . . . . . . . . . . . . . . . . . . . . . . . . . . . . . . . . . . . . . . . . . . . . . . . . . . . . . . . . . . 100
. . . . . . . . . . . . . . . . . . . . . . . . . . . . . . . . . . . . . . . . . . . . . . . . . . . . . . . . . . . . . . . . . . . . . . . . . . . . . . . . . . . . . . . . . . . . . . 108
. . . . . . . . . . . . . . . . . . . . . . . . . . . . . . . . . . . . . . . . . . . . . . . . . . . . . . . . . . . . . . . . . . . . . . . . . . . . . . . . . . . . . . . . . . . . . . . . . . . . . . 113
. . . . . . . . . . . . . . . . . . . . . . . . . . . . . . . . . . . . . . . . . . . . . . . . . . . . . . . . . . . . . . . . . . . . . . . . . . . . . . . . . . . . . . . . . . 117
. . . . . . . . . . . . . . . . . . . . . . . . . . . . . . . . . . . . . . . . . . . . . . . . . . . . . . . . . . . . . . . . . . . . . . . . . . . . . . . . . . . . . . . . . . . . 118
. . . . . . . . . . . . . . . . . . . . . . . . . . . . . . . . . . . . . . . . . . . . . . . . . . . . . . . . . . . . . . . . . . . . . . . 120
. . . . . . . . . . . . . . . . . . . . . . . . . . . . . . . . . . . . . . . . . . . . . . . . . . . . . . . . . . . . . . . . . . . . . . . . . . . . . . . . . . . . 126
. . . . . . . . . . . . . . . . . . . . . . . . . . . . . . . . . . . . . . . . . . . . . . . . . . . . . . . . . . . . . . . . . . . . . . . . . . . . . . . . . . . . . . . . 133
. . . . . . . . . . . . . . . . . . . . . . . . . . . . . . . . . . . . . . . . . . . . . . . . . . . . . . . . . . . . . . . . . . . . . . . . . . . . . . . . . . . . . . . . . . . . . . . . . . 139
. . . . . . . . . . . . . . . . . . . . . . . . . . . . . . . . . . . . . . . . . . . . . . . . . . . . . . . . . . . . . . . . . . . . . . . . . . . . . . . . . . . . . . . . . . . . . . . . . . . 145
. . . . . . . . . . . . . . . . . . . . . . . . . . . . . . . . . . . . . . . . . . . . . . . . . . . . . . . . . . . . . . . . . . . . . . . . . . . . . . . . . . . . . . . . . . 158
. . . . . . . . . . . . . . . . . . . . . . . . . . . . . . . . . . . . . . . . . . . . . . . . . . . . . . . . . . . . . . . . . . . . . . . . . . . . . . . . . . . . . . . . . . . . . . . . . 164
. . . . . . . . . . . . . . . . . . . . . . . . . . . . . . . . . . . . . . . . . . . . . . . . . . . . . . . . . . . . . . . . . . . . . . . . . . . . . . . . . . . . . . . . . . . . . . . . . . . . . . 166
. . . . . . . . . . . . . . . . . . . . . . . . . . . . . . . . . . . . . . . . . . . . . . . . . . . . . . . . . . . . . . . . . . . . . . . . . . . . . . . . . . . . . . . . . . . . . . . . . . . . . 170
Last updated 6/14/2014
. . . . . . . . . . . . . . . . . . . . . . . . . . . . . . . . . . . . . . . . . . . . . . . . . . . . . . . . . 129
Page 4

INDESIGN
Content s
Reviewing the Forms tools . . . . . . . . . . . . . . . . . . . . . . . . . . . . . . . . . . . . . . . . . . . . . . . . . . . . . . . . . . . . . . . . . . . . . . . . . . . . . . . . . . . . . . . . . . . 170
Testing a form in Acrobat . . . . . . . . . . . . . . . . . . . . . . . . . . . . . . . . . . . . . . . . . . . . . . . . . . . . . . . . . . . . . . . . . . . . . . . . . . . . . . . . . . . . . . . . . . . . 170
Working with Frames
Creating cross-references (video 5:45)
Formatting grids
Frame grid properties
Generating image captions with metadata (PDF, 148 KB)
Grid Mode and Live Distribute (video 2:48)
. . . . . . . . . . . . . . . . . . . . . . . . . . . . . . . . . . . . . . . . . . . . . . . . . . . . . . . . . . . . . . . . . . . . . . . . . . . . . . . . . . . . . . . . . . . . . . . . . . . . . . . . . . . . . . . . 171
Grids
Grouping, locking, and duplicating objects
Importing files from other applications
Layers
. . . . . . . . . . . . . . . . . . . . . . . . . . . . . . . . . . . . . . . . . . . . . . . . . . . . . . . . . . . . . . . . . . . . . . . . . . . . . . . . . . . . . . . . . . . . . . . . . . . . . . . . . . . . . . . 171
Laying out frames and pages
Layout grids
. . . . . . . . . . . . . . . . . . . . . . . . . . . . . . . . . . . . . . . . . . . . . . . . . . . . . . . . . . . . . . . . . . . . . . . . . . . . . . . . . . . . . . . . . . . . . . . . . . . . . . . . . 171
Live captions (video 3:04)
Making shiny graphics (PDF, 203 KB)
Managing documents with multiple page sizes (PDF, 136 KB)
Managing graphics links
Managing pages and spreads
Master pages
Mini Bridge: Getting access to your assets (PDF, 180 KB)
Mixing page sizes with the new Page tool (video 8:03)
Numbering pages, chapters, and sections
Paragraphs that span and split columns (video 2:01)
Placing graphics
Reusing graphics and text
Rotating Spread view (video 3:31)
Ruler guides
. . . . . . . . . . . . . . . . . . . . . . . . . . . . . . . . . . . . . . . . . . . . . . . . . . . . . . . . . . . . . . . . . . . . . . . . . . . . . . . . . . . . . . . . . . . . . . . . . . . . . . . . . 173
Rulers and measurement units
Spanning and Splitting columns (video 6:15)
Tex t var iables
Transforming objects
Understanding graphics formats
Working with files and templates
Working with frames and objects
. . . . . . . . . . . . . . . . . . . . . . . . . . . . . . . . . . . . . . . . . . . . . . . . . . . . . . . . . . . . . . . . . . . . . . . . . . . . . . . . . . . . . . . . . . . . . . . . 170
. . . . . . . . . . . . . . . . . . . . . . . . . . . . . . . . . . . . . . . . . . . . . . . . . . . . . . . . . . . . . . . . . . . . . . . . . . . . . . . . 170
. . . . . . . . . . . . . . . . . . . . . . . . . . . . . . . . . . . . . . . . . . . . . . . . . . . . . . . . . . . . . . . . . . . . . . . . . . . . . . . . . . . . . . . . . . . . . . . . . . . . 170
. . . . . . . . . . . . . . . . . . . . . . . . . . . . . . . . . . . . . . . . . . . . . . . . . . . . . . . . . . . . . . . . . . . . . . . . . . . . . . . . . . . . . . . . . . . . . . . 170
. . . . . . . . . . . . . . . . . . . . . . . . . . . . . . . . . . . . . . . . . . . . . . . . . . . . . . . . . . . . . . 171
. . . . . . . . . . . . . . . . . . . . . . . . . . . . . . . . . . . . . . . . . . . . . . . . . . . . . . . . . . . . . . . . . . . . . . . . . . . 171
. . . . . . . . . . . . . . . . . . . . . . . . . . . . . . . . . . . . . . . . . . . . . . . . . . . . . . . . . . . . . . . . . . . . . . . . . . . 171
. . . . . . . . . . . . . . . . . . . . . . . . . . . . . . . . . . . . . . . . . . . . . . . . . . . . . . . . . . . . . . . . . . . . . . . . . . . . . . . 171
. . . . . . . . . . . . . . . . . . . . . . . . . . . . . . . . . . . . . . . . . . . . . . . . . . . . . . . . . . . . . . . . . . . . . . . . . . . . . . . . . . . . . . . . 171
. . . . . . . . . . . . . . . . . . . . . . . . . . . . . . . . . . . . . . . . . . . . . . . . . . . . . . . . . . . . . . . . . . . . . . . . . . . . . . . . . . . . . . . . . . . . 172
. . . . . . . . . . . . . . . . . . . . . . . . . . . . . . . . . . . . . . . . . . . . . . . . . . . . . . . . . . . . . . . . . . . . . . . . . . . . . . . . . 172
. . . . . . . . . . . . . . . . . . . . . . . . . . . . . . . . . . . . . . . . . . . . . . . . . . . . . . . . . 172
. . . . . . . . . . . . . . . . . . . . . . . . . . . . . . . . . . . . . . . . . . . . . . . . . . . . . . . . . . . . . . . . . . . . . . . . . . . . . . . . . . . . . . . . . . . . . 172
. . . . . . . . . . . . . . . . . . . . . . . . . . . . . . . . . . . . . . . . . . . . . . . . . . . . . . . . . . . . . . . . . . . . . . . . . . . . . . . . . . . . . . . . 172
. . . . . . . . . . . . . . . . . . . . . . . . . . . . . . . . . . . . . . . . . . . . . . . . . . . . . . . . . . . . . . . . . . . . . . . . . . . . . . . . . . . . . . . . . . . . . . . . . . . . . . . . 172
. . . . . . . . . . . . . . . . . . . . . . . . . . . . . . . . . . . . . . . . . . . . . . . . . . . . . . . . . . . . . . . 172
. . . . . . . . . . . . . . . . . . . . . . . . . . . . . . . . . . . . . . . . . . . . . . . . . . . . . . . . . . . . . . . . 173
. . . . . . . . . . . . . . . . . . . . . . . . . . . . . . . . . . . . . . . . . . . . . . . . . . . . . . . . . . . . . . . . . . . . . . . . . . . . 173
. . . . . . . . . . . . . . . . . . . . . . . . . . . . . . . . . . . . . . . . . . . . . . . . . . . . . . . . . . . . . . . . . . 173
. . . . . . . . . . . . . . . . . . . . . . . . . . . . . . . . . . . . . . . . . . . . . . . . . . . . . . . . . . . . . . . . . . . . . . . . . . . . . . . . . . . . . . . . . . . . . . . . . . . . . 173
. . . . . . . . . . . . . . . . . . . . . . . . . . . . . . . . . . . . . . . . . . . . . . . . . . . . . . . . . . . . . . . . . . . . . . . . . . . . . . . . . . . . . . . . . . . 173
. . . . . . . . . . . . . . . . . . . . . . . . . . . . . . . . . . . . . . . . . . . . . . . . . . . . . . . . . . . . . . . . . . . . . . . . . . . . . . . . . . . . 173
. . . . . . . . . . . . . . . . . . . . . . . . . . . . . . . . . . . . . . . . . . . . . . . . . . . . . . . . . . . . . . . . . . . . . . . . . . . . . . . . . . . . . . . 173
. . . . . . . . . . . . . . . . . . . . . . . . . . . . . . . . . . . . . . . . . . . . . . . . . . . . . . . . . . . . . . . . . . . . . . . . . 174
. . . . . . . . . . . . . . . . . . . . . . . . . . . . . . . . . . . . . . . . . . . . . . . . . . . . . . . . . . . . . . . . . . . . . . . . . . . . . . . . . . . . . . . . . . . . . . . . . . . . . . . 174
. . . . . . . . . . . . . . . . . . . . . . . . . . . . . . . . . . . . . . . . . . . . . . . . . . . . . . . . . . . . . . . . . . . . . . . . . . . . . . . . . . . . . . . . . . . . . . . . 174
. . . . . . . . . . . . . . . . . . . . . . . . . . . . . . . . . . . . . . . . . . . . . . . . . . . . . . . . . . . . . . . . . . . . . . . . . . . . . . . . . . . . . 174
. . . . . . . . . . . . . . . . . . . . . . . . . . . . . . . . . . . . . . . . . . . . . . . . . . . . . . . . . . . . . . . . . . . . . . . . . . . . . . . . . . . . 174
. . . . . . . . . . . . . . . . . . . . . . . . . . . . . . . . . . . . . . . . . . . . . . . . . . . . . . . . . . . . . . . . . . . . . . . . . . . . . . . . . . . . 174
iv
Chapter 4: Text
Threading text
Wrapping text around objects
. . . . . . . . . . . . . . . . . . . . . . . . . . . . . . . . . . . . . . . . . . . . . . . . . . . . . . . . . . . . . . . . . . . . . . . . . . . . . . . . . . . . . . . . . . . . . . . . . . . . . . 175
. . . . . . . . . . . . . . . . . . . . . . . . . . . . . . . . . . . . . . . . . . . . . . . . . . . . . . . . . . . . . . . . . . . . . . . . . . . . . . . . . . . . . . . 180
Arabic and Hebrew features | CC, CS6
Anchored objects
Find/Change
Bullets and numbering
Formatting CJK characters
Articles (CS5.5)
. . . . . . . . . . . . . . . . . . . . . . . . . . . . . . . . . . . . . . . . . . . . . . . . . . . . . . . . . . . . . . . . . . . . . . . . . . . . . . . . . . . . . . . . . . . . . . . . . . . 194
. . . . . . . . . . . . . . . . . . . . . . . . . . . . . . . . . . . . . . . . . . . . . . . . . . . . . . . . . . . . . . . . . . . . . . . . . . . . . . . . . . . . . . . . . . . . . . . . . . . . . . . . 203
. . . . . . . . . . . . . . . . . . . . . . . . . . . . . . . . . . . . . . . . . . . . . . . . . . . . . . . . . . . . . . . . . . . . . . . . . . . . . . . . . . . . . . . . . . . . . . 218
. . . . . . . . . . . . . . . . . . . . . . . . . . . . . . . . . . . . . . . . . . . . . . . . . . . . . . . . . . . . . . . . . . . . . . . . . . . . . . . . . . . . . . . . . . . 228
. . . . . . . . . . . . . . . . . . . . . . . . . . . . . . . . . . . . . . . . . . . . . . . . . . . . . . . . . . . . . . . . . . . . . . . . . . . . . . . . . . . . . . . . . . . . . . . . . . . . . . 234
Spell-checking and language dictionaries
. . . . . . . . . . . . . . . . . . . . . . . . . . . . . . . . . . . . . . . . . . . . . . . . . . . . . . . . . . . . . . . . . . . . . . . . . . . . . . . . 185
. . . . . . . . . . . . . . . . . . . . . . . . . . . . . . . . . . . . . . . . . . . . . . . . . . . . . . . . . . . . . . . . . . . . . . . . . . . . 235
Last updated 6/14/2014
Page 5

INDESIGN
Content s
Text Frame fitting options | CC, CS6 . . . . . . . . . . . . . . . . . . . . . . . . . . . . . . . . . . . . . . . . . . . . . . . . . . . . . . . . . . . . . . . . . . . . . . . . . . . . . . . . . . 242
Adding text to frames . . . . . . . . . . . . . . . . . . . . . . . . . . . . . . . . . . . . . . . . . . . . . . . . . . . . . . . . . . . . . . . . . . . . . . . . . . . . . . . . . . . . . . . . . . . . . . . 244
Editing text
Captions
Tracking and reviewing changes
Tex t var iables
Adding editorial notes in InDesign
Glyphs and special characters
Linked stories (CS5.5)
Creating bullets and number
Creating conditional text (vid
Creating footnotes (video 2:44)
Linking text stories (PDF, 217 KB)
Track text changes (video 2:01)
Working with markers
. . . . . . . . . . . . . . . . . . . . . . . . . . . . . . . . . . . . . . . . . . . . . . . . . . . . . . . . . . . . . . . . . . . . . . . . . . . . . . . . . . . . . . . . . . . . . . . . . . . . . . . . . 252
. . . . . . . . . . . . . . . . . . . . . . . . . . . . . . . . . . . . . . . . . . . . . . . . . . . . . . . . . . . . . . . . . . . . . . . . . . . . . . . . . . . . . . . . . . . . . . . . . . . . . . . . . . . . 264
. . . . . . . . . . . . . . . . . . . . . . . . . . . . . . . . . . . . . . . . . . . . . . . . . . . . . . . . . . . . . . . . . . . . . . . . . . . . . . . . . . . . . 266
. . . . . . . . . . . . . . . . . . . . . . . . . . . . . . . . . . . . . . . . . . . . . . . . . . . . . . . . . . . . . . . . . . . . . . . . . . . . . . . . . . . . . . . . . . . . . . . . . . . . . . . 269
. . . . . . . . . . . . . . . . . . . . . . . . . . . . . . . . . . . . . . . . . . . . . . . . . . . . . . . . . . . . . . . . . . . . . . . . . . . . . . . . . . . 273
. . . . . . . . . . . . . . . . . . . . . . . . . . . . . . . . . . . . . . . . . . . . . . . . . . . . . . . . . . . . . . . . . . . . . . . . . . . . . . . . . . . . . . . . 274
. . . . . . . . . . . . . . . . . . . . . . . . . . . . . . . . . . . . . . . . . . . . . . . . . . . . . . . . . . . . . . . . . . . . . . . . . . . . . . . . . . . . . . . . . . . . . . . . 282
ing (video 12:16) . . . . . . . . . . . . . . . . . . . . . . . . . . . . . . . . . . . . . . . . . . . . . . . . . . . . . . . . . . . . . . . . . . . . . . . . 283
eo 6:48) . . . . . . . . . . . . . . . . . . . . . . . . . . . . . . . . . . . . . . . . . . . . . . . . . . . . . . . . . . . . . . . . . . . . . . . . . . . . . . . . 283
. . . . . . . . . . . . . . . . . . . . . . . . . . . . . . . . . . . . . . . . . . . . . . . . . . . . . . . . . . . . . . . . . . . . . . . . . . . . . . . . . . . . . . 283
. . . . . . . . . . . . . . . . . . . . . . . . . . . . . . . . . . . . . . . . . . . . . . . . . . . . . . . . . . . . . . . . . . . . . . . . . . . . . . . . . . . . . 284
. . . . . . . . . . . . . . . . . . . . . . . . . . . . . . . . . . . . . . . . . . . . . . . . . . . . . . . . . . . . . . . . . . . . . . . . . . . . . . . . . . . . . . 284
. . . . . . . . . . . . . . . . . . . . . . . . . . . . . . . . . . . . . . . . . . . . . . . . . . . . . . . . . . . . . . . . . . . . . . . . . . . . . . . . . . . . . . . . . . . . . . . 284
Chapter 5: Styles
Paragraph and character styles
Object styles
. . . . . . . . . . . . . . . . . . . . . . . . . . . . . . . . . . . . . . . . . . . . . . . . . . . . . . . . . . . . . . . . . . . . . . . . . . . . . . . . . . . . . . . . . . . . . . . . . . . . . . . . 293
Drop caps and nested styles
Working with styles
. . . . . . . . . . . . . . . . . . . . . . . . . . . . . . . . . . . . . . . . . . . . . . . . . . . . . . . . . . . . . . . . . . . . . . . . . . . . . . . . . . . . . . . . . . . . . . . . . 306
Applying GREP styles (video 4:46)
. . . . . . . . . . . . . . . . . . . . . . . . . . . . . . . . . . . . . . . . . . . . . . . . . . . . . . . . . . . . . . . . . . . . . . . . . . . . . . . . . . . . . . . 285
. . . . . . . . . . . . . . . . . . . . . . . . . . . . . . . . . . . . . . . . . . . . . . . . . . . . . . . . . . . . . . . . . . . . . . . . . . . . . . . . . . . . . . . . . 299
. . . . . . . . . . . . . . . . . . . . . . . . . . . . . . . . . . . . . . . . . . . . . . . . . . . . . . . . . . . . . . . . . . . . . . . . . . . . . . . . . . . . 307
v
Chapter 6: Typography
Using fonts
Formatting text
Text composition
Formatting characters
Aligning text
Formatting paragraphs
Leading
Tabs and indents
Kerning and tracking
. . . . . . . . . . . . . . . . . . . . . . . . . . . . . . . . . . . . . . . . . . . . . . . . . . . . . . . . . . . . . . . . . . . . . . . . . . . . . . . . . . . . . . . . . . . . . . . . . . . . . . . . . . 308
. . . . . . . . . . . . . . . . . . . . . . . . . . . . . . . . . . . . . . . . . . . . . . . . . . . . . . . . . . . . . . . . . . . . . . . . . . . . . . . . . . . . . . . . . . . . . . . . . . . . . 313
. . . . . . . . . . . . . . . . . . . . . . . . . . . . . . . . . . . . . . . . . . . . . . . . . . . . . . . . . . . . . . . . . . . . . . . . . . . . . . . . . . . . . . . . . . . . . . . . . . . . 316
. . . . . . . . . . . . . . . . . . . . . . . . . . . . . . . . . . . . . . . . . . . . . . . . . . . . . . . . . . . . . . . . . . . . . . . . . . . . . . . . . . . . . . . . . . . . . . . 321
. . . . . . . . . . . . . . . . . . . . . . . . . . . . . . . . . . . . . . . . . . . . . . . . . . . . . . . . . . . . . . . . . . . . . . . . . . . . . . . . . . . . . . . . . . . . . . . . . . . . . . . . 328
. . . . . . . . . . . . . . . . . . . . . . . . . . . . . . . . . . . . . . . . . . . . . . . . . . . . . . . . . . . . . . . . . . . . . . . . . . . . . . . . . . . . . . . . . . . . . . 333
. . . . . . . . . . . . . . . . . . . . . . . . . . . . . . . . . . . . . . . . . . . . . . . . . . . . . . . . . . . . . . . . . . . . . . . . . . . . . . . . . . . . . . . . . . . . . . . . . . . . . . . . . . . . . 337
. . . . . . . . . . . . . . . . . . . . . . . . . . . . . . . . . . . . . . . . . . . . . . . . . . . . . . . . . . . . . . . . . . . . . . . . . . . . . . . . . . . . . . . . . . . . . . . . . . . . 339
. . . . . . . . . . . . . . . . . . . . . . . . . . . . . . . . . . . . . . . . . . . . . . . . . . . . . . . . . . . . . . . . . . . . . . . . . . . . . . . . . . . . . . . . . . . . . . . . 346
Document installed fonts (video 2:29)
Chapter 7: Tables
Tab le and cell styles
Creating tables
Formatting tables
Selecting and editing tables
Table strokes and fills
. . . . . . . . . . . . . . . . . . . . . . . . . . . . . . . . . . . . . . . . . . . . . . . . . . . . . . . . . . . . . . . . . . . . . . . . . . . . . . . . . . . . . . . . . . . . . . . . . 350
. . . . . . . . . . . . . . . . . . . . . . . . . . . . . . . . . . . . . . . . . . . . . . . . . . . . . . . . . . . . . . . . . . . . . . . . . . . . . . . . . . . . . . . . . . . . . . . . . . . . . . 355
. . . . . . . . . . . . . . . . . . . . . . . . . . . . . . . . . . . . . . . . . . . . . . . . . . . . . . . . . . . . . . . . . . . . . . . . . . . . . . . . . . . . . . . . . . . . . . . . . . . 359
. . . . . . . . . . . . . . . . . . . . . . . . . . . . . . . . . . . . . . . . . . . . . . . . . . . . . . . . . . . . . . . . . . . . . . . . . . . . . . . . . . . . . . . . . 363
. . . . . . . . . . . . . . . . . . . . . . . . . . . . . . . . . . . . . . . . . . . . . . . . . . . . . . . . . . . . . . . . . . . . . . . . . . . . . . . . . . . . . . . . . . . . . . . . 368
Chapter 8: Interactivity
Hyperlinks
Forms | CC, CS6
Buttons
Cross-references
. . . . . . . . . . . . . . . . . . . . . . . . . . . . . . . . . . . . . . . . . . . . . . . . . . . . . . . . . . . . . . . . . . . . . . . . . . . . . . . . . . . . . . . . . . . . . . . . . . . . . . . . . . 373
. . . . . . . . . . . . . . . . . . . . . . . . . . . . . . . . . . . . . . . . . . . . . . . . . . . . . . . . . . . . . . . . . . . . . . . . . . . . . . . . . . . . . . . . . . . . . . . . . . . . . 379
. . . . . . . . . . . . . . . . . . . . . . . . . . . . . . . . . . . . . . . . . . . . . . . . . . . . . . . . . . . . . . . . . . . . . . . . . . . . . . . . . . . . . . . . . . . . . . . . . . . . . . . . . . . . . 382
. . . . . . . . . . . . . . . . . . . . . . . . . . . . . . . . . . . . . . . . . . . . . . . . . . . . . . . . . . . . . . . . . . . . . . . . . . . . . . . . . . . . . . . . . . . . . . . . . . . . . 390
Interactive web documents for Flash
. . . . . . . . . . . . . . . . . . . . . . . . . . . . . . . . . . . . . . . . . . . . . . . . . . . . . . . . . . . . . . . . . . . . . . . . . . . . . . . . 349
. . . . . . . . . . . . . . . . . . . . . . . . . . . . . . . . . . . . . . . . . . . . . . . . . . . . . . . . . . . . . . . . . . . . . . . . . . . . . . . . . 397
Last updated 6/14/2014
Page 6

INDESIGN
Content s
Animation . . . . . . . . . . . . . . . . . . . . . . . . . . . . . . . . . . . . . . . . . . . . . . . . . . . . . . . . . . . . . . . . . . . . . . . . . . . . . . . . . . . . . . . . . . . . . . . . . . . . . . . . . . 405
Dynamic PDF documents . . . . . . . . . . . . . . . . . . . . . . . . . . . . . . . . . . . . . . . . . . . . . . . . . . . . . . . . . . . . . . . . . . . . . . . . . . . . . . . . . . . . . . . . . . . . 409
Structuring PDFs
Page transitions
Movies and sounds
Bookmarks
Creating and editing motion presets (video 5:23)
Creating documents with Interactive features (video 8:06)
Creating interactive documents in a snap (PDF, 201 KB)
Creating multistate objects (PDF, 203 KB)
Creating rich interactive documents (PDF, 6.7 MB)
Exploring new FLA export options (video 6:26)
. . . . . . . . . . . . . . . . . . . . . . . . . . . . . . . . . . . . . . . . . . . . . . . . . . . . . . . . . . . . . . . . . . . . . . . . . . . . . . . . . . . . . . . . . . . . . . . . . . . . 413
. . . . . . . . . . . . . . . . . . . . . . . . . . . . . . . . . . . . . . . . . . . . . . . . . . . . . . . . . . . . . . . . . . . . . . . . . . . . . . . . . . . . . . . . . . . . . . . . . . . . . 417
. . . . . . . . . . . . . . . . . . . . . . . . . . . . . . . . . . . . . . . . . . . . . . . . . . . . . . . . . . . . . . . . . . . . . . . . . . . . . . . . . . . . . . . . . . . . . . . . . . 419
. . . . . . . . . . . . . . . . . . . . . . . . . . . . . . . . . . . . . . . . . . . . . . . . . . . . . . . . . . . . . . . . . . . . . . . . . . . . . . . . . . . . . . . . . . . . . . . . . . . . . . . . . . 422
. . . . . . . . . . . . . . . . . . . . . . . . . . . . . . . . . . . . . . . . . . . . . . . . . . . . . . . . . . . . . . . . . . . . . 424
. . . . . . . . . . . . . . . . . . . . . . . . . . . . . . . . . . . . . . . . . . . . . . . . . . . . . . . . . . . . 424
. . . . . . . . . . . . . . . . . . . . . . . . . . . . . . . . . . . . . . . . . . . . . . . . . . . . . . . . . . . . . . . 424
. . . . . . . . . . . . . . . . . . . . . . . . . . . . . . . . . . . . . . . . . . . . . . . . . . . . . . . . . . . . . . . . . . . . . . . . . . . . . 425
. . . . . . . . . . . . . . . . . . . . . . . . . . . . . . . . . . . . . . . . . . . . . . . . . . . . . . . . . . . . . . . . . . . . 425
. . . . . . . . . . . . . . . . . . . . . . . . . . . . . . . . . . . . . . . . . . . . . . . . . . . . . . . . . . . . . . . . . . . . . . . 425
Chapter 9: Drawing and painting
Drawing with the Pen tool
Drawing with lines and shapes
Editing paths
. . . . . . . . . . . . . . . . . . . . . . . . . . . . . . . . . . . . . . . . . . . . . . . . . . . . . . . . . . . . . . . . . . . . . . . . . . . . . . . . . . . . . . . . . . . . . . . . . . . . . . . . 432
Understanding paths and shapes
Drawing with the Pencil tool
Compound paths and shapes
Change corner appearance
Applying line (stroke) settings
. . . . . . . . . . . . . . . . . . . . . . . . . . . . . . . . . . . . . . . . . . . . . . . . . . . . . . . . . . . . . . . . . . . . . . . . . . . . . . . . . . . . . . . . . . . 426
. . . . . . . . . . . . . . . . . . . . . . . . . . . . . . . . . . . . . . . . . . . . . . . . . . . . . . . . . . . . . . . . . . . . . . . . . . . . . . . . . . . . . . . 430
. . . . . . . . . . . . . . . . . . . . . . . . . . . . . . . . . . . . . . . . . . . . . . . . . . . . . . . . . . . . . . . . . . . . . . . . . . . . . . . . . . . . 439
. . . . . . . . . . . . . . . . . . . . . . . . . . . . . . . . . . . . . . . . . . . . . . . . . . . . . . . . . . . . . . . . . . . . . . . . . . . . . . . . . . . . . . . . . 442
. . . . . . . . . . . . . . . . . . . . . . . . . . . . . . . . . . . . . . . . . . . . . . . . . . . . . . . . . . . . . . . . . . . . . . . . . . . . . . . . . . . . . . . . 444
. . . . . . . . . . . . . . . . . . . . . . . . . . . . . . . . . . . . . . . . . . . . . . . . . . . . . . . . . . . . . . . . . . . . . . . . . . . . . . . . . . . . . . . . . . 449
. . . . . . . . . . . . . . . . . . . . . . . . . . . . . . . . . . . . . . . . . . . . . . . . . . . . . . . . . . . . . . . . . . . . . . . . . . . . . . . . . . . . . . . 451
vi
Chapter 10: Color
Applying color
. . . . . . . . . . . . . . . . . . . . . . . . . . . . . . . . . . . . . . . . . . . . . . . . . . . . . . . . . . . . . . . . . . . . . . . . . . . . . . . . . . . . . . . . . . . . . . . . . . . . . . . . . . . . . . . . 464
Tints
Mixing inks
Gradients
Working with swatches
Using colors from imported graphics
Understanding spot and processcolors
. . . . . . . . . . . . . . . . . . . . . . . . . . . . . . . . . . . . . . . . . . . . . . . . . . . . . . . . . . . . . . . . . . . . . . . . . . . . . . . . . . . . . . . . . . . . . . . . . . . . . . 456
. . . . . . . . . . . . . . . . . . . . . . . . . . . . . . . . . . . . . . . . . . . . . . . . . . . . . . . . . . . . . . . . . . . . . . . . . . . . . . . . . . . . . . . . . . . . . . . . . . . . . . . . . . 466
. . . . . . . . . . . . . . . . . . . . . . . . . . . . . . . . . . . . . . . . . . . . . . . . . . . . . . . . . . . . . . . . . . . . . . . . . . . . . . . . . . . . . . . . . . . . . . . . . . . . . . . . . . . 468
. . . . . . . . . . . . . . . . . . . . . . . . . . . . . . . . . . . . . . . . . . . . . . . . . . . . . . . . . . . . . . . . . . . . . . . . . . . . . . . . . . . . . . . . . . . . . . 473
. . . . . . . . . . . . . . . . . . . . . . . . . . . . . . . . . . . . . . . . . . . . . . . . . . . . . . . . . . . . . . . . . . . . . . . . . . . . . . . . . 480
. . . . . . . . . . . . . . . . . . . . . . . . . . . . . . . . . . . . . . . . . . . . . . . . . . . . . . . . . . . . . . . . . . . . . . . . . . . . . . . 481
Chapter 11: Transparency
Adding transparency effects
Flattening transparent artwork
Blending colors
. . . . . . . . . . . . . . . . . . . . . . . . . . . . . . . . . . . . . . . . . . . . . . . . . . . . . . . . . . . . . . . . . . . . . . . . . . . . . . . . . . . . . . . . . . . . . . . . . . . . . . 500
. . . . . . . . . . . . . . . . . . . . . . . . . . . . . . . . . . . . . . . . . . . . . . . . . . . . . . . . . . . . . . . . . . . . . . . . . . . . . . . . . . . . . . . . . 483
. . . . . . . . . . . . . . . . . . . . . . . . . . . . . . . . . . . . . . . . . . . . . . . . . . . . . . . . . . . . . . . . . . . . . . . . . . . . . . . . . . . . . . . 492
Chapter 12: Exporting and publishing
Export content for EPUB
Export content to HTML
Exporting to Adobe PDF
Export to JPEG format
Export content for EPUB | CS6
Export content for EPUB | CS5.5
Export content to HTML | CS6 & CS5.5
Exporting XML
. . . . . . . . . . . . . . . . . . . . . . . . . . . . . . . . . . . . . . . . . . . . . . . . . . . . . . . . . . . . . . . . . . . . . . . . . . . . . . . . . . . . . . . . . . . . . . . . . . . . . . 530
Adobe PDF options
Build digital magazines with InDesign CS5.5 and A
. . . . . . . . . . . . . . . . . . . . . . . . . . . . . . . . . . . . . . . . . . . . . . . . . . . . . . . . . . . . . . . . . . . . . . . . . . . . . . . . . . . . . . . . . . . . . 504
. . . . . . . . . . . . . . . . . . . . . . . . . . . . . . . . . . . . . . . . . . . . . . . . . . . . . . . . . . . . . . . . . . . . . . . . . . . . . . . . . . . . . . . . . . . . . 511
. . . . . . . . . . . . . . . . . . . . . . . . . . . . . . . . . . . . . . . . . . . . . . . . . . . . . . . . . . . . . . . . . . . . . . . . . . . . . . . . . . . . . . . . . . . . . 514
. . . . . . . . . . . . . . . . . . . . . . . . . . . . . . . . . . . . . . . . . . . . . . . . . . . . . . . . . . . . . . . . . . . . . . . . . . . . . . . . . . . . . . . . . . . . . . . 519
. . . . . . . . . . . . . . . . . . . . . . . . . . . . . . . . . . . . . . . . . . . . . . . . . . . . . . . . . . . . . . . . . . . . . . . . . . . . . . . . . . . . . . . . 520
. . . . . . . . . . . . . . . . . . . . . . . . . . . . . . . . . . . . . . . . . . . . . . . . . . . . . . . . . . . . . . . . . . . . . . . . . . . . . . . . . . . . . . 524
. . . . . . . . . . . . . . . . . . . . . . . . . . . . . . . . . . . . . . . . . . . . . . . . . . . . . . . . . . . . . . . . . . . . . . . . . . . . . . . . 527
. . . . . . . . . . . . . . . . . . . . . . . . . . . . . . . . . . . . . . . . . . . . . . . . . . . . . . . . . . . . . . . . . . . . . . . . . . . . . . . . . . . . . . . . . . . . . . . . . . 532
dobe Digital Publishing Suite (video 09:06) . . . . . . . . . . . . . . . . . . . . . . . . . 542
Last updated 6/14/2014
Page 7

INDESIGN
Content s
Adding audio and video content to EPUB (video 02:46) . . . . . . . . . . . . . . . . . . . . . . . . . . . . . . . . . . . . . . . . . . . . . . . . . . . . . . . . . . . . . . . 542
Controlling order of content export from InDesign to EPUB without changing your layout (video 04:54) . . . . . . . . . . . . . . . . 542
Creating covers and title pages for EPUB (video 05:50)
Exporting documents to EPUB (PDF, 265 KB)
Exporting to EPUB for the Apple iBook
. . . . . . . . . . . . . . . . . . . . . . . . . . . . . . . . . . . . . . . . . . . . . . . . . . . . . . . . . . . . . . . . . . . . . . . . . . 542
store (PDF, 2.5 MB) . . . . . . . . . . . . . . . . . . . . . . . . . . . . . . . . . . . . . . . . . . . . . . . . . . . . . . . . . . . . . 543
Setting object export options (PDF, 160 KB), CS5.5 and later
Styles mapped to tags in InDesign for im
proved EPUB export (video 05:13) . . . . . . . . . . . . . . . . . . . . . . . . . . . . . . . . . . . . . . . . . . . . 543
Using Object Export options to customize how objects and images ex
. . . . . . . . . . . . . . . . . . . . . . . . . . . . . . . . . . . . . . . . . . . . . . . . . . . . . . . . . . . . . . . . 542
. . . . . . . . . . . . . . . . . . . . . . . . . . . . . . . . . . . . . . . . . . . . . . . . . . . . . . . . . . . 543
port to EPUB ( video 05:18) . . . . . . . . . . . . . . . . . . . . . . 543
Chapter 13: Printing
Preflighting files before handoff
Preparing PDFs for service providers
Preparing to print separations
Printer’s marks and bleeds
Printing booklets
Printing documents
. . . . . . . . . . . . . . . . . . . . . . . . . . . . . . . . . . . . . . . . . . . . . . . . . . . . . . . . . . . . . . . . . . . . . . . . . . . . . . . . . . . . . . . . . . . . . . . . . . . . 560
. . . . . . . . . . . . . . . . . . . . . . . . . . . . . . . . . . . . . . . . . . . . . . . . . . . . . . . . . . . . . . . . . . . . . . . . . . . . . . . . . . . . . . . . . . . . . . . . . 565
Creating PostScript and EPS files
Trap presets
. . . . . . . . . . . . . . . . . . . . . . . . . . . . . . . . . . . . . . . . . . . . . . . . . . . . . . . . . . . . . . . . . . . . . . . . . . . . . . . . . . . . . . . . . . . . . . . . . . . . . . . . . 580
Trapping documents and books
Printing thumbnails and oversized
Printing graphics and fonts
Overprinting
. . . . . . . . . . . . . . . . . . . . . . . . . . . . . . . . . . . . . . . . . . . . . . . . . . . . . . . . . . . . . . . . . . . . . . . . . . . . . . . . . . . . . . . . . . . . . . . . . . . . . . . . 593
Adjusting ink options for trapping
Inks, separations, and screen frequency
Printing booklets using your desktop printer
Adobe Creative Suite 5/5.5 Printing Guide (PDF, 21 MB)
. . . . . . . . . . . . . . . . . . . . . . . . . . . . . . . . . . . . . . . . . . . . . . . . . . . . . . . . . . . . . . . . . . . . . . . . . . . . . . . . . . . . . 544
. . . . . . . . . . . . . . . . . . . . . . . . . . . . . . . . . . . . . . . . . . . . . . . . . . . . . . . . . . . . . . . . . . . . . . . . . . . . . . . . . 551
. . . . . . . . . . . . . . . . . . . . . . . . . . . . . . . . . . . . . . . . . . . . . . . . . . . . . . . . . . . . . . . . . . . . . . . . . . . . . . . . . . . . . . . 553
. . . . . . . . . . . . . . . . . . . . . . . . . . . . . . . . . . . . . . . . . . . . . . . . . . . . . . . . . . . . . . . . . . . . . . . . . . . . . . . . . . . . . . . . . . . 558
. . . . . . . . . . . . . . . . . . . . . . . . . . . . . . . . . . . . . . . . . . . . . . . . . . . . . . . . . . . . . . . . . . . . . . . . . . . . . . . . . . . . . 575
. . . . . . . . . . . . . . . . . . . . . . . . . . . . . . . . . . . . . . . . . . . . . . . . . . . . . . . . . . . . . . . . . . . . . . . . . . . . . . . . . . . . . 585
documents . . . . . . . . . . . . . . . . . . . . . . . . . . . . . . . . . . . . . . . . . . . . . . . . . . . . . . . . . . . . . . . . . . . . . . . . 589
. . . . . . . . . . . . . . . . . . . . . . . . . . . . . . . . . . . . . . . . . . . . . . . . . . . . . . . . . . . . . . . . . . . . . . . . . . . . . . . . . . . . . . . . . . 591
. . . . . . . . . . . . . . . . . . . . . . . . . . . . . . . . . . . . . . . . . . . . . . . . . . . . . . . . . . . . . . . . . . . . . . . . . . . . . . . . . . . 597
. . . . . . . . . . . . . . . . . . . . . . . . . . . . . . . . . . . . . . . . . . . . . . . . . . . . . . . . . . . . . . . . . . . . . . . . . . . . . . 598
. . . . . . . . . . . . . . . . . . . . . . . . . . . . . . . . . . . . . . . . . . . . . . . . . . . . . . . . . . . . . . . . . . . . . . . . . 604
. . . . . . . . . . . . . . . . . . . . . . . . . . . . . . . . . . . . . . . . . . . . . . . . . . . . . . . . . . . . . . . 604
vii
Chapter 14: Digital publications
Digital Publishing Suite overview
Applying guide-based Liquid Layout rules
Applying object-based Liquid Layout rules
Understanding Liquid Layout rules
Using basic Liquid Layout rules: Scale, R
Working with Alternate Layouts
Folio Producer Tools (video 1:04)
. . . . . . . . . . . . . . . . . . . . . . . . . . . . . . . . . . . . . . . . . . . . . . . . . . . . . . . . . . . . . . . . . . . . . . . . . . . . . . . . . . . . 605
. . . . . . . . . . . . . . . . . . . . . . . . . . . . . . . . . . . . . . . . . . . . . . . . . . . . . . . . . . . . . . . . . . . . . . . . . . . 605
. . . . . . . . . . . . . . . . . . . . . . . . . . . . . . . . . . . . . . . . . . . . . . . . . . . . . . . . . . . . . . . . . . . . . . . . . . . 605
. . . . . . . . . . . . . . . . . . . . . . . . . . . . . . . . . . . . . . . . . . . . . . . . . . . . . . . . . . . . . . . . . . . . . . . . . . . . . . . . . . . 605
ecenter, and Based on Master . . . . . . . . . . . . . . . . . . . . . . . . . . . . . . . . . . . . . . . . . . . . . . . . . 606
. . . . . . . . . . . . . . . . . . . . . . . . . . . . . . . . . . . . . . . . . . . . . . . . . . . . . . . . . . . . . . . . . . . . . . . . . . . . . . . . . . . . . . 606
. . . . . . . . . . . . . . . . . . . . . . . . . . . . . . . . . . . . . . . . . . . . . . . . . . . . . . . . . . . . . . . . . . . . . . . . . . . . . . . . . . . . . 606
Chapter 15: Automation
Scripting
Plug-ins
Data merge
. . . . . . . . . . . . . . . . . . . . . . . . . . . . . . . . . . . . . . . . . . . . . . . . . . . . . . . . . . . . . . . . . . . . . . . . . . . . . . . . . . . . . . . . . . . . . . . . . . . . . . . . . . . . 607
. . . . . . . . . . . . . . . . . . . . . . . . . . . . . . . . . . . . . . . . . . . . . . . . . . . . . . . . . . . . . . . . . . . . . . . . . . . . . . . . . . . . . . . . . . . . . . . . . . . . . . . . . . . . . 608
. . . . . . . . . . . . . . . . . . . . . . . . . . . . . . . . . . . . . . . . . . . . . . . . . . . . . . . . . . . . . . . . . . . . . . . . . . . . . . . . . . . . . . . . . . . . . . . . . . . . . . . . . 609
Chapter 16: Accessibility
Creating accessible PDF documents (PDF, 2.6 MB)
Chapter 17: System requirements
System requirements for Indesign
. . . . . . . . . . . . . . . . . . . . . . . . . . . . . . . . . . . . . . . . . . . . . . . . . . . . . . . . . . . . . . . . . . . . . . . . . . . . . . . . . . . . 620
. . . . . . . . . . . . . . . . . . . . . . . . . . . . . . . . . . . . . . . . . . . . . . . . . . . . . . . . . . . . . . . . . . . . 619
Last updated 6/14/2014
Page 8

Chapter 1: What's New
New features summary
Adobe InDesign CC 2014 ships with several new features and enhancements that enrich your publishing experience.
New features such as creating color groups, enhancements to EPUB, Behance integration, and footnotes enhancements
make your publishing experience exciting and more effective.
Seamless update
Shortcuts and preferences are retained when you update to the latest version of InDesign, ensuring that you can easily
and quickly get to work with the latest version.
1
• The InDesign preferences and presets from an earlier version are retained. You can also manually trigger local
gration of presets and preferences from Edit > Migrate Previous Local Settings.
mi
• Previous version settings are migrated from Creative Cloud in the following scenarios:
• No local settings are available for migration
• No current version (10.0) settings are available on Creative Cloud
This ensures that you don’t have to change your settings every time y
migrated, make sure that sync settings is initiated for the current version so that all the latest settings are now stored in
the cloud.
ou update InDesign CC. Once settings are
In application - What's New dialog
On the first installation of InDesign CC 2014, a What's new dialog greets you with content that provides information
about the new features in this release. Click a link to learn more about the feature.
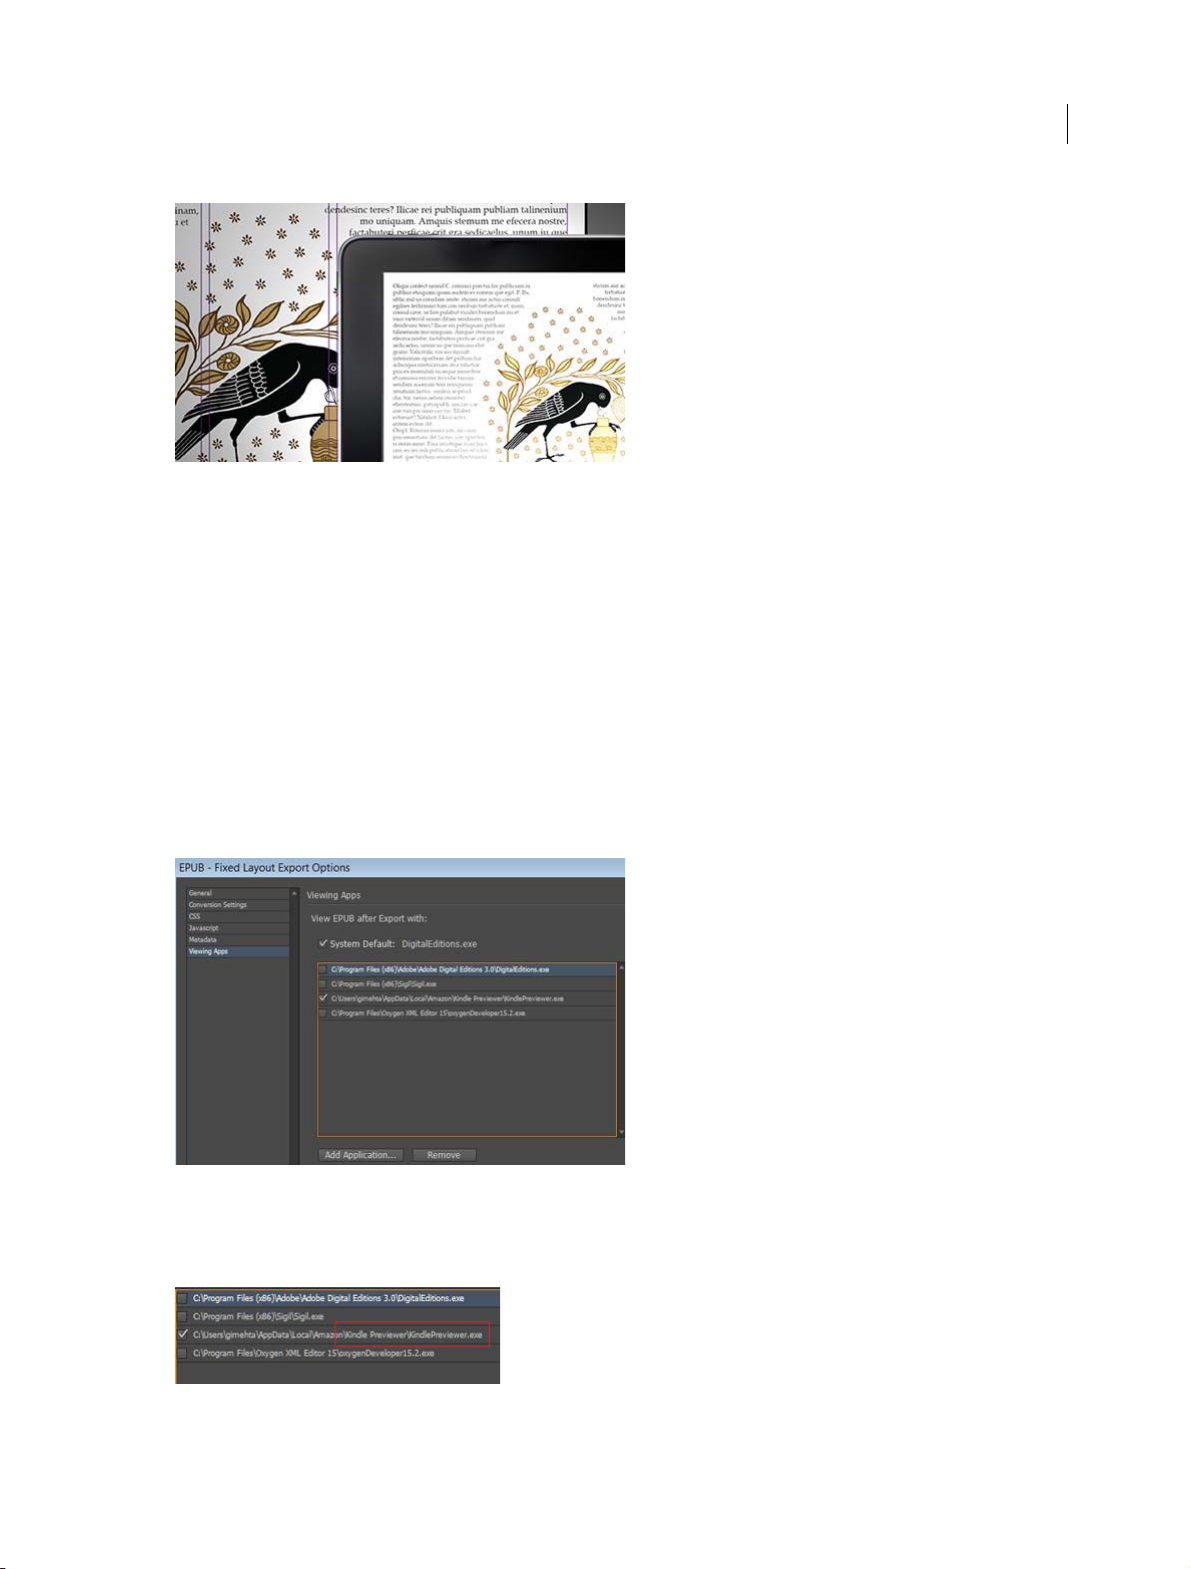
EPUB enhancements
In this release, InDesign provides support for Fixed Layout EPUBs. You also get control over adding epub:type
markups. The enhancements made in this release also provide improved CSS support for table and cell styles. You can
update metadata in the fixed layout and reflowable layouts, in addition to, viewing the exported outputs in Viewing
Apps tabs.
Fixed Layout: InDesi
children's eBooks and for complex non-fiction like cookbooks and textbooks. Unlike standard eBooks, fixed layout
eBooks retain the same page layout and design, as their print book counterparts. You can export your InDesign
document to a fixed layout EPUB format. You can control the way the layout would appear on a digital reader using
this feature. Select File > Export > EPUB (Fixed Layout) from Save as type, to explore this format.
gn now supports this format that is interesting and interactive. This format is used widely for
Last updated 6/14/2014
Page 9
What's New
EPUB Fixed Layout
Customizable object width and height in CSS: You can now customize the height and width of an object in a CSS file
in the Object Export Options dialog box (reflowable layout only).
2
New EPUB type markup: A n
ew EPUB type helps improve the accessibility of components in EPUB export design.
This new epub:type (Object Export Options > EPUB and HTML) helps you define the elements in a publication and
design the intended reading order for the reader of the EPUB file.
Writing improved CSS for table and cells styles: T
nd cell styles now get mapped appropriately to the CSS. If a
able a
table is not used, InDesign creates no unnecessary CSS files.
Metadata:
h Reflowable/Fixed Layout tabs.
bot
Viewing Apps (Export): A V
You can update the file info or metadata of your InDesign file and the same EPUB data gets populated in
iewing Apps tab has been introduced in both Reflowable and Fixed Layout EPUB export
options. Viewing Apps displays the applications that you can configure to open or view the EPUB files.
A. Add EPUB viewers in Viewing Apps tab
Many significant improvements and enhancements have been made to the EPUB capability of InDesign. (To see the list
of all changes, refer to InDesign_EPUB_Changes_CC_9.2_to_10.0 pdf .)
B. Select the viewer for EPUB output
Last updated 6/14/2014
Page 10
What's New
More Help topics
Export content to HTML
Improvements to tables
As part o f en han cemen ts to t abl es i n InDesig n, y ou now get the abili ty t o simply dra g-and -dr op t able r ows and c olu mns
from one position to another within the same table. Select the rows you want to copy or duplicate, hover over the
selected rows, a unique cursor indicating that the selection can be moved is displayed. The item row can be simply
dragged and dropped (or copied with an 'Alt' key pressed).
3
You can also copy the contents from header and footer rows t
rows can also be duplicated and converted to header and footer rows.
For more information, see Creating tables.
Simplified working in tables
o b
ody rows (by pressing Alt/Opt key). Likewise, body
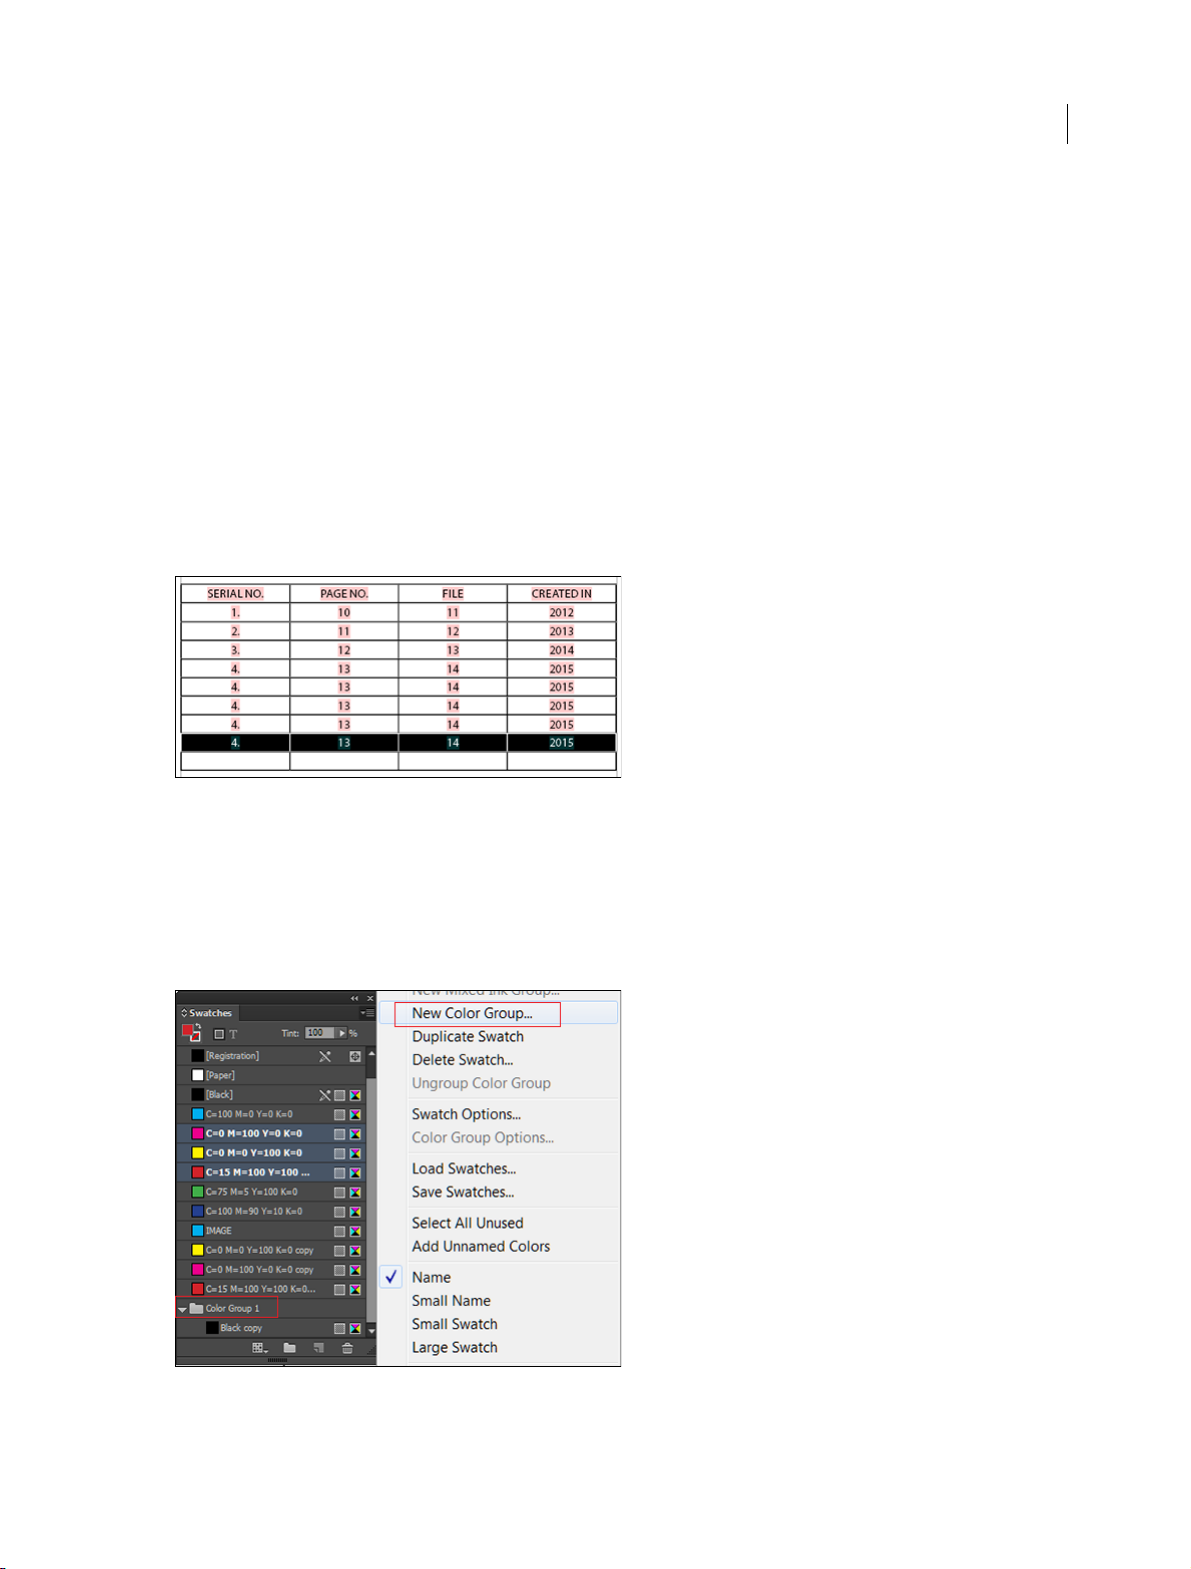
Color groups
You can now create and manage color groups in InDesign. Simply create Color Groups from the Swatches panel
through the new Color Group icon or from the flyout and context menu. You can also share the color groups with
another application using Adobe Swatch Exchange (.ase) files. For example, load color swatches from another project
in Illustrator.
Create and manage color swatches with color groups
For details, see Apply color.
Last updated 6/14/2014
Page 11
What's New
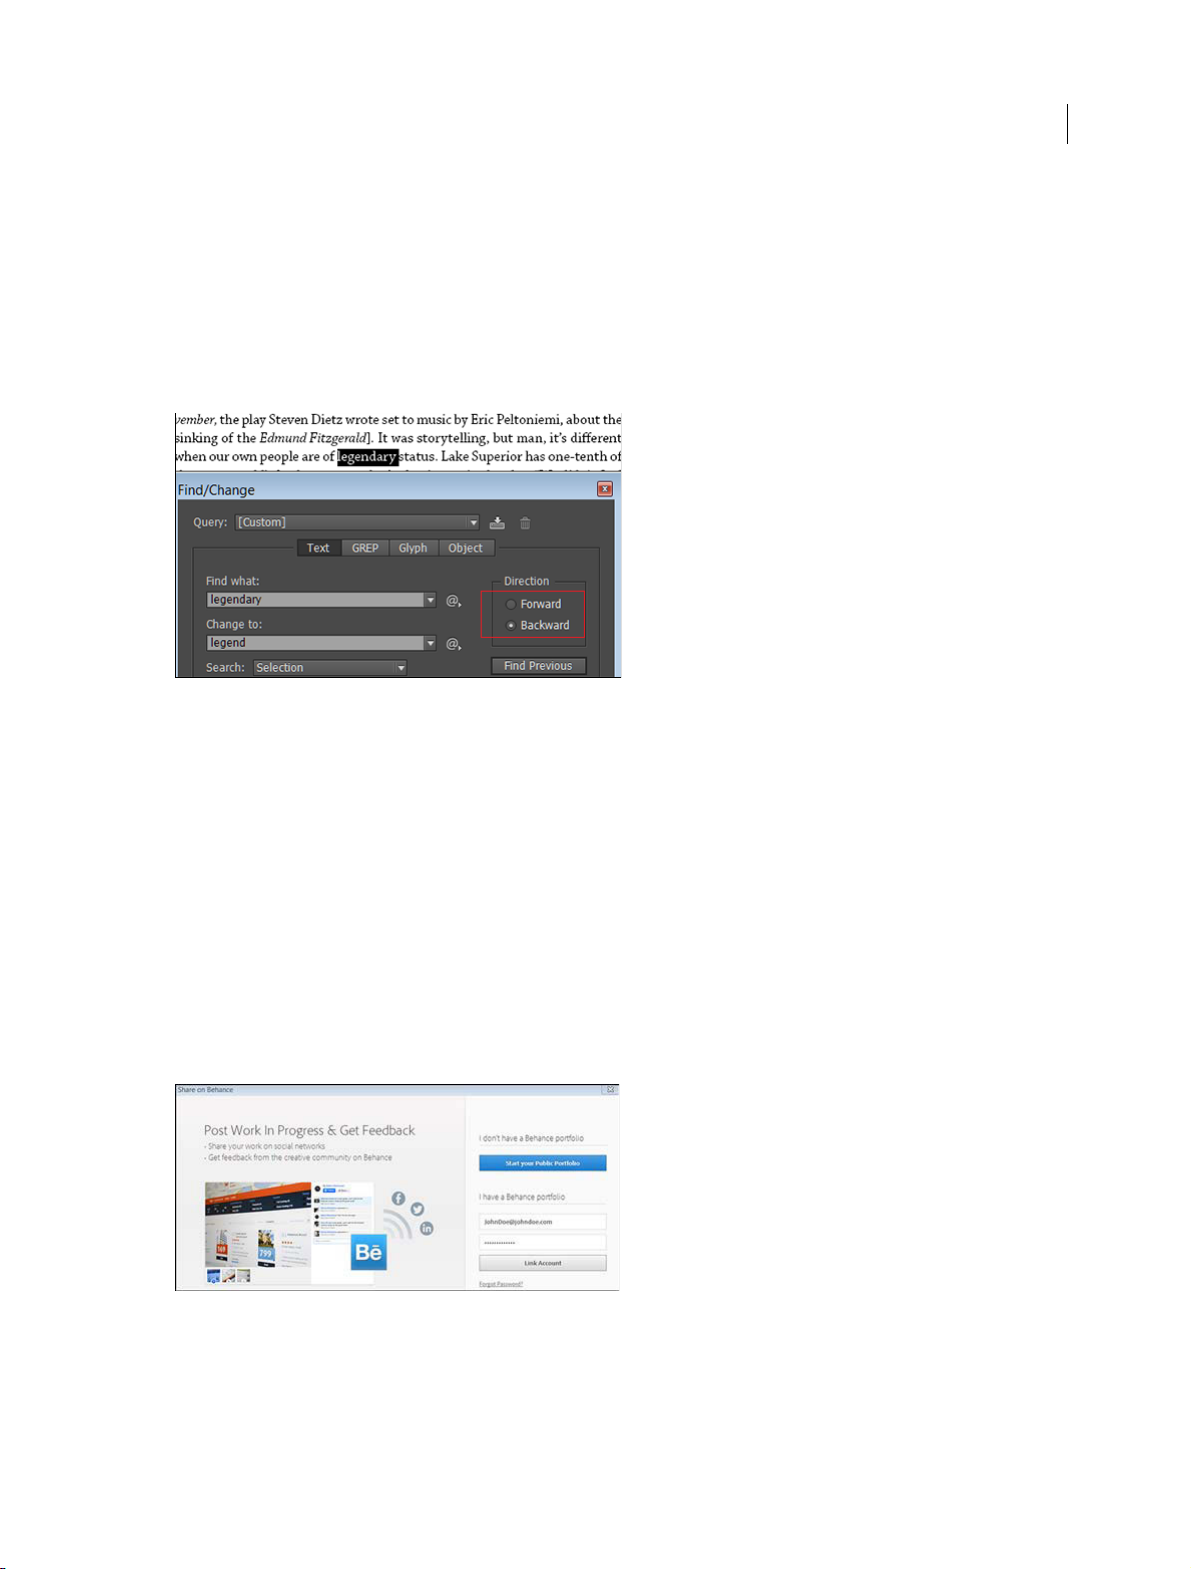
Enhanced search - Find Previous
In previous InDesign versions, users could only search in forward direction. It meant that if you skipped over an item
too fast and wanted to go back, the only way was to complete the find operation and start over again. This workflow
has been improved now.
The Find/Change dialog in InDesign now has two search direction buttons - Forward and Backward. As search forward
is ena
search strings in Text, GREP, and Glyph tabs.
y default, you can switch to Backward to reverse the flow of the search. The new functionality helps you
bled b
4
Enhanced Search
For more information, see Find/Change overview.
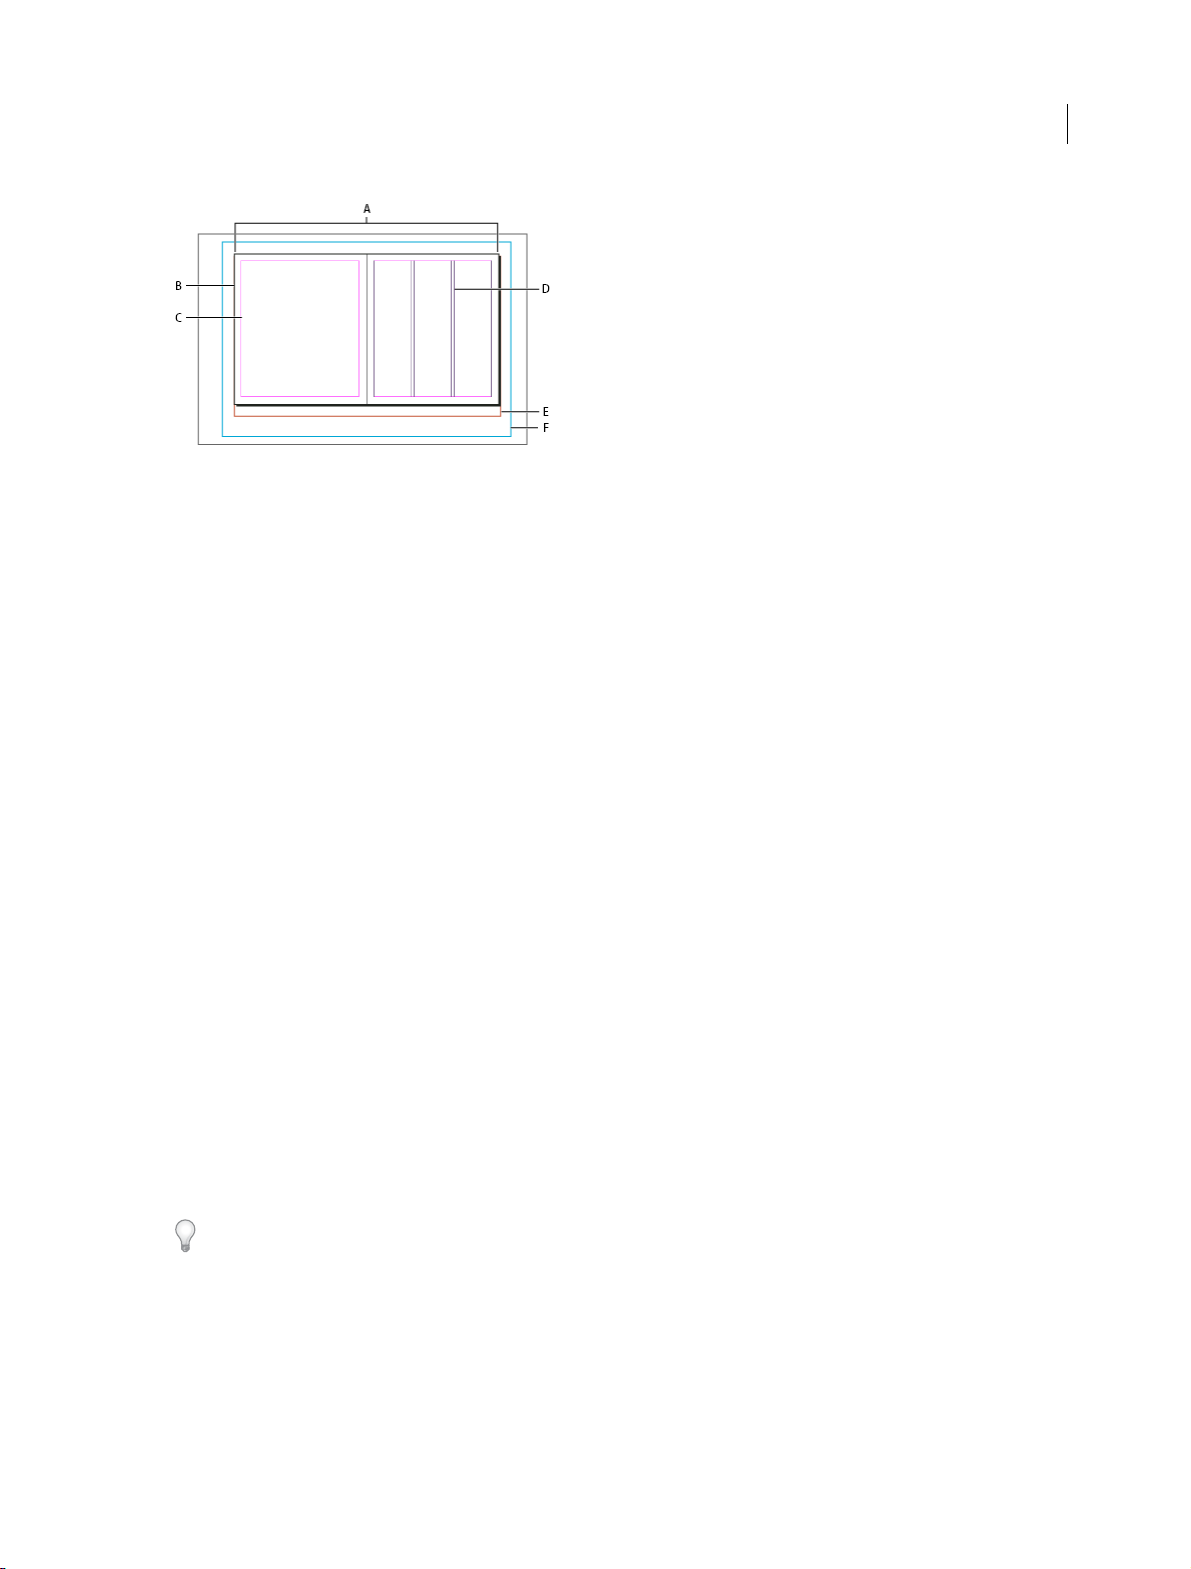
Behance integration
Showcase and discover creative work on Behance. As a member, you can create a portfolio of your work and broadcast
it widely and efficiently. Or, explore the latest creative work on a global scale by browsing featured or popular work
across fields.
You can upload spreads as work-in-progress to Behance directly from within InDesign. Spreads are converted to images
a
shared on Behance for review and feedback.
nd
At a time, you can upload only one spread from InDesign. To share a complete document, you can share as many times
as t
umber of spreads in the document. Each spread goes as a separate upload and posting on Behance.
he n
For more information, see Share your InDesign work on Behance .
Share on Behance
Last updated 6/14/2014
Page 12

What's New
Improved packaging
From this release, you get the ability to include a PDF and IDML file in any package created from InDesign for
individual documents. An InDesign package now includes INDD, linked files, fonts, IDML, and a PDF (Print).
Enhanced data merge for QR code
Now, you can place a data source containing a QR code in a merged document. The QR code workflow is integrated
with the merged document. The following types of QR code can be linked via data merge in InDesign documents:
• Plain Text
• We b Hyp e r l in k
• Te x t Mess a g e
• Email
• Business Card
Today, if you’re creating business cards for multiple people (in an organization, for example), you can use data merge.
If
you want to add a QR code, you would have to manually create a QR code for every unique business card. With this
ne w update to data me rge, you d on't have to create a QR co de manuall y for each card; th e QR code can be automat ically
created during the data merge.
5
For more information, see Generate QR codes
Footnote enhancements
You can now apply textwrap to an anchored or floating object that is part of a footnote. This enhancement works on
both rectangular and non-rectangular text frames.
If a floating object (not anchored or inline) on which textwrap is applied interacts with footnote text, text wrap takes
effe
ct.
For more information, see
HiDPI support for Windows
InDesign now supports HiDPI for Microsoft Windows across a wide variety of DPI display settings. You can view sharp
and clear User Interface elements, visually appealing under various scaling factors. HiDPI support enables the display
of text and complex artwork in greater clarity, and in colors and hues that are more vibrant.
Scalable effects
Earlier, transparency effects applied on an object in InDesign did not scale with the object. Now, all effects get applied.
Effects such as drop shadows properly scale as you change the scale of an object or text. With the new Scalable Effects
feature, an option to scale the transparency effects while scaling an object has been added in the Control panel and
Transform panel flyout menus. You can activate scaling using this option.
For more information, see Scalability of an effect.
Last updated 6/14/2014
Page 13

What's New
Modernization - Changes to panels
Tool Hints panel
As part of modernization, the Tool Hints panel has been converted from Flash technology to HTML5. This panel
(Windows >Utilities >Tool Hints) displays information about tool name, toolhint, and tool icon of the selected tool. It
was earlier APE (Flash) based extension, the panel is now a CEP HTML5 based extension.
Background Tasks panel
The Background Tasks panel (Window > Utilities > Background Tasks) is used to monitor the progress of ongoing
background tasks. It also allows the user to cancel an ongoing background task. This panel was earlier APE (Flash)
based and has now been converted to run on the drover User Interface technology.
6
Last updated 6/14/2014
Page 14

Chapter 2: Workspace and workflow
Create new documents
Page design begins with the basics: starting a new document, setting up pages, and positioning margins and columns
or changing grid settings.
Create a new document
1 Choose File > New > Document.
The New Document dialog box combines the Document Setup and the Margins And Columns dialog boxes, so that
you
can set up the page size, margins, and page columns all in one place. You can change these settings at any time.
2 Specify document setup options. (See New Document options .)
To specify the dimensions of the bleed and slug areas, click the Arrow button before the Bleed and Slug label. The
ble
ed and slug areas extend out from the edges of the defined Page Size. To make the bleed or slug areas extend
evenly on all sides, click the Make All Settings The Same icon .
7
3 (Only in InDesign CC) Select the Preview checkbox to see how your new document will look like. Make necessary
changes if required.
4 Click OK to open the new document with the settings you specified.
To set default layout settings for all new documents , choose File > Document Setup or Lay out > Margins And Columns,
and set options when no documents are open.
New Document options
Document Preset Choose a preset that you have saved earlier.
Intent If you are creating a document to be output to PDF or SWF for the web, choosing the Web option changes
several options in t he dialog box, such as turning off Facing Pages, changing the orientation from portrait to landscape,
and using a page size based on monitor resolution. You can edit any of these settings after the document is created.
CS6 and later:
also change the intent of the document after it is created.
Number of pages Specify the number of pages to create in the new document.
Start Page # Specify which number the document starts on. If you specify an even number (such as 2) with Facing
Pages selected, the first spread in the document begins with a two-page spread. See Start a document with a two-page
spread .
Facing Pages Select this option to make left and right pages face each other in a double-page spread, such as for books
and magazi nes. Deselect this option to let each page stand alone, such as w hen you’re printing flyers or posters or when
you want objects to bleed in the binding.
tal publishing intent has been added for publications aimed for the Digital Publishing Suite. You can
Digi
After you’ve created a document, you can use the Pages panel to create spreads with more than two pages or force the
f
wo pages to open as a spread. (See Control spread pagination .)
irst t
Last updated 6/14/2014
Page 15

Workspace and workflow
Master Text Frame CS5.5 and earlier: Select this option to create a text frame the size of the area within the margin
guides, matching the column settings you specified. The master text frame is added to the A Master. (See Using text
frames on master pages.)
The Master Text Frame option is available only when you’ve chosen File > New > Document.
Primary Text Frame CS6 and later: select this option to add a primary text frame on the master page. When you apply
a new master page, the story in the primary text frame automatically flows into the primary text frame of the new
master page.
Page Size Choose a page size from the menu, or type values for Width and Height. Page size represents the final size
you want after bleeds or other marks outside the page are trimmed.
Orientation Click Portrait (tall) or Landscape (wide). These icons interact dynamically with the dimensions
you enter in Page Size. When Height is the larger value, the portrait icon is selected. When Width is the larger value,
ndscape icon is selected. Clicking the deselected icon switches the Height and Width values.
the la
Ti p:
To specify the dimensions of the bleed and slug areas, click the Arrow button before the Bleed and Slug label in the
Document dialog box. To make the bleed or slug areas extend evenly on all sides, click the Make All Settings The
New
Same icon .
Bleed The Bleed area allows you to print objects that are arranged at the outer edge of the defined page size. For a page
of the required dimensions, if an object is positioned at its edge, some white may appear at the edge of the printed area
due to slight misalignment during printing or trimming. For this reason, you should position an object that is at the
edge of the page of the required dimensions a little beyond the edge, and trim after printing. Bleed area is shown by a
red line on the document. You can set bleed area settings from Bleed in the Print dialog box.
8
Slug The slug area is discarded when the document is trimmed to its final page size. The slug area holds printing
information, customized color bar information, or displays other instructions and descriptions for other information
in the document. Objects (including text frames) positioned in the slug area are printed but will disappear when the
document is trimmed to its final page size.
Objects outside the bleed or slug area (whichever extends farther) do not print.
Preview (Only in InDesign CC) Select this checkbox to see how your new document will look like. Make necessary
changes to the options if the preview is not as desired.
Note: You can also click the Save Document Preset icon to save document settings for future use.
Document window overview
Each page or spread in your document has its own pasteboard and guides, which are visible in Normal View mode. (To
switch to Normal View, choose View > Screen Mode > Normal.) The pasteboard is replaced with a gray background
when the document is viewed using one of the Preview modes. (See Preview documents.) You can change the color of
this preview background and guides in Guides & Pasteboard preferences.
Last updated 6/14/2014
Page 16
Workspace and workflow
Document and guides in Normal View Mode
A Spread (black lines) B Page ( black lines) C Margin guides (magenta lines) D Column guides (violet lines) E Bleed area (red lines) F Slug area
e lines)
(blu
Document window notes:
• Lines of other colors are ruler guides which, when present, appear in the layer color when selected. See Layers .
• Column guides appear in front of margin guides. When a column guide is exactly in front of a margin guide, it hides
the margin guide.
9
Create custom page sizes
You can create custom page sizes that appear in the Page Size menu in the New Document dialog box.
1 Choose File > New > Document.
2 Choose Custom Page Size from the Page Size menu.
3 Type a name for the page size, specify page size settings, and then click Add.
The New Doc Sizes.txt file that lets you create custom page sizes in previous version of InDesign is not available in
InDe
sign CS5 or later.
Define document presets
You can save document settings for page size, columns, margins, and bleed and slug areas in a preset to save time and
ensure consistency when creating similar documents.
1 Choose File > Document Presets > Define.
2 Click New in the dialog box that appears.
3 Specify a name for the preset and select basic layout options in the New Document Preset dialog box. (See New
Document options for a description of each option.)
4 Click OK twice.
You can save a d ocument preset to a s eparate f ile and distr ibute i t to oth er use rs. To save and load docume nt pres et files,
use the Save and Load buttons in the Document Presets dialog box.
Create a document using a preset
1 Do one of the following:.
• Choose File > Document Preset > [name of preset]. (Hold down Shift while choosing the preset to create a new
document based on the preset without opening the New Document dialog box.)
Last updated 6/14/2014
Page 17

Workspace and workflow
• Choose File > New > Document, and then choose a preset from the Document Preset menu in the New
Document dialog box.
The New Document dialog box displays the preset layout options.
2 Make changes to the options (if desired) and click OK.
To skip the New Document dialog box, press the Shift key as you select a preset from the Document Preset menu.
More Help topics
Recommended workflow for InDesign documents
Use document templates
Add documents to a book file
Change document setup, margins, and columns
Sync Settings using Adobe Creative Cloud
10
Introduction
When you work on multiple computers, managing and syncing glyph sets, menu customizations, keyboard shortcuts,
custom workspaces, and PDF presets among the computers could be a chore.
The new Sync Settings feature enables individual users to sync their settings using Creative Cloud. If you use two
comp
uters, for example, one at home and another at work, the Sync Settings feature makes it easy for you to keep those
settings synchronized on these two computers. Also, if you have replaced your old computer with a new one and have
reinstalled InDesign, you can get the application set up quickly with all your settings in place by just pressing a button.
Note: A
t any given time, you can activate InDesign on two computers only.
The
syncing happens via your Adobe Creative Cloud account. All the settings are uploaded to Creative Cloud and then
wnloaded and applied on the other computer.
are do
All sync operations are initiated by users. They cannot be scheduled or performed automatically (such as at launch or
du
ng shutdown).
ri
Prerequisites for this feature to work:
• Computers should be connected to the Internet.
• You have signed into your Adobe Creative Cloud account on both computers.
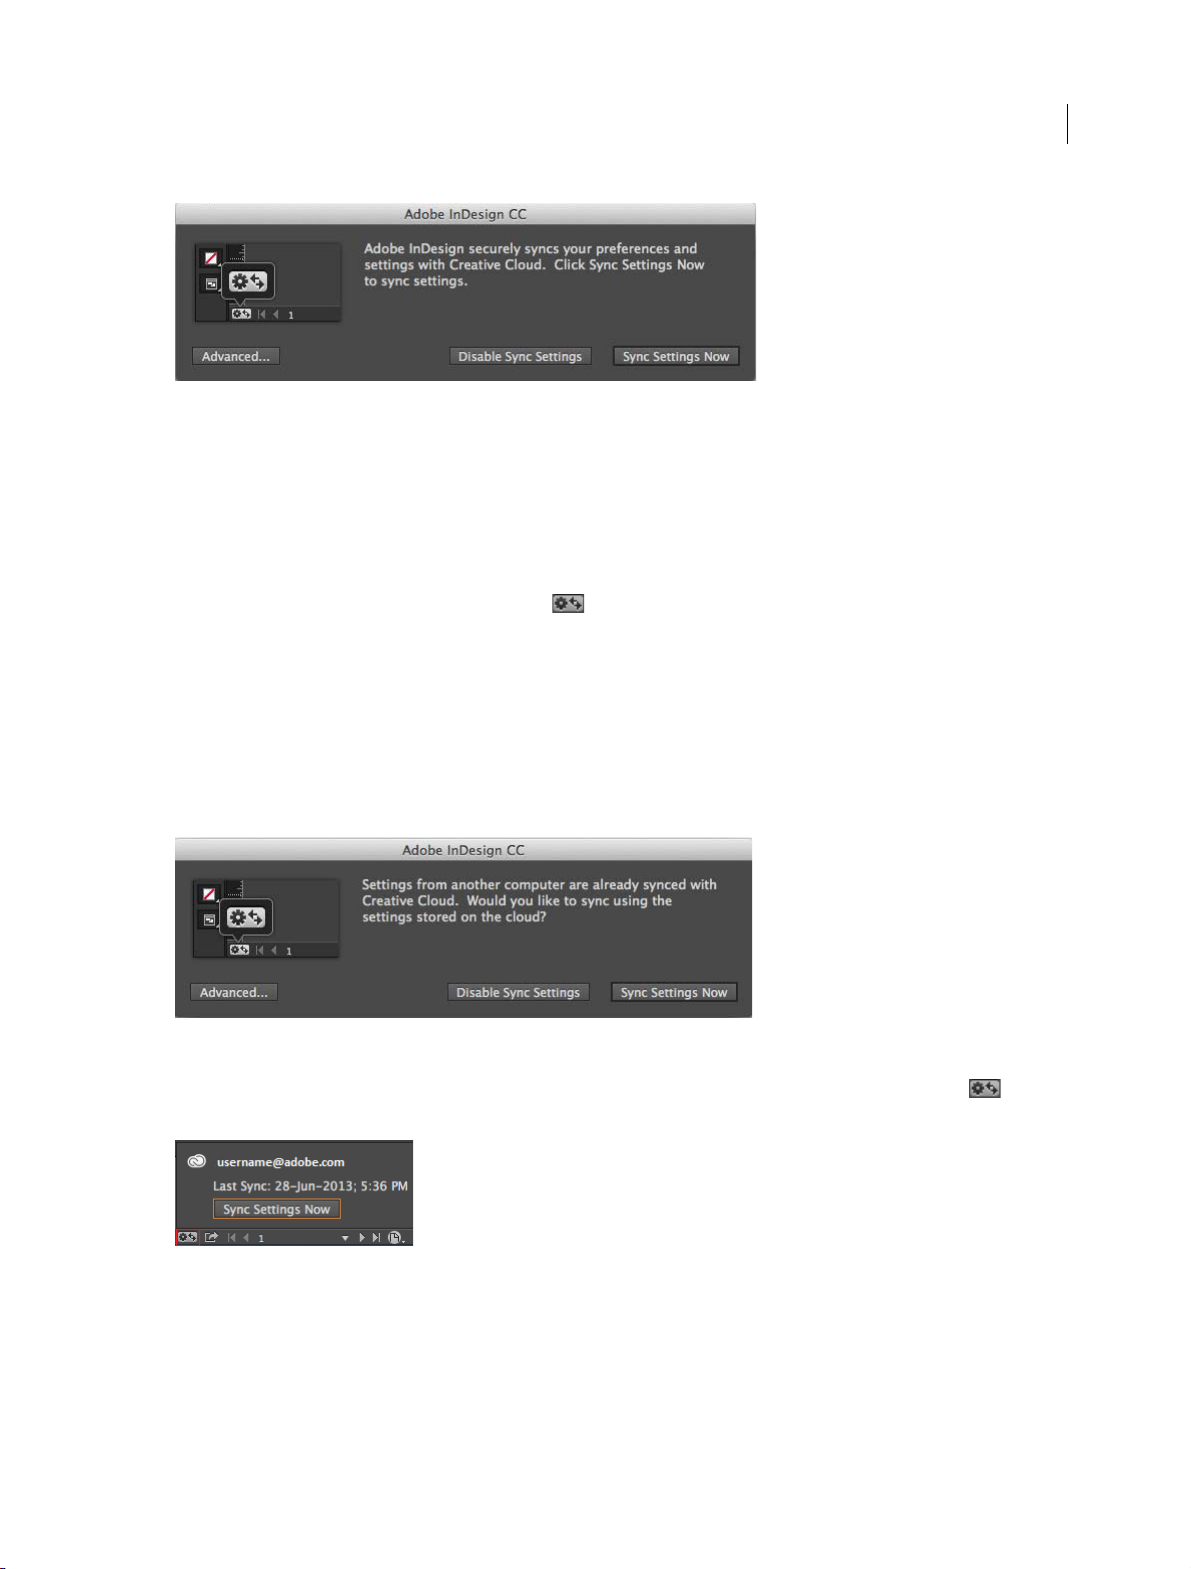
Sync settings at first launch
After installation, when you launch the application and create a document or open an existing document for the first
time, you will see a prompt asking whether you want to start the sync.
Last updated 6/14/2014
Page 18
Workspace and workflow
• Click Sync Settings Now to initiate the sync.
• Click Disable Sync Settings to disable the feature.
• Click Advanced to open the Preferences dialog, where you can choose and customize what items are synchronize.
Using the sync settings feature
Do any one of the following:
• [Recommended] Click the Sync Settings icon ( ) at the lower-left corner of the InDesign active document
window, and then click Sync
• ClickEdit (Mac:InDesign) > {AdobeID logged in} > Sync Settings Now.
Settings Now.
11
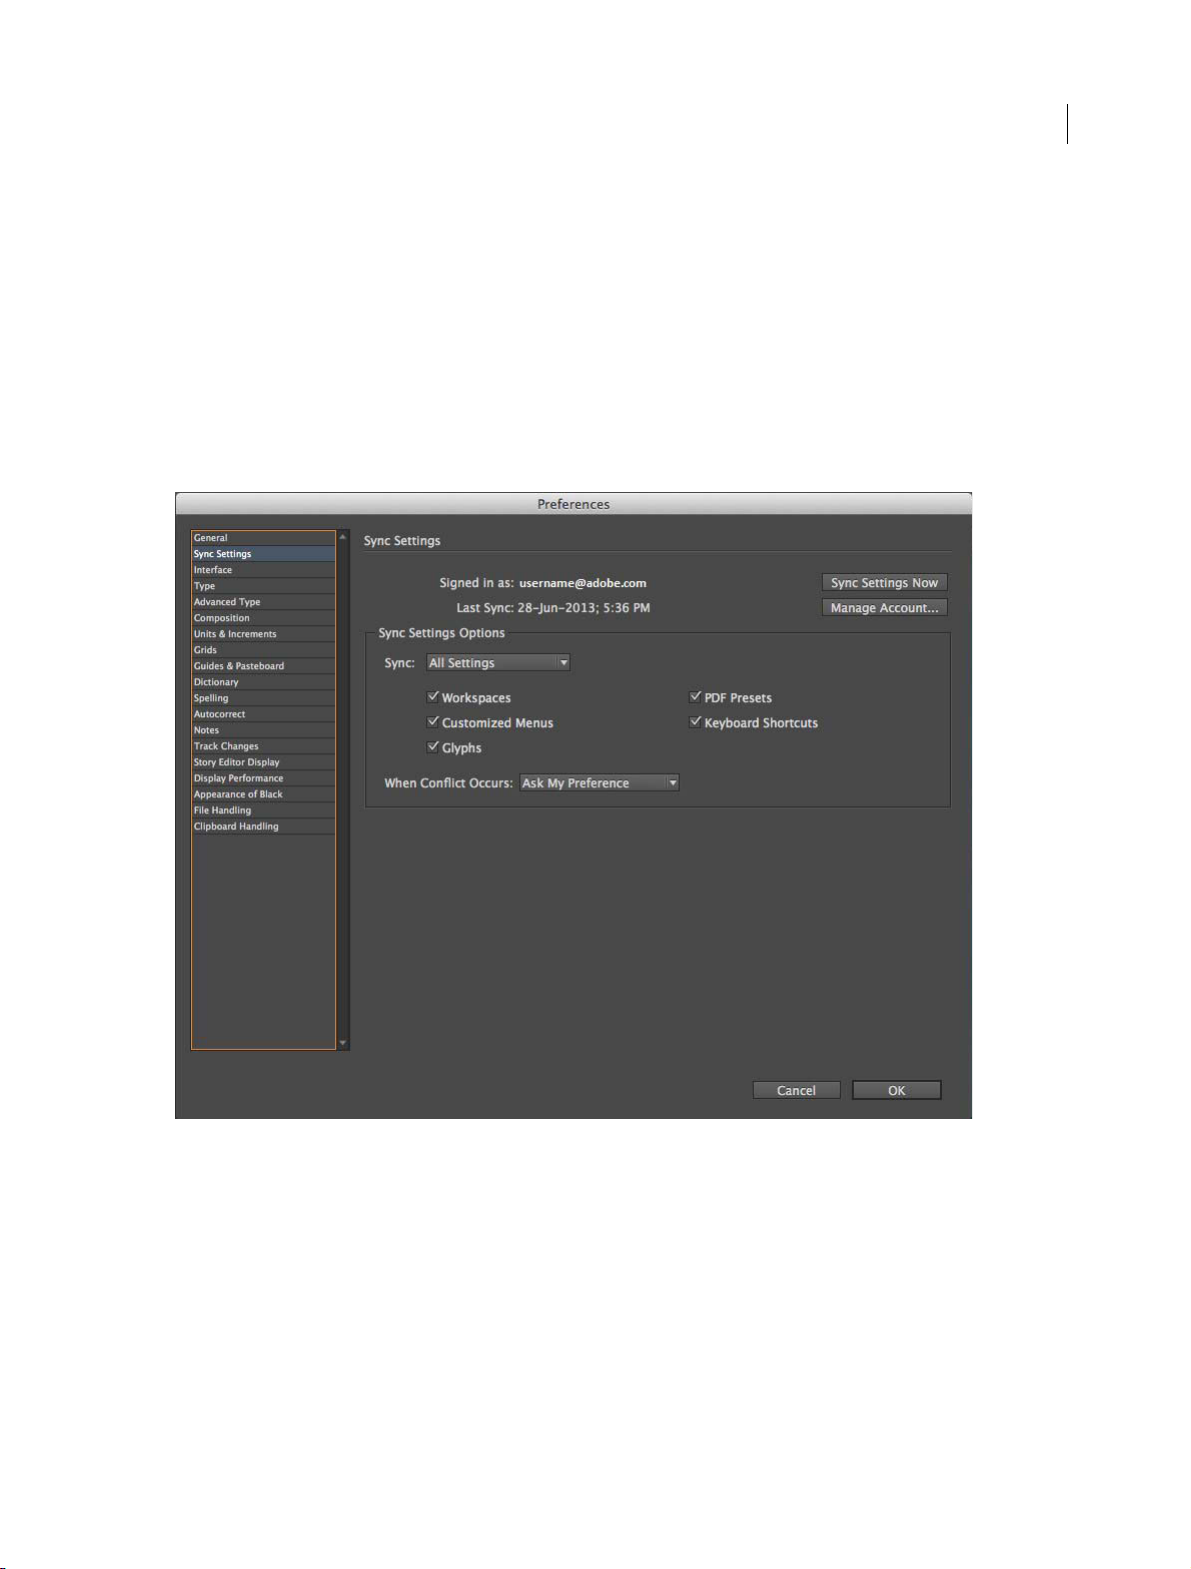
Sync settings on successive launches
When you launch InDesign with prior sync information available, and create a document or open an existing document
for the first time, you will see a prompt asking whether you would like to sync the setting from the cloud. To initiate the
sync, click Sync Settings Now.
The settings are downloaded to your local computers and are updated in the application. If you change glyph sets,
keyb
oard shortcuts, custom workspaces, or PDF presets, you should initiate sync before you close the application. You
can see the sync status in the left-bottom corner of the document status bar. Click the Sync Settings icon ( ) in the
status bar and then click Sync Settings Now.
Managing sync
What gets synced
• Wo r k sp a c es
Last updated 6/14/2014
Page 19
Workspace and workflow
• Menu sets
• PDF presets
• Keyboard shortcuts
• Glyphs sets
Choose what you want to sync
Navigate to the Preferences > Sync Settings tab:
• Click Edit (Mac: InDesign) > {AdobeID logged in} > Manage Sync Settings. or
• ClickEdit (Mac: InDesign) > Preferences > Sync Settings.
12
Select the checkboxes for the settings that you want to sync. You can also choose what to do in case of conflict.
Note: T
o sync your settings successfully, you must change the settings only from within the application. The sync settings
ature does not sync any file that is manually placed in a folder location.
fe
Choose an option in case of conflict
There are situations when the system could detect sync conflicts. Sync conflicts occur when the system is unable to
determine whether you want a setting from Creative Cloud or from your local computer to be retained since both have
been changed after the last sync operation.
Last updated 6/14/2014
Page 20

Workspace and workflow
Suppose that you change PDF presets on your work computer and sync settings to the Cloud. You then go home and
change the same presets on your home computer without syncing with the cloud first. Now since the settings in the
cloud and the settings on your home computer are both updated, conflict occurs when your try to sync. If you try to
sync in this state, you see a conflict prompt.
• Sync Local: Sync local settings on this computer to the cloud; overwrite the cloud version with the local version of
settings.
• Sync Cloud: Sync from the cloud to this local computer; ignore changes made to the local settings and replace them
with the settings in the cloud.
What’s not supported
• Keyboard shortcuts created for Windows will only sync with a Windows computer. Mac keyboard shortcuts will
only sync with a Mac computer.
• Assets saved to a custom location are not synced.
13
• Any modifications (for example: rearrangement of panel) made after creation of the Workspace will not be synced.
For Workspace syncing, first set up your working environment and then create a workspace and initiate the sync
process.
Saving documents
Save documents
Saving a document saves the current layout, references to source files, which page is currently displayed, and the zoom
level. Protect your work by saving often. You can save a file as any of the following:
• A regular document.
• A copy of the document, which creates a duplicate of the document under a different name, leaving the original
document active.
• A template, which normally opens as an untitled document. A template can contain settings, text, and graphics that
you preset as a starting point for other documents.
Saving a document also updates the metadata (or file informa
metadata includes a thumbnail preview, fonts used in the document, color swatches, and all metadata in the File Info
dialog box, all of which enable efficient searching. For example, you might want to search for all documents that use
a particular color.
n) that is part of the InDesign document. This
tio
You can view this metadata in Bridge and in the Advanced area of the File Info dialog box. You can control whether
to
update the preview when you save by using a preference setting. The other metadata (fonts, colors, and links) are
updated whenever you save a document.
Last updated 6/14/2014
Page 21

Workspace and workflow
The Save, Save As, and Save a Copy commands store documents in the InDesign file format. For information about
storing documents in other file formats, see the Index.
If you’re saving a document in order to bring it to a prepress service provider for final output, InDesign can
a
omatically collect all necessary files, such as linked graphics and fonts, in one folder. (See Package files.)
ut
14
Note: The information entered in the File > File Info dialog box g
EPUB in the following formats:
ets updated in the Metadata tab when you export an
• Fixed Layout EPUB
• Reflowable EPUB
❖ Do one of the following:
• To save a document under a new name, choose File > Save As, specify a location and filename, and click Save.
The newly named file becomes the active document. Using the Save As command might reduce the file size.
• To save an existing document under the same name, choose File > Save.
• To save all open documents to their existing locations and filenames, press Ctrl+Alt+Shift+S (Windows) or
Command+Option+Shift+S (Mac OS).
• To save a copy of a document under a new name, choose File > Save a Copy, specify a location and filename, and
click Save. The saved copy does not become the active document.
Note: To avoid problems, avoid reserved characters that have special meanings in some operating systems. For example,
oid filenames with spaces, tabs, or initial periods, or filenames that use these characters: / \ : ; * ? < > , $ %. Similarly,
av
avoid using characters with accents (such as ü, ñ, or é), even when using a non-English version of InDesign. Problems may
occur if the file is opened in a different platform.
If you have frequently work with several documents open at the same time and want to save them all at once, use a
keyboard shortcut. Choose Edit > Keyboard Shortcuts, choose Views, Navigation from the Product Area menu, and
s
ct Save All in the Commands list. You can then edit or add a shortcut. You can use Quick Apply to specify the Save All
ele
command.
Include previews in saved documents
Thumbnail previews of documents and templates provide easy identification of those files in Adobe Bridge and Adobe
Mini Bridge. A preview is created when you save a document or template. A document preview includes a JPEG image
of only the first spread; a template preview includes a JPEG image of each page in the template. You can control the size
of the preview and the number of pages to suit your needs. For example, Extra Large 1024x1024 enables you to quickly
scan the contents of a page at high-resolution before you open the file.
You can enable the option in Preferences or in the Save As dialog box. Because previews increase both file size and the
tim
t takes to save the document, you may prefer to enable the option on demand using the Save Asdialog box.
e i
1 Do one of the following:
• To include a preview every time you save a document, choose Edit > Preferences > File Handling (Windows) or
InDesign > Preferences > File Handling (Mac OS).
• To include a preview for a specific document, choose File >Save As.
• To include a preview for a specific document, choose File > Save Content As.
2 Select Always Save Preview Images With Documents.
3 If you are setting the preview using the Preferences dialog box, choose the number of preview pages from the Pages
menu, and choose an option from the Preview Size menu.
Last updated 6/14/2014
Page 22

Workspace and workflow
Note: Selecting the preview option in the Save As dialog box also selects the option in the Preferences dialog box, and
uses the default Pages and Preview Size settings.
Save an InDesign Markup (IDML) document
In some cases you may want to save an InDesign in interchange markup format. It’s especially useful to save in this
format when you open a QuarkXPress or PageMaker publication in InDesign, when you open a document created in
a previous version of InDesign, or when you’re experiencing problems with your document, such as not being able to
delete color swatches.
1 Choose File > Save (CS6) or File > Export (CS5).
2 From the Save As Type (Windows) or Format (Mac OS) menu, choose InDesign Markup (IDML).
3 Click Save.
You can open the saved IDML file in InDesign CS5 and InDesign CS4 but not in any previous version of InDesign.
For information on using IDML for development purposes, see
www.adobe.com/go/learn_id_indesignmarkup_cs4_en.
Save backwards to the previous InDesign version
To open an InDesign CS6 document in InDesign CS5, in InDesign CS6, Save (File > Save) the document to the
InDesign Markup Language (IDML). (The IDML format replaces the Interchange INX format used for saving
backwards in previous versions.)
15
To open an InDesign CS5 document in InDesign CS4, in I
InDesign Markup Language (IDML). (The IDML format replaces the Interchange INX format used for saving
backwards in previous versions.)
Ensure that the computer running the previous version of InDesign is updated with the appropriate plug-ins so that it
c
pen the exported IDML file. The person running the previous version of InDesign can obtain the compatibility
an o
plug-i ns by ch oosing Help > Updates and foll owing the prompt s. Plug-ins c an also b e installed from the Adobe web site :
Vi si t Product updates page on the Adobe website, and choose InDesign from the product list.
Opening a document in a previous version of InDesign is also referred to as “saving down.”
Note: C
ontent created using features specific to the later version
the document in a previous version of InDesign.
1 Choose File > Save (CS6) or File > Export (CS5).
2 From the File Type (Windows) or Format (Mac OS) menu, choose InDesign Markup (IDML).
3 Click Save.
You can open the .idml file in previous version of InDesign t
Note: To open the InDesign CS5 document in InDesign CS3, open the exported IDML file in InDesign CS4, save it and
expor
t it to InDesign CS3 Interchange (INX), and then open the exported INX file in InDesign CS3. Make sure that all
InDesign versions are up to date.
nDesign CS5, exp
of InDesign may be modified or omitted when you open
o convert it to an untitled InDesign document.
ort (File > Export) the document to the
Work with metadata
Metadata is a set of standardized information about a file, such as author name, resolution, color space, copyright, and
keywords applied to it. You can use metadata to streamline your workflow and organize your files.
About the XMP standard
Last updated 6/14/2014
Page 23

Workspace and workflow
Metadata information is stored using the Extensible Metadata Platform (XMP) standard, on which Adobe Bridge ,
Adobe Illustrator, Adobe InDesign, and Adobe Photoshop are built. XMP is built on XML, and in most cases the
metadata is stored in the file. If it isn’t possible to store the information in the file, metadata is stored in a separate file
called a sidecar file. XMP facilitates the exchange of metadata between Adobe applications and across publishing
workflows. For example, you can save metadata from one file as a template, and then import the metadata into other
files.
Metadata that is stored in other formats, such as Exif, IPTC (IIM), GPS, and TIFF, is synchronized and described with
XMP
s
o that it can be more easily viewed and managed. Other applications and features also use XMP to communicate
and store information such as version comments, which you can search using Adobe Bridge.
In most cases the metadata remains with the file even when the file format changes, for example, from PSD to JPG.
M
ta is also retained when files are placed in an Adobe document or project.
etada
You can use the XMP Software Development Kit to customize the creation, processing, and interchange of metadata.
For example, you can use the XMP SDK to add fields to the File Infodialog box. For more information on XMP and the
XMP SD
isit the Adobe website.
K, v
Working with metadata in Adobe Bridge and Adobe Creative Suite components
Many of the power ful Adobe Bri dge featu res th at a llow y ou to o rgani ze, sea rch, a nd kee p tr ack of y our fi les and versi ons
de
d on XMP metadata in your files. Adobe Bridge provides two ways of working with metadata: through the
pen
Metadata panel and through the File Infodialog box (InDesign) or the Content File Info dialog box (InCopy).
16
In some cases, multiple views exist for the same metadata property. For example, a property may be labeled Author in
o
iew and Creator in another, but both refer to the same underlying property. Even if you customize these views for
ne v
specific workflows, they remain standardized through XMP.
Add metadata using the File Info dialog box
The File Info dialog box displays camera data, file properties, an edit history, copyright, and author information of the
current document. The File Info dialog box also displays custom metadata panels. You can add metadata directly in the
File Information dialog box. Any information you enter in a field overrides existing metadata and applies the new value
to all selected files.
1 Choose File > File Info (InDesign) or File > Content File Info (InCopy).
2 Select any of the following from the tabs at the top of the dialog box:
Use the Right and Left arrows to scroll the tabs, or click the down-pointing arrow and choose a category from the list.
Description Lets you enter document information about the file, such as document title, author, description, and
keywords that can be used to search for the document. To specify copyright information, select Copyrighted from
the Copyright Status pop-up menu. Then enter the copyright owner, notice text, and the URL of the person or
company holding the copyright.
IPTC Includes four areas: IPTC Content describes the visual content of the image. IPTC Contact lists the contact
information for the photographer. IPTC Image lists descriptive information for the image. IPTC Status lists
workflow and copyright information.
Camera Data Inclu des two areas : Ca mera D ata 1 di spl ays re ad- only i nform ati on abo ut the cam era and se tti ngs use d
to take the photo, such as make, model, shutter speed, and f-stop. Camera Data 2 lists read-only file information
about the photo, including pixel dimensions and resolution
Video Data Lists information about the video file, including video frame width and height, and lets you enter
information such as tape name and scene name.
Audio Data Lets you enter information about the audio file, including the title, artist, bit rate, and loop settings.
Last updated 6/14/2014
Page 24

Workspace and workflow
Mobile SWF Lists information about mobile media files, including title, author, description, and content type.
Categories Lets you enter information based on Associated Presscategories.
Origin Lets you enter file information that is useful for news outlets, including when and where the file was created,
transmission information, special instructions, and headline information.
DICOM Lists patient, study, series, and equipment information for DICOM images.
History Displays Adobe Photoshop history log information for images saved with Photoshop. The History tab
appears only if Adobe Photoshop is installed.
Illustrator Lets you apply a document profile for print, web, or mobile output.
Advanced Displays fields and structures for storing metadata by using namespaces and properties, such as file
format and XMP, Exif, and PDF properties.
Raw Data Displays XMP text information about the file.
3 Type the information to add in any displayed field.
4 Click OK to apply the changes.
Export metadata as an XMP file
You c an sa ve m etad ata in an XMP f il e to sha re w ith o ther user s. Th ese X MP fi le s ca n be u sed a s tem pla tes for popu lat ing
InDesign documents and other documents created with XMP-enabled applications. Templates you export are stored in
a shared location that all XMP-enabled applications can access. They also appear in the pop-up menu at the bottom of
the File Infodialog box.
17
1 Choose File >File Info (InDesign) or File > Content File Info (InCopy).
2 Choose Export from the pop-up menu at the bottom of the dialog box.
3 Type a filename, choose a location for the file, and click Save.
To view metadata templates in Explorer (Windows) or the Finder (Mac OS), click the pop-up menu at the bottom
of the File Info dialog box and choose Show Templates Folder.
Import metadata from an XMP file
When you import metadata into a document from an exported XMP template file, you can specify whether to clear all
metadata in the current document and add the new metadata, keep all but the matching metadata, or add matching
metadata to the existing metadata.
❖ Choose File >File Info (InDesign) or File > Content File Info (InCopy).
• Choose an XMP file from the pop-up menu at the bottom of the dialog box, select an import option, and click
OK.
• Choose Import from the pop-up menu at the bottom of the dialog box, select an import option, and click OK.
Then double-click the XMP template file you want to import.
Last updated 6/14/2014
Page 25

Workspace and workflow
Edit metadata in image files
When you generate captions of placed images in InDesign, the metadata from the placed image is used. Although you
can edit the metadata of InDesign documents, you cannot edit the metadata of placed files in InDesign. Instead, change
the metadata of placed images using their original applications, using Finder or Explorer, or using Adobe Bridge or
Adobe Mini Bridge.
1 In InDesign, right-click (Windows) or Control-click (Mac OS) the image, and then choose Edit Original.
You can also choose Edit With and then choose an application such as Adobe Illustrator or Adobe Photoshop.
2 In the original application, choose File > File Info.
3 Edit the metadata, and then click OK.
You can also select an image in Adobe Bridge and choose File > File Info to edit the image metadata. See Add metadata
using the File Info dialog box .
More Help topics
Use document templates
Recover documents
Print thumbnails
18
Work with metadata in Adobe
Understanding a basic managed-file workflow
For detailed information and instructions, click the links below.
Sharing content
The Adobe InCopy LiveEdit Workflow plug-ins let writers and editors develop copy in InCopy at the same time as
designers prepare layouts in Adobe InDesign. This workflow includes container files, called assignments, for grouping
related pieces of content, and file-locking and notification tools for sharing and updating files in InCopy or InDesign
over a shared network or in compressed packages that can be distributed via e-mail.
In the shared network workflow, InDesign users export text and graphics to a shared location on a file system, where
t
he
files become available to InCopy users who will write and edit the content. Selected text frames and graphics frames
are either exported to the assignment or exported as separate InCopy files, where they become part of the managed
process and are linked to the InDesign document. These shared files are referred to as managed files. When users work
in the assignment file or in the InDesign file on a local server, changes to the associated layout or content are
communicated to all users involved in the workflow for that document.
Multiple InCopy or InDesign users can open the same content file simultaneously, and multiple InCopy users can open
t
he s
ame assignment file simultaneously. However, only one user at a time can check out the InCopy file for editing.
Others can view the file on a read-only basis. The user who checks out a managed InCopy file can share his or her work
with other users by saving the file to the shared server or by returning the file to the InDesign user; however, other users
can’t make changes to the file until it’s checked back in. This system allows multiple users to access the same file but
prevents users from overwriting each other’s work.
For more information, see the InCopy LiveEdit Workflow guide (PDF) at www.adobe.com/go/learn_liveedit.
Last updated 6/14/2014
Page 26
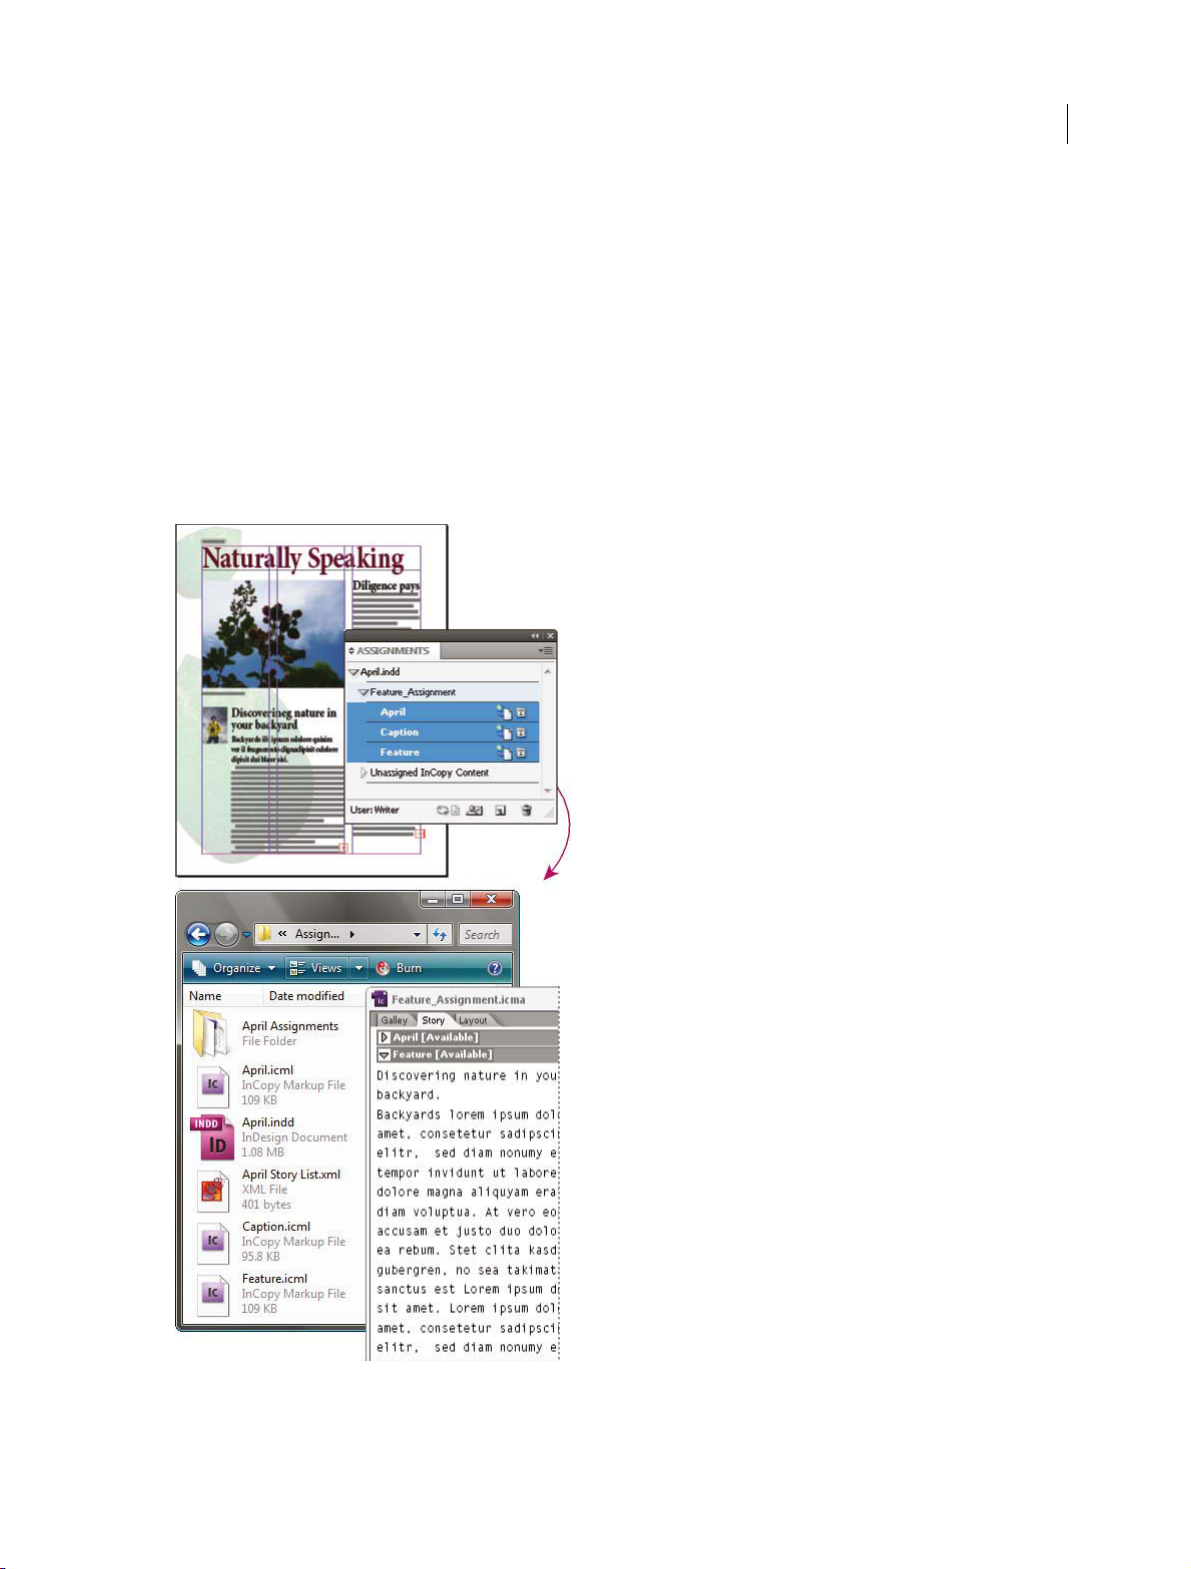
Workspace and workflow
Ways to work with content in InCopy
Content is either a body of text that flows through one or more frames, or an imported graphic. There are five basic
ways to work on content in InCopy: open an assignment file, open an assignment package, open a linked InCopy file,
open an InDesign file that has linked InCopy files, or compose content entirely in InCopy.
Open assignment files created in InDesign
19
InDesign users can create an assignment file and designate co
ent for sharing. This method lets the InDesign user
nt
associate related components (heading, body, graphics, captions, and so on), and then assign them to different InCopy
users for writing and editing. InCopy users open the assignment file and work on only the components assigned to
them. The live layout view shows how their edited copy relates to the InDesign layout, without opening the entire
InDesign document. However, if the layout changes, the InDesign user must update assignments to notify InCopy users
about the changes. You can share assignment files on a server or through assignment packages.
InDesign document (.indd) with assignment file (.icml) composed of three linked content files (.incx). Assignment and its components are listed
in Assignments panel and are opened in InCopy.
Last updated 6/14/2014
Page 27
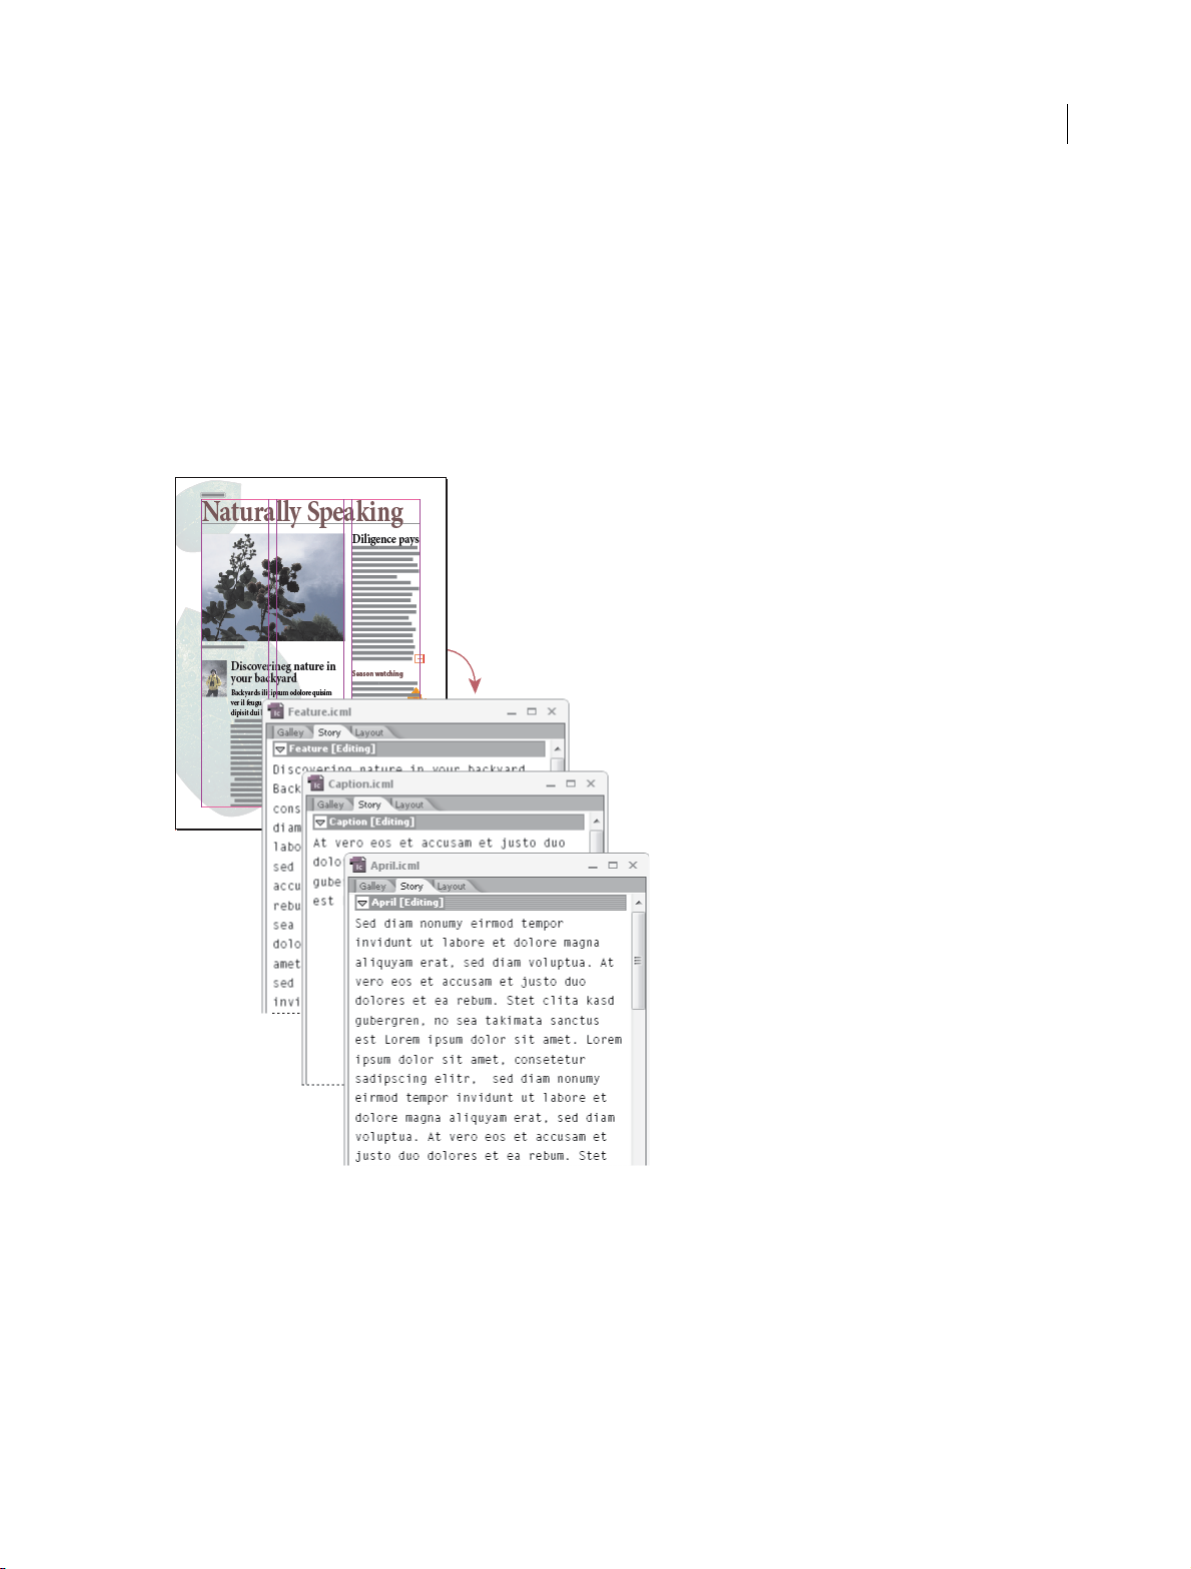
Workspace and workflow
Open assignment packages
20
The a ssignment pa ckages workf low is espe cially usef ul whe n designe
rs and writers are working on the same project but
don’t have access to a local server. In such cases, the InDesign user can create one or more packages and send the
compressed files to the assigned InCopy users via e-mail. InCopy users can open the assignment packages, edit the
contents, and return the packages to the InDesign user, who can then update the document.
Open linked InCopy files exported from InDesign
In cert ain workflows, InDes ign us ers might e xport text and graphics as sep arate f iles, rather than w rapping t hem insi de
a
signment file. Exporting separate files is useful if you work on unrelated graphics or bodies of text. However,
n as
InCopy users aren’t able to see how the content fits within the InDesign layout.
InDesign document (.indd) with three linked but unassigned content files (.icml) opened in InCopy
Open InDesign documents that have linked InCopy files
To see all page items in the context of an entire layout, InCopy users can open and edit an InDesign document in
InC
opy. This approach can be useful for editing and copyfitting if seeing the overall layout is important, or for editing
most of the stories in a document rather than a few. After the InCopy user edits the stories, the InDesign user can then
update the links to the modified files. If the InDesign user changes the layout, the InCopy user is notified when the
InDesign document is saved.
Compose content entirely in InCopy
Last updated 6/14/2014
Page 28

Workspace and workflow
You can create content in InCopy that isn’t associated with an InDesign file. In these stand-alone documents, you can
type text, assign fonts and styles, and import graphics from other applications (such as Adobe Illustrator and Adobe
Photoshop) to enhance the text. You can also assign tags for future XML use. This approach is a good option in an
editorial workflow where the content precedes the design. You can also set up and modify the text area, page size, and
orientation for stand-alone InCopy documents. But if the story is later linked to an InDesign document, the InDesign
settings override the settings used in InCopy.
Managed files
For a file to be managed, it must be added to an assignment file, exported from InDesign as InCopy content, or placed
as InCopy content into InDesign. Managed files communicate both content status and ownership. With managed files,
you can:
• Lock and unlock stories to help preserve file integrity.
• Notify InCopy users when the associated InDesign layout is outdated.
• Identify the user working on a file.
• Notify users when an InCopy content file is outdated, being used by someone, or available for editing. Notification
methods include alert messages, frame icons, status icons in the Links panel, and status icons in the Assignments
panel.
21
Read-only files
Once a content file becomes managed, it’s re
has checked it out. The software creates a lock file (*.idlk) when a user checks out a content file, giving that user
exclusive editing control. Read-only files have the following characteristics:
-only to all users in the workflow at all times, except to the person who
ad
• An InCopy user cannot manually format the text in it. However, if text has been assigned character or paragraph
styles, an InDesign user can change the definition of those styles, thereby changing the formatting of the text even
when the file is checked out to someone else. These style definition changes are reflected in the text once the
InDesign user updates the file.
• In general, neither an InCopy nor InDesign user can change objects, such as text and applied styles, in locked
InCopy content. Some objects, such as character and paragraph styles, are only used by the content. For example,
you can’t change how a character style is applied to objects in locked content, but you can change the character style
itself, thereby changing the appearance of the text.
• An InDesign user can change the margins and columns of the text content as well as the shape, location, and number
of text frames the story occupies.
• An InDesign user can change the geometry and formatting of a graphics frame without checking out the graphic.
An InCopy user cannot change a graphics frame or any formatting on the frame. However, both InDesign and
InCopy users have to check out the graphics frame in order to modify the graphic itself (for example, to rotate or
scale it).
Best practices for working with managed files
Use the following practices to make sure that you work with the most up-to-date content and don’t overwrite someone
else’s work:
• Store assignment files on a server where all team members have access. If team members don’t have access to a
server, you can create and distribute assignment packages.
Last updated 6/14/2014
Page 29

Workspace and workflow
• When you create an assignment, a special folder is created to hold the assignment file and the content. Use these
assignment folders to maintain assignment and content files. They simplify managing the shared files across a
workgroup and help ensure that users open the correct files.
• In InCopy, open the assignment file instead of an individua l InCopy sto r y. That way, you can s ee the c opyfit and
layout information in Galley and Layout views. If you export content without using assignment files, you can see
copyfit and layout information only by opening the InDesign file.
• As soon as you open an assignment file, open an InDesign document, or check out content in either InDesign or
InCopy; make sure that frame edges are showing (View > Extras > Show Frame Edges) so that you can see the frame
icons when they appear.
• In InDesign, if you must remove files from the workflow (because of a production deadline, for example), you can
unlink them or cancel an assignment package.
Managed-file workflow examples
When you establish workflow management between InCopy and InDesign, writers and editors can compose, rewrite,
expand, and edit documents at the same time that designers prepare the layout. Common workflows include managing
files on a local server, sharing files via e-mail packages, or using some combination of the two methods.
These workflows assume that you have a basic InDesign template with layout geometries, styles, and placeholder text.
L
ut geometries include page dimensions as well as text and graphics frames. InCopy uses these items to show proper
ayo
copyfit information.
22
Local server workflow
1.In InDesign, create assignments and add content to them.
This step incorporates exported text and graphics frames into the managed process, where they become available to
InC
opy users for writing and editing.
2.Make the assignment files available to InCopy users.
Save the files to a server that all workflow users have access to.
3.In InCopy, open the assignment file, and check out and edit a story or graphic.
In InC opy, the files containing content assigned to you app ear in t he Assignments panel. Whenever you save the file on
a lo
erver, the changes are saved on the file system and anyone working on that document (the InDesign layout or
cal s
another managed content file in the document) receives notification of the changes. Those users can update the content
to view the latest changes. The content remains checked out to you until you check it in.
4.In InDesign, work on the layout.
Regardless of whether the content files are being edited in InCopy, InDesign users can work on the document layout;
t
y don’t have to check out the document. Whenever the InCopy user saves the checked-out content, the InDesign
he
user can update that content within the layout to see the latest revisions.
5.In InCopy, continue working.
When finished with your edits, check in the content. Other users are then able to check out the content and work on it.
I
user is modifying the layout in InDesign simultaneously, you can update and view the layout geometry as you work.
f a
6.In InDesign, make sure that all the content is checked in.
The managed workflow makes it possible to know who has checked out files. After content files are checked in,
I
esign users can check out the files to finalize the layout as necessary.
nD
Last updated 6/14/2014
Page 30

Workspace and workflow
E-mail package workflow
1.In InDesign, create and send assignment packages.
Create assignment packages and assign contents to the appropriate InCopy users, and then send the packages to the
InC
opy users. The packaged files are automatically checked out to help avoid editing conflicts.
2.In InCopy, open the assignment package, and check out and edit a story or graphic.
If you receive an assignment package in e-mail, double-click the package to open it in InCopy. Changes you make to
t
ile are saved only locally. Other users are not notified when you make changes.
he f
3.In InDesign, work on the layout.
Regardless of whether the content files are packaged, InDesign users can work on the document layout; they don’t have
to
k out the document. If you need to update the layout or assignments, you can send an updated package to the
chec
InCopy users.
4.In InCopy, return the edited package.
When finished with your edits, check in the content and return the modified package. Other users are then able to
c
k out the content, view the latest revisions, and work on the file.
hec
5.In InDesign, make sure that all the content is checked in.
23
The managed workflow makes it possible to know who has checked out files. After assignment packages are returned,
s
ies in assignment packages are checked in. InDesign users can check out the files to finalize the layout as necessary.
tor
Enter user identification
All users in the workflow must have a user name. This identification reveals who has checked out a particular file and
makes this information available to other users. It’s also required in order to check out a file for editing.
If you’ve already specified a user name and want to change it, you must check in any content you have checked out.
Other
wise, changing user identification during an editing session would forfeit your ability to edit content that you
have checked out—it would be checked out to you under a different name.
User identification is application-specific; no single user can have multiple user identifications per application.
Note: T
he InCopy Notes and Track Changes features also use the specified name to identify the author of a note or a tracked
ge.
chan
1 Do either of the following:
• Choose File > User.
• Choose User from the Assignments panel menu.
2 Type a unique name and click OK.
If you forget to specify a user name using this method, you’re prompted to enter one when you attempt your first
workfl
ow action.
Note: The Color pop-up menu in this dialog box is for identifying editorial notes and tracked changes. You can choose the
co
lor now if you want, but it doesn’t affect anything you do in a managed workflow.
Last updated 6/14/2014
Page 31

Workspace and workflow
Workflow icons
Icons can appear on text and graphics frames, the Assignments panel, and in the story bar (InCopy only). Edit status
icons appear next to the managed file in the Links panel and Assignments panel, and communicate content status. Icons
appear on frames that contain a linked InCopy story (in the Layout view in both InDesign and InCopy). These icons
also communicate content status and can be used to differentiate between managed and unmanaged content. The
associated tool tip indicates editing status and ownership. To view the frame icons, make sure that frame edges are
showing in InDesign and InCopy (View > Extras > Show Frame Edges).
Note: (I
nDesign) The InDesign document window must be in Normal Mode for the frame edges to show. (Click the Normal
Mo
de button at the lower left of the toolbox.)
Icon Name Location
24
Available Assignments panel (InDesign and InCopy),
In Use By [name] Assignments panel, text frames, and graphics
Editing Assignments panel, text frames, and graphics
vailable And Out Of Date Text and graphics frames
A
In Use By [name] And Out Of Date Text and graphics frames
Editing And Out Of Date Text and graphics frames
Out Of Date Assignments panel
Text Content Out Of Date Assignments panel and text frames
Text Content Up To Date Assignments panel and text frames
Graphics Content Out Of Date Assignments panel and graphics frames
Graphics Content Up To Date Assignments panel and graphics frames
Packaged Content Assignments panel
text fr
ames, and graphics frames
frames
frames
Note: The Out Of Date icon on the Available, In Use, Editing, Text Content, and Graphics Content icons indicates that the
cont
ent is out of date; that is, the version on the file system is newer than the version displayed on your computer.
More Help topics
Export content as separate InCopy files (InDesign)
Work with stand-alone documents
Unlink content files (InDesign)
Tracking and reviewing changes
Using editorial notes
Adding editorial notes in InDesign
Last updated 6/14/2014
Page 32

Workspace and workflow
Workspace basics
Click the following links for more information.
Workspace overview
You create and manipulate your documents and files using various elements, such as panels, bars, and windows. Any
arrangement of these elements is called a workspace. The workspaces of the different applications in Adobe® Creative
Suite® 5 share the same appearance so that you can move between the applications easily. You can also adapt each
application to the way you work by selecting from several preset workspaces or by creating one of your own.
Although the default workspace layout varies in different products, you manipulate the elements much the same way
in
all of
them.
• The Application bar across the top contains a workspace switcher, menus (Windows only), and other application
controls. On the Mac for certain products, you can show or hide it using the Window menu.
• The Tools panel contains tools for creating and editing images, artwork, page elements, and so on. Related tools are
grouped.
• The Control panel displays options for the currently selected tool. In Illustrator, the Control panel displays options
for the currently selected object. (In Adobe Photoshop® this is known as the Options bar. In Adobe Flash®, Adobe
Dreamweaver®, and Adobe Fireworks® this is known as the Property Inspector and includes properties of the
currently selected element.)
25
• The Document window displays the file you’re working on. Document windows can be tabbed and, in certain cases,
grouped and docked.
• Panels help you monitor and modify your work. Examples include the Timeline in Flash, the Brush panel in
Illustrator, the Layers panel in Adobe Photoshop®, and the CSS Styles panel in Dreamweaver. Panels can be grouped,
stacked, or docked.
• The Application frame groups all the workspace elements in a single, integrated window that lets you treat the
application as a single unit. When you move or resize the Application frame or any of its elements, all the elements
within it respond to each other so none overlap. Panels don’t disappear when you switch applications or when you
accidentally click out of the application. If you work with two or more applications, you can position each
application side by side on the screen or on multiple monitors.
If you are using a Mac and prefer the traditional, free-form user interface, you can turn off the Application frame.
I
dobe Illustrator®, for example, select Window > Application Frame to toggle it on or off. (In Flash, the
n A
Application frame is on permanently for Mac, and Dreamweaver for Mac does not use an Application frame.)
Last updated 6/14/2014
Page 33

Workspace and workflow
26
Default Illustrator workspace
A Tabb ed D ocument wi ndows B Application bar C Workspace switcher D Panel title bar E Control panel F Too l s pan el G Collapse To Icons
on H Four panel groups in vertical dock
butt
Hide or show all panels
• (Illustrator, Adobe InCopy®, Adobe InDesign®, Photoshop, Fireworks)To hide or show all panels, including the Tools
panel and Control panel, press Tab.
• (Illustrator, InCopy, InDesign, Photoshop) To hide or show all panels except the Tools panel and Control panel,
press Shift+Tab.
You can temporarily display hidden panels if Auto-Show Hidden Panels is selected in Interface preferences. It’s always
on in Illustrator. Move the pointer to the edge of the applica
ti
on window (Windows®) or to the edge of the monitor (Mac
OS®) and hover over the strip that appears.
• (Flash, Dreamweaver, Fireworks) To hide or show all panels, press F4.
Display panel options
❖ Click the panel menu icon in the upper-right corner of the panel.
You can open a panel menu even when the panel is minimized.
In Photoshop, you can change the font size of the text in panels and tool tips. In the Interface preferences, choose a
size from the UI Font Size menu.
Last updated 6/14/2014
Page 34

Workspace and workflow
(Illustrator) Adjust panel brightness
❖ In User Interface preferences, move the Brightness slider. This control affects all panels, including the Control panel.
Reconfigure the Tools panel
You can display the tools in the Tools panel in a single column, or side by side in two columns. (This feature is not
available in the Tools panel in Fireworks and Flash.)
In InDesign and InCopy, you also can switch from single-column to double-column (or single-row) display by setting
an option in Interface preferences.
❖ Click the double arrow at the top of the Tools panel.
Manage windows and panels
You can create a custom workspace by moving and manipulating Document windows and panels. You can also save
workspaces and switch among them. For Fireworks, renaming custom workspaces can lead to unexpected behavior.
Note: The following examples use Photoshop for demonstration purposes. The workspace behaves the same in all the
pro
ducts.
Rearrange, dock, or float document windows
When you open more than one file, the Document windows are tabbed.
27
• To rearrange the order of tabbed Document windows, drag a window’s tab to a new location in the group.
• To undock (float or untab) a Document window from a group of windows, drag the window’s tab out of the group.
Note: In Photoshop you can also choose Window > Arrange > Float in Window to float a single Document window, or
Wi
ndow > Arrange > Float All In Windows to float all of the Document windows at once. See tech note kb405298 for more
information.
Note: Dr
button
windows. Search “Tile Vertically” in Dreamweaver Help for more information on this topic. The workflow is slightly
different for Macintosh users.
eamweaver does not support docking and undocking Document windows. Use the Document window’s Minimize
to create floating windows (Windows), or choose Window > Tile Vertically to create side-by-side Document
• To dock a Document window to a separate group of Document windows, drag the window into the group.
• To create groups of stacked or tiled documents, drag the window to one of the drop zones along the top, bottom, or
sides of another window. You can also select a layout for the group by using the Layout button on the Application bar.
Note: Some products do not support this functionality. However, your product may have Cascade and Tile commands in
e Window menu to help you lay out your documents.
th
• To switch to another document in a tabbed group when dragging a selec tion, drag the selection over the document’s
tab for a moment.
Note: S
ome products do not support this functionality.
Dock and undock panels
A dock is a collection of panels or panel groups displayed together, generally in a vertical orientation. You dock and
undock panels by moving them into and out of a dock.
• To dock a panel, drag it by its tab into the dock, at the top, bottom, or in between other panels.
• To dock a panel group, drag it by its title bar (the solid empty bar above the tabs) into the dock.
Last updated 6/14/2014
Page 35

Workspace and workflow
• To remove a panel or panel group, drag it out of the dock by its tab or title bar. You can drag it into another dock or
make it free-floating.
Navigator panel being dragged out to new dock, indicated by blue vertical highlight
28
Navigator panel now in its own dock
You can prevent panels from filling all the space in a dock. Drag the bottom edge of the dock up so it no longer meets
the edge of the workspace.
Move panels
As you move panels, you see blue highlighted drop zones, areas where you can move the panel. For example, you can
move a panel up or down in a dock by dragging it to the narrow blue drop zone above or below another panel. If you
drag to an area that is not a drop zone, the panel floats freely in the workspace.
Note: T
he position of the mouse (rather than the position of the panel), activates the drop zone, so if you can’t see the drop
ne, try dragging the mouse to the place where the drop zone should be.
zo
• To move a panel, drag it by its tab.
• To move a panel group, drag the title bar.
Last updated 6/14/2014
Page 36

Workspace and workflow
Narrow blue drop zone indicates Color panel will be docked on its own above the Layers panel group.
A Title bar B Tab C Drop zone
Press Ctrl (Windows) or Command (Mac OS) while moving a panel to prevent it from docking. Press Esc while moving
the panel to cancel the operation.
Add and remove panels
If you remove all panels from a dock, the dock disappears. You can create a dock by moving panels to the right edge of
the workspace until a drop zone appears.
• To remove a panel, right-click (Windows) or Control-click (Mac) its tab and then select Close, or deselect it from
the Window menu.
29
• To add a panel, select it from the Window menu and dock it wherever you want.
Manipulate panel groups
• To move a panel into a group, drag the panel’s tab to the highlighted drop zone in the group.
Adding a panel to a panel group
• To rearrange panels in a group, drag a panel’s tab to a new location in the group.
• To remove a panel from a group so that it floats freely, drag the panel by its tab outside the group.
• To move a group, drag the title bar (the area above the tabs).
Stack floating panels
When you drag a panel out of its dock but not into a drop zone, the panel floats freely. The floating panel allows you to
position it anywhere in the workspace. You can stack floating panels or panel groups so that they move as a unit when
you drag the topmost title bar.
Free-floating stacked panels
• To stack floating panels, drag a panel by its tab to the drop zone at the bottom of another panel.
Last updated 6/14/2014
Page 37

Workspace and workflow
• To change the stacking order, drag a panel up or down by its tab.
Note: Be sure to release the tab over the narrow drop zone between
panels, rather than the broad drop zone in a title bar.
• To remove a panel or panel group from the stack, so that it floats by itself, drag it out by its tab or title bar.
Resize panels
• To minimize or maximize a panel, panel group, or stack of panels, double-click a tab. You can also double-click the
tab area (the empty space next to the tabs).
• To resize a panel, drag any side of the panel. Some panels, such as the Color panel in Photoshop, cannot be resized
by dragging.
Collapse and expand panel icons
You can collapse panels to icons to reduce clutter on the workspace. In some cases, panels are collapsed to icons in the
default workspace.
30
Panels collapsed to icons
Panels expanded from icons
• To collapse or expand all panel icons in a column, click the double arrow at the top of the dock.
• To expand a single panel icon, click it.
• To resize panel icons so that you see only the icons (and not the labels), adjust the width of the dock until the text
disappears. To display the icon text again, make the dock wider.
• To collapse an expanded panel back to its icon, click its tab, its icon, or the double arrow in the panel’s title bar.
In some products, if you select Auto-Collapse Icon Panels from the Interface or User Interface Options preferences, an
expanded panel icon collapses automatically when you click away from it.
• To add a floating panel or panel group to an icon dock, drag it in by its tab or title bar. (Panels are automatically
collapsed to icons when added to an icon dock.)
Last updated 6/14/2014
Page 38

Workspace and workflow
• To move a panel icon (or panel icon group), drag the icon. You can drag panel icons up and down in the dock, into
other docks (where they appear in the panel style of that dock), or outside the dock (where they appear as floating
icons).
Save and switch workspaces
By saving the current size and position of panels as a named workspace, you can restore that workspace even if you
move or close a panel. The names of saved workspaces appear in the workspace switcher in the Application bar.
Save a custom workspace
1 With the workspace in the configuration you want to save, do one of the following:
• (Illustrator) Choose Window > Workspace > Save Workspace.
• (Photoshop, InDesign, InCopy) Choose Window > Workspace > New Workspace.
• (Dreamweaver) Choose Window > Workspace Layout > New Workspace.
• (Flash) Choose New Workspace from the workspace switcher in the Application bar.
• (Fireworks) Choose Save Current from the workspace switcher in the Application bar.
2 Type a name for the workspace.
3 (Photoshop, InDesign) Under Capture, select one or more options:
Panel Locations Saves the current panel locations (InDesign only).
31
Keyboard shortcuts Saves the current set of keyboard shortcuts (Photoshop only).
Menus or Menu Customization Saves the current set of menus.
Display or switch workspaces
❖ Select a workspace from the workspace switcher in the Application bar.
In Photoshop, you can assign keyboard shortcuts to each workspace to navigate among them quickly.
Delete a custom workspace
• Select Manage Workspaces from the workspace switcher in the Application bar, select the workspace, and then click
Delete. (The option is not available in Fireworks.)
• (Photoshop, InDesign, InCopy) Select Delete Workspace from the workspace switcher.
• (Illustrator) Choose Window > Workspace > Manage Workspaces, select the workspace, and then click the Delete
icon.
• (Photoshop, InDesign) Choose Window > Workspace >Delete Workspace, select the workspace, and then click
Delete.
Restore the default workspace
1 Select the Default or Essentials workspace from the workspace switcher in the application bar. For Fireworks, see
the article http://www.adobe.com/devnet/fireworks/articles/workspace_manager_panel.html.
Note: I
n Dreamweaver, Designer is the default workspace.
2 For Fireworks (Windows), delete these folders:Wi n d ow s
Vista\\Users\<username>\AppData\Roaming\Adobe\Fireworks CS4\ Windows XP\\Documents and
Settings\<username>\Application Data\Adobe\Fireworks CS4
Last updated 6/14/2014
Page 39

Workspace and workflow
3 (Photoshop, InDesign, InCopy) Select Window > Workspace > Reset [Workspace Name].
(Photoshop) Restore a saved workspace arrangement
In Photoshop, workspaces automatically appear as you last arranged them, but you can restore the original, saved
arrangement of panels.
• To restore an individual workspace, choose Window > Workspace > Reset Wo r k s p a c e N ame.
• To restore all the workspaces installed with Photoshop, click Restore Default Workspaces in the Interface
preferences.
To rearrange the order of workspaces in the application bar, drag them.
About view modes
You can change the visibility of the document window using the Mode buttons at the bottom of the toolbox or by
choosing commands from the View > Screen Mode menu. When the toolbox is displayed in a single column, you can
select view modes by clicking the current mode button and selecting a different mode from the menu that appears.
Normal Mode
Displays artwork in a standard window with all visible grids and guides showing, non-printing objects showing, and a
white pasteboard.
32
Preview Mode
Displays artwork as if it were output, with all non-printing elements suppressed (grids, guides, non-printing objects),
and the pasteboard set to the preview background color defined in Preferences.
Bleed Mode
Displays artwork as if it were output, with all non-printing elements suppressed (grids, guides, non-printing objects),
the pasteboard set to the preview background color defined in Preferences, and any printing elements within the
document's bleed area (defined in Document Setup) showing.
Slug Mode
Displays artwork as if it were output, with all non-printing elements suppressed (grids, guides, non-printing objects),
the pasteboard set to the preview background color defined in Preferences, and any printing elements within the
document's slug area (defined inDocument Setup) showing.
Presentation Mode
Displays artwork as if it were a slideshow presentation, with no menus, panels, or tools displayed. See Use Presentation
Mode.
Using the status bar
The status bar (at the lower left of a document window) shows information about the status of a file and lets you turn
to a different page. Click the status bar menu to do any of the following:
• Show the current file in the file system by choosing Reveal In Explorer (Windows®) or Reveal In Finder (Mac OS®).
• Show the current file in Adobe® Bridge® by choosing Reveal in Bridge.
• Show the current file in Adobe Mini Bridge by choosing Reveal in Mini Bridge.
Last updated 6/14/2014
Page 40

Workspace and workflow
In Mac OS, you can display the zoom percentage in the status bar by hiding the application bar (Window > Application
Bar). In Windows, you cannot hide the application bar.
Control panel overview
The Control panel (Window > Control) offers quick access to options, commands, and other panels related to the
current page item or objects you select. By default, the Control panel is docked to the top of the document window;
however, you can dock it to the bottom of the window, convert it to a floating panel, or hide it altogether.
Options displayed in the Control panel vary depending on the type of object you select:
• When you select a frame, the Control panel displays options for resizing, repositioning, skewing, and rotating the
frame, or applying an object style.
• When you select text inside a frame, the Control panel displays either character or paragraph options. Click the
paragraph and character icons on the left side of the Control panel to determine whether paragraph or character
options are displayed. If your monitor size and resolution allows, the Control panel displays additional options. For
example, if the character icon is selected, all the character options are displayed, and some paragraph options appear
on the right of the Control panel. If you click the paragraph icon, all paragraph options are displayed, and some
character options appear on the right.
• When you select a table cell, the Control panel displays options for adjusting row and column dimensions, merging
cells, aligning text, and adding strokes.
As the options in the Control panel change, you can get more information about each option by using tool tips—p
descriptions that appear when you hover over an icon or option label with the pointer.
op-up
33
Control panel with tool tip displayed
Control panel menu
To open dialog boxes associated with Control panel icons, Alt-click (Windows) or Option-click (Mac OS) as you click
a Control panel icon. For example, when a frame is selected, hold down Alt or Option and click the Rotation Angle icon
to open the Rotate dialog box.
Display the panel menu
❖ Click the icon to the right of the Control panel.
Last updated 6/14/2014
Page 41

Workspace and workflow
Dock or float the Control panel
❖ Do one of the following:
• Drag the vertical bar on the left side of the Control panel until the toolbar is docked to the top or bottom of the
application window (Windows) or screen (Mac OS).
• Choose Dock At Top, Dock At Bottom, or Float from the Control panel menu.
Customize the Control panel
1 Choose Customize from the Control panel menu locatedd on the right side of the Control panel.
2 Specify options that you want to display or hide, and then click OK.
About the Navigator panel
If you’re familiar with previous versions of InDesign, you may wonder why you can’t find the Navigator panel. The
Navigator panel does not appear in InDesign CS5. The Power Zoom feature effectively replaces the Navigator panel.
See Use power zo om.
Use context menus
Unlike the menus that appear at the top of your screen, context-sensitive menus display commands related to the active
tool or selection. You can use context menus as a quick way to choose commonly used commands.
34
1 Position the pointer over the document, object, or panel.
2 Click the right mouse button.
Note: (Mac OS) If you don’t have a two-button mouse, you can display a context menu by pressing the Control key as you
cli
ck with the mouse.
Change Interface preferences
1 Choose Edit > Preferences > Interface (Windows) or InDesign > Preferences > Interface (Mac OS).
2 Choose the settings you want to specify, and click OK.
Tool Tips Tool tips appear when you hold the mouse pointer over interface items such as tools in the toolbar and
options in the Control panel. Choose None to turn off tool tips.
Show Thumbnails On Place When you place a graphic, a thumbnail of the image appears in the loaded graphics cursor.
Similarly, a thumbnail of the first few lines of text appears in the loaded text cursor. Deselect this option if you don’t
want thumbnails to appear when placing graphics or text.
Show Transformation Values When you’re creating, sizing, or rotating an object, the cursor displays the [x,y]
coordinates, width and height, or rotation information.
Enable Multi-Touch Gestures Select this option to allow Windows and Mac OS multi-touch mouse gestures to work in
InDesign. For example, when you use the Magic Mouse in Mac OS, the swipe gesture scrolls up or down or moves to
the previous or next page or spread, and the rotate gesture rotates the spread.
Highlight Object Under Selection Tool Select this option to highlight the frame edges of objects when the direct
selection tool is moved over it.
Floating Tools Panel Specify whether the toolbar appears as a single column, double column, or single row.
Auto-Collapse Icon Panels When this option is selected, clicking the document window closes the open panel
automatically.
Last updated 6/14/2014
Page 42

Workspace and workflow
Auto-Show Hidden Panels When you hide panels by pressing Tab, holding the mouse pointer over the side of the
document window temporarily reveals the panels if this option is selected. If this option is not selected, you must press
Tab again to display panels.
Open Documents As Tabs When this option is deselected, documents you create or open appear as floating windows
rather than tabbed windows.
Enable Floating Document Window Docking If this option is selected, you can dock floating documents with each
other as tabbed windows. If this option is deselected, floating document windows aren’t docked with other document
windows, unless you hold down Ctrl (Windows) or Command (Mac OS) while dragging.
Hand Tool To control whether to greek text and images when you scroll a document, drag the Hand Tool slider to the
desired level of performance versus quality.
Live Screen Drawing Select an option to determine whether the image redraws as you drag an object. If Immediate is
selected, the image redraws while you drag. If Never is selected, dragging an image moves only the frame, and then
image is moved when you release the mouse button. If Delayed is selected, the image redraws only if you pause before
dragging. Delayed offers the same behavior as in InDesign CS4.
More Help topics
Using Adob e Bridge with InDesign
35
Adobe Version Cue
Keys for the Control panel
Default keyboard shortcuts
Adobe InDesign CS5 provides shortcuts to help you quickly work in documents without using the mouse. Many
keyboard shortcuts appear next to the command names in menus. You can use the default InDesign shortcut set, the
QuarkXPress 4.0 or Adobe PageMaker 7.0 shortcut set, or a shortcut set that you create. You can share shortcut shortcut
sets with others using InDesign on the same platform.
InDesign provides shortcuts to help you quickly work in documents without using the mouse. Many keyboard
sh
or
tcuts appear next to the command names in menus. You can use the default InDesign shortcut set or a shortcut set
that you create. You can share shortcut sets with others using InDesign on the same platform.
Keys for tools
You can generate a list of the current keyboard set by choosing Show Set in the Keyboard Shortcuts dialog box. This
option is especially useful for printing a copy of your custom shortcuts.
This table isn’t a complete list of keyboard shortcuts. It lists
commands or tool tips.
Choose Window > Utilities > Tool Hints, and then select a tool to view its shortcuts and modifier keys.
only those shortcuts that aren’t displayed in menu
Last updated 6/14/2014
Page 43

Workspace and workflow
To ol Windows Mac OS
Selection tool V, Esc V, Esc
Direct Selection tool A A
Toggle Selection and Direct Selection tool Ctrl+Tab Command+Control+Tab
Page tool Shift+P Shift+P
Gap tool U U
Pen tool P P
Add Anchor Point tool = =
Add Anchor Point tool = = (on the numeric pad)
Delete Anchor Point tool - -
Delete Anchor Point tool -
Convert Direction Point tool Shift+C Shift+C
Type tool T T
Type On A Path tool Shift+T Shift+T
36
Pencil tool (Note tool) N N
Line tool \ \
Rectangle Frame tool F F
Rectangle tool M M
Ellipse tool L L
Rotate tool R R
Scale tool S S
Shear tool O O
Free Transform tool E E
Eyedropper tool I I
Measure tool K K
Gradient tool G G
Scissors tool C C
Hand tool H H
Temporarily selects Hand tool Spacebar (Layout mode), Alt (Text mode), or
Zoom tool Z Z
Temporarily selects Zoom In tool Ctrl+Spacebar Command+Spacebar
Alt+Spacebar (bo
th)
Spacebar (Layout mode), Option (Text mode),
or Option+Spacebar (both)
Toggle Fill and Stroke X X
Swap Fill and Stroke Shift+X Shift+X
Toggle between Formatting Affects Container
and Formatting Affects Text
J J
Last updated 6/14/2014
Page 44

Workspace and workflow
Tool Windows Mac OS
Apply Color , [comma] , [comma]
Apply Gradient . [period] . [period]
Apply No Color / /
37
Switch between Normal View and Preview
Mode
Frame Grid tool (horizontal) Y Y
Frame Grid tool (vertical) Q Q
Gradient Feather tool Shift+G Shift+G
W W
Keys for selecting and moving objects
This table isn’t a complete list of keyboard shortcuts. It lists only those shortcuts that aren’t displayed in menu
commands or tool tips.
Result Windows Mac OS
Temporarily select Selection or Direct
ion tool (last used)
Select
Temporarily select Group Selection tool Direct Selection tool+Alt; or Pen, Add Anchor
Select container of selected content Esc or double-click Esc or double-click
Select content of selected container Shift+Esc or double-click Shift+Esc or double-click
Add to or subtract from a selection of multiple
objects
Any tool (except selection tools)+Ctrl Any tool (except selection tools)+ Command
Point, or Delete Anchor Point tool+Alt+Ctrl
Selection, Direct Selection, or Group Selection
tool+Shift–click (to deselect, click center
point)
Direct Selection tool+Option; or Pen, Add
Anchor Point, or Delete Anchor Point
tool+Option+Command
Selection, Direct Selection, or Group Selection
tool+Shift–click (to deselect, click center
point)
Duplicate selection Selection, Direct Selection, or Group Selection
Duplicate and offset selection Alt+Left Arrow, Right Arrow, Up Arrow, or
Duplicate and offset selection by 10 times** Alt+Shift+Left Arrow, Right Arro
Move selection** Left Arrow, Right Arrow, Up Arrow, Down
Move selection by 10th** Ctrl+Shift+Left Arrow, Right Arrow, Up Arrow,
Move selection by 10 times** Shift+Left Arrow, Right Arrow, Up Arrow,
Select master page item from document page Selection or Direct Selection tool+Ctrl+Shift–
Select next object behind or in front Selection tool+Ctrl–click, or Selection
Alt–drag*
tool+
Down Arrow key
Down Arrow key
Arrow key
Down arrow key
Down Arrow key
click
Alt+Ctrl–click
tool+
w, Up Arrow,
Last updated 6/14/2014
Selection, Direct Selection, or Group Selection
tool+ Option–drag*
Option+Left Arrow, Right Arrow, Up Arrow, or
Down Arrow key
Option+Shift+Left Arrow, Right Arrow, Up
Arrow, Down Arrow key
Left Arrow, Right Arrow, Up Arrow, Down
Arrow key
Command+Shift+Left Arrow, Right Arrow, Up
Arrow, Down arrow key
Shift+Left Arrow, Right Arrow, Up Arrow,
Down Arrow key
Selection or Direct Selection tool+
Command+Shift–click
Selection tool+Command–click or Selection
tool+Option+ Command–click
Page 45

Workspace and workflow
Result Windows Mac OS
38
Select next or previous frame in story Alt+Ctrl+Page Down/ Alt+Ctrl+Page Up Option+Command+Page Down/
Select first or last frame in story Shift+Alt+Ctrl+Page Down/
*Press Shift to constrain movement to 45°
angles.
**Amount is set in Edit > Preferences > Units &
ents (Windows) or InDesign >
Increm
Preferences > Units & Increments (Mac OS).
Shift+Alt+Ctrl+Page Up
Option+Command+Page Up
Shift+Option+Command+Page Down/
Shift+Option+Command+Page Up
Keys for transforming objects
This table isn’t a complete list of keyboard shortcuts. It lists only those shortcuts that aren’t displayed in menu
commands or tool tips.
Result Windows Mac OS
Duplicate and transform selection Transformation tool+Alt–drag* Transformation tool+Option–drag*
Display Transform tool dialog box Select object+double-click Scale tool, Rotate
Decrease scale by 1% Ctrl+, Command+,
Decrease scale by 5% Ctrl+Alt+, Command+Option+,
Increase scale by 1% Ctrl+. Command+.
tool
, or Shear tool in Toolbox
Select object+double-click Scale tool, Rotate
tool, or Shear tool in Toolbox
Increase scale by 5% Ctrl+Alt+. Command+Option+.
Resize frame and content Selection tool+Ctrl–drag Selection tool+Command–drag
Resize frame and content proportionately Selection tool+Shift+Ctrl–drag Selection tool+Shift+Command–drag
Constrain proportion Ellipse tool, Polygon tool, or Rectangle
Switch image from High Quality Display to
Fast Dis
play
*After you select a transformation tool, hold
e mouse button, and then hold down
down th
Alt (Windows) or Option (Mac OS) and drag.
Press Shift to constrain movement to 45°
angles.
hift–drag
tool+S
Ctrl+Alt+Shift+Z Command+Option+Shift+Z
Ellipse tool, Polygon tool, or Rectangle
tool+Shift–drag
Keys for editing paths and frames
This table isn’t a complete list of keyboard shortcuts. It lists only those shortcuts that aren’t displayed in menu
commands or tool tips.
Last updated 6/14/2014
Page 46

Workspace and workflow
Result Windows Mac OS
39
Temporarily select Convert Direction Point
tool
Temporarily switch between Add Anchor
Point and Delete Anchor Point tool
Temporarily select Add Anchor Point tool Scissors tool+Alt Scissors tool+Option
Keep Pen tool selected when pointer is over
path or anch
Move anchor point and handles while
drawing
Display the Stroke panel F10 Command+F10
or point
Dir
ect Selection tool+Alt+C trl, or Pen tool+Alt Direct Selection tool+Option+ Command, or
Alt Option
Pen tool+Shift Pen tool+Shift
Pen tool+spacebar Pen tool+spacebar
Pen tool+Option
Keys for tables
This table isn’t a complete list of keyboard shortcuts. It lists only those shortcuts that aren’t displayed in menu
commands or tool tips.
Result Windows Mac OS
Insert or delete rows or columns while
ging
drag
Resize rows or columns without changing the
size of the table
Resize rows or columns proportionally Shift–drag right or bottom table border Shift–drag right or bottom table border
Begin dragging row or column border, and
then hold down Alt as you drag
Shift–drag interior row or column border Shift–drag interior row or column border
Begin dragging row or column border, and
then hold down Option as you drag
Move to next/previous cell Tab /S hi ft +Tab Tab /S hi ft +Tab
Move to first/last cell in column Alt+Page Up/ Alt+Page Down Option+Page Up/ Option+Page Down
Move to first/last cell in row Alt+Home/ Alt+End Option+Home/ Option+End
Move to first/last row in frame Page Up/Page Down Page Up/Page Down
Move up/down one cell Up Arrow/Down Arrow Up Arrow/Down Arrow
Move left/right one cell Left Arrow/Right Arrow Left Arrow/Right Arrow
Select cell above/below the current cell Shift+Up Arrow/ Shift+Down Arrow Shift+Up Arrow/ Shift+Down Arrow
Select cell to the right/left of the current cell Shift+Right Arrow/ Shift+Left Arrow Shift+Right Arrow/ Shift+Left Arrow
Start row on next column Enter (numeric keypad) Enter (numeric keypad)
Start row on next frame Shift+Enter (numeric keypad) Shift+Enter (numeric keypad)
Toggle between text selection and cell
selec
tion
Esc Esc
Keys for finding and changing text
This table isn’t a complete list of keyboard shortcuts. It lists only those shortcuts that aren’t displayed in menu
commands or tool tips.
Last updated 6/14/2014
Page 47

Workspace and workflow
Result Windows Mac OS
Insert selected text into Find What box Ctrl+F1 Command+F1
40
Insert selected text into Find What box and
find
s next
Find next occurrence of Find What text Shift+F2 or Alt+Ctrl+F Shift+F2 or Option+Command+F
Insert selected text into Change To box Ctrl+F2 Command+F2
Replace selection with Change To text Ctrl+F3 Command+F3
Shift+F1 Shift+F1
Keys for working with type
This table isn’t a complete list of keyboard shortcuts. It lists only those shortcuts that aren’t displayed in menu
commands or tool tips.
Result Windows Mac OS
Bold (only for fonts with bold face) Shift+Ctrl+B Shift+Command+B
Italic (only for fonts with italic face) Shift+Ctrl+I Shift+Command+I
Normal Shift+Ctrl+Y Shift+Command+Y
Underline Shift+Ctrl+U Shift+Command+U
Strikethrough Shift+Ctrl+/ Control+Shift+Command+/
All caps (on/off) Shift+Ctrl+K Shift+Command+K
Asian language hyphenation Shift+Ctrl+K Shift+Command+K
Small caps (on/off ) Shift+Ctrl+H Shift+Command+H
Tate-chu-yoko setting Shift+Ctrl+H Shift+Command+H
Superscript Shift+Ctrl+(+) [plus sign] Shift+Command+(+) [plus sign]
Subscript Shift+Alt+Ctrl+(+) [plus sign] Shift+Option+Command+(+) [plus sign]
Reset horizontal or vertical scale to 100% Shift+Ctrl+X or Shift+Alt+Ctrl+X Shift+Command+X or
Basic letter group setting or detail setting Shift+Ctrl+X or Shift+Alt+Ctrl+X Shift+Command+X or
Align left, right, or center Shift+Ctrl+L, R, or C Shift+Command+L, R, or C
Justify all lines Shift+Ctrl+F (all lines) or J (all but last line) Shift+Command+F (all lines) or J (all but last
Align both ends or equal spacing Shift+Ctrl+F (align both end) or J (equal
Increase or decrease point size* Shift+Ctrl+> or < Shift+Command+> or <
Increase or decrease point size by five times* Shift+Ctrl+Alt+> or < Shift+Command+ Option+> or <
Increase or decrease leading (horizontal text)* Alt+Up Arrow/ Alt+Down Arrow Option+Up Arrow/ Option+Down Arrow
Increase or decrease leading (vertical text)* Alt+Right Arrow/ Alt+Left Arrow Option+Right Arrow/ Option+Left Arrow
Increase or decrease leading by five times
(horizontal text)*
spacing)
Alt+Ctrl+Up Arrow/ Alt+Ctrl+Down Arrow Option+Command+Up Arrow/
Shift+Option+Command+X
Shift+Option+Command+X
)
line
Shift+Command+F (align both ends) or J
(equal spacing)
Option+Command+Down Arrow
Last updated 6/14/2014
Page 48

Workspace and workflow
Result Windows Mac OS
41
Increase or decrease leading by five times
(vertical text)*
Auto leading Shift+Alt+Ctrl+A Shift+Option+Command+A
Align to grid (on/off ) Shift+Alt+Ctrl+G Shift+Option+Command+G
Auto-hyphenate (on/off ) Shift+Alt+Ctrl+H Shift+Option+Command+H
Increase or decrease kerning and tracking
(horizontal text)
Increase or decrease kerning and tracking
(vertical text)
Increase or decrease kerning and tracking by
five times (horizontal text)
Increase or decrease kerning and tracking by
five times (vertical text)
Increase kerning between words* Alt+Ctrl+\ Option+Command+\
Decrease kerning between words* Alt+Ctrl+Backspace Option+Command+Delete
Clear all manual kerning and reset tracking to 0Alt+Ctrl+Q Option+Command+Q
Increase or decrease baseline shift**
izontal text)
(hor
Increase or decrease baseline shift** (vertical
text)
Alt+Ctrl+Right Arrow/ Alt+Ctrl+Left Arrow Option+Command+Right Arrow/
Option+Command+Left Arrow
Alt+Left Arrow/Alt+Right Arrow Option+Left Arrow/ Option+Right Arrow
Alt+Up Arrow/ Alt+Down Arrow Option+Up Arrow/ Option+Down Arrow
Alt+Ctrl+Left Arrow/ Alt+Ctrl+Right Arrow Option+Command+Left Arrow/
Option+Command+Right Arrow
Alt+Ctrl+Up Arrow/ Alt+Ctrl+Down Arrow Option+Command+Up Arrow/
Option+Command+Down Arrow
Shift+Alt+Up Arrow/ Shift+Alt+Down Arrow Shift+Option+Up Arrow/ hift+Option+Down
Arrow
Shift+Alt+Right Arrow/ Shift+Alt+Left Arrow Shift+Option+Right Arrow/
Shift+Option+Left Arrow
Increase or decrease baseline shift by five
times (horizontal text)
Increase or decrease baseline shift by five
times (vertical text)
Automatically flow story Shift–click loaded text icon Shift–click loaded text icon
Semi-automatically flow story Alt–click loaded text icon Option–click loaded text icon
Recompose all stories Alt+Ctrl+/ Option+Command+/
Insert current page number Alt+Ctrl+N Option+Command+N
*Press Shift to increase or decrease kerning
betw
een words by five times.
**Amount is set in Edit > Preferences > Units &
ents (Windows) or InDesign >
Increm
Preferences > Units & Increments (Mac OS).
Shift+Alt+Ctrl+Up Arrow/
Shift+Alt+Ctrl+Down Arrow
Shift+Alt+Ctrl+Right Arrow/
Shift+Alt+Ctrl+Left Arrow
Shift+Option+Command+Up Arrow/
Shift+Option+Command+Down Arrow
Shift+Option+Command+Right Arrow/
hift+Option+Command+Left Arrow
Keys for navigating through and selecting text
This table isn’t a complete list of keyboard shortcuts. It lists only those shortcuts that aren’t displayed in menu
commands or tool tips.
Last updated 6/14/2014
Page 49

Workspace and workflow
Result Windows Action Mac OS Action
Move to right or left one character Right Arrow/ Left Arrow Right Arrow/ Left Arrow
Move up or down one line Up Arrow/ Down Arrow Up Arrow/ Down Arrow
42
Move to right or left one word Ctrl+Right Arrow/ Ctrl+Left Arrow Command+Right Arrow/ Command+Left
Move to start or end of line Home/End Home/End
Move to previous or next paragraph Ctrl+Up Arrow/ Ctrl+Down Arrow Command+Up Arrow/ Command+Down
Move to start or end of story Ctrl+Home/ Ctrl+End Command+Home/ Command+End
Select one word Double-click word Double-click word
Select one character right or left Shift+Right Arrow/ Shift+Left Arrow Shift+Right Arrow/ Shift+Left Arrow
Select one line above or below Shift+Up Arrow/ Shift+Down Arrow Shift+Up Arrow/ Shift+Down Arrow
Select start or end of line Shift+Home/ Shift+End Shift+Home/ Shift+End
Select one paragraph Triple-click or quadruple-click paragraph,
Select one paragraph before or after Shift+Ctrl+Up Arrow/ Shift+Ctrl+Down Ar row Shift+Command+Up Arrow/
Select current line Shift+Ctrl+\ Shift+Command+\
Select characters from insertion point Shift–click Shift–click
Select start or end of story Shift+Ctrl+Home/ Shift+Ctrl+End Shift+Command+Home/
Select all in story Ctrl+A Command+A
depend
ing on Text Preferences setting
Arrow
Arro
w
Triple-click or quadruple-click paragraph,
depending on Text Preferences setting
Shift+Command+Down Arrow
Shift+
Command+End
Select first/last frame Shift+Alt+Ctrl+Page Up/ Shift+Alt+Ctrl+Page
Select previous/next frame Alt+Ctrl+Page Up/ Alt+Ctrl+Page Down Option+Command+Page Up/
Delete word in front of insertion point (Story
Editor)
Update missing font list Ctrl+Alt+Shift+/ Command+Option+Shift+/
Down
Ctrl+Backspace or Delete Command+Delete or Del (numeric keypad)
Shift+Option+ Command+Page Up/
Shift+Option+ Command+Page Down
Option+Co
mmand+Page Down
Keys for viewing documents and document workspaces
This table isn’t a complete list of keyboard shortcuts. It lists only those shortcuts that aren’t displayed in menu
commands or tool tips.
Result Windows Mac OS
Temporarily select Hand tool Spacebar (with no text insertion point), Alt-
Temporarily select Zoom In tool Ctrl+spacebar Command+spacebar
Temporarily select Zoom Out tool Alt+Ctrl+spacebar or Alt+Zoom In tool Option+Command+spacebar or
drag (
with text insertion point), or
Alt+spacebar (in both text and non-text
modes)
Spacebar (with no text insertion point),
Option–drag (with text insertion point), or
Option+spacebar (in both text and nontext
modes)
Option+Zoom Intool
Last updated 6/14/2014
Page 50

Workspace and workflow
Result Windows Mac OS
Zoom to 50%, 200%, or 400% Ctrl+5, 2, or 4 Command+5, 2, or 4
Redraw screen Shift+F5 Shift+F5
Open new default document Ctrl+Alt+N Command+Option+N
43
Switch between current and previous zoom
levels
Switch to next/previous document window Ctrl+~ [tilde]/ Shift+Ctrl+F6 or Ctrl+Shift+~
Scroll up/down one screen Page Up/Page Down Page Up/Page Down
Go back/forward to last-viewed page Ctrl+Page Up/ Ctrl+Page Down Command+Page Up/ Command+Page Down
Go to previous/next spread Alt+Page Up/ Alt+Page Down Option+Page Up/ Option+Page Down
Fit spread in window Double-click Hand tool Double-click Hand tool
Activate the Go To command Ctrl+J Command+J
Fit selection in window Ctrl+Alt+(+) [plus sign] Command+Option+(+) [plus sign]
Display the entire object Ctrl+Alt+(+) [plus sign] Command+Option+(+) [plus sign]
Go to master page while \ panel is closed Ctrl+J, type prefix of master, press Enter Command+J, type prefix of master, press
Cycle through units of measurement Shift+Alt+Ctrl+U Shift+Option+Command+U
Snap guide to ruler increments Shift–drag guide Shift–drag guide
Switch between page and spread guides
(creation only)
Temporarily turn on/off snap to Control-drag object
Create vertical and horizontal ruler guides for
the spread
Alt+Ctrl+2 Option+Command+2
[tilde]
Ctrl–drag guide Command–drag guide
drag from zero point Command–drag from zero point
Ctrl–
Command+F6 or Command+~ [tilde]/
Command+Shift+~ [tilde]
Return
Select all guides Alt+Ctrl+G Option+Command+G
Lock or unlock zero point Right-click zero point and choose an option Control–c lick zero point and choose an option
Use current magnification for view threshold
of new
guide
Select buttons in alert dialog boxes Press first letter of button name, if underlined Press first letter of button name
Show information on installed plug-ins and
components
InDesign
Alt–drag guide Option–drag guide
Ctrl+Help > About Design Command+InDesign menu > About InDesign
Keys for working with XML
This table isn’t a complete list of keyboard shortcuts. It lists only those shortcuts that aren’t displayed in menu
commands or tool tips.
Last updated 6/14/2014
Page 51

Workspace and workflow
Result Windows Mac OS
Expand/Collapse element Right Arrow/Left Arrow Right Arrow/Left Arrow
Expand/Collapse element and child elements Alt+Right Arrow/ Alt+Left Arrow Option+Right Arrow/ Option+Left Arrow
Extend XML selection up/down Shift+Up Arrow/ Shift+Down Arrow Shift+Up Arrow/ Shift+Down Arrow
Move XML selection up/down Up Arrow/ Down Arrow Up Arrow/ Down Arrow
Scroll structure pane up/down one screen Page Up/ Page Down Page Up/ Page Down
Select first/last XML node Home/ End Home/ End
Extend selection to first/last XML node Shift+Home/ Shift+End Shift+Home/ Shift+End
44
Go to previous/next validation error Ctrl+Left Arrow/ Ctrl+Right Arrow Command+Left Arrow/ Command+Right
Automatically tag text frames and tables Ctrl+Alt+Shift+F7 Command+Option+Shift+F7
Arro
w
Keys for indexing
This table isn’t a complete list of keyboard shortcuts. It lists only those shortcuts that aren’t displayed in menu
commands or tool tips.
Result Windows Mac OS
Create index entry without dialog box
(alphanumeric only)
Open index entry dialog box Ctrl+7 Command+7
Create proper name index entry (last name,
first name)
Shift+Ctrl+Alt+[ Shift+Command+Option+[
Shift+Ctrl+Alt+] Shift+Command+Option+]
Keys for panels
This table isn’t a complete list of keyboard shortcuts. It lists only those shortcuts that aren’t displayed in menu
commands or tool tips.
Result Windows Mac OS
Delete without confirmation Alt-click Delete icon Option-click Delete icon
Create item and set options Alt-click New button Option-click New button
Apply value and keep focus on option Shift+Enter Shift+Enter
Activate last-used option in last-used panel Ctrl+Alt+~ [tilde] Command+Option+~ [tilde]
Select range of styles, layers, links, swatches,
or library objec
Select nonadjacent styles, layers, links,
swatches, or library objects in a panel
Apply value and select next value Tab Tab
Move focus to selected object, text, or
window
ts in a panel
Shift-click Shift-click
Ctrl-click Command-click
Esc Esc
Last updated 6/14/2014
Page 52

Workspace and workflow
Result Windows Mac OS
45
Show/Hide all panels, Toolbox, and Control
panel (with no insertion point)
Show/Hide all panels except the Toolbox and
Control panel (docked or not)
Open or close all stashed panels Ctrl+Alt+Tab Command+Option+Tab
Stash a panel group Alt+drag any panel tab (in the group) to edge
Select item by name Alt+Ctrl-click in list, and then use keyboard to
Open the Drop Shadow panel Alt+Ctrl+M Command+Option+M
Tab Ta b
Shift+Tab Shift+Tab
reen
of sc
select item by name
Option+drag any panel tab (in the group) to
edge of window
Option+Command-click in list and then use
keyboard to select item by name
Keys for the Control panel
This table isn’t a complete list of keyboard shortcuts. It lists only those shortcuts that aren’t displayed in menu
commands or tool tips.
Result Windows Mac OS
Toggle focus to/from Control panel Ctrl+6 Command+6
Toggle Character/Paragraph text attributes
mode
Change reference point when proxy has focus Any key on the numeric keypad or keyboard
Ctrl+Alt+7 Command+Option+7
numb
ers
Any key on the numeric keypad or keyboard
numbers
Display the pop-up menu that has focus Alt+Down Arrow
Open Units & Increments Preferences Alt-click Kerning icon Option-click Kerning icon
Open the Text Frame Option
Open the Move dialog box Alt-click X or Y icon Option-click X or Y icon
Open the Rotate dialog box Alt-click Angle icon Option-click Angle icon
Open the Scale dialog box Alt-click X or Y Scale icon Option-click X or Y Scale icon
Open the Shear dialog box Alt-click Shear icon Option-click Shear icon
Open Text Preferences Alt-click Superscript, Subscript, or Small
Open the Underline Options dialog box Alt-click Underline button Option-click Underline button
Open the Strikethrough Options dialog box Al
Open the Grids Preferences Alt-click Align To Baseline Grid, or Do Not
Open the Drop Caps & Nested Styles dialog
box
Open the Justification dialog box Alt-click Leading icon Option-click Leading icon
s dialog box Alt-click Number Of Columns icon Option-click Number of Columns icon
Caps
button
t-click Strikethrough button Option-click Strikethrough button
Align To Baseline Grid button
Alt-click Drop Cap Number Of Lines, or Drop
Cap One Or More Characters icon
Option-click Superscript, Subscript, or Small
Caps button
Option-click Align To Baseline Grid, or Do Not
Align To Baseline Grid button
Option-click Drop Cap Number Of Lines, or
Drop Cap One Or More Characters icon
Last updated 6/14/2014
Page 53

Workspace and workflow
Result Windows Mac OS
Open Named Grid dialog box Double-click Named Grid icon Double-click Named Grid icon
Open New Named Grid Options dialog box Alt-click Named Grid icon Option-click Named Grid icon
46
Open Frame Grid Options dial
og box Alt-click Number of characters Horizontal,
Number of Characters Vertical, Character Aki,
Line Aki, Vertical Scale, Horizontal Scale, Grid
View, Font Size, Number of Columns, or
Column Gutter icon
Option-click Number of characters Horizontal,
Number of Characters Vertical, Character Aki,
Line Aki, Vertical Scale, Horizontal Scale, Grid
View, Font Size, Number of Columns, or
Column Gutter icon
Keys for type panels and dialog boxes
This table isn’t a complete list of keyboard shortcuts. It lists only those shortcuts that aren’t displayed in menu
commands or tool tips.
Result Windows Mac OS
Open Justification dialog box Alt+Ctrl+Shift+J Option+Command+Shift+J
Open Paragraph Rules dialog box Alt+Ctrl+J Option+Command+J
Open Keep Options dialog box Alt+Ctrl+K Option+Command+K
Activate Character panel Ctrl+T Command+T
Activate Paragraph panel Ctrl+Alt+T Command+Option+T
Keys for the character and paragraph styles
This table isn’t a complete list of keyboard shortcuts. It lists only those shortcuts that aren’t displayed in menu
commands or tool tips.
Result Windows Mac OS
Make character style definition match text Select text and press Shift+Alt+Ctrl+C Select text and press
Make paragraph style definition match text Select text and press Shift+Alt+Ctrl+R Select text and press
Change options without applying style Shift+Alt+Ctrl-double-click style Shift+Option+Command-double-click style
Remove style and local formatting Alt-click paragraph style name Option-click paragraph style name
Clear overrides from paragraph style Alt+Shift-click paragraph style name Option+Shift-click paragraph style name
Show/hide Paragraph and Character Styles
, respectively
panels
F11, Shift+F11 Command+F11, Command+Shift+F11
Shift+
Option+Command+C
Shift+Option+Command+R
Keys for the Tabs panel
This table isn’t a complete list of keyboard shortcuts. It lists only those shortcuts that aren’t displayed in menu
commands or tool tips.
Result Windows Mac OS
Activate Tabs panel Shift+Ctrl+T Shift+Command+T
Switch between alignment options Alt-click tab Option-click tab
Last updated 6/14/2014
Page 54

Workspace and workflow
Keys for the Layers panel
This table isn’t a complete list of keyboard shortcuts. It lists only those shortcuts that aren’t displayed in menu
commands or tool tips.
Result Windows Mac OS
Select all objects on layer Alt-click layer Option-click layer
Copy selection to new layer Alt-drag small square to new layer Option-drag small square to new layer
Add new layer below selected layer Ctrl-click Create New Layer Command-click Create New Layer
Add new layer to the top of the layer list Shift+Ctrl-click Create New Layer Shift+Command-click Create New Layer
47
Add new layer to the top of the layer list and
open New Laye
Add new layer and open New Layer dialog box Alt-click Create New Layer Option-click Create New Layer
r dialog box
Shift+Alt+Ctrl-click Create New Layer Cmd+Option+Shift-click Create New Layer
Keys for the Pages panel
This table isn’t a complete list of keyboard shortcuts. It lists only those shortcuts that aren’t displayed in menu
commands or tool tips.
Result Windows Mac OS
Apply master to selected page Alt-click master Option-click master
Base another master page on selected master Alt-click the master you want to base the
Create master page Ctrl-click Create New Page button Command-click Create New Page button
Display Insert Pages dialog box Alt-click New Page button Option-click New Page button
Add new page after last page Shift+Ctrl+P Shift+Command+P
selec
ted master on
Option-click the master you want to base the
selected master on
Keys for the Color panel
This table isn’t a complete list of keyboard shortcuts. It lists only those shortcuts that aren’t displayed in menu
commands or tool tips.
Result Windows Mac OS
Move color sliders in tandem Shift-drag slider Shift-drag slider
Select a color for the nonactive fill or stroke Alt-click color bar Option-click color bar
Switch between color modes (CMYK, RGB,
LAB)
Shift-click color bar Shift-click color bar
Keys for using the Separations Preview panel
This table isn’t a complete list of keyboard shortcuts. It lists only those shortcuts that aren’t displayed in menu
commands or tool tips.
Last updated 6/14/2014
Page 55

Workspace and workflow
Result Windows Action Mac OS Action
Turn on Overprint preview Ctrl+Alt+Shift+Y Command+Option+Shift+Y
Show all plates Ctrl+Alt+Shift+~ [tilde] Command+Option+Shift+~ [tilde]
Show Cyan plate Ctrl+Alt+Shift+1 Command+Option+Shift+1
Show Magenta plate Ctrl+Alt+Shift+2 Command+Option+Shift+2
Show Yellow plate Ctrl+Alt+Shift+3 Command+Option+Shift+3
Show Black plate Ctrl+Alt+Shift+4 Command+Option+Shift+4
Show 1st Spot plate Ctrl+Alt+Shift+5 Command+Option+Shift+5
Show 2nd Spot plate Ctrl+Alt+Shift+6 Command+Option+Shift+6
Show 3rd Spot plate Ctrl+Alt+Shift+7 Command+Option+Shift+7
Keys for the Swatches panel
This table isn’t a complete list of keyboard shortcuts. It lists only those shortcuts that aren’t displayed in menu
commands or tool tips.
48
Result Windows Mac OS
Create new swatch based on the current
swat
ch
Create spot color swatch based on the current
swat
ch
Change options without applying swatch Shift+Alt+Ctrl-double-click swatch Shift+Option+Command-double-click
Alt-click New Swatch button Option-click New Swatch button
Alt+Ctrl-click New Swatch button Option+Command-click New Swatch button
swatch
Keys for the Transform panel
This table isn’t a complete list of keyboard shortcuts. It lists only those shortcuts that aren’t displayed in menu
commands or tool tips.
Result Windows Mac OS
Apply value and copy object Alt+Enter Option+Enter
Apply width, height, or scale value
ortionally
prop
Ctrl+Enter Command+Enter
Keys for resolving conflicts between Mac OS 10.3x and 10.4
This table isn’t a complete list of keyboard shortcuts. It lists only those shortcuts that aren’t displayed in menu
commands or tool tips.
Result Mac OS
Open Preferences dialog box Command+K
Open Paragraph Styles panel Command+F11
Open Character Styles panel Command+Shift+F11
Last updated 6/14/2014
Page 56

Workspace and workflow
Result Mac OS
Open Swatches panel F5
Open Pages panel Command+F12
Minimize active application window Command+M
Hide application Command+H
More Help topics
Use keyboard shor tcut s ets
Working with files and templates
Recommended workflow for InDesign documents
You can improve performance and prevent many problems by establishing a good workflow to use with Adobe
InDesign.
49
Maintain a clean computer system
Over time, changes occur to software and hardware that can lead to performance loss and system problems.
D
ragmenting the hard disk, removing older versions of software, updating device drivers, optimizing memory,
ef
running virus protection utilities, and performing other maintenance tasks can prevent applications and files from
becoming damaged. Performing these tasks regularly helps ensure that InDesign opens, displays, and prints documents
as expected.
Create a project folder
Before you begin a project, determine which files you’ll need and how you’ll store them. If you’ve experienced problems
w
it
h broken links, consider storing your linked files in the same folder as your document. InDesign maintains links to
files you place in a document, but if a link is broken, InDesign looks for the file in the document’s folder. Storing a
document and its linked files in the same folder makes it easy to move them from one computer to another. Storing files
in one folder also ensures that InDesign finds the original graphics when printing a document. If InDesign cannot
locate a linked graphic, it won’t reflect changes you make to the original graphic, and it may print the graphic poorly or
not at all.
If your project consists of multiple documents (for example, chapters in a book), you may find it useful to create a
p
ject folder that contains a folder for each document and its linked files.
ro
Consider using a template
Use a template if you frequently create similar projects. Templates let you create consistent documents more quickly
w
e protecting the original file. For example, if you create a monthly newsletter, your template might include ruler
hil
guides, page numbers, the newsletter masthead, and styles you want to use in each issue. (See Use document templates
.)
Open documents locally
Last updated 6/14/2014
Page 57

Workspace and workflow
Before you open a document stored on a network volume or on removable media, copy the document and any linked
graphic s to your local hard disk. The slower access time and data transfer rate of a network volume or removable media
can cause data to become lost or corrupted, possibly damaging the document. However, be aware of overriding
someone else’s work if you copy the local files back to a network server.
Solve problems before converting a file
Damaged Adobe PageMaker or QuarkXPress® files usually remain damaged when opened in InDesign. If an error or
o
ther unexp
ected behavior occurs with a converted file, open the original file in the source application and
troubleshoot it for damage.
50
If the converted file has problems, export it to IDML format, a
en open the IDML file and save it as an InDesign
nd th
document.
Save documents
Save documents frequently, and create backup copies of important files. You can clear unnecessary data from a
d
ument by using the Save As command. When you use the Save command, InDesign appends new information to
oc
the document but doesn’t remove outdated data, such as information about a deleted graphic. When you use the Save
As command, however, InDesign completely rewrites the document, including only information about objects and
pages currently in the document. A document that contains only necessary data occupies less hard drive space and
redraws and prints more quickly.
Practice good design habits
• Create styles in a document. Creating styles with no documents open can cause duplicate styles to appear when you
create a new document. To share styles in documents, save the styles and load them.
• Use appropriate fonts. When choosing fonts for a document, consider how you intend to format and print the text.
InDesign works well with OpenType®, Type 1 (also called PostScript), and TrueType fonts. Damaged or poorly
constructed fonts can damage an InDesign document or cause it to print with unexpected results, so use reliable
fonts created by established font vendors. If you work with a service bureau, find out its font requirements.
• Avoid using too many text frames. Use as few text frames as possible to keep the document file size smaller and the
layout easier to manipulate.
Be smart with art
• Use the appropriate graphics file format. When you create graphics for a project, consider how you plan to print the
document. If you intend to print the document at a service bureau, ask the service bureau which graphic formats
wo rk b est w ith t he ou tpu t de vi ce i t us es . Th e ser vi ce bu rea u ca n als o adv ise y ou o n the opt imal reso lut ion for imag es.
• Store graphics externally. When you import a graphic file, InDesign creates a link to the graphic by default. Linking
helps minimize the file size of the document and improves the performance of InDesign. When you print the
document, the original graphic file must be available and linked. If InDesign can’t find the original, the graphic may
print as a low resolution preview or as a gray box.
Verify links and fonts before you print
To ensure that a document prints correctly, verify that all links are intact and all fonts are available. A link becomes
b
en if you delete, move, or rename the original graphic. Use the Preflight and Package features before handing off
rok
files to a service bureau.
Last updated 6/14/2014
Page 58

Workspace and workflow
Open InDesign documents
In ge ner al, you op en d ocumen t and t emplate files the s ame way yo u do in other p rog rams. When y ou ope n an InD esi gn
template, it opens as a new, untitled document by default. Document files use the extension .indd, template files use the
extension .indt, snippet files use the extension .idms, library files use the extension .indl, interchange files use the
extension .inx, markup files use the extension .idml, and book files use the extension .indb.
You can also use the File > Open command to open files from earlier versions of InDesign, InDesign Interchange (.inx)
f
iles, I
nDesign Markup (.idml) files, Adobe PageMaker 6.0 and later, QuarkXPress 3.3 and 4.1, and QuarkXPress
Passport 4.1 files. In addition, other software vendors may make plug-in software that lets you open other file formats.
To view additional information about an InDesign document, hold down Ctrl and choose Help > About InDesign
(Windows) or hold down Command and choose InDesign > About InDesign (Mac OS).
Use the Open command
1 Choose File > Open and select one or more documents.
2 Do one of the following, and then click Open:
• Select Normal (Windows) or Open Normal (Mac OS) to open the original document or a copy of a template.
• Select Original (Windows) or Open Original (Mac OS) to open an original document or template.
• Select Copy (Windows) or Open Copy (Mac OS) to open a copy of a document or template.
51
3 If a warning message appears telling you that the color settings in the document are different from the color settings
in the application, select an option, and click OK.
Note: C
olor warning messages are off by default, but you can show warnings if you change the default settings in the
lor Settings dialog box (Edit >Color Settings.)
Co
4 If a warning message appears telling you that the document contains missing fonts, do one of the following:
• Click OK. InDesign will automatically format the text with a substitute.
• Click Find Font to search for and list fonts used throughout your document.
For more information on finding missing fonts, see Find and change fonts.
5 If a warning message appears telling you that the document contains missing or modified links, use the Links panel
to fix the links. See Update, restore, and replace links .
Open recent document
❖ Choose File > Open Recent, and select one of the documents you saved recently.
To specify how many recent documents are displayed, choose Edit > Preferences > File Handling (Windows), or
InDes
ign > Preferences > File Handling, and then specify a number for Number Of Recent Items To Display. The
maximum number is 30.
Choosing word lists when opening documents
When opening a document, you may see an alert message asking if you want to use the word list in the document or
an exception word list in the user dictionary. An exception word list includes words that were added to the User
Dictionary while the document was worked on. If you know which exception word list you use, click its button. If you’re
not sure, cl ick either button, cho ose Edit > Spel ling > Dictionar y to insp ect th e word lists, and t hen, if n ecess ary, choose
Edit > Preferences > Dictionary (Windows) or InDesign > Preferences > Dictionary (Mac OS) to reset the word list used
for composition. See Hyphenation and spelling dictionaries.
Last updated 6/14/2014
Page 59

Workspace and workflow
Convert earlier versions of InDesign documents
❖ To convert previous versions of InDesign documents to the current version, choose File > Open and open the file.
Keep in mind the following points:
• If you used third-party plug-ins to create an earlier version of a document, check with the manufacturer to make
sure that they are installed correctly for and are compatible with InDesign CS5 before you convert the document.
• When you convert a document, you may see an alert message asking if you want to use the exception word list
in the user dictionary or the one in the document. For information about this alert message, see Choosing word
lists when opening documents .
• Library files created in earlier versions of InDesign will open and convert in InDesign CS5, even if the library is
locked. You have to specify a name and location for the converted library files; the default naming convention is
filename-X.indl.
• Previous versions of InDesign can’t open latest InDesign documents directly. For example, to open an InDesign
CS5 document in InDesign CS4, you must do two things. First, choose File > Export in InDesign CS5 to save the
document in IDML format. Second, update InDesign CS4 with special plug-ins that let you open the IDML file.
(See Save backwards to the previous InDesign version.)
If you’re experiencing problems with a document that was created in a previous version of InDesign, use the Export
dialog box in InDesign CS5 to save the document in InDesign Markup (IDML) format. Then open the IDML file and
s
t as an InDesign document.
ave i
52
Using Adobe Bridge with InDesign
Adobe Bridge is a cross-platform application included with AdobeCreative Suite components that helps you locate,
organize, and browse the assets you need to create print, web, video, and audio content. You can start Adobe Bridge
from any Creative Suitecomponent (except Adobe Acrobat®), and use it to access both Adobe and non-Adobe asset
types.
From Adobe Bridge, you can:
• Manage image, footage, and audio files: Preview, search, sort, and process files in Adobe Bridge without opening
individual applications. You can also edit metadata for files, and use Adobe Bridge to place files into your
documents, projects, or compositions.
• View the links inside an InDesign document as thumbnails while in Adobe Bridge, without actually having to open
the InDesign document in InDesign.
• Drag assets from Adobe Bridge into the InDesign document window, or drag assets from the document window
into Adobe Bridge to create snippets. See Use snippets .
• Perform automated tasks, such as batch commands.
• Synchronize color settings across color-managed Creative Suite components.
• Start a real-time web conference to share your desktop and review documents.
Adobe Version Cue
Adobe Version Cue® and Adobe Drive are not included in Adobe Creative Suite 5, nor any future version of the Creative
Suite. Adobe continues to invest in asset management enablement through open industry standards and partnerships.
For more information, see www.adobe.com/go/learn_vc_end_en.
Last updated 6/14/2014
Page 60

Workspace and workflow
Use document templates
Templates are useful starting points for standard documents because you can preset them with layout, graphics, and
text. For example, if you prepare a monthly magazine, you can create a template that contains the layout of a typical
issue, including ruler guides, grids, master pages, custom styles and swatches, placeholder frames, layers, and any
standard graphics or text. That way you can simply open the template each month and import new content.
You create a template the same way you create a regular document; the only difference occurs when you save the
do
cu
ment. When you prepare a template for others to use, you may want to add a layer containing instructions about
the template; hide or delete the layer before printing the document. See Layers .
53
Note: F
or Chinese versions of InDesign, you can open specially de
signed templates that include custom mojikumi sets.
Save a document as a template
1 Choose File > Save As, and specify a location and filename.
2 Choose InDesign CS5 Template for Save As Type (Windows) or Format (Mac OS), and then click Save.
Start a new document from a template
1 Choose File > Open.
2 Locate and select a template.
3 Select Normal (Windows) or Open Normal (Mac OS), and then click Open.
4 Save the new document with its own name.
Edit an existing template
1 Choose File > Open.
2 Locate and select a template.
3 Select Original (Windows) or Open Original (Mac OS), and then click Open.
Reviewing InDesign documents
Adobe offers several methods for reviewing InDesign documents.
Tracking editing changes
As you or another person edits text, InDesign highlights added text and strikes through deleted text when Track
Chan
ges is turned on. Use the Story Editor to view changes. The document owner can go through the edits and accept
or reject changes. See Tracking and reviewing changes .
Using Acrobat to review a PDF file
You can export the InDesign document to PDF and use Adobe Acrobat to set up an e-mail review or a shared review
on
Acrobat.com or another server. Reviewers can add comments using the Sticky Note tool and other markup methods.
The document owner can then go through the PDF review comments and edit the original InDesign document. For
more information, see Acrobat Help.
Using CS Revie w
CS Review is an online subscription service that lets you s
immediate feedback. When you create a review using the CS Review panel, you upload one or more snapshots of the
file to the Acrobat.com workspace. Reviewers can then add comments.
ha
re your designs on the web so that others can provide
Last updated 6/14/2014
Page 61

Workspace and workflow
When you create a review, you can divide the review into parts that offer separate areas for review commenting. A
review can consist of parts from different files and applications. As the review progresses, you can add and remove
review parts as part of a dynamic review process.
Designing calendars and business cards from templates
One way to create a calendars, business cards, resumes or CVs, and other specialized documents is to use templates.
Adobe provides several templates at the Adobe Marketplace and Exchange site:
www.adobe.com/go/exchange
Use search to locate additional resources for specialty documents.
More Help topics
Save backwards to the previous InDesign version
Add documents to a book file
Hyphenation and spelling dictionaries
Save backwards to the previous InDesign version
54
Plug-ins
Reusing graphics and text
Adobe Bridge
Mini Bridge
CS Review
Customize menus and keyboard shortcuts
Customize menus
Hiding and colorizing menu commands is a way to remove menu clutter and emphasize commands you frequently use.
Note that hiding menu commands simply removes the menu command from view; it doesn’t disable any features. At
any time, you can view hidden commands by selecting the Show All Menu Items command at the bottom of a menu,
or you can choose Window > Workspace > Show Full Menus to show all the menus for the selected workspace. You can
include customized menus in workspaces you save.
You can customize the main menu, context menus, and panel menus. Context menus appear when you right-click
(W
indows) o
panel.
r Control-click (Mac OS) an area. Panel menus appear when you click the icon in the upper right of a
Note: I
f you select a different workspace, such as Getting Started, some menu commands are hidden. To display menu
mmands, choose Show All Menu Items at the bottom of the menu, or choose a different workspace, such as Advanced.
co
Last updated 6/14/2014
Page 62

Workspace and workflow
Create a custom menu set
1 Choose Edit > Menus.
You cannot edit the default menu set.
2 Click Save As, type the name of the menu set, and click OK.
3 From the Category menu, choose Application Menus or Context & Panel Menus to determine which menus are
customized.
4 Click the arrows to the left of the menu categories to display subcategories or menu commands. For each command
you want to customize, click the eye icon under Visibility to show or hide the command; click None under Color to
select a color from the menu.
5 Click Save, and then click OK.
Select a custom menu set
1 Choose Edit > Menus.
2 Choose the menu set from the Set menu, and then click OK.
Edit or delete a custom menu set
1 Choose Edit > Menus.
2 Choose the menu set from the Set menu, and then do one of the following:
55
• To edit a menu set, change the visibility or color of menu commands, click Save, and then click OK.
• To delete a menu set, click Delete and then click Yes. If you’ve modified the menu set without saving it, you’re
prompted to save the current menu set. Click Yes to save the menu set, or click No to discard changes.
Show hidden menu items
• Choose Window > Workspace > Show Full Menus. This command turns on all menus for the selected workspace.
You can hide the menus again by resetting the workspace.
• Choose Show All Menu Items at the bottom of the menu that includes hidden commands.
Holding down Ctrl (Windows) or Command (Mac OS) and clicking a menu name temporarily displays any menu
commands you’ve hidden by customizing menus.
Missing menu commands
If you can’t find a menu command, it may be hidden. If you select a workspace other than Advanced, some menu
commands are hidden. It’s also possible that you or someone else used the Menus command to hide menu items.
If you can’t find a command you’re looking for, try any of these techniques:
• Choose Show All Menu Items at the bottom of the menu.
• Choose Window > Workspace > Show Full Menus.
• Choose Window > Workspace, and select a different workspace (Advanced shows all menu items).
• Choose Edit > Menus, locate the menu command, and make sure it isn’t hidden.
If menu commands are still missing, try restoring preferences.
Last updated 6/14/2014
Page 63

Workspace and workflow
Use keyboard shortcut sets
Tool tips provide an instantaneous reference for shortcuts. InDesign also provides a shortcut editor in which you can
view and generate a list of all shortcuts, and edit or create your own shortcuts. The shortcut editor includes all the
commands that accept shortcuts, but some of these commands are undefined in the Default shortcut set.
You can also associate keyboard shortcuts with paragraph or character styles (see Add paragraph and character styles)
or scripts.
Mike Witherell provides a reference guide of keyboard shortcuts on Free keyboard shortcuts (English only).
Change the active shortcut set
1 If you want the shortcut set to be active for all documents, make sure that no documents are open.
2 Choose Edit > Keyboard Shortcuts.
3 Select a shortcut set in the Set menu. For example, select Shortcuts for QuarkXPress® 4.0.
4 Click OK.
View shortcuts
1 Choose Edit > Keyboard Shortcuts.
2 For Set, select a shortcut set.
3 For Product Area, select the area containing the commands you want to view.
56
4 From Commands, select a command. The shortcut is displayed in the Current Shortcut section.
Generate a list of shortcuts for printing
1 Choose Edit > Keyboard Shortcuts.
2 For Set, select a shortcut set.
3 Click Show Set.
A text file opens with all current and undefined shortcuts for that set.
Create a new shortcut set
1 Choose Edit > Keyboard Shortcuts.
2 Click New Set.
3 Type a name for the new set, select a shortcut set in the Based On Set menu, and click OK.
Create or redefine a shortcut
1 Choose Edit > Keyboard Shortcuts.
2 For Set, select a shortcut set or click New Set to create a new shortcut set.
Note: You cannot edit the Default or the QuarkXPress shortcut sets. Instead, create a new set based on one of these sets,
an
d then edit the new set.
3 For Product Area, select the area containing the command you want to define or redefine.
4 In the Commands list, select the command that you want to define or redefine.
5 In the New Shortcut box, press the keys for your new keyboard shortcut. If the key sequence is currently being used
for another command, InDesign displays that command under Current Shortcuts. You can choose to change the
original shortcut also, or try another shortcut.
Last updated 6/14/2014
Page 64

Workspace and workflow
Note: Do not assign single-key shortcuts to menu commands, because they interfere with the typing of text. If an
insertion point is active when you type a single-key shortcut, InDesign actives the keyboard shortcut instead of inserting
the character in the text.
6 In the Context list, select the context in which you want the keyboard shortcut to function. The context ensures that
the shortcut performs the way you intended. For example, you can assign Ctrl+G to merge table cells (Table context)
and Ctrl+G to insert special characters (Text context).
57
Note: Assig
document. Shortcuts you assign in other contexts, such as Table or Text, override shortcuts assigned in the Default
context.
7 Do one of the following:
n shortcuts in the Default context when you want them t
o function regardless of the current state of the
• Click Assign to create a new shortcut where none currently exists.
• Click Assign to add another shortcut to a command. Menu commands can have multiple keyboard shortcuts.
8 Click OK to close the dialog box, or click Save to keep the dialog box open while you enter more shortcuts.
Copying keyboard shortcut sets
Keyboard shortcut s ets (*.indk) are saved in two loc ations. The application preset shor tcuts appear in the Prese ts folder
in the main application folder. The shortcut sets you create appear in the Shortcut Sets folder in the following locations:
Windows XP Documents and Settings\[username]\Application Data\Adobe\InDesign\[version]\[language]InDesign
Shortcut Sets
Windows Vista and Windows 7
Users\[username]\AppData\Roaming\Adobe\InDesign\[Version]\[Language]\InDesign Shortcut Sets
Mac OS Users/[username]/Library/Preferences/Adobe InDesign/[version]/[language]/InDesign Shortcut Sets
If you created a keyboard shortcut set on one computer and want to use it on a different computer, copy the *.indk file
to th
e same location on the other computer.
You can move a keyboard set from the custom location to the application folder. Doing so makes the custom shortcuts
ava
ilable to all the users sharing a computer. However, make sure that you do not have two sets with the same name,
one in each place. Make sure that the application keyboard sets and the custom sets have different names.
More Help topics
Save a custom workspace
Save a custom workspace
Restore all preferences and default settings
Default keyboard shortcuts
Scripting
Recovery and undo
Last updated 6/14/2014
Page 65

Workspace and workflow
Recover documents
InDesign guards your data against unexpected power or system failures using an automatic recovery feature.
Automatically recovered data exists in a temporary file that is separate from the original document file on disk. Under
normal circumstances you don’t need to think about automatically recovered data, because any document updates
stored in the automatic recovery file are automatically added to the original document file when you choose the Save
or Save As command or exit from InDesign normally. Automatically recovered data is important only if you’re unable
to save successfully before an unexpected power or system failure.
58
Even though these features exist, you should save your files
or system failures.
of
ten and create backup files in case of unexpected power
Find recovered documents
1 Restart your computer.
2 Start InDesign.
If automatically recovered data exists, InDesign automatically displays the recovered document. The word
[Recov
ered] appears after the filename in the title bar of the document window to indicate that the document
contains unsaved changes that were automatically recovered.
Note: I
f InDesign fails after attempting to open a document using automatically recovered changes, the automatically
covered data may be corrupted.
re
3 Do one of the following:
• To save the recovered data, choose File >Save As, specify a location and a new filename, and click Save. The Save
As command keeps the recovered version that includes the automatically recovered data; the word [Recovered]
disappears from the title bar.
• To discard automatically recovered changes and use the most recent version of the document that was explicitly
saved to disk before the failure occurred, close the file without saving it and open the file on disk, or choose File
> Revert.
Change the location of recovered documents
1 Choose Edit > Preferences > File Handling (Windows) or InDesign > Preferences > File Handling (Mac OS).
2 Under Document Recovery Data, click Browse (Windows) or Choose (Mac OS).
3 Specify the new location for the recovered document, click Select (Windows) or Choose (Mac OS), and then click
OK.
Undo mistakes
If necessary, you can cancel a lengthy operation before it’s completed, undo recent changes, or revert to a previously
saved version. You can undo or redo up to several hundred of the most recent actions (the amount is limited by the
amount of RAM available and the kinds of actions you performed). The series of actions is discarded when you choose
the Save As command, close a document, or when you exit from the program.
❖ Do one of the following:
• To undo the most recent change, choose Edit > Undo [action]. (You cannot undo certain actions, such as
scrolling.)
• To redo an action, choose Edit > Redo [action].
• To undo all changes made since the last time you saved the project, choose File > Revert (InDesign) or File >
Revert Content (InCopy).
Last updated 6/14/2014
Page 66

Workspace and workflow
• To close a dialog box without applying changes, click Cancel.
Converting QuarkXPress and PageMaker documents
Open QuarkXPress files in InDesign
InDesign can convert document and template files from QuarkXPress 3.3 or 4.1x. InDesign can also convert document
and template files from multi-language QuarkXPress Passport 4.1x files, so there is no longer any need to save these
files as single-language files first. (To convert documents created with QuarkXPress 5.0 or later, reopen the documents
in QuarkXPress and save them in 4.0 format.)
For more information, see the QuarkXPress Conversion Guide (PDF) at www.adobe.com/go/learn_quarkconv.
Open a QuarkXPress document or template
1 Make sure that the original application file is closed.
2 To ensure that all links are maintained, copy all linked files to the same QuarkXPress document folder.
59
3 In InDesign, choose File > Open.
4 In Windows, choose QuarkXPress (3.3-4.1x) or QuarkXPress Passport (4.1x) from the Files Of Type menu.
5 Select a file and click Open.
Note: If InDesign cannot convert a file or a specific part of a file, it displays a warning describing the reasons it cannot
co
nvert it and the results of the conversion.
6 If a warning dialog box appears, do one of the following:
• Click Save to save a copy of the warnings as a text file, and then open the file in InDesign.
• Click Close to close the dialog box and open the file in InDesign.
7 To more accurately convert text wrap applied in QuarkXPress, do the following in InDesign:
• Select Text Wrap Only Affects Objects Beneath in the Composition area of the Preferences dialog box.
• Assign the Adobe Single-Line Composer in the Paragraph panel menu to one or more paragraphs.
If you’re experiencing problems with the converted QuarkXPress document, use the Export dialog box to save the
document in InDesign Markup (IDML) format. Then open the IDML file and save it as an InDesign document.
Save a QuarkXPress template as an InDesign template
1 Open the template in InDesign.
2 Choose File > Save As and specify a location and filename.
3 Choose InDesign Template for Save As Type (Windows) or Format (Mac OS), and then click Save.
What gets converted from QuarkXPress
When you open a QuarkXPress file, InDesign converts the original file information to native InDesign information:
• Text boxes are converted to InDesign text frames.
Last updated 6/14/2014
Page 67

Workspace and workflow
To accurately convert text wrap applied in QuarkXPress, select Text Wrap Only Affects Text Beneath in the
Composition area of the Preferences dialog box.
• Styles are converted to InDesign styles.
• Because QuarkXPress uses different color profiles, they are ignored in InDesign.
• Text and graphics links are preserved and appear in the Links panel.
Note: Embedded graphics—those added to the original document using the Paste command—are not converted. For more
in
formation on embedded graphics, see About links and embedded graphics.
InDesign does not support OLE or Quark XTensions. Consequently, when you open files that contain OLE or Quark
XTensions graphics, those graphics will not appear in the InDesign document. If your QuarkXPress document does not
con
rt, check the original and remove any objects that were created by an XTension; then save, and try to convert again.
ve
• All master pages and layers are converted to InDesign masters and layers.
• All master-page objects, as well as QuarkXPress guides, are placed on the corresponding InDesign master pages.
• Grouped objects remain grouped except where nonprinting items are included in a group.
• All strokes and lines (including paragraph rules) are converted to the stroke styles they most closely resemble.
Custom strokes and dashes are converted to custom strokes and dashes in InDesign.
Colors are converted exactly to InDesign colors, except in the following situations:
60
• Multi-ink colors from QuarkXPress are mapped to mixed inks in InDesign, unless the multi-ink color does not
contain at least one spot color. In this case, the multi-ink color is converted to a process color instead.
• QuarkXPress 4.1 colors from the color library are converted based on their CMYK values.
• QuarkXPress 3.3 HSB colors are converted to RGB, and colors from the color library are converted based on their
CMYK values.
• QuarkXPress 4.1 HSB and LAB colors are converted to RGB, and colors from the color library are converted based
on their RGB/CMYK values.
For information about other conversion issues, check the support documents on the Adobe website at
www.adobe.com/support.
Convert PageMaker documents
InDesign can convert document and template files from Adobe PageMaker 6.0 and later. When you open a PageMaker
file, InDesign converts the original file information to native InDesign information. InDesign files are saved with an
.indd filename extension.
For more information, see the PageMaker Conversion Guide (PDF) at www.adobe.com/go/learn_pmconv.
Before opening the document in InDesign, you may want to do the following:
• If the PageMaker file or its linked graphics are located on a network server, floppy disk, or removable drive, it may
not open as expected if an interruption in data transfer occurs. To prevent data transfer problems, copy documents
and their links to the hard disk, preferably in the same folder where the PageMaker publication is stored, before
opening them in InDesign.
• You may want to use Save As in PageMaker to clear unnecessary hidden data.
• To ensure that all links are maintained, copy all linked files to the same folder where the PageMaker publication is
stored.
Last updated 6/14/2014
Page 68

Workspace and workflow
• Make sure that all necessary fonts are available in InDesign.
• Repair broken graphics links in the PageMaker publication.
• If you have a problem converting a large PageMaker document, convert portions of the PageMaker file separately to
isolate the problem.
If you cannot open a corrupt PageMaker document in PageMaker, try opening it in InDesign. InDesign can recover most
documents that PageMaker cannot open.
Open a PageMaker document or template
1 Make sure that the original application file is closed.
2 In InDesign, choose File > Open.
3 In Windows, choose PageMaker (6.0-7.0) in the Files of Type menu.
4 Select a file and click Open.
Note: If InDesign cannot convert a file or a specific part of a file, it displays a warning describing the reasons it cannot
co
nvert it and the results of the conversion attempt.
5 If a warning dialog box appears, do one of the following:
• Click Save to save a copy of the warnings as a text file, and then open the file in InDesign.
61
• Click Close to open the file in InDesign without saving the text file.
If you’re experiencing problems with the converted PageMaker document, use the Export dialog box to save the
document in InDesign Markup (IDML) format. Then open the IDML file and save it as an InDesign document.
Save a PageMaker template as an InDesign template
1 Open the template in InDesign.
2 Choose File > Save As and specify a location and filename.
3 Choose InDesign Template for Save As Type (Windows) or Format (Mac OS), and then click Save.
Common PageMaker conversion issues
Note the following:
• All master pages and layers are converted to InDesign masters and layers. Master pages in PageMaker convert to
master pages in InDesign and retain all objects including page numbering and guides. To maintain the order of
overlapping items, InDesign creates two layers when converting a PageMaker publication: Default and Master
Default. Master Default contains the Master page items.
• PageMaker document guides are placed on the Default layer in InDesign.
• All items on the PageMaker pasteboard appear on the pasteboard of the first spread in the InDesign document.
• All objects designated in PageMaker as Non-Printing are converted with Nonprinting selected in the InDesign
Attributes panel.
• Grouped objects remain grouped except where nonprinting items are included in a group.
Text and tables conversion issues
Note the following:
• Text is converted to InDesign text frames.
• Tables in PageMaker files are converted to InDesign tables.
Last updated 6/14/2014
Page 69

Workspace and workflow
• Styles are converted to InDesign styles. The [No style] in PageMaker is the equivalent of [No Paragraph Style] in
InDesign. However, [No Paragraph Style] picks up the attributes of a named style if that style was selected before
any typing occurred in the PageMaker publication.
• InDesign uses the Adobe Paragraph Composer for all paragraphs, causing some text to reflow. You can assign the
Adobe Single-Line Composer to one or more paragraphs to create line breaks more similarly to the PageMaker
composition engine, but text may still reflow.
• InDesign uses only Baseline leading. Proportional and Top of Caps leading in PageMaker convert to Baseline
leading in InDesign, possibly resulting in text shifting.
• The First Baseline of converted text may appear different than text created in InDesign. The First Baseline of
converted text is set to Leading, but the First Baseline of text created in InDesign is set to Ascent by default.
• InDesign uses a different hyphenation method than PageMaker, so line breaks may be different.
• Shadow text converts as plain text. Outline text converts as text with a stroke of 0.25 inches and a fill of Paper.
Book, index, and TOC conversion issues
Note the following:
• InDesign ignores Booklists when opening PageMaker publications. If you want to open all the publications on a
Booklist together, run the Build Booklet plug-in in PageMaker with a layout of None selected so that the booked
publications are combined into one. Note that text blocks and frames will no longer be threaded.
• Index entries from a PageMaker publication appear in the InDesign Index panel. Text with cross-references that use
the See Herein or See Also Herein option are mapped as See or See Also.
• Table of Contents text converts as a Table of Contents, with PageMaker TOC Style available in the style pop-up menu
in the InDesign TOC dialog box.
62
Linking and embedding conversion issues
Note the following:
• Text and graphics links are preserved and appear in the Links panel.
• If InDesign cannot locate the original link to a graphic, a warning appears asking you to repair the link in
PageMaker.
• InDesign does not support OLE (object linking and embedding). Consequently, when you open files that contain
OLE graphics, those graphics will not appear in the InDesign document.
Color and trapping conversion issues
Note the following:
• Colors are converted exactly to InDesign colors. PageMaker HLS colors are converted to RGB colors, and colors
from other color libraries are converted based on their CMYK values.
• Tints are converted as percentages of the parent color. If the parent color isn’t in the Swatches panel, it’s added during
conversion. When an object with a tint is selected, the parent color is selected in the Swatches panel, and the tint
value appears in the pop-up menu.
• Color profiles for PageMaker files are converted directly. All Hexachrome colors are converted to RGB values.
Profiles that are not ICC-compliant are replaced using the default CMS settings and profiles you specified for
InDesign.
• All strokes and lines (including paragraph rules) are converted to the default stroke styles they most closely
resemble. Custom strokes and dashes are converted to custom strokes and dashes in InDesign.
Last updated 6/14/2014
Page 70

Workspace and workflow
• InDesign does not support screen patterns or angles applied to TIFF images in Image Control; it drops these from
imported TIFF files.
• When Auto-Overprint Black Strokes or Fills (or both) is selected in the Trapping Preferences dialog box in
PageMaker, the setting carries over to InDesign, but Overprint Stroke or Overprint Fill is deselected in the Attributes
panel.
For information about other PageMaker conversion issues, check the support documents on the Adobe website.
More Help topics
PageMaker Conversion Guide
To olb ox
Toolbox overview
Some tools in the toolbox are for selecting, editing, and creating page elements. Other tools are for choosing type,
shapes, lines, and gradients. You can change the overall layout of the toolbox to fit your preferred window and panel
layout. By default, the toolbox appears as a single vertical column of tools. You can also set it up as a double vertical
column or as one horizontal row. However, you can’t rearrange the positions of individual tools in the toolbox. You can
drag the top of the toolbox to move it.
63
Select a tool from the default toolbox by clicking it. The toolbox also contains several hidden tools related to the visible
to
. Hidden tools are indicated by arrows to the right of the tool icons. Select a hidden tool by clicking and holding
ols
the current tool in the toolbox and then selecting the tool that you want.
The name of the tool and its keyboard shortcut appear when you hold the pointer over the tool—this text is called the
to
ou can turn off tool tips by choosing None from the Tool Tips menu in Interface preferences.
ol tip. Y
Open the Tool Hints panel (choose Window > Utilities > Tool Hints) to see which shortcut and modifier keys work with
the selected tool.
Last updated 6/14/2014
Page 71

Workspace and workflow
64
Note: Content Collector and Content Placer tools are not available in CS5.5 or earlier.
Display the toolbox
❖ Choose Window > Tools.
Display tool options
❖ Double-click a tool in the toolbox.
This procedure works only for some tools, such as the Eyedropper, Pencil, and Polygon tools.
Display and select hidden tools
1 In the toolbox, position the pointer over a tool that has hidden tools and hold down the mouse button.
2 When the hidden tools appear, select a tool.
Last updated 6/14/2014
Page 72

Workspace and workflow
Hidden tools menu
Select tools temporarily
1 When one tool is selected, hold down the keyboard shortcut of a different tool.
2 With the keyboard shortcut still held down, perform an action.
3 Release the keyboard shortcut to return to the previous tool.
For example, if the Gap tool is selected, hold down the V key to temporarily use the Selection tool. When you release
the V
key, the Gap tool is selected.
View tool hints
The Tool Hints panel describes how modifier keys work with the selected tool.
65
1 Choose Window > Utilities > Tool Hints to display the Tool Hints panel.
2 Select a tool in the toolbox to view a description of that tool and its modifier keys and shortcuts.
Change the toolbox layout
1 Choose Edit > Preferences > Interface (Windows) or InDesign > Preferences > Interface (Mac OS).
2 Choose a layout option from the Floating Tools Panel menu and click OK.
You can also click the double arrow icon at the top of the toolbox to change the toolbox layout.
Tools over view
Type tools Create and format type in standard or customized blocks or paths. (See Create text frames.)
Drawing tools Draw and style simple and complex objects, including rectangles, ellipses, polygons, freeform shapes.
(See Drawing .)
Selection tools Select (activate) objects, points, or lines. (See Selecting objects .)
Transform tools Reshape, reorient, and resize objects. (See Transforming ob j e c ts .)
Navigation tools Move around in, control the view of, and measure distances in a document. (See Zoom in and outand
Rulers and measurement units .)
The Scissors tool Splits paths and frames. (See Split a path.)
Last updated 6/14/2014
Page 73

Workspace and workflow
Gallery of selection tools
66
Selection tool lets you select entire
objects.
Direct Selection tool lets you select
points on a path or contents within
a frame.
Page tool lets you create multiple
page sizes within a document.
Gap tool lets you adjust the space
between objects.
Last updated 6/14/2014
Page 74

Workspace and workflow
Gallery of drawing and type tools
67
Last updated 6/14/2014
Page 75

Workspace and workflow
68
Last updated 6/14/2014
Page 76

Workspace and workflow
69
Pen tool lets you draw straight and
curved paths.
Add Anchor Point tool lets you add
anchor points to a path.
Delete Anchor Point tool lets you
remove anchor points from a path.
Convert Direction Point tool lets
you convert corner points and
smooth points.
Last updated 6/14/2014
Page 77

Workspace and workflow
70
Type tool lets you create text frames
and select
text.
Vertical Type tools lets you create
vertic
al text frames and select text.
Type on a Path tool lets you create
and edit typ
e on paths.
Pencil tool lets you draw a freeform
path.
Smooth tool lets you remove excess
angles from a path.
Erase tool lets you delete points on
a path.
Line tool lets you draw a line
segment.
Last updated 6/14/2014
Rectangle Frame tool lets you
create a square or rectangle
placeholder.
Ellipse Frame tool lets you create a
circle or oval placeholder.
Page 78

Workspace and workflow
71
Polygon Frame tool lets you create
a multi-sided shape placeholder.
Rectangle tool lets you create a
square or rectangle.
Gallery of transformation tools
Free Transform tool lets you rotate,
scale, or shear an obj
ect.
Rotate tool lets you rotate objects
around a fixed point.
Ellipse tool lets you create a c ircle or
oval.
Scale tool lets you resize objects
around a fixed point.
Polygon tool lets you create multisided shape.
Shear tool lets you skew objects
around a fixed point.
Last updated 6/14/2014
Page 79

Workspace and workflow
Gallery of modification and navigation tools
72
Eyedropper tool lets you sample
color or type attributes from objects
and apply them to other objects.
Measure tool measures the
distance
Scissors tool cuts paths at specified
points.
Hand
within the document window.
More Help topics
Selecting objects
Understanding paths and shapes
between two points.
tool moves the page view
Gradient Swatch tool lets you
adjust
the beginning and ending
points and angle of gradients
within objects.
Zoom tool increases and decreases
the view magnification in the
document window.
Gradient Feather tool lets you fade
an object into the background.
Note tool lets you add comments.
Tran sformin g objects
Sharing content
Last updated 6/14/2014
Page 80

Workspace and workflow
Exporting content from InDesign
Exporting content from InDesign to InCopy establishes a link between the two applications. You export InDesign text
frames, graphics frames, and their contents to InCopy using either of two methods:
• Create a container file (*.icma)—called an assignment—and add related groupings of document items (such as the
text and graphics of a story) to the assignment so they can be worked on together. Content within assignments is
exported as *.icml files.
• Export text and graphics frames separately (including placeholder frames) using the Edit > InCopy > Export menu
commands. Exported content is saved as *.icml files.
After content is exported, small icons appear at the top left of exported frames in InDesign and InCopy, and in the
Assignmen
frames and they differentiate managed frames from those that aren’t part of the workflow. All exported content appears
in the Assignments panel. Content exported using the Export menu commands appears in the Unassigned InCopy
Content section of the Assignments panel list. While both methods establish a controlled connection between InCopy
content and an InDesign document, the primary method is to use assignment files.
Exporting content makes the content available for users to check out while maintaining a link to the original InDesign
do
cume
Once the content is exported, InCopy users can see (but not change) the page layouts, styles, and so forth as they appear
in the
ts panel. A link to the exported file appears in the Links panel. These icons indicate the status of managed
nt. (This link is made from within InDesign; you cannot create the link from InCopy.)
InDesign document.
73
Note: Y
ou can also create text or anchored graphics using InCopy and then place them in InDesign.
Assignments panel overview
The primary tool for working with assignments is the Assignments panel (Window > Assignments in InCopy, Window
> Editorial > Assignments in InDesign). The Assignments panel displays the files exported from the currently active
InDesign document, and an icon indicates their status. The Assignments panel menu also contains commands that
control import version and file-management functions between InCopy and InDesign. When you open an assignment
in InCopy, the assignment name and its contents appear in the Assignments panel. You can double-click text and
graphics frames in the Assignments panel to select them in the document window.
Note: A
ll content expor ted to InCopy or added to an assignment is also listed in the Links panel. Although you can do some
workf
low management tasks, such as checking out and checking in content, the recommended panel for these tasks is the
Assignments panel.
Last updated 6/14/2014
Page 81

Workspace and workflow
InDesign Assignments panel
A InCopy content names B InDesign document name C Assignment Out Of Date status D Available And Text Up To Date status E In Use And
t Out Of Date status F Edi ting And Te xt Up To D ate s tatu s G Unassigned content H User name I Update Content button J Check Out/Check
Tex
election button K New Assignment button L Delete Selected Assignments/Remove button
In S
74
InCopy Assignments panel
A InCopy content names B Assignment Out Of Date status C Assignment name D Available And Text Up To Date status E In Use And Text
ate status F Editing And Text Up To Date status G User name H Update Design button I Update Content button J Check Out/Check
Out Of D
election button
In S
Assignment files
In InDesign, assignment files are containers for organizing collections of page items. For example, you might want to
select all the items in a story (headline, byline, copy, graphics, and captions), and then assign them to one InCopy user.
Adding those items to an assignment provides a convenient way for InCopy users to access only the content for which
they are responsible. Assignment files (*.icma) appear in the file system, in the InCopy story bar, and in status messages.
Only InDesign users can create assignment files; only InCopy users can open them.
When you create an assignment, a folder is created in the s
as sig nme nt folde r in clude s the *. icm a as sig nme nt f ile s and a conte nt subfo lde r th at conta ins any e xporte d In Copy s tor y
files (in .icml format) that are part of images or other resources. Once the assignment is created, store the project folder
in a location where all users have access to it, or create and distribute an assignment package. If content is exported
before it’s added to an assignment, the files on disk are not moved to the content folder of the assignment file.
Assignment files include the following:
• Links or pointers to the associated page items, including placeholder frames. These elements let the InCopy user
open a single file in InCopy and have editorial access to multiple page items.
Last updated 6/14/2014
cation as the InDesign document by default. This
ame lo
Page 82

Workspace and workflow
• Any transformations on the graphics included in the assignment, such as moving, scaling, rotating, or shearing.
• Page geometry, so InCopy users can see the layout of the frame and its content that they’re editing without opening
the entire InDesign file.
• Color-coding of assigned frames in the document.
Illustration of page in InCopy showing page geometry and color coding
Create assignments and add content (InDesign)
Only InDesign users can create assignments and add content to them. There are several ways to create assignments.
The method you choose usually depends on whether you have content to add at the time you create the assignment.
75
• Create empty assignment files. From your InDesign document, you can create a series of empty assignments to act
as templates for content to come later.
• Create assignments and add content at the same time.
• Add content to an existing assignment file. You can add linked content—text and graphics that have already been
exported as InCopy content—or you can add selected page items to become linked InCopy content. If one or more
of the selected frames already contain InCopy content files, and none is part of an assignment, you can add them to
a new or existing assignment file.
By default, the assignment folder you create is saved in the same folder as the InDesign document. You can then place
this f
Note: If you don’t want InCopy users to place and fit graphics, don’t add graphics frames to an assignment.
n a server or create and send a package.
older o
Create empty assignment files (InDesign)
1 In InDesign, save the document.
2 In the Assignments panel, choose New Assignment from the panel menu.
3 In the New Assignment dialog box, specify assignment file options and click OK.
Simultaneously create assignments and add content (InDesign)
1 In InDesign, create a document that has one or more text frames, graphics frames, or placeholder items, and then
save the document.
2 Select the text and graphics frames you want to add.
3 Do one of the following:
• From the Assignments panel menu, choose Add To Assignment, and then select New.
• Choose Edit > InCopy > Add [option] To Assig n m e nt > New.
Last updated 6/14/2014
Page 83

Workspace and workflow
4 In the New Assignment dialog box, specify assignment file options and click OK.
The newly created assignment file includes any frames selected in the document window.
Add content to existing assignments (InDesign)
1 Save the InDesign document.
2 Select the text and graphics frames you want to add.
3 Do one of the following:
• From the Assignments panel menu, choose Add To Assignment, and then select the assignment.
• Drag content from the Unassigned InCopy Content section of the Assignments panel into an existing
assignment.
• Select page items with the Selection tool and drag them to an existing Assignment in the Assignments panel.
• Choose Edit > InCopy > Add [option] To Assignment, and then select the assignment.
4 Choose Update All Assignments from the Assignments panel menu to make the content files available to InCopy
users.
Note: You can add content only to assignments in the same document. However, you can import the same content into
ltiple documents and add it to an assignment in each of those documents.
mu
76
Assignment file options (InDesign)
When you create or modify an assignment file, you can set the following options:
Assignment Name The unique identification of the assignment in the Assignments panel, for example “Ocean article.”
This name must conform to the file naming conventions of the operating system.
Assigned To The unique identification of the user assigned to the files. The user’s name appears in parentheses
following the assignment name in the Assignments panel. Entering a name here is for informational purposes only; it
doesn’t grant special rights or permissions to the user.
Color Displays a list of colors for adding a distinctive highlight to the frames of the current assignment in the document
window, and to the assignment names in the Assignments panel. This color coding differentiates frames that belong to
one assignment from frames that belong to another, and it differentiates from unassigned frames. To toggle the display
of this color coding, choose View > Extras > Show/Hide Assigned Frames. In InCopy, the color coding is visible only
in Layout view.
Note: I
f toggling the display of assigned frames produces unexpected results, those frames might be tagged for XML and
ew > Structure > Show Tagged Frames might be enabled. You cannot show assigned frames and tagged frames at the
Vi
same time.
Change Click the Change button to specify the location of the assignments folder. By default, the assignments folder is
created in the same location as the InDesign file.
Placeholder Frames Lets InCopy users see the text and graphics frames in the assignment as well as boxes (or other
shapes) representing all other frames on those InDesign pages. All frames and placeholders accurately reflect the size,
shape, and location of the InDesign originals. Placeholder frames are empty shapes that don’t show any of the content
in the InDesign document. The Placeholder Frames option provides the least amount of fidelity, and therefore provides
the fastest performance. In InCopy, the placeholder frames are visible only in Layout view. InCopy users cannot check
out and edit placeholder frames.
Assigned Spreads Lets InCopy users see all assigned frames, as well as the entire contents of other frames that aren’t
part of the assignment, on the same spread. In InCopy, content in frames outside an assignment isn’t editable and is
visible only in Layout view.
Last updated 6/14/2014
Page 84

Workspace and workflow
All Spreads Exports all content in the InDesign document to the assignment file. This option provides the maximum
amount of fidelity; it also provides the slowest performance because the assignment file displays the design and layout
of every page, including pages not relevant to the section a user is editing.
Linked Image Files When Packaging Includes a copy of linked images in the assignment package. Selecting this option
gives InCopy users access to images but increases the package’s file size. InCopy users can include images while
returning a package.
Export content as separate InCopy files (InDesign)
If your workgroup prefers working with separate files rather than using assignments, you can export InCopy content
without using an assignments file. Compared with creating a single assignment file with references to multiple content
files and layout information, this method creates a separate file (.icml) for each text or graphics frame you specify in
the document. To see the context of the content you are editing, you must also open the associated InDesign document
(.indd).
Cater the InDesign document to suit your workflow needs. For example, if you want all of the editor’s comments to be
exp
ted in a single file, create a layer for the editor to make comments. You can then export all the content on the
or
selected layer.
Note: A
quick way to export content as separate InCopy files is to use the Selection tool to drag selected frames into the
assigned InCopy Content in the Assignments panel.
Un
77
1 In InDesign, create a document with one or more text frames, graphics frames, or placeholder items.
2 Do either of the following:
• Select the text or graphics frame of a single story, or Shift-click to select multiple frames.
• Click an insertion point in a story, or select some text in a text frame.
3 Choose Edit > InCopy > Export, and then choose one of the following options:
Selection Exports all selected text and graphics frames.
Layer Exports all content on the selected layer.
All Stories Exports every story that has not been exported already.
All Graphics Exports every graphic that has not been exported already.
All Graphics And Stories Exports every story and graphic that has not been exported already.
If you export all content in the document, and then add more text or graphics frames to the same document, you
can save time exporting the new ones by using the Export > All Stories (or All Graphics or All Graphics And Stories)
comm
and again. InDesign exports only the new content.
4 Enter a name and location for the files, and then click Save.
The file name you specify is used as a prefix for identifying each exported content file in the file system. If you export
mul
tiple text frames, the first several characters of the text are automatically appended to the file name; for example,
“mystory-Upcoming cycling events.icml.” For multiple graphics frames, the file names are formed as “mystorygraphic,” “mystory-graphic-1,” and so on. The file name appears in the file system, in the InCopy story bar, and in
status messages.
5 When prompted, save your InDesign file.
The InCopy content is now managed, and is available to be checked out and edited by other users in the workflow.
Shared content appears in the Links panel just like imported graphics. If you move a shared file manually, you can use
th
e Links pa
n
el to update its link.
Last updated 6/14/2014
Page 85

Workspace and workflow
When you export content, you see the Available icon on the text frame (InDesign and InCopy), and in the
Assignments panel (InCopy). The word [Editing] appears in the story bar (InCopy).
More Help topics
Workf l o w i cons
Placing InCopy files in InDesign documents
Relink missing assignment files (InDesign)
Best practices for working with managed files
PageMaker menu commands
Browse through these tables to learn where Adobe PageMaker commands are found in AdobeInDesign CS5.
PageMaker File menu commands
PageMaker command InDesign equivalent Additional information
78
File > New File > New > Document
File > Open File > Open
File > Recent Publications File > Open Recent (Windows®)
File > Close File > Close
File > Save File > Save There is no preference in InDesign to Save
File > Save As File > Save As See note above.
File > Revert File > Revert InDesign does not revert to “mini-saved”
File > Place File > Place
File > Acquire No equivalent Scan images using the software that came
File > Export File > Export
File > Links Manager Window > Links
File > Document Setup File > Document Setup
File > Printer Styles File > Print Presets
Smaller
or Save Faster. Use Save to perform a
fast save and Save Asto compact a document
to the smallest possible size.
of a document as PageMaker does;
versions
instead, InDesign offers unlimited levels of
Undo.
with your scanne
in InDesign.
r, and then place the images
File > Print File > Print
File > Preferences > General Edit > Preferences (Windows) or InDesign >
Preferences (Mac OS)
Last updated 6/14/2014
Equivalent settings can be found in
Composition, Units & Increments, Guides &
Pasteboard, and Display Performance
preferences.
Page 86

Workspace and workflow
PageMaker command InDesign equivalent Additional information
79
File > Preferences > Online No equivalent You can drag objects from a web browser to
File > Preferences > Layout Adjustment Layout > Layout Adjustment You specify layout adjustment options and
File > Preferences > Trapping Window > Output > Trap Presets To specify trapping preferences, create a new
File > Exit (Windows) or File > Quit (Mac OS) File > Exit (Windows) or InDesign > Quit
InDesign (Mac OS)
InDesign without configuring a proxy.
enable layout adjustment at the same time.
Settings in InDesign match those in
PageMaker almost exactly. Ruler guides follow
their associated column or margin guides by
default. To change this, deselect Allow Ruler
Guides To Move.
eset.
Trap pr
PageMaker Edit menu commands
PageMaker command InDesign equivalent Additional information
Edit > Undo Edit > Undo InDesign allows unlimited levels of Undo.
Edit > Cut Edit > Cut
Edit > Copy Edit > Copy
Edit > Paste Edit > Paste InDesign does not support OLE; however, you
can se
t similar options in the Links panel.
Edit > Clear Edit > Clear
Edit > Select All Edit > Select All
Edit > Deselect All Edit > Deselect All
Edit > Editions (Mac OS) No equivalent InDesign does not support Publish/Subscribe ;
Edit > Paste Multiple Edit > Step And Repeat
Edit > Paste Special Edit > Paste Without Formatting
Edit > Insert Object (Windows) File > Place
Edit > Edit Story Edit > Edit In Story Editor
Edit > Edit Original Edit > Edit Original You can also choose Edit Original in the Links
Edit > Show Clipboard (Mac OS) No equivalent
Edit > Ruby/Tatechuyoko/Emphasis
omposite Glyphs
Marks/C
Edit > Vertical Text Type > Writing Direction > Horizontal or
Ruby Placement and Spacing, Tate-chu-yoko,
and Kenten (for emphasis marks) appear on
the Character panel menu. Choose Type >
Glyphs to display the Glyphs panel.
Vertical
ver, you can set similar options in the
howe
Links panel.
panel m
enu.
You can use the Vertical Type tool in the
toolbox.
Last updated 6/14/2014
Page 87

Workspace and workflow
PageMaker Layout menu commands
PageMaker command InDesign equivalent Additional information
80
Layout > Go To Page Layout > Go To Page You can also double-click a page icon in the
Layout > Insert Pages Layout > Pages > Insert Pages
Layout > Remove Pages Layout > Pages > Delete Pages
Layout > Sort Pages Window > Pages Click an d drag pages in the Pages panel to sort
yout > Go Back Layout > Go Back
La
Layout > Go Forward Layout > Go Forward
Layout > Column Guides Layout > Margins And Columns
Layout > Copy Master Guides No equivalent InDesign master guides from any given
Layout > Autoflow
Press Shift when a loaded text icon is
displayed.
Pages pan
them.
master are always copied to pages that use
that master.
You can flow text manually, automatically
(with
el to jump to that page.
autoflow), or semi-automatically.
PageMaker Type menu commands
PageMaker command InDesign equivalent Additional information
Type > Font Type > Font
Type > Size Type > S ize
Type > Leading Type > Character or Control panel
mode (Window > Control)
Type > Type Style Type > Character or Control panel
mode (Window > Control)
Type > Expert Kerning Type > Character or Control panel
mode (Window > Control)
Type > Horizontal Scale Control panel in Character mode (Window >
Control)
Type > Character Type > Character
Type > Paragraph Type > Paragraph
Type > Indents/Tabs Type > Tabs
Type > Hyphenation Type > Paragraph Choose Hyphenation from the Paragraph
in Character
in Character
in Character
InDesign uses baseline leading by default, as
opposed to proportional leading, which is
PageMaker’s default.
InDesign displays the type styles available for
the selected font. You can also use Quick
Apply.
Expert kerning in PageMaker is similar to
optical kerning in InDesign.
panel m
enu.
Last updated 6/14/2014
Page 88

Workspace and workflow
PageMaker command InDesign equivalent Additional information
81
Type > Alignment Type > Paragraph or Control panel in
Type > Styl e Type > Paragraph Styles or Type > Character
Type > Define Styles Type > Paragraph Styles or Type > Character
Paragraph mode (Window > Control)
Styles
Styles
InDesign supports both paragraph and
character styles.
Choose New Paragraph Style in the Paragraph
Styles panel to create a paragraph style.
Choose New Character Style in the Character
Styles panel to create a character style.
PageMaker Element menu commands
PageMaker command InDesign equivalent Additional information
Element > Fill Window > Color > Swatches or Window >
Element > Stroke Window > Stroke Choose a stroke style in the Stroke panel or
Element > Fill And Stroke Window > Color > Swatches, Window >
Element > Frame > Attach Content No equivalent InDesign automatically creates a frame for
r > Color
Colo
Stroke, and Window > Output > Attributes
InDesign does not support patterned fills. The
Swatches panel in InDesign is equivalent to
the Colors palette in PageMaker.
defin
e a custom stroke style.
Create tints using the Swatches panel. Specify
overprinting in the Attributes panel.
text files or graphics you import. To paste
content into an existing frame, select the
frame, and then place or paste the content
into it.
Element > Frame > Frame Options Object > Text Frame Options (text frames
Element > Frame > Change To Frame Object > Content > [con
Element > Frame > Next Frame View > Extras > Show Text Threads
Element > Frame > Previous Frame View > Extras > Show Text Threads
Element > Frame > Remove From Threads Double-click the in port or out port to break a
Element > Frame > Delete Content Select content in the frame, and then press
Element > Arrange Object > Arrange
Element > Align Objects (Windows) or
ment > Align (Mac OS)
Ele
Element > Text Wrap Window > Text Wrap
Element > Group Object > Group
Element > Ungroup Object > Ungroup
Element > Lock Position Object > Lock Position
only) or Obje
thre
Delete.
Window > Object & Layout > Align
ct > Fitting
tent type]
ad.
For text frames, specify columns, vertical
alignment, and inset spacing in the Text
Frame Options dialog box. Set horizontal
alignment in the Paragraph panel (Type >
Paragraph). For graphics and text frames, use
subcommands on the Object > Fitting menu
to fit content to a frame (or vice versa).
Select text with the Type tool. Select graphics
with the Direct Selection tool.
Last updated 6/14/2014
Page 89

Workspace and workflow
PageMaker command InDesign equivalent Additional information
Element > Unlock Object > Unlock Position
82
Element > Mask Object > Clipping Path You can also mask a graphic by creating the
masking sha
to mask, and then pasting it into the shape
(Edit > Paste Into), or by adjusting its graphics
frame.
Element > Unmask Object > Clipping Path See note above.
Element > Image > Image Control No equivalent Use the Edit Original command to change
image contr
application.
Element > Image > CMS Source Object > Image Color Settings
Element > Image > Photoshop Effects Object > Effects
Element > Polygon Settings Double-click the Polygon tool in the Toolbox
Element > Rounded Corners Object > Corner Options
Element > Link Info Window > Links Choose Link Information on the Links panel
menu.
Element > Link Options Type Preferences or Window > Links In File Handling Preferences, select or deselect
Create Link
Spreadsheet Files. Or, on the Links panel
menu, choose Unlink.
Element > Non-Printing Window > Output > Attributes
Element > Remove Transformation No equivalent
pe, copying the image you want
ol settings in the original
s When Placing Text And
PageMaker Utilities menu commands
PageMaker command InDesign equivalent Additional information
Utilities > Plug-ins Help > Configure Plug-ins (Windows) or
Utilities > Find Edit > Find/Change You can perform Find/Change operations in
Utilities > Find Next Edit > Find Next See note above.
Utilities > Change Edit > Find/Change See note above.
Utilities > Spelling Edit > Spelling > Check Spelling You can check spelling in Layout view or Story
Ut
ilities > Book File > New > Book You add, delete, and sort documents in a book
Utilities > Index Entry Window > Type & Tables > Index To add an index entry, click the New button in
Utilities > Show Index Index panel in Reference mode (Window >
sign > Configure Plug-ins (Mac OS)
InDe
& Tables > Index)
Type
Layo
ut view or Story Editor.
Editor.
using the Book panel.
the Index panel.
Last updated 6/14/2014
Page 90

Workspace and workflow
PageMaker command InDesign equivalent Additional information
83
Utilities > Create Index Window > Type & Tables > Index Choose Generate Index on the Index panel
Utilities > Create TOC Layout > Table Of Contents
Utilities > Define Colors Window > Color > Swatches Choose New Color Swatch in the Swatches
menu.
panel m
enu.
PageMaker View menu commands
PageMaker command InDesign equivalent Additional information
View > Display Master Items Choose Hide/Show Master Items from the
View > Display Non-Printing Items
View > Zoom In View > Zoom In
View > Zoom Out View > Zoom Out
View > Actual Size View > Actual Size
View > Fit In Window View > Fit Page In Window or View > Fit
View > Entire Pasteboard View > Entire Pasteboard
Pages panel menu
Select Normal View Mode in the Toolbox
to view nonprinting items. To hide
nonpr
inting items, select Preview Mode .
Spread I
n Window
You can also create a layer for objects you do
want to print, and then show or hide that
not
layer when you print or export.
View > Zoom To Choose a magnification level from the Zoom
View > Hide/Show Rulers View > Hide/Show Rulers
View > Snap To Rulers No equivalent
View > Zero Lock Right-click (Windows) or Control-click (Mac
View > Hide/Show Guides View > Grids & Guides > Hide/Show Guides
View > Snap To Guides View > Grids & Guides > Snap To Guides
View > Lock Guides View > Grids & Guid es > Lock Guides And View
View > Clear Ruler Guides Using InDesign keyboard shortcuts, Press
View > Send Guides To Back Edit > Preferences > Guides & Pasteboard
View > Hide/Show Scroll Bars No equivalent
the bottom of the document
menu at
window.
OS) the z
ero point, and then choose Lock Zero
Point from the context menu that appears.
s & Guides > Lock Column Guides
> Grid
Ctrl+Alt+G (Windows) or
Command+Option+G (Mac OS) to select all
guides on the current spread, and then press
Delete.
ows) or InDesign > Preferences > Guide s
(Wind
& Pasteboard (Mac OS)
Select the Guides In Back option.
Last updated 6/14/2014
Page 91

Workspace and workflow
PageMaker Window menu commands
PageMaker command InDesign equivalent Additional information
Window > Arrange Icons (Windows) No equivalent
Window > Tile Window > Arrange > Tile
Window > Cascade Window > Arrange > Cascade
Window > Hide/Show Tools Window > Tools
Window > Hide/Show Control Palette Window > Control
84
Window > Hide/Show Colors Window > Color > Swatches or Window >
Window > Hide/Show Styles Window > Styles > Paragraph Styles or
Window > Hide/Show Layers Window > Layers
Window > Hide/Show Master Pages Window > Pages
Window > Hide/Show Hyperlinks Window > Interactive > Hyperlinks
Window > Plug-in Palettes No equivalent Plug-ins appear as added options in InDesign
Window > [name of open document] Window > [name of open document]
Color > Color
Character Styles
men
us or panels, or in InDesign dialog boxes.
Assignment packages
Create and send packages (InDesign)
Under ideal circumstances, all InDesign and InCopy users on the team have access to a server where assignment files
are stored. However, if one or more users don’t have access to a common server, you can create and distribute
compressed assignment packages. After working on the assignment, the InCopy user repackages the assignment and
returns it to be integrated into the InDesign document. Package files created in InDesign include the .icap extension.
The return package files created in InCopy include the .idap extension.
There are two commands for packaging files: Package For InCopy and Package And Email. Use Package For InCopy to
cr
e a compressed package that you can distribute manually; use Package And Email to create a compressed package
eat
that is attached automatically to an e-mail message.
Note: Do not confuse an assignment package with the File > Package command in InDesign that lets you bundle and send
cument and its assets to a printer.
a do
Create a package for manual distribution
1 Create an assignment and add the content you want to include in the package.
Only content that is checked in can be included in the packaged
prompted to check in content.
2 In the Assignments panel, select the assignment and choose Package For InCopy from the panel menu.
3 Specify a name and location for the package file, and click Save.
Last updated 6/14/2014
assignment. If any content is checked out, you’re
Page 92

Workspace and workflow
You can attach the package file to an e-mail message, upload it to an FTP server, or copy it to a disk or other external
media.
85
Note: C
hoosing Edit > Undo after you create a package cancels th
it doesn’t delete the package file from your computer or unsend the e-mail.
e package and unlocks the items in the assignment, but
Create a package for e-mail (InDesign)
1 Create an assignment and add the content you want to include in the package.
Only content that is checked in is included in the packaged assignment. If any content is checked out, you’re
pro
mpted to check in content.
2 In the Assignments panel, select the assignment and choose Package For InCopy And Email from the panel menu.
A compressed assignment package is created and attached to an e-mail message of your default e-mail application.
Note: I
f you want to use a different e-mail application, change the default e-mail application. See your system
documen
3 Edit the e-mail message by adding a recipient and providing any instructions. Send the message.
All items in the assignment are checked out to the assigned user. However, the contents of the package itself aren’t
locke
tation for details.
d, so anyone can open the package and edit them.
Cancel a package
In some cases, the package you send isn’t returned. For example, the message may have gotten lost, or the recipient may
no longer work on the project. In such a situation, you can cancel a package.
1 In the Assignments panel, select the packaged assignment, and choose Cancel Package from the panel menu.
2 Click OK to cancel the package.
Canceling a package doesn’t remove the package file from your computer.
When a package is cancelled, the package’s contents are available for editing. Be aware that if someone returns a package
has been cancelled, conflicts may occur.
that
Update a package
After you create a package, you may want to add, remove, or resize items.
1 Add, remove, or resize one or more stories to the packaged assignment.
2 Select the assignment in the Assignments panel, and do one of the following:
• Choose Update Package from the Assignments panel menu. Specify the name and location of the file. Make the
updated package available to users by placing it on a shared server or by e-mail. Remember to notify InCopy
users that the package has been updated.
• Choose Update Package And Email from the Assignments panel menu, and then send the message.
When InCopy users open the updated package, only new content is added automatically to the assignment; InCopy
users can de
cide whether to overwrite existing content, allowing them to preserve previous edits.
Receive packages (InCopy)
You may receive a package from an InDesign user who created the package or from an InCopy user who forwarded the
package to you. When you open an assignment package, the package is decompressed, and the contents are copied to
a new subfolder in an InCopy Assignments folder.
Last updated 6/14/2014
Page 93

Workspace and workflow
Open a package (InCopy)
❖ To open an InCopy package (*.icap or *.incp), do any of the following:
• Launch the package using the e-mail application. For example, double-click the attachment file.
• Use Explorer or Finder to open the file. For example, double-click the file or drag it to the InCopy application
icon.
• In InCopy, choose File > Open, and double-click the packaged assignment file.
• In InCopy, choose Open Package from the Assignments panel menu, and then double-click the package file.
You can now edit the stories in the package. When you begin editing a story, you’re prompted to check out the contents
of the f
rame. When you’ve finished editing, save all content and return or forward the package.
Return or forward a package (InCopy)
After you open and edit a package, you can send it to another InCopy user or you can return it to the InDesign user
who created the package. Package files created for other InCopy users include the .icap extension; return package files
created for InDesign users include the .idap extension.
1 Edit and check in the content you want to include in the package.
2 From the Assignments panel menu, choose one of the following:
Forward For InCopy Create a package for another InCopy user. Specify the name and location of the package file,
and then make it available to the InCopy user.
86
Forward For InCopy And Email Create and send a package for another InCopy user via e-mail. The package appears
as an attachment in a new message in your default e-mail application. Specify the recipient, provide instructions,
and send the e-mail message.
Return For InDesign Create a package to return to the InDesign user.
Return For InDesign And Email Create and return a package to the InDesign user by e-mail. The package appears as
an attachment in a new message in your default e-mail application. Specify the recipient, provide instructions, and
send the e-mail message.
Receive return packages (InDesign)
❖ To open an InDesign package (*.idap or *.indp), do any of the following:
• Launch the package using the e-mail application. For example, double-click the attachment file.
• Use Explorer or Finder to open the file. For example, double-click the file or drag it to the InDesign application
icon.
• In InDesign, choose File > Open, and double-click the package file.
• In InDesign, choose Open Package from the Assignments panel menu, and then double-click the package file.
You’re prompted to update all links when opening the package. I
packaged, you can determine whether to update or unlink the content in the InDesign file. When the stories in the files
are returned and checked in, you can check out and edit the content.
More Help topics
Package files
f a story has been modified since the assignment was
Check in content
Save changes (InCopy)
Last updated 6/14/2014
Page 94

Workspace and workflow
Update assignment files (InDesign)
Unlink content files (InDesign)
Adjusting your workflow
Move content between assignments (InDesign)
InDesign users can move content between existing assignments as well as from the Unassigned InCopy Content section
of the Assignments panel. You can also create a new assignment and move content to it.
1 Save the InDesign document.
2 In the Assignments panel, click the arrow to the left of the assignment name to display the contents of the
assignment.
3 Select an item in an assignment.
4 Do one of the following:
87
• Drag the content from one assignment to another.
• To move content to an existing assignment, choose Add To Assignment from the Assignments panel menu, and
then select the desired assignment.
• To c reate a new assignment as you move content , from the Ass ignments panel menu , choose Add To Ass ignment
> New, and then specify options in the New Assignment dialog box.
5 Choose Update All Assignments from the Assignments panel menu.
If the assignment lists are short, you might prefer dragging content items to and from assignments and the Unassigned
InCopy Content section.
Delete assignments (InDesign)
❖ In the Assignments panel, select one or more assignments and choose Delete Assignment in the panel menu.
Deleting assignments accomplishes the following:
• Removes the assignment data from the document.
• Deletes the assignment file from the file system.
• Removes the assignment name from the list.
• Moves any InCopy content to the Unassigned InCopy Content section in the Assignments panel.
Note: If an InCopy user has an assignment open when it is deleted in InDesign, an alert message notifies the InCopy user
that
the assignment has been deleted. However, the content files are not deleted and can be updated without loss of changes.
Relink missing assignment files (InDesign)
If you move or delete an assignment file from disk, and then open the InDesign document from which it was created,
InDesign won’t know where the assignment file is located. You need to re-create the assignment file so InDesign can
find it.
Last updated 6/14/2014
Page 95

Workspace and workflow
Re-create the assignment file in the original location
❖ In the Assignments panel, do one of the following:
• Select the missing assignment (it will still be listed in the panel) and choose Update Selected Assignments from
the panel menu.
• Choose Update All Assignments from the panel menu.
Change the assignment location
❖ To re-create the assignment file in a new location, do one of the following in the Assignments panel:
• Select the assignment and choose Change Assignment Location from the panel menu. Specify a location and
name for the new file.
• Double-click the assignment name. In the Assignment Options dialog box, click Change and specify a location
and name for the new file.
Correct mistakes
If you make a mistake, you can discard changes made since the last Save command and restore the content from the file
system.
Because InDesign automatically saves every editable InCopy content file when you save the InDesign document, the
Cance
l Checkout command restores only versions since the last time the document was changed.
88
❖ Do one of the following:
• To undo the most recent change, choose Edit > Undo [action].
• To undo all changes made since the last time you saved the document, choose File > Revert Content.
• To undo changes since the last saved version and remove the lock file, select the content in the Assignments panel
and choose Cancel Check Out from the panel menu. This action makes the content read-only and available for
others to check out.
Overriding locked files (InDesign)
Users might not immediately realize how their actions affect others in the workflow, and might accidentally create
situations where conflicts exist between content status and ownership. If necessary, the InDesign user can resolve
conflicts by unlinking a locked file checked out to a different user and taking control over the file. Unlinking a file stores
the content in the InDesign document, but the content is no longer shared with InCopy.
Unlink content files (InDesign)
If necessary (because of a production deadline, for example), InDesign users can remove a content file from the
managed workflow and from the Links panel by unlinking it. If you want to make the content available again for editing,
you must reexport it as InCopy content using a different file name. This ensures that the old lock file won’t prevent users
from editing the file.
Note: U
nlinking your own checked-out file removes it from the workflow and deletes the lock file from disk. You can re-
expor
t the content and overwrite the file name without conflict.
❖ To unli nk an InC opy c ontent fi le, sele ct the file ( .icml or .i ncx extension) in the Li nks pane l and choos e Unlin k from
the panel menu. Unlinking embeds the content into the document and removes the link to the InCopy file on disk.
To relink the file, choose Edit > Undo Unlink.
Last updated 6/14/2014
Page 96

Workspace and workflow
You can also unlink by deleting a frame, or using the InDesign Links panel to relink a content file to another file. You
can also select the story in the Assignments panel and drag it to the Trash icon.
Placing InCopy files in InDesign documents
Although a typical workflow begins in InDesign, where the basic layout and text and graphics placeholders are defined
and exported to InCopy, a different workflow can start with a stand-alone InCopy content file (.icml or .incx) that you
place in InDesign using the File > Place command.
89
Consider the following dependencies when you place
Styles If the InCopy text file has styles applied, they are added to the InDesign list of styles for the document. In the
event of a style-name conflict, InDesign overwrites the imported style with its existing style.
Layout You can create the basic layout geometry for the content in InDesign, and then create or import the text and
styles from a word-processing application. (Text files placed within InCopy are embedded in the InCopy document and
are not linked to any external file.)
Placing/Duplicating If you place an InCopy content file more than once, each instance of the content appears in the
InDesign Links panel, but they are all managed as one content file. The same is true for any exact copies of a content
file (by any means of duplication).
Note: I
f you copy and paste some, but not all, of the text in a managed InCopy content file, the result is a new content file
is not connected to the original and has no link to any external file (InCopy or otherwise). The original and the pasted
that
portions can be edited independently of each other.
Updates/Management Once multiple instances of a managed content file are present in an InDesign document, they
beh ave as i f the y wer e op en in t wo appl icat ion s. For e xample , che ckin g ou t on e ins tan ce of the c ont ent file lock s all othe r
instances so that you can edit only the checked-out instance. In this case, you would use the appropriate Update
command to refresh the other (open) instances of the content.
Copy content files in an InDesign document:
In
More Help topics
Update, restore, and replace links
Accidentally updating your work
Working with managed files
Open shared content
Only InCopy users can open assignment files (.inca). If an InCopy user opens an InDesign file that contains
assignments, the user will have access to all the managed content, regardless of assignments.
❖ Do one of the following.
• In InCopy, choose File > Open, select an assignment file (.icma or .inca), and click Open.
• In InDesign or InCopy, choose File > Open, select an InDesign file (.indd) that contains assigned content, and
click Open.
• Open an assignment package. See Receive packages (InCopy).
The assignment names and their contents appear in the Assignments panel.
Last updated 6/14/2014
Page 97

Workspace and workflow
Check out content
When you check out an item, a hidden lock file (.idlk) is placed on the file system. Once the content is checked out, you
have exclusive control over its content, and others are locked out from making changes. You can check out InCopy
content only; you cannot check out InDesign documents with layout information.
If you attempt to close an InDesign do cument containing one or more InCopy content file s that are che cked out to you,
a
t message appears, prompting you to check in all content. If you close the document without checking in the
n aler
content files, they will still be checked out to you the next time you open the InDesign document. Saving the InDesign
document automatically saves every editable InCopy content file.
Check out content (InDesign)
❖ Do one of the following:
• In the layout, select the text or graphics frames to edit and choose Edit > InCopy > Check Out.
• In the Assignments panel, select the files and choose Check Out from the panel menu.
When you check out available content in InDesign, you see the Editing icon on the InDesign frame. In InCopy, the
In Use icon appears on the InCopy frame and in the Assignments panel if the assignment files are stored on a local
server.
90
Check out content (InCopy)
1 Do one of the following:
• If the content you want is part of an assignment, choose File > Open and select the assignment file (.icma or
.inca).
• If the content you want was exported as individual files, choose File > Open and select the InCopy file (.icml or
.incx). To see the layout so you can do copyfitting, select the InDesign document.
2 Do one of the following:
• To check out a single InCopy content file, choose File > Check Out.
• To check out all content in an assignment at once, select the assignment in the Assignments panel, and choose
Check Out from the panel menu.
• To check out individual items in an assignment, open the assignments list in the Assignments panel, select an
item or multiple items, and choose Check Out from the panel menu.
The Editing icon appears next to the item or items in the Assig
checked out to you for your exclusive use.
3 If prompted to update the content with changes, click OK.
When you check out available content in InCopy, you see the Editing icon on the InCopy frame, and in the
Assignments panel. In InDesign, the In Use icon appears on the InDesign frame.
ts panel, indicating that the content is
nmen
Opening managed files (InCopy)
Opening a managed content file (.icml or .incx) directly in InCopy and working with it in Story view may be more
appropriate for quick writing and editing. You do not have to check out an individual managed file to edit it; InCopy
automatically checks it out. When you save and close the file, InCopy automatically checks in the content. The Save
commands are different when you open individual files.
Last updated 6/14/2014
Page 98

Workspace and workflow
Update assignment files (InDesign)
You can save changes to assignments manually or when you close the current document. Updating an assignment file
is the only way to make layout changes available to InCopy users.
❖ Do one of the following:
• To update selected assignments, select them in the Assignments panel and choose Update Selected Assignments
from the Assignments panel menu.
• To update all out-of-date assignments in the current document, choose Update Out-Of-Date Assignments from
the Assignments panel menu. Only assignments that are out of date are updated.
• To update all assignments in the current document, choose Update All Assignments from the Assignments panel
menu.
91
Note: I
f an InCopy user has an assignment open when you update the assignment, the Out Of Date icon appe
to the assignment in the InCopy Assignments panel.
ars next
Update content
To make sure that you’re always working on the most up-to-date content, be sure to watch for Out Of Date icons in the
Assignments panel, and then update content accordingly. Updating an InCopy assignment file and its contents or
updating individual content files copies data from the latest file system copy so that the version displayed on your
computer matches the one on the file system. Updating does not require checking in or out and does not give you
editing rights. However, updating can cause problems if another user has deleted your lock.
Note: U
pdating content does not update content in assignment packages that have not been returned.
cal updating workflow is as follows:
A typi
1 The InCopy user opens an assignment file or checks out an individual content file and edits the content.
2 The InCopy user saves the content file, which updates the copy on the file system, and continues working.
3 The InDesign user sees the Out Of Date icon in both the Assignments panel and the Links panel next to the
selection, and the In Use and Text Content Out Of Date icon or Graphics Content Out Of Date icon on
the associated frame.
Assignments panel with In Use and Out Of Date icons (left) and Layout with out-of-date content (right)
4 The InDesign user updates the content.
Update content while opening a managed document (InDesign)
1 Choose File > Open, locate the file you want to open, and click Open.
Last updated 6/14/2014
Page 99

Workspace and workflow
2 Click Yes when prompted to update the document with the modified content on the file system.
3 Do one of the following:
• To let InDesign update the links, click Fix Links Automatically.
• To fix links manually, click Don’t Fix, and then, in the Links panel, select the file to update and choose Update
Link from the panel menu.
Update content while working (InDesign)
❖ Do one of the following:
• Select the text or graphics frames in the layout and choose Edit > InCopy > Update Content.
• Select the text or graphics frames in the Links panel, and click the Update Link button or choose Update
Link from the Assignments panel menu.
Update content while working (InCopy)
❖ Do one of the following:
• Click an insertion point in the text frame to select it, and then choose File > Update Content.
• Select the content in the Assignments panel, and then click the Update Content button or choose Update
Content from the Assignments panel menu.
92
You can also update content using the Links panel.
Accidentally updating your work
In most cases, the update commands are disabled for content you have checked out, because that content would always
be up to date. However, an undesirable situation can occur if a different user deletes the lock on checked-out content
(by dragging the lock file [.idlk] to the Recycle Bin [Windows] or Trash [Mac OS]), and modifies the content. In this
case, the update commands can become enabled even while the content is checked out to you, essentially allowing two
people to edit the content at the same time. Updating the content results in lost work. For best results, do not delete the
lock files.
Update the InDesign layout
InDesign users can modify the layout (for example, change the size or location of the text frames of a story) and save
the changes while InCopy users are modifying the text of these text frames. In a shared server workflow, the way InCopy
users are notified about layout changes depends on whether they have opened an assignment file or have checked out
individual content files and also opened the linked InDesign file.
Consider the following:
• If an InDesign user changes the layout of frames in an assignment, the user must update the assignment to make the
design changes available to InCopy users. InDesign does not automatically update assignment files when the
document is saved.
• Once the InDesign user updates the assignment stored on a shared server, the Out Of Date icon appears next to
the assignment in the InCopy Assignments panel. The InCopy user must update the design to see the current layout.
• If an InDesign user changes the layout of exported content that is not part of an assignment, the Out Of Date icon
appears next to the InDesign document name in the Assignments panel, and the document title bar indicates the
layout is out-of-date. InCopy users can update the currently active InDesign document with the latest layout and
style changes.
Last updated 6/14/2014
Page 100

Workspace and workflow
Updating the layout in InCopy is useful for copyfitting tasks, because the latest appearance and line breaks are visible
in Layout and Galley views.
❖ Do one of the following:
• If you have an assignment file open and the Assignments panel shows the Out Of Date icon next to the
assignment name, click the Update Design button , or choose File > Update Design. You cannot undo this
command.
• If you are not working with assignment files and you have more than one InDesign document open, select the
one you want to make active, and choose File > Update Design.
Check in content
When you check in a managed content file, you save it to a shared location on a file system where it can be checked out
by others for editing or other changes. Exporting a text or graphics frame from InDesign also checks it in automatically.
Although a checked-in file is available for editing, it is not actually editable until it is checked out (unless you edit the
conten
t in stand-alone mode in InCopy). Checking in content relinquishes editing control, but does not close the file.
The content remains open on your screen, but in a read-only state.
The LiveEdit Workflow plug-ins do not create multiple file versions. Instead, files are overwritten when updated in
ei
er InCopy or InDesign.
th
93
If you are working on an assignment package, return or for
ward the assignment package after checking it in.
Check in managed content (InDesign)
❖ Do one of the following:
• Select the content in the layout and choose Edit > InCopy > Check In.
• In the Assignments panel, select the content and choose Check In from the panel menu.
Check in managed content (InCopy)
❖ Do one of the following:
• Select the content in Layout view and choose File > Check In.
• In the Assignments panel, select the content and choose Check In from the panel menu.
Note: You can undo the most recent changes before you check in content.
Wh
en you check in a file, the Available icon appears on the text or graphics frame in the InDesign layout, in the
InCopy Layout view, in the Assignments panel, and in the story bar (InCopy).
Save changes (InDesign)
As you work on content you have checked out, you can save your changes and update the file-system copy.
❖ Do one of the following:
• To save the selected content without saving changes to the InDesign document or any of its linked files, select the
content in the layout and choose Edit > InCopy > Save Content.
• To save every content file checked out to you, choose File > Save. This type of save does not automatically update
assignment files or checked-out content files in InCopy. However, the checked-out files in InCopy will show the
Out Of Date icon in the Assignments panel.
Last updated 6/14/2014
 Loading...