

Page 1

Getting Started with Fireworks
Page 2

Trademarks
1 Step RoboPDF, ActiveEdit, ActiveTest, Authorware, Blue Sky Software, Blue Sky, Breeze, Breezo, Captivate, Central,
ColdFusion, Contribute, Database Explorer, Director, Dreamweaver, Fireworks, Flash, FlashCast, FlashHelp, Flash Lite,
FlashPaper, Flex, Flex Builder, Fontographer, FreeHand, Generator, HomeSite, JRun, MacRecorder, Macromedia, MXML,
RoboEngine, RoboHelp, RoboInfo, RoboPDF, Roundtrip, Roundtrip HTML, Shockwave, SoundEdit, Studio MX, UltraDev,
and WebHelp are either registered trademarks or trademarks of Macromedia, Inc. and may be registered in the United States or
in other jurisdictions including internationally. Other product names, logos, designs, titles, words, or phrases mentioned within
this publication may be trademarks, service marks, or trade names of Macromedia, Inc. or other entities and may be registered in
certain jurisdictions including internationally.
Third-Party Information
This guide contains links to third-party websites that are not under the control of Macromedia, and Macromedia is not
responsible for the content on any linked site. If you access a third-party website mentioned in this guide, then you do so at your
own risk. Macromedia provides these links only as a convenience, and the inclusion of the link does not imply that Macromedia
endorses or accepts any responsibility for the content on those third-party sites.
Copyright © 2005 Macromedia, Inc. All rights reserved. This manual may not be copied, photocopied, reproduced,
translated, or converted to any electronic or machine-readable form in whole or in part without written approval from
Macromedia, Inc. Notwithstanding the foregoing, the owner or authorized user of a valid copy of the software with which
this manual was provided may print out one copy of this manual from an electronic version of this manual for the sole
purpose of such owner or authorized user learning to use such software, provided that no part of this manual may be
printed out, reproduced, distributed, resold, or transmitted for any other purposes, including, without limitation,
commercial purposes, such as selling copies of this documentation or providing paid-for support services.
Part number ZFW80M100
Acknowledgments
Project Management: Charles Nadeau, Debi Robson
Writing: David Sullivan, Rosanne Conroy, Charles Nadeau
Editing: Melba Lancaster, Shawn Jackson, Linda Adler
Production Management: Patrice O’Neill
Media Design and Production: Adam Barnett, Aaron Begley, John Francis, Paul Rangel, Arena Reed, Mario Reynoso
Localization Project Management: Luciano Arruda
Special thanks to Jon Varese, Jennifer Rowe, Jay Armstrong, Alan Musselman, Maureen Keating, Matt Hoffberg, David Spells,
Sheila McGinn, Andrew Wilson, Rosana Francescato, Kristin Conradi, and the entire Fireworks engineering and QA teams.
First Edition: August 2005
Macromedia, Inc.
600 Townsend St.
San Francisco, CA 94103
Page 3

Contents
Chapter 1: Introduction . . . . . . . . . . . . . . . . . . . . . . . . . . . . . . . . . . . . 5
What you can do with Fireworks. . . . . . . . . . . . . . . . . . . . . . . . . . . . . . . . . .5
What's new in Fireworks 8 . . . . . . . . . . . . . . . . . . . . . . . . . . . . . . . . . . . . . . .6
Installing Fireworks . . . . . . . . . . . . . . . . . . . . . . . . . . . . . . . . . . . . . . . . . . . . .9
Chapter 2: Learning Fireworks . . . . . . . . . . . . . . . . . . . . . . . . . . . . .11
Where to start . . . . . . . . . . . . . . . . . . . . . . . . . . . . . . . . . . . . . . . . . . . . . . . . . .11
Getting the most from the Fireworks documentation. . . . . . . . . . . . . . . .11
Using the Fireworks help system . . . . . . . . . . . . . . . . . . . . . . . . . . . . . . . . 12
Chapter 3: Fireworks Basics . . . . . . . . . . . . . . . . . . . . . . . . . . . . . . 15
Getting to know the Fireworks workspace . . . . . . . . . . . . . . . . . . . . . . . . 15
Accomplishing basic tasks in Fireworks . . . . . . . . . . . . . . . . . . . . . . . . . 25
Chapter 4: Tutorial: Creating Page Mock-ups. . . . . . . . . . . . . . . 29
Create a working folder . . . . . . . . . . . . . . . . . . . . . . . . . . . . . . . . . . . . . . . . 30
Review your task. . . . . . . . . . . . . . . . . . . . . . . . . . . . . . . . . . . . . . . . . . . . . . 30
Create and save a new document. . . . . . . . . . . . . . . . . . . . . . . . . . . . . . . 32
Import and place images. . . . . . . . . . . . . . . . . . . . . . . . . . . . . . . . . . . . . . . 33
Create a composite of the content area . . . . . . . . . . . . . . . . . . . . . . . . . 35
Place text and images . . . . . . . . . . . . . . . . . . . . . . . . . . . . . . . . . . . . . . . . . 40
Export the image for the web. . . . . . . . . . . . . . . . . . . . . . . . . . . . . . . . . . . .47
Chapter 5: Tutorial: Handling Photographs. . . . . . . . . . . . . . . . . 49
Review your task. . . . . . . . . . . . . . . . . . . . . . . . . . . . . . . . . . . . . . . . . . . . . . 49
Batch process large image files . . . . . . . . . . . . . . . . . . . . . . . . . . . . . . . . 50
Compose the images. . . . . . . . . . . . . . . . . . . . . . . . . . . . . . . . . . . . . . . . . . 52
Preview and export the images . . . . . . . . . . . . . . . . . . . . . . . . . . . . . . . . . 56
View the final optimized images . . . . . . . . . . . . . . . . . . . . . . . . . . . . . . . . 58
3
Page 4

Chapter 6: Tutorial: Creating a Page Banner . . . . . . . . . . . . . . . . 61
Review your task . . . . . . . . . . . . . . . . . . . . . . . . . . . . . . . . . . . . . . . . . . . . . . 61
Add a background and place the logo . . . . . . . . . . . . . . . . . . . . . . . . . . . 62
Organize your objects with layers . . . . . . . . . . . . . . . . . . . . . . . . . . . . . . . 66
Create a contrasting background for the logo. . . . . . . . . . . . . . . . . . . . . 68
Create an outline around the banner . . . . . . . . . . . . . . . . . . . . . . . . . . . . . 72
Create a slanted edge effect . . . . . . . . . . . . . . . . . . . . . . . . . . . . . . . . . . . . 74
Add a tag line to the banner. . . . . . . . . . . . . . . . . . . . . . . . . . . . . . . . . . . . . 76
Export an optimized image file . . . . . . . . . . . . . . . . . . . . . . . . . . . . . . . . . . 76
Chapter 7: Tutorial: Creating a Web Page. . . . . . . . . . . . . . . . . . . 81
View the completed web page . . . . . . . . . . . . . . . . . . . . . . . . . . . . . . . . . . 81
Open the source file . . . . . . . . . . . . . . . . . . . . . . . . . . . . . . . . . . . . . . . . . . . 82
Import an image . . . . . . . . . . . . . . . . . . . . . . . . . . . . . . . . . . . . . . . . . . . . . . . 83
Slice the document . . . . . . . . . . . . . . . . . . . . . . . . . . . . . . . . . . . . . . . . . . . . 84
Create a rollover. . . . . . . . . . . . . . . . . . . . . . . . . . . . . . . . . . . . . . . . . . . . . . . 87
Create buttons for a navigation bar . . . . . . . . . . . . . . . . . . . . . . . . . . . . . . 91
Create and edit a pop-up menu . . . . . . . . . . . . . . . . . . . . . . . . . . . . . . . . .99
Optimize the document . . . . . . . . . . . . . . . . . . . . . . . . . . . . . . . . . . . . . . . 108
Export HTML . . . . . . . . . . . . . . . . . . . . . . . . . . . . . . . . . . . . . . . . . . . . . . . . . 111
Test the completed file . . . . . . . . . . . . . . . . . . . . . . . . . . . . . . . . . . . . . . . . .115
4Contents
Page 5

CHAPTER 1
Introduction
Macromedia Fireworks 8 is the definitive solution for professional web
graphics design and production. It is the first production environment to
address and solve the special challenges facing web graphics designers and
developers.
This chapter covers the following topics:
What you can do with Fireworks . . . . . . . . . . . . . . . . . . . . . . . . . . . . . 5
What's new in Fireworks 8. . . . . . . . . . . . . . . . . . . . . . . . . . . . . . . . . . . 6
Installing Fireworks . . . . . . . . . . . . . . . . . . . . . . . . . . . . . . . . . . . . . . . . . 9
What you can do with Fireworks
You can use Fireworks to create, edit, and animate web graphics, add
advanced interactivity, and optimize images in a professional environment.
In Fireworks, you can create and edit bitmap and vector graphics in a single
application. Everything is editable, all the time. And you can automate the
workflow to meet the demands of time-consuming updates and changes.
Fireworks integrates with other Macromedia products such as
Dreamweaver, Flash, FreeHand, and Director, as well as your other favorite
graphics applications and HTML editors, to provide a truly integrated web
solution. You can easily export Fireworks graphics with HTML and
JavaScript code customized for the HTML editor you’re using.
1
5
Page 6

What's new in Fireworks 8
Create and optimize images for the web with precise control in an
intuitive, customizable environment. New support for ActionScript and
CSS (Cascading Style Sheet) formats allow Fireworks to work even more
efficiently with Dreamweaver and Flash. New file formats supported, new
panels and dramatically streamlined workflow optimize both your time
and your images.
Optimization
Image Editing panel This new panel is a central location where you can
access commonly used image editing tools, filters,
and menu commands.
More import file
formats
Batch processing
workflow optimized
Take advantage of the integrated workflow in Fireworks to create and
optimize images for Dreamweaver 8 and Flash Professional 8 without
losing information or time with roundtrip editing. Use improved support
for CSS and ActionScript, as well as feature alignment with the other
Studio products.
Fireworks 8 now supports import of QuickTime
Image, MacPaint, SGI & JPEG 2000 file formats
(QuickTime plug-in required for QuickTime support).
Streamlined file renaming, the ability to check file
dimensions when scaling during a batch process
and the addition of a status bar and log file are just a
few of the optimizations to this workflow.
6Introduction
Integrated workflow
CSS (Cascading
Style Sheet) pop-up
menus
Vector compatibility Vector attributes (fills, strokes, filters and blend
More slicing options Polygon slices are inserted automatically when a
Recognize
ActionScript color
values
Fireworks 8 uses CSS (Cascading Style Sheet)
format to create interactive Pop-up Menus. The
result is clean and easy to customize code that
integrates well with sites built in Dreamweaver.
modes) are preserved when moving objects
between Flash and Fireworks.
selected object is a polygon path.
Fireworks recognizes ActionScript color values
when copied from Flash and pasted into Fireworks
color value fields.
Page 7

Integrated workflow
Use the "Save as"
command to save
bitmaps into
different file types
Evolved Open, Save
and Export logic
Less intrusive grids Like Flash, grids now use a dotted line and a lighter
Choose single-file output formats such as gif, jpg,
tiff, in the "Save As" dialog.
The logic used to determine the default folders in the
Open, Save, Save As, Save a Copy, and Export
dialogs is enhanced by reducing the amount of
navigation required.
default grid color.
Use Fireworks for visual tools to create professional quality web graphics
and animations such as rollovers and pop-ups without the need to
program. Exercise precise control over your images with many new creative
options.
Create without complexity
25 new blend
modes
Perspective shadow Add a perspective shadow to open paths and text
Solid Shadow A new live filter that stamps the object it is applied to
Mobile interface
components
Sample buttons,
animations themes
and bullets
Auto Shape
Properties panel
Live Marquee &
Convert Selections
(Marquee to Path
and Path to
Marquee)
Autoname text Layers are automatically named by the text you type
25 new choices to alter the look of your colors and
objects.
objects.
several times.
Mock up your mobile interface quickly with bitmap
interface components.
Get started quickly with cool new assets like
buttons, animations, themes and bullets.
This new panel is used to modify the properties of
auto shape properties such as the Star Auto Shape,
Arrow Auto Shape or Smart Polygon Auto Shape.
Turn active selections into editable vector paths and
the reverse. Get instant feedback on filters and
settings applied to selections.
in them.
What's new in Fireworks 8 7
Page 8

Create without complexity
Special Characters
panel
Reshape text on a
path
Use this new panel to insert special characters
directly into text blocks.
Edit path points when text is attached
.
Save time and effort with the many refinements made to common tasks.
Workflow Improvements
Recent Fonts &
Optimization
remember last
settings used
Save multiple
selections
Select objects that
share an edge in the
Layers panel
Autosave
preferences
Group consecutive
nudges
Improved tablet
support
Lock objects Lock on a per-object basis in the Layers panel.
Recently used fonts now appear at the top of font
menus. Optimization now defaults to the last
settings used.
Save, restore, name and delete multiple marquee
selections within PNG files.
Shift-click to select objects that share an edge or
boundary in the layers panel.
Fireworks 8 preferences are automatically saved
more frequently.
Consecutive nudges are treated as one move.
Tablet support is improved for Path Scrubber tools
and stroke pressure sensitivity.
8Introduction
For more information on the new features, see the Fireworks page on the
Macromedia website at www.macromedia.com/go/fireworks.
Page 9

Installing Fireworks
This section explains how to install Fireworks.
Be sure to read the release notes on the Macromedia website at
www.macromedia.com/go/fireworks_documentation for late-breaking
information or instructions.
To install Fireworks:
1.
Insert the Fireworks CD into your computer’s CD-ROM drive.
2.
Do one of the following:
■ In Windows, the Fireworks installation program starts
automatically.
■ In Macintosh, double-click the Fireworks installer icon that appears
on the desktop.
3.
Follow the onscreen instructions.
The installation program prompts you to enter the required
information.
4.
If prompted to do so, restart your computer.
Installing Fireworks 9
Page 10

10 Introduction
Page 11

CHAPTER 2
Learning Fireworks
Macromedia Fireworks 8 includes a variety of resources to help you learn
the program quickly and become proficient in creating your own web
graphics.
This chapter contains the following topics:
Where to start . . . . . . . . . . . . . . . . . . . . . . . . . . . . . . . . . . . . . . . . . . . . . . 11
Getting the most from the Fireworks documentation . . . . . . . . . . . 11
Using the Fireworks help system . . . . . . . . . . . . . . . . . . . . . . . . . . . . 12
Where to start
If you are completely new to Fireworks, begin by reading Chapter 3,
“Fireworks Basics,” on page 15, and then do the tutorials.
If you have experience creating web graphics, begin by doing the tutorials
in this guide, and then read “Fireworks Basics” in Using Fireworks.
Getting the most from the
2
Fireworks documentation
Fireworks includes a variety of media to help you learn the program
quickly and become proficient in creating your own images.
Using Fireworks is the Fireworks user manual. You can access it at any
time in Fireworks help (Help > Using Fireworks). The manual is also
available in PDF format on the Macromedia website at
www.macromedia.com/go/fireworks_documentation.
11
Page 12

Getting Started with Fireworks provides an interactive introduction to
the key features of Fireworks. You can complete tutorials covering common
Fireworks tasks, such as using the drawing and editing tools, optimizing
images, and creating rollovers, navigation bars, and other interactive
elements. You can access the guide at any time in Fireworks help (Help >
Getting Started with Fireworks). The guide is also available in PDF format
on the Macromedia website at www.macromedia.com/go/
fireworks_documentation.
The Fireworks application contains many dialog boxes and tooltips that
help you use the program. Tooltips appear when you move the pointer over
a user interface element.
The Fireworks Support Center at www.macromedia.com/go/
fireworks_support offers support and problem-solving information.
The Fireworks Developer Center at www.macromedia.com/go/
fireworks_devnet presents information to help you improve your skills and
learn new ones.
The Fireworks discussion group provides a lively exchange for Fireworks
users, technical support representatives, and the Fireworks development
team. Use a newsgroup reader to go to news://forums.macromedia.com/
macromedia.fireworks.
Extending Fireworks includes information about writing JavaScript to
automate Fireworks tasks. You can control every Fireworks command or
setting using special JavaScript commands that Fireworks can interpret.
The manual is available both in help and on the Macromedia website as a
downloadable PDF.
12 Learning Fireworks
Using the Fireworks help system
The online help system available in the Help menu provides detailed
information on all tasks you can perform with Fireworks.
Accessing help
You can access online help while you work in Fireworks.
To open Fireworks Help:
■ Select Help > Fireworks Help.
Page 13

Searching help
You can do a full text search of Fireworks Help.
To search online help (Windows):
1.
In Fireworks Help, click the Search tab.
2.
Type a word or phrase in the text box, and then click List Topics.
3.
Double-click a topic in the list of results to display it.
To search online help (Macintosh):
1.
In Fireworks Help, type a word or phrase in the Ask a Question text
box, and then press Enter.
2.
Double-click a topic in the list of results to display it.
Using the index
You can find information quickly with the index.
To use the index (Windows):
1.
In Fireworks Help, click the Index tab.
2.
Scroll to an index entry in the alphabetized list and double-click it to
display the indexed information.
TIP
To search for a
specific phrase,
enclose it in double
quotes.
To use the index (Macintosh):
1.
In Fireworks Help, click the Index link in the table of contents.
2.
Click a letter and scroll to an index entry in the list.
3.
Click a number beside the entry to display the indexed information.
Using the Start Page
When you start Fireworks without opening a document, the Fireworks
Start page appears in the work environment. The Start page gives you
quick access to Fireworks tutorials, recent files, and Fireworks Exchange,
where you can add new capabilities to some Fireworks features. Use the
Start page much like a web page. Click any of the features you see to use
them.
TIP
You can start typing
a keyword in the text
box to quickly scroll
to an index entry.
Using the Fireworks help system 13
Page 14

To disable the Start page:
1.
Run Fireworks without opening a document.
The Start page is displayed.
2.
Click Don’t Show Again.
Printing the Fireworks Documentation
The following books are available in PDF format on the Macromedia
website at www.macromedia.com/go/fireworks_documentation:
■ Using Fireworks
■ Getting Started with Fireworks
■ Extending Fireworks
You can print all or part of the PDF on your own printer or you can bring
the PDF to a copy shop.
14 Learning Fireworks
Page 15

CHAPTER 3
Fireworks Basics
Macromedia Fireworks 8 is a versatile application for designing graphics
for use on the web. You can create and edit both bitmap and vector images,
design web effects such as rollovers and pop-up menus, crop and optimize
graphics to reduce their file size, and save time by automating repetitive
tasks. Its innovative solutions tackle the major problems facing graphic
designers and webmasters.
This chapter covers the following tpics:
Getting to know the Fireworks workspace. . . . . . . . . . . . . . . . . . . . 15
Accomplishing basic tasks in Fireworks . . . . . . . . . . . . . . . . . . . . . . 25
Getting to know the Fireworks workspace
When you open a document in Fireworks for the first time, Fireworks
activates the work environment, including the Tools panel, Property
inspector, menus, and other panels.
3
15
Page 16
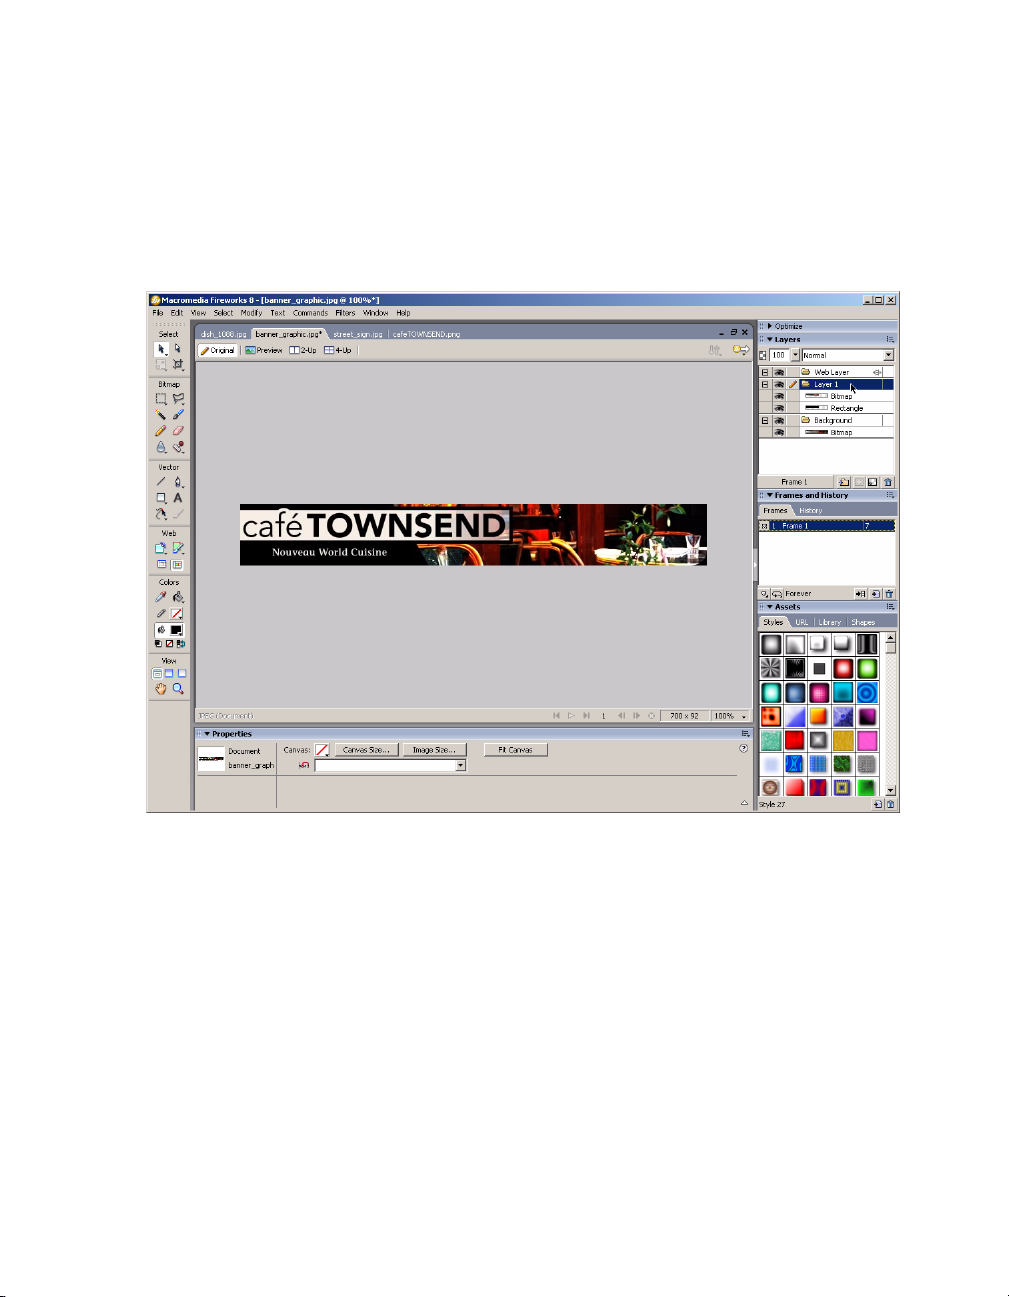
The Tools panel, on the left of the screen, contains labeled categories,
including bitmap, vector, and web tool groups. The Property inspector
appears along the bottom of the document and initially displays document
properties; the properties change when you choose a new tool or an object
in the document. The panels are initially docked in groups along the right
side of the screen.
16 Fireworks Basics
Page 17
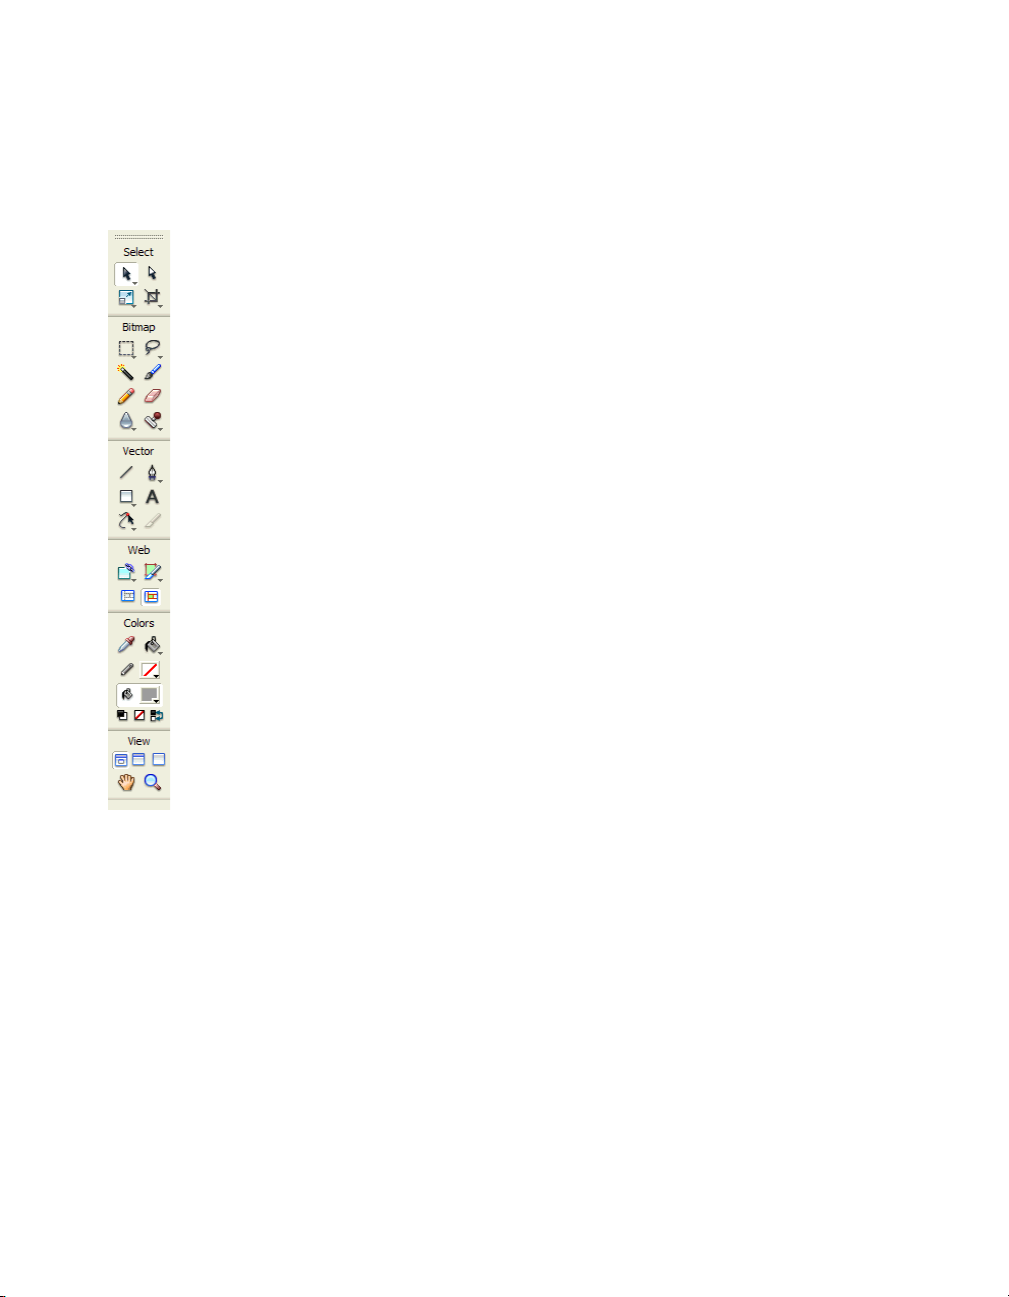
Using the Tools panel
The Tools panel is organized into six categories: Select, Bitmap, Vector,
Web, Colors, and View.
About bitmap and vector graphics
Computers display graphics in either vector or bitmap format.
Understanding the difference between the two formats helps you
understand Fireworks, which contains both vector and bitmap tools and is
capable of opening or importing both formats.
Getting to know the Fireworks workspace 17
Page 18

Bitmap graphics are composed of dots, called pixels, arranged in a grid.
When you edit a bitmap graphic, you modify pixels rather than lines and
curves. Bitmap graphics are resolution-dependent, which means that the
data describing the image is fixed to a grid of a particular size. Enlarging a
bitmap graphic redistributes the pixels in the grid, often making the edges
of the image appear ragged.
Vector graphics render images using lines and curves, called vectors, that
include color and position information. When you edit a vector graphic,
you modify the properties of the lines and curves that describe its shape.
Vector graphics are resolution-independent, which means you can move,
resize, reshape, or change the color of a vector graphic, as well as display it
on output devices of varying resolutions, without changing the quality of
its appearance.
You can experiment with the bitmap and vector tools on a blank canvas in
Fireworks to see the difference between the two formats.
Changing tool options
When you select a tool, the Property inspector displays tool options. Some
options remain displayed as you work with the tool. For other tools, such
as the basic shape, Pen, and Line tools, the Property inspector displays the
properties of selected objects. For more information about the Property
inspector, see “Using the Property inspector” in Fireworks Help.
18 Fireworks Basics
To display tool options in the Property inspector for a tool that
you’re already using:
■ Choose Select > Deselect to deselect all objects.
For information about specific tool options, see the sections that introduce
the various tools in Using Fireworks.
Page 19
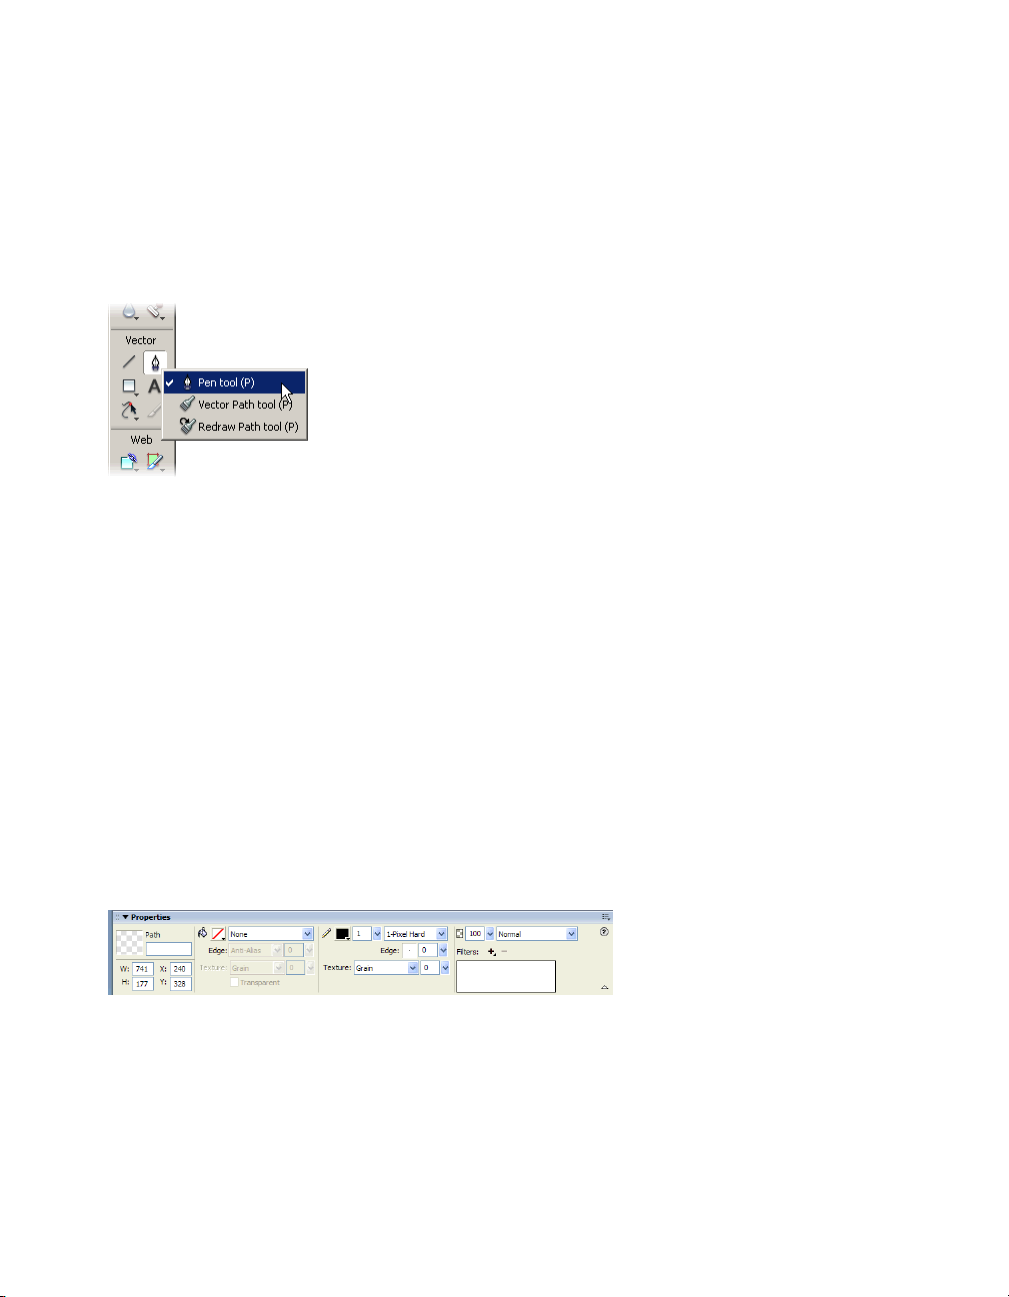
Selecting a tool from a tool group
A small triangle in the lower right corner of a tool in the Tools panel
indicates that it is part of a tool group. For example, the Rectangle tool is
part of the basic shape tool group, which also includes the Rounded
Rectangle, Ellipse, and Polygon basic tools, as well as all of the Smart Shape
tools, which appear below the divider line.
To select an alternative tool from a tool group:
1.
Click the tool icon and hold down the mouse button.
A pop-up menu appears with tool icons, tool names, and shortcut keys.
The currently selected tool has a check mark to the left of the tool
name.
2.
Drag the pointer to highlight the tool you want, and release the mouse
button.
The tool appears in the Tools panel, and the tool options appear in the
Property inspector.
Using the Property inspector
The Property inspector lets you edit the properties of the current selection,
tool, or document. By default, the Property inspector is docked at the
bottom of the workspace.
Getting to know the Fireworks workspace 19
Page 20
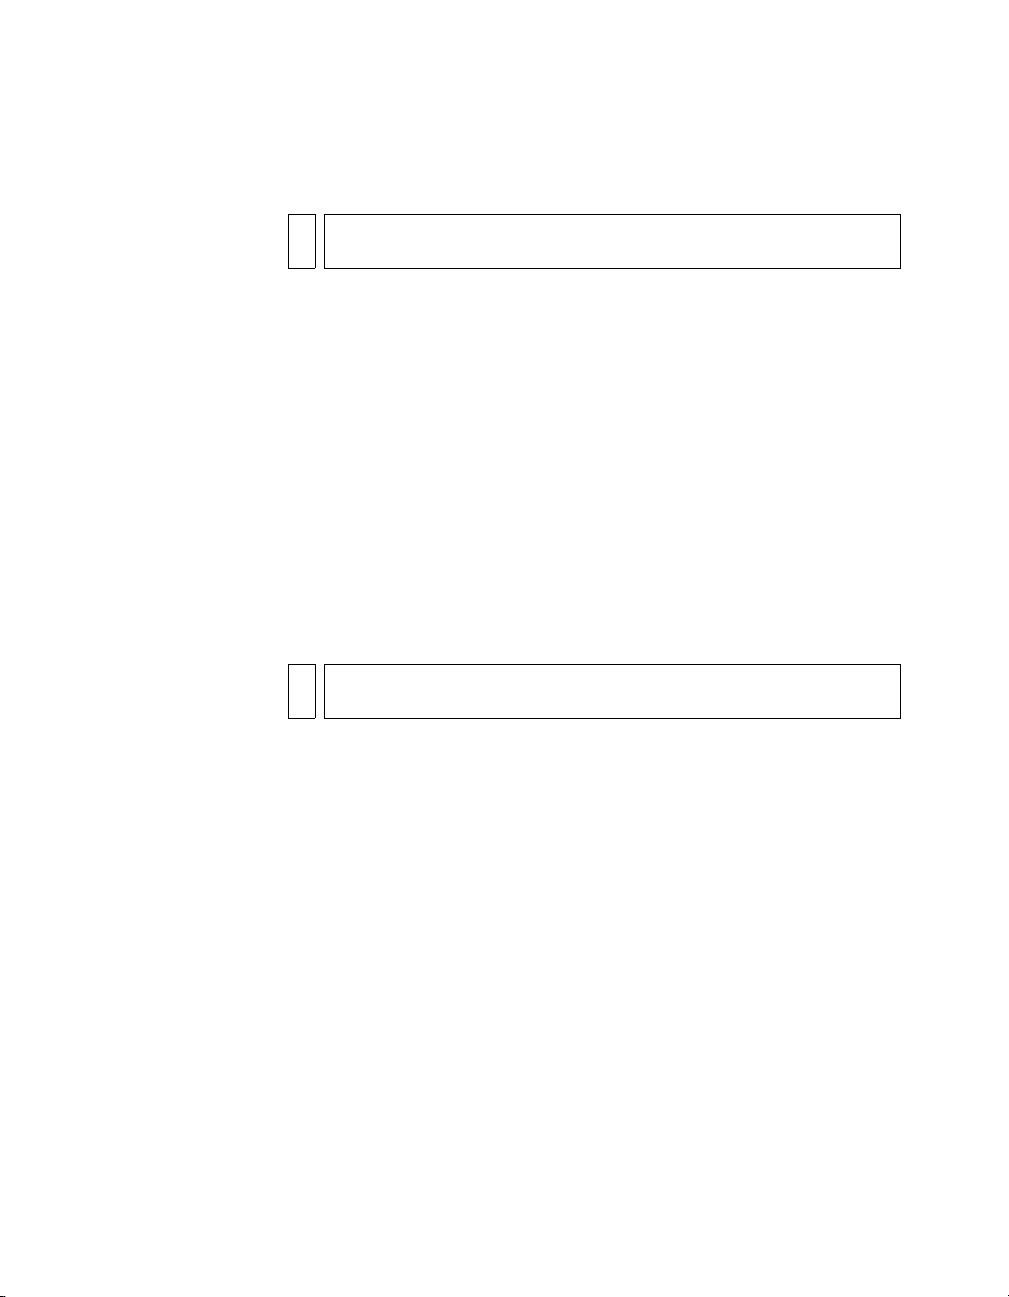
The Property inspector can be open at half height, displaying two rows of
properties, or at full height, displaying four rows. You can also fully
collapse the Property inspector while leaving it in the workspace.
NOTE
Most procedures in Using Fireworks assume that the Property inspector is
displayed at full height.
To undock the Property inspector:
■ Drag the gripper at the upper left corner to another part of the
workspace.
To dock the Property inspector at the bottom of the workspace
(Windows only):
■ Drag the side bar on the Property inspector to the bottom of the
screen.
To expand a half-height Property inspector to full height,
revealing additional options:
■ Click the expander arrow in the lower right corner of the Property
inspector.
■ Click the icon in the upper right of the Property inspector and select
Full Height from the Property inspector Options menu.
NOTE
In Windows, the Options menu is available only when the Property
inspector is docked.
20 Fireworks Basics
To reduce the Property inspector to half height:
■ Click the expander arrow in the lower right corner of the Property
inspector.
■ Select Half Height from the Property inspector Options menu.
To collapse the Property inspector when it is docked:
■ Click the expander arrow or the title of the Property inspector.
■ Select Collapse Panel Group from the docked Property inspector’s
Options menu.
For more information about specific Property inspector options, see the
appropriate sections in Using Fireworks.
Page 21

Using panels
Panels help you edit aspects of a selected object or elements of the
document. Panels let you work on frames, layers, symbols, and more. Each
panel is draggable, so you can group panels together in custom
arrangements.
Some panels are not displayed by default, but you can display them if you
want. Some panels are not grouped with other panels by default, but you
can group them if you want. When you group panels together, all panel
group names appear in the panel group title bar. You can, however, assign
any name you like to panel groups.
The Optimize panel lets you manage the settings that control a file’s size
and file type and work with the color palette of the file or slice to be
exported.
The Layers panel organizes a document’s structure and contain options
for creating, deleting, and manipulating layers.
The Frames panel includes options for creating animations.
The History panel lists commands you recently used so that you can
quickly undo and redo them. In addition, you can select multiple actions,
and then save and reuse them as commands. For more information, see
“Using the History panel to undo and repeat multiple actions” in Using
Fireworks.
The Shapes panel contains Auto Shapes that are not displayed in the
Tools panel.
The Styles panel lets you store and reuse combinations of object
characteristics or choose a stock style.
The Library panel contains graphic symbols, button symbols, and
animation symbols. You can easily drag instances of these symbols from the
Library panel to your document. You can make global changes to all
instances by modifying only the symbol.
The URL panel lets you create libraries containing frequently used URLs.
The Color Mixer panel (Window > Color Mixer) lets you create new
colors to add to the current document’s color palette or to apply to selected
objects.
The Swatches panel (Window > Swatches) manages the current
document’s color palette.
Getting to know the Fireworks workspace 21
Page 22

The Info panel (Window > Info) provides information about the
dimensions of selected objects and the exact coordinates of the pointer as
you move it across the canvas.
The Behaviors panel (Window > Behaviors) manages behaviors, which
determine what hotspots and slices do in response to mouse movement.
The Find panel (Window > Find) lets you search for and replace elements
such as text, URLs, fonts, and colors in a document or multiple
documents.
The Align panel (Window > Align) contains controls for aligning and
distributing objects on the canvas.
The Auto Shape Properties panel (Window > Auto Shape Properties) lets
you set the properties of Auto Shapes.
The Image Editing panel (Window > Image Editing) assembles the most
commonly used tools for photo editing in one place.
The Special Characters panel (Window > Special Character) lets you
insert special characters into your text directly from within Fireworks,
rather than having to copy and paste the characters from another source.
Organizing panels and panel groups
By default, some Fireworks panels are docked on the right side of the
workspace. Some panels are organized in panel groups. Other panels are
not displayed initially but can be opened from the Window menu. You can
undock panel groups, add panels to a group, undock individual panels,
rearrange the order of docked panel groups, and collapse and close panel
groups. You can also open and close individual panels.
TIP
A check mark next to
a panel name in the
Window menu
indicates that the
panel is open.
22 Fireworks Basics
To open a closed panel:
■ Select the panel from the Window menu.
To close a panel, do one of the following:
■ Select the panel name from the Window menu.
■ Click the Close button in the panel title bar when the panel is
undocked.
To undock or move a panel group:
■ Drag the panel gripper on the upper left corner away from the panel
docking area on the right side of the screen.
Page 23
To dock a panel group:
■ Drag the panel gripper onto the panel docking area.
As you drag a panel or panel group over the panel docking area, a
placement preview line or rectangle shows where it would be placed
among the groups.
To collapse or expand a panel group or panel, do one of the
following:
■ Click the title of the panel group or panel.
NOTE
The title bar is still visible when the panel group or panel is collapsed.
■ Click the expander arrow in the upper left corner of the panel group or
panel.
To undock a panel from a panel group:
■ Select Group With > New Panel Group from the Options menu in the
panel group’s title bar. (The Group With command’s name changes
depending on the name of the active panel.) The panel appears in a
new panel group of its own.
To dock a panel in a panel group:
■ Select the name of a panel group from the Group With submenu of the
panel group’s Options menu. (The Group With command’s name
changes depending on the name of the active panel.)
To rename a panel group:
1.
Click the icon in the upper right of the panel group and select Rename
Panel Group from the Options menu.
2.
Enter the new name.
To return panels to their default positions for your screen
resolution, do one of the following:
■ Select Window > Workspace Layouts > 1024 x 768.
■ Select Window > Workspace Layouts > 1280 x 1024.
Getting to know the Fireworks workspace 23
Page 24
To hide all panels and the Property inspector:
■ Select Window > Hide Panels. To view hidden panels, select Window >
Hide Panels again.
NOTE
Panels that are hidden when you select Hide Panels remain hidden when
you deselect this command.
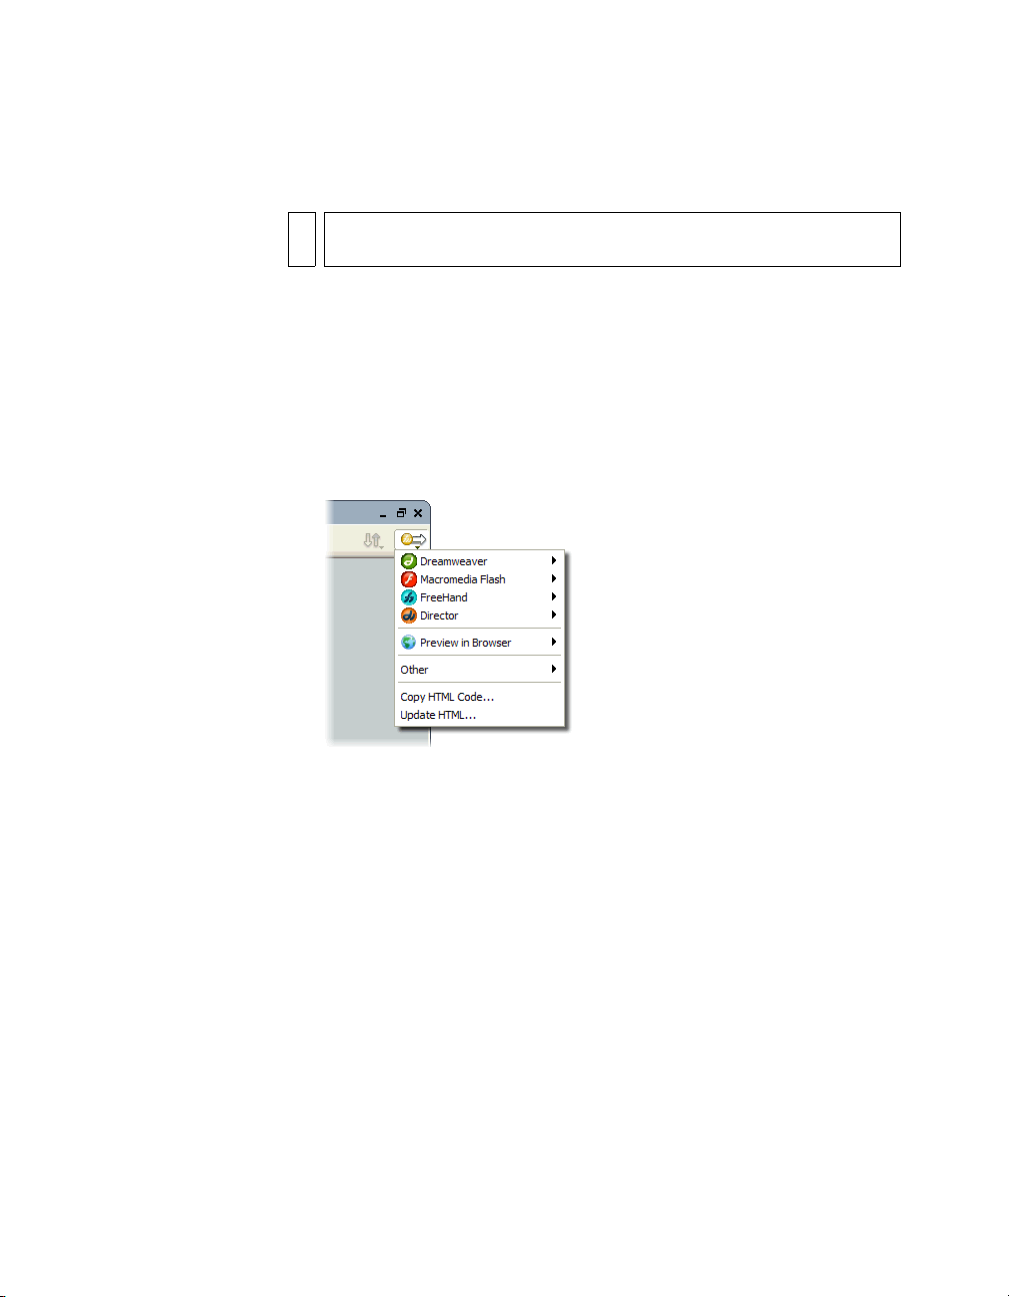
About the Quick Export button
The Quick Export button lets you export your Fireworks files to a number
of Macromedia applications, including Dreamweaver, Flash, Director, and
Macromedia FreeHand MX. In addition, you can export your files to
Photoshop, FrontPage, Adobe
your files in the browser of your choice.
GoLive, and Illustrator, or you can preview
24 Fireworks Basics
Page 25
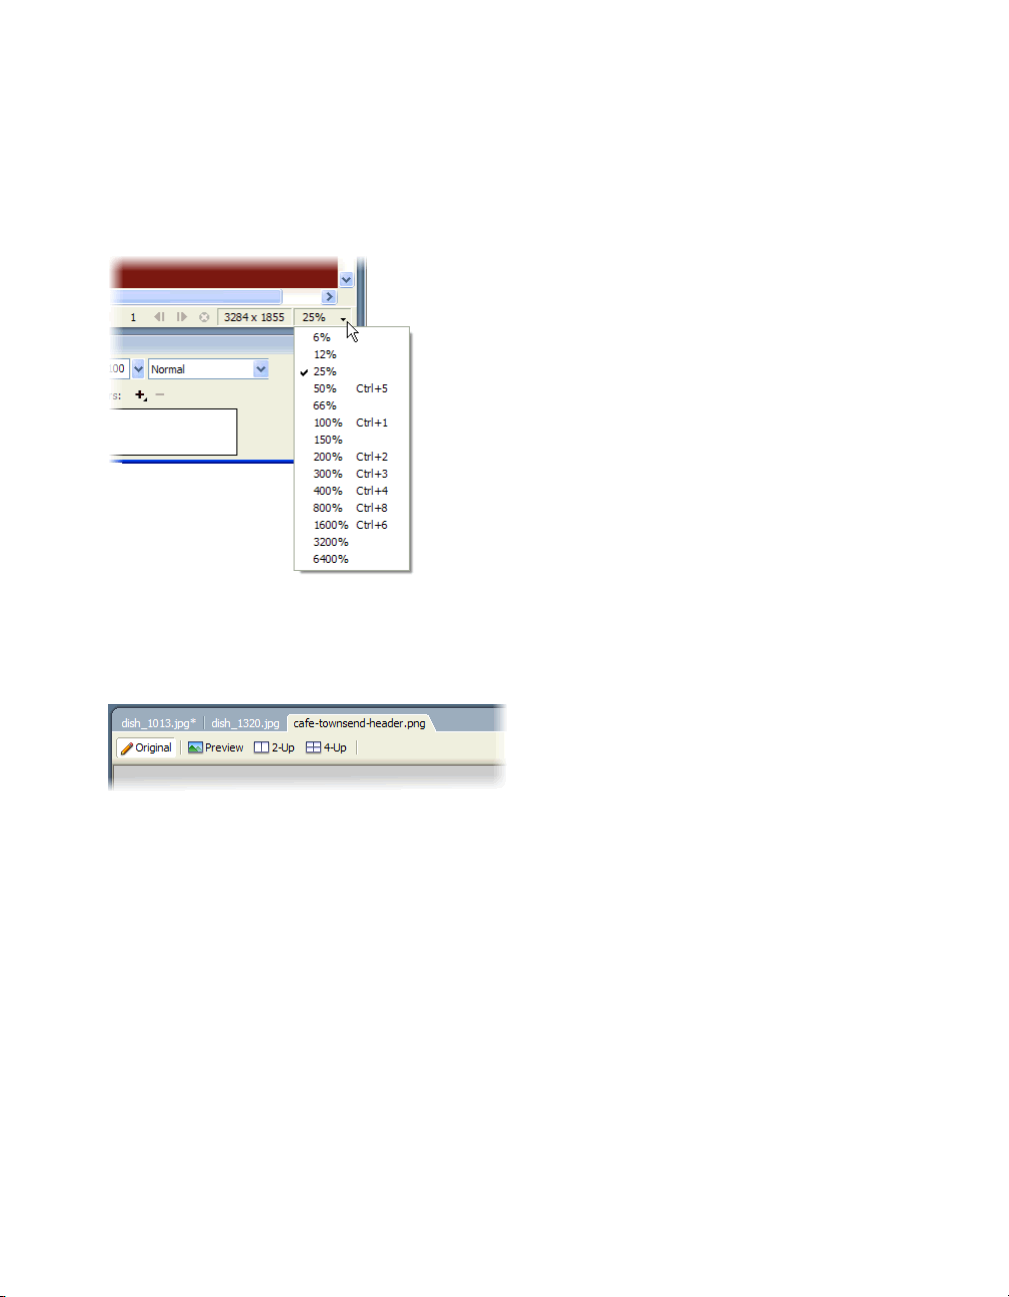
Navigating and viewing a document
You can control your document’s magnification, its number of views, and
its display mode. In addition, you can easily pan the view of a document,
which is helpful if you zoom in and can no longer see the entire canvas.
When your document is maximized in Windows, you can easily choose
among multiple open documents by using the document tabs that appear
at the top of the document window. Each open document displays its
filename on a tab.
Accomplishing basic tasks in Fireworks
Fireworks is a versatile application for creating, editing, and optimizing
web graphics. This section describes how to accomplish basic tasks such as
creating, opening, and saving files. It also describes how to convert files to
other file formats. For more detailed information, see “Fireworks Basics” in
Using Fireworks.
Accomplishing basic tasks in Fireworks 25
Page 26

About graphic files
You can work with a variety of file types in Fireworks. For example, you
can start with a PNG file and save it as a JPEG file or GIF file. You can
create HTML files that contain JavaScript code. You can also export or save
an image as a file type specific to another application, such as Photoshop or
Macromedia Flash, if you want to continue working in the other
application.
The following are the most common file types in Fireworks:
PNG, or Portable Network Graphic, is the native file format for Fireworks.
PNG is a versatile web graphic format that can support up to 32-bit color,
contain transparency or an alpha channel, and be progressive.
GIF, or Graphics Interchange Format, is a popular web graphic format for
cartoons, logos, graphics with transparent areas, and animations. GIFs
contain a maximum of 256 colors.
JPEG was developed by the Joint Photographic Experts Group specifically
for photographic or high-color images. The JPEG format is best for digital
or scanned photographs, images using textures, images with gradient color
transitions, and any images that require more than 256 colors.
For information on other file types in Fireworks, see “Choosing a file type”
in Using Fireworks.
26 Fireworks Basics
Creating new files in Fireworks
When you create a new file in Fireworks, you create a Portable Network
Graphic, or PNG file. PNG is the native file format for Fireworks. You can
easily convert the file to other web graphic formats, such as JPEG or GIF.
For more information, see “Converting files to other formats” on page 28.
Page 27

To create a new file:
1.
Select File > New.
The New Document dialog box opens.
2.
Enter the canvas width and height measurements in pixels, inches, or
centimeters.
3.
Enter a resolution in pixels per inch or pixels per centimeter.
4.
Select white, transparent, or a custom color for the canvas.
NOTE
Use the Custom color box pop-up window to select a custom canvas
color.
5.
Click OK to create the new document.
Fireworks creates a PNG file. Using a PNG file as your source file has the
following advantages:
■ The source PNG file is always editable. You can go back and make
additional changes even after you export the file for use on the web.
■ You can slice complex graphics into pieces in the PNG file and export
them as multiple files with different file formats and various
optimization settings.
Accomplishing basic tasks in Fireworks 27
Page 28

Opening files in Fireworks
In Fireworks, you can easily open and edit both vector and bitmap
graphics.
TIP
To open a file
without overwriting
the previous version,
select Open as
Untitled, and then
save the file using a
different name.
To open a file:
1.
Select File > Open.
2.
In the Open dialog box, select the file and click Open.
Saving files in Fireworks
After you create graphic files in Fireworks, you can save them to a new
location or rename them.
To save a file:
■ Select File > Save.
To save a file to a new location or to rename the file:
1.
Select File > Save As.
2.
In the Save As dialog box, browse to the desired location or type the new
filename.
3.
Click Save.
Converting files to other formats
You can easily convert files to other web graphic formats, such as JPEG or
GIF.
28 Fireworks Basics
To convert a file to a new file format:
1.
Select File > Save As.
2.
In the Save As dialog box, select a new file type from the Save As Type
pop-up menu.
3.
Click Save.
Page 29

CHAPTER 4
Tutorial: Creating Page Mock-ups
This tutorial will guide you through the basic tasks of creating a mock-up
of a web page with Macromedia Fireworks 8. Page mock-ups are typically
used to show proposed page designs to colleagues or clients. Once a design
is approved, the mock-up is used by web designers as a blueprint to create
the page.
In this tutorial, you’ll complete the following tasks:
Create a working folder. . . . . . . . . . . . . . . . . . . . . . . . . . . . . . . . . . . . .30
Review your task . . . . . . . . . . . . . . . . . . . . . . . . . . . . . . . . . . . . . . . . . .30
Create and save a new document . . . . . . . . . . . . . . . . . . . . . . . . . . . 32
Import and place images . . . . . . . . . . . . . . . . . . . . . . . . . . . . . . . . . . . 33
Create a composite of the content area . . . . . . . . . . . . . . . . . . . . . . 35
Place text and images . . . . . . . . . . . . . . . . . . . . . . . . . . . . . . . . . . . . . .40
Export the image for the web. . . . . . . . . . . . . . . . . . . . . . . . . . . . . . . . 47
4
29
Page 30

Create a working folder
Before you begin, create a working folder that includes the sample files
used in the tutorials in Getting Started. This task consists of creating the
working folder on your hard disk and copying the sample files from the
Fireworks application folder to the working folder.
1.
Create a new folder called local_sites somewhere on your hard disk. For
example, create a folder called local_sites in either of the following
locations:
■ (Windows) C:\Documents and Settings\your_user_name\
My Documents\local_sites
■ (Macintosh) /Users/your_user_name/Documents/local_sites
On the Macintosh, there’s a folder called Sites already in your user
folder. Don’t use that Sites folder as your local folder; the Sites folder is
where you place your pages to make them publicly accessible when
you’re using the Macintosh as a web server.
2.
Locate the cafe_townsend and global folders in the Fireworks
application folder on your hard disk. If you installed Fireworks to its
default location, the path to the folders is as follows:
■ (Windows) C:\Program Files\Macromedia\
Fireworks 8\Tutorial_assets\
■ (Macintosh) /Applications/Macromedia Fireworks 8/
Tutorial_assets/
3.
Copy the cafe_townsend and global folders to your local_sites folder.
Review your task
Café Townsend, a fictional restaurant, hired your team to design and build
their website. During the early planning stages of the project, members of
your team met with Cafe Townsend representatives to brainstorm ideas for
the website. During the meeting, your team sketched several possible
designs on napkins (the meeting was held in a Cafe Townsend restaurant).
30 Tutorial: Creating Page Mock-ups
Page 31

When the team returned to the office, they told you the clients particularly
liked two designs, which were captured in the following napkin sketches:
Review your task 31
Page 32

You’re given the task of creating a page mock-up of the second design to
show to the clients. The mock-up will look like a real web page but it won’t
work like one.
Create and save a new document
After previewing the completed page mock-up, you’re ready to begin your
project.
1.
In Fireworks, select File > New.
2.
In the New Document dialog box, enter 700 for the width and 600 for
the height. Ensure that both measurements are in pixels.
3.
Set the Canvas color to Custom and select black from the custom color
menu.
The New Document dialog box should look as follows:
4.
32 Tutorial: Creating Page Mock-ups
Click OK to create the document.
A Document window appears with a title bar that reads Untitled-1.png
(Windows) or Untitled-1 (Macintosh).
If the Document window isn’t maximized, that is, if it doesn’t fill the
center of the screen, maximize it by clicking the Maximize button
(Windows) or the zoom box (Macintosh) at the top of the Document
window. This step will give you plenty of room to work.
Page 33

5.
Select File > Save, and then browse to the following folder on your
hard disk:
local_sites/cafe_townsend/fireworks_assets/
6.
Name the file homepage-mockup.
NOTE
On the Macintosh, select the Add Filename Extension option if it’s not
already selected.
7.
Click Save.
The title bar displays the new filename with a .png extension. PNG is
the native file format for Fireworks. The PNG file is your source file.
It’s where you’ll do all of your work in Fireworks. At the end of this
tutorial, you’ll learn how to export your document to another format
for the web.
Import and place images
Next you import images and position them on the Fireworks canvas to see
how they’ll fit on the final web page.
Import the banner graphic
The banner graphic you have is a mock-up of the banner you’ll use on the
actual page. You’ll produce the final version of the banner in “Tutorial:
Creating a Page Banner” on page 61“.
1.
Select File > Import and browse to the following folder on your hard
disk:
local_sites/cafe_townsend/fireworks_assets/
2.
Select banner-mockup.jpg and click Open.
An insertion pointer appears indicating where the upper-left corner of
the graphic will be positioned.
Import and place images 33
Page 34

3.
Align the pointer with the upper-left corner of the canvas and click to
insert the banner graphic.
The banner graphic appears surrounded by a blue frame indicating that
it’s the currently selected object.
4.
Use the arrow keys on your keyboard to precisely align the banner
graphic with the top of the canvas.
The banner is correctly aligned if the values of its X and Y coordinates
in the Property inspector are both 0. The Property inspector is located
at the bottom of the Document window. If it’s not visible, select
Window > Properties.
5.
Click anywhere outside the selected banner graphic to deselect it.
6.
Save your work.
Import the slideshow placeholder image
Next, you import a placeholder image representing the size and position of
a Flash-based photo slideshow that will be on the final web page.
Placeholder images are valuable for representing how a composition
element will look without having to accommodate the large file size or
having to build the complex element in its final form.
1.
2.
3.
4.
34 Tutorial: Creating Page Mock-ups
Select File > Import and browse to the following folder on your hard
disk:
local_sites/cafe_townsend/fireworks_assets/
Double-click slideshow-placeholder.jpg.
Position the insertion pointer about 6 pixels below the banner graphic
you imported earlier, and then click to insert the slideshow placeholder.
With the placeholder image still selected, use the arrow keys on your
keyboard to adjust its position on the canvas.
The placeholder image is correctly aligned if the values of its X and Y
coordinates in the Property inspector are 0 and 98 respectively.
Page 35

5.
Click anywhere outside the selected image to deselect it.
6.
Save your work.
Create a composite of the content area
Now you’re ready to create a mock-up of the content area of the web page.
You’ll draw Fireworks vector objects to graphically represent areas of the
web page.
Before you begin, you review the napkin sketch to refresh your memory of
the design.
Create and edit a rounded rectangle
The first object to create is a rounded rectangle that represents the top and
bottom bars of the content area. You decide to create a large rounded
rectangle that defines the total extent of the content area.
Create a composite of the content area 35
Page 36

1.
Select the Rounded Rectangle tool in the Vector section of the
Tools panel.
The Rounded Rectangle tool is a shape tool. Click the expander icon
on the shape icon to select it.
2.
In the Document window, position the cross-hair pointer over the
canvas, and drag downward and to the right to create the shape.
You can draw the rounded rectangle anywhere on the canvas. Don’t
worry about size and position at this point; you’ll resize and position it
later in this procedure.
3.
When you release the mouse button, a rounded rectangle appears,
selected, in the area you defined.
You can see when an object is selected because it displays blue corner
points. Most objects also have a blue highlight around their outer
edges, but rectangles are an exception. A rounded rectangle shape also
has control points that appear as yellow diamonds. These control
points let you change the size and corner roundness of the rounded
rectangle.
36 Tutorial: Creating Page Mock-ups
Page 37

4.
With the rounded rectangle still selected, in the Property inspector, click
the Fill Color box next to the bucket icon.
The Fill Color pop-up window opens.
5.
Type 6B1101 in the text box at the top of the window, and then press
Enter.
6.
Click the Stroke Color box next to the pencil icon, and then click the
Transparent button at the top of the Stroke Color pop-up window. (It
should be selected by default.)
The rounded rectangle now has a dark red fill and no stroke.
Next, you need to resize and position the rounded rectangle. You decide to
do this precisely with the Property inspector.
1.
With the rounded rectangle still selected, in the Property inspector, type
700 in the width box (W), type 340 in the height box (H), type 0 for
the X position, type 255 for the Y position, and then press Enter to
apply the last value.
NOTE
The Y position is only an approximation. You can alternatively use the
arrow keys to nudge the rounded rectangle up or down until it is about 6
pixels below the slideshow placeholder image.
After resizing the rounded rectangle, you notice that the rounded edges are
distorted. You want to adjust these to create appropriately rounded corners.
Create a composite of the content area 37
Page 38

The rounded rectangle is a Fireworks Auto Shape, so you can use the Auto
Shape Properties panel to adjust the roundness of the corners.
1.
With the rounded rectangle still selected, open the Auto Shape
Properties panel by selecting Window > Auto Shape Properties (not
Window > Auto Shapes).
2.
Enter 20 for the roundness of the first corner, and then press Enter.
Because the values are locked, changing one roundness value changes
all the other values.
At the same time, Fireworks adjusts the corners of the shape on the
canvas.
3.
Close the Auto Shapes Properties panel, and then click anywhere
outside the canvas to deselect the rounded rectangle.
4.
Save your work.
Create a navigation sidebar area
Next, you decide to create a rectangle to define the navigation sidebar for
the web page.
1.
2.
38 Tutorial: Creating Page Mock-ups
Select the Rectangle tool in the Vector section of the Tools panel.
Position the cross-hair pointer in the rounded rectangle you drew earlier
and drag downward and to the right to create a vertical rectangle for the
sidebar.
You can draw the rectangle anywhere on the canvas. You’ll resize and
position it later.
When you release the mouse button, a rectangle appears, selected, in
the area you defined.
Page 39

Next, you need to give the rectangle an orange fill.
1.
With the rectangle still selected, in the Property inspector, click the Fill
Color box next to the bucket icon.
The Fill Color pop-up window appears.
2.
Type A3210A in the text box at the top of the window, and then press
Enter.
3.
Click the Stroke Color box next to the pencil icon, and then click the
Transparent button at the top of the Stroke Color pop-up window.
The rectangle now has an orange fill and no stroke.
Next, you need to resize and position the rounded rectangle. You decide to
do this precisely with the Property inspector.
1.
With the rectangle still selected, in the Property inspector, type 140 in
the width box (W), type 295 in the height box (H), type 0 for the X
position, type 278 for the Y position, and then press Enter to apply the
last value.
NOTE
The Y position is only an approximation. You can use the arrow keys to
nudge the rounded rectangle up or down until it is centered vertically with
the rounded rectangle you drew earlier. The difference in height between
the two objects is 45 pixels, so the top of the orange rectangle should be
22 or 23 pixels below the top of the dark red rounded rectangle.
2.
Save your work.
Create the copy area
Finally, you need to create an off-white rectangle to represent the area
where the web page’s text will appear.
1.
Select the Rectangle tool in the Vector section of the Tools panel.
2.
Position the cross-hair pointer in the rounded rectangle you created
earlier and drag downward and to the right to create a horizontal
rectangle for the copy area.
You can draw the rectangle anywhere on the canvas. You’ll resize and
position it later.
When you release the mouse button, a rectangle appears, selected, in
the area you defined.
Create a composite of the content area 39
Page 40

Now you need to give the rectangle an off-white fill.
1.
With the rectangle still selected, in the Property inspector, click the Fill
Color box next to the bucket icon.
The Fill Color pop-up window appears.
2.
Type F7EEDF in the text box at the top of the window, and then press
Enter.
3.
Click the Stroke Color box next to the pencil icon, and then click the
Transparent button at the top of the Stroke Color pop-up window.
The rectangle now has an off-white fill and no stroke.
Next, you need to resize and position the rounded rectangle. You decide to
do this precisely with the Property inspector.
1.
With the rectangle still selected, in the Property inspector, type 560 in
the width box (W), type 295 in the height box (H), type 140 for the X
position, and type 278 for the Y position, and then press Enter to apply
the last value.
NOTE
The Y position should be identical to the Y position of the sidebar
rectangle.
Place text and images
After creating the mock-up of the content area, you decide to create some
text boxes to represent the content and navigation links, and import images
to represent other features of the content area.
40 Tutorial: Creating Page Mock-ups
Page 41

Place placeholder text for the links
The first element to create is the text representing the navigation links.
1.
Select the Text tool in the Vector section of the Tools panel, and move
the pointer over the Document window.
The pointer changes to an I-beam, and the Property inspector displays
text properties.
Font Size Fill color Style buttons
scale
2.
In the Property inspector, set the following tool properties:
■ From the Font pop-up menu, select TrebuchetMS.
NOTE
If you don’t have TrebuchetMS, select Verdana or a similar font instead.
■ Click the Bold button.
■ Enter 14 as the font size.
■ Select Smooth Anti-Alias as the anti-aliasing level.
■ Click the Color icon next to the font size menu and select the white
Alignment buttonsLeadingHorizontal
swatch.
■ Click the Left Alignment button.
■ Enter 200 as the leading percentage next to the vertical, two-
headed arrow icon.
3.
With the I-beam pointer, click once near the upper-left corner of the
sidebar rectangle.
This step creates an empty text block.
4.
Type Cuisine in the text block, and then press Enter to start a new line.
The width of the text block expands as you type.
Place text and images 41
Page 42

5.
Type the following items, pressing Enter after each to start a new line:
■ Chef Ipsum
■ Articles
■ Special Events
■ Location
■ Menu
■ Contact Us
When you complete this step, you have a text block representing the
navigation links.
6.
Click the Pointer tool in the Tools panel to deselect the text box.
7.
Save your work.
Place a placeholder image for the video
Next, you add a placeholder image in the main content area to represent a
video that will run on the final web page. See “Review your task”
on page 30.
1.
2.
42 Tutorial: Creating Page Mock-ups
Select File > Import and browse to the following folder on your hard
disk:
local_sites/cafe_townsend/fireworks_assets/
Select video-placeholder.jpg and click Open.
Page 43

3.
Position the insertion pointer about 6 pixels below and to the right of
the upper-left corner of the off-white copy area, and then click to insert
the image.
4.
With the placeholder image still selected, use the arrow keys on your
keyboard to adjust its position.
5.
Click anywhere outside the selected image to deselect it.
6.
Save your work.
Place a placeholder image for the featured item
Next, you add a placeholder image in the main content area to represent a
featured menu item to be displayed on the final web page. See “Review
your task” on page 30.
1.
Select File > Import and browse to the following folder on your hard
disk:
local_sites/cafe_townsend/fireworks_assets/
2.
Select feature-placeholder.jpg and click Open.
3.
Position the insertion pointer about 6 pixels below the videoplaceholder image, and then click to insert the image.
Place text and images 43
Page 44

4.
With the placeholder image still selected, use the arrow keys on your
keyboard to adjust its position.
You want to position the image so that its left edge aligns with the left
edge of the video placeholder image.
5.
Click anywhere outside the selected image to deselect it.
6.
Save your work.
Add placeholder text for the page copy
Finally, you will draw an empty text box and import some placeholder text
into it to represent the page copy.
1.
2.
44 Tutorial: Creating Page Mock-ups
In the Vector section of the Tools panel, select the Text tool.
In the Property inspector, set the following tool properties:
■ From the Font pop-up menu, select Verdana.
■ Enter 11 as the font size.
■ Make sure the Bold button is not selected.
■ Click the Color box, type 240E0A in the text box at the top of the
Color window, and then press Enter.
■ Enter 200 as the leading percentage next to the vertical, two-
headed arrow icon.
Page 45

3.
Position the I-beam pointer about 6 pixels from the upper-right corner
of the video-placeholder image, and then drag down and to the right to
draw a text box.
Ensure that there is about a 6-pixel margin on all sides.
4.
Type or paste about two paragraphs of placeholder text in the text box.
Because the text represents where text would be for the web page, it
doesn’t need to say anything. You can paste the text in the
loremipsum.txt file located in the following folder:
local_sites/cafe_townsend/fireworks_assets/
Now that you’ve created the basic text blocks, you decide to modify some
of the text so that the paragraphs begin with highlighted text and have text
at the end of each paragraph that simulate links.
1.
Select the Text tool in the Vector section of the Tools panel, and then
select the first three words of the first paragraph.
2.
In the Property inspector, do the following:
■ Click the Bold button.
■ Click the Color box, type 6B1101 in the text box at the top of the
Color window, and then press Enter.
3.
Repeat these steps for the first three words in the second paragraph.
Place text and images 45
Page 46

Now you add a line of text at the end of each paragraph and make it look
like a web link.
1.
Click the I-beam pointer at the end of the first paragraph and press the
spacebar on your keyboard.
2.
Type Learn more, and then select the text you just typed.
3.
In the Property inspector, do the following:
■ Click the Underline button.
■ Click the Color box, type 32596E in the text box at the top of the
Color window, and then press Enter.
4.
Click the I-beam pointer at the end of the second paragraph and press
the spacebar on your keyboard.
5.
Type Make a reservation, and then select the text you just typed.
6.
In the Property inspector, do the following:
■ Click the Underline button.
■ Click the Color box, type 32596E in the text box at the top of the
Color window, and then press Enter.
7.
Click the Pointer tool in the Tools panel to deselect the text.
8.
Save your work.
46 Tutorial: Creating Page Mock-ups
Page 47

Export the image for the web
The mock-up of the Cafe Townsend homepage you created should look as
follows:
Next, you decide to export the PNG file to a JPEG file that you can display
on an internal website or e-mail to your colleagues or clients.
Export the image for the web 47
Page 48

1.
Select File > Image Preview.
2.
In the Format pop-up menu, select JPEG.
3.
In the Quality text box, type 90, or use the Quality slider.
Because this image will not be used on a public web page, you don’t
need to be concerned about file size and download time. Otherwise, a
quality setting of 90 might be too high.
In the area above the preview image, you can see how your settings
affect the file size and download time.
4.
Click Export.
The Export dialog box appears.
5.
Browse to the following folder:
local_sites/cafe_townsend/fireworks_assets/
6.
Click Export.
Fireworks creates a JPEG version of your page mock-up in the
fireworks_assets folder. Your PNG file still exists and you should use it
to edit the mockup in response to feedback. After you complete each
revision, export it again.
In this tutorial, you completed a page mock-up. You learned to create and
save Fireworks files, import and place images, draw vector shapes, place
text and images, and export images.
For detailed information about any of the features covered in this tutorial,
and for information on additional Fireworks features, see Using Fireworks.
48 Tutorial: Creating Page Mock-ups
Page 49

CHAPTER 5
Tutorial: Handling Photographs
This tutorial will guide you through the basic tasks of optimizing
photographs with Macromedia Fireworks 8. You will learn how to batch
process the files, and to compose and export a group of images.
In this tutorial, you’ll complete the following tasks:
Review your task . . . . . . . . . . . . . . . . . . . . . . . . . . . . . . . . . . . . . . . . . .49
Batch process large image files . . . . . . . . . . . . . . . . . . . . . . . . . . . . .50
Compose the images. . . . . . . . . . . . . . . . . . . . . . . . . . . . . . . . . . . . . . . 52
Preview and export the images. . . . . . . . . . . . . . . . . . . . . . . . . . . . . .56
View the final optimized images . . . . . . . . . . . . . . . . . . . . . . . . . . . . .58
Review your task
According to the page mock-up you created previously, the Cafe Townsend
website will include a Flash-based photo slideshow.
5
You are provided with six digital photographs of dishes from the restaurant
menu. Your task is to prepare the images for the slideshow. They need to be
of good quality yet small enough to download quickly. Also, the size of
each image must be 700 pixels by 150 pixels to fit the dimensions of the
slideshow.
NOTE
For a tutorial on creating the slideshow in Flash, see the Macromedia
Flash 8 tutorials.
49
Page 50

Batch process large image files
When the source of your image files is a digital camera, you probably won’t
be able to use the images directly as web graphics. The size and resolution
are much too great. You may also want to alter the composition so that
only parts of the photographs are used.
When all the image files require the same adjustments, you can eliminate
the time-consuming process of opening and modifying each file by batch
processing the image files.
For the Cafe Townsend project, you decide to batch process the six JPEG
files downloaded from a digital camera. You want to perform the following
actions to all the files:
■ Because the images have different dimensions, you want to resize them
so they are all same width.
■ Because the filenames are not very informative, you want to add a
“dish_” prefix to the filenames to better describe the images.
The first step is to select the files you want to process.
If you haven’t already set up a working folder, you must do so before you
begin. For instructions, see “Create a working folder” on page 30.
1.
In Fireworks, select File > Batch Process.
The Batch dialog box appears.
2.
Browse to the following folder on your hard disk:
local_sites/cafe_townsend/fireworks_assets/camera_files
The folder contains six JPEG images downloaded from a digital
camera.
3.
To quickly select all the files for the batch, click Add All, and then click
Next.
The Batch Process dialog box appears. This dialog box lets you specify
the actions you want to perform on a batch of files. In this case, you
want to scale and rename your files.
4.
Under Batch Options, select Scale, and then click Add to include the
action in the batch process.
50 Tutorial: Handling Photographs
Page 51

5.
In the Scale box at the bottom of the dialog box, select Scale to Size from
the list, and then set the size dimensions as follows:
■ Ty p e 750 in the width box.
■ For the height, select Variable from the list.
6.
Under Batch Options, select Rename, and then click Add to include the
action in the batch process.
7.
In the Rename box at the bottom of the dialog box, select the Add Prefix
option and enter dish_ in the text box.
8.
Click Next to move to the next screen.
9.
Make sure the Same Location As Original File option is selected, and
then click Batch to start the batch process.
Fireworks scales all the images and adds a dish_ prefix to each filename.
When prompted, click OK to finish the process.
When you look at the files in the camera_files folder, you notice that
Fireworks has placed the original image files in a folder called Original
Files. You also notice that the scaling operation has significantly
reduced the size of the files.
Batch process large image files 51
Page 52

TIP
While completing
the tutorial, you may
find it useful to undo
a change you’ve
made. Fireworks can
undo several of your
recent changes,
depending on the
number of undo
steps you set in
Preferences. To
undo the most
recent change,
select Edit > Undo.
Compose the images
The next step is to compose the images to appear in the slideshow. Each
image must be 700 pixels by 150 pixels to fit the dimensions of the
slideshow. However, because each image you batch processed is larger than
the slideshow dimensions, you must choose, or compose, an interesting
700 x 150 image from each larger image.
One option is to open each image, crop it, and export it. However, you
decide to take a more efficient approach: create a single image file that
holds all six images while still letting you compose and export the images at
any time.
You begin by creating the image source file. In the next section, you’ll add
frames to the file, place an image in each frame, and compose the images.
You’ll then be able to export all six images in one operation.
1.
In Fireworks, select File > New.
2.
In the New Document dialog box, enter 700 for the width and 150 for
the height.
Make sure that both measurements are in pixels.
3.
Set the canvas color to White, and then click OK to create the image
source file.
4.
If the Document window isn’t maximized, that is, if it doesn’t fill the
center of the screen, maximize it by clicking the Maximize button
(Windows) or the zoom box (Macintosh) at the top of the Document
window. This step will give you plenty of room to work.
5.
Select File > Save.
6.
Browse to the following folder on your hard disk:
local_sites/cafe_townsend/fireworks_assets/
7.
Name the file ImageSource.png and click Save.
As you complete the tutorial, remember to save your work often by
selecting File > Save.
52 Tutorial: Handling Photographs
Page 53

Create and name frames
Next, you create several frames in the ImageSource.png file to hold the
image files that you processed earlier.
Frames are a Fireworks feature that are typically used to create animations
and rollovers. In this case, you use frames to hold the individual photos
before you export them to separate files all at once.
1.
Make sure the ImageSource.png file is open in Fireworks.
2.
Select Window > Frames to open the Frames panel.
3.
Click the context menu on the upper right corner of the panel, and then
select Add Frames.
4.
In the Add Frames dialog box, enter 5 as the number of new frames,
make sure the After the Current Frame option is selected, and click OK.
Compose the images 53
Page 54

Fireworks adds five new frames to the existing one, giving you a total of
six.
By default, Fireworks names the new frames Frame 2, Frame 3, and so
on. You want to rename the frames to reflect the filenames for the
images you’ll export later in this tutorial.
5.
In the Frames panel, double-click Frame 1.
6.
Type Image0 in the textbox that appears, and then press Enter to accept
the new name.
NOTE
The Flash developer in charge of creating the slideshow has asked you to
start the numbering at 0 for coding reasons.
54 Tutorial: Handling Photographs
7.
Continue renaming the frames Image 1, Image 2, and so on.
When you export the images later in this tutorial, Fireworks will
automatically name the exported files with the frame names.
8.
Save your work.
Place and compose an image in each frame
Now that you created six frames, you want to import the files you
processed earlier into each of the frames. Once imported, you can easily
compose each image by dragging it around the canvas. Using frames to
store and manipulate the images also allows you to export them all at once
with the file settings you want.
Page 55

1.
In the Frames panel, select the first frame.
2.
Select File > Import and browse to the following folder on your hard
disk:
local_sites/cafe_townsend/fireworks_assets/camera_files
3.
Select dish_1013.jpg and click Open.
4.
Align the insertion pointer just outside the upper-left corner of the
canvas as shown in the following illustration, and then click to insert the
image.
The image appears, selected, on the canvas.
The image is larger than the canvas, as indicated by its blue outline.
Instead of cropping the image, you’ll move it until the part of the image
you want appears in the “window” created by the canvas. When you
export the image later in the tutorial, it’ll be cropped so that its height
and width match the canvas size (700 x 150 pixels).
Compose the images 55
Page 56

5.
To compose the image, drag it until the part you want appears in the
window created by the canvas.
6.
Click anywhere outside the selected image to deselect it.
7.
Repeat steps 1 through 6 for the remaining five images, making sure to
select a new, empty frame before importing each image.
8.
Save your work.
56 Tutorial: Handling Photographs
Preview and export the images
Your image source file now contains six frames with six images. Holding
the images in frames lets you export them all at once with the file settings
you want, as follows.
Page 57
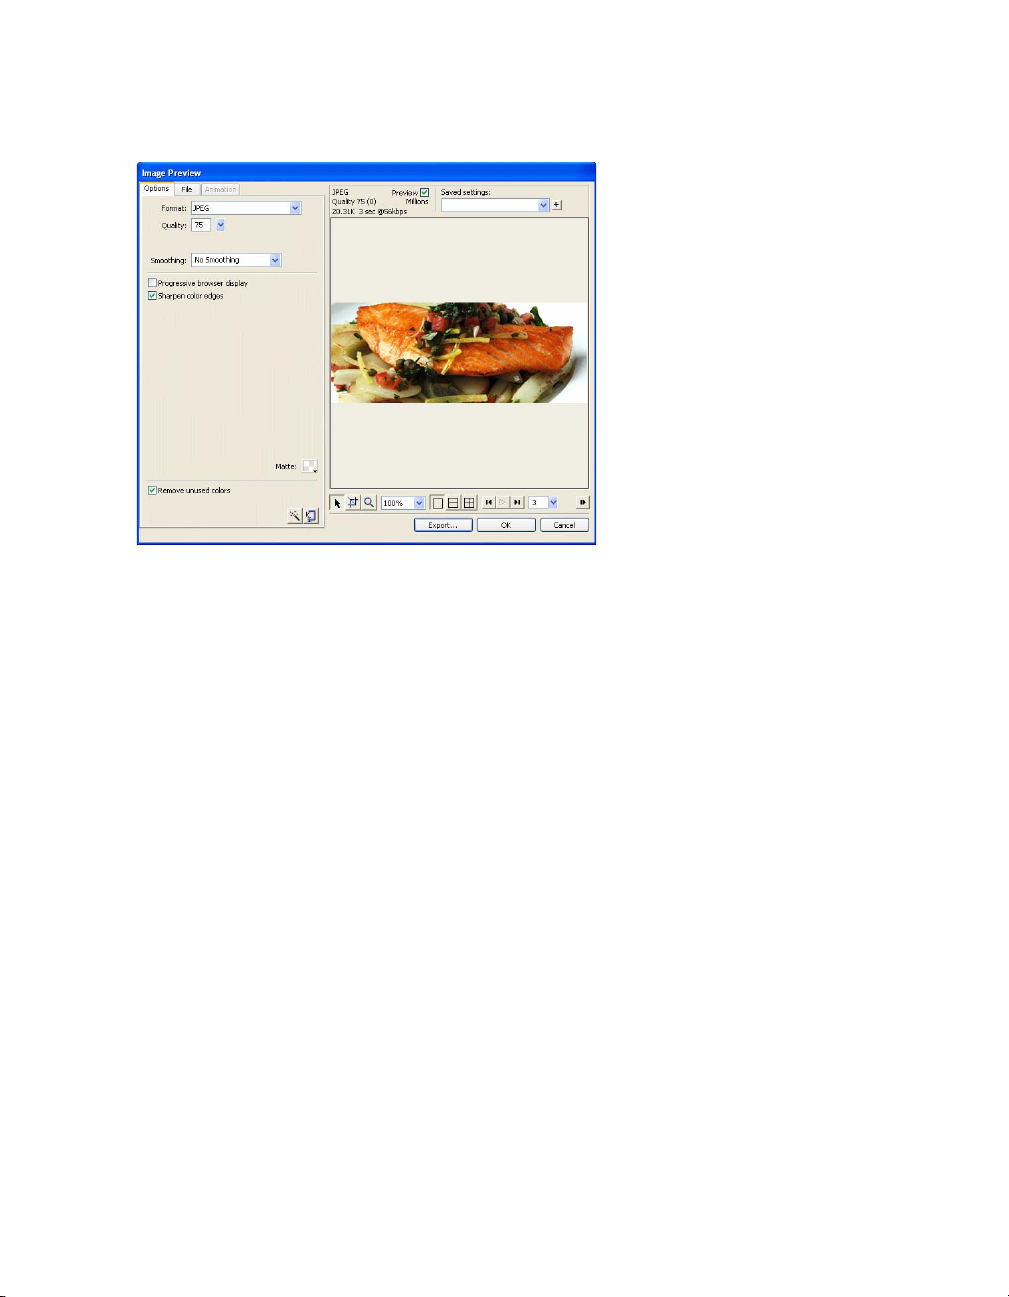
1.
Select File > Image Preview.
2.
In the Image Preview dialog box, do the following:
■ In the Format pop-up menu, select JPEG.
The JPEG format is best for digital or scanned photographs, images
using textures, images with gradient color transitions, and any
images that require more than 256 colors. For more information on
format choices, see“About graphic files” on page 26.
■ In the Quality text box, type 75, or use the Quality slider.
■ Select the Sharpen Color Edges option.
■ Click Export.
3.
In the Export dial og box that appears, browse to the following folder on
your hard disk:
local_sites/cafe_townsend/images/
4.
Select Frames to Files in the Export pop-up menu.
5.
Make sure that Trim Images is not selected.
6.
Click Export.
Fireworks exports each frame as a separate image file to the images
folder using the name of the frame for the filename.
Preview and export the images 57
Page 58

View the final optimized images
After exporting the images, you can see how they look by opening them in
Fireworks.
You’ll notice the following:
■ All images are cropped to display the composition you created when
you positioned the images on the canvas.
■ All images are uniformly 700 pixels wide and 150 pixels high, and have
a resolution of 72 pixels per inch.
The following tables indicate how the final images differ from the original
JPEG files that the digital camera created:
Original digital camera files
Filename File dimensions File size
1013.jpg 1679 x 1170 pixels 402K
1088.jpg 2920 x 1876 pixels 1732K
1095.jpg 2063 x 1444 pixels 753K
1111.jpg 3040 x 1840 pixels 2831K
1320.jpg 3284 x 1855 pixels 1364K
1396.jpg 3346 x 2000 pixels 1435K
58 Tutorial: Handling Photographs
Final images
Filename File dimensions File size
Image0 700 x 150 pixels 12K
Image1 700 x 150 pixels 16K
Image2 700 x 150 pixels 23K
Image3 700 x 150 pixels 19K
Image4 700 x 150 pixels 21K
Image5 700 x 150 pixels 14K
The final images have the uniform dimensions you need and have much
smaller file sizes, which is critical for public websites.
Page 59

In this tutorial, you learned to batch process large images files, create and
name frames, place images on frames, and to preview and export files. For
detailed information about any of the features covered in this tutorial, and
for information on additional Fireworks features, see Using Fireworks.
View the final optimized images 59
Page 60

60 Tutorial: Handling Photographs
Page 61

CHAPTER 6
Tutorial: Creating a Page Banner
This tutorial will guide you through the task of designing a page banner
with Macromedia Fireworks 8. You’ll learn to import image assets, work
with layers, shapes, masks, and text, and optimize and export the finished
banner graphic.
In this tutorial, you’ll complete the following tasks:
Review your task . . . . . . . . . . . . . . . . . . . . . . . . . . . . . . . . . . . . . . . . . . 61
Add a background and place the logo. . . . . . . . . . . . . . . . . . . . . . . . 62
Organize your objects with layers. . . . . . . . . . . . . . . . . . . . . . . . . . . . 66
Create a contrasting background for the logo . . . . . . . . . . . . . . . . . 68
Create an outline around the banner . . . . . . . . . . . . . . . . . . . . . . . . . 72
Create a slanted edge effect . . . . . . . . . . . . . . . . . . . . . . . . . . . . . . . . 74
Add a tag line to the banner . . . . . . . . . . . . . . . . . . . . . . . . . . . . . . . . . 76
Export an optimized image file . . . . . . . . . . . . . . . . . . . . . . . . . . . . . . 76
6
Review your task
During the planning stages of the Cafe Townsend project, several possible
designs for a banner graphic were discussed. The following is a sketch of
the design approved by the Cafe Townsend representatives:
You are provided with a set of assets. Your task is to create the final banner
for the website based on the design sketch.
61
Page 62

Add a background and place the logo
After you create a new PNG file for the banner, you want to import a
photo to serve as the background image for the graphic. You also want to
import the Cafe Townsend logo.
You start by creating a new PNG file for the banner.
If you haven’t already set up a working folder, you must do so before you
begin. For instructions, see “Create a working folder” on page 30.
1.
In Fireworks, select File > New.
2.
In the New Document dialog box, do the following:
■ Enter 700 for the width and 92 for the height. Ensure that both
measurements are in pixels.
■ Set the canvas color to Custom and select black from the custom
color menu
3.
Click OK to create the document.
If the Document window isn’t maximized, that is, if it doesn’t fill the
center of the screen, maximize it by clicking the Maximize button
(Windows) or the zoom box (Macintosh) at the top of the Document
window. This step will give you plenty of room to work.
4.
Select File > Save and browse to the following folder on your hard disk:
local_sites/cafe_townsend/images/
5.
Name the file banner_graphic.png.
NOTE
On the Macintosh, select the Add Filename Extension option if it’s not
already selected.
62 Tutorial: Creating a Page Banner
6.
Click Save.
Import the background image
The background of the banner graphic consists of a photograph of the
interior of a Cafe Townsend restaurant. You want to import the
photograph in your document, and then adjust it to fit the dimensions of
the banner.
Page 63

1.
With the banner_graphic.png file open in Fireworks, select File >
Import and browse to the following folder on your hard disk:
local_sites/cafe_townsend/fireworks_assets/
2.
Select cafePhoto.jpg and click Open.
3.
Align the insertion pointer with the upper-left corner of the canvas as
shown in the following illustration, and then click to insert the image.
The image appears, selected, on the canvas. The image is larger than
the canvas, as indicated by its blue outline. To make it fit the way you
want, you scale and position the photo.
4.
With the image still selected, select the Scale tool in the Tools panel (or
press Q).
Add a background and place the logo 63
Page 64

5.
Zoom out to view the entire photo by using the magnification pop-up
menu in the lower right corner of the Document window.
6.
With the Scale tool, reduce the size of the photo by about 25 percent by
clicking the selection point in the lower right corner of the photo and
dragging the mouse towards the upper-left corner.
Moving a corner selection point with the Scale tool scales the photo
proportionately.
.
64 Tutorial: Creating a Page Banner
Page 65

7.
Click the photo and drag it so that the canvas displays the part of the
photo that you want to be visible in the banner.
Move the photo to compose an interesting image for the banner
graphic’s background.
8.
Once you’re satisfied with the image, save your work.
Import the logo
Next you import a vector-based graphic of the Cafe Townsend logo. Vector
graphics are one of two types of graphics you can create, import, or modify
in Fireworks. For more information, see “About bitmap and vector
graphics” on page 17.
The file you import was created as a vector graphic in Fireworks and saved
in the Adobe Illustrator format (an AI file), a common format for graphic
design work.
1.
With the banner_graphic.png file open in Fireworks, zoom in to full
size by selecting 100% from the magnification pop-up menu if you
haven’t done so already.
2.
Select File > Import and browse to the following folder on your hard
disk:
local_sites/cafe_townsend/fireworks_assets/
Add a background and place the logo 65
Page 66

3.
Select cafeLogo.ai and click Open.
The Vector File Options dialog box appears. This is where you can
adjust how a vector file is imported.
4.
Click OK to accept the default options.
5.
Position the insertion pointer inside the upper-left corner of the banner
and click to insert the graphic.
At this point the logo is not clearly visible because it’s black and
transparent against the dark background image. You’ll highlight it later
so that it better stands out.
6.
Save your work.
66 Tutorial: Creating a Page Banner
Organize your objects with layers
Now that you imported two graphics into your document, you want to
arrange them in layers so that you can more easily organize the banner’s
composition and manipulate its elements.
Page 67

Specifically, you want to organize the elements on three layers—one layer
for the background, a second layer for the logo, and a third layer for other
graphics. To better identify the elements on each layer, you also want to
give each layer a name that clearly indicates what’s on the layer.
1.
Make sure the banner_graphic.png file is open in Fireworks.
2.
If the Layers panel is not already open, select Window > Layers.
So far the banner graphic contains a single layer called Layer 1.
3.
At the bottom of the panel, click the New/Duplicate Layer button twice
to create two more layers.
4.
Rename the layers by double-clicking each one and entering the
following names in the Layer Name textbox that appears:
■ For Layer 3, Graphics
■ For Layer 2, Logo
■ For Layer 1, Background
5.
Change the layer stacking order by clicking the Graphics layer and
dragging it below the Logo layer.
A dark line indicates where the object will be dropped if you release the
mouse button at that time. To place an element on a layer, release the
mouse button when the dark line appears at the bottom of the layer.
TIP
It’s always a good
idea to name your
layers so that you
can easily identify
them later. When a
document gets large
and contains many
layers and objects, it
can be difficult to
manage them if your
layers and objects
don’t have unique
names.
Organize your objects with layers 67
Page 68

ABOUT...
More about layers Layers divide a Fireworks document into discrete planes. A document can consist
of many layers, and each layer can contain many objects. In Fireworks, the Layers panel lists the layers in
a document and the objects that each layer contains.
The objects and layers in the Layers panel show the order of how these elements are stacked in the
composition. Layers or objects higher in the panel will cover layers and objects that are below them in the
panel. By rearranging the stacking order of layers or of objects within a layer you can create the effect of
objects that mask, or block out, other objects.
6.
Drag the logo image (called “Group: 3 objects”) from the Background
layer to the Logo layer.
The Layers panel should look as follows:
7.
Save your work.
68 Tutorial: Creating a Page Banner
Create a contrasting background for the logo
The Cafe Townsend logo is not clearly visible because it’s black and
transparent against a dark background. You decide to place a lighter
colored rectangle behind the logo to make it stand out more.
1.
In the Layers panel, select the Logo layer.
Page 69
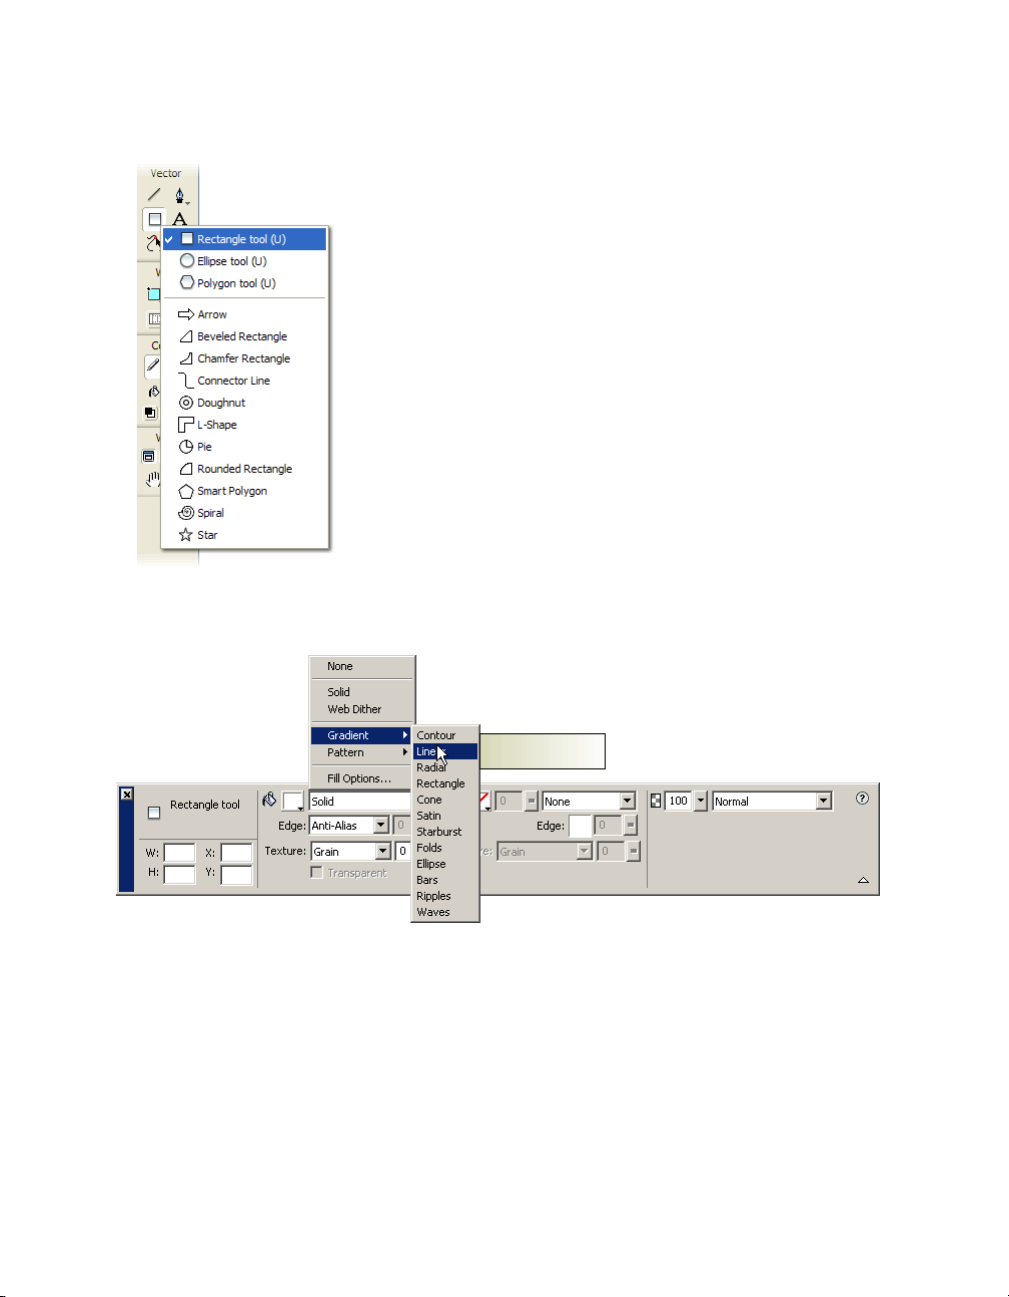
2.
In the Tools panel, select the Rectangle tool.
3.
In the Property inspector, set the following properties for the tool:
a.
Click the Fill Category box and select Gradient > Linear.
.
Create a contrasting background for the logo 69
Page 70

b.
Click the Fill Color box next to the bucket icon and then click the
button just above the Preset label in the dialog box that appears.
A pop-up window appears to let you pick the first gradient color.
70 Tutorial: Creating a Page Banner
Page 71

c.
Ty p e F7EFE3 in the text box at the top of the window, and then
press Enter.
The beginning color of the gradient changes to reflect your color
choice.
d.
Click the second gradient color button (on the right side of the
dialog box) and click the white swatch with the eyedropper pointer.
The ending color of the gradient changes to reflect your color
choice.
e.
Click the Opacity button for the second gradient color, in the
upper-right corner of the dialog box:
The Opacity pop-up window appears.
f.
Use the slider to set the opacity of the second gradient color to
50%.
Create a contrasting background for the logo 71
Page 72

TIP
Increase the
document
magnification to
fine-tune your work
4.
Press Enter to accept the settings, and then draw a rectangle over the
Cafe Townsend logo in the banner.
When you release the mouse button, a semi-transparent rectangle
appears over the logo.
5.
Select the Pointer tool (or press V) and drag the blue corner points of
the rectangle to position and resize the rectangle so that it is within and
slightly smaller than the logo.
The rectangle obscures the logo beneath it. You want to change the
stacking order of the two objects so that the rectangle is beneath the
logo.
6.
In the Logo layer of the Layers panel, drag the rectangle object so that it
is below the logo object (called “Group: 3 objects”).
The logo is now properly displayed, with the rectangle highlighting
rather than obscuring the logo.
7.
Save your work.
72 Tutorial: Creating a Page Banner
Create an outline around the banner
You want to create a black outline around the banner. To create this effect,
you decide to use a rounded rectangle as a vector mask.
A vector mask crops or clips the underlying object to the shape of its path,
creating a cookie-cutter effect.
Page 73

1.
Select the Background layer in the Layers panel.
2.
Select the Rounded Rectangle tool in the Vector section of the Tools
panel.
3.
In the Property inspector, set the following properties for the tool:
■ Select None from the Fill Category pop-up menu.
■ Click the Color box next to the pencil icon and set the stroke color
to a light gray such as #666666.
■ Set the stroke tip size to 1 and the stroke category to 1-Pixel Soft.
4.
On the canvas, draw and position the rounded rectangle inside the
banner.
The area that falls outside the rounded rectangle will be black, forming
the banner’s outline.
Use the blue selection points to adjust the size of the shape. Use the
yellow diamond-shaped control points to adjust the roundness of the
corners.
5.
With the rounded rectangle still selected, select Edit > Cut.
Create an outline around the banner 73
Page 74

6.
In the Layers panel, select the background photo (called “Bitmap”) on
the Background layer.
You want to apply the mask to this object.
7.
Select Edit > Paste As Mask to apply the mask to the photo.
On the canvas, the area covered by the rounded rectangle is visible. The
area outside it is masked.
In the Layers panel, a mask thumbnail appears next to the background
photo. The green highlight around the mask thumbnail indicates that
it is selected.
8.
Save your work.
Create a slanted edge effect
You want to create a slanted edge effect in the banner, as shown in the
banner sketch (see “Review your task” on page 61). To produce this effect,
you decide to create a shape and use it as a mask.
1.
In the Layers panel, select the Graphics layer.
2.
In the Tools panel, select the Pen tool.
74 Tutorial: Creating a Page Banner
Page 75

3.
In the Property inspector, set the following properties for the Pen tool:
■ Click the Stroke Color box next to the pencil icon and click the
Transparent button.
■ In the Fill Category pop-up menu, select Solid.
■ Click the Fill Color box next to the bucket icon and select the black
swatch with the eyedropper pointer.
4.
In the Document window outside the canvas, click four times to draw a
rectangular shape, and then click on the first point to close the shape.
Your rectangle should be a little taller than the banner graphic and
about a third of its length.
5.
Select the Pointer tool (or press V) and move the shape so that it covers
the left side of the banner.
NOTE
Because the shape is on the Graphics layer, it obscures the background
image but not the logo. According to the stacking order shown in the
Layers panel, the Logo layer is above the Graphics layer while the
Background layer is below it.
6.
Select the Subselection tool (or press A) and click the shape’s anchor
points to adjust its shape so that its right side is slanted, as follows.
7.
Save your work.
Create a slanted edge effect 75
Page 76

Add a tag line to the banner
Next, you need to add the company’s tag line, Nouveau World Cuisine, to
the banner.
1.
In the Layers panel, select the Graphics layer.
2.
Select the Text tool in the Tools panel.
3.
In the Property inspector, set the following properties for the tool:
■ Select Arial from the Font pop-up menu.
■ Enter 14 as the font size.
■ Click the Bold button.
■ Click the Color box, type F7EFE3 as the text color, and then press
Enter.
■ Click the Left Alignment button.
4.
Click below the logo graphic and type Nouveau World Cuisine.
5.
Click once outside the text block to apply your text entry.
Fireworks creates a new text object on the Graphics layer whose default
name matches the text you typed. This feature gives you the ability to
quickly identify the text objects you use in your composition.
6.
Save your work.
Export an optimized image file
Now that you completed the banner graphic, you’re ready to optimize and
export the image as an JPEG file.
ABOUT...
The ultimate goal in web graphic design is to create great-looking images that download as fast as
possible. To do that, you must reduce the file size of your image while maintaining its quality as much as
possible. This balancing act is optimization—finding the right mix of color, compression, and quality.
76 Tutorial: Creating a Page Banner
Page 77

Optimize and preview the image
Before you export any document from Fireworks, you should always
optimize it. Optimizing ensures that an image is exported with the best
possible balance of compression and quality.
1.
If the Optimize panel isn’t already open, select Window > Optimize to
open it.
2.
From the Settings pop-up menu, select JPEG – Better Quality.
The options in the panel change to reflect the new setting.
These settings can be changed, but for this tutorial you use the default
settings.
Export an optimized image file 77
Page 78

3.
Click the Preview button near the top left of the Document window.
Fireworks displays your document as it will appear when exported with
the current settings.
At the lower left of the window, Fireworks displays the size of the
exported file and the estimated time it will take to display the image
when viewed on the web.
NOTE
While previewing the image, you can try different quality settings in the
Optimize panel and see their effects on the image.
78 Tutorial: Creating a Page Banner
Export the image
After choosing your optimization settings, export the image as a JPEG file.
1.
Select File > Export.
The filename listed has a .jpg extension. Fireworks chose this file
format because you selected it in the Optimize panel.
2.
Browse to the following folder on your hard disk:
local_sites/cafe_townsend/images/
Page 79

3.
Ensure that the Save As Type (Windows) or Save As (Macintosh) popup menu reads Images Only, and click Export.
The JPEG file is exported to the images folder.
Remember that the PNG file is your source file, or working file.
Although you exported your document in JPEG format, you also must
save the PNG file so that any changes you made will be reflected in the
source file too.
4.
Select File > Save to save the changes to the PNG file.
View the exported image
Your banner graphic is done. Compare the JPEG file created during the
export process to the PNG file you worked on.
■ In Fireworks, select File > Open, browse to the images folder, and
double-click the banner_graphic.jpg file.
NOTE
If the file doesn’t appear in the images folder, select JPEG from the Files
of Type pop-up menu.
The JPEG image opens in Fireworks. Because JPEG images are bitmaps, all
your objects and layers are flattened in the Layers panel.
Also, the Property inspector displays only a few properties. All the
properties available in the PNG file are no longer available in a JPEG file.
Export an optimized image file 79
Page 80

You still have your source PNG file, so if you need to do more work on the
design, you can edit the PNG file and export it again. A PNG file always
remains fully editable even if you export the image to another format, such
as JPEG.
In this tutorial, you accomplished the work required to create a banner
graphic in Fireworks. You learned how to create a new document and
import images. You also worked with layers, shapes, masks, and text.
Finally, you optimized and exported the completed image.
For detailed information about any of the features covered in this tutorial,
and for information on additional Fireworks features, see Using Fireworks.
80 Tutorial: Creating a Page Banner
Page 81

CHAPTER 7
Tutorial: Creating a Web Page
This tutorial will guide you through the basic tasks of designing and
creating a web page with Macromedia Fireworks 8. You’ll also learn to
create interactive elements such as buttons, rollovers, and pop-up menus.
Before you begin, you must create a working folder. For instructions, see
“Create a working folder” on page 30.
In this tutorial, you’ll complete the following tasks:
View the completed web page . . . . . . . . . . . . . . . . . . . . . . . . . . . . . . 81
Open the source file. . . . . . . . . . . . . . . . . . . . . . . . . . . . . . . . . . . . . . . .82
Import an image . . . . . . . . . . . . . . . . . . . . . . . . . . . . . . . . . . . . . . . . . . . 83
Slice the document . . . . . . . . . . . . . . . . . . . . . . . . . . . . . . . . . . . . . . . .84
Create a rollover . . . . . . . . . . . . . . . . . . . . . . . . . . . . . . . . . . . . . . . . . . . 87
Create buttons for a navigation bar . . . . . . . . . . . . . . . . . . . . . . . . . . 91
Create and edit a pop-up menu . . . . . . . . . . . . . . . . . . . . . . . . . . . . . 99
Optimize the document . . . . . . . . . . . . . . . . . . . . . . . . . . . . . . . . . . . 108
Export HTML . . . . . . . . . . . . . . . . . . . . . . . . . . . . . . . . . . . . . . . . . . . . . 111
Test the completed file . . . . . . . . . . . . . . . . . . . . . . . . . . . . . . . . . . . . .115
7
View the completed web page
First, look at the completed tutorial file to see how your finished project
will appear after you export it as an HTML file.
1.
Start your web browser.
2.
With your file browser, locate and open the following folder on your
hard disk:
local_sites/global/Complete/
81
Page 82

3.
Select the final.htm file and drag it to the open browser window.
For this tutorial, you will complete a partially finished version of this
page for Global, a rental car company.
4.
(Internet Explorer) If the browser displays a message that it has
restricted the file from showing active content, click the message for
options and select Allow Blocked Content.
5.
Move the pointer over the large Vintage graphic on the right side of the
page.
When the pointer moves over the graphic, another image on the page
changes. This is called a disjoint rollover.
6.
Move the pointer across the navigation bar along the top of the page.
The buttons change in response to the pointer passing over them.
7.
Click the Rates button to test the link.
The link takes you to the Fireworks page at www.macromedia.com, but
you will enter your own Uniform Resource Locator (URL) for this and
other items as you complete the tutorial.
8.
Use your browser’s Back button to return to the final.htm page.
9.
Move the pointer over the Worldwide Airports graphic. A pop-up menu
appears. Move the pointer over each item in the menu, including the
first item, which contains a submenu.
10.
Click United States to test the link, and then return to the final.htm
page.
11.
When you finish viewing the web page, you can either close it or leave
it open for reference as you complete the tutorial.
NOTE
The Complete folder also includes the PNG file from which the HTML file
is generated. To view this file, double-click final.png.
82 Tutorial: Creating a Web Page
Open the source file
After viewing the final.htm file in a browser, you’re ready to begin.
1.
In Fireworks, select File > Open, and then browse to the following
folder on your hard disk:
local_sites/global/Start/
2.
Double-click the global.png file to open it in Fireworks.
Page 83

3.
Select File > Save As and save the file in the following folder:
local_sites/global/
NOTE
Saving the file in another location prevents you from overwriting the
original file in case you need to start over.
Import an image
After opening and saving the unfinished design for the Global web page,
you add the large Vintage graphic to it.
1.
Select File > Import, and then browse to the following folder:
local_sites/global/Assets/
2.
Select vintage.jpg and click Open.
3.
Click anywhere in the empty, white area of the canvas to insert the
graphic.
4.
Drag the image so that it is positioned as shown in the following
illustration.
5.
Save your work.
Import an image 83
Page 84

Slice the document
Graphic designers use a process called slicing to cut an image into smaller
pieces. Smaller images download more quickly over the web, so users can
watch a page load progressively rather than waiting for one large image to
download. In addition, slicing makes it possible to optimize various parts
of a document differently. Slicing is also necessary for adding interactivity.
In this step, you create slices for some of the graphic elements on the web
page. Later you’ll add interactivity to these slices as well as set optimization
and compression settings for them.
1.
With the Vintage graphic still selected on the canvas, select Edit >
Insert > Rectangular Slice.
A rectangular slice is inserted on top of the graphic. Slices have a green
overlay by default.
2.
Click anywhere outside the slice to deselect it.
Red slice guides define the slice, spanning the width and height of the
document. When you created the slice, Fireworks autosliced the rest of
the document for you.
NOTE
If you don’t see the red slice guides, select View > Slice Guides.
84 Tutorial: Creating a Web Page
3.
Shift-click the Worldwide Airports button graphic and the Great
Weekend Rates graphic on the left side of the document to select both
at the same time.
Page 85

4.
Select Edit > Insert > Rectangular Slice, and then select Multiple in the
message box that appears.
This step allows you to insert multiple slices at the same time.
Slices are inserted on top of each of the selected graphics. Adding more
slices changes the layout of autoslices in the rest of the document.
5.
Click anywhere outside the slices to deselect them.
There is now a space between the Vintage slice and the Great Weekend
Rates slice. This is a thin autoslice.
6.
Place the pointer over the Vintage image’s left slice guide.
The pointer changes to the guide movement pointer, indicating that
you can grab the slice guide and drag it. By dragging a slice guide, you
can change the shape of a slice.
7.
Select View > Guides > Snap to Guides to enable Snap to Guides if it is
not already selected.
Slice the document 85
Page 86

8.
Drag the slice guide to the left until it snaps with the right slice guide on
the Great Weekend Rates graphic, as shown in the following
illustration:
9.
Release the mouse button.
The Vintage slice now extends all the way to the edge of the Great
Weekend Rates slice, and the tiny autoslice is deleted. Think of slices as
table cells in a spreadsheet application or word processor. For example,
dragging slice guides to resize a slice resizes other slices just as dragging
cell borders in a table resizes other table cells. If you drag a slice guide
over and beyond autoslices, the slice guides merge and the unnecessary
autoslices are deleted.
86 Tutorial: Creating a Web Page
Page 87

10.
If the Layers panel is minimized or isn’t visible, select Window > Layers
to open it.
At the top of the panel is the Web Layer. It contains all of a document’s
web objects. The three slices you created are listed here. The Web Layer
is always the topmost layer in any document. It can’t be moved,
renamed, or deleted.
11.
Save your work.
Create a rollover
Now that you sliced your document, you can create interactive elements.
You decide to use two of your slices to create a rollover.
There are two kinds of rollovers: simple rollovers and disjoint rollovers. A
simple rollover displays a different image when the pointer moves over it in
a web browser. A disjoint rollover causes another image to change in a
different part of the screen when the pointer moves over it. You’ll create a
disjoint rollover here.
Create a rollover 87
Page 88

1.
Select the slice that covers the Vintage graphic.
The round icon in the center of the slice is called a behavior handle. It
allows you to add behaviors, or interactivity, to a slice. If you are
familiar with behaviors in Macromedia Dreamweaver, you’ll recognize
many of the same behaviors in Fireworks.
Behavior handle
You can also apply behaviors by using the Behaviors panel. However,
for simple interactivity like rollovers, it’s faster and easier to apply a
behavior by using the slice’s behavior handle.
2.
Drag the behavior handle onto the Great Weekend Rates slice, and
release the mouse button.
88 Tutorial: Creating a Web Page
A blue behavior line extends from the behavior handle to the corner of
the slice, and the Swap Image dialog box appears.
Page 89

3.
Ensure that Frame 2 is selected in the Swap Image From pop-up menu,
and click OK.
When the pointer moves over the Vintage slice in a browser, the image
in Frame 2 replaces the Great Weekend Rates graphic. The Vintage
graphic is considered the trigger for the rollover effect, and the image
that replaces the Great Weekend Rates graphic is considered the
swap image.
The next step is to add the swap image to Frame 2.
4.
If the Frames panel is minimized or isn’t visible, select Window >
Frames to open it.
The Frames panel lists the frames available in the current document.
Currently there is only one frame in the document. The Frames panel
is typically used for animation. In the case of rollovers, it is used to hold
swap images.
5.
Click the New/Duplicate Frame button at the bottom of the panel.
A new frame, named Frame 2, is created in the Frames panel. As
indicated by the workspace, the frame is empty except for the slices you
inserted (slices are shared across all frames).
6.
Select File > Import, and then browse to the following folder:
local_sites/global/Assets folder.
Create a rollover 89
Page 90

7.
Select the rates.gif file and click Open.
8.
Place the pointer over the slice where the Great Weekend Rates graphic
was located in Frame 1.
Align the pointer as best you can with the upper-left corner of the slice.
9.
Click to insert the graphic.
The Vintage Classic Rates graphic appears.
10.
Click the Preview button at the top of the Document window, and hide
the slices in the document by clicking the Hide Slices and Hotspots
button in the Web section of the Tools panel.
90 Tutorial: Creating a Web Page
Page 91

11.
Move the pointer over the Vintage graphic.
The Great Weekend Rates image changes when the pointer rolls over
the Vintage graphic.
12.
When you are finished, click the Original button at the top of the
Document window to return to normal view, and turn slices back on by
clicking the Show Slices and Hotspots button in the Tools panel.
13.
Save your work.
You have successfully created a disjoint rollover. You can create simple
rollovers in a similar manner: When dragging a slice’s behavior handle as
you did in step 2, you simply drag it back onto the same slice.
Generally, web designers add a rollover effect to an image to provide users
with a visual cue that the graphic is clickable. If the Global website were an
actual site on the Internet, you’d probably want the Vintage and Rates
images to link to other pages that provide more information. For the
purposes of this tutorial, you leave the disjoint rollover as it is. You’ll get
plenty of practice attaching links to other web objects in the following
section.
Create buttons for a navigation bar
TIP
If the image seems
to jump a bit or the
transition between
graphics doesn’t
look smooth, hide
the slices and adjust
the position of the
swap image in
Frame 2 with the
Property inspector.
Its x and y
coordinates should
match the
coordinates of the
Great Weekend
Rates image (11,
202).
Buttons are web objects that link to other web pages. Their appearance
typically changes depending on the user’s mouse movement or other
action, such as clicking, as a visual cue indicating interactivity. For
example, a button may display a different rollover effect when the pointer
moves over it than when it has been clicked.
A navigation bar—also known as a nav bar—is a series of buttons that
appears on one or more pages of a website. Typically, all the buttons within
a nav bar look the same, except for their text.
In this step, you create the buttons for the Global website nav bar.
Create buttons for a navigation bar 91
Page 92

Create a button symbol
The initial graphic and text for one button have already been created for
you. You convert this graphic into a button symbol.
1.
In Fireworks, select the button graphic labeled BUTTON TEXT in the
upper-left corner of the document.
2.
Select Modify > Symbol > Convert to Symbol.
The Symbol Properties dialog box appears.
3.
Type My Button in the Name text box, select Button as the symbol
type, and click OK.
A slice appears on top of the button graphic, and a shortcut icon
appears at the left of the slice. This indicates that the selection in the
workspace is an instance of the symbol you just created. Symbols are
like master copies of your graphics. When you change a symbol, all of
the instances of that symbol in your document change automatically.
Symbols reside in the library.
92 Tutorial: Creating a Web Page
4.
If the Library panel is minimized or isn’t visible, select Window >
Library.
Your symbol is listed in the Library panel.
Page 93

Create button states
Next you create various states for the button symbol. Button states are the
different ways a button appears when rolled over or clicked in a web
browser.
1.
Double-click the button instance you created.
The Button Editor appears with the button graphic displayed in the
work area.
2.
Click the tabs at the top of the Button Editor.
The first four tabs represent the button states. The last tab, Active Area,
represents the hot area on the button, or where a user must click or roll
over to activate the button states. The active area is also the swap area
for the button, or the area that changes with each button state.
Currently there are no states for the button symbol other than the Up
state, the state of the button before it is rolled over or clicked.
3.
Click the Over tab, and then click the Copy Up Graphic button.
The button graphic is copied from the Up tab. The Over state of a
button is its appearance when the pointer rolls over it. To give users
visual feedback, you decide to change the color of the rectangle behind
the text.
Create buttons for a navigation bar 93
Page 94

4.
Select the rectangle on the Over tab, making sure you select the
rectangle and not the text.
To select the rectangle, select the Subselection tool (or press A) and
hover carefully over the left or right edges of the button graphic. The
outlines of two overlapping objects should appear. The rectangle has 4
selection points while the text has 6 selection points. Carefully select
the outline with 4 selection points. If the name of the object in the
Property inspector is “Button rectangle,” you successfully selected the
rectangle.
5.
Click the Fill Color box in the Property inspector and select black as the
color.
The rectangle is now black while the text remains white.
6.
Click the Down tab at the top of the Button Editor, and click the Copy
Over Graphic button.
The button graphic is copied from the Over tab. The Down state of a
button is its appearance after a user clicks it. This time you don’t
change the color of the rectangle; you leave it as it is.
7.
Click Done in the Button Editor to apply your changes to the button
symbol.
8.
Click the Preview button in the Document window and test the
button’s states.
Disable slices if necessary. When you are finished, click the Original
button and enable slices again.
9.
Save your work.
94 Tutorial: Creating a Web Page
Create multiple button instances
Next you create more instances of the button symbol.
1.
Select the button in the workspace if it isn’t already selected.
2.
Select Edit > Clone.
A new instance of the button appears on top of the original button.
3.
Hold down Shift while pressing the Right Arrow key repeatedly to move
the new instance to the right.
Holding down the Shift key moves the instance in 10-pixel increments.
If necessary, use the arrow keys alone to move the selection one pixel at
a time.
Page 95
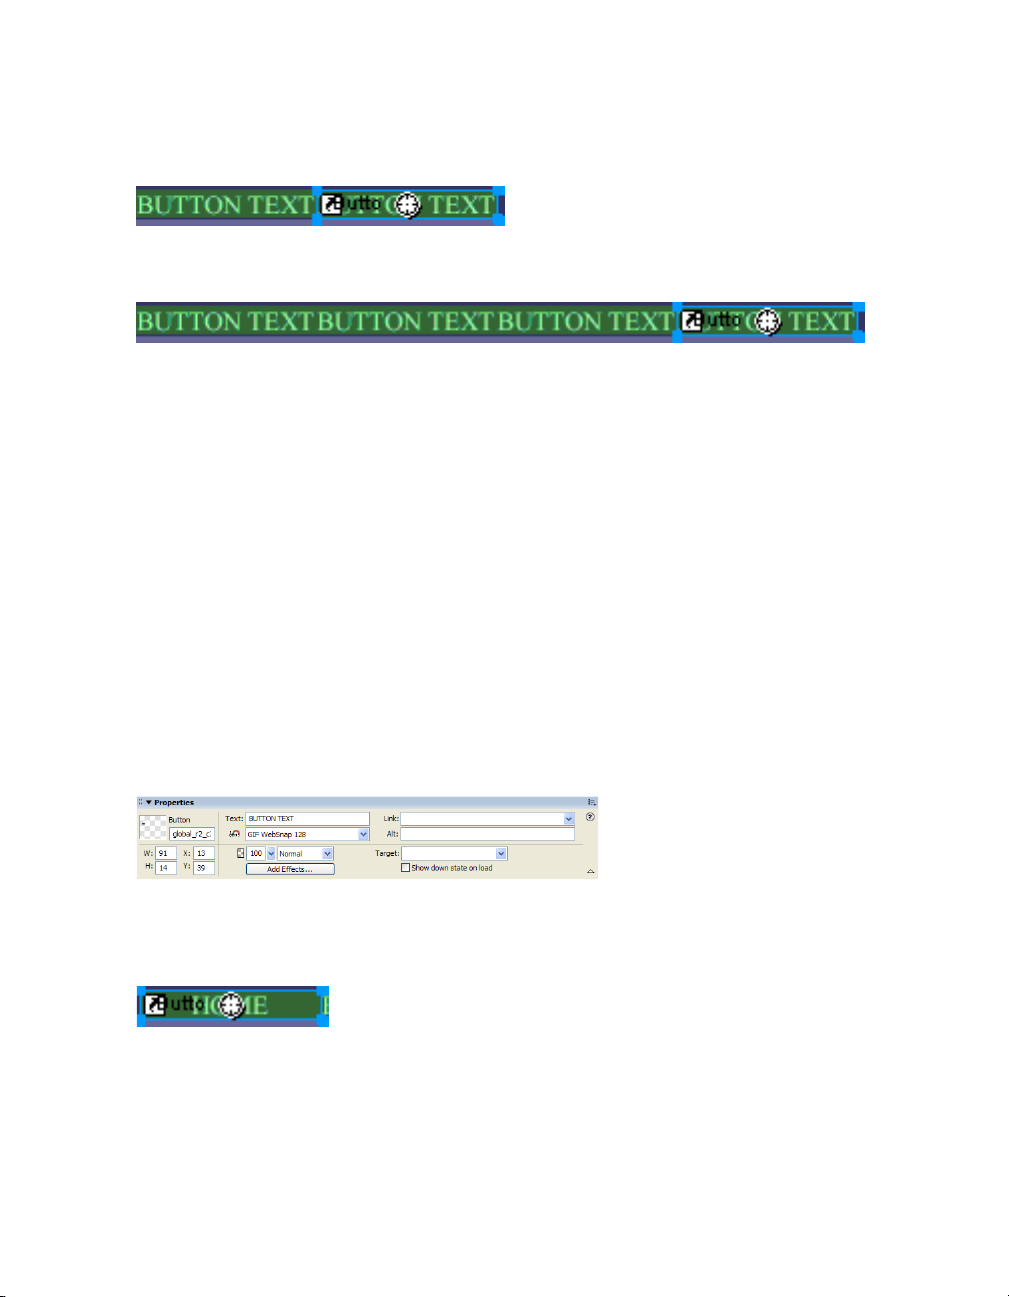
Position the instance to the immediate right of the original instance,
but not overlapping, as shown in the following illustration:
4.
Clone two more instances of the button, and position each to the right
of the previous instance.
As a shortcut, you can press Alt (Windows) or Option (Macintosh)
while dragging the selected instance with the pointer to make a copy of
it. After positioning the new instance to the immediate right of the
previous instance, select Edit > Repeat Duplicate to automatically
create and place another copy of the instance.
Change button instance text
Now that you created all the buttons for your nav bar, you need to give
each button unique text. You can easily change the text on a button
instance by using the Property inspector.
1.
Select the button instance at the far left.
Properties for the button instance appear in the Property inspector.
With the exception of the Export Settings pop-up menu, these
properties apply to the selected instance only. Making changes here will
not affect the original button symbol in the library.
2.
In the Property inspector, replace the text in the Text box with the word
HOME in uppercase letters. Then press Enter.
The text on the button changes to reflect your entry.
Create buttons for a navigation bar 95
Page 96

3.
For the remaining three buttons, change the button text to VEHICLES,
RATES, and CONTACT US, respectively.
Assign URLs to the buttons
Next you assign a unique URL to each button instance. A URL is the
address or location of a page on the web. You can easily assign URLs to
buttons by using the Property inspector.
1.
Select the button instance labeled Home.
2.
Enter index.htm in the Link text box of the Property inspector.
When clicked in a web browser, the Home button will jump to a page
called index.htm. You’ll discover later in the tutorial why you linked
the Home button to this page.
3.
Select the Vehicles button instance and enter your favorite URL in the
Link text box of the Property inspector.
NOTE
NOTE
96 Tutorial: Creating a Web Page
For the purposes of this tutorial, any working URL will suffice. If you
were creating a real website, you would enter the URL that you wanted
the Vehicles button to jump to.
Be sure to enter the URL of an actual website, so that you can test your
button links later.
4.
Assign a URL to each of the remaining button instances. Once again,
any working URL will suffice.
5.
Select File > Preview in Browser, and then select a browser.
If no browser is listed, you must select a browser by selecting File >
Preview in Browser > Set Primary Browser.
To test button links, you must preview the document in a browser.
Page 97

When the document opens in your browser, test the buttons you
created. Except for the Home button, which links to a file you haven’t
created yet, each button should jump to the link you specified in
Fireworks.
Edit the button symbol
Next you modify the original button symbol. The changes you make will
be automatically applied to all the button instances in your nav bar.
You may be wondering what the original button symbol looks like now
that you changed the text on several of its instances.
1.
Double-click any of the button instances in the workspace.
The Button Editor appears with the original button symbol and text
displayed in the workspace. The original button symbol is still intact
and displays the original text.
When you changed the text of each button in the workspace, you only
edited a button instance. If you make any changes here to the rectangle
or to text appearance, you will be editing the original symbol, so those
changes will be reflected in all the instances in the workspace.
2.
Click the Over tab.
3.
Select the black rectangle.
To select the rectangle, select the Subselection tool (or press A) and
carefully select the outline with 4 selection points, not the one with six.
If the name of the object in the Property inspector is “Button
rectangle,” you successfully selected the rectangle.
4.
Click the Fill Color box in the Property inspector, enter FF6633 as the
color value, and then press Enter to apply the color change.
The rectangle is now orange.
5.
Click Done in the Button Editor to apply the change to the button
symbol.
6.
Click the Preview button in the Document window and test the
buttons.
Each button’s Over state is now orange. You changed only the button
symbol, but the change was applied to all the button instances in your
nav bar.
Create buttons for a navigation bar 97
Page 98

7.
Click the Original button in the Document window and double-click
any button instance in the workspace.
You decide to change the appearance of the text in the button symbol.
8.
In the Up tab, select the button text.
To select the text, select the Subselection tool (or press A) and carefully
select the outline with 6 selection points, not the one with four. If the
name of the object in the Property inspector is “Button text,” you
successfully selected the text.
9.
In the Property inspector, select Arial as the font.
10.
Repeat this step for each button state.
11.
With the Text tool, double-click the text block in the Button Editor,
and delete the word BUTTON.
12.
Click the Pointer tool in the Tools panel to deselect the text block.
13.
Click Yes in the message box that asks whether you want to change the
text in the other button states.
Examine the various button states in the Button Editor. The text
changes in one state are reflected across all the button states. Compare
this to when you changed the font; you had to change it in each state.
That’s because you can apply different graphical and text attributes to
each state of a button. This is useful if you want the text color to
change when a user rolls over a button, for example.
14.
Click Done to exit from the Button Editor.
The font on each button instance changes to reflect the new font
selection, but the text remains the same. Button instances reflect only
the changes you make to a button symbol’s graphical appearance,
including its text attributes, but not changes you make to the text itself.
Button symbols enable you to change the graphical appearance of all
button instances in a nav bar quickly, while preserving each instance’s
unique text.
15.
Save your work.
98 Tutorial: Creating a Web Page
Page 99

Create and edit a pop-up menu
A pop-up menu is a menu that appears when you move the pointer over a
trigger image in a browser. It contains a list of items that link to other web
pages.
In this section, you create and edit a pop-up menu that lists Global’s
airport locations.
Create pop-up menu list items
You start by creating the menu list items with the Pop-up Menu Editor.
1.
Select the slice that covers the Worldwide Airports graphic.
2.
Select Modify > Pop-up Menu > Add Pop-up Menu.
The Pop-up Menu Editor appears.
Create and edit a pop-up menu 99
Page 100

3.
Double-click the first field in the Text column, type North America,
and then press Enter.
The next field in the column is highlighted, ready for you to create
another entry.
4.
Type Europe and press Enter.
5.
Create three more entries for Africa, Middle East, and Asia/Pacific.
6.
Double-click the first field in the Link column, enter a working URL of
your choice, and then press Enter.
For the purposes of this tutorial, any URL will suffice. Be sure it’s an
actual URL so that you’ll be able to test your links later.
NOTE
100 Tutorial: Creating a Web Page
7.
Enter URLs for the remaining entries.
There is always one extra line at the bottom of the entry list in the Pop-up
Menu Editor. It’s there so you can easily add new entries without having to
click the Add Menu button.
 Loading...