Page 1

Using Fireworks
Page 2

Trademarks
1 Step RoboPDF, ActiveEdit, ActiveTest, Authorware, Blue Sky Software, Blue Sky, Breeze, Breezo, Captivate, Central,
ColdFusion, Contribute, Database Explorer, Director, Dreamweaver, Fireworks, Flash, FlashCast, FlashHelp, Flash Lite,
FlashPaper, Flash Video Encoder, Flex, Flex Builder, Fontographer, FreeHand, Generator, HomeSite, JRun, MacRecorder,
Macromedia, MXML, RoboEngine, RoboHelp, RoboInfo, RoboPDF, Roundtrip, Roundtrip HTML, Shockwave, SoundEdit,
Studio MX, UltraDev, and WebHelp are either registered trademarks or trademarks of Macromedia, Inc. and may be registered in
the United States or in other jurisdictions including internationally. Other product names, logos, designs, titles, words, or phrases
mentioned within this publication may be trademarks, service marks, or trade names of Macromedia, Inc. or other entities and
may be registered in certain jurisdictions including internationally.
Third-Party Information
This guide contains links to third-party websites that are not under the control of Macromedia, and Macromedia is not
responsible for the content on any linked site. If you access a third-party website mentioned in this guide, then you do so at your
own risk. Macromedia provides these links only as a convenience, and the inclusion of the link does not imply that Macromedia
endorses or accepts any responsibility for the content on those third-party sites.
Copyright © 2005 Macromedia, Inc. All rights reserved. This manual may not be copied, photocopied, reproduced,
translated, or converted to any electronic or machine-readable form in whole or in part without written approval from
Macromedia, Inc. Notwithstanding the foregoing, the owner or authorized user of a valid copy of the software with which
this manual was provided may print out one copy of this manual from an electronic version of this manual for the sole
purpose of such owner or authorized user learning to use such software, provided that no part of this manual may be
printed out, reproduced, distributed, resold, or transmitted for any other purposes, including, without limitation,
commercial purposes, such as selling copies of this documentation or providing paid-for support services.
Acknowledgments
Project Management: Charles Nadeau, Debi Robson
Writing: Rosanne Conroy
Editing: Melba Lancaster, Shawn Jackson, Lisa Stanziano
Production Management: Patrice O’Neill
Media Design and Production: Adam Barnett, Aaron Begley, John Francis, Paul Rangel, Arena Reed, Mario Reynoso
Localization Project Management: Luciano Arruda
Special thanks to Matt Hoffberg, Maureen Keating, David Spells, Marisa Bozza, Souvik Bose, Alan Musselman, Sheila McGinn,
Andrew Wilson, Rosana Francescato, Masayo Noda, Kashka Pregowska-Czerw, Kristin Conradi, Bonnie Loo, and the entire
Fireworks engineering and QA teams.
First Edition: August 2005
Macromedia, Inc.
601 Townsend St.
San Francisco, CA 94103
Page 3

Contents
Chapter 1: Introduction . . . . . . . . . . . . . . . . . . . . . . . . . . . . . . . . . . . . 7
System requirements . . . . . . . . . . . . . . . . . . . . . . . . . . . . . . . . . . . . . . . . . . . 7
Installing Fireworks . . . . . . . . . . . . . . . . . . . . . . . . . . . . . . . . . . . . . . . . . . . . .8
What’s new in Fireworks 8 . . . . . . . . . . . . . . . . . . . . . . . . . . . . . . . . . . . . . . .9
Guide to instructional media. . . . . . . . . . . . . . . . . . . . . . . . . . . . . . . . . . . . . 12
Chapter 2: Fireworks Basics . . . . . . . . . . . . . . . . . . . . . . . . . . . . . . 13
About working in Fireworks . . . . . . . . . . . . . . . . . . . . . . . . . . . . . . . . . . . . . 14
About vector and bitmap graphics . . . . . . . . . . . . . . . . . . . . . . . . . . . . . . . 15
Creating a new document. . . . . . . . . . . . . . . . . . . . . . . . . . . . . . . . . . . . . . . 17
Opening and importing files . . . . . . . . . . . . . . . . . . . . . . . . . . . . . . . . . . . . . 18
Saving Fireworks files . . . . . . . . . . . . . . . . . . . . . . . . . . . . . . . . . . . . . . . . . 26
The Fireworks work environment . . . . . . . . . . . . . . . . . . . . . . . . . . . . . . . 29
Chapter 3: Selecting and Transforming Objects. . . . . . . . . . . . . . 51
Selecting objects . . . . . . . . . . . . . . . . . . . . . . . . . . . . . . . . . . . . . . . . . . . . . . 51
Selecting pixels . . . . . . . . . . . . . . . . . . . . . . . . . . . . . . . . . . . . . . . . . . . . . . 55
Editing selected objects . . . . . . . . . . . . . . . . . . . . . . . . . . . . . . . . . . . . . . . 68
Transforming and distorting selected objects and selections . . . . . . 69
Organizing objects . . . . . . . . . . . . . . . . . . . . . . . . . . . . . . . . . . . . . . . . . . . . .74
Chapter 4: Working with Bitmaps. . . . . . . . . . . . . . . . . . . . . . . . . .79
Working with bitmaps . . . . . . . . . . . . . . . . . . . . . . . . . . . . . . . . . . . . . . . . . 80
Creating bitmap objects . . . . . . . . . . . . . . . . . . . . . . . . . . . . . . . . . . . . . . . 80
Accessing common photo editing tools all in one place . . . . . . . . . . . 82
Drawing, painting, and editing bitmap objects . . . . . . . . . . . . . . . . . . . . 83
Retouching bitmaps. . . . . . . . . . . . . . . . . . . . . . . . . . . . . . . . . . . . . . . . . . . 86
Adjusting bitmap color and tone . . . . . . . . . . . . . . . . . . . . . . . . . . . . . . . . 93
Blurring and sharpening bitmaps . . . . . . . . . . . . . . . . . . . . . . . . . . . . . . .104
Adding noise to an image . . . . . . . . . . . . . . . . . . . . . . . . . . . . . . . . . . . . . .109
3
Page 4

Chapter 5: Working with Vector Objects . . . . . . . . . . . . . . . . . . . . 111
Drawing vector objects . . . . . . . . . . . . . . . . . . . . . . . . . . . . . . . . . . . . . . . .112
Editing paths. . . . . . . . . . . . . . . . . . . . . . . . . . . . . . . . . . . . . . . . . . . . . . . . . 132
Chapter 6: Using Text . . . . . . . . . . . . . . . . . . . . . . . . . . . . . . . . . . 143
Entering text . . . . . . . . . . . . . . . . . . . . . . . . . . . . . . . . . . . . . . . . . . . . . . . . . 144
Editing text . . . . . . . . . . . . . . . . . . . . . . . . . . . . . . . . . . . . . . . . . . . . . . . . . . 147
Applying strokes, fills, and filters to text . . . . . . . . . . . . . . . . . . . . . . . . . 157
Attaching text to a path . . . . . . . . . . . . . . . . . . . . . . . . . . . . . . . . . . . . . . . 158
Transforming text . . . . . . . . . . . . . . . . . . . . . . . . . . . . . . . . . . . . . . . . . . . . 160
Converting text to paths. . . . . . . . . . . . . . . . . . . . . . . . . . . . . . . . . . . . . . . .161
Importing text . . . . . . . . . . . . . . . . . . . . . . . . . . . . . . . . . . . . . . . . . . . . . . . . .161
Checking spelling . . . . . . . . . . . . . . . . . . . . . . . . . . . . . . . . . . . . . . . . . . . . 163
Using the Text Editor . . . . . . . . . . . . . . . . . . . . . . . . . . . . . . . . . . . . . . . . . 165
Chapter 7: Applying Color, Strokes, and Fills . . . . . . . . . . . . . . . 167
Using the Colors section of the Tools panel . . . . . . . . . . . . . . . . . . . . . 168
Organizing swatch groups and color models . . . . . . . . . . . . . . . . . . . . 169
Using color boxes and color pop-up windows . . . . . . . . . . . . . . . . . . . 176
Working with strokes . . . . . . . . . . . . . . . . . . . . . . . . . . . . . . . . . . . . . . . . . 177
Working with fills . . . . . . . . . . . . . . . . . . . . . . . . . . . . . . . . . . . . . . . . . . . . . 182
Applying gradient and pattern fills . . . . . . . . . . . . . . . . . . . . . . . . . . . . . . 184
Adding texture to strokes and fills . . . . . . . . . . . . . . . . . . . . . . . . . . . . . . 190
Chapter 8: Using Live Filters. . . . . . . . . . . . . . . . . . . . . . . . . . . . . 193
Applying Live Filters . . . . . . . . . . . . . . . . . . . . . . . . . . . . . . . . . . . . . . . . . . 194
Editing Live Filters. . . . . . . . . . . . . . . . . . . . . . . . . . . . . . . . . . . . . . . . . . . 200
Chapter 9: Layers, Masking, and Blending . . . . . . . . . . . . . . . . 203
Working with layers. . . . . . . . . . . . . . . . . . . . . . . . . . . . . . . . . . . . . . . . . . 204
Masking images . . . . . . . . . . . . . . . . . . . . . . . . . . . . . . . . . . . . . . . . . . . . . . 210
Blending and transparency . . . . . . . . . . . . . . . . . . . . . . . . . . . . . . . . . . . 230
Chapter 10: Using Styles, Symbols, and URLs . . . . . . . . . . . . . 235
Using styles . . . . . . . . . . . . . . . . . . . . . . . . . . . . . . . . . . . . . . . . . . . . . . . . .236
Using symbols . . . . . . . . . . . . . . . . . . . . . . . . . . . . . . . . . . . . . . . . . . . . . . 240
Working with URLs. . . . . . . . . . . . . . . . . . . . . . . . . . . . . . . . . . . . . . . . . . .246
4Contents
Page 5

Chapter 11: Slices, Rollovers, and Hotspots. . . . . . . . . . . . . . . . . 251
Creating and editing slices . . . . . . . . . . . . . . . . . . . . . . . . . . . . . . . . . . . . 252
Making slices interactive. . . . . . . . . . . . . . . . . . . . . . . . . . . . . . . . . . . . . . 260
Preparing slices for export . . . . . . . . . . . . . . . . . . . . . . . . . . . . . . . . . . . . 269
Working with hotspots and image maps. . . . . . . . . . . . . . . . . . . . . . . . 275
Chapter 12: Creating Buttons and Pop-up Menus . . . . . . . . . . . 281
Creating button symbols. . . . . . . . . . . . . . . . . . . . . . . . . . . . . . . . . . . . . . 282
Creating navigation bars . . . . . . . . . . . . . . . . . . . . . . . . . . . . . . . . . . . . . 293
Creating pop-up menus . . . . . . . . . . . . . . . . . . . . . . . . . . . . . . . . . . . . . . 293
Chapter 13: Creating Animation . . . . . . . . . . . . . . . . . . . . . . . . . 307
Building animation . . . . . . . . . . . . . . . . . . . . . . . . . . . . . . . . . . . . . . . . . . . 308
Working with animation symbols . . . . . . . . . . . . . . . . . . . . . . . . . . . . . . 308
Working with frames . . . . . . . . . . . . . . . . . . . . . . . . . . . . . . . . . . . . . . . . . .313
Tweening . . . . . . . . . . . . . . . . . . . . . . . . . . . . . . . . . . . . . . . . . . . . . . . . . . . .318
Previewing an animation. . . . . . . . . . . . . . . . . . . . . . . . . . . . . . . . . . . . . . .319
Exporting your animation . . . . . . . . . . . . . . . . . . . . . . . . . . . . . . . . . . . . . 320
Working with existing animations . . . . . . . . . . . . . . . . . . . . . . . . . . . . . . 322
Using multiple files as one animation . . . . . . . . . . . . . . . . . . . . . . . . . . . 323
Chapter 14: Optimizing and Exporting . . . . . . . . . . . . . . . . . . . . 325
About optimizing. . . . . . . . . . . . . . . . . . . . . . . . . . . . . . . . . . . . . . . . . . . . . 326
Using the Export Wizard. . . . . . . . . . . . . . . . . . . . . . . . . . . . . . . . . . . . . . 326
Optimizing in the workspace . . . . . . . . . . . . . . . . . . . . . . . . . . . . . . . . . . .331
Exporting from Fireworks . . . . . . . . . . . . . . . . . . . . . . . . . . . . . . . . . . . . . 352
Sending a Fireworks document as an e-mail attachment . . . . . . . . . 370
Using the File Management button . . . . . . . . . . . . . . . . . . . . . . . . . . . . . 371
Chapter 15: Using Fireworks with Other Applications . . . . . . . 373
Working with Macromedia Dreamweaver . . . . . . . . . . . . . . . . . . . . . . 374
Working with Macromedia Flash . . . . . . . . . . . . . . . . . . . . . . . . . . . . . . 392
Working with Macromedia FreeHand MX . . . . . . . . . . . . . . . . . . . . . . 399
Working with Macromedia Director MX . . . . . . . . . . . . . . . . . . . . . . . . 405
Working with Macromedia HomeSite . . . . . . . . . . . . . . . . . . . . . . . . . . .410
Working with Adobe Photoshop. . . . . . . . . . . . . . . . . . . . . . . . . . . . . . . .413
About working with Adobe GoLive. . . . . . . . . . . . . . . . . . . . . . . . . . . . . .419
About working with HTML editors . . . . . . . . . . . . . . . . . . . . . . . . . . . . . 420
About extending Fireworks . . . . . . . . . . . . . . . . . . . . . . . . . . . . . . . . . . . 420
Contents 5
Page 6

Chapter 16: Automating Repetitive Tasks . . . . . . . . . . . . . . . . . . 421
Finding and replacing . . . . . . . . . . . . . . . . . . . . . . . . . . . . . . . . . . . . . . . . .422
Batch processing . . . . . . . . . . . . . . . . . . . . . . . . . . . . . . . . . . . . . . . . . . . .426
Extending Fireworks . . . . . . . . . . . . . . . . . . . . . . . . . . . . . . . . . . . . . . . . . .437
Flash SWF movies used as Fireworks panels . . . . . . . . . . . . . . . . . . 443
Chapter 17: Preferences and Keyboard Shortcuts . . . . . . . . . . 445
Setting preferences. . . . . . . . . . . . . . . . . . . . . . . . . . . . . . . . . . . . . . . . . . 445
Changing keyboard shortcut sets . . . . . . . . . . . . . . . . . . . . . . . . . . . . . 449
Working with configuration files. . . . . . . . . . . . . . . . . . . . . . . . . . . . . . . . 451
About reinstalling Fireworks . . . . . . . . . . . . . . . . . . . . . . . . . . . . . . . . . . .453
Viewing package contents (Macintosh only). . . . . . . . . . . . . . . . . . . . .453
Index . . . . . . . . . . . . . . . . . . . . . . . . . . . . . . . . . . . . . . . . . . . . . . . . 455
6Contents
Page 7

CHAPTER 1
Introduction
Macromedia Fireworks 8 is the definitive solution for professional web graphics design and
production. It is the first production environment to address and solve the special challenges
facing web graphics designers and developers.
You can use Fireworks to create, edit, and animate web graphics, add advanced interactivity,
and optimize images in a professional environment. In Fireworks, you can create and edit
bitmap and vector graphics in a single application. Everything is editable, all the time. And
you can automate the workflow to meet the demands of time-consuming updates and
changes.
Fireworks integrates with other Macromedia products such as Dreamweaver, Flash,
FreeHand, and Director, as well as your other favorite graphics applications and HTML
editors, to provide a truly integrated web solution. You can easily export Fireworks graphics
with HTML and JavaScript code customized for the HTML editor you’re using.
This chapter covers the following topics:
System requirements. . . . . . . . . . . . . . . . . . . . . . . . . . . . . . . . . . . . . . . . . . . . . . . . . . . . . . . 7
Installing Fireworks . . . . . . . . . . . . . . . . . . . . . . . . . . . . . . . . . . . . . . . . . . . . . . . . . . . . . . . . 8
What’s new in Fireworks 8 . . . . . . . . . . . . . . . . . . . . . . . . . . . . . . . . . . . . . . . . . . . . . . . . . . 9
Guide to instructional media. . . . . . . . . . . . . . . . . . . . . . . . . . . . . . . . . . . . . . . . . . . . . . . . 12
1
System requirements
Before installing Fireworks, make sure your computer meets the system requirements. For
more information, see the Macromedia website at www.macromedia.com/go/sysreqs.
7
Page 8

Installing Fireworks
This section explains how to install Fireworks.
Be sure to read the release notes on the Macromedia website at www.macromedia.com/go/
fireworks_documentation for late-breaking information or instructions.
To install Fireworks:
1. Insert the Fireworks CD into your computer’s CD-ROM drive.
2. Do one of the following:
■ In Windows, the Fireworks installation program starts automatically.
■ On the Macintosh, double-click the Fireworks Installer icon.
3. Follow the onscreen instructions.
The installation program prompts you to enter the required information.
4. If prompted, restart your computer.
Registering Fireworks
It’s a good idea to register your copy of Macromedia Fireworks, electronically or by mail. You
can register electronically during the product activation process when you first launch
Fireworks.
By registering, you get on the priority list to receive up-to-the-minute notices about upgrades
and new Macromedia products. You will receive timely e-mail notices about product updates
and new content appearing on both the www.macromedia.com and
www-euro.macromedia.com websites.
To register your copy of Fireworks, do one of the following:
■ Select Help > Online Registration and fill out the electronic form.
■ Select Help > Print Registration, print the form, and mail it to the address shown on
the form.
Viewing the files installed with Fireworks
At some point you may need to view or access the files installed with Fireworks. During
installation, Fireworks places files in various locations on your system. It’s important to
understand why these files reside where they do. For more information, see “Working with
configuration files” on page 451.
8 Chapter 1: Introduction
Page 9

Macintosh users should pay special attention to the format Fireworks uses to store the
application and its default configuration files. For more information, see “Viewing package
contents (Macintosh only)” on page 453.
What’s new in Fireworks 8
Create and optimize images for the web with precise control in an intuitive, customizable
environment. New support for ActionScript and CSS (Cascading Style Sheet) formats allow
Fireworks to work even more efficiently with Dreamweaver and Flash. New file formats
supported, new panels and dramatically streamlined workflow optimize both your time and
your images.
Optimization
Image Editing panel This new panel is a central location where you can access
commonly used image editing tools, filters, and menu
commands.
More import file formats Fireworks 8 now supports import of QuickTime Image,
MacPaint, SGI & JPEG 2000 file formats (QuickTime plug-in
required for QuickTime support).
Batch processing workflow
optimized
Streamlined file renaming, the ability to check file dimensions
when scaling during a batch process and the addition of a
status bar and log file are just a few of the optimizations to this
workflow. For more information on batch processing, see
“Batch processing” on page 426.
Take advantage of the integrated workflow in Fireworks to create and optimize images for
Dreamweaver 8 and Flash Professional 8 without losing information or time with roundtrip
editing. Use improved support for CSS and ActionScript, as well as feature alignment with the
other Studio products.
Integrated workflow
CSS (Cascading Style
Sheet) pop-up menus
Vector compatibility Vector attributes (fills, strokes, filters and blend modes) are
Fireworks 8 uses CSS (Cascading Style Sheet) format to
create interactive Pop-up Menus. The result is clean and easy
to customize code that integrates well with sites built in
Dreamweaver. For more information, see “About exporting
pop-up menus” on page 305.
preserved when moving objects between Flash and Fireworks.
What’s new in Fireworks 8 9
Page 10

Integrated workflow
More slicing options Polygon slices are inserted automatically when a selected
object is a polygon path. See “Creating nonrectangular slices”
on page 255.
Recognize ActionScript
color values
Use the "Save as"
command to save bitmaps
into different file types
Evolved Open, Save and
Export logic
Less intrusive grids Like Flash, grids now use a dotted line and a lighter default grid
Fireworks recognizes ActionScript color values when copied
from Flash and pasted into Fireworks color value fields.
Choose single-file output formats such as gif, jpg, tiff, in the
"Save As" dialog. See “Saving documents in other formats”
on page 27.
The logic used to determine the default folders in the Open,
Save, Save As, Save a Copy, and Export dialogs is enhanced
by reducing the amount of navigation required.
color.
Use Fireworks for visual tools to create professional quality web graphics and animations such
as rollovers and pop-ups without the need to program. Exercise precise control over your
images with many new creative options.
Create without complexity
25 new blend modes 25 new choices to alter the look of your colors and objects.
Perspective shadow Add a perspective shadow to open paths and text objects.
Solid Shadow A new live filter that stamps the object it is applied to several
times.
Mobile interface
components
Sample buttons, animations
themes and bullets
Auto Shape Properties
panel
Live Marquee & Convert
Selections (Marquee to
Path and Path to Marquee)
Autoname text Layers are automatically named by the text you type in them.
Mock up your mobile interface quickly with bitmap interface
components.
Get started quickly with cool new assets like buttons,
animations, themes and bullets.
This new panel is used to modify the properties of auto shape
properties such as the Star Auto Shape, Arrow Auto Shape or
Smart Polygon Auto Shape.
Turn active selections into editable vector paths and the
reverse. Get instant feedback on filters and settings applied to
selections. See “Converting a marquee to a path” on page 63
and “Converting a path to a marquee selection” on page 138.
See “Naming a text object” on page 144.
10 Chapter 1: Introduction
Page 11

Create without complexity
Special Characters panel Use this new panel to insert special characters directly into text
blocks.
Reshape text on a path Edit path points when text is attached. See “Editing paths and
text attached to paths” on page 158
.
Save time and effort with the many refinements made to common tasks.
Workflow Improvements
Recent Fonts &
Optimization remember last
settings used
Save multiple selections Save, restore, name and delete multiple marquee selections
Select objects that share an
edge in the Layers panel
Autosave preferences Fireworks 8 preferences are automatically saved more
Group consecutive nudges Consecutive nudges are treated as one move.
Improved tablet support Tablet support is improved for Path Scrubber tools and stroke
Lock objects Lock on a per-object basis in the Layers panel. See “Protecting
Recently used fonts now appear at the top of font menus.
Optimization now defaults to the last settings used. See
“Saving and reusing optimization settings” on page 351.
within PNG files. See “Saving marquee selections” on page 64.
Shift-click to select objects that share an edge or boundary in
the layers panel.
frequently.
pressure sensitivity.
layers and objects” on page 207.
For more information on the new features, see the Fireworks page on the Macromedia website
at www.macromedia.com/go/fireworks.
What’s new in Fireworks 8 11
Page 12

Guide to instructional media
A variety of resources are available for learning Fireworks, including this manual, Fireworks
Help, PDF versions of the Fireworks documentation components, and several web-based
information sources.
■ Using Fireworks is the Fireworks user manual. You can access it at any time in Fireworks
help (Help > Using Fireworks). The manual is also available in PDF format on the
Macromedia website at www.macromedia.com/go/fireworks_documentation.
■ Getting Started with Fireworks provides an interactive introduction to the key features of
Fireworks. You can complete tutorials covering common Fireworks tasks, such as using the
drawing and editing tools, optimizing images, and creating rollovers, navigation bars, and
other interactive elements. You can access the guide at any time in Fireworks help (Help >
Getting Started with Fireworks). The guide is also available in PDF format on the
Macromedia website at www.macromedia.com/go/fireworks_documentation.
■ The Fireworks Support Center at www.macromedia.com/go/fireworks_support offers
support and problem-solving information.
■ The Fireworks Developer Center at www.macromedia.com/go/fireworks_devnet presents
information to help you improve your skills and learn new ones.
■ The Fireworks discussion group provides a lively exchange for Fireworks users, technical
support representatives, and the Fireworks development team. Use a newsgroup reader to
go to news://forums.macromedia.com/macromedia.fireworks.
■ Extending Fireworks includes information about writing JavaScript to automate Fireworks
tasks. You can control every Fireworks command or setting using special JavaScript
commands that Fireworks can interpret. The manual is available both in help and on the
Macromedia website as a downloadable PDF.
12 Chapter 1: Introduction
Page 13

CHAPTER 2
Fireworks Basics
Macromedia Fireworks 8 is an application for designing graphics for use on the web. Its
innovative solutions tackle the major problems facing graphic designers and webmasters.
Using the wide range of tools in Fireworks, you can create and edit both vector and bitmap
graphics within a single file.
The advent of Fireworks freed web designers from having to jump back and forth among as
many as a dozen task-specific applications. Its nondestructive Live Filters eliminate the
frustration of having to re-create web graphics from scratch after any simple edit. Fireworks
generates JavaScript, making rollovers easy to create. Efficient optimization features shrink the
size of web graphic files without sacrificing quality.
If you are new to Fireworks, it would be helpful for you to understand general Fireworks
concepts such as opening, importing, and saving files; finding your way around the Fireworks
environment; and working within a file. After you create a new file or open an existing file,
the Fireworks work environment is available to you.
This chapter contains the following topics:
About working in Fireworks . . . . . . . . . . . . . . . . . . . . . . . . . . . . . . . . . . . . . . . . . . . . . . . . 14
About vector and bitmap graphics . . . . . . . . . . . . . . . . . . . . . . . . . . . . . . . . . . . . . . . . . . 15
Creating a new document. . . . . . . . . . . . . . . . . . . . . . . . . . . . . . . . . . . . . . . . . . . . . . . . . . .17
Opening and importing files . . . . . . . . . . . . . . . . . . . . . . . . . . . . . . . . . . . . . . . . . . . . . . . . 18
Saving Fireworks files . . . . . . . . . . . . . . . . . . . . . . . . . . . . . . . . . . . . . . . . . . . . . . . . . . . . . 26
The Fireworks work environment . . . . . . . . . . . . . . . . . . . . . . . . . . . . . . . . . . . . . . . . . . . 29
2
13
Page 14

About working in Fireworks
Fireworks is a versatile application for creating, editing, and optimizing web graphics. You can
create and edit both bitmap and vector images, design web effects such as rollovers and popup menus, crop and optimize graphics to reduce their file size, and save time by automating
repetitive tasks. When a document is complete, you can export or save it as a JPEG file, GIF
file, or file of another format—along with HTML files containing HTML tables and
JavaScript code—for use on the web. You also can export or save a type of file specific to
another application, such as Photoshop or Macromedia Flash, if you want to continue
working in the other application.
Vector and bitmap objects
In the Fireworks Tools panel, you will find distinct sections containing tools for drawing and
editing vectors and bitmaps. For more information on these two basic formats, see “About
vector and bitmap graphics” on page 15
In Fireworks, the tool you select determines whether the object you create is a vector or a
bitmap. For example, select the Pen tool from the Vector section of the Tools panel, and you
can begin drawing vector paths by plotting points. Select the Brush tool, and you can drag to
paint a bitmap object. Select the Text tool, and you can begin typing.
After drawing vector objects, bitmap objects, or text, you can use a wide array of tools, effects,
commands, and techniques to enhance and complete your graphics. You can use the
Fireworks tools in the Button Editor to create interactive navigation buttons.
You can also use the Fireworks tools to edit imported graphics. You can import and edit files
in JPEG, GIF, PNG, PSD, and many other file formats. After you import a graphic image,
you can adjust its color and tone, as well as crop, retouch, and mask it.
Interactive graphics
Slices and hotspots are web objects that specify interactive areas in a web graphic. Slices cut an
image into different sections to which you can apply rollover behaviors, animation, and
Uniform Resource Locator (URL) links. In addition, you can export the sections using
different settings. On a web page, each slice appears in a table cell. Hotspots let you assign
URL links and behaviors to all or part of a graphic. For more information, see “Slices,
Rollovers, and Hotspots” on page 251.
14 Chapter 2: Fireworks Basics
Page 15

Slices and hotspots have drag-and-drop rollover handles that let you quickly assign swap
image and rollover behaviors to graphics directly in the workspace. The Button Editor and
Pop-up Menu Editor are convenient Fireworks features that help you build special interactive
graphics for navigating websites.
About optimizing and exporting graphics
Fireworks has powerful optimization features to help you find the balance between file size
and acceptable visual quality as you prepare to export graphics. You can optimize web graphics
in Fireworks to minimize their file size so that they load quickly into websites, while
comparing the quality of the graphics in the Preview, 2-Up, or 4-Up views in the workspace.
You can slice an image into smaller parts and then optimize each part in the format that best
suits the content. For added optimization flexibility, you can use selective JPEG compression
to focus the most important part of a JPEG while reducing the quality of the background.
After you optimize your graphics, the next step is to export them for use on the web. From
your Fireworks source PNG document, you can export files of a number of types, including
JPEG, GIF, animated GIF, and HTML tables containing sliced images in multiple file types.
For more information, see “Optimizing and Exporting” on page 325.
About vector and bitmap graphics
Computers display graphics in either vector or bitmap format. Understanding the difference
between the two formats helps you understand Fireworks, which contains both vector and
bitmap tools and is capable of opening or importing both formats.
About vector and bitmap graphics 15
Page 16
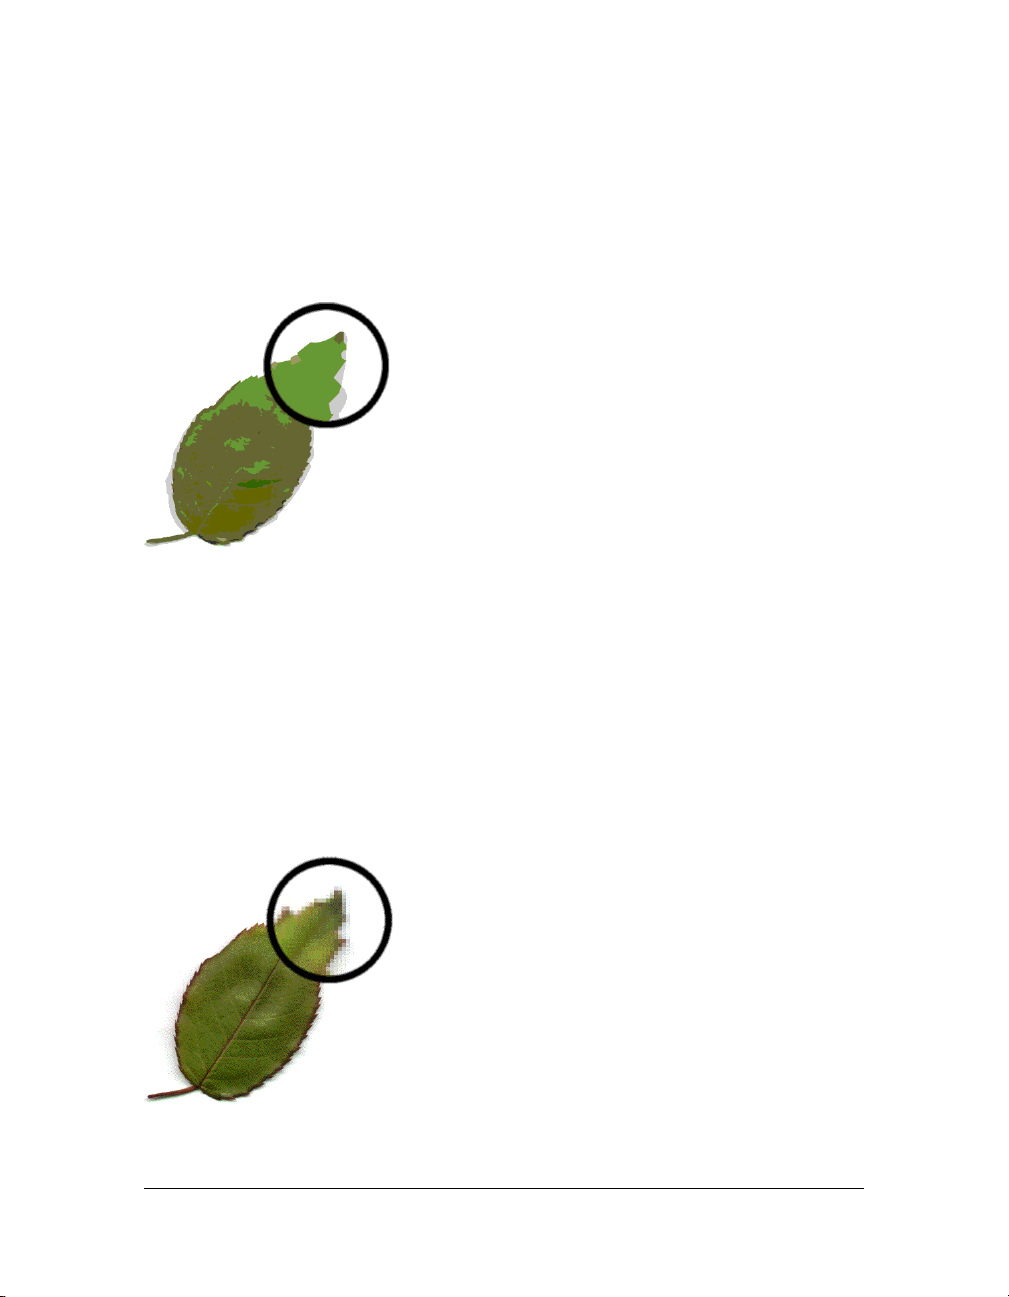
About vector graphics
Vector graphics render images using lines and curves, called vectors, that include color and
position information. For example, the image of a leaf may be defined by a series of points
that describe the outline of the leaf. The color of the leaf is determined by the color of its
outline (the stroke) and the color of the area enclosed by the outline (the fill)
When you edit a vector graphic, you modify the properties of the lines and curves that
describe its shape. Vector graphics are resolution-independent, which means you can move,
resize, reshape, or change the color of a vector graphic, as well as display it on output devices
of varying resolutions, without changing the quality of its appearance.
About bitmap graphics
Bitmap graphics are composed of dots, called pixels, arranged in a grid. Your computer screen
is a large grid of pixels. In a bitmap version of the leaf, the image is determined by the location
and color value of each pixel in the grid. Each dot is assigned a color. When viewed at the
correct resolution, the dots fit together like tiles in a mosaic to form the image.
16 Chapter 2: Fireworks Basics
Page 17
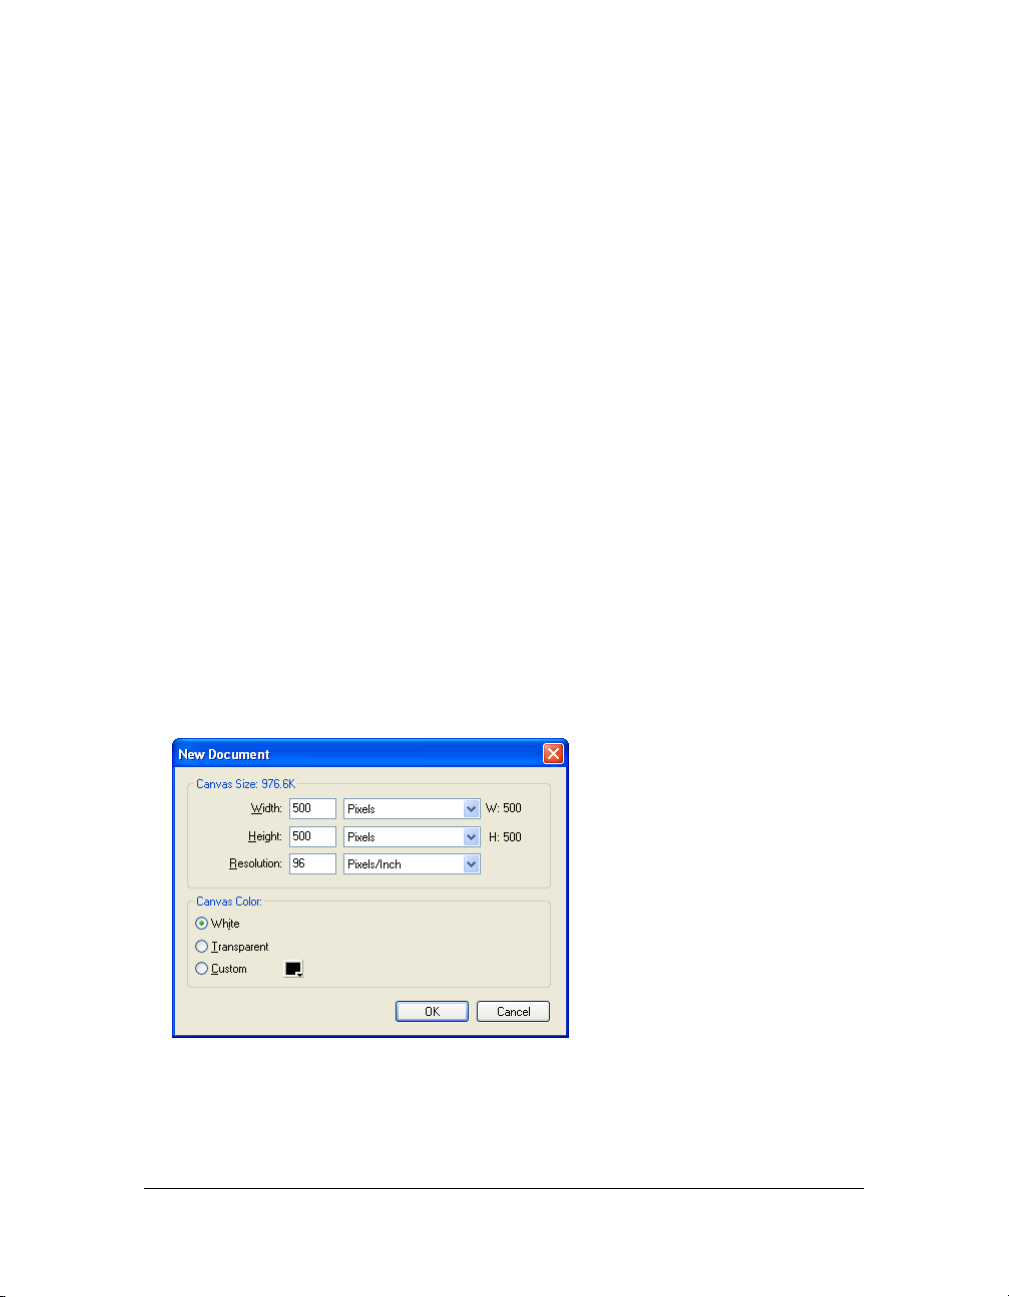
When you edit a bitmap graphic, you modify pixels rather than lines and curves. These
bitmap graphics are resolution-dependent, which means that the data describing the image is
fixed to a grid of a particular size. Enlarging a bitmap graphic redistributes the pixels in the
grid, often making the edges of the image appear ragged. Displaying a bitmap graphic on an
output device with a lower resolution than the image itself can also degrade the image’s
quality.
Creating a new document
When you select File > New to create a new document in Fireworks, you create a Portable
Network Graphic, or PNG document. PNG is the native file format for Fireworks. After you
create graphics in Fireworks, you can export or save them in other familiar web graphic
formats, such as JPEG, GIF, and animated GIF. You can also export or save graphics in many
of the popular formats used off the web, such as TIFF and BMP. Whatever optimization and
export settings you choose, the original Fireworks PNG file is preserved to allow easy editing
later.
To create a web graphic in Fireworks, you must first set up a new document or open an
existing one. You can adjust the setup options later in the Property inspector.
To create a new document:
1. Select File > New.
The New Document dialog box opens.
2. Enter the canvas width and height measurements in pixels, inches, or centimeters.
3. Enter a resolution in pixels per inch or pixels per centimeter.
Creating a new document 17
Page 18
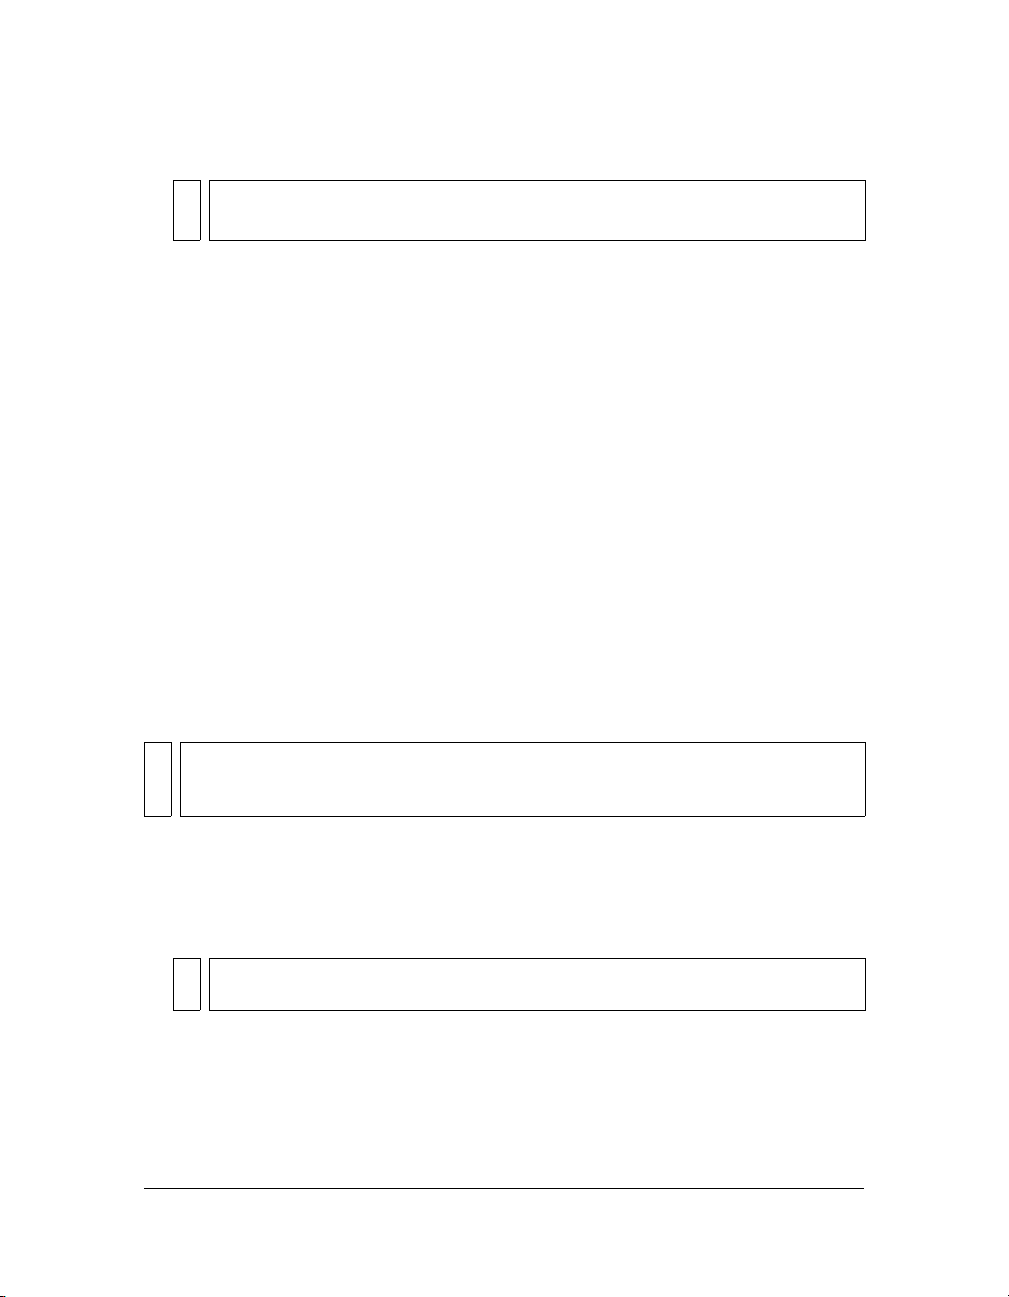
4. Select white, transparent, or a custom color for the canvas.
NOTE
Use the Custom color box pop-up window to select a custom canvas color.
5. Click OK to create the new document.
To create a new document the same size as an object on the Clipboard:
1. Copy an object to the Clipboard from any of the following:
■ Another Fireworks document
■ A web browser
■ Any of the applications listed in “Pasting into Fireworks” on page 22
2. Select File > New.
The New Document dialog box opens with the width and height dimensions of the object
on the Clipboard.
3. Set the resolution and canvas color, and click OK.
4. Select Edit > Paste to paste the object from the Clipboard into the new document.
Opening and importing files
In Fireworks, you can easily open, import, and edit both vector and bitmap images created in
other graphics programs. In addition, you can import images from a digital camera or scanner.
NOTE
Fireworks preserves many, but not all JavaScript behaviors when you import a file from
Macromedia Dreamweaver. If Fireworks supports a particular behavior, it recognizes
that behavior and maintains it when you move a file back to Dreamweaver.
To open a Fireworks document:
1. Select File > Open.
The Open dialog box appears.
2. Select the file and click Open.
TIP
To open a file without overwriting the previous version, select Open as Untitled, and
then save the file using a different name.
This section covers the following topics:
■ “Opening recently closed documents” on page 19
■ “Opening graphics created in other applications” on page 19
■ “Creating Fireworks PNG files from HTML files” on page 20
■ “Inserting objects into a Fireworks document” on page 21
18 Chapter 2: Fireworks Basics
Page 19

Opening recently closed documents
The File menu lists up to 10 recently closed documents in the Open Recent submenu. The
Start Page also lists recently closed documents.
To open a recently closed file:
1. Select File > Open Recent.
2. Select a file from the submenu.
To open a recently closed file when no files are open:
1. Click the file name on the Start page.
Opening graphics created in other applications
With Fireworks, you can open files created in other applications or file formats, including
Photoshop, Macromedia FreeHand, Illustrator, uncompressed CorelDRAW, WBMP, EPS,
JPEG, GIF, and animated GIF files.
When you open a file format other than PNG using File > Open, you create a new Fireworks
PNG document based on the file you open. You can use all of the features of Fireworks to edit
the image. You can then either select Save As to save your work as a new Fireworks PNG file
or as another file format; or with some image types, you can select Save to save the document
in its original format. Saving in the document’s original format flattens the image to a single
layer and eliminates your ability to edit the Fireworks-specific features you added to the
image.
Using Fireworks, you can save the following file formats directly: Fireworks PNG, GIF,
animated GIF, JPEG, BMP, WBMP, TIF, SWF, AI, PSD, and PICT (Mac only).
NOTE
Fireworks saves 16-bit TIF images at 24-bit color depth.
Animated GIFs
You can bring animated GIF files into Fireworks in two ways:
■ You can import an animated GIF as an animation symbol. You can edit and move all the
elements of the animation as a single unit and use the Library panel to create new
instances of the symbol.
NOTE
When you import an animated GIF, the frame delay setting defaults to 0.07 seconds.
If necessary, use the Frames panel to restore the original timing.
Opening and importing files 19
Page 20

■ You can open an animated GIF as you would open a normal GIF file. Each element of the
GIF is placed as a separate image in its own Fireworks frame. You can convert the graphic
to an animation symbol in Fireworks.
EPS files
Fireworks opens most EPS files, such as Photoshop EPS files, as flattened bitmap images, in
which all objects are combined on a single layer. Some EPS files exported from Illustrator,
however, retain their vector information.
When you open or import most EPS files, the EPS File Options dialog box opens.
Image Size determines the image dimensions and the units in which the image is rendered.
You can select from pixels, percent, inches, and centimeters.
Resolution indicates the pixels per unit for the resolution.
Constrain Proportions opens the file in the same proportions as the original.
Anti-aliased smooths jagged edges in the opened EPS file.
When you open or import Illustrator EPS files that contain vector information, the Vector
File Options dialog box opens. This is the same dialog box that appears when you open or
import FreeHand files.
WBMP files
Fireworks can open WBMP files, which are 1-bit (monochrome) files optimized for mobile
computing devices. This format is for use on Wireless Application Protocol (WAP) pages. You
can open a WBMP file directly using File > Open or import a WBMP file using File >
Import.
Creating Fireworks PNG files from HTML files
Fireworks can open and import HTML content created in other applications. When you
open or import an HTML file, Fireworks reconstructs the layout and behaviors defined by the
HTML code, allowing you to re-create web pages that contain sliced graphics, JavaScript
buttons, and other types of interactivity. This allows you to salvage inherited websites even if
you don’t have the source PNG files. With this feature, you can quickly open or import a web
page to update graphics, change document layout, or alter navigational links, buttons, and
other interactive elements, all without having to rebuild the page from scratch or modify its
scripting.
20 Chapter 2: Fireworks Basics
Page 21

Because Fireworks exports HTML content in the form of an HTML table, it also determines
the document layout for imported HTML based on HTML tables. An HTML file must
contain at least one table for Fireworks to be able to reconstruct it. For more about HTML,
see “Exporting HTML” on page 357.
You can get HTML content into Fireworks in several ways:
■ You can open all the HTML tables in an HTML file.
■ You can open the first HTML table that Fireworks encounters in an HTML file.
■ You can import the first HTML table that Fireworks encounters into an existing
Fireworks document.
NOTE
Fireworks can also import documents that use UTF-8 encoding and those that are
written in XHTML. XHTML files usually have the extension .xhtm or .xhtml. For more
information on these file types, see “Exporting files with and without UTF-8 encoding”
on page 366 and “Exporting XHTML” on page 365.
To open all tables of an HTML file:
1. Select File > Reconstitute Table.
2. Select the HTML file that contains the tables you want to open, and click Open.
Each of the tables opens in its own document window.
To open only the first table of an HTML file:
1. Select File > Open.
2. Select the HTML file that contains the table you want to open, and click Open.
The first table in the HTML file opens in a new document window.
To import the first table of an HTML file into an open Fireworks document:
1. Select File > Import.
2. Select the HTML file you want to import from, and click Open.
3. Click to place the insertion point where you’d like the imported table to appear.
Inserting objects into a Fireworks document
You can import, drag, or copy and paste vector objects, bitmap images, or text created
in other applications into a Fireworks document. You can also import images from a digital
camera or scanner.
Opening and importing files 21
Page 22

Dragging images into Fireworks
You can drag vector objects, bitmap images, or text into Fireworks from any application that
supports dragging:
■ FreeHand 7 or later
■ Flash 3 or later
■ Photoshop 4 or later
■ Illustrator 7 or later
■ Microsoft Office 97 or later
■ Microsoft Internet Explorer 3 or later
■ Netscape Navigator 3 or later
■ CorelDRAW 7 or later
To drag an image or text into Fireworks:
■ From the other application, drag the object or text into Fireworks.
Pasting into Fireworks
Pasting an object copied from another application into Fireworks places the object in the
center of the active document. You can copy and paste an object or text in any of these
formats from the Clipboard:
■ FreeHand 7 or later
■ Illustrator
■ PNG
■ PICT (Macintosh)
■ DIB (Windows)
■ BMP (Windows)
■ ASCII text
■ EPS
■ WBMP
■ TXT
■ RTF
To paste into Fireworks:
1. In the other application, copy the object or text that you wish to paste.
2. In Fireworks, paste the object or text into your document.
22 Chapter 2: Fireworks Basics
Page 23

Location of pasted objects
When you paste an object into Fireworks, the placement of the pasted object depends on
what is selected:
■ If at least one object on a single layer is selected, the pasted object is placed in front of—or
stacked directly above—the selected object on the same layer.
■ If the layer itself is selected and either no objects or all objects are selected, the pasted
object is placed in front of—or stacked directly above—the topmost object on the same
layer.
■ If two or more objects on more than one layer are selected, the pasted object is placed in
front of—or stacked directly above—the topmost object in the topmost layer.
■ If the Web Layer or an object on the Web Layer is selected, the pasted object is placed in
front of—or stacked above—all other objects on the bottommost layer.
NOTE
The Web Layer is a special layer that contains all web objects. It always remains at the
top of the Layers panel. For more information about layers, see “Layers, Masking,
and Blending” on page 203.
Resampling pasted objects
When you paste a bitmap with a resolution that differs from that of the destination Fireworks
document, Fireworks asks whether you want the bitmap to be resampled.
Resampling adds pixels to or subtracts pixels from a resized bitmap to match the appearance
of the original bitmap as closely as possible. Resampling a bitmap to a higher resolution
typically causes little loss of quality. Resampling to a lower resolution, however, always causes
data loss and usually a drop in quality.
To resample a bitmap object by pasting:
1. Copy the bitmap to the Clipboard in Fireworks or another program.
2. Select Edit > Paste in Fireworks.
If the bitmap image on the Clipboard has a different resolution than the current
document does, you see a dialog box asking whether or not to resample.
3. Select one of the following:
■ Resample maintains the original width and height of the pasted bitmap, adding or
subtracting pixels as necessary.
■ Don’t Resample maintains all the original pixels, which may make the relative size of
the pasted image larger or smaller than expected.
Opening and importing files 23
Page 24

Importing PNG files
You can import Fireworks PNG files into the current layer of the active Fireworks document.
Any hotspot objects and slice objects are placed on the document’s Web Layer. For more
information about slices and web objects, see “Viewing and displaying slices and slice guides”
on page 256. For more information about layers, see “Working with layers” on page 204.
To import a PNG file into a Fireworks document layer:
1. In the Layers panel, select the layer into which you want to import the file.
2. Select File > Import to open the Import dialog box.
3. Navigate to the file to be imported and click Open.
4. On the canvas, position the import pointer where you want to place the upper left corner
of the image.
5. Import the file:
■ Click to import the full-size image.
■ Drag the import pointer to resize the image as you import.
Fireworks retains the proportions of the image.
Importing from a digital camera or scanner
You can import images from a digital camera or scanner only if it is TWAIN compliant
(Windows) or uses built-in OS X Image Capture capability (Macintosh). Images imported
into Fireworks from a digital camera or scanner open as new documents.
NOTE
Fireworks cannot import from digital cameras or image scanners unless the appropriate
software drivers, modules, and plug-ins have been installed. For specific instructions
about installation, settings, and options, consult your camera or scanner documentation
for the TWAIN module or Photoshop Acquire plug-in.
On the Macintosh, Fireworks automatically looks for the Photoshop Acquire plug-ins in the
Plug-ins folder within the Fireworks application folder. If you do not want to put the plug-ins
there, you must point Fireworks to an alternative location.
NOTE
The exact location of the Plug-ins folder varies depending on your operating system. For
more information, see “Working with configuration files” on page 451.
24 Chapter 2: Fireworks Basics
Page 25

To direct Fireworks to Photoshop Acquire plug-ins:
1. In Fireworks, select Edit > Preferences.
NOTE
On Mac OS X, select Fireworks > Preferences.
2. Click the Folders tab.
3. Select Photoshop Plug-Ins.
4. Click Browse if the Select the Photoshop Plug-ins Folder (Windows) or Choose a Folder
(Macintosh) dialog box doesn’t automatically open.
5. Navigate to the folder containing the Photoshop plug-ins.
To import an image from a digital camera (Macintosh):
1. Connect the camera to your computer.
2. Install the software that accompanies the camera if you have not already done so.
3. In Fireworks, select File > Acquire, and then select either Camera Acquire or Camera
Select.
4. In the Select Camera dialog box, select a camera, and then click OK.
5. In the Select Images dialog box, select the images you want to import, and then click OK.
NOTE
The Select Images dialog box only displays file types that are supported by
Fireworks.
6. Follow the instructions to apply the desired settings.
The imported image is opened as a new Fireworks document.
To import an image from a digital camera (Windows):
1. Connect the camera to your computer.
2. Install the software that accompanies the camera if you have not already done so.
3. In Fireworks, select File > Scan, and then select either Twain Acquire or Twain Select.
4. In the Select Source dialog box, select a source, and then click OK.
5. In the Select Images dialog box, select the images you want to import, and then click OK.
The user interface for your camera software appears.
6. Follow the instructions to apply the desired settings.
The imported image is opened as a new Fireworks document.
Opening and importing files 25
Page 26
To import an image from a scanner (Macintosh):
1. Connect the scanner to your computer.
2. Install the software that accompanies the scanner if you have not already done so.
3. In Fireworks, select File > Acquire, and then select either Twain Acquire or Twain Select.
NOTE
For most T WAIN modules or Photoshop Acquire plug-ins, additional dialog boxes
prompt you to set other options.
4. Follow the instructions to apply the desired settings.
The imported image is opened as a new Fireworks document.
To import an image from a scanner (Windows):
1. Connect the scanner to your computer.
2. Install the software that accompanies the scanner if you have not already done so.
3. In Fireworks, select File > Scan, and then select either Twain Acquire or Twain Select.
NOTE
For most TWAIN modules or Photoshop Acquire plug-ins, additional dialog boxes
prompt you to set other options.
4. Follow the instructions to apply the desired settings.
The imported image is opened as a new Fireworks document.
Saving Fireworks files
When you create a new document or open an existing Fireworks PNG file, the document’s
filename has the extension .png. Files of other types, such as PSD and HTML, also open as
PNG files, allowing you to use the Fireworks PNG document as your source file, or working
file.
However, many files retain their original filename extensions and optimization settings when
opened in Fireworks. For more information, see “Saving documents in other formats”
on page 27.
The location to which Fireworks defaults when you save a document is determined by the
following, in this order:
■ The current file location
■ The current export/save location, which is defined anytime you browse from the default
location in a Save, Save As, Save a Copy, or Export dialog box
■ The default location where new documents or images are saved on your operating system
26 Chapter 2: Fireworks Basics
Page 27

Saving Fireworks PNG files
When you create a new document or open an existing Fireworks PNG file, the document’s
filename has the extension .png. The file displayed in the Fireworks document window is your
source file, or working file.
Using a Fireworks PNG file as your source file has the following advantages:
■ The source PNG file is always editable. You can go back and make additional changes
even after you export the file for use on the web.
■ You can slice complex graphics into pieces in the PNG file and export them as multiple
files with different file formats and various optimization settings.
To save a new Fireworks document:
1. Select File > Save As.
The Save As dialog box opens.
2. Browse to the desired location and type the filename.
You do not need to enter an extension; Fireworks does that for you.
3. Click Save.
To save an existing document:
■ Select File > Save.
Saving documents in other formats
When you use File > Open to open a file of a format other than PNG, you can use all of the
features of Fireworks to edit the image. You can then select Save As to save your work as a new
Fireworks PNG file, or you can select a different format in which to save your file. For most
file types, you can select Save to save the document in its original format.
NOTE
If you save a PNG file as a bitmap file such as a GIF or JPEG, the graphic objects you
manipulated in the PNG will no longer be available in the bitmap file (see “About vector
and bitmap graphics” on page 15). If you need to revise the image, edit the source PNG
file and then export it again.tt
You can save to the following file formats directly: Fireworks PNG, GIF, animated GIF, JPEG,
BMP, WBMP, TIF, SWF, AI, PSD, and PICT (Macintosh only). Fireworks saves 16-bit TIF
images at 24-bit color depth.
Files of other types, such as PSD and HTML, open as PNG files, allowing you to use the
Fireworks PNG document as your source file. Any edits you perform are applied to the PNG
file and not the original.
Saving Fireworks files 27
Page 28

To save in an existing GIF, JPEG, TIF, BMP, or other file format listed above:
1. Select File > Save.
2. If you made modifications to the document that aren’t editable in the file’s original format,
a notification appears in the Save dialog box. Noneditable modifications include adding
new objects, masks, and Live Filters, as well as adjusting opacity, applying blend modes,
and saving pixel selections.
NOTE
If you don’t select the Save as a Copy option, the file format of the document you are
working on will be changed to the format in which you save it.
To export a document to another format:
1. Select a file format in the Optimize panel.
2. Select File > Export to export the document.
For more information about exporting files, see “Optimizing and Exporting”
on page 325.
28 Chapter 2: Fireworks Basics
Page 29
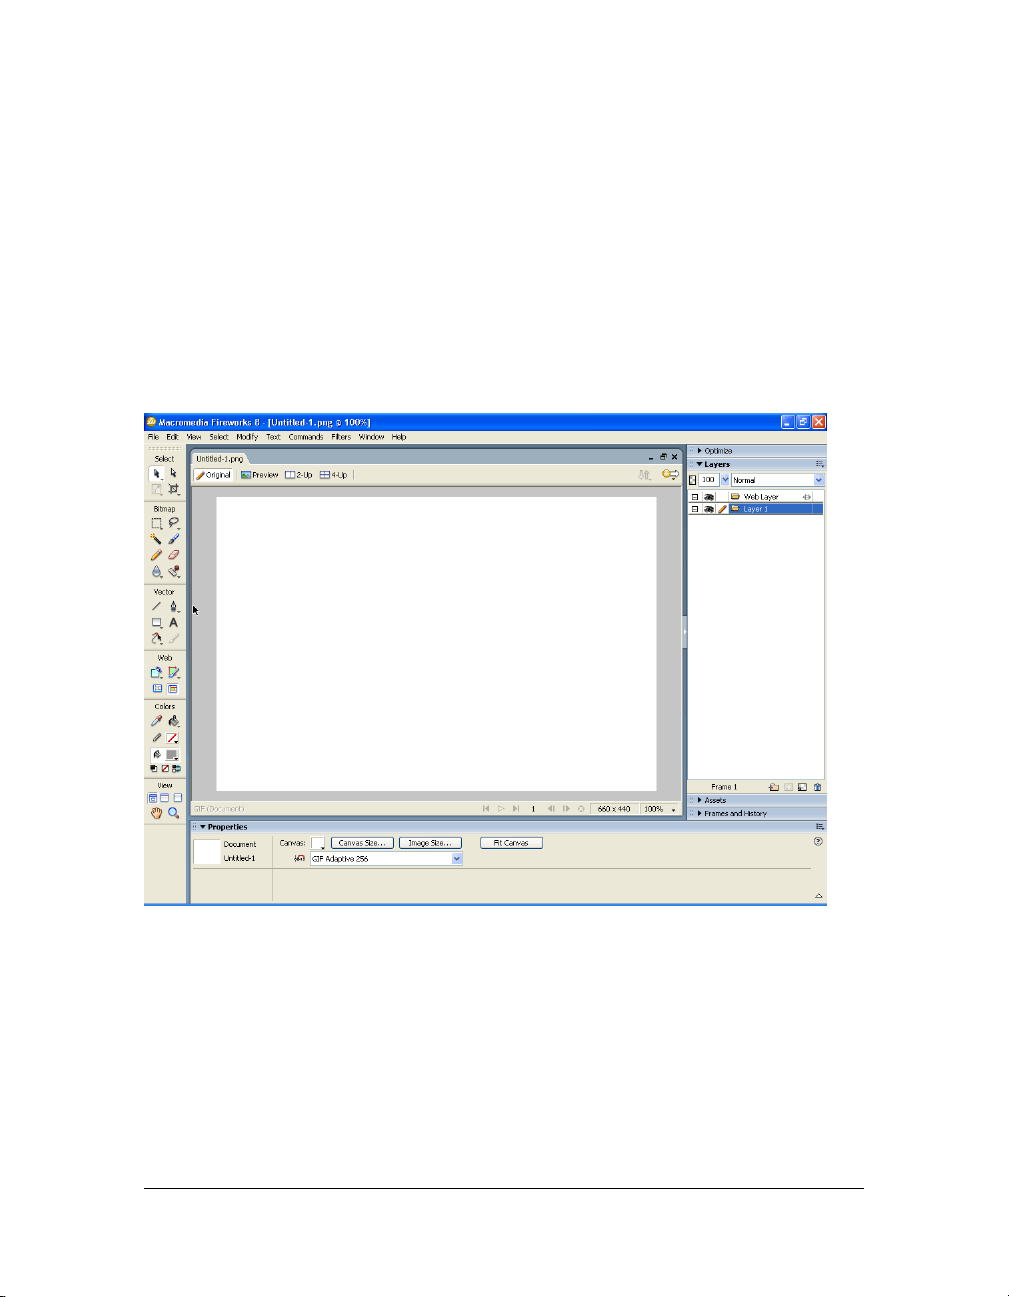
The Fireworks work environment
When you open a document in Fireworks for the first time, Fireworks activates the work
environment, including the Tools panel, Property inspector, menus, and other panels. The
Tools panel, on the left of the screen, contains labeled categories, including bitmap, vector,
and web tool groups. The Property inspector appears along the bottom of the document by
default and initially displays document properties. It then changes to display properties for a
newly selected tool or currently selected object as you work in the document. The panels are
initially docked in groups along the right side of the screen. The document window appears in
the center of the application.
Using the Start page
When you start Fireworks without opening a document, the Fireworks Start page appears in
the work environment. The Start page gives you quick access to Fireworks tutorials, recent
files, and Fireworks Exchange, where you can add new capabilities to some Fireworks features.
Use the Start page much like a web page. Click any of the features you see to use them.
The Fireworks work environment 29
Page 30
To disable the Start page:
1. Run Fireworks without opening a document.
The Start page is displayed.
2. Click Don’t Show Again.
Using the Tools panel
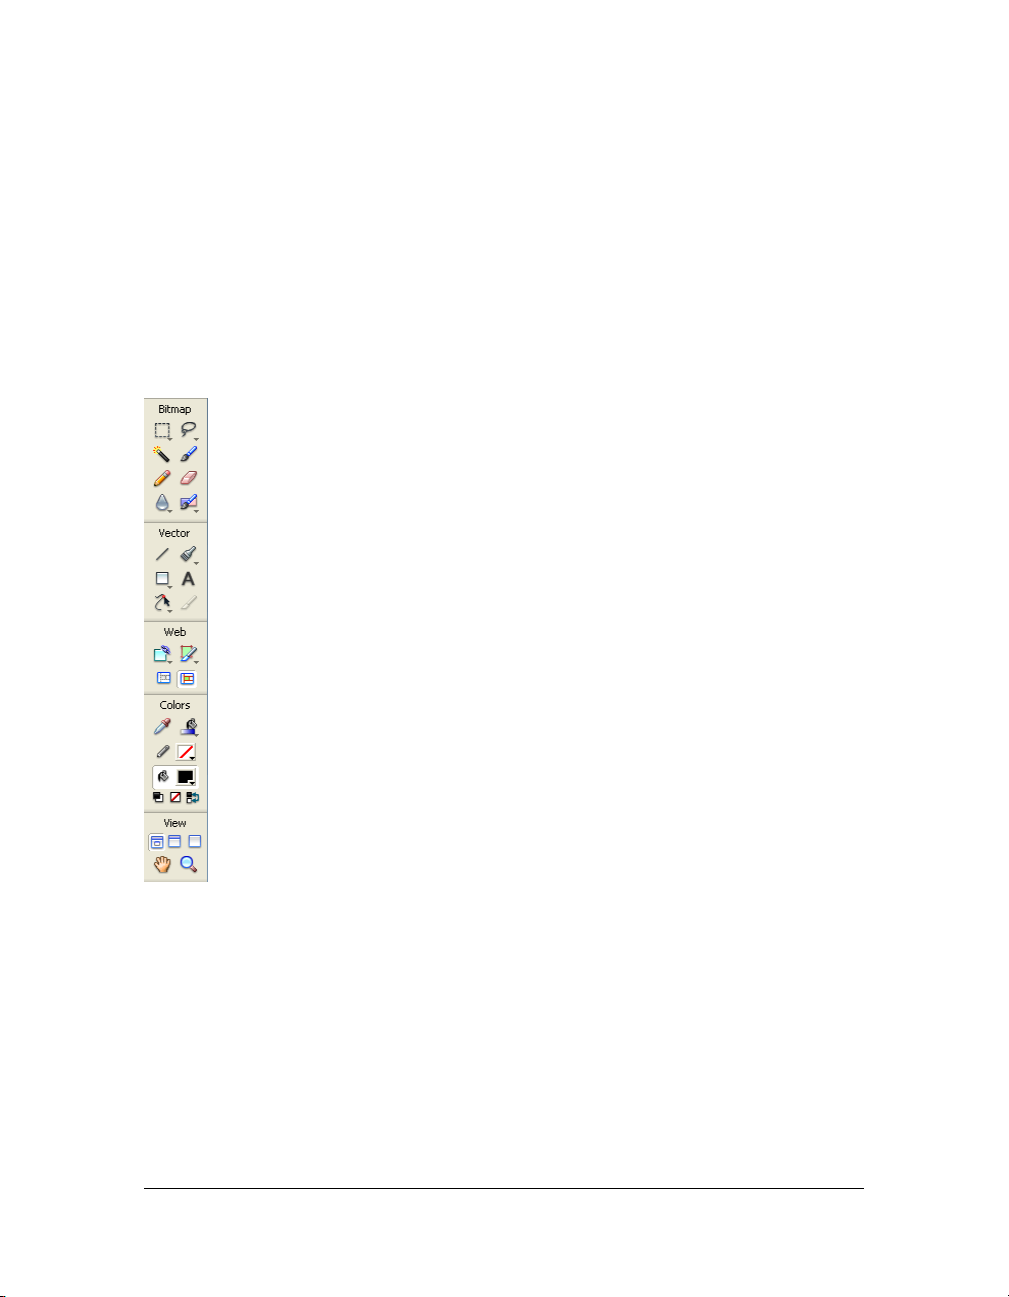
The Tools panel is organized into six categories: Select, Bitmap, Vector, Web, Colors, and
View.
Changing tool options
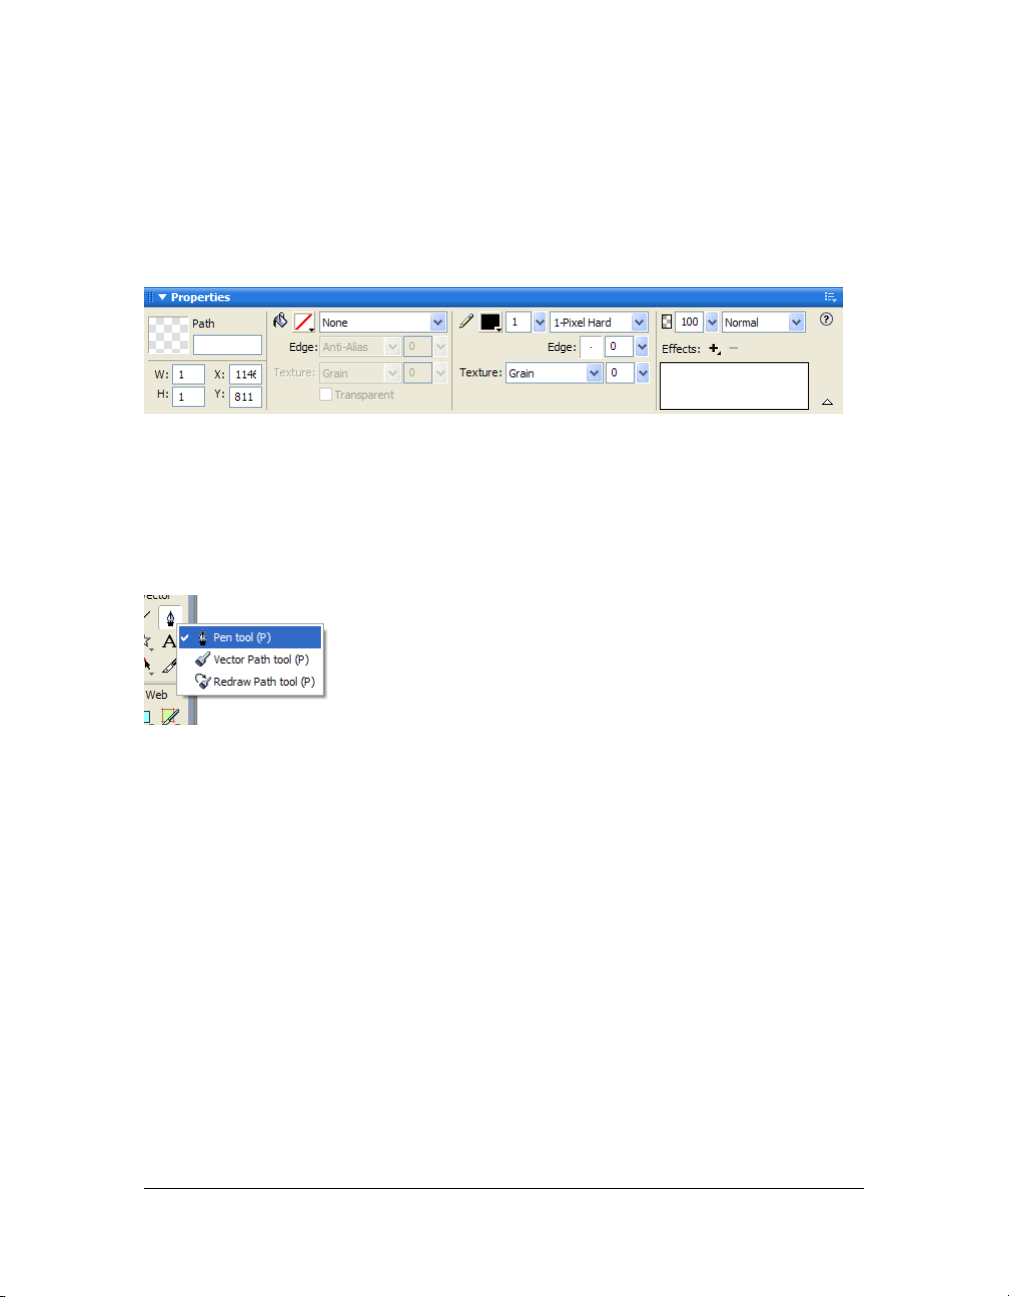
When you select a tool, the Property inspector displays tool options. Some tool options
remain displayed as you work with the tool. For other tools, such as the basic shape, Pen, and
Line tools, the Property inspector displays the properties of selected objects. For more
information about the Property inspector, see “Using the Property inspector” on page 31.
30 Chapter 2: Fireworks Basics
Page 31
To display tool options in the Property inspector for a tool that you are
already using:
■ Select Select > Deselect to deselect all objects.
For information about specific tool options, see the sections that introduce the various tools
throughout Using Fireworks or Fireworks Help.
Selecting a tool from a tool group
A small triangle in the lower right corner of a tool in the Tools panel indicates that it is part of
a tool group. For example, the Rectangle tool is part of the basic shape tool group, which also
includes the Rounded Rectangle, Ellipse, and Polygon basic tools, as well as all of the Auto
Shape tools, which appear below the divider line.
To select an alternative tool from a tool group:
1. Click the tool icon and hold down the mouse button.
A pop-up menu appears with tool icons, tool names, and shortcut keys. The currently
selected tool has a check mark to the left of the tool name.
2. Drag the pointer to highlight the tool you want, and release the mouse button.
The tool appears in the Tools panel, and the tool options appear in the Property inspector.
Using the Property inspector
The Property inspector is a context-sensitive panel that displays current selection properties,
current tool options, or document properties. By default, the Property inspector is docked at
the bottom of the workspace.
The Fireworks work environment 31
Page 32
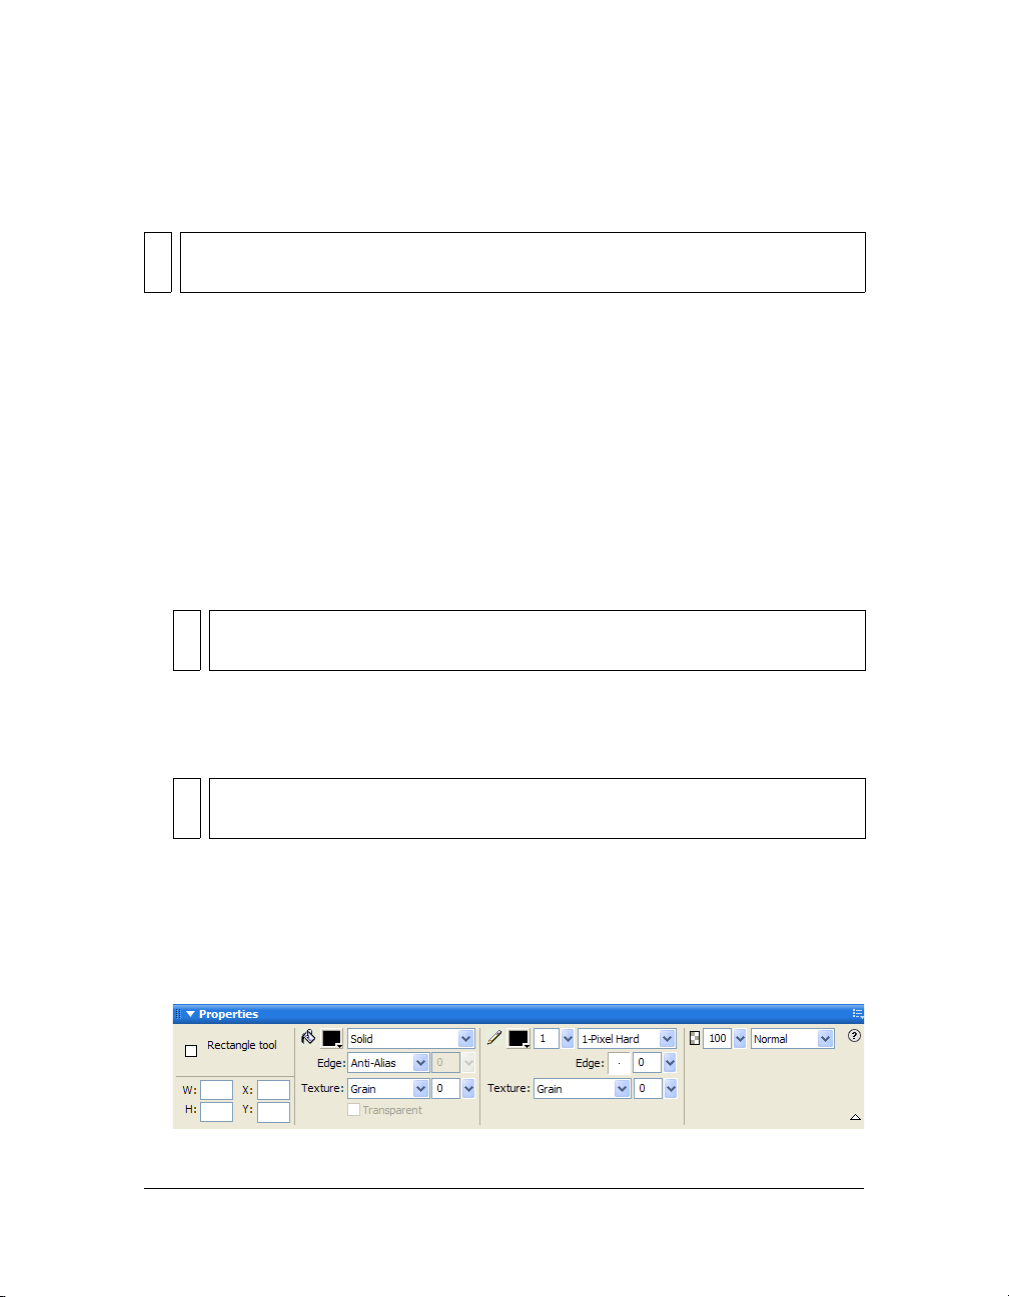
The Property inspector can be open at half height, displaying two rows of properties, or at full
height, displaying four rows. You can also fully collapse the Property inspector while leaving it
in the workspace.
NOTE
Most procedures in Using Fireworks assume that the Property inspector is displayed at
full height.
To undock the Property inspector:
■ Drag the gripper at the upper left corner to another part of the workspace.
To dock the Property inspector at the bottom of the workspace
(Windows only):
■ Drag the side bar on the Property inspector to the bottom of the screen.
To expand a half-height Property inspector to full height, revealing additional
options, do one of the following:
■ Click the expander arrow in the lower right corner of the Property inspector.
■ Click the icon in the upper right of the Property inspector and select Full Height from the
Property inspector Options menu.
NOTE
In Windows, the Options menu is available only when the Property inspector is
docked.
To reduce the Property inspector to half height, do one of the following:
■ Click the expander arrow in the lower right corner of the Property inspector.
■ Select Half Height from the Property inspector Options menu.
NOTE
In Windows, the Options menu is available only when the Property inspector is
docked.
To collapse the Property inspector when it is docked, do one of the following:
■ Click the expander arrow or the title of the Property inspector.
■ Select Collapse Panel Group from the docked Property inspector Options menu.
For more information about specific Property inspector options, see the appropriate
sections throughout Using Fireworks or Fireworks Help.
32 Chapter 2: Fireworks Basics
Page 33

Using panels
Panels are floating controls that help you edit aspects of a selected object or elements of the
document. Panels let you work on frames, layers, symbols, color swatches, and more. Each
panel is draggable, so you can group panels together in custom arrangements.
Some panels may be grouped together by default, while others are not. The following panels
may contain other panels:
■ Assets
■ Colors
■ Frames and History
The Optimize, Image Editing, Layers, Shapes, Auto Shape Properties, Info, Behaviors, Find,
and Align panels are not typically grouped with other panels by default, but you can group
them if you want. When you group panels together, all panel group names appear in the panel
group title bar. You can, however, assign any name you like to panel groups.
The Optimize panel lets you manage the settings that control a file’s size and file type and
work with the color palette of the file or slice to be exported.
The Image Editing panel includes commonly-used tools and options for editing images.
The Layers panel organizes a document’s structure and contains options for creating,
deleting, and manipulating layers.
The Frames panel includes options for creating animations.
The History panel lists commands you have recently used so that you can quickly undo and
redo them. In addition, you can select multiple actions, and then save and reuse them as
commands. For more information, see “Using the History panel to undo and repeat multiple
actions” on page 49.
The Shapes panel contains Auto Shapes that are not displayed in the Tools panel.
The Auto Shapes Properties panel lets you make changes to the properties of an Auto Shape
after you insert one into your document.
The Styles panel lets you store and reuse combinations of object characteristics or select a
stock style.
The Special Characters panel lets you insert special characters into text blocks directly from
within Fireworks by using a single click.
The Library panel contains graphic symbols, button symbols, and animation symbols. You
can easily drag instances of these symbols from the Library panel to your document. You can
make global changes to all instances by modifying only the symbol. For more information, see
“Using Styles, Symbols, and URLs” on page 235.
The Fireworks work environment 33
Page 34

The URL panel lets you create libraries containing frequently used URLs.
The Color Mixer panel lets you create new colors to add to the current document’s color
palette or to apply to selected objects.
The Swatches panel manages the current document’s color palette.
The Info panel provides information about the dimensions of selected objects and the exact
coordinates of the pointer as you move it across the canvas.
The Behaviors panel manages behaviors, which determine what hotspots and slices do in
response to mouse movement.
The Find panel lets you search for and replace elements such as text, URLs, fonts, and colors
in a document or multiple documents.
The Align panel contains controls for aligning and distributing objects on the canvas.
Organizing panel groups and panels
By default, Fireworks panels are docked in groups in the docking area on the right side of the
workspace. You can undock panel groups, add panels to a group, undock individual panels,
rearrange the order of docked panel groups, and collapse and close panel groups. You can also
open and close individual panels.
To undock or move a panel group:
■ Drag the panel gripper on the upper left corner away from the panel docking area on the
right side of the screen.
To dock a panel group:
■ Drag the panel gripper onto the panel docking area.
As you drag a panel or panel group over the panel docking area, a placement preview line
or rectangle shows where it would be placed among the groups.
To collapse or expand a panel group or panel, do one of the following:
■ Click the title of the panel group or panel.
NOTE
The title bar is still visible when the panel group or panel is collapsed.
■ Click the expander arrow in the upper left corner of the panel group or panel.
To undock a panel from a panel group:
■ Select Group With > New Panel Group from the Options menu in the panel group’s title
bar. (The Group With command’s name changes depending on the name of the active
panel.) The panel appears in a new panel group of its own.
34 Chapter 2: Fireworks Basics
Page 35

To dock a panel in a panel group:
■ Select the name of a panel group from the Group With submenu of the panel group’s
Options menu. (The Group With command’s name changes depending on the name of
the active panel.)
To rename a panel group:
1. Click the icon in the upper right of the panel group and select Rename Panel Group from
the Options menu.
2. Enter the new name.
To return panels to their default positions for your screen resolution, do one of
the following:
■ Select Window > Workspace Layouts > 800 x 600.
■ Select Window > Workspace Layouts > 1024 x 768.
■ Select Window > Workspace Layouts > 1280 x 1024.
To open a panel:
■ Select the panel name from the Window menu.
TIP
A check mark next to a panel name in the Window menu indicates that the panel is
open.
To close a panel, do one of the following:
■ Select the panel name from the Window menu.
■ Click the Close button in the panel title bar when the panel is undocked.
To hide all panels and the Property inspector:
■ Select Window > Hide Panels. To view hidden panels, select Window > Hide Panels again.
NOTE
Panels that are hidden when you select Hide Panels remain hidden when you
deselect this command.
To show or hide panels docked to the application window (Windows only), do
one of the following:
■ Drag the vertical bar to the left of the docked panel area to resize the panel area.
The Fireworks work environment 35
Page 36
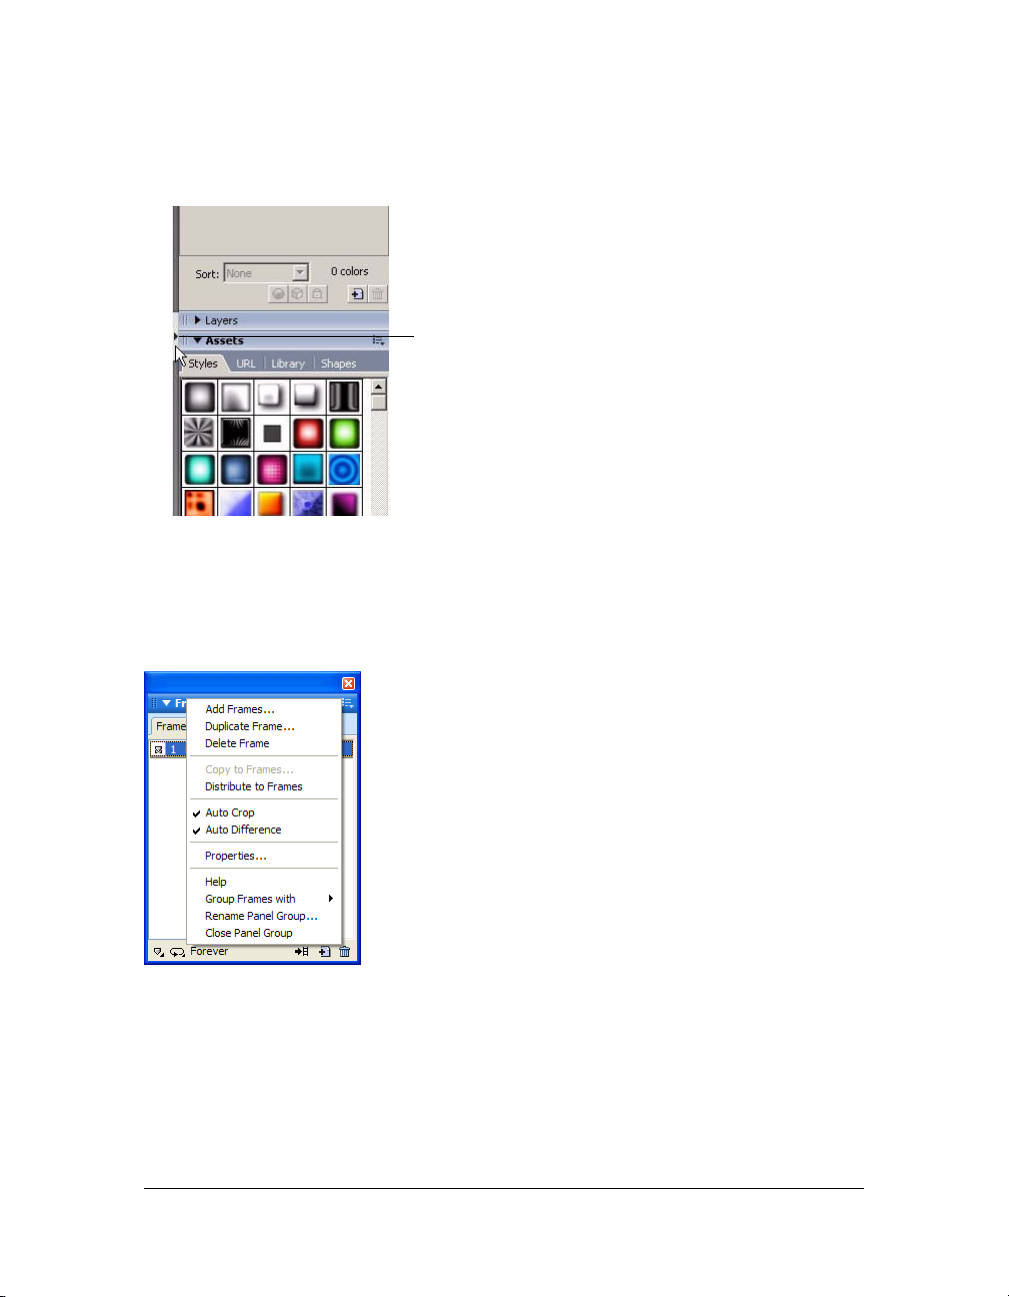
■ Click the small arrow that separates the docked panel area from the rest of the
application window.
Click to show or hide docked panel area
Using the panel group or panel Options menu
Each panel group and panel has an Options menu listing a range of choices specific to the
active panel or panel group. An Options menu also appears in the Property inspector (except
in Windows when the Property inspector is undocked).
To select an option from a panel group or panel Options menu:
1. Click the Options menu icon in the upper right corner of the panel group or panel to open
the menu.
2. Select a menu item.
36 Chapter 2: Fireworks Basics
Page 37
Saving panel layouts
You can save the layout of panels by using the Commands menu. Then the next time you
open Fireworks, the panels are arranged in the same position in the workspace.
To save a workspace layout:
1. Select Window > Workspace Layouts > Save Current.
2. Name the workspace layout and click OK.
To open a saved workspace layout:
■ Select Window > Workspace Layouts and select a workspace layout from the submenu.
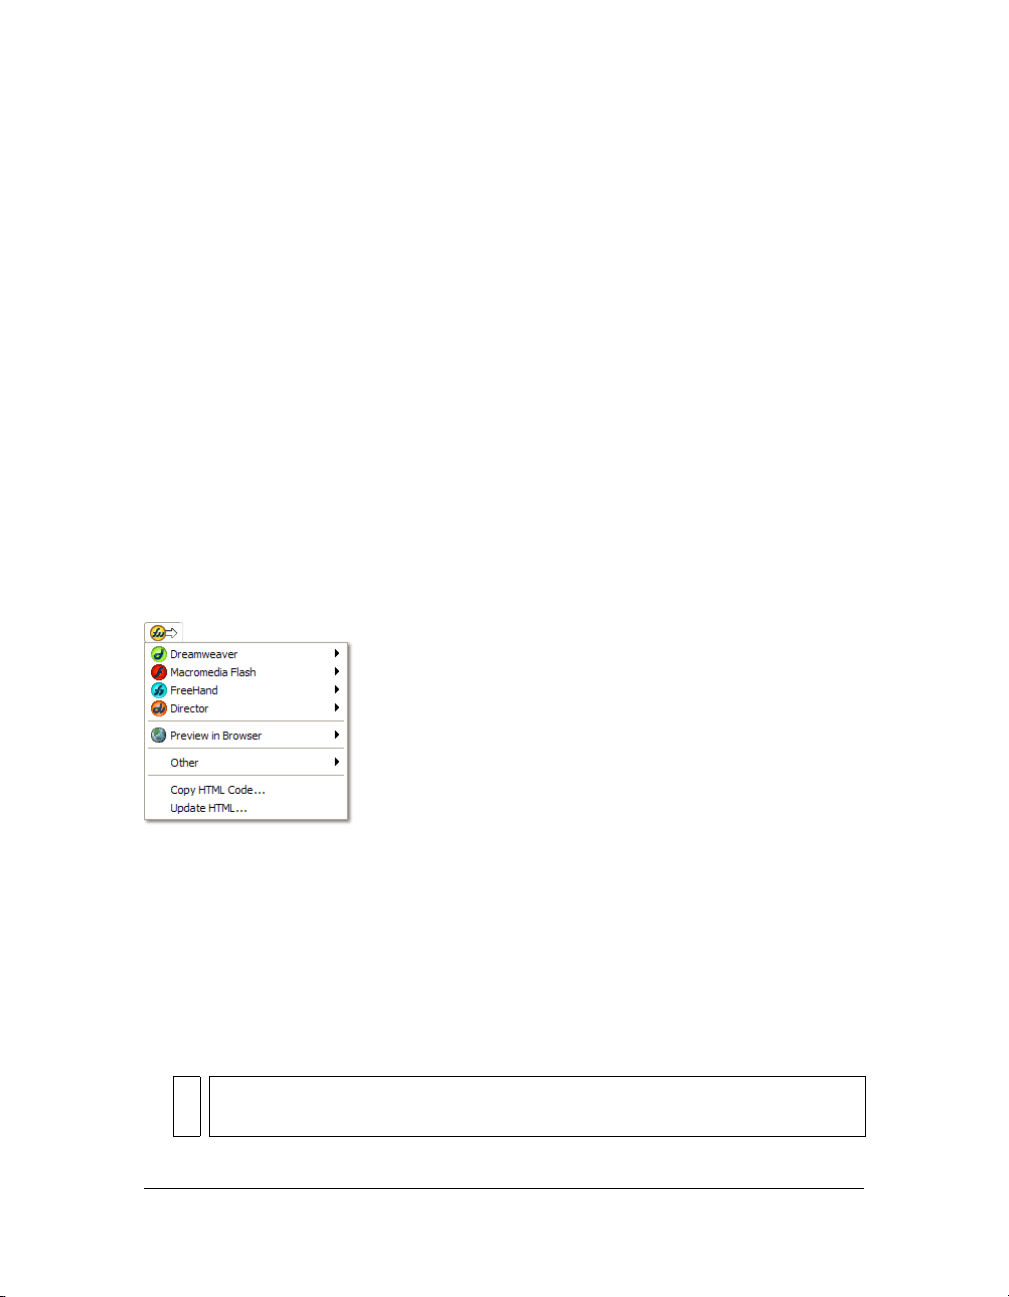
About the Quick Export button
The Quick Export button lets you export your Fireworks files to a number of Macromedia
applications, including Dreamweaver, Flash, Director, and FreeHand. In addition, you can
export your files to Photoshop, FrontPage, Adobe
your files in the browser of your choice. For more information, see “Using the Quick Export
button” on page 369.
GoLive, and Illustrator, or you can preview
Opening and moving toolbars (Windows only)
Fireworks for Windows includes two toolbars containing common Fireworks commands.
To show or hide a toolbar:
■ Select Window > Toolbars and select a toolbar.
To undock a toolbar:
■ Drag the toolbar away from its docked location.
NOTE
If a toolbar is undocked, you can click the close button at the upper right of the title
bar to close it.
The Fireworks work environment 37
Page 38
To dock a toolbar:
■ Drag the toolbar onto a docking area at the top, bottom, left, or right of the application
window until the placement preview rectangle appears.
Navigating and viewing a document
You can control your document’s magnification, its number of views, and its display mode. In
addition, you can easily pan the view of a document, which is helpful if you zoom in and can
no longer see the entire canvas.
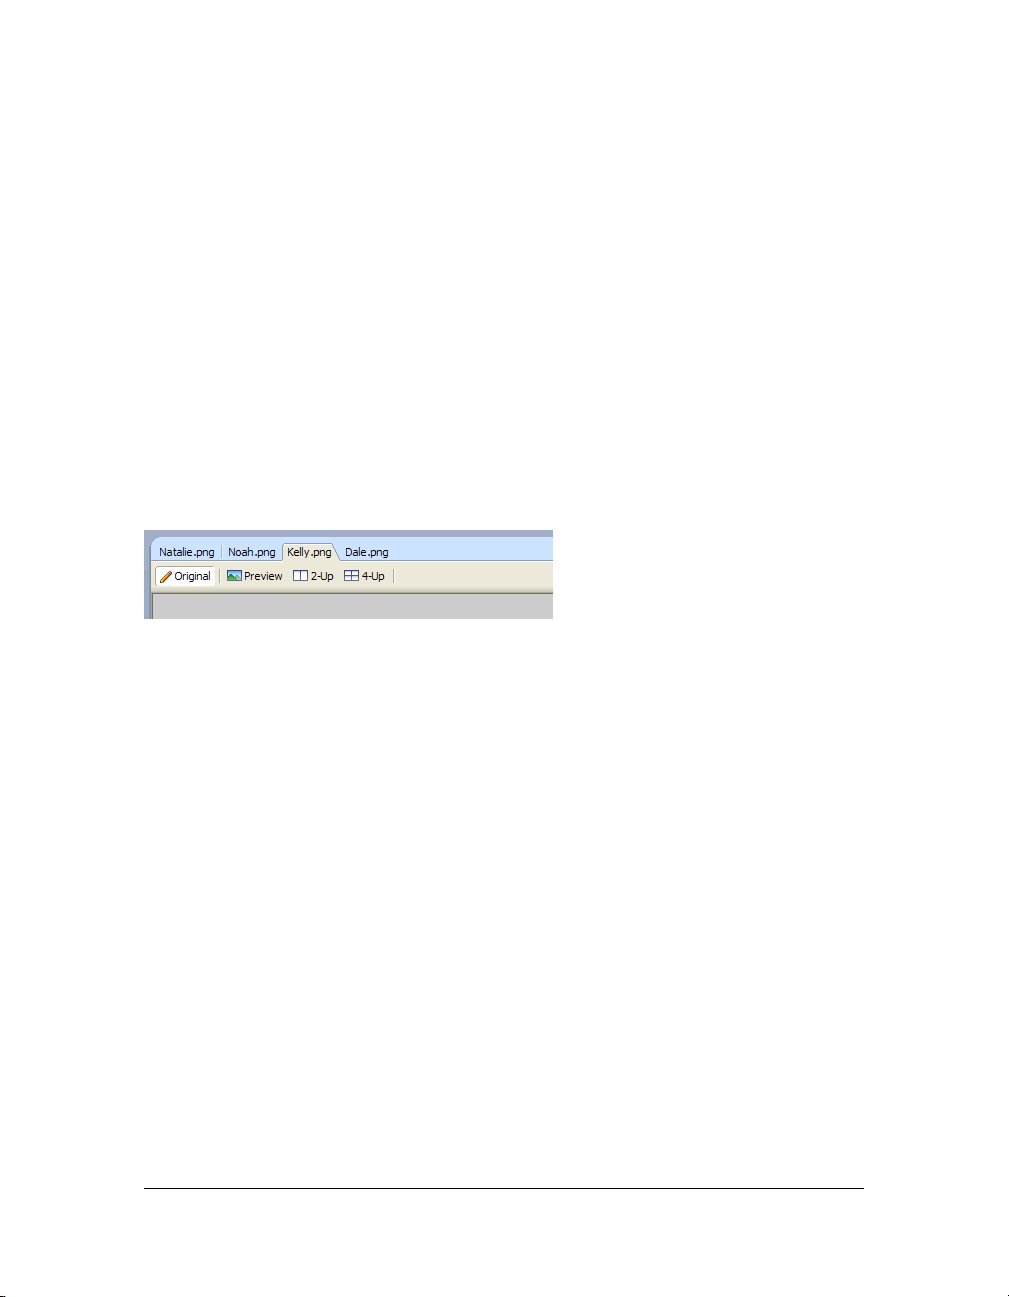
Using document tabs (Windows)
When your document is maximized, you can easily choose among multiple open documents
using the document tabs that appear at the top of the document window. Each open
document displays its filename on a tab that appears above the view buttons.
To select a different document when the current document is maximized:
■ Click the document tab for the document you want to view.
38 Chapter 2: Fireworks Basics
Page 39
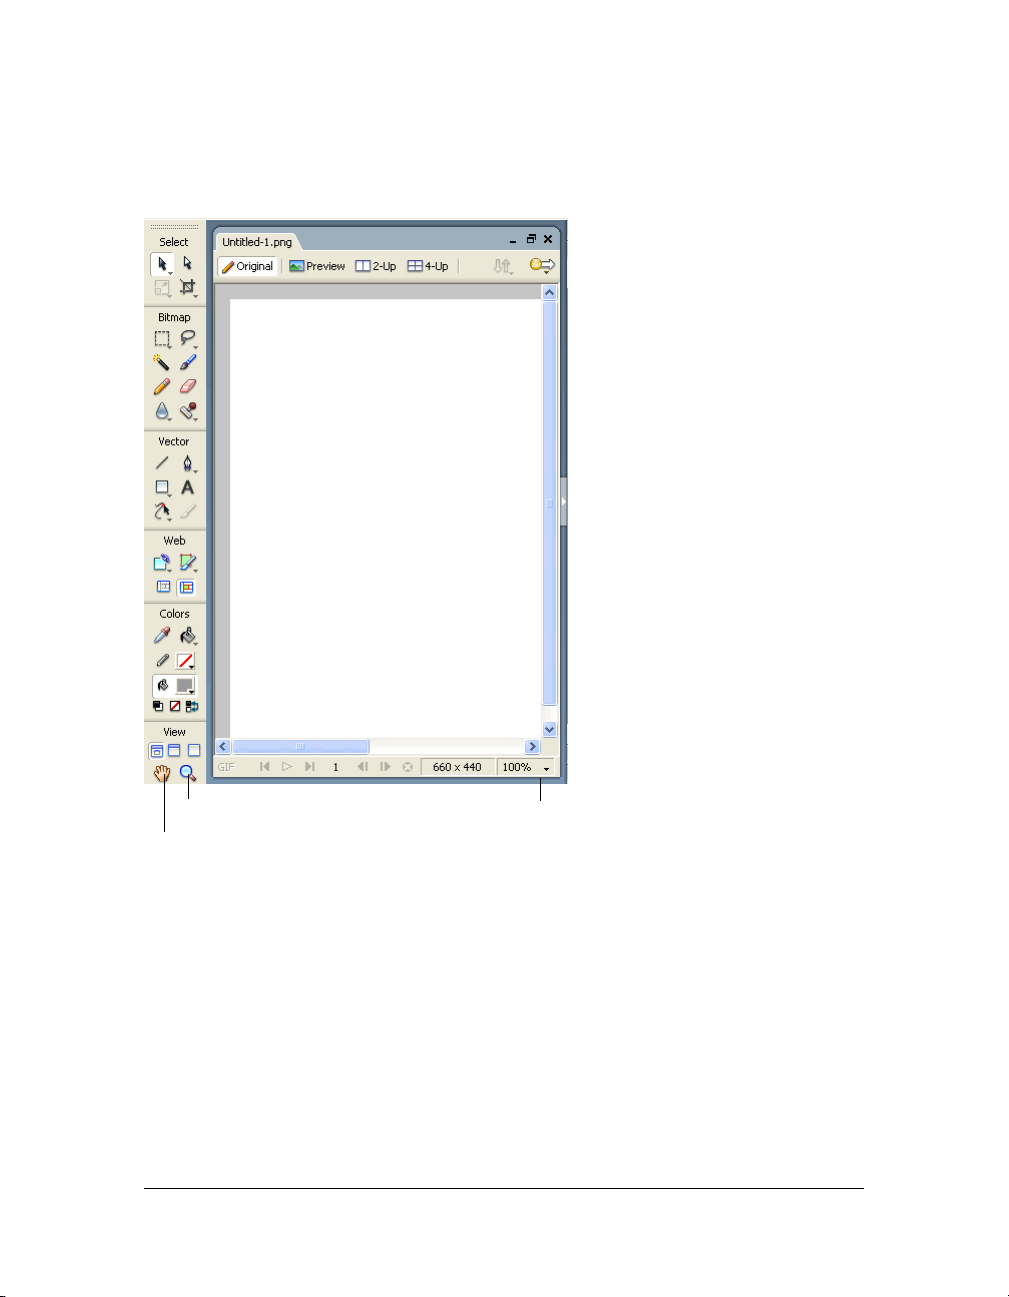
Zooming and panning
Fireworks lets you zoom in or out at a preset or user-defined magnification percentage.
Zoom tool
Hand tool
Zoom pop-up menu
To zoom in using preset increments, do one of the following:
■ Select the Zoom tool and click to specify the new center point inside the document
window. Each click magnifies the image to the next preset magnification.
■ Select a zoom setting from the Set Magnification pop-up menu at the bottom of the
document window.
■ Select Zoom In or a preset magnification from the View menu.
The Fireworks work environment 39
Page 40

To zoom out using preset increments, do one of the following:
■ Select the Zoom tool and Alt-click (Windows) or Option-click (Macintosh) inside the
document window. Each click reduces the view to the next preset percentage.
■ Select a zoom setting from the Set Magnification pop-up menu at the bottom of the
document window.
■ Select Zoom Out or a preset magnification from the View menu.
To zoom in on a specific area without being constrained by preset zoom
increments:
1. Select the Zoom tool.
2. Drag over the part of the image that you want to magnify.
The size of the zoom selection box determines the precise magnification percentage,
which is displayed in the Set Magnification text box.
NOTE
You cannot enter a magnification percentage in the Set Magnification text box.
To zoom out based on a specific area:
■ Alt-drag (Windows) or Option-drag (Macintosh) a selection area with the Zoom tool.
To return to 100% magnification:
■ Double-click the Zoom tool in the Tools panel.
To pan around the document:
1. Select the Hand tool.
2. Drag the hand pointer.
As you pan beyond the canvas edge, the view continues to pan so that you can work with
pixels along the canvas edge.
To fit the document in the current view:
■ Double-click the Hand tool.
Using view modes to manage the workspace
You use the view mode buttons in the View section of the Tools panel to control the layout of
your workspace. You can select one of three view modes:
Standard Screen mode is the default document window view.
Full Screen with Menus mode is a maximized document window view set against a gray
background with menus, toolbars, scroll bars, and panels visible.
40 Chapter 2: Fireworks Basics
Page 41

Full Screen mode is a maximized document window view set against a black background
with no menus, toolbars, or title bars visible.
To change view modes, do one of the following:
■ To change to Full Screen with Menus mode, click the Full Screen with Menus Mode
button in the Tools panel.
■ To change to Full Screen Mode, click the Full Screen Mode button in the Tools panel.
■ To return to Standard Screen mode, right-click (Windows) or Control-click (Macintosh)
in the document window and select Exit Full Screen Mode, or click the Standard Screen
Mode button in the Tools panel.
Displaying multiple document views
You can use multiple views to see one document at different magnifications simultaneously.
Changes you make in one view are automatically reflected in all other views of the same
document. Generally, you’ll want to be sure that your document is not maximized in the
workspace before creating multiple views. This lets you see multiple views of the document
at one time.
To open an additional document view at a different zoom setting:
1. Select Window > Duplicate Window.
2. Select a zoom setting for the new window.
To tile document views:
■ Select Window > Tile Horizontal or Window > Tile Vertical.
To close a document view window:
■ Click the window’s Close button.
Controlling document redraw
Display modes affect a document’s onscreen representation, but not its object data or output
quality.
The Fireworks work environment 41
Page 42

To control document redraw:
■ Select View > Full Display.
When Full Display is selected, Fireworks displays the document in all available colors with
full detail. When Full Display is deselected, Fireworks displays paths as 1 pixel wide with
no fill and displays images with an X through them.
Display and draft modes
To display a document as it would appear on a different platform:
■ In Windows, select View > Macintosh Gamma.
■ On the Macintosh, select View > Windows Gamma.
You can now preview how the document would appear on the other computer platform.
For example, if you are working on the Windows platform, you can use this command to
preview how a document would appear on the Macintosh platform.
Changing the canvas
When you first create a new Fireworks document, you must specify document characteristics.
You can modify the size and color of the canvas and change the image’s resolution anytime
using the Modify menu or the Property inspector. As you work with the document, you can
also rotate the canvas and trim unwanted parts.
Changing canvas size, color, and resolution
Fireworks makes it easy to change to the canvas size, canvas color, and image resolution.
To change the canvas size:
1. Do one of the following:
■ Select Modify > Canvas > Canvas Size.
■ Select Select > Deselect, click the Pointer tool to display the document properties in
the Property inspector, then click the Canvas Size button.
2. Enter the new dimensions in the Width and Height text boxes.
42 Chapter 2: Fireworks Basics
Page 43
3. Click an Anchor button to specify which sides of the canvas Fireworks will add to or delete
from, and click OK.
NOTE
By default, the center anchor is selected, indicating that changes to the size of the
canvas are made on all sides.
To change the canvas color from the Modify menu:
1. Select Modify > Canvas > Canvas Color.
2. Select White, Transparent, or Custom. If you select Custom, click a color in the Swatches
pop-up window.
To select the canvas color from the Property inspector:
1. Select Select > Deselect, click the Pointer tool to display the document properties in the
Property inspector, then click the Canvas color box.
2. Pick a color from the Swatches pop-up window or click the eyedropper on a color
anywhere onscreen. To select a transparent canvas, click the None button in the Swatches
pop-up window.
To resize a document and all of its contents:
1. Do one of the following:
■ Select Select > Deselect, click the Pointer tool to display the document properties in
the Property inspector, then click the Image Size button in the Property inspector.
■ Select Modify > Canvas > Image Size.
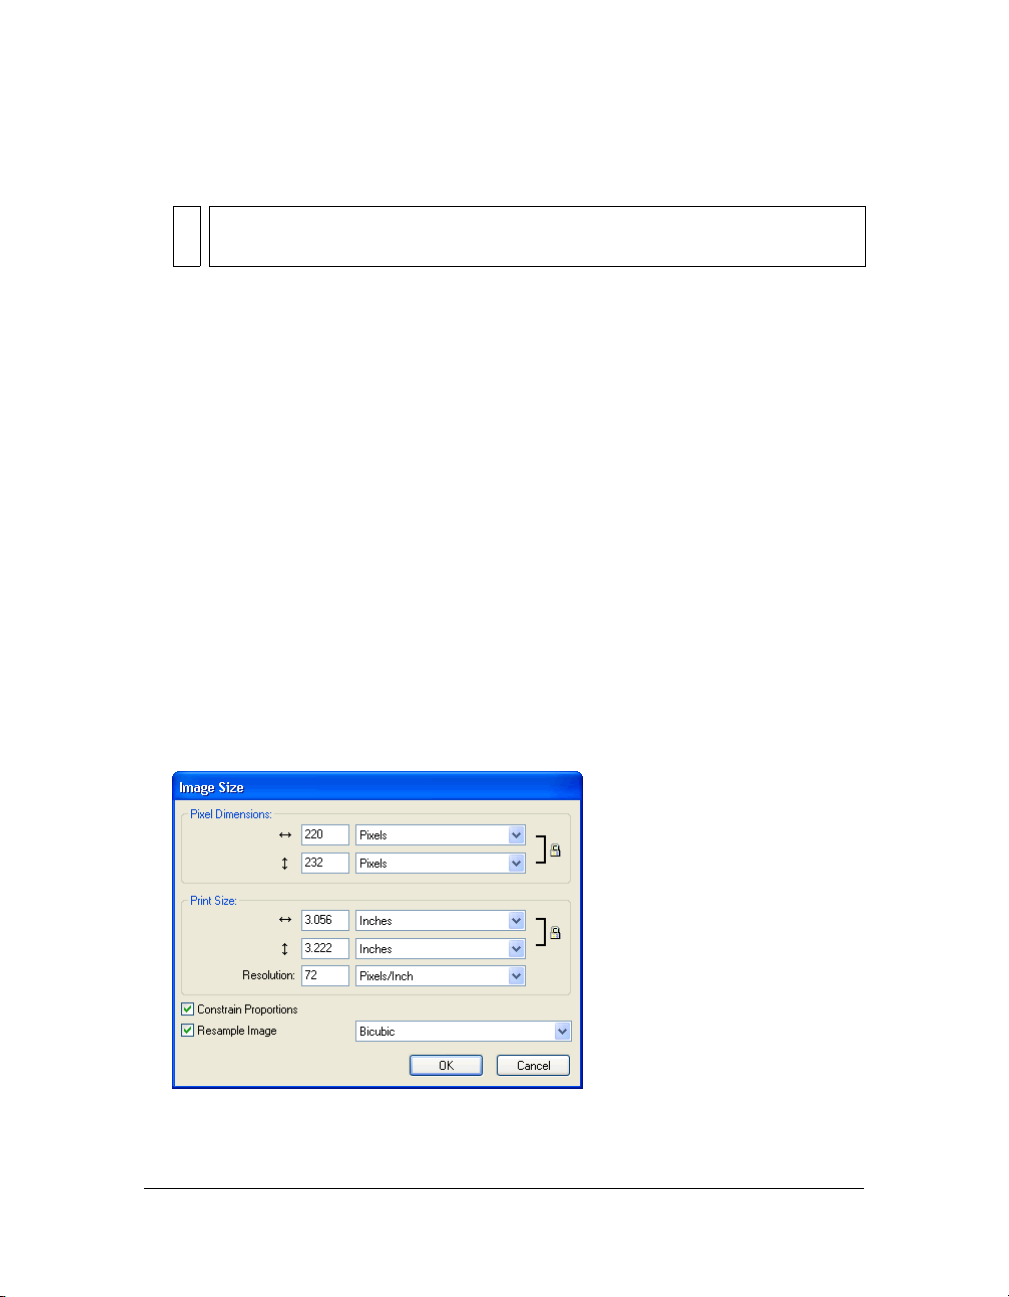
The Image Size dialog box opens.
The Fireworks work environment 43
Page 44

2. In the Pixel Dimensions text boxes, enter new horizontal and vertical dimensions.
You can change the units of measure. If Resample Image is deselected, you can change the
resolution or print size but not pixel dimensions.
3. In the Print Size text boxes, enter horizontal and vertical dimensions for the printed image.
4. In the Resolution text box, enter a new resolution for the image.
You can select between pixels/inch and pixels/cm as the units, or select Resample Image.
Changing the resolution also changes the pixel dimensions.
5. Do one of the following:
■ To maintain the same ratio between the document’s horizontal and vertical
dimensions, select Constrain Proportions.
■ Deselect Constrain Proportions to resize width and height independently.
6. Select Resample Image to add or remove pixels when resizing the image to approximate the
same appearance at a different size.
7. Click OK.
About resampling
Fireworks resamples images differently than most image-editing applications do. Fireworks
contains pixel-based bitmap image objects and path-based vector objects.
■ When a bitmap object is resampled, pixels are added to or removed from the image to
make it larger or smaller.
■ When a vector object is resampled, little quality loss occurs because the path is redrawn
mathematically at a larger or smaller size.
Because the attributes of vector objects in Fireworks are visible as pixels, some strokes or fills
may appear slightly different after resampling because the pixels that compose the stroke or fill
must be redrawn.
NOTE
Guides, hotspot objects, and slice objects are resized when the document’s image size
is changed.
Resizing bitmap objects always presents a unique problem—do you add or remove pixels to
resize the image, or do you change the number of pixels per inch or centimeter?
You can alter the size of a bitmap image by adjusting the resolution or by resampling the
image. When adjusting the resolution, you change the size of the pixels in the image so that
more or fewer pixels fit in a given space. Adjusting the resolution without resampling does not
result in data loss.
44 Chapter 2: Fireworks Basics
Page 45

Resampling up, or adding pixels to make the image larger, may result in quality loss because
the pixels being added do not always correspond to the original image.
Downsampling, or removing pixels to make the image smaller, always causes quality loss
because pixels are discarded to resize the image. Data loss in the image is another side effect
of downsampling.
Rotating the canvas
Rotating the canvas is helpful when an image is imported upside down or sideways. You can
rotate the canvas 180°, 90° clockwise, or 90° counterclockwise.
When you rotate the canvas, all objects in the document rotate.
To rotate the canvas, do one of the following:
■ Select Modify > Canvas > Rotate 180°.
■ Select Modify > Canvas > Rotate 90° CW.
■ Select Modify > Canvas > Rotate 90° CCW.
Trimming or fitting the canvas
If your document contains extra space around the contents of the canvas, you can trim the
canvas. You can also modify the canvas by expanding it to fit objects that extend beyond its
boundary.
Original; trimmed canvas
To trim or fit the canvas to the document contents:
■ Select Select > Deselect to view the document properties in the Property inspector.
■ Click Fit Canvas in the Property inspector.
The canvas expands or contracts to the size of the contents of the canvas.
The Fireworks work environment 45
Page 46

Cropping a document
By cropping, you can delete unwanted portions of a document. The canvas is resized to fit an
area that you define.
By default, cropping deletes objects that extend beyond the canvas boundaries. You can retain
objects outside the canvas by changing a preference before cropping.
To crop a document:
1. Select the Crop tool from the Tools panel or select Edit > Crop Document.
2. Drag a bounding box on the canvas. Adjust the crop handles until the bounding box
surrounds the area of the document that you want to keep.
3. Double-click inside the bounding box or press Enter to crop the document.
Fireworks resizes the canvas to the area you define and deletes objects beyond the edges of
the canvas.
TIP
You can retain objects outside the canvas by deselecting Delete Objects when
Cropping on the Editing tab of the Preferences dialog box before cropping. For more
information about preferences, see “Setting preferences” on page 445.
Using context menus
Context menus let you quickly access commands that are relevant to the current selection.
To display a context menu:
■ Right-click (Windows) or Control-click (Macintosh) a selected item in the document
window.
46 Chapter 2: Fireworks Basics
Page 47

Using rulers, guides, and the grid
You can use rulers and guides to lay out objects as precisely as possible and to help you draw.
You can place guides in the document and snap objects to those guides or turn on the
Fireworks grid and snap objects to the grid.
Using rulers
Rulers help you to measure, organize, and plan the layout of your work. Because Fireworks
images are intended for the web, where graphics are measured in pixels, the rulers in Fireworks
always measure in pixels, regardless of the unit of measurement you used when creating the
document.
To show and hide rulers:
■ Select View > Rulers.
Vertical and horizontal rulers appear along the margins of the document window.
The Fireworks work environment 47
Page 48

Using guides
Guides are lines that you drag onto the document canvas from the rulers. They serve as
drawing aids to help you place and align objects. You can use guides to mark important parts
of your document, such as the margins, the document center point, and areas where you want
to work precisely.
To help you align objects, Fireworks lets you snap objects to guides. You can lock guides to
prevent them from being accidentally moved.
NOTE
Guides do not reside on a layer, nor are they exported with a document. They are merely
design tools.
Fireworks also has slice guides that allow you to slice a document for use on the web. Regular
image guides are different from slice guides, however. For information on slice guides, see
“Moving slice guides to edit slices” on page 258.
To create a horizontal or vertical guide:
1. Click and then drag from the corresponding ruler.
2. Position the guide on the canvas and release the mouse button.
NOTE
You can reposition the guide by dragging it again.
To move a guide to a specific position:
1. Double-click the guide.
2. Enter the new position in the Move Guide dialog box, and click OK.
To show or hide guides:
■ Select View > Guides > Show Guides.
To snap objects to guides:
■ Select View > Guides > Snap to Guides.
To change guide colors:
1. Select View > Guides > Edit Guides.
2. Select the new guide color from the color box pop-up window, and click OK.
To lock or unlock all guides:
■ Select View > Guides > Lock Guides.
To remove a guide:
■ Drag the guide off the canvas.
48 Chapter 2: Fireworks Basics
Page 49

Using the grid
The Fireworks grid displays a system of horizontal and vertical lines on the canvas. The grid is
useful for placing objects precisely. In addition, you can view, edit, resize, and change the
color of the grid.
NOTE
The grid does not reside on a layer, nor is it exported with a document. It is merely a
design tool.
To show and hide the grid:
■ Select View > Grid > Show Grid.
To snap objects to the grid:
■ Select View > Grid > Snap to Grid.
To change the grid color:
1. Select View > Grid > Edit Grid.
2. Select the new grid color from the color box pop-up window, and click OK.
To change the size of the grid’s cells:
1. Select View > Grid > Edit Grid.
2. Enter the appropriate values in the horizontal and vertical spacing text boxes, and click OK.
Using the History panel to undo and repeat multiple actions
With the History panel, you can view, modify, and repeat the actions taken to create the
document. The History panel lists the most recent actions you have performed in Fireworks,
up to the number specified in the Undo Steps field in the Fireworks Preferences dialog box.
With the History panel, you can do any of the following:
■ Quickly undo and redo recent actions.
■ Select recently performed actions from the History panel and repeat them.
■ Copy selected commands to the Clipboard as the JavaScript text equivalent.
■ Save a group of recently performed actions as a custom command, and then select it from
the Command menu to reuse as a single command. For more information about creating
commands using the History panel, see “Scripting with the History panel” on page 438.
The Fireworks work environment 49
Page 50

To undo and redo actions:
1. Select Window > History to open the History panel.
2. Drag the Undo marker up or down.
To repeat actions:
1. Perform the actions.
2. Do one of the following to highlight the actions to be repeated in the History panel:
■ Click an action to highlight it.
■ Control-click (Windows) or Command-click (Macintosh) to highlight multiple
individual actions.
■ Shift-click to highlight a continuous range of actions.
3. Click the Replay button at the bottom of the History panel.
To save actions for reuse:
1. Highlight the actions to be saved in the History panel.
2. Click the Save button at the bottom of the panel.
3. Enter a command name and click OK.
To use the saved custom command:
■ Select the command name from the Commands menu.
50 Chapter 2: Fireworks Basics
Page 51
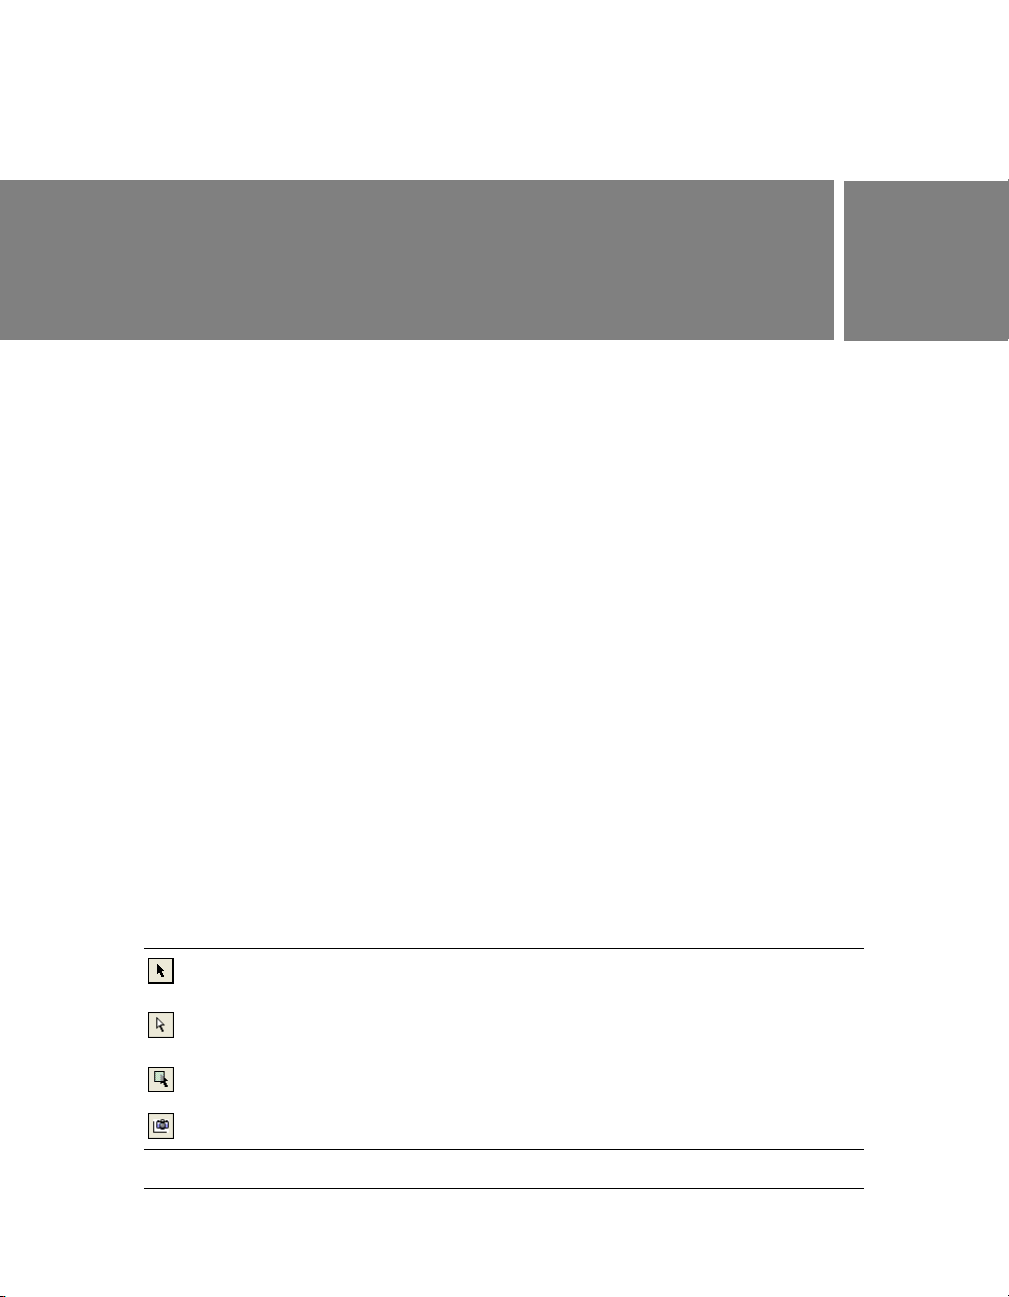
CHAPTER 3
Selecting and Transforming Objects
As you work in Macromedia Fireworks 8, you manipulate vector and bitmap objects, text
blocks, slices and hotspots, and areas of pixels. Using the selection and transformation tools,
you can move, copy, delete, rotate, scale, or skew objects. In documents that have multiple
objects, you can organize the objects by stacking, grouping, and aligning them.
This chapter contains the following topics:
Selecting objects . . . . . . . . . . . . . . . . . . . . . . . . . . . . . . . . . . . . . . . . . . . . . . . . . . . . . . . . . 51
Selecting pixels. . . . . . . . . . . . . . . . . . . . . . . . . . . . . . . . . . . . . . . . . . . . . . . . . . . . . . . . . . . 55
Editing selected objects . . . . . . . . . . . . . . . . . . . . . . . . . . . . . . . . . . . . . . . . . . . . . . . . . . . 68
Transforming and distorting selected objects and selections . . . . . . . . . . . . . . . . . .69
Organizing objects . . . . . . . . . . . . . . . . . . . . . . . . . . . . . . . . . . . . . . . . . . . . . . . . . . . . . . . . 74
Selecting objects
Before you can do anything with any object on the canvas, you must select it. This applies to
a vector object, path, or points; a text block, word, or letter; a slice or hotspot; an instance; or
a bitmap object.
You can use any of the following to select objects:
The Layers panel displays each object. You can click an object in the Layers panel to it select
when the panel is open and layers are expanded. For more information, see Chapter 9,
“Layers, Masking, and Blending,” on page 203.
3
The Pointer tool selects objects when you click the objects or drag a selection area
around them.
The Subselection tool selects an individual object in a group or the points of a vector
object.
The Select Behind tool selects an object that is behind another object.
The Export Area tool selects an area to be exported as a separate file.
51
Page 52

For information about selecting specific areas of pixels in a bitmap image, see “Selecting
pixels” on page 55.
Using the Pointer tool
The Pointer tool selects objects when you click them or when you drag a selection area around
all or part of the objects.
To select an object by clicking, do one of the following:
■ Move the Pointer tool over the object’s path or bounding box and click.
■ Click the object’s stroke or fill.
■ Select the object in the Layers panel.
TIP
To preview what you would select if you were to click on an object beneath the
pointer on the canvas, select the Mouse Highlight option in the Editing tab of the
Preferences dialog box. For more about preferences, see “Setting preferences”
on page 445.
To select objects by dragging:
■ Drag the Pointer tool to include one or more objects in the selection area.
Using the Subselection tool
You use the Subselection tool to select, move, or modify points on a vector path or an object
that is part of a group.
To move or modify objects with the Subselection tool:
1. Select the Subselection tool.
2. Make a selection.
Selection handles appear.
52 Chapter 3: Selecting and Transforming Objects
Page 53

3. Do one of the following:
■ To modify an object, drag one of its points or selection handles.
■ To move the entire object, drag anywhere in the object except a point or selection
handle.
Using the Select Behind tool
When working with graphics that contain multiple objects, you can use the Select Behind
tool to select an object that is hidden or obscured by other objects.
To select an object that is behind other objects:
■ Click the Select Behind tool repeatedly over the stacked objects, progressing through the
objects top to bottom in stacking order until you select the object you want.
NOTE
You also can select a hard-to-reach object by clicking it in the Layers panel when the
layers are expanded.
Selection information in the Property inspector
Whenever you select an object, the Property inspector identifies the selection. The upper left
area of the Property inspector contains the following information about the selection:
■ A description of the item being inspected
■ A text box to enter a name for that item
NOTE
The name appears in the title bar of the document whenever you select this item. For
slices and buttons, the name is the filename when exported.
■ The number of objects when more than one object is selected
NOTE
If the status bar is turned on (Windows only), selected objects are also identified in the
status bar at the bottom of the document window.
The Property inspector also displays information and settings for the object type selected. For
example, when you select a vector path, the Property inspector displays vector path properties,
such as stroke width and color.
Selecting objects 53
Page 54
Modifying a selection
After you select a single object, you can add objects to the selection and deselect objects that
are selected. Using a single command, you can select or deselect everything on every layer in a
document. You can also hide the selection path so that you can edit a selected object while
viewing it as it will appear on the web or in print.
To add to a selection:
■ Hold down Shift while clicking additional objects with the Pointer, Subselection, or Select
Behind tool.
To deselect an object while leaving other objects selected:
■ Hold down Shift while clicking the selected object.
To select everything on every layer in the document:
■ Choose Select > Select All.
NOTE
Select All does not select hidden objects.
To deselect all selected objects:
■ Choose Select > Deselect.
NOTE
You must deselect the Single Layer Editing preference to select all visible objects on
all layers in a document. When you select the Single Layer Editing preference, only
objects on the current layer are selected. For more information, see “Organizing
layers” on page 207.
To hide the path selection feedback of a selected object:
■ Select View > Hide Edges.
NOTE
You can use the Layers panel or the Property inspector to identify the selected
object when the outline and points are hidden.
To hide selected objects:
■ Select View > Hide Selection.
NOTE
Hidden objects are not exported. (This does not apply to slice and hotspot web
objects on the Web Layer.)
54 Chapter 3: Selecting and Transforming Objects
Page 55
To show all objects:
■ Select View > Show All.
NOTE
To hide objects whether they are selected or not, you can click or drag along the Eye
column in the Layers panel.
Selecting pixels
You can edit pixels over an entire canvas or select one of the selection tools to constrain your
editing to a particular area of an image:
The Marquee tool selects a rectangular area of pixels in an image.
The Oval Marquee tool selects an elliptical area of pixels in an image.
The Lasso tool selects a freeform area of pixels in an image.
The Polygon Lasso tool selects a straight-edged freeform area of pixels in an image.
The Magic Wand tool selects an area of similarly colored pixels in an image.
The pixel selection tools draw selection marquees that define the area of selected pixels. After
you draw the selection marquee, you can manipulate it by moving it, adding to it, or basing
another selection on it. You can edit the pixels inside the selection, apply filters to the pixels,
or erase pixels without affecting the pixels beyond the selection. You can also create a floating
selection of pixels that you can edit, move, cut, or copy.
Bitmap selection tool options
When you select the Marquee, Oval Marquee, Lasso, Polygon Lasso, or Magic Wand tool, the
Property inspector displays the options for that tool.
Selecting the Live marquee box allows you to change Edge settings and the amount of feather
(if Feather is specified as the Edge setting) for your bitmap selection while you’re using the
Marquee, Oval Marquee, Lasso, Polygon Lasso, and Magic Wand tool.
The Property inspector also displays three Edge options for these tools:
Hard creates a marquee selection with a defined edge.
Anti-alias prevents jagged edges in the marquee selection.
Feather lets you soften the edge of the pixel selection.
Selecting pixels 55
Page 56

When using a selection tool, you can set the Feather option before creating a selection, or you
can feather existing selections by selecting the Live marquee box. You can also feather existing
selections using the Feather command in the Select menu. For more information, see
“Feathering a pixel selection” on page 62.
When you select the Marquee or Oval Marquee, the Property inspector also displays three
style options:
Normal lets you create a marquee in which the height and width are independent of each
other.
Fixed Ratio constrains the height and width to defined ratios.
Fixed Size sets the height and width to a defined dimension.
NOTE
The Magic Wand tool also has a Tolerance setting. For more information, see “Selecting
areas of similar color” on page 57.
Creating pixel selection marquees
The Marquee, Oval Marquee, and Lasso tools in the Bitmap section of the Tools panel allow
you to select specific pixel areas of a bitmap image by drawing a marquee around them.
NOTE
If you want to be able to change the settings for your selection while using one of these
tools, be sure that you selected the Live marquee box before making your selection.
To select a rectangular or elliptical area of pixels:
1. Select the Marquee or Oval Marquee tool.
2. Set the Style and Edge options in the Property inspector. For more information, see
“Bitmap selection tool options” on page 55.
3. Drag to draw a selection marquee, which defines the pixel selection.
To draw additional square or circular marquees, hold down Shift as you drag the Marquee
or Oval Marquee tool. If Live marquee is turned on while you make a series of selections,
the Live marquee feature only affects the last selection in the series.
To draw a marquee from a center point, deselect any other active marquees, and then hold
down Alt (Windows) or Option (Macintosh) as you draw.
To select a freeform area of pixels:
1. Select the Lasso tool.
2. Select an Edge option in the Property inspector. For more information, see “Bitmap
selection tool options” on page 55.
3. Drag the pointer around the pixels you want to select.
56 Chapter 3: Selecting and Transforming Objects
Page 57

Plotting points to create a marquee selection
The Polygon Lasso tool allows you to select specific pixels in a bitmap image by clicking
repeatedly around the perimeter of the pixel area you want to select.
To select a polygonal area of pixels:
1. Select the Polygon Lasso tool.
2. Select an Edge option in the Property inspector. For more information, see “Bitmap
selection tool options” on page 55.
3. Click to plot points around the perimeter of the object or area to outline the selection.
Hold down Shift to constrain Polygon Lasso marquee segments to 45° increments.
4. Do one of the following to close the polygon:
■ Click the starting point.
■ Double-click in the workspace.
Selecting areas of similar color
The Magic Wand tool allows you to select areas of pixels that are similar in color. By adjusting
the Magic Wand’s Tolerance and Edge options in the Property inspector, you can control how
the Magic Wand selects pixels.
To select an area of pixels of similar color range:
1. Select the Magic Wand tool.
2. Select an Edge option in the Property inspector. For more information, see “Bitmap
selection tool options” on page 55.
3. Set the tolerance level by dragging the tolerance slider in the Property inspector.
Tolerance represents the tonal range of colors that are selected when you click a pixel with
the Magic Wand. If you enter 0 and click a pixel, only adjacent pixels of exactly the same
tone are selected. If you enter 65, a wider range of tones is selected.
Selecting pixels 57
Page 58
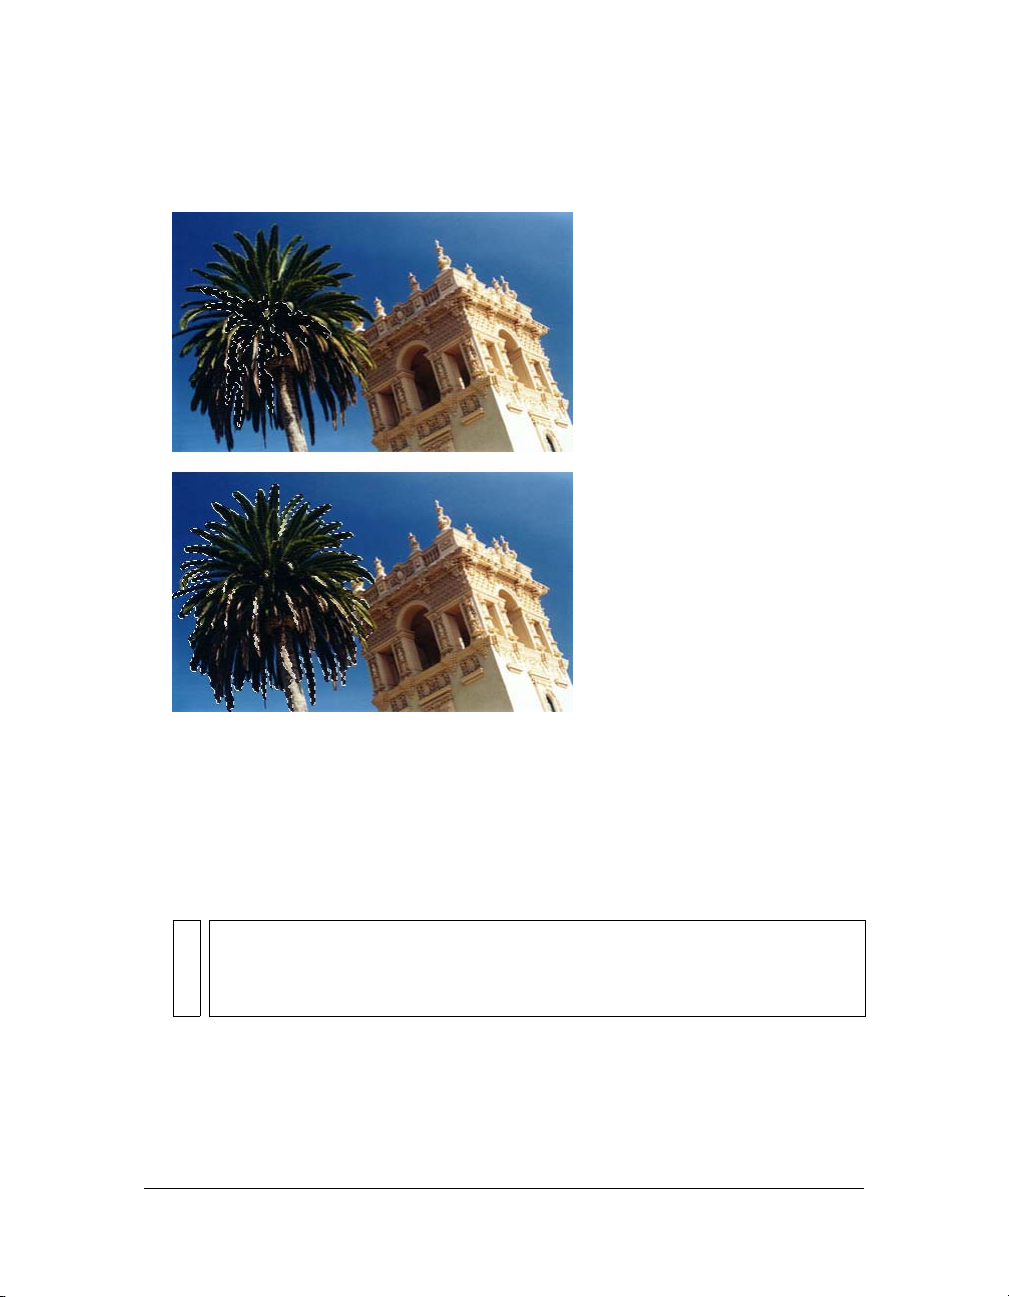
4. Click the area of color you want to select.
A marquee appears around the selected range of pixels.
Pixels selected with a lower tolerance (above), then a higher tolerance (below)
To select similar colors throughout the document:
1. Select an area of color with a marquee or lasso tool, or with the Magic Wand tool.
2. Select Select > Select Similar.
One or more marquees show all areas containing the selected range of pixels, according to
the current Tolerance setting in the Property inspector for the Magic Wand tool.
NOTE
To adjust the tolerance for the Select Similar command, select the Magic Wand tool
and then change the Tolerance setting in the Property inspector before using the
command. You can also select the Live marquee box so that you can change the
Tolerance setting while using the the Magic Wand tool.
58 Chapter 3: Selecting and Transforming Objects
Page 59

Removing a selection marquee
You can remove a selection marquee without affecting the document.
To remove a marquee, do one of the following:
■ Draw another marquee.
■ Click outside the current selection with a marquee or lasso tool.
■ Press Escape.
■ Select Select > Deselect.
Adjusting selection marquees
After selecting pixels with a marquee or lasso tool, you can edit or move the marquee border
without affecting the pixels beneath it. You can manually add pixels to or delete pixels from a
marquee border using modifier keys.
In addition, you can expand or contract the marquee border by a specified amount, select an
additional area of pixels around the existing marquee, or smooth the border of the marquee.
Moving a marquee
You can move a marquee to place it over a different area of pixels.
To move the marquee, do one of the following:
■ Drag the marquee with a marquee or lasso tool or the Magic Wand tool.
■ Use the arrow keys to nudge the marquee in 1-pixel increments.
■ Press Shift and use the arrow keys to move the marquee in 10-pixel increments.
Adjusting a marquee selection with the Spacebar
You can easily reposition a marquee as you draw it by pressing the Spacebar while drawing.
To reposition a selection with the Spacebar:
1. Begin dragging to draw the selection.
2. Without releasing the mouse button, hold down the Spacebar.
3. Drag the marquee to another location on the canvas.
4. While still holding down the mouse button, release the Spacebar.
5. Continue dragging to draw the selection.
Selecting pixels 59
Page 60

Adding to a pixel selection
After drawing a selection marquee with any bitmap selection tool, you can add to the
selection with the same tool or another bitmap selection tool.
To add to an existing pixel selection:
1. Select any bitmap selection tool.
2. Hold down Shift and draw additional selection marquees.
3. Repeat steps 1 and 2 with any bitmap selection tool to continue adding to the selection.
Overlapping marquees join to form a contiguous marquee.
Subtracting pixels from a selection
You can subtract pixels from a selection, or punch out parts of a selection, defining pixel areas
inside the original marquee that will no longer be part of the selection.
To subtract pixels from a selection:
■ Hold down Alt (Windows) or Option (Macintosh) and use a bitmap selection tool to
select the pixel area to be punched out.
Creating a marquee from intersecting marquees
You can select pixels in an existing marquee by drawing a marquee that overlaps the original.
To select a pixel area defined by the intersection of two marquees:
1. Hold down Alt+Shift (Windows) or Option+Shift (Macintosh) while creating a new
marquee selection that overlaps the original marquee.
2. Release the mouse button.
Only the pixels in the intersection area of the two marquees are selected.
Using thumbnails and modifier keys to modify pixel selections
With a bitmap selected, you can create a pixel selection on that bitmap using the opacity of
any object or mask in the Layers panel. For more information about the Layers panel, see
“Working with layers” on page 204.
60 Chapter 3: Selecting and Transforming Objects
Page 61

To create or replace a pixel selection on a selected bitmap using the opacity of
an object:
1. In the Layers panel, position the pointer over the thumbnail of the object you want to use
to create the pixel selection.
2. Hold down Control (Windows) or Command (Macintosh).
The pointer changes to indicate you are about to select the alpha channel, or the opaque
area, of the object.
3. Click the thumbnail.
A new pixel selection is created on the selected bitmap.
To add to the current pixel selection:
■ Control-Shift-click (Windows) or Command-Shift-click (Macintosh) the thumbnail of an
object in the Layers panel to add the shape of its opaque area to the current pixel selection.
TIP
When you position the pointer over the thumbnail and hold down the specified
modifier keys, the pointer indicates that you are about to add to the pixel selection.
To subtract from the current pixel selection:
■ Control-Alt-click (Windows) or Command-Option-click (Macintosh) the thumbnail of
an object in the Layers panel to subtract the shape of its opaque area from the current
pixel selection.
TIP
When you position the pointer over the thumbnail and hold down the specified
modifier keys, the pointer indicates that you are about to subtract from the pixel
selection.
To create a pixel selection on a selected bitmap from the intersection of
overlapping objects:
1. Control-click (Windows) or Command-click (Macintosh) an object’s thumbnail to select
its alpha channel, or opaque area.
2. Control-Shift-Alt-click (Windows) or Command-Shift-Option-click (Macintosh)
another object.
A pixel selection is created on the selected bitmap from the intersection of the opaque
areas of the two overlapping objects.
TIP
When you position the pointer over the thumbnail and hold down the specified
modifier keys, the pointer indicates that you are about to create a pixel selection from
the intersection of the opaque areas of two overlapping objects.
Selecting pixels 61
Page 62

Creating an inverse pixel selection
Starting with a current pixel selection, you can create another pixel selection that selects all the
pixels that are not currently selected. You can use this method to select and then erase all
pixels surrounding the original selection, for example.
To create an inverse pixel selection:
1. Make a pixel selection using any bitmap selection tool.
2. Select Select > Inverse Selection.
All pixels that were not in the original selection are now selected.
Feathering a pixel selection
Feathering creates a see-through effect for the selected pixels. When using the Feather
command, you can try out various feather amounts and view the results before deselecting the
pixels. You can also feather a selection by setting a feather amount in the Property inspector
before or during your use of a bitmap selection tool. For more information, see “Bitmap
selection tool options” on page 55.
To feather a pixel selection:
1. Select Select > Feather.
2. Enter a Feather amount in the Feather dialog box.
The selection marquee changes size to reflect the feather amount.
3. If necessary, change the number in the Feather dialog box to adjust the feather amount.
4. Click OK.
TIP
To view the appearance of the feathered selection without the surrounding pixels,
select Select > Select Inverse, and then press Delete. You can then use the History
panel or Edit > Undo to try again.
Expanding or contracting a marquee
After you draw a marquee to select pixels, you can expand or contract its border.
To expand the border of a marquee:
1. After drawing the marquee, select Select > Expand Marquee.
2. Enter the number of pixels by which you want to expand the border of the marquee, and
click OK.
62 Chapter 3: Selecting and Transforming Objects
Page 63
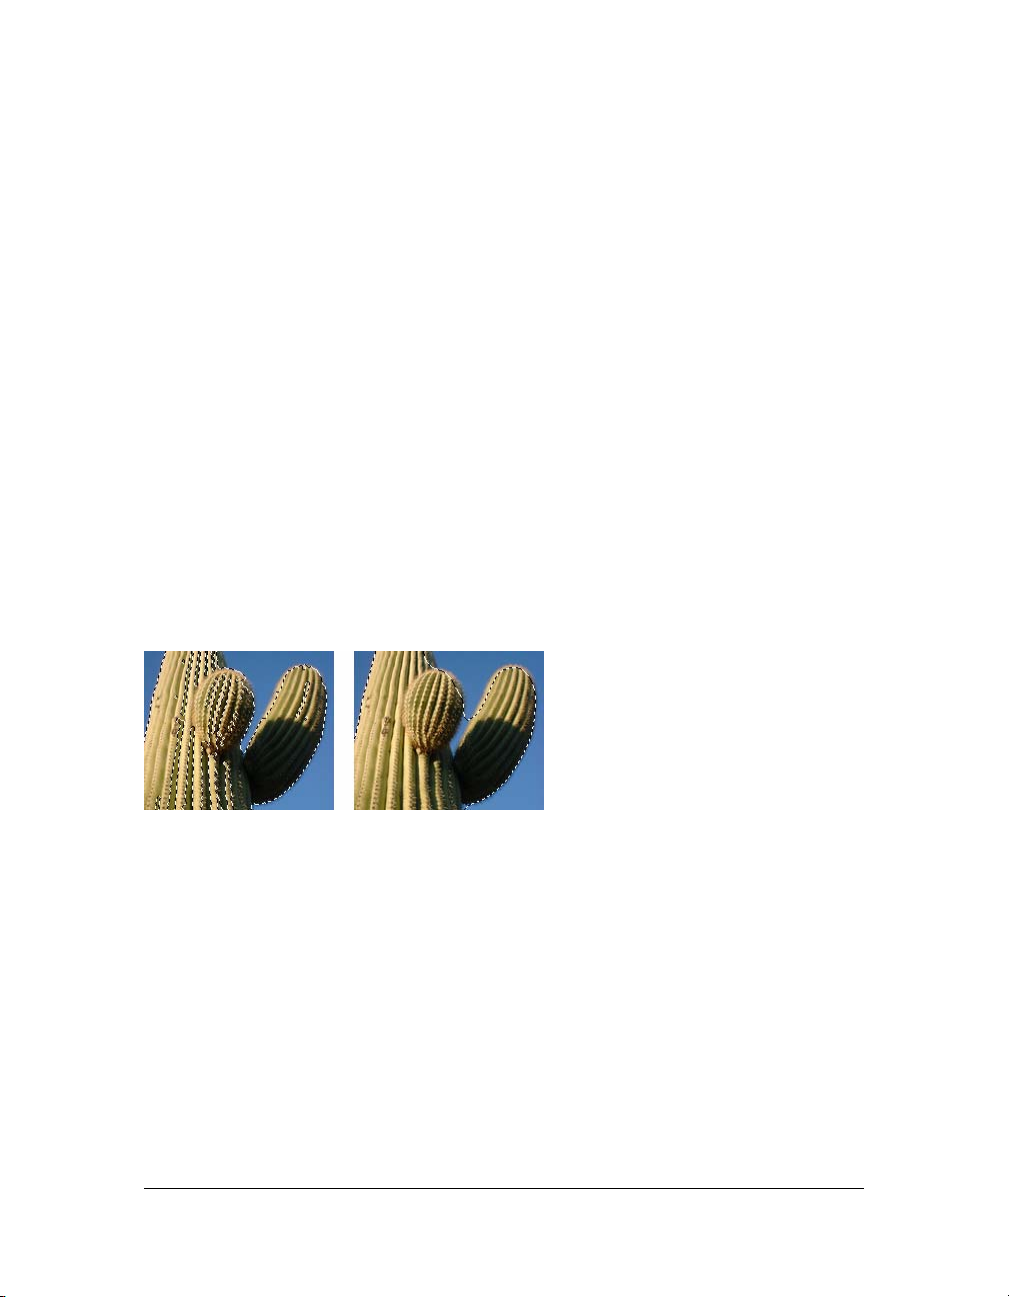
To contract the border of a marquee:
1. After drawing the marquee, select Select > Contract Marquee.
2. Enter the number of pixels by which you want to contract the border of the marquee, and
click OK.
Selecting an area around an existing marquee
You can create an additional marquee to frame an existing marquee at a specified width. This
lets you create special graphics effects, such as feathering the edges of a pixel selection.
To select an area around an existing marquee:
1. After drawing a marquee, select Select > Border Marquee.
2. Enter the width of the marquee that you want to place around the existing marquee, and
click OK.
Smoothing the border of a marquee
You can eliminate excess pixels along the edges of a pixel selection. This is useful if excess
pixels appear along the border of a pixel selection or marquee after you use the Magic Wand
tool.
A pixel selection before and after smoothing
To smooth the border of a marquee:
1. Select Select > Smooth Marquee.
2. Enter a sample radius to specify the desired degree of smoothing, and click OK.
Converting a marquee to a path
Using Fireworks, you can convert a bitmap selection to a vector object by drawing a marquee
around the part of the bitmap that you want to convert. This process is useful if you want to
start creating an animation by tracing a selection from a bitmap, for example.
Selecting pixels 63
Page 64

To convert a marquee to a path
■ After drawing a marquee, select Select > Convert Marquee to Path.
The document’s current stroke and fill attributes are applied to the new path.
Transferring a marquee selection
You can transfer a marquee selection from one bitmap to another bitmap object on the same
layer or one on a different layer. You can also transfer the marquee selection to a mask.
To transfer a marquee selection to another bitmap object:
1. Make a selection by drawing the marquee.
2. In the Layers panel, select a different bitmap object on the same layer or an object on a
different layer.
The marquee is transferred to that object.
NOTE
Fireworks treats masks and masked objects as separate objects. For more
information on masks, see “Masking images” on page 210.
Saving marquee selections
You can save the size, shape, and location of a selection to reapply later. You can also save
multiple marquee selections.
To save a marquee selection:
1. Select Select > Save Bitmap Selection to open the Save Selection dialog box.
2. The Document box displays the name of the active document in which your marquee
selection will be saved. You can either leave that name as is, or select another one from the
pop-up menu if you would rather save your marquee selection to another open document.
3. The Selection box displays the name of the active selection in the active document. If this
is a new selection, the word New appears by default. You can leave that as is, or if you want
to replace a previously saved selection with the new selection, select another saved selection
from the pop-up menu.
4. The Name box, which displays the word Default, is only enabled if the Selection box
displays the word New. If this is the case, select the word Default and type a name for your
new selection.
64 Chapter 3: Selecting and Transforming Objects
Page 65

5. If the Selection box displays the word New, the New selection will be enabled in the
Operation section of the Save Selection dialog box. If a previously saved selection is selected
in the Selection box, then all of the following options will be enabled in the Operation
section.
■ “Replace selection” replaces the active selection in the active document with the one
specified in the Selection box.
■ “Add to selection” adds the active selection to the one specified in the Document and
Selection boxes.
■ “Subtract from selection” subtracts the active selection from the one specified in the
Document and Selection boxes.
■ “Intersect with selection” intersects the active selection with the one specified in the
Document and Selection boxes.
6. Select an option in the Operation section, and then click OK.
Repeat this process for each of the marquee selections that you want to save.
Restoring marquee selections
You can restore a marquee selection that you have previously named and saved.
To restore a marquee selection:
1. Select Select > Restore Bitmap Selection to open the Restore Selection dialog box.
2. The Document box displays the name of the active document in which a marquee selection
has been saved. You can either leave that name as is, or select another one from the pop-up
menu if you would rather restore a marquee selection from another open document.
3. The Selection box displays the name of the selection that will be restored. If you want to
restore a different selection, select it from the pop-up menu.
4. If you want to invert the restored selection, select the Invert box.
5. If there is no active marquee selection in the current document, then New selection will be
enabled in the Operation section of the Restore Selection dialog box. If there is an active
marquee selection in the current document, then all of the following options will be
enabled in the Operation section.
■ “Replace selection” replaces the active selection in the active document with the one
specified in the Selection box.
■ “Add to selection” adds the active selection to the one specified in the Document and
Selection boxes.
Selecting pixels 65
Page 66

■ “Subtract from selection” subtracts the active selection from the one specified in the
Document and Selection boxes.
■ “Intersect with selection” intersects the active selection with the one specified in the
Document and Selection boxes.
6. Select an option in the Operation section, and then click OK
Repeat this process for each of the marquee selections that you want to restore.
Deleting marquee selections
You can delete a marquee selection that you have previously named and saved.
NOTE
This feature is enabled only if an open document contains at least one saved selection.
To delete a marquee selection:
1. Select Select > Delete Bitmap Selection to open the Delete Selection dialog box.
2. The Document box displays the name of the active document containing a marquee
selection. You can either leave that name as is, or select another one from the pop-up menu
if you want to delete a marquee selection from a different document.
3. The Selection box displays the name of the active selection in the active document. You
can leave that as is, or if you want to delete a different selection from the document that
appears in the Document box, select another selection from the pop-up menu.
4. To delete the selection that appears in the Selection box, click OK. To close the dialog box
without deleting any selections, click Cancel.
Creating and moving a floating pixel selection
When you drag a marquee to a new location, the marquee itself moves. If you want to move,
edit, cut, or copy a selection of pixels, you must first make the pixels a floating selection.
To create a floating pixel selection:
1. Make a pixel selection with a bitmap selection tool.
2. Do one of the following:
■ Hold down Control (Windows) or Command (Macintosh) and drag the selection
using any tool from the Bitmap section of the Tools panel.
■ Select the Pointer tool and drag the selection.
66 Chapter 3: Selecting and Transforming Objects
Page 67

To move a floating selection, do one of the following:
■ Drag the floating selection with the Pointer tool or any bitmap selection tool.
■ If a nonselection bitmap tool is active, hold down Control (Windows) or Command
(Macintosh) and drag the floating selection.
■ Use the arrow keys or Shift+arrow keys.
When you deselect the floating pixel selection or select any vector or web tool, the floating
selection becomes part of the current bitmap object.
Inserting a new bitmap by cutting or copying
You can insert a new bitmap based on a pixel selection into the current layer of a document by
cutting or copying the selected pixels.
To insert a new bitmap by cutting and pasting a pixel selection:
1. Select an area of pixels using a pixel selection tool.
2. Select Edit > Insert > Bitmap via Cut.
A new bitmap object based on the pixel selection is created in the current layer, and the
selected pixels are removed from the original bitmap object. In the Layers panel, a
thumbnail of the new bitmap appears in the current layer, above the object from which it
was cut.
To insert a new bitmap by copying and pasting a pixel selection:
1. Select an area of pixels using a pixel selection tool.
2. Select Edit > Insert > Bitmap via Copy.
A new bitmap object based on the pixel selection is created in the current layer, and the
selected pixels remain in the original bitmap object. In the Layers panel, a thumbnail of
the new bitmap appears in the current layer, above the object from which it was copied.
Selecting pixels 67
Page 68

Editing selected objects
Fireworks gives you a number of ways to edit selected objects: you can move objects on the
canvas or from application to application, you can replicate objects with the Clone and
Duplicate commands, or you can remove objects from the workspace altogether.
To move a selection, do one of the following:
■ Drag it with the Pointer, Subselection, or Select Behind tool.
■ Press any arrow key to move the selection in 1-pixel increments.
■ Hold down Shift while pressing any arrow key to move the selection in 10-pixel
increments.
■ In the Property inspector, enter the X and Y coordinates for the location of the top left
corner of the selection.
■ Enter the object’s x and y coordinates in the Info panel. If the X and Y boxes aren’t visible,
drag the bottom edge of the panel.
To move or copy selected objects by pasting:
1. Select an object or multiple objects.
2. Select Edit > Cut or Edit > Copy.
3. Select Edit > Paste.
To duplicate one or more selected objects:
■ Select Edit > Duplicate.
As you repeat the command, duplicates of the selected object appear in a cascading
arrangement from the original, 10 pixels lower and 10 pixels to the right of the previous
duplicate. The most recently duplicated object becomes the selected object.
NOTE
You cannot use the Duplicate or Clone commands with bitmap selections. Use the
Subselection tool or Rubber Stamp tool to duplicate parts of a bitmap image. For more
information about using the Subselection tool, see the following procedures. For more
information about using the Rubber Stamp tool, see “Retouching bitmaps” on page 86.
To duplicate a selected object by dragging:
■ Alt-drag (Windows) or Option-drag (Macintosh) the object using the Pointer tool.
To duplicate a pixel selection, do one of the following:
■ Drag the pixel selection using the Subselection tool.
■ Alt-drag (Windows) or Option-drag (Macintosh) the object using the Pointer tool.
68 Chapter 3: Selecting and Transforming Objects
Page 69
To clone a selection:
■ Select Edit > Clone.
The clone of the selection is stacked precisely in front of the original and becomes the
selected object.
NOTE
To move a selected clone away from the original with pixel-by-pixel precision, use
the arrow keys or Shift+arrow keys. This is a convenient way to maintain a specific
distance between clones or maintain the vertical or horizontal alignment of the
clones.
To delete selected objects, do one of the following:
■ Press Delete or Backspace.
■ Select Edit > Clear.
■ Select Edit > Cut.
■ Right-click (Windows) or Control-click (Macintosh) the object and select Edit > Cut
from the context menu.
To cancel or deselect a selection, do one of the following:
■ Select Select > Deselect.
■ Click anywhere in the image outside of the selected area if you are using the Marquee,
Oval Marquee, or Lasso tool.
■ Press Escape.
Transforming and distorting selected objects and selections
You can transform a selected object or group, or a pixel selection, using the Scale, Skew, and
Distort tools and menu commands:
Scale enlarges or reduces an object.
Skew slants an object along a specified axis.
Distort moves the sides or corners of an object in the direction you drag a selection
handle while the tool is active. This is helpful in creating a 3D look.
Transforming and distorting selected objects and selections 69
Page 70
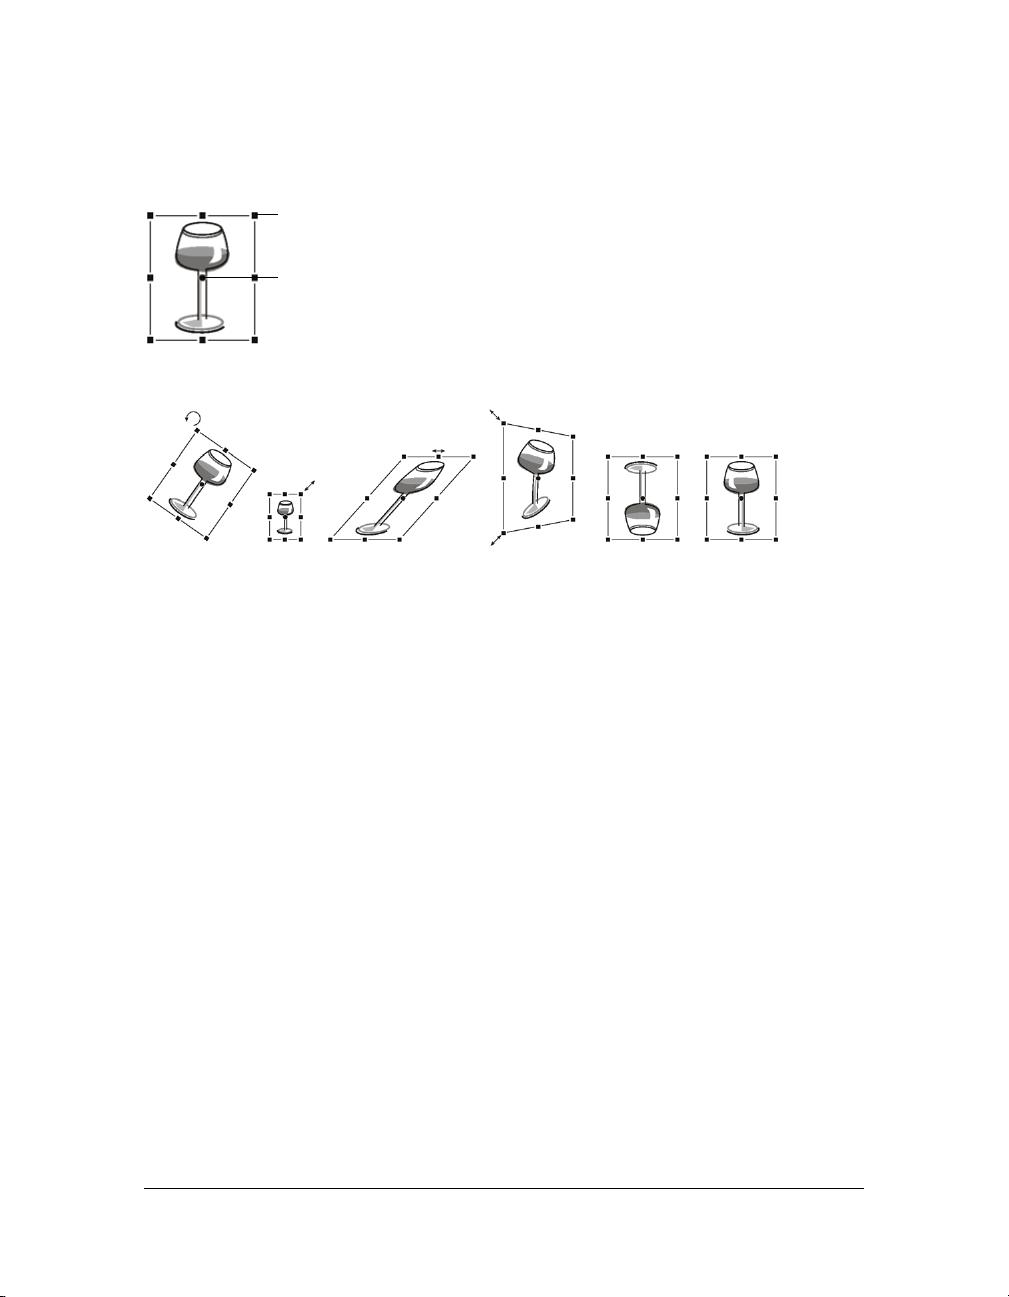
When you select any transformation tool or Transform menu command, Fireworks displays
transform handles around selected objects.
Transform handles
Center point
Original object
Object rotated, scaled, skewed, distorted, and flipped vertically and horizontally
To transform selected objects using the transform handles:
1. Select a transformation tool.
As you move the pointer on or near the selection handles, the pointer changes to indicate
the current transformation.
2. Do one of the following to transform the objects:
■ Place the pointer near a corner point and then drag to rotate.
■ Drag a transform handle to transform according to the active transformation tool.
3. Double-click inside the window or press Enter to apply your changes.
70 Chapter 3: Selecting and Transforming Objects
Page 71
Resizing (scaling) objects
Scaling an object enlarges or reduces it horizontally, vertically, or in both directions.
To scale a selected object:
1. Do one of the following to display the transform handles:
■ Select the Scale tool.
■ Select Modify > Transform > Scale.
2. Drag the transform handles:
■ To scale the object both horizontally and vertically, drag a corner handle. Proportions
are constrained if you press the Shift key as you scale.
■ To scale the object horizontally or vertically, drag a side handle.
■ To scale the object from the center, press Alt while dragging any handle.
NOTE
You can also resize selected objects by entering dimensions in the Property
inspector. For more information, see “Transforming objects numerically”
on page 73.
Rotating objects
When rotated, an object pivots on its center point. You rotate an object by selecting a preset
angle or by placing the pointer outside an object’s transform handles to display the rotation
pointer before you drag.
NOTE
You can also rotate the document canvas. For more information, see “Rotating the
canvas” on page 45.
To rotate a selected object 90° or 180°:
■ Select Modify > Transform and select a Rotate command from the submenu.
To rotate a selected object by dragging:
1. Select any transformation tool.
2. Move the pointer outside the object until the rotation pointer appears.
Transforming and distorting selected objects and selections 71
Page 72

3. Drag to rotate the object.
TIP
To constrain rotation to 15° increments relative to the horizon, Shift-drag the pointer.
4. Double-click inside the window or press Enter to apply your changes.
To relocate the axis of rotation:
■ Drag the center point away from the center.
To reset the axis of rotation to the center of the selection, do one of the
following:
■ Double-click the center point
■ Press Escape to deselect the object, then select it again.
Flipping objects
You can flip an object across its vertical or horizontal axis without moving its relative position
on the canvas.
To flip a selected object:
■ Select Modify > Transform > Flip Horizontal or Flip Vertical.
Skewing objects
Skewing an object transforms it by slanting it along the horizontal or vertical axis, or both
axes.
To skew a selected object:
1. Do one of the following to display the transform handles:
■ Select the Skew tool.
■ Select Modify > Transform > Skew.
2. Drag a handle to skew the object.
3. Double-click inside the window or press Enter to remove the transform handles.
To achieve the illusion of perspective:
■ Drag a corner point.
72 Chapter 3: Selecting and Transforming Objects
Page 73

Distorting objects
You change the size and proportions of an object by dragging a selection handle with the
Distort tool.
To distort a selected object:
1. Do one of the following to display the transform handles:
■ Select the Distort tool.
■ Select Modify > Transform > Distort.
2. Drag a handle to distort the object.
3. Double-click inside the window or press Enter to apply your changes.
Transforming objects numerically
Instead of dragging an object to scale, resize, or rotate it, you can transform it by entering
specific values.
To resize selected objects using the Property inspector or Info panel:
■ Enter new width (W) or height (H) measurements.
NOTE
If the W and H boxes aren’t visible in the Property inspector, click the expander
arrow to see all properties.
To scale or rotate selected objects using Numeric Transform:
1. Select Modify > Transform > Numeric Transform.
The Numeric Transform dialog box opens.
2. From the pop-up menu, select the type of transformation to perform on the current
selection: Scale, Resize, or Rotate.
3. Select Constrain Proportions to maintain horizontal and vertical proportions when scaling
or resizing a selection.
4. Select Scale Attributes to transform the fill, stroke, and effects of the object along with the
object itself.
5. Deselect Scale Attributes to transform the path only.
6. Type numeric values to transform the selection, then click OK.
Transforming and distorting selected objects and selections 73
Page 74

Viewing transformation information in the Info panel
The Info panel lets you view numerical transformation information for the currently selected
object. The information updates as you edit the object.
■ For scaling and free transformations, the Info panel shows the width (W) and height (H)
of the original object before transformation and the percentage of increase or decrease in
width and height during the transformation.
■ For skewing and distorting, the Info panel shows the skew angle in one-degree increments
and the X and Y pointer coordinates during the transformation.
To view transformation information as you transform a selection:
■ Select Window > Info.
Organizing objects
When working with multiple objects in a single document, you can use several techniques to
organize the document:
■ You can group individual objects to treat them as one or protect each object’s relationship
to the others in the group.
■ You can arrange objects behind or in front of other objects. The way objects are arranged
is called the stacking order.
■ You can align selected objects to an area of the canvas or to a vertical or horizontal axis.
Grouping objects
You can group individual selected objects and then manipulate them as if they were a single
object. For example, after drawing the petals of a flower as individual objects, you can group
them to select and move the entire flower as a single object.
You can edit groups without ungrouping them. You can select an individual object in a group
for editing without ungrouping the objects. You can also ungroup the objects at any time.
To group two or more selected objects:
■ Select Modify > Group.
To ungroup selected objects:
■ Select Modify > Ungroup.
74 Chapter 3: Selecting and Transforming Objects
Page 75
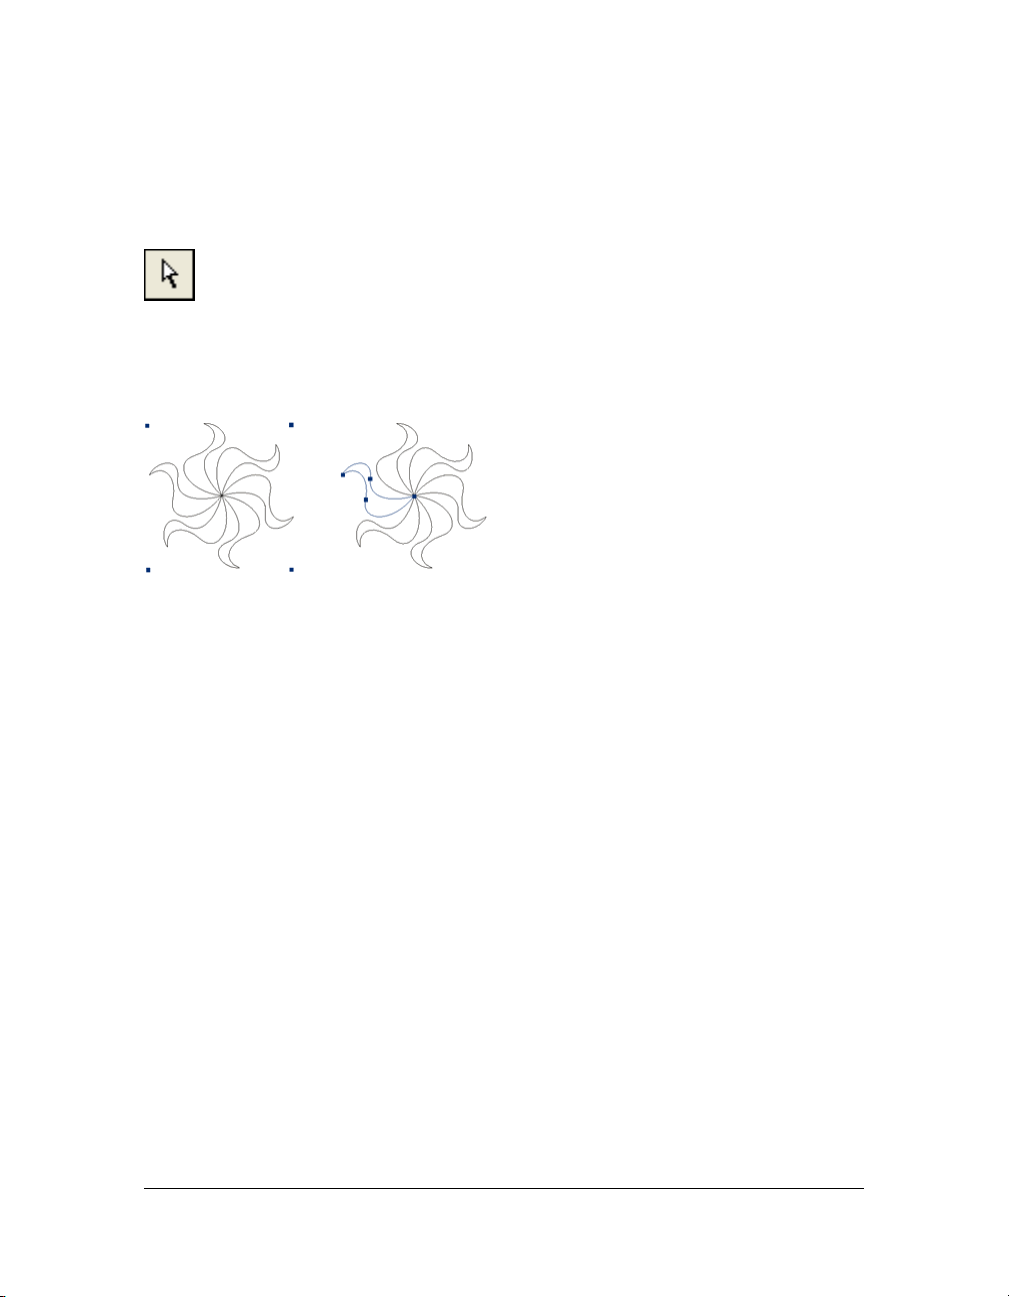
Selecting objects within groups
To work with individual objects within a group, you can either ungroup the objects or use the
Subselection tool to select individual objects while leaving the group intact.
Subselection tool
Modifying the attributes of a subselected object changes only the subselected object, not the
entire group. Moving a subselected object to another layer removes the object from the group.
Subselecting an object within a group
To select an object that is part of a group:
■ Select the Subselection tool and click the object or drag a selection area around it. To add
objects to or remove them from the selection, hold down Shift as you click or drag.
To select the group that contains a subselected object, do one of the following:
■ Right-click (Windows) or Control-click (Macintosh) anywhere in the group and select
Select > Superselect from the context menu.
■ Select Select > Superselect.
To select all objects within a selected group, do one of the following:
■ Right-click (Windows) or Control-click (Macintosh) anywhere on the group and select
Select > Subselect from the context menu.
■ Select Select > Subselect.
Stacking objects
Within a layer, Fireworks stacks objects based on the order in which they were created, placing
the most recently created object on the top of the stack. The stacking order of objects
determines how they appear when they overlap.
Organizing objects 75
Page 76

Layers also affect the stacking order. For example, suppose a document has two layers named
Layer 1 and Layer 2. If Layer 1 is listed below Layer 2 on the Layers panel, then everything on
Layer 2 appears in front of everything on Layer 1. You can change the order of layers by
dragging the layer in the Layers panel to a new position. For more information, see
“Organizing layers” on page 207.
To change the stacking order of a selected object or group within a layer:
■ Select Modify > Arrange > Bring to Front or Send to Back to move the object or group to
the top or bottom of the stacking order.
■ Select Modify > Arrange > Bring Forward or Send Backward to move the object or group
up or down one position in the stacking order.
If more than one object or group is selected, the objects move in front of or behind all
unselected objects while maintaining their order relative to one another.
Aligning objects
The Align commands in the Modify menu give you a wide range of arrangement options,
allowing you to do any of the following:
■ Align objects along a horizontal or vertical axis.
■ Align selected objects vertically along their right edge, center, or left edge, or horizontally
along their top edge, center, or bottom edge.
NOTE
Edges are determined by the bounding boxes enclosing each selected object.
■ Distribute selected objects so that their centers or edges are evenly spaced.
You can apply one or more Align commands to selected objects.
To align selected objects, do one of the following:
■ Select Modify > Align > Left to align the objects to the leftmost selected object.
■ Select Modify > Align > Center Vertical to align the center points of the objects along a
vertical axis.
■ Select Modify > Align > Right to align the objects to the rightmost selected object.
■ Select Modify > Align > Top to align the objects to the topmost selected object.
■ Select Modify > Align > Center Horizontal to align the center points of the objects along a
horizontal axis.
■ Select Modify > Align > Bottom to align the objects to the bottommost selected object.
76 Chapter 3: Selecting and Transforming Objects
Page 77

To evenly distribute the widths or heights of three or more selected objects:
■ Select Modify > Align > Distribute Widths or Modify > Align > Distribute Heights.
About arranging objects among layers
The Layers panel offers another dimension of organizational control. You can move selected
objects from one layer to another by dragging the object thumbnail or the blue selection
indicator in the Layers panel to another layer. For more information, see “Organizing layers”
on page 207.
Organizing objects 77
Page 78

78 Chapter 3: Selecting and Transforming Objects
Page 79

CHAPTER 4
Working with Bitmaps
Bitmaps are graphics composed of small colored squares called pixels, which combine like the
tiles of a mosaic to create an image. Examples of bitmap graphics include photographs,
scanned images, and graphics created from paint programs. They are sometimes referred to
as raster images.
Macromedia Fireworks 8 combines the functionality of photo-editing, vector-drawing, and
painting applications. You can create bitmap images by drawing and painting with bitmap
tools, by converting vector objects to bitmap images, or by opening or importing images.
Fireworks has a powerful set of Live Filters for tone and color adjustment, as well as a number
of ways to retouch your bitmap images, including cropping, feathering, and duplicating or
cloning images. In addition, Fireworks has a set of image-retouching tools—Blur, Sharpen,
Dodge, Burn, and Smudge.
For information on methods for selecting and transforming images and pixel areas, see
Chapter 3, “Selecting and Transforming Objects,” on page 51.
This chapter contains the following topics:
Working with bitmaps . . . . . . . . . . . . . . . . . . . . . . . . . . . . . . . . . . . . . . . . . . . . . . . . . . . . . 80
Creating bitmap objects . . . . . . . . . . . . . . . . . . . . . . . . . . . . . . . . . . . . . . . . . . . . . . . . . . .80
Accessing common photo editing tools all in one place . . . . . . . . . . . . . . . . . . . . . . . 82
Drawing, painting, and editing bitmap objects . . . . . . . . . . . . . . . . . . . . . . . . . . . . . . . . 83
Retouching bitmaps. . . . . . . . . . . . . . . . . . . . . . . . . . . . . . . . . . . . . . . . . . . . . . . . . . . . . . . 86
Adjusting bitmap color and tone . . . . . . . . . . . . . . . . . . . . . . . . . . . . . . . . . . . . . . . . . . . . 93
Blurring and sharpening bitmaps . . . . . . . . . . . . . . . . . . . . . . . . . . . . . . . . . . . . . . . . . . 104
Adding noise to an image . . . . . . . . . . . . . . . . . . . . . . . . . . . . . . . . . . . . . . . . . . . . . . . . . 109
4
79
Page 80

Working with bitmaps
The Bitmap section of the Tools panel contains bitmap selection and editing tools. To edit the
pixels of a bitmap in your document, you can select a tool from the Bitmap section. Unlike in
previous versions of Fireworks, you do not need to deliberately switch between bitmap mode
and vector mode, but you can still work with bitmaps, vector objects, and text. Switching to
the appropriate mode is as simple as selecting a vector or bitmap tool from the Tools panel.
NOTE
Previous versions of Fireworks display a striped border around the canvas to indicate
that Fireworks is in bitmap mode. If you prefer to see the familiar striped border when
working with bitmaps, you can select Bitmap Options > Display Striped Border from the
Edit category of the Preferences dialog box.
Creating bitmap objects
You can create bitmap graphics by using the Fireworks bitmap drawing and painting tools, by
cutting or copying and pasting pixel selections, or by converting a vector image into a bitmap
object. Another way to create a bitmap object is to insert an empty bitmap image in your
document and then draw, paint, or fill it.
When you create a new bitmap object, it is added to the current layer. In the Layers panel
with layers expanded, you can see a thumbnail and name for each bitmap object under the
layer on which it resides. Although some bitmap applications consider each bitmap object a
layer, Fireworks organizes bitmap objects, vector objects, and text as separate objects that
reside on layers. For more information, see “Working with layers” on page 204.
To create a new bitmap object:
1. Select the Brush or Pencil tool from the Bitmap section of the Tools panel.
2. Paint or draw with the Brush or Pencil tool to create bitmap objects on the canvas.
A new bitmap object is added to the current layer in the Layers panel. For more
information on using the Pencil or Brush tools, see “Drawing, painting, and editing
bitmap objects” on page 83.
You can create a new empty bitmap, and then draw or paint pixels in the empty bitmap.
80 Chapter 4: Working with Bitmaps
Page 81

To create an empty bitmap object, do one of the following:
■ Click the New Bitmap Image button in the Layers panel.
■ Select Edit > Insert > Empty Bitmap.
■ Draw a selection marquee, starting in a blank area of the canvas, and fill it. For more
information, see “Creating pixel selection marquees” on page 56.
An empty bitmap is added to the current layer in the Layers panel. If the empty bitmap is
deselected before any pixels have been drawn, imported, or otherwise placed on it, the
empty bitmap object automatically disappears from the Layers panel and the document.
To cut or copy pixels and paste them as a new bitmap object:
1. Make a pixel selection using the Marquee tool, Lasso tool, or Magic Wand tool.
For more information, see “Selecting pixels” on page 55.
2. Do one of the following:
■ Select Edit > Cut, then Edit > Paste.
■ Select Edit > Copy, then Edit > Paste.
■ Select Edit > Insert > Bitmap via Copy to copy the current selection into a new
bitmap.
■ Select Edit > Insert > Bitmap via Cut to cut the current selection for placement into a
new bitmap.
The selection appears in the Layers panel as an object on the current layer.
NOTE
You can also Right-click (Windows) or Control-click (Macintosh) a pixel marquee
selection and select a cut or copy option from the context menu. For more
information about the Bitmap via Cut and Bitmap via Copy options, see “Inserting a
new bitmap by cutting or copying” on page 67.
To convert selected vector objects to a bitmap image, do one of the following:
■ Select Modify > Flatten Selection.
■ Select Flatten Selection from the Layers panel Options menu.
A vector-to-bitmap conversion is irreversible, except when Edit > Undo or undoing
actions in the History panel is still an option. Bitmap images cannot be converted to
vector objects.
Creating bitmap objects 81
Page 82

Accessing common photo editing tools all in one place
To make it easy for you get started editing photos as quickly as possible, Fireworks has
assembled the most commonly used tools for photo editing all in one place. The Image
Editing panel contains the following tools:
Dodge, and Burn.
The Image Editing panel also contains:
■ Transform Tools: Scale, Skew, Distort, Free Rotate
■ Transform Commands: Numeric Transform, Rotate options, Flip Horizontal, Flip
Vertical, Remove Transformations
■ Adjust Color: Auto Levels, Brightness/Contrast, Curves, Hue/Saturation, Invert, Levels,
Convert to Grayscale, Convert to Sepia Tone
■ Filters: Blur, Blur More, Sharpen, Sharpen More, Unsharp Mask, Add Noise, Convert to
Alpha, Find Edges
■ View Options: Show/Hide Rulers, Show/Hide Grid, Snap/Don’t Snap to Grid, Edit Grid,
Show/Hide Guides, Snap/Don’t Snap to Guides, Lock/Unlock Guides, Edit Guides
The tools contained in the Image Editing panel are the same tools you’ll find in other places
in Fireworks (such as in the toolbox and on the Modify > Transform menu). The Image
Editing panel, which you can open by selecting Window > Image Editing, simply presents
some of the most commonly used tools all in one panel for your convenience.
For detailed information on how to use these tools and options, please see “Retouching
bitmaps” on page 86, “Adjusting bitmap color and tone” on page 93, “Blurring and
sharpening bitmaps” on page 104, and “Adding noise to an image” on page 109.
Red-eye Removal, Crop, Rotate, Blur, Sharpen,
82 Chapter 4: Working with Bitmaps
Page 83

Drawing, painting, and editing bitmap objects
The Bitmap section of the Tools panel contains tools for selecting, drawing, painting, and
editing pixels in a bitmap image.
Drawing bitmap objects
You can use the Pencil tool to draw 1-pixel lines, either freehand lines or constrained, straight
lines, much as you use a real pencil, with or without a ruler, to draw hard-edged lines. You can
also zoom in on a bitmap and use the Pencil tool to edit individual pixels.
To draw an object with the Pencil tool:
1. Select the Pencil tool.
2. Set tool options in the Property inspector:
Anti-aliased smooths the edges of the lines you draw.
Auto Erase uses the fill color when the Pencil tool is clicked over the stroke color.
Preserve Transparency restricts the Pencil tool to drawing only in existing pixels, not in
transparent areas of a graphic.
3. Drag to draw. Shift-drag to constrain the path to a horizontal, vertical, or diagonal line.
Painting bitmap objects
You can use the Brush tool to paint a brush stroke using the color in the Stroke Color box, or
you can use the Paint Bucket tool to change the color of selected pixels to the color in the Fill
Color box. With the Gradient tool, you can fill bitmap or vector objects with a combination
of colors in adjustable patterns.
To paint an object with the Brush tool:
1. Select the Brush tool.
2. Set the stroke attributes in the Property inspector.
3. Drag to paint.
For more information about setting Brush tool options, see “Working with strokes”
on page 177.
Drawing, painting, and editing bitmap objects 83
Page 84
To change the color of pixels to the color in the Fill Color box:
1. Select the Paint Bucket tool.
2. Select a color in the Fill Color box.
3. Set the tolerance value in the Property inspector.
NOTE
The tolerance determines how similar in color pixels must be to be filled. A low
tolerance value fills pixels with color values similar to the pixel you click. A high
tolerance fills pixels with a broader range of color values.
4. Click the image.
All pixels within the tolerance range change to the fill color.
To apply a gradient fill to a pixel selection:
1. Make the selection.
2. Select the Gradient tool.
3. Set the fill attributes in the Property inspector.
4. Click the pixel selection to apply the fill.
The Paint Bucket and Gradient tools can also fill selected vector objects. For more
information about creating, applying, and editing gradient fills, see “Working with fills”
on page 182.
Sampling a color to use as a stroke or fill color
With the Eyedropper tool, you can sample color from an image to designate a new stroke or
fill color. You can sample the color of a single pixel, an average of color values within a 3-by-3pixel area, or an average of color values within a 5-by-5-pixel area.
To sample a stroke or fill color:
1. If the correct attribute is not already active, do one of the following:
■ Click the stroke icon next to the Stroke Color box in the Tools panel to make it the
active attribute.
■ Click the fill icon next to the Fill Color box in the Tools panel to make it the active
attribute.
NOTE
Do not click the color box itself. If you do, the eyedropper pointer that appears is not
the Eyedropper tool. For information on the color box eyedropper pointer, see
“Sampling colors from a color pop-up window” on page 177.
2. Open a Fireworks document or any file that Fireworks can open. For more information,
see Chapter 11, “Slices, Rollovers, and Hotspots,” on page 251.
84 Chapter 4: Working with Bitmaps
Page 85
3. Select the Eyedropper tool from the Colors section of the Tools panel. Set the Color
Averaging Sample setting in the Property inspector:
1-pixel creates a stroke or fill color from a single pixel.
3x3 pixels creates a stroke or fill color from the average of color values in a 3-by-3-pixel
area.
5x5 pixels creates a stroke or fill color from the average of color values in a 5-by-5-pixel
area.
4. Click the Eyedropper tool anywhere in the document.
The sampled color appears in all Stroke Color or Fill Color boxes throughout Fireworks.
Erasing bitmap objects
You can use the Eraser tool to remove pixels. By default, the Eraser tool pointer represents the
size of the current eraser, but you can change the size and appearance of the pointer in the
Preferences dialog box. For more information, see “Editing preferences” on page 446.
Eraser tool
To erase pixels in a selected bitmap object or pixel selection:
1. Select the Eraser tool.
2. In the Property inspector, select the round or square eraser shape.
3. Drag the Edge slider to set the softness of the eraser’s edge.
4. Drag the Size slider to set the size of the eraser.
5. Drag the Eraser Opacity slider to set the degree of opacity.
6. Drag the Eraser tool over the pixels you want to erase.
Drawing, painting, and editing bitmap objects 85
Page 86
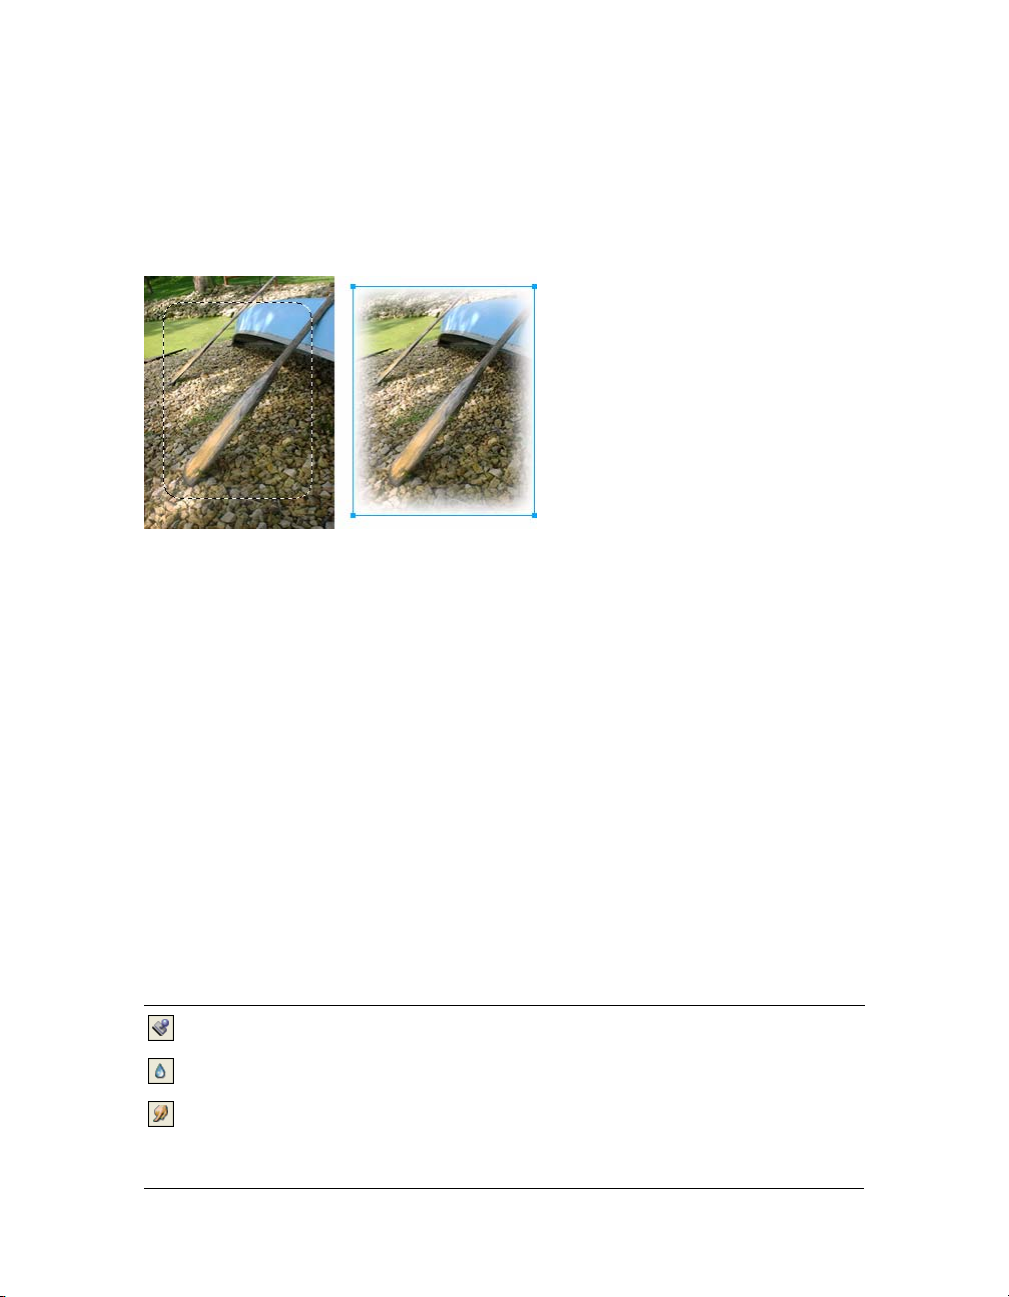
Feathering pixel selections
Feathering blurs the edges of a pixel selection and helps the selected area blend with
the surrounding pixels. Feathering is useful when you copy a selection and paste it onto
another background.
To feather the edges of a pixel selection as you make a pixel selection:
1. Select a bitmap selection tool from the Tools panel.
2. Select Feather from the Edge pop-up menu in the Property inspector.
3. Drag the slider to set the number of pixels you want to blur along the edge of the selection.
4. Make a selection.
To feather the edges of a pixel selection from the menu bar:
1. Select Select > Feather.
2. Type a value in the Feather Selection dialog box to set the feather radius, and click OK.
The radius value determines the number of pixels that are feathered on each side of the
selection border.
Retouching bitmaps
Fireworks provides a wide range of tools to help you retouch your images. You can alter an
image’s size, reduce or sharpen its focus, or copy and “stamp” a part of it to another area.
The Rubber Stamp tool lets you copy or clone one area of an image to another.
The Blur tool decreases the focus of selected areas in an image.
The Smudge tool picks up color and pushes it in the direction that you drag in an image.
86 Chapter 4: Working with Bitmaps
Page 87

The Sharpen tool sharpens areas in an image.
The Dodge tool lightens parts of an image.
The Burn tool darkens parts of an image.
The Red-eye Removal tool reduces the appearance of red eye in photos
The Replace Color tool paints over one color with another color
Cloning pixels
The Rubber Stamp tool clones an area of a bitmap image so that you can stamp it elsewhere in
the image. Cloning pixels is useful when you want to fix a scratched photograph or remove
dust from an image; you can copy a pixel area of a photo and replace the scratch or dust spot
with the cloned area.
To clone portions of a bitmap image:
1. Select the Rubber Stamp tool.
2. Click an area to designate it as the source, or the area you want to clone.
The sampling pointer becomes a cross-hair pointer.
NOTE
To designate a different area of pixels to clone, you can Alt-click (Windows) or
Option-click (Macintosh) another area of pixels to designate it as the source.
3. Move to a different part of the image and drag the pointer.
You will see two pointers. The first one, the source of the cloning, is in the shape of a cross
hair. For more information, see “Editing preferences” on page 446.
Depending upon the brush preferences you’ve selected, the second pointer is a rubber
stamp, a cross hair, or a blue circle. As you drag the second pointer, pixels beneath the first
pointer are copied and applied to the area beneath the second.
Retouching bitmaps 87
Page 88

To set Rubber Stamp tool options:
1. Select the Rubber Stamp tool.
2. Select from among the following options in the Property inspector:
Size determines the size of the stamp.
Edge determines the softness of the stroke (100% is hard; 0% is soft).
Source Aligned affects the sampling operation. When Source Aligned is selected, the
sampling pointer moves vertically and horizontally in alignment with the second. When
Source Aligned is deselected, the sample area is fixed, regardless of where you move and
click the second pointer.
Use Entire Document samples from all objects on all layers. When this option is
deselected, the Rubber Stamp tool samples from the active object only.
Opacity determines how much of the background can be seen through the stroke.
Blend Mode affects how the cloned image affects the background.
To duplicate a pixel selection, do one of the following:
■ Drag the pixel selection with the Subselection tool.
■ Alt-drag (Windows) or Option-drag (Macintosh) the pixel selection using the Pointer
tool.
Blurring, sharpening, and smudging pixels
The Blur and Sharpen tools affect the focus of pixels. The Blur tool lets you emphasize or
deemphasize parts of an image by selectively blurring the focus of elements, much as a
photographer controls depth of field. The Sharpen tool can be useful for repairing scanning
problems or out-of-focus photographs. The Smudge tool lets you gently blend colors, as when
creating a reflection of an image.
To blur or sharpen an image:
1. Select the Blur or Sharpen tool.
2. Set brush options in the Property inspector:
Size sets the size of the brush tip.
Edge specifies the softness of the brush tip.
Shape sets a round or square brush tip shape.
Intensity sets the amount of blurring or sharpening.
3. Drag the tool over the pixels to be sharpened or blurred.
TIP
Hold down Alt (Windows) or Option (Macintosh) to change from one tool behavior to
the other.
88 Chapter 4: Working with Bitmaps
Page 89

To smudge colors in an image:
1. Select the Smudge tool.
2. Set the tool options in the Property inspector:
Size specifies the size of the brush tip.
Shape sets a round or square brush tip shape.
Edge specifies the softness of the brush tip.
Pressure sets the intensity of the stroke.
Smudge Color allows you to smudge using a specified color at the beginning of each
stroke. If this option is deselected, the tool uses the color under the tool pointer.
Use Entire Document smudges using color data from all objects on all layers. If this
option is deselected, the Smudge tool uses colors from the active object only.
3. Drag the tool over the pixels to be smudged.
Lightening and darkening pixels
You use the Dodge or Burn tool to lighten or darken parts of an image, respectively. This is
similar to the darkroom technique of increasing or decreasing light exposure as the
photograph is developed.
To lighten or darken parts of an image:
1. Select the Dodge tool to lighten parts of an image or the Burn tool to darken parts of an
image.
2. Set the brush options in the Property inspector:
Size sets the size of the brush tip.
Shape sets a round or square brush tip shape.
Edge sets the softness of the brush tip.
3. Set the exposure in the Property inspector.
The exposure ranges from 0% to 100%. For a lessened effect, specify a lower percentage
value; for a stronger effect, specify a higher value.
4. Set the range in the Property inspector:
Shadows changes mainly the dark portions of the image.
Highlights changes mainly the light portions of the image.
Midtones changes mainly the middle range per channel in the image.
5. Drag over the part of the image you want to lighten or darken.
Hold down Alt (Windows) or Option (Macintosh) as you drag the tool to temporarily
switch from the Dodge tool to the Burn tool or from the Burn tool to the Dodge tool.
Retouching bitmaps 89
Page 90
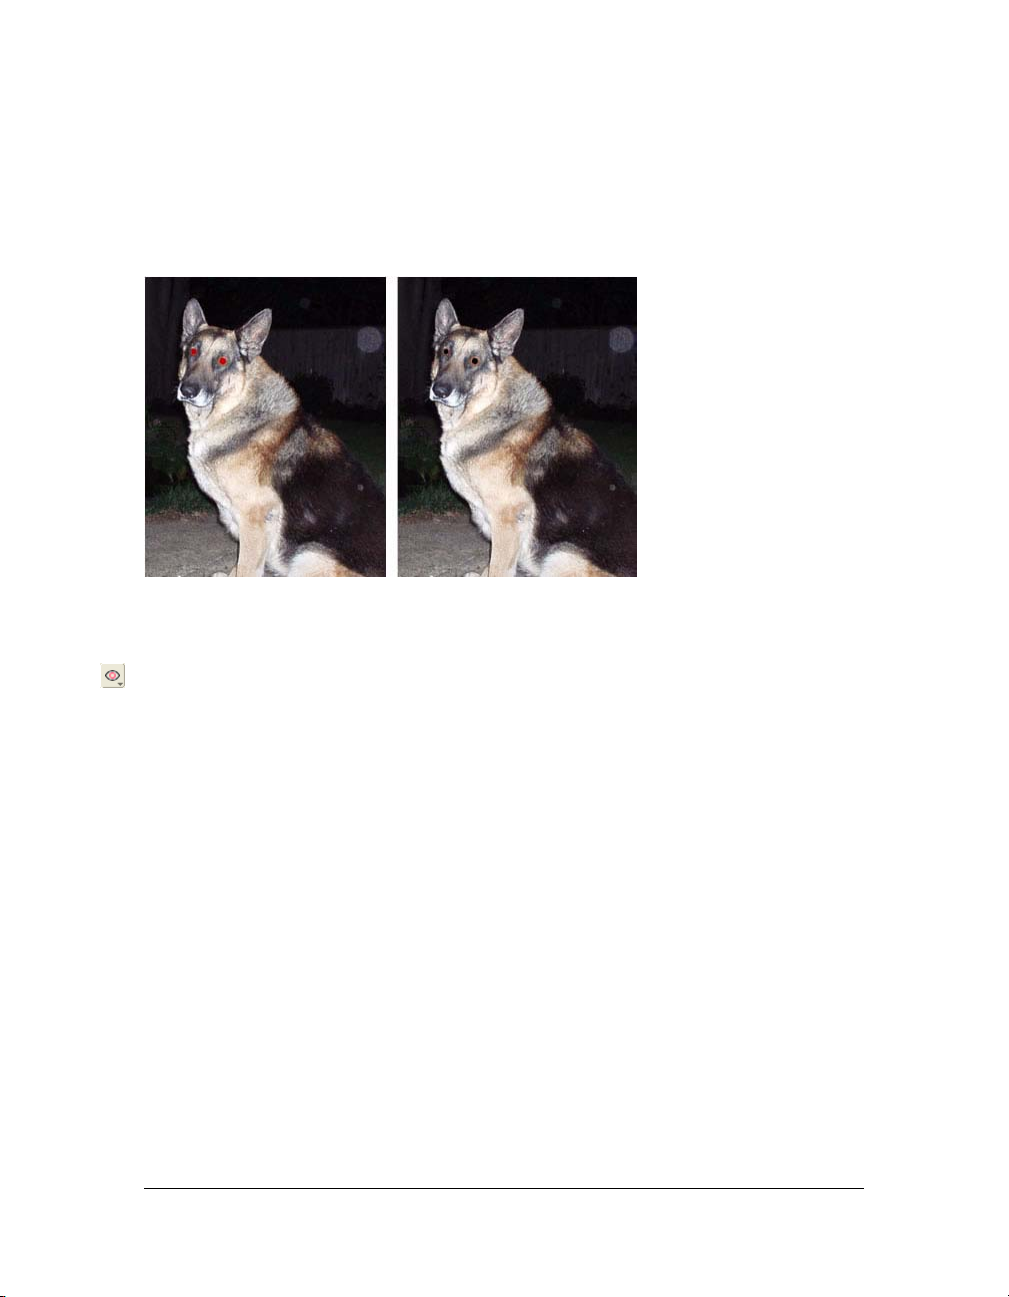
Removing red-eye from photos
In some photographs, the subjects’ pupils are an unnatural shade of red. You can use the Redeye Removal tool to correct this red-eye effect. The Red-eye Removal tool quickly paints red
areas of a photograph only, replacing reddish colors with grays and blacks.
Original photograph; after using the Red-eye Removal tool
To correct the red-eye effect in a photograph:
1. Select the Red-eye Removal tool from its pop-up menu.
2. Set the attributes in the Property inspector:
Tolerance determines the range of hues to replace (0 replaces only red; 100 replaces all
hues that contain red).
Strength sets the darkness of the grays used to replace reddish colors.
3. Click and drag the cross-hair pointer over the red pupils in the photograph.
90 Chapter 4: Working with Bitmaps
Page 91
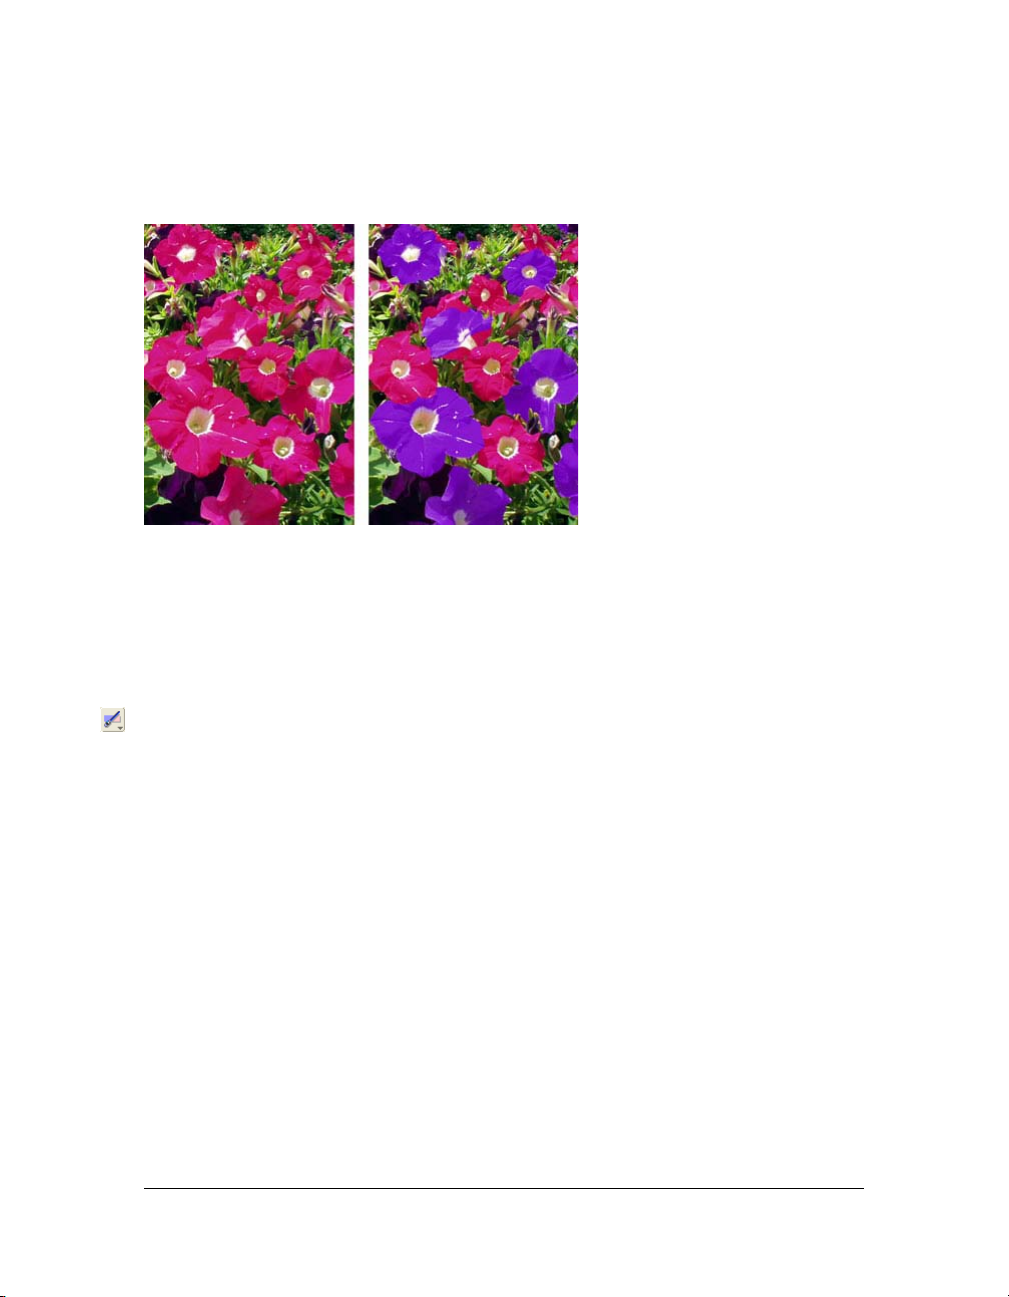
Replacing colors
The Replace Color tool lets you select a color and paint over that color with a different color.
Original photograph; after using the Replace Color tool
Fireworks provides two different ways to replace one color with another. You can replace a
color that you’ve specified in the color swatch, or you can replace a color by using the Replace
Color tool directly on the image.
To replace one color with another using the color swatch:
1. Select the Replace Color tool from its pop-up menu.
2. In the From box in the Property inspector, click Swatch.
3. Click the From color well to select the color probe, and select a color from the pop-up
menu to specify the color you want to replace.
4. Click the To color well in the Property inspector and select a color from the pop-up menu.
5. Set the other stroke attributes in the Property inspector:
Size sets the size of the brush tip.
Shape sets a round or square brush tip shape.
Tolerance determines the range of colors to replace (0 replaces only the To color; 255
replaces all colors similar to the To color).
Strength determines how much of the Change color is replaced.
Colorize replaces the Change color with the To color. Deselect Colorize to tint the
Change color with the To color, leaving some of the Change color intact.
6. Drag the tool over the color you want to replace.
Retouching bitmaps 91
Page 92

To replace one color with another by selecting a color on the image:
1. Select the Replace Color tool from its pop-up menu.
2. In the From box in the Property inspector, click Image.
3. Click the To color well in the Property inspector to select the color probe, then select a
color from the pop-up menu.
4. Set the other stroke attributes in the Property inspector:
Size sets the size of the brush tip.
Shape sets a round or square brush tip shape.
Tolerance determines the range of colors to replace (0 replaces only the To color; 255
replaces all colors similar to the To color).
Strength determines how much of the Change color is replaced.
Colorize replaces the From color with the To color. Deselect Colorize to tint the From
color with the To color, leaving some of the From color intact.
5. Using the tool, click down on a section of the bitmap image that contains the color you
want to replace. Without lifting the tool, continue to brush across the image with it. The
color that you clicked down on when you initiated the brushing action will be replaced by
the color you’ve specified in the To color well.
Cropping a selected bitmap
You can isolate a single bitmap object in a Fireworks document and crop only that bitmap
object, leaving other objects on the canvas intact.
To crop a bitmap image without affecting other objects in the document:
1. Select a bitmap object by clicking the object on the canvas or by clicking its thumbnail in
the Layers panel, or draw a selection marquee using a bitmap selection tool.
2. Select Edit > Crop Selected Bitmap.
The crop handles appear around the entire selected bitmap or around the selection
marquee, if you drew one in step 1.
92 Chapter 4: Working with Bitmaps
Page 93
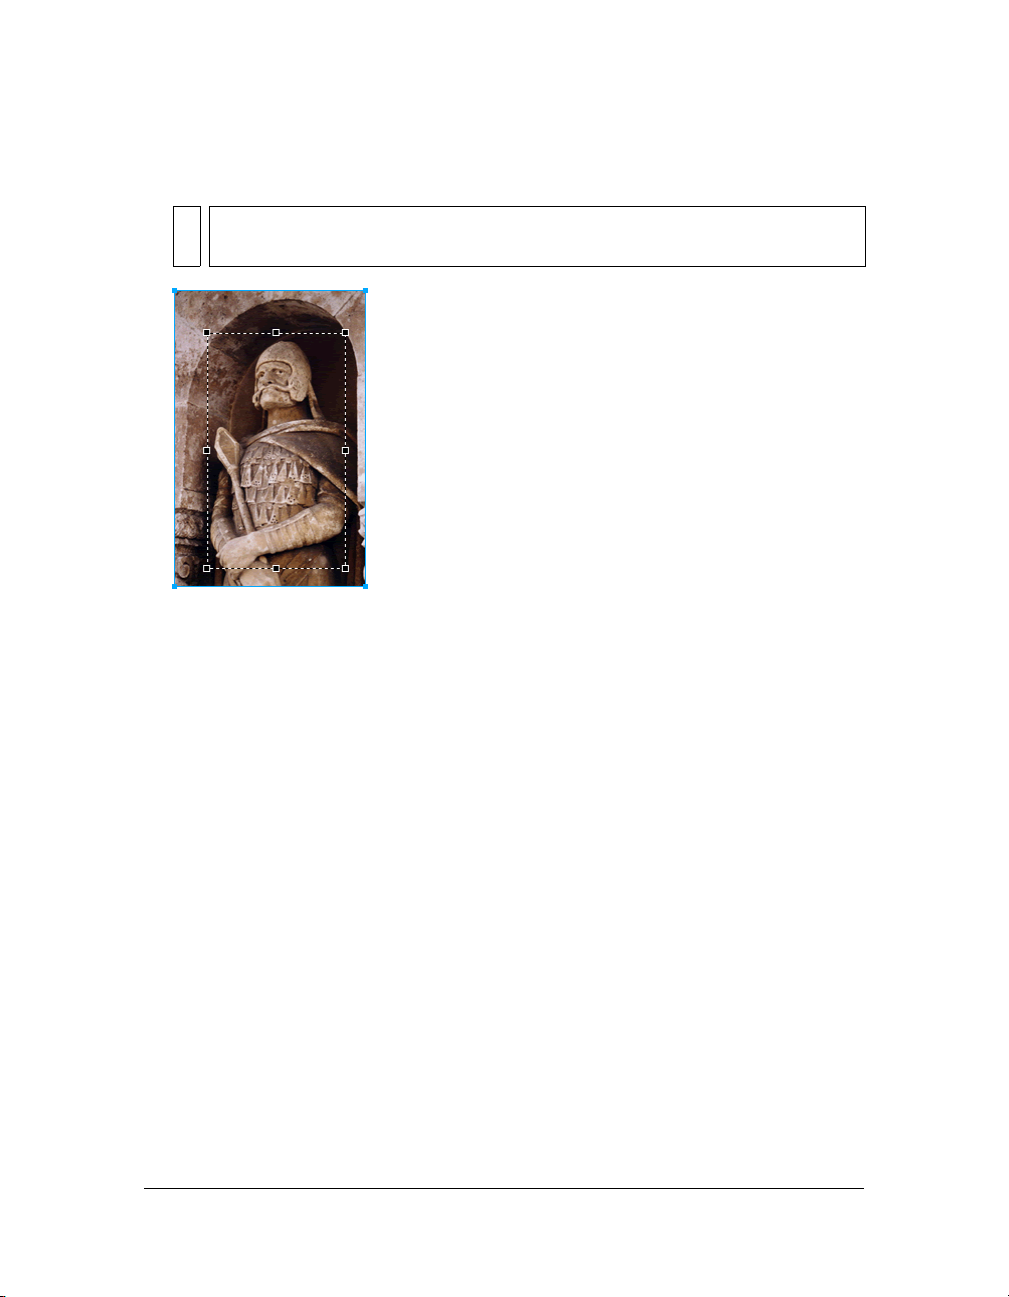
3. Adjust the crop handles until the bounding box surrounds the area of the bitmap image
that you want to keep.
NOTE
To cancel a crop selection, press Escape.
Bounding box
4. Double-click inside the bounding box or press Enter to crop the selection.
Every pixel in the selected bitmap outside the bounding box is removed, but other objects
in the document remain.
Adjusting bitmap color and tone
Fireworks has color- and tone-adjustment filters to help you improve and enhance the colors
in your bitmap images. You can adjust the contrast and brightness, the tonal range, and the
hue and color saturation of your images.
Applying filters as Live Filters from the Property inspector is nondestructive. Live Filters do
not permanently alter the pixels; you can remove or edit them anytime.
If you prefer to apply filters in an irreversible, permanent way, you can select them from the
Filters menu. However, Macromedia recommends that you use filters as Live Filters whenever
possible.
You can apply filters from the Filters menu to pixel selections, but not Live Filters. You can,
however, define an area of a bitmap and create a separate bitmap from it, and then apply a
Live Filter to it.
Adjusting bitmap color and tone 93
Page 94

If you apply a filter to a selected vector object using the Filters menu, Fireworks converts the
selection to a bitmap.
To apply a Live Filter to an area defined by a bitmap selection marquee:
1. Select a bitmap selection tool and draw a selection marquee.
2. Select Edit > Cut.
3. Select Edit > Paste.
Fireworks pastes the selection exactly where the pixels were originally located, but the
selection is now a separate bitmap object.
4. Click the thumbnail of the new bitmap object in the Layers panel to select the bitmap
object.
5. Apply a Live Filter from the Property inspector.
Fireworks applies the Live Filter only to the new bitmap object, simulating the application
of a filter to a pixel selection.
NOTE
Although Live Filters are more flexible, large numbers of Live Filters in a document
can slow down Fireworks performance. For more information, see “Controlling
document redraw” on page 41.
Adjusting tonal range
You can use the Levels and Curves features to adjust a bitmap’s tonal range. With Levels, you
can correct bitmaps that contain a high concentration of pixels in the highlights, midtones, or
shadows. Or you can use Auto Levels and let Fireworks adjust the tonal range for you. If you
want more precise control over a bitmap’s tonal range, you can use the Curves feature, which
lets you adjust any color along the tonal range without affecting other colors.
Using the Levels feature
A bitmap with a full tonal range should have an even number of pixels in all areas. The
Levels feature corrects bitmaps with a high concentration of pixels in the highlights,
midtones, or shadows.
Highlights corrects an excess of light pixels, which makes the image look washed out.
Midtones corrects an excess of pixels in the midtones, which makes the image bland.
Shadows corrects an excess of dark pixels, which hides much of the detail.
94 Chapter 4: Working with Bitmaps
Page 95
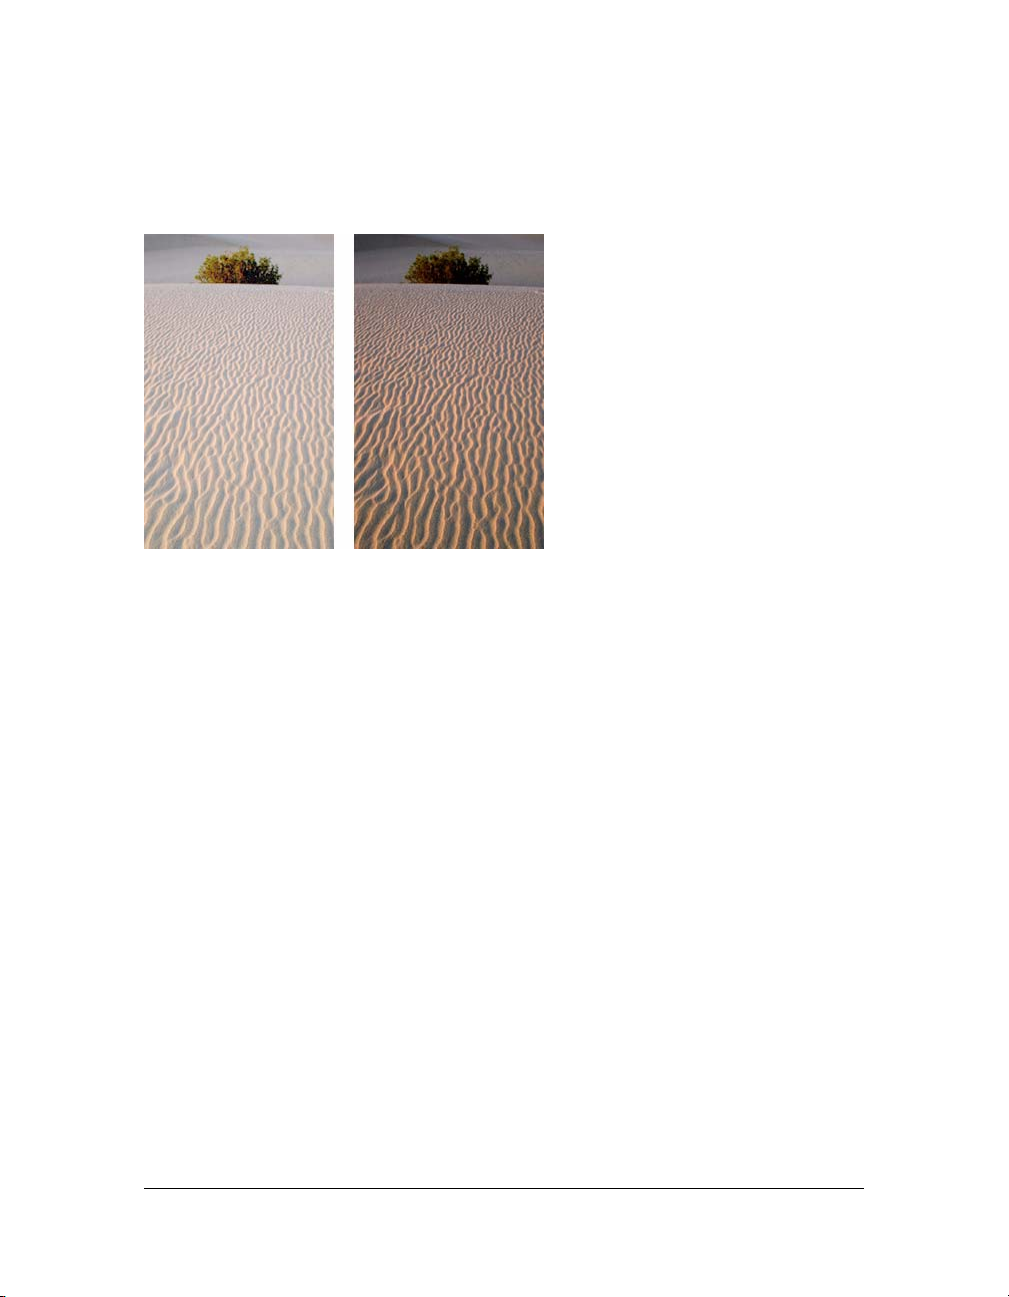
The Levels feature sets the darkest pixels as black and the lightest pixels as white, then
redistributes the midtones proportionally. This produces an image with the sharpest detail in
all of its pixels.
Original with pixels concentrated in the highlights; after adjusting with Levels
You can use the Histogram in the Levels dialog box to view the pixel distribution of a bitmap.
The Histogram is a graphical representation of the distribution of pixels in the highlights,
midtones, and shadows.
The Histogram helps you determine the best method of correcting an image’s tonal range. A
high concentration of pixels in the shadows or highlights indicates that you could improve the
image by applying the Levels or Curves feature.
The horizontal axis represents color values from darkest (0) to brightest (255). Read the
horizontal axis from left to right: the darker pixels are on the left, the midtone pixels are in the
center, and the brighter pixels are on the right.
The vertical axis represents the number of pixels at each brightness level. Typically, you should
adjust the highlights and shadows first. Adjusting the midtones second lets you improve their
brightness value without affecting the highlights and shadows.
Adjusting bitmap color and tone 95
Page 96
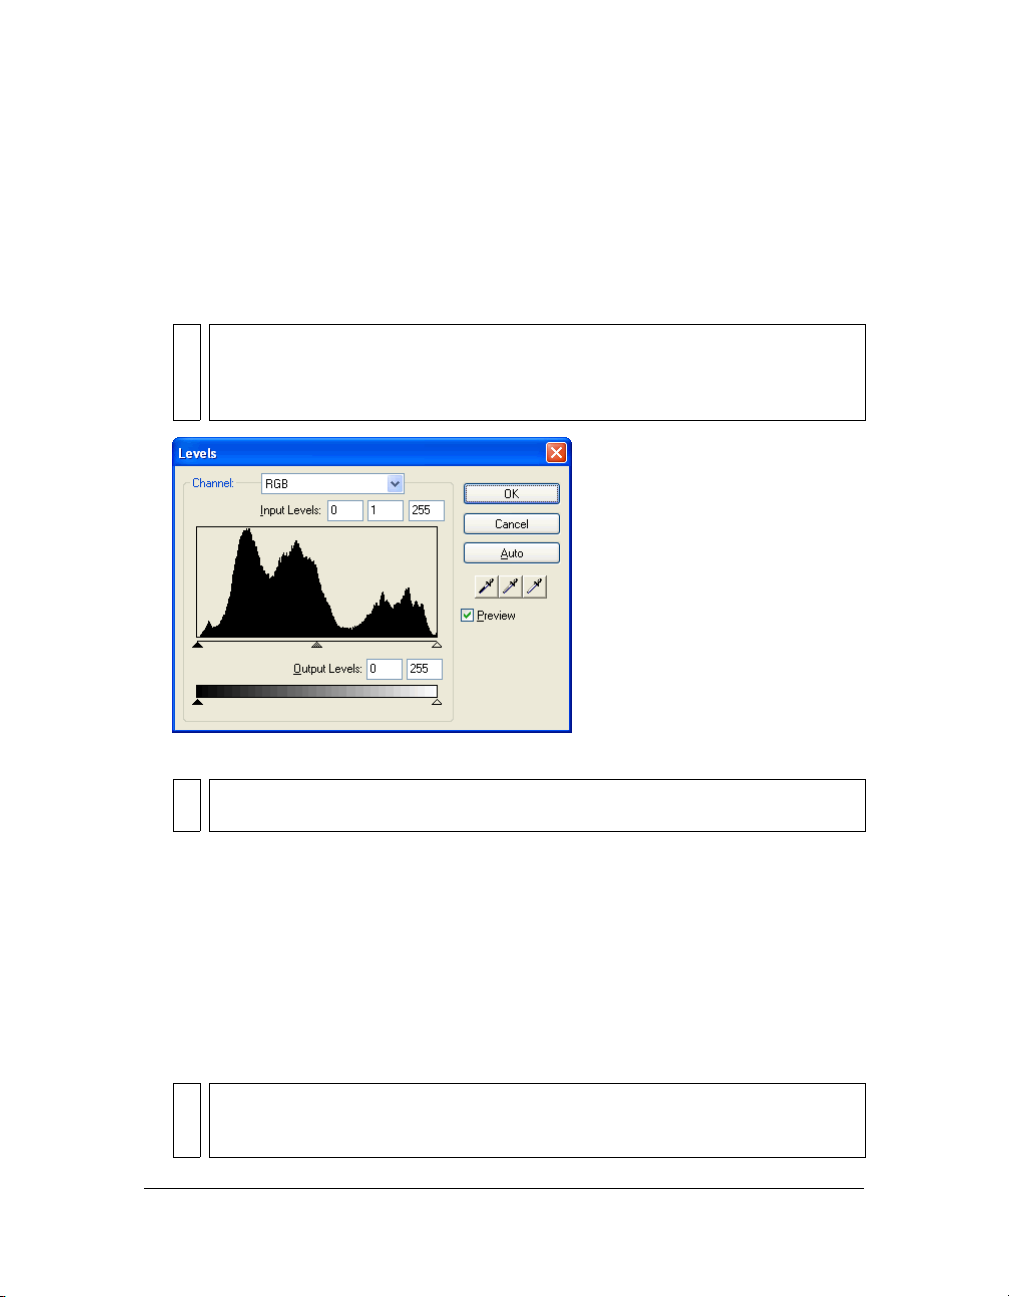
To adjust highlights, midtones, and shadows:
1. Select the bitmap image.
2. Do one of the following to open the Levels dialog box:
■ In the Property inspector, click the Add Live Filters button, and then select Adjust
Color > Levels from the Filters pop-up menu.
■ Select Filters > Adjust Color > Levels.
NOTE
Applying a filter from the Filters menu is destructive; that is, it cannot be undone
except when Edit > Undo is an option. To maintain the ability to adjust, turn off, or
remove this filter, apply it as a Live Filter, as described in the first bulleted option in
this step. For more information, see Chapter 8, “Using Live Filters,” on page 193.
Levels dialog box
TIP
To view your changes in the workspace, select Preview in the dialog box. As you
make changes, the image updates automatically.
3. In the Channel pop-up menu, select whether you want to apply changes to individual color
channels (Red, Blue, or Green) or to all color channels (RGB).
4. Drag the Input Levels sliders under the Histogram to adjust the highlights, midtones, and
shadows:
■ The right slider adjusts the highlights using values from 255 to 0.
■ The center slider adjusts the midtones using values from 10 to 0.
■ The left slider adjusts the shadows using values from 0 to 255.
As you move the sliders, the values are automatically entered in the Input Levels boxes.
NOTE
The shadow value cannot be higher than the highlight value; the highlight value
cannot be lower than the shadow value; and the midtones must fall between the
shadow and highlight settings.
96 Chapter 4: Working with Bitmaps
Page 97
5. Drag the Output Levels sliders to adjust the contrast values in the image:
■ The right slider adjusts the highlights using values from 255 to 0.
■ The left slider adjusts the shadows using values from 0 to 255.
As you move the sliders, the values are automatically entered in the Output Levels boxes.
Using Auto Levels
You can use Auto Levels to have Fireworks make tonal range adjustments for you.
To adjust highlights, midtones, and shadows automatically:
1. Select the image.
2. Do one of the following to select Auto Levels:
■ In the Property inspector, click the Add Live Filters button, and then select Adjust
Color > Auto Levels from the Filters pop-up menu.
■ Select Filters > Adjust Color > Auto Levels.
NOTE
Applying a filter from the Filters menu is destructive; that is, it cannot be undone
except when Edit > Undo is an option. To maintain the ability to adjust, turn off, or
remove this filter, apply it as a Live Filter, as described in the first bulleted option in
this step. For more information, see Chapter 8, “Using Live Filters,” on page 193.
TIP
You can also adjust highlights, midtones, and shadows automatically by clicking the
Auto button in the Levels or Curves dialog box.
Using Curves
The Curves feature is similar to the Levels feature but it provides more precise control over the
tonal range. Whereas Levels uses highlights, shadows, and midtones to correct the tonal range,
Curves lets you adjust any color along the tonal range, instead of only three variables, without
affecting other colors. For example, you can use Curves to correct for a color cast caused by
lighting conditions.
The grid in the Curves dialog box illustrates two brightness values:
The horizontal axis represents the original brightness of the pixels, shown in the Input box.
The vertical axis represents the new brightness values, shown in the Output box.
When you first open the Curves dialog box, the diagonal line indicates that no changes have
been made, so the input and output values are the same for all pixels.
Adjusting bitmap color and tone 97
Page 98
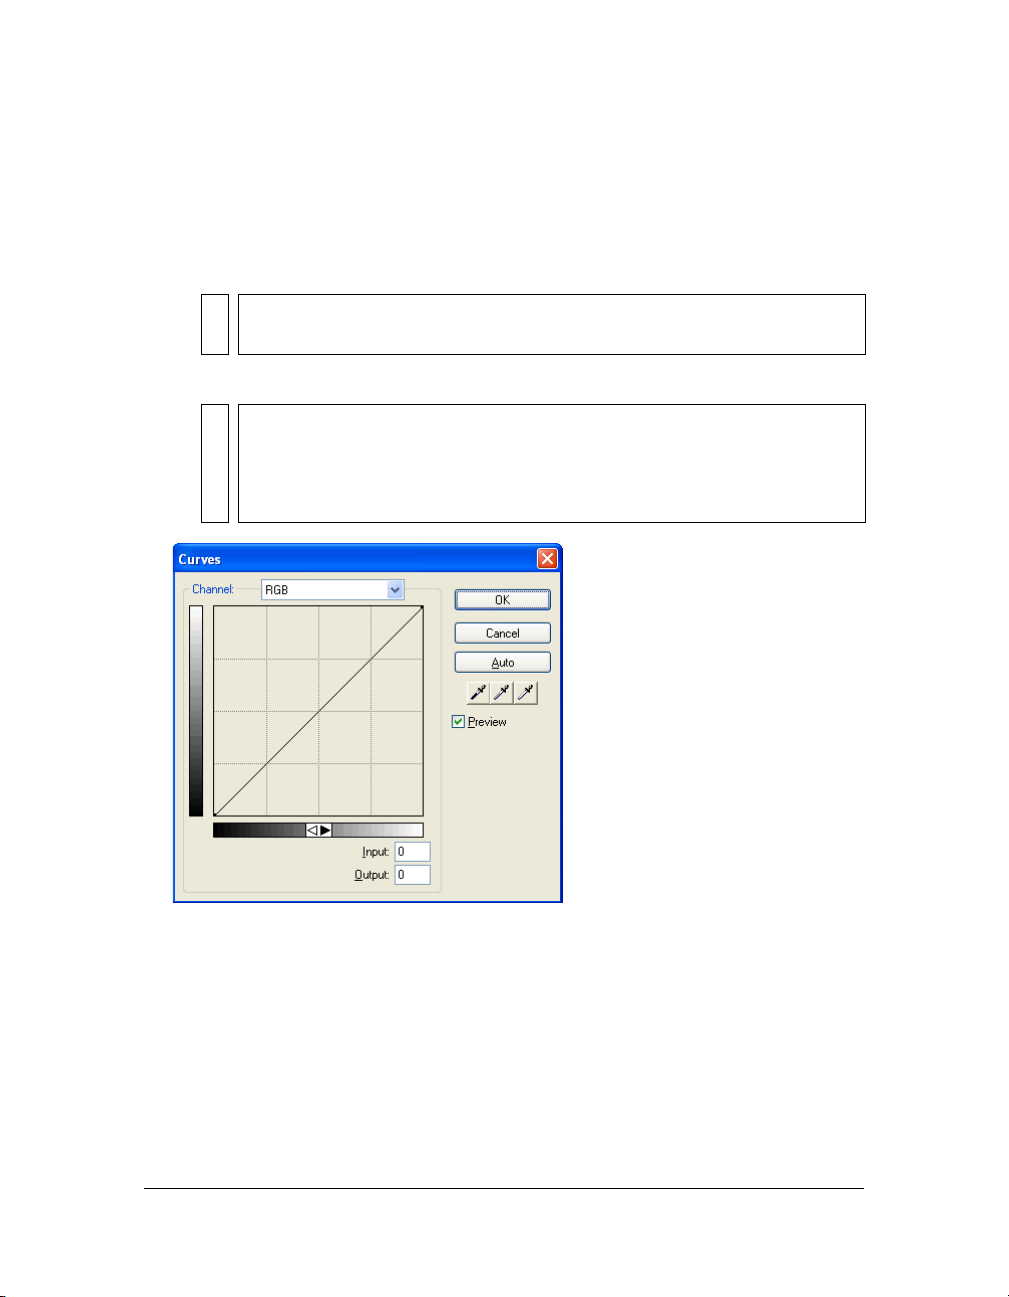
To adjust a specific point in the tonal range:
1. Select the image.
2. Do one of the following to open the Curves dialog box:
■ In the Property inspector, click the Plus (+) button beside the Filters label, and then
select Adjust Color > Curves from the Filters pop-up menu.
NOTE
If the Property inspector is partially minimized, click the Add Filters button
instead of the Plus button.
■ Select Filters > Adjust Color > Curves.
NOTE
Applying a filter from the Filters menu is destructive; that is, it cannot be undone
except when Edit > Undo is an option. To maintain the ability to adjust, turn off, or
remove this filter, apply it as a Live Filter, as described in the first bulleted option
in this step. For more information, see Chapter 8, “Using Live Filters,” on
page 193.
Curves dialog box
3. In the Channel pop-up menu, select whether you want to apply changes to individual color
channels or to all colors.
98 Chapter 4: Working with Bitmaps
Page 99
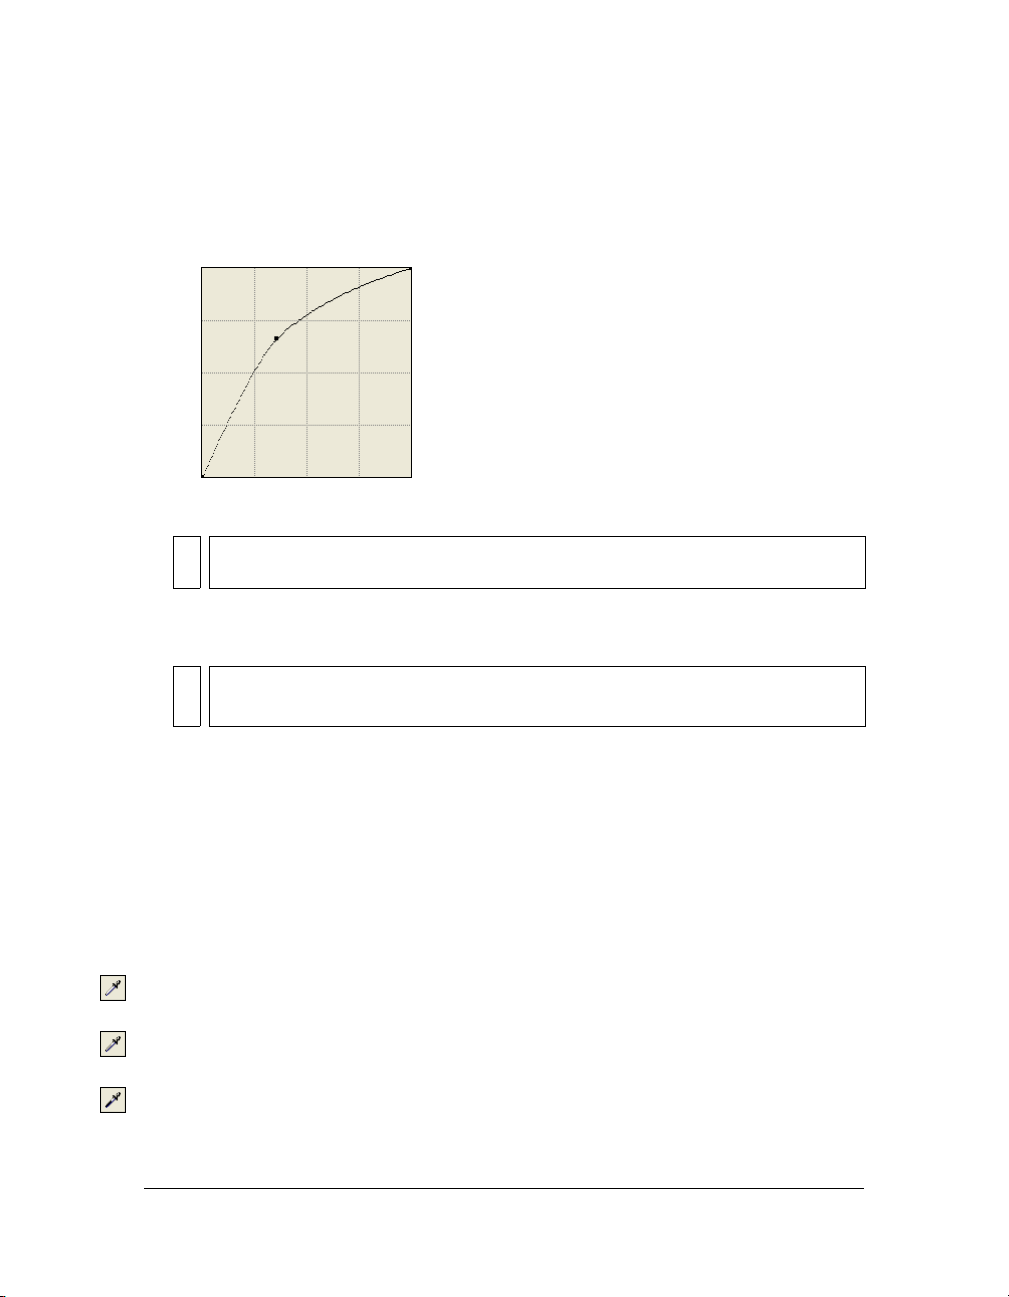
4. Click a point on the grid’s diagonal line and drag it to a new position to adjust the curve.
■ Each point on the curve has its own Input and Output values. When you drag a point,
the Input and Output values update automatically.
■ The curve displays brightness values of 0 to 255, with 0 representing the shadows.
Curve after dragging a point to adjust
TIP
You can also adjust highlights, midtones, and shadows automatically by clicking the
Auto button in the Curves dialog box.
To delete a point along the curve:
■ Drag the point off the grid.
NOTE
You cannot delete the end points of the curve.
Using tonal eyedroppers
You can adjust the highlights, shadows, and midtones using the Shadow, Highlight, or
Midtone eyedropper in the Levels or Curves dialog box.
To adjust the tonal balance manually using the tonal eyedroppers:
1. Open the Levels or Curves dialog box, and select a color channel from the Channel pop-
up menu.
2. Select the appropriate eyedropper to reset the tonal values in the image:
■ Click the lightest pixel in the image with the Highlight eyedropper to reset the
highlight value.
■ Click a pixel of neutral color in the image with the Midtone eyedropper to reset the
midtone value.
■ Click the darkest pixel in the image with the Shadow eyedropper to reset the shadow
value.
3. Click OK.
Adjusting bitmap color and tone 99
Page 100
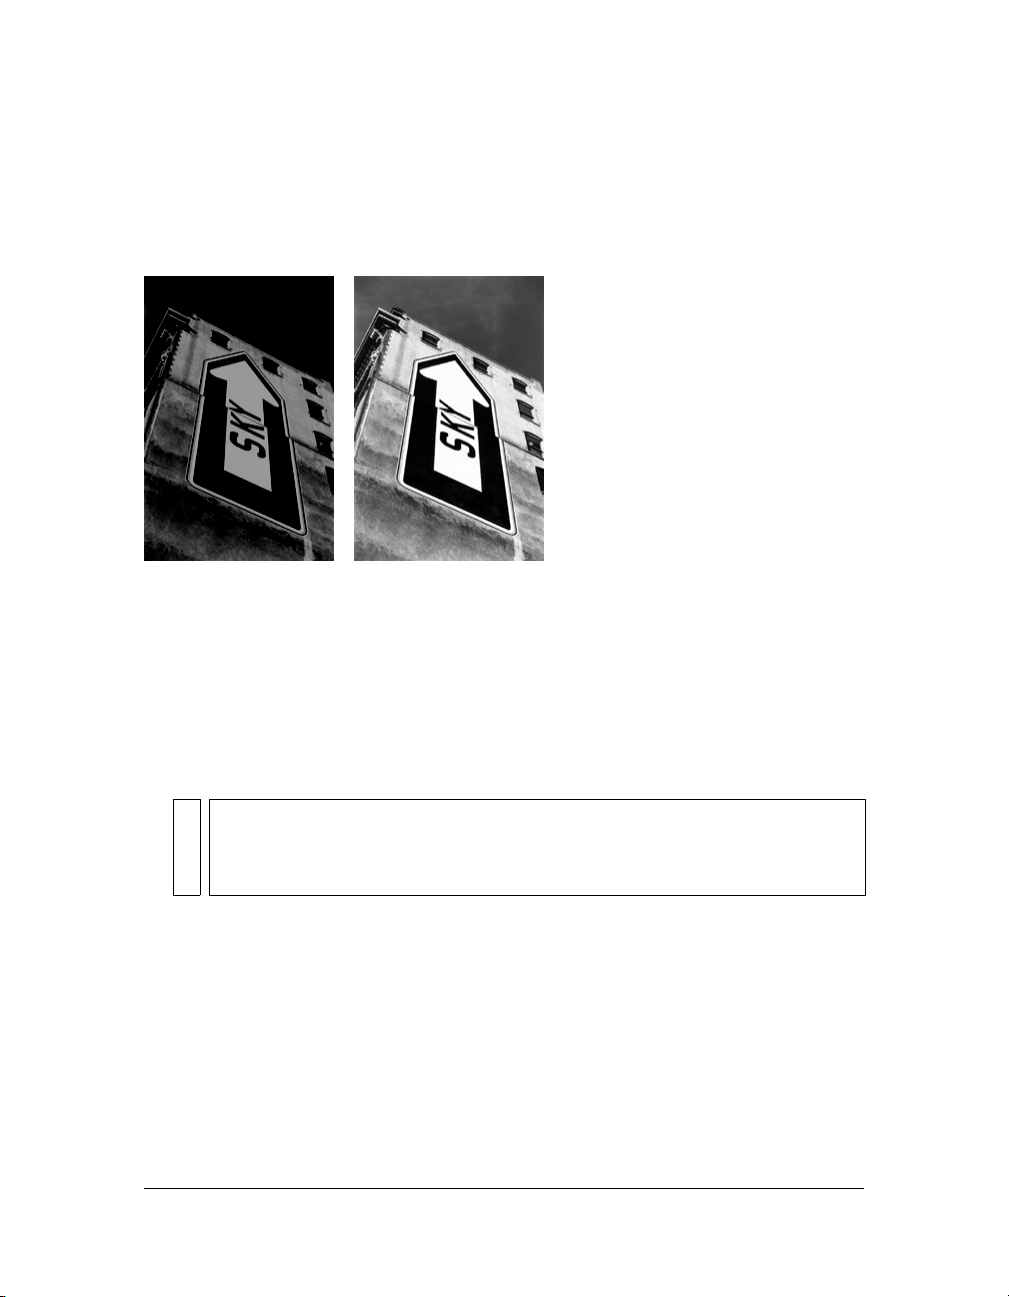
Adjusting brightness and contrast
The Brightness/Contrast feature modifies the contrast or brightness of pixels in an image.
This affects the highlights, shadows, and midtones of an image. You typically use Brightness/
Contrast when correcting images that are too dark or too light.
Original; after adjusting brightness
To adjust the brightness or contrast:
1. Select the image.
2. Do one of the following to open the Brightness/Contrast dialog box:
■ In the Property inspector, click the Add Live Filters button, and then select Adjust
Color > Brightness/Contrast from the Filters pop-up menu.
■ Select Filters > Adjust Color > Brightness/Contrast.
NOTE
Applying a filter from the Filters menu is destructive; that is, it cannot be undone
except when Edit > Undo is an option. To maintain the ability to adjust, turn off, or
remove this filter, apply it as a Live Filter, as described in the first bulleted option in
this step. For more information, see Chapter 8, “Using Live Filters,” on page 193.
3. Drag the Brightness and Contrast sliders to adjust the settings.
Values range from –100 to 100.
4. Click OK.
100 Chapter 4: Working with Bitmaps
 Loading...