

Page 1

Using
ADOBE® DREAMWEAVER® CS5 & CS5.5
Page 2

Legal notices
Legal notices
For legal notices, see http://help.adobe.com/en_US/legalnotices/index.html.
Last updated 12/7/2011
Page 3

Contents
Chapter 1: What’s New
What’s New . . . . . . . . . . . . . . . . . . . . . . . . . . . . . . . . . . . . . . . . . . . . . . . . . . . . . . . . . . . . . . . . . . . . . . . . . . . . . . . . . . . . . . . . . . . . . . . . . . . . . . . . . . . 1
Chapter 2: Workspace
Dreamweaver workflow and workspace . . . . . . . . . . . . . . . . . . . . . . . . . . . . . . . . . . . . . . . . . . . . . . . . . . . . . . . . . . . . . . . . . . . . . . . . . . . . . . . . 4
Working in the Document window . . . . . . . . . . . . . . . . . . . . . . . . . . . . . . . . . . . . . . . . . . . . . . . . . . . . . . . . . . . . . . . . . . . . . . . . . . . . . . . . . . . . 17
Using toolbars, inspectors, and context menus . . . . . . . . . . . . . . . . . . . . . . . . . . . . . . . . . . . . . . . . . . . . . . . . . . . . . . . . . . . . . . . . . . . . . . . . 20
Customizing the Dreamweaver CS5 workspace . . . . . . . . . . . . . . . . . . . . . . . . . . . . . . . . . . . . . . . . . . . . . . . . . . . . . . . . . . . . . . . . . . . . . . . . 22
Keyboard shortcuts . . . . . . . . . . . . . . . . . . . . . . . . . . . . . . . . . . . . . . . . . . . . . . . . . . . . . . . . . . . . . . . . . . . . . . . . . . . . . . . . . . . . . . . . . . . . . . . . . . . 32
Extensions . . . . . . . . . . . . . . . . . . . . . . . . . . . . . . . . . . . . . . . . . . . . . . . . . . . . . . . . . . . . . . . . . . . . . . . . . . . . . . . . . . . . . . . . . . . . . . . . . . . . . . . . . . . 34
Chapter 3: Working with Dreamweaver sites
About Dreamweaver sites . . . . . . . . . . . . . . . . . . . . . . . . . . . . . . . . . . . . . . . . . . . . . . . . . . . . . . . . . . . . . . . . . . . . . . . . . . . . . . . . . . . . . . . . . . . . 36
Set up a local version of your site . . . . . . . . . . . . . . . . . . . . . . . . . . . . . . . . . . . . . . . . . . . . . . . . . . . . . . . . . . . . . . . . . . . . . . . . . . . . . . . . . . . . . 37
Connect to a remote server . . . . . . . . . . . . . . . . . . . . . . . . . . . . . . . . . . . . . . . . . . . . . . . . . . . . . . . . . . . . . . . . . . . . . . . . . . . . . . . . . . . . . . . . . . . 38
Set up a testing server . . . . . . . . . . . . . . . . . . . . . . . . . . . . . . . . . . . . . . . . . . . . . . . . . . . . . . . . . . . . . . . . . . . . . . . . . . . . . . . . . . . . . . . . . . . . . . . . 45
Version Control and Advanced settings . . . . . . . . . . . . . . . . . . . . . . . . . . . . . . . . . . . . . . . . . . . . . . . . . . . . . . . . . . . . . . . . . . . . . . . . . . . . . . . 47
Manage Sites dialog box options . . . . . . . . . . . . . . . . . . . . . . . . . . . . . . . . . . . . . . . . . . . . . . . . . . . . . . . . . . . . . . . . . . . . . . . . . . . . . . . . . . . . . . 48
Import and export Dreamweaver site settings . . . . . . . . . . . . . . . . . . . . . . . . . . . . . . . . . . . . . . . . . . . . . . . . . . . . . . . . . . . . . . . . . . . . . . . . . 49
Edit an existing remote website . . . . . . . . . . . . . . . . . . . . . . . . . . . . . . . . . . . . . . . . . . . . . . . . . . . . . . . . . . . . . . . . . . . . . . . . . . . . . . . . . . . . . . . 50
Set site preferences for transferring files . . . . . . . . . . . . . . . . . . . . . . . . . . . . . . . . . . . . . . . . . . . . . . . . . . . . . . . . . . . . . . . . . . . . . . . . . . . . . . . 51
Managing Contribute sites . . . . . . . . . . . . . . . . . . . . . . . . . . . . . . . . . . . . . . . . . . . . . . . . . . . . . . . . . . . . . . . . . . . . . . . . . . . . . . . . . . . . . . . . . . . . 52
iii
Chapter 4: Creating and Managing Files
Creating and opening documents . . . . . . . . . . . . . . . . . . . . . . . . . . . . . . . . . . . . . . . . . . . . . . . . . . . . . . . . . . . . . . . . . . . . . . . . . . . . . . . . . . . . 59
Managing files and folders . . . . . . . . . . . . . . . . . . . . . . . . . . . . . . . . . . . . . . . . . . . . . . . . . . . . . . . . . . . . . . . . . . . . . . . . . . . . . . . . . . . . . . . . . . . . 72
Getting and putting files to and from your server . . . . . . . . . . . . . . . . . . . . . . . . . . . . . . . . . . . . . . . . . . . . . . . . . . . . . . . . . . . . . . . . . . . . . . 80
Checking in and checking out files . . . . . . . . . . . . . . . . . . . . . . . . . . . . . . . . . . . . . . . . . . . . . . . . . . . . . . . . . . . . . . . . . . . . . . . . . . . . . . . . . . . . 85
Synchronizing files . . . . . . . . . . . . . . . . . . . . . . . . . . . . . . . . . . . . . . . . . . . . . . . . . . . . . . . . . . . . . . . . . . . . . . . . . . . . . . . . . . . . . . . . . . . . . . . . . . . 93
Comparing files for differences . . . . . . . . . . . . . . . . . . . . . . . . . . . . . . . . . . . . . . . . . . . . . . . . . . . . . . . . . . . . . . . . . . . . . . . . . . . . . . . . . . . . . . . 94
Rolling back files (Contribute users) . . . . . . . . . . . . . . . . . . . . . . . . . . . . . . . . . . . . . . . . . . . . . . . . . . . . . . . . . . . . . . . . . . . . . . . . . . . . . . . . . . . 97
Cloaking files and folders in your Dreamweaver site . . . . . . . . . . . . . . . . . . . . . . . . . . . . . . . . . . . . . . . . . . . . . . . . . . . . . . . . . . . . . . . . . . . 97
Storing file information in Design Notes . . . . . . . . . . . . . . . . . . . . . . . . . . . . . . . . . . . . . . . . . . . . . . . . . . . . . . . . . . . . . . . . . . . . . . . . . . . . . . 100
Testing your Dreamweaver site . . . . . . . . . . . . . . . . . . . . . . . . . . . . . . . . . . . . . . . . . . . . . . . . . . . . . . . . . . . . . . . . . . . . . . . . . . . . . . . . . . . . . . 102
Chapter 5: Managing assets and libraries
About assets and libraries . . . . . . . . . . . . . . . . . . . . . . . . . . . . . . . . . . . . . . . . . . . . . . . . . . . . . . . . . . . . . . . . . . . . . . . . . . . . . . . . . . . . . . . . . . . . 106
Working with assets . . . . . . . . . . . . . . . . . . . . . . . . . . . . . . . . . . . . . . . . . . . . . . . . . . . . . . . . . . . . . . . . . . . . . . . . . . . . . . . . . . . . . . . . . . . . . . . . . 107
Creating and managing a list of favorite assets . . . . . . . . . . . . . . . . . . . . . . . . . . . . . . . . . . . . . . . . . . . . . . . . . . . . . . . . . . . . . . . . . . . . . . . 111
Working with library items . . . . . . . . . . . . . . . . . . . . . . . . . . . . . . . . . . . . . . . . . . . . . . . . . . . . . . . . . . . . . . . . . . . . . . . . . . . . . . . . . . . . . . . . . . . 113
Chapter 6: Creating pages with CSS
Understanding Cascading Style Sheets . . . . . . . . . . . . . . . . . . . . . . . . . . . . . . . . . . . . . . . . . . . . . . . . . . . . . . . . . . . . . . . . . . . . . . . . . . . . . . . 118
The CSS Styles panel . . . . . . . . . . . . . . . . . . . . . . . . . . . . . . . . . . . . . . . . . . . . . . . . . . . . . . . . . . . . . . . . . . . . . . . . . . . . . . . . . . . . . . . . . . . . . . . . . 122
Last updated 12/7/2011
Page 4

USING DREAMWEAVER
Contents
Enhancements to CSS3 support in the CSS styles panel (CS5.5) . . . . . . . . . . . . . . . . . . . . . . . . . . . . . . . . . . . . . . . . . . . . . . . . . . . . . . . . 126
Set CSS Styles preferences . . . . . . . . . . . . . . . . . . . . . . . . . . . . . . . . . . . . . . . . . . . . . . . . . . . . . . . . . . . . . . . . . . . . . . . . . . . . . . . . . . . . . . . . . . . 128
Create a new CSS rule . . . . . . . . . . . . . . . . . . . . . . . . . . . . . . . . . . . . . . . . . . . . . . . . . . . . . . . . . . . . . . . . . . . . . . . . . . . . . . . . . . . . . . . . . . . . . . . 128
Set CSS properties . . . . . . . . . . . . . . . . . . . . . . . . . . . . . . . . . . . . . . . . . . . . . . . . . . . . . . . . . . . . . . . . . . . . . . . . . . . . . . . . . . . . . . . . . . . . . . . . . . . 129
Edit a CSS rule . . . . . . . . . . . . . . . . . . . . . . . . . . . . . . . . . . . . . . . . . . . . . . . . . . . . . . . . . . . . . . . . . . . . . . . . . . . . . . . . . . . . . . . . . . . . . . . . . . . . . . . 135
Add a property to a CSS rule . . . . . . . . . . . . . . . . . . . . . . . . . . . . . . . . . . . . . . . . . . . . . . . . . . . . . . . . . . . . . . . . . . . . . . . . . . . . . . . . . . . . . . . . . 136
Apply, remove, or rename CSS class styles . . . . . . . . . . . . . . . . . . . . . . . . . . . . . . . . . . . . . . . . . . . . . . . . . . . . . . . . . . . . . . . . . . . . . . . . . . . . 136
Move/export CSS rules . . . . . . . . . . . . . . . . . . . . . . . . . . . . . . . . . . . . . . . . . . . . . . . . . . . . . . . . . . . . . . . . . . . . . . . . . . . . . . . . . . . . . . . . . . . . . . 137
Convert inline CSS to a CSS rule . . . . . . . . . . . . . . . . . . . . . . . . . . . . . . . . . . . . . . . . . . . . . . . . . . . . . . . . . . . . . . . . . . . . . . . . . . . . . . . . . . . . . . 138
Link to an external CSS style sheet . . . . . . . . . . . . . . . . . . . . . . . . . . . . . . . . . . . . . . . . . . . . . . . . . . . . . . . . . . . . . . . . . . . . . . . . . . . . . . . . . . . 139
Edit a CSS style sheet . . . . . . . . . . . . . . . . . . . . . . . . . . . . . . . . . . . . . . . . . . . . . . . . . . . . . . . . . . . . . . . . . . . . . . . . . . . . . . . . . . . . . . . . . . . . . . . . 140
Format CSS code . . . . . . . . . . . . . . . . . . . . . . . . . . . . . . . . . . . . . . . . . . . . . . . . . . . . . . . . . . . . . . . . . . . . . . . . . . . . . . . . . . . . . . . . . . . . . . . . . . . . 140
Disable/Enable CSS . . . . . . . . . . . . . . . . . . . . . . . . . . . . . . . . . . . . . . . . . . . . . . . . . . . . . . . . . . . . . . . . . . . . . . . . . . . . . . . . . . . . . . . . . . . . . . . . . . 141
Inspect CSS in Live view . . . . . . . . . . . . . . . . . . . . . . . . . . . . . . . . . . . . . . . . . . . . . . . . . . . . . . . . . . . . . . . . . . . . . . . . . . . . . . . . . . . . . . . . . . . . . 142
Check for cross-browser CSS rendering issues . . . . . . . . . . . . . . . . . . . . . . . . . . . . . . . . . . . . . . . . . . . . . . . . . . . . . . . . . . . . . . . . . . . . . . . . 142
Use Design-Time style sheets . . . . . . . . . . . . . . . . . . . . . . . . . . . . . . . . . . . . . . . . . . . . . . . . . . . . . . . . . . . . . . . . . . . . . . . . . . . . . . . . . . . . . . . . 144
Use Dreamweaver sample style sheets . . . . . . . . . . . . . . . . . . . . . . . . . . . . . . . . . . . . . . . . . . . . . . . . . . . . . . . . . . . . . . . . . . . . . . . . . . . . . . . 145
Update CSS style sheets in a Contribute site . . . . . . . . . . . . . . . . . . . . . . . . . . . . . . . . . . . . . . . . . . . . . . . . . . . . . . . . . . . . . . . . . . . . . . . . . . 145
Laying out pages with CSS . . . . . . . . . . . . . . . . . . . . . . . . . . . . . . . . . . . . . . . . . . . . . . . . . . . . . . . . . . . . . . . . . . . . . . . . . . . . . . . . . . . . . . . . . . . 146
Working with div tags . . . . . . . . . . . . . . . . . . . . . . . . . . . . . . . . . . . . . . . . . . . . . . . . . . . . . . . . . . . . . . . . . . . . . . . . . . . . . . . . . . . . . . . . . . . . . . . 152
iv
Chapter 7: Laying out pages with HTML
Using visual aids for layout . . . . . . . . . . . . . . . . . . . . . . . . . . . . . . . . . . . . . . . . . . . . . . . . . . . . . . . . . . . . . . . . . . . . . . . . . . . . . . . . . . . . . . . . . . 167
Presenting content with tables . . . . . . . . . . . . . . . . . . . . . . . . . . . . . . . . . . . . . . . . . . . . . . . . . . . . . . . . . . . . . . . . . . . . . . . . . . . . . . . . . . . . . . 170
Using Frames . . . . . . . . . . . . . . . . . . . . . . . . . . . . . . . . . . . . . . . . . . . . . . . . . . . . . . . . . . . . . . . . . . . . . . . . . . . . . . . . . . . . . . . . . . . . . . . . . . . . . . . . 185
Chapter 8: Adding content to pages
Use the Insert panel . . . . . . . . . . . . . . . . . . . . . . . . . . . . . . . . . . . . . . . . . . . . . . . . . . . . . . . . . . . . . . . . . . . . . . . . . . . . . . . . . . . . . . . . . . . . . . . . . 198
Set page properties . . . . . . . . . . . . . . . . . . . . . . . . . . . . . . . . . . . . . . . . . . . . . . . . . . . . . . . . . . . . . . . . . . . . . . . . . . . . . . . . . . . . . . . . . . . . . . . . . 201
Set CSS link properties for an entire page . . . . . . . . . . . . . . . . . . . . . . . . . . . . . . . . . . . . . . . . . . . . . . . . . . . . . . . . . . . . . . . . . . . . . . . . . . . . . 202
Set CSS heading properties for an entire page . . . . . . . . . . . . . . . . . . . . . . . . . . . . . . . . . . . . . . . . . . . . . . . . . . . . . . . . . . . . . . . . . . . . . . . . 203
Set title and encoding properties for a page . . . . . . . . . . . . . . . . . . . . . . . . . . . . . . . . . . . . . . . . . . . . . . . . . . . . . . . . . . . . . . . . . . . . . . . . . . 203
Use a tracing image to design a page . . . . . . . . . . . . . . . . . . . . . . . . . . . . . . . . . . . . . . . . . . . . . . . . . . . . . . . . . . . . . . . . . . . . . . . . . . . . . . . . 204
Understanding document encoding . . . . . . . . . . . . . . . . . . . . . . . . . . . . . . . . . . . . . . . . . . . . . . . . . . . . . . . . . . . . . . . . . . . . . . . . . . . . . . . . . 204
Select and view elements in the Document window . . . . . . . . . . . . . . . . . . . . . . . . . . . . . . . . . . . . . . . . . . . . . . . . . . . . . . . . . . . . . . . . . . 205
Colors . . . . . . . . . . . . . . . . . . . . . . . . . . . . . . . . . . . . . . . . . . . . . . . . . . . . . . . . . . . . . . . . . . . . . . . . . . . . . . . . . . . . . . . . . . . . . . . . . . . . . . . . . . . . . . . 207
Zoom in and out . . . . . . . . . . . . . . . . . . . . . . . . . . . . . . . . . . . . . . . . . . . . . . . . . . . . . . . . . . . . . . . . . . . . . . . . . . . . . . . . . . . . . . . . . . . . . . . . . . . . 208
Set download time and size preferences . . . . . . . . . . . . . . . . . . . . . . . . . . . . . . . . . . . . . . . . . . . . . . . . . . . . . . . . . . . . . . . . . . . . . . . . . . . . . 209
Working with text . . . . . . . . . . . . . . . . . . . . . . . . . . . . . . . . . . . . . . . . . . . . . . . . . . . . . . . . . . . . . . . . . . . . . . . . . . . . . . . . . . . . . . . . . . . . . . . . . . . 210
Set text properties in the Property inspector . . . . . . . . . . . . . . . . . . . . . . . . . . . . . . . . . . . . . . . . . . . . . . . . . . . . . . . . . . . . . . . . . . . . . . . . . 217
Spell check a web page . . . . . . . . . . . . . . . . . . . . . . . . . . . . . . . . . . . . . . . . . . . . . . . . . . . . . . . . . . . . . . . . . . . . . . . . . . . . . . . . . . . . . . . . . . . . . . 220
Import tabular data . . . . . . . . . . . . . . . . . . . . . . . . . . . . . . . . . . . . . . . . . . . . . . . . . . . . . . . . . . . . . . . . . . . . . . . . . . . . . . . . . . . . . . . . . . . . . . . . . . 220
Import Microsoft Office documents (Windows only) . . . . . . . . . . . . . . . . . . . . . . . . . . . . . . . . . . . . . . . . . . . . . . . . . . . . . . . . . . . . . . . . . . 221
Create a link to a Word or Excel document . . . . . . . . . . . . . . . . . . . . . . . . . . . . . . . . . . . . . . . . . . . . . . . . . . . . . . . . . . . . . . . . . . . . . . . . . . . 221
Use HTML Formatting . . . . . . . . . . . . . . . . . . . . . . . . . . . . . . . . . . . . . . . . . . . . . . . . . . . . . . . . . . . . . . . . . . . . . . . . . . . . . . . . . . . . . . . . . . . . . . . 222
Use horizontal rules . . . . . . . . . . . . . . . . . . . . . . . . . . . . . . . . . . . . . . . . . . . . . . . . . . . . . . . . . . . . . . . . . . . . . . . . . . . . . . . . . . . . . . . . . . . . . . . . . 224
Modify font combinations . . . . . . . . . . . . . . . . . . . . . . . . . . . . . . . . . . . . . . . . . . . . . . . . . . . . . . . . . . . . . . . . . . . . . . . . . . . . . . . . . . . . . . . . . . . 224
Last updated 12/7/2011
Page 5

USING DREAMWEAVER
Contents
Insert dates . . . . . . . . . . . . . . . . . . . . . . . . . . . . . . . . . . . . . . . . . . . . . . . . . . . . . . . . . . . . . . . . . . . . . . . . . . . . . . . . . . . . . . . . . . . . . . . . . . . . . . . . . 225
Adding and modifying images . . . . . . . . . . . . . . . . . . . . . . . . . . . . . . . . . . . . . . . . . . . . . . . . . . . . . . . . . . . . . . . . . . . . . . . . . . . . . . . . . . . . . . . 226
Adding video . . . . . . . . . . . . . . . . . . . . . . . . . . . . . . . . . . . . . . . . . . . . . . . . . . . . . . . . . . . . . . . . . . . . . . . . . . . . . . . . . . . . . . . . . . . . . . . . . . . . . . . . 237
Inserting SWF files . . . . . . . . . . . . . . . . . . . . . . . . . . . . . . . . . . . . . . . . . . . . . . . . . . . . . . . . . . . . . . . . . . . . . . . . . . . . . . . . . . . . . . . . . . . . . . . . . . . 242
Adding web widgets . . . . . . . . . . . . . . . . . . . . . . . . . . . . . . . . . . . . . . . . . . . . . . . . . . . . . . . . . . . . . . . . . . . . . . . . . . . . . . . . . . . . . . . . . . . . . . . . 245
Adding Sound . . . . . . . . . . . . . . . . . . . . . . . . . . . . . . . . . . . . . . . . . . . . . . . . . . . . . . . . . . . . . . . . . . . . . . . . . . . . . . . . . . . . . . . . . . . . . . . . . . . . . . . 246
Adding media objects . . . . . . . . . . . . . . . . . . . . . . . . . . . . . . . . . . . . . . . . . . . . . . . . . . . . . . . . . . . . . . . . . . . . . . . . . . . . . . . . . . . . . . . . . . . . . . . 247
Automating tasks . . . . . . . . . . . . . . . . . . . . . . . . . . . . . . . . . . . . . . . . . . . . . . . . . . . . . . . . . . . . . . . . . . . . . . . . . . . . . . . . . . . . . . . . . . . . . . . . . . . 255
Chapter 9: Linking and navigation
About linking and navigation . . . . . . . . . . . . . . . . . . . . . . . . . . . . . . . . . . . . . . . . . . . . . . . . . . . . . . . . . . . . . . . . . . . . . . . . . . . . . . . . . . . . . . . . 261
Linking . . . . . . . . . . . . . . . . . . . . . . . . . . . . . . . . . . . . . . . . . . . . . . . . . . . . . . . . . . . . . . . . . . . . . . . . . . . . . . . . . . . . . . . . . . . . . . . . . . . . . . . . . . . . . . 263
Jump menus . . . . . . . . . . . . . . . . . . . . . . . . . . . . . . . . . . . . . . . . . . . . . . . . . . . . . . . . . . . . . . . . . . . . . . . . . . . . . . . . . . . . . . . . . . . . . . . . . . . . . . . . 270
Navigation bars . . . . . . . . . . . . . . . . . . . . . . . . . . . . . . . . . . . . . . . . . . . . . . . . . . . . . . . . . . . . . . . . . . . . . . . . . . . . . . . . . . . . . . . . . . . . . . . . . . . . . 272
Image maps . . . . . . . . . . . . . . . . . . . . . . . . . . . . . . . . . . . . . . . . . . . . . . . . . . . . . . . . . . . . . . . . . . . . . . . . . . . . . . . . . . . . . . . . . . . . . . . . . . . . . . . . . 272
Troubleshooting links . . . . . . . . . . . . . . . . . . . . . . . . . . . . . . . . . . . . . . . . . . . . . . . . . . . . . . . . . . . . . . . . . . . . . . . . . . . . . . . . . . . . . . . . . . . . . . . 274
Chapter 10: Previewing pages
Previewing pages . . . . . . . . . . . . . . . . . . . . . . . . . . . . . . . . . . . . . . . . . . . . . . . . . . . . . . . . . . . . . . . . . . . . . . . . . . . . . . . . . . . . . . . . . . . . . . . . . . . 276
v
Chapter 11: Working with page code
General information about coding in Dreamweaver . . . . . . . . . . . . . . . . . . . . . . . . . . . . . . . . . . . . . . . . . . . . . . . . . . . . . . . . . . . . . . . . . . 281
Setting up your coding environment . . . . . . . . . . . . . . . . . . . . . . . . . . . . . . . . . . . . . . . . . . . . . . . . . . . . . . . . . . . . . . . . . . . . . . . . . . . . . . . . . 285
Setting coding preferences . . . . . . . . . . . . . . . . . . . . . . . . . . . . . . . . . . . . . . . . . . . . . . . . . . . . . . . . . . . . . . . . . . . . . . . . . . . . . . . . . . . . . . . . . . 287
Writing and editing code . . . . . . . . . . . . . . . . . . . . . . . . . . . . . . . . . . . . . . . . . . . . . . . . . . . . . . . . . . . . . . . . . . . . . . . . . . . . . . . . . . . . . . . . . . . . 292
Collapsing code . . . . . . . . . . . . . . . . . . . . . . . . . . . . . . . . . . . . . . . . . . . . . . . . . . . . . . . . . . . . . . . . . . . . . . . . . . . . . . . . . . . . . . . . . . . . . . . . . . . . . 308
Optimizing and debugging code . . . . . . . . . . . . . . . . . . . . . . . . . . . . . . . . . . . . . . . . . . . . . . . . . . . . . . . . . . . . . . . . . . . . . . . . . . . . . . . . . . . . 310
Editing code in Design view . . . . . . . . . . . . . . . . . . . . . . . . . . . . . . . . . . . . . . . . . . . . . . . . . . . . . . . . . . . . . . . . . . . . . . . . . . . . . . . . . . . . . . . . . 315
Working with head content for pages . . . . . . . . . . . . . . . . . . . . . . . . . . . . . . . . . . . . . . . . . . . . . . . . . . . . . . . . . . . . . . . . . . . . . . . . . . . . . . . . 321
Working with server-side includes . . . . . . . . . . . . . . . . . . . . . . . . . . . . . . . . . . . . . . . . . . . . . . . . . . . . . . . . . . . . . . . . . . . . . . . . . . . . . . . . . . . 325
Managing tag libraries . . . . . . . . . . . . . . . . . . . . . . . . . . . . . . . . . . . . . . . . . . . . . . . . . . . . . . . . . . . . . . . . . . . . . . . . . . . . . . . . . . . . . . . . . . . . . . . 328
Importing custom tags into Dreamweaver . . . . . . . . . . . . . . . . . . . . . . . . . . . . . . . . . . . . . . . . . . . . . . . . . . . . . . . . . . . . . . . . . . . . . . . . . . . 330
Chapter 12: Adding JavaScript behaviors
Using JavaScript behaviors (general instructions) . . . . . . . . . . . . . . . . . . . . . . . . . . . . . . . . . . . . . . . . . . . . . . . . . . . . . . . . . . . . . . . . . . . . . 333
Applying built-in JavaScript behaviors . . . . . . . . . . . . . . . . . . . . . . . . . . . . . . . . . . . . . . . . . . . . . . . . . . . . . . . . . . . . . . . . . . . . . . . . . . . . . . . 336
Chapter 13: Working with other applications
Cross-application integration . . . . . . . . . . . . . . . . . . . . . . . . . . . . . . . . . . . . . . . . . . . . . . . . . . . . . . . . . . . . . . . . . . . . . . . . . . . . . . . . . . . . . . . . 347
Working with Fireworks and Dreamweaver . . . . . . . . . . . . . . . . . . . . . . . . . . . . . . . . . . . . . . . . . . . . . . . . . . . . . . . . . . . . . . . . . . . . . . . . . . . 348
Working with Photoshop and Dreamweaver . . . . . . . . . . . . . . . . . . . . . . . . . . . . . . . . . . . . . . . . . . . . . . . . . . . . . . . . . . . . . . . . . . . . . . . . . 353
Working with Flash and Dreamweaver . . . . . . . . . . . . . . . . . . . . . . . . . . . . . . . . . . . . . . . . . . . . . . . . . . . . . . . . . . . . . . . . . . . . . . . . . . . . . . . 362
Working with Adobe Bridge and Dreamweaver . . . . . . . . . . . . . . . . . . . . . . . . . . . . . . . . . . . . . . . . . . . . . . . . . . . . . . . . . . . . . . . . . . . . . . . 362
Working with Device Central and Dreamweaver . . . . . . . . . . . . . . . . . . . . . . . . . . . . . . . . . . . . . . . . . . . . . . . . . . . . . . . . . . . . . . . . . . . . . . 365
Working with ConnectNow and Dreamweaver . . . . . . . . . . . . . . . . . . . . . . . . . . . . . . . . . . . . . . . . . . . . . . . . . . . . . . . . . . . . . . . . . . . . . . . 366
AIR Extension for Dreamweaver . . . . . . . . . . . . . . . . . . . . . . . . . . . . . . . . . . . . . . . . . . . . . . . . . . . . . . . . . . . . . . . . . . . . . . . . . . . . . . . . . . . . . 367
Last updated 12/7/2011
Page 6

USING DREAMWEAVER
Contents
Chapter 14: Creating and managing templates
About Dreamweaver templates . . . . . . . . . . . . . . . . . . . . . . . . . . . . . . . . . . . . . . . . . . . . . . . . . . . . . . . . . . . . . . . . . . . . . . . . . . . . . . . . . . . . . . 374
Recognizing templates and template-based documents . . . . . . . . . . . . . . . . . . . . . . . . . . . . . . . . . . . . . . . . . . . . . . . . . . . . . . . . . . . . . . 379
Creating a Dreamweaver template . . . . . . . . . . . . . . . . . . . . . . . . . . . . . . . . . . . . . . . . . . . . . . . . . . . . . . . . . . . . . . . . . . . . . . . . . . . . . . . . . . . 382
Creating editable regions in templates . . . . . . . . . . . . . . . . . . . . . . . . . . . . . . . . . . . . . . . . . . . . . . . . . . . . . . . . . . . . . . . . . . . . . . . . . . . . . . . 385
Creating repeating regions in templates . . . . . . . . . . . . . . . . . . . . . . . . . . . . . . . . . . . . . . . . . . . . . . . . . . . . . . . . . . . . . . . . . . . . . . . . . . . . . 387
Using optional regions in templates . . . . . . . . . . . . . . . . . . . . . . . . . . . . . . . . . . . . . . . . . . . . . . . . . . . . . . . . . . . . . . . . . . . . . . . . . . . . . . . . . . 389
Defining editable tag attributes in templates . . . . . . . . . . . . . . . . . . . . . . . . . . . . . . . . . . . . . . . . . . . . . . . . . . . . . . . . . . . . . . . . . . . . . . . . . 391
Creating a nested template . . . . . . . . . . . . . . . . . . . . . . . . . . . . . . . . . . . . . . . . . . . . . . . . . . . . . . . . . . . . . . . . . . . . . . . . . . . . . . . . . . . . . . . . . . 393
Editing, updating, and deleting templates . . . . . . . . . . . . . . . . . . . . . . . . . . . . . . . . . . . . . . . . . . . . . . . . . . . . . . . . . . . . . . . . . . . . . . . . . . . . 395
Exporting and importing template content . . . . . . . . . . . . . . . . . . . . . . . . . . . . . . . . . . . . . . . . . . . . . . . . . . . . . . . . . . . . . . . . . . . . . . . . . . . 399
Applying or removing a template from an existing document . . . . . . . . . . . . . . . . . . . . . . . . . . . . . . . . . . . . . . . . . . . . . . . . . . . . . . . . 400
Editing content in a template-based document . . . . . . . . . . . . . . . . . . . . . . . . . . . . . . . . . . . . . . . . . . . . . . . . . . . . . . . . . . . . . . . . . . . . . . 402
Template syntax . . . . . . . . . . . . . . . . . . . . . . . . . . . . . . . . . . . . . . . . . . . . . . . . . . . . . . . . . . . . . . . . . . . . . . . . . . . . . . . . . . . . . . . . . . . . . . . . . . . . . 404
Setting authoring preferences for templates . . . . . . . . . . . . . . . . . . . . . . . . . . . . . . . . . . . . . . . . . . . . . . . . . . . . . . . . . . . . . . . . . . . . . . . . . 405
Chapter 15: Building Spry pages visually
About the Spry framework . . . . . . . . . . . . . . . . . . . . . . . . . . . . . . . . . . . . . . . . . . . . . . . . . . . . . . . . . . . . . . . . . . . . . . . . . . . . . . . . . . . . . . . . . . . 407
Working with Spry widgets (general instructions) . . . . . . . . . . . . . . . . . . . . . . . . . . . . . . . . . . . . . . . . . . . . . . . . . . . . . . . . . . . . . . . . . . . . . 407
Working with the Spry Accordion widget . . . . . . . . . . . . . . . . . . . . . . . . . . . . . . . . . . . . . . . . . . . . . . . . . . . . . . . . . . . . . . . . . . . . . . . . . . . . . 409
Working with the Spry Menu Bar widget . . . . . . . . . . . . . . . . . . . . . . . . . . . . . . . . . . . . . . . . . . . . . . . . . . . . . . . . . . . . . . . . . . . . . . . . . . . . . 412
Working with the Spry Collapsible Panel widget . . . . . . . . . . . . . . . . . . . . . . . . . . . . . . . . . . . . . . . . . . . . . . . . . . . . . . . . . . . . . . . . . . . . . . 417
Working with the Spry Tabbed Panels widget . . . . . . . . . . . . . . . . . . . . . . . . . . . . . . . . . . . . . . . . . . . . . . . . . . . . . . . . . . . . . . . . . . . . . . . . 419
Working with the Spry Tooltip widget . . . . . . . . . . . . . . . . . . . . . . . . . . . . . . . . . . . . . . . . . . . . . . . . . . . . . . . . . . . . . . . . . . . . . . . . . . . . . . . . 422
Working with the Spry Validation Radio Group widget . . . . . . . . . . . . . . . . . . . . . . . . . . . . . . . . . . . . . . . . . . . . . . . . . . . . . . . . . . . . . . . . 423
Working with the Spry Validation Text Field widget . . . . . . . . . . . . . . . . . . . . . . . . . . . . . . . . . . . . . . . . . . . . . . . . . . . . . . . . . . . . . . . . . . . 427
Working with the Spry Validation Text Area widget . . . . . . . . . . . . . . . . . . . . . . . . . . . . . . . . . . . . . . . . . . . . . . . . . . . . . . . . . . . . . . . . . . . 431
Working with the Spry Validation Select widget . . . . . . . . . . . . . . . . . . . . . . . . . . . . . . . . . . . . . . . . . . . . . . . . . . . . . . . . . . . . . . . . . . . . . . 435
Working with the Spry Validation Checkbox widget . . . . . . . . . . . . . . . . . . . . . . . . . . . . . . . . . . . . . . . . . . . . . . . . . . . . . . . . . . . . . . . . . . 438
Working with the Spry Validation Password widget . . . . . . . . . . . . . . . . . . . . . . . . . . . . . . . . . . . . . . . . . . . . . . . . . . . . . . . . . . . . . . . . . . . 440
Working with the Spry Validation Confirm widget . . . . . . . . . . . . . . . . . . . . . . . . . . . . . . . . . . . . . . . . . . . . . . . . . . . . . . . . . . . . . . . . . . . . 444
Displaying data with Spry . . . . . . . . . . . . . . . . . . . . . . . . . . . . . . . . . . . . . . . . . . . . . . . . . . . . . . . . . . . . . . . . . . . . . . . . . . . . . . . . . . . . . . . . . . . . 447
Adding Spry effects . . . . . . . . . . . . . . . . . . . . . . . . . . . . . . . . . . . . . . . . . . . . . . . . . . . . . . . . . . . . . . . . . . . . . . . . . . . . . . . . . . . . . . . . . . . . . . . . . . 458
vi
Chapter 16: Designing for multiple screens and devices
Creating media queries (CS5.5 and later) . . . . . . . . . . . . . . . . . . . . . . . . . . . . . . . . . . . . . . . . . . . . . . . . . . . . . . . . . . . . . . . . . . . . . . . . . . . . . 462
Change page orientation for mobile devices (CS5.5 and later) . . . . . . . . . . . . . . . . . . . . . . . . . . . . . . . . . . . . . . . . . . . . . . . . . . . . . . . . . 464
Creating web applications for mobile devices (CS5.5 and later) . . . . . . . . . . . . . . . . . . . . . . . . . . . . . . . . . . . . . . . . . . . . . . . . . . . . . . . . 464
Packaging web applications . . . . . . . . . . . . . . . . . . . . . . . . . . . . . . . . . . . . . . . . . . . . . . . . . . . . . . . . . . . . . . . . . . . . . . . . . . . . . . . . . . . . . . . . . 467
Preview pages using the Multiscreen Preview panel . . . . . . . . . . . . . . . . . . . . . . . . . . . . . . . . . . . . . . . . . . . . . . . . . . . . . . . . . . . . . . . . . . 470
Chapter 17: Using Adobe Online Services
Using Dreamweaver with Adobe Online services . . . . . . . . . . . . . . . . . . . . . . . . . . . . . . . . . . . . . . . . . . . . . . . . . . . . . . . . . . . . . . . . . . . . . 471
Chapter 18: Displaying XML data with XSLT
About XML and XSLT . . . . . . . . . . . . . . . . . . . . . . . . . . . . . . . . . . . . . . . . . . . . . . . . . . . . . . . . . . . . . . . . . . . . . . . . . . . . . . . . . . . . . . . . . . . . . . . . 477
Performing XSL transformations on the server . . . . . . . . . . . . . . . . . . . . . . . . . . . . . . . . . . . . . . . . . . . . . . . . . . . . . . . . . . . . . . . . . . . . . . . . 484
Last updated 12/7/2011
Page 7

USING DREAMWEAVER
Contents
Performing XSL transformations on the client . . . . . . . . . . . . . . . . . . . . . . . . . . . . . . . . . . . . . . . . . . . . . . . . . . . . . . . . . . . . . . . . . . . . . . . . 500
Missing character entities for XSLT . . . . . . . . . . . . . . . . . . . . . . . . . . . . . . . . . . . . . . . . . . . . . . . . . . . . . . . . . . . . . . . . . . . . . . . . . . . . . . . . . . . 502
Chapter 19: Preparing to build dynamic sites
Understanding web applications . . . . . . . . . . . . . . . . . . . . . . . . . . . . . . . . . . . . . . . . . . . . . . . . . . . . . . . . . . . . . . . . . . . . . . . . . . . . . . . . . . . . . 504
Set up your computer for application development . . . . . . . . . . . . . . . . . . . . . . . . . . . . . . . . . . . . . . . . . . . . . . . . . . . . . . . . . . . . . . . . . . 511
Database connections for ColdFusion developers . . . . . . . . . . . . . . . . . . . . . . . . . . . . . . . . . . . . . . . . . . . . . . . . . . . . . . . . . . . . . . . . . . . . 516
Database connections for ASP developers . . . . . . . . . . . . . . . . . . . . . . . . . . . . . . . . . . . . . . . . . . . . . . . . . . . . . . . . . . . . . . . . . . . . . . . . . . . . 518
Database connections for PHP developers . . . . . . . . . . . . . . . . . . . . . . . . . . . . . . . . . . . . . . . . . . . . . . . . . . . . . . . . . . . . . . . . . . . . . . . . . . . 525
Troubleshooting database connections . . . . . . . . . . . . . . . . . . . . . . . . . . . . . . . . . . . . . . . . . . . . . . . . . . . . . . . . . . . . . . . . . . . . . . . . . . . . . . 526
Removing connection scripts . . . . . . . . . . . . . . . . . . . . . . . . . . . . . . . . . . . . . . . . . . . . . . . . . . . . . . . . . . . . . . . . . . . . . . . . . . . . . . . . . . . . . . . . 531
Chapter 20: Making pages dynamic
Optimizing the workspace for visual development . . . . . . . . . . . . . . . . . . . . . . . . . . . . . . . . . . . . . . . . . . . . . . . . . . . . . . . . . . . . . . . . . . . 532
Designing dynamic pages . . . . . . . . . . . . . . . . . . . . . . . . . . . . . . . . . . . . . . . . . . . . . . . . . . . . . . . . . . . . . . . . . . . . . . . . . . . . . . . . . . . . . . . . . . . 535
Dynamic content sources overview . . . . . . . . . . . . . . . . . . . . . . . . . . . . . . . . . . . . . . . . . . . . . . . . . . . . . . . . . . . . . . . . . . . . . . . . . . . . . . . . . . 536
Dynamic content panels . . . . . . . . . . . . . . . . . . . . . . . . . . . . . . . . . . . . . . . . . . . . . . . . . . . . . . . . . . . . . . . . . . . . . . . . . . . . . . . . . . . . . . . . . . . . . 541
Defining sources of dynamic content . . . . . . . . . . . . . . . . . . . . . . . . . . . . . . . . . . . . . . . . . . . . . . . . . . . . . . . . . . . . . . . . . . . . . . . . . . . . . . . . 543
Adding dynamic content to pages . . . . . . . . . . . . . . . . . . . . . . . . . . . . . . . . . . . . . . . . . . . . . . . . . . . . . . . . . . . . . . . . . . . . . . . . . . . . . . . . . . . 556
Changing dynamic content . . . . . . . . . . . . . . . . . . . . . . . . . . . . . . . . . . . . . . . . . . . . . . . . . . . . . . . . . . . . . . . . . . . . . . . . . . . . . . . . . . . . . . . . . . 560
Displaying database records . . . . . . . . . . . . . . . . . . . . . . . . . . . . . . . . . . . . . . . . . . . . . . . . . . . . . . . . . . . . . . . . . . . . . . . . . . . . . . . . . . . . . . . . . 562
Viewing live data . . . . . . . . . . . . . . . . . . . . . . . . . . . . . . . . . . . . . . . . . . . . . . . . . . . . . . . . . . . . . . . . . . . . . . . . . . . . . . . . . . . . . . . . . . . . . . . . . . . . 571
Adding custom server behaviors . . . . . . . . . . . . . . . . . . . . . . . . . . . . . . . . . . . . . . . . . . . . . . . . . . . . . . . . . . . . . . . . . . . . . . . . . . . . . . . . . . . . . 572
vii
Chapter 21: Building applications visually
Building master and detail pages . . . . . . . . . . . . . . . . . . . . . . . . . . . . . . . . . . . . . . . . . . . . . . . . . . . . . . . . . . . . . . . . . . . . . . . . . . . . . . . . . . . . 583
Building search and results pages . . . . . . . . . . . . . . . . . . . . . . . . . . . . . . . . . . . . . . . . . . . . . . . . . . . . . . . . . . . . . . . . . . . . . . . . . . . . . . . . . . . . 590
Building a record insert page . . . . . . . . . . . . . . . . . . . . . . . . . . . . . . . . . . . . . . . . . . . . . . . . . . . . . . . . . . . . . . . . . . . . . . . . . . . . . . . . . . . . . . . . 596
Building an update record page . . . . . . . . . . . . . . . . . . . . . . . . . . . . . . . . . . . . . . . . . . . . . . . . . . . . . . . . . . . . . . . . . . . . . . . . . . . . . . . . . . . . . 599
Building a delete record page . . . . . . . . . . . . . . . . . . . . . . . . . . . . . . . . . . . . . . . . . . . . . . . . . . . . . . . . . . . . . . . . . . . . . . . . . . . . . . . . . . . . . . . . 604
Building pages with advanced data manipulation objects (ColdFusion, ASP) . . . . . . . . . . . . . . . . . . . . . . . . . . . . . . . . . . . . . . . . . . 611
Building a registration page . . . . . . . . . . . . . . . . . . . . . . . . . . . . . . . . . . . . . . . . . . . . . . . . . . . . . . . . . . . . . . . . . . . . . . . . . . . . . . . . . . . . . . . . . 615
Building a login page . . . . . . . . . . . . . . . . . . . . . . . . . . . . . . . . . . . . . . . . . . . . . . . . . . . . . . . . . . . . . . . . . . . . . . . . . . . . . . . . . . . . . . . . . . . . . . . . 617
Building a page that only authorized users can access . . . . . . . . . . . . . . . . . . . . . . . . . . . . . . . . . . . . . . . . . . . . . . . . . . . . . . . . . . . . . . . . 619
Securing a folder in your application (ColdFusion) . . . . . . . . . . . . . . . . . . . . . . . . . . . . . . . . . . . . . . . . . . . . . . . . . . . . . . . . . . . . . . . . . . . . 622
Using ColdFusion components . . . . . . . . . . . . . . . . . . . . . . . . . . . . . . . . . . . . . . . . . . . . . . . . . . . . . . . . . . . . . . . . . . . . . . . . . . . . . . . . . . . . . . 623
Chapter 22: Building forms
Using forms to collect information from users . . . . . . . . . . . . . . . . . . . . . . . . . . . . . . . . . . . . . . . . . . . . . . . . . . . . . . . . . . . . . . . . . . . . . . . . 630
Creating web forms . . . . . . . . . . . . . . . . . . . . . . . . . . . . . . . . . . . . . . . . . . . . . . . . . . . . . . . . . . . . . . . . . . . . . . . . . . . . . . . . . . . . . . . . . . . . . . . . . 633
Building ColdFusion forms . . . . . . . . . . . . . . . . . . . . . . . . . . . . . . . . . . . . . . . . . . . . . . . . . . . . . . . . . . . . . . . . . . . . . . . . . . . . . . . . . . . . . . . . . . . 646
Chapter 23: Accessibility
Dreamweaver and accessibility . . . . . . . . . . . . . . . . . . . . . . . . . . . . . . . . . . . . . . . . . . . . . . . . . . . . . . . . . . . . . . . . . . . . . . . . . . . . . . . . . . . . . . 659
Last updated 12/7/2011
Page 8

Chapter 1: What’s New
What’s New
Important: This page provides a list of new features in Dreamweaver CS5 and Dreamweaver CS5.5. This page does NOT
tell you how to use those features. For more information about any of the new features, click the corresponding links
provided. You can also watch a
What’s new (CS5.5)
Multiscreen support
Preview your designs in standard screen resolutions, or use media queries to define resolution. When testing for
devices that change page orientation based on how the device is held, use the landscape and portrait options during
preview. For more information, see
Media query support
Use media queries to customize the appearance of your site for different screen resolutions. For more information, see
“Creating media queries (CS5.5 and later)” on page 462.
CS5 feature overview, or a CS5.5 feature overview on AdobeTV.
“Designing for multiple screens and devices” on page 462.
1
Web applications for mobile devices
Quickly design a web application that works on most mobile devices using the jQuery Mobile widget. For more
information, see
“Creating web applications for mobile devices (CS5.5 and later)” on page 464.
Package web applications for Android, iPhone, and iPad
Package your web applications in Dreamweaver, and deploy them to Android™ and iOS-based devices. For more
information, see
“Packaging web applications” on page 467.
HTML5, CSS3, and jQuery support
Dreamweaver supports code hinting for HTML5, CSS3, and jQuery.
Starter layouts are also available for building HTML5 pages from scratch. Dreamweaver supports the HTML5 feature
to embed videos in HTML pages. For more information, see
The CSS panel has been enhanced to support commonly used CSS3 properties. For more information, see “Code
hints” on page 292 and “Enhancements to CSS3 support in the CSS styles panel (CS5.5)” on page 126.
“Embed videos in web pages (HTML5)” on page 237.
FTPS support
Transfer data using FTPS. FTPS (FTP over SSL) provides both encryption and authentication support as compared to
SFTP that supports only encryption. For more information, see
“FTPS connections (CS5.5)” on page 41.
W3C validator support
Create standards-compliant HTML and XHTML pages using the W3C validator in Dreamweaver. For more
information, see
“Validate documents using W3C validator (CS5.5)” on page 312.
Last updated 12/7/2011
Page 9

USING DREAMWEAVER
What’s New
What’s new (CS5)
Adobe BrowserLab
Dreamweaver CS5 integrates with Adobe BrowserLab, one of the new CS Live online services, which provides a fast
and accurate solution for cross-browser compatibility testing. With BrowserLab you can preview web pages and local
content using multiple viewing and comparison tools. See
Business Catalyst integration
Adobe Business Catalyst is a hosted application that replaces traditional desktop tools with one, central platform for
web designers. The application works hand-in-hand with Dreamweaver, and lets you build everything from basic datadriven websites to powerful online stores. See
http://www.adobe.com/go/business_catalyst_get_extension_en.
CSS enhancements
CSS Disable/Enable
CSS Disable/Enable lets you disable and re-enable CSS properties directly from the CSS Styles panel. Disabling a CSS
property simply comments out the specified property without actually deleting it. See
page 141.
“BrowserLab” on page 471.
“Disable/Enable CSS” on
2
CSS Inspection
Inspect mode lets you visually display the CSS box model properties—including padding, border, and margin—in
detail without reading code or requiring a separate third-party utility such as Firebug. See
on page 142.
CSS starter layouts
Dreamweaver CS5 includes updated and simplified CSS starter layouts. The complex descendent selectors from the
CS4 layouts have been removed and replaced with simplified, easy-to-understand classes. See
CSS layout” on page 150.
“Inspect CSS in Live view”
“Create a page with a
Dynamically-Related Files
The Dynamically-Related Files feature lets you discover all of the external files and scripts necessary to assemble PHPbased Content Management System (CMS) pages, and displays their filenames in the Related Files toolbar. By default
Dreamweaver supports file discovery for the Wordpress, Drupal, and Joomla! CMS frameworks. See
Dynamically-Related Files” on page 70.
“Open
Live view navigation
Live view navigation activates links in Live view, allowing you to interact with server-side applications and dynamic
data. The feature also allows you to enter a URL to inspect pages served from a live web server and edit pages you have
browsed to if they exist in one of your locally defined sites. See
“Previewing pages in Dreamweaver” on page 276.
PHP custom class code hinting
PHP custom class code hinting displays the proper syntax for PHP functions, objects, and constants, helping you type
more accurate code. Code hinting also works with your own custom functions and classes, as well as third-party
frameworks, such as the Zend framework.
Last updated 12/7/2011
Page 10

USING DREAMWEAVER
What’s New
Simplified site setup
The newly redesigned Site Definition dialog box (now the Site Setup dialog box) makes it easier to set up a local
Dreamweaver site so that you can start building web pages right away. The remote server category lets you specify your
remote and testing servers in one view. See
server” on page 38.
“Set up a local version of your site” on page 37 and “Connect to a remote
Site-specific code hints
The Site-specific code hints feature lets you customize your coding environment when working with third-party PHP
libraries and CMS frameworks such as WordPress, Drupal, Joomla!, or other frameworks. Theme files for blogs and
other custom PHP files and directories can be included or excluded as sources for code-hints. See
hints” on page 294.
“Site-specific code
Subversion support enhancements
Dreamweaver CS5 expands its support for Subversion, allowing you to move, copy, and delete files locally, and then
synchronize changes with your remote SVN repository. The new Revert command allows you to quickly correct tree
conflicts or rollback to a previous version of a file. Additionally, a new extension allows you to specify which version
of Subversion you would like to work with on a given project. See
page 88.
“Use Subversion (SVN) to get and check in files” on
3
Deprecated features
The following features have been deprecated as of Dreamweaver CS5:
• Accessibility validation report
• ASP/JavaScript server behaviors
• Check Browser JavaScript behavior
• Connect to FTP/RDS server without defining a site
• Control Shockwave or SWF JavaScript behavior
• Create Web Photo Album
• Hide Pop-up Menu JavaScript behavior
• InContext Editing Manage Available CSS Classes
• Insert FlashPaper
• Insert/Remove Mark of the Web
• Microsoft Visual Sourcesafe integration
• Navigation bars
• Play Sound JavaScript behavior
• Show Events menu (Behaviors panel)
• Show Pop-up Menu JavaScript behavior
• Timeline JavaScript behaviors
• Validate tags
• View Live Data
Last updated 12/7/2011
Page 11

Chapter 2: Workspace
Dreamweaver workflow and workspace
Dreamweaver workflow overview
You can use several approaches to create a website. This is one approach:
Plan and set up your site
Determine where the files will go and examine site requirements, audience profiles, and site goals. Additionally,
consider technical requirements such as user access, as well as browser, plug-in, and download restrictions. After
you’ve organized your information and determined a structure, you can begin creating your
Dreamweaver sites” on page 36.)
Organize and manage your site files
In the Files panel you can easily add, delete, and rename files and folders to change the organization as needed. The
Files panel also has many tools for managing your site, transferring files to and from a remote server, setting up a Check
In/Check Out process to prevent files from being overwritten, and synchronizing the files on your local and remote
sites. From the Assets panel, you can easily organize the assets in a site; you can then drag most assets directly from the
Assets panel into a Dreamweaver document. You can also use Dreamweaver to manage aspects of your
Adobe®Contribute® sites. (See
page 106.)
“Managing files and folders” on page 72 and “Managing assets and libraries” on
site. (See “Working with
4
Lay out your web pages
Choose the layout technique that works for you, or use the Dreamweaver layout options in conjunction with one
another to create your site’s look. You can use Dreamweaver AP elements, CSS positioning styles, or predesigned CSS
layouts to create your layout. The table tools let you design pages quickly by drawing and then rearranging the page
structure. If you want to display multiple elements at once in a browser, you can use frames to lay out your documents.
Finally, you can create new pages based on a Dreamweaver template, then update the layout of those pages
automatically when the template changes. (See
HTML” on page 167.)
Add content to pages
Add assets and design elements such as text, images, rollover images, image maps, colors, movies, sound, HTML links,
jump menus, and more. You can use built-in page-creation features for such elements as titles and backgrounds, type
directly in the page, or import content from other documents. Dreamweaver also provides behaviors for performing
tasks in response to specific events, such as validating a form when the visitor clicks the Submit button or opening a
second browser window when the main page has finished loading. Finally, Dreamweaver provides tools for
maximizing website performance and for testing pages to ensure compatibility with different web browsers. (See
“Adding content to pages” on page 198.)
Create pages by hand coding
Coding web pages by hand is another approach to creating pages. Dreamweaver provides easy-to-use visual editing
tools, but it also provides a sophisticated coding environment; you can use either approach, or both, to create and edit
your pages. (See
“Working with page code” on page 281.)
“Creating pages with CSS” on page 118 and “Laying out pages with
Last updated 12/7/2011
Page 12

USING DREAMWEAVER
Workspace
Set up a web application for dynamic content
Many websites contain dynamic pages that allow visitors to view information stored in databases, and usually allow
some visitors to add new information and edit information in the databases. To create such pages, you must first set
up a web server and application server, create or modify a Dreamweaver site, and connect to a database. (See
“Preparing to build dynamic sites” on page 504.)
Create dynamic pages
In Dreamweaver, you can define a variety of sources of dynamic content, including recordsets extracted from
databases, form parameters, and JavaBeans components. To add the dynamic content to a page, simply drag it onto
the page.
You can set your page to display one record or many records at a time, display more than one page of records, add
special links to move from one page of records to the next (and back), and create record counters to help users keep
track of the records. You can encapsulate application or business logic using technologies such as Adobe® ColdFusion®
and web services. If you need more flexibility, you can create custom server behaviors and interactive forms. (See
“Making pages dynamic” on page 532.)
Test and publish
Testing your pages is an ongoing process that happens throughout the development cycle. At the end of the cycle, you
publish the site on a server. Many developers also schedule periodic maintenance to ensure that the site remains
current and functional. (See
“Getting and putting files to and from your server” on page 80.)
5
For a video tutorial on what you can do with Dreamweaver, see www.adobe.com/go/lrvid4040_dw.
Workspace layout overview
The Dreamweaver workspace lets you view documents and object properties. The workspace also places many of the
most common operations in toolbars so that you can quickly make changes to your documents.
In Windows®, Dreamweaver provides an all-in-one-window integrated layout. In the integrated workspace, all
windows and panels are integrated into a single larger application window.
Last updated 12/7/2011
Page 13
USING DREAMWEAVER
Workspace
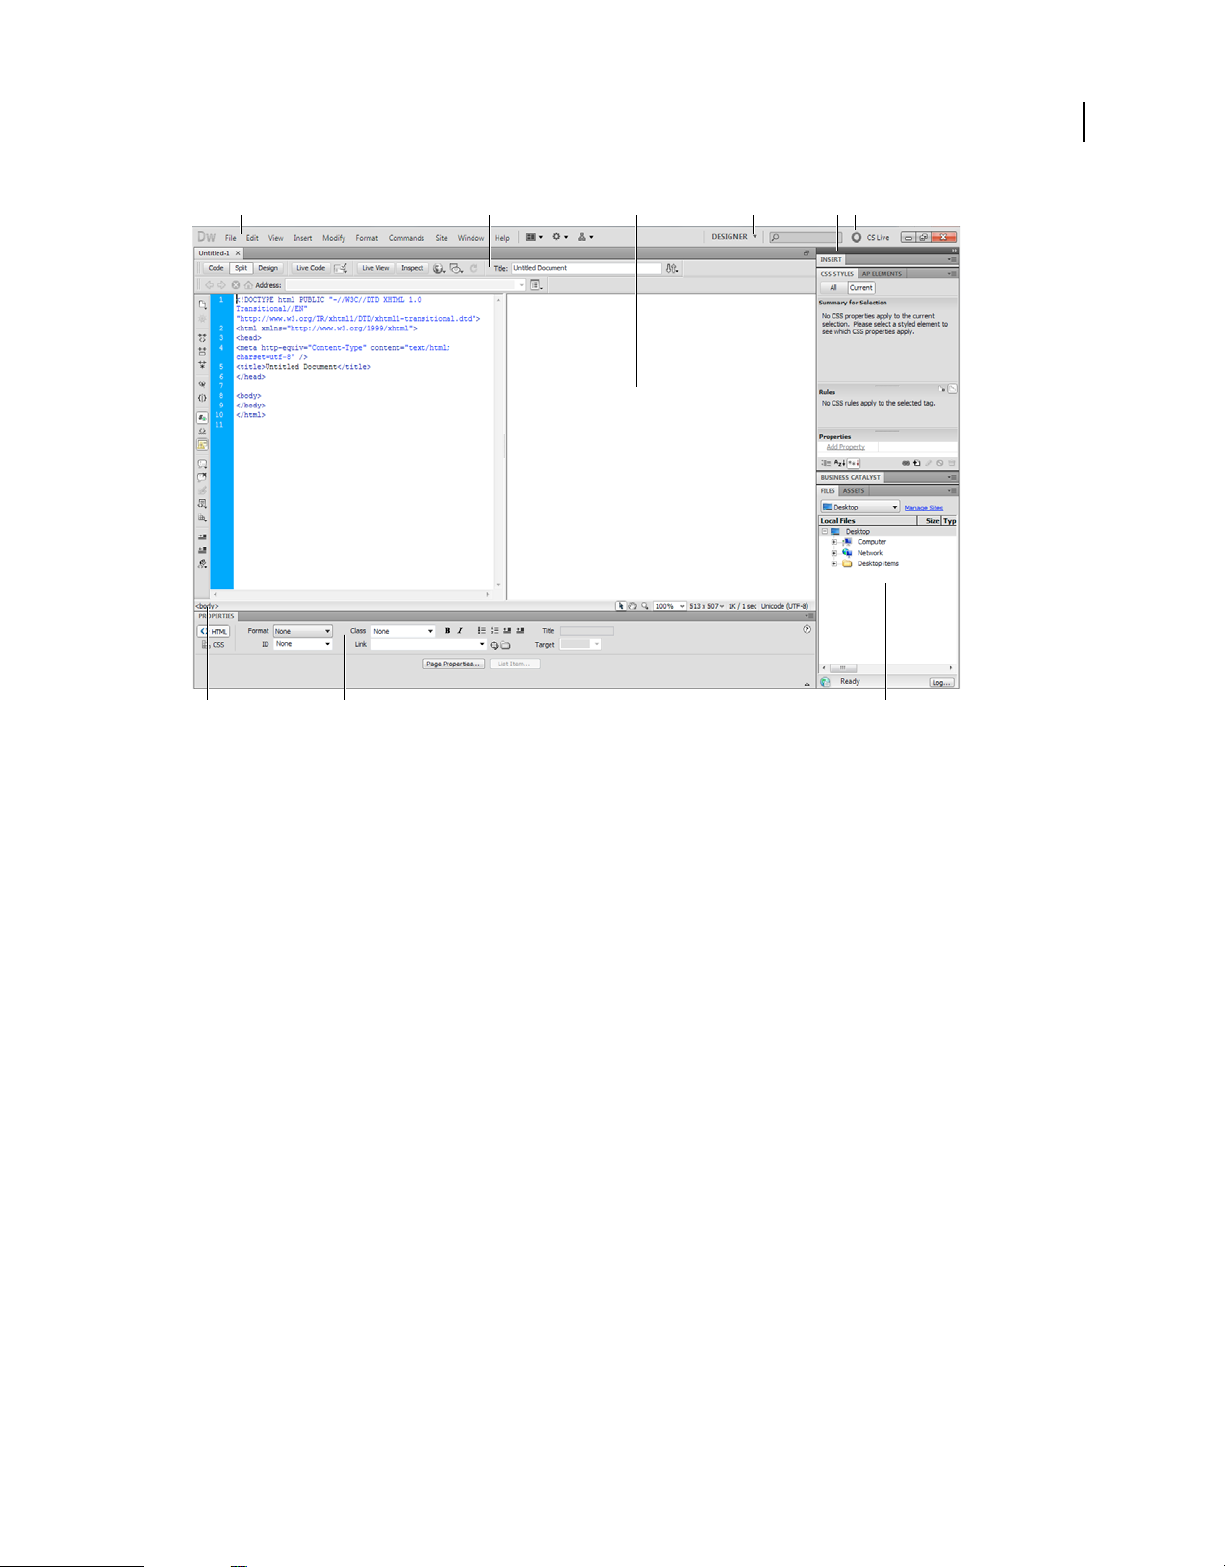
A B C E FD
6
G
A. Application bar B. Document toolbar C. Document window D. Workspace switcher E. Panel groups F. CS Live G. Tag selector
H. Property inspector I. Files panel
H I
On Mac OS®, Dreamweaver can display multiple documents in a single window with tabs that identify each document.
Dreamweaver can also display a floating workspace in which each document appears in its own individual window.
Panel groups are initially docked together, but can be undocked into their own windows. When panel groups are
docked and the document area is maximized, resizing or showing and hiding panels auto-sizes the main document,
just as it does on Windows.
Last updated 12/7/2011
Page 14

USING DREAMWEAVER
Workspace
A B DC E F
7
G
A. Application bar B. Document toolbar C. Workspace switcher D. Document window E. CS Live F. Panel groups G. Tag selector
H. Property inspector I. Files panel
H
I
For a tutorial on working with different Dreamweaver workspaces, see www.adobe.com/go/lrvid4042_dw.
Workspace elements overview
The workspace includes the following elements.
Note: Dreamweaver provides many other panels, inspectors, and windows. To open the panels, inspectors, and windows,
use the Window menu.
The Welcome screen Lets you open a recent document or create a new document. From the Welcome screen, you can
also learn more about Dreamweaver by taking a product tour or a tutorial.
The Application bar Across the top of the application window contains a workspace switcher, menus (Windows only),
and other application controls.
The Document toolbar Contains buttons that provide options for different views of the Document window (such as
Design view and Code view), various viewing options, and some common operations such as previewing in a browser.
The Standard toolbar (Not displayed in the default workspace layout.) Contains buttons for common operations from
the File and Edit menus: New, Open, Browse in Bridge, Save, Save All, Print Code, Cut, Copy, Paste, Undo, and Redo.
To display the Standard toolbar, select View
The Coding toolbar (Displayed in Code view only.) Contains buttons that let you perform many standard coding
operations.
> Toolbars > Standard.
The Style Rendering toolbar (Hidden by default.) Contains buttons that let you see how your design would look in
different media types if you use media-dependent style sheets. It also contains a button that lets you enable or disable
Cascading Style Sheets
(CSS) styles.
Last updated 12/7/2011
Page 15

USING DREAMWEAVER
Workspace
The Document window Displays the current document as you create and edit it.
The Property inspector Lets you view and change a variety of properties for the selected object or text. Each object has
different properties. The Property inspector is not expanded by default in the Coder workspace layout.
The Tag selector Located in the Status bar at the bottom of the Document window. Shows the hierarchy of tags
surrounding the current selection. Click any tag in the hierarchy to select that tag and all its
Panels Help you monitor and modify your work. Examples include the Insert panel, the CSS Styles panel, and the Files
contents.
panel. To expand a panel, double-click its tab.
The Insert panel Contains buttons for inserting various types of objects, such as images, tables, and media elements,
into a document. Each object is a piece of HTML code that lets you set various attributes as you insert it. For example,
you can insert a table by clicking the Table button in the Insert panel. If you prefer, you can insert objects using the
Insert menu instead of the Insert panel.
The Files panel Lets you manage your files and folders, whether they are part of a Dreamweaver site or on a remote
server. The Files panel also lets you access all the files on your local disk, much like
Windows Explorer
(Windows) or the Finder (Macintosh).
8
Document window overview
The Document window shows the current document. You can select any of the following views:
Design view A design environment for visual page layout, visual editing, and rapid application development. In this
view, Dreamweaver displays a fully editable, visual representation of the document, similar to what you would see
when viewing the page in a browser.
Code view A hand-coding environment for writing and editing HTML, JavaScript, server-language code—such PHP
or ColdFusion Markup Language (CFML)—and any other kind of code.
Split Code view A split version of Code view that lets you scroll to work on different sections of the document at the
same time.
Code and Design view Lets you see both Code view and Design view for the same document in a single window.
Live view Similar to Design view, Live view displays a more realistic representation of what your document will look
like in a browser, and lets you interact with the document exactly as you would in a browser. Live view is not editable.
However, you can edit in Code view and refresh Live view to see your changes.
Live Code view Only available when viewing a document in Live view. Live Code view displays the actual code that a
browser uses to execute the page, and can dynamically change as you interact with the page in Live view. Live Code
view is not editable.
When a Document window is maximized (the default), tabs appear at the top of the Document window showing the
filenames of all open documents. Dreamweaver displays an asterisk after the filename if you’ve made changes that you
haven’t saved yet.
To switch to a document, click its tab.
Dreamweaver also displays the Related Files toolbar below the document’s tab (or below the document’s title bar if
you’re viewing documents in separate windows). Related documents are documents associated with the current file,
such as CSS files or JavaScript files. To open one of these related files in the Document window, click its filename in
the Related Files toolbar.
Last updated 12/7/2011
Page 16
USING DREAMWEAVER
Workspace
More Help topics
“Working in the Document window” on page 17
“About Live view” on page 276
“Open Related Files” on page 68
“General information about coding in Dreamweaver” on page 281
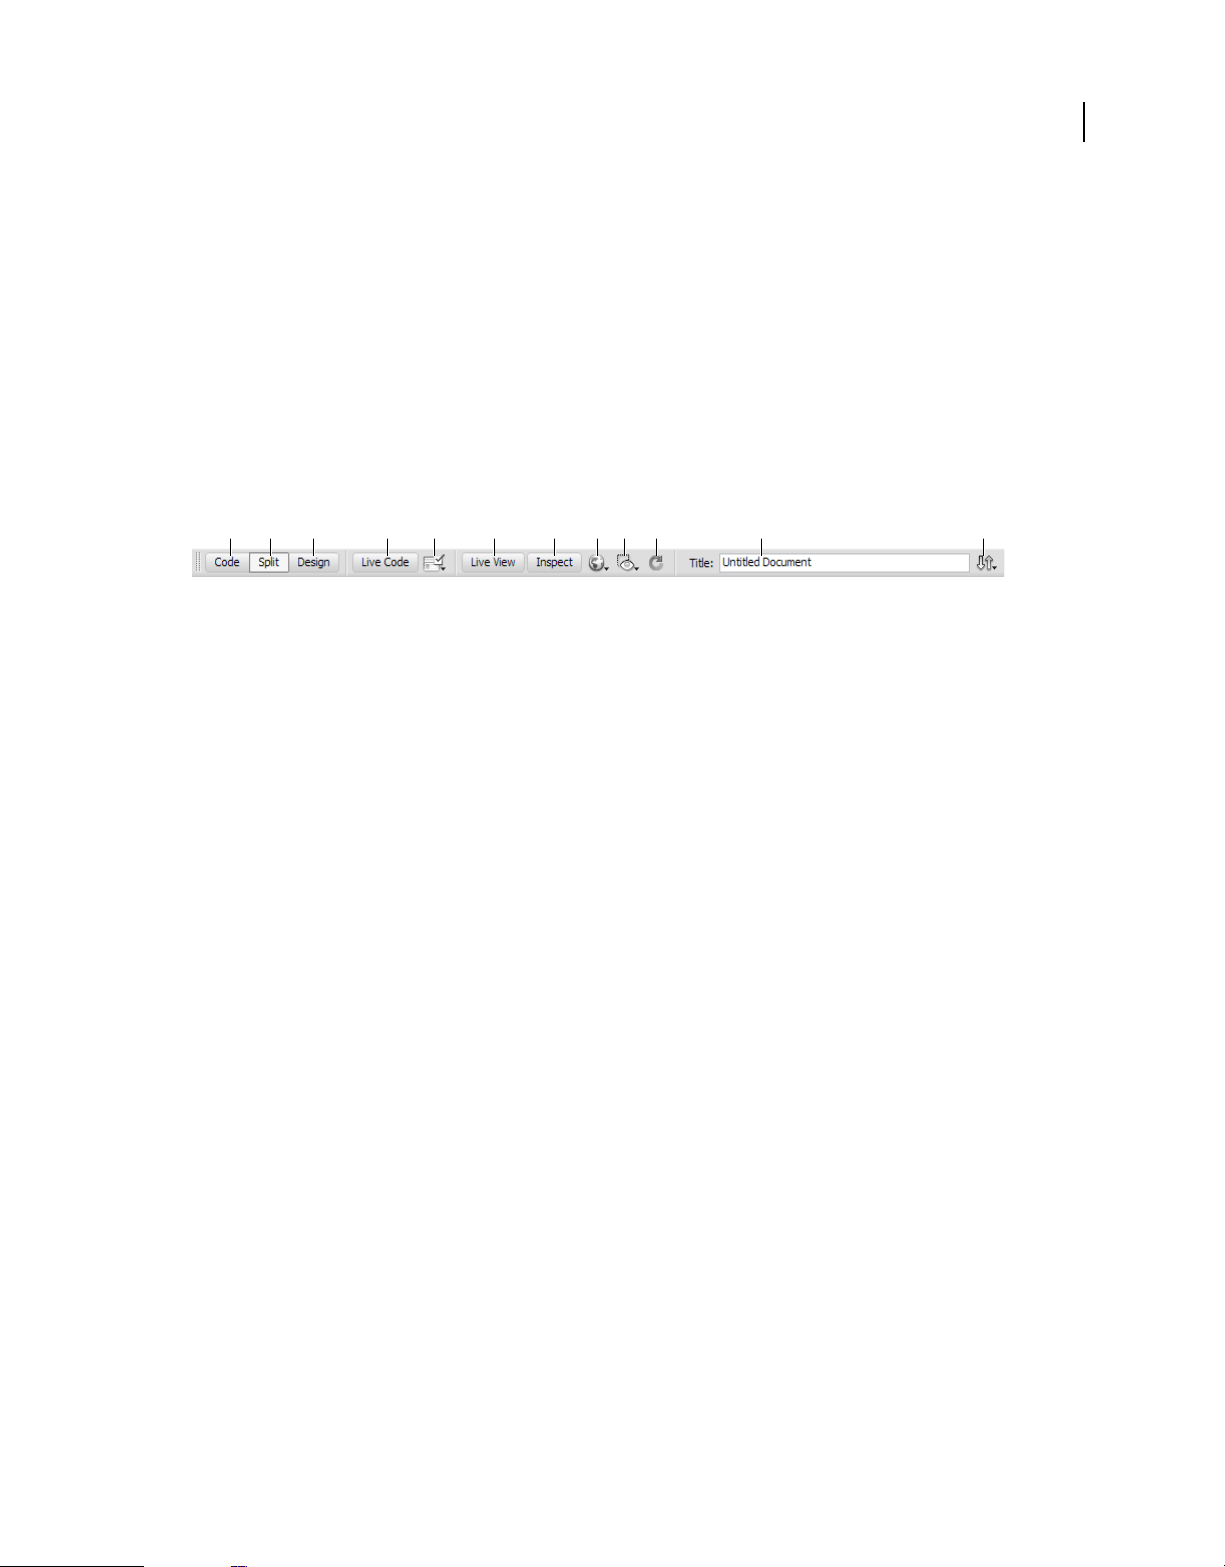
Document toolbar overview
The Document toolbar contains buttons that let you toggle between different views of your document quickly. The
toolbar also contains some common commands and options related to viewing the document and transferring it
between the local and remote sites. The illustration below shows the expanded Document toolbar.
A B C D E G H I J K LF
A. Show Code view B. Show Code and Design view C. Show Design view D. Live Code view E. Check Browser Compatibility F. Live view
G. CSS Inspect mode H. Preview/Debug in Browser I. Visual Aids J. Refresh Design View K. Document Title L. File Management
The following options appear in the Document toolbar:
9
Show Code View Displays only the Code view in the Document window.
Show Code and Design Views Splits the Document window between the Code and the Design views. When you select
this combined view, the option Design View on Top becomes available in the View Options menu.
Show Design View Displays only the Design view in the Document window.
Note: If you are working with XML, JavaScript, CSS, or other code based file types, you cannot view the files in Design
view and the Design and Split buttons are dimmed out.
Live View Displays a non-editable, interactive, browser based view of the document.
Live Code View Displays the actual code used by the browser to execute the page.
Document Title Allows you to enter a title for your document, to be displayed in the browser’s title bar. If your
document already has a title, it appears in this field.
File Management Displays the File Management pop-up menu.
Preview/Debug in Browser Allows you to preview or debug your document in a browser. Select a browser from the
pop-up menu.
Refresh Design View Refreshes the document’s Design view after you make changes in Code view. Changes you make
in Code view don’t automatically appear in Design view until you perform certain actions, such as saving the file or
clicking this button.
Note: Refreshing also updates code features that are DOM (Document Object Model) dependent, such as the ability to
select a code block’s opening or closing tags.
View Options Allows you to set options for Code view and Design view, including which view you want to appear
above the other. Options in the menu are for the current view: Design view, Code view, or both.
Visual Aids Lets you use different visual aids to design your pages.
Validate Markup Lets you validate the current document or a selected tag.
Check Browser Compatibility Lets you check if your CSS is compatible across different browsers.
Last updated 12/7/2011
Page 17
USING DREAMWEAVER
Workspace
More Help topics
“Preview pages in Live view” on page 276
“Setting coding preferences” on page 287
“View and edit head content” on page 321
“Using visual aids for layout” on page 167
Standard toolbar overview
The Standard toolbar contains buttons for common operations from the File and Edit menus: New, Open, Browse in
Bridge, Save, Save All, Print Code, Cut, Copy, Paste, Undo, and Redo. Use these buttons just as you would use the
equivalent menu commands.
Style Rendering toolbar overview
The Style Rendering toolbar (hidden by default) contains buttons that let you see how your design would look in
different media types if you use media-dependent style sheets. It also contains a button that lets you enable or disable
CSS styles. To display the toolbar, select View
> Toolbars > Style Rendering.
10
This toolbar only works if your documents use media-dependent style sheets. For example, your style sheet might
specify a body rule for print media and a different body rule for handheld devices. For more information on creating
media-dependent style sheets, see the World Wide Web Consortium website at
www.w3.org/TR/CSS21/media.html.
By default, Dreamweaver displays your design for the screen media type (which shows you how a page is rendered on
a computer screen). You can view the following media type renderings by clicking the respective buttons in the Style
Rendering toolbar.
Render Screen Media Type Shows you how the page appears on a computer screen.
Render Print Media Type Shows you how the page appears on a printed piece of paper.
Render Handheld Media Type Shows you how the page appears on a handheld device, such as a mobile phone or a
BlackBerry device.
Render Projection Media Type Shows you how the page appears on a projection device.
Render TTY Media Type Shows you how the page appears on a teletype machine.
Render TV Media Type Shows you how the page appears on a television screen.
Toggle Displaying Of CSS Styles Lets you enable or disable CSS styles. This button works independently of the other
media buttons.
Design-time Style Sheets Lets you specify a Design-time style sheet.
For a tutorial on designing style sheets for print and handheld devices, see www.adobe.com/go/vid0156.
Browser Navigation toolbar overview
The Browser Navigation toolbar becomes active in Live view, and shows you the address of the page you’re looking at
in the Document window. As of Dreamweaver CS5, Live view acts like a regular browser, so even if you browse to a
site outside of your local site (for example, http://www.adobe.com), Dreamweaver will load the page in the Document
window.
Last updated 12/7/2011
Page 18
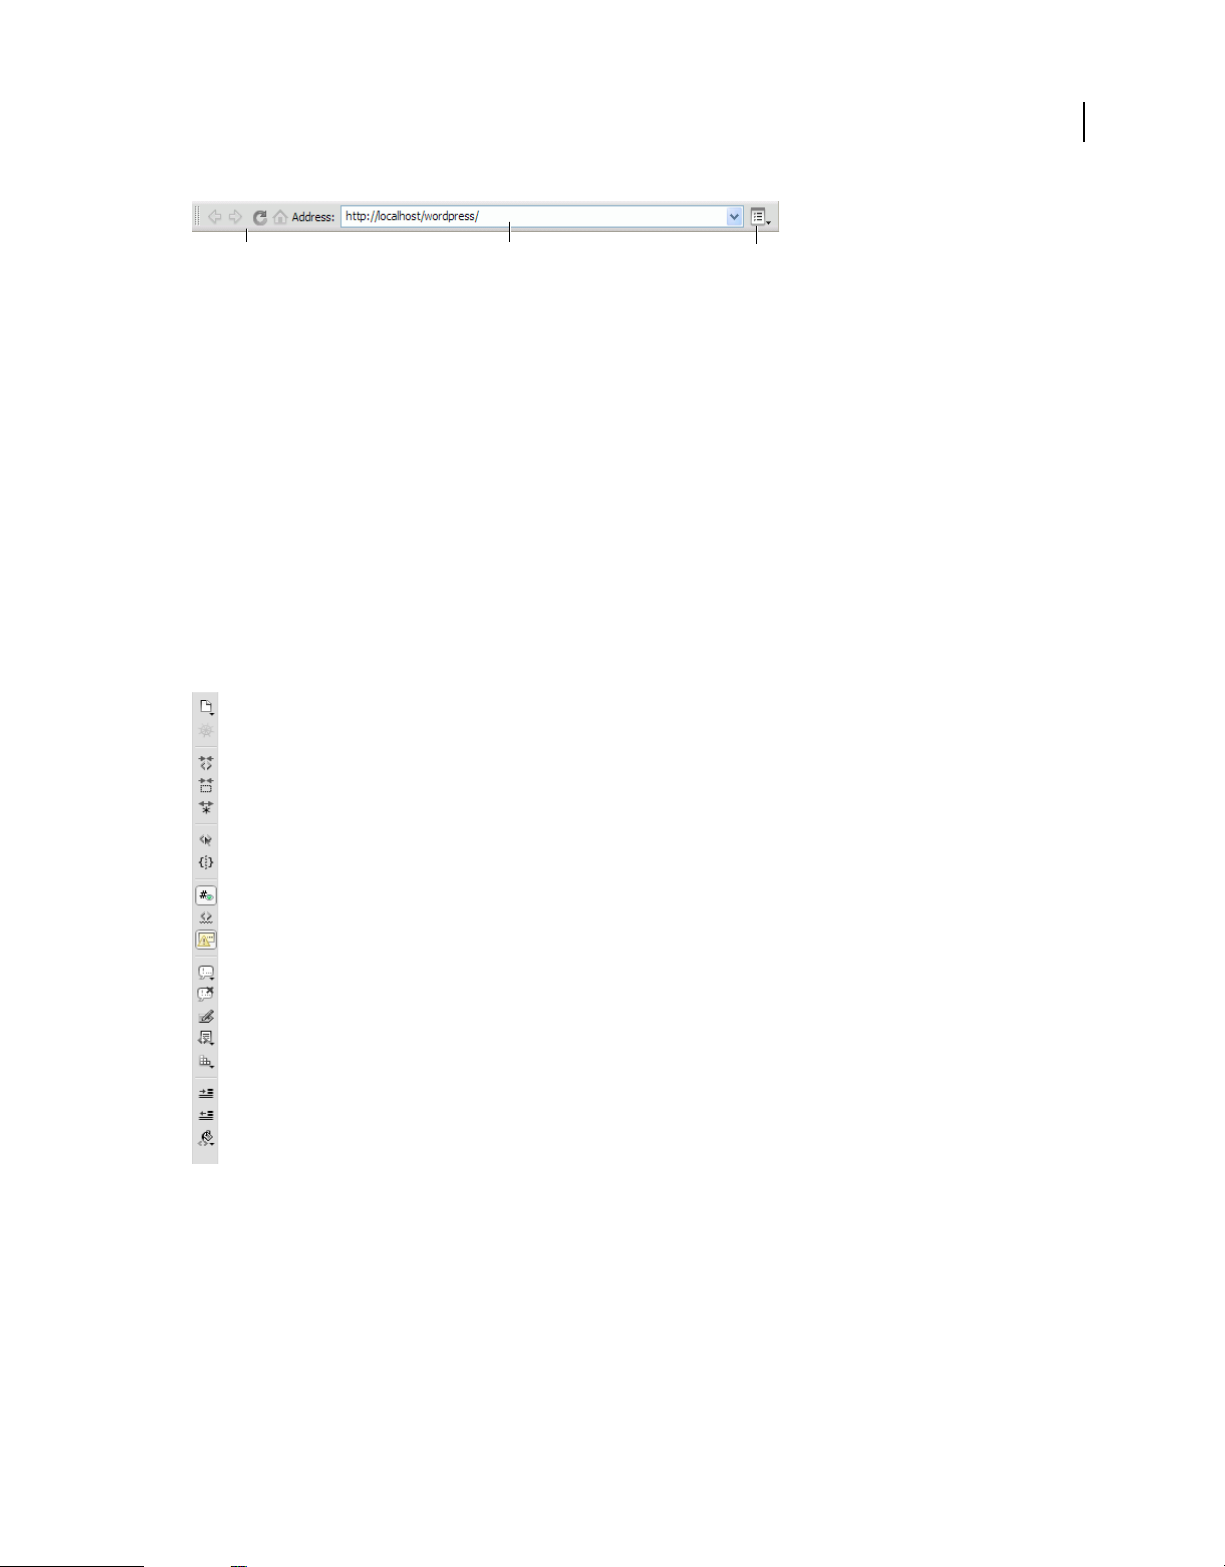
USING DREAMWEAVER
Workspace
11
BA
A. Browser controls B. Address box C. Live view options
C
By default, links are not active in Live view. Having links non-active lets you select or click link text in the Document
window without being taken to another page. To test links in Live view, you can enable one-time clicking or
continuous clicking by selecting Follow Links or Follow Links Continuously from the View options menu to the right
of the address box.
More Help topics
“Previewing pages in Dreamweaver” on page 276
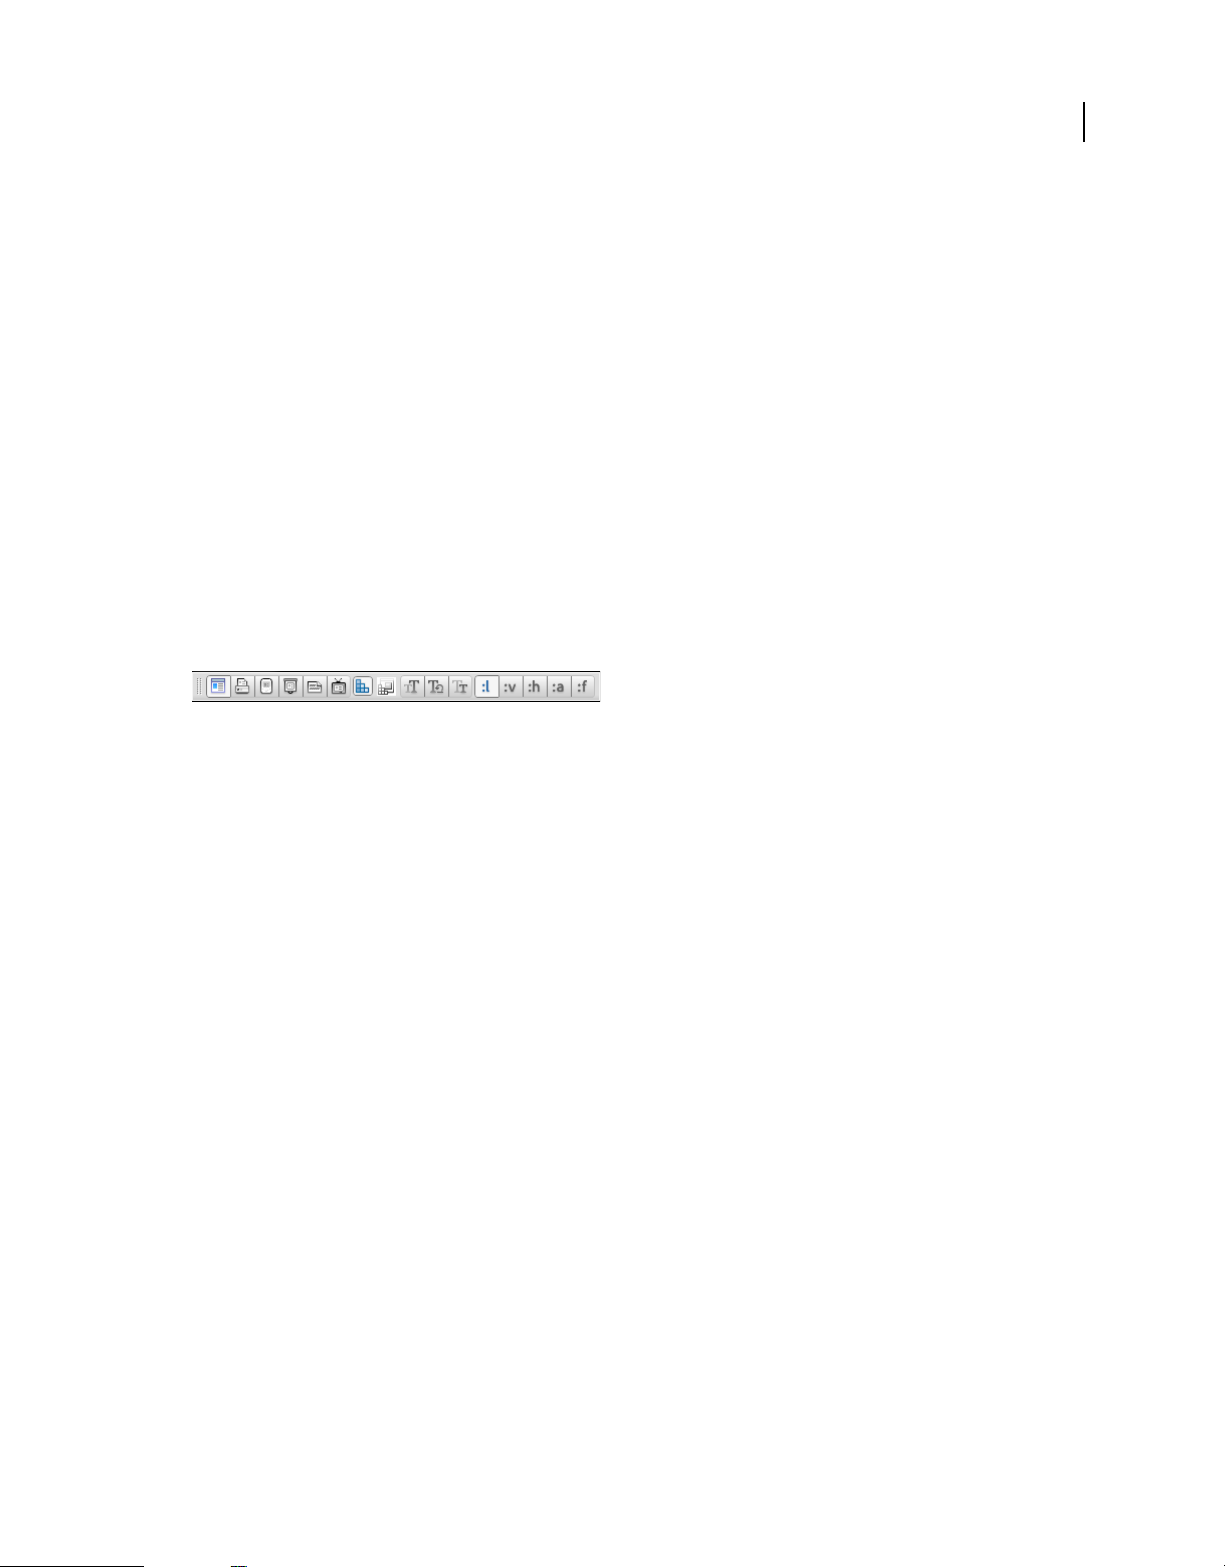
Coding toolbar overview
The Coding toolbar contains buttons that let you perform many standard coding operations, such as collapsing and
expanding code selections, highlighting invalid code, applying and removing comments, indenting code, and inserting
recently used code snippets. The Coding toolbar appears vertically on the left side of the Document window, and is
only visible when Code view is showing.
You cannot undock or move the Coding toolbar, but you can hide it (View > Toolbars > Coding).
You can also edit the Coding toolbar to display more buttons (such as Word Wrap, Show Hidden Characters, and Auto
Indent), or hide buttons that you don’t want to use. To do so, however, you must edit the XML file that generates the
toolbar. For more information, see Extending Dreamweaver.
More Help topics
“Insert code with the Coding toolbar” on page 296
Last updated 12/7/2011
Page 19
USING DREAMWEAVER
Workspace
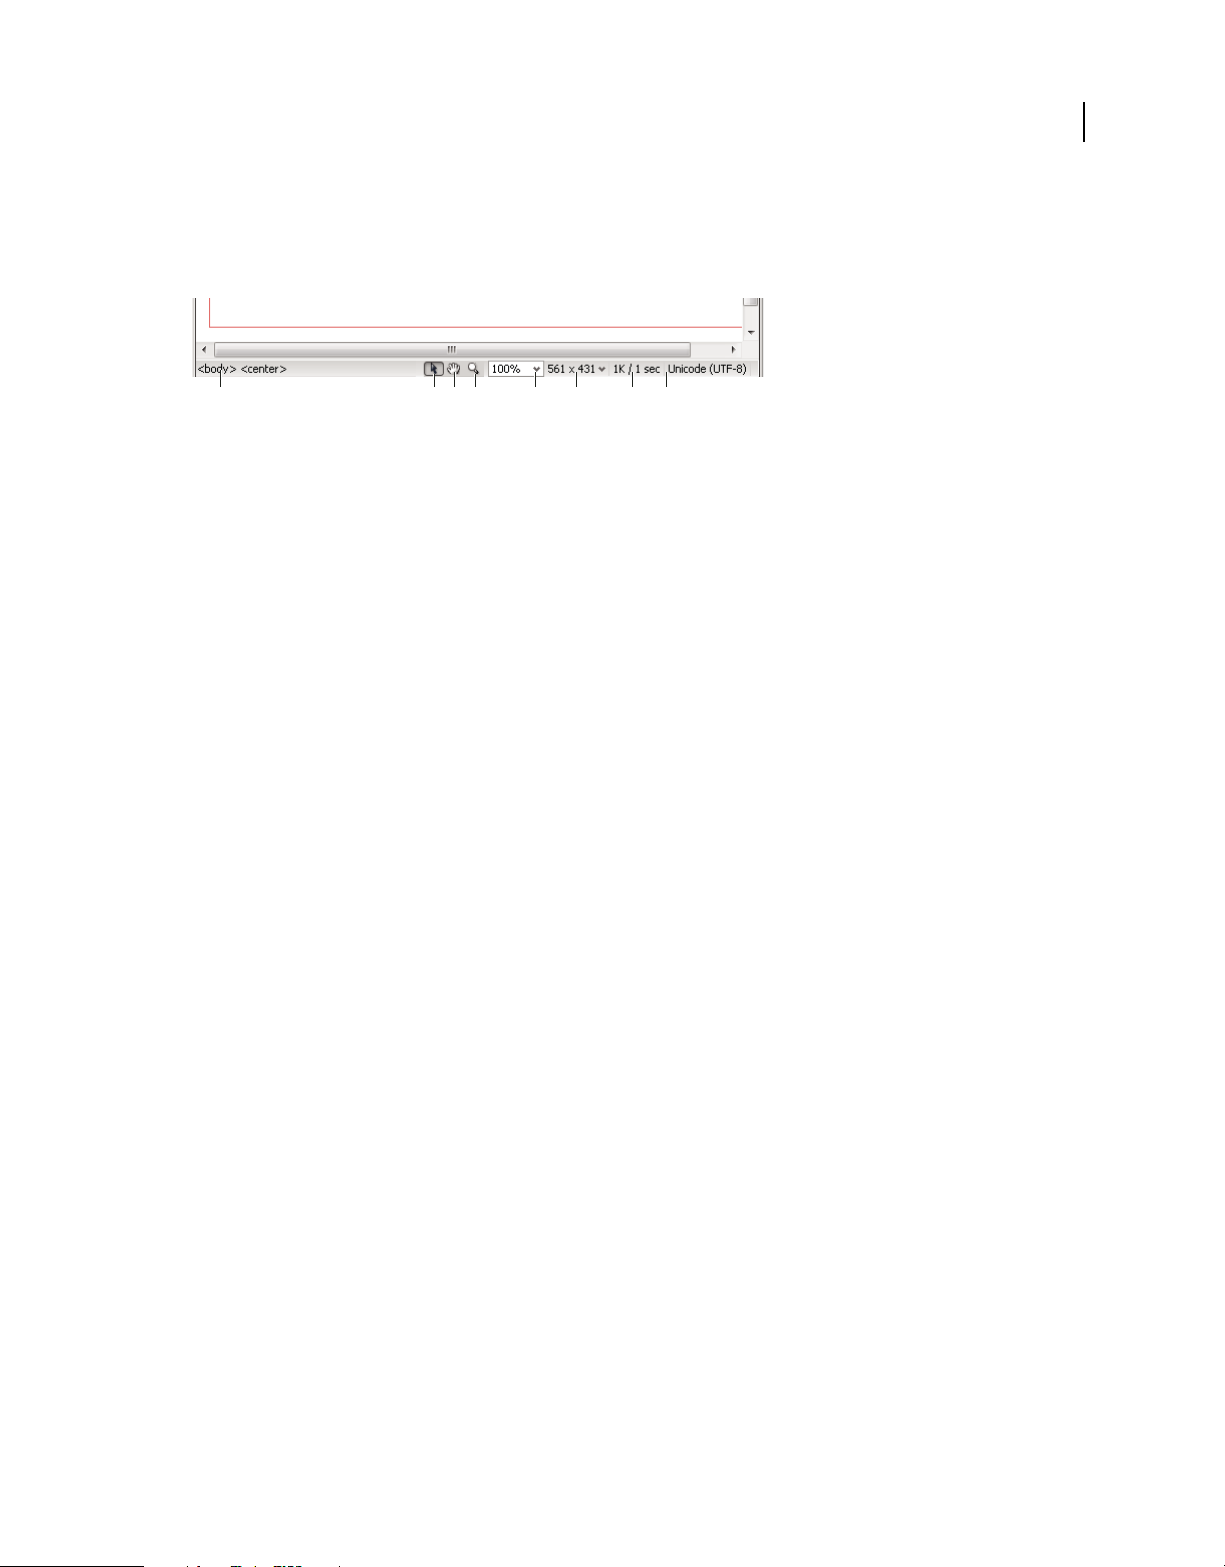
Status bar overview
The Status bar at the bottom of the Document window provides additional information about the document you are
creating.
A B C D E F G H
A. Tag selector B. Select tool C. Hand tool D. Zoom tool E. Set magnification F. Window size pop-up menu G. Document size and estimated
download time H. Encoding indicator
Tag selector Shows the hierarchy of tags surrounding the current selection. Click any tag in the hierarchy to select that
tag and all its contents. Click
tag in the tag selector, right-click (Windows) or Control-click (Macintosh) the tag and select a class or ID from the
context menu.
Select tool Enables and disables the Hand tool.
Hand tool Lets you click the document and drag it in the Document window.
Zoom tool and Set Magnification pop-up menu Let you set a magnification level for your document.
<body> to select the entire body of the document. To set the class or ID attributes for a
12
Window size pop-up menu (Not available in Code view.) Lets you resize the Document window to predetermined or
custom dimensions. When you change the view size of a page in design or live view only the dimensions of the view
size change. The document size is unaltered.
In addition to predetermined and custom sizes, Dreamweaver also lists sizes specified in a media query. When you
select a size corresponding to a media query, Dreamweaver uses the media query to display the page. You can also
change the page orientation to preview the page for mobile devices where the page layout changes based on how the
device is held.
Document size and download time Shows the estimated document size and estimated download time for the page,
including all dependent files such as images and other media files.
Encoding indicator Shows the text encoding for the current document.
More Help topics
“Set window size and connection speed” on page 20
“Zoom in and out” on page 208
“Resize the Document window” on page 18
“Set download time and size preferences” on page 209
Last updated 12/7/2011
Page 20
USING DREAMWEAVER
Workspace
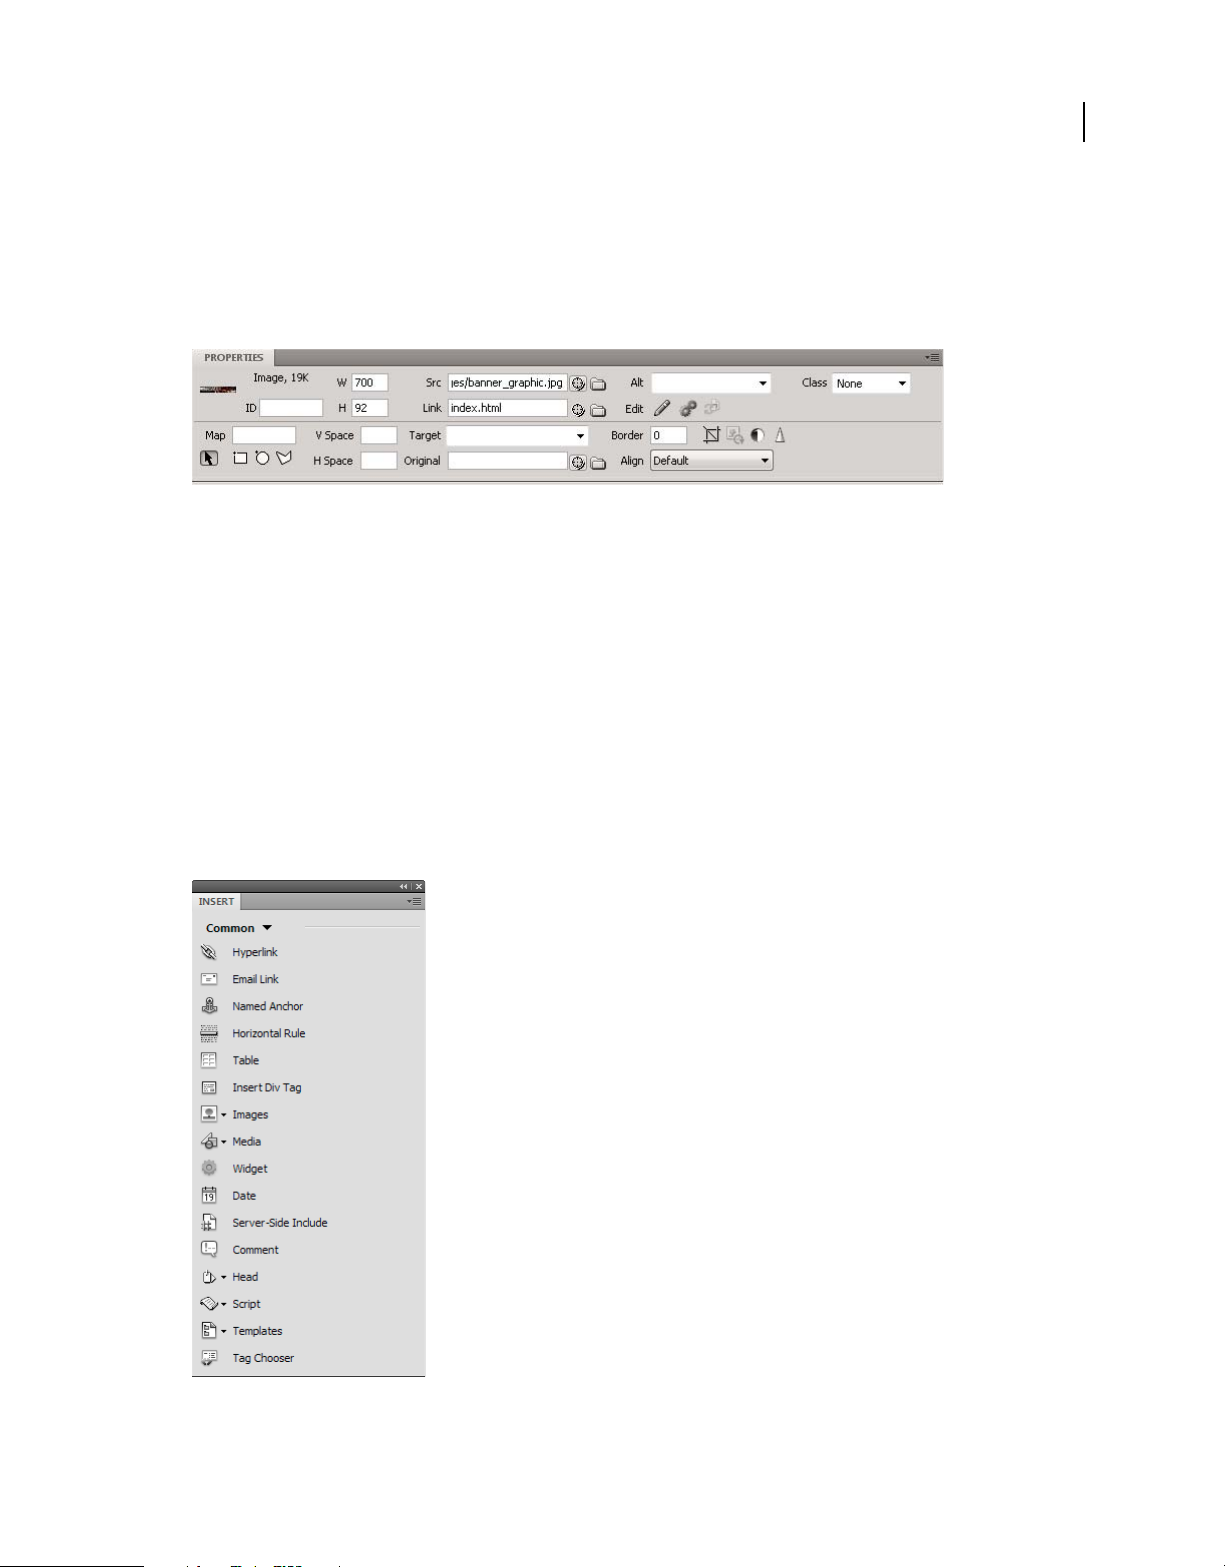
Property inspector overview
The Property inspector lets you examine and edit the most common properties for the currently selected page element,
such as text or an inserted object. The contents of the Property inspector vary depending on the element selected. For
example, if you select an image on your page, the Property inspector changes to show properties for the image (such
as the file path to the image, the width and height of the image, the border around the image, if any, and so on).
The Property inspector is at the lower edge of the workspace by default, but you can undock it and make it a floating
panel in the workspace.
More Help topics
“Dock and undock panels” on page 23
“Use the Property inspector” on page 21
13
Insert panel overview
The Insert panel contains buttons for creating and inserting objects such as tables, images, and links. The buttons are
organized into several categories, which you can switch by selecting the desired category from the Category pop-up
menu. Additional categories appear when the current document contains server code, such as ASP or CFML
documents.
Last updated 12/7/2011
Page 21

USING DREAMWEAVER
Workspace
Some categories have buttons with pop-up menus. When you select an option from a pop-up menu, it becomes the
default action for the button. For example, if you select Image Placeholder from the Image button’s pop-up menu, the
next time you click the Image button, Dreamweaver inserts an image placeholder. Anytime you select a new option
from the pop-up menu, the default action for the button changes.
The Insert panel is organized in the following categories:
The Common category Lets you create and insert the most commonly used objects, such as images and tables.
The Layout category Lets you insert tables, table elements, div tags, frames, and Spry widgets. You can also choose
two views for tables: Standard (default) and Expanded Tables.
The Forms category Contains buttons for creating forms and inserting form elements, including Spry validation
widgets.
The Data category Lets you insert Spry data objects as well as other dynamic elements like recordsets, repeated
regions, and record insertion and update forms.
The Spry category Contains buttons for building Spry pages, including Spry data objects and widgets.
The InContext Editing category Contains buttons for building InContext editing pages, including buttons for Editable
Regions, Repeating Regions, and managing CSS classes.
The Text category Lets you insert a variety of text- and list-formatting tags, such as b, em, p, h1, and ul.
14
The Favorites category Lets you group and organize the Insert panel buttons you use the most in one common place.
Server-code categories Available only for pages that use a particular server language, including ASP, CFML Basic,
CFML Flow, CFML Advanced, and PHP. Each of these categories provides server-code objects that you can insert in
Code view.
Unlike other panels in Dreamweaver, you can drag the Insert panel out of its default dock position and drop it into a
horizontal position at the top of the Document window. When you do so, it changes from a panel to a toolbar (though
you cannot hide and display it in the same way as other toolbars).
More Help topics
“Use the Insert panel” on page 198
Last updated 12/7/2011
Page 22
USING DREAMWEAVER
Workspace
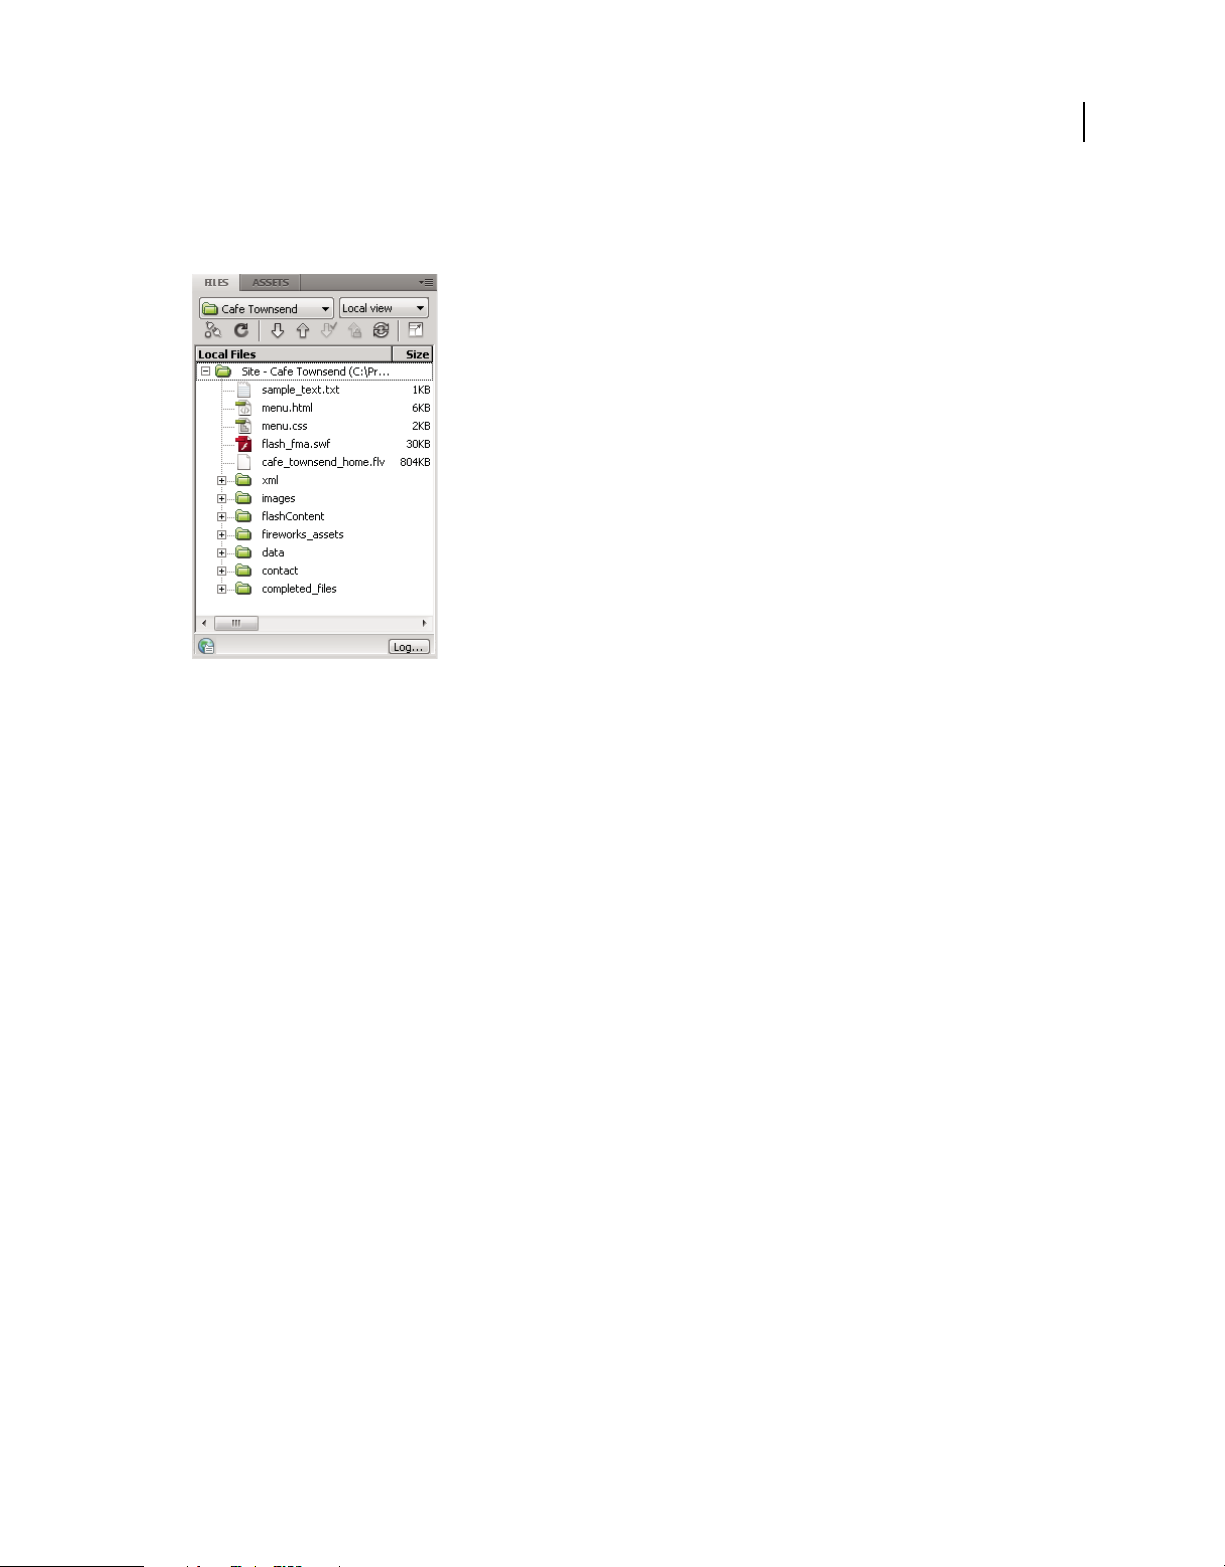
Files panel overview
Use the Files panel to view and manage the files in your Dreamweaver site.
15
When you view sites, files, or folders in the Files panel, you can change the size of the viewing area, and expand or
collapse the Files panel. When the Files panel is collapsed, it displays the contents of the local site, the remote site, the
testing server, or the SVN repository as a list of files. When expanded, it displays the local site and either the remote
site, the testing server, or the SVN repository.
For Dreamweaver sites, you can also customize the Files panel by changing the view—either your local or remote site—
that appears by default in the collapsed panel.
(CS5.5) The Files panel interacts with the server at regular intervals to update its content. An error message is displayed
when you try to perform an action in the Files panel when it is running these auto-updates. To disable auto-updates,
open the Files panel options menu, and deselect Auto-Update in the View menu.
To update the contents of the panel manually, use the Refresh button in the panel. The current check-out status of files,
however, is updated only when auto-updates are enabled.
More Help topics
“Work with files in the Files panel” on page 75
Last updated 12/7/2011
Page 23
USING DREAMWEAVER
Workspace
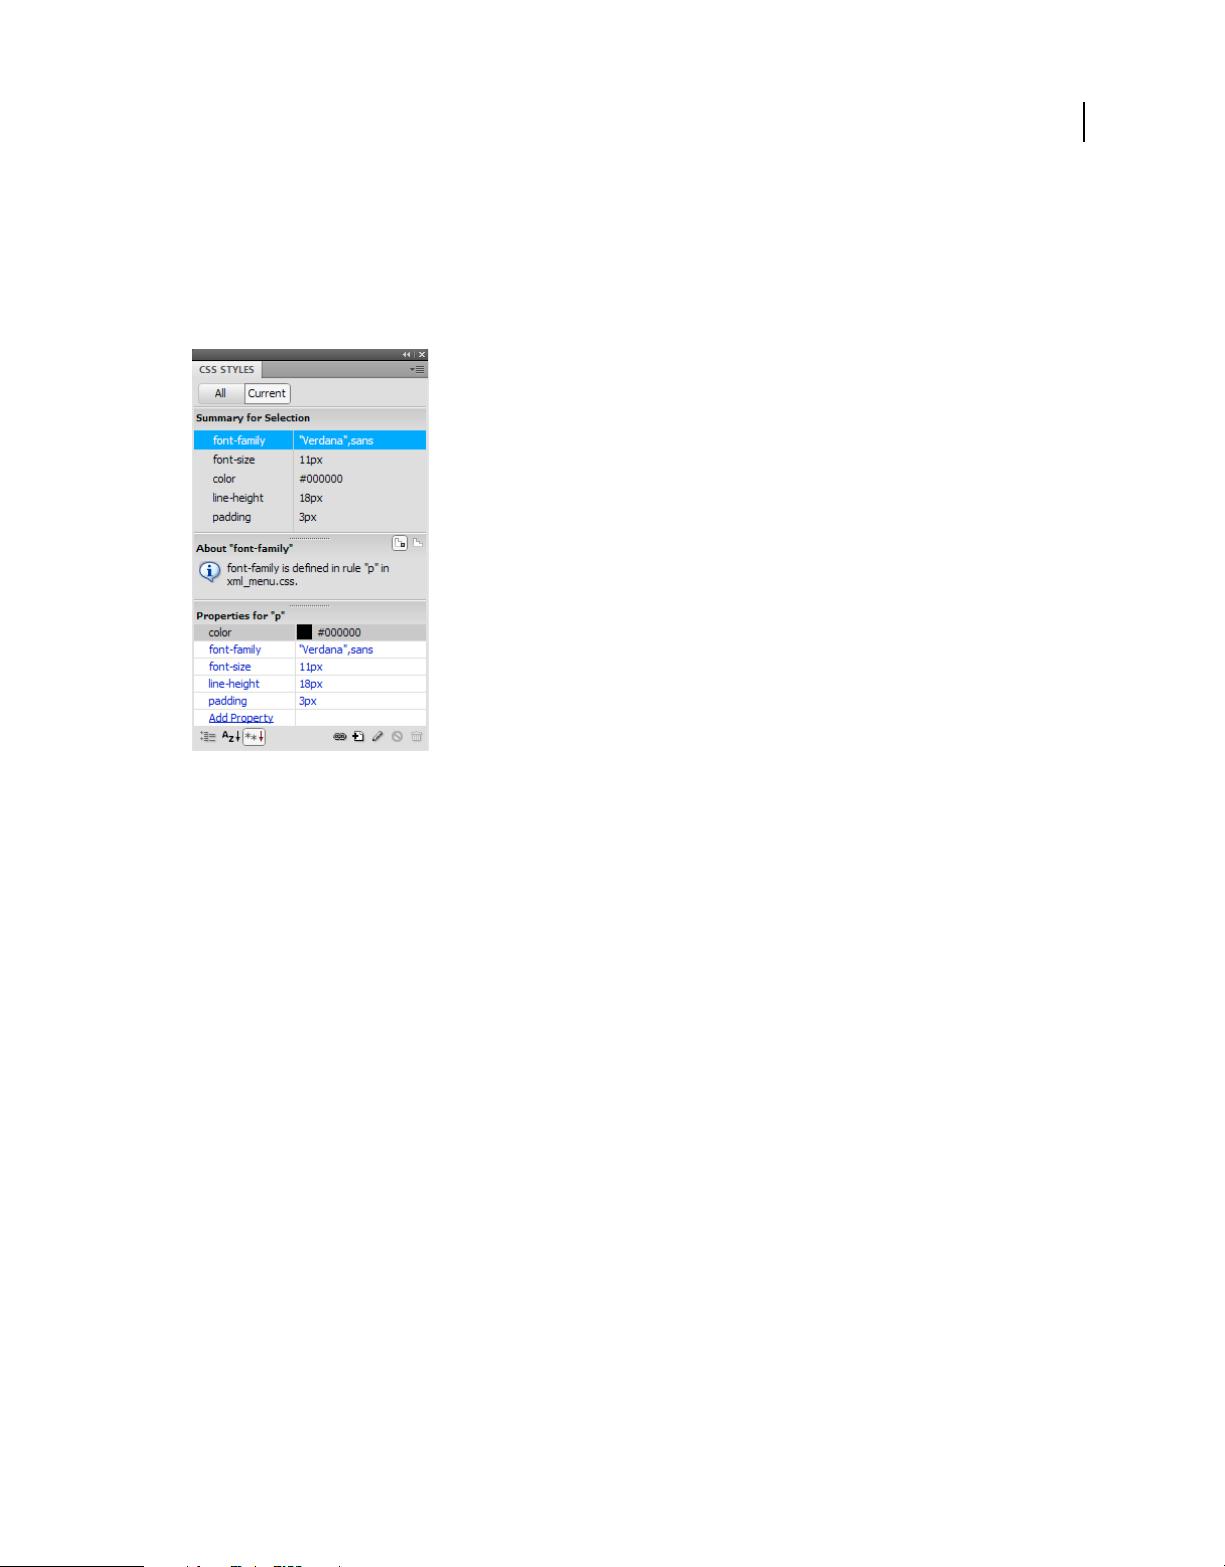
CSS Styles panel overview
The CSS Styles panel lets you track the CSS rules and properties affecting a currently selected page element (Current
mode), or the rules and properties affecting an entire document (All mode). A toggle button at the top of the CSS Styles
panel lets you switch between the two modes. The CSS Styles panel also lets you modify CSS properties in both All and
Current mode.
16
You can resize any of the panes by dragging the borders between the panes.
In Current mode, the CSS Styles panel displays three panes: a Summary for Selection pane that displays the CSS
properties for the current selection in the document, a Rules pane that displays the location of selected properties (or
a cascade of rules for the selected tag, depending on your selection), and a Properties pane that lets you edit CSS
properties for the rule defining the selection.
In All mode, the CSS Styles panel displays two panes: an All Rules pane (on top), and a Properties pane (on bottom). The
All Rules pane displays a list of rules defined in the current document as well as all rules defined in style sheets attached
to the current document. The Properties pane lets you edit CSS properties for any selected rule in the All Rules pane.
Any changes you make in the Properties pane are applied immediately, letting you preview your work as you go.
Visual guides overview
Dreamweaver provides several kinds of visual guides to help you design documents and predict approximately how
they appear in browsers. You can do any of the following:
• Instantly snap the Document window to a desired window size to see how the elements fit on the page.
• Use a tracing image as the page background to help you duplicate a design created in an illustration or image-
editing application such as Adobe® Photoshop® or Adobe® Fireworks®.
• Use rulers and guides to provide a visual cue for precise positioning and resizing of page elements.
• Use the grid for precise positioning and resizing of absolutely positioned elements (AP elements).
Grid marks on the page help you align AP elements, and when snapping is enabled, AP elements automatically snap
to the closest grid point when moved or resized. (Other objects, such as images and paragraphs, do not snap to the
grid.) Snapping works regardless of whether the grid is visible.
Last updated 12/7/2011
Page 24

USING DREAMWEAVER
Workspace
More Help topics
“Using visual aids for layout” on page 167
GoLive users
If you have been using GoLive and want to switch to working with Dreamweaver, you can find an online introduction
to the Dreamweaver workspace and workflow, as well as a discussion of ways to migrate your sites to Dreamweaver.
More Help topics
Dreamweaver for GoLive users tutorial
Working in the Document window
Switch between views in the Document window
You can view a document in the Document window in Code view, Split Code view, Design view, Code and Design
views (Split view), or Live view. You also have the option of viewing Split Code view or Code and Design views
horizontally or vertically. (Horizontal display is the default.)
17
Switch to Code view
❖ Do one of the following:
• Select View > Code.
• In the Document toolbar, click the Show Code View button.
Switch to Split Code view
Split Code view splits your document in two so that you can work on two sections of the code at once.
❖ Select View > Split Code.
Switch to Design view
❖ Do one of the following:
• Select View > Design.
• In the Document toolbar, click the Show Design View button.
Show both Code and Design views
❖ Do one of the following:
• Select View > Code and Design.
• In the Document toolbar, click the Show Code and Design Views button.
Last updated 12/7/2011
Page 25

USING DREAMWEAVER
Workspace
By default, Code view appears at the top of the Document window and Design view appears at the bottom. To display
Design view on top, select View
> Design View on Top.
Toggle between Code view and Design view
❖ Press Control+backquote (`).
If both views are showing in the Document window, this keyboard shortcut changes keyboard focus from one view to
the other.
Split views vertically
This option is only available for Split Code view and Code and Design views (Split view). It is disabled for Code view
and Design view.
1 Make sure that you are in Split Code view (View > Split Code) or Code and Design views (View > Code and
Design).
2 Select View > Split Vertically.
If you are in Code and Design views, you have the option of displaying Design view on the left (View > Design View
on Left).
18
More Help topics
“Document window overview” on page 8
“Preview pages in Live view” on page 276
Cascade or tile Document windows
If you have many documents open at once, you can cascade or tile them.
More Help topics
“Manage windows and panels” on page 22
“Display tabbed documents (Dreamweaver Macintosh)” on page 28
Cascade Document windows
❖ Select Window > Cascade.
Tile Document windows
• (Windows) Select Window > Tile Horizontally or Window > Tile Vertically.
• (Macintosh) Select Window > Tile.
Resize the Document window
The Status bar displays the Document window’s current dimensions (in pixels). To design a page that looks its best at
a specific size, you can adjust the Document window to any of the predetermined sizes, edit those predetermined sizes,
or create sizes.
When you change the view size of a page in design or live view only the dimensions of the view size change. The
document size is unaltered.
Last updated 12/7/2011
Page 26
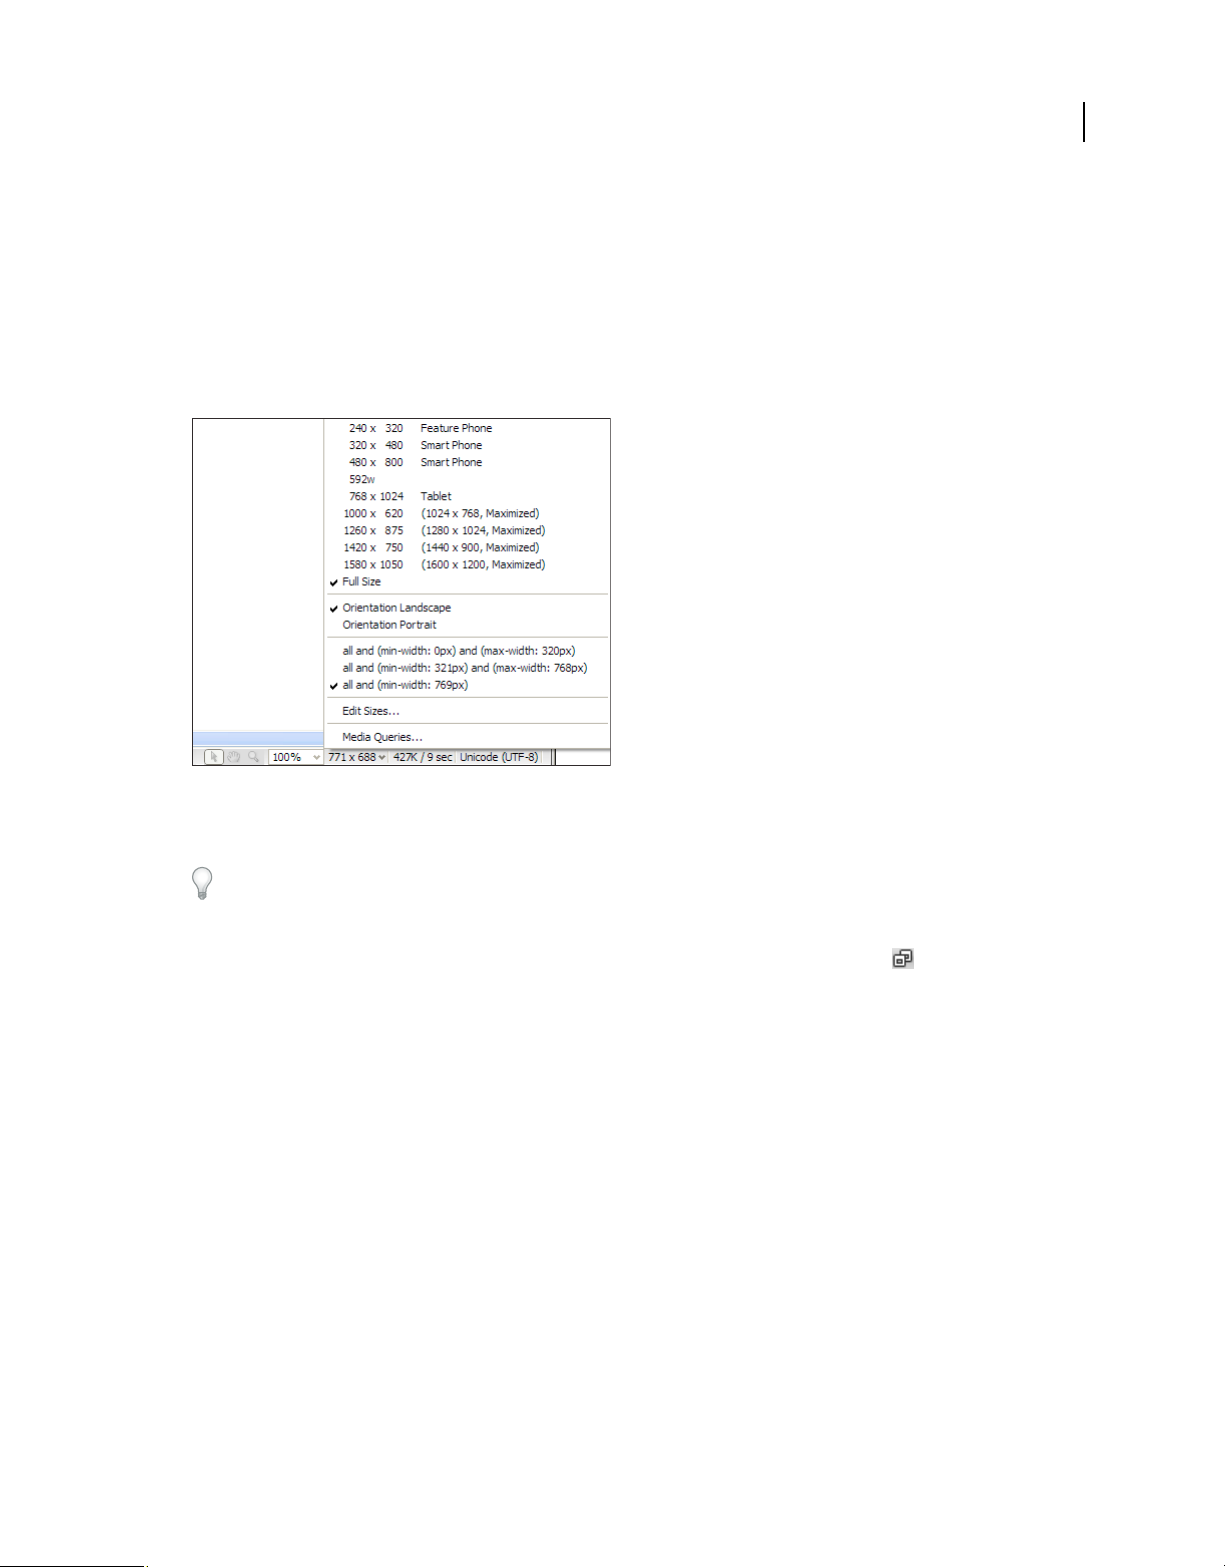
USING DREAMWEAVER
Workspace
In addition to predetermined and custom sizes, Dreamweaver also lists sizes specified in a media query. When you
select a size corresponding to a media query, Dreamweaver uses the media query to display the page. You can also
change the page orientation to preview the page for mobile devices where the page layout changes based on how the
device is held.
Resize the Document window to a predetermined size
❖ Select one of the sizes from the Window Size pop-up menu at the bottom of the Document window. Dreamweaver
CS5.5 and later offers an extended list of choices, including choices for common mobile devices (as pictured below).
19
The window size shown reflects the inside dimensions of the browser window, without borders; the monitor size or
mobile device is listed to the right.
For less precise resizing, use your operating system’s standard methods of resizing windows, such as dragging the
lower-right corner of a window.
Note: (Windows only) Documents within the Document window are maximized by default, and you can't resize a
document when it's maximized. To de-maximize the document, click the de-maximize button
in the upper right
corner of the document.
Change the values listed in the Window Size pop-up menu
1 Select Edit Sizes from the Window Size pop-up menu.
2 Click any of the width or height values in the Window Sizes list, and type a new value.
To make the Document window adjust only to a specific width (leaving the height unchanged), select a height value
and delete it.
3 Click the Description box to enter descriptive text about a specific size.
Add a new size to the Window Size pop-up menu
1 Select Edit Sizes from the Window Size pop-up menu.
2 Click the blank space below the last value in the Width column.
3 Enter values for Width and Height.
To set the Width or Height only, simply leave one field empty.
4 Click the Description field to enter descriptive text about the size you added.
Last updated 12/7/2011
Page 27

USING DREAMWEAVER
Workspace
For example, you might type SVGA or average PC next to the entry for an 800 x 600 pixel monitor, and 17-in. Mac
next to the entry for an 832 x 624 pixel monitor. Most monitors can be adjusted to a variety of pixel dimensions.
Set window size and connection speed
1 Select Edit > Preferences (Windows) or Dreamweaver > Preferences (Macintosh).
2 Select Status Bar (CS5) or Window Sizes (CS5.5 and later) from the Category list on the left.
3 Set any of the following options:
Window Sizes lets you customize the window sizes that appear in the Status bar’s pop-up menu.
Connection Speed determines the connection speed (in kilobits per second) used to calculate the download size. The
download size for the page is displayed in the Status bar. When an image is selected in the Document window, the
image’s download size is displayed in the Property inspector.
More Help topics
“Status bar overview” on page 12
“Resize the Document window” on page 18
20
Reports in Dreamweaver
You can run reports in Dreamweaver to find content, troubleshoot, or test content. You can generate the following
types of reports:
Search Lets you search for tags, attributes, and specific text within tags.
Reference Lets you search for helpful reference information.
Validation Lets you check for code or syntax errors.
Browser Compatibility Lets you test the HTML in your documents to see if any tags or attributes are unsupported by
your target browsers.
Link Checker Lets you find and fix broken, external, and orphaned links.
Site Reports Enable you to improve workflow and test HTML attributes in your site. Workflow reports include
checked out by, recently modified, and design notes; HTML reports include combinable nested font tags, accessibility,
missing Alt text, redundant nested tags, removable empty tags, and untitled documents.
FTP Log Enables you to view all FTP file-transfer activity.
Server Debug Lets you view information to debug an Adobe® ColdFusion® application.
Using toolbars, inspectors, and context menus
Display toolbars
Use the Document and Standard toolbars to perform document-related and standard editing operations; the Coding
toolbar to insert code quickly; and the Style Rendering toolbar to display your page as it would appear in different
media types. You can choose to display or hide the toolbars as necessary.
• Select View > Toolbars, and then select the toolbar.
• Right-click (Windows) or Control-click (Macintosh) any of the toolbars and select the toolbar from the context menu.
Last updated 12/7/2011
Page 28

USING DREAMWEAVER
Workspace
Note: To display or hide the Coding toolbar in the Code inspector (Window > Code Inspector), select Coding Toolbar
from the View Options pop-up menu at the top of the inspector.
More Help topics
“Document toolbar overview” on page 9
“Standard toolbar overview” on page 10
“Coding toolbar overview” on page 11
“Style Rendering toolbar overview” on page 10
Use the Property inspector
The Property inspector lets you examine and edit the most common properties for the currently selected page element,
such as text or an inserted object. The contents of the Property inspector vary depending on the element(s) selected.
To access help for a particular Property inspector, click the help button in the upper right corner of the Property
inspector, or select Help from a Property inspector’s Options menu.
Note: Use the Tag inspector to view and edit every attribute associated with a given tag’s properties.
21
More Help topics
“Property inspector overview” on page 13
“Set text properties in the Property inspector” on page 217
“Dock and undock panels” on page 23
“Change attributes with the Tag inspector” on page 316
Show or hide the Property inspector
❖ Select Window > Properties.
Expand or collapse the Property inspector
❖ Click the expander arrow in the lower-right corner of the Property inspector.
View and change properties for a page element
1 Select the page element in the Document window.
You might have to expand the Property inspector to view all the properties for the selected element.
2 Change any of the properties in the Property inspector.
Note: For information on specific properties, select an element in the Document window, and then click the Help icon in
the upper-right corner of the
3 If your changes are not immediately applied in the Document window, apply the changes in one of these ways:
• Click outside the property-editing text fields.
• Press Enter (Windows) or Return (Macintosh).
• Press Tab to switch to another property.
Property inspector.
Last updated 12/7/2011
Page 29
USING DREAMWEAVER
Workspace
Use context menus
Context menus provide convenient access to the most useful commands and properties related to the object or window
you’re working with. Context menus list only those commands that pertain to the current selection.
1 Right-click (Windows) or Control-click (Macintosh) the object or window.
2 Select a command from the context menu.
22
Customizing the Dreamweaver CS5 workspace
Manage windows and panels
You can create a custom workspace by moving and manipulating Document windows and panels. You can also save
workspaces and switch among them. For Fireworks, renaming custom workspaces can lead to unexpected behavior.
Note: The following examples use Photoshop for demonstration purposes. The workspace behaves the same in all the
products.
Rearrange, dock, or float document windows
When you open more than one file, the Document windows are tabbed.
• To rearrange the order of tabbed Document windows, drag a window’s tab to a new location in the group.
• To undock (float or untab) a Document window from a group of windows, drag the window’s tab out of the group.
Last updated 12/7/2011
Page 30

USING DREAMWEAVER
Workspace
Note: In Photoshop you can also choose Window > Arrange > Float in Window to float a single Document window,
or Window > Arrange > Float All In Windows to float all of the Document windows at once. See tech note
kb405298
for more information.
Note: Dreamweaver does not support docking and undocking Document windows. Use the Document window’s
Minimize button to create floating windows (Windows), or choose Window > Tile Vertically to create side-by-side
Document windows. Search “Tile Vertically” in Dreamweaver Help for more information on this topic. The workflow
is slightly different for Macintosh users.
• To dock a Document window to a separate group of Document windows, drag the window into the group.
• To create groups of stacked or tiled documents, drag the window to one of the drop zones along the top, bottom, or
sides of another window. You can also select a layout for the group by using the Layout button on the Application bar.
Note: Some products do not support this functionality. However, your product may have Cascade and Tile commands
in the Window menu to help you lay out your documents.
• To switch to another document in a tabbed group when dragging a selection, drag the selection over the document’s
tab for a moment.
Note: Some products do not support this functionality.
Dock and undock panels
A dock is a collection of panels or panel groups displayed together, generally in a vertical orientation. You dock and
undock panels by moving them into and out of a dock.
23
• To dock a panel, drag it by its tab into the dock, at the top, bottom, or in between other panels.
• To dock a panel group, drag it by its title bar (the solid empty bar above the tabs) into the dock.
• To remove a panel or panel group, drag it out of the dock by its tab or title bar. You can drag it into another dock
or make it free-floating.
Navigator panel being dragged out to new dock, indicated by blue vertical highlight
Last updated 12/7/2011
Page 31

USING DREAMWEAVER
Workspace
Navigator panel now in its own dock
You can prevent panels from filling all the space in a dock. Drag the bottom edge of the dock up so it no longer meets
the edge of the workspace.
Move panels
As you move panels, you see blue highlighted drop zones, areas where you can move the panel. For example, you can
move a panel up or down in a dock by dragging it to the narrow blue drop zone above or below another panel. If you
drag to an area that is not a drop zone, the panel floats freely in the workspace.
24
Note: The position of the mouse (rather than the position of the panel), activates the drop zone, so if you can’t see the drop
zone, try dragging the mouse to the place where the drop zone should be.
• To move a panel, drag it by its tab.
• To move a panel group, drag the title bar.
A
B
C
Narrow blue drop zone indicates Color panel will be docked on its own above the Layers panel group.
A. Title bar B. Tab C. Drop zone
Press Ctrl (Windows) or Command (Mac OS) while moving a panel to prevent it from docking. Press Esc while
moving the panel to cancel the operation.
Add and remove panels
If you remove all panels from a dock, the dock disappears. You can create a dock by moving panels to the right edge
of the workspace until a drop zone appears.
• To remove a panel, right-click (Windows) or Control-click (Mac) its tab and then select Close, or deselect it from
the Window menu.
• To add a panel, select it from the Window menu and dock it wherever you want.
Last updated 12/7/2011
Page 32

USING DREAMWEAVER
Workspace
Manipulate panel groups
• To move a panel into a group, drag the panel’s tab to the highlighted drop zone in the group.
Adding a panel to a panel group
• To rearrange panels in a group, drag a panel’s tab to a new location in the group.
• To remove a panel from a group so that it floats freely, drag the panel by its tab outside the group.
• To move a group, drag the title bar (the area above the tabs).
Stack floating panels
When you drag a panel out of its dock but not into a drop zone, the panel floats freely. The floating panel allows you
to position it anywhere in the workspace. You can stack floating panels or panel groups so that they move as a unit
when you drag the topmost title bar.
25
Free-floating stacked panels
• To stack floating panels, drag a panel by its tab to the drop zone at the bottom of another panel.
• To change the stacking order, drag a panel up or down by its tab.
Note: Be sure to release the tab over the narrow drop zone between panels, rather than the broad drop zone in a title bar.
• To remove a panel or panel group from the stack, so that it floats by itself, drag it out by its tab or title bar.
Resize panels
• To minimize or maximize a panel, panel group, or stack of panels, double-click a tab. You can also double-click the
tab area (the empty space next to the tabs).
• To resize a panel, drag any side of the panel. Some panels, such as the Color panel in Photoshop, cannot be resized
by dragging.
Collapse and expand panel icons
You can collapse panels to icons to reduce clutter on the workspace. In some cases, panels are collapsed to icons in the
default workspace.
Last updated 12/7/2011
Page 33

USING DREAMWEAVER
Workspace
Panels collapsed to icons
26
Panels expanded from icons
• To collapse or expand all panel icons in a column, click the double arrow at the top of the dock.
• To expand a single panel icon, click it.
• To resize panel icons so that you see only the icons (and not the labels), adjust the width of the dock until the text
disappears. To display the icon text again, make the dock wider.
• To collapse an expanded panel back to its icon, click its tab, its icon, or the double arrow in the panel’s title bar.
In some products, if you select Auto-Collapse Icon Panels from the Interface or User Interface Options preferences,
an expanded panel icon collapses automatically when you click away from it.
• To add a floating panel or panel group to an icon dock, drag it in by its tab or title bar. (Panels are automatically
collapsed to icons when added to an icon dock.)
• To move a panel icon (or panel icon group), drag the icon. You can drag panel icons up and down in the dock, into
other docks (where they appear in the panel style of that dock), or outside the dock (where they appear as floating
icons).
Save and switch workspaces
By saving the current size and position of panels as a named workspace, you can restore that workspace even if you
move or close a panel. The names of saved workspaces appear in the workspace switcher in the Application bar.
Save a custom workspace
1 With the workspace in the configuration you want to save, do one of the following:
• (Illustrator) Choose Window > Workspace > Save Workspace.
• (Photoshop, InDesign, InCopy) Choose Window > Workspace > New Workspace.
• (Dreamweaver) Choose Window > Workspace Layout > New Workspace.
Last updated 12/7/2011
Page 34

USING DREAMWEAVER
Workspace
• (Flash) Choose New Workspace from the workspace switcher in the Application bar.
• (Fireworks) Choose Save Current from the workspace switcher in the Application bar.
2 Type a name for the workspace.
3 (Photoshop, InDesign) Under Capture, select one or more options:
Panel Locations Saves the current panel locations (InDesign only).
Keyboard shortcuts Saves the current set of keyboard shortcuts (Photoshop only).
Menus or Menu Customization Saves the current set of menus.
Display or switch workspaces
❖ Select a workspace from the workspace switcher in the Application bar.
In Photoshop, you can assign keyboard shortcuts to each workspace to navigate among them quickly.
Delete a custom workspace
• Select Manage Workspaces from the workspace switcher in the Application bar, select the workspace, and then
click Delete. (The option is not available in Fireworks.)
• (Photoshop, InDesign, InCopy) Select
• Delete Workspace
• from the workspace switcher.
• (Illustrator) Choose Window > Workspace > Manage Workspaces, select the workspace, and then click the Delete icon.
• (Photoshop, InDesign) Choose Window > Workspace >
• Delete Workspace
• , select the workspace, and then click Delete.
27
Restore the default workspace
1 Select the Default or Essentials workspace from the workspace switcher in the application bar. For Fireworks, see
the article
http://www.adobe.com/devnet/fireworks/articles/workspace_manager_panel.html.
Note: In Dreamweaver, Designer is the default workspace.
2 For Fireworks (Windows), delete these folders:
Windows Vista \\Users\<username>\AppData\Roaming\Adobe\Fireworks CS4\
Windows XP \\Documents and Settings\<username>\Application Data\Adobe\Fireworks CS4
3 (Photoshop, InDesign, InCopy) Select Window > Workspace > Reset [Workspace Name].
(Photoshop) Restore a saved workspace arrangement
In Photoshop, workspaces automatically appear as you last arranged them, but you can restore the original, saved
arrangement of panels.
• To restore an individual workspace, choose Window > Workspace > Reset Workspace Name.
• To restore all the workspaces installed with Photoshop, click Restore Default Workspaces in the Interface
preferences.
Last updated 12/7/2011
Page 35

USING DREAMWEAVER
Workspace
To rearrange the order of workspaces in the application bar, drag them.
Display tabbed documents (Dreamweaver Macintosh)
You can view multiple documents in a single Document window by using tabs to identify each document. You can also
display them as part of a floating workspace, in which each document appears in its own window.
Open a tabbed document in a separate window
❖ Control-click the tab and select Move To New Window from the context menu.
Combine separate documents into tabbed windows
❖ Select Window > Combine As Tabs.
Change the default tabbed document setting
1 Select Dreamweaver > Preferences, and then select the General category.
2 Select or deselect Open Documents in Tabs, and click OK.
Dreamweaver does not alter the display of documents that are currently open when you change preferences.
Documents opened after you select a new preference, however, display according to the preference you selected.
28
Turn on color icons
By default, Dreamweaver CS4 and later uses black and white icons that turn into colored icons when you hover over
them. You can turn color icons on permanently so that no hovering is required.
❖ Do one of the following:
• Choose View > Color Icons.
• Switch to the Classic or Coder workspace.
To turn color icons off again, deselect Color Icons in the View menu, or switch to a different workspace.
More Help topics
“Display or switch workspaces” on page 27
Hide and display the Dreamweaver Welcome screen
The Welcome screen appears when you start Dreamweaver and anytime that you do not have any documents open.
You can choose to hide the Welcome screen, and then later display it again. When the Welcome screen is hidden and
no documents are open, the Document window is
Hide the Welcome screen
❖ Select the Don’t Show Again option on the Welcome screen.
Display the Welcome screen
1 Select Edit > Preferences (Windows) or Dreamweaver > Preferences (Macintosh).
2 In the General category, select the Show Welcome Screen option.
blank.
Last updated 12/7/2011
Page 36

USING DREAMWEAVER
Workspace
About customizing Dreamweaver in multiuser systems
You can customize Dreamweaver to suit your needs even in a multiuser operating system such as Windows XP or
OS X.
Mac
Dreamweaver prevents any user’s customized configuration from affecting any other user’s customized configuration.
To accomplish this goal, the first time you run Dreamweaver in one of the multiuser operating systems that it
recognizes, the application creates copies of a variety of configuration files. These user configuration files are stored in
a folder that belongs to you.
For example, in Windows XP, they’re stored in C:\Documents and Settings\username\Application
Data\Adobe\Dreamweaver\en_US\Configuration, which is hidden by default. To show hidden files and folders, select
> Folder Options in
Tools
Windows Explorer
, click the View tab, and select the
Show Hidden Files
and Folders option.
In Windows Vista, they’re stored in C:\Users\username\AppData\Roaming\Adobe\Dreamweaver
\en_US\Configuration, which is hidden by default. To show hidden files and folders, select Tools
> Folder Options in
29
Windows Explorer
, click the View tab, and select the
Show Hidden Files
and Folders option.
In Mac OS X, they’re stored inside your Home folder; specifically, in Users/username/Library/Application
Support/Adobe/Dreamweaver/Configuration.
If you reinstall or upgrade Dreamweaver, Dreamweaver automatically makes backup copies of existing user
configuration files, so if you customized those files by hand, you still have access to the changes you made.
Set General preferences for Dreamweaver
1 Select Edit > Preferences (Windows) or Dreamweaver > Preferences (Macintosh).
2 Set any of the following options:
Open Documents In Tabs Opens all documents in a single window with tabs that let you switch between documents
(Macintosh only).
Show Welcome Screen Displays the Dreamweaver Welcome screen when you start Dreamweaver or when you don’t
have any documents open.
Reopen Documents on Startup Opens any documents that were open when you closed Dreamweaver. If this option is
not selected, Dreamweaver displays the Welcome screen or a blank screen when you start (depending on your Show
Welcome Screen setting).
Warn When Opening Read-Only Files Alerts you when you open a read-only (locked) file. Choose to unlock/check out
the file, view the file, or cancel.
Enable Related Files Lets you see which files are connected to the current document (for example, CSS or JavaScript
files). Dreamweaver displays a button for each related file at the top of the document, and opens the file if you click the
button.
Last updated 12/7/2011
Page 37

USING DREAMWEAVER
Workspace
Discover Dynamically-Related Files Lets you select whether Dynamically-Related Files appear in the Related Files
toolbar automatically, or after manual interaction. You can also choose to disable the discovery of DynamicallyRelated Files.
Update Links When Moving Files Determines what happens when you move, rename, or delete a document within
your site. Set this preference to always update links automatically, never update links, or prompt you to perform an
update. (See
Show Dialog When Inserting Objects Determines whether Dreamweaver prompts you to enter additional information
“Update links automatically” on page 268.)
when inserting images, tables, Shockwave movies, and certain other objects by using the Insert panel or the Insert
menu. If this option is off, the dialog box does not appear and you must use the Property inspector to specify the source
file for images, the number of rows in a table, and so on. For roll over images and Fireworks HTML, a dialog box always
appears when you insert the object, regardless of this option setting. (To temporarily override this setting, Controlclick (Windows) or Command-click (Macintosh) when creating and inserting objects.)
Enable Double-Byte Inline Input Lets you enter double-byte text directly into the Document window if you are using
a development environment or language kit that facilitates double-byte text (such as Japanese characters). When this
option is deselected, a text input window appears for entering and converting double-byte text; the text appears in the
Document window after it is accepted.
Switch To Plain Paragraph After Heading Specifies that pressing Enter (Windows) or Return (Macintosh) at the end
of a heading paragraph in Design view creates a new paragraph tagged with a
tagged with a heading tag such as
h1 or h2.) When the option is disabled, pressing Enter or Return at the end of a
p tag. (A heading paragraph is one that’s
heading paragraph creates a new paragraph tagged with the same heading tag (allowing you to type multiple headings
in a row and then go back and fill in details).
30
Allow Multiple Consecutive Spaces Specifies that typing two or more spaces in Design view creates nonbreaking
spaces that appear in a browser as multiple spaces. (For example, you can type two spaces between sentences, as you
would on a typewriter.) This option is designed mostly for people who are used to typing in word processors. When
the option is disabled, multiple spaces are treated as a single space (because browsers treat multiple spaces as single
spaces).
Use <strong> and <em> in Place of <b> and <i> Specifies that Dreamweaver applies the strong tag whenever you
perform an action that would normally apply the
would normally apply the
in HTML mode and choosing Format
i tag. Such actions include clicking the Bold or Italic buttons in the text Property inspector
> Style > Bold or Format > Style > Italic. To use the b and i tags in your
b tag, and applies the em tag whenever you perform an action that
documents, deselect this option.
Note: The World Wide Web Consortium discourages use of the b and i tags; the strong and em tags provide more
semantic information than the
Warn when placing editable regions within <p> or <h1> - <h6> tags Specifies whether a warning message is displayed
b and i tags do.
whenever you save a Dreamweaver template that has an editable region within a paragraph or heading tag. The
message tells you that users will not be able to create more paragraphs in the region. It is enabled by default.
Centering Specifies whether you want to center elements using divalign="center" or the center tag when you
click the Align Center button in the Property inspector.
Note: Both of these approaches to centering have been officially deprecated as of the HTML 4.01 specification; you should
use CSS styles to center text. Both of these approaches are still technically valid as of the XHTML 1.0 Transitional
specification, but they’re no longer valid in the XHTML 1.0 Strict specification.
Maximum Number of History Steps Determines the number of steps that the History panel retains and shows. (The
default value should be sufficient for most users.) If you exceed the given number of steps in the History panel, the
oldest steps are discarded.
Last updated 12/7/2011
Page 38

USING DREAMWEAVER
Workspace
For more information, see “Task automation” on page 255.
Spelling Dictionary lists the available spelling dictionaries. If a dictionary contains multiple dialects or spelling
conventions (such as American English and British English), the dialects are listed separately in the Dictionary pop-up
menu.
More Help topics
“Workspace layout overview” on page 5
“Update links automatically” on page 268
Set Fonts preferences for documents in Dreamweaver
A document’s encoding determines how the document appears in a browser. Dreamweaver font preferences let you
view a given encoding in the font and size you prefer. The fonts you select in the Fonts Preferences dialog, however,
only affect the way fonts appear in Dreamweaver; they do not affect the way the document appears in a visitor’s
browser. To change the way fonts appear in a browser, you need to change the text by using the Property inspector or
by applying a CSS rule.
For information on setting a default encoding for new documents, see “Creating and opening documents” on page 59.
1 Select Edit > Preferences (Windows) or Dreamweaver > Preferences (Macintosh).
2 Select Fonts from the Category list on the left.
3 Select an encoding type (such as Western European or Japanese) from the Font Settings list.
Note: To display an Asian language, you must be using an operating system that supports double-byte fonts.
31
4 Select a font and size to use for each category of the selected encoding.
Note: To appear in the font pop-up menus, a font must be installed on your computer. For example, to see Japanese text
you must have a Japanese font installed.
Proportional Font The font that Dreamweaver uses to display normal text (for example, text in paragraphs, headings,
and tables). The default depends on your system’s installed fonts. For most U.S. systems, the default is Times New
Roman 12 pt. (Medium) on Windows and Times 12 pt. on Mac
Fixed Font The font Dreamweaver uses to display text within pre, code, and tt tags. The default depends on your
OS.
system’s installed fonts. For most U.S. systems, the default is Courier New 10 pt. (Small) on Windows and Monaco 12
pt. on Mac
Code View The font used for all text that appears in the Code view and Code inspector. The default depends on your
OS.
system’s installed fonts.
More Help topics
“Understanding document encoding” on page 204
Customize Dreamweaver highlighting colors
Use the Highlighting preferences to customize the colors that identify template regions, library items, third-party tags,
layout elements, and code in Dreamweaver.
Last updated 12/7/2011
Page 39

USING DREAMWEAVER
Workspace
More Help topics
“Use the color picker” on page 208
“Change the highlight color of div tags” on page 154
Change a highlighting color
1 Select Edit > Preferences and select the Highlighting category.
2 Beside the object you want to change the highlighting color for, click the color box, and then use the color picker
to select a new color, or enter a hexadecimal value.
Activate or deactivate highlighting for an object
1 Select Edit > Preferences and select the Highlighting category.
2 Beside the object you want to activate or deactivate highlighting color for, select or deselect the Show option.
Restore default preferences
For procedures on restoring default Dreamweaver preferences, see Tech Note 83912.
32
Keyboard shortcuts
Create a reference sheet for the current shortcut set
A reference sheet is a record of the current shortcut set. The information is stored in HTML table format. You can view
the reference sheet in a web browser or print it.
1 Select Edit > Keyboard Shortcuts (Windows) or Dreamweaver > Keyboard Shortcuts (Macintosh).
2 Click the Export Set As HTML button, which is the third button in the set of four at the top of the dialog box.
3 In the Save dialog box that appears, enter the name for the reference sheet, and select the appropriate location for
saving the file.
Customize keyboard shortcuts
Use the Keyboard Shortcut Editor to create your own shortcut keys, including keyboard shortcuts for code snippets.
You can also remove shortcuts, edit existing shortcuts, and select a predetermined set of shortcuts in the Keyboard
Shortcut Editor.
More Help topics
“Work with code snippets” on page 304
Create a keyboard shortcut
Create your own shortcut keys, edit existing shortcuts, or select a predetermined set of shortcuts.
1 Select Edit > Keyboard Shortcuts (Windows) or Dreamweaver > Keyboard Shortcuts (Macintosh).
Last updated 12/7/2011
Page 40

USING DREAMWEAVER
Workspace
2 Set any of the following options and click OK:
Current Set Allows you to choose a set of predetermined shortcuts included with Dreamweaver, or any custom set
you’ve defined. The predetermined sets are listed at the top of the menu. For example, if you are familiar with the
shortcuts found in HomeSite or BBEdit, you can use those shortcuts by choosing the corresponding predetermined set.
Commands Allows you to select a category of commands to edit. For example, you can edit menu commands, such as
the Open command, or code editing commands, such as Balance Braces.
To add or edit a keyboard shortcut for a code snippet, select Snippet from the Commands pop-up menu.
The command list Displays the commands associated with the category you selected from the Commands pop-up
menu, along with the assigned shortcuts. The Menu Commands category displays this list as a tree view that replicates
the structure of the menus. The other categories list the commands by name (such as Quit Application), in a flat list.
Shortcuts Displays all shortcuts assigned to the selected command.
Add Item (+) Adds a new shortcut to the current command. Click this button to add a new blank line to the Shortcuts.
Enter a new key combination and click Change to add a new keyboard shortcut for this command. You can assign two
different keyboard shortcuts for each command; if there are already two shortcuts assigned to a command, the Add
Item button does nothing.
Remove Item (-) Removes the selected shortcut from the list of shortcuts.
33
Press Key Displays the key combination you enter when you’re adding or changing a shortcut.
Change Adds the key combination shown in the Press Key to the list of shortcuts, or changes the selected shortcut to
the specified key combination.
Duplicate Set Duplicates the current set. Give the new set a name; the default name is the current set’s name with the
word copy appended.
Rename Set Renames the current set.
Export as HTML File Saves the current set in an HTML table format for easy viewing and printing. You can open the
HTML file in your browser and print the shortcuts for easy reference.
Delete Set Deletes a set. (You cannot delete the active set.)
Remove a shortcut from a command
1 Select Edit > Keyboard Shortcuts (Windows) or Dreamweaver > Keyboard Shortcuts (Macintosh).
2 From the Commands pop-up menu, select a command category.
3 In the Commands list, select a command and then select a shortcut.
4 Click the Remove Item (-) button.
Add a shortcut to a command
1 Select Edit > Keyboard Shortcuts (Windows) or Dreamweaver > Keyboard Shortcuts (Macintosh).
2 From the Commands pop-up menu, select a command category.
3 In the Commands list, select a command.
To add a keyboard shortcut for a code snippet, select Snippet from the Commands pop-up menu.
The shortcuts assigned to the command appear in the Shortcuts.
Last updated 12/7/2011
Page 41

USING DREAMWEAVER
Workspace
4 Prepare to add a shortcut by doing one of the following:
• If there are fewer than two shortcuts already assigned to the command, click the Add Item (+) button. A new blank
line appears in the Shortcuts and the insertion point moves to the Press Key.
• If there are already two shortcuts assigned to the command, select one of them (that one will be replaced by the new
shortcut). Then click in the Press Key.
5 Press a key combination. The key combination appears in the Press Key.
Note: If there is a problem with the key combination (for example, if the key combination is already assigned to another
command), an explanatory message appears just below the Shortcuts and you may be unable to add or edit the shortcut.
6 Click Change. The new key combination is assigned to the command.
Edit an existing shortcut
1 Select Edit > Keyboard Shortcuts (Windows) or Dreamweaver > Keyboard Shortcuts (Macintosh).
2 From the Commands pop-up menu, select a command category.
3 In the Commands list, select a command and then select a shortcut to change.
4 Click in the Press Key and enter a new key combination.
5 Click the Change button to change the shortcut.
Note: If there is a problem with the key combination (for example, if the key combination is already assigned to another
command), an explanatory message appears just below the Shortcuts field and you may be unable to add or edit the
shortcut.
34
About keyboard shortcuts and non-U.S. keyboards
The default Dreamweaver keyboard shortcuts work primarily on U.S.-standardized keyboards. Keyboards from other
countries (including those produced in the United Kingdom), may not provide the functionality necessary for utilizing
these shortcuts. If your keyboard does not support certain Dreamweaver-enabled shortcuts, Dreamweaver disables
their functionality.
To customize keyboard shortcuts that work with non-U.S.-standardized keyboards, see “Changing keyboard shortcut
mappings” in
Extending Dreamweaver
.
Extensions
Add and manage extensions in Dreamweaver
Extensions are new features that you can add easily to Dreamweaver. You can use many types of extensions; for
example, there are extensions that let you reformat tables, connect to back-end databases, or help you write scripts for
browsers.
Note: To install extensions that all users have access to in a multiuser operating system, you must be logged in as
Administrator (Windows) or root (Mac
OS X).
To find the latest extensions for Dreamweaver, use the
Last updated 12/7/2011
Page 42

USING DREAMWEAVER
Workspace
Adobe Exchange
website at www.adobe.com/go/dreamweaver_exchange/. Once there, you can log in and download extensions (many
of which are free), join discussion groups, view user ratings and reviews, and install and use the Extension Manager.
You must install the Extension Manager before you can install extensions.
The Extension Manager is a separate application that lets you install and manage extensions in Adobe applications.
Start the Extension Manager from Dreamweaver by choosing Commands
1 On the
2 Adobe Exchange
3 website, click the download link for an extension.
> Manage Extensions.
Your browser might let you choose to open and install it directly from the site or save it to disk.
• If you are opening the extension directly from the site, the Extension Manager handles the installation
automatically.
• If you are saving the extension to disk, a good place to save the extension package file (.mxp or .mxi) is the
Downloaded Extensions folder within the Dreamweaver application folder on your
4 Double-click the extension package file, or open the Extension Manager and select File > Install Extension. (Some
computer.
extensions aren’t accessible until you restart the application.
Note: Use the Extension Manager to remove extensions or to see more information about an extension.
35
More Help topics
“About customizing Dreamweaver in multiuser systems” on page 29
Last updated 12/7/2011
Page 43

Chapter 3: Working with Dreamweaver sites
A Adobe® Dreamweaver® CS5 site is a collection of all of the files and assets in your website. You can create web pages
on your computer, upload them to a web server, and maintain the site by transferring updated files whenever you save
them. You can also edit and maintain websites that were created without Dreamweaver.
About Dreamweaver sites
What is a Dreamweaver “site”?
In Dreamweaver the term “site” refers to a local or remote storage location for the documents that belong to a website.
A Dreamweaver site provides a way to organize and manage all of your web documents, upload your site to a web
server, track and maintain your links, and manage and share files. You should define a site to take full advantage of
Dreamweaver features.
36
Note: To define a Dreamweaver site, you only need to set up a local folder. To transfer files to a web server or to develop
web applications, you must also add information for a remote site and testing server.
A Dreamweaver site consists of as many as three parts, or folders, depending on your development environment and
the type of website you are developing:
Local root folder Stores the files you’re working on. Dreamweaver refers to this folder as your “local site.” This folder
is typically on your local computer, but it can also be on a network server.
Remote folder Stores your files for testing, production, collaboration, and so on. Dreamweaver refers to this folder as
your “remote site” in the Files panel. Typically, your remote folder is on the computer where your web server is
running. The remote folder holds the files that users access on the Internet.
Together, the local and remote folders enable you to transfer files between your local hard disk and web server, making
it easy to manage files in your Dreamweaver sites. You work on files in the local folder, and then publish them to the
remote folder when you want other people to view them.
Testing server folder The folder where Dreamweaver processes dynamic pages.
For a tutorial on defining a Dreamweaver site, see www.adobe.com/go/learn_dw_comm08_en.
Understanding local and remote folder structure
When you want to use Dreamweaver to connect to a remote folder, you specify the remote folder in the Servers
category of the Site Setup dialog box. The remote folder that you specify (also referred to as the “host directory”) should
correspond to the local root folder of your Dreamweaver site. (The local root folder is the top-level folder of your
Dreamweaver site.) Remote folders, like local folders, can have any title, but commonly, Internet Service Providers
(ISPs) name the top-level remote folders for individual user accounts public_html, pub_html, or something similar. If
you are in charge of your own remote server, and can name the remote folder anything you want, it is a good idea for
your local root folder and remote folder to have the same name.
Last updated 12/7/2011
Page 44

USING DREAMWEAVER
Working with Dreamweaver sites
The following example shows a sample local root folder on the left and a sample remote folder on the right. The local
root folder on the local machine maps directly to the remote folder on the web server, rather than to any of the remote
folder’s sub folders, or folders that exist above the remote folder in the directory structure.
37
login directory
(Shouldn’t be remote folder
in this case)
public_html
(Should be
remote folder)
Assets
(Shouldn’t be
remote folder)
HTML
Local folder
(root folder)
Assets
HTML
no
yes
no
Note: The above example illustrates one local root folder on the local machine, and one top-level remote folder on the
remote web server. If, however, you are maintaining a number of Dreamweaver sites on your local machine, you would
need an equal number of remote folders on the remote server. In such a case the above example would not apply, and you
would instead create different remote folders within the public_html folder, and then map them to their corresponding
local root folders on your local machine.
When you first establish a remote connection, the remote folder on the web server is usually empty. Then, when you
use Dreamweaver to upload all of the files in your local root folder, the remote folder populates with all of your web
files. The directory structure of the remote folder and the local root folder should always be the same. (That is, there
should always be a one-to-one correspondence between the files and folders in your local root folder, and the files and
folders in your remote folder.) If the structure of the remote folder doesn’t match the structure of the local root folder,
Dreamweaver uploads files to the wrong place, where they might not be visible to site visitors. Additionally, image and
link paths can easily break when folder and file structures are not in synch.
The remote folder must exist before Dreamweaver can connect to it. If you don’t have a designated folder that acts as
your remote folder on the web server, create one or ask your ISP’s server administrator to create one for
you.
Set up a local version of your site
To set up a local version of your site, all you need to do is specify the local folder where you’ll store all of your site files.
The local folder can be on your local computer or on a network server.
1 Identify or create the folder on your computer where you want to store the local version of your site files. (The
folder can be anywhere on your computer.) You’ll specify this folder as your local site in Dreamweaver.
2 In Dreamweaver, choose Site > New Site.
3 In the Site Setup dialog box, make sure the Site category is selected. (It should be selected by default.)
4 In the Site Name text box, enter a name for your site. This name appears in the Files panel and in the Manage Sites
dialog box; it does not appear in the browser.
5 In the Local Site Folder text box, specify the folder you identified in step one—the folder on your computer where
you want to store the local version of your site files. You can click the folder icon to the right of the text box to
browse to the folder.
6 Click Save to close the Site Setup dialog box. You can now begin working on your local site files in Dreamweaver.
Last updated 12/7/2011
Page 45

USING DREAMWEAVER
Working with Dreamweaver sites
When you’re ready, you can fill out the other categories in the Site Setup dialog box, including the Servers category,
where you can specify a remote folder on your remote server.
For a video tutorial on setting up a new Dreamweaver site, see www.adobe.com/go/learn_dw_comm08_en.
Connect to a remote server
Once you’ve specified a local site in Dreamweaver, you can specify a remote server for your site as well. The remote
server (often referred to as the web server) is where you publish your site files so that people can view them online. The
remote server is simply another computer like your local computer with a collection of files and folders on it. You’ll
specify a folder for your site on the remote server, just as you specified a folder for your local site on your local
computer.
Dreamweaver refers to the specified remote folder as your remote site.
When you set up a remote folder, you must select a connection method for Dreamweaver to upload and download files
to and from your web server. The most typical connection method is FTP, but Dreamweaver also supports
local/network, FTPS, SFTP, WebDav, and RDS connection methods. If you don’t know which connection method to
use, ask your ISP or your server administrator.
38
Note: Dreamweaver also supports connections to IPv6-enabled servers. Supported connection types include FTP, SFTP,
WebDav, and RDS. For more information, see
www.ipv6.org/
Specify a connection method
FTP connections
Use this setting if you connect to your web server using FTP.
1 Select Site > Manage Sites.
2 Click New to set up a new site, or select an existing Dreamweaver site and click Edit.
3 In the Site Setup dialog box, select the Servers category and do one of the following:
• Click the Add New Server button to add a new server
• Select an existing server and click the Edit Existing Server button
The following illustration shows the Basic screen of the Server category with the text fields already populated.
Last updated 12/7/2011
Page 46

USING DREAMWEAVER
Working with Dreamweaver sites
Basic screen of the Server category, Site Setup dialog box.
39
4 In the Server Name text box, specify a name for the new server. The name can be anything of your choosing.
5 Select FTP from the Connect Using pop-up menu.
6 In the FTP Address text box, enter the address of the FTP server to which you upload files for your website.
Your FTP address is the full Internet name of a computer system, such as ftp.mindspring.com. Enter the full address
without any additional text. In particular, don’t add a protocol name in front of the address.
If you do not know your FTP address, contact your web hosting company.
Note: Port 21 is the default port for receiving FTP connections. You can change the default port number by editing the
text box to the right. The result when you save your settings is a colon and the new port number appended to your FTP
address (for example, ftp.mindspring.com:29).
7 In the Username and Password text boxes, enter the username and password that you use to connect to the FTP
server.
8 Click Test to test your FTP address, username, and password.
Note: You must obtain the FTP address, username and password information from the system administrator for the
company hosting your site. No one else has access to this information. Enter the information exactly as your system
administrator gives it to you.
9 Dreamweaver saves your password by default. Deselect the Save option if you prefer that Dreamweaver prompt you
for a password each time you connect to the remote server.
10 In the Root Directory text box, enter the directory (folder) on the remote server where you store documents that
are visible to the public.
If you’re uncertain about what to enter as the root directory, contact the server’s administrator or leave the text box
blank. On some servers, your root directory is the same as the directory you first connect to with FTP. To find out,
connect to the server. If a folder with a name like public_html, or www, or your user name, appears in the Remote File
view in your Files panel, that’s probably the directory you should enter in the Root Directory text box.
Last updated 12/7/2011
Page 47

USING DREAMWEAVER
Working with Dreamweaver sites
11 In the Web URL text box enter the URL of your website (for example, http://www.mysite.com). Dreamweaver uses
the Web URL to create site root-relative links, and to verify links when you use the link checker.
For a more extensive explanation of this option, see “Advanced Settings category” on page 47.
12 Expand the
13 More Options
14 section if you still need to set more options.
15 Select Use Passive FTP if your firewall configuration requires use of passive FTP.
Passive FTP enables your local software to set up the FTP connection rather than requesting the remote server to set
it up. If you’re not sure whether you use passive FTP, check with your system administrator, or try both checking and
unchecking the Use Passive FTP option.
For more information, see TechNote 15220 on the Adobe website at www.adobe.com/go/tn_15220.
16 Select Use IPv6 Transfer Mode if you are using an IPv6-enabled FTP server.
With the deployment of version 6 of the Internet Protocol (IPv6), EPRT and EPSV have replaced the FTP commands
PORT and PASV, respectively. Thus, if you are trying to connect to an IPv6-enabled FTP server, you must use the
extended passive (EPSV) and the extended active (EPRT) commands for your data connection.
For more information, see www.ipv6.org/.
40
17 Select Use Proxy if you want to specify a proxy host or proxy port.
For more information, click the link to go to the Preferences dialog box, and then click the Help button in the Site
category of the Preferences dialog.
18 Click Save to close the Basic screen. Then in the Servers category, specify whether the server you just added or edited
is a remote server, a testing server, or both.
For help with troubleshooting FTP connectivity problems, see TechNote kb405912 on the Adobe website at
www.adobe.com/go/kb405912.
SFTP connections
Use Secure FTP (SFTP) if your firewall configuration requires use of secure FTP. SFTP uses encryption and public keys
to secure a connection to your testing server.
Note: Your server must be running an SFTP service for you to select this option. If you don’t know whether your server is
running SFTP, check with your server administrator.
1 Select Site > Manage Sites.
2 Click New to set up a new site, or select an existing Dreamweaver site and click Edit.
3 In the Site Setup dialog box, select the Servers category and do one of the following:
• Click the Add New Server button to add a new server
• Select an existing server and click the Edit Existing Server button
4 In the Server Name text box, specify a name for the new server. The name can be anything of your choosing.
5 Select SFTP from the Connect Using pop-up menu.
The rest of the options are the same as the options for FTP connections. See the above section for more information.
Note: Port 22 is the default port for receiving SFTP connections.
Last updated 12/7/2011
Page 48

USING DREAMWEAVER
Working with Dreamweaver sites
FTPS connections (CS5.5)
FTPS (FTP over SSL) provides both encryption and authentication support as compared to SFTP that offers only
encryption support.
When using FTPS for data transfer, you can choose to encrypt your credentials, and also the data being transmitted to
the server. In addition, you can choose to authenticate the server's credentials and connections. The credentials of a
server are validated against the current set of trusted CA server certificates in the Dreamweaver database. Certificate
Authorities (CAs), which include companies like VeriSign, Thawte, and so on, issue digitally signed server certificates
Note: This procedure describes options specific to FTPS. For information on regular FTP options, see the previous section.
1 Select Site > Manage Sites.
2 Click New to set up a new site, or select an existing Dreamweaver site and click Edit.
3 In the Site Setup dialog box, select the Servers category and do one of the following:
• Click the “+” (Add New Server) button to add a new server.
• Select an existing server and click the Edit Existing Server button.
4 In Server Name, specify a name for the new server.
5 In Connect Using, select one of the following based on your requirement.
FTP over SSL/TLS (Implicit Encryption) The server terminates the connection if the security request is not received.
41
FTP over SSL/TLS (Explicit Encryption) If the client does not request security, the server can choose to proceed with
an insecure transaction, or refuse/limit the connection.
6 In Authentication, choose one of the following options:
None The server’s credentials, signed or self-signed, are displayed. If you accept the server’s credentials, the
certificate is added to a certificate store,
trustedSites.db, in Dreamweaver. When you connect to the same server
the next time, Dreamweaver directly connects to the server.
Note: If the credentials of a self-signed certificate have changed on the server, you are prompted to accept the new
credentials.
Trusted The presented certificate is validated with the current set of trusted CA server certificates in the
Dreamweaver database. The list of trusted servers is stored in the
cacerts.pem file.
Note: An error message is displayed if you select Trusted Server, and connect to a server with a self-signed certificate.
7 Expand the
8 More Options
9 section to set more options.
Encrypt Only Command Channel Select this option if you want to encrypt only the commands that are being
transmitted. Use this option when the data being transmitted is already encrypted, or does not contain sensitive
information.
Encrypt Only User Name and Password Select this option if you want to encrypt only your user name and
password.
10 Click Save to close the Basic screen. Then in the Servers category, specify whether the server you added or edited is
a remote server, a testing server, or both.
For help with troubleshooting FTP connectivity problems, see TechNote kb405912 on the Adobe website at
www.adobe.com/go/kb405912.
Last updated 12/7/2011
Page 49

USING DREAMWEAVER
Working with Dreamweaver sites
Local or network connections
Use this setting to connect to a network folder, or if you are storing files or running your testing server on your local
computer.
1 Select Site > Manage Sites.
2 Click New to set up a new site, or select an existing Dreamweaver site and click Edit.
3 In the Site Setup dialog box, select the Servers category and do one of the following:
• Click the Add New Server button to add a new server
• Select an existing server and click the Edit Existing Server button
4 In the Server Name text box, specify a name for the new server. The name can be anything of your choosing.
5 Select Local/Network from the Connect Using pop-up menu.
6 Click the folder icon beside the Server Folder text box to browse to and select the folder where you store your site
files.
7 In the Web URL text box enter the URL of your website (for example, http://www.mysite.com). Dreamweaver uses
the Web URL to create site root-relative links, and to verify links when you use the link checker.
For a more extensive explanation of this option, see “Advanced Settings category” on page 47.
42
8 Click Save to close the Basic screen. Then in the Servers category, specify whether the server you just added or edited
is a remote server, a testing server, or both.
WebDAV connections
Use this setting if you connect to your web server using the Web-based Distributed Authoring and Versioning
(WebDAV) protocol.
For this connection method, you must have a server that supports this protocol, such as Microsoft Internet
Information Server (IIS) 5.0 or an appropriately configured installation of Apache web server.
Note: If you select WebDAV as your connection method, and you are using Dreamweaver in a multiuser environment,
you should also make sure that all of your users select WebDAV as the connection method. If some users select WebDAV,
and other users select other connection methods (FTP, for example), Dreamweaver’s check-in/check-out feature will not
work as expected, since WebDAV uses its own locking system.
1 Select Site > Manage Sites.
2 Click New to set up a new site, or select an existing Dreamweaver site and click Edit.
3 In the Site Setup dialog box, select the Servers category and do one of the following:
• Click the Add New Server button to add a new server
• Select an existing server and click the Edit Existing Server button
4 In the Server Name text box, specify a name for the new server. The name can be anything of your choosing.
5 Select WebDAV from the Connect Using pop-up menu.
6 For the URL, enter the complete URL to the directory on the WebDAV server you want to connect to.
This URL includes the protocol, port, and directory (if not the root directory). For example,
http://webdav.mydomain.net/mysite.
7 Enter your username and password.
This information is for server authentication and is not related to Dreamweaver. If you are not sure of your username
and password, check with
your system administrator or webmaster.
Last updated 12/7/2011
Page 50

USING DREAMWEAVER
Working with Dreamweaver sites
8 Click Test to test your connection settings.
9 Select the Save option if you want Dreamweaver to remember your password each time you start a new session.
10 In the Web URL text box enter the URL of your website (for example, http://www.mysite.com). Dreamweaver uses
the Web URL to create site root-relative links, and to verify links when you use the link checker.
For a more extensive explanation of this option, see “Advanced Settings category” on page 47.
11 Click Save to close the Basic screen. Then in the Servers category, specify whether the server you just added or edited
is a remote server, a testing server, or both.
RDS connections
Use this setting if you connect to your web server using Remote Development Services (RDS). For this connection
method, your remote server must be on a computer running Adobe® ColdFusion®
1 Select Site > Manage Sites.
2 Click New to set up a new site, or select an existing Dreamweaver site and click Edit.
3 In the Site Setup dialog box, select the Servers category and do one of the following:
• Click the Add New Server button to add a new server
• Select an existing server and click the Edit Existing Server button
4 In the Server Name text box, specify a name for the new server. The name can be anything of your choosing.
5 Select RDS from the Connect Using pop-up menu.
6 Click the Settings button and provide the following information in the Configure RDS Server dialog box:
• Enter the name of the host computer where your web server is installed.
The host name is probably an IP address or a URL. If you are unsure, ask your administrator.
43
• Enter the port number that you connect to.
• Enter your root remote folder as the host directory.
For example, c:\inetpub\wwwroot\myHostDir\.
• Enter your RDS username and password.
Note: These options might not appear if you set your username and password in the ColdFusion Administrator security
settings.
• Select the Save option if you want Dreamweaver to remember your settings.
7 Click OK to close the Configure RDS Server dialog box.
8 In the Web URL text box enter the URL of your website (for example, http://www.mysite.com). Dreamweaver uses
the Web URL to create site root-relative links, and to verify links when you use the link checker.
For a more extensive explanation of this option, see “Advanced Settings category” on page 47.
9 Click Save to close the Basic screen. Then in the Servers category, specify whether the server you just added or edited
is a remote server, a testing server, or both.
Microsoft Visual SourceSafe connections
Support for Microsoft Visual SourceSafe has been deprecated as of Dreamweaver CS5.
Last updated 12/7/2011
Page 51

USING DREAMWEAVER
Working with Dreamweaver sites
Set Advanced server options
1 Select Site > Manage Sites.
2 Click New to set up a new site, or select an existing Dreamweaver site and click Edit.
3 In the Site Setup dialog box, select the Servers category and do one of the following:
• Click the Add New Server button to add a new server
• Select an existing server and click the Edit Existing Server button
4 Specify Basic options as necessary, and then click the Advanced button.
5 Select Maintain Synchronization Information if you want to automatically synchronize your local and remote files.
(This option is selected by default.)
6 Select Automatically Upload Files to Server on Save if you want Dreamweaver to upload your file to your remote
site when you save the file.
7 Select Enable File Check Out if you want to activate the Check In/Out system.
8 If you are using a Testing server, select a server model from the Server Model pop-up menu. For more information,
“Set up a testing server” on page 45.
see
Connect to or disconnect from a remote folder with network access
❖ You don’t need to connect to the remote folder; you’re always connected. Click the Refresh button to see your
remote files.
44
Connect to or disconnect from a remote folder with FTP access
❖ In the Files panel:
• To connect, click Connects to Remote Host in the toolbar.
• To disconnect, click Disconnect in the toolbar.
Troubleshoot the remote folder setup
The following list provides information on common problems you may encounter in setting up a remote folder, and
how to resolve them.
There is also an extensive tech note that specifically provides FTP troubleshooting information on the Adobe website
www.adobe.com/go/kb405912.
at
• The Dreamweaver FTP implementation might not work properly with certain proxy servers, multilevel firewalls,
and other forms of indirect server access. If you encounter problems with FTP access, ask your local system
administrator for help.
• For a Dreamweaver FTP implementation, you must connect to the remote system’s root folder. Be sure to indicate
the remote system’s root folder as the host directory. If you’ve specified the host directory using a single slash (/),
you might need to specify a relative path from the directory you are connecting to and the remote root folder. For
example, if the remote root folder is a higher level directory, you may need to specify a ../../ for the host directory.
• Use underscores in place of spaces, and avoid special characters in file and folder names wherever possible. Colons,
slashes, periods, and apostrophes in file or folder names can sometimes cause problems.
• If you encounter problems with long filenames, rename them with shorter names. On the Mac OS, filenames
cannot be more than 31 characters long.
Last updated 12/7/2011
Page 52

USING DREAMWEAVER
Working with Dreamweaver sites
• Many servers use symbolic links (UNIX), shortcuts (Windows), or aliases (Macintosh) to connect a folder on one
part of the server’s disk with another folder elsewhere. Such aliases usually have no effect on your ability to connect
to the appropriate folder or directory; however, if you can connect to one part of the server but not another, there
might be an alias discrepancy.
• If you encounter an error message such as “cannot put file,” your remote folder may be out of space. For more
detailed information, look at the FTP log.
Note: In general, when you encounter a problem with an FTP transfer, examine the FTP log by selecting Window >
Results (Windows) or Site
> FTP Log (Macintosh), then clicking the FTP Log tag.
Set up a testing server
If you plan to develop dynamic pages, Dreamweaver needs the services of a testing server to generate and display
dynamic content while you work. The testing server can be your local computer, a development server, a staging server,
or a production server.
For a detailed overview about the purposes of a testing server, see David Powers’s Dreamweaver Developer Center
Setting up a local testing server in Dreamweaver CS5.
article,
45
More Help topics
“Choosing an application server” on page 513
“Preparing to build dynamic sites” on page 504
Set up a testing server
1 Select Site > Manage Sites.
2 Click New to set up a new site, or select an existing Dreamweaver site and click Edit.
3 In the Site Setup dialog box, select the Servers category and do one of the following:
• Click the Add New Server button to add a new server
• Select an existing server and click the Edit Existing Server button
4 Specify Basic options as necessary, and then click the Advanced button.
Note: You must specify a Web URL in the Basic screen when specifying a testing server. For more information, see the
next section.
5 Under Testing Server, select the server model you want to use for your web application.
Note: As of Dreamweaver CS5, Dreamweaver no longer installs ASP.NET, ASP JavaScript, or JSP server behaviors.
(You can manually
longer officially supports them.) If you’re working on ASP.NET, ASP JavaScript, or JSP pages, however, Dreamweaver
will still support Live view, code coloring, and code hinting for those pages. You do not need to select ASP.NET, ASP
JavaScript or JSP in the Site Definition dialog box for any of these features to work.
re-enable the deprecated server behaviors if you wish, but keep in mind that Dreamweaver no
6 Click Save to close the Advanced screen. Then in the Servers category, specify the server you just added or edited
as a testing server.
Last updated 12/7/2011
Page 53

USING DREAMWEAVER
Working with Dreamweaver sites
About the Web URL for the testing server
You must specify a Web URL so Dreamweaver can use the services of a testing server to display data and to connect
to databases while you work. Dreamweaver uses the design-time connection to provide you with useful information
about the database, such as the names of the tables in your database and the names of the columns in your tables.
A Web URL for a testing server comprises the domain name and any of your website’s home directory’s subdirectories
or virtual directories.
Note: The terminology used in Microsoft IIS may vary from server to server, but the same concepts apply to most web
servers.
The home directory The folder on the server mapped to your site’s domain name. Suppose the folder you want to use
to process dynamic pages is c:\sites\company\, and this folder is your home directory (that is, this folder is mapped to
your site’s domain name—for example, www.mystartup.com). In that case, the URL prefix is
http://www.mystartup.com/.
If the folder you want to use to process dynamic pages is a subfolder of your home directory, simply add the subfolder
to the URL. If
folder you want to use to process dynamic pages is
http://www.mystartup.com/inventory/
If the folder you want to use to process dynamic pages is not your home directory or any of its subdirectories, you must
create a virtual directory.
your home directory is c:\sites\company\, your site’s domain name is www.mystartup.com, and the
c:\sites\company\inventory. Enter the following Web URL:
46
A virtual directory A folder that is not physically contained in the home directory of the server even though it appears
to be in the URL. To create a virtual directory, specify an alias for the folder’s path in the URL. Suppose your home
directory is c:\sites\company, your processing folder is d:\apps\inventory, and you define an alias for this folder called
warehouse. Enter the following Web URL:
http://www.mystartup.com/warehouse/
Localhost Refers to the home directory in your URLs when the client (usually a browser, but in this case
Dreamweaver) runs on the same system as your web server. Suppose Dreamweaver is running on the same Windows
system as the web server, your home directory is c:\sites\company, and you defined a virtual directory called
warehouse to refer to the folder you want to use to process dynamic pages. The following are the Web URLs you would
enter for selected web servers:
Web server Web URL
ColdFusion MX 7 http://localhost:8500/warehouse/
IIS http://localhost/warehouse/
Apache (Windows) http://localhost:80/warehouse/
Jakarta Tomcat (Windows) http://localhost:8080/warehouse/
Note: By default the ColdFusion MX 7 web server runs on port 8500, the Apache web server runs on port 80, and the
Jakarta Tomcat web server runs on port 8080.
For Macintosh users running the Apache web server, your personal home directory is Users/MyUserName/Sites,
where MyUserName is your Macintosh user name. An alias called ~MyUserName is automatically defined for this
folder when you install Mac
OS 10.1 or higher. Therefore, your default Web URL in Dreamweaver is as follows:
http://localhost/~MyUserName/
Last updated 12/7/2011
Page 54

USING DREAMWEAVER
Working with Dreamweaver sites
If the folder you want to use to process dynamic pages is Users:MyUserName:Sites:inventory, then the Web URL is as
follows:
http://localhost/~MyUserName/inventory/
Version Control and Advanced settings
Access the Version Control and Advanced settings categories in the Site Setup dialog box by choosing Site > Manage
Sites, selecting the site you want to edit, and clicking Edit.
Version Control category
You can get and check in files using Subversion. For more information, see “Use Subversion (SVN) to get and check
in files” on page 88.
Advanced Settings category
Local Info
Default Images Folder The folder in which you want to store images for your site. Enter the path to the folder, or click
the folder icon to browse to the folder. Dreamweaver uses the path to the folder when you add images to documents.
47
Links Relative To Specifies the kind of links Dreamweaver creates when you create links to other assets or pages in
your site. Dreamweaver can create two kinds of links: document-relative and site root-relative. For more information
on the differences between the two, see
By default, Dreamweaver creates document-relative links. If you change the default setting and select the Site Root
option, make sure the correct Web URL for the site is entered in the Web URL text box (see below). Changing this
setting does not convert the path of existing links; the setting will only apply to new links you create visually with
Dreamweaver.
Note: Content linked by site-root relative links does not appear when you preview documents in a local browser unless
you specify a testing server, or select the Preview Using Temporary File option in Edit > Preferences > Preview In Browser.
This is because browsers don’t recognize site roots—servers do.
Web URL The URL of your website. Dreamweaver uses the Web URL to create site root-relative links, and to verify
links when you use the link checker.
Site root-relative links are useful if you are uncertain about the final location in the directory structure of the page
you’re working on, or if you think you might later relocate or reorganize files that contain links. Site root-relative links
are links whose paths to other site assets are relative to the site root, not the document, so if you move the document
at some point, the path to the assets remains correct.
For example, let’s say that you’ve specified http://www.mysite.com/mycoolsite (the remote server’s site root directory)
as the Web URL, and that you also have an images folder in the mycoolsite directory on the remote server
(http://www.mysite.com/mycoolsite/images). Let’s also say that your index.html file is in the mycoolsite directory.
When you create a site root-relative link from the index.html file to an image in the images directory, the link looks as
follows:
“Absolute, document-relative, and site root-relative paths” on page 261.
<img src="/mycoolsite/images/image1.jpg" />
This is different from a document-relative link, which would simply be:
Last updated 12/7/2011
Page 55

USING DREAMWEAVER
Working with Dreamweaver sites
<img src="images/image1.jpg" />
The appendage of /mycoolsite/ to the image source links the image relative to the site root, not the document.
Assuming the image stays in the image directory, the file path to the image (/mycoolsite/images/image1.jpg), will
always be correct, even if you move the index.html file to another directory.
For more information, see “Absolute, document-relative, and site root-relative paths” on page 261.
With regard to link verification, the Web URL is necessary for determining whether a link is internal or external to the
site. For example, if your web URL is http://www.mysite.com/mycoolsite, and the link checker finds a link with a URL
of http://www.yoursite.com on your page, the checker determines that the latter link is an external link and reports it
as such. Similarly, the link checker uses the Web URL to determine if links are internal to the site, and then checks to
see if those internal links are broken.
Case-sensitive Links Checking Checks that the case of the links matches the case of the filenames when Dreamweaver
checks links. This option is useful on UNIX systems where filenames are case-sensitive.
Enable Cache Indicates whether to create a local cache to improve the speed of link and site management tasks. If you
do not select this option, Dreamweaver asks you if you want to create a cache again before it creates the site. It is a good
idea to select this option because the Assets panel (in the Files panel group) only works if a cache is created.
Cloaking and other categories
For more information on the Cloaking, Design Notes, File View Columns, Contribute, Templates, or Spry categories,
click the Help button in the dialog box.
48
Manage Sites dialog box options
The Manage Sites dialog box is your gateway into various Dreamweaver site functions. From this dialog box, you can
initiate the process for creating a new site, editing an existing site, duplicating a site, removing a site, or importing or
exporting a site’s settings.
Note: The Manage Sites dialog box does not let you connect to or publish files to a remote server. For instructions on
connecting to a remote server, see
website, see “Edit an existing remote website” on page 50.
1 Select Site > Manage Sites and select a site from the list on the left.
2 Click a button to select one of the options, make any changes you need to make, and click Done.
New Enables you to create a new site. When you click the New button the Site Setup dialog box opens, letting you
name and specify the location for your new site. For more information, see
page 37.
Edit Enables you to edit information such as username, password, and server information for an existing
Dreamweaver site. Select the existing site in the site list on the left and click the Edit button to edit the existing site. For
more information on editing existing site options, see
Duplicate Creates a copy of an existing site. To duplicate a site, select the site in the site list on the left and click the
Duplicate button. The duplicated site appears in the site list with the word “copy” appended to the name of the site. To
change the name of the duplicated site, leave the site selected and click the Edit button.
Remove Deletes the selected site and all of its setup information from your list of Dreamweaver sites; it does not delete
the actual site files. (If you want to remove the site files from your computer, you need to do that manually.) To delete
a site from Dreamweaver, select the site in the site list and then click the Remove button. You cannot undo this action.
“Connect to a remote server” on page 38. If you are trying to connect to an existing
“Set up a local version of your site” on
“Connect to a remote server” on page 38.
Last updated 12/7/2011
Page 56

USING DREAMWEAVER
Working with Dreamweaver sites
Export/Import Enables you to either export the selected site’s settings as an XML file (*.ste), or import a site’s settings.
For more information, see
Note: The import feature only imports site settings that have previously been exported. It does not import site files to
create a new Dreamweaver site. For information on creating a new site in Dreamweaver, see “Set up a local version of
your site” on page 37.
“Import and export Dreamweaver site settings” on page 49.
More Help topics
“About Dreamweaver sites” on page 36
“Edit an existing remote website” on page 50
Import and export Dreamweaver site settings
You can export your site settings as an XML file that you can later import into Dreamweaver. Exporting/importing
sites enables you to transfer site settings to other machines and product versions, share site settings with other
and back up site settings.
The import/export feature does not import or export site files. It only imports/exports site settings to save you the time
of recreating sites in Dreamweaver. For information on creating a new site in Dreamweaver, see
of your site” on page 37.
“Set up a local version
users,
49
Export your site settings regularly so that you have a backup copy if anything happens to the site.
More Help topics
“About Dreamweaver sites” on page 36
Backing up and restoring site definitions
Export your site settings
1 Select Site > Manage sites.
2 Select one or more sites whose settings you want to export and click Export:
• To select more than one site, Control-click (Windows) or Command-click (Macintosh) each site.
• To select a range of sites, Shift-click the first and last site in the range.
3 If you want to back up your site settings for yourself, select the first option in the Exporting Site dialog box and click
OK. Dreamweaver saves remote server login information, such as the user name and password, as well as local path
information.
4 If you want to share your settings with other users, select the second option in the Exporting Site dialog box and
click OK. (Dreamweaver does not save information that would not work for other users, such as your remote server
login information and local paths.)
5 For each site whose settings you want to export, browse to a location where you want to save the site file and click
Save. (Dreamweaver saves each site’s settings as an XML file, with an .ste file extension.)
6 Click Done.
Note: Save the *.ste file to your site root folder or to your desktop to make it easy to find. If you cannot remember where
you put it, do a file search on your computer for files with the *.ste extension to locate it.
Last updated 12/7/2011
Page 57

USING DREAMWEAVER
Working with Dreamweaver sites
Import site settings
1 Select Site > Manage sites.
2 Click Import.
3 Browse to and select one or more sites—defined in files with an .ste file extension—whose settings you want to
import.
To select more than one site, Control-click (Windows) or Command-click (Macintosh) each .ste file. To select a range
of sites, Shift-click the first and last file in the range.
4 Click Open and then click Done.
After Dreamweaver imports the site settings, the site names appear in the Manage Sites dialog box.
Edit an existing remote website
You can use Dreamweaver to copy an existing remote site (or any branch of a remote site) to your local disk and edit
it there, even if you didn’t use Dreamweaver to create the original site. You must have the correct connection
information, and connect to the site’s remote server, before you can edit the site.
50
1 Create a local folder to contain the existing site and set up the folder as the local folder for the site. (See “Set up a
local version of your site” on page 37.)
Note: You must locally duplicate the entire structure of the relevant branch of the existing remote site.
2 Set up a remote folder, using the remote access information about the existing site. You must connect to the remote
site to download the files to your computer before you can edit them. (See
Make sure to choose the correct root folder for the remote site.
3 In the Files panel (Window > Files), click the Connects To Remote Host button (for FTP access) or the Refresh
button (for network access) in the toolbar to view the remote site.
4 Edit the site:
“Connect to a remote server” on page 38.)
• If you want to work with the entire site, select the root folder of the remote site in the Files panel, and click Get
File(s) in the toolbar to download the entire site to your local disk.
• If you want to work with just one of the files or folders of the site, locate the file or folder in the Remote view of the
Files panel, and click Get File(s) in the toolbar to download that file to your local disk.
Dreamweaver automatically duplicates as much of the remote site’s structure as is necessary to place the downloaded
file in the correct part of the site hierarchy. When editing only one part of a site, you should generally include
dependent files, such as image files.
More Help topics
“About Dreamweaver sites” on page 36
Editing an existing website (Dreamweaver blog)
Last updated 12/7/2011
Page 58

USING DREAMWEAVER
Working with Dreamweaver sites
Set site preferences for transferring files
You select preferences to control file transfer features that appear in the Files panel.
1 Select Edit > Preferences (Windows) or Dreamweaver > Preferences (Macintosh).
2 In the Preferences dialog box, select Site from the category list on the left.
3 Set the options and click OK.
Always Show Specifies which site (remote or local) is always shown, and in which Files panel pane (left or right) the
local and remote files appear.
By default, the local site always appears on the right. Whichever pane is not chosen (the left one by default) is the
changeable pane: this pane can display the files in the other site (the remote site by default).
Dependent Files Displays a prompt for transferring dependent files (such as images, external style sheets, and other
files referenced in the HTML file) that the browser loads when it loads the HTML file. By default, both Prompt on
Get/Check Out and Prompt on Put/Check In are selected.
It’s usually a good idea to download dependent files when checking out a new file, but if the latest versions of the
dependent files are already on the local disk, there’s no need to download them again. This is also true for uploading
and checking in files: no need if up-to-date copies are already at the destination.
51
If you deselect these options, your dependent files are not transferred. Therefore, to force the Dependent Files dialog
box to appear even when these options are deselected, hold down Alt (Windows) or Option (Macintosh) while
choosing the Get, Put, Check In, or Check Out commands.
FTP Connection Determines whether the connection to the remote site is terminated after the specified number of
minutes have passed with no activity.
FTP Time Out Specifies the number of seconds in which Dreamweaver attempts to make a connection with the remote
server.
If there is no response after the specified amount of time, Dreamweaver displays a warning dialog box alerting you to
this fact.
FTP Transfer options Determines whether Dreamweaver selects the default option, after a specified number of
seconds, when a dialog box appears during a file transfer and there is no user response.
Proxy Host Specifies the address of the proxy server through which you connect to outside servers if you are behind a
firewall.
If you are not behind a firewall, leave this space blank. If you are behind a firewall, select the Use Proxy option in the
Site Definition dialog box (Servers > Edit Existing Server (pencil icon) >
More Options
).
Proxy Port Specifies the port in your proxy or firewall through which you pass to connect to the remote server. If you
connect through a port other than 21 (the default for FTP), enter the number here.
Put Options: Save Files Before Putting Indicates that unsaved files are saved automatically before being put onto the
remote site.
Move Options: Prompt Before Moving Files on Server Alerts you when you attempt to move files on the remote site.
Manage Sites Opens the Manage Sites dialog box, where you can edit an existing site or create a new one.
Last updated 12/7/2011
Page 59

USING DREAMWEAVER
Working with Dreamweaver sites
You can define whether the types of files that you transfer are transferred as ASCII (text) or binary, by customizing
the FTPExtensionMap.txt file in the Dreamweaver/Configuration folder (on the Macintosh,
FTPExtensionMapMac.txt). For more information see, Extending Dreamweaver.
Managing Contribute sites
Managing Contribute sites
Adobe® Contribute® CS4 combines a web browser with a web-page editor. It enables your colleagues or clients to
browse to a page in a site that you created, and to edit or update the page if they have permission to do so. Contribute
users can add and update basic web content, including formatted text, images, tables, and links. Contribute site
administrators can limit what ordinary (non-administrator) users can do in a site.
Note: This topic assumes that you are a Contribute administrator.
As the site administrator, you give non-administrators the ability to edit pages by creating a connection key and
sending it to them (for information on how to do this, see Contribute Help. You can also set up a connection to a
Contribute site using Dreamweaver, which lets you or your site designer connect to the Contribute site and use all of
the editing capabilities available in Dreamweaver.
52
Contribute adds functionality to your website with Contribute Publishing Server (CPS), a suite of publishing
applications and user management tools that lets you integrate Contribute with your organization’s user directory
service—for example, Lightweight Directory Access Protocol (LDAP) or Active Directory. When you enable your
Dreamweaver site as a Contribute site, Dreamweaver reads Contribute’s administration settings whenever you
connect to the remote site. If Dreamweaver detects that CPS is enabled, it inherits some of the functionality of CPS,
such as file rollback and event logging.
You can use Dreamweaver to connect to and modify a file in a Contribute site. Most Dreamweaver capabilities work
the same way with a Contribute site as they do with any other site. However, when you use Dreamweaver with a
Contribute site, Dreamweaver automatically performs certain file-management operations, such as saving multiple
revisions of a document, and logging certain events in the CPS Console.
For more information, see Contribute Help.
Site structure and page design for a Contribute site
To enable Contribute users to edit your website, keep the following points in mind when you structure it:
• Keep your site structure simple. Don’t nest folders too deeply. Group related items together in a folder.
• Set up appropriate read and write permissions for folders on the server.
• Add index pages to folders as you create them, to encourage Contribute users to place new pages in the correct
folders. For example, if Contribute users provide pages containing meeting minutes, create a folder in the site root
folder named meeting_minutes, and create an index page in that folder. Then provide a link from your site’s main
page to the index page for meeting minutes. A Contribute user can then navigate to that index page and create a
new page of minutes for a specific meeting, linked from that page.
• On each folder’s index page, provide a list of links to the individual content pages and documents in that folder.
• Keep page designs as simple as possible, minimizing fancy formatting.
Last updated 12/7/2011
Page 60

USING DREAMWEAVER
Working with Dreamweaver sites
• Use CSS rather than HTML tags and name your CSS styles clearly. If the Contribute users use a standard set of styles
in Microsoft Word, use the same names for the CSS styles, so that Contribute can map the styles when a user copies
information from a Word document and pastes it into a Contribute page.
• To prevent a CSS style from being available to Contribute users, change the name of the style so that the name starts
with mmhide_. For example, if you use a style named RightJustified in a page but you don’t want Contribute users
to be able to use that style, rename the style to mmhide_RightJustified.
Note: You have to add mmhide_ to the style name in Code view; you cannot add it in the CSS panel.
• Use as few CSS styles as possible, to keep things simple and clean.
• If you use server-side includes for HTML page elements, such as headers or footers, create an unlinked HTML page
that contains links to the include files. Contribute users can then bookmark that page and use it to navigate to the
include files and edit them.
More Help topics
“Creating a Dreamweaver template” on page 382
“Working with server-side includes” on page 325
File transfer to and from a Contribute site
Contribute uses a system much like the Dreamweaver Check In/Check Out system to ensure that only one user at a
time can edit a given web page. When you enable Contribute compatibility in Dreamweaver, the Dreamweaver Check
In/Check Out system is automatically enabled.
53
To transfer files to and from a Contribute site using Dreamweaver, always use the Check In and Check Out commands.
If you instead use the PUT and GET commands to transfer files, you might overwrite the modifications that a
Contribute user has recently made to a file.
When you check a file in to a Contribute site, Dreamweaver makes a backup copy of the previous checked-in version
of the file in the _baks folder and adds your user name and a date stamp to a Design Notes file.
More Help topics
“Checking in and checking out files” on page 85
Contribute file and folder permissions on the server
Contribute provides a way to manage file and folder permissions for each user role you define; however, Contribute
doesn’t provide a way to manage the underlying read and write permissions assigned to files and folders by the server.
In Dreamweaver, you can manage those permissions directly on the
If a Contribute user doesn’t have read access on the server to a dependent file, such as an image displayed in a page,
the contents of the dependent file don’t appear in the Contribute window. For example, if a user doesn’t have read
access to an images folder, the images in that folder appear as broken image icons in Contribute. Similarly,
Dreamweaver templates are stored in a subfolder of the site’s root folder, so if a Contribute user doesn’t have read
access to the root folder, they can’t use templates in that site unless you copy the templates to an appropriate folder.
When you set up a Dreamweaver site, you must give users read access on the server to the /_mm folder (the _mm
subfolder of the root folder), the /Templates folder, and all of the folders containing assets that they will need to use.
server.
If, for security reasons, you can’t give users read access to the /Templates folder, you can still enable Contribute users
templates. See “Enable Contribute users to access templates without root folder access” on page 57.
to access
Last updated 12/7/2011
Page 61

USING DREAMWEAVER
Working with Dreamweaver sites
For more information about Contribute permissions, see Administering Contribute in Contribute Help.
Contribute special files
Contribute uses a variety of special files that aren’t intended to be viewed by visitors to your site:
• The shared settings file, which has an obfuscated filename with a CSI extension, appears in a folder named _mm in
the root folder of the site, and contains information that Contribute uses to manage the site
• Older versions of files, in folders named _baks
• Temporary versions of pages, so that users can preview changes
• Temporary lock files, indicating that a given page is being edited or previewed
• Design Notes files containing metadata about the site’s pages
In general, you shouldn’t edit any of these Contribute special files using Dreamweaver; Dreamweaver manages
them automatically.
If you don’t want these Contribute special files to appear on your publicly accessible server, you can set up a staging
server where Contribute users work on pages. Then periodically copy those web pages from the staging server to a
production server that’s on the web. If you take this staging-server approach, copy only web pages to the production
server, not any of the above-listed Contribute special files. In particular, don’t copy the _mm and _baks folders to
the production
server.
54
Note: For information about setting up a server to prevent visitors from seeing files in folders that begin with an
underscore, see “Website security” in Contribute Help.
Occasionally you might need to manually delete Contribute special files. For example, there might be
circumstances in which Contribute fails to delete temporary preview pages when the user is finished previewing; in
that case, you would have to manually delete those temporary pages. Temporary preview pages have filenames that
begin with TMP.
Similarly, under some circumstances an outdated lock file may be accidentally left on the server. If that happens,
you must manually delete the lock file to allow others to edit the page.
Prepare a site for use with Contribute
If you’re preparing an existing Dreamweaver site for Contribute users, you need to explicitly enable Contribute
compatibility to use Contribute-related features; Dreamweaver does not prompt you to do this; however, when you
connect to a site that’s been set up as a Contribute site (that has an administrator), Dreamweaver prompts you to
enable Contribute compatibility.
Not all connection types support Contribute compatibility. The following restrictions apply to connection types:
• If your remote site connection uses WebDAV, you can’t enable Contribute compatibility, because those source-
control systems aren’t compatible with the Design Notes and Check In/Check Out systems that Dreamweaver uses
for Contribute sites.
• If you use RDS to connect to your remote site, you can enable Contribute compatibility, but you must customize
your connection before you can share it with Contribute users.
• If you’re using your local computer as a web server, you must set up the site using an FTP or network connection
to your computer (rather than just a local folder path) to be able to share your connection with Contribute users.
When you enable Contribute compatibility, Dreamweaver automatically enables Design Notes (including the Upload
Design Notes For Sharing option) and the Check In/Check Out system.
Last updated 12/7/2011
Page 62

USING DREAMWEAVER
Working with Dreamweaver sites
If Contribute Publishing Server (CPS) is enabled on the remote site you are connecting to, Dreamweaver notifies the
CPS every time you trigger a network operation such as checking in, rolling back, or publishing a file. The CPS will log
these events, and you can view the log in the CPS Administration Console. (If you disable CPS, these events are not
logged.) You enable CPS using Contribute. For more information, see Adobe Contribute Help.
Note: You can make a site Contribute compatible without having Contribute on your computer; but if you want to be
able to start Contribute Administrator from Dreamweaver, you must have Contribute installed on the same computer as
Dreamweaver and you must be connected to the remote site before you enable Contribute compatibility. Otherwise,
Dreamweaver cannot read Contribute’s administrative settings to determine whether CPS and Rollback are enabled.
Important: You must make sure that the shared settings file (CSI file) that Contribute uses to administer the site is on
the remote server and uncorrupted. Contribute automatically creates this file (and overwrites old versions of it) whenever
you administer in Contribute Administrator. If the shared settings file is not on the server or is corrupted, Dreamweaver
returns the error, "The file required for Contribute compatibility does not exist on the server" whenever you attempt a
network operation (such as put). To ensure that the correct file is on the server, disable the connection to the server in
Dreamweaver, start Contribute Administrator, make an administration change, and then reconnect to the server in
Dreamweaver. For more information, see Adobe Contribute Help.
1 Select Site > Manage Sites.
2 Select a site, then click Edit.
3 In the Site Setup dialog box, expand Advanced Settings, select the Contribute category, and then select Enable
Contribute Compatibility.
4 If a dialog box appears saying that you must enable Design Notes and Check In/Check Out, click OK.
5 If you haven’t already provided your Check In/Check Out contact information, type your name and e-mail address
in the dialog box, and then click OK. Rollback status, CPS status, the Site Root URL text box, and the Administer
Site in Contribute button appear in the Site Definition dialog box.
If Rollback is enabled in Contribute, you’ll have the ability to roll back to previous versions of files that you’ve
changed in Dreamweaver.
55
6 Check the URL in the Site Root URL text box and correct it if necessary. Dreamweaver constructs a site root URL
based on other site-definition information you’ve provided, but sometimes the constructed URL isn’t quite right.
7 Click the Test button to verify that you’ve entered the correct URL.
Note: If you are ready to send a connection key or perform Contribute site administration tasks now, skip the
remaining steps.
8 Click Administer Site in Contribute if you want to make administration changes. Remember, you must have
Contribute installed on the same machine if you want to open Contribute Administrator from Dreamweaver.
9 Click Save and then click Done.
More Help topics
“Rolling back files (Contribute users)” on page 97
Administer a Contribute site using Dreamweaver
After you enable Contribute compatibility, you can use Dreamweaver to start Contribute to perform site
administration tasks.
Note: Contribute must be installed on the same computer as Dreamweaver.
Last updated 12/7/2011
Page 63

USING DREAMWEAVER
Working with Dreamweaver sites
As an administrator of a Contribute site, you can:
• Change the administrative settings for the site.
Contribute administrative settings are a collection of settings that apply to all users of your website. These settings
enable you to fine-tune Contribute to provide a better user experience.
• Change the permissions granted to user roles in Contribute.
• Set up Contribute users.
Contribute users need certain information about the site to be able to connect to it. You can package all of this
information in a file called a connection key to send to Contribute users.
Note: A connection key is not the same as a Dreamweaver exported site file.
Before you give Contribute users the connection information they need to edit pages, use Dreamweaver to create
the basic folder hierarchy for your site, and to create any templates and CSS style sheets needed for the site.
1 Select Site > Manage Sites.
2 Select a site, and then click Edit.
3 In the Site Setup dialog box, expand Advanced Settings and select the Contribute category.
4 Click the Administer Site in Contribute button.
Note: This button does not appear if you have not enabled Contribute compatibility.
56
5 If prompted, enter the administrator password, and then click OK.
The Administer Website dialog box appears.
• To change administrative settings, select a category from the list on the left, and then change settings as necessary.
• To change role settings, in the Users and Roles category, click Edit Role Settings, and then make changes as
necessary.
• To send a connection key to set up users, in the Users and Roles category, click Send Connection Key, and then
complete the Connection Wizard.
6 Click Close, click OK, and then click Done.
For more information about administrative settings, managing user roles, or creating a connection key, see Contribute Help.
More Help topics
“Import and export Dreamweaver site settings” on page 49
Delete, move, or rename a remote file in a Contribute site
Deleting a file from the remote server that hosts a Contribute site works much like deleting a file from the server for
any Dreamweaver site. However, when you delete a file from a Contribute site, Dreamweaver asks whether to delete
all older versions of the file. If you choose to keep the older versions, Dreamweaver saves a copy of the current version
in the _baks folder so you can restore it later.
Renaming a remote file or moving it from one folder to another in a Contribute site works the same way it works in
any Dreamweaver site. In a Contribute site, Dreamweaver also renames or moves the associated previous versions of
the file that are saved in the _baks folder.
1 Select the file in the Remote pane of the Files panel (Window > Files), and then press Backspace (Windows) or
(Macintosh).
Delete
Last updated 12/7/2011
Page 64

USING DREAMWEAVER
Working with Dreamweaver sites
A dialog box appears asking you to confirm that you want to delete the file.
2 In the confirmation dialog box:
• To delete all previous versions of the file as well as the current version, select the Delete Rollback Versions option.
• To leave previous versions on the server, deselect the Delete Rollback Versions option.
3 Click Yes to delete the file.
Enable Contribute users to access templates without root folder access
In a Contribute site, you manage underlying file and folder permissions directly on the server. If, for security reasons,
you can’t give users read access to the /Templates folder, you can still make the templates available to users.
1 Set up the Contribute site so that its root folder is the folder you want users to see as the root.
2 Manually copy the template folder from the main site’s root folder into the Contribute site’s root folder, using the
Files panel.
3 After you update templates for the main site, recopy the changed templates into appropriate subfolders as needed.
If you take this approach, don’t use site root-relative links in the subfolders. Site root-relative links are relative to the
main root folder on the server, not to the root folder you define in Dreamweaver. Contribute users can’t create site
root-relative links.
57
If links in a Contribute page appear to be broken, it’s possible that there’s a problem with folder permissions,
particularly if the links link to pages outside of the Contribute user’s root folder. Check read and write permissions for
folders on the server.
More Help topics
“Absolute, document-relative, and site root-relative paths” on page 261
Troubleshoot a Contribute site
If a remote file in a Contribute site appears to be checked out, but the file isn’t actually locked on the user’s computer,
you can unlock the file to enable users to edit it.
When you click any button related to Contribute site administration, Dreamweaver verifies that it can connect to your
remote site and that the Site Root URL you’ve given for the site is valid. If Dreamweaver can’t connect, or if the URL
isn’t valid, an error message appears.
If the administration tools aren’t working properly, there might be something wrong with the _mm folder.
Unlock a file in a Contribute site
Note: Before following this procedure, make sure that the file really isn’t checked out. If you unlock a file while a
Contribute user is editing it, multiple users might edit the file simultaneously.
1 Do one of the following:
• Open the file in the Document window, and then select Site > Undo Check Out.
• In the Files panel (Window > Files), right-click (Windows) or Control-click (Macintosh), and then select Undo
Check Out.
A dialog box might appear, indicating who has the file checked out and asking you to confirm that you want to unlock
the file.
2 If the dialog box appears, click Yes to confirm.
Last updated 12/7/2011
Page 65

USING DREAMWEAVER
Working with Dreamweaver sites
The file is unlocked on the server.
Troubleshoot connection problems for a Contribute site
1 Check the Site Root URL in the Contribute category of the Site Definition dialog box by opening that URL in a
browser, to make sure that the correct page opens.
2 Use the Test button in the Remote Info category of the Site Definition dialog box to make sure that you can connect
to the site.
3 If the URL is correct but the Test button results in an error message, ask your system administrator for help.
Troubleshoot Contribute administration tools
1 On the server, make sure that you have read and write permissions, and executable permissions if necessary, for the
_mm folder.
2 Make sure that the _mm folder contains a shared settings file with a CSI extension.
3 If it doesn’t, use the Connection Wizard (Windows) or Connection Assistant (Macintosh) to create a connection
to the site and to become an administrator for the site. The shared settings file is created automatically when you
become an administrator. For more information about becoming an administrator for an existing Contribute
website, see Administering Contribute in Contribute Help.
58
Last updated 12/7/2011
Page 66

Chapter 4: Creating and Managing Files
Creating and opening documents
About creating Dreamweaver documents
Dreamweaver offers a flexible environment for working with a variety of web documents. In addition to HTML
documents, you can create and open a variety of text-based documents, including ColdFusion Markup Language
(CFML), ASP, JavaScript, and
Cascading Style Sheets
(CSS). Source code files, such as Visual Basic, .NET, C#, and Java, are also supported.
Dreamweaver provides several options for creating a new document. You can create any of the following:
• A new blank document or template
• A document based on one of the predesigned page layouts that comes with Dreamweaver, including over 30 CSS-
based page layouts
• A document based on one of your existing templates
You can also set document preferences. For example, if you typically work with one type of document, you can set
it as the default document type for new pages you create.
59
You can easily define document properties, such as meta tags, document title, and background colors, and several
other page properties in either Design view or Code view.
Dreamweaver file types
You can work with a variety of file types in Dreamweaver. The primary kind of file you will work with is the HTML
file. HTML files—or Hypertext Markup Language files—contain the tag-based language responsible for displaying a
web page in a browser. You can save HTML files with either the .html or .htm extension. Dreamweaver saves files using
the .html extension by default.
Dreamweaver lets you create and edit HTML5-based web pages. Starter layouts are also available for building HTML5
pages from scratch.
Following are some of the other common file types you might use when working in Dreamweaver:
CSS Cascading Style Sheet files have a .css extension. They are used to format HTML content and control the
positioning of various page elements.
GIF Graphics Interchange Format files have a .gif extension. GIF format is a popular web graphic format for cartoons,
logos, graphics with transparent areas, and animations. GIFs contain a maximum of 256 colors.
JPEG Joint Photographic Experts Group files (named after the organization that created the format) have a .jpg
extension, and are usually photographs or high-color images. The JPEG format is best for digital or scanned
photographs, images using textures, images with gradient color transitions, and any images that require more than 256
colors.
XML Extensible Markup Language files have a .xml extension. They contain data in a raw form that can be formatted
using XSL (Extensible Stylesheet Language).
Last updated 12/7/2011
Page 67

USING DREAMWEAVER
Creating and Managing Files
XSL Extensible Stylesheet Language files have a .xsl or .xslt extension. They are used to style XML data that you want
to display on a web page.
CFML ColdFusion Markup Language files have a .cfm extension. They are used to process dynamic pages.
PHP Hypertext Preprocessor files have a .php extension and are used to process dynamic pages.
More Help topics
“Displaying XML data with XSLT” on page 477
“Building applications visually” on page 583
“Understanding Cascading Style Sheets” on page 118
Create a blank page
You can create a page that contains a predesigned CSS layout, or create a completely blank page and then create a
layout of your own.
1 Select File > New.
2 In the Blank Page category of the New Document dialog box, select the kind of page you want to create from the
Page Type column. For example, select HTML to create a plain HTML page, select ColdFusion to create a
ColdFusion page, and so on.
3 If you want your new page to contain a CSS layout, select a predesigned CSS layout from the Layout column;
otherwise, select None. Based on your selection, a preview and description of the selected layout appears on the
right side of the dialog box.
The predesigned CSS layouts provide the following types of columns:
60
Fixed Column width is specified in pixels. The column does not resize based on the size of the browser or the site
visitor’s text settings.
Liquid Column width is specified as a percentage of the site visitor’s browser width. The design adapts if the site visitor
makes the browser wider or narrower, but does not change based on the site visitor’s text settings.
Dreamweaver also offers two HTML5 CSS layouts: two- and three-column fixed.
4 Select a document type from the DocType pop-up menu. In most cases, you can use the default selection, XHTML
1.0 Transitional.
Selecting one of the XHTML document type definitions from the DocType (DTD) menu makes your page XHTMLcompliant. For example, you can make an HTML document XHTML-compliant by selecting XHTML 1.0 Transitional
or XHTML 1.0 Strict from the menu. XHTML (Extensible Hypertext Markup Language) is a reformulation of HTML
as an XML application. Generally, using XHTML gives you the benefits of XML, while ensuring the backward and
future compatibility of your web documents.
Note: For more information about XHTML, see the World Wide Web Consortium (W3C) website, which contains the
specification for XHTML 1.1 - Module-Based XHTML (
www.w3.org/TR/xhtml11/) and XHTML 1.0
(www.w3c.org/TR/xhtml1/), as well as XHTML validator sites for web-based files (http://validator.w3.org/) and local
files (http://validator.w3.org/file-upload.html).
Dreamweaver also offers HTML5 as a doctype option.
5 If you selected a CSS layout in the Layout column, select a location for the layout’s CSS from the Layout CSS pop-
up menu.
Add To Head Adds CSS for the layout to the head of the page you’re creating.
Last updated 12/7/2011
Page 68

USING DREAMWEAVER
Creating and Managing Files
Create New File Adds CSS for the layout to a new external CSS file and attaches the new style sheet to the page you’re
creating.
Link To Existing File Lets you specify an existing CSS file that already contains the CSS rules needed for the layout. To
do this, click the Attach Style Sheet icon above the Attach CSS file pane and select an existing CSS style sheet. This
option is particularly useful when you want to use the same CSS layout (the CSS rules for which are contained in a
single file) across multiple documents.
6 (Optional) You can also attach CSS style sheets to your new page (unrelated to the CSS layout) when you create the
page. To do this, click the Attach Style Sheet icon
above the Attach CSS file pane and select a CSS style sheet.
For a detailed walk-through of this process, see David Powers’s article, Automatically attaching a style sheet to new
documents.
7 Select Enable InContext Editing if you want to create a page that becomes InContext Editing-enabled as soon as
you save it.
An InContext Editing-enabled page must have at least one div tag that can be specified as an editable region. For
example, if you’ve selected the HTML page type, you must select one of the CSS layouts for your new page, since these
layouts already contain pre-defined
div tags. The InContext Editing editable region is automatically placed on the div
tag with the content ID. You can later add more editable regions to the page if you like.
8 Click Preferences if you want to set default document preferences, such as a document type, encoding, and a file
extension.
9 Click Get More Content if you want to open Dreamweaver Exchange where you can download more page design
content.
10 Click the Create button.
11 Save the new document (File > Save).
12 In the dialog box that appears, navigate to the folder where you want to save the file.
It’s a good idea to save your file in a Dreamweaver site.
61
13 In the File Name box, type a name for the file.
Avoid using spaces and special characters in file and folder names, and do not begin a filename with a numeral. In
particular, do not use special characters (such as é, ç, or ¥) or punctuation marks (such as colons, slashes, or periods)
in the names of files you intend to put on a remote server; many servers change these characters during upload, which
will cause any links to the files to break.
More Help topics
“XHTML code” on page 282
“Laying out pages with CSS” on page 146
“Set default document type and encoding” on page 66
“Business Catalyst InContext Editing” on page 471
Create a blank template
You can use the New Document dialog box to create Dreamweaver templates. By default, templates are saved in the
Templates folder of your site.
1 Select File > New.
Last updated 12/7/2011
Page 69

USING DREAMWEAVER
Creating and Managing Files
2 In the New Document dialog box, select the Blank Template category.
3 Select the kind of page you want to create from the Template Type column. For example, select HTML template to
create a plain HTML template, select ColdFusion template to create a ColdFusion template, and so on.
4 If you want your new page to contain a CSS layout, select a predesigned CSS layout from the Layout column;
otherwise, select None. Based on your selection, a preview and description of the selected layout appears on the
right side of the dialog box.
The predesigned CSS layouts provide the following types of columns:
Fixed Column width is specified in pixels. The column does not resize based on the size of the browser or the site
visitor’s text settings.
Liquid Column width is specified as a percentage of the site visitor’s browser width. The design adapts if the site visitor
makes the browser wider or narrower, but does not change based on the site visitor’s text settings.
5 Select a document type from the DocType pop-up menu. In most cases, you will want to leave this selected to the
default selection, XHTML 1.0 Transitional.
Selecting one of the XHTML document type definitions from the DocType (DTD) menu makes your page XHTMLcompliant. For example, you can make an HTML document XHTML-compliant by selecting XHTML 1.0 Transitional
or XHTML 1.0 Strict from the menu. XHTML (Extensible Hypertext Markup Language) is a reformulation of HTML
as an XML application. Generally, using XHTML gives you the benefits of XML, while ensuring the backward and
future compatibility of your web documents.
62
Note: For more information about XHTML, see the World Wide Web Consortium (W3C) website, which contains the
specification for XHTML 1.1 - Module-Based XHTML (
www.w3.org/TR/xhtml11/) and XHTML 1.0
(www.w3c.org/TR/xhtml1/), as well as XHTML validator sites for web-based files (http://validator.w3.org/) and local
files (http://validator.w3.org/file-upload.html).
6 If you selected a CSS layout in the Layout column, select a location for the layout’s CSS from the Layout CSS pop-
up menu.
Add to Head Adds CSS for the layout to the head of the page you’re creating.
Create New File Adds CSS for the layout to a new external CSS styles sheet and attaches the new style sheet to the page
you’re creating.
Link To Existing File Lets you specify an existing CSS file that already contains the CSS rules needed for the layout. To
do this, click the Attach Style Sheet icon
above the Attach CSS file pane and select an existing CSS style sheet. This
option is particularly useful when you want to use the same CSS layout (the CSS rules for which are contained in a
single file) across multiple documents.
7 (Optional) You can also attach CSS style sheets to your new page (unrelated to the CSS layout) when you create the
page. To do this, click the Attach Style Sheet icon
8 Select Enable InContext Editing if you want to create a page that becomes InContext Editing-enabled as soon as
above the Attach CSS file pane and select a CSS style sheet.
you save it.
An InContext Editing-enabled page must have at least one div tag that can be specified as an editable region. For
example, if you’ve selected the HTML page type, you must select one of the CSS layouts for your new page, since these
layouts already contain pre-defined
div tags. The InContext Editing editable region is automatically placed on the div
tag with the content ID. You can later add more editable regions to the page if you like.
9 Click Preferences if you want to set default document preferences, such as a document type, encoding, and a file
extension.
10 Click Get More Content if you want to open Dreamweaver Exchange where you can download more page design
content.
Last updated 12/7/2011
Page 70

USING DREAMWEAVER
Creating and Managing Files
11 Click the Create button.
12 Save the new document (File > Save). If you haven’t added editable regions to the template yet, a dialog box appears
telling you that there are no editable regions in the document. Click OK to close the dialog box.
13 In the
14 Save As
15 dialog box, select a site in which to save the template.
16 In the File Name box, type a name for the new template. You do not need to append a file extension to the name of
the template. When you click Save, the .dwt extension is appended to the new template, which is saved in the
Templates folder of your site.
Avoid using spaces and special characters in file and folder names and do not begin a filename with a numeral. In
particular, do not use special characters (such as é, ç, or ¥) or punctuation (such as colons, slashes, or periods) in the
names of files you intend to put on a remote server; many servers change these characters during upload, which will
cause any links to the files to break.
More Help topics
“XHTML code” on page 282
“Laying out pages with CSS” on page 146
63
“Creating and managing templates” on page 374
“Working with Dreamweaver sites” on page 36
“Set default document type and encoding” on page 66
“Business Catalyst InContext Editing” on page 471
Create a page based on an existing template
You can select, preview, and create a new document from an existing template. You can either use the New Document
dialog box to select a template from any of your Dreamweaver-defined sites or use the Assets panel to create a new
document from an existing template.
More Help topics
“Creating and managing templates” on page 374
“Working with Dreamweaver sites” on page 36
“Set default document type and encoding” on page 66
Create a document based on a template
1 Select File > New.
2 In the New Document dialog box, select the Page From Template category.
3 In the Site column, select the Dreamweaver site that contains the template you want use, and then select a template
from the list on the right.
4 Deselect Update Page When Template Changes if you don’t want to update this page each time you make changes
to the template on which this page is based.
5 Click Preferences if you want to set default document preferences, such as a document type, encoding, and a file
extension.
Last updated 12/7/2011
Page 71

USING DREAMWEAVER
Creating and Managing Files
6 Click Get More Content if you want to open Dreamweaver Exchange where you can download more page design
content.
7 Click Create and save the document (File > Save).
Create a document from a template in the Assets panel
1 Open the Assets panel (Window > Assets), if it is not already open.
2 In the Assets panel, click the Templates icon on the left to view the list of templates in your current site.
If you just created the template you want to apply, you might need to click the Refresh button to see it.
3 Right-click (Windows) or Control-click (Macintosh) the template you want to apply, then select New From
Template.
The document opens in the Document window.
4 Save the document.
Create a page based on a Dreamweaver sample file
Dreamweaver comes with several professionally developed frame page layout and CSS design files. You can use these
sample files as starting points for designing pages in your sites. When you create a document based on a sample file,
Dreamweaver creates a copy of the file.
64
You can preview a sample file and read a brief description of a document’s design elements in the New Document
dialog box. In the case of CSS style sheets, you can copy a predesigned style sheet and apply it to your documents.
Note: If you create a document based on a predefined frameset, only the frameset structure is copied, not the frame
contents; additionally, you must save each frame file separately.
1 Select File > New.
2 In the New Document dialog box, select the Page From Sample category.
3 In the Sample Folder column, select CSS Style Sheet or Frameset; then select a sample file from the list on the right.
4 Click the Create button.
The new document opens in the Document window (Code and Design views). If you selected CSS Style Sheet, the CSS
style sheet opens in Code view.
5 Save the document (File > Save).
6 If the Copy Dependent Files dialog box appears, set the options, and then click Copy to copy the assets to the
selected folder.
You can choose your own location for the dependent files or use the default folder location Dreamweaver generates
(based on the sample file’s source name).
More Help topics
“Understanding Cascading Style Sheets” on page 118
“Save frame and frameset files” on page 192
Last updated 12/7/2011
Page 72

USING DREAMWEAVER
Creating and Managing Files
Create other kinds of pages
The Other category of the New Document dialog box lets you create various types of pages that you might want to use
in Dreamweaver, including C#, VBScript, and text-only pages.
1 Select File > New.
2 In the New Document dialog box, select the Other category.
3 Select the kind of document you want to create from the Page Type column and click the Create button.
4 Save the document (File > Save).
Save and revert documents
You can save a document using its current name and location, or save a copy of a document using a different name
and location.
When naming files, avoid using spaces and special characters in file and folder names. In particular, do not use special
characters (such as é, ç, or ¥) or punctuation (such as colons, slashes, or periods) in the names of files you intend to
put on a remote server; many servers change these characters during upload, which will cause any links to the files to
break. Also, do not begin a filename with a numeral.
65
More Help topics
“Create a blank page” on page 60
Save a document
1 Do one of the following:
• To overwrite the current version on the disk, and save any changes you have made, select File > Save.
• To save the file in a different folder or using a different name, select File >
• Save As
• .
2 In the
3 Save As
4 dialog box that appears, navigate to the folder where you want to save the file.
5 In the File Name text box, type a name for the file.
6 Click Save to save the file.
Save all open documents
1 Select File > Save All.
2 If there are any unsaved documents open, the
3 Save As
4 dialog box is displayed for each unsaved document.
In the dialog box that appears, navigate to the folder where you want to save the file.
5 In the File Name box, type a name for the file and click Save.
Last updated 12/7/2011
Page 73

USING DREAMWEAVER
Creating and Managing Files
Revert to the last saved version of a document
1 Select File > Revert.
A dialog box asks if you want to discard your changes, and revert to the previously saved version.
2 Click Yes to revert to the previous version; click No to keep your changes.
Note: If you save a document, and then exit Dreamweaver, you cannot revert to the previous version of the document
when you restart Dreamweaver.
Set default document type and encoding
You can define which document type is used as a default document for a site.
For example, if most pages in your site are of a specific file type (such as Cold Fusion, HTML, or ASP documents), you
can set document preferences that automatically create new documents of the specified file type.
1 Select Edit > Preferences (Windows) or Dreamweaver > Preferences (Macintosh).
You can also click the Preferences button in the New Document dialog box to set new document preferences when you
create a new document.
2 Click New Document from the category list on the left.
3 Set or change preferences as necessary, and click OK to save them.
Default Document Select a document type that will be used for pages that you create.
66
Default Extension Specify the file extension you prefer (.htm or .html) for new HTML pages you create.
Note: This option is disabled for other file types.
Default Document Type (DDT) Select one of the XHTML document type definitions (DTD) to make new pages
XHTML-compliant. For example, you can make an HTML document XHTML-compliant by selecting XHTML 1.0
Transitional or XHTML 1.0 Strict from the menu.
Default Encoding Specify the encoding to be used when a new page is created, as well as when a document is opened
that does not specify any encoding.
If you select Unicode (UTF-8) as the document encoding, entity encoding is not necessary because UTF-8 can safely
represent all characters. If you select another document encoding, entity encoding may be necessary to represent
certain characters. For more information on character entities, see
www.w3.org/TR/REC-html40/sgml/entities.html.
If you select Unicode (UTF-8) as a default encoding, you can include a Byte Order Mark (BOM) in the document by
selecting the Include Unicode Signature (BOM) option.
A BOM is 2-4 bytes at the beginning of a text file that identifies a file as Unicode, as well as the byte order of the
following bytes. Because UTF-8 has no byte order, adding a UTF-8 BOM is optional. For UTF-16 and UTF-32, it is
required.
Unicode Normalization Form Select one of these options if you select Unicode (UTF-8) as a default encoding.
There are four Unicode Normalization Forms. The most important is Normalization Form C because it's the most
common one used in the Character Model for the World Wide Web. Adobe provides the other three Unicode
Normalization Forms for completeness.
Show New Document Dialog Box on Control+N Deselect this option (“on Command+N” for Macintosh) to
automatically create a document of the default document type when you use the key command.
Last updated 12/7/2011
Page 74

USING DREAMWEAVER
Creating and Managing Files
In Unicode, there are characters that are visually similar but can be stored within the document in different ways. For
example, “ë” (e-umlaut) can be represented as a single character, “e-umlaut,” or as two characters, “regular Latin e” +
“combining umlaut.” A Unicode combining character is one that gets used with the previous character, so the umlaut
would appear above the “Latin e.” Both forms result in the same visual typography, but what is saved in the file is
different for each form.
Normalization is the process of making sure all characters that can be saved in different forms are all saved using the
same form. That is, all “ë” characters in a document are saved as single “e-umlaut” or as “e” + “combining umlaut,”
and not as both forms in one document.
For more information on Unicode Normalization and the specific forms that can be used, see the Unicode website at
www.unicode.org/reports/tr15.
More Help topics
“XHTML code” on page 282
“Understanding document encoding” on page 204
Converting HTML5 to an older doctype
Using File > Convert to switch from HTML5 to an older DOCTYPE doesn’t remove HTML5 elements or attributes.
Only the DOCTYPE changes, and trailing slashes (for XHTML) are inserted.
67
Semantic tags, such as <header> and <article>, and attributes such as required, placeholder, and
type="number" are not affected.
Set the default file extension of new HTML documents
You can define the default file extension of HTML documents created in Dreamweaver. For example, you can use an
.htm or .html extension for all new HTML documents.
1 Select Edit > Preferences (Windows) or Dreamweaver > Preferences (Macintosh).
You can also click the Preferences button in the New Document dialog box to set new document preferences when you
create a new document.
2 Click New Document from the category list on the left.
3 Make sure that HTML is selected in the Default Document pop-up menu.
4 In the Default Extension box, specify the file extension you want for new HTML documents created in
Dreamweaver.
For Windows, you can specify the following extensions: .html, .htm, .shtml, .shtm, .stm, .tpl, .lasso, .xhtml.
For Macintosh, you can specify the following extensions: .html, .htm, .shtml, .shtm, .tpl, .lasso, .xhtml, .ssi.
Open and edit existing documents
You can open an existing web page or text-based document, whether or not it was created in Dreamweaver, and edit
it in either Design view or Code view.
If the document you open is a Microsoft Word file that was saved as an HTML document, you can use the Cleanup
Word HTML command to remove the extraneous markup tags that Word inserts into HTML files.
To clean up HTML or XHTML that was not generated by Microsoft Word, use the Cleanup HTML command.
Last updated 12/7/2011
Page 75

USING DREAMWEAVER
Creating and Managing Files
You can also open non-HTML text files, such as JavaScript files, XML files, CSS style sheets, or text files saved by word
processors or text editors.
1 Select File > Open.
You can also use the Files panel to open files.
2 Navigate to and select the file you want to open.
Note: If you haven’t already done so, it’s a good idea to organize files you plan to open and edit in a Dreamweaver site,
instead of opening them from another location.
3 Click Open.
The document opens in the Document window. JavaScript, text, and CSS Style Sheets open in Code view by default.
You can update the document while working in Dreamweaver, and save the changes in the file.
More Help topics
“Clean up code” on page 310
“Start an external editor for media files” on page 248
“Work with files in the Files panel” on page 75
68
Open Related Files
Dreamweaver lets you view files related to your main document, without losing the main document’s focus. For
example, if you have CSS and JavaScript files attached to a main document, Dreamweaver lets you view and edit these
related files in the Document window while keeping the main document visible.
Note: Dynamically Related Files (such as PHP files in Content Management Systems) are covered in the next Help
section.
By default, Dreamweaver displays the names of all files related to a main document in a Related Files toolbar below the
main document’s title. The order of the buttons in the toolbar follows the order of related files links that exist within
the main document.
Note: If a related file is missing, Dreamweaver still displays the corresponding button in the Related Files toolbar. If you
click the button, however, Dreamweaver does not display anything.
Dreamweaver supports the following kinds of related files:
• Client-side script files
• Server Side Includes
• Spry data set sources (XML and HTML)
• External CSS style sheets (including nested style sheets)
For a video overview from the Dreamweaver engineering team about working with related files, see
www.adobe.com/go/dw10relatedfiles.
For a video tutorial on working with Live View, related files, and the Code Navigator, see
www.adobe.com/go/lrvid4044_dw.
Last updated 12/7/2011
Page 76

USING DREAMWEAVER
Creating and Managing Files
Open a related file from the Related Files toolbar
Do one of the following:
• In the Related Files toolbar at the top of the document, click the filename of the related file you want to open.
• In the Related Files toolbar, right-click the filename of the related file you want to open and select Open as Separate
File from the context menu. When you open a related file by this method, the main document does not remain
simultaneously visible.
Open a related file from the Code navigator
1 Place the insertion point on a line or in an area that you know is affected by a related file.
2 Wait for the Code Navigator indicator to appear, and then click it to open the Code Navigator.
3 Hover over the items in the Code Navigator to see more information about them. For example, if you want to
change a particular CSS color property, but don’t know which rule it resides in, you can find the property by
hovering over the available rules in the Code Navigator.
4 Click the item you’re interested in to open the corresponding related file.
Return to the source code of the main document
❖ Click the Source Code button in the Related Files toolbar.
69
Change the display of related files
You can view related files in a number of ways:
• When you open a related file from Design view or Code and Design views (Split view), the related file displays in a
split view above the Design view of the main document.
You can select View > Design View on Top if you want the related file to display at the bottom of the Document
window instead.
• When you open a related file from vertically split Code and Design views (View > Split vertically), the related file
displays in a split view alongside the Design view of the main document.
You can select or deselect Design View on Left (View > Design View on Left), depending on where you want the
Design view.
• When you open a related file from Split Code view or Vertical Split Code view (View > Split Code view, and View >
Split vertically), the related file displays in a split view beneath, above, or alongside the source code for the main
document, depending on the options you have selected.
The “code view” in the display option refers to the source code of the main document. For example, if you select
> Code View on Top, Dreamweaver displays the source code of the main document in the top half of the
View
Document window. If you select View
document on the left side of the Document window.
> Code View on Left, Dreamweaver displays the source code of the main
• Standard Code view does not let you display related Documents at the same time as the main document’s source code.
Disable related files
1 Select Edit > Preferences (Windows) or Dreamweaver > Preferences (Macintosh).
2 In the General category, deselect Enable Related Files.
Last updated 12/7/2011
Page 77

USING DREAMWEAVER
Creating and Managing Files
More Help topics
“Switch between views in the Document window” on page 17
“Navigate to related code” on page 302
“Previewing pages in Dreamweaver” on page 276
Related files tutorial
Open Dynamically-Related Files
The Dynamically-Related Files feature extends the functionality of the Related Files feature by allowing you to see the
related files of dynamic pages in the Related Files toolbar. Specifically, the Dynamically-Related Files feature lets you
see the numerous dynamic includes that are required to generate the runtime code for popular open-source PHP
Content Management System (CMS) frameworks such as WordPress, Drupal and Joomla!.
To use the Dynamically-Related Files feature, you must have access to a local or remote PHP application server
running WordPress, Drupal, or Joomla!. One common approach for testing pages is to set up a localhost PHP
application server, and test the pages locally.
Before you test pages, you’ll need to perform the following steps:
• Set up a Dreamweaver site and make sure that you have filled out the Web URL text box the Site Setup dialog box.
• Set up a PHP application server.
Important: The server must be running before you attempt to work with Dynamically-Related Files in Dreamweaver.
70
• Install WordPress, Drupal, or Joomla! on the application server. For more information, see:
• WordPress Installation
• Drupal Installation
• Joomla Installation
• In Dreamweaver, define a local folder where you’ll download and edit your CMS files.
• Define the location of the installed WordPress, Drupal, or Joomla! files as your remote and testing folder.
• Download (Get) your CMS files from the remote folder.
More Help topics
www.adobe.com/go/dwcs5drf_en
Set Dynamically-Related Files preferences
When you open a page that is associated with Dynamically-Related Files, Dreamweaver can discover the files
automatically, or let you discover the files manually (which you do by clicking a link in the Info bar above the page).
The default setting is manual discovery.
1 Choose Edit > Preferences (Windows) or Dreamweaver > Preferences (Macintosh OS).
2 In the General category, make sure the Enable Related Files option is selected.
3 Select Manually or Automatically from the Dynamically-Related Files pop-up menu. You can also disable the
discovery entirely by selecting Disabled.
Last updated 12/7/2011
Page 78

USING DREAMWEAVER
Creating and Managing Files
Discover Dynamically-Related Files
1 Open a page that has Dynamically-Related Files associated with it—for example, the site root index.php page of a
WordPress, Drupal, or Joomla! site.
2 If the discovery of Dynamically-Related Files is set to manual (the default), click the Discover link in the Info bar
that appears above the page in the Document window.
If the discovery of Dynamically-Related Files is automatically enabled, then a list of Dynamically-Related Files
appears in the Related Files toolbar.
The order of Related and Dynamically-Related Files in the Related Files toolbar is as follows:
• Static related files (i.e. related files that do not require any sort of dynamic processing)
• External related files (i.e. .css and .js files) that are attached to dynamic path server include files
• Dynamic path server include files (i.e. .php, .inc, and .module files)
Filter Related Files
Because Related Files and Dynamically-Related Files can often be numerous, Dreamweaver lets you filter Related Files
so that you can precisely locate the files you want to work with.
1 Open a page that has Related Files associated with it.
2 Discover Dynamically-Related Files if necessary.
3 Click the Filter Related Files icon at the right side of the Related Files toolbar.
4 Select the types of files you want to see in the Related Files toolbar. By default, Dreamweaver selects all Related Files.
5 To create a custom filter, click the Filter Related Files icon and choose Custom Filter.
The Custom Filter dialog only allows for the filtering of exact file names (style.css), file extensions (.php), and
wildcard expressions using asterisks (*menu*). You can filter on multiple wildcard expressions by separating each
expression with a semi-colon (for example, style.css;*.js;*tpl.php).
71
Note: Filter settings do not persist once you close the file.
Clean up Microsoft Word HTML files
You can open documents saved by Microsoft Word as HTML files, and then use the Clean Up Word HTML command
to remove the extraneous HTML code generated by Word. The Clean Up Word HTML command is available for
documents saved as HTML files by Word
The code that Dreamweaver removes is primarily used by Word to format and display documents in Word and is not
needed to display the HTML file. Retain a copy of your original Word (.doc) file as a backup, because you may not be
able to reopen the HTML document in Word once you’ve applied the Clean Up Word HTML feature.
To clean up HTML or XHTML that was not generated by Microsoft Word, use the Cleanup HTML command.
1 Save your Microsoft Word document as an HTML file.
Note: In Windows, close the file in Word to avoid a sharing violation.
2 Open the HTML file in Dreamweaver.
To view the HTML code generated by Word, switch to Code view (View > Code).
3 Select Commands > Clean Up Word HTML.
Note: If Dreamweaver is unable to determine which version of Word was used to save the file, select the correct version
from the pop-up menu.
97 or later.
Last updated 12/7/2011
Page 79

USING DREAMWEAVER
Creating and Managing Files
4 Select (or deselect) options for the cleanup. The preferences you enter are saved as default cleanup settings.
Dreamweaver applies the cleanup settings to the HTML document and a log of the changes appears (unless you
deselected that option in the dialog box).
Remove All Word Specific Markup Removes all Microsoft Word-specific HTML, including XML from HTMLtags,
Word custom metadata and link tags in the head of the document, Word XML markup, conditional tags and their
contents, and empty paragraphs and margins from styles. You can select each of these options individually using the
Detailed tab.
Clean Up CSS Removes all Word-specific CSS, including inline CSS styles when possible (where the parent style has
the same style properties), style attributes beginning with “mso,” non-CSS style declarations, CSS style attributes from
tables, and all unused style definitions from the head. You can further customize this option using the Detailed tab.
Clean Up <font> Tags Removes HTML tags, converting the default body text to size 2 HTML text.
Fix Invalidly Nested Tags Removes the font markup tags inserted by Word outside the paragraph and heading (block-
level) tags.
Apply Source Formatting Applies the source formatting options you specify in HTML Format preferences and
SourceFormat.txt to the document.
Show Log On Completion Displays an alert box with details about the changes made to the document as soon as the
cleanup is finished.
72
5 Click OK, or click the Detailed tab if you want to further customize the Remove All Word Specific Markup and
Clean Up CSS options, and then click OK.
More Help topics
“Clean up code” on page 310
“Import Microsoft Office documents (Windows only)” on page 221
Managing files and folders
About managing files and folders
Dreamweaver includes a Files panel that helps you manage and transfer files to and from a remote server. When you
transfer files between local and remote sites, parallel file and folder structures between the sites are maintained. When
transferring files between sites, Dreamweaver creates corresponding folders if they do not yet exist in a site. You can
also synchronize the files between your local and remote sites; Dreamweaver copies files in both directions as necessary
and removes unwanted files when appropriate.
Using the Files panel
The Files panel enables you to view files and folders, whether they are associated with a Dreamweaver site or not, and
perform standard file maintenance operations, such as opening and moving files.
Note: In previous versions of Dreamweaver the Files panel was called the Site panel.
You can move the Files panel as necessary and set preferences for the panel.
Use this panel to perform the following tasks:
• Access sites, a server, and local drives
Last updated 12/7/2011
Page 80

USING DREAMWEAVER
Creating and Managing Files
• View files and folders
• Manage files and folders in the Files panel
For Dreamweaver sites, use the following options to display or transfer files:
A B C D E F G H I J K L M
Expanded Files panel options.
A. Site pop-up menu B. Connect/Disconnect C. Refresh D. View site FTP log E. Site files view F. Testing server G. Repository view H. Get
File(s) I. Put File(s) J. Check Out File(s) K. Check In File(s) L. Synchronize M. Expand/Collapse
Note: The Site Files view, Testing Server view, and Synchronize buttons appear only in the expanded Files panel.
The Site pop-up menu Lets you select a Dreamweaver site and display that site’s files. You can also use the Site menu
to access all the files on your local disk, much like
Windows Explorer
(Windows) or the Finder (Macintosh).
Connect/Disconnect (FTP, RDS, and WebDAV protocol) Connects to or disconnects from the remote site. By default,
Dreamweaver disconnects from the remote site if it has been idle for more than 30 minutes (FTP only). To change the
time limit, select Edit
> Preferences (Windows) or Dreamweaver > Preferences (Macintosh), then select Site from the
category list on the left.
73
Refresh Refreshes the local and remote directory lists. Use this button to manually refresh the directory lists if you
deselected either Refresh Local File List Automatically or Refresh Remote File List Automatically in the Site Definition
dialog box.
Site Files view Displays the file structure of the remote and local sites in the panes of the Files panel. (A preference
setting determines which site appears in the left pane and which appears in the right pane.) Site Files view is the default
view for the Files panel.
Testing Server view Displays the directory structure of the testing server and the local site.
Repository view Displays the Subversion (SVN) Repository.
Get File(s) Copies the selected files from the remote site to your local site (overwriting the existing local copy of the
file, if any). If Enable File Check In And Check Out is enabled, the local copies are read-only; the files remain available
on the remote site for other team members to check out. If Enable File Check In and Check Out is disabled, the file
copies will have both read and write privileges.
Note: The files Dreamweaver copies are the files you select in the active pane of the Files panel. If the Remote pane is
active, the selected remote or testing server files are copied to the local site; if the Local pane is active, Dreamweaver copies
the remote or testing server version of the selected local files to the local site.
Put File(s) Copies the selected files from the local site to the remote site.
Note: The files Dreamweaver copies are the files you select in the active pane of the Files panel. If the Local pane is active,
the selected local files are copied to the remote site or testing server; if the Remote pane is active, Dreamweaver copies the
local versions of the selected remote server files to the remote site.
If you are putting a file that doesn’t already exist on the remote site, and Enable File Check In and Out is enabled, the
file is added to the remote site as “checked out.” Click the Check In Files button if you want to add a file without the
checked out status.
Last updated 12/7/2011
Page 81

USING DREAMWEAVER
Creating and Managing Files
Check Out File(s) Transfers a copy of the file from the remote server to your local site (overwriting the existing local
copy of the file, if any) and marks the file as checked out on the server. This option is not available if Enable File Check
In and Check Out in the Site Definitions dialog box is disabled for the current site.
Check In File(s) Transfers a copy of the local file to the remote server and makes the file available for editing by others.
The local file becomes read-only. This option is not available if the Enable File Check In and Check Out option in the
Site Definitions dialog box is disabled for the current site.
Synchronize Synchronizes the files between the local and remote folders.
The Expand/Collapse button Expands or collapses the Files panel to display one or two panes.
More Help topics
“Files panel overview” on page 15
“Working with Dreamweaver sites” on page 36
“Check files into and out of a remote folder” on page 86
“Put files on a remote server” on page 83
“Get files from a remote server” on page 81
“Synchronizing files” on page 93
74
View files and folders
You can view files and folders in the Files panel, whether they are associated with a Dreamweaver site or not. When
you view sites, files, or folders in the Files panel, you can change the size of the viewing area, and, for Dreamweaver
sites, you can expand or collapse the Files panel.
For Dreamweaver sites, you can also customize the Files panel by changing the view—either your local or remote site—
that appears by default in the collapsed panel. Or, you can switch the content views in the expanded Files panel using
the Always Show option.
Open or close the Files panel
❖ Select Window > Files.
Expand or collapse the Files panel (Dreamweaver sites only)
❖ In the Files panel (Window > Files), click the Expand/Collapse button in the toolbar.
Note: If you click the Expand/Collapse button to expand the panel while it is docked, the panel maximizes so that you
cannot work in the Document window. To return to the Document window, click the Expand/Collapse button again to
collapse the panel. If you click the Expand/Collapse button to expand the panel while it is not docked, you can still work
in the Document window. Before you can dock the panel again, you must first collapse it.
When the Files panel is collapsed it displays the contents of the local site, the remote site, or the testing server as a list
of files. When expanded, it displays the local site and either the remote site or testing server.
Change the size of the view area in the expanded Files panel
❖ In the Files panel (Window > Files), with the panel expanded, do one of the following:
• Drag the bar that separates the two views to increase or decrease the view area of the right or left pane.
• Use the scroll bars at the bottom of the Files panel to scroll through the views’ contents.
Last updated 12/7/2011
Page 82

USING DREAMWEAVER
Creating and Managing Files
Change the site view in Files panel (Dreamweaver sites only)
❖ Do one of the following:
• In the collapsed Files panel (Window > Files), select Local View, Remote View, Testing Server, or Repository View
from the Site View pop-up menu.
Note: Local View appears in the Site View menu by default.
• In the expanded Files panel (Window > Files), click the Site Files button (for the remote site), the Testing Server
button, or the Repository Files button.
ABC
A. Site Files B. Testing Server C. Repository Files
75
Note: Before you can view a remote site, testing server or repository, you must set up a remote site, testing server, or SVN
repository.
View files outside of a Dreamweaver site
❖ Navigate your computer using the Site pop-up menu, much as you would if you were using
❖ Windows Explorer
❖ (Windows) or the Finder (Macintosh).
Work with files in the Files panel
You can open or rename files; add, move, or delete files; or refresh the Files panel after you make changes.
For Dreamweaver sites, you can also determine which files (on either the local or remote site) have been updated since
the last time they were transferred.
More Help topics
“Synchronizing files” on page 93
“Access sites, a server, and local drives” on page 78
Open a file
1 In the Files panel (Window > Files), select a site, server, or drive from the pop-up menu (where the current site,
server, or drive appears).
2 Navigate to the file you want to open.
3 Do one of the following:
• Double-click the file’s icon.
• Right-click (Windows) or Control-click (Macintosh) the file’s icon, then select Open.
Dreamweaver opens the file in the Document window.
Last updated 12/7/2011
Page 83

USING DREAMWEAVER
Creating and Managing Files
Create a file or folder
1 In the Files panel (Window > Files), select a file or folder.
Dreamweaver will create the new file or folder inside the currently selected folder, or in the same folder as the currently
selected file.
2 Right-click (Windows) or Control-click (Macintosh), then select New File or New Folder.
3 Enter a name for the new file or folder.
4 Press Enter (Windows) or Return (Macintosh).
Delete a file or folder
1 In the Files panel (Window > Files), select the file or folder you want to delete.
2 Right-click (Windows) or Control-click (Macintosh), then select Edit > Delete.
Rename a file or folder
1 In the Files panel (Window > Files), select the file or folder you want to rename.
2 Do one of the following to activate the name of the file or folder:
• Click in the filename, pause, then click again.
• Right-click (Windows) or Control-click (Macintosh) the file’s icon, then select Edit > Rename.
3 Type the new name over the existing name.
4 Press Enter (Windows) or Return (Macintosh).
76
Move a file or folder
1 In the Files panel (Window > Files), select the file or folder you want to move.
2 Do one of the following:
• Copy the file or folder, then paste it in a new location.
• Drag the file or folder to a new location.
3 Refresh the Files panel to see the file or folder in its new location.
Refresh the Files panel
❖ Do one of the following:
• Right-click (Windows) or Control-click (Macintosh) any file or folder, then select Refresh.
• (Dreamweaver sites only) Click the Refresh button in the Files panel toolbar (this option refreshes both panes).
Note: Dreamweaver refreshes the Files panel when you make changes in another application, then return to
Dreamweaver.
Find files in your Dreamweaver site
Dreamweaver makes it easy to find selected, open, checked out, or recently modified files in your site. You can also
find files that are newer in your local or remote site.
More Help topics
“Use reports to test your site” on page 104
Last updated 12/7/2011
Page 84

USING DREAMWEAVER
Creating and Managing Files
Find an open file in your site
1 Open the file in the Document window.
2 Select Site > Locate in Site.
Dreamweaver selects the file in the Files panel.
Note: If the open file in the Document window is not part of the current site in the Files panel, Dreamweaver attempts to
determine which of your Dreamweaver sites the file belongs to; if the current file belongs to only one local site,
Dreamweaver opens that site in the Files panel, then highlights the file.
Locate and select checked out files in a Dreamweaver site
❖ In the collapsed Files panel (Window > Files), click the Options menu in the upper-right corner of the Files panel,
then select Edit
> Select Checked Out Files.
Dreamweaver selects the files in the Files panel.
Find a selected file in your local or remote site
1 Select the file in the Local or Remote view of the Files panel (Window > Files).
2 Right-click (Windows) or Control-click (Macintosh), then select Locate in Local Site or Locate in Local Site
(depending on where you selected the file).
Dreamweaver selects the file in the Files panel.
77
Locate and select files that are newer in the local site than in the remote site
❖ In the collapsed Files panel (Window > Files), click the Options menu in the upper-right corner of the Files panel,
then select Edit
> Select Newer Local.
Dreamweaver selects the files in the Files panel.
Locate and select files that are newer in the remote site than in the local site
❖ In the collapsed Files panel (Window > Files), click the Options menu in the upper-right corner of the Files panel,
then select Edit
> Select Newer Remote.
Dreamweaver selects the files in the Files panel.
Find recently modified files in your site
1 In the collapsed Files panel (Window > Files), click the Options menu in the upper-right corner of the Files panel,
and then select Edit
2 Do one of the following to indicate search dates for the report:
• To report on all files modified in the last several days, select Files Created or Modified in the Last and enter a
number in the box.
• To report on all files modified within a specific time frame, click the Files Created or Modified in the Between radio
button, then specify a date range.
3 (Optional) Enter a user name in the Modified By box to limit your search to files modified by a specific user between
the dates you indicated.
Note: This option is only available for reports on Contribute sites.
> Select Recently Modified.
Last updated 12/7/2011
Page 85

USING DREAMWEAVER
Creating and Managing Files
4 Select a radio button to indicate where you want to view files listed in the report, if necessary:
Local Machine if the site contains static pages.
Testing Server if the site contains dynamic pages.
Note: This option assumes you defined a Testing Server in the Site Definition dialog box (XREF). If you have not defined
a Testing Server and entered a URL prefix for that server, or if you are running the report for more than one site, this
option is not available.
Other Location if you want to enter a path in the text box.
5 Click OK to save your settings.
Dreamweaver highlights the files that were modified within the selected time frame in the Files panel.
Identify and delete unused files
You can identify and delete files that are no longer used by other files in your site.
1 Select Site > Check Links Sitewide.
Dreamweaver checks all the links in your site and displays the broken ones in the Results panel.
2 Select Orphaned Files from the menu on the Link Checker panel.
Dreamweaver displays all the files with no incoming links. This means that no files in your site link to these files.
78
3 Select the files you want to delete and press Delete.
Important: Although no other file in the site links to these files, some of the listed files may link to other files. Use caution
when deleting the files.
More Help topics
“Enable and disable site cloaking” on page 98
Access sites, a server, and local drives
You can access, modify, and save files and folders in your Dreamweaver sites, as well as files and folders that are not
part of a Dreamweaver site. In addition to Dreamweaver sites, you can access a server, a local drive, or your desktop.
Before you can access a remote server, you must set up Dreamweaver to work with that server.
Note: The best way to manage your files is to create a Dreamweaver site.
Open an existing Dreamweaver site
❖ In the Files panel (Window > Files), select a site from the menu (where the current site, server, or drive appears).
Last updated 12/7/2011
Page 86

USING DREAMWEAVER
Creating and Managing Files
Open a folder on a remote FTP or RDS server
1 In the Files panel (Window > Files), select a server name from the menu (where the current site, server, or drive
appears).
Note: Server names appear for servers you’ve configured Dreamweaver to work with.
2 Navigate to and edit files as you normally do.
Access a local drive or your desktop
1 In the Files panel (Window > Files), select Desktop, Local Disk, or CD Drive from the menu (where the current site,
server, or drive appears).
2 Navigate to a file, then do any of the following:
• Open files in Dreamweaver or another application
• Rename files
• Copy files
• Delete files
79
• Drag files
When you drag a file from one Dreamweaver site to another or to a folder that is not part of a Dreamweaver site,
Dreamweavercopies the file to the location where you drop it. If you drag a file within the same Dreamweaver site,
Dreamweavermoves the file to the location where you drop it. If you drag a file that is not part of a Dreamweaver site
to a folder that is not part of a Dreamweaver site, Dreamweaver moves the file to the location where you drop it.
Note: To move a file that Dreamweaver copies by default, hold down the Shift key (Windows) or the Command key
(Macintosh) while you drag. To copy a file that Dreamweaver moves by default, hold the Control key (Windows) or the
Option key (Macintosh) while you drag.
Customize the file and folder details displayed in the expanded Files panel
When you view a Dreamweaver site in the expanded Files panel, information about the files and folders is displayed
in columns. For example, you can see the file type or the date a file was modified.
You can customize the columns by doing any of the following (some operations are only available for columns you
add, not default columns):
• Reorder or realign columns
• Add new columns (for a maximum of 10 columns)
• Hide columns (except the filename column)
• Designate columns to be shared with all users connected to a site
Last updated 12/7/2011
Page 87

USING DREAMWEAVER
Creating and Managing Files
• Delete columns (custom columns only)
• Rename columns (custom columns only)
• Associate columns with a Design Note (custom columns only)
Change the order of the columns
❖ Select a column name, and then click the up or down arrow button to change the position of the selected column.
Note: You can change the order of any column except Name, which is always the first column.
Add, delete, or change detail columns
1 Select Site > Manage Sites.
2 Select a site, then click Edit.
3 Expand Advanced Settings and select the File View Columns category.
4 Select a column and click the Plus (+) button to add a column, or the Minus (–) button to delete a column.
Note: The column is deleted immediately and without confirmation, so make certain that you want to delete the column
before clicking the Minus (–) button.
5 In the Column Name box, enter a name for your column.
6 Select a value from the Associate with Design Notes menu, or type in your own.
Note: You must associate a new column with a Design Note, so that there is data to display in the Files panel.
80
7 Select an alignment to determine how text is aligned within the column.
8 Select or deselect Show to reveal or hide the column.
9 Select Share with All Users of This Site to share the column with all users connected to the remote site.
Sort by any detail column in the Files panel
❖ Click the heading for the column you want to sort.
Click the heading again to reverse the order (ascending or descending) by which Dreamweaver sorts the column.
Getting and putting files to and from your server
File transfer and dependent files
If you’re working in a collaborative environment, use the Check In/Check Out system to transfer files between local
and remote sites. If you’re the only person working on the remote site, however, you can use the Get and Put
commands to transfer files without checking them in or out.
When you transfer a document between a local and remote folder using the Files panel, you have the option of
transferring the document’s dependent files. Dependent files are images, external style sheets, and other files
referenced in your document that a browser loads when it loads the document.
Note: It’s usually a good idea to download dependent files when checking out a new file, but if the latest versions of the
dependent files are already on the local disk, there’s no need to download them again. This is also true for uploading and
checking in files: no need if up-to-date copies are already at the remote site.
Last updated 12/7/2011
Page 88

USING DREAMWEAVER
Creating and Managing Files
Library items are treated as dependent files.
Some servers report errors when putting library items. However, you can cloak these files to prevent them from being
transferred.
More Help topics
“Checking in and checking out files” on page 85
“Enable and disable site cloaking” on page 98
About background file transfers
You can perform other, non-server-related, activities while you’re getting or putting files. Background file transfer
works for all of the transfer protocols supported by Dreamweaver: FTP, SFTP, LAN, WebDAV, Subversion, and RDS.
Non-server-related activities include common operations like typing, editing external style sheets, generating sitewide reports, and creating new sites.
Server-related activities that Dreamweaver cannot perform during file transfers include the following:
• Put/Get/Check in/Check out files
• Undo check-out
• Create a database connection
• Bind dynamic data
• Preview data in Live view
• Insert a web service
• Delete remote files or folders
• Preview in a browser on a testing server
• Save a file to a remote server
• Insert an image from a remote server
• Open a file from a remote server
• Auto put files upon saving
• Drag files to the remote site
• Cut, copy, or paste files on the remote site
• Refresh Remote view
By default, the Background File Activity dialog box is open during file transfers. You can minimize the dialog box by
clicking the Minimize button in the upper right corner. Closing the dialog box during file transfers results in a
cancelation of the operation.
81
Get files from a remote server
Use the Get command to copy files from the remote site to your local site. You can use the Files panel or the Document
window to get files.
Dreamweaver creates a log of file activity during the transfer that you can view and save.
Note: You cannot turn background file transfer off. If you have the detail log open in the Background File Activity dialog
box, you can close that to improve performance.
Last updated 12/7/2011
Page 89

USING DREAMWEAVER
Creating and Managing Files
Dreamweaver also records all FTP file transfer activity. If an error occurs when you are transferring a file using FTP,
the Site FTP log can help you determine the problem.
More Help topics
“Checking in and checking out files” on page 85
“Synchronizing files” on page 93
Get files from a remote server using the Files panel
1 In the Files panel (Window > Files), select the desired files to download.
Usually you select these files in the Remote view, but you can select the corresponding files in the Local view if you
prefer. If the Remote view is active, then Dreamweaver copies the selected files to the local site; if the Local view is
active, then Dreamweaver copies the remote versions of the selected local files to the local site.
Note: To get only those files for which the remote version is more recent than the local version, use the Synchronize
command.
2 Do one of the following to get the file:
• Click the Get button in the Files panel toolbar.
• Right-click (Windows) or Control-click (Macintosh) the file in the Files panel, then select Get from the context menu.
3 Click Yes in the Dependent Files dialog box to download dependent files; if you already have local copies of the
dependent files, click No. The default is to not download dependent files. You can set this option at Edit
Preferences
Dreamweaver downloads the selected files, as follows:
> Site.
>
82
• If you’re using the Check In/Check Out system, getting a file results in a read-only local copy of the file; the file
remains available on the remote site or testing server for other team members to check out.
• If you’re not using the Check In/Check Out system, getting a file results in a copy that has both read and write
privileges.
Note: If you’re working in a collaborative environment—that is, if others are working on the same files—you should
not disable Enable File Check In and Check Out. If other people are using the Check In/Check Out system with the
site, you should use that system as well.
To stop the file transfer at any time, click the Cancel button in the Background File Activity dialog box.
Get files from a remote server using the Document window
1 Make sure the document is active in the Document window.
2 Do one of the following to get the file:
• Select Site > Get.
• Click the File Management icon in the Document window toolbar, then select Get from the menu.
Note: If the current file is not part of the current site in the Files panel, Dreamweaver attempts to determine which locally
defined site the current file belongs to. If the current file belongs to only one local site, Dreamweaver opens that site, then
performs the Get operation.
Display the FTP log
1 Click the Options menu in the upper right corner of the Files panel.
2 Select View > Site FTP Log.
Last updated 12/7/2011
Page 90

USING DREAMWEAVER
Creating and Managing Files
Note: In the Expanded Files Panel, you can click the FTP Log button to display the log.
Put files on a remote server
You can put files from the local site to the remote site, generally without changing the file’s checked out status.
There are two common situations in which you might use the Put command instead of Check In:
• You’re not in a collaborative environment and you aren’t using the Check In/Check Out system.
• You want to put the current version of the file on the server but you’re going to keep editing it.
Note: If you put a file that didn’t previously exist on the remote site and you’re using the Check In/Check Out system,
the file is copied to the remote site and is then checked out to you so that you can continue editing.
You can use the Files panel or the Document window to put files. Dreamweaver creates a log of file activity during
the transfer that you can view and save.
Note: You cannot turn background file transfer off. If you have the detail log open in the Background File Activity
dialog box, you can close that to improve performance.
Dreamweaver also records all FTP file transfer activity. If an error occurs when you are transferring a file using FTP,
the Site FTP log can help you determine the problem.
83
For a tutorial on putting files on a remote server, see www.adobe.com/go/vid0163.
For a tutorial on troubleshooting publishing problems, see www.adobe.com/go/vid0164.
More Help topics
“Synchronizing files” on page 93
“About the Check In/Check Out system” on page 85
Putting files tutorial
Troubleshoot publishing problems tutorial
Put files on a remote or testing server using the Files panel
1 In the Files panel (Window > Files), select the files to upload.
Usually you select these in the Local view, but you may select the corresponding files in the Remote view if you prefer.
Note: You can put only those files for which the local version is more recent than the remote version.
2 Do one of the following to put the file on the remote server:
• Click the Put button in the Files panel toolbar.
• Right-click (Windows) or Control-click (Macintosh) the file in the Files panel, then select Put from the context menu.
3 If the file hasn’t been saved, a dialog box appears (if you set this preference in the Site category of the Preferences
dialog box) allowing you to save the file before putting it on the remote server. Click Yes to save the file or No to
put the previously saved version on the remote server.
Note: If you do not save the file, any changes you’ve made since the last time you saved will not be put onto the remote
server. However, the file remains open, so you can still save the changes after putting the file on the server if you want.
4 Click Yes to upload dependent files along with the selected files, or click No to refrain from uploading dependent
files. The default is to not upload dependent files. You can set this option at Edit
> Preferences > Site.
Last updated 12/7/2011
Page 91

USING DREAMWEAVER
Creating and Managing Files
Note: It’s usually a good idea to upload dependent files when checking in a new file, but if the latest versions of the
dependent files are already on the remote server, there’s no need to upload them again.
To stop the file transfer at any time, click the Cancel button in the Background File Activity dialog box.
Put files on a remote server using the Document window
1 Make sure the document is active in the Document window.
2 Do one of the following to put the file:
• Select Site > Put.
• Click the File Management icon in the Document window toolbar, then select Put from the menu.
Note: If the current file is not part of the current site in the Files panel, Dreamweaver attempts to determine which locally
defined site the current file belongs to. If the current file belongs to only one local site, Dreamweaver opens that site, then
performs the Put operation.
Display the FTP log
1 Click the Options menu in the upper right corner of the Files panel.
2 Select View > Site FTP Log.
Note: In the Expanded Files Panel, you can click the FTP Log button to display the log.
84
Manage file transfers
You can view the status of file transfer operations, as well as a list of transferred files and their outcomes (transfer
successful, skipped, or failed). You can also save a log of the file activity.
Note: Dreamweaver lets you perform other non-server-related activities while you’re transferring files to or from a server.
Cancel a file transfer
❖ Click the Cancel button in the Background File Activity dialog box. If the dialog box isn’t showing, click the File
Activity button at the bottom of the Files panel.
Show the Background File Activity dialog box during transfers
❖ Click the File Activity or Log button at the bottom of the Files panel.
Note: You cannot hide or remove the Log button. It’s a permanent part of the panel.
View details of the last file transfer
1 Click the Log button at the bottom of the Files panel to open the Background File Activity dialog box.
2 Click the Details expander arrow.
Save a log of the last file transfer
1 Click the Log button at the bottom of the Files panel to open the Background File Activity dialog box.
2 Click the Save Log button and save the information as a text file.
You can review the file activity by opening the log file in Dreamweaver or in any text editor.
Last updated 12/7/2011
Page 92

USING DREAMWEAVER
Creating and Managing Files
Checking in and checking out files
About the Check In/Check Out system
If you’re working in a collaborative environment, you can check files in and out from local and remote servers. If you’re
the only person working on the remote server, you can use the Put and Get commands without checking files in or out.
Note: You can use Get and Put functionality with a testing server, but you cannot use the Check In/ Check Out system
with a testing server.
Checking out a file is the equivalent of declaring “I’m working on this file now—don’t touch it!” When a file is checked
out, the name of the person who checked out the file is displayed in the Files panel, along with a red check mark (if a
team member checked out the file) or green check mark (if you checked out the file) next to the file’s icon.
Checking in a file makes the file available for other team members to check out and edit. When you check in a file after
editing it, your local version becomes read-only and a lock symbol appears beside the file in the Files panel to prevent
you from making changes to the file.
Dreamweaver does not make checked-out files read-only on the remote server. If you transfer files with an application
other than Dreamweaver, you can overwrite checked-out files. However, in applications other than Dreamweaver, the
LCK file is visible next to the checked-out file in the file hierarchy to help prevent such accidents.
85
More Help topics
“Getting and putting files to and from your server” on page 80
Set up the Check In/Check Out system
Before you can use the Check In/Check Out system, you must associate your local site with a remote server.
1 Select Site > Manage Sites.
2 Select a site and click Edit.
3 In the Site Setup dialog box, select the Servers category and do one of the following:
• Click the Add New Server button to add a new server
• Select an existing server and click the Edit Existing Server button
4 Specify Basic options as necessary, and then click the Advanced button.
5 Select Enable File Check Out if you are working in a team environment (or working alone but from several different
machines). Deselect this option if you want to disable file check in and check out for your website.
This option is useful to let others know that you checked out a file for editing, or to alert yourself that you may have
left a more recent version of a file on another machine.
If you do not see Check In/Out options, it means that you have not set up a remote server.
6 Select the Check Out Files when Opening option if you want to automatically check out files when you double-click
to open them from the Files panel.
Using File > Open to open a file doesn’t check the file out even when this option is selected.
7 Set the remaining options:
Check Out Name The check-out name appears in the Files panel alongside any files that are checked out; this enables
team members to communicate with the right person if a file they need is checked out.
Last updated 12/7/2011
Page 93

USING DREAMWEAVER
Creating and Managing Files
Note: If you work alone from several different machines, use a different check-out name on each machine (for example,
AmyR-HomeMac and AmyR-OfficePC) so you’ll know where the latest version of the file is if you forget to check it in.
Email Address If you enter an e-mail address, when you check out a file, your name appears in the Files panel as a link
(blue and underlined) next to that file. If a team member clicks on the link, their default e-mail program opens a new
message with the user’s e-mail address and a subject that corresponds to the file and site name.
Check files into and out of a remote folder
After you set up the Check In/Check Out system, you can check in and check out files on a remote server using the
Files panel or from the Document window.
Check out files using the Files panel
1 In the Files panel (Window > Files), select files to check out from the remote server.
Note: You can select files in the Local or Remote view, not the Testing Server view.
A red check mark indicates that another team member has the file checked out and a lock symbol indicates that the
file is read-only (Windows) or locked (Macintosh).
2 Do one of the following to check out the file(s):
• Click the Check Out button in the Files panel toolbar.
• Right-click (Windows) or Control-click (Macintosh), then select Check Out from the context menu.
3 In the Dependent Files dialog box, click Yes to download dependent files along with the selected files, or click No
to refrain from downloading dependent files. The default is to not download dependent files. You can set this
option at Edit
Note: It’s usually a good idea to download dependent files when checking out a new file, but if the latest versions of the
dependent files are already on the local disk, there’s no need to download them again.
> Preferences > Site.
86
A green check mark appears beside the local file’s icon indicating that you have checked it out.
Important: If you check out the currently active file, the currently open version of the file is overwritten by the new
checked-out version.
Check in files using the Files panel
1 In the Files panel (Window > Files), select checked-out or new file(s).
Note: You can select files in the Local or Remote view, but not the Testing Server view.
2 Do one of the following to check in the file(s):
• Click the Check In button in the Files panel toolbar.
• Right-click (Windows) or Control-click (Macintosh), then select Check In from the context menu.
3 Click Yes to upload dependent files along with the selected files, or click No to refrain from uploading dependent
files. The default is to not upload dependent files. You can set this option at Edit
Note: It’s usually a good idea to upload dependent files when checking in a new file, but if the latest versions of the
dependent files are already on the remote server, there’s no need to upload them again.
A lock symbol appears beside the local file’s icon indicating that the file is now read-only.
Important: If you check in the currently active file, the file may be automatically saved before it’s checked in, depending
on the preference options you’ve set.
> Preferences > Site.
Last updated 12/7/2011
Page 94

USING DREAMWEAVER
Creating and Managing Files
Check in an open file from the Document window
1 Make sure the file you want to check in is open in the Document window.
Note: You can check in only one open file at a time.
2 Do one of the following:
• Select Site > Check In.
• Click the File Management icon in the Document window toolbar, then select Check In from the menu.
If the current file is not part of the active site in the Files panel, Dreamweaver attempts to determine which locally
defined site the current file belongs to. If the current file belongs to a site other than the one that’s active in the Files
panel, Dreamweaver opens that site, then performs the check in operation.
Important: If you check in the currently active file, the file may be automatically saved before it’s checked in, depending
on the preference options you’ve set.
Undo a file check-out
If you check out a file, then decide not to edit it (or decide to discard the changes you made), you can undo the checkout operation and the file returns to its original state.
To undo a file check-out, do one of the following:
87
• Open the file in the Document window, then select Site > Undo Check Out.
•
In the Files panel (Window > Files), right-click (Windows) or Control-click (Macintosh), then select Undo Check Out.
The local copy of the file becomes read-only, and any changes you’ve made to it are lost.
Use WebDAV to check in and check out files
Dreamweaver can connect to a server that uses WebDAV (Web-based Distributed Authoring and Versioning), which
is a set of extensions to the HTTP protocol that allow users to collaboratively edit and manage files on remote web
servers. For more information, see
1 If you have not already done so, define a Dreamweaver site that specifies the local folder you use to store your
project files.
2 Select Site > Manage Sites, and then double-click your site in the list.
3 In the Site Setup dialog box, select the Servers category and do one of the following:
• Click the Add New Server button to add a new server
• Select an existing server and click the Edit Existing Server button
4 In the Basic screen, select WebDAV from the Connect Using pop-up menu, and complete the rest of the Basic
screen options, as necessary.
5 Click the Advanced button.
6 Select the Enable File Check Out option and enter the following information:
• In the Check Out Name box, enter a name identifying you to other team members.
• In the Email Address box, enter your e-mail address.
The name and e-mail addresses are used to identify ownership on the WebDAV server and appear in the Files panel
for contact purposes.
www.webdav.org.
7 Click Save.
Last updated 12/7/2011
Page 95

USING DREAMWEAVER
Creating and Managing Files
Dreamweaver configures the site for WebDAV access. When you use the Check In or Check Out command on any
site file, the file is transferred using WebDAV.
Note: WebDAV may be unable to properly check out any files with dynamic content like PHP tags or SSIs because the
HTTP GET renders these as they are checked out.
Use Subversion (SVN) to get and check in files
Dreamweaver can connect to a server that uses Subversion (SVN), a versioning control system that lets users
collaboratively edit and manage files on remote web servers. Dreamweaver is not a full SVN client, but does let users
get the latest versions of files, make changes, and commit the files.
Important: Dreamweaver CS5 uses the Subversion 1.6.6 client library, and Dreamweaver CS5.5 uses the 1.6.9 client
library. Later versions of the Subversion client library are not backward-compatible. Be aware, if you update a third-party
client application (for example, TortoiseSVN) to work with a later version of Subversion, the updated Subversion
application will update local Subversion meta data, and Dreamweaver will no longer be able to communicate with
Subversion. This issue is not affected by updates to the Subversion server as those updates are backward-compatible. If
you do upgrade to a third-party client application that works with Subversion 1.7 or later, you’ll need to check with Adobe
for updates before you can use Subversion with Dreamweaver again. For more information on this issue, see
www.adobe.com/go/dw_svn_en.
Adobe recommends that you use a third-party file comparison tool as you work with SVN version-controlled files.
When you compare files for differences, you can learn exactly what kinds of changes other users made to the files. For
more information on file comparison tools, use a web search engine such as Google Search to search for “file
comparison” or “diff” tools. Dreamweaver works with most third-party tools.
88
For a video overview of working with SVN and Dreamweaver, see www.adobe.com/go/lrvid4049_dw.
Set up an SVN connection
Before you use Subversion (SVN) as a version control system with Dreamweaver, you must set up a connection to an
SVN server. You set up a connection to an SVN server in the Version Control category of the Site Definition dialog box.
The SVN server is a repository of files from which you and other users can get and commit files. It is different from
the remote server you typically use with Dreamweaver. When using SVN, the remote server remains the “live” server
for your web pages, and the SVN server exists to hold the repository of files over which you want to maintain version
control. The typical workflow is to get and commit files back and forth between the SVN server, and then publish them
to your remote server from Dreamweaver. The remote server setup is completely separate from the SVN set up.
You must have access to an SVN server and an SVN repository before you begin this set up. For more information
about SVN, see the Subversion website at
To set up the SVN connection, follow these steps:
1 Choose Sites > Manage Sites, select the site you want to set up version control for, and click the Edit button.
Note: If you haven’t already set up local and remote folders for a Dreamweaver site, you’ll at least need to set up a
local site before proceeding. (The remote site is not required at this stage, but you will eventually need to set it up before
publishing your files to the Web.) For more information, see
2 In the Site Setup dialog box, select the Version Control category.
3 Select Subversion from the Access pop-up menu.
4 Set access options as follows:
• Select a protocol from the Protocol pop-up menu. The available protocols are HTTP, HTTPS, SVN, and
SVN+SSH.
http://subversion.apache.org/.
“Working with Dreamweaver sites” on page 36.
Last updated 12/7/2011
Page 96

USING DREAMWEAVER
Creating and Managing Files
Note: Using the SVN+SSH protocol requires special configuration. For more information, see
www.adobe.com/go/learn_dw_svn_ssh_en.
• Enter the address for the SVN server in the Server address text box (typically in the form of
servername.domain.com).
• Enter the path to your repository on the SVN server in the Repository path text box (typically something like
/svn/your_root_directory. It is up to the server administrator to name the root folder for the SVN repository.)
• (Optional) If you want to use a server port other than the default server port, select Non Default and enter the
port number in the text box.
• Enter your SVN server user name and password.
5 Click Test to test your connection, or click OK to close the dialog box. Then click Done to close the Manage Sites
dialog box.
Once the connection with the server established, your SVN repository is available for viewing in the Files panel. To
view it, you can select Repository View from the View pop-up menu, or click the Repository Files button
expanded Files panel.
in the
More Help topics
“Working with Dreamweaver sites” on page 36
89
“Using the Files panel” on page 72
Get the latest versions of files
When you get the latest version of a file from the SVN repository, Dreamweaver merges the contents of that file with
the contents of its corresponding local copy. (In other words, if someone else has updated the file since you last
committed it, those updates are merged into the local version of the file on your computer.) If the file does not yet exist
on the local hard drive, Dreamweaver simply gets the file.
Note: When getting files for the first time from the repository, you should work with a local directory that is empty, or a
local directory that does not contain files with the same names as files in the repository. Dreamweaver will not mount
repository files to the local drive upon first try if the local drive contains files whose names match files in the remote
repository.
1 Make sure that you’ve successfully set up an SVN connection.
2 Do one of the following:
• Display the local version of your SVN files in the Files panel by selecting Local view from the View pop-up menu.
(If you are working in the expanded Files panel, the Local view is automatically displayed.) Then right-click
(Windows) or Control-click (Macintosh) the file or folder you’re interested in and select Version Control
Latest Versions.
• Display the SVN repository files by selecting Repository View from the View pop-up menu in the Files panel,
or by clicking the Repository Files button in the expanded Files panel. Then right-click (Windows) or Controlclick (Macintosh) the file or folder you’re interested in and select Get Latest Versions.
Note: You can also either right-click a file and choose Check Out from the context menu, or select the file and click the
Check Out button to get the latest version. Because SVN does not support a check-out workflow, however, this action does
not actually check out the file in the traditional sense.
> Get
Commit files
1 Make sure that you’ve successfully set up an SVN connection.
Last updated 12/7/2011
Page 97

USING DREAMWEAVER
Creating and Managing Files
2 Do one of the following:
• Display the local version of your SVN files in the Files panel by selecting Local view from the View pop-up menu.
(If you are working in the expanded Files panel, the Local view is automatically displayed.) Then select the file
you want to commit and click the Check In button.
• Display the SVN repository files by selecting Repository View from the View pop-up menu in the Files panel,
or by clicking the Repository Files button in the expanded Files panel. Then right-click (Windows) or Controlclick (Macintosh) the file you want to commit and select Check In.
3 Review the actions in the Commit dialog box, make changes if necessary, and click OK.
You can change actions by selecting the file whose action you want to change, and clicking the buttons at the bottom
of the Commit dialog box. Two choices are available: commit and ignore.
Note: A green check mark on a file in the Files panel denotes a changed file that has not yet been committed to the
repository.
Update status of files or folders in the repository
You can update the SVN status of a single file or folder. The update does not refresh the entire display.
1 Make sure that you’ve successfully set up an SVN connection.
2 Display the SVN repository files by selecting Repository View from the View pop-up menu in the Files panel, or by
clicking the Repository Files button in the expanded Files panel.
3 Right-click (Windows) or Control-click (Macintosh) any folder or file in the repository and select Update Status.
90
Update status of local file or folders
You can update the SVN status of a single file or folder. The update does not refresh the entire display.
1 Make sure that you’ve successfully set up an SVN connection.
2 Display the local version of your SVN files in the Files panel by selecting Local view from the View pop-up menu.
(If you are working in the expanded Files panel, the Local view is automatically displayed.)
3 Right-click (Windows) or Control-click (Macintosh) any folder or file in the Files panel and select Update Status.
View revisions for a file
1 Make sure that you’ve successfully set up an SVN connection.
2 Do one of the following:
• Display the local version of your SVN files in the Files panel by selecting Local view from the View pop-up menu.
(If you are working in the expanded Files panel, the Local view is automatically displayed.) Then right-click
(Windows) or Control-click (Macintosh) the file you want to see revisions for and select Version Control
Show Revisions.
• Display the SVN repository files by selecting Repository View from the View pop-up menu in the Files panel,
or by clicking the Repository Files button in the expanded Files panel. Then right-click (Windows) or Controlclick (Macintosh) the file you want to see revisions for and select Show Revisions.
3 In the Revision History dialog box, select the revision or revisions you’re interested in and do one of the following:
• Click Compare to Local to compare the selected revision with the local version of the file.
Note: You must install a third-party file comparison tool before you can compare files. For more information on
file comparison tools, use a web search engine such as Google Search to search for “file comparison” or “diff” tools.
Dreamweaver works with most third-party tools.
>
Last updated 12/7/2011
Page 98

USING DREAMWEAVER
Creating and Managing Files
• Click Compare to compare two selected revisions. Control-click to select two revisions simultaneously.
• Click View to view the selected revision. This action does not overwrite the current local copy of the same file.
You can save the selected revision to your hard drive just as you would save any other file.
• Click Promote to make the selected revision the most current revision in the repository.
Lock and unlock files
Locking a file in the SVN repository lets other users know that you are working on a file. Other users can still edit the
file locally, but will not be able to commit the file until you’ve unlocked it. When you lock a file in the repository, you’ll
see an open-lock icon on the file. Other users see a completely locked icon.
1 Make sure that you’ve successfully set up an SVN connection.
2 Do one of the following:
• Display the SVN repository files by selecting Repository View from the View pop-up menu in the Files panel,
or by clicking the Repository Files button in the expanded Files panel. Then right-click (Windows) or Controlclick (Macintosh) the file you’re interested in and select Lock or Unlock.
• Display the local version of your SVN files in the Files panel by selecting Local view from the View pop-up menu.
(If you are working in the expanded Files panel, the Local view is automatically displayed.) Then right-click
(Windows) or Control-click (Macintosh) the file you’re interested in and select Lock or Unlock.
91
Add a new file to the repository
A blue plus sign on a file in the Files panel denotes a file that does not yet exist in the SVN repository.
1 Make sure that you’ve successfully set up an SVN connection.
2 In the Files panel, select the file you want to add to the repository and click the Check In button.
3 Make sure that the file is selected for Commit in the Commit dialog box and click OK.
Move, copy, delete, or revert files
• To move a file, drag the file to the destination folder in your local site.
When you move a file, Dreamweaver marks the file in the new location with an Add With History sign, and marks
the file in the old location with a Delete sign. When you Commit these files, the file in the old location disappears.
• To copy a file, select the file, copy it (Edit > Copy), and paste (Edit > Paste) the file in the new location.
When you copy and paste a file, Dreamweaver marks the file in the new location with an Add With History sign.
• To delete a file, select the file and press delete.
Dreamweaver gives you the option of whether you want to delete the local version of the file only, or both the local
version and the version on the SVN server. If you select to delete the local version only, the file on the SVN server
is not affected. If you select to delete the version on the SVN server as well, the local version is marked with a Delete
sign, and you must commit the file for the deletion to take place.
• To revert a copied or moved file to its original location, right-click the file and select Version Control > Revert.
Last updated 12/7/2011
Page 99

USING DREAMWEAVER
Creating and Managing Files
Resolve conflicting files
If your file conflicts with another file on the server, you can edit it and then mark it as resolved. For example, if you try
to check in a file that conflicts with another user’s changes, SVN will not let you commit the file. You can get the latest
version of the file from the repository, manually make changes to your working copy, and then mark your file as
resolved so that you can commit it.
1 Make sure that you’ve successfully set up an SVN connection.
2 Display the local version of your SVN files in the Files panel by selecting Local view from the View pop-up menu.
(If you are working in the expanded Files panel, the Local view is automatically displayed.)
3 Right-click (Windows) or Control-click (Macintosh) the file you want to resolve and select Version Control > Mark
as Resolved.
Go offline
You might find it useful to avoid repository access during other file-transfer activities by going off-line. Dreamweaver
will reconnect to the SVN repository as soon as you invoke an activity that requires a connection (Get Latest Versions,
Commit, and so on).
1 Make sure that you’ve successfully set up an SVN connection.
2 Display the local version of your SVN files in the Files panel by selecting Local view from the View pop-up menu.
(If you are working in the expanded Files panel, the Local view is automatically displayed.)
3 Right-click (Windows) or Control-click (Macintosh) any file or folder in the Files panel and select Version
> Go Offline.
Control
92
Clean up a local SVN site
This command lets you remove locks on files so that you can resume unfinished operations. You should use this
command to remove old locks if you receive “working copy locked” errors.
1 Make sure that you’ve successfully set up an SVN connection.
2 Display the local version of your SVN files in the Files panel by selecting Local view from the View pop-up menu.
(If you are working in the expanded Files panel, the Local view is automatically displayed.)
3 Right-click (Windows) or Control-click (Macintosh) the file you want to clean up and select Version Control >
Clean Up.
About moving files and folders in Subversion-controlled sites
When you move the local versions of files or folders in a Subversion-controlled site, you run the risk of creating
problems for other users who might be synching to the SVN repository. For example, if you move a file locally, and
don't commit that file to the repository for a few hours, another user might try to get the latest version of the file from
the file’s old location. For this reason, you should always commit files back to the SVN server immediately after you've
moved them locally.
Files and folders remain on the SVN server until you've manually deleted them. So even if you move a file to a different
local folder and commit it, the old version of the file remains in the previous location on the server. To avoid confusion,
delete the old copies of files and folders that you've moved.
When you move a file locally and commit it back to the SVN server, the file’s version history is lost.
Last updated 12/7/2011
Page 100

USING DREAMWEAVER
Creating and Managing Files
Synchronizing files
Synchronize the files on your local and remote sites
After you’ve created files in your local and remote sites, you can synchronize the files between the two sites.
Note: If your remote site is an FTP server (rather than a networked server), then synchronizing your files uses FTP.
Before you synchronize your sites, you can verify which files you want to put, get, delete, or ignore. Dreamweaver also
confirms which files have been updated after you complete the synchronization.
More Help topics
“Manage file transfers” on page 84
“Check files into and out of a remote folder” on page 86
“Get files from a remote server” on page 81
“Put files on a remote server” on page 83
“Comparing files for differences” on page 94
93
Check which files are newer on the local or remote site, without synchronizing
❖ In the Files panel, do one of the following:
• Click the Options menu in the upper-right corner, and then select Edit > Select Newer Local or Edit > Select Newer
Remote.
• In the Files panel, right-click (Windows) or Control-click (Macintosh), and then select Select > Newer Local or
> Newer Remote.
Select
Display detailed synchronization information for a particular file
❖ In the Files panel, right-click (Windows) or Control-click (Macintosh) the file you want information about, and
then select Display Synchronize information.
Note: You must have the Maintain Synchronization Information option selected in the Remote category of the Site
Definition dialog box for this feature to be available.
Synchronize your files
1 In the Files panel (Window > Files), select a site from the menu where the current site, server, or drive appears.
2 (Optional) Select specific files or folders or go to the next step to synchronize the entire site.
3 Click the Options menu in the upper-right corner of the Files panel and select Site > Synchronize.
You can also click the Synchronize button at the top of the Files panel to synchronize files.
4 In the Synchronize menu, do one of the following:
• To synchronize the entire site, select Entire Site Name Site.
• To synchronize selected files only, select Selected Local Files Only (or Selected Remote Files Only if the Remote
view of the Files panel was where you made the most recent selection).
Last updated 12/7/2011
 Loading...