

Page 1

Using Dreamweaver
macromedia
™
®
Page 2

Trademarks
Afterburner, AppletAce, Attain, Attain Enterprise Learning System, Attain Essentials, Attain Objects for Dreamweaver, Authorware,
Authorware Attain, Authorware Interactive Studio, Authorware Star, Authorware Synergy, Backstage, Backstage Designer, Backstage
Desktop Studio, Backstage Enterprise Studio, Backstage Internet Studio, Design in Motion, Director, Director Multimedia Studio,
Doc Around the Clock, Dreamweaver, Dreamweaver Attain, Drumbeat, Drumbeat 2000, Extreme 3D, Fireworks, Flash, Fontographer,
FreeHand, FreeHand Graphics Studio, Generator, Generator Developer's Studio, Generator Dynamic Graphics Server, Knowledge
Objects, Knowledge Stream, Knowledge Track, Lingo, Live Effects, Macromedia, Macromedia M Logo & Design, Macromedia Flash,
Macromedia Xres, Macromind, Macromind Action, MAGIC, Mediamaker, Object Authoring, Power Applets, Priority Access, Roundtrip
HTML, Scriptlets, SoundEdit, ShockRave, Shockmachine, Shockwave, Shockwave Remote, Shockwave Internet Studio, Showcase, Tools
to Power Your Ideas, Universal Media, Virtuoso, Web Design 101, Whirlwind and Xtra are trademarks of Macromedia, Inc. and may be
registered in the United States or in other jurisdictions including internationally. Other product names, logos, designs, titles, words or
phrases mentioned within this publication may be trademarks, servicemarks, or tradenames of Macromedia, Inc. or other entities and
may be registered in certain jurisdictions including internationally.
This guide contains links to third-party Web sites that are not under the control of Macromedia, and Macromedia is not responsible for
the content on any linked site. If you access a third-party Web site mentioned in this guide, then you do so at your own risk. Macromedia
provides these links only as a convenience, and the inclusion of the link does not imply that Macromedia endorses or accepts any
responsibility for the content on those third-party sites.
Apple Disclaimer
APPLE COMPUTER, INC. MAKES NO WARRANTIES, EITHER EXPRESS OR IMPLIED, REGARDING THE ENCLOSED
COMPUTER SOFTWARE PACKAGE, ITS MERCHANTABILITY OR ITS FITNESS FOR ANY PARTICULAR PURPOSE.
THE EXCLUSION OF IMPLIED WARRANTIES IS NOT PERMITTED BY SOME STATES. THE ABOVE EXCLUSION MAY
NOT APPLY TO YOU. THIS WARRANTY PROVIDES YOU WITH SPECIFIC LEGAL RIGHTS. THERE MAY BE OTHER
RIGHTS THAT YOU MAY HAVE WHICH VARY FROM STATE TO STATE.
Copyright © 2000 Macromedia, Inc. All rights reserved. This manual may not be copied, photocopied, reproduced, translated, or
converted to any electronic or machine-readable form in whole or in part without prior written approval of Macromedia, Inc.
Part Number ZDW40M100
Acknowledgments
Project Management: Sheila McGinn
Writing: Kim Diezel, Valerie Hanscom, Jed Hartman, Emily Ricketts
Editing: Anne Szabla and Lisa Stanziano
Production Management: John “Zippy” Lehnus
Multimedia Design and Production: Aaron Begley and Noah Zilberberg
Print Production: Chris Basmajian, Paul Benkman, Caroline Branch, and Rebecca Godbois
Web Editing and Production: Jane Flint DeKoven and Jeff Harmon
Special thanks to Jaime Austin, Chris Bank, Saam Barrager, Heidi Bauer, Jennifer Chapman, Winsha Chen, Kristin Conradi,
Margaret Dumas, Peter Fenczik, Jean Fitzgerald, S Fred Golden, Stephanie Goss, Victor Grigorieff, Narciso (nj) Jaramillo, John Koch,
David Lenoe, Eric Lerner, Charles Nadeau, Eric Ott, Jeff Schang, Mike Sundermeyer, and the Dreamweaver engineering and QA teams.
First Edition: November 2000
Macromedia, Inc.
600 Townsend St.
San Francisco, CA 94103
2
Page 3

CONTENTS
INTRODUCTION
Getting Started . . . . . . . . . . . . . . . . . . . . . . . . . . . . . . . . . 11
System requirements . . . . . . . . . . . . . . . . . . . . . . . . . . . . . . . . . . . . . . 12
Installing Dreamweaver. . . . . . . . . . . . . . . . . . . . . . . . . . . . . . . . . . . . 12
Learning Dreamweaver . . . . . . . . . . . . . . . . . . . . . . . . . . . . . . . . . . . . 13
Web development workflow . . . . . . . . . . . . . . . . . . . . . . . . . . . . . . . . 17
Where to start . . . . . . . . . . . . . . . . . . . . . . . . . . . . . . . . . . . . . . . . . . . 20
Typographical conventions . . . . . . . . . . . . . . . . . . . . . . . . . . . . . . . . . 22
What’s new in Dreamweaver 4 . . . . . . . . . . . . . . . . . . . . . . . . . . . . . . 22
HTML and Web technologies resources . . . . . . . . . . . . . . . . . . . . . . . 25
Accessibility and Dreamweaver . . . . . . . . . . . . . . . . . . . . . . . . . . . . . . 26
CHAPTER 1
Dreamweaver Tutorial . . . . . . . . . . . . . . . . . . . . . . . . . . 27
Take a guided tour of Dreamweaver . . . . . . . . . . . . . . . . . . . . . . . . . . 28
The Dreamweaver work area . . . . . . . . . . . . . . . . . . . . . . . . . . . . . . . . 28
Set up the site structure for the tutorial . . . . . . . . . . . . . . . . . . . . . . . . 31
Define a local site . . . . . . . . . . . . . . . . . . . . . . . . . . . . . . . . . . . . . . . . 31
Create the site home page . . . . . . . . . . . . . . . . . . . . . . . . . . . . . . . . . . 34
Design a page in Layout view . . . . . . . . . . . . . . . . . . . . . . . . . . . . . . . 35
Add content to the page . . . . . . . . . . . . . . . . . . . . . . . . . . . . . . . . . . . 44
Work in Standard view . . . . . . . . . . . . . . . . . . . . . . . . . . . . . . . . . . . . 50
Use the Assets panel . . . . . . . . . . . . . . . . . . . . . . . . . . . . . . . . . . . . . . 56
Insert Flash objects . . . . . . . . . . . . . . . . . . . . . . . . . . . . . . . . . . . . . . . 60
Create a template. . . . . . . . . . . . . . . . . . . . . . . . . . . . . . . . . . . . . . . . . 63
Check your site . . . . . . . . . . . . . . . . . . . . . . . . . . . . . . . . . . . . . . . . . . 68
The next steps . . . . . . . . . . . . . . . . . . . . . . . . . . . . . . . . . . . . . . . . . . . 70
3
Page 4

CHAPTER 2
Dreamweaver Basics. . . . . . . . . . . . . . . . . . . . . . . . . . . .71
About the Dreamweaver work area . . . . . . . . . . . . . . . . . . . . . . . . . . . .72
About the different views in Dreamweaver . . . . . . . . . . . . . . . . . . . . . .73
Working with colors . . . . . . . . . . . . . . . . . . . . . . . . . . . . . . . . . . . . . . .87
About Web-safe colors. . . . . . . . . . . . . . . . . . . . . . . . . . . . . . . . . . . . . .88
Setting preferences . . . . . . . . . . . . . . . . . . . . . . . . . . . . . . . . . . . . . . . .88
Using Dreamweaver with other applications . . . . . . . . . . . . . . . . . . . . .89
Basic Customizing in Dreamweaver . . . . . . . . . . . . . . . . . . . . . . . . . . .90
CHAPTER 3
Planning and Setting Up Your Site . . . . . . . . . . . . . .95
About site planning and design . . . . . . . . . . . . . . . . . . . . . . . . . . . . . . .95
Using Dreamweaver to set up a new site . . . . . . . . . . . . . . . . . . . . . . .102
Editing an existing Web site . . . . . . . . . . . . . . . . . . . . . . . . . . . . . . . .104
Editing a remote site . . . . . . . . . . . . . . . . . . . . . . . . . . . . . . . . . . . . . .105
Removing a site from your list of sites . . . . . . . . . . . . . . . . . . . . . . . . .106
CHAPTER 4
Site Management and Collaboration . . . . . . . . . . . 107
About the Site window . . . . . . . . . . . . . . . . . . . . . . . . . . . . . . . . . . . .108
Viewing and opening files in the Site window . . . . . . . . . . . . . . . . . . .112
About the site map . . . . . . . . . . . . . . . . . . . . . . . . . . . . . . . . . . . . . . .116
Using the site map. . . . . . . . . . . . . . . . . . . . . . . . . . . . . . . . . . . . . . . .117
Setting up a remote site. . . . . . . . . . . . . . . . . . . . . . . . . . . . . . . . . . . .123
About WebDAV and SourceSafe integration . . . . . . . . . . . . . . . . . . . .127
Troubleshooting remote site setup. . . . . . . . . . . . . . . . . . . . . . . . . . . .130
Using Check In/Check Out . . . . . . . . . . . . . . . . . . . . . . . . . . . . . . . .131
About Design Notes . . . . . . . . . . . . . . . . . . . . . . . . . . . . . . . . . . . . . .134
Using reports to improve workflow . . . . . . . . . . . . . . . . . . . . . . . . . . .141
Getting and putting files . . . . . . . . . . . . . . . . . . . . . . . . . . . . . . . . . . .143
Synchronizing the files on your local and remote sites . . . . . . . . . . . . .146
4
Contents
Page 5

CHAPTER 5
Setting Up a Document . . . . . . . . . . . . . . . . . . . . . . . 149
Creating, opening, and saving HTML documents . . . . . . . . . . . . . . .150
Setting document properties . . . . . . . . . . . . . . . . . . . . . . . . . . . . . . . .152
Selecting elements in the Document window . . . . . . . . . . . . . . . . . . .154
Using visual guides in the design process. . . . . . . . . . . . . . . . . . . . . . .157
Viewing and editing head content. . . . . . . . . . . . . . . . . . . . . . . . . . . .159
About automating tasks. . . . . . . . . . . . . . . . . . . . . . . . . . . . . . . . . . . .160
CHAPTER 6
Designing Page Layout. . . . . . . . . . . . . . . . . . . . . . . . 167
About layout cells and tables . . . . . . . . . . . . . . . . . . . . . . . . . . . . . . . .169
Drawing layout cells and tables . . . . . . . . . . . . . . . . . . . . . . . . . . . . . .170
Moving and resizing layout cells and tables . . . . . . . . . . . . . . . . . . . . .176
Formatting layout cells and tables . . . . . . . . . . . . . . . . . . . . . . . . . . . .177
Setting layout width . . . . . . . . . . . . . . . . . . . . . . . . . . . . . . . . . . . . . .179
Setting Layout View preferences . . . . . . . . . . . . . . . . . . . . . . . . . . . . .182
CHAPTER 7
Using Tables to Present Content . . . . . . . . . . . . . . . 183
Inserting a table. . . . . . . . . . . . . . . . . . . . . . . . . . . . . . . . . . . . . . . . . .184
Selecting table elements. . . . . . . . . . . . . . . . . . . . . . . . . . . . . . . . . . . .187
Formatting tables and cells . . . . . . . . . . . . . . . . . . . . . . . . . . . . . . . . .189
Resizing tables and cells. . . . . . . . . . . . . . . . . . . . . . . . . . . . . . . . . . . .194
Adding and removing rows and columns. . . . . . . . . . . . . . . . . . . . . . .196
Copying and pasting cells . . . . . . . . . . . . . . . . . . . . . . . . . . . . . . . . . .199
Sorting tables . . . . . . . . . . . . . . . . . . . . . . . . . . . . . . . . . . . . . . . . . . .201
Exporting table data . . . . . . . . . . . . . . . . . . . . . . . . . . . . . . . . . . . . . .202
CHAPTER 8
Using Frames . . . . . . . . . . . . . . . . . . . . . . . . . . . . . . . . 203
Deciding whether to use frames . . . . . . . . . . . . . . . . . . . . . . . . . . . . .204
About creating frame-based Web pages . . . . . . . . . . . . . . . . . . . . . . . .205
Creating frames. . . . . . . . . . . . . . . . . . . . . . . . . . . . . . . . . . . . . . . . . .206
Selecting a frame or frameset. . . . . . . . . . . . . . . . . . . . . . . . . . . . . . . .208
Saving frame and frameset files . . . . . . . . . . . . . . . . . . . . . . . . . . . . . .211
About frame and frameset properties. . . . . . . . . . . . . . . . . . . . . . . . . .212
Controlling frame content with links . . . . . . . . . . . . . . . . . . . . . . . . .218
Handling browsers that can’t display frames . . . . . . . . . . . . . . . . . . . .219
Using behaviors with frames . . . . . . . . . . . . . . . . . . . . . . . . . . . . . . . .220
Contents
5
Page 6

CHAPTER 9
Managing and Inserting Assets. . . . . . . . . . . . . . . . . 221
Using the Assets panel. . . . . . . . . . . . . . . . . . . . . . . . . . . . . . . . . . . . .222
Using favorite assets . . . . . . . . . . . . . . . . . . . . . . . . . . . . . . . . . . . . . .229
CHAPTER 10
Inserting and Formatting Text . . . . . . . . . . . . . . . . . 233
Inserting text and objects . . . . . . . . . . . . . . . . . . . . . . . . . . . . . . . . . .234
Creating lists . . . . . . . . . . . . . . . . . . . . . . . . . . . . . . . . . . . . . . . . . . . .237
Setting fonts, styles, color, and alignment . . . . . . . . . . . . . . . . . . . . . .238
Using HTML styles to format text . . . . . . . . . . . . . . . . . . . . . . . . . . .244
Using CSS style sheets. . . . . . . . . . . . . . . . . . . . . . . . . . . . . . . . . . . . .248
Converting CSS styles to HTML tags . . . . . . . . . . . . . . . . . . . . . . . . .256
Checking spelling . . . . . . . . . . . . . . . . . . . . . . . . . . . . . . . . . . . . . . . .258
Searching and replacing text, tags, and attributes. . . . . . . . . . . . . . . . .258
CHAPTER 11
Inserting Images. . . . . . . . . . . . . . . . . . . . . . . . . . . . . . .267
Inserting an image. . . . . . . . . . . . . . . . . . . . . . . . . . . . . . . . . . . . . . . .268
Setting image properties . . . . . . . . . . . . . . . . . . . . . . . . . . . . . . . . . . .269
Creating image maps. . . . . . . . . . . . . . . . . . . . . . . . . . . . . . . . . . . . . .273
Using an external image editor . . . . . . . . . . . . . . . . . . . . . . . . . . . . . .277
Applying behaviors to images . . . . . . . . . . . . . . . . . . . . . . . . . . . . . . .280
6
CHAPTER 12
Using Dreamweaver and Fireworks Together . . . 281
Getting Fireworks files into Dreamweaver . . . . . . . . . . . . . . . . . . . . . .282
Launching Fireworks from within Dreamweaver . . . . . . . . . . . . . . . . .285
Editing Fireworks files placed in Dreamweaver . . . . . . . . . . . . . . . . . .288
Optimizing Fireworks images and animations placed in Dreamweaver 290
Updating Fireworks HTML placed in Dreamweaver. . . . . . . . . . . . . .293
Creating Web photo albums . . . . . . . . . . . . . . . . . . . . . . . . . . . . . . . .293
Contents
Page 7

CHAPTER 13
Inserting Media . . . . . . . . . . . . . . . . . . . . . . . . . . . . . . 297
Inserting media objects . . . . . . . . . . . . . . . . . . . . . . . . . . . . . . . . . . . .297
Launching an external editor. . . . . . . . . . . . . . . . . . . . . . . . . . . . . . . .298
Using Design Notes with media objects . . . . . . . . . . . . . . . . . . . . . . .300
About Flash content . . . . . . . . . . . . . . . . . . . . . . . . . . . . . . . . . . . . . .300
Using Flash button objects . . . . . . . . . . . . . . . . . . . . . . . . . . . . . . . . .301
Using Flash text objects. . . . . . . . . . . . . . . . . . . . . . . . . . . . . . . . . . . .304
Setting Flash object properties. . . . . . . . . . . . . . . . . . . . . . . . . . . . . . .305
Inserting Flash movies. . . . . . . . . . . . . . . . . . . . . . . . . . . . . . . . . . . . .307
Inserting Generator objects . . . . . . . . . . . . . . . . . . . . . . . . . . . . . . . . .309
About Shockwave movies . . . . . . . . . . . . . . . . . . . . . . . . . . . . . . . . . .310
Adding sound to a page. . . . . . . . . . . . . . . . . . . . . . . . . . . . . . . . . . . .311
Inserting Netscape Navigator plugin content. . . . . . . . . . . . . . . . . . . .313
Inserting an ActiveX control . . . . . . . . . . . . . . . . . . . . . . . . . . . . . . . .316
Inserting a Java applet . . . . . . . . . . . . . . . . . . . . . . . . . . . . . . . . . . . . .318
Using parameters. . . . . . . . . . . . . . . . . . . . . . . . . . . . . . . . . . . . . . . . .319
Using behaviors to control media . . . . . . . . . . . . . . . . . . . . . . . . . . . .320
CHAPTER 14
Editing HTML in Dreamweaver . . . . . . . . . . . . . . . . 321
Understanding basic HTML tags . . . . . . . . . . . . . . . . . . . . . . . . . . . .322
Inserting comments. . . . . . . . . . . . . . . . . . . . . . . . . . . . . . . . . . . . . . .327
Using the Dreamweaver Reference panel . . . . . . . . . . . . . . . . . . . . . . .328
About Roundtrip HTML . . . . . . . . . . . . . . . . . . . . . . . . . . . . . . . . . .329
Using the Code view (or Code inspector) . . . . . . . . . . . . . . . . . . . . . .330
Inserting scripts. . . . . . . . . . . . . . . . . . . . . . . . . . . . . . . . . . . . . . . . . .335
Opening and editing non-HTML files in Dreamweaver . . . . . . . . . . .338
Editing an HTML tag in the Design view. . . . . . . . . . . . . . . . . . . . . .338
Setting code formatting preferences. . . . . . . . . . . . . . . . . . . . . . . . . . .343
Cleaning up HTML source code. . . . . . . . . . . . . . . . . . . . . . . . . . . . .347
Cleaning up Microsoft Word HTML . . . . . . . . . . . . . . . . . . . . . . . . .348
Using external HTML editors. . . . . . . . . . . . . . . . . . . . . . . . . . . . . . .350
Contents
7
Page 8

CHAPTER 15
Linking and Navigation . . . . . . . . . . . . . . . . . . . . . . . 353
About document locations and paths . . . . . . . . . . . . . . . . . . . . . . . . .354
Creating links . . . . . . . . . . . . . . . . . . . . . . . . . . . . . . . . . . . . . . . . . . .358
Managing links . . . . . . . . . . . . . . . . . . . . . . . . . . . . . . . . . . . . . . . . . .366
Creating jump menus . . . . . . . . . . . . . . . . . . . . . . . . . . . . . . . . . . . . .369
Creating navigation bars . . . . . . . . . . . . . . . . . . . . . . . . . . . . . . . . . . .371
Attaching behaviors to links . . . . . . . . . . . . . . . . . . . . . . . . . . . . . . . .374
CHAPTER 16
Reusing Content with Templates
and Libraries . . . . . . . . . . . . . . . . . . . . . . . . . . . . . . . . . 375
Creating templates . . . . . . . . . . . . . . . . . . . . . . . . . . . . . . . . . . . . . . .377
Defining a template’s editable regions . . . . . . . . . . . . . . . . . . . . . . . . .381
Creating documents based on templates . . . . . . . . . . . . . . . . . . . . . . .388
Updating pages based on a template . . . . . . . . . . . . . . . . . . . . . . . . . .391
Exporting and importing XML content . . . . . . . . . . . . . . . . . . . . . . .392
Creating, managing, and editing library items. . . . . . . . . . . . . . . . . . .396
Using server-side includes . . . . . . . . . . . . . . . . . . . . . . . . . . . . . . . . . .404
CHAPTER 17
Using Dynamic Layers . . . . . . . . . . . . . . . . . . . . . . . 407
8
About layers and HTML code. . . . . . . . . . . . . . . . . . . . . . . . . . . . . . .408
Creating layers on your page . . . . . . . . . . . . . . . . . . . . . . . . . . . . . . . .409
Manipulating layers. . . . . . . . . . . . . . . . . . . . . . . . . . . . . . . . . . . . . . .412
Setting layer properties . . . . . . . . . . . . . . . . . . . . . . . . . . . . . . . . . . . .417
Changing the stacking order of layers . . . . . . . . . . . . . . . . . . . . . . . . .420
Changing layer visibility . . . . . . . . . . . . . . . . . . . . . . . . . . . . . . . . . . .420
Using tables and layers for layout . . . . . . . . . . . . . . . . . . . . . . . . . . . .421
Animating your layers . . . . . . . . . . . . . . . . . . . . . . . . . . . . . . . . . . . . .425
Behavior actions for controlling layers timelines . . . . . . . . . . . . . . . . .434
Contents
Page 9

CHAPTER 18
Using Behaviors . . . . . . . . . . . . . . . . . . . . . . . . . . . . . 435
Using the Behaviors panel . . . . . . . . . . . . . . . . . . . . . . . . . . . . . . . . . .436
About events . . . . . . . . . . . . . . . . . . . . . . . . . . . . . . . . . . . . . . . . . . . .436
Attaching a behavior . . . . . . . . . . . . . . . . . . . . . . . . . . . . . . . . . . . . . .439
About behaviors and text. . . . . . . . . . . . . . . . . . . . . . . . . . . . . . . . . . .441
Attaching a behavior to a timeline. . . . . . . . . . . . . . . . . . . . . . . . . . . .442
Changing a behavior . . . . . . . . . . . . . . . . . . . . . . . . . . . . . . . . . . . . . .442
Updating a behavior . . . . . . . . . . . . . . . . . . . . . . . . . . . . . . . . . . . . . .443
Creating new actions. . . . . . . . . . . . . . . . . . . . . . . . . . . . . . . . . . . . . .443
Downloading and installing third-party behaviors. . . . . . . . . . . . . . . .443
Using the behavior actions that come with Dreamweaver . . . . . . . . . .444
CHAPTER 19
Debugging JavaScript Code. . . . . . . . . . . . . . . . . . 473
Running the debugger. . . . . . . . . . . . . . . . . . . . . . . . . . . . . . . . . . . . .474
Finding and fixing logical errors . . . . . . . . . . . . . . . . . . . . . . . . . . . . .476
CHAPTER 20
Creating Forms . . . . . . . . . . . . . . . . . . . . . . . . . . . . . . . 481
About CGI scripts. . . . . . . . . . . . . . . . . . . . . . . . . . . . . . . . . . . . . . . .482
About form objects . . . . . . . . . . . . . . . . . . . . . . . . . . . . . . . . . . . . . . .482
Creating a form. . . . . . . . . . . . . . . . . . . . . . . . . . . . . . . . . . . . . . . . . .483
About form fields . . . . . . . . . . . . . . . . . . . . . . . . . . . . . . . . . . . . . . . .485
Inserting checkboxes and radio buttons. . . . . . . . . . . . . . . . . . . . . . . .491
About lists and menus. . . . . . . . . . . . . . . . . . . . . . . . . . . . . . . . . . . . .493
About form buttons . . . . . . . . . . . . . . . . . . . . . . . . . . . . . . . . . . . . . .496
About form design . . . . . . . . . . . . . . . . . . . . . . . . . . . . . . . . . . . . . . .498
Processing forms . . . . . . . . . . . . . . . . . . . . . . . . . . . . . . . . . . . . . . . . .499
Using behaviors with forms. . . . . . . . . . . . . . . . . . . . . . . . . . . . . . . . .500
CHAPTER 21
Testing and Publishing a Site . . . . . . . . . . . . . . . . . . 501
Checking for browser compatibility . . . . . . . . . . . . . . . . . . . . . . . . . .502
Using Behaviors to detect browsers and plugins. . . . . . . . . . . . . . . . . .503
Previewing in browsers . . . . . . . . . . . . . . . . . . . . . . . . . . . . . . . . . . . .504
Checking links in a page or site . . . . . . . . . . . . . . . . . . . . . . . . . . . . . .506
Checking download time and size . . . . . . . . . . . . . . . . . . . . . . . . . . . .509
Using Reports to test a site . . . . . . . . . . . . . . . . . . . . . . . . . . . . . . . . .509
Contents
9
Page 10

CHAPTER 22
Customizing Dreamweaver . . . . . . . . . . . . . . . . . . . . 513
Changing the default file type . . . . . . . . . . . . . . . . . . . . . . . . . . . . . . .514
Modifying the Objects panel. . . . . . . . . . . . . . . . . . . . . . . . . . . . . . . .515
Creating a simple object . . . . . . . . . . . . . . . . . . . . . . . . . . . . . . . . . . .516
About customizing Dreamweaver menus. . . . . . . . . . . . . . . . . . . . . . .517
Customizing the appearance of dialog boxes . . . . . . . . . . . . . . . . . . . .529
Changing default HTML formatting . . . . . . . . . . . . . . . . . . . . . . . . .530
Working with browser profiles. . . . . . . . . . . . . . . . . . . . . . . . . . . . . . .532
Extending Dreamweaver: Basics . . . . . . . . . . . . . . . . . . . . . . . . . . . . .536
Customizing the interpretation of third-party tags . . . . . . . . . . . . . . .537
APPENDIX
Keyboard Shortcuts . . . . . . . . . . . . . . . . . . . . . . . . . . 545
File menu . . . . . . . . . . . . . . . . . . . . . . . . . . . . . . . . . . . . . . . . . . . .545
Edit menu. . . . . . . . . . . . . . . . . . . . . . . . . . . . . . . . . . . . . . . . . . . . . .546
Page views. . . . . . . . . . . . . . . . . . . . . . . . . . . . . . . . . . . . . . . . . . . . . .546
Viewing page elements . . . . . . . . . . . . . . . . . . . . . . . . . . . . . . . . . . . .547
Code editing . . . . . . . . . . . . . . . . . . . . . . . . . . . . . . . . . . . . . . . . . . . .547
Editing text . . . . . . . . . . . . . . . . . . . . . . . . . . . . . . . . . . . . . . . . . . . . .549
Formatting text . . . . . . . . . . . . . . . . . . . . . . . . . . . . . . . . . . . . . . . . . .550
Finding and replacing text. . . . . . . . . . . . . . . . . . . . . . . . . . . . . . . . . .550
Working in tables . . . . . . . . . . . . . . . . . . . . . . . . . . . . . . . . . . . . . . . .551
Working with frames. . . . . . . . . . . . . . . . . . . . . . . . . . . . . . . . . . . . . .551
Working with layers . . . . . . . . . . . . . . . . . . . . . . . . . . . . . . . . . . . . . .552
Working with timelines. . . . . . . . . . . . . . . . . . . . . . . . . . . . . . . . . . . .552
Working with images . . . . . . . . . . . . . . . . . . . . . . . . . . . . . . . . . . . . .553
Managing hyperlinks. . . . . . . . . . . . . . . . . . . . . . . . . . . . . . . . . . . . . .553
Targeting and previewing in browsers . . . . . . . . . . . . . . . . . . . . . . . . .553
Debugging in browsers . . . . . . . . . . . . . . . . . . . . . . . . . . . . . . . . . . . .554
Site management and FTP . . . . . . . . . . . . . . . . . . . . . . . . . . . . . . . . .554
Site map . . . . . . . . . . . . . . . . . . . . . . . . . . . . . . . . . . . . . . . . . . . . . . .555
Playing plugins . . . . . . . . . . . . . . . . . . . . . . . . . . . . . . . . . . . . . . . . . .555
Working with templates . . . . . . . . . . . . . . . . . . . . . . . . . . . . . . . . . . .555
Inserting objects . . . . . . . . . . . . . . . . . . . . . . . . . . . . . . . . . . . . . . . . .556
History panel . . . . . . . . . . . . . . . . . . . . . . . . . . . . . . . . . . . . . . . . . . .556
Opening and closing panels. . . . . . . . . . . . . . . . . . . . . . . . . . . . . . . . .557
Getting help . . . . . . . . . . . . . . . . . . . . . . . . . . . . . . . . . . . . . . . . . . . .557
Keyboard Shortcut Matrix. . . . . . . . . . . . . . . . . . . . . . . . . . . . . . . . . .558
10
Contents
INDEX
. . . . . . . . . . . . . . . . . . . . . . . . . . . . . . . . . . . . . . . . 563
Page 11

INTRODUCTION
Getting Started
.............................................................................................................
Macromedia Dreamweaver is a professional HTML editor for visually designing
and managing Web sites and pages. Whether you enjoy the control of handcoding HTML or prefer to work in a visual editing environment, Dreamweaver
makes it easy to get started and provides you with helpful tools to enhance your
Web design experience.
Dreamweaver includes many coding tools and features: an HTML, CSS, and
JavaScript reference, a JavaScript Debugger, and code editors (the Code view and
Code inspector) that allow you to edit JavaScript, XML, and other text documents
directly in Dreamweaver. Macromedia Roundtrip HTML technology imports
HTML documents without reformatting the code—and you can set
Dreamweaver to clean up and reformat HTML when you want it to.
The visual editing features in Dreamweaver also let you quickly add design and
functionality to your pages without writing a line of code. You can view all your
site elements or assets and drag them from an easy-to-use panel directly into a
document. Streamline your development workflow by creating and editing images
in Macromedia Fireworks, then importing them directly into Dreamweaver, or by
adding Flash objects you create directly in Dreamweaver.
Dreamweaver is fully customizable. Use Dreamweaver to create your own
objects and commands, modify keyboard shortcuts, and even write JavaScript
code to extend Dreamweaver capabilities with new behaviors, Property inspectors,
and site reports.
11
Page 12

System requirements
The following hardware and software is required to run Dreamweaver.
For Microsoft Windows:
•
An Intel Pentium processor or equivalent, 166 MHz or faster, running
Windows 95, Windows 98, Windows 2000, Windows ME, or Windows NT
(with Server Pack 3)
•
Version 4.0 or later of Netscape Navigator or Microsoft Internet Explorer
32 MB of random-access memory (RAM) plus 110 MB of available disk space
•
•
A 256-color monitor capable of 800 x 600 pixel resolution
•
A CD-ROM drive
For the Macintosh:
A Power Macintosh running Mac OS 8.6 or 9.x
•
32 MB of random-access memory (RAM) plus 135 MB of available disk space
•
•
A 256-color monitor capable of 800 x 600 pixel resolution
•
A CD-ROM drive
Installing Dreamweaver
12
Introduction
Follow these steps to install Dreamweaver on either a Windows or a
Macintosh computer.
To install Dreamweaver:
1
Insert the Dreamweaver CD into the computer’s CD-ROM drive.
2
Choose from the following options:
•
In Windows, choose Start > Run. Click Browse and choose the Dreamweaver 4
Installer.exe file on the Dreamweaver CD. Click OK in the Run dialog box to
begin the installation.
•
On the Macintosh, double-click the Dreamweaver Installer icon.
Follow the onscreen instructions.
3
If prompted, restart your computer.
4
Page 13

Learning Dreamweaver
Macromedia Dreamweaver includes a variety of resources to help you learn the
program quickly and become proficient in creating your own Web sites and pages.
These resources include a printed book, online help pages, Guided Tour movies,
a tutorial, and interactive lessons. You can also find regularly updated tips,
TechNotes, examples, and information at the Dreamweaver Support Center on
the Macromedia Web site.
Start by viewing the Guided Tour movies to learn about Dreamweaver features.
Next, complete the Dreamweaver tutorial. Finally, try the Dreamweaver lessons to
learn how to accomplish specific tasks in Dreamweaver.
Guided Tour movies
The Guided Tour movies provide an animated overview of the Web development
process and take you through a tour of Dreamweaver features.
To view a Guided Tour movie, choose Help > Guided Tours and click one of the
movie titles. When each movie is over, click the Home button to return to the list
of movies, then click another movie. You can watch the whole tour or skip ahead
to see particular sections.
Tutorial
The Dreamweaver tutorial is the best place to start if you want to get some handson experience creating pages in Dreamweaver. By working through the tutorial,
you’ll learn how to create a sample Web site with some of the most useful and
powerful features of Dreamweaver. The tutorial is in both Dreamweaver Help and
the
Using Dreamweaver
tutorial at the Macromedia Web site.
The tutorial includes sample pages and assets (images and Macromedia Flash files)
to help you get started developing a Web site.
book. You can also download a printable version of the
Dreamweaver lessons
Dreamweaver comes with a set of interactive lessons. Each lesson takes you
through the steps of a specific task and includes sample pages that contain all the
design and functional elements needed. Use the lessons as step-by-step guides with
the sample pages, or as a guide as you work in your own pages.
To locate the lessons, choose Help > Lessons and select a topic.
Getting Started
13
Page 14

Dreamweaver user guide (printed book)
Using Dreamweaver
provides a printed alternative to Dreamweaver Help, and
contains information on using Dreamweaver commands and features. Certain
reference topics about program options are not included in the printed book; see
Dreamweaver Help for information on those topics.
If you purchased the Electronic Software Download (ESD) version of
Dreamweaver, you can download a printable version of
Using Dreamweaver
from
the Dreamweaver Support Center at http://www.macromedia.com/support/
dreamweaver/documentation.html.
Dreamweaver Help
Dreamweaver Help provides comprehensive information about all Dreamweaver
features, optimized for use online.
For best results viewing Dreamweaver Help, use Netscape Navigator 4.0 or later
or Microsoft Internet Explorer 4.0 or later.
Dreamweaver Help makes extensive use of JavaScript. Make sure that JavaScript is
enabled in your browser. If you plan to use the search feature, make sure that Java
is enabled as well.
14
Introduction
Page 15
Dreamweaver Help includes the following components:
Contents
enables you to see all of the information organized by subject. Click
top-level entries to view subtopics.
The index,
like a traditional printed index, can be used to find important terms
and go to related topics.
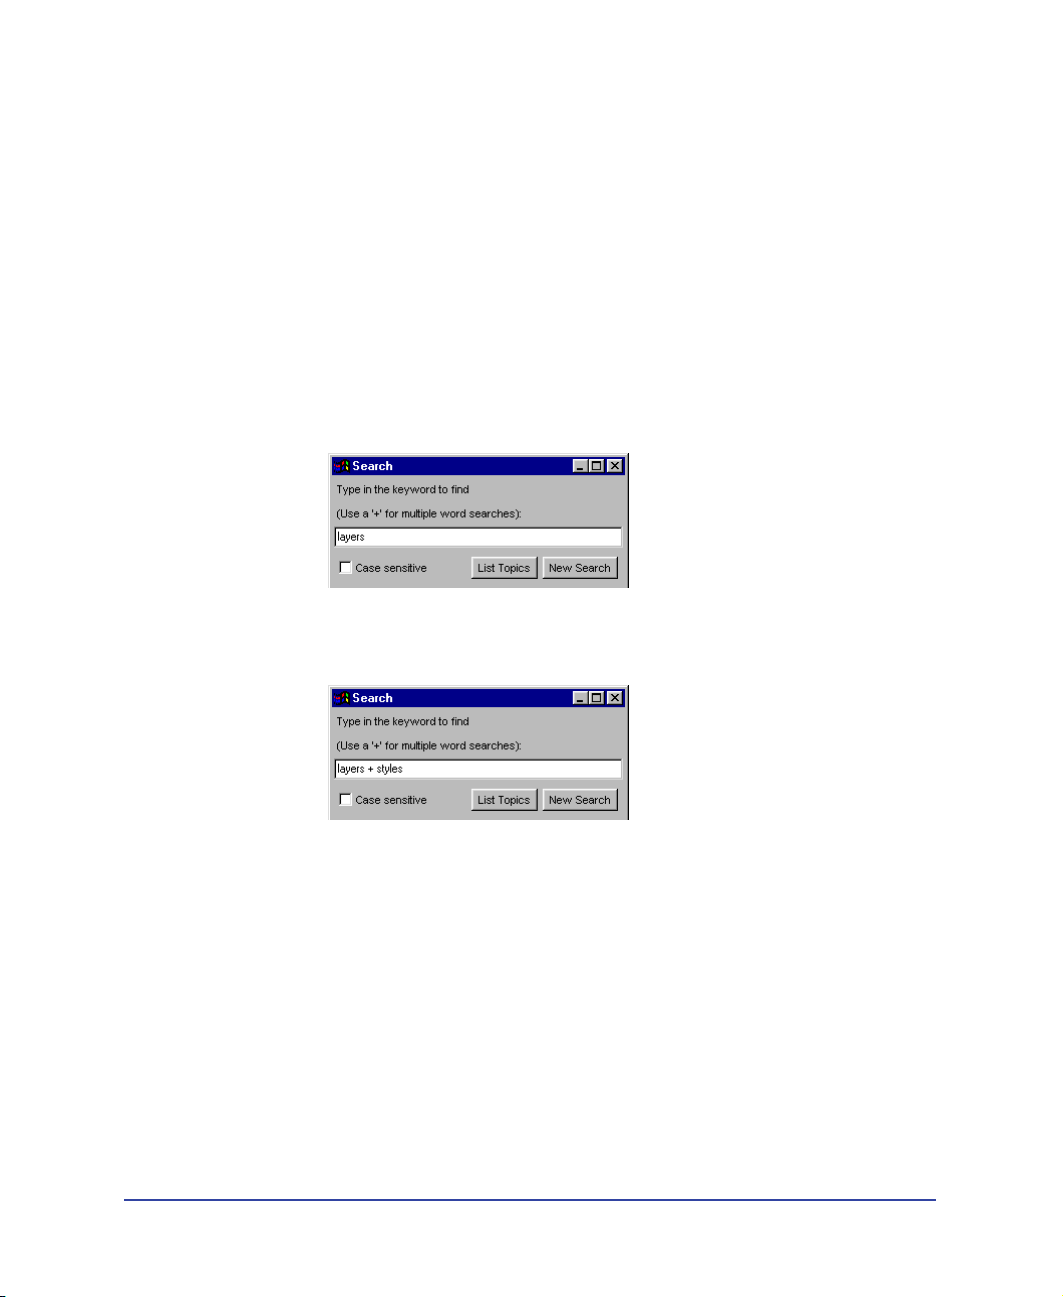
Search
allows you to find any character string in all topic text. The search feature
requires a 4.0 browser with Java enabled.
Note:
When you click Search, a Java security window may appear, asking for permission
to read files on your hard disk. You must grant this permission for the search to work. The
applet does not write anything to your hard disk, nor does it read any files outside
Dreamweaver Help.
•
To search for a phrase, simply type the phrase in the text field.
To search for files that contain two keywords (for example,
•
separate the search terms with a plus (+) sign.
layers
and
styles
),
Getting Started
15
Page 16
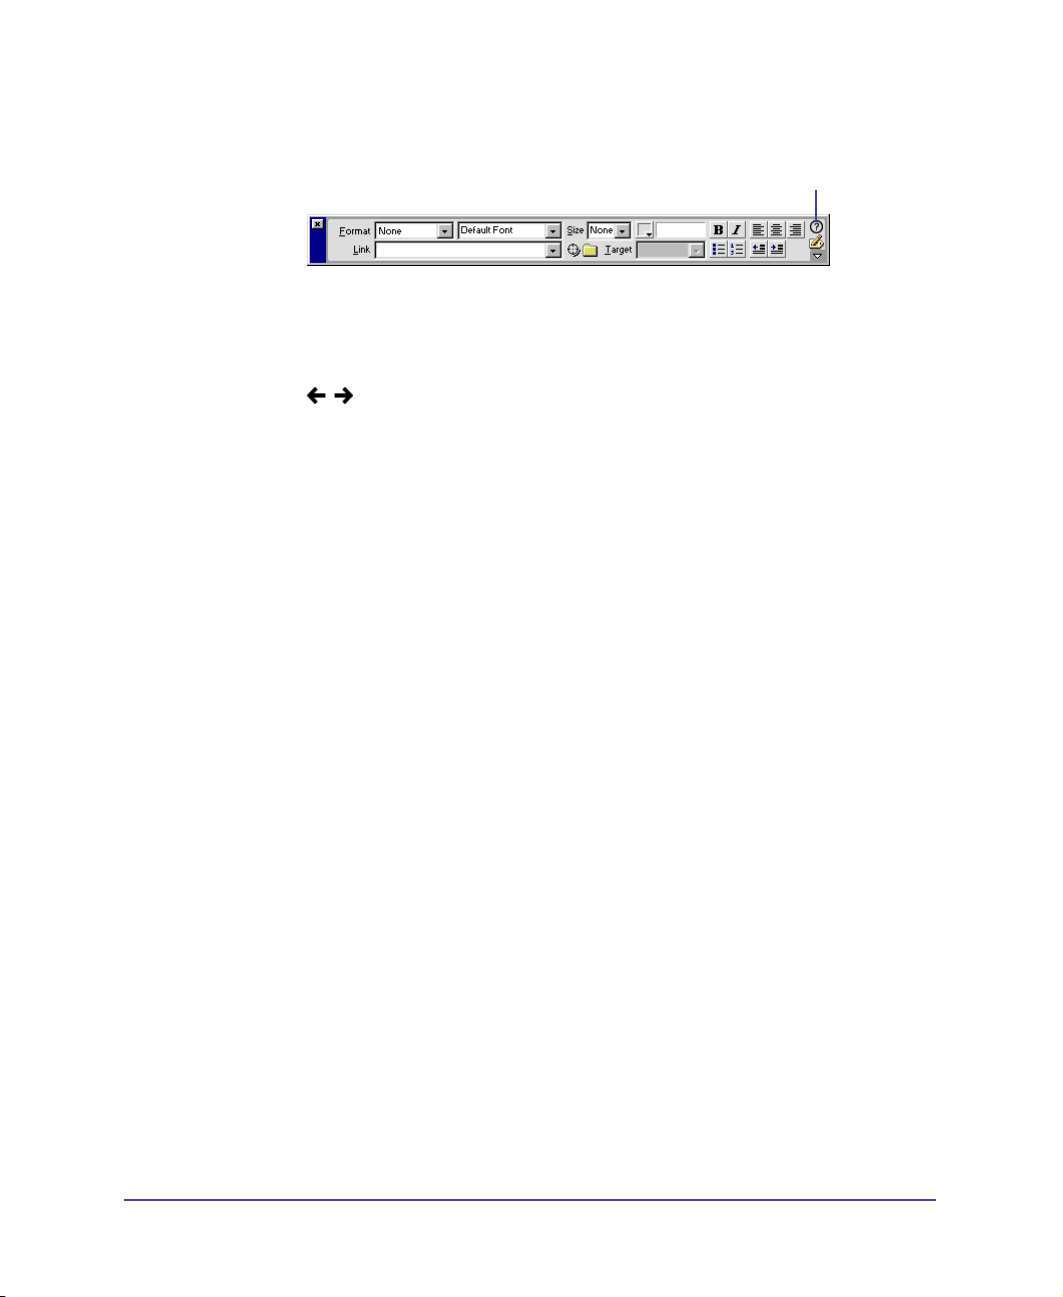
Context-sensitive help
provides a Help button in each dialog box, or a question
mark icon in inspectors, windows, and panels, that opens a relevant help topic.
Click here to open Help
The Dreamweaver Help navigation bar
provides buttons you can click to move
through topics. The right and left arrow buttons move to the previous or next
topic in a section (following the topic order listed in the table of contents).
Extending Dreamweaver
The
Extending Dreamweaver
help system provide information on the
Dreamweaver Document Object Model and the APIs (application programming
interfaces) that allow JavaScript and C developers to create objects, commands,
property inspectors, behaviors, and translators.
Dreamweaver Support Center
The Dreamweaver Support Center Web site is updated regularly with the latest
information on Dreamweaver, plus advice from expert users, examples, tips,
updates, and information on advanced topics. Check the Web site often for the
latest news on Dreamweaver and how to get the most out of the program at
http://www.macromedia.com/support/dreamweaver/.
Dreamweaver discussion group
Discuss technical issues and share helpful hints with other Dreamweaver
users by visiting the Dreamweaver discussion group. You’ll find information
about accessing the discussion group on the Macromedia Web site at
http://www.macromedia.com/software/dreamweaver/discussiongroup/.
16
Introduction
Page 17

Web development workflow
The Web development workflow starts with the process of defining a site’s strategy
or goals, progresses to design (where you work out the look and feel of a
prospective site), and moves into the production or development phase (where
the site is built and pages are coded); the site is tested for functionality and to see
if it meets its defined objectives, and then the site is published. Many developers
also schedule periodic maintenance to ensure that the site remains current
and functional.
To make it easier for you to find the information you need as you develop Web
sites, the
model this standard approach to Web development—site planning, design,
development, testing, and publishing and maintenance.
About site Planning
Planning and organizing your site carefully from the start can save you time later
on. Organizing your site includes much more than determining where the files
will go: site planning often involves examining site requirements, audience
profiles, and site goals. Additionally, you should consider technical requirements
such as user access, and browser, plugin or download restrictions.
Once you’ve organized your information and determined an operating structure,
you begin creating your site.
• Determine what strategy to employ and user issues to consider as you plan your
• Use the Dreamweaver site map to set up your site’s organizational structure. In
If you work on a Web Development team, you may also be interested in
these topics:
• Set up systems that will prevent team members from overwriting files; see
• Use Design Notes to communicate with Web team members; see “Saving file
Using Dreamweaver
site. See “Planning and Setting Up Your Site” on page 95.
the Dreamweaver Site window you can easily add, delete, and rename files and
folders to change the organization as you need. See “Site Management and
Collaboration” on page 107.
“Setting up the Check In/Check Out system” on page 132.
information in Design Notes” on page 135.
documentation is divided into broad sections that
Getting Started
17
Page 18

About designing Web pages
Most Web design projects start with storyboards or flowcharts that are turned
into sample pages. Use Dreamweaver to create mock-up sample pages as you
work toward a final design. Mock-ups usually show the design layout, site
navigation, technical components, themes and color, and graphic images or
other media elements.
• Create HTML documents in Dreamweaver, easily add page title, or
background color. See, “Setting Up a Document” on page 149.
• Dreamweaver Layout view and layout tools let you quickly design Web pages
by drawing and then rearranging the page structure. See, “Designing Page
Layout” on page 167.
• Use the Dreamweaver Objects panel to design and quickly add tables, create
frame documents, design forms, and work with layers. See “Using Tables to
Present Content” on page 183, “Using Frames” on page 203, “Using Dynamic
Layers” on page 407, and “Creating Forms” on page 481.
About adding content
Using Dreamweaver, you can easily add a variety of content to Web pages. Add
assets and design elements, such as text, images, colors, movies, sound, and other
forms of media.
• The Assets panel lets you easily organize the assets in a site; you can then drag
most assets directly from the Assets panel into a Dreamweaver document. See
“Managing and Inserting Assets” on page 221.
• Type directly in a Dreamweaver document, or import text from other
documents, then format the text using the Dreamweaver Property inspector, or
HTML Styles panel. You can also easily create your own Cascading Style
Sheets. See “Inserting and Formatting Text” on page 233.
• Insert images, including rollover images, image maps, and Fireworks sliced
images. Use alignment tools to position images in a page. See “Inserting
Images” on page 267 and “Using Dreamweaver and Fireworks Together” on
page 281.
• Insert other types of media in a Web page, such as Flash, Shockwave, and
QuickTime movies, sound, and applets. See “Inserting Media” on page 297.
• Add content in the Dreamweaver code editor: Use the Dreamweaver Code
view or Code inspector to write your own HTML or JavaScript code. “Editing
HTML in Dreamweaver” on page 321.
Introduction18
Page 19

• With Dreamweaver you can create standard HTML links, including anchor
links and e-mail links, or easily set up graphical navigation systems, such as
jump menus and navigation bars. See “Linking and Navigation” on page 353.
• Dreamweaver templates and library files let you easily apply reusable content in
your site. You can create new pages from the template, then add or change
content in the editable areas. See “Reusing Content with Templates
and Libraries” on page 375.
About interactivity and animation
Many Web pages are static, containing only text and images. Dreamweaver allows
you to go beyond static pages, using interactivity and animation to capture
visitors’ interest. You can give visitors feedback as they move and click,
demonstrate concepts, validate form data without contacting the server—in short,
you can let visitors see and do more within the page.
There are several ways to add interactivity and animation to your pages
using Dreamweaver:
• Use timelines to create animations that do not require plugins, ActiveX controls,
or Java. Timelines use dynamic HTML to change the position of a layer or the
source of an image over time or to call behavior actions automatically after the
page has loaded. See “Using Dynamic Layers” on page 407.
• Use behaviors to perform tasks in response to specific events, such as highlighting
a button when the visitor passes the pointer over it, validating a form when the
visitor clicks the Submit button, or opening a second browser window when the
main page is finished loading. See “Using Behaviors” on page 435.
• Debug custom JavaScript code. See “Debugging JavaScript Code” on page 473.
• Use forms to allow your site visitors to enter data directly on the Web page. See
“Creating Forms” on page 481.
Getting Started 19
Page 20

About testing and publishing your site
Your site is complete and ready for the world—but before you publish it on a
server, you must test the site. Depending on the size of the project, client
specifications, and kinds of browsers that visitors will use, you may need to move
your site to a staging server where it can be tested and edited. When corrections
have been made, you publish the site where the public can access it. Once the site
is published, establish a maintenance cycle to ensure quality, respond to user
feedback, and update the site’s information.
Use the following Dreamweaver features to test and publish your sites:
• To add new tags in a page or fix your code, use the Dreamweaver Reference
panel to look up JavaScript, CSS and HTML code. See “Using the
Dreamweaver Reference panel” on page 328.
• Use the JavaScript Debugger to help you fix JavaScript errors in your code.
The debugger lets you set breakpoints in the code, then allows you to view the
code as a page is debugged right in Dreamweaver. See “Debugging JavaScript
Code” on page 473.
• Run browser and plugin checks, test and fix links in your documents, and run
site reports to check HTML files for common mistakes. See “Testing and
Publishing a Site” on page 501.
• In the Dreamweaver Site window you’ll find many tools to help you manage your
site, transfer files to and from a remote server, set up a Check In/Check Out
process to prevent files from being overwritten, and synchronize the files on your
local and remote sites. See “Site Management and Collaboration” on page 107.
Where to start
This guide includes information for readers at a variety of levels. To get the most
out of the documentation, start by reading the parts that are most relevant to your
level of experience.
For HTML novices:
1 Begin by watching the Guided Tour movies. From the Dreamweaver main
menu, choose Help > Guided Tours.
2 Next, work through the Dreamweaver tutorial. Choose Help > Tutorial, or
follow the steps in the printed manual.
3 Work through the lessons for the topics that interest you. Choose Help >
Lessons, then select a lesson.
Introduction20
Page 21

4
Progress through “Dreamweaver Basics” on page 71, “Planning and Setting Up
Your Site” on page 95, “Site Management and Collaboration” on page 107, and
“Linking and Navigation” on page 353.
5 To learn about formatting text and including images in your pages, read “Inserting
and Formatting Text” on page 233 and “Inserting Images” on page 267.
That’s all you really need to begin producing high-quality Web sites, but when
you’re ready to learn how to use more advanced layout and interaction tools, you
can proceed through the rest of the book in order. You may want to skip
“Customizing Dreamweaver,” at least at first.
For experienced Web designers who are new to Dreamweaver:
1 Begin by watching the Guided Tour movies. From the Dreamweaver main
menu, choose Help > Guided Tours.
2 Work through the Dreamweaver tutorial to learn the basics of using
Dreamweaver. Choose Help > Tutorial, or follow the steps in the
printed manual.
3 Work through the lessons for the topics that interest you. Choose Help >
Lessons, then select a lesson.
4 Read “Dreamweaver Basics” on page 71 for a further overview of the
Dreamweaver user interface.
5 Although much of the material in “Site Management and Collaboration” on
page 107 and “Linking and Navigation” on page 353 is probably familiar to
you, skim those chapters to see how these familiar concepts are implemented in
Dreamweaver; pay particular attention to Using Dreamweaver to set up a new
site. Then read “Site Management and Collaboration” on page 107.
6 “Inserting and Formatting Text” on page 233 and “Inserting Images” on page
267 provide useful information on the details of using Dreamweaver to create
basic HTML pages.
7 Read the overview at the beginning of each subsequent chapter to determine
whether its topics are of interest to you.
For experienced Web designers who are familiar with Dreamweaver 3:
1 Begin by reading “What’s new in Dreamweaver 4” on page 22. Follow the
cross-references from that section to sections covering new Dreamweaver
features.
2 You may want to skim “Dreamweaver Basics” on page 71 to learn about new
aspects of the Dreamweaver user interface.
3 Check out the Dreamweaver lessons; choose Help > Lessons for a list of
interactive lessons you can try.
4 If you’re interested in customizing and extending Dreamweaver, read
“Customizing Dreamweaver” on page 513.
Getting Started 21
Page 22

Typographical conventions
The following typographical conventions are used in this guide:
• Code font indicates HTML tag and attribute names as well as literal text
used in examples.
• Italic code font indicates replaceable items (sometimes called
metasymbols) in code.
• Bold roman text indicates text for you to enter verbatim.
What’s new in Dreamweaver 4
The new features in Dreamweaver 4 enhance HTML editing, make it easier to
design pages, improve site and asset management, let you create your own Flash
objects, streamline your workflow, improve team collaboration, and allow you to
customize and extend Dreamweaver.
Enhanced code editing
The Dreamweaver toolbar allows you to manage how you view a page—Design
view, Code view, or a view of both code and design. The toolbar provides easy
access to commonly used features such as Preview in Browser and Design Notes.
See “Using the toolbar” on page 78
Code view provides a new way to view HTML source code directly in the
Dreamweaver Document window. See “Opening the Code view (or Code
inspector)” on page 331. You can also edit non-HTML documents such as
JavaScript files and XML files directly in the Dreamweaver Code view. See
“Inserting scripts” on page 335.
Integrated code editors Dreamweaver now has integrated, state-of-the-art code
editors—the Code view and the Code inspector. You can set word wrapping, code
indenting, live syntax coloring, and more from the Options menu in either of
these editors. See “Setting Code view (or Code inspector) options” on page 333.
The Reference panel is a quick reference tool for HTML, JavaScript, and CSS. It
provides information about the specific tags you are working with in the Code view
(or Code inspector). See “Using the Dreamweaver Reference panel” on page 328.
The Code Navigation pop-up menu allows you to select code for JavaScript
functions in a page; by using this menu, you can quickly navigate JavaScript code
while working in Code view. See “Viewing script functions” on page 337.
The JavaScript Debugger lets you debug JavaScript document while in
Dreamweaver. For example, you can set breakpoints to control the code you want
to examine. See “Debugging JavaScript Code” on page 473.
Introduction22
Page 23

Easier page design
Layout view lets you quickly design your Web pages by drawing boxes (tables or cells)
to which you can add content. See “Drawing layout cells and tables” on page 170.
Improved templates make it easier for you to identify the editable regions in a
template file. Templates now display a tab that contains the editable region’s name
and a bounding rectangle. See “Creating templates” on page 377.
CSS style sheets can now be defined as soon as you create a new style. You can
also easily attach an existing CSS style sheet with a button in the CSS Styles panel.
See “Using CSS style sheets” on page 248.
Improved integration
Flash buttons and Flash text are now built right into Dreamweaver. You can pick
from a set of predefined Flash buttons and insert them into your document or
have your Flash designer create custom button templates for you. See “Using Flash
button objects” on page 301 and “Using Flash text objects” on page 304.
Roundtrip slicing lets you work seamlessly between Dreamweaver and Fireworks 4.
You can edit and update images and HTML tables you import from Fireworks.
You can also edit in Dreamweaver or Fireworks and have the changes preserved in
both places. See “Editing Fireworks files placed in Dreamweaver” on page 288.
The Web-safe color picker allows you to easily match colors with graphics. With
just one click, you can select a color from anywhere on the desktop and the color
picker snaps to the nearest Web-safe color. See “Working with colors” on page 87.
Getting Started 23
Page 24

Streamlining your workflow
The Assets panel allows you to manage your site’s assets. You can see all the
images, colors, external URLs, and scripts, as well as Flash, Shockwave,
QuickTime, template, and library items in a central location. Preview assets, and
then drag them right into place on your HTML document. Save commonly used
assets in a favorites list and reuse them across sites. See “Using the Assets panel” on
page 222 and “Using favorite assets” on page 229.
Improved Design Notes let you attach notes to a file so you can track changes or
communicate about development issues with other members of your team. You can
insert and view comments directly in the Dreamweaver Site window. See “About
Design Notes” on page 134 and “Using reports to improve workflow” on page 141.
Integrated e-mail allows you to communicate with team members. When a file is
checked out by someone else, you can now click on the team member’s name to send
an e-mail message. See “Setting up the Check In/Check Out system” on page 132.
Site reporting lets you use several predefined reports to test common HTML
document problems, such as untitled documents or missing alt tags. You can also
write custom reports to suit your needs, display report results, and open problem
files within the Report results window. See “Setting up the Check In/Check Out
system” on page 132 and “Creating reports” on page 510.
SourceSafe integration If you own SourceSafe, you can now check files into and
out of SourceSafe while working in Dreamweaver. See “Using Dreamweaver with
Visual SourceSafe” on page 128.
WebDAV integration now use Dreamweaver to transfer files using the WebDAV
protocol. See “Using Dreamweaver with the WebDAV protocol” on page 127.
The Package Manager (formerly the Extension Manager) easily install extensions
with a single click. Visit the Macromedia Exchange and download useful extensions
to make your job easier. See “Adding extensions to Dreamweaver” on page 93.
Common user interface
Keyboard shortcuts have a new interface that is common to all Macromedia Web
publishing products. This new interface allows you to edit existing keyboard
shortcuts, create new shortcuts for menu items, and delete keyboard shortcuts you
don’t want. You can also switch between sets of keyboard shortcut configurations.
See “Using the Keyboard Shortcut Editor” on page 90.
Window management is now improved: all windows snap into place. When you
open a new window, Dreamweaver prevents it from overlapping visible panels.
Panels now have a new Macromedia look and behave consistently across the Web
publishing products. All panels have icons and text so that you can easily identify
them. Panels all use system colors and fonts on both Windows and Macintosh
systems, and have consistent snapping and dragging behaviors.
Introduction24
Page 25

HTML and Web technologies resources
The following are some useful resources available on the Web:
The HTML 4.0 specification (http://www.w3.org/TR/REC-html40/) is the official
specification for HTML from the World Wide Web Consortium.
Index DOT HTML (http://www.blooberry.com/indexdot/html/) is a comprehensive
listing of HTML tags, attributes, and values, as well as their compatibility with
the various browsers.
The ZDNet Developer Tag Library (http://www.zdnet.com/devhead/resources/
tag_library/) is another listing of information about all HTML tags.
The Cascading Style Sheets, level 1 specification (CSS1) (http://www.w3.org/TR/
REC-CSS1) is the official specification for style sheets from the World Wide Web
Consortium.
Web Review Style Sheets Reference Guide (http://webreview.com/guides/style/
style.html) explains what CSS styles are and which browsers they work in.
“CGI Scripts for Fun and Profit” (http://www.hotwired.lycos.com/webmonkey/
99/26/index4a.html) is an article from the Hotwired Webmonkey site on
incorporating ready-made CGI (Common Gateway Interface) scripts
into your pages.
The CGI Resource Index (http://www.cgi-resources.com/) is a repository of all
things related to CGI, including ready-made scripts, documentation, books, and
even programmers for hire.
The Common Gateway Interface site (http://hoohoo.ncsa.uiuc.edu/cgi/) includes
an introduction to CGI.
Entities Table (http://www.bbsinc.com/iso8859.html) lists the entity names used
in ISO 8859-1 (Latin-1).
The Dynamic HTML Events page (http://msdn.microsoft.com/workshop/author/
dhtml/reference/events.asp#om40_event) provides information about events in
Microsoft Internet Explorer.
Microsoft ASP Overview pages (http://msdn.microsoft.com/workshop/server/
asp/ASPover.asp) provide information about Active Server Pages (ASP).
Sun JSP page (http://java.sun.com/products/jsp/) provides information about
JavaServer Pages (JSP).
The PHP pages (http://www.php.net/) provide information about PHP:
Hypertext Preprocessor.
Allaire ColdFusion product page (http://www.allaire.com/Products/ColdFusion)
provides information about ColdFusion.
Getting Started 25
Page 26

The XML.com site (http://www.xml.com) provides information, tutorials, and tips
about Extensible Markup Language (XML), as well as other Web technologies.
JavaScript Bible, by Danny Goodman (IDG Books), comprehensively covers the
JavaScript 1.2 language.
JavaScript: The Definitive Guide, by David Flanagan (O’Reilly & Associates),
provides reference information for every JavaScript function, object, method,
property, and event handler.
Accessibility and Dreamweaver
Macromedia supports the creation of great Web experiences that are accessible to
everyone, including those with disabilities. We encourage the implementation of
international standards to guide developers of accessible sites, including the
guidelines offered by the World Wide Web Consortium (W3C). Many
government policies on Web accessibility, including those of the United States,
reference W3C guidelines. W3C guidelines on Web content encourage developers
to adopt design and coding practices for accessibility, many of which are robustly
supported by Macromedia products. For more information on W3C guidelines,
please consult the Web Content Authoring Guidelines (http://www.w3.org/TR/
WAI-WEBCONTENT/full-checklist.html).
For the latest information on product features and resources that support
accessible design, please see Macromedia's accessibility page (http://
www.macromedia.com/accessibility/).
Introduction26
Page 27

CHAPTER 1
Dreamweaver Tutorial
.............................................................................................................
The Dreamweaver tutorial walks you through the steps of building Web pages.
You’ll learn how to use Macromedia Dreamweaver to define a local site, and you’ll
use Dreamweaver panels and tools to create and edit Web documents.
In this tutorial, you’ll create Web pages for Compass, a fictitious company that
specializes in adventure travel. If you’re new to Dreamweaver, start at the
beginning of the tutorial and work your way through the end. If you’re already
familiar with Dreamweaver, you may want to start at “Use the Assets panel” on
page 56; this section and those that follow it focus on new or changed features in
Dreamweaver such as the Assets panel, Flash buttons and text, using a template,
running a site report and adding a Design Note.
The tutorial takes approximately one to two hours to complete, depending on
your experience, and focuses on the following Dreamweaver tasks:
• Defining a local site
• Creating a page in Layout view
• Inserting an image and a rollover image
• Working with tables in Standard view
• Creating a link to another document
• Inserting assets from the Assets panel
• Inserting Flash Text and Flash Button objects
• Creating and applying a template
• Running a site report
• Adding a Design Note
1
Note: This tutorial demonstrates some features that are supported only in 4.0 or
later browsers.
27
Page 28
Take a guided tour of Dreamweaver
Before you get started, watch the Guided Tour movies to familiarize yourself with
the Web development process and with Dreamweaver features.
1 In Dreamweaver, choose Help > Guided Tour.
2 Click a movie title.
3 Close the movie when you finish.
The Dreamweaver work area
Let’s start with a brief overview of the Dreamweaver work area.
• If you haven’t already launched Dreamweaver, double-click the Dreamweaver
icon to launch it.
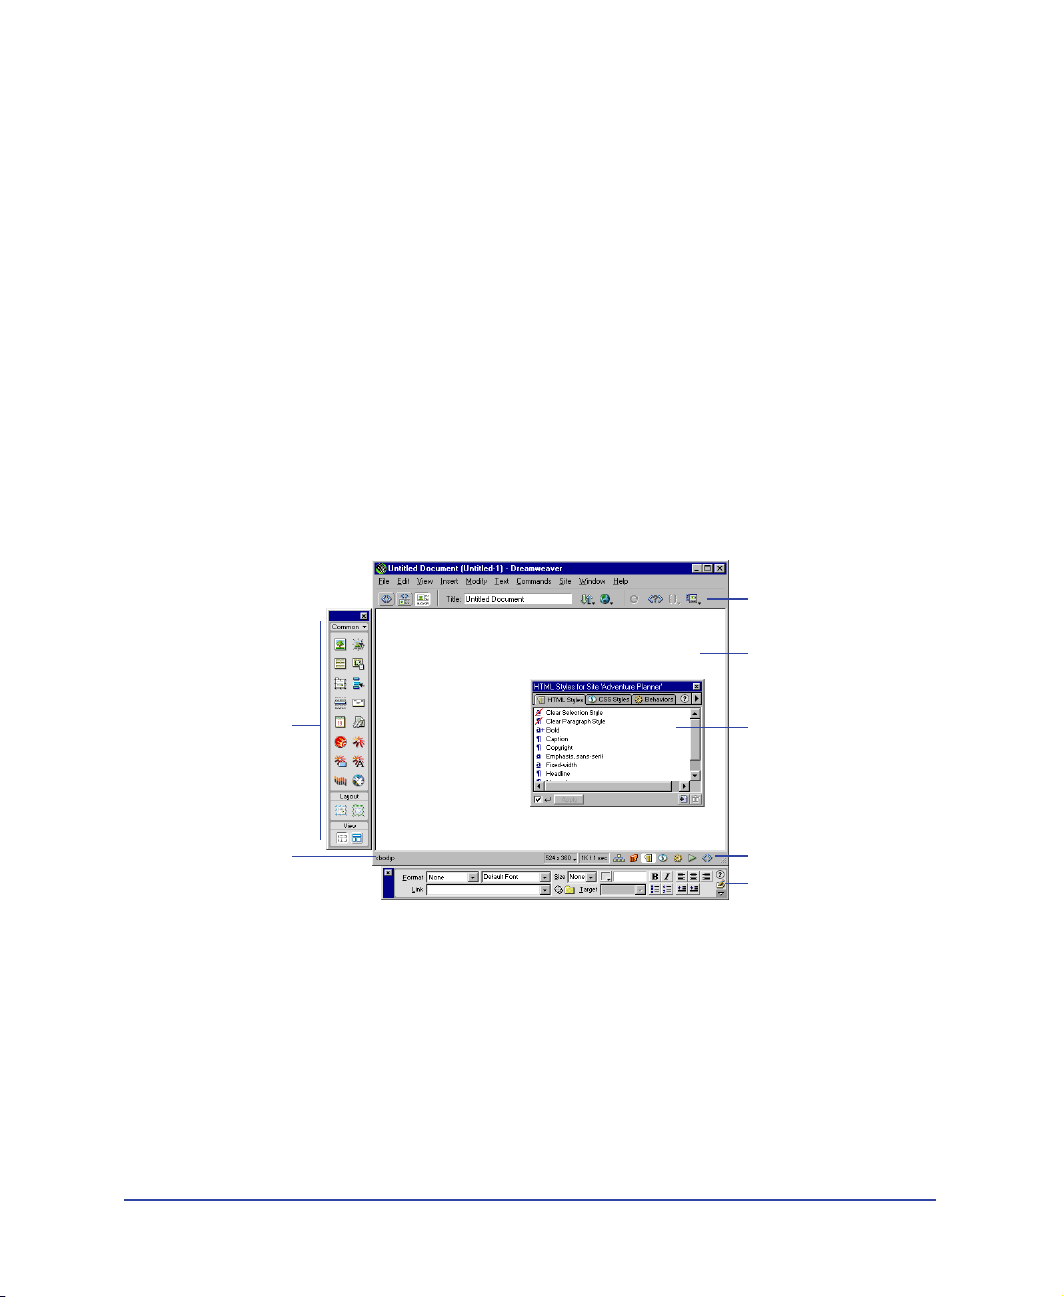
The Dreamweaver work area accommodates different styles of working
and levels of expertise. When you launch Dreamweaver, the following work
area items open:
Toolbar
Document window
Objects panel
Tag selector
Chapter 128
Floating panel
Launcher bar
Property inspector
• The Document window displays the current document as you create and edit it.
• The Objects panel contains icons you click to insert objects in your document,
and to change the way you work in a document.
Page 29

• Dreamweaver provides many floating panels, such as the HTML Styles panel and
the Code inspector, which enable you to work with other Dreamweaver elements.
• The Launcher bar contains buttons for opening and closing your most
frequently used inspectors and panels.
• The Property inspector displays properties for the selected object or text, and
lets you modify those properties. (Which properties appear in the inspector
depend on the object actively selected in the document.)
To open Dreamweaver windows, inspectors, and panels, use the Window menu. A
check mark next to an item in the Window menu indicates that the named item is
currently open (though it may be hidden behind other windows). To display an
item that isn’t currently open, choose the item name from the menu or use its
keyboard shortcut.
Working in Dreamweaver
Dreamweaver can display a document in three ways: in Design view, in Code
view, and in a split view that shows both the design and code. (To change the view
in which you’re working, select a view in the Dreamweaver toolbar.) By default,
Dreamweaver displays the Document window in Design view.
In addition, you can work with the Dreamweaver Design view in two different
ways—in Layout view and Standard view. (You select these views in the View
category of the Objects panel.) In Layout view you can design a page layout, insert
graphics, text, and other media; in Standard view, in addition to inserting graphics
text and media, you can also insert layers, create frame documents, create tables,
and apply other changes to your page—options that aren’t available in Layout view.
How the tutorial files are arranged
Both the completed and partially completed HTML files used in this tutorial
are in the Compass_Site folder in the Tutorial folder. Images and other associated
files for the site are also in the Compass_Site folder.
Each tutorial file has a meaningful name—for example, the HTML file that
contains travel destination information is named Destinations.html. The partially
completed files—which you’ll be working on—have names similar to their
completed file counterparts, except they begin with DW4_; the partially
completed version of Destinations.html, for example, is called
DW4_Destinations.html.
Dreamweaver Tutorial 29
Page 30
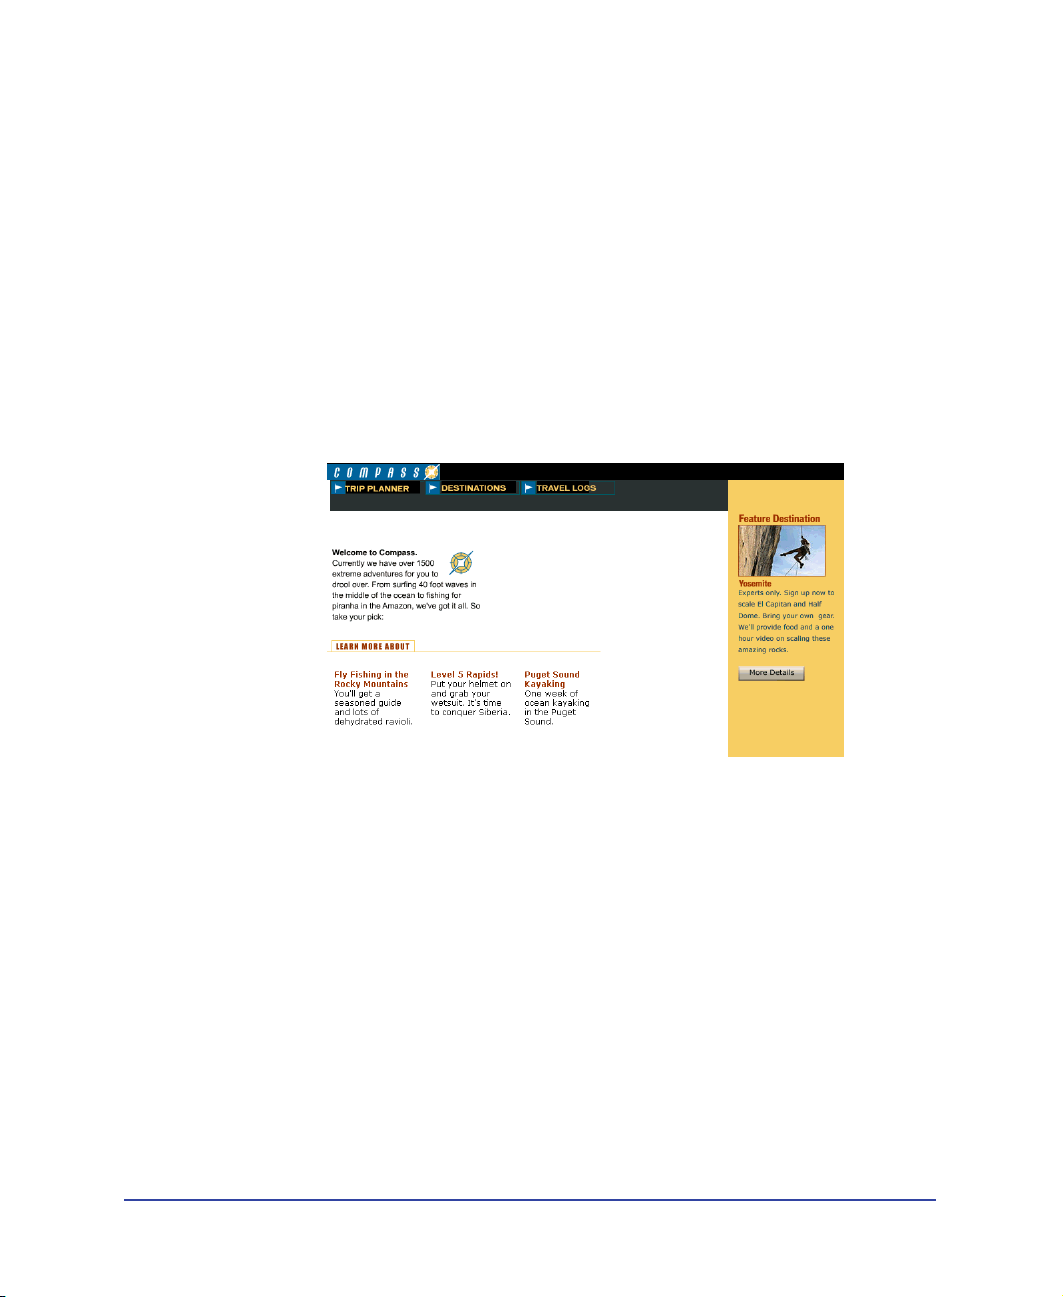
Preview the completed Web site
Next, view pages in the completed Web site to get an idea of what you’ll be
working toward.
1 If you haven’t already done so, launch Dreamweaver.
2 In Dreamweaver, choose File > Open. In the file browsing dialog box, navigate
to the Dreamweaver 4 folder (where you installed Dreamweaver); then navigate
to Tutorial/Compass_Site.
3 In the Compass_Site folder, select CompassHome.html, and then click Open
to open the Compass home page in the Document window.
Do not edit this page; you will create your own version of this page.
4 Choose File > Preview in Browser and select a browser in which to view the
Compass home page. (Use a version 4.0 or later browser to view this site.)
5 Move the pointer over the navigation buttons to see rollover image effects.
Click the navigation buttons to explore the site.
6 Close the browser when you’re finished looking at the site.
7 Open a new blank document in Dreamweaver, choose File > Open.
8 Close the CompassHome.html file, which is open in Dreamweaver.
Chapter 130
Page 31

Set up the site structure for the tutorial
There are two ways you can work with the tutorial files—use a predefined local
site or define a local site.
• If you’re new to Dreamweaver, you may want to define the local site for the
tutorial so you’ll know how to set up a local site when you’re ready to work on
your own sites.
• If you’re already familiar with defining a site using Dreamweaver, you may want
to use the predefined tutorial site. From the Dreamweaver main menu
choose Site > Open Site, then select Tutorial - Dreamweaver. The Tutorial Dreamweaver site links to the Compass_Site files located in the Dreamweaver
4/Tutorial folder. After selecting the local site, skip to the “Create the site home
page” on page 34 section of the tutorial.
Note: If you select the predefined site, the site name displayed in the tutorial
screenshots will not match; instead of seeing my_tutorial, you’ll see Tutorial Dreamweaver as the site name in your screens.
Define a local site
When you define a local site, you tell Dreamweaver where you plan to store all the
files for a particular site. To work effectively in Dreamweaver, always define a local
site for each Web site you create.
For this tutorial, you’ll specify the Compass_Site folder as the local site folder.
1 If it isn’t already open, launch Dreamweaver.
A blank document opens.
2 Choose Site > New Site.
3 In the Site Definition dialog box, make sure Local Info is selected in the
Category list.
4 In the Site Name field, type my_tutorial.
The site name lets you easily identify and select a site from a list of sites
you’ve defined.
5 Click the folder icon to the right of the Local Root Folder field.
Dreamweaver Tutorial 31
Page 32

6
In the dialog box that appears, navigate to the Tutorial/Compass_Site folder,
and do one of the following:
• In Windows, click Open, then click Select when Compass_Site appears in
the Select field.
• On the Macintosh, click Choose to select the Compass_Site folder.
The Local Root Folder field updates to display the path to the local site.
Note: The complete path to the Compass_Site folder may vary, depending on where
you installed Dreamweaver.
7 Under Cache, do one of the following:
• Select Enable Cache (Windows) to create a cache file for the site.
• Select Use Cache to Speed Link Updates (Macintosh) to create a cache
file for the site.
Caching the files in the Compass_Site folder creates a record of existing
files so Dreamweaver can quickly update links when you move, rename,
or delete a file.
8 Click OK to close the dialog box.
Chapter 132
Page 33

9
Click OK to the cache message.
The Site window now displays a list of all the folders and files in the local site.
The list also acts as a file manager, allowing you to copy, paste, delete, move,
and open files just as you would on a computer desktop.
Dreamweaver Tutorial 33
Page 34

Create the site home page
Now that a site structure is set up for storing pages and assets for the Compass
site, you’ll create the first page—a home page for the site. As you build this page,
you’ll add images, text, and Flash assets; your document will contain the same
design components as the completed Compass home page.
Save your document
Begin by saving the document you’re working in.
1 Leave the Site window open, and click the Document window to make
it active.
The Site window remains open in the background.
2 Choose File > Save.
3 In the Save As dialog box, select the Compass_Site folder as the location for
this document.
4 In the File Name field, type my_CompassHome.html.
5 Click Save.
Notice that the document name now appears at the top of the Document window.
Chapter 134
Page 35

Define the document page title
Though the document has a file name, notice it is still labelled Untitled
Document; that’s because it needs an HTML document name, or page title.
Defining a page title helps site visitors identify the page they’re browsing: the
page title appears in the browser title bar and in the bookmark list. If you create
a document without a page title, the document appears in the browser with the
title Untitled Document.
In this part of the tutorial, you’ll title your page.
1 With the Document window active, choose View > Toolbar if the toolbar isn’t
already visible.
The Dreamweaver toolbar appears above the Document window
2 In the Title field, type Compass Home Page; then click in the Document
window to see the page title update in the Document window’s title bar.
3 Save your file.
Design a page in Layout view
You’ll start your first page while working in the Dreamweaver Design view. You’ll
lay out the page then insert images and text.
The page you complete in this section of the tutorial will look similar to this page.
Dreamweaver Tutorial 35
Page 36
Work in Layout view
Dreamweaver has two visual design views—Standard view and Layout view. You’ll
start by working in Layout view, which allows you to draw layout cells or layout
tables into which you can add content such as images, text, or other media.
In this part of the tutorial, you’ll lay out the page; in the next section you’ll add
content. (Once you’re comfortable with these two tasks, you may find it easier to
add layout and content together.)
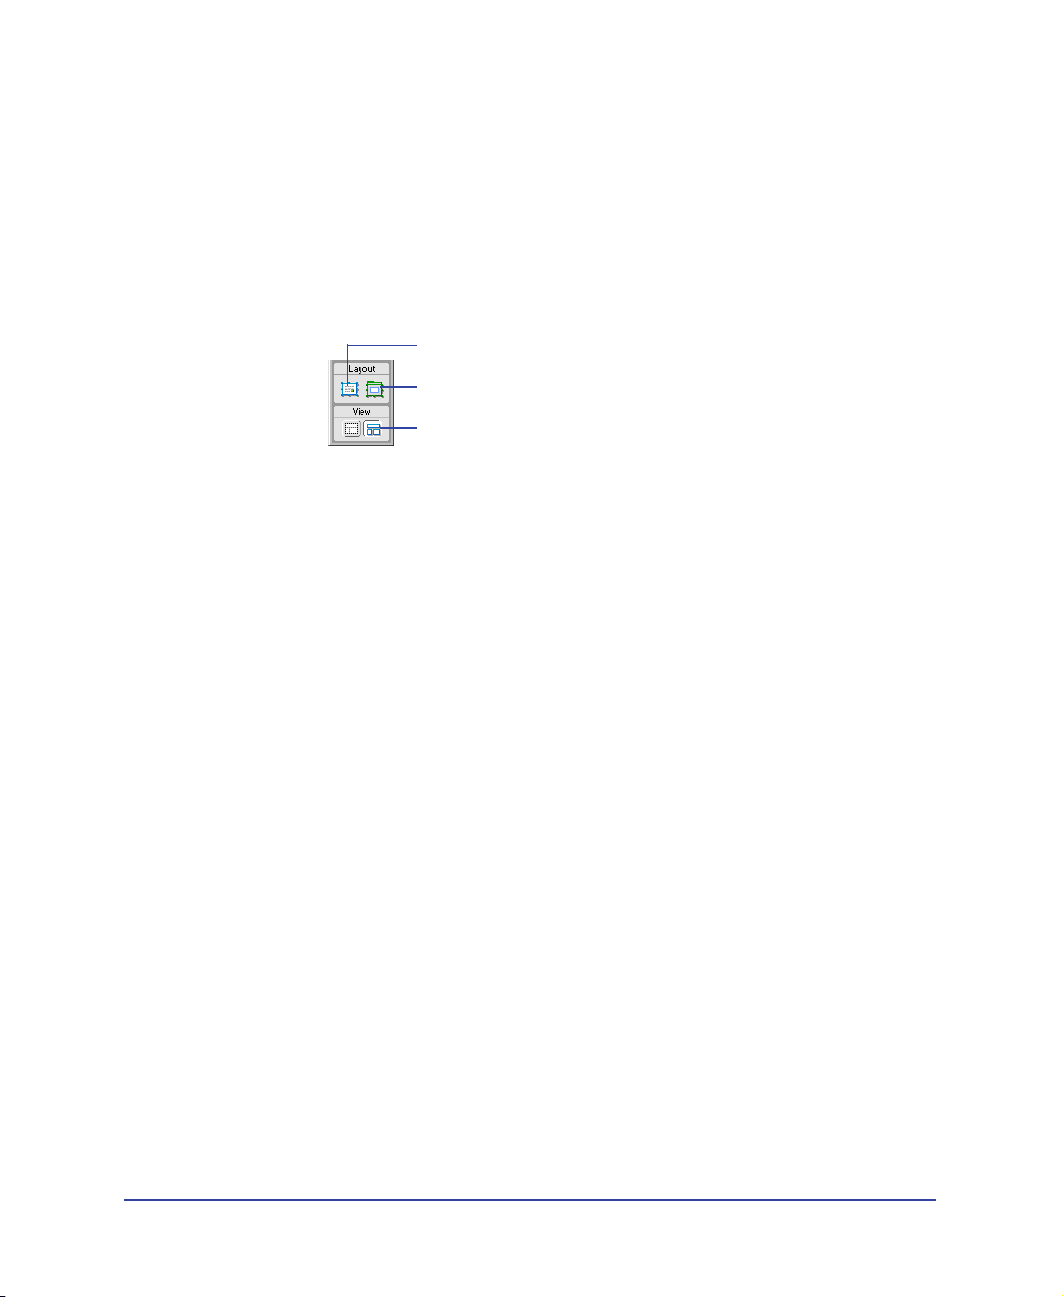
1 In the Objects panel, click the Layout View icon if it isn’t already selected.
Draw Layout Cell icon
Draw Layout Table icon
Layout View icon
The Getting Started in Layout View dialog box appears and describes the
Layout view options.
2 Review the options, then click OK to close the dialog box.
3 In the Objects panel under Layout notice the Layout options—Draw Layout
Cell and Draw Layout Table—are now available; these options aren’t available
in Standard view.
Chapter 136
Page 37
Draw layout cells
In Layout view you can draw layout cells and layout tables to define the design
areas of a document. This task is easier to accomplish if you prepare a sample of
the page you’re creating before you begin laying out a page.
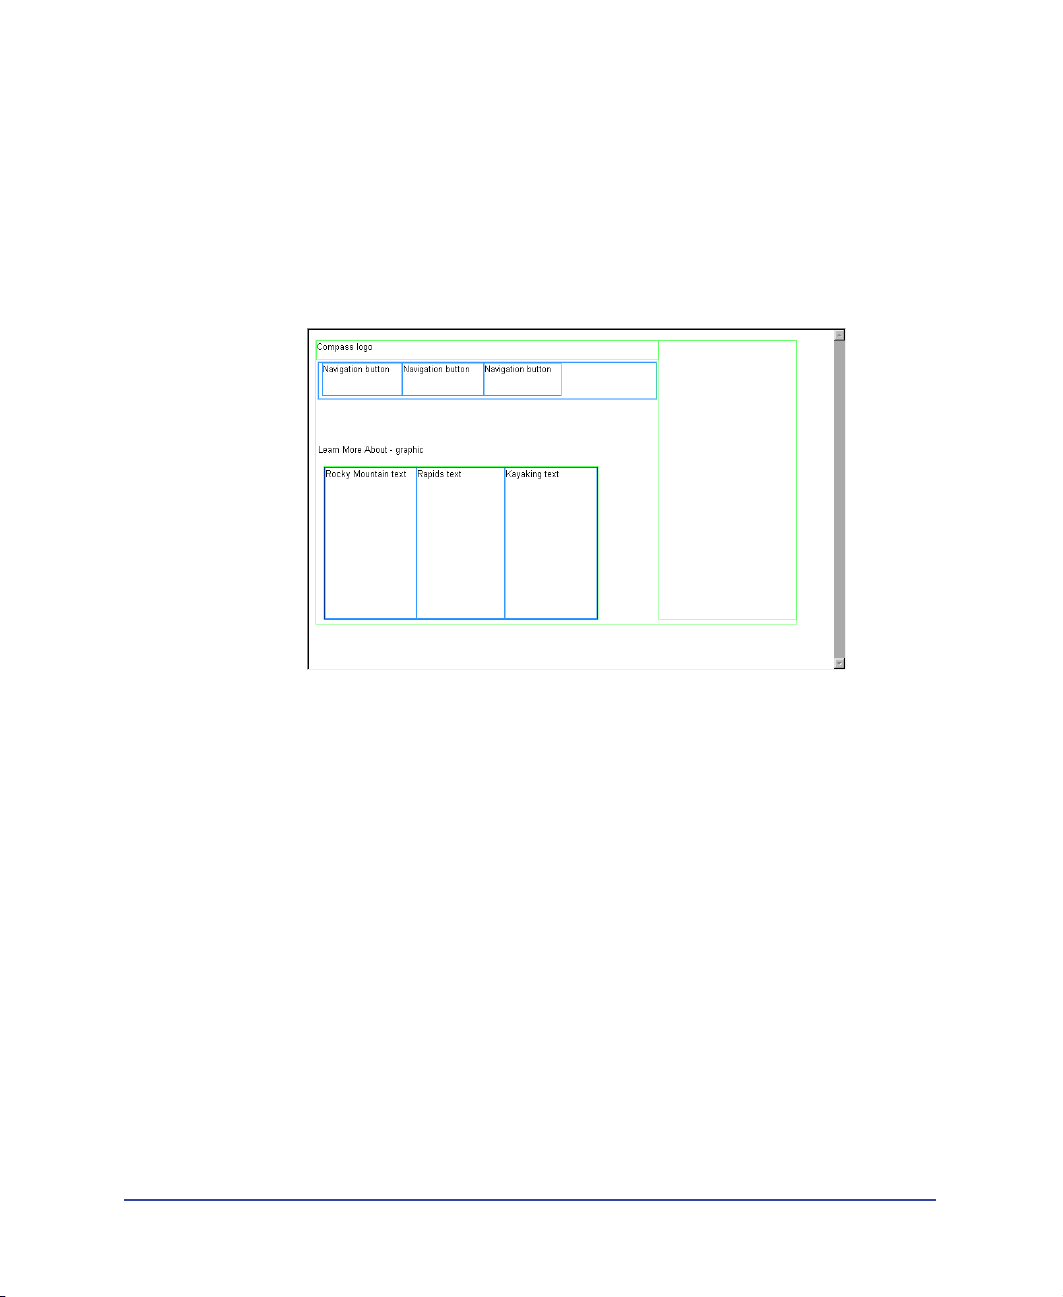
Look at the following sample layout to get an idea of the page layout you’re
creating in this section of the tutorial. There’s a cell for the Compass logo, a table
with three cells for site navigation buttons, a cell for another graphic, and a table
for three cells that will hold text.
You’ll draw tables and cells similar to this layout as you work in your document.
First, you’ll draw a layout cell in which you’ll insert the Compass logo.
1 Click in the Document window of the my_CompassHome document to make
the document active.
2 If they aren’t already open, open the following work area tools:
• The Objects panel (choose Window > Objects), which you’ll use to add objects
to your document.
• The Property inspector (choose Window > Properties), which you’ll use to set
properties or attributes for objects in your document. If the Property inspector
isn’t already expanded, click the expander arrow in the lower right corner so
you can see all the property options.
3 In the Objects panel, click the Draw Layout Cell icon.
Dreamweaver Tutorial 37
Page 38
4
Move the pointer to the Document window; the mouse pointer changes to a
drawing tool (looks like a small cross). Click in the upper left corner of the
document, then drag to draw a layout cell.
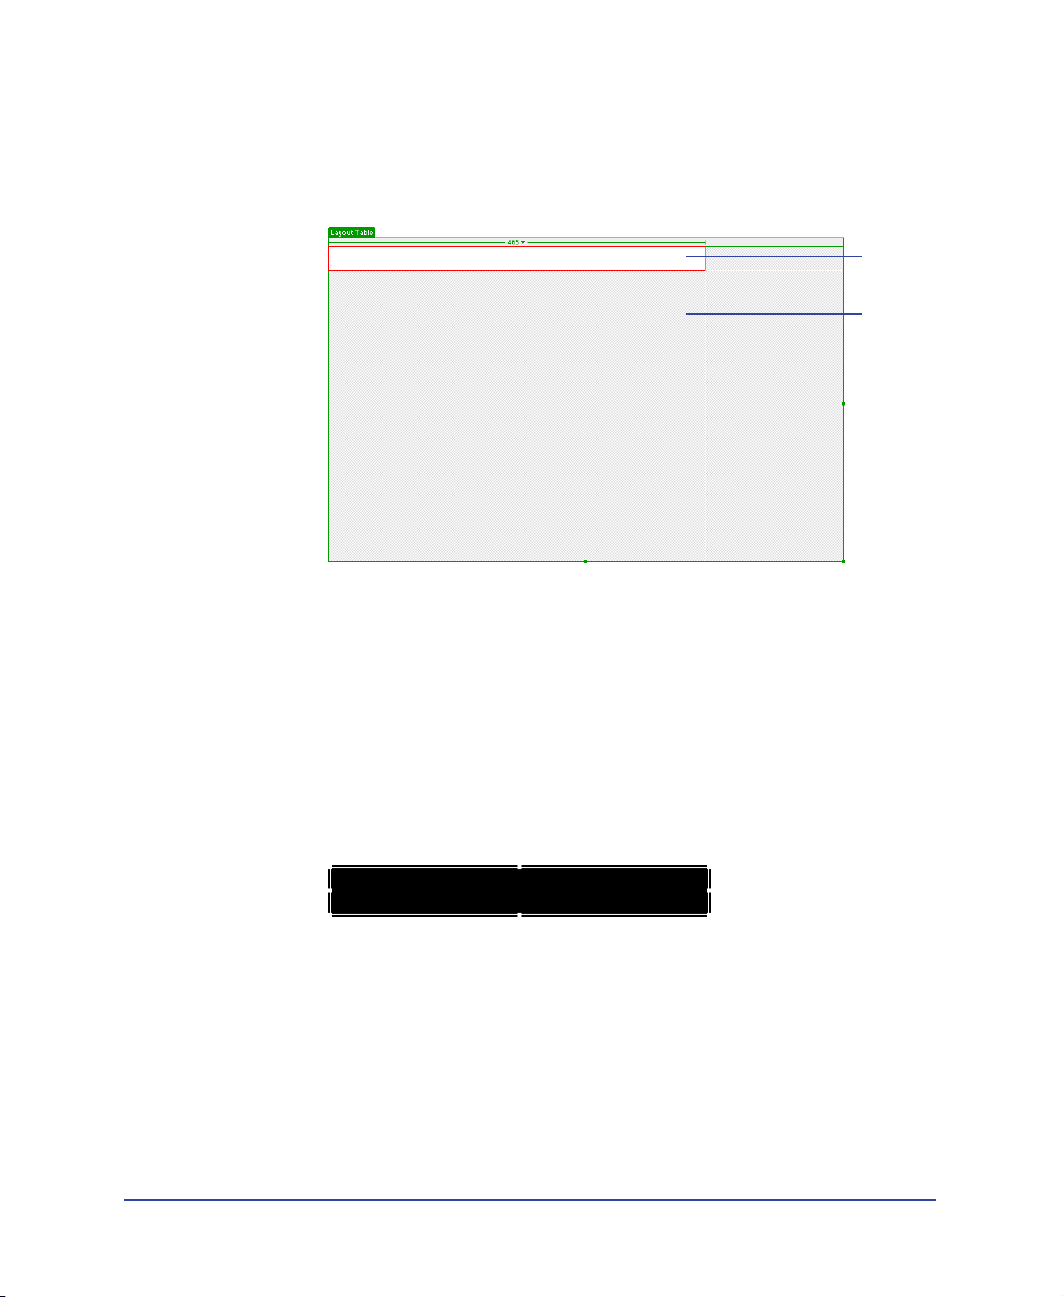
When you release the mouse, a layout cell appears in a layout table.
The layout table expands to fill the Document window, and defines the page
layout area. The white rectangle is the layout cell you drew. You can place
additional layout cells in the gray area of the layout table.
Layout
Cell
Layout
Table
Resize layout cells
To precisely design a page, you can set the size of cells you add in a document. You
can also reposition cells in the page.
1 Click the border of the layout cell to select it.
Handles appear around a selected layout cell:
Chapter 138
Page 39

2
To resize this layout cell, do one of the following:
• In the Property inspector for the layout cell, type 510 in the Fixed field to set the
cell’s width to 510 pixels, then click in the document to see the cell width change.
Note: If you enter a pixel width that is larger than the width of the layout table, or that
causes the cell to overlap another cell in a layout table, Dreamweaver alerts you and
adjusts the cell width to a valid width.
• On the right side of the layout cell, drag the middle resize handle to the right
until the cell is the desired width. When you release the mouse, the cell’s width
is displayed in the column header area along the top of the layout table.
Add multiple layout cells
Next you’ll add three layout cells below the logo cell you just created. Later you’ll
insert the page’s navigation buttons in these cells.
1 In the Objects panel, click the Draw Layout Cell icon; then hold down the
Control key (Windows) or Command key (Macintosh).
2 In the Document window, position the pointer below the cell you drew for the
logo; then drag to draw a layout cell.
Continue to hold the Control key (Windows) or Command key (Macintosh)
and draw two more layout cells. Your screen should look similar to this.
Dreamweaver Tutorial 39
Page 40

Move a layout cell
If you need to line up the cells next to each other you can resize and move the
layout cells as you need. You change the size of a layout cell by using one of its
resize handles.
You cannot click and drag a cell to move it to a new position. If you need to move
a layout cell to reposition it in a document, follow these steps.
1 Click the border of a layout cell to select it.
2 To move the layout cell, do one of the following:
• Use the arrow keys.
• Hold down Shift and use the arrow keys to move a layout cell 5 pixels at a time.
Group cells in a layout table
Now you’ll create a table of the navigation button cells you just created. Grouping
the cells in a table enables you to control the cell spacing and to easily move the
cells as a group if you want change the page layout. You’ll create a table for the
navigation buttons that is the same width as the logo cell above it.
Use Draw Layout Table to group the navigation button images.
1 In the Objects panel, click the Draw Layout Table icon.
2 In the Document window, position the pointer at the top left corner of the first
navigation button cell; then drag the pointer so the table contains the three
cells and is the length of the logo cell.
Chapter 140
Page 41

3
Release the mouse to see the cells grouped in a new table.
You’ve created a table that contains three layout cells (the white area in the
table) and an empty space (the gray area in the table).
Move the layout table
You can select and move a layout table to other areas in a document. You cannot,
however, move a layout table so that it overlaps another.
Next you’ll move the table you just created a few pixels to the right to offset the
alignment of the navigation buttons to the logo when they are inserted in the page.
1 In the Document window click the tab on the Layout table to move it.
2 Drag the layout table a few pixels to the right to reposition it, then drag one of
the table’s right resize handles to align the right sides of the logo and navigation
button layout cells.
Notice that as you create new tables and cells, gridlines appear outlining the
layout area. You can use these gridlines to align the layout elements.
Dreamweaver Tutorial 41
Page 42

Add another layout cell
Next add a layout cell for the Learn More About graphic.
1 In the Objects panel, click the Draw Layout Cell icon.
2 In the Document window, draw a new cell in the space below the navigation
button table.
Your page should look similar to this:
Create a layout table
In the last section you used cells to create a table. Now, you’ll start with a table
and add cells.
1 In the Objects panel, click the Draw Layout Table icon.
2 Move the pointer to the Document window. In the area below the layout cell
you just added, drag the pointer to the right to align with the right side of the
topmost cell; then drag down to the bottom of the Document window.
Chapter 142
Page 43

Draw layout cells in a table
Now add layout cells into which you’ll add text about travel locations.
1 In the Objects panel, click the Draw Layout Cell icon and move the pointer to
the layout table you just drew.
2 Draw a table cell approximately one-third the space in the table.
3 Click the border of the layout cell to select it; then in the Property inspector’s
Fixed field, type 170 to set the cells width.
4 Draw another table cell approximately one-third the space in the table next to
the first cell.
5 Click the border of the layout cell to select it; then in the Property inspector’s
Fixed field, type 170 to set the cells width.
6 Draw the last table cell in the remaining space in the table. Resize or move the
cells to adjust the size or position of the cells as needed.
Your screen should look similar to this:
Dreamweaver Tutorial 43
Page 44

Add content to the page
Now that you’ve laid out the areas of the page, you’ll add the graphical content,
such as the logo, and rollover images.
Insert images
You’ll learn two ways to insert images in Dreamweaver—using Dreamweaver’s
main menu and using the Objects panel.
1 Click anywhere in the logo layout cell (the topmost layout cell).
Clicking in a layout cell places the insertion point in the cell without
selecting the cell.
2 Choose Insert > Image.
3 In the Select Image Source dialog box, locate the Compass_Site folder
and navigate to the Assets folder, then the images folder; click the
compass_logo.gif to select it.
4 Make sure the Relative To pop-up menu located at the bottom of the dialog
box is set to Document, then click Select (Windows) or Open (Macintosh) to
select the image.
The image appears in the layout cell.
5 Click anywhere in the Learn More About layout cell to place the insertion
point in the cell.
6 In the Objects panel’s Common category, click the Insert Image icon.
7 In the Select Image Source dialog box, locate the Compass_Site/Assets/images
folder, and navigate to learnMoreAbout.gif; then click Select (Windows) or
Open (Macintosh) to select the image.
The image appears in the layout cell.
8 Choose File > Save to save the changes you made to the home page.
Chapter 144
Page 45

Create a rollover image
A rollover image is an image whose display changes when the pointer passes
(“rolls”) over it.
You’ll use the Insert Rollover Image command to create three rollover images for
the navigation buttons—Trip Planner, Destinations, and Travel Logs.
A rollover image consists of two images: the image displayed when the page first
loads in the browser, and the image displayed when the pointer moves over the
original image. Be sure to use images that are the same size. The first image
dictates the size of the display, so if the second image is much smaller or much
larger, the results will look distorted or unprofessional.
Next, you’ll add a navigation button with a rollover image to your page.
Then you’ll add the other navigation buttons and preview the page in a browser
to test the rollovers.
1 In the Document window, click in the first cell of the navigation button table.
This tells Dreamweaver where you want the image inserted.
2 To insert a rollover image, do one of the following:
• In the Common category of the Objects panel, click the Insert Rollover
Image icon.
• Choose Insert > Interactive Image > Rollover Image.
3 In the Insert Rollover Image dialog box, type planner in the Image Name field.
This gives the image a unique name, and makes it easily identifiable in the
HTML code.
4 In the Original Image field, click Browse; then navigate to
MenuTripPlanner.gif and click Select (Windows) or Open (Macintosh).
This tells Dreamweaver which image to display when the page first loads.
5 In the Rollover Image field, click Browse; then navigate to
MenuTripPlanner_on.gif and click Select (Windows) or Open (Macintosh).
This tells Dreamweaver which image to display when the pointer is over
the original image.
Dreamweaver Tutorial 45
Page 46

6
Make sure the Preload Rollover Image option is selected so the rollover images
load when the page loads in the browser, ensuring a quick transition between
images when a user moves the pointer over the original image.
7 Click OK to close the dialog box.
The image appears in the document.
8 Resize the layout cell to fit the image.
Create the other rollover images
Now you’ll add rollover images for the other navigation buttons.
1 In the Document window, click in the second navigation button cell; then in the
Common category of the Objects panel, click the Insert Rollover Image icon.
2 In the Insert Rollover Image dialog box, type destinations in the Image Name
field to provide the image a unique name.
3 In the Original Image field, click Browse, then navigate to and select
MenuDestinations.gif.
4 In the Rollover Image field, click Browse, then navigate to and select
MenuDestinations_on.gif.
5 Make sure the Preload Rollover Image option is selected, then click OK to close
the dialog box.
6 In the Document window, click in the third navigation button cell; then in the
Objects panel’s Common category, click the Insert Rollover Image icon.
7 In the Insert Rollover Image dialog box, type travellog in the Image Name field
to provide the image a unique name.
8 In the Original Image field, click Browse then navigate to and select
MenuTravelLogs.gif.
9 In the Rollover Image field, click Browse then navigate to and select
MenuTravelLogs_on.gif.
10 Make sure the Preload Rollover Image option is selected, then click OK to close
the dialog box.
11 Resize the two layout cells to fit the image.
Chapter 146
Page 47

Preview your document
You cannot view rollover behavior in the Dreamweaver Document window;
rollover images work only in a browser. However, you can preview the document
in Dreamweaver to see its browser-related functions. You do not have to save the
document before you preview it.
1 Press F12 to see your document in a Web browser.
Move the mouse pointer over the rollover images you created to see them change.
2 When you finish previewing the file, close the browser window.
3 Return to the Dreamweaver Document window and choose File > Save to save
the changes you made to the home page.
Dreamweaver Tutorial 47
Page 48

Insert text
Now you’ll add text in the cells of the bottom layout table.
In Dreamweaver, you can type content directly into a layout cell, or you can cut
and paste content from another document into a layout cell. In this tutorial, you’ll
add text to the layout cell by copying and pasting content from an existing text file
to a layout cell.
1 Choose File > Open; then, in the Compass_Site folder, open
DW4_HomeText.txt.
The DW4_HomeText.txt document opens in a new Dreamweaver
Document window.
2 In DW4_HomeText.txt select the first two lines of text, “Fly Fishing”
through “ravioli.”
3 Choose Edit > Copy to copy the text.
4 In the my_CompassHome document, click in the first layout cell in the text-
description layout table.
5 Choose Edit > Paste to paste the text into the layout cell.
6 In DW4_HomeText.txt select the next two lines of text, “Level 5 Rapids”
through “Siberia.”
7 Choose Edit > Copy to copy the text.
8 In the my_CompassHome document, click in the second cell in the text
description layout table.
9 Choose Edit > Paste to paste the text into the layout cell.
10 In DW4_HomeText.txt select the last two lines of text, “Puget Sound
Kayaking” through “Puget Sound.”
11 Copy the text, then paste it in the third cell in the layout table.
12 Close DW4_HomeText.txt, then click in the my_CompassHome.html to
make it the active document.
Format text
You can format text in the Document window by setting properties in the
Property inspector. First, select the text you want to format, then apply the
changes. You’ll change the font type and size of the text.
1 If the Property inspector isn’t open, choose Window > Properties.
2 In the first text description layout cell, select all the text from the word “Fly,”
through the last word “ravioli.”
Chapter 148
Page 49
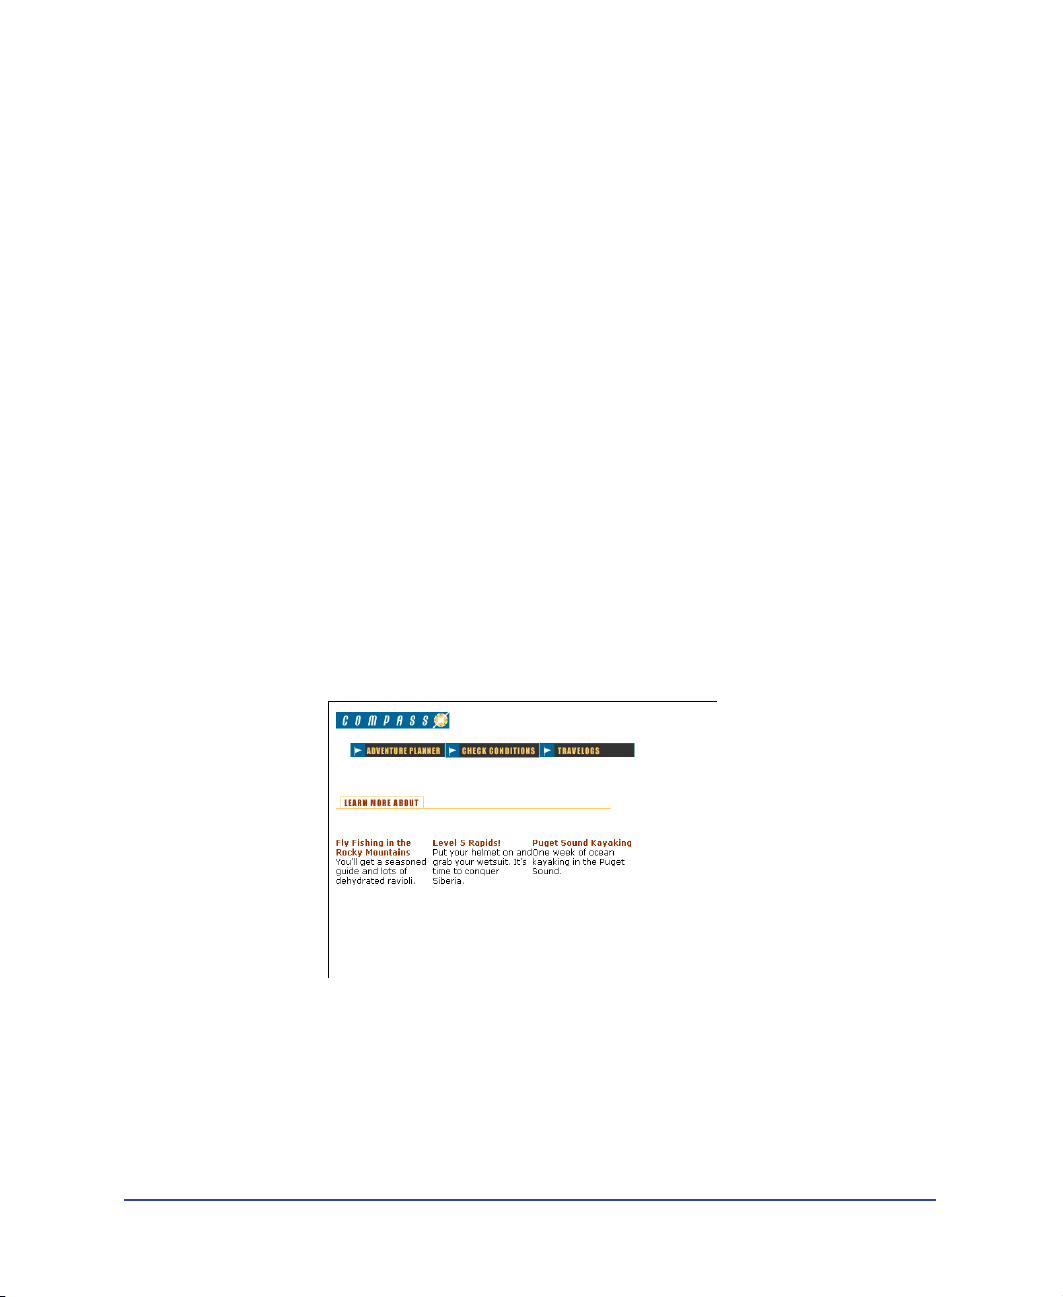
3
In the Property inspector’s second Format pop-up menu, which currently reads
Default Font, select Verdana, Arial, Helvetica, sans-serif.
4 In the Size pop-up menu, select 2.
The text in your document automatically updates to reflect the changes.
5 Repeat the above steps to select and format the text in the other two text-
description layout cells.
Apply color and style
Now you’ll apply additional formatting changes to the text; you’ll apply color and
style to create heading text.
1 In the first text description layout cell, select the heading text from the word
“Fly,” through the word “Mountains.”
2 In the Property inspector, click the color picker; then move the eyedropper to
the Learn More About image in the document window and select the brown
color of the text in the image.
3 Still in the Property inspector, click the B icon to apply bold style to the text.
4 Repeat the above steps to apply color and style to the heading text in the other
text description layout cells.
5 Press F12 to preview your page in a browser.
Your page should look similar to the page below.
Notice the text. There is little separation between text in one layout cell and the
next. You’ll fix that in the upcoming tutorial steps.
6 Close the browser window, then click in the Document window to
make it active.
Dreamweaver Tutorial 49
Page 50

Work in Standard view
Layout view is helpful for laying out Web pages. Though you can adjust most of
your design elements in Layout view, certain changes must be completed in
Standard view. When you switch to Standard view, you’ll see how Dreamweaver
uses tables to create your page structure. The Layout tables in Layout view are
<table> tags in Standard view.
Now you’ll learn how to work with tables to continue fine-tuning your design.
First, you’ll switch to the Dreamweaver Standard view.
• In the Objects panel, click the Standard View icon.
Your page should look similar to the screen below.
Set cell properties
Cell height determines the height of the space within a cell row. Notice the space
around the Compass logo. You want to remove the extra space between the logo
and navigation buttons.
1 Click anywhere in the blank area of the cell containing the Compass logo
image (but not the image itself).
2 In the cell Property inspector, in the H field (height), that currently contains a
value, delete the value.
3 Still in the Property inspector, click the Bg color box icon located in the bottom
area of the Property inspector; then use the eyedropper to select black.
The background color is applied to the cell.
4 Click anywhere in the Document window to see the change.
Chapter 150
Page 51
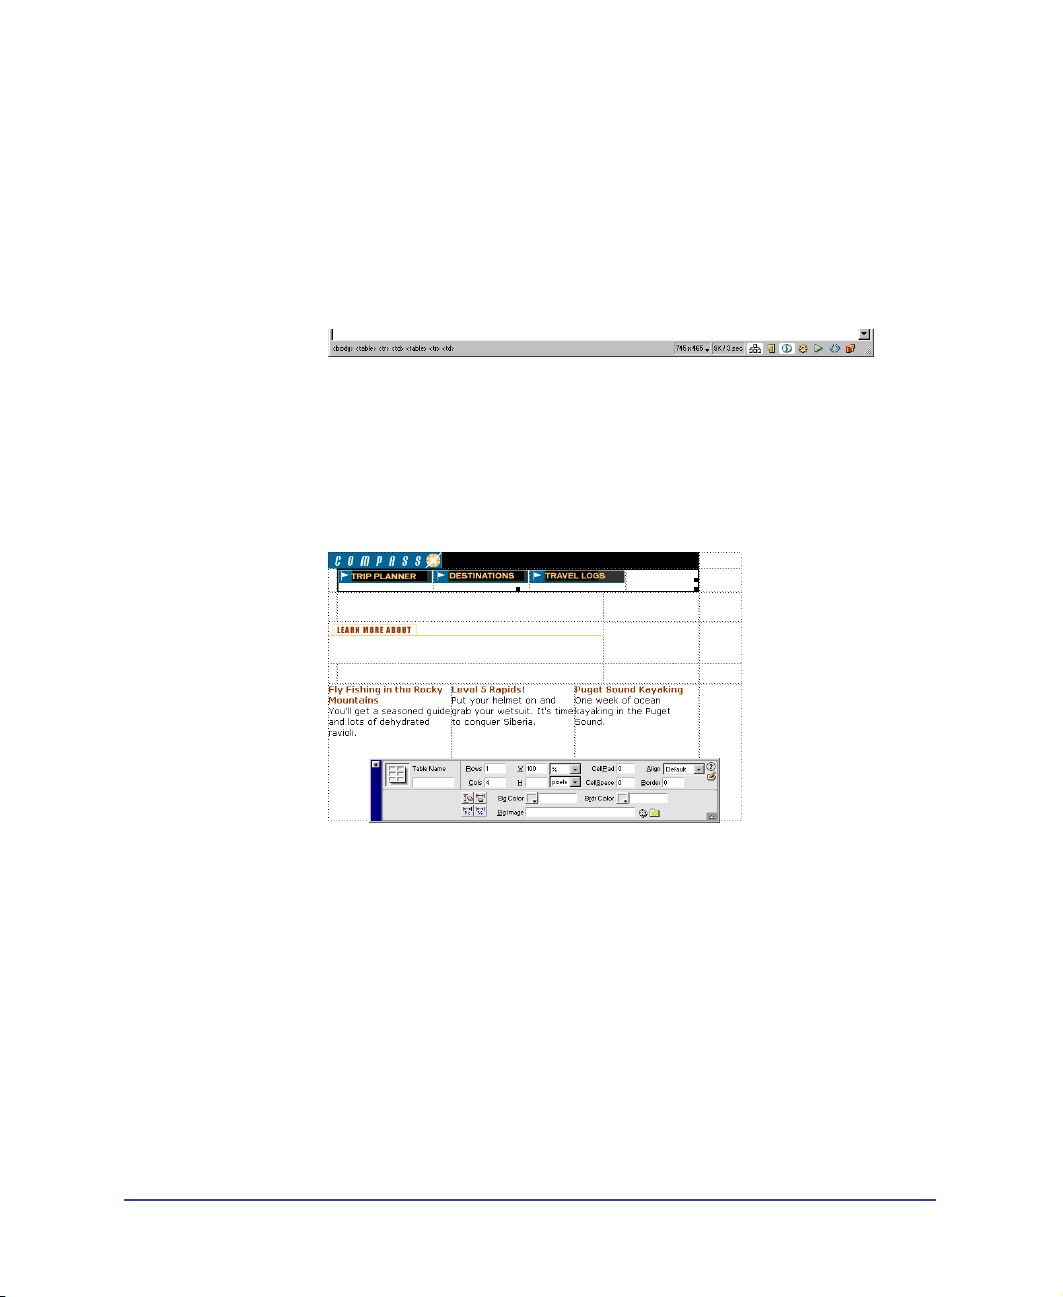
Selecting a table
Next you’ll adjust the space in the navigation button table. The easiest way to
select a table in Standard view is by using the tag selector, which displays HTML
tags of elements in the document.
You’ll use the tag selector to select the table containing the navigation buttons.
1 Click in the cell that contains the Trip Planner image.
Notice the tag selector at the bottom left of the Document window.
Note: The tags in your tag selector may vary based on the number of tables you created
while in Layout view.
2 In the tag selector, click the rightmost <table> tag.
In the Document window a border appears around the navigation button table,
and the Property inspector now reflects properties for a table.
Set table properties
Now you’ll use the table Property inspector to clear the extra space in the
navigation buttons table and to add a background color in the table.
1 In the Property inspector, click the Clear Row Heights icon. It’s the top left
button in the lower half of the Property inspector.
The extra space is removed from the table.
2 Still in the Property inspector, click the Bg Color color box icon, then use the
eyedropper to select the color black.
The black background color is applied to the navigation buttons table.
Dreamweaver Tutorial 51
Page 52
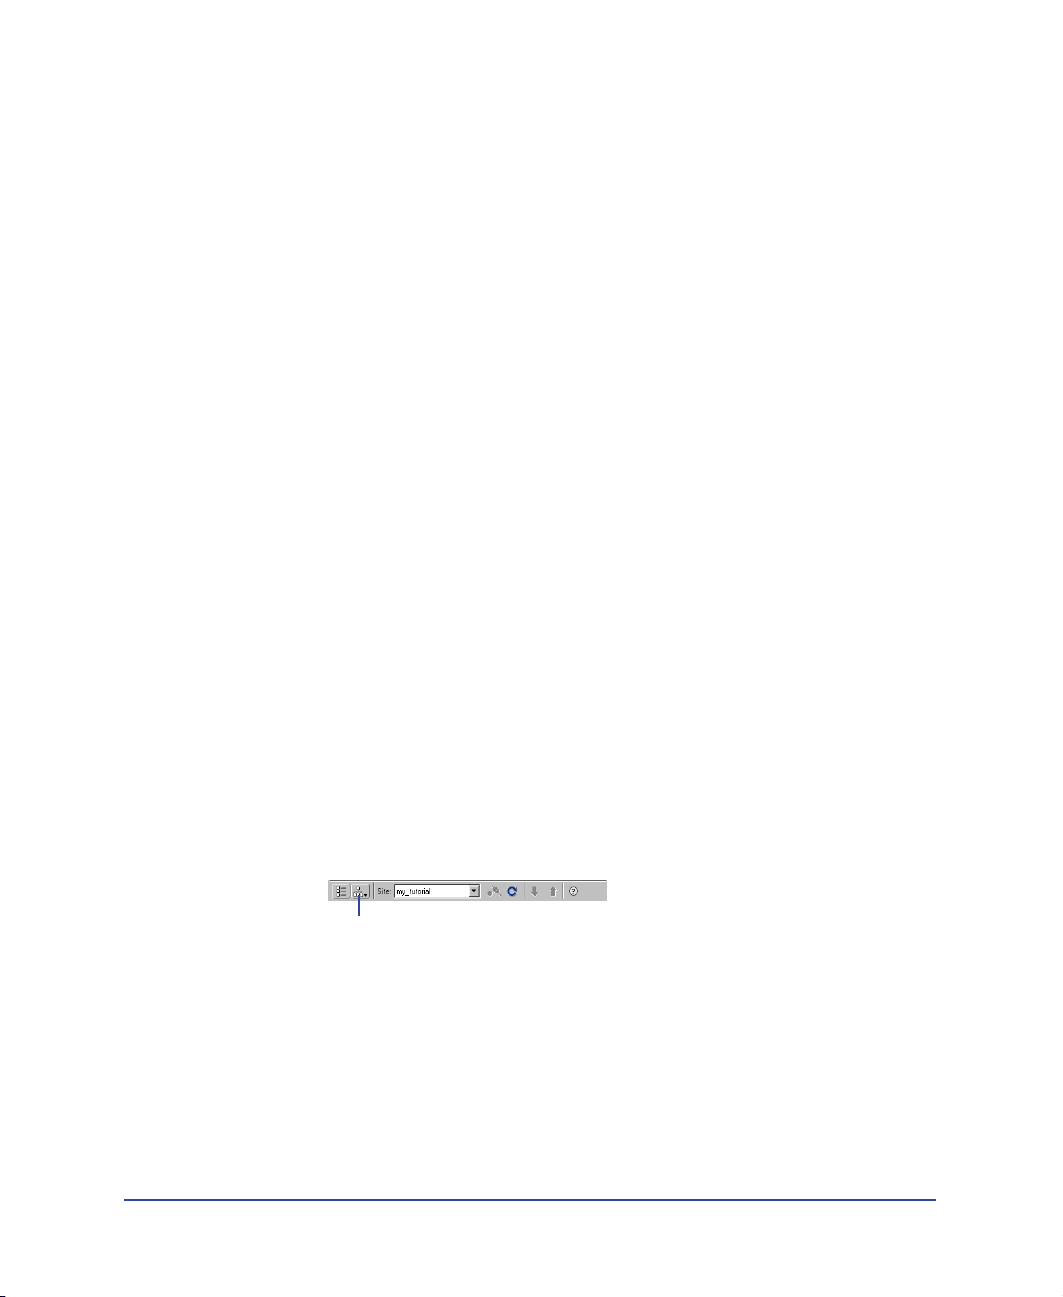
Add cell padding
Next, you’ll make changes to the cells that contain text. As you can see, the text is
too close the edges of the cells. You’ll add padding to the cells to leave room
between the text and cells.
1 Click in the first cell in the text description table.
2 In the tag selector, click the rightmost <table> tag to select the table.
3 In the Property inspector’s CellPad field, type 10 to add 10 pixels of space
between the text and the table cells.
4 Click anywhere in the Document window to see the changes.
5 Save your document.
View the site files
To see a high-level representation of the structure of a local site, you use the
Dreamweaver Site Map view. You can also use the site map to add new files to the
site; to add, remove, and change links; and to create a graphic file of the site that
you can export to and print from an image-editing application.
The site map always displays the home page for a site at the top of the map; below
the home page you can see which files the home page links to.
There are a number of ways to define a site’s home page. The easiest way to set a
home page is by using the context menu within the Site window.
1 Click the title bar of the Site window to make it active. (If the Site window is
not visible, choose Window > Site Files.)
2 In the Site window’s Local Folder list, right-click (Windows) or Control-click
(Macintosh) the my_CompassHome.html document; then in the context
menu, choose Set as Home Page.
3 Click the Site Map icon in the top left area of the Site window; then in the Site
Map pop-up menu, select Map and Files.
Site Map icon
Chapter 152
Page 53

The Site window now appears with two views of your local site: on the left is a site
map, which graphically represents the current structure of the Compass site (with
my_CompassHome.html as the home page), and on the right is a list of the local
folder’s contents.
The my_CompassHome.html page currently has no links. You’ll add links to this
page in the next section of this tutorial.
Leave the Site window open for now, so you can see how the site map updates as
you add links to the home page.
Dreamweaver Tutorial 53
Page 54
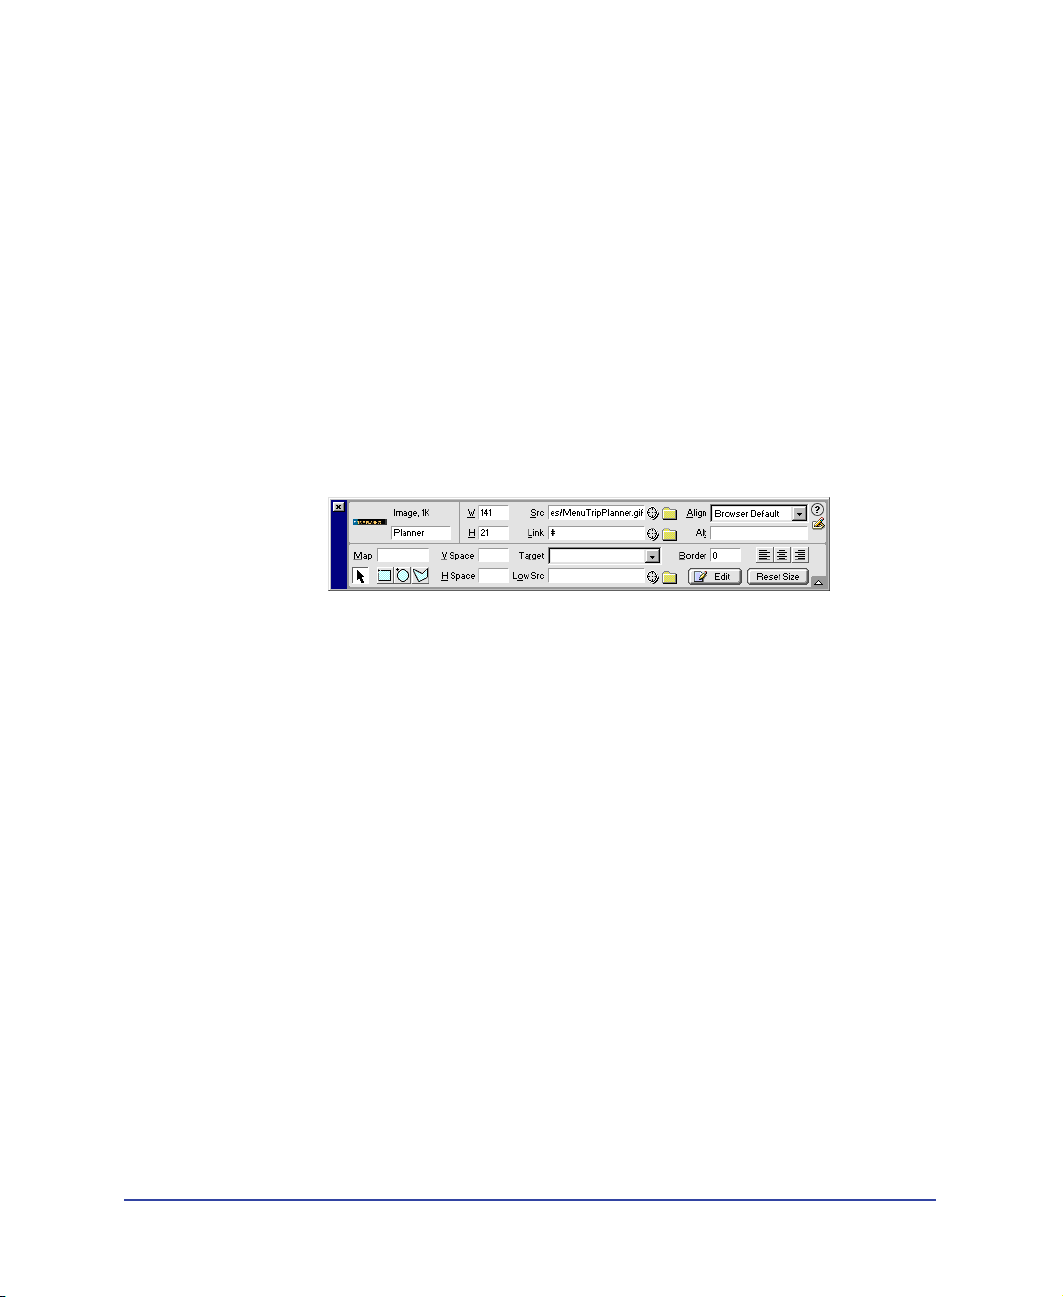
Link your documents
Images in the top area of the Compass home page guide visitors to specific pages
in the site. Now you’ll add links for the navigation buttons.
You’ll see that there are a number of ways to create links using Dreamweaver. First,
you’ll add a link from the Trip Planner image to the TripPlanner.html page using
the Property inspector.
1 In the Site window, double-click the icon for the my_CompassHome.html file
in either pane.
The my_CompassHome.html file becomes the active window.
2 In the Document window, click the Trip Planner image once to select it.
3 Choose Window > Properties to open the Property inspector if it isn’t
already open.
The Property inspector displays information about the selected image.
Note: The Link field contains a number sign (#), often referred to as a null or “dummy”
link, created when you inserted the rollover image. Don’t remove this character. It will
soon be replaced with the file name of the document you link to.
4 In the Property inspector, click the folder icon to the right of the Link field.
5 In the Select File dialog box, browse to the Compass_Site folder and then to
DW4_TripPlanner.html; click Select (Windows) or Open (Macintosh) to
select the file to open when the Trip Planner button is clicked.
The file name appears in the Link field of the Property inspector. Now
you’ll add a link to the Destinations image using the Property inspector and
the Site window.
6 Click the title bar of the Site window to make it active, or choose Window >
Site Files. Resize your Document window, if necessary, so that you can position
the left side of the Document window and the Site window side by side.
7 In the Document window, click the Destinations image to select it.
Chapter 154
Page 55

8
In the Property inspector, click the Drag to File icon (located to the right of the
Link field), then drag the pointer to the Site window; in the Local Folder List,
point to the file DW4_Destinations.html.
The file name appears in the Link field in the Property inspector for the
products image.
9 Click the Site Map icon in the Site window. The site map updates to reflect the
link you added.
A plus (+) sign next to any file in the site map indicates that the file contains
links to other documents. Click the plus sign to expand the site map to display
the associated files; click the minus (–) sign to collapse the site map.
Next, you’ll add a link for the Travelogs image.
10 In the Document window, click the Travelogs image to select it.
11 In the Property inspector, drag the Point-to-File icon to the Site window, and
point to the file DW4_Travelog.html.
12 Choose File > Save to save the changes you’ve made to the home page.
Dreamweaver Tutorial 55
Page 56
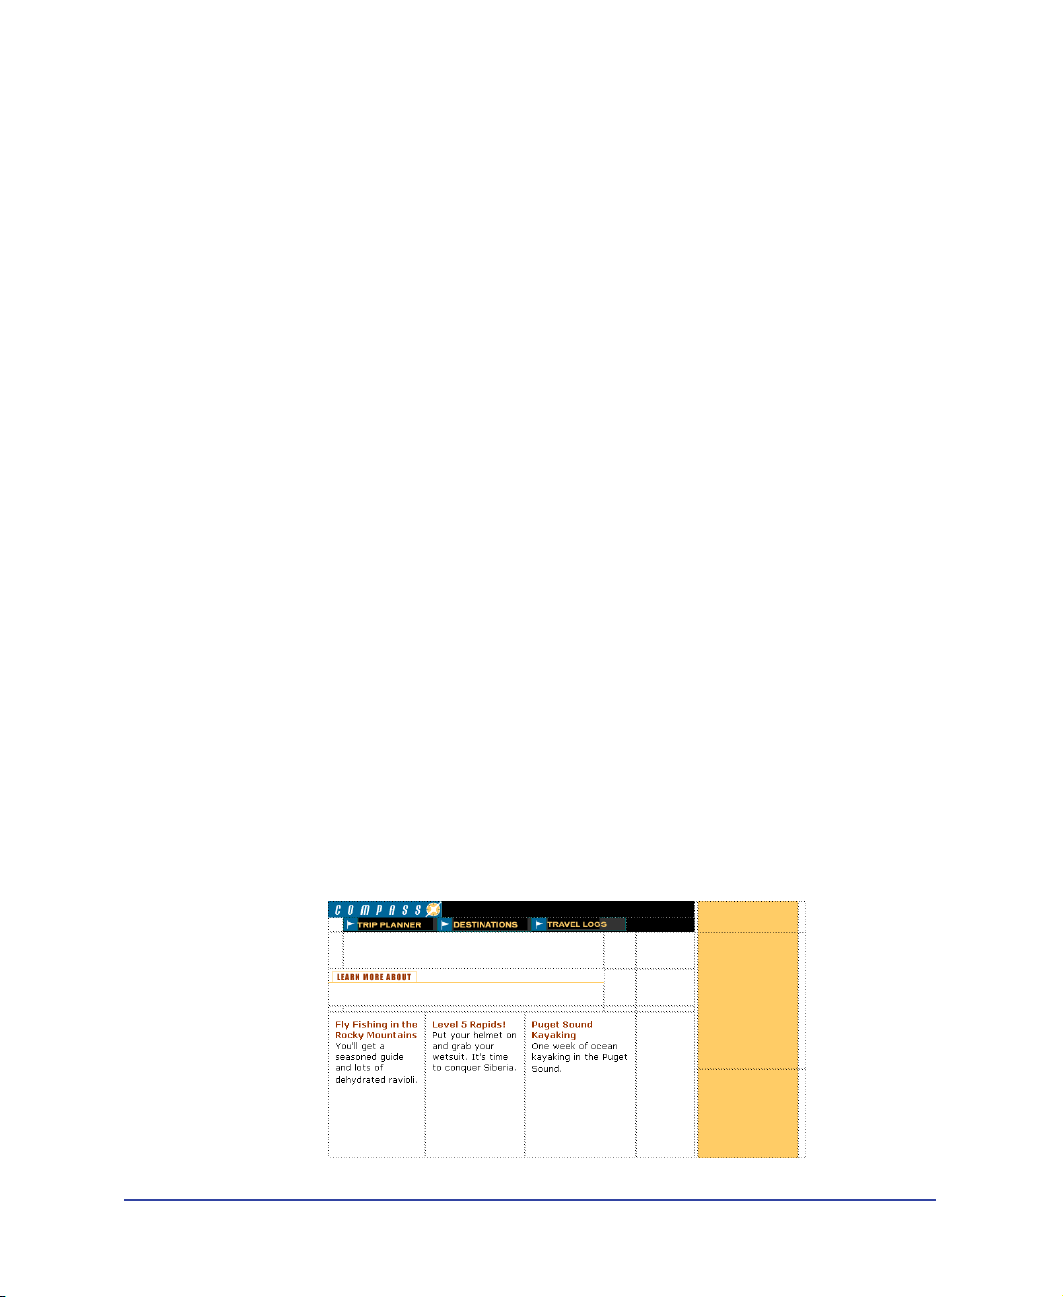
Test your page
You can’t test your links in Dreamweaver, you must check your links in a browser
to make sure the pages operate as you expect.
1 Press F12 to preview the page in a browser.
Click the navigation buttons to check your links. Click your browser’s back
button to return to your home page.
2 When you’re finished testing your page, choose File > Close to close the page.
Use the Assets panel
The Assets panel lets you view your site assets such as images, HTML colors,
links, Flash movies, other types of movies, scripts, templates, and library items.
You can view all your site assets in one place and then easily add content to your
page directly from the panel.
Now you’ll learn how to use the Assets panel to add assets to a page.
Select a new document
So you don’t need to create additional tables in your home page, this tutorial
includes an HTML file that is similar to the home page you created; it includes a
new table cell on the right side of the document.
To start this part of the tutorial do one of the following:
• If you’re continuing the tutorial from the previous section, choose File > Open
then select DW4_CompassHome2.html.
• If you’re starting the tutorial in this section, choose Site > Open Site, then in
the Sites list select Tutorial - Dreamweaver to open a defined site. In the
Document window’s main menu choose File > Open; in the dialog box that
appears, select DW4_CompassHome2.html.
The DW4_CompassHome2.html file opens.
Chapter 156
Page 57

Asset options
View site assets
Begin by opening the Assets panel.
1 Open the Assets panel by doing one of the following:
• Choose Window > Assets.
• Click the Show Asset icon in the Launcher Bar.
The Assets panel appears.
Assets preview area
Dreamweaver Tutorial 57
Page 58

Insert an image
You’ll start by using the Assets panel to insert two images in the page—a rock
climber image and a text image.
1 In the Assets panel, click the Images icon and make sure the Site radio button
located at the top of the Assets panel is selected so you can view all of the
images in the Compass site.
2 In the Names list, select the image icon for climber.jpg then drag it to the
middle table cell in the right side of the page.
3 Press the right arrow key (this deselects the climber image and places the
insertion point after the image), then press Shift+Enter (Windows) or
Shift+Return (Macintosh) to insert a line break.
4 In the Name list, select featureText.gif then drag it to the line break you just
created placing the featureText image under the climber image.
Insert a Flash movie
Now you’ll add a different type of asset. You’ll drag a Flash movie into the cell
below the navigation buttons.
1 Click the Flash icon in the Assets panel to view all the Flash files in the
Compass site.
2 In the Names list, click welcome.swf to select the Flash movie you’re inserting
in the document.
In the Assets panel’s preview area you see a placeholder for the Flash movie.
Chapter 158
Page 59

3
Click the Play button in the Assets panel’s preview area to view the Flash movie.
Play button
4 In the Names list, drag the Welcome.swf to the cell below the Trip Planner
navigation button.
A Flash move placeholder appears in the selected cell.
Apply a color using the Assets panel
Colors you apply to HTML elements, such as to text or as a background color,
are automatically added to the color category of the Assets panel. You can select
a color from the Assets panel and apply it to text in the same page or to other
pages in your site.
1 Place the insertion point after the rock climber image, then press Enter
(Windows) or Return (Macintosh) to add a new paragraph, then type Yosemite.
2 Double-click Yosemite to select the text.
3 In the Assets panel, click the Colors icon to view HTML colors in the
Compass site.
4 In the Value list, select the color icon for #993300 then drag it to the selected
text to apply the color.
Create a favorite assets list
Use the Assets panel to manage your assets. You can create your own group of
favorites assets in the Assets panel. Next, you’ll add the Compass logo and
navigation button image to your site Favorites list.
1 In the Assets panel, select the Images icon.
2 In the Name list, click compass_logo.gif to select it, then do one of the
following:
• Right-click (Windows) or Control-click (Macintosh) to use the context menu,
then select Add to Favorites.
• Click the Add to Favorites icon located in the lower right of the Assets panel.
You are alerted that the selected asset was added to your site’s Favorites list.
3 Click OK.
Dreamweaver Tutorial 59
Page 60

Add multiple images to favorites
Now, you’ll add the navigation button images to the favorites list. You can select
multiple images in the Assets panel, then add them to your favorites at one time.
1 In the Assets panel’s Images list click the first navigation button image
(MenuDestinations.gif).
2 Select the other navigation buttons by doing one of the following:
• Press Shift (Windows) and in the Images list click MenuTripPlanner_on.gif (the
last navigation button in the list) to select all of the navigation button images.
• Press Shift (Macintosh) and hold it while you select each of the navigation
button images.
3 Click the Add to Favorites icon.
4 Click OK to the alert message.
View favorite assets
You can view the assets you’ve added to your Favorites list, and use this view for
inserting assets in your document.
To view images you’ve added to the Favorites list, click the Favorites radio button
at the top of the Assets panel.
Insert Flash objects
Flash objects are small graphic SWF (Shockwave) files you can create while working
in Dreamweaver. You can create Flash Text and Flash Button objects. Using Flash
Text allows you to design Web pages that use nonstandard fonts without worrying
about which fonts visitors to your site have available on their computers. Flash
buttons are created from Flash templates that ship with Dreamweaver. You can
easily customize a template button and add it to your Web pages.
Chapter 160
Page 61

Create a Flash Text object
Now you’ll create a Flash Text object to use as a title in your home page.
1 In the Document window, place the insertion point above the image of the
rock climber.
2 In the Object panel, click the Insert Flash Text icon.
The Insert Flash Text dialog box appears.
3 In the Insert Flash Text dialog box, set the following options:
• For Font, select Verdana or choose one of your favorite fonts.
• For Size, type 18.
• For Color, click the color box, then use the eyedropper to select brownish color
of the heading text in the document.
• For Rollover Color, click the color box; then move the eyedropper to the
Document window and select the gold color in the table’s background.
• In the Text field, type Featured Destination.
• In the Save As field, type myText.swf.
4 Click OK to close the Insert Flash Text dialog box.
Dreamweaver Tutorial 61
Page 62

View the Flash Text object in the document
The Flash Text object appears in the document. You must play the Flash object to
see the text with its rollover effect.
1 If it isn’t already expanded, in the Property inspector click the expander
arrow to see all.
2 In the Flash Text Property inspector, click Play.
3 In the Document window, roll the pointer over the Flash Text object.
4 To stop playing the object, click Stop in the Property inspector.
Create a Flash button object
Now you’ll see how easy it is to add a Flash button to a document. You’ll create a
Flash button, and add it below the climber image.
1 In the Document window, place the insertion point where you want the object
to appear, below the image of the rock climber, then in the Objects panel, click
the Insert Flash Button icon.
The Insert Flash Button dialog box appears.
Chapter 162
Page 63

2
In the Insert Flash Button dialog box, set the following options:
• In the Style list, select Beveled Rect-Bronze.
• For Button Text, type More Details.
• For Font, select Verdana, or choose one of your favorite fonts.
• For Size, type 11.
• Click Apply to see the Flash button in the document.
• In Save As, type myButton.swf
3 Click OK to close the dialog box.
The Flash Button object appears in the document.
View the Flash button in the document
The Flash button you inserted has a rollover effect, now you’ll play the button to
see how it looks.
1 In the Flash button Property inspector, click Play to play the button in
the document.
2 In the Document window, roll the pointer over the object to see the Flash
button’s rollover effect.
3 To stop playing the object, click Stop in the Property inspector.
Create a template
You can use templates to create documents that have a common structure and
appearance. Templates are useful when you want to make sure that all of the pages
in a site share certain characteristics.
Once you apply a single template to a group of pages, you can change information
on the group of pages by editing the template and then reapplying it to those
pages. While elements unique to each page (such as text describing an item for
sale) remain unchanged, common template elements (such as navigation bars) are
updated on all of the pages that use the template.
The Compass trip destination page links to several travel detail pages that describe
places site viewers may be interested in traveling to. You’ll use the design of an
existing travel detail page to create a template. Using a template ensures that your
travel information pages will have an identical layout and format.
Dreamweaver Tutorial 63
Page 64

Create a template from an existing page
In this section, you’ll create a template from an existing travel page and then use
the template to create a new travel page.
1 In the Site window’s Local Folder list, double-click the icon for
DW4_TravelDetail_surf.html to open the file.
2 Choose File > Save as Template.
The Save As Template dialog box appears.
The existing templates, travelDetail and travelDetail_v2, were created for and
applied to the completed Compass site travel pages. You’ll create your own
version of this template.
3 In the Save As field, change the template name: type myTravelDetail and
click Save.
In the Document window a new document replaces the DW4_TravelDetail
document. In the document title bar, notice the document contains a Template
identifier <<Template>>, and a Dreamweaver template file extension (.dwt).
Modify the template
At this point, the new template is the same as the page from which you saved the
template. A template contains both locked and editable regions. Locked regions
can be edited only inside the template itself. Editable regions are placeholders for
content that is unique to each page the template is applied to. In your template,
the logo and navigation buttons aren’t editable; the destination’s title, related
banner ad, and destination description are editable.
Your first step is to create editable regions in the template.
1 In the myTravelDetail.dwt template in the Document window, click the
topmost Flash placeholder to select it; this movie displays the destination’s title.
Chapter 164
Page 65
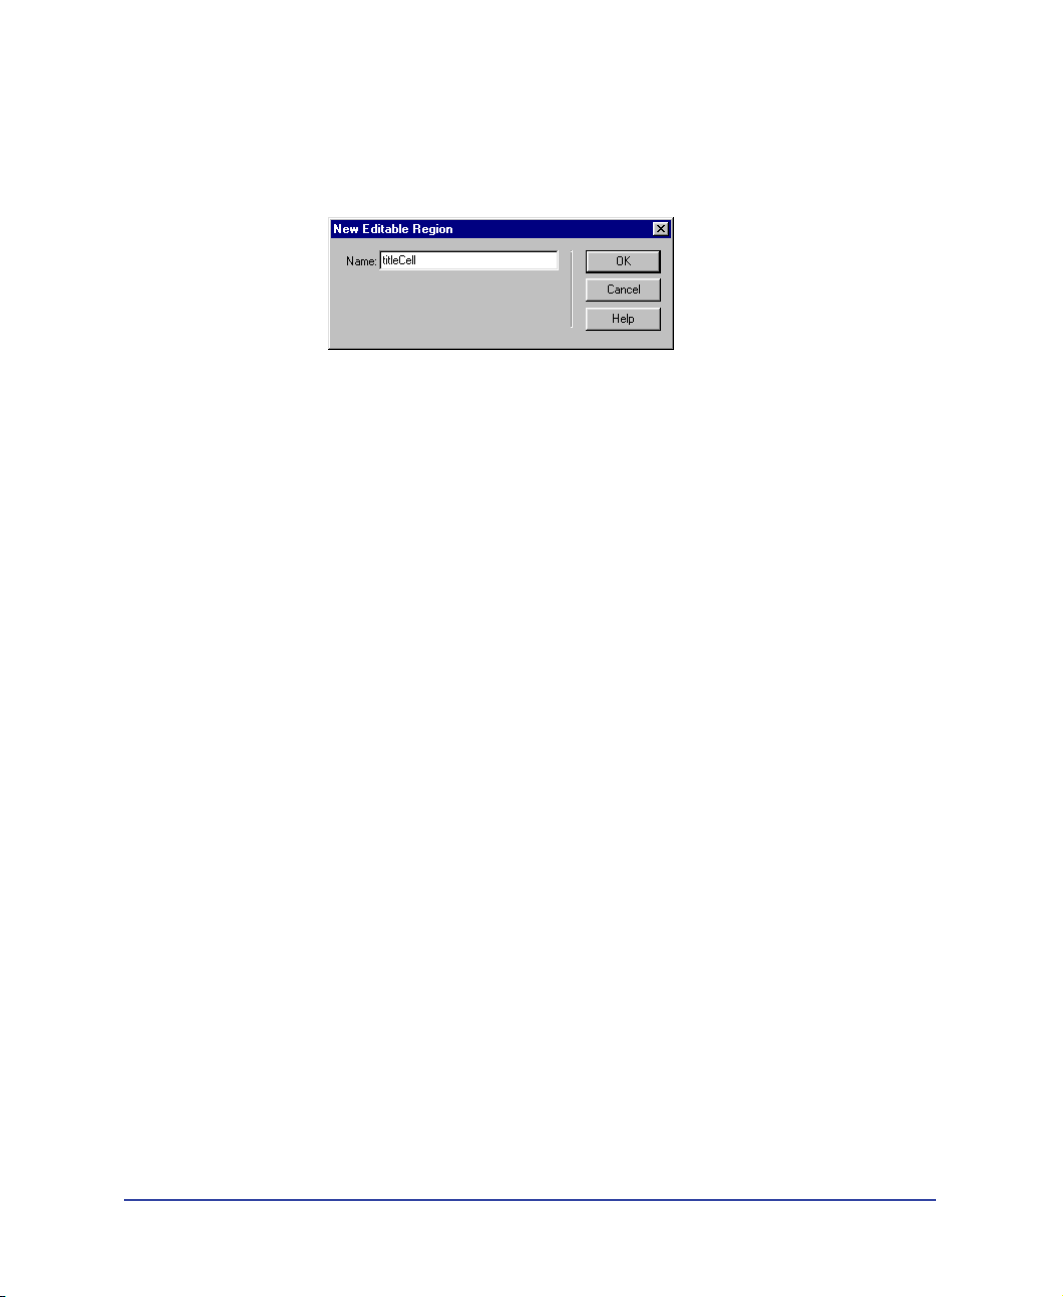
2
Choose Modify > Templates > New Editable Region.
The New Editable Region dialog box appears.
3 In the Name field, type titleCell as the name for this region of the template.
4 Click OK.
A template region is created. Notice the tab that contains the template region’s
name. The placeholder is also surrounded by a light-blue line that identifies the
boundaries of the editable area.
5 In the Document window, select the Flash banner placeholder, then choose
Modify > Templates > New Editable Region to make this an editable region in
the template.
6 In the Name field in the New Editable Region dialog box, type adCell and
then click OK.
The template area identifiers appear in the document.
7 In the Document window, select all of the text in the first cell below the banner
ad, and then choose Modify > Templates > New Editable Region to make this
an editable area of the template.
8 In the Name field in the New Editable Region dialog box, type textCell1
and click OK.
9 In the Document window, select all of the text in the second cell below the
banner ad, and then choose Modify > Templates > New Editable Region to
make this an editable section of the template.
10 In the Name field in the New Editable Region dialog box, type textCell2
and click OK.
11 Choose File > Save to save the template file.
Dreamweaver Tutorial 65
Page 66

Apply the template to a new page
Now that you’ve set the editable regions in your template, you’ll use the template
to create a travel detail page for a trip to New Zealand.
1 Choose File > New from Template to open a new document.
2 In the Templates list in the Select Template dialog box, select myTravelDetail,
then click Select to select the template you want to apply to the new page.
The template is applied to the new document.
This page contains the same regions and content as the template you created.
Note: If you move the mouse pointer to a noneditable region of this template, such as
the logo or navigation button areas, the mouse pointer changes to indicate that you
can’t access the locked region.
3 Save your document, and name the file myTravelDetail_mtnBike.html.
Chapter 166
Page 67

Editing a template-based page
Now you’ll update the myTravelDetail_mtnBike.html document, updating the
editable regions with assets and text that refer to travel details about mountain
biking in New Zealand.
1 In the Document window, click the Flash placeholder in the titleCell region to
select the object you want to replace.
2 In the Property inspector’s File field, click the folder icon; then in the dialog
box that appears, navigate to Assets/swfs and select text_mtnBike.swf.
3 In the adCell region, click the Flash placeholder to select the object you
want to replace.
4 In the Property inspector’s File field, click the folder icon; then in the dialog
box that appears, navigate to Assets/swfs then select bikeAd.swf.
5 Choose File > Open, then navigate to DW4_MtnBikeText.txt to open a
document that contains the text for this destination.
6 In DW4_MtnBikeText.txt, copy the paragraph of text under Cell 1; in the
myTravelDetail_mtnBike document replace the current text in the textCell1
region by selecting it, then pasting the copied text.
7 In DW4_MtnBikeText.txt, copy the paragraph of text under Cell 2; in the
myTravelDetail_mtnBike document replace the current text in the textCell2
region by selecting that text then pasting the copied text.
The travel details information is updated.
8 Close DW4_MtnBikeText.text.
9 In the Title field of the toolbar, type New Zealand biking.
10 Save your document.
Dreamweaver Tutorial 67
Page 68

Check your site
Before posting your pages to a remote server you should always check your files.
So far you’ve learned how to test your pages by previewing them in a browser, now
you’ll learn about other Dreamweaver tools available for creating a follow-up for a
file and for testing your pages.
First, you’ll learn how to add a Design Note to a file, and then you’ll see how to
run a report on files in your site.
Create a Design Note
Design Notes are a great way to manage your site by inserting comments in
your document’s Site window. Use Design Notes to schedule production work,
place follow-ups on files, or to communicate file or site details with team
members. Next you’ll create a Design Note to follow-up on making a change
to one of your site pages.
1 In the Dreamweaver Site Window (Site > Site Files), in the Local Folder pane
select DW4_Destinations.html.
2 In the main menu choose File > Design Notes.
The Design Notes dialog box appears.
3 In the Basic Info tab, in the Status pop-up menu select Needs Attention.
4 Click the calendar icon to add the date in the Notes field.
5 Click in the Notes field, then type Need to create Devil’s Tower page and add
links to documents.
6 Select the Show When File Is Opened option so the Design Note automatically
opens when this page is opened.
Chapter 168
Page 69
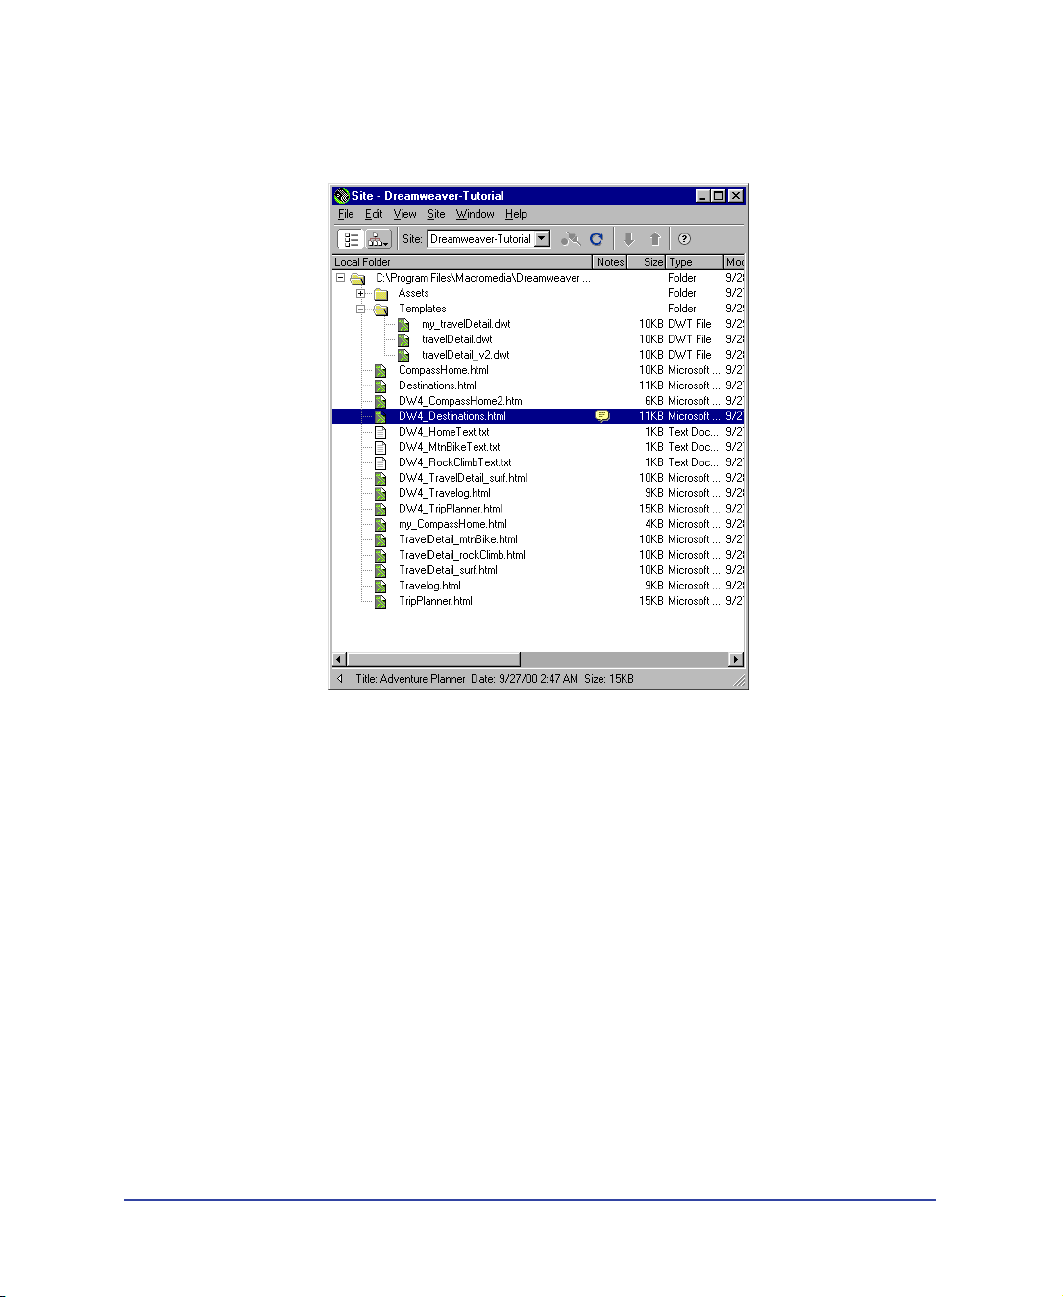
7
Click OK to close the dialog box.
A Design Note icon appears in the Notes column in the Local Folder pane.
8 In the Site Window, select DW4_Destinations.html and open it.
The document and its associated Design Note opens; you can easily see what
actions are required for this file.
Dreamweaver Tutorial 69
Page 70

Sitewide reports
You can run site reports to check HTML file conditions and to manage workflow.
Run reports at the document, folder, or site level. You’ll run a report to see if you
have any untitled documents in your site.
1 Choose Site > Reports.
The Reports dialog box appears.
2 In the Reports dialog in the Report On pop-up menu, select Entire Local Site;
then under HTML Reports, select Untitled Document.
3 Click Run to run a report.
A Results dialog box appears listing any documents without a page title.
4 In the File list click the file to select it.
The Detailed Description field updates with detailed warning information.
5 Click Open File to open the file and correct the problem.
The file opens.
6 In the Title field of the toolbar, type Featured Destinations.
7 Save and close the file when you’re done.
8 Close the Results dialog box.
The next steps
Congratulations, you’ve completed the Dreamweaver tutorial. You know how to
design pages, add content, and test your pages. If you want, you can continue
creating pages and links for the Compass site. You know how to do everything
required to complete the pages (or you can use the completed pages as a
reference). After you’ve updated the pages, preview your pages to test the rollovers
and links to make sure they work.
If you want to learn more about using Dreamweaver, try the Dreamweaver
lessons; in the Dreamweaver main menu choose Help> Lessons then select one
of the lessons.
If you have a copy of both Dreamweaver and Fireworks, and want to learn how to
work with these tools together, see the Dreamweaver and Fireworks tutorials.
If you’re interested in learning more about using HTML code, JavaScript code, or
cascading style sheets, check out the Reference materials that ship with
Dreamweaver. Choose Windows > Reference.
Chapter 170
Page 71

CHAPTER 2
Dreamweaver Basics
.............................................................................................................
Getting started in Macromedia Dreamweaver is as easy as opening an existing
HTML document or creating a new one. However, to get the most out of your
Dreamweaver experience, you should understand the basic concepts behind the
Dreamweaver work area and how to choose options, use inspectors and panels,
and set preferences that fit your work style best.
2
71
Page 72

About the Dreamweaver work area
The Dreamweaver work area accommodates different styles of working and levels
of expertise. Here are some of the most commonly used components:
Toolbar
Objects panel
Tag selector
Context menu
Document
window
Launcher bar
Property
inspector
• The Document window displays the current document as you create
and edit it.
• The Launcher bar at the bottom right of the Document window contains
buttons for opening and closing your most frequently used inspectors and
panels. The icons on the Launcher bar also appear on the Launcher, a floating
panel that you can choose from the Window menu. You can specify which
icons appear in the Launcher bar and Launcher by setting Panels preferences.
• The toolbar contains buttons and pop-up menus that let you view the
Document window in different ways, set view options, and access some
common operations, for example, previewing in a browser.
• Context menus let you quickly access useful commands pertaining to the
current selection or area. To display a context menu, right-click (Windows) or
Control-click (Macintosh) an item in a window.
• The Objects panel contains buttons for creating and inserting various types of
objects, such as images, tables, layers, and frames. You can also switch between
Standard and Layout view and access the Layout view drawing tools.
• The Property inspector displays properties for the selected object or text, and
lets you modify those properties. (Which properties appear in the inspector
depend on the object or text selected.)
Chapter 272
Page 73

• Dreamweaver provides many other inspectors, panels, and windows not shown
here, such as the History panel and the Code inspector. Many of these items
can be “docked”—that is, you can combine windows, inspectors, and panels
into tabbed windows.
To open Dreamweaver windows, inspectors, and panels, use the Window menu. A
check mark next to an item in the Window menu indicates that the named item is
currently open (though it may be hidden behind other windows). To display an
item that isn’t currently open, choose the item name from the menu.
If a panel or inspector is checked but does not appear, choose Window >
Arrange Panels.
About the different views in Dreamweaver
Dreamweaver allows you to work in your document in several ways—using
Design view, using Code view, or using a combined view that displays both the
design and code of the document. You can change the view in which you’re
working by selecting a view in the Dreamweaver toolbar. For more information,
see “Using the toolbar” on page 78.
Working with the Code view
As you create and work with documents, Dreamweaver automatically generates
their underlying HTML source code. To examine or edit this code, use one of the
Dreamweaver code editors: the Code view in the Document window or the Code
inspector. For more detailed information, see “Using the Code view (or Code
inspector)” on page 330.
Working with the Design view
The Dreamweaver Design view displays a visual representation of your document,
rather than the underlying code. When you work in the Design view, there are
two views in which you can design—Layout view and Standard view. You select
these views in the Objects panel under View.
In Layout view you can design a page layout and insert graphics, text, and other
media. For more information, see “Designing Page Layout” on page 167.
Work in Standard view to insert layers, create frame documents, create tables, or
to use other features that aren’t available in Layout view. To work in Standard view,
click the Standard View icon in the Objects panel.
Dreamweaver Basics 73
Page 74

About the Document window
In Design view, the Document window displays the current document
approximately as it appears in a Web browser. The title bar of the Document
window displays the page title and, in parentheses, the name of the root folder, the
file name, and an asterisk if the file contains unsaved changes.
The status bar, found at the bottom of the Document window, provides
additional information about the document you are creating.
Document size and
estimated download time
Tag selector
Window Size
pop-up menu
Launcher bar
The tag selector displays the HTML parent tags that control selected text or
objects. Click one of these tags to highlight its contents in the Document window.
Click <body> to select the whole body of the document.
The Window Size pop-up menu lets you resize the Document window to predetermined
or custom dimensions. See “Resizing the Document window” on page 75.
To the right of the Window Size pop-up menu, you’ll see the estimated document
size and download time of the page, including all dependent files such as images
and other media files. See “Checking download time and size” on page 509.
The Launcher bar appears along the bottom of the Document window. By
default, the Launcher bar buttons open the Site window, the Assets panel, the
HTML Styles panel, the CSS Styles panel, the Behaviors panel, the History panel,
and the Code inspector. To specify which buttons appear in the Launcher bar (and
the floating Launcher), see “Customizing the Launcher bar” on page 77.
Chapter 274
Page 75

Resizing the Document window
The Document window status bar displays the window’s current dimensions (in
pixels). If you click this window size, Dreamweaver displays the Window Size
pop-up menu, which lets you set the window size to fit any of several common
monitor sizes. To design a page that looks its best at a specific size, you can adjust
the Document window to any of the predetermined sizes, edit those
predetermined sizes, or create new sizes.
Note: The window size given reflects the inside dimensions of the browser window,
without borders; the monitor size is listed in parentheses. For example, you would
use the size “536 x 196 (640 x 480, Default)” if your visitors are likely to be using
Microsoft Internet Explorer or Netscape Navigator in their default configurations on a
640 x 480 monitor.
To resize the Document window to a predetermined size:
Choose one of the sizes from the pop-up menu at the bottom of the
Document window.
To change the values listed in the Window Size pop-up menu:
1 Choose Edit Sizes from the Window Size pop-up menu.
2 Click any of the width or height values in the Window Sizes list and type
a new value.
To make the Document window adjust only to a specific width (leaving the
height unchanged), select a height value and delete it.
3 Click the Description field to enter descriptive text about a specific size.
4 Click OK to save the change and return to the Document window.
Dreamweaver Basics 75
Page 76

To add a new size to the Window Size pop-up menu:
1 Choose Edit Sizes from the Window Size pop-up menu.
2 Click the blank space below the last value in the Width column.
3 Enter values for Width and Height. To set the Width or Height only, simply
leave one field empty.
4 Click the Description field to enter descriptive text about the size you added.
5 Click OK to save the change and return to the Document window.
For example, you might type SVGA or average PC next to the entry for an
800 x 600 pixel monitor, and 17-in. Mac next to the entry for an 832 x 624
pixel monitor. Note that most monitors can be adjusted to a variety of pixel
dimensions.
Minimizing and restoring windows and panels (PC users only)
You can minimize and restore all open Dreamweaver windows—Document
windows, inspectors, and panels.
• To minimize all Dreamweaver windows, press Shift+F4, or select Window >
Minimize All.
• To restore all Dreamweaver windows, press Alt+Shift+F4. If you have at least
one window open, you can select Window > Restore All to restore any
additional window.
Setting Status Bar preferences
Use Status Bar preferences to set options for the status bar at the bottom of the
Document window. To display these preferences, choose Edit > Preferences and
select Status Bar.
Window Sizes lets you customize the window sizes that appear in the status bar’s
pop-up menu. See “Resizing the Document window” on page 75.
Connection Speed determines the connection speed (in kilobits per second) used
to calculate the download size. The download size for the page is displayed in the
status bar. The download size for images and other assets is displayed in the
Property inspector when an image is selected.
Show Launcher in Status Bar displays the Launcher bar at the bottom of the
Document window. The buttons in the Launcher bar launch windows, panels, and
inspectors. The Launcher contains the same buttons (with text) and functions. For
more information, see “Customizing the Launcher bar” on page 77.
Chapter 276
Page 77

Using the Launcher bar
The Launcher bar contains buttons for opening and closing various panels,
windows, and inspectors. You can also display the Launcher, a floating panel with
identical buttons.
To show or hide the Launcher:
Choose Window > Launcher.
If the Launcher bar does not appear at the bottom of the Doc window, turn on
the Show Launcher in Status Bar option in Status Bar preferences.
To switch the Launcher orientation from horizontal to vertical:
Click the orientation icon at the lower right.
For information on the items that the default Launcher buttons open, see “About
the Site window” on page 108, “Managing and Inserting Assets” on page 221,
“Using HTML styles to format text” on page 244, “Using the CSS Styles panel”
on page 255, “Using the Behaviors panel” on page 436, “About automating tasks”
on page 160, and “Using the Code view (or Code inspector)” on page 330.
Customizing the Launcher bar
Use Panels preferences to specify which items appear in the Launcher bar
and Launcher.
To specify which buttons appear in the Launcher bar and Launcher:
1 Choose Edit > Preferences, then select Panels from the category list.
The items selected to display in the Launcher and Launcher bar are listed in the
Show in Launcher box.
2 To add an item to the Launcher and Launcher bar, click the Plus (+) button.
3 To remove an item from the Launcher and Launcher bar, highlight the item
and click the Minus (-) button.
4 To change the order of the items in the Launcher or Launcher bar, select an
item in the list and click an arrow button.
For example, to move an item to the right in the Launcher, move the item
down in the list.
5 Click OK.
The Launcher and Launcher bar change to show the items you specified.
Dreamweaver Basics 77
Page 78

Using the toolbar
The Dreamweaver toolbar contains buttons that let you toggle between different
views of your document quickly: Code, Design, and a third view that comprises
both Code and Design view. The toolbar also contains some common commands
related to your view selection and your document’s status. The Options menu
items (button located on the right) change depending on the view you select.
Code View
Design View
Code and Design View
Document Title
File Status
Preview in browser
Reference
Refresh Design View
Options Menu
Code Navigaton
• To view or hide the toolbar, choose View > Toolbar.
• To display code only in the Document window, click the Show Code
View button.
• To display a view containing both Code and Design views, click the Show
Code and Design Views button.
When you select this view, the option Design View on Top becomes available
in the View menu. Use this option to specify which view appears at the top of
your Document window.
• To display the Design view only, click the Show Design View button.
You can also access these views through the View menu.
• To enter a title for your document, use the Title field.
If your document already has a title, it appears in this field.
• To display the File Status pop-up menu, click the File Status Menu button.
• To preview or debug your document in a browser, click the Preview/Debug in
Browser button and choose one of the browsers listed in the pop-up menu.
To add or change the browsers listed in the menu, choose Edit Browser List.
• To refresh your Design view, click the Refresh Design View button.
• To access the Reference panel, click the Reference button.
The Reference panel contains reference information on HTML, CSS, and
JavaScript code. For more information, see “Using the Dreamweaver Reference
panel” on page 328.
Chapter 278
Page 79

• To navigate through your code, click the Code Navigation button. For more
information, see “Debugging JavaScript Code” on page 473.
• To access the Options menu, click the Options Menu button.
The Options menu lists different options for each view. For more information
on Code view options, see “Using the Code view (or Code inspector)” on page
330. For more information on Design view options, see “Designing Page
Layout” on page 167.
Note: When the Document window displays both views, you can access either view’s
Options menu by clicking in the desired view, then clicking the Options menu.
Using context menus
Dreamweaver makes extensive use of context menus, which let you quickly access
the most useful commands and properties related to the object or window you’re
working with. Context menus list only those commands that pertain to the
current selection.
To use a context menu:
1 Right-click (Windows) or Control-click (Macintosh) the object or window.
The context menu for the selected object or window appears.
2 Choose the command from the context menu and release the mouse button.
Dreamweaver Basics 79
Page 80
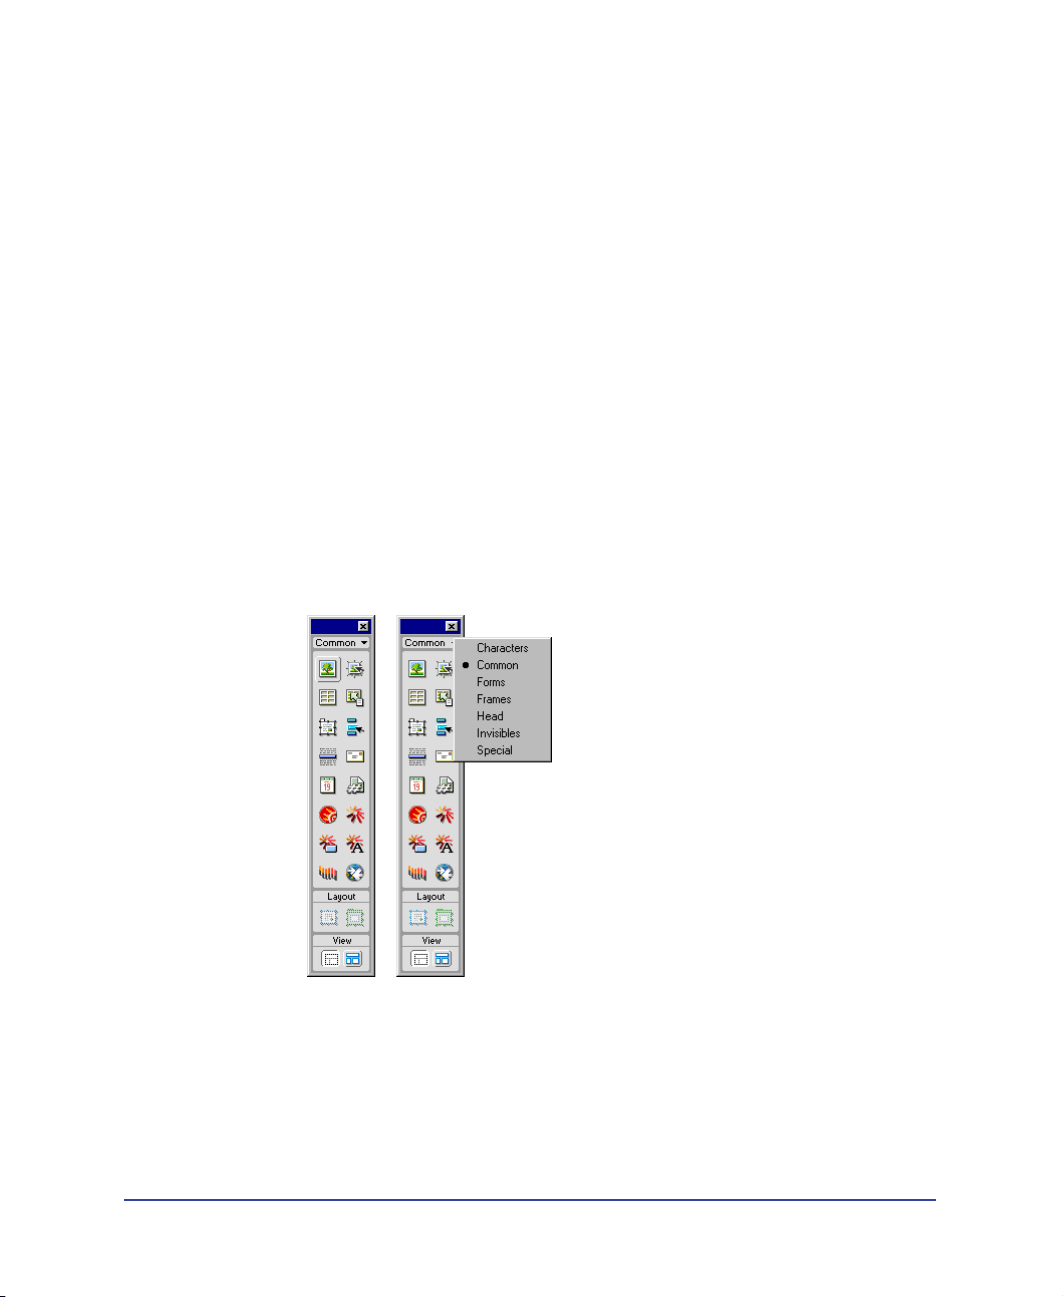
Using the Objects panel
The Objects panel contains buttons for creating and inserting objects such
as tables, layers, and images. To show or hide the Objects panel, choose
Window > Objects.
To insert an object:
Click the corresponding Objects panel button or drag the button’s icon into the
Document window. Depending on the object, a corresponding object-insertion
dialog box appears, prompting you to select or insert the file or object you want.
To bypass this dialog box and insert an empty placeholder object:
Hold down the Control (Windows) or Option (Macintosh) key while inserting
the object. (For example, to insert a placeholder for an image without specifying
an image file, hold down Control or Option and click the Image button.)
Note: This does not bypass all dialog boxes. Certain objects such as navigation bars,
layers, Flash buttons, frames, and so on, do not insert placeholders.
The Objects panel contains seven categories by default: Characters, Common,
Forms, Frames, Head, Invisibles, and Special. It also contains buttons that change
the view: Standard and Layout.
Chapter 280
Page 81

• The Characters category contains special characters such as the copyright
symbol, curved quotation marks, and trademark symbols. Note that these
symbols may not display correctly in browsers (Navigator and IE) older than
versions 3.0.
• The Common category contains buttons for creating and inserting the most
commonly used objects, such as images, tables, and layers.
• The Forms category contains buttons for creating forms and inserting
form elements.
• The Frames category contains common frameset structures.
• The Head category contains buttons for adding various head elements, such as
meta, keywords, and base tags.
• The Invisibles category contains buttons for creating objects that are not visible
in the browser window, such as named anchors. Choose View > Visual Aids >
Invisible Elements to display icons that mark the locations of these objects.
Click invisible-element icons in the Document window to select the objects
and change their properties. See “About invisible elements” on page 156.
• The Special category contains buttons for inserting special items such as Java
applets, plugins, and ActiveX objects. For more information, see .
• The View section of the Objects panel lets you choose between Standard
(default) or Layout view. If Layout view is selected, you can also select the
Layout tools—Draw Layout Cell and Draw Layout Table. For more
information, see “Designing Page Layout” on page 167.
To switch categories, use the pop-up menu at the top of the panel. You can modify
any object in the panel or create your own objects; see “Modifying the Objects
panel” on page 515 and “Creating a simple object” on page 516. For information
on each panel’s options, see the related topics in Dreamweaver Help.
Some of the General preference settings affect the Objects panel. To modify these
preferences, choose Edit > Preferences and then select General.
• When you insert objects such as images, tables, scripts, and head elements, a
dialog box prompts you for additional information. You can suppress these
dialog boxes by turning off the Show Dialog When Inserting Objects option or
by holding down the Control key while creating the object. When you insert
an object with this option off, the object is given default attribute values. Use
the Property inspector to change object properties after inserting the object.
• The Objects panel preference lets you display the contents of the Objects panel
as text only, icons only, or text and icons.
Dreamweaver Basics 81
Page 82
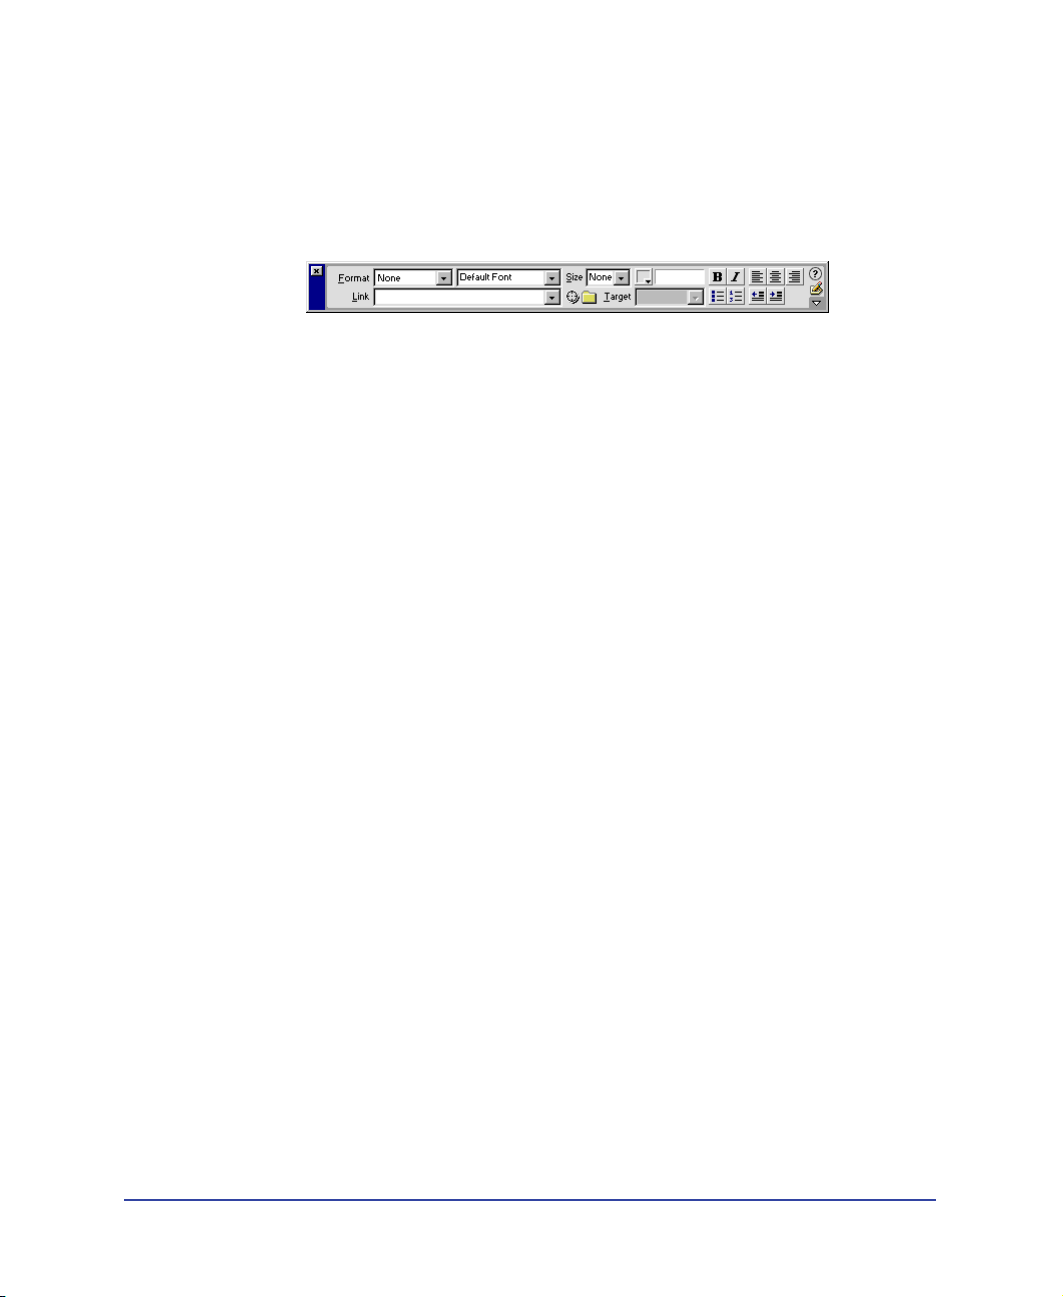
Using the Property inspector
The Property inspector lets you examine and edit properties for the currently
selected page element. (A page element is an object or text.) You can select page
elements in either the Document window or the Code inspector.
To show or hide the Property inspector, choose Window > Properties.
Most changes you make to properties are immediately applied in the
Document window. (For some properties, changes are not applied until you click
outside the property-editing text fields, press Return, or press Tab to switch to
another property.)
The contents of the Property inspector vary depending on the element
selected. For information on specific properties, select an element in the
Document window and then click the Help icon in the upper right corner of
the Property inspector.
The Property inspector initially displays the most commonly used properties
of the selected element. Click the expander arrow in the lower right corner of
the Property inspector to see more of the element’s properties. (In a few cases,
certain obscure properties may not appear even in the expanded Property
inspector; in these cases, use the Code inspector or Code view to code these
properties by hand.)
Using dockable floating panels
Most of the panels in Dreamweaver can be docked—that is, combined into a
single floating panel with multiple tabs. This makes it easy to access the
information you need without cluttering your workspace. (However, the
Launcher, Property inspector, and Site window cannot be docked.) Also, panels
and inspectors now “snap” automatically to each other, the sides of the screen, or
the Document window. This makes it easier to move and arrange the different
floating panels and windows in Dreamweaver.
Chapter 282
Page 83
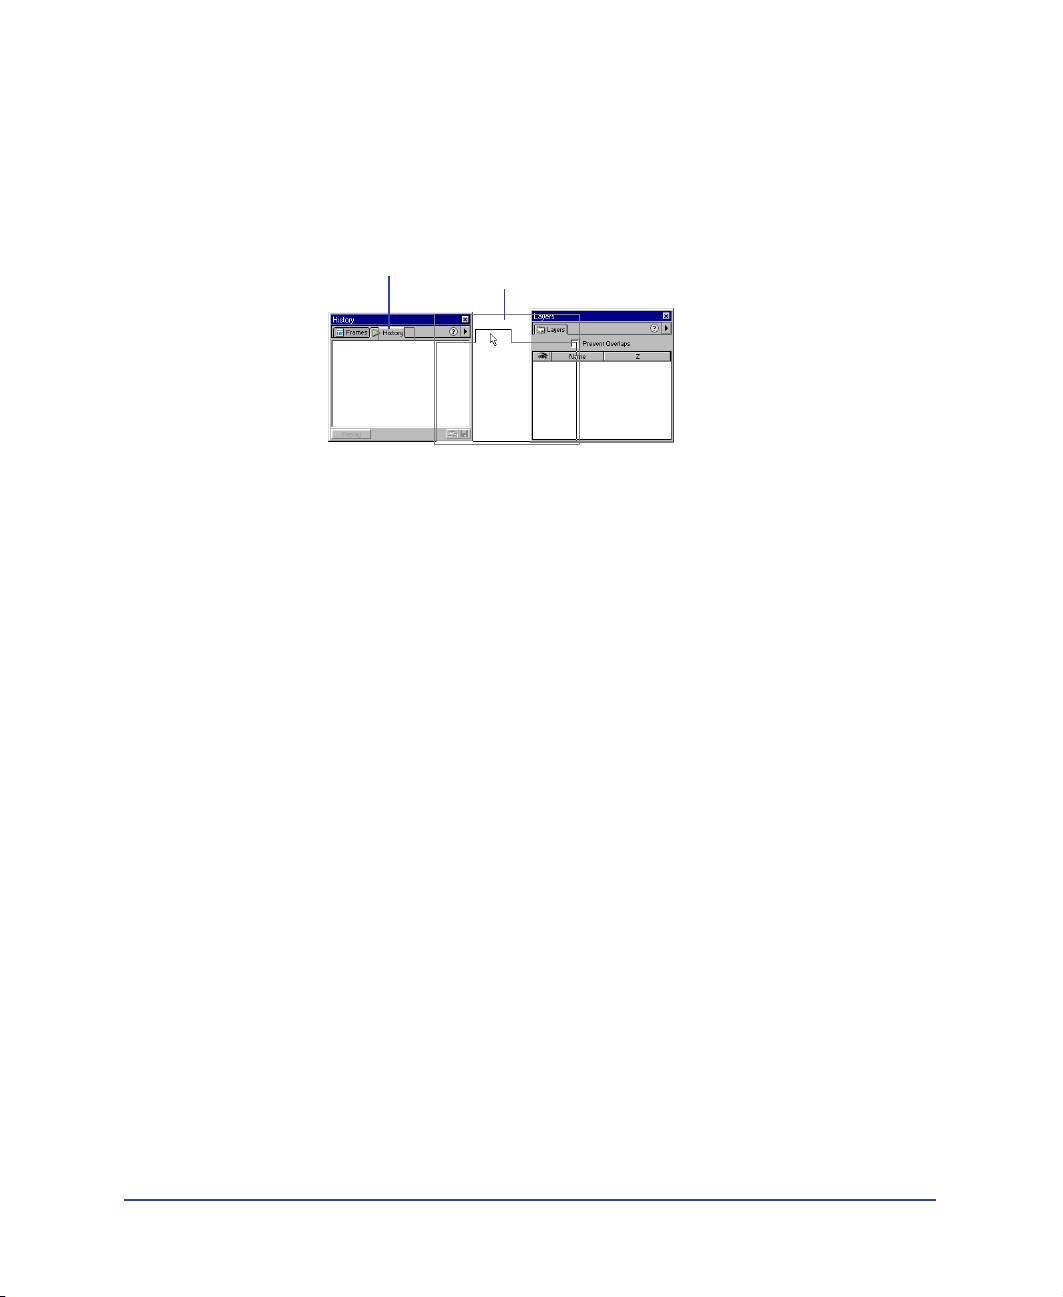
To combine two or more panels to create one tabbed panel:
1 Drag the tab (not the title bar) of one floating panel over another floating
panel. When a highlighted border appears around the target panel, release the
mouse button.
2 Click any tab in the tabbed panel to bring the corresponding panel to the front.
History panel tab History panel being dragged
to the Layers panel
Because the Objects panel does not have a tab, you can’t dock it with another
panel by dragging the Objects panel onto the other panel; however, you can drag
the tab of another panel over the Objects panel to combine them. You can move
tabbed panels back and forth between floating panels, rearranging them to suit
your workflow, by using the process described above.
To remove a panel from a tabbed panel:
Drag its tab out of the window.
Setting Panels preferences
Use Panels preferences to specify which panels and inspectors always appear in
front of the Document and Site windows, and which ones are allowed to be
obscured. You can also use Panels preferences to specify which panels and
inspectors appear in the Launcher and Launcher bar.
To specify where each panel appears in relation to the Document window:
1 Choose Edit > Preferences, then select Panels from the category list.
By default, all windows, panels, and inspectors appear in front of the
Document window.
2 Deselect the windows, panels, and inspectors that you want to place behind the
Document window.
For example, if you want to allow the Document window to obscure the Code
inspector, deselect the Code Inspector option. The Code inspector now appears
in front of the Document window only when it is active.
Similarly, if you want to allow the Document window to obscure any floating
panels that you have added by customizing Dreamweaver, deselect All
Other Floaters.
Dreamweaver Basics 83
Page 84
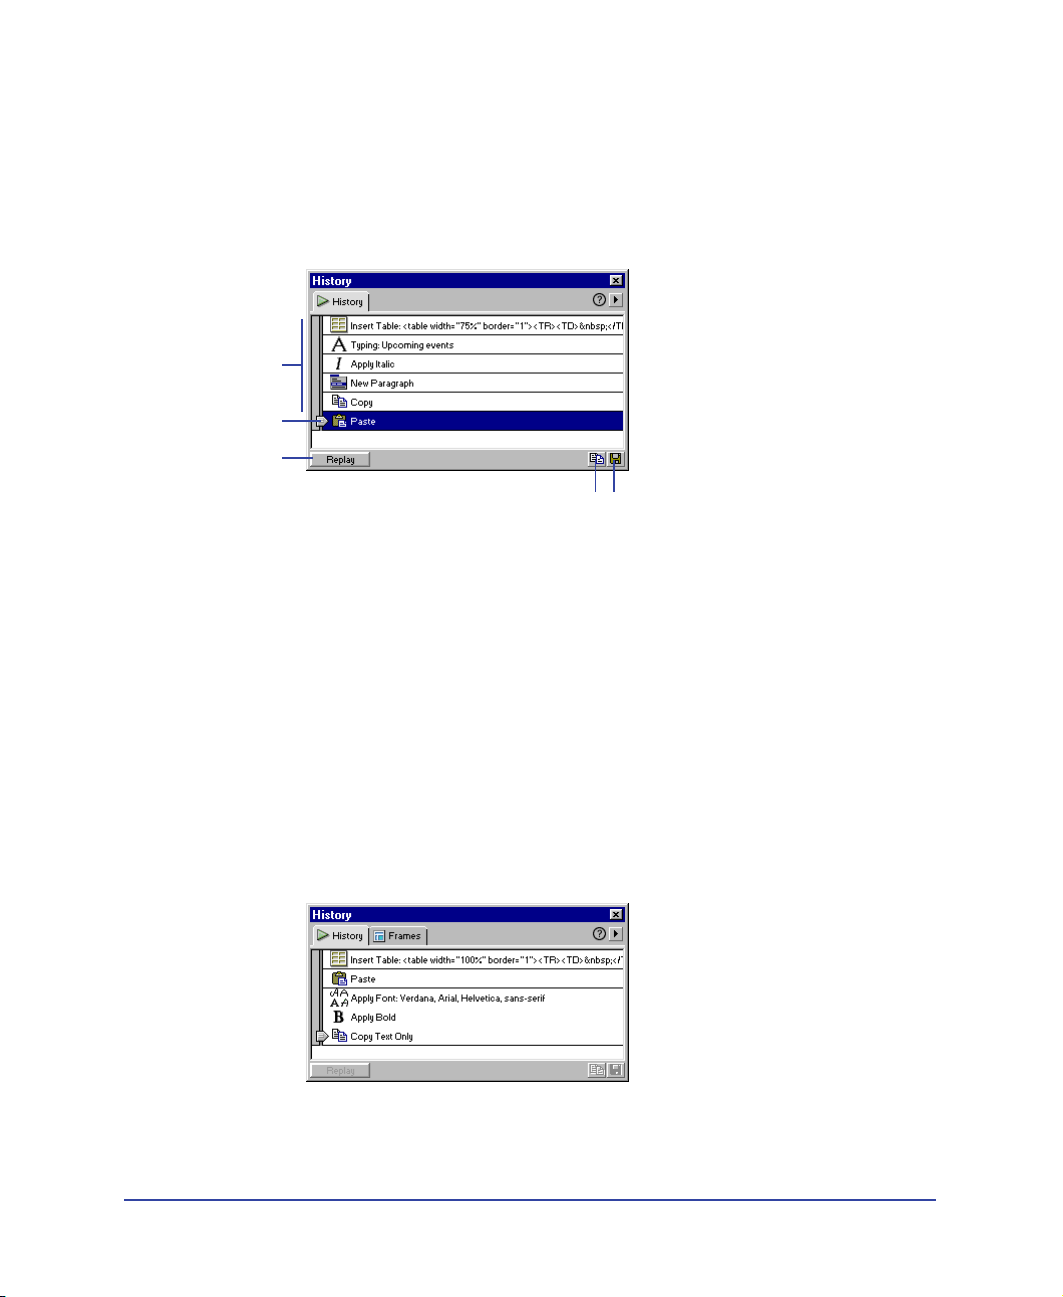
Steps
Slider (thumb)
Replay button
About the History panel
The History panel shows a list of all the steps you’ve performed in the active
document since you created or opened that document. (The History panel doesn’t
show steps you’ve performed in other frames, in other Document windows, or in
the Site window.) It allows you to undo one or more steps; it also allows you to
replay steps and to create new commands to automate repetitive tasks.
Copy Steps button Save As Command button
The slider, or thumb, in the History panel initially points to the last step that
you performed.
Using the History panel
The History panel keeps track of every step of your work in Dreamweaver. You
can use the History panel to undo multiple steps at once.
If you want to undo the last operation you performed in a document, choose
Edit > Undo, just as you would do in any other application. (The name of
the Undo command changes in the Edit menu to reflect the last operation
you performed.)
The History panel also lets you replay steps you’ve already performed and
automate tasks by creating new commands. For more information, see “About
automating tasks” on page 160.
Chapter 284
Page 85
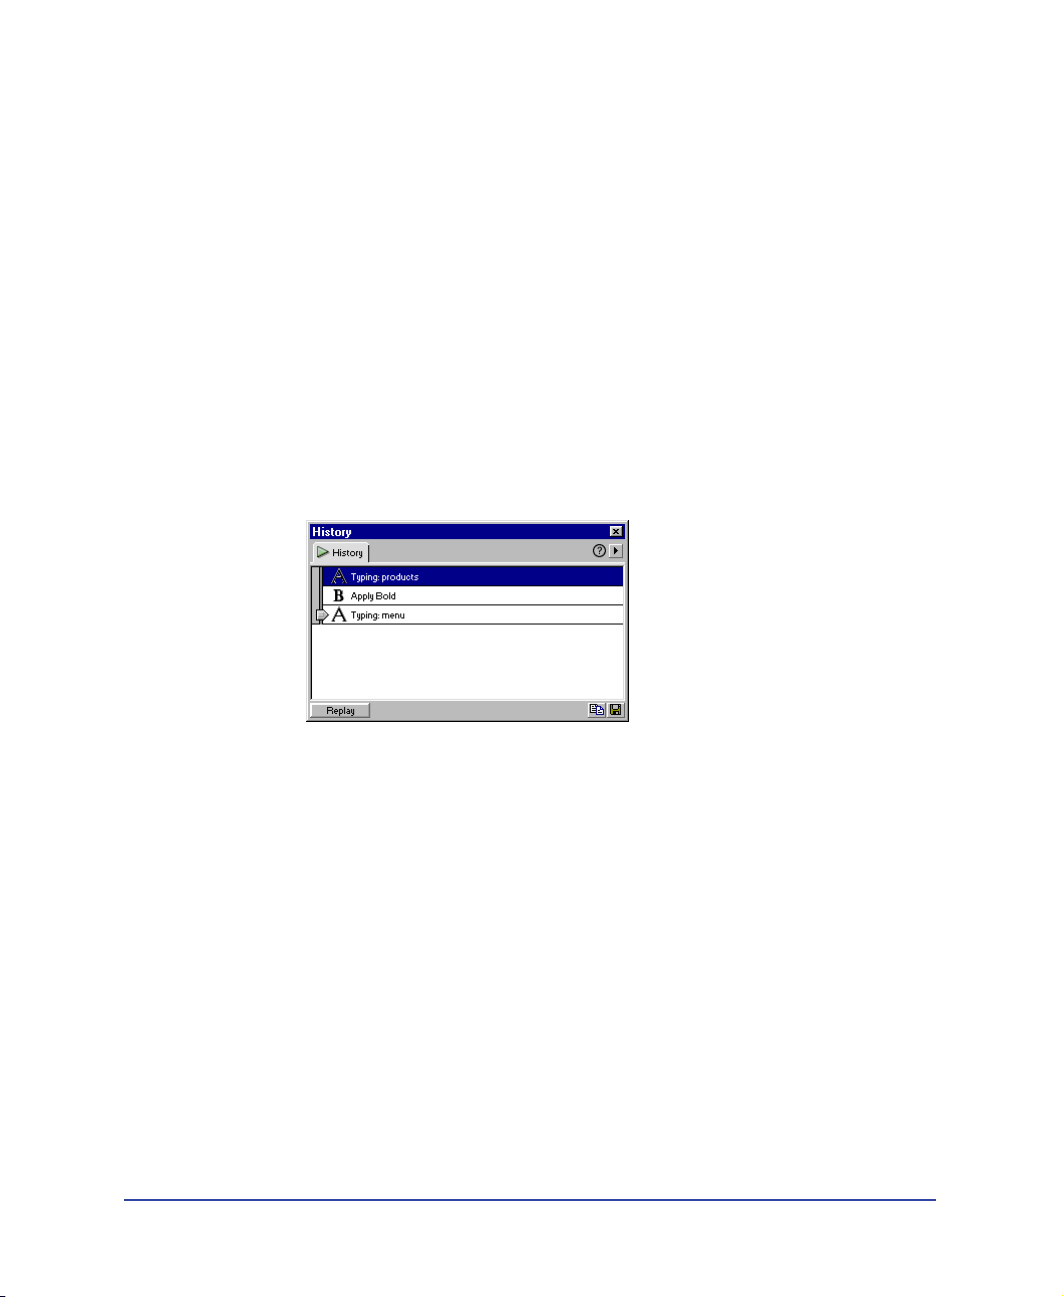
To open the History panel:
Choose Window > History.
To undo the last step:
Drag the History panel slider up one step in the list. This has the same effect as
choosing Edit > Undo.
The undone step turns gray.
To undo multiple steps at once, do one of the following:
• Drag the slider to point to any step.
• Click to the left of a step along the path of the slider; the slider scrolls
automatically to that step, undoing steps as it scrolls.
Note: To scroll automatically to a particular step, you must click to the left of the step;
clicking the step itself selects the step. Selecting a step is different from going back to that
step in your undo history.
As with undoing a single step, if you undo a series of steps and then do something
new in the document, you can no longer redo the undone steps; they disappear
from the History panel.
The History panel also allows you to repeat steps that appear in your step history,
and to automate tasks based on steps you’ve performed.See “About automating
tasks” on page 160
Dreamweaver Basics 85
Page 86

To set the number of steps that the History panel retains and shows:
1 Choose Edit > Preferences and select General from the Category list.
2 Enter a number for Maximum Number of History Steps.
The default value should be sufficient for most users’ needs. The higher the
number, the more memory the History panel requires. This can affect
performance and slow your computer down significantly. When the History
panel reaches this maximum number of steps, the earliest steps are discarded.
Note: You can’t rearrange the order of steps in the History panel. Don’t think of the History
panel as an arbitrary collection of commands; think of it as a way to view the steps you’ve
performed, in the order in which you performed them.
To erase the history list for the current document:
In the History panel’s context menu, choose Clear History.
This command also clears all undo information for the current document; after
choosing Clear History, you will be unable to undo the steps that are cleared.
(Note that Clear History does not undo steps; it merely removes the record of
those steps from Dreamweaver memory.)
Using other Dreamweaver panels
The Dreamweaver work area comprises many other panels. Here are just a few:
The Code inspector shows the code that browsers use to display the document
as a Web page. To show or hide the Code inspector, choose Window >
Code Inspector.
Changes you make in the Document window are immediately reflected in
the Code inspector. When you enter HTML into the Code inspector and then
click outside the inspector, corresponding changes appear in the Document
window. For more information, see “Using the Code view (or Code inspector)”
on page 330.
For minor editing of HTML tags, you can use the Quick Tag Editor instead of the
Code inspector. To display the Quick Tag Editor, press Control+T (Windows) or
Command+T (Macintosh), or choose Modify > Quick Tag Editor. For more
information, see “Editing an HTML tag in the Design view” on page 338.
The Reference panel provides detailed information about the HTML tag you are
working on, including tag attributes. You can open the Reference panel from the
Window menu, the Launcher bar, or the Code inspector.
For example, you can select an img tag, click the Reference button in the toolbar,
and find out what attributes apply (align, border, and so on). For more
information, see “Using the Dreamweaver Reference panel” on page 328.
The Dreamweaver JavaScript Debugger lets you debug client-side JavaScript. You
can open the JavaScript Debugger from the Window menu. For more
information, see “Debugging JavaScript Code” on page 473.
Chapter 286
Page 87
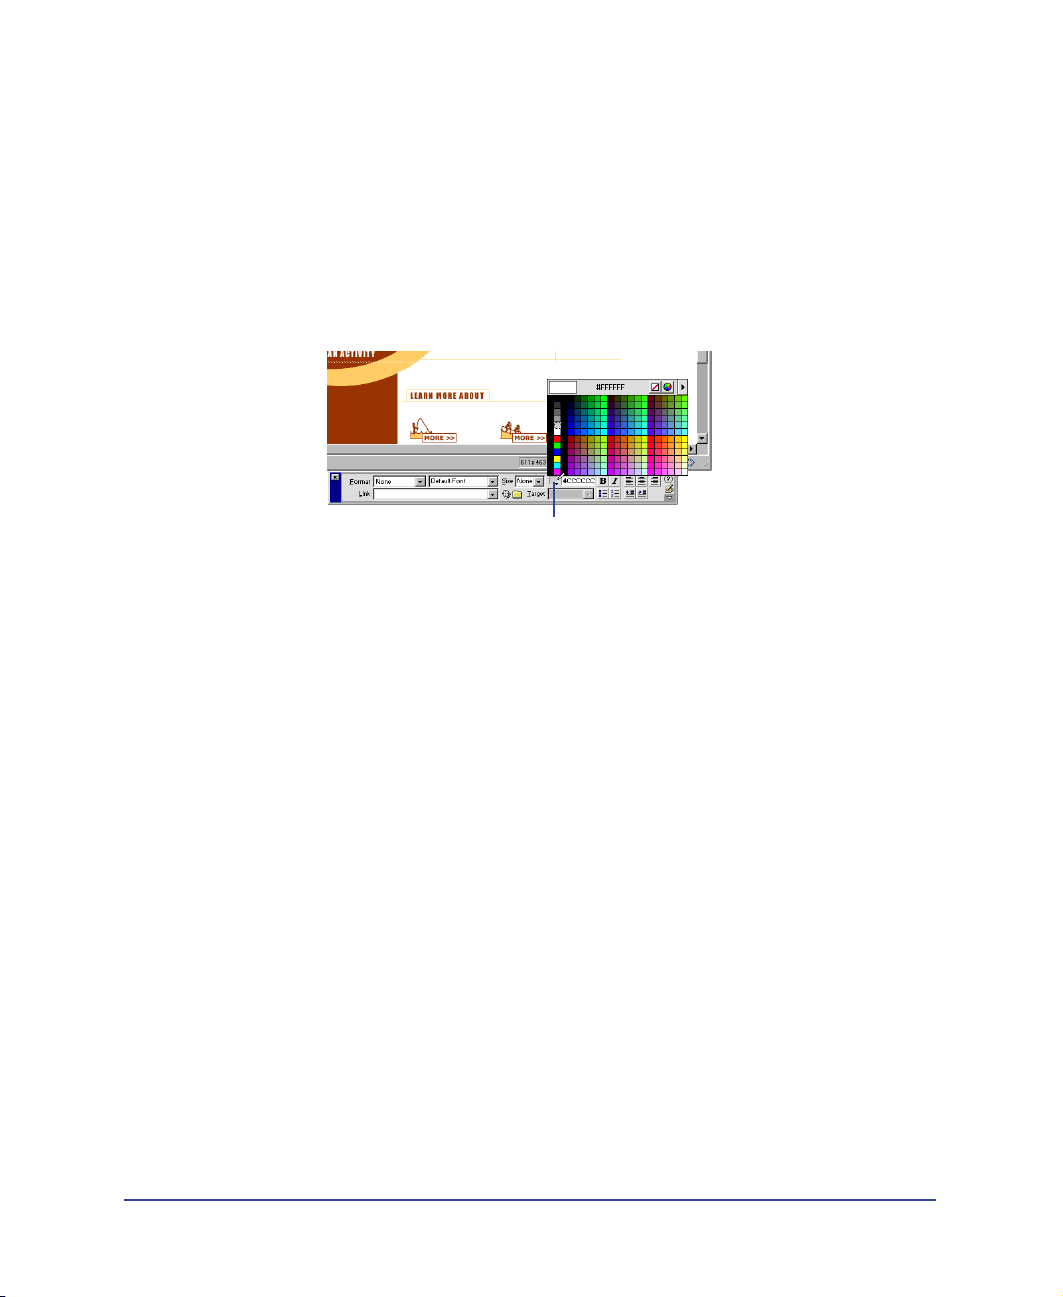
Working with colors
In Dreamweaver, many of the dialog boxes, as well as the Property inspector for
many page elements, contain a color box, which opens a color picker. Use the
color picker to choose a color for a page element.
To choose a color in Dreamweaver:
1 Click a color box in any dialog box or in the Property inspector.
The color picker appears.
Property inspector
color box
2 Do one of the following:
• Use the eyedropper to select a color swatch from the palette. All colors in the
Color Cubes (default) and Continuous Tone palettes are Web-safe; other
palettes are not.
• Use the eyedropper to pick up a color from anywhere on your screen—even
outside the Dreamweaver windows. (If you click the desktop or another
application, Dreamweaver picks up the color where you clicked, but you
may switch into the other application; in that case, click a Dreamweaver
window to continue working in Dreamweaver, or hold down the mouse
button when moving from Dreamweaver to the desktop to keep from
switching out of Dreamweaver.)
• To expand your color selection, use the pop-up menu at the top right corner of
the color picker. You can select Color Cubes, Continuous Tone, Windows OS,
Mac OS, Grayscale, and Snap to Web Safe.
Note that the Color Cubes and Continuous Tone palettes are Web safe,
whereas Windows OS, Mac OS and Grayscale are not. If you are using a palette
that isn’t Web-safe and then choose Snap to Web Safe, Dreamweaver replaces
the selected color with the closest Web-safe color. In other words, you may not
get the color you see.
• To clear the current color without choosing a different color, click the
Strikethrough button.
• To open the system color picker, click the Color Wheel button.
Dreamweaver Basics 87
Page 88

About Web-safe colors
In HTML, colors are expressed either as hexadecimal values (for example,
#FF0000) or as color names (red). A Web-safe color is one that appears the same
in Netscape Navigator and Microsoft Internet Explorer on both Windows and
Macintosh systems when running in 256-color mode. The conventional wisdom
is that there are 216 common colors, and that any hexadecimal value that
combines the pairs 00, 33, 66, 99, CC, or FF (RGB values 0, 51, 102, 153, 204,
and 255, respectively) represents a Web-safe color.
Testing, however, reveals that there are only 216 Web-safe colors. Internet
Explorer on Windows does not correctly render the colors #0033FF (0,51,255),
#3300FF (51,0,255), #00FF33 (0,255,51), and #33FF00 (51,255,0).
The Color Cubes (default) and the Continuous Tone palettes in Dreamweaver use
the 216-color Web-safe palette; selecting a color from these palettes displays the
color’s hexadecimal value.
To choose a color outside the Web-safe range, open the system color picker by
clicking the Color Wheel button in the upper right corner of the Dreamweaver
color picker. The system color picker is not limited to Web-safe colors.
UNIX versions of Netscape Navigator use a different color palette than the
Windows and Macintosh versions. If you are developing exclusively for UNIX
browsers (or your target audience is Windows or Macintosh users with 24-bit
monitors and UNIX users with 8-bit monitors), consider using hexadecimal
values that combine the pairs 00, 40, 80, BF, or FF, which produce Web-safe
colors for SunOS.
Setting preferences
Dreamweaver has preference settings that control the general appearance of the
Dreamweaver user interface as well as options related to specific features such as
layers, style sheets, displaying HTML and JavaScript code, external editors, and
previewing in browsers. Information about specific preference options is provided
throughout this guide in conjunction with the associated feature or topic.
This guide describes only the most common of the preference options.
For information on a specific preference option not covered here, see the
corresponding topic in Dreamweaver Help.
Setting General preferences
The General preferences control the general appearance of Dreamweaver. To
change these preferences, choose Edit > Preferences, and then click General. The
General preferences are divided into two subcategories: File options and Editing
options. For detailed information on these preferences, see Dreamweaver Help.
Chapter 288
Page 89

Setting Fonts/Encoding preferences
Use Fonts/Encoding preferences to set a default font encoding for new documents
and to set the fonts that Dreamweaver uses to display each font encoding. A
document’s encoding determines how the document is displayed in a browser.
Dreamweaver font settings let you work with text in the font and size you prefer
without affecting how the document appears when viewed by others in a browser.
To change the encoding of the current document:
Choose Modify > Page Properties and then select an encoding from the
Document Encoding pop-up menu.
To change the default encoding to be used when creating new documents:
Choose Edit > Preferences, click Fonts/Encoding in the Category list, and choose
an encoding from the Default Encoding pop-up menu.
To set the fonts to use for each type of encoding:
1 Choose Edit > Preferences and click Fonts/Encoding in the Category list.
2 Select the encoding type (such as Western [Latin1] or Japanese) from the Font
Settings list, then choose fonts to use for that encoding from the font pop-up
menus below the Font Settings list.
For more information about Fonts/Encoding preferences, see Dreamweaver Help.
Using Dreamweaver with other applications
Dreamweaver accommodates your Web design and development process by
making it easy for you to work with other applications. For information about
working with other applications such as browsers, HTML editors, image editors,
and animation tools, see the following topics:
• For information about using Dreamweaver with other HTML editors, such as
HomeSite or BBEdit, see “Using external HTML editors” on page 350.
• You can specify preferred browsers for previewing your site. See “Previewing in
browsers” on page 504.
• You can launch an external image editor, such as Macromedia Fireworks, from
within Dreamweaver. See “Using an external image editor” on page 277.
• You can configure Dreamweaver to launch a different editor for each file type.
See “Launching an external editor” on page 298.
• For information about adding animation to your site with Flash movies, see
“About Flash content” on page 300.
• To learn how to add interactivity to your site with Shockwave movies, see
“About Shockwave movies” on page 310.
Dreamweaver Basics 89
Page 90

Basic Customizing in Dreamweaver
There are some basic techniques you can use to customize Dreamweaver to suit
your needs. For example, by setting preferences, creating your own keyboard
shortcuts, and adding extensions, you can set up your work area without knowing
complex code or editing text files. For more information on advanced customizing
features, see “Customizing Dreamweaver” on page 513.
Using the Keyboard Shortcut Editor
Use the Keyboard Shortcut Editor to create your own shortcut keys, edit existing
shortcuts, or use the predetermined shortcut sets.
To access the Keyboard Shortcut Editor:
Choose Edit > Keyboard Shortcuts.
The Keyboard Shortcut dialog box appears containing several options you can
select and commands you can edit.
Duplicate Set button
Delete Set button
Save as HTML
File button
Rename Icon button
Chapter 290
Page 91

Current Set is a menu that displays the sets of predetermined shortcuts that are
included with Dreamweaver, and any custom sets you’ve defined. By default, the
current set is the one that Dreamweaver is using in the current doc. The
predetermined sets are listed at the top of the menu. If you are familiar with the
shortcuts found in Dreamweaver 3, you can use them by choosing the
predetermined Dreamweaver 3 set. (In this set, the Dreamweaver 3 set contains
the Dreamweaver 3 shortcuts for Dreamweaver 3 features, and the Dreamweaver
4 shortcuts for features that weren’t in Dreamweaver 3.
Commands is a pop-up menu that lets you select the command category you want
to edit. For example, you can edit menu commands, such as the Open File
command, or one of thee code editing commands, such as Balance Braces.
Command List displays the commands associated with the category you selected
from the Commands pop-up menu, along with the assigned shortcuts. The Menu
and Site Menu commands categories display this list as a tree view that replicates
the structure of the menus. The other categories list the commands by name (for
example, Quit Application).
Shortcuts window displays the list of shortcuts assigned to the selected command.
Press key displays the new key combination you enter.
Plus adds a new shortcut to the current command. Click Plus (+) to activate the
Shortcuts field. Enter a new key command and click Change to add a new
keyboard shortcut for this command. You can assign two different keyboard
shortcuts for each command.
Minus removes the selected shortcut from the list of shortcuts.
Change applies the new shortcut to the command and adds it to the list of
shortcuts.
• Click the Duplicate button to duplicate the current set. You have the option to
name the set or keep the default name (the current set’s name with “copy” suffix).
• Click the Rename button to rename the current set.
• Click the Save as HTML File button to save the current set in an HTML table
format for easy viewing and printing. You can open the HTML file in your
browser and print the shortcuts for easy reference.
• Click the Delete button to delete copies and custom sets. (You cannot
delete active sets.)
Dreamweaver Basics 91
Page 92

To remove a shortcut from a command:
1 From the Commands pop-up menu, select the command category that
contains the command shortcut you want to remove; for example, Site
Menu Commands.
The Command list displays the commands associated with that category.
2 From the Command list, select the command shortcut you want to remove.
You’ll see a list of shortcuts assigned to the commands.
3 Select the shortcuts you want to remove.
4 Click the Minus (-) button.
To add a shortcut to a command:
1 Select the command category that contains the command you want.
The Command list displays the commands associated with that category.
2 Select the command from the Command list.
You’ll see any shortcuts already assigned to the command in the Shortcuts list.
3 Click the Plus (+) button. The Shortcuts entry field activates and the insertion
point moves to the Press Key field.
4 Press the key combination you want to add; the key combination appears in the
Press Key Field.
If there is a problem with the shortcut—for example, if the key combination is
already assigned to another command—an alert appears letting you reassign
the key combination or cancel.
5 Click Change. The new key combination is assigned to the command.
To edit an existing shortcut:
1 Select the command category that contains the command you want.
The Command list displays the commands in the chosen category.
2 Select the command from the Command list.
You’ll see the shortcuts already assigned to the command in the Shortcuts field.
If more than one shortcut is assigned to a command, you’ll need to select the
one you want to change.
3 Click in the Press Key field and type the desired key combination.
4 Click the Change button to change the shortcut.
Note: If there is a problem with the key combination, an explanatory message is displayed
just below the Shortcuts field and you may be unable to add, delete, or edit the shortcut.
For example, if the key combination is already assigned to another command, warning text
is displayed just below the Shortcuts field.
Chapter 292
Page 93

Adding extensions to Dreamweaver
Extensions are new features that you can add easily to Dreamweaver 4. You can use
many types of extensions; for example, there are extensions that let you reformat
tables, connect to back-end databases, or help you write scripts for browsers.
To find the latest extensions for Dreamweaver, use the Macromedia Exchange
Web site at http://www.macromedia.com/exchange/dreamweaver/. Once there,
you can log in and download extensions (many of which are free), join discussion
groups, view user ratings and reviews, and install and use the Package Manager.
You must install the Package Manager before you can download extensions.
The Package Manager runs in conjunction with Dreamweaver and lets you install
and manage extensions. After you’ve downloaded and installed the Package
Manager from the Exchange site, launch the Package Manager directly from
Dreamweaver by choosing Manage Extensions from the Commands menu.
Dreamweaver Basics 93
Page 94

To install and manage extensions:
1 Click the download link found at the Web site for the extension you want.
You can choose to open and install it directly from the site or save it to disk.
• If you are opening it directly, the Package Manager handles the installation
automatically.
• If you are saving it to disk, save the extension package file (.mxp) to the
Downloaded Extensions folder within the Dreamweaver folder on your
computer. (For example, My Computer\c:\Program
Files\Macromedia\Dreamweaver 4\Configuration\Extensions.)
2 Double-click the extension package file or choose Install Extension from the
Package Manager File menu.
The file will be installed in Dreamweaver. Some extensions aren’t accessible
until Dreamweaver has restarted; you may be prompted to quit and restart
the application.
Use the Package Manager to remove extensions or to see more information
about the extension.
Chapter 294
Page 95

CHAPTER 3
Planning and Setting Up Your Site
.............................................................................................................
A Web site is a set of linked documents with shared attributes, such as related
topics, a similar design, or a shared purpose.
Macromedia Dreamweaver is a site creation and management tool, so you can use
it to create complete Web sites, in addition to individual documents. For best
results, design and plan your Web site before you create any of the pages that the
site will contain.
Note: If you can’t wait to start creating documents immediately, you can try out some of the
Dreamweaver document-creation tools and make a sample document. (See “Creating,
opening, and saving HTML documents” on page 150.) But don’t start serious document
development until you’ve set up a site.
3
The first step in creating a Web site is planning. See “About site planning and
design” on page 95. The next step is to set up the basic structure of the site; see
“Using Dreamweaver to set up a new site” on page 102. If you already have a site
on a Web server and you want to begin using Dreamweaver to edit that site, see
“Setting up a remote site” on page 123.
About site planning and design
In Dreamweaver, the term site can refer either to a Web site or to a local storage
location for the documents belonging to a Web site. When you begin thinking
about creating a Web site, you should follow a series of planning steps to make
sure your site succeeds. Even if you are just creating a personal home page that
only friends and family will see, it can still be to your advantage to plan the site
carefully in order to make sure everyone will be able to use it successfully.
95
Page 96

Determining your goals
Deciding what your site goals are is the very first step you should take when you
create a Web site. Ask yourself or your client questions about the site. What do
you hope to accomplish by having a Web site? Write down your goals so that you
remember them as you go through the design process. Goals help you focus and
target your Web site to your particular needs.
A Web site that provides news about a specific subject should have a very different
look and navigation than a Web site that will sell products. The complexity of
your goals will affect the navigation, the media that you use (Flash, Director, and
so on), and even the look and feel of your site.
Choosing a target audience
After you have decided what you want to accomplish with your Web site, you
need to decide who you want to visit your site. This may seem to be a silly
question, since most people want everyone to visit their Web site. However, it is
difficult to create a Web site that every single person in the world will be able to
use. People use different browsers, connect at different speeds, and may or may
not have media plug-ins. All these factors can affect the use of your site. That is
why you need to determine a target audience.
Think about the people who will be attracted to your Web site, or who you hope
to attract. What kinds of computers do you think they will be using, what
platform might be the dominant one (Macintosh, Windows, Linux, and so on)?
What is the average connection speed (33.6 modem or DSL)? What kinds of
browsers and monitor sizes will they be using? Are you creating an intranet site
where everyone will be using the same computer OS and browser? All of these
factors can greatly affect the way your Web page appears to visitors.
Once you choose the audience and have determined what types of computers,
connection speeds, and browsers they will be using, you can target your design.
For example, say your target audience is predominantly Windows users with 17inch monitors and using Internet Explorer 3.0 or above. As you design your Web
page, you should test that your site works best in Microsoft Internet Explorer on a
Windows computer with a screen size of 800 x 600 pixels. Fewer viewers may use
Netscape Navigator on a Macintosh platform, but you should also make sure your
site still works on those machines, although it may not display as precisely as it
does for your target audience.
Chapter 396
Page 97

Creating sites for browser compatibility
As you create your site, you should be aware of the variety of Web browsers your
visitors are likely to use. Where possible, design sites for maximum browser
compatibility, given other design constraints.
There are over two dozen different Web browsers in use, most of which have been
released in more than one version. Even if you target only Netscape Navigator and
Microsoft Internet Explorer, which are used by the majority of Web users, be
aware that not everyone uses the very latest versions of those browsers. If your site
is on the Web, sooner or later someone will visit it using Netscape Navigator
2.0—or the browser that AOL provides its customers, or a text-only browser
such as Lynx.
There are some circumstances under which there’s no need to create crossbrowser-compatible sites. For example, if your site is available only on your
company’s intranet, and you know that all of your company’s employees use the
same browser, you can optimize your site to rely on features of that browser.
Similarly, if you’re creating HTML content to be distributed on CD-ROM, and
you distribute a browser on the CD, you can assume that all of your customers
have access to that particular browser.
Under most circumstances, for Web sites designed for public viewing, it’s a
good idea to make your site viewable in as many browsers as possible. Pick one
or two browsers as your target browsers, and design the site for those browsers,
but try exploring the site in other browsers now and then to avoid including too
much incompatible content. You can also post a message on a discussion board
to ask others to view your site. This can be a good way to get feedback from a
wide audience.
The more sophisticated your site is—in terms of layout, animation, multimedia
content, and interaction—the less likely it is to be cross-browser compatible. Not
all browsers can run JavaScript, for example. A page of plain text that uses no
special characters will probably display well in any browser, but such a page may
have much less aesthetic appeal than one that uses graphics, layout, and
interaction effectively. Try to strike a balance between designing for maximum
effect and designing for maximum browser compatibility.
One useful approach is to provide multiple versions of certain important pages,
such as your site’s home page. For example, you can design both a framed version
and a frameless version of such a page. You can then include in your Web page a
behavior that automatically shifts visitors without frame-capable browsers to the
frameless version. For more information, see “Using the behavior actions that
come with Dreamweaver” on page 444.
Planning and Setting Up Your Site 97
Page 98

Organizing the site structure
Organizing your site carefully from the start can save you frustration and time later
on. If you begin creating documents without thinking about where in your folder
hierarchy they should go, you may end up with a huge, unwieldy folder full of files,
or with related files scattered through a half-dozen similarly named folders.
The usual way to set up a site is to create a folder on your local disk that contains
all the files for your site (referred to as the local site), and to create and edit
documents within that folder. You then copy those files to a Web server when you
are ready to publish your site and allow the public to view it. This approach is
better than creating and editing files on the live public Web site itself, because it
allows you to test changes in the local site before making them publicly viewable,
and then when you’re finished, you can upload the local site files and update the
entire public site at once.
See “Using Dreamweaver to set up a new site” on page 102 to coordinate your
local site with Dreamweaver. Once you set up the local site with Dreamweaver,
you are better able to manage your site files, track links, update pages, and more.
Break down your site into categories. Put related pages in the same folder. For
example, your company press releases, contact information, and job postings
might all go in one folder, and your online catalog pages in another folder. Use
subfolders where necessary. This type of organization will make your site easier to
maintain and navigate.
Chapter 398
Page 99
Decide where to put items such as images and sound files. It’s convenient to place
all your images, for example, in one location, so that when you want to insert an
image into a page you know where to find it. Designers sometimes place all of the
non-HTML items to be used on a site in a folder called Assets. That folder may
contain other folders—for example, an Images folder, a Shockwave folder, and a
Sound folder. Or you might have a separate Assets folder for each group of related
pages on your site, if there aren’t many assets shared among such groups.
Site 1
my_site1 (root folder)
About_the_Company
Catalog
Assets (for whole site)
index.html (home page)
Use the same structure for local and remote sites. Your local site and your remote
Site 2
my_site2 (root folder)
About_the_Company
Assets
Catalog
Assets
index.html (home page)
Web site should have exactly the same structure. If you create a local site using
Dreamweaver and then upload everything to the remote site, Dreamweaver
ensures that the local structure is precisely duplicated in the remote site.
Planning and Setting Up Your Site 99
Page 100

Creating your design look
You save a lot of time later in the process if you plan your design and layout before
you actually begin working in Dreamweaver. It can be as simple as creating a
mock-up drawing of how you want the site layout to look on a piece of paper. A
more advanced approach would be to create a composite drawing of your site
using software such as Macromedia Freehand or Fireworks. The important thing
is to have a mock-up of your layout and design so you can follow it later as you
build your site.
It is important to maintain consistency in your page layout and design. You want
users to be able to click through the pages in your site without getting confused
because all the pages have a different look, or the navigation is in a different place
on each page.
Designing the navigation scheme
Another area where planning pays off is navigation. As you design your site, think
about the experience you want your visitors to have. Think about how a visitor to your
site will be able to move from one area to another. Consider the following points:
“You are here.” Visitors should easily know where they are in your site and how to
return to your top-level page.
Searching and indexes make it easy for visitors to find any information they
are looking for.
Feedback provides a way for visitors to contact the webmaster (if appropriate) if
something is wrong with the site, and to contact other relevant people associated
with the company or the site.
Design the way your navigation will look. Navigation should be consistent
throughout your site. If you place a navigation bar across the top of your home
page, try to keep it there for all the linked pages.
Dreamweaver has two navigation tools that you can use to create your navigation
scheme. For more information, see “Linking and Navigation” on page 353.
Chapter 3100
 Loading...