

Page 1
Installation Settings Guide
In this guide we will describe the advanced
installation settings that you can access from
KONOz’s main menu. We recommend that
an HVAC service professional uses these settings
to fine-tune your thermostat’s performance for
your home.
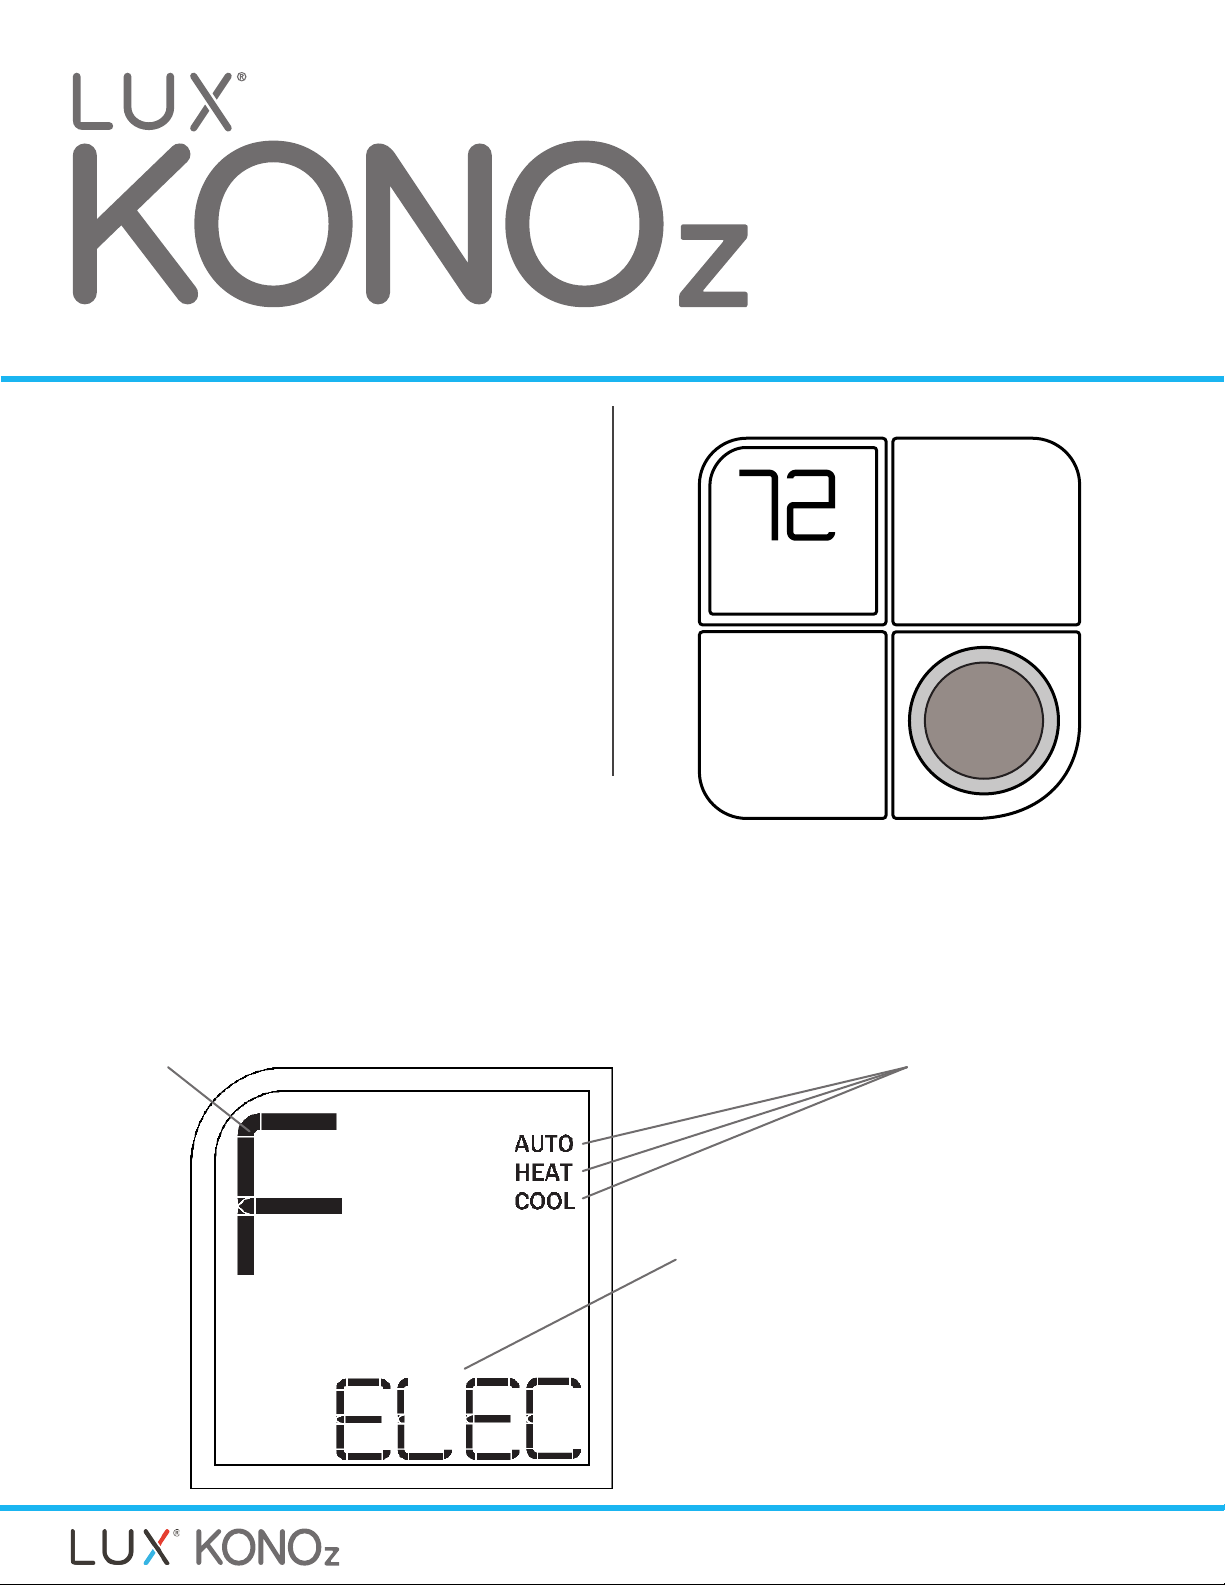
You can access the installation settings by going to
the main menu and selecting the gear icon. You
will see “IS” on the screen and will be prompted to
select “yes” or “no”. Select “yes” to access the
installation settings. Rotate the knob to view
settings and press the knob to confirm.
Once in the installer settings, rotate the knob to
change a setting value. Press the knob to confirm
the new value and proceed to the next option.
There are three ways to exit the settings:
1. Continue through the remaining settings until you
pass setting 99.
2. Press and hold the knob for 3 seconds after you
confirm any changes to your settings.
3. Wait 60 seconds after you confirm any changes
to your settings.
System Type & Configuration
You will first see your current system type and configuration – confirm by pressing the knob
and then you will begin navigating through the available settings.
HVAC system type
F = Furnace
HP = Heat Pump
Available System
Modes
HVAC system subtype
Furnace Systems
ELEC: Electric fan. Thermostat calls fan
to run with heat
GAS: Gas fan. Thermostat does not call
fan to run with heat
BOIL: Boiler. No fan connected to
heating system
Heat Pump
o: Changeover valve = O
b: Changeover valve = B
Installation Settings Guide
Page 2
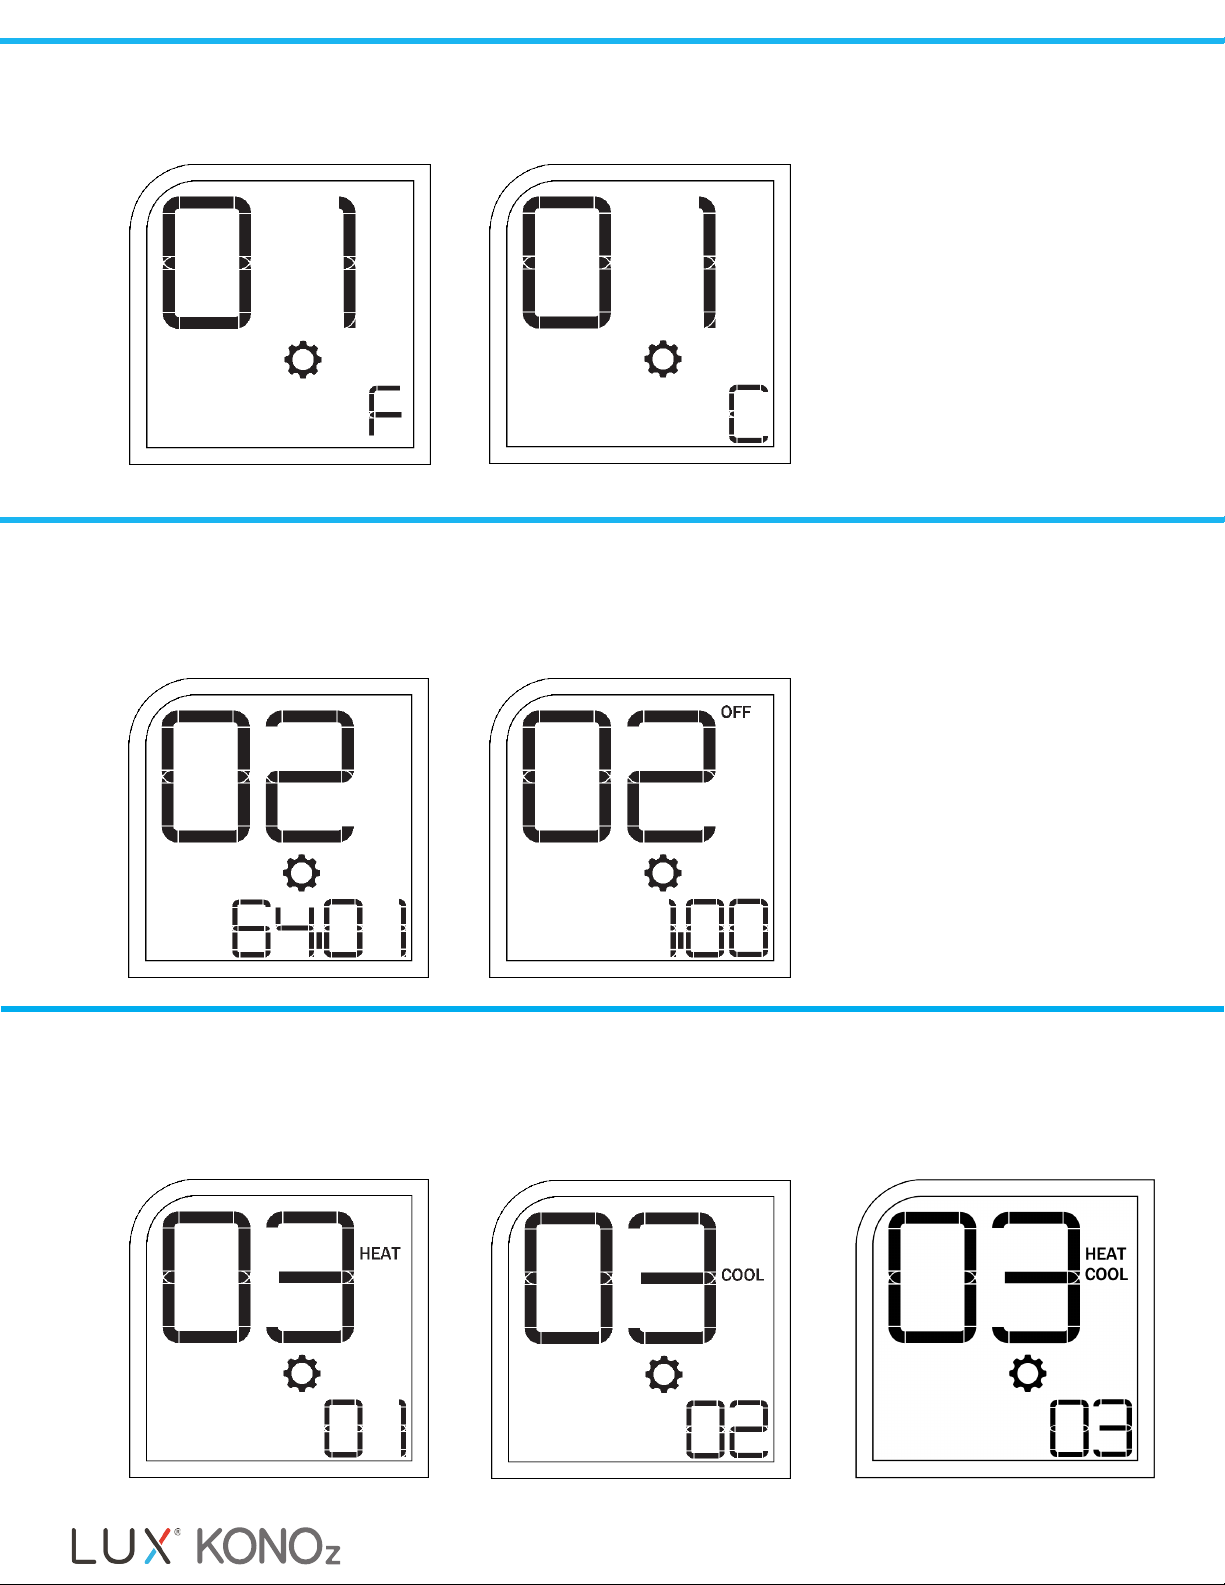
-01 Temperature Format
Use this setting to select your preferred temperature format.
F for Fahrenheit C for Celsius
-02 Temperature Calibration
KONOz is factory calibrated, but you can use this setting to adjust the temperature
sensor for your home. The screen will alternate between your calibration temperature and the
offset value – to remove calibration, make sure that the offset value is set to 0.
-03 Available HVAC Modes
KONOz uses terminal detection to identify your system type and you can use this
installation setting to view and change the available modes. Use this setting to view and/or
change the different modes available depending on your system type. Rotate the knob to see
various options and configurations for your system.
Heat Only Heat & Cool
Cool Only
Installation Settings Guide
Page 3
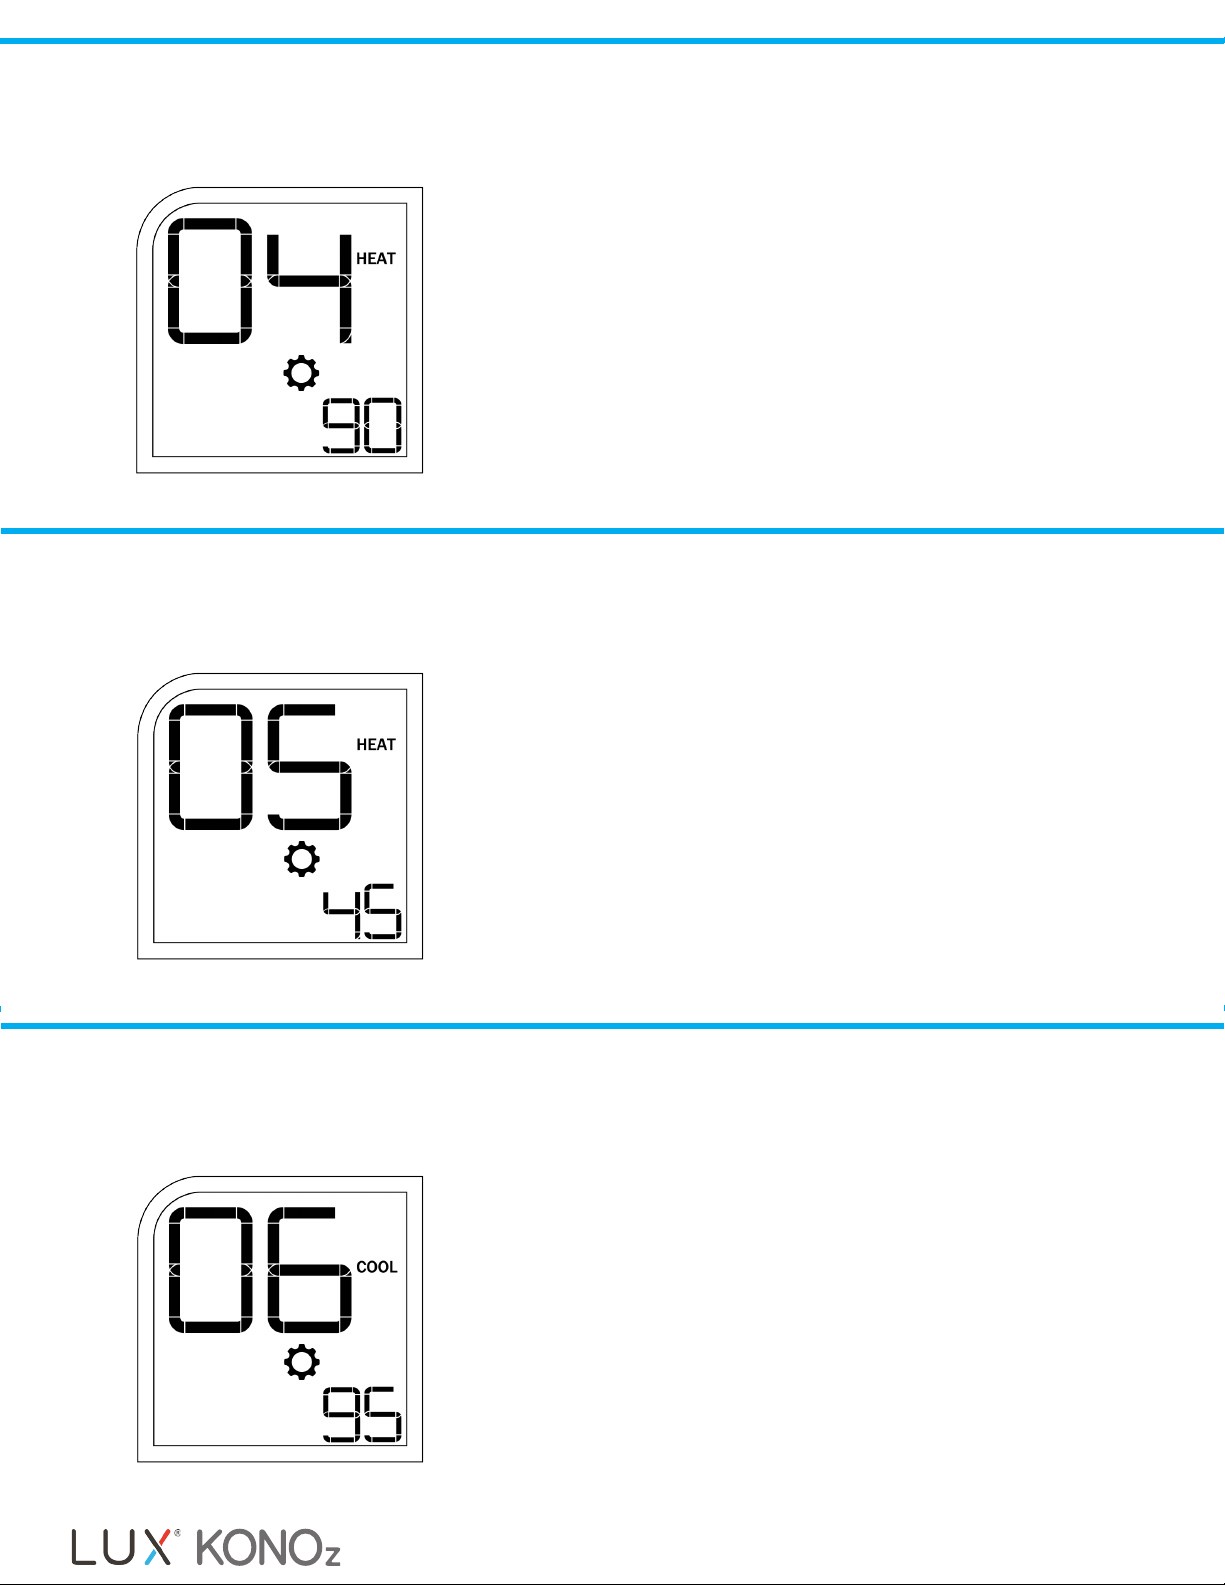
-04 Maximum Heat Limit
Use this setting to set a maximum temperature limit for your heating system. The limit can be
as high as 90°F (32°C) or as low as 60°F (15°C). *Note: Not available for cool only systems
Default Temperature: 90°F
-05 Minimum Heat Limit
Use this setting to set a minimum temperature limit for your heating system. The minimum
heat limit range is from 60°F (15°C) to as low as 45°F (7°C). *Note: Not available for cool
only systems
Default Temperature: 45°F
-06 Maximum Cool Limit
Use this setting to set a maximum temperature limit for your cooling system. The maximum
cool limit range is dependent on your heating limits.
Default Temperature: 95°F
Installation Settings Guide
Page 4

-07 Minimum Cool Limit
Use this setting to set a minimum temperature limit for your cooling system. The minimum
cool limit range is dependent on the values you entered for your heating and cooling limits.
Default Temperature: 50°F
-08 System Type
Use this setting to modify the system type. The available options include Gas Furnace, Electric
Furnace, Boiler (No Fan) and Heat Pump. See step 09 below for additional options when
selecting Heat Pump.
Gas Furnace Electric Furnace
-09 System Type - Heat Pump
If you selected heat pump during #8, you will then have to select your valve type in #9. Select
O or B depending on your valve type. B will energize the B/O terminal in heat mode and O
will energize the B/O terminal in cool mode.
Heat Pump Option O Valve
Boiler (No Fan)
B Valve
Installation Settings Guide
Page 5

-10 Minimum On/Off Time
Use this setting to set a standby time so that your HVAC systems can safely and efficiently
switch on and off. You can either select a 5-minute or a 2-minute off time. During normal
operation, the hourglass icon indicates that the minimum off time is temporarily preventing
your heating and cooling system from turning on.
-11 Temperature Swing
Use this setting to set a swing value. Your swing setting determines how far the ambient
Temperature can deviate from the set temperature before KONOz turns on your heating
or cooling system. You can select 0, .25°, .5°, 1° or 2.25°.
-12 Stage 2 Heating Offset (for conventional systems)
Use this setting to set a value that your thermostat will use to decide when to turn on your
second stage of heating. You can select Off, 1, 2, 3, 4 or 5 degrees F.
Off, no second stage heat 1°
Installation Settings Guide
5°
Page 6

-13 Stage 2 (Auxiliary) Heating Offest (for heat pump systems)
Use this setting to set a value that your thermostat will use to decide when to turn on your
second stage of heating. You can select Off, 1, 2, 3, 4 or 5 degrees F.
Off, no second stage heat 1°
-14 Clock Format
Use this setting to choose between 12-hour am/pm time display or 24-hour time display.
*Note: This setting not available with battery-only power.
12 Hour AM/PM Display 24 Hour Time Display
5°
-15 Backlight
Use this setting to choose between a backlight auto-off setting of 10 seconds or an always-on
backlight. When the backlight is turned off the display will not be visible. Press the knob
to turn on the display. *Note: This setting not available with battery-only power.
10 Seconds Always On
Installation Settings Guide
Page 7

-16 Filter Life
Use this setting to turn on and set a value for your air filter’s lifespan. You’ll then be able to check
its remaining lifespan in the fan settings sub-menu. (You can select Off, 30, 60, 90, 120, 180 or 365 days).
Off 30 Days
-98 Compressor Bypass
Use this setting to temporarily disable the minimum on/ off time protection. If you set
compressor bypass protection to ‘yes’ then your system will switch heating and cooling on/off
without waiting for the minimum on/off time.
Compressor Bypass On Compressor Bypass Off
365 Days
-99 Factory Reset
Use this setting to initiate a factory reset and to setup your KONOz from scratch.
Reset KONOz Do Not Reset KONOz
Installation Settings Guide
Page 8

-Additional Features
Lock: Press and hold the knob for 10 seconds on the main run screen to lock local
control of KONOz. When locked, press and hold the knob for 10 seconds
to unlock.
Power Cycle: Remove KONOz from its base and locate the black reset
button on the back of the thermostat. Press and hold this button for 3 seconds
to fully power cycle the device.
EMER Heat: If you have a Heat Pump system with stage 2 (auxiliary) heat
enabled, you can select EMER heat from the mode menu. When this is enabled,
the thermostat will not use the compressor heating stage and will use the
auxiliary heating stage as the only heat source.
For wiring diagrams, please reference the appendix
section of the KONOz Manual
We’re here to help! Please contact our customer support team for assistance:
PHONE:
LIVE CHAT:
EMAIL:
VIDEOS:
SUPPORT HOURS:
856.234.8803
LuxProducts.com/support
techsupport@luxproducts.com
LuxProducts.com/Videos
8am to 6pm EST, Monday - Friday
LUX Products - Designed in Philadelphia
Installation Settings Guide
 Loading...