

Page 1
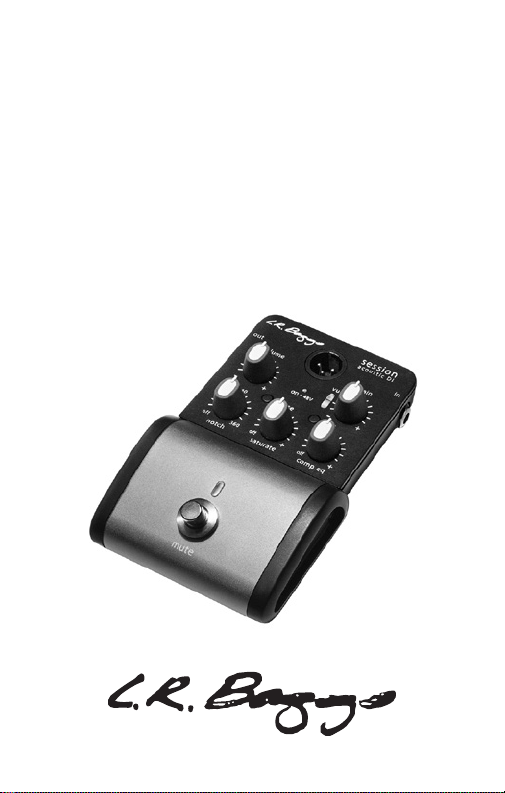
SESSION
ACOUSTIC DI
USER’S GUIDE
Page 2

INTRODUCTION
Inspired by the LR Baggs Handcrafted Video Sessions
and our experience in some of Nashville’s great studios,
Session Acoustic DI brings our signature studio sound to
your live rig. The Session DI enhances your acoustic
pickup and imparts the rich sonic character that you’d
expect from an experienced audio engineer using some
of the world’s nest studio gear. We’ve captured this
studio magic and put it into a compact, easy-to-use DI
that will transform your live sound.
GETTING STARTED
1. Power the Session DI with a 9V battery, 9V DC power
supply (not provided) or 48V phantom power. An
orange light will indicate 9V battery or DC power
and a green light will indicate 48V phantom power.
2. Plug your guitar into the input to activate the Session
DI (upper right hand side) and a cable to either the
¼” output (upper left hand side) or the XLR output
(on the top).
3. Adjust the gain control by using the VU meter. Read
section B in this manual for setting your gain to the
appropriate level.
4. Plug the ¼” and/or XLR output cable into your amp
or PA and experiment with the Session DI.
Continue with this manual to learn more about it s features.
Page 3
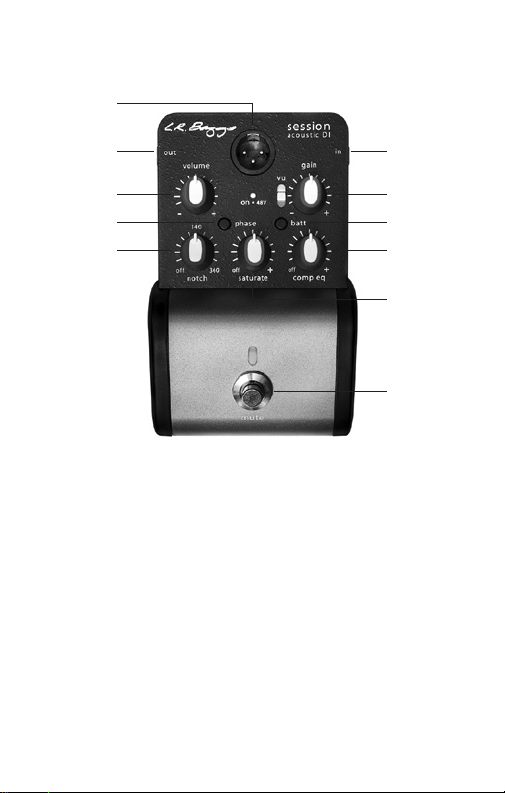
TOP FEATURES
K
AJ
BI
CH
DG
E
F
A. Instrument Input
The ¼” input is an unbalanced (mono), all discrete input.
Plugging into the input will activate the Session DI,
therefore, unplugging will turn the system o. Be sure
to mute the signal before unplugging from the Session
DI to avoid a loud pop.
B. Gain
Setting the gain is one of the most important keys to
achieving optimum sound quality and signal-to-noise
ratio. If you have a volume control on your guitar, make
sure it is turned all the way up before setting the gain.
Begin with the gain control in the counter-clockwise
Page 4

position. Turn the control clockwise as you strum the
guitar until the VU meter clips red slightly at your loudest
playing level. Make sure yellow clips consistently.
C. Battery Check
Push the “batt” button to check how much life is left in
the battery. The VU meter’s LED display doubles as the
battery check function by reversing the color orientation.
A full battery will give you approximately 125 hours of
playing time. Two LEDs means you have approximately
30 hours left. One red LED means it’s time to change the
battery (located on the underside). To maximize battery
life, make sure to unplug your instrument cable when
you are not using the Session DI.
D. Comp EQ
The Session DI features 3 narrowly focused bands of
compression for taming common problematic frequencies
and enhancing the voice of your guitar. The low, mid,
and high frequency compressors are essentially
“touch-sensitive” EQs that respond in real-time to your
dynamics. The harder you strum, the more they compress
and vice versa. When the knob is in the counter-clockwise
position, the eect is completely o. Turn the control
clockwise and apply to taste.
E. Saturate
The Session DI’s analog saturation is voiced specically
for the acoustic guitar. Engage the eect to add warmth,
dimension and pleasing harmonic content while
smoothing your signal for an enhanced, post-processed
mix. When the knob is in the counter-clockwise position,
the eect is completely o. Turn the control clockwise
to saturate the signal.
Page 5

F. M ute
Press the footswitch to engage the mute for both the
XLR and ¼” outputs. The orange LED will light up when
the Session DI is muted. Press the footswitch again to
un-mute your signal.
G. Notch
The notch lter is designed to help control feedback. If
your guitar begins to feedback, slowly turn the notch
control clockwise. The oending frequency will stop
instantly when the notch is in the proper position.
H. Phase
Press this button to invert the phase. Usually, one phase
will provide the best sound and feedback resistance. We
recommend trying both phases each time you set up.
I. Volume
The master volume aects both the ¼” and XLR outputs.
J. ¼” output
The ¼” output is an unbalanced line level output. You
can plug into any amp or device that has a ¼” input. For
best results we recommend a full-range PA or high
quality acoustic amplier.
K. XLR output
The XLR, or DI output (located on the top), is a balanced
output for connecting to a mixing desk with a standard
XLR cable.
Page 6

SIDE FEATU RES
A B
C
A. DC INPUT
The DC power input is designed for a standard 2mm
plug commonly used with eects pedals and “oor-box”
products. Most power supplies or multi-power devices
designed for musical products may be used. 9VDC
recommended with a 12VDC maximum.
B. HPF (High Pass Filter)
The Session DI’s high-pass lter may be used to attenuate
extraneous low frequencies, allowing for an appropriate
mix in dierent playing situations and sound systems.
The variable “hpf” switches between 40, 80, 120 and
200Hz.
C. Ground Lift
Engage this switch to reduce or eliminate groundrelated noise.
Page 7

SPECIFICATIONS
1/4” INPUT
Input Impedance: 10 Megohms
Preamp Gain: -12dB to +26dB
Input Level: -25dBv to 1.8dBv (0.53Vrms to 1.23Vrms)
DI OUTPUT
Output Level: -1dBv (0.88VRms) Balanced
Output Impedance: 470 ohms
LINE OUTPUT
Output Level: -1dBv (0.88VRms) Unbalanced
Output Impedance: 470 ohms
POWER
DC Power Consumption: 0.65W Max at 9V
DC Current Draw: 3mA
Voltage Range: 7.5VDC - 12VDC
Power Supply: 9VDC with 100mA (or 1 Watt) minimum
9V Battery Life: 125 hours
Phantom Power: 24VDC minimum
Signal to Noise: 90dB, unweighted
HIGH PASS FILTER
Frequencies: 40Hz, 80Hz, 120Hz, 200Hz
PHYSICAL CHARACTERISTICS
1.5Lbs, 6.25” Length x 4” Width x 1.75” Depth
These specications may change without notice.
Page 8

PRODUCT REGISTRATION
& WARRANTY INFORMATION
Register the Session DI online at:
www.lrbaggs.com/product-registration
LIMITED WARRANTY
L.R. Baggs warrants to the using purchaser that this
product shall be free of defects in workmanship and
materials under normal and proper use for a period of
one year. If you experience problems with the Session
DI, please contact your dealer.
To learn more about this product, please visit:
www.lrbaggs.com/session
 Loading...