

Page 1
Bostonian (564) Wilmington Face
Black 95400186 Nickel 95400187
Compatibility:
• 564 SS Fireplace
• 564 Electric Fireplace
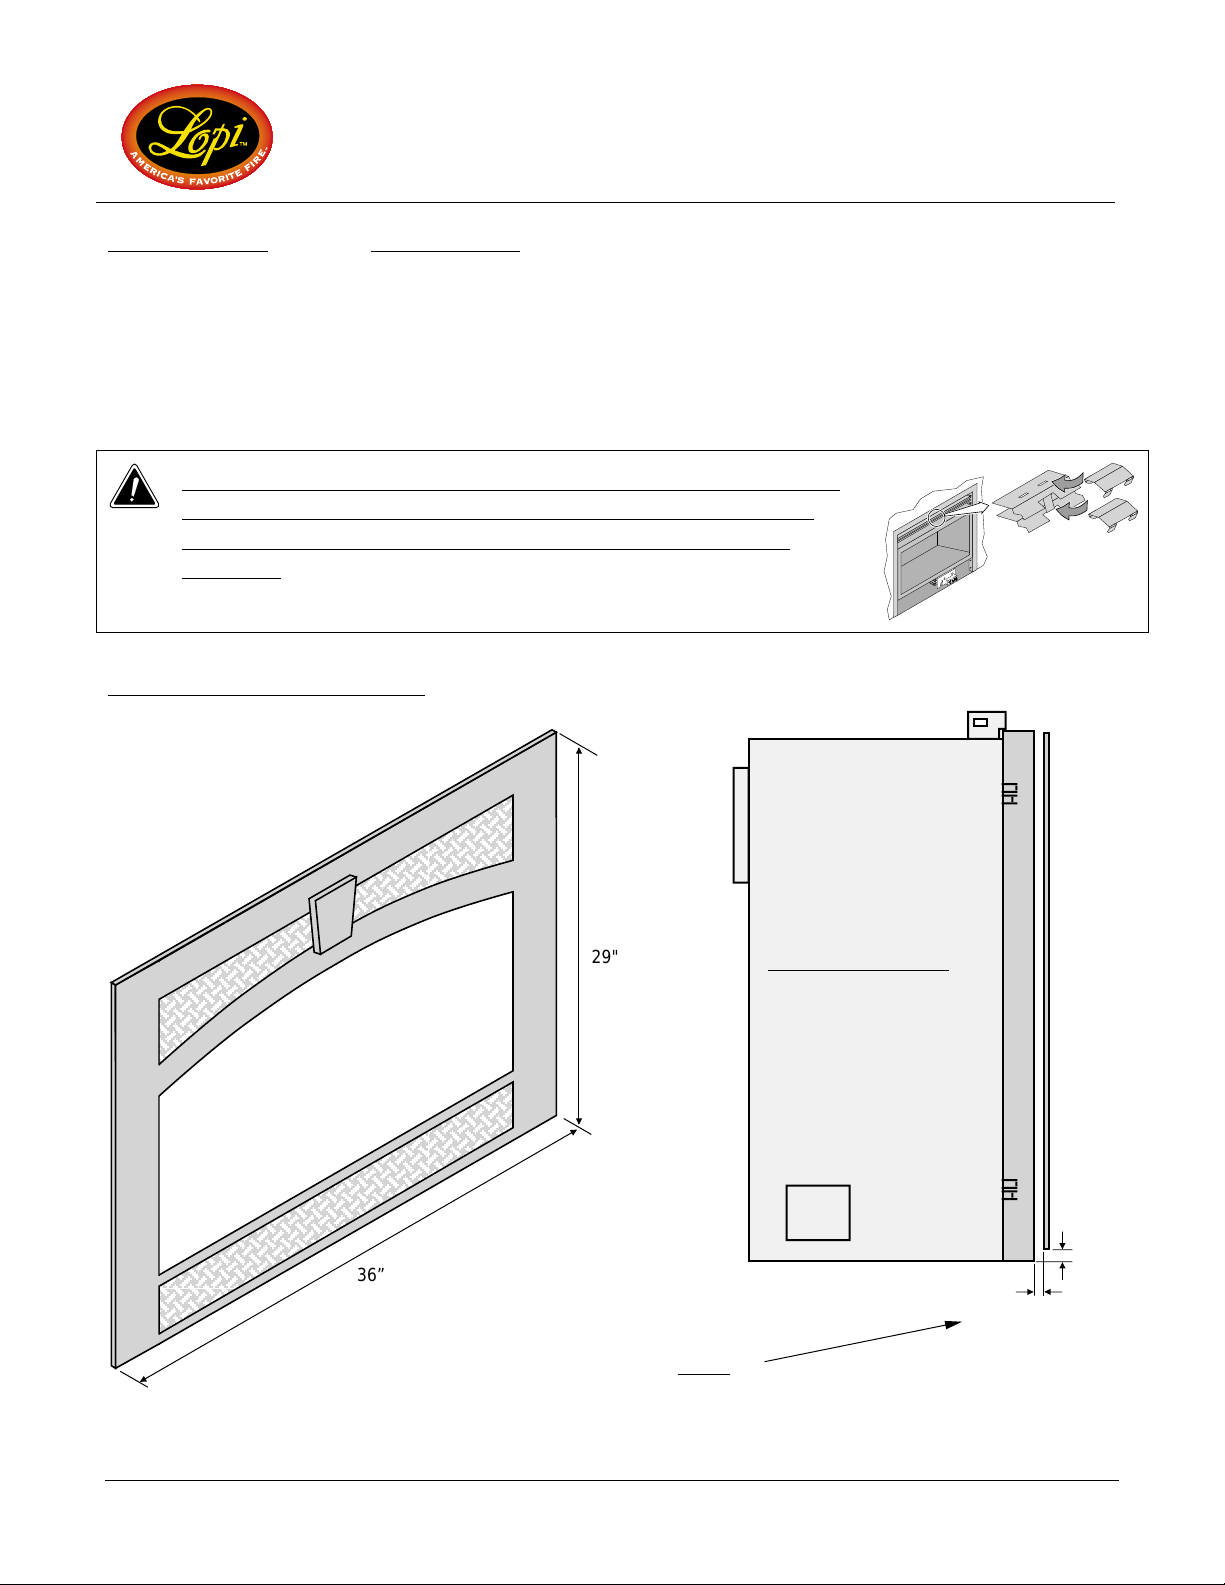
The center deflectors must be in place when using this face to prevent
the facing above the fireplace from becoming too hot. If this face is
replacing a Lopi Grill (96200801), make sure to replace the center
deflectors.
Packing List:
• Face
• 564 SS Glass Frame Cover • 564 E Side and Hinge Brackets
• (2) 564 SS Top Brackets (w screws) • 564 E Upper Heat Shield
• (2) 564 SS Upper Mounting Brackets • 564 E Cove Cover
• (2) 564 SS Lower Mounting Brackets • (14) 8-32 Nuts
• (2) 10-24 1-1/2" Screws (564 SS only)
Installation Details – 564 SS
29"
36”
NOTE:
This face has an adjustable bracket that allows for
different facing depths to be tucked under the face.
Page 1 of 6 8/17/07 © Travis Industries, Inc.
SIDE OF FIREPLACE
1”
0” TO 1”
Page 2
Bostonian (564) Wilmington Face
Black 95400186 Nickel 95400187
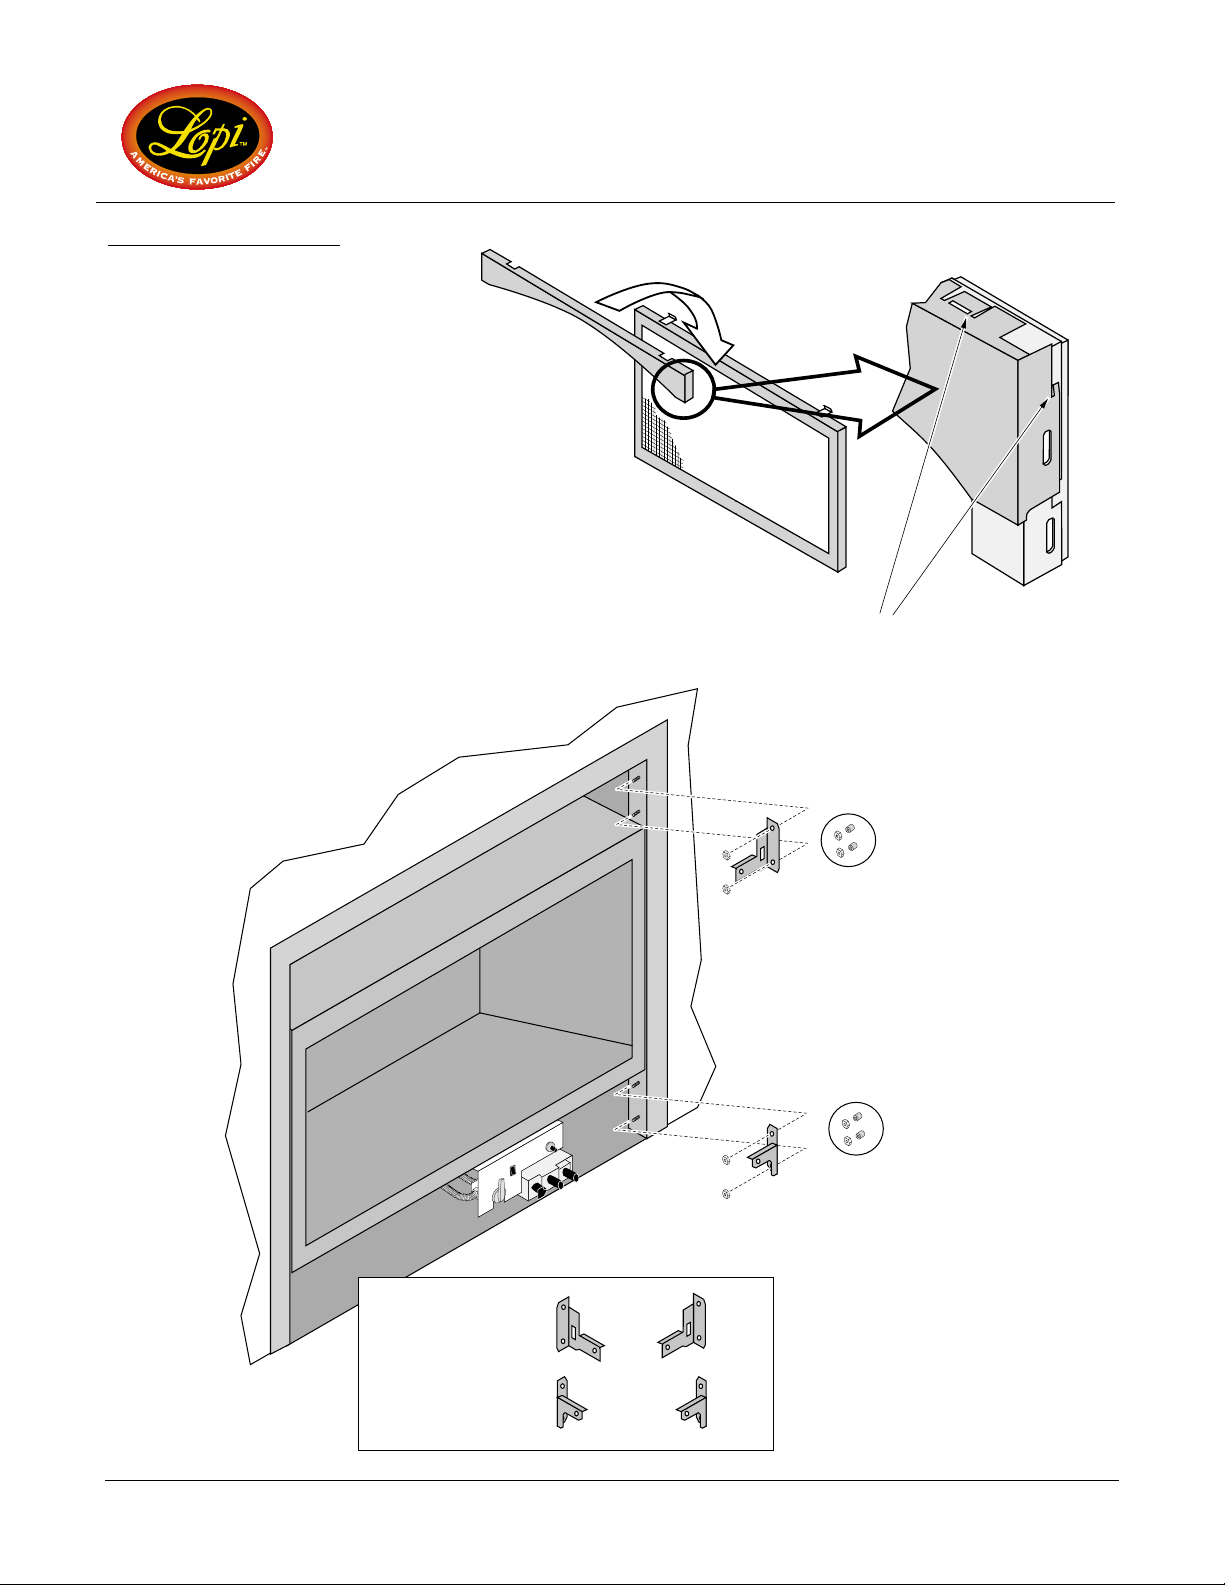
Installation – 564 SS
1 Remove the glass frame (see
the owner's manual for
details). Install glass frame
cover as shown to the right.
2 Install face mounting brackets
to the fireplace.
Place the cover over the top of the door frame.
Push these tabs inwards
to lock the cover in place.
Remove and discard the nuts and bushings
above and below the firebox.
Bracket
Identification
Upper
Left
Lower
Left
Discard the stock
bushings and nuts.
Upper
Bracket
Place the upper and lower brackets in place
and secure using the nuts included with this
kit.
Discard the stock
bushings and nuts.
Lower
Bracket
Repeat these steps for the opposite side.
Upper
Right
Lower
Right
Page 2 of 6 6/24/08 © Travis Industries, Inc.
Page 3

Bostonian (564) Wilmington Face
Black 95400186 Nickel 95400187
Installation – 564 SS (continued)
3 The facing and hearth (if applicable) must be installed prior to attaching the face. See the installation
manual for complete details.
Raised
Fireplaces
Note how the tile is 1”
(maximum) above the
base of the fireplace.
Floor-Level
Fireplaces
Maximum 1`” Hearth
Page 3 of 6 8/17/07 © Travis Industries, Inc.
Page 4

Bostonian (564) Wilmington Face
AAA
AAA
AAA
AAA
AAA
AAA
Installation – 564 SS (continued)
4 Install the face following the directions below.
Black 95400186 Nickel 95400187
Attach the upper brackets
to the face with the
a
included nuts. The upper
bracket consists of two
pieces - note orientation.
Optional Facing (and/or hearth) -See the installation manual for details.
The face is secured to the fireplace with four screws. Two
of the screws are fastened to the upper brackets with
c
press nuts. The lower screws are included with the face.
Slide the face into place. The
tabs on the upper brackets insert
b
into the slots on the fireplace
brackets, holding the face in place
while the screws are tightened.
Plated Surfaces
Use denatured alcohol and a soft cloth to clean plated surfaces. Marks
left on the surface may damage the face.
Page 4 of 6 8/17/07 © Travis Industries, Inc.
Soft Cloth
Denatured
Alcohol
Page 5

Bostonian (564) Wilmington Face
Black 95400186 Nickel 95400187
Installation – 564 Electric
1 Install the upper heat shield onto the 564 E fireplace.
Place the upper heat shield included with this kit
Remove the stock upper heat shield.
on top of the fireplace (note position of heat
shield). Place the stock heat shield on top of it
and secure with the same screws.
Page 5 of 6 8/17/07 © Travis Industries, Inc.
Page 6

Bostonian (564) Wilmington Face
Black 95400186 Nickel 95400187
2 Place the face, face down, on a soft, non-scratching surface. Install the 564 Electric mounting brackets onto
the back of the face.
Attach the 564 E side bracket.
Use the nuts included with
c
this kit.
Repeat steps “a” through
d
“c” for the opposite side.
Remove and
discard the
a
hinge assembly
from the face.
Attach the 564 E hinge bracket. Use
b
the nuts removed earlier.
3 Pull the electric fireplace out of the mantel (or built-in location). Attach the cove cover and face following the
directions below. Slide the fireplace back into place to complete the installation.
Hang the 564 E cove
cover over the glass this keeps light from
exiting the grill opening
along the top of the face.
a
Before installing the face
e
verify the lower grill is
centered. Loosen the nuts
and adjust if necessary.
c
Lift the face up slightly, tilt
it forward and insert the
top hooks until the face
locks in place.
b
Tilt the face back slightly and insert the
bottom hooks into the slots on the fireplace.
Page 6 of 6 8/17/07 © Travis Industries, Inc.
 Loading...