

Page 1

10Base-T
to
10Base-2 Converter
User’s Manual
Page 2

10Base-T to 10Base-2 Converter
COPYRIGHT
All rights reserved. No part of this publication may be reproduced,
stored in a retrieval system, or transmitted in any form or by any
means, whether electronic, mechanical, photo copying, recording
or otherwise, without the prior written permission of the publisher.
FCC WARNING
This equipment has been tested and found to comply with the
limits for class A device, pursuant to part 15 of FCC rules. These
limits are designed to provide reasonable protection against
harmful interference in a commercial installation. This equipment
generates, uses and can radiate radio frequency energy and, if not
installed and used in accordance with the instructions, may cause
harmful interference to radio communication. Operation of this
equipment in a residential area is likely to cause harmful
interference, in which case, the user will be required to correct the
interference at the user’s own expense.
Page 3

10Base-T to 10Base-2 Converter
Table of Contents
1. Introduction
Product Summary & Benefits………….…. 1
Features…………………………………….. 3
Specifications………………………………. 4
2. Installation
Package Contents………………………… 5
MDI/MDIX Connection……………….……. 6
Positioning of Converter…………………… 7
Connections.............……………………… 9
3. LED Indicators
LED Indicators…………….………………. 10
4. Appendix
A - Internal Power Supply ...………..…… 11
B - Mounting ................………….....…… 12
C - Cables ................……….....………… 13
D - About RJ-45 Cables ..…………..…… 14
Page 4

10Base-T to 10Base-2 Converter
1
Introduction
Product Summary & Benefits
The 10Base-T to 10Base-2 Media Converter was specifically
designed to offer the network designer the tools for migration from
Coaxial based Ethernet to UTP based Ethernet. Now, migration or
expansion of existing networks can be achieved with minimum
cost and complexity. The converter is completely transparent to
the network so the network performs exactly the way it did before only now it can migrate both UTP and Coaxial mediums.
Expands the Size of an Existing Network
Provides UTP/Coaxial connectivity to Ethernet segments, allowing
for even further networking expansion between extended nodes.
Allows for the quick and easy addition of Coaxial segments to
existing 10Base-T networks.
Enhances Networking Distances
Connecting this converter to UTP segments can further extend
distances of up to 185 meters for a total segment length of 285
meters. The Converter can be connected to an additional Fiber
converter for even longer extensions.
Page 5
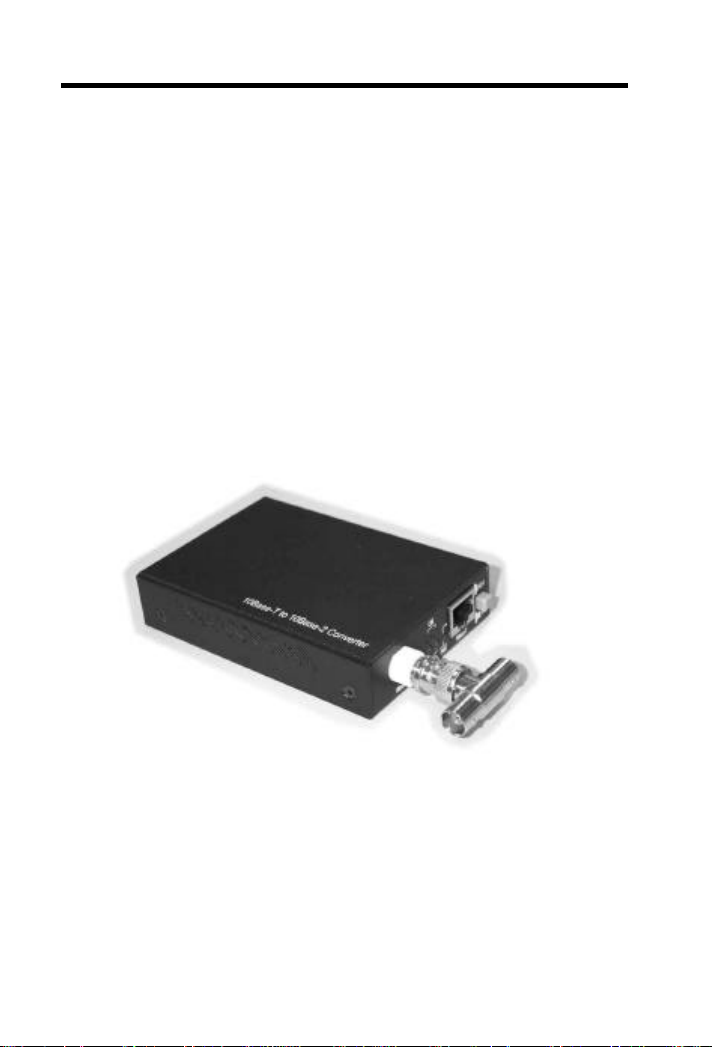
10Base-T to 10Base-2 Converter
Cabling Flexibility
This unit allows network managers to put UTP cabling anywhere
within a network without retrofitting the arrangement of the Ethernet
network. Its sleek design makes it easy to be install in a compact
space or on wall mount locations. Several converters can be
simultaneously installed by using a 19” Rack-mount Chassis.
Converter with BNC T-connector Attached
Page 6

10Base-T to 10Base-2 Converter
Features
• Complies with IEEE 802.3 10Base-2/T standards
• MDI/MDI-X push button selection for RJ-45 port
connection
• Extended distances of up to 285m
• Operates in half duplex mode
• Compatible with other 10Base-2/T devices
• Status LEDs for RCV, LNK, & Part to easily monitor
network activities
• External and Internal power supply options
• FCC Class A & CE approved
Page 7

10Base-T to 10Base-2 Converter
Specifications
Standard: IEEE 802.3 10Bade-T/2
Connectors: 1x shielded RJ-45, 1x BNC
1 x BNC T-connector
Max. Distance: UTP: 100 meters (Cat 3.)
Coaxial: 185 meters
Unit LED: Power , Link, Receive, and Partitioning
Delay: Same as Class 1 repeater, Typically less than 23Bit
Power: AC voltage 12VDC at 0.8A power adapter
Frequency: 47Hz to 63Hz
Please see Appendix A for internal Power Supply
O
to 70C
O
O
Temp: Operating: 0CO– 70C
Storage:
-20C
Humidity: Operating: 10% to 80% RH
Dimensions: 109.2 x 73.8 x 23.4mm (L x W x H)
Page 8

10Base-T to 10Base-2 Converter
2
Installation
Package Contents
Before proceeding, please check that your package contains the
following items, and that they are in good order:
• One converter
• One AC adapter (external) or one power cord (internal)
• One BNC T-connector
• Four self-adhesive pads
• One user’s manual
To successfully install your converter, please see the following
procedures below:
• Using 10Base-2 Cable
• MDI/MDI-X Connection
• Positioning of Converter
• Install Your Converter
Page 9

10Base-T to 10Base-2 Converter
MDI/MDI-X Connection
The MDI/MDI-X push button alleviates the worry of cable type
configuration when connecting the converter with another 10BaseT device. Simply refer to the table below for the correct switch
selection:
Device Cable Selection
Hub or Straight Select
Switch Through MDI
Hub or Crossover Select
Switch MDI-X
DTE Straight Select
(NIC) Through MDI
Configuration
Crossover Selection Table
MDI-X
MDI
10Base-T
Location of Crossover Switch
Page 10

10Base-T to 10Base-2 Converter
Positioning of Converter
The following are drawings of typical Applications for the Converter.
Obviously the actual distances will depend on your network, the
quality of cables used, and the terminal equipment employed.
Example 1
The unit allows conversion from 10Base-T UTP to 10Base-2
Coaxial cable. In this configuration, equipment can be added to
existing 10Base-T networks. Distances of up to 185 meters can
be achieved.
Page 11

10Base-T to 10Base-2 Converter
Example 2
The unit allows conversion from 10Base-T UTP to 10Base-2
Coaxial cable. In this configuration an additional 10Base-2
segment can be added to the network.
Example 3
By using a combination of fiber and UTP converters, it is possible
to achieve extended 10Base-2 segments.
Page 12

10Base-T to 10Base-2 Converter
Connections
10Base-T Connection
1. Make sure that the length for straight through twisted pair
cable between 10Base-T device (hub or switch) and
converter is no greater than 100 meters.
2. Connect one end of twisted pair cable to RJ-45 jack on the
converter and the other to the RJ-45 jack on the 10Base-T
device.
10Base-2 Connection
To connect to an Ethernet using 10Base2 cable, do the following:
1. Attach the supplied BNC T-connector to the converter’s
BNC connector.
2. Connect one end of a Thinnet (10Base2) coaxial cable to the
BNC T-connector attached to the media converter.
3. Connect the other end of the coaxial cable to the BNC Tconnector attached to the Ethernet device.
Note: If either your converter or the Ethernet device is an end
node, attach a BNC terminator to the open connector on the
BNC T-connector.
Page 13

10Base-T to 10Base-2 Converter
3
LED Indicators
This converter has several LEDs to enable you to determine the
status of the converter and to see what is happening across your
network. They are as follows:
10Base-2
LNK
RCV
PART
10Base-T
MDI-X
MDI
PWR Green light - Illuminates when power is on
LNK Green light - Illuminates when receiving link pulses
from compliant devices.
RCV Amber light - Flashes or illuminates when receiving
data packets (depends on the rate of
data passing through).
PART Green light - Illuminates when partitioning occurs.
Page 14

10Base-T to FL Converter
Appendix A
Internal Power Supply Models
Rear View of Converter with AC Power Supply
Power: 90 - 240V AC (Optional 12V Adapter)
Dimensions: 109 x 174 x 44.3 mm (LxWxH)
Rear View of Converter with DC Power Supply
Power: -48V DC (Optional 12V Adapter)
Dimensions: 109 x 174 x 44.3 mm (LxWxH)
Page 15

10Base-T to FL Converter
Appendix B
Coverter Mounting
This converter can be placed in any location that will make its
installation convenient. If you place the converter on a horizontal
surface or on top of existing networking equipment, please affix the
four rubber pads included in the package.
This converter can also be mounted on a vertical surface. Simply
use the underside of the unit as a template to measure and mark
out the position of the holes on to the surface where the unit is to
be installed. Then use two screws to mount the converter firmly in
place.
Please exercise caution when using power tools. Also, install this
unit away from damp or wet locations, or in close proximity to very
hot surfaces. These types of environments can have a detrimental
effect on the converter and cables. An ideal location is a lightly
cooled place such as a typical equipment room.
Page 16

10Base-T to FL Converter
the diameter
for UTP and
twist too
the internal
Place cable ties
not over tighten
to avoid using
the cable
trays and when
Appendix C
Cables
The following are some recommendations as to what you should
and should not do when installing cables. Remember - cables are
the deciding factor in network performance
6mm
Try to
maintain
a bend
24mm
radius of
(min.) 4x
of the cable
100x for fiber.
at regular
intervals - do
cable ties - try
with fiber.
Try not to
allow the
cable to
much - this
creates a
strain on
cables.
Do not stretch
especially on
corners, in
vertical cable
spanning long
distances.
Page 17

10Base-T to FL Converter
Converter Hub
Appendix D
About RJ -45 Cables
When connecting your network devices, use standard
Category 3 eight -way cables for 10Base-T configurations
and Category 5 cable for 100Base-TX. The pin
assignments are as follows:
Pin 1 TD+ Pair 2 White/Orange
Pin 2 TD- Pair 2 Orange/White
Pin 3 RX+ Pair 3 White/Green
Pin 4 N/A Pair 1 Blue/White
Pin 5 N/A Pair 1 White/Blue
Pin 6 RX- Pair 3 Green/White
Pin 7 N/A Pair 4 Brown/White
Pin 8 N/A Pair 4 Brown/White
Application Cable Type Application
Converter
to
Converter
or
Network Adapter
Converter
to
Switch
Straight-through
Cable
Cross-Over
Cable
1 1
2 2
3 3
6
Converter Converter
1
1
2
2
3
3
6 6
6
 Loading...