

Page 1
INSTALLATION & OPERATION
MANUAL
SP834
Portable Printer System
DOC#: MN-834-A
Page 2

POWER SWITCH & AUTO POWER OFF
This switch turns the printer on and off. If the printer is left on with no activity (no motion of the
print head) for more than 1.5 minutes, the printer will automatically turn off. To turn the printer
back on, turn off the power switch, then turn the power switch back on.
STATUS LED – when operating
The STATUS LED located on the front panel of the printer indicates the following:
OPERATING = RED
CHARGING = GREEN
OPERATING
When the power is turned on, and the printer is not receiving a signal from the T675, the RED
STATUS LED will illuminate steadily. When the printer is receiving a signal from the T675, the
RED STATUS LED will flash rapidly.
When the printer is NOT receiving a signal from the T675 and low battery power is detected, the
RED STATUS LED will flash once per second and the built-in beeper will beep at the same rate.
To reset the low battery condition, turn the printer off and back on. This low power indicator is
useful when troubleshooting printers that suddenly stop printing for no ‘apparent’ reason.
If the printer detects an internal problem during power-on, or if a printer mechanism fails during
operation, the RED STATUS LED will slowly flash indicating an error code. The error code is
displayed by the RED STATUS LED blinking a certain number of times, and after a 2-second
pause, the blinking resumes. Count the number of times to determine the error code. The error
codes are:
01 = LOW BATTERY POWER DETECTED
02 = PRINT HEAD CANNOT FIND HOME POSITION
03 = CANNOT FIND TOP-OF-FORM MARK
04 = PAPER OUT CONDITION DETECTED
05 = BAD CPU RAM OR EPROM
06 = BAD EXTERNAL RAM
07 = BAD REAL-TIME CLOCK
08 = STUCK KEYPAD
09 = FLASH ERASE ERROR
10 = FLASH PROGRAMMING ERROR
CHARGING
When charging power is first connected and if the battery is excessively discharged, the unit will
trickle charge the battery for several minutes until the cell voltage reaches approximately 0.9V.
While this initial trickle charge takes place the GREEN STATUS LED will flash every 1.5 seconds.
Once the trickle charge has raised the cell voltage enough, fast charge will automatically begin
and the GREEN STATUS LED will be illuminated steadily.
When the battery is fully charged, the GREEN STATUS LED will flash 2 times per second. If the
battery is completely charged and the printer is again connected for charging, depending upon the
battery voltage the GREEN STATUS LED will turn on for approx. 1 second 1-2 seconds after the
unit is first connected. The LED then turns off for several minutes and then begins flashing rapidly
2 times per second just as it does when fast charging is complete.
Page 3
A fully discharged battery pack should take approx. 1.25 hours to be fully charged. It is safe to
leave the unit always connected for a charge. After fast charge, the battery will trickle charge at a
rate of C/50 which is (1/50 x 1.3aH) or 26 milliamps.
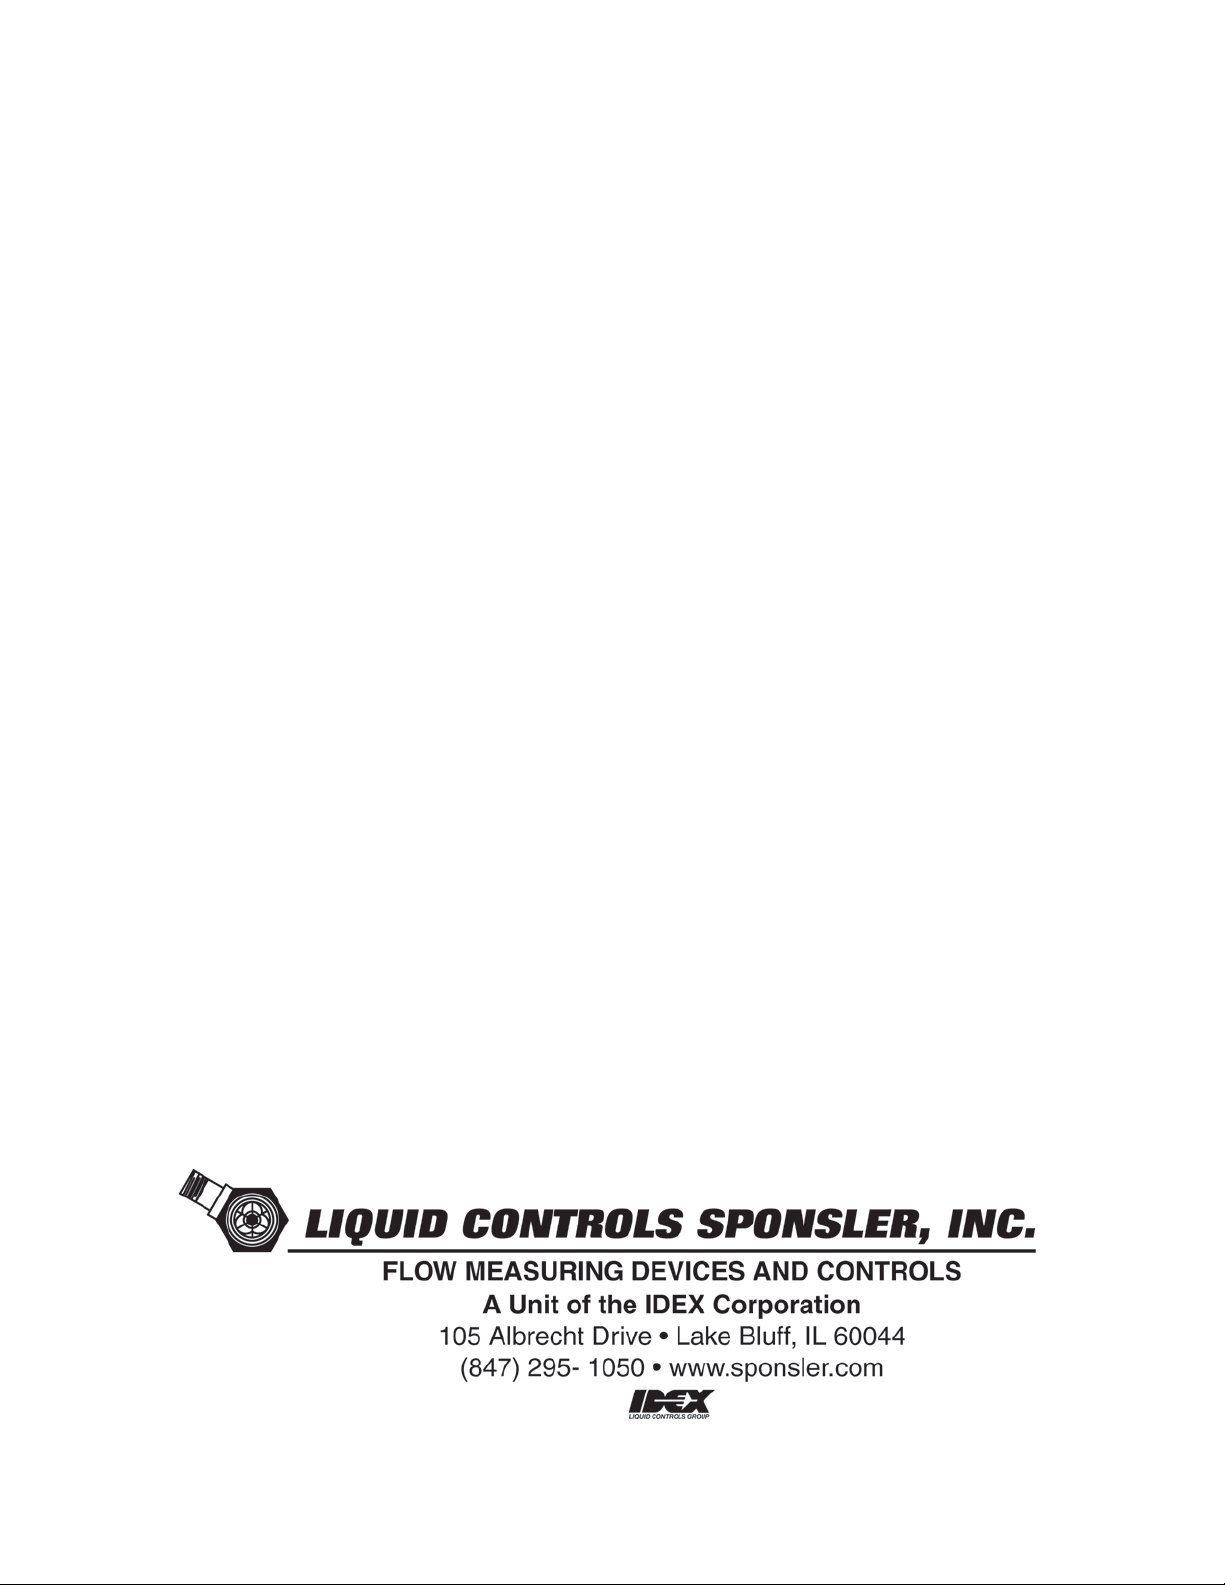
RECHARGING THE PRINTER
Insert 12VDC Probe into
lighter outlet
TOP OF FORM PUSHBUTTON (BLACK)
The TOP OF FORM pushbutton will cause the paper to advance to the top of the next form. Once
this button is pressed the paper will advance until the TOP OF FORM mark is detected. During
the paper advancement, the print head is constantly moved across the paper to help prevent the
paper from getting caught under the print head. Once the TOF mark is detected and the
pushbutton is released, the printer will home the print head and is then ready to operate normally.
TOP OF FORM is detected by the top of form sensor located at the right side of the paper tray
under the drag bar. The threshold of the sensor is factory calibrated.
PRINT PUSHBUTTON (RED)
The PRINT pushbutton will cause a ticket to be printed as long as the printer is receiving a signal
from the T675 and the RED STATUS LED is flashing rapidly. First, the ticket information is stored
in the ticket storage memory. Next the paper advances to the top of form (if it is already at top of
form, the paper will back up slightly then advance forward so that the ticket is aligned with the
upper edge of the top of form mark). Finally, the print head returns to home (leftmost) position,
and the ticket is printed. The paper is then advanced to the top of the form position so the ticket
can be easily removed from the printer.
SETTING THE TIME AND DATE
The time and date are received from the T675 and therefore must be changed in the T675 in
order to be changed on a ticket.
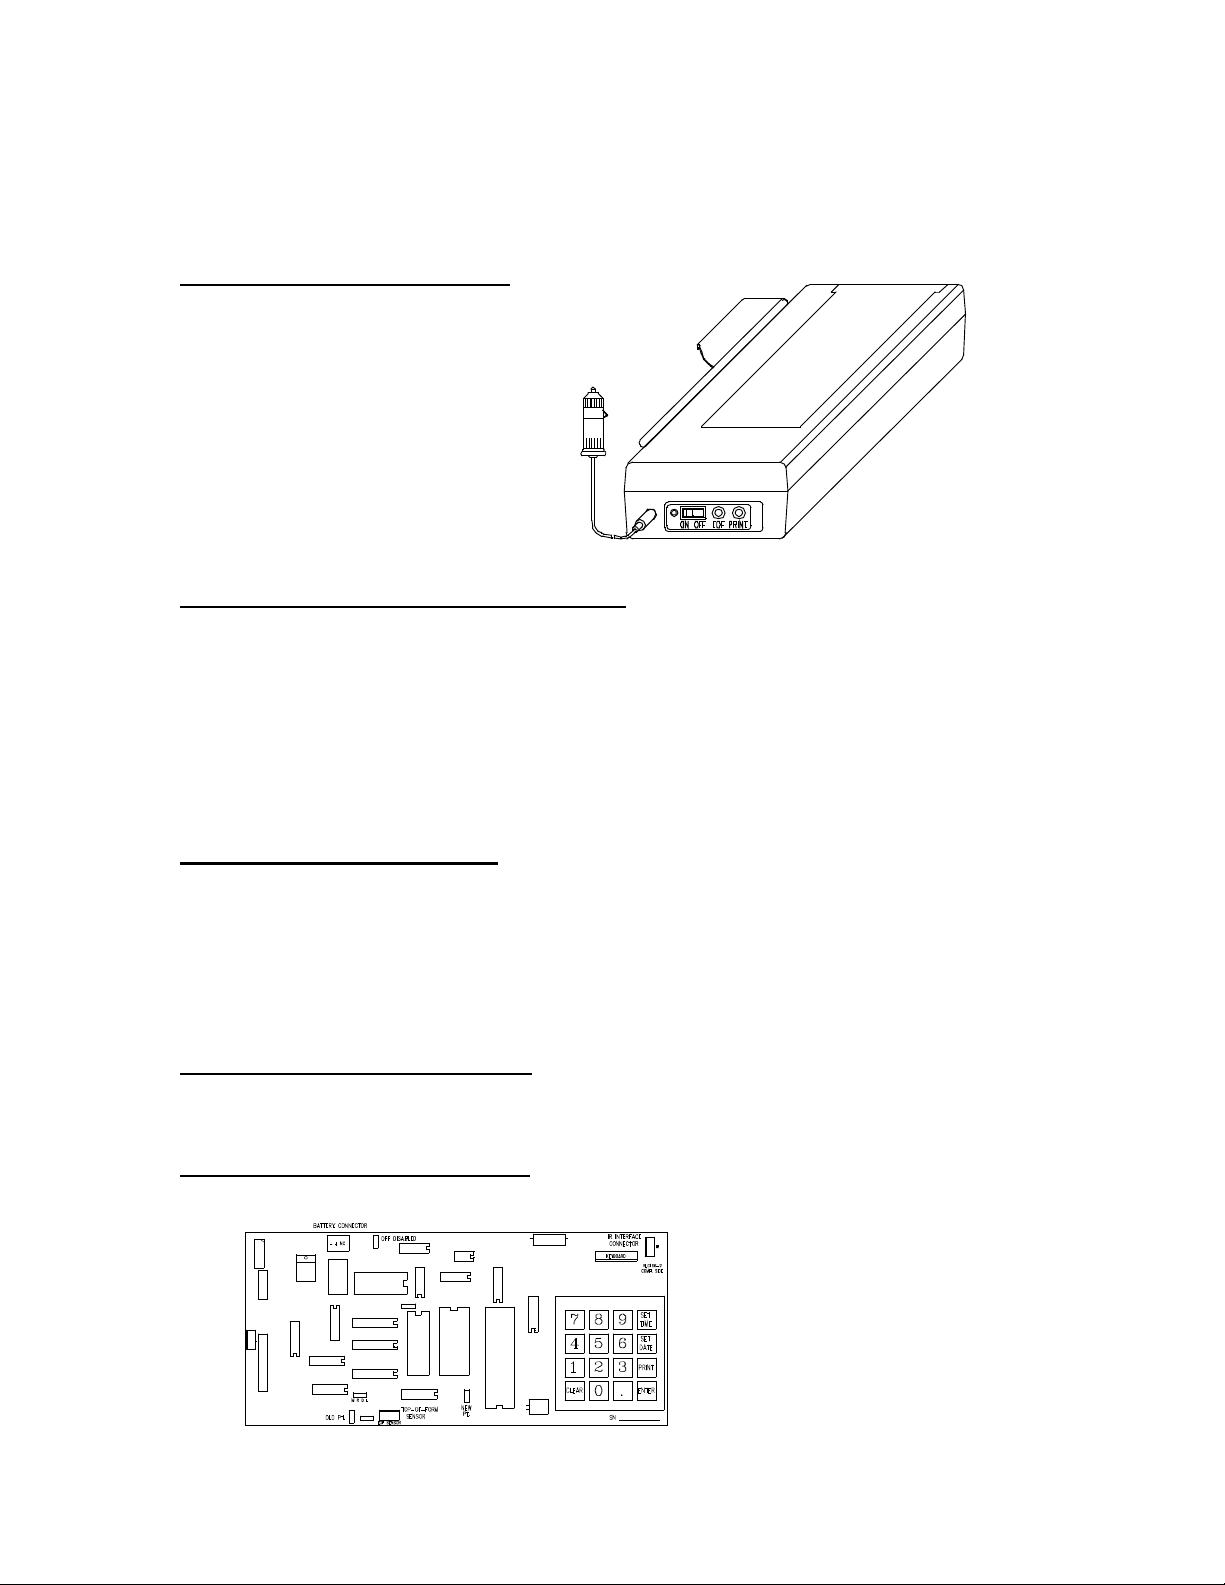
PRINTER CONROL PC BOARD
Page 4

ERASING CUSTOM MESSAGES
FONTS
80 chcts.
Delivery receipt from:
7 lines
3 lines
To erase messages using the internal keypad, begin the erase sequence by pressing the CLEAR
key. The printer will now print the following menu on the ticket:
0 – DO NOT ERASE
1 – ERASE CUSTOM MESSAGES
To exit without erasing, press any key other than 1. To erase the custom messages press the ‘1’
key, “MESSAGE ERASED!” will print.
CUSTOM MESSAGES: Programmed at the factory
Seven lines available at top of ticket, 3 lines available at bottom of ticket
3 fonts: Large = 20 characters per line
Regular = 40 characters per line
Small = 80 characters per line
MULTIPLE TICKETS
Printer may be programmed at the factory to print up to 3 copies. User must specify number of
tickets required. The first ticket will print ***ORIGINAL COPY***, the second ticket will print
***DUPLICATE COPY***, and the third ticket will print ***TRIPLICATE COPY*** as the last line of
the ticket. The following is an example of a standard ticket:
LARGE
20 chcts.
STANDARD
40 chcts.
Date 15:18 12-Jun-96
Customer
Product LOX
Temp -288.9 F, CALC @ NBP
C.F. .9792480469
Start 0
Stop 112
Total 112 GALLONS
Tractor Trailer ___________________
Driver
Signature
DEPUTY
SMALL
SPONSLER, INC.
THE MEASURE OF EXCELLENCE
2363 Sandifer Blvd., Westminster, SC 29693
phone (864) 647-2065 fax (864) 647-1255
BE SURE TO INQUIRE ABOUT OUR ENTIRE PRODUCT LINE FOR 2001
Have a great day!
Custom
message,
top of
ticket
Custom
Page 5

PRIN
Printer Holster
***ORIGINAL COPY***
message,
ticket
P/B SWITCH
GREEN LED
OPERATION PROCEDURE
T675 WITH SP825 DATACUBE & SP834 PORTABLE PRINTER
To be performed as the final segment of delivery procedure.
1) Turn the SP825 ‘ON’ by depressing the P/B switch. Two short low volume
beeps will occur and the green LED
indicator flashes quickly.
2) With red lens inward, align SP825 in T675 bracket. One long loud volume
beep occurs when data is successfully transferred to SP825.
bottom of
3) Within 1 ½ minutes with the red lens inward, insert SP825 into SP834
printer holster
Page 6

4) Turn SP834 ‘ON’ red LED illuminates.
Red Print Button
Make sure paper height doesn’t exceed
5) SP834 red LED indicator flashes rapidly, indicating communication.
6) Depress ‘RED’ print button.
7) Remove SP825 from SP834 printer holster.
LOADING PAPER INTO THE PRINTER
1) Orient the printer as shown in the
following drawing:
Slide the paper tray cover back.
2) Place new paper in paper tray EXACTLY
as shown:
the bottom of drag bar
Page 7

3) Curl back the top sheet as shown and feed the
paper under the drag bar, through the opening
and into the printer mechanism, keeping the
paper evenly aligned.
4) Press the paper feed pushbutton (BLACK) while
feeding paper into printer mechanism. Once the
paper catches, the printer will continue feeding
paper until the top of form mark is detected.
Replace the paper try cover. The printer is now ready for operation.
DECLARATION OF CONFORMITY
This is to certify that the listed equipment below conforms to the listed Directive
and Product Standard.
Name of Manufacturer: Sponsler Company, Inc.
2363 Sandifer Boulevard
Westminster, SC 29693 USA
Type of Equipment: Ticket Printer and Data Cube
Conforming Models: SP834 (printer) and SP825 (data cube)
Directive/Product Standard: EMC Directive 89/336/EEC
using EN61326
Equipment Type/Environment: Industrial Location (Class A)
Sponsler, Inc.
Date: February 28, 2002 Signature:
Title: President
Page 8

©2009
Pub. No. MN-834-A-R2
(09/09)
 Loading...