

Page 1
CAMPER ANCHOR TIE DOWNS
HAPPIJAC COMPANY
505 North Kays Drive, Kaysville, UT 84037
Phone: (801) 544-2585 Fax: (801) 546-2202
INSTALLATION
INSTRUCTIONS
Model: CA-FD7
FITS: 1997 FORD F-150
1997 FORD F-250 (Under 8,500 GVW)
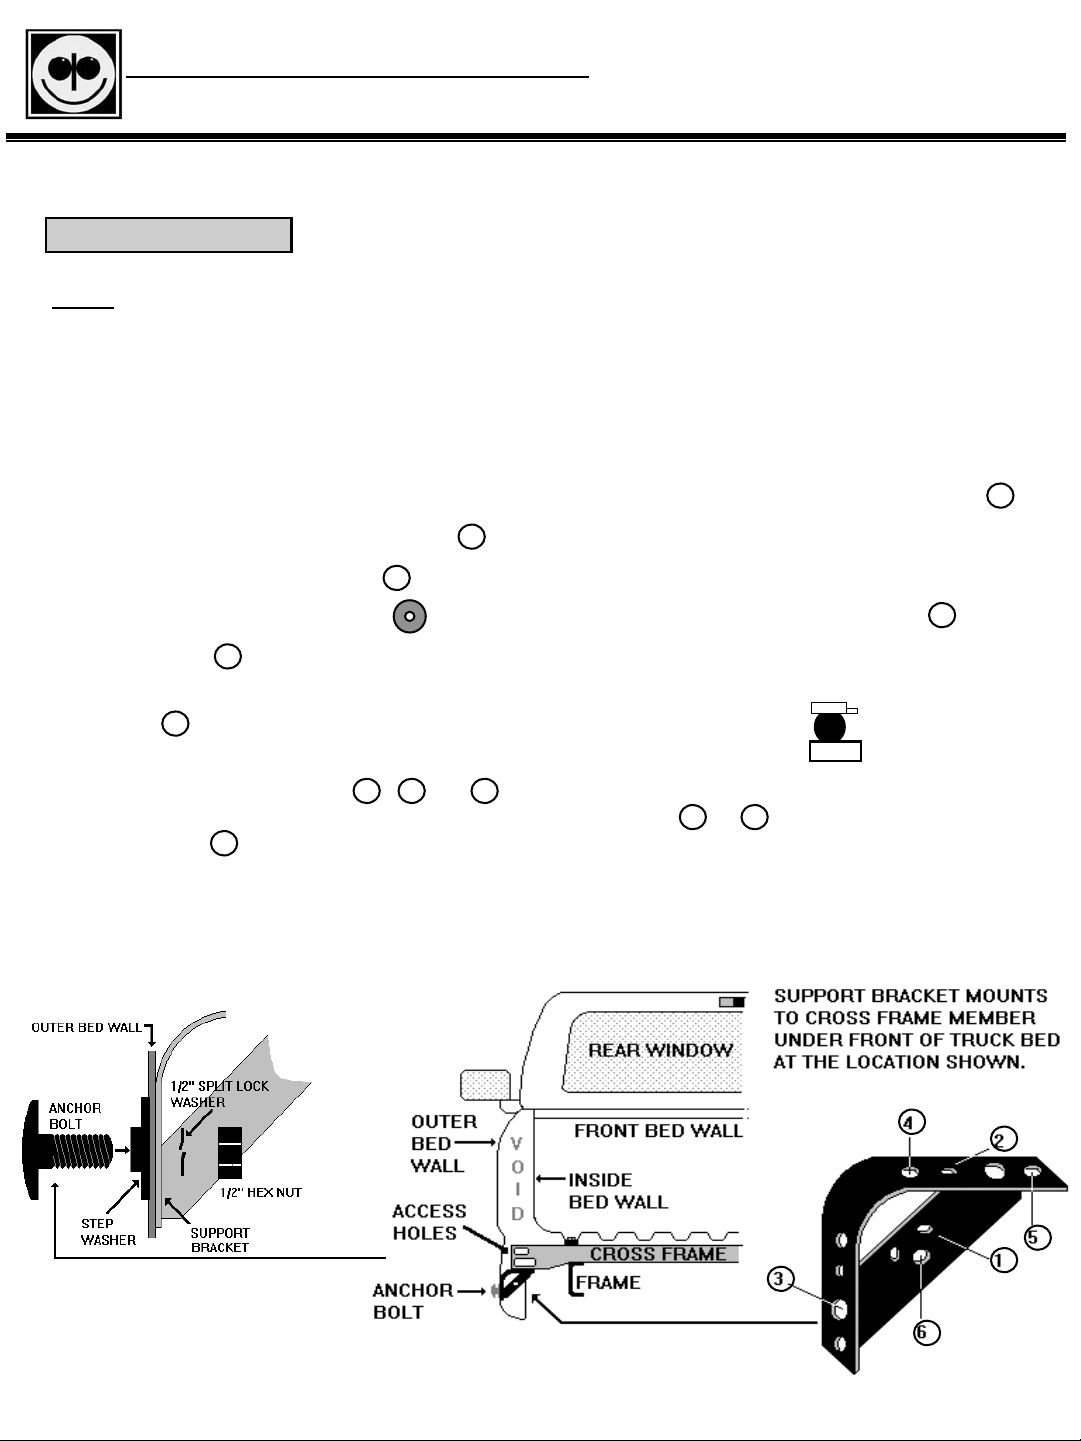
FRONT ANCHORS
NOTE: The diagram below shows driver’s side installation. The support brackets are universal
and will fit either side. Familiarize yourself with the hole numbers for the drivers
side installation, then locate the corresponding holes for the passenger side installation.
1. Locate the installation point for the triangular support bracket under truck frame cross member
at front of truck bed as shown. (Fig. 2)
2. Fit bracket as shown so that it rests flush against all three surfaces which it contacts (cross frame,
outer wall, & vertical support) then mark, center punch, and drill a 1/8” pilot hole at hole location 1
3. Install #8 sheet metal screw at location 1 , recheck positioning of support bracket then tighten.
4. Drill 1/8” pilot hole at location 2 and install and tighten #8 sheet metal screw.
5. Using centering guide provided, drill 1/8” pilot hole (from inside out) at hole location 3 .
6. Enlarge hole 3 through outer bed wall to 1/2” drilling from the outside.
7. Install chrome step washer onto chrome anchor bolt with stepped side toward head, then insert
in hole 3 from the outside. Set anchor bolt with flat sides at top and bottom , and secure
with 1/2” lock washer & nut. (Fig. 1)
8. Drill 3/8” holes at positions 4 , 5 , & 6 and install 3/8” hardware. Insert bolt with flat washer
downward through access holes in cross frame member at holes 4 & 5 . Insert bolt with flat washer
through hole 6 . Secure all bolts with 3/8” split lock washer & nut.
Fig. 1
Fig. 2
SEE REVERSE FOR REAR ANCHOR INSTALLATION
Page 2
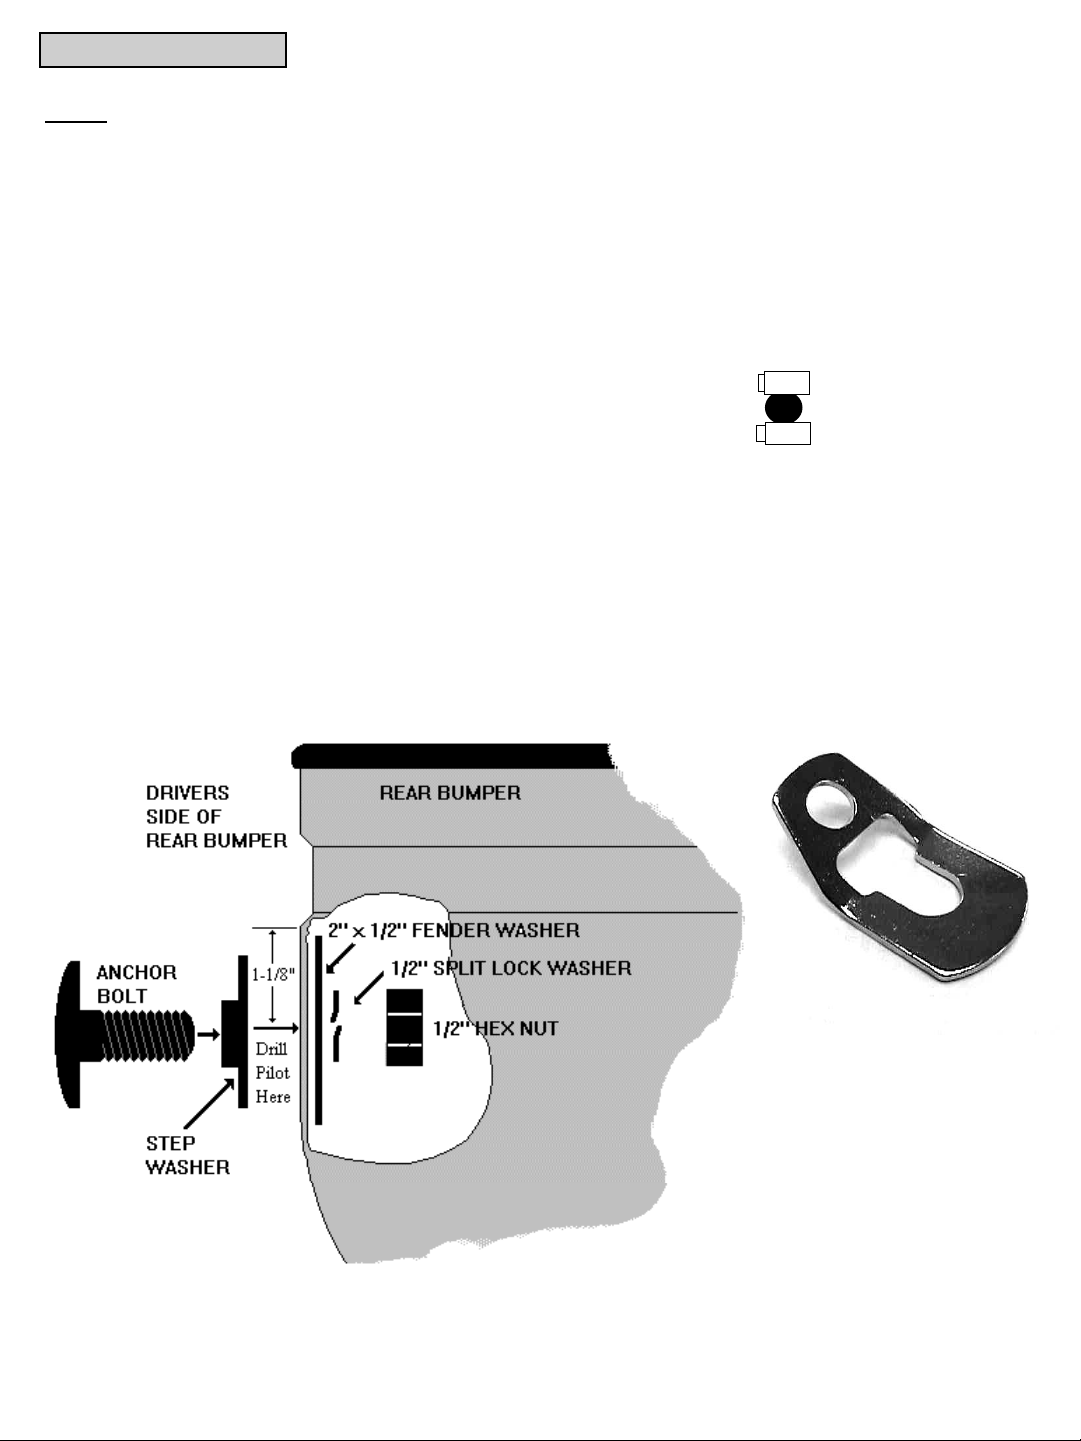
REAR ANCHORS
NOTE
: The diagram below shows driver’s side installation. The same procedure and dimensions
apply to the passenger side installation.
1. Looking at the end of the bumper, locate and mark a point mid way (center) from left to right,
and 1-1/8” down from bottom of inset. (See Fig. 3 below)
2. Center punch, then drill 1/8” pilot hole at this point.
3. Enlarge hole to 1/2”.
4. Install anchor bolt as shown in Fig. 3, with the flat surfaces horizontal.
5. When loading camper, slide the angled tie down coupler (Fig. 4) over the anchor bolt
and insert turnbuckles into the eye of the coupler.
It is best to slip the turnbuckle hook through the coupler from the truck side outward.
NOTE: When camper is not loaded, remove and store Tiedown Couplers to avoid loosing them.
Fig. 3
Fig. 4
Tiedown Coupler
 Loading...