

Page 1
A Division of Cisco Systems, Inc.
Wireless-G
IP Phone
Voice
®
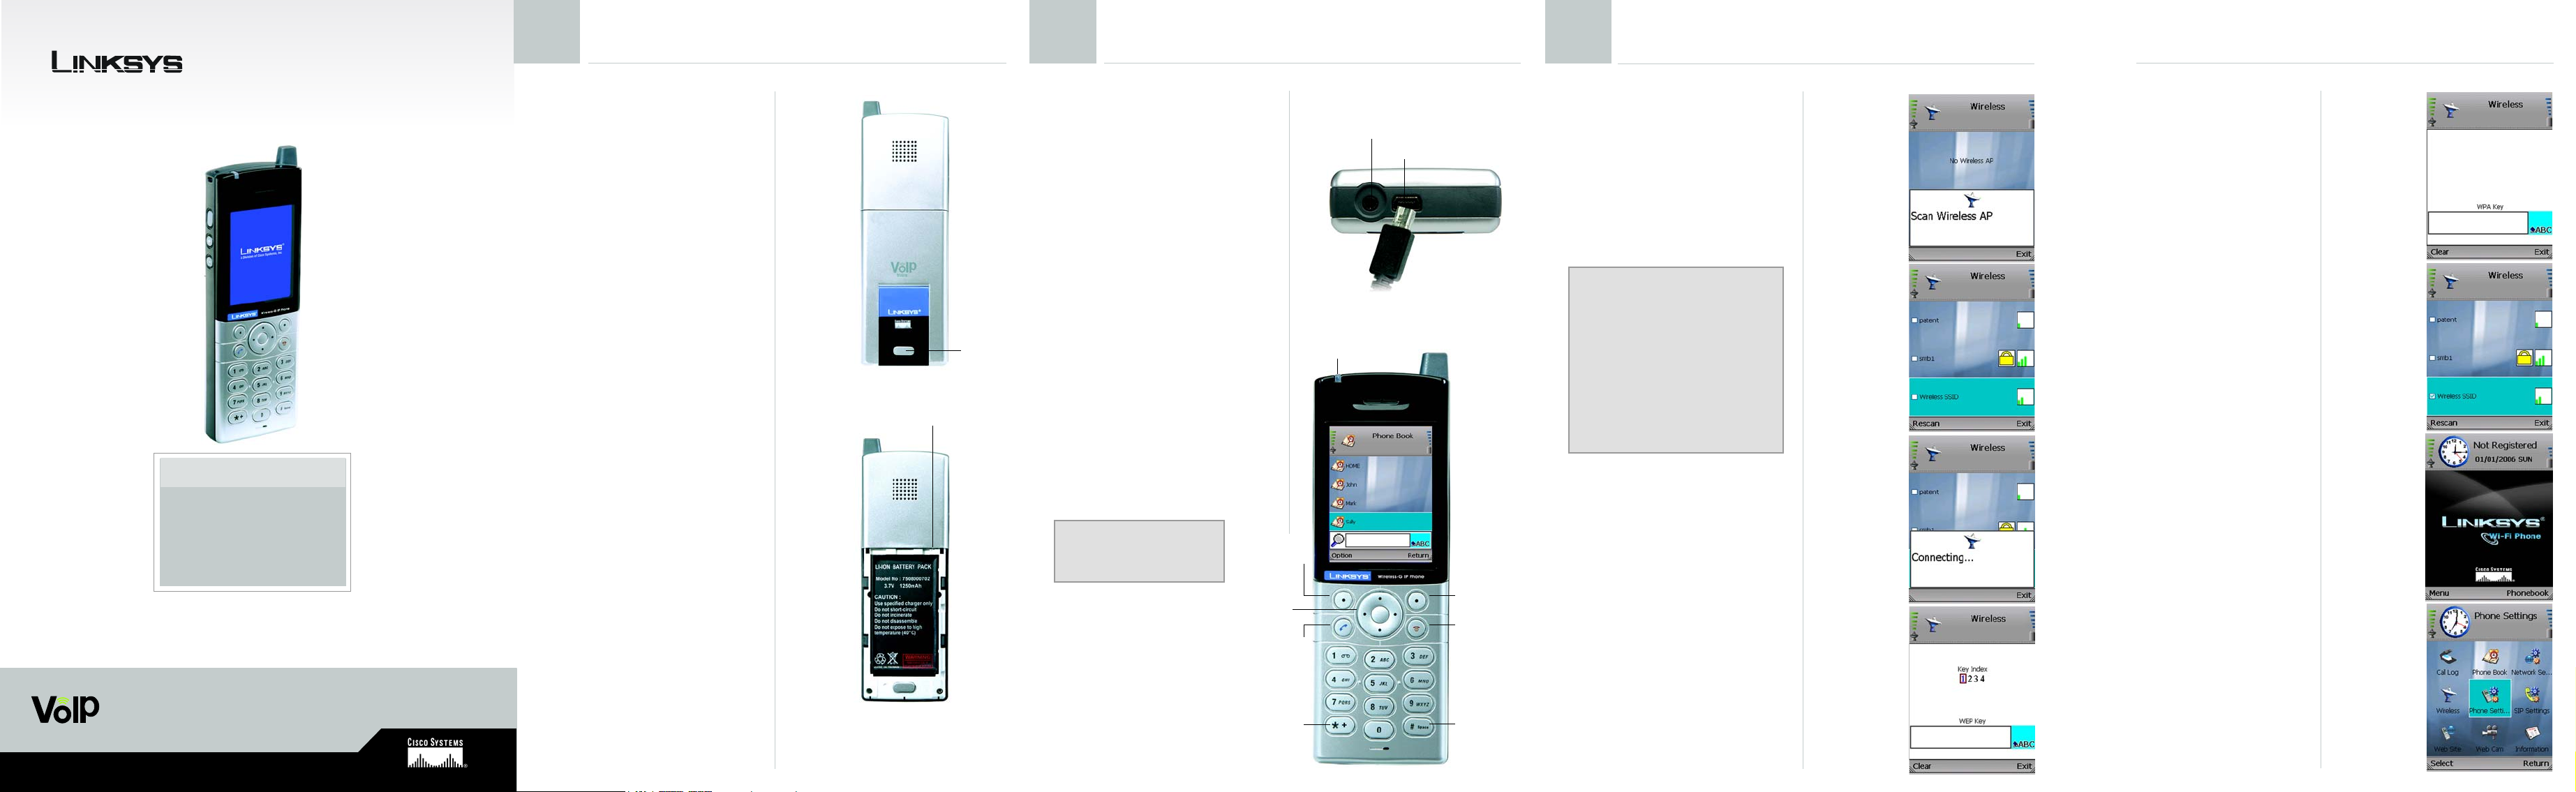
Package Contents
• Handset
• Power Adapter
• Quick Installation
•User Guide on CD-ROM
Quick Installation
12
To insert the battery, follow these
instructions:
A Remove the cover of the
B Insert the battery. Make sure
C Insert the door and slide it
Inserting the Battery Powering on the IP Phone
Make sure you have the account
Headset
Jack
USB Port
Power LED
battery compartment. Push
down on the button and
slide the cover downward.
the metal contacts of the
battery line up with the
metal contacts of the
battery compartment.
upward until it snaps into
place.
A
Metal Contacts
Button
information, including necessary
IP Phone settings, supplied by your
Internet phone service provider.
If you already have an account
set up with your Internet phone
service provider, then proceed to
step A. If you do not have an
account, then go to the website
of your Internet phone service
provider and sign up for service.
Proceed to step A.
A Plug the USB mini-B
connector of the included
power adapter into the USB
mini-B port of the IP Phone.
Then connect the power
adapter to a standard
electrical outlet.
B The power LED will flash,
alternating between blue
and purple.
NOTE: For the initial charge,
allow the battery to charge
for at least 10 hours.
Navigation Pad
and Center
Selection Key
Soft Key
Call
Soft Key
Power or
End Call
B
Different Key
Choices or + Sign
Enter Symbol
or Space
3
Before you begin, make sure your
network has an active Internet
connection.
Setting Up the IP Phone
A Press the Power button for
two seconds.
B The IP Phone will scan for
wireless networks and then
display a list of networks.
NOTE: The following are descriptions
of your navigation choices:
• Navigation Pad - Scroll through
menu choices
• Center Selection Key - Make
selections or save changes
• Clear Soft Key - Use for a
backspace
• Exit Soft Key - Cancel changes
and return to the previous screen
Scroll through the list, and
press the center selection
key to select a network.
If the network you want is
not shown, select Rescan.
C The IP Phone will
automatically connect to
the network.
If WEP security is enabled,
select the appropriate
transmit key from the Key
Index, and then enter the
network’s WEP key. Press the
center selection key.
B1
B2
C
If WPA security is enabled,
then enter the network’s
WPA key. Press the center
selection key.
D You will be notified when the
IP Phone has connected to
the network, and a
checkmark will appear next
to the name of the network.
Select Exit.
E The standby screen will
appear. Select Menu.
F Phone Settings will be
highlighted. Navigate the
menu choices, and then
select SIP Settings.
WPA
D
E
Model No.
Model No.
WIP330
WEP
F
Page 2
4
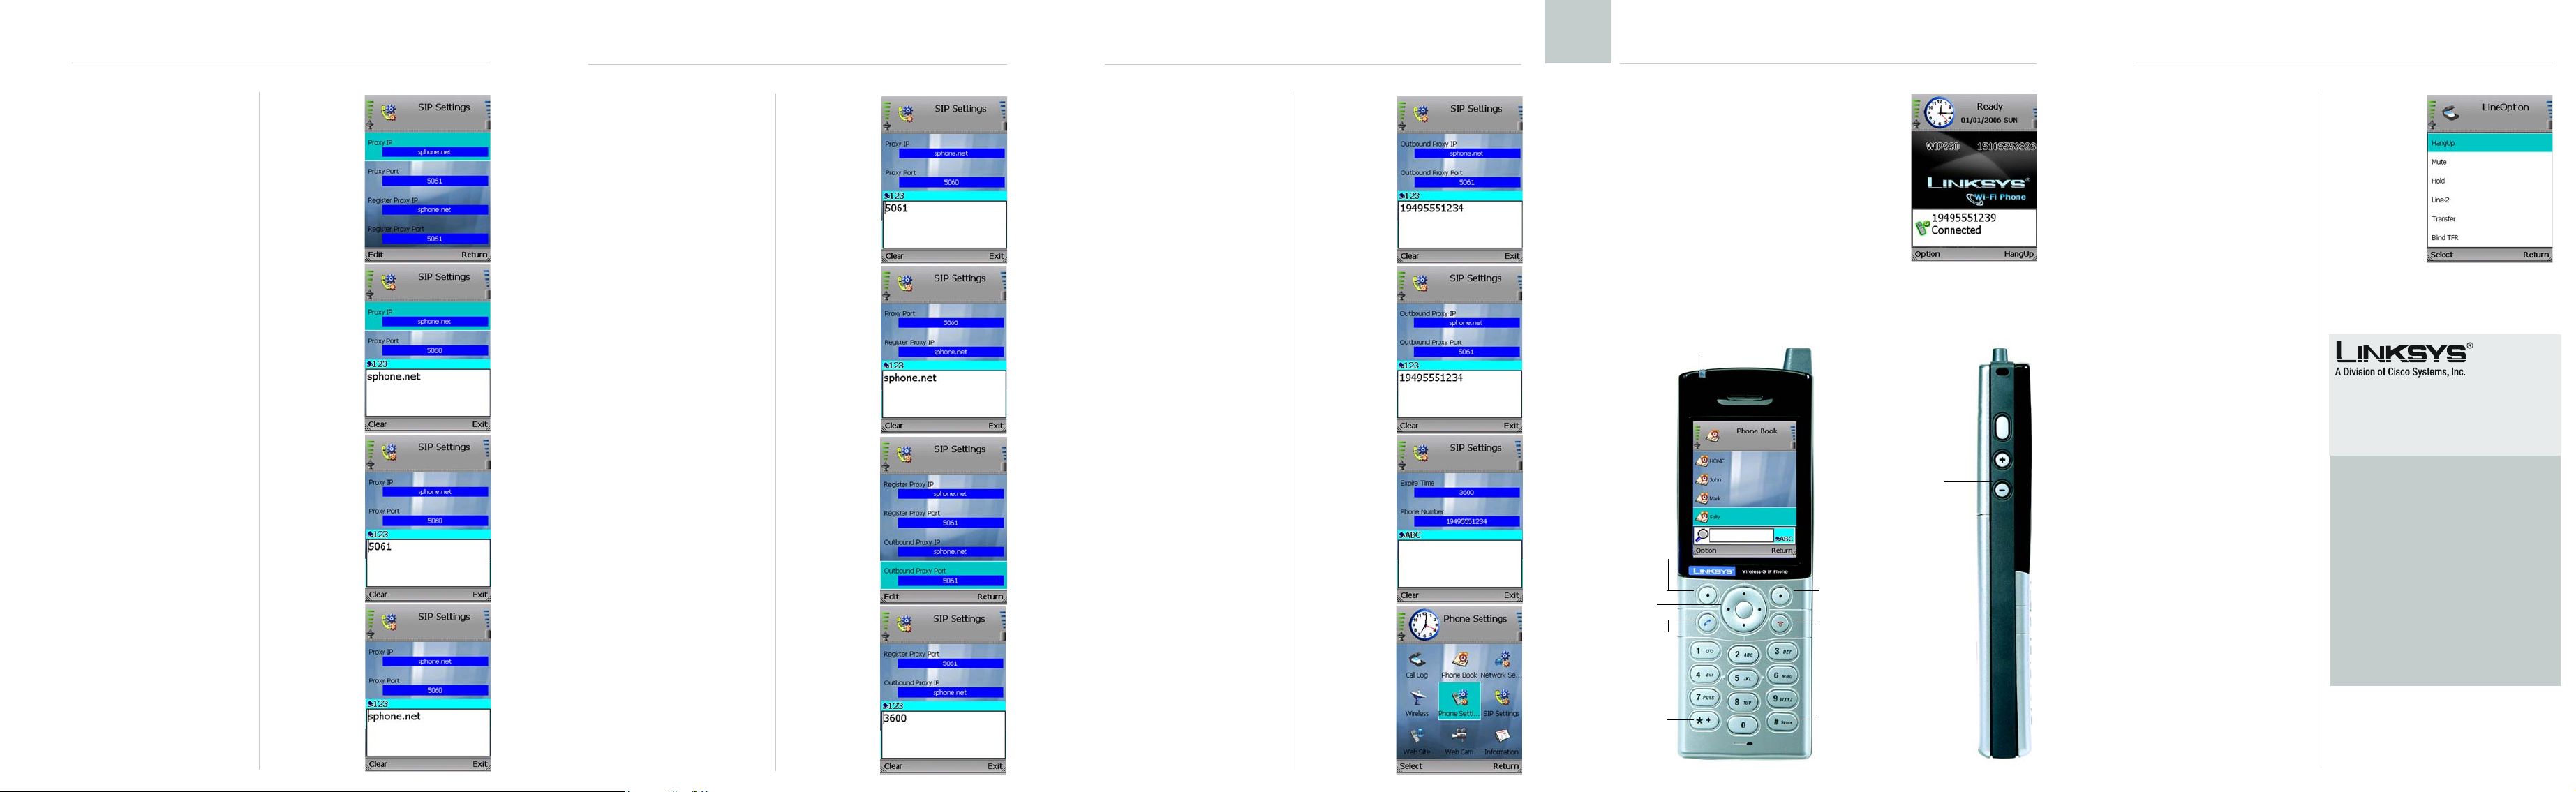
Using the IP Phone
G A list of SIP settings will be
displayed. You will enter the
settings your Internet phone
service provider has given
you. (If you do not have
these settings, contact your
provider.)
For the Proxy IP setting,
select Edit.
H Enter the Proxy IP address,
and press the center
selection key.
I Scroll down to Proxy Port,
and select Edit.
J Enter the Proxy Port number,
and press the center
selection key.
K Scroll down to Register Proxy
IP, and select Edit.
L Enter the Register Proxy IP
address, and press the
center selection key.
G
H
J
M Scroll down to Register Proxy
Port, and select Edit.
N Enter the Register Proxy Port
number, and press the
center selection key.
U Scroll down to Phone
Number, and select Edit.
V Enter the Phone Number
you will use for Internet
phone calls, and press the
center selection key.
O Scroll down to Outbound
Proxy IP, and select Edit.
P Enter the Outbound Proxy IP
address, and press the
center selection key.
N
W Scroll down to User Name,
and select Edit.
X Enter the User Name,
and press the center
selection key.
V
Q Scroll down to Outbound
Proxy Port, and select Edit.
Y Scroll down to Password,
and select Edit.
R Enter the Outbound Proxy
Port number, and press the
center selection key.
P
Z Enter the Password,
and press the center
selection key.
X
S If your Internet phone
service provider did not
provide an Expire Time
setting, then keep the
default, 3600 seconds, and
proceed to step U.
If your Internet phone
service provider provided
an Expire Time setting, then
scroll down to Expire Time,
and select Edit.
Q
T Enter the Expire Time,
and press the center
selection key.
L
T
AA On the SIP Settings screen,
select Return.
AB On the Phone Settings
screen, select Return.
The standby screen will appear
and indicate that the IP Phone is
ready for phone calls.
Congratulations! The installation
of the Wireless-G IP Phone
is complete.
Z
AA
A To make a call, enter the phone number you
want to call.
B Press the Call button.
C When you are on a phone call, select Option
to see a list of menu choices.
D Select HangUp to end the call.
C
To change the volume, use the + and - buttons on the side panel of the
IP Phone.
Power LED
Volume
Soft Key
Navigation Pad
and Center
Selection Key
Call
Different Key
Choices or + Sign
Soft Key
Power or
End Call
Enter Symbol
or Space
Options
When you are on a call, you have
several options available. Press
the left soft key to make a
selection, and press the right soft
key to return to the previous
menu. Use the navigation pad to
scroll through these menu
choices:
•HangUp
•Mute
•Hold
•Transfer
• Blind TFR (Transfer)
• Conference
For details about these options
and other settings, refer to the User
Guide on the CD-ROM.
For instructions on how to check
your voicemail, contact your
Internet phone service provider.
For additional information or troubleshooting
help, refer to the User Guide on the Setup CDROM. You can also call or e-mail for further
support.
24-hour Technical Support
800-326-7114
(toll-free from US or Canada)
E-mail Support
support@linksys.com
Website
http://www.linksys.com or
http://support.linksys.com
RMA (Return Merchandise Authorization)
http://www.linksys.com/support
FTP Site
ftp://ftp.linksys.com
Sales Information
800-546-5797 (800-LINKSYS)
Linksys is a registered trademark or trademark of
Cisco Systems, Inc. and/or its affiliates in the U.S.
and certain other countries. Copyright © 2006
Cisco Systems, Inc. All rights reserved.
WIP330_V1.1-QI-60123NC JL
 Loading...