

Wireless-G IP Phone
USER’s MANUAL 〉〉〉〉〉〉〉〉〉〉
December, 2005

Contents
1. Getting Started....................................................................................5
1.1 Reading this User’s Guide................................................................5
1.2 Charging the Battery........................................................................5
1.3 Switching the Phone On or Off.........................................................6
1.4 Power Saving Mode.........................................................................6
1.5 Making a Call..................................................................................6
1.6 Answering a Call..............................................................................7
1.7 Using the Key Lock Feature.............................................................7
1.8 Care and Maintenance.....................................................................7
2. Phone Features...................................................................................8
2.1 Overall Appearance.........................................................................8
2.2 Overall Features..............................................................................9
2.3 Product Specification.......................................................................9
2.4 WLAN Application..........................................................................10
3. Learning to Use Your Phone............................................................11
3.1 Using the Icons ............................................................................. 11
3.2 Entering Text................................................................................. 11
3.2.1 English Mode....................................................................... 11
3.2.2 Using Numeric Mode............................................................ 12
3.2.3 Using IP Mode..................................................................... 12
3.2.4 While Making a Call.............................................................13
3.3 Checking the Status....................................................................... 13
4. Setting UP Your Phone.....................................................................14
4.1 Quick Ways to Set Up Your Wi-Fi Phone.........................................14
4.2 Storing Names and Numbers..........................................................16
4.3 Setting the Time and Date.............................................................. 17
4.4 Setting a Ring Mode......................................................................18
4.5 Setting a Wallpaper Image ............................................................. 18
4.6 Adjusting the Backlight...................................................................19
5. Calling Features................................................................................20
5.1 Viewing Recent Calls..................................................................... 20
5.2 Returning an Unanswered Call.......................................................20
1

5.3 Transferring a Call......................................................................... 20
5.4 Using the Call Mute.......................................................................21
5.5 Using Call Waiting .........................................................................21
5.6 Using Call Forwarding....................................................................21
6. Menus.................................................................................................23
6.1 Main Menu....................................................................................23
6.1.1 Phonebook.......................................................................... 23
6.1.2 Call Log...............................................................................24
6.1.3 E-mail................................................................................. 25
6.1.4 Speed Dial...........................................................................27
6.1.5 Profile................................................................................. 27
6.1.6 Setting.................................................................................28
6.1.7 Tools................................................................................... 33
7. Troubleshooting.................................................................................35
2

Federal Communication Commission Interference Statement
This equipment has been tested and found to comply with the limits for a Class B digital
device, pursuant to Part 15 of the FCC Rules. These limits are designed to provide
reasonable protection against harmful interference in a residential installation. This
equipment generate, uses and can radiate radio frequency energy and, if not installed
and used in accordance with the instructions, may cause harmful interference to radio
communications. However, there is no guarantee that interference will not occur in a
particular installation. If this equipment does cause harmful interference to radio or
television reception, which can be determined by turning the equipment off and on,
the user is encouraged to try to correct the interference by one of the following
measures:
- Reorient or relocate the receiving antenna.
- Increase the separation between the equipment and receiver.
- Connect the equipment into an outlet on a circuit different from that to which
the receiver is connected.
- Consult the dealer or an experienced radio/TV technician for help.
This device complies with Part 15 of the FCC Rules. Operation is subject to the following
two conditions: (1) This device may not cause harmful interference, and (2) this device
must accept any interference received, including interference that may cause
undesired operation.
FCC Caution: Any changes or modifications not expressly approved by the party
responsible for compliance could void the user's authority to operate this equipment.
IMPORTANT NOTE:
FCC Radiation Exposure Statement:
This equipment complies with FCC radiation exposure limits set forth for an uncontrolled
environment. End users must follow the specific operating instructions for satisfying RF
exposure compliance. To maintain compliance with FCC RF exposure compliance
requirements, please avoid direct contact to the transmitting antenna during
transmitting.
This transmitter must not be co-located or operating in conjunction with any other
antenna or transmitter.
We declare that the product is limited in CH1~CH11 by specified firmware controlled in
the USA.
3

IC statement
Operation is subject to the following two conditions:
1) This device may not cause interference and
2) This device must accept any interference, including interference
that may cause undesired operation of the device.
4
For the first time usage, it is recommended to charge the battery for at
The battery charging status is properly performed only after
If the battery is completely exhausted, then the battery requires
approximately three hours (with the phone powered off) to be fully
1. Getting Started
1
1.1 Reading this User’s Guide
Thank you for purchasing this Wi-Fi phone. To operate accordingly your new
phone, carefully read this user’s guide first. Screen displays and illustrations in
this user’s guide are designed to help you to operate all the steps directly and
precisely.
1.2 Charging the Battery
New battery is shipped partially charged. Before you can use your phone, you
need to install and charge the battery.
1. Make sure the battery is installed properly.
2. There are two ways to charge the battery.
3. You can either plug the power adapter between the data cable slot on the
bottom of the phone and the socket.
4. Or use mini-USB cable to charge through your notebook or related device.
5. While charging, you can still do operations according to your preference
with the phone.
Note!
least 8 hours.
uninterrupted charging/ discharging.
The battery heats up a bit during charging. This is not malfunction.
charged.
5
1.3 Switching the Phone On or Off
n Press and hold the Power key
animations
n To turn OFF the phone, press and hold the Power key
of animations
will be shown on the screen.
will be displayed on the screen.
to turn ON the phone. Series of
. Series
1.4 Power Saving Mode
To save power consumption, the LCD monitor will turn dark after 15
seconds (as default) without any operations.
To turn on again the LCD monitor, just press any key.
1.5 Making a Call
n It is necessary to set up your Wi-Fi phone first before making any calls.
(Details refer to chapter 4.1)
n There are two ways to make call:
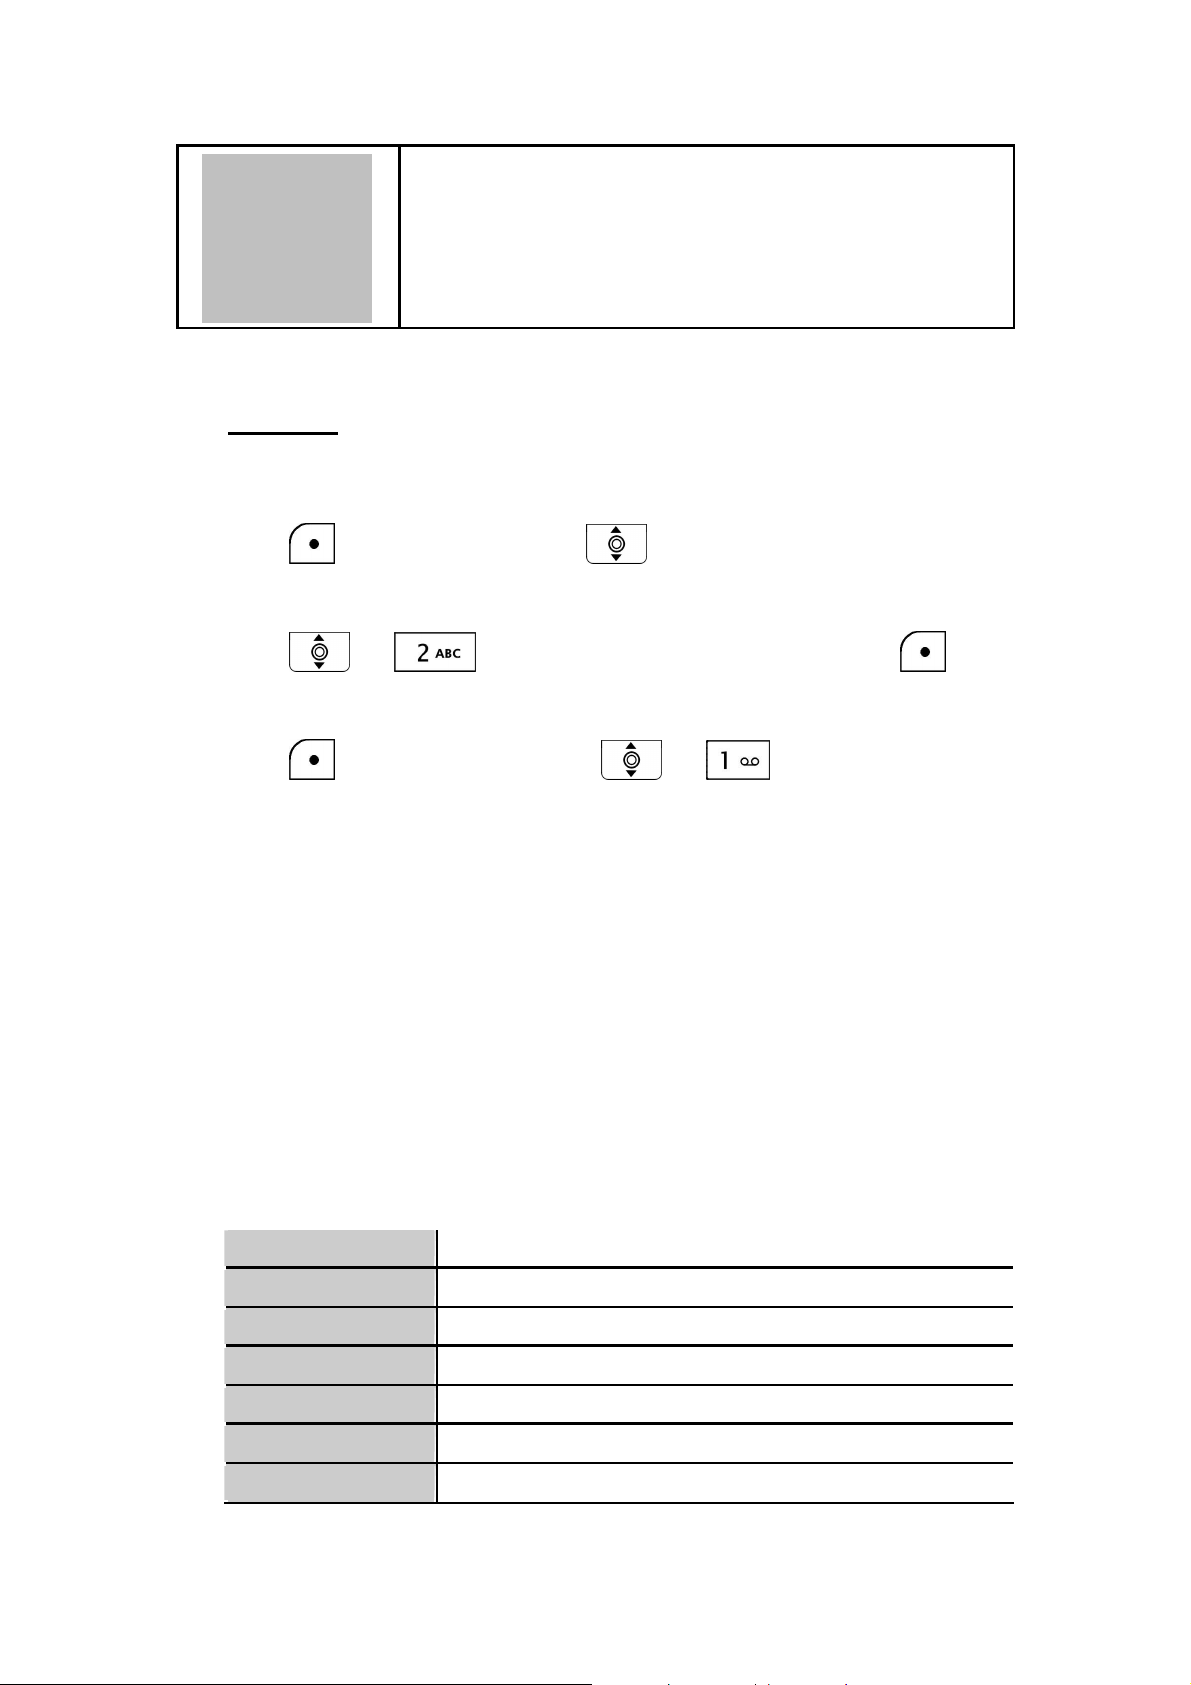
Ø In Standby, enter the numeric keys and then press
Ø In Standby, press and your Phonebook displays.
Press
press .
to Search the desired contact member and then
.
6
1.6 Answering a Call
n When you receive a call, your phone rings and/or vibrates and displays an
incoming call message.
Press To
Or
Or
Accept and pick up the phone call.
Reject the incoming phone call.
1.7 Using the Key Lock Feature
n Key lock is used to avoid unintentional pressing of keys.
n There are two ways to set the key lock function:
1. In Standby, press and hold
2. Or in menu option: Setting→Keypad→Keypad Lock
Press To
to activate the key lock.
Activate key lock.
1. To unlock the key lock, press and hold . A pop-up message
displays on the screen “Press * to unlock” and then press to
deactivate the key lock.
1.8 Care and Maintenance
n Keep your phone and accessories away from dusty, wet or dirty
areas.
n Don’t put your phone or accessories in extremely hot or cold areas.
n Don’t use harsh chemicals, cleaning solvents, or strong detergents to
clean your phone or accessories.
7
2. Phone Features
2
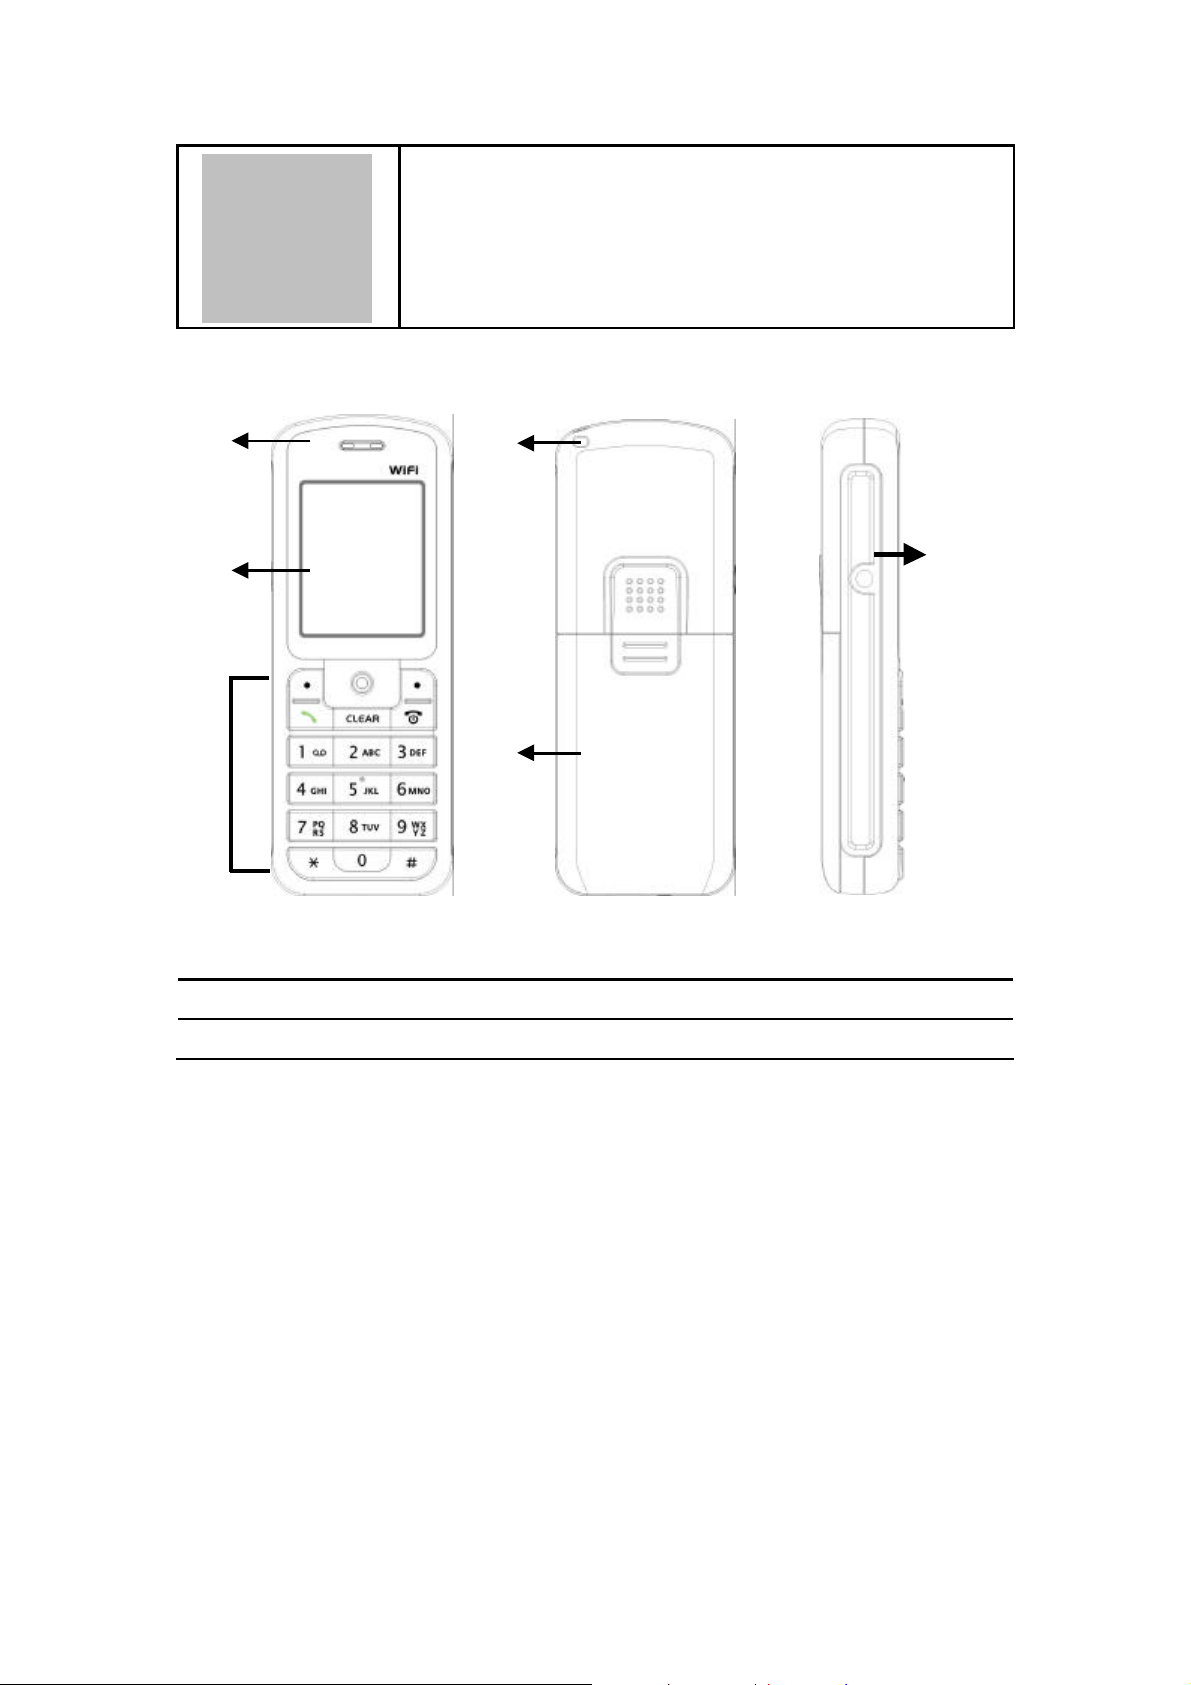
2.1 Overall Appearance
1
2
3
1. Earphone 4. Hand strap
2. Screen 5. Battery cap
4
5
6
3. Keypads 6. Earphone slot
8

2.2 Overall Features
n Pixel-based display-Intuitive access to calling features.
n Nine speed dials configurable in the set.
n Comfort noise generation (CNG), voice activity detection (VAD) and
adaptive jitter buffer
n RF and battery level indication
n Local phone book
n External 2.4GHz antenna
n USB charger interface
n ABS+PC plastic housing
n Simple keypad
n Remote FW upgrading via Wi-Fi
n SIP v2 signaling protocol, RFC-3261
2.3 Product Specification
Item Description
CPU Ø BRCM1160
Flash Memory Ø NOR 16MB
SRAM Memory Ø 12MB
Data/power Recharge Port Ø USB 1.1
Wireless LAN Standard Compliance Ø IEEE802.11b/g 2.4GHz
Wireless Frequency Range Ø Approx. 2.400~2.4835GHz
Output Power Ø Max. 13dBm @802.11g
Ø Max. 17dBm @802.11b
Data Transmission Rate Ø 1, 2, 5.5, 11Mbps up to 54Mbps
WLAN Network Architecture Type Ø Infrastructure
LCD Ø 1.8” Colorful LCD, 128x160
pixel, 65k colors
Antenna Type Ø Embedded antenna
Battery Ø Li-ion 900 mAh
Power Supply Ø External power adapter or
mini-USB cable
Dimension Ø 118mm (L) x 45mm (W) x
20.5mm (H)
Weight Ø Approx. 100g
9

2.4 WLAN Application
Place a Call via “SIP Proxy Server”
Use your new Wi-Fi phone to make and receive VoIP telephone calls when you
are within range of a wireless Internet Telephony Service Provider (ITSP). You
do not need to know if the recipient’s connection type is an IP, cellular or
landline based service. Your Wi-Fi phone can call any landline or mobile
telephone that a traditional PSTN telephone can connect to as well as the IP
telephone network. Calls received from IP telephones works exactly as you
would expect from the traditional telephone service.
n Your Wi-Fi phone registers with a SIP proxy server in the following
circumstances:
Ø Your connection uses an IP Telephony Service.
Ø Your connection is based in a corporate VoIP environment.
10

3. Learning to Use
3
3.1 Using the Icons
Icon Description
Your Phone
/
/
/ / /
Signal Strength
Indicates the received signal strength. The greater
the number of bars, the better the signal
Message
When you have received new messages.
In Call / Call Forward
When you are on the phone or forward the call.
Network Encryption
When you have set for network encryption.
SIP Registered/ Not Registered
When you have (not) registered to SIP server.
Ring Mode (Silent/Ring/Vibrate/Ring+Vibrate)
Details refer to chapter 4.4 Setting a Ring Mode.
Alarm
Pops up when you set an alarm to ring at a
specified time.
Battery Level
Indicates the level of the battery. The more bars
you see, the more power you have remaining.
3.2 Entering Text
3.2.1 English Mode
n When inputting the text in English, press the key labeled with the
character you prefer:
-Once for the first character;
-Twice for the second character and so on…
This method is so-called Multi-tap typing.
11

For example, you have to press the 5 key twice display the character
“K”, the 3 key five times to display the character “e” and the 6 key five
times again to display “n”.
n The cursor moves to the right when you press a different key. When
entering the same letter twice or a different letter on the same key,
just wait for a few seconds for the cursor to move to the right
automatically, and then select the next letter.
n You can insert a space between words/letters by pressing the 0 key.
n Refer to the chart below for detailed information about the characters
available:
Key Characters in the Order Displayed
0 space
1
" ' [ ] < > ( ) { }
2 ABCabc
3 DEFdef
4 GHIghi
5 JKLjkl
6 MNOmno
7 PQRSpqrs
8 TUVtuv
9 WXYZwxyz
*
#
* . + - / , : ; = ? !
# @ $ % & \ ^ _ ` | ~
n Clearing Letters and Words:
To delete letters, press the
3.2.2 Using Numeric Mode
Clear key.
n Numeric mode enables you to input numbers in your text, such as
phone number. Press the keys accordingly to the digits you want
before manually switching back to the appropriate text input mode.
3.2.3 Using IP Mode
Key Characters in the Order Displayed
0-9 0-9
* *
12

3.2.4 While Making a Call
Key Characters in the Order Displayed
0 0, + (press and hold)
1-9 1-9
* *
# #
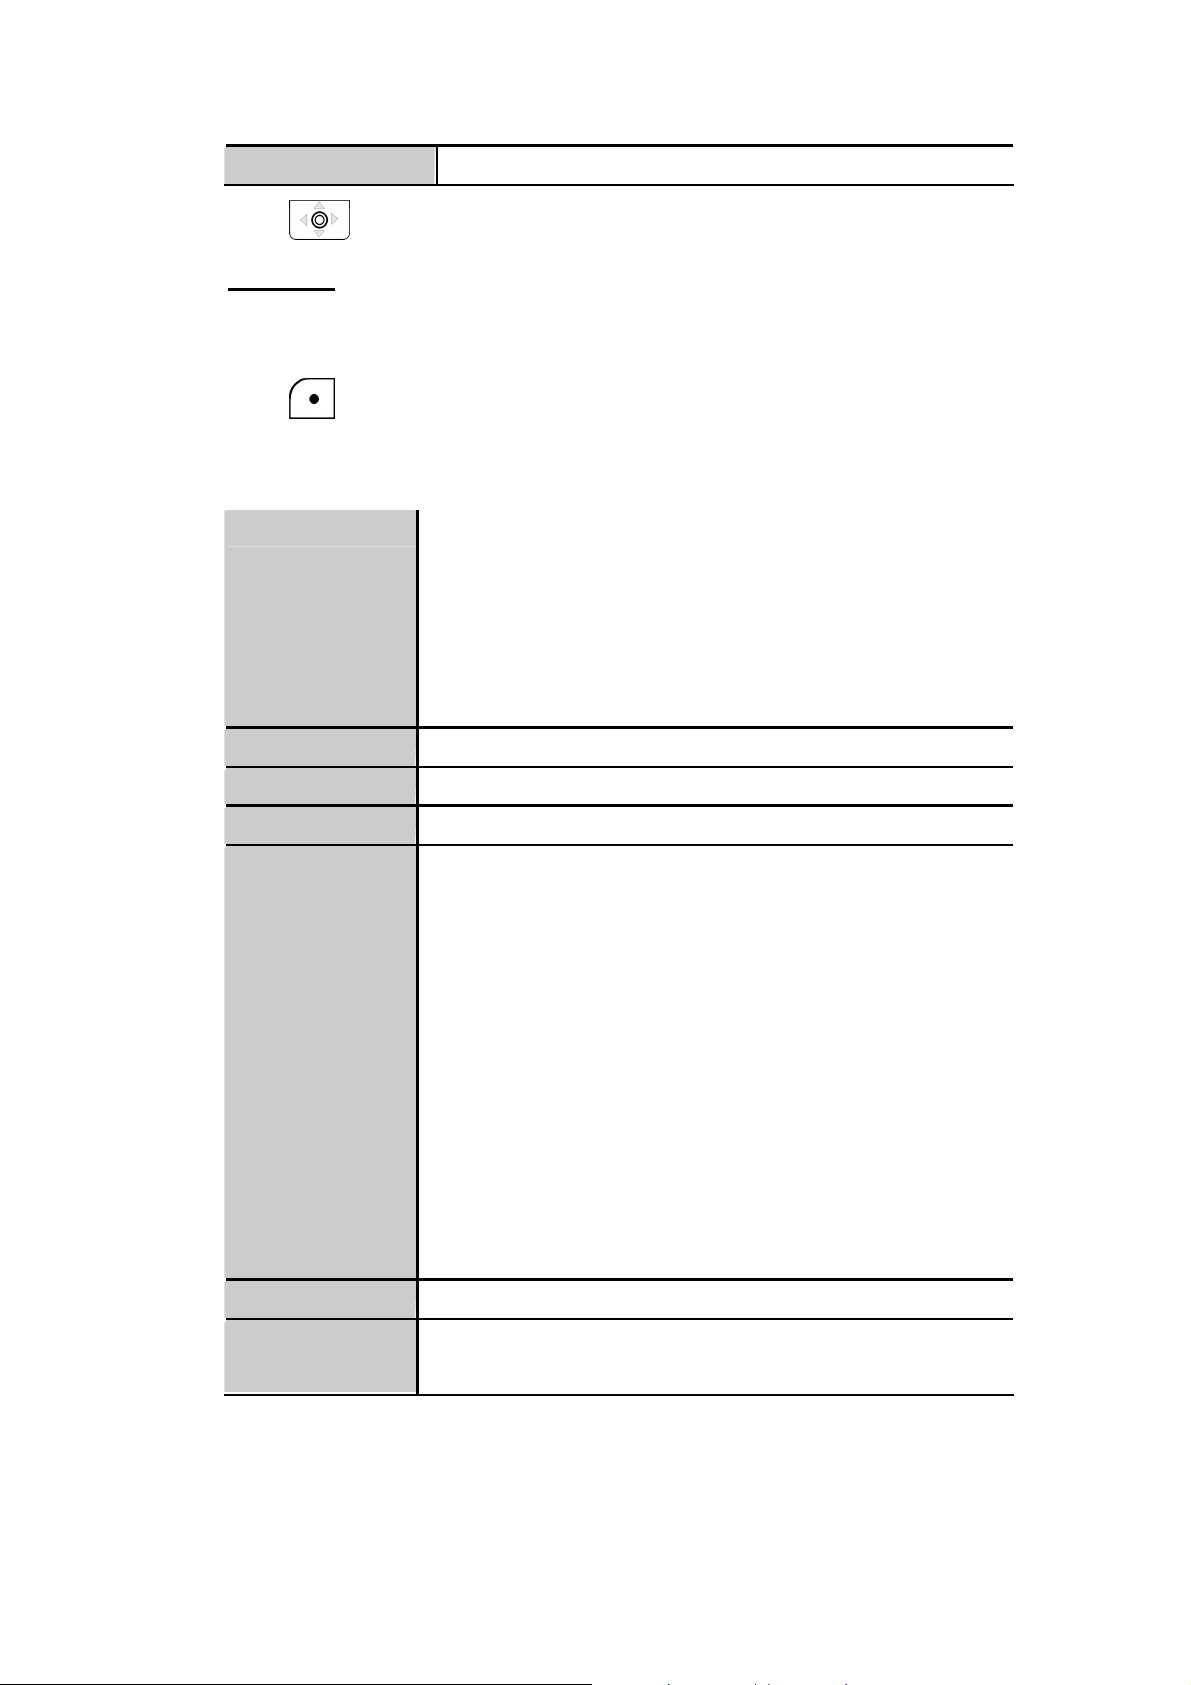
3.3 Checking the Status
n You can always check your phone’s connection status (Wireless and
SIP phone) by using this option.
n Press
Wireless You can view the following information:
SIP Phone You will see the following information:
Status:
Phone Status
BSSID, IP Address and MAC Address.
SIP Server, User Agent and Status,
13
4. Setting UP Your Phone
4
4.1 Quick Ways to Set Up Your Wi-Fi Phone
n First Step:
ü It is required to set password for the profile. After the profile’s password is
set, you need to input the configured password to enter the profile menu.
1. Press
2. Input the profile’s password first. (default: A).
3. Press
Select.
4. Press Option and then press or to Edit.
5. Six profiles can be set in this feature. Only one profile can be activated at a
time. Adjust the following options as basic operations: (other adjustments
are based on the requirements by each individual network provider.)
Ø Preview: detailed information is listed.
Ø Phone Number: numbers are given by the network provider. For
Ø Auth. ID: input your authorized user ID. For example: 233.
Ø Auth. Passwd.: input your authorized password.
Ø SIP Domain: stands for Session Initiation Protocol domain name.
Menu and then press to select Profile.
or to select SIP Account and then press
example: 233.
The domain of the phone.
Ø Proxy Addr.: the address of SIP server. For example: 192.168.0.1.
Ø Advance: The following options are indicated:
Proxy Port The port number of SIP server.
Outbound Addr. Outbound proxy address.
Outbound Port Outbound proxy port.
Local Port Local port number.
Reg. Timer(sec) Registration refreshing interval.
Codec Compressed audio format.
Pkt Time(ms) Audio transmitting interval.
14
OutofBand DTMF The working of out-of-band dual-tone multifrequency.
, making it much more difficult for hackers to find
6. Press OK to confirm your settings.
n Last Step
:
1. In Profile menu, after finishing SIP Account setting, access to Network
Profile.
2. Press Option to Edit-Wireless Setting, IP Setting, Account
Choice and STUN Setting.
Ø Wireless Setting: The following options are indicated:
ESSID Stands for Extended Service Set Identifier. By
specifying the ESSID is how you make sure that you
connect to your wireless network instead of your
neighbors network by mistake. You can either manually
input the New ESSID or select Site Survey to check
the all available networks. For example: Default.
Operating Mode Select either Ad-Hoc mode or Infrastructure mode.
Channel Select a specific channel number or set as Auto.
Data Rate Select a specific data rate or set as Auto.
Security Act as your usage permission passport. This is an
effective way to achieve data security. Your network
provider should inform you about the authentication
types for the access point encryption modes.
Options for you to choose: Open, WEP(either 64 bit or
128 bit shared key algorithm, as described in the IEEE
802.11 standard); WPA-PSK ( either TKIP as
automatically changes the keys at a preset time
interval
and exploit them. Or AES as advanced encryption
standard). WPA-PSK2-PSK (either TKIP or AES). WPA
(either TKIP or AES). WPA2 (either TKIP or AES).
Key Index You can define WEP Key Index from One to Four.
Key WEP key ensures data transmission from wireless
access points.
Other Profile Options:
15
Rename Preset profile name can be named again. (Either
You need to input IP Address, IP Netmask, IP Gateway,
rename in alphabet letters or numbers)
Delete To remove the chosen profile. A pops-up message
“Delete?” displays on the screen. Press
delete the chosen profile.
Auto Detect You can either activate On or deactivate Off profiles’
detection.
Move
You can change profiles’ priorities. Only one
profile can be moved at a time.
Ø IP Setting: The following options are indicated:
Fixed IP
Primary DNS and Secondary DNS.
DHCP
To activate press
PPPoE Input User Name and Password.
Ø Account Choice: Press to select the specific SIP Account
Set .
OK to
and then press Set to confirm your setting.
Ø STUN Setting: Details please contact with your network service
provider.
STUN
Press
STUN Addr. Consult the IP address with your network service
provider.
STUN Port Consult the Port number with your network service
provider.
3. After finish setting-Wireless Setting, IP Setting, Account Choice and
STUN Setting, back to Profile Option select Activate the specific network.
4. You can also Preview Wireless Setting status, IP Setting, SIP Account and
STUN status by using this option.
5. Back to Standby, Wi-Fi connection is activated.
to set On or Off.
4.2 Storing Names and Numbers
n You can store or edit your friends’ name and phone number information on
16
your phonebook.
n 200 entries can be recorded in the Phonebook.
1. Phonebook→ Option→ New.
2. Press
Tone and set the Speed Dial.
Ø Scroll the input method by pressing the left soft key
Ø The selected text input method indicator shows at the left bottom
3. After filling the details press
Select to input the appropriate Name, Number, E-mail, Ring
.
of the screen. (English mode→ ABC or Numeric mode→123).
OK to confirm your settings.
4.3 Setting the Time and Date
n It is necessary to set the time and date to fully use your phone features.
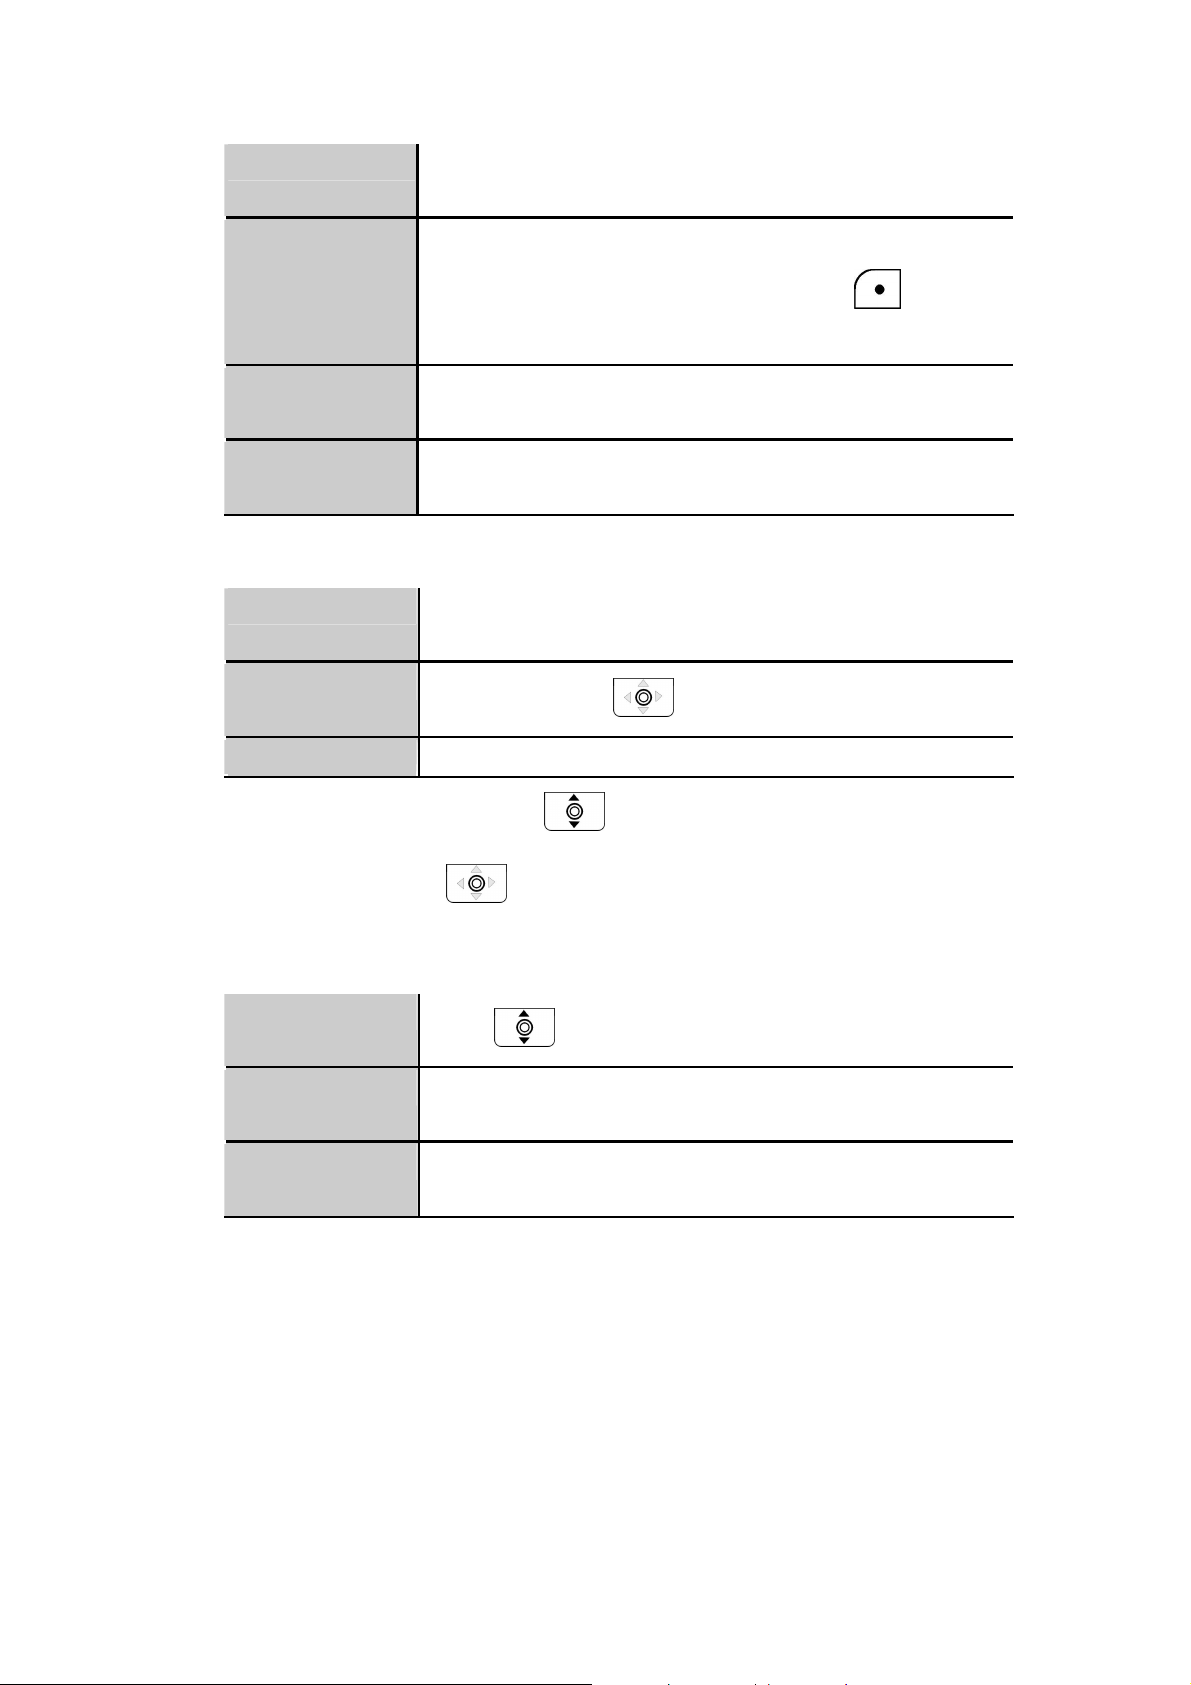
n Set the time:
1. Setting? Clock? Time.
Press To
0-9 Enter the time directly
Scroll right or left to change
hours/minutes/seconds
Scroll up or down to change the time or to
n Set the time format:
1. Setting? Clock? Time Format.
Press To
Confirm your time format setting
n Set the date:
1. Setting? Clock? Date.
Press To
0-9 Enter the date directly
choose AM or PM
Confirm your time setting
Scroll up or down to choose
12-Hour or 24-Hour
Scroll right or left to change
years/months/days
17

Scroll up or down to increase or decrease
Confirm your date setting
the date
4.4 Setting a Ring Mode
n Your phone rings or vibrates to aware you of an incoming call or other
event. This ring or vibration acts as an alert.
n You can select 1 to 17 different melodies.
n Set the Ring Mode:
1. Setting? Sound Setting? Ring Mode.
2. The following options are available:
Ø Silent: the phone neither rings nor vibrates.
Ø Ring: the phone rings using the selected ring melody.
Ø Vibrate: the phone vibrates but does not ring.
Ø Ring + Vibrate: the phone first rings and then starts to vibrate.
3. Press
n Set the Ring Tone:
1. Setting? Sound Setting? Ring Tone.
2. Press to select Melody.
Press To
Set to confirm your setting.
Scroll up or down to different ring melody
Play the selected melody
Set your ring tone melody
4.5 Setting a Wallpaper Image
n You can set a picture as wallpaper image in your phone’s standby screen.
n There are five built-in pictures for you to change the background image.
1. Setting? Display Setting? Wallpaper.
Press To
Scroll up or down to different wallpaper
18

View the selected wallpaper
Set your background image
4.6 Adjusting the Backlight
n You can adjust the brightness of the display screen to see it better in
different lighting conditions.
1. Setting? Display Setting? LCD Brightness.
Press To
Increase or decrease the LCD lighting level
Set your display lighting level
19
5. Calling Features
5
5.1 Viewing Recent Calls
n Your phone keeps lists of the calls you recently received and dialed, even
if the calls did no connect.
1. Call Log→ Dialed Calls/ Received Calls.
2. Press
together, with the time and date when the call was received.
3. You can also redial the number by pressing the
View the name and/or the numbers, if available, display
key.
5.2 Returning an Unanswered Call
n This option lets you check the last phone calls you received, but did not
answer.
n Your phone keeps a record of your missed calls, and displays:
Ø The (missed call) indicator;
Ø X Missed Calls, where X is the number of unanswered calls.
1. Call Log→ Missed Calls.
2. Press
together, with the time and date when the call was received.
View the name and the numbers, if available, display
3. You can also redial the number by pressing the key.
5.3 Transferring a Call
n When you are on a call, you can announce that you are transferring an
active call to another party, or you can directly transfer the call.
Press To
Put the call on Hold
Dial the 3rd party numbers and place a new
Keypad keys and
20
call

While 3rd party is connected to execute
transfer function.
5.4 Using the Call Mute
n When you are on a call, you can turn off your microphone so that the peer
party will not hear your voice.
Press To
Switch between to hear or to mute caller’s
voice
5.5 Using Call Waiting
n When you are on a call, an alert tone sounds to indicate that you have
received a second call.
1. Setting→ Call Setting→ Call Waiting:
2. Press
Waiting function.
3.
Press To
Switch ( )
> End Call
4. If Call Waiting is set as Off, then the second incoming call will be
rejected. The alert tone will not be activated either.
to select On and then press Set to activate Call
Answer the new call
Switch between the calls
End the call on talk
5.6 Using Call Forwarding
n You can divert a call to another number, based on different conditions.
n When Call Forwarding is activated, an icon
screen.
will be displayed on the
To activate call forwarding function: there are four features that you
can choose:
1. Setting→ Call Setting→ Call Forward:
l Fwd. Number: will transfer the call to the designated number under
specified conditions.
l Forward All: will transfer all calls under any conditions.
21

l No Answer: will divert the call after 18 seconds when the call is
unanswered.
l Busy: will transfer the call when then line is busy or the call is
rejected.
2. Press
to select On and then press Set to activate Call
Forward function.
3. To deactivate the function, press
to select Off and press Back
to menu.
n To deactivate call forwarding function:
1. Setting→ Call Setting→ Call Forward, choose Cancel All and press
Select.
2. The Call Forward function is then set deactivated.
22

6
6.1 Main Menu
6.1.1 Phonebook
6. Menus
This section helps you to use Phonebook’s features
After storing entries in your Phonebook, you can search for them
and view for details.
The entries are listed according to alphabetical order. After finding
the appropriate name, press
Feature
Search
Edit
Phonebook→Search
Press
You are asked to enter the name.
Press OK to find the appropriate entries.
Phonebook→Edit
Press
Option to Search and press Select.
to scroll the list and then press to Edit.
View to check the details.
Description
.
You can either modify the name, number, e-mail, ring tone and/or
speed dial.
Press
Delete
Phonebook→Delete
Press
A pop-up message “Delete?” displays on the screen press
OK to confirm your settings.
to scroll the list and then press to Delete.
OK
23

or Back to cancel the deletion and return to the menu.
displays on the screen press
New
Phonebook→New
Press
Number, E-mail, Ring Tone and set the Speed Dial.
Select to Preview and input the appropriate Name,
6.1.2 Call Log
Feature Description
Missed Calls Details refer to chapter 5.2 Returning an Unanswered Call.
Call Log→Missed Calls
Press
Delete All Missed calls.
Dialed Calls Details refer to chapter 5.1 Viewing Recent Calls.
Call Log→Dialed Calls
Press
Option and you can Save, Delete the Record or
Option and you can Save, Delete the Record or
Delete All Dialed calls.
Received Calls Details refer to chapter 5.1 Viewing Recent Calls.
Call Log→Received Calls
Press
Delete All Received calls.
Delete All You can remove all records (missed, dialed and received)
from the Call Log,
Call Log→Delete All
A pop-up message “Delete All?”
OK or Back to cancel the deletion and return to
the menu.
Option and you can Save, Delete the Record or
24

6.1.3 E-mail
all mails in the
n Using the Mail-feature, you can receive or send messages instantly.
n Receiving or Sending e-mails are based on POP3 and SMTP system
design.
n To use this feature you are required to have an e-mail account (a specific
username and password) from your e-mail service provider.
n The maximum storage size is 500 mails for Inbox, Outbox and Draft all
together.
n Before an e-mail account is configured, entering the E-mail menu will
directly guide you to enter Account Setting.
n To save power consumption, the phone does not automatically scan mails
in mailboxes.
Feature Description
Write New Writing new mails, you can Preview the subject, recipients and
content; fill in the Subject, add the Recipients (either Input
Address directly or search from the Phonebook), write the
Content, and then you can either Save To Draft or Send the
Mail.
While editing, press
0-9).
Receive A pop-up message “Receive Mails?” indicates on the screen,
press
Inbox This menu allows you to access your e-mail In Box and read the
e-mail messages you’ve received.
Press
View . Details (From, Date, Recipients and Subject) are
indicated.
Press Option you can also Reply, Reply with Log (reply
OK then you can receive new mails.
to the mail you want to read and then press
to switch the input method (ABC or
with the original content), Forward (either Preview the detail,
read the Subject, set the Recipients, write the Content, Save
To Draft or Send Mail) or Delete the mail or Clear
Inbox.
Outbox When you enter this option, the list of the e-mail messages
25
you’ve sent are displayed on the screen.
Press
to the mail you want to read and then press
View . Details (From, Date, Recipients and Subject) are
indicated.
You can also Forward (either Preview the detail, read the
Subject, set the Recipients, write the Content, Save To Draft
or Send Mail) or Delete the mail or Clear all mails in the
Outbox.
Draft In this menu, you can retrieve e-mail messages you saved.
When you select this menu, the list of the e-mail messages you
saved in the draft displays.
Press
to the mail you want to read and then press
View . Details (From, Date, Recipients and Contents) are
indicated.
You can also Edit (either Preview the detail, read the Subject,
set the Recipients, write the Content, Save To Draft or Send
Account
Setting
Mail) or Delete the mail or Clear all mails in the Draft.
Mail→Account Setting
The following options are available:
Account Name: enter a name for the activated account.
Your Name: enter the name to be displayed as the sender
name.
Mail Address: enter your e-mail address.
POP3 Addr.: enter your e-mail address.
POP3 User ID: enter your e-mail ID.
POP3 Passwd.: enter your e-mail password.
SMTP Addr.: enter your e-mail address.
SMTP User ID.: enter your e-mail ID.
SMTP Passwd.: enter your e-mail password.
Advance:
Ø Reply Address: can be either in English or IP address.
Ø POP3 Port: provided by your network service provider.
(default: 110)
Ø SMTP Port: provided by your network service provider.
(default: 25)
Ø Signature: enter your signature according to your
26

preference.
to set the key from the
Ø Reserve Mail: you can store your mails on the server
6.1.4 Speed Dial
n There are two ways to set Speed Dial, either through Phonebook menu
or by Speed Dial menu.
n Each entry you saved in your phonebook can be assigned as a unique
speed dial number (1-9) in phone memory.
Feature Description
Phonebook Select the entry to which you want to assign the speed
dialing number. Press
Phonebook→Edit→Speed Dial.
Set the speed dial key from the 1 to 9 key, and press
Set the key.
Feature Description
Speed Dial Select the key to which you want to assign the speed
dialing number. Press
in the Phonebook is listed.
Set the speed dial key from the 1 to 9 key, and press
Set the key.
Option
Option and entries recorded
6.1.5 Profile
Details refer to chapter 4.1 Quick Ways to Set Up Your Wi-Fi
Phone.
Other features:
Feature Description
27
Roaming
Profile→Roaming
You can use your phone to roam between wireless
networks (access points.)
There are five major settings listed:
Roam Metric:
From 0dBm to -99dBm. Default value: -70dBm
l Roam Delta:
From: 0dBm to -99dBm. Default value: 20dBm
l NProbes:
From 1 to 100. Default value: 2
l Active Time:
From 1ms to 1000ms. Default value: 20ms
l Home Time:
From 1ms to 1000ms. Default value: 20ms
Profile Passwd
Security EZ
Profile→Profile Passwd
You can change your Old profile Password into Set New
Password based on your preference.
If the input old password is not correct, a message “Error!”
pops up on the screen.
Profile→Security EZ (Secure Easy Setup)
By using this feature, helps to imply and simplifies to set
up Wi-Fi Protected Access— WPA-PSK TKIP security.
Press
Press Yes to activate this function. Please wait for
some seconds. To Cancel the action press .
When it is connected “Save Configuration” displays on
the screen and then select one profile to save this
configuration.
Select, a message “To run SES?” pops up.
When the connection is failed “Secure Ez failed, Please
retry”. press Back to the sub-menu.
6.1.6 Setting
n This section helps you to use Setting’s features.
28

Feature Description
to
to
to
Language You can set the display language: English, Chinese (Trad.)
(optional), Chinese (Simp.) (optional) and Japanese (optional).
Setting→Language
Clock
Press
Set to confirm your setting or press Back
menu.
Setting→Clock
There are six options offered in Clock menu:
l Time:
This option enables you to adjust the current time.
Setting→Clock→Time
Press
and input the appropriate time with numeric keys.
Press OK to confirm your setting or press Back
menu.
l Date:
This option enables you to adjust the current date.
Setting→Clock→Date
Press
and input the appropriate date with numeric keys.
Press OK to confirm your setting or press Back
menu.
l Time Format:
You can set the desired display format (12-Hour or 24-Hour)
for the time.
Setting→Clock→Time Format
If 12-Hour is set as Time Format, the correspondent format
(AM/PM) indicates on the screen.
l Timezone
:
You can set the timezone of your location to count the time
difference when you travel around the world.
Setting→Clock→Timezone
l DaylightSavings
:
You can set Off or On if the daylight savings time is needed
(depend on different area).
29

Setting→Clock→DaylightSavings
l Network Time
:
You can set Off or On for Network Time.
Setting→Clock→Network Time
If the network time is set On, then Time Server is listed.
Alarm Clock This option enables you to set the alarm to ring at a specific
time.
Setting→Alarm Clock
Press
to set the alarm clock On and then press
Select.
Press and input the appropriate time with numeric keys.
Call Setting Seven options included in Call Setting:
l Call Waiting:
Details refer to chapter 5.5 Using Call Waiting.
Setting→Call Setting→Call Waiting
l Call Forward:\
Details refer to chapter 5.6 Using Call Forwarding.
Setting→Call Setting→Call Forward
l Block Caller ID:
You can either display or hide your telephony number while
dialing out calls.
Set Off or On to deactivate/activate this function.
Setting→Call Setting→Block Caller ID
l Refuse Private:
This feature enables you to reject answering the anonymous
calls.
Set Off or On to deactivate/activate this function.
Setting→Call Setting→Refuse Private
l Beep Notice
:
This feature allows you to set Off or On for beep awareness at
the 50 seconds for every 1 minute interval.
Setting→Call Setting→Beep Notice
Press
Set to confirm your setting. Or press Back to
the menu.
l Hold Transfer:
30
You can either transfer the calls through SIP or DTMF Flash.
Default setting: SIP.
l Regional Tone:
You can either select North America or Japan for Regional
Tone.
Press Set to confirm your setting.
Speed Dial There are three options for you to choose:
To Disable, to Ask or to Dial the speed dial.
Setting→Speed Dial
Sound Setting
Setting→Sound Setting
Four options included in Sound Setting:
l Speaker Volume
:
You can adjust the speaker volume by using 5-way navigation
key.
Setting→Sound Setting→Speaker Volume
To level UP the volume, either press
or .
To level DOWN the volume, either press or .
Press OK to confirm your setting and then press
Back to menu.
l Ring Tone
:
You can select the preferred Melody and/or set the Ring
Volume in Ring Tone menu.
Setting→Ring Tone→Ring Volume
To level UP the volume, either press
or .
To level DOWN the volume, either press or
l Ring Mode
:
Details refer to chapter 4.4 Setting a Ring Mode.
Setting→Ring Mode
l Warning Tone:
You can either turn On or Off for warning tone. Press
Set to confirm your setting.
31
Display
Setting→Display Setting
Setting
Five options included in Display Setting:
l Wallpaper:
Details refer to chapter 4.5 Setting a Wallpaper Image.
Setting→Display Setting→Wallpaper
l Greeting:
This option enables you to set welcome words as greeting and
to be displayed when the phone is powered on.
Setting→Display Setting→Greeting
*Text input method refer to chapter 3.2 Entering Text.
l LCD OffTime:
You can select the period of time the LCD is on. The backlight
turns on when you press a key and turns off when there is no
activity for the specified time period.
You can either select LCD off time as Always On, 15 Seconds
or 30 Seconds.
Setting→Display Setting→LCD OffTime
l LCD Brightness:
Keypad
Details refer to chapter 4.7 Adjusting the Backlight.
Setting→Display Setting→LCD Brightness
Setting→Keypad
Three options included in Keypad:
l Key Lock:
Key lock is used to prevent unintentional pressing of keys.
Setting→Display Setting→Keypad Lock
Press
Select to process the action or press Back
to the menu.
l Key Tone:
You can activate the tone that the phone sounds when you
press a key.
To activate the key tone, press to select Click Tone. To
deactivate the key tone, select Tone Off.
l Key Backlight:
You can activate the key backlight when you press a key.
32
6.1.7 Tools
n This section helps you to use Tools’ features
Feature Description
Signal Quality This menu displays the status of current wireless
connection, including ESSID, BSSID, Channel, Rate,
RSSI, Noise and Security.
Tools→Signal Quality→ESSID/ BSSID/ Channel/ Rate/
RSSI/ Noise/ Security
Site Survey This menu lists all available networks.
You can see all listed networks (sites)’ information.
Tools→Site Survey
*Press
*Press Detail to check the details.
Statistics In this menu, you can check the following information: IP
Renew to rescan the networks.
.
Statistics, RTP/RTCP, Encoding and Decoding.
Tools→Statistics
*To refresh the information, press
Battery In this menu, you can see Charger Status and Voltage
level.
Tools→Battery
Ping In this menu, you can check the reaching status to a host
network.
Tools→Ping
Version In this menu, information of Bootcode, Firmware, Built
Time and RAM Size are listed.
Tools→Version
Advance
Tools→Advance
There are three major operations set for Advance menu:
Profile Passwd:
to set Renew.
Tools→Advance→Profile Passwd
You can change your Old profile Password into Set New
Password based on your preference.
If the input old password is not correct, a message “Error!”
33

pops up on the screen.
to process the
Back to Default:
Tools→Advance→Back to Default
You can either Clear the original data recorded in
Phonebook, E-mail or Others. You can also remove All
settings on your phone at once.
A message (such as Clear Phonebook & Speed Dial?;
Clear E-mail?; Clear Others?; Clear All?) pops up on the
screen before the deleting. Press
action or press Back to the menu.
Restart
:
Tools→Advance→Restart
A message “Restart?” will pop up first. Press
process the action or press Back to the menu.
OK
OK to
34

7. Troubleshooting
7
1. Unable To Register With The SIP Server
Ø Make sure the Internet and the SIP proxy server are reachable.
Ø Make sure the SIP account and the password are correct.
2. Which Codec Should I Choose
Ø As which codec choice is depending on what codec is supported on both
end of the VoIP host. Generally a codec with low bandwidth consumption
and high voice quality is a good codec.
3. How Good Is The Call Quality
Ø Technology advances in IP telephony transportation have made Internet
calling as good as or better than normal PSTN connections. This is mostly
effective for high speed Broadband connections, whereas dial up services
have some way to go before delivering the quality of PSTN calling.
35
 Loading...