


2.1A-30001-B96
LINCOLN GmbH • Postfach 1263 • D-69183 W alldorf • Tel +49 (6227) 33-0 • Fax +49 (6227) 33-259 • Tx 466088
Page 1 from 24
Subject to modifications
Owner Manual
Tec hnical Description
10071327
QUICKLUB
®

2.1A-30001-B96
LINCOLN GmbH • Postfach 1263 • D-69183 W alldorf • Tel +49 (6227) 33-0 • Fax +49 (6227) 33-259 • Tx 466088
Page 5 from 24
Subject to modifications
Owner Manual
Tec hnical Description
Pump Types
Fig. 1 - The different types of pump 203
• Control unit models 203
The following control units can be used for the 203 pumps: (refer to
the respective Technical Description)
a) external control units
PSG 01
PSG 02 (Industry)
b) integrated control units
- with fixed pause time (6 hours) and adjustable operating time, F*
- with adjustable pause and operating times, V00-V03*
- with metering device monitoring (microprocessor control), F
M 00 - M 23*
c) integrated control unit (trailers)
- with fixed time of availability (6 hours) and adjustable operating
time, H *
* Refer to the designation on the pump nameplate.
Example: P203 -2XNBO - 1 K6 - 24 - 2A1.10 - V00
Also refer to the designation code on page 6.
• The 203 pumps differ from each other only in the design and
reservoir size as well as in the type of the electric connection
(different plugs with or without electric cable).
• Reservoir sizes:
2 l transparent plastic reservoir
4 l transparent plastic reservoir
8 l transparent plastic reservoir
• Electric connection
For the industrial applications, the pumps are only equipped with
plugs.
The pumps model 203 used in commercial vehicles are equipped with a 10 m electric cable.
• All other data such as:
- motor voltage
- version of the control unit
- remote control for triggering an additional lubrication
- cycle (2A1)
- design and number of pump elements
- design and number of safety valves
- filling type
- use of return line connections
- low - level control (option)
can be learnt from the pump type designation code.
1173b95

LINCOLN GmbH • Postf ach 1263 • D-69183 Walldorf • Tel +49 (6227) 33-0 • Fax +49 (6227) 33-259 • Tx 466088
Page 6 from 24
Owner Manual
Tec hnical Description
2.1A-30001-B96
Subject to modifications
Identification Code - Pump Models 203
Examples of model designations
Basicpump model for grease or oil
with 1-3 outlets and 12 VDC or 24 VDC motor
Reservoir design
2 = 2 l transparent plastic reservoir
4 = 4 l transparent plastic reservoir
8 = 8 l transparent plastic reservoir
X = Reservoire for grease
Y = Reservoire for oil
N = Standard design
L = Low - level control
without designation = Standard reservoire (2 Litre)
BO = Filling from top
FL = Flat-type reservoire (2 Litre)
Pump elements
1-3 = Number of the use elements
K 5 = Piston diameter = 5 mm
K 6 = Piston diameter = 6 mm
K 7 = Piston diameter = 7 mm
Motor
12 V DC or 24 V DC motor
Number of the possible connections
1A = 1 connection,supply voltage
2A = 2 connections, supply voltage +
remote control for additional lubrication,
for low - level control, piston detector (microprocessor)
Type of connection
1 = Hirschmann plug
4 = AMP - flanged plug (microprocessor)
8 = PG - cable gland
Connection outside the pump
00 = without socket-outlet, without cable
01 = with socket-outlet, without cable
10 = with 10 m cable
11 = with 10 m ADR cable
12 = with 10 m cable, 4 - wire (microprocessor M00 - M07)
13 = with 10 m cable, 5 - wire (microprocessor M08 - M23)
Control p. c. b. s. 12V / 24 V
F - with fixed pause time and variable adjustable operating time
F ADR - with fixed pause time and variable adjustable operating time**
V00 -V03 -with adjustable pause and operating time
V00 -V03 - ADR with adjustable pause and operating time **
M 00 ...M 23* - with microprocessor control (various
adjustments - see combinations of the jumper - positions)
H - for trailer or semitrailers
H - ADR for trailors and semitrailors**
No designation: Pump without control p. c. b.
* Not in conjunction with Hirschmann plugs (type of connection 1)
** for transport of hazard materials
Note: Any pumps combinations other the above standard pumps can be composed and ordered in accorcance with the valid model identification code.
P203- 2 X N - 1 K6- 24- 1A 1. 01- V00
P203- 4 X L - 1 K7- 24- 2A 1. 10- V02
P203- 2 X N - 1 K6- 12- 1A 8. 00
P203- 2 X N - 1 K6- 24- 2A 1. 11- V00-ADR
P203- 2 y N BO- 2 K5- 24- 1A 1. 01- F
P203- 4 X N BO- 1 K6- 24- 2A 4. 12- M00

2.1A-30001-B96
LINCOLN GmbH • Postfach 1263 • D-69183 W alldorf • Tel +49 (6227) 33-0 • Fax +49 (6227) 33-259 • Tx 466088
Page 7 from 24
Subject to modifications
Owner Manual
Tec hnical Description
Description of the QUICKLUB 203 Central Lubrication Pump
• The QUICKLUB 203 central lubrication pump
- is a compact multiline pump consisting of the following components:
Housing with integrated motor
Reservoir with stirring paddle
Printed circuit board
Pump element
Safety valve
Filling nipple
Electrical connection parts
- can drive up to 3 pump elements
- operates according to lubrication cycles (pause and operating
times)
- can be equipped with a low-level control
- can supply up to 300 lubrication points depending on the line
lengths
- is designed for the automatic lubrication of the connected lubrication points
- is designed for the delivery of greases up to NLGI 2 at temperatures from - 25° C to 70° C or of mineral oils of at least 40 mm²/s
(cST)
- can be used at low temperatures down to - 40° C.
• During the operating time the pump dispenses lubricant to the
connected lubrication points via one or several metering devices.
Fig. 2 - Pump components
1 - Reservoir 5 - Plug 2A1
2 - Pump element 6 - Filling nipple, pump
3 - Safety valve 7 - Printed circuit board
4 - Filling nipple, system 8 - Plug 1A1
Emergency lubrication 9 - Return line connection
possible
00002618
Low-level control (optional)
• The pump model 203 can be equipped with a low-level control.
• The following versions are available:
- Low-level control in conjunction with printed circuit boards
F* and V00-V03*
- Low-level control in conjunction with printed circuit board
M00-M23*
- Low-level control for pumps without printed circuit board.
• When the reservoir is empty, the signal lamp flashes, thus indicating the low level. Refer to the chapter Low-level control.
* The designation indicates the version of the printed circuit board. It
is part of the pump type designation code mentioned on the nameplate of each pump. Example: P203 ...- 2XN - 1K6 - 24 - 1A1.10 V00
Fig. 3 - QUICKLUB central lubrication pump, 2 l reservoir
1006a93

LINCOLN GmbH • Postf ach 1263 • D-69183 Walldorf • Tel +49 (6227) 33-0 • Fax +49 (6227) 33-259 • Tx 466088
Page 8 from 24
Owner Manual
Tec hnical Description
2.1A-30001-B96
Subject to modifications
Mode of Operation
• The electric motor drives the eccentric 1 (Fig. 5, 6).
• During the operating time:
- piston 2 sucks in lubricant from the reservoir. Ref er to Fig. 5.
- piston 2 dispenses the lubricant to the connected lubrication
points via the metering device. Refer to Fig. 6.
• The following designs are available:
Piston diameter, K5 ..................................................... 5 mm
Lubricant output ........................................ approx. 2 cm³/min
Piston diameter K6 (standard) ...................................... 6 mm
Lubricant output ..................................... approx.. 2.8 cm³/min
Piston diameter, K7 ..................................................... 7 mm
Lubricant output ........................................ approx. 4 cm³/min
20002068
Fig. 4 - Pump element
1 - Piston
2 - Return spring
3 - Check valve
1003a95
1004a95
Fig. 6 - The pump element dispenses lubricant
Fig. 5 - The pump element sucks in lubricant
1 - Eccentric 3 - Spring
2 - Piston 4 - Check valve
Pump Elements
Suction Phase
Delivery Phase
1 - Eccentric 3 - Spring
2 - Piston 4 - Check valve

2.1A-30001-B96
LINCOLN GmbH • Postfach 1263 • D-69183 W alldorf • Tel +49 (6227) 33-0 • Fax +49 (6227) 33-259 • Tx 466088
Page 9 from 24
Subject to modifications
Owner Manual
Tec hnical Description
Check valve
• The check valve:
- closes the pressure line during suctionstroke
- prevents the lubricant from flowing back to the housing or reservoir
1 - Reservoir with stirring paddle
2 - Pump
3 - Check valve, spring-loaded
4 - Pressure limiting valve
R - Return line
p - Pressure line
Arrangement of the pump elements
• If several pump elements are to be installed, the installation arrangement shown in Fig. 8 must be adhered to.
• If there is only one pump element , it can be installed in any position. Standard position is no. 3.
• If there are two elements, install one in position 3 and the other in
position 1.
Pressure limiting valve without grease return
Important: Each pump element must be secured with a pressure
limiting valve.
• The pressure limiting valve
- limits the pressure build-up in the system
- opens at an overpressure of 250 or 350 bar depending on the
safety valve design.
• If lubricant is leaking at the pressure limiting valve, this indicates
that the system is malfunctioning.
Note: The pumps model 203 are equipped without pressure limiting
valve. When ordering the pumpe, order the safety valve seperatly.
See the Parts Catalog under Safety valves.
Pressure limiting valve with grease return (optional)
If the system is blocked, grease will leak from the pressure limiting
valve. This grease quantity is returned to the reservoir.
Fig. 7 - Hydraulic diagram of the pump
Fig. 8 - Arrangement of the pump elements
Fig. 9 - Pressure limiting valve
Fig. 10 - Pressure limiting valve with grease return
10012618
00002626
1163a95
1164b95
Pressure Limiting Valve (safety valve)

LINCOLN GmbH • Postf ach 1263 • D-69183 Walldorf • Tel +49 (6227) 33-0 • Fax +49 (6227) 33-259 • Tx 466088
Page 16 from 24
Owner Manual
Tec hnical Description
2.1A-30001-B96
Subject to modifications
T echnical Data
Pump
Admissible operating temperature ...................... -40° C to 70° C*
Number of outlets .......................................................... 1,2 or 3
Reservoir capacity ....................................................... 2 l, 4 l , 8 l
Refilling ........................ via hydraulic lubrication fitting or from top
Lubricant .................................. greases of at least NLGI grade 2
mineral oils up to 40mm²/s (cST) at 40° C
Class of protection .........................IP6K 9K acc. to DIN 40050 T9
*Note: The pump is designed for the above mentioned temperature range. The lubricants used must still be pumpable at the
temperatures mentioned above. In case of doubt, consult the
lubricant manufacturer.
Motor:
DC gear motor (interference-suppressed)
Operating voltage. .................................... 12VDC or 24VDC
Max. current input
12V ............................................................................. 6.5 A
24V ................................................................................3 A
Speed ...........................................................approx.17 rpm
Note: The pump motor is designed for intermittent operation. For
continous operation, contact the pump manufacturer.
Torsion torques
Electric motor on housing .................................................12 Nm
Pump element in housing ................................................25 Nm
Closure plug in housing .................. ..........................................12 Nm
Pump element
Piston diameter, K5 ........................................................... 5 mm
Lubricant output ........................................ approx. 2 cm³/min
Piston diameter, (standard) K6........................................... 6 mm
Lubricant output ...................................... approx. 2.8cm³/min
Piston diameter, K7 ........................................................... 7 mm
Lubricant output ........................................ approx. 4 cm³/min
Max. operating pressure. ................................................ 350 bar
Connection thread. ............................................................G 1/ 4
suitable for tube DIA .................................................... 6 mm
Important! The lubricant output listed refers to grease of NLGI grade
2 measured at 20°C, backpressure 100 bar, nominal voltage 12/24
V. Any differing pressures or temperatures result in different lubricant
outputs. Any system design must be based on the above values.
Weights
The weights below include the following ‘‘individual weights”:
- Pump kit with one pump element, safety valve, grease filling
(0.75 kg, 1.5 kg)
- Packing (cardboard box)
- Attaching parts
- Operating Instructions
2 l reservoir, standard design (0.75 kg)
Pump 203 without connection cable ................................. 5.4 kg
Pump 203, version E 1 ..................................................... 6.5 kg
Pump 203, version E 2 ..................................................... 7.1 kg
4 l reservoir , standar d design (1.5 kg)
Pump 203 without connection cable ................................. 8.3 kg
Pump 203, version E 1 ..................................................... 9.3 kg
Pump 203, version E 2 ..................................................... 9.9 kg
8 l reservoir , standar d design (1.5 kg)
Pump 203 without connection cable ................................. 8.6 kg
Pump 203, version E 1 ..................................................... 9.6 kg
Pump 203, version E 2 .................................................... 10.2 kg
In the case of pump versions deviating from those mentioned, add
the weights of the following components to the mentioned weights.
Per pump element ..........................................................+0.2 kg
Per safety valve...............................................................+0.1 kg
10 m monitoring cable, 5-wire
(microprocessor) E 4 ....................................................... +1.1 kg
10 m monitoring cable, 4-wire
(microprocessor) E 4 ....................................................... +0.4 kg
Connection cable with piston detector ............................... 0.1 kg
Reservoir version “Filling from top” (only 2 l)* ..................+0.15 kg
2 l flat-type reservoir ........................................................+0.5 kg
* Note: The 4l and 8l reservoirs ha ve the standard design ”filling from
top”.

2.6A-20002-B962.6A-20002-B96
2.6A-20002-B962.6A-20002-B96
2.6A-20002-B96
LINCOLN GmbH • Postf ach 1263 • D-69183 Walldorf • Tel +49 (6227) 33-0 • Fax +49 (6227) 33-259 • Tx 466088
Page 5 from 15Page 5 from 15
Page 5 from 15Page 5 from 15
Page 5 from 15
Subject to modifications
Owner ManualOwner Manual
Owner ManualOwner Manual
Owner Manual
TT
TT
T
ecec
ecec
ec
hnical Descriptionhnical Description
hnical Descriptionhnical Description
hnical Description
Fig. 4 - Printed circuit board 236-13870-1
1059a95
Fig.5 - Time sequence diagram
tB - Working hours T - Lubrication cycle
tP - Various pause times T 1 - Stored pause times
T2 - Operating times
20002443
• The printed circuit board automatically controls the sequence of
the pause and operating times of the model 203 central lubrication
pump as a function of the vehicle or machine working hours tB
(Fig. 5).
• The sequence of the pause and operating times is activated when
the machine contact or driving switch is switched on.
• A lubrication cycle consists of one pause time and one operating
time. Once the pause time has elapsed, the operating time starts to
run. This lubrication cycle is repeated permanently after the machine or vehicle has been put into operation. Refer to Fig. 5.
• During the operating time the pump element dispenses the lubricant to the lubrication points via progressive metering devices.
LINCOLN GmbH • Postf ach 1263 • D-69183 Walldorf • Tel +49 (6227) 33-0 • Fax +49 (6227) 33-259 • Tx 466088
Page 6 from 15Page 6 from 15
Page 6 from 15Page 6 from 15
Page 6 from 15
Owner ManualOwner Manual
Owner ManualOwner Manual
Owner Manual
TT
TT
T
ecec
ecec
ec
hnical Descriptionhnical Description
hnical Descriptionhnical Description
hnical Description
2.6A-20002-B962.6A-20002-B96
2.6A-20002-B962.6A-20002-B96
2.6A-20002-B96
Subject to modifications
The pause timeThe pause time
The pause timeThe pause time
The pause time
- determines the frequency of the lubrication cycles within a working cycle;
- is started and stopped via the machine contact or driving switch;
- is adjustable.
• When the machine contact or the driving switch is switched off, the
pause times which have already elapsed are stored and added
up (refer to T1, Fig. 5) until the time which has been set on the blue
rotary switch (Fig.8) is reached.
• The pause time setting may be different for each application. It
must be adjusted in accordance with the respective lubrication
cycles. Also see ”To set the pause time”.
The operating timeThe operating time
The operating timeThe operating time
The operating time
- depends on the system’s lubricant requirement ;
- is adjustable;
- is finished when the machine contact or the driving switch is switched off.
• The longer the operating time, the greater the lubricant requirement and vice-versa.
• When the machine contact or the driving switch is switched off, the
operating times which have already elapsed are stored and added up until the time which has been set on the red rotary switch
(Fig. 10) is reached. After this, the lubrication cycle starts again.
• The operating time setting may be different for each application. It
must be adjusted in accordance with the respective lubricant requirement. Also see ”To set the operating time”.
20002438
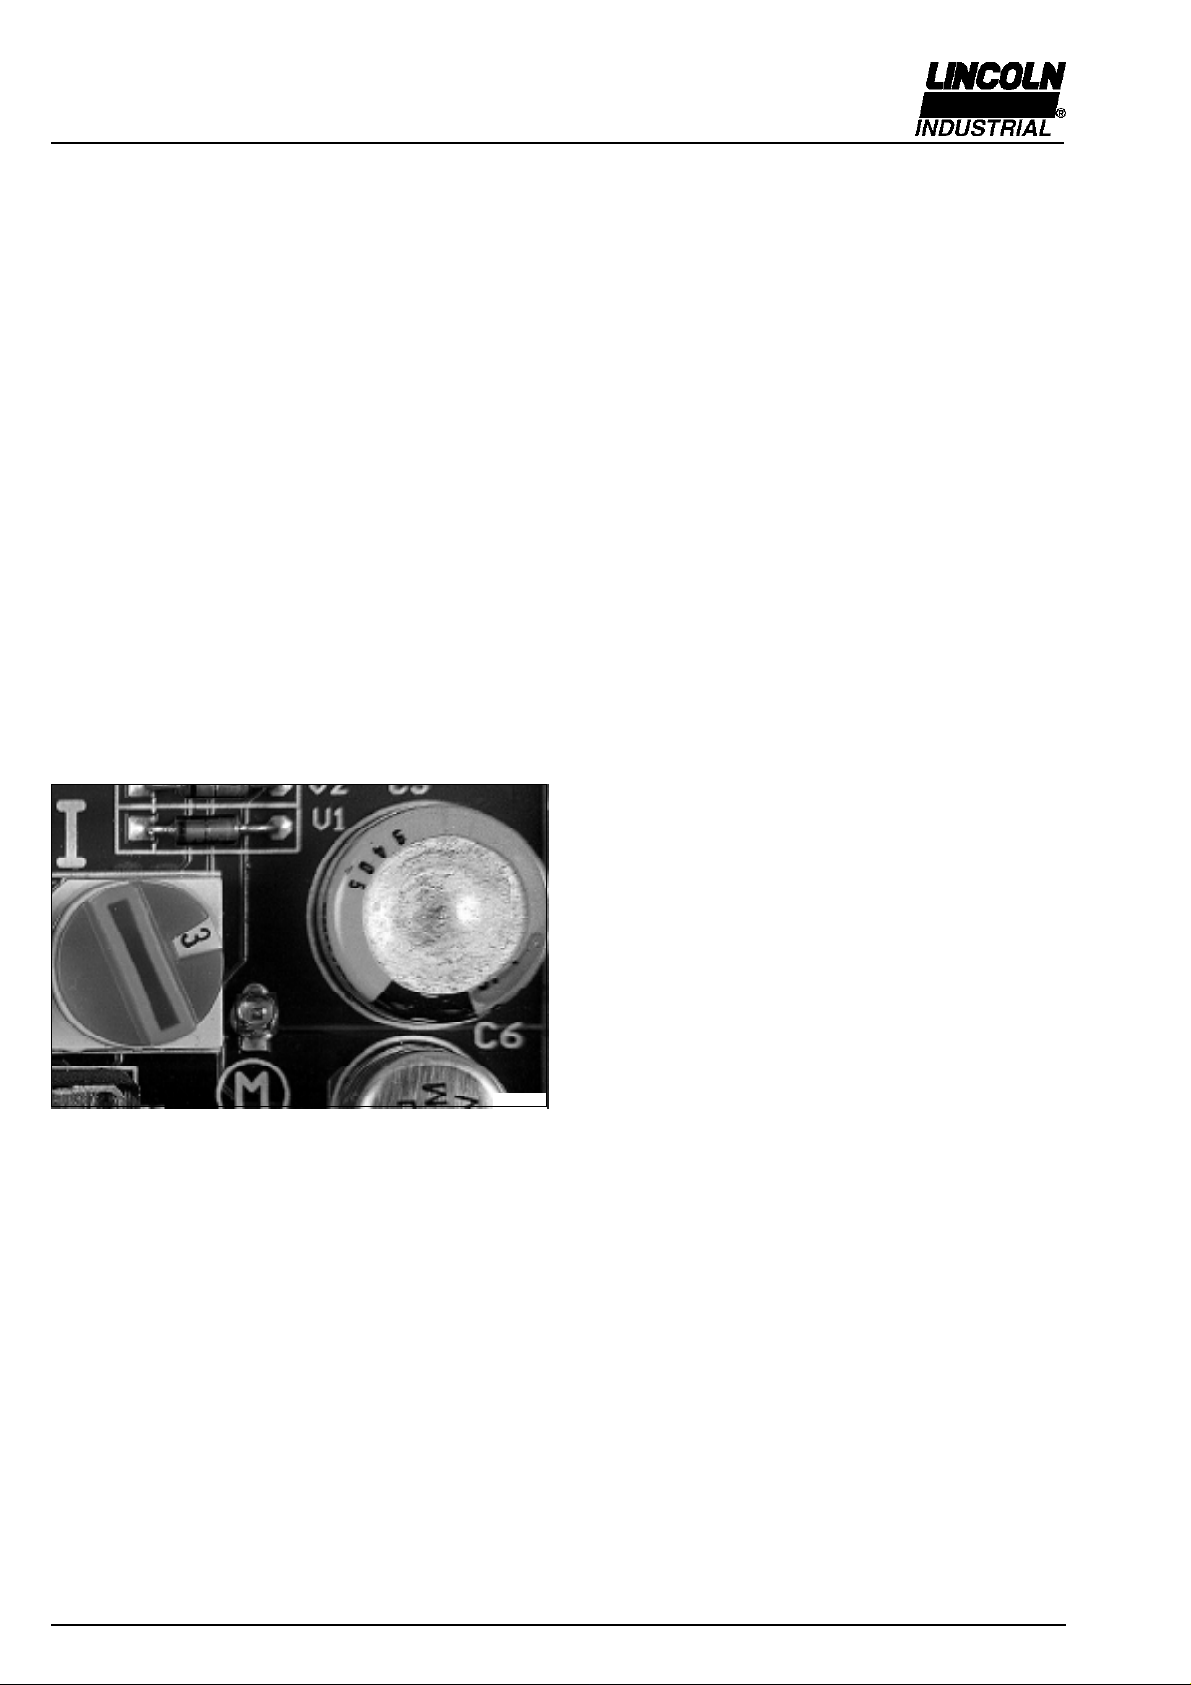
Fig. 6 -Capacitor
Time storage when the power supply is switched offTime storage when the power supply is switched off
Time storage when the power supply is switched offTime storage when the power supply is switched off
Time storage when the power supply is switched off
• When the ignition voltage or operating voltage is switched off, a
capacitor takes over the power supply to the printed circuit board,
thus the times which have already elapsed are not lost.
••
••
•
Switching off until 5 daysSwitching off until 5 days
Switching off until 5 daysSwitching off until 5 days
Switching off until 5 days
When the power supply is switched on again the printed circuit
circuit board continues to operate from the point where it had been
interrupted.
••
••
•
Switching on after 5 daysSwitching on after 5 days
Switching on after 5 daysSwitching on after 5 days
Switching on after 5 days
When the power supply is switched on again, the capaci-
tor is charged. The printed circuit board
immediatel immediatel
immediatel immediatel
immediatel
yy
yy
y
starts with an operating time. starts with an operating time.
starts with an operating time. starts with an operating time.
starts with an operating time.

2.6A-20002-B962.6A-20002-B96
2.6A-20002-B962.6A-20002-B96
2.6A-20002-B96
LINCOLN GmbH • Postf ach 1263 • D-69183 Walldorf • Tel +49 (6227) 33-0 • Fax +49 (6227) 33-259 • Tx 466088
Page 7 from 15Page 7 from 15
Page 7 from 15Page 7 from 15
Page 7 from 15
Subject to modifications
Owner ManualOwner Manual
Owner ManualOwner Manual
Owner Manual
TT
TT
T
ecec
ecec
ec
hnical Descriptionhnical Description
hnical Descriptionhnical Description
hnical Description
Switch position Switch position
Switch position Switch position
Switch position
11
11
1
22
22
2
33
33
3
44
44
4
55
55
5
66
66
6
77
77
7
88
88
8
99
99
9
AA
AA
A
BB
BB
B
CC
CC
C
DD
DD
D
EE
EE
E
FF
FF
F
Minutes 3,75 7,5 11,25 15 18,75 22,5 26,25 30 33,75 37,5 41,25 45 48,75 52,5 56,25
Hours 1 2 3 456789101112131415
* To set the pause or oper ating time, remove the co ver on the pump
housing.
Note: To reset a jumper (Fig. 9), remove the printed circuit board.
Important:Important:
Important:Important:
Important: After having set the pause time or operating time, screw
the cover on the pump housing again
Fig. 9 - Preselection of the time range
Fig. 7 - The cover to access the printed circuit board has been removed
00002617
Fig. 8 - Rotary switch - Pause time
20002452
20002451
TT
TT
T
o set the pause timeo set the pause time
o set the pause timeo set the pause time
o set the pause time
The pause time can be set to 15 different settings by means of the
blue rotary switch.blue rotary switch.
blue rotary switch.blue rotary switch.
blue rotary switch.
Time ranges: Minutes or hours
Time SettingTime Setting
Time SettingTime Setting
Time Setting
Note: The 0 setting has no function.
Factory settingFactory setting
Factory settingFactory setting
Factory setting
Rotary switch on :............................................................ 6 hours
or ........................................................................... 22.5 minutes
•
The time ranges can be modified by replugging the jumper (Fig. 9)
on the printed circuit board.
• Factory setting of the jumper: see chart page 14. The combination
number can be learnt from the pump type designation code mentioned on the nameplate of each pump.

LINCOLN GmbH • Postf ach 1263 • D-69183 Walldorf • Tel +49 (6227) 33-0 • Fax +49 (6227) 33-259 • Tx 466088
Page 8 from 15Page 8 from 15
Page 8 from 15Page 8 from 15
Page 8 from 15
Owner ManualOwner Manual
Owner ManualOwner Manual
Owner Manual
TT
TT
T
ecec
ecec
ec
hnical Descriptionhnical Description
hnical Descriptionhnical Description
hnical Description
2.6A-20002-B962.6A-20002-B96
2.6A-20002-B962.6A-20002-B96
2.6A-20002-B96
Subject to modifications
Switch positionSwitch position
Switch positionSwitch position
Switch position
11
11
1
22
22
2
33
33
3
44
44
4
55
55
5
66
66
6
77
77
7
88
88
8
99
99
9
AA
AA
A
BB
BB
B
CC
CC
C
DD
DD
D
EE
EE
E
FF
FF
F
Seconds 7,5 15 22,5 30 37,5 45 52,5 60 67,5 75 82,5 90 97,5 105 112,5
Minutes 2 4 6 8 10 12 14 16 18 20 22 24 26 28 30
TT
TT
T
o set the operating timeo set the operating time
o set the operating timeo set the operating time
o set the operating time
• The operating time can be set to 15 different setting by means of
the red rotary switch.
Time ranges: Seconds or minutes
Fig. 10 - Rotary switch - Operating time
20002453
Fig. 11 - Preselection of the time range
20002437
Note: The 0 setting has no function.
Factory settingFactory setting
Factory settingFactory setting
Factory setting
Rotary switch on :........................................................ 6 minutes
or ......................................................................... 22.5 seconds
•
The time ranges can be modified by replugging the jumper (Fig.
11) on the printed circuit board.
• Factory setting of the jumper: see chart page 14. The combination
numbers can be learnt from the pump type designation code mentioned on the nameplate of each pump.

2.6A-20002-B962.6A-20002-B96
2.6A-20002-B962.6A-20002-B96
2.6A-20002-B96
LINCOLN GmbH • Postf ach 1263 • D-69183 Walldorf • Tel +49 (6227) 33-0 • Fax +49 (6227) 33-259 • Tx 466088
Page 9 from 15Page 9 from 15
Page 9 from 15Page 9 from 15
Page 9 from 15
Subject to modifications
Owner ManualOwner Manual
Owner ManualOwner Manual
Owner Manual
TT
TT
T
ecec
ecec
ec
hnical Descriptionhnical Description
hnical Descriptionhnical Description
hnical Description
RepairRepair
RepairRepair
Repair
The defective printed circuit boards should be suitably packed and
returned to the factory .
•
If the printed cirIf the printed cir
If the printed cirIf the printed cir
If the printed cir
cuit boarcuit boar
cuit boarcuit boar
cuit boar
d md m
d md m
d m
ust be replaced,ust be replaced,
ust be replaced,ust be replaced,
ust be replaced,
a model a model
a model a model
a model
V 00 V 00
V 00 V 00
V 00 will
always be delivered. See chart page 14.
• Before installing another printed circuit board, take care that the
setting of the jumper or that of the operating/pause time is the
same as on the old printed circuit board.
Note: In the case of model 203 pump, version 2A1, with external
illuminated pushbutton, it is also possible to trigger an additional
lubrication cycle via this pushbutton.
Fig. 13 - T o trigger an additional lubrication cycle, only pumps with illuminated pushbutton
20002458
20002457
Fig. 12 - LED on the printed circuit board
• To check the pump operation it is possible to perform an operational test.
Pumps model 203 Pumps model 203
Pumps model 203 Pumps model 203
Pumps model 203 installed
on machineson machines
on machineson machines
on machines
* Switch on the machine contact.
Pumps model 203Pumps model 203
Pumps model 203Pumps model 203
Pumps model 203 installed
on commercial vehicleson commercial vehicles
on commercial vehicleson commercial vehicles
on commercial vehicles
* Switch on the driving switch
For all pumpsFor all pumps
For all pumpsFor all pumps
For all pumps
• To check whether power is applied to the printed circuit board,
observe whether the LED 1 Fig. 10 is lit.
* Press pushbutton 5 on the printed circuit board
(> 2 seconds) (> 2 seconds)
(> 2 seconds) (> 2 seconds)
(> 2 seconds) until
the right-hand LED 3 lights up.
• A shorter pause time elapses, followed by a normal lubrication
cycle.
• Additional lubrication cycles can be triggered at any time.
1 - LED, left-hand 4 - Rotary switch, operating time
2 - Rotary switch, pause time 5 - Pushbutton for additional
3 - LED, right-hand lubrication
Operational Operational
Operational Operational
Operational
TT
TT
T
est / est /
est / est /
est /
TT
TT
T
o o
o o
o
TT
TT
T
rigrig
rigrig
rig
gg
gg
g
er an Ader an Ad
er an Ader an Ad
er an Ad
ditionalditional
ditionalditional
ditional
Lubrication CycleLubrication Cycle
Lubrication CycleLubrication Cycle
Lubrication Cycle

2.6A-20002-B962.6A-20002-B96
2.6A-20002-B962.6A-20002-B96
2.6A-20002-B96
LINCOLN GmbH • Postf ach 1263 • D-69183 Walldorf • Tel +49 (6227) 33-0 • Fax +49 (6227) 33-259 • Tx 466088
Page 11 from 15Page 11 from 15
Page 11 from 15Page 11 from 15
Page 11 from 15
Subject to modifications
Owner ManualOwner Manual
Owner ManualOwner Manual
Owner Manual
TT
TT
T
ecec
ecec
ec
hnical Descriptionhnical Description
hnical Descriptionhnical Description
hnical Description
TT
TT
T
ecec
ecec
ec
hnical Datahnical Data
hnical Datahnical Data
hnical Data
Rated voltage ............................................................ 12/24V DC
Operating voltage
12V/ 24V..........................................................9V to 3 0 V
Residual rippple in relation
with the operating voltage ....................... ± 5% acc. to DIN 41755
Motor output ................................ Transistor 7A/short-circuit proof
Reverse voltage protection:
The operating voltage inputs are protected against
polarity reversal
Temperature range .................................... -25°C to 70°C
Lamp current in the case of pump 2A1 ........................... max. 2 A
Class of protection
Printed circuit board installed in housing ........................ IP 6 K 9 K
In order to protect the printed circuit board against condensation it
has been covered with a protective varnish.
All the printed circuit boards comply with the EMC (Electromagnetic
compatibility) guidelines for road vehicles acc. to DIN 40839 T1, 3
and 4.
The printed circuit boards model V additionnally comply with the
EMC guideline 89 / 336 / EWG
Emitted interference acc. to, ....................... EN 55011 / 03.91 and
......................................................... EN 50081-1 / 01.92
Noise immunity acc. to .................................prEN 50082-2 / 1993
Time setting
Pause time, depending on the jumper position:
......................................3.75; 7.5; 11.25; to 56.25 minutes
.......................................................... 1, 2 , 3...to 15 hours
Operating time, depending on the jumper position
....................................... 7.5; 15; 22.5;....to 112.5 seconds
..................................................... 2, 4 , 6 ,....to 30 minutes
Factory setting
Pause time.......................................................... 6 hours
or ............................................................... 22.5 minutes
Operating time.................................................. 6 minutes
or ............................................................. 22.5 seconds

LINCOLN GmbH • Postf ach 1263 • D-69183 Walldorf • Tel +49 (6227) 33-0 • Fax +49 (6227) 33-259 • Tx 466088
Page 12 from 15Page 12 from 15
Page 12 from 15Page 12 from 15
Page 12 from 15
Owner ManualOwner Manual
Owner ManualOwner Manual
Owner Manual
TT
TT
T
ecec
ecec
ec
hnical Descriptionhnical Description
hnical Descriptionhnical Description
hnical Description
2.6A-20002-B962.6A-20002-B96
2.6A-20002-B962.6A-20002-B96
2.6A-20002-B96
Subject to modifications
1192b95
Fig. 14 - Connection diagram Quicklub 203 with adjustable pause time
Connection via Hirschmann plug-in connectors DIN 43650-A
A - Printed circuit board
B - Pump housing
C - Cable connector 1
D - Line socket 1 (black)
for connection cable, 3-wire
Connection Diagram - Industrial ApplicationsConnection Diagram - Industrial Applications
Connection Diagram - Industrial ApplicationsConnection Diagram - Industrial Applications
Connection Diagram - Industrial Applications
1A1 - Pump without illuminated pushbutton
2A1 - Pump with cable connection for
illuminated pushbutton*
F - Machine contact
* on request
G - Cable connector 2*
H - Line socket 2 (grey)
for connection cable, 3-wire*
I - Pushbutton for additional lubrication
J - Signal lamp in the case of low-level
control
Fig. 15 - Terminals of the printed circuit board
1009a93
- Low-level control
31 - Earth N - Level control
15 - Driving switch Z - Additional lubrication
M
- Motor - Signal lamp
Attention! If a pump model 103 CS...E2 is replaced by a pump model P203-...-...-2A1.10, the lamp connection of the illuminatedAttention! If a pump model 103 CS...E2 is replaced by a pump model P203-...-...-2A1.10, the lamp connection of the illuminated
Attention! If a pump model 103 CS...E2 is replaced by a pump model P203-...-...-2A1.10, the lamp connection of the illuminatedAttention! If a pump model 103 CS...E2 is replaced by a pump model P203-...-...-2A1.10, the lamp connection of the illuminated
Attention! If a pump model 103 CS...E2 is replaced by a pump model P203-...-...-2A1.10, the lamp connection of the illuminated
pushbutton must be changed from minus to plus.pushbutton must be changed from minus to plus.
pushbutton must be changed from minus to plus.pushbutton must be changed from minus to plus.
pushbutton must be changed from minus to plus.

2.6A-20002-B962.6A-20002-B96
2.6A-20002-B962.6A-20002-B96
2.6A-20002-B96
LINCOLN GmbH • Postf ach 1263 • D-69183 Walldorf • Tel +49 (6227) 33-0 • Fax +49 (6227) 33-259 • Tx 466088
Page 13 from 15Page 13 from 15
Page 13 from 15Page 13 from 15
Page 13 from 15
Subject to modifications
Owner ManualOwner Manual
Owner ManualOwner Manual
Owner Manual
TT
TT
T
ecec
ecec
ec
hnical Descriptionhnical Description
hnical Descriptionhnical Description
hnical Description
A - Printed circuit board
B - Pump housing
C - Cable connector 1
D - Line socket 1 (black)
with connection cable, 3-wire
1A1 - Pump without illuminated pushbutton
Fig. 16 - Connection diagram Quicklub 203 with adjustable pause time
Connection via Hirschmann plug-in connectors DIN 43650-A
1155b95
Connection DiaConnection Dia
Connection DiaConnection Dia
Connection Dia
gram - Applications fgram - Applications f
gram - Applications fgram - Applications f
gram - Applications f
or Commeror Commer
or Commeror Commer
or Commer
cial cial
cial cial
cial
VV
VV
V
ehicehic
ehicehic
ehic
lesles
lesles
les
2A1 - Pump with cable connection
for illuminated pushbutton**
F - Driving switch
G - Fuse 10 A
H - Cable, black
I - Cable, brown
*does not belong to the scope of delivery
**equipment available on request
J - Cable red
K - Cable connector 2**
L - Line socket 2 (grey)
with connection cable, 3-wire**
M - Illuminated pushbutton**
O - Signal lamp in the case of low-level
control
P - Battery cutoff*
Attention! If a pump model 103 CS...E2 is replaced by a pump model P203-...-...-2A1.10, the lamp connection of the illuminatedAttention! If a pump model 103 CS...E2 is replaced by a pump model P203-...-...-2A1.10, the lamp connection of the illuminated
Attention! If a pump model 103 CS...E2 is replaced by a pump model P203-...-...-2A1.10, the lamp connection of the illuminatedAttention! If a pump model 103 CS...E2 is replaced by a pump model P203-...-...-2A1.10, the lamp connection of the illuminated
Attention! If a pump model 103 CS...E2 is replaced by a pump model P203-...-...-2A1.10, the lamp connection of the illuminated
pushbutton must be changed from minus to plus.pushbutton must be changed from minus to plus.
pushbutton must be changed from minus to plus.pushbutton must be changed from minus to plus.
pushbutton must be changed from minus to plus.

LINCOLN GmbH • Postfach 1263 • D-69183 Walldorf • Tel +49 (6227) 33-0 • Fax +49 (6227) 33-259 • Tx 466088
Page A 4Page A 4
Page A 4Page A 4
Page A 4
Owner ManualOwner Manual
Owner ManualOwner Manual
Owner Manual
Operating InstructionsOperating Instructions
Operating InstructionsOperating Instructions
Operating Instructions
2.2A-10001-A962.2A-10001-A96
2.2A-10001-A962.2A-10001-A96
2.2A-10001-A96
Subject to modifications
Note: It must nevertheless be ensured that the oils or greases used
do not alter their consistency significantly in the course of time or
under the influence of temperature or pressure.
Progressive Metering Devices Model SSVProgressive Metering Devices Model SSV
Progressive Metering Devices Model SSVProgressive Metering Devices Model SSV
Progressive Metering Devices Model SSV
• The progressive metering devices model SSV can be used for
dispensing
- mineral oils with min. 40 mm²/s (cST) or
- greases up to the penetration class NLGI 2
The progressive metering devicesThe progressive metering devices
The progressive metering devicesThe progressive metering devices
The progressive metering devices
- are piston-operated metering devices;
- automatically (progressively) dispense the lubricant fed by the
pump to the connected lubrication points;
- have a lubricant output of 0.2 cm³ per outlet and piston stroke;
- when one or more outlets are closed (see ”Combining outlets”)
they can dispense a double or multiple lubricant quantity
;;
;;
;
- are available with 6 to 12 outlets or up to 22 outlets;
- offer the option of combining several lubrication points into one
centralized lubrication point.
- meter the supplied lubricant into predetermined single quantities.
- can be monitored visually or electronically.
• The installation of max. 3 pump elements allows the supply of
lubricant to max. 3 separate lubrication circuits.
• Each lubrication circuit is equipped with a pressure relief valve
(safety valve) which limits the pressure to the maximum admissible value.
• Any blockage in a lubrication circuit is indicated by grease leaking
from the respective pressure relief valve.
Suitable LubricantsSuitable Lubricants
Suitable LubricantsSuitable Lubricants
Suitable Lubricants
Progressive Plunger Metering Devices - GeneralProgressive Plunger Metering Devices - General
Progressive Plunger Metering Devices - GeneralProgressive Plunger Metering Devices - General
Progressive Plunger Metering Devices - General
Features of a Progressive Metering DeviceFeatures of a Progressive Metering Device
Features of a Progressive Metering DeviceFeatures of a Progressive Metering Device
Features of a Progressive Metering Device
• The term ”progressive
” refers to the special features of the lub-” refers to the special features of the lub-
” refers to the special features of the lub-” refers to the special features of the lub-
” refers to the special features of the lub-
ricant distribution within the metering devices, e.g.ricant distribution within the metering devices, e.g.
ricant distribution within the metering devices, e.g.ricant distribution within the metering devices, e.g.
ricant distribution within the metering devices, e.g.
- the successive movements of the individual pistons within the
metering device due to the supplied lubricant being under pressure;
- the pistons move in a predetermined order and the cycles are
repeated constantly;
- each piston must have completed its movement fully before the
next piston can be moved, no matter whether the lubricant is dispensed continuously or intermittently;
- the pistons operate interdependently of one another;
- no lubrication point which is connected to the system is omitted.
10002709
Fig. 2: Metering device typel SSV 8 shown as a model
10002710
Fig. 3: Sectional view of a SSV 8 metering device

Subject to modifications
LINCOLN GmbH • Postfach 1263 • D-69183 Walldorf • Tel +49 (6227) 33-0 • Fax +49 (6227) 33-259 • Tx 466088
Page A 5
Owner Manual
Operating Instructions
2.2A-10001-A96
• QUICKLUB progressive metering devices offer the option of combining several lubrication points on a machine to one or more
central lubrication points, as shown in Fig. 4 which illustrates this
basic feature.
Applications
Fig. 6: Multiline pump expanded by a progressive metering device
• Progressive metering devices can be used in two-line or singleline centralized lubrication systems in order to increase the number of outlets of multiline pumps or to subdivide the single metering devices and measuring valves (Fig. 4 - 8) also as secomdary
metering devices in large and small oil circulating systems.
Fig. 4: Central lubrication point
• When they are used in connection with hand-operated pumps,
pneumatic or electric pumps the progressive metering devices
are a simple and low-cost centralized lubrication system. See Fig.
5.
1 - Hand-operated pump
2 - Pneumatically operated pump
3 - Electrically operated pump
4 - Lubrication fitting block
5 - Hand-operated filling pump
4024b95
Fig. 5: Possible pump connections
4025a95
1207a95
Fig. 7: Two-line system expanded by a progressive metering device
1205a95

LINCOLN GmbH • Postfach 1263 • D-69183 Walldorf • Tel +49 (6227) 33-0 • Fax +49 (6227) 33-259 • Tx 466088
Page A 6Page A 6
Page A 6Page A 6
Page A 6
Owner ManualOwner Manual
Owner ManualOwner Manual
Owner Manual
Operating InstructionsOperating Instructions
Operating InstructionsOperating Instructions
Operating Instructions
2.2A-10001-A962.2A-10001-A96
2.2A-10001-A962.2A-10001-A96
2.2A-10001-A96
Subject to modifications
Lubricant DistribLubricant Distrib
Lubricant DistribLubricant Distrib
Lubricant Distrib
ution ution
ution ution
ution
Within the MeteringWithin the Metering
Within the MeteringWithin the Metering
Within the Metering
DeviceDevice
DeviceDevice
Device
Phase 1Phase 1
Phase 1Phase 1
Phase 1
• The lubricant enters the metering device from above (white arrow)
and flows to the right-hand end of piston A.
• Piston A (black arrow) is moved to the left under the pressure of the
lubricant, causing the lubricant ahead of the left-hand end of piston A to be dispensed to outlet 2 (dashed arrow).
Lubricant under pump pressure
Lubricant under delivery pressure of the piston
Lubricant, pressureless
Phase 2Phase 2
Phase 2Phase 2
Phase 2
• Once piston A has reached its left-hand final position, the junction
channel to the right-hand end of piston B is opened.
• The lubricant which arrives from above (white arrow) also moves
piston B (black arrow) to the left, causing the lubricant quantity
ahead of the left-hand end of piston B to be dispensed to
outlet 7 (dashed arrow).
Lubricant under pump pressure
Lubricant under delivery pressure of the piston
Fig. 9: Phase 1
Fig. 10: Phase 2
Fig. 8: Single-line system expanded by a progressive metering device
1206a95
• The 5 following illustrations show how the lubricant distribution is
made to the individual outlets.
Note: To simplify the description we only show the lubricant distribution for outlets 2, 7, 5, 3 and 1. The remaining distribution operations
are derived from the logical pumping sequence.
2007a95
2008a95

Subject to modifications
LINCOLN GmbH • Postfach 1263 • D-69183 Walldorf • Tel +49 (6227) 33-0 • Fax +49 (6227) 33-259 • Tx 466088
Page A 7Page A 7
Page A 7Page A 7
Page A 7
Owner ManualOwner Manual
Owner ManualOwner Manual
Owner Manual
Operating InstructionsOperating Instructions
Operating InstructionsOperating Instructions
Operating Instructions
2.2A-10001-A962.2A-10001-A96
2.2A-10001-A962.2A-10001-A96
2.2A-10001-A96
Fig. 12: Phase 4
Fig. 11: Phase 3
Phase 3Phase 3
Phase 3Phase 3
Phase 3
• Once piston B has reached its left-hand final position, the junction
channel to the right-hand end of piston A is opened.
• The lubricant which flows from above (white arrow) moves piston
C (black arrow) to the left, causing the lubricant quantity ahead of
the left-hand end of piston C to be dispensed to outlet 5 (dashed
arrow).
Lubricant under pump pressure
Lubricant under delivery pressure of the piston
Phase 4Phase 4
Phase 4Phase 4
Phase 4
• The channel to the right-hand end of piston D is now open (black
arrow).
• The lubricant which is fed from above (white arrow) moves piston
D to the left, causing the lubricant quantity ahead of the left-hand
end of piston D to be dispensed out of the metering device via
outlet 3 (dashed arrow).
Lubricant under pump pressure
Lubricant under delivery pressure of the piston
Phase 5Phase 5
Phase 5Phase 5
Phase 5
• In phase 4, piston D had opened the junction channel to the lefthand end of piston A.
• The lubricant flowing in (white arrow) moves piston A to the right
(black arrow), causing the lubricant quantity to be dispensed to
outlet 1(dashed arrow).
• In the subsequent distribution sequence, pistons B - D are moved
from the left to the right one after the other.
• A complete distribution sequence is finished and a new cycle can
begin.
Lubricant under pump pressure
Lubricant under delivery pressure of the piston
Fig.13: Phase 5
2009a95
2010a95
2011a95
When the lubricant supply is interruptedWhen the lubricant supply is interrupted
When the lubricant supply is interruptedWhen the lubricant supply is interrupted
When the lubricant supply is interrupted
- the pistons come to a halt;
- the lubricant is no longer dispensed to the lubrication point.
• When the lubricant is fed again to the metering device, the cycle
begins from the point where it had been interrupted.

LINCOLN GmbH • Postfach 1263 • D-69183 Walldorf • Tel +49 (6227) 33-0 • Fax +49 (6227) 33-259 • Tx 466088
Page A 8Page A 8
Page A 8Page A 8
Page A 8
Owner ManualOwner Manual
Owner ManualOwner Manual
Owner Manual
Operating InstructionsOperating Instructions
Operating InstructionsOperating Instructions
Operating Instructions
2.2A-10001-A962.2A-10001-A96
2.2A-10001-A962.2A-10001-A96
2.2A-10001-A96
Subject to modifications
Fig.15: Indicator pin installed on metering device
Fig. 14: Example of a lubrication system
1064a95
System-dependent monitoringSystem-dependent monitoring
System-dependent monitoringSystem-dependent monitoring
System-dependent monitoring
• The main metering device (B, Fig. 14) and the secondary metering
devices are connected by a high pressure plastic hose G. This
feature automatically causes the linkage of the progressive system connected downstream of the pump.
• If only one piston does not move in any metering device or if the
metering device can no longer dispense any lubricant via its outlets, this metering device will block itself.
• If one of the secondary metering devices is blocked, the main
metering device is also blocked. The whole progressive system
installed downstream of the pump stops operating.
• The fundamental internal structure of the progressive metering
device guarantees the self-monitoring of the sequence within the
metering device.
• The linkage makes it possible to monitor the operation of the whole system.
Visual monitoringVisual monitoring
Visual monitoringVisual monitoring
Visual monitoring
• The metering devices can be equipped with an indicator pin which
is connected to the piston and moves back and forth during lubricant distribution.
• If there is a blockage in the system, the indicator pin stops moving.
Note: It is also possible to indicate the movements of the indicator pin
or any blockage in the system by means of a control switch (KS) or a
proximity switch (KN).
Electrical monitoring (microprocessor controlElectrical monitoring (microprocessor control
Electrical monitoring (microprocessor controlElectrical monitoring (microprocessor control
Electrical monitoring (microprocessor control
))
))
)
1011a96
Monitoring of the OperationMonitoring of the Operation
Monitoring of the OperationMonitoring of the Operation
Monitoring of the Operation
D - Secondary metering device SSV 6
E - Lubricant plastic tube
F - Secondary metering device SSV 12
G - High pressure plastic hose
A - Safety valve
B - Main metering device SSV 6
C - Secondary metering device
SSV 8
Fig. 16 - Piston detector installed on the metering device
00002634
•A
piston detectorpiston detector
piston detectorpiston detector
piston detector (initiator) which has been installed on a metering device instead of a piston closure plug monitors the pump
operating timeoperating time
operating timeoperating time
operating time and brings it to a close after all the pistons of this
metering device have dispensed their lubricant quantity.
• If there is a blockage in the system or if the pump reservoir is empty ,
the piston detector can no longer record the piston movements.
The switching off signal is not transmitted to the control unit. A fault
signal occurs.
Important! Important!
Important! Important!
Important! For the system monitoring it is recommended that
oneone
oneone
one
SSV metering device with pre-assembled piston detector SSV metering device with pre-assembled piston detector
SSV metering device with pre-assembled piston detector SSV metering device with pre-assembled piston detector
SSV metering device with pre-assembled piston detector be
used per lubrication circuit. These special metering de vices must be
ordered separately for each lubrication system. Refer to the Parts
Catalog.
• The pre-assembled metering devices have the designation
SSV ...SSV ...
SSV ...SSV ...
SSV ...
- N - N
- N - N
- N (they are availab le f or SSV 6, 8, 10 and 12). They must
be installed in the system instead of a normal metering device.

Subject to modifications
LINCOLN GmbH • Postfach 1263 • D-69183 Walldorf • Tel +49 (6227) 33-0 • Fax +49 (6227) 33-259 • Tx 466088
Page A 9Page A 9
Page A 9Page A 9
Page A 9
Owner ManualOwner Manual
Owner ManualOwner Manual
Owner Manual
Operating InstructionsOperating Instructions
Operating InstructionsOperating Instructions
Operating Instructions
2.2A-10001-A962.2A-10001-A96
2.2A-10001-A962.2A-10001-A96
2.2A-10001-A96
Fig.17: Pressure relief valve
Determining the Lubricant Output by Combining OutletsDetermining the Lubricant Output by Combining Outlets
Determining the Lubricant Output by Combining OutletsDetermining the Lubricant Output by Combining Outlets
Determining the Lubricant Output by Combining Outlets
TT
TT
T
ube Fittings,ube Fittings,
ube Fittings,ube Fittings,
ube Fittings,
Scre Scre
Scre Scre
Scre
w-Tw-T
w-Tw-T
w-T
ypeype
ypeype
ype
5- Outlet fitting assembly
6- Clamping ring (brass)
7 - Valve body
8- Cutting ring
9- Coupling nut
10 - Junction channel
11 - Copper washer
12 - Closure plug, outlet borehole
1- Inlet fitting
2- Delivery hole of the piston
3- Closure plug, installed
4- Closure plug, piston (with champfered),
piston
Fig. 18: Install the outlet fittings and closure plugs in accordance with the dosage
1012a96
4092a97
• The whole system can be monitored visually via the pressure
relief valve. If lubricant is leaking at the pressure relief valve during
the distribution sequence, this indicates that there is a blockage in
the system.
ImportantImportant
ImportantImportant
Important: In the case of the progressive metering devices models
SSV 6 - 12 the
outlets 1 and/or 2 must never be closedoutlets 1 and/or 2 must never be closed
outlets 1 and/or 2 must never be closedoutlets 1 and/or 2 must never be closed
outlets 1 and/or 2 must never be closed. In the case
of the progressive metering devices model SSV 14 - 22,
the twothe two
the twothe two
the two
outlets with the highest numbers must never be closed,outlets with the highest numbers must never be closed,
outlets with the highest numbers must never be closed,outlets with the highest numbers must never be closed,
outlets with the highest numbers must never be closed, otherwise the system would block owing to the structure of the metering
device.

LINCOLN GmbH • Postfach 1263 • D-69183 Walldorf • Tel +49 (6227) 33-0 • Fax +49 (6227) 33-259 • Tx 466088
Page A 10Page A 10
Page A 10Page A 10
Page A 10
Owner ManualOwner Manual
Owner ManualOwner Manual
Owner Manual
Operating InstructionsOperating Instructions
Operating InstructionsOperating Instructions
Operating Instructions
2.2A-10001-A962.2A-10001-A96
2.2A-10001-A962.2A-10001-A96
2.2A-10001-A96
Subject to modifications
TT
TT
T
ube Fittings,ube Fittings,
ube Fittings,ube Fittings,
ube Fittings,
Push-in-T Push-in-T
Push-in-T Push-in-T
Push-in-T
ype (main metering deype (main metering de
ype (main metering deype (main metering de
ype (main metering de
vice)vice)
vice)vice)
vice)
Fig. 19 - Install the push-in type outlet fittings and the closure plugs in accordance with the dosage
1203a95
• The output quantities can be raised by closing outlet boreholes.
• Install an outlet fitting assembly in each outlet borehole which will
be used. Refer to Fig. 18, 19, 20.
•
Never remove closure plug 4 Never remove closure plug 4
Never remove closure plug 4 Never remove closure plug 4
Never remove closure plug 4 (chamfered) on the piston side.
•
Never useNever use
Never useNever use
Never use closure plug 12 (Fig. 18) or 7 (Fig. 19, 20)
as a pistonas a piston
as a pistonas a piston
as a piston
closure plug 4.closure plug 4.
closure plug 4.closure plug 4.
closure plug 4.
Important:Important:
Important:Important:
Important: Always use valve body 7 (Fig. 18) in conjunction with
clamping ring 6.
• Clamping ring 6 (Fig. 18) closes the junction channels 10 to the
other outlet channels.
Note: In the case of push-in type fittings the clamping ring is always a
firm component part of the valve body.
Important: Important:
Important: Important:
Important: In the case of the progressive metering devices
modelmodel
modelmodel
model
SSV 6 - 12 the outlets 1 and/or 2 must never be closed.SSV 6 - 12 the outlets 1 and/or 2 must never be closed.
SSV 6 - 12 the outlets 1 and/or 2 must never be closed.SSV 6 - 12 the outlets 1 and/or 2 must never be closed.
SSV 6 - 12 the outlets 1 and/or 2 must never be closed. I n the case
of the progressive metering devices
model SSV 14 - 22, the twomodel SSV 14 - 22, the two
model SSV 14 - 22, the twomodel SSV 14 - 22, the two
model SSV 14 - 22, the two
outlets with the highest numbers must never be closed,outlets with the highest numbers must never be closed,
outlets with the highest numbers must never be closed,outlets with the highest numbers must never be closed,
outlets with the highest numbers must never be closed, otherwise the system would block due to the structure of the metering device.
5 - Va lve body assembly (with reinforced collar)
6 - Junction channels
7 - Closure plug, outlet borehole
8 - Copper washer
1 - Inlet fitting with protective cap *
2 - Delivery borehole of the piston
3 - Closure plug installed in outlet borehole
4 - Closure plug (chamfered), piston
* on request

Subject to modifications
LINCOLN GmbH • Postfach 1263 • D-69183 Walldorf • Tel +49 (6227) 33-0 • Fax +49 (6227) 33-259 • Tx 466088
Page A 11Page A 11
Page A 11Page A 11
Page A 11
Owner ManualOwner Manual
Owner ManualOwner Manual
Owner Manual
Operating InstructionsOperating Instructions
Operating InstructionsOperating Instructions
Operating Instructions
2.2A-10001-A962.2A-10001-A96
2.2A-10001-A962.2A-10001-A96
2.2A-10001-A96
TT
TT
T
ube Fittings,ube Fittings,
ube Fittings,ube Fittings,
ube Fittings,
Push-inT Push-inT
Push-inT Push-inT
Push-inT
ype (secondarype (secondar
ype (secondarype (secondar
ype (secondar
y metering dey metering de
y metering dey metering de
y metering de
vices)vices)
vices)vices)
vices)
Fig. 20: Install the push-in type outlets fittings and closure plugs in accordance with the dosage
1204a95
1014a96
Single lubricant outputSingle lubricant output
Single lubricant outputSingle lubricant output
Single lubricant output
• The simple lubricant output is the lubricant quantity dispensed by
a piston per stroke and per outlet borehole to one lubrication point.
It amounts to 0.2 cm³.
Double or multiple lubricant outputDouble or multiple lubricant output
Double or multiple lubricant outputDouble or multiple lubricant output
Double or multiple lubricant output
• If one or more lubrication points require a double or a multiple
lubricant amount, this can be performed by closing one or more
outlets.
• As shown in Fig. 21, outlet borehole 10 has been closed. The
lubricant quantity supplied by this outlet flows out of the metering
device via outlet 8.
• Total quantity at outlet 8:
- is the quantity of outlet 8
- plus the lubricant quantity of outlet 10.
• If a triple quantity is needed (at outlet 1), close the outlet borehole
located above the discharge borehole. Refer to outlets 3 and 5 on
Fig. 21.
5 - Valve body assembly (with knurled collar)
6 - Junction channels
7 - Closure plug, outlet borehole
8 - Copper washer
1 - Inlet fitting
2 - Delivery borehole of the piston
3 - Closure plug installed in outlet borehole
4 - Closure plug (chamfered), piston
Fig. 21: Single, double and triple lubricant output
x - Outlet quantity (1x: single, 2x: double, etc.)
1 - 10 Outlet numbers
A - Clamping ring (brass)

Subject to modifications
LINCOLN GmbH • Postfach 1263 • D-69183 Walldorf • Tel +49 (6227) 33-0 • Fax +49 (6227) 33-259 • Tx 466088
Page A 25Page A 25
Page A 25Page A 25
Page A 25
Owner ManualOwner Manual
Owner ManualOwner Manual
Owner Manual
Operating InstructionsOperating Instructions
Operating InstructionsOperating Instructions
Operating Instructions
2.2A-10001-A962.2A-10001-A96
2.2A-10001-A962.2A-10001-A96
2.2A-10001-A96
TT
TT
T
ecec
ecec
ec
hnical Datahnical Data
hnical Datahnical Data
hnical Data
Tightening torquesTightening torques
Tightening torquesTightening torques
Tightening torques
Metering Device Model SSVMetering Device Model SSV
Metering Device Model SSVMetering Device Model SSV
Metering Device Model SSV
Lubricant output per outlet and per stroke ......................... 0.2cm³
Max. operating pressure ................................................. 350 bar
Min. operating pressure....................................................20 bar
Max.differential pressure
between two outlets ....................................................... 100 bar
Outlet connection for tube................................................Ø 6mm
Inlet connection ................................................................. G 1/ 8
Operating temperature ........................................ - 25° C to 70°C
Push-inTPush-inT
Push-inTPush-inT
Push-inT
ype ype
ype ype
ype
TT
TT
T
ube Fittingsube Fittings
ube Fittingsube Fittings
ube Fittings
High pressure range, p max. .......................................... 350 bar
Inlet tube fittings of the metering devices
Outlet fittings, main metering device
Low-pressure range, p max. ........................................... 250 bar
Outlet fittings, secondary metering devices
Inlet fittings to the lubrication pointInlet fittings to the lubrication point
Inlet fittings to the lubrication pointInlet fittings to the lubrication point
Inlet fittings to the lubrication point
LinesLines
LinesLines
Lines
High-pressure plastic hoseHigh-pressure plastic hose
High-pressure plastic hoseHigh-pressure plastic hose
High-pressure plastic hose
Min. bursting pressure (in connection with
hose clamp, screwed). ................................................... 600 bar
Min. bending radius. ........................................................ 50 mm
Min. temperature ............................................................. - 40° C
Plastic tubePlastic tube
Plastic tubePlastic tube
Plastic tube
Min. bending radius ......................................................... 30mm
Bursting pressure at 20° C .............................................approx. 250 bar
Min. temperature ............................................................. - 40° C
Closure plug (piston) in metering device ...........................10 Nm
Closure plug (outlets) in metering device ..........................10 Nm
Inlet fitting in metering device
screw-type.......................................................................17 Nm
plug-type .........................................................................10 Nm
Outlet fitting in metering device
screw-type.......................................................................10 Nm
plug-type .......................................................................... 8 Nm
Compression nut onto inlet fitting ......................................10 Nm
Compression nut onto outlet fitting, screw-type
plastic tube ....................................................................... 5 Nm
steel tube ........................................................................10 Nm
Installation of metering device........................................... 10Nm
 Loading...