

Page 1

Table of contents
Quick Start — How to get going
Safety information
Introduction
Audio features
Navigation features
DVD functionality
Rear seat controls
Display options
System options
CD DJ
General information
2
4
6
11
20
32
33
34
35
37
44
All rights reserved. Reproduction by any means, electronic or mechanical
including photocopying, recording or by any information storage and retrieval
system or translation in whole or part is not permitted without written
authorization from Ford Motor Company. Ford may change the contents without
notice and without incurring obligation.
Copyright © 2002 Ford Motor Company
1
Page 2
Quick Start — How to get going
QUICK START — HOW TO GET GOING
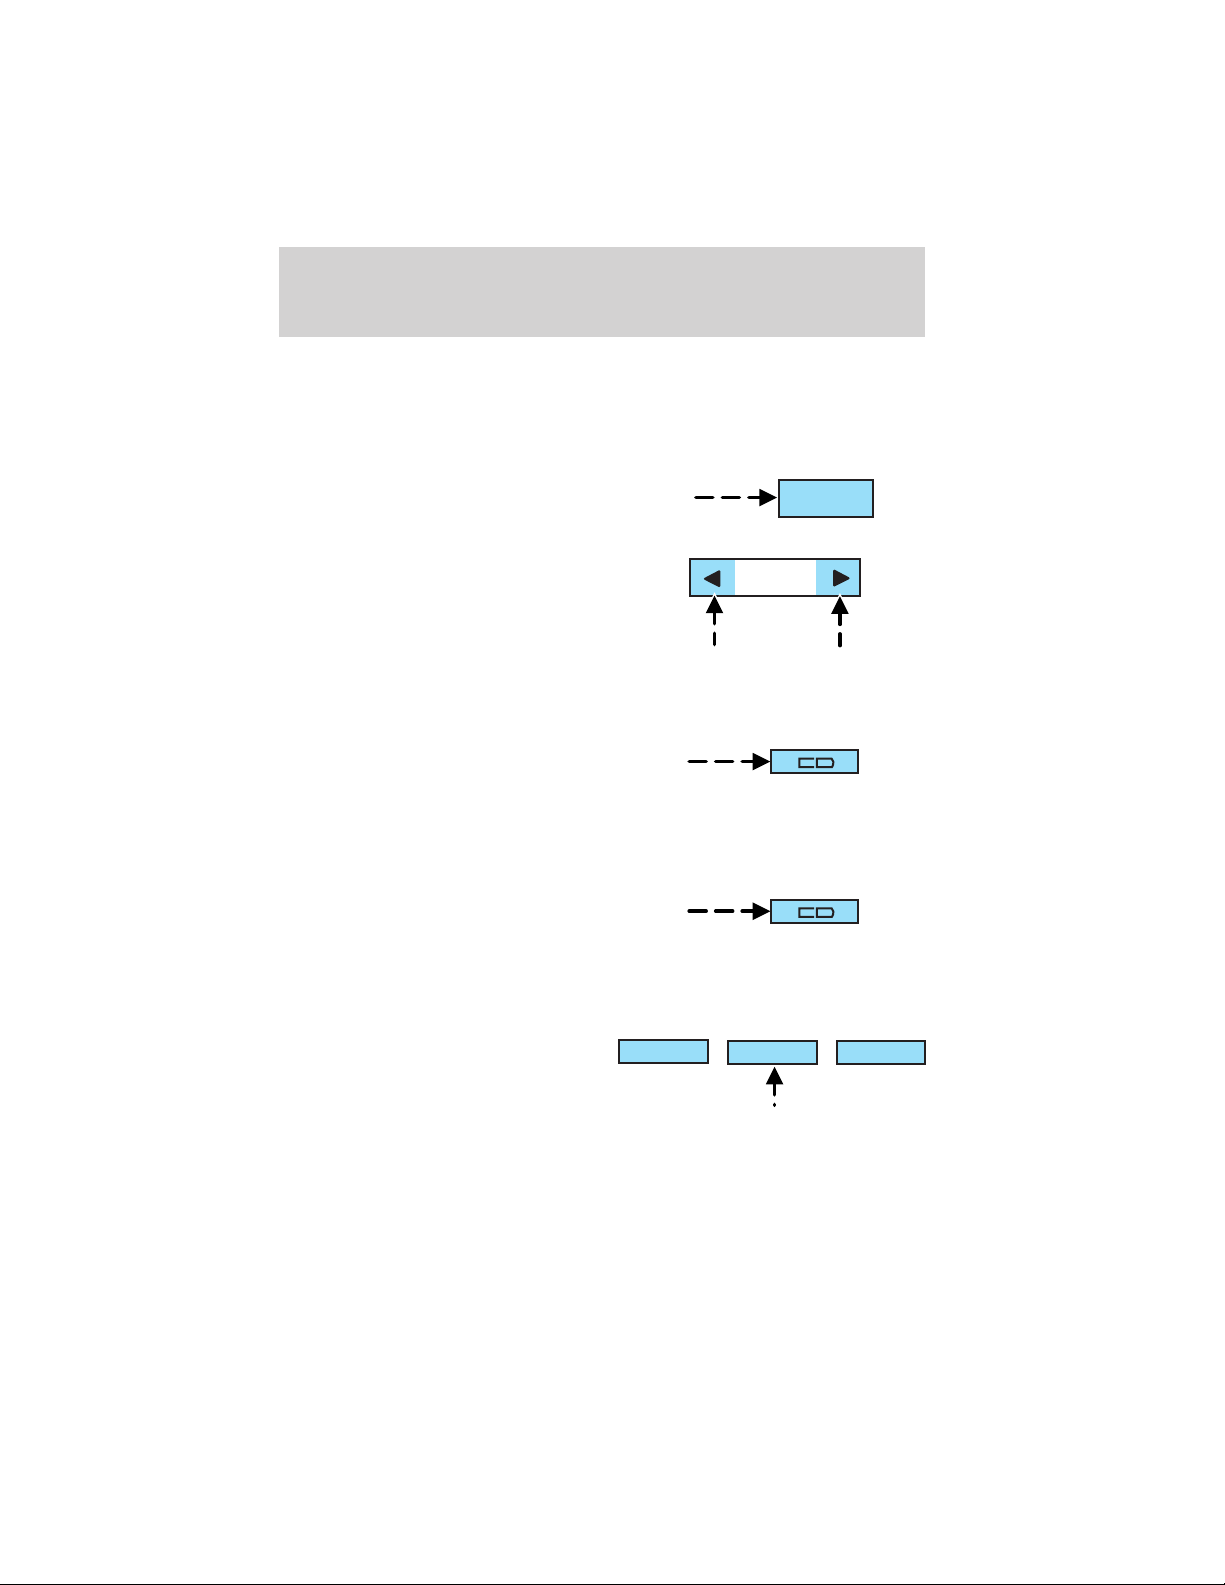
To play a radio station:
1. Ensure that the ignition and the Vehicle Navigation Radio (VNR)
system are ON.
2. Press the AM/FM control to select
the desired frequency band.
AM/FM
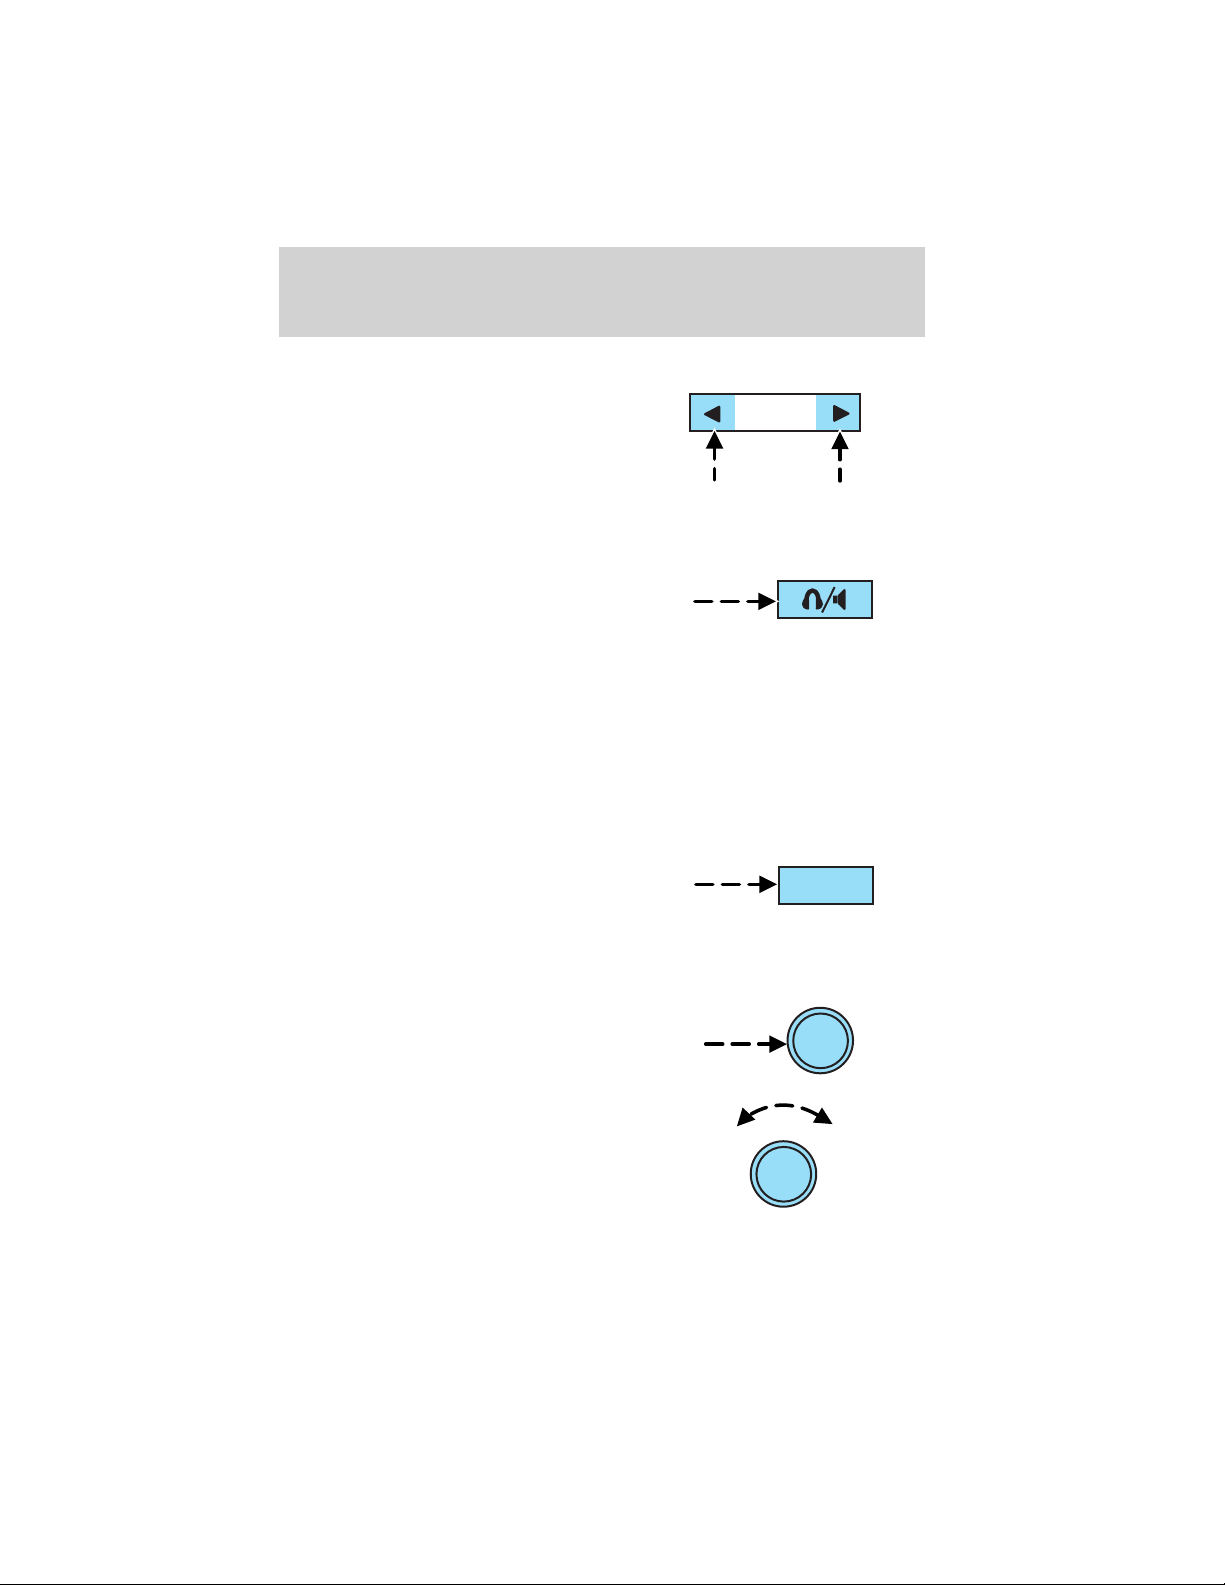
3. Press the SEEK control to locate
a station.
SEEK
To play a CD in the VNR:
1. Ensure that the ignition and the
VNR system are ON.
2. Insert a CD into the single slot of
the VNR and the CD will automatically begin play. If a CD is already
loaded into the system, press the CD control.
To play a CD in the CD DJ:
1. Ensure that the ignition and the
VNR system are ON.
2. Insert CD(s) into the CD DJ
magazine. Insert magazine into CD DJ. If the CD DJ magazine is already
loaded, press the CD control to toggle through CD, CD DJ and DVD (if
equipped).
3. Press the memory presets to
choose the desired disc in the CD
1
2
3
5
4
DJ.
Note: The navigation CD is not operational in the CD DJ.
6
2
Page 3

Quick Start — How to get going
To use the Navigation system:
1. Ensure that the ignition and the VNR system are ON, and a map data
disc is inserted into the VNR CD slot.
Note: If the operator wishes to navigate and listen to an audio CD, the
navigation CD must be loaded into the VNR and the audio CD must be
loaded into the CD DJ.
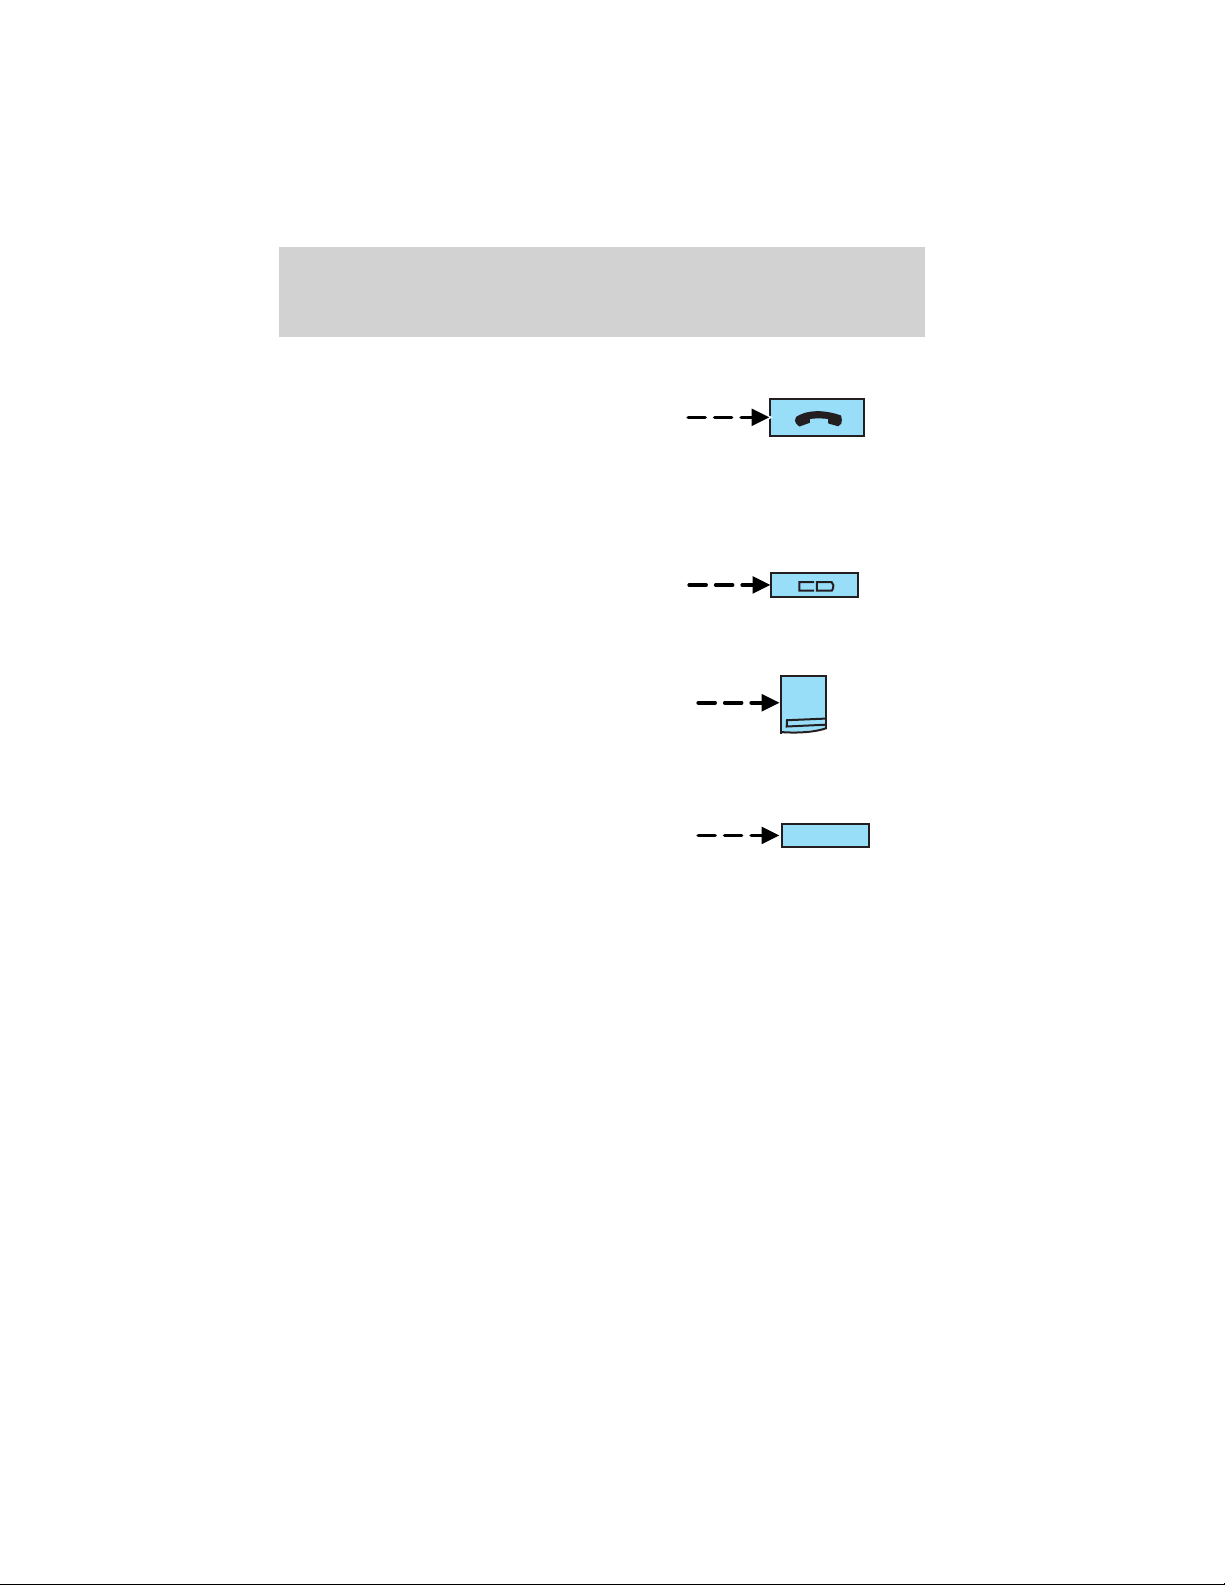
2. Press the NAV control to enter
into Navigation mode.
3. To enter a destination, ensure
that the vehicle is in the PARK position. Refer to the Navigation Chapter.
4. To navigate to home from the
current location, press HOME. If a
home location has not previously
been stored, pressing and holding
HOME will store the home location.
NAV
HOME
3
Page 4
Safety information
SAFETY INFORMATION
Please read and follow all stated safety precautions. Failure to do
so may increase your risk of collision and personal injury. Ford
Motor Company shall not be liable for any damages of any type arising
from failure to follow these guidelines.
Do not attempt to service, repair or modify the system. See your Ford or
Lincoln Mercury dealer.
The driver must not attempt to operate any detailed operation of
the navigation system while the vehicle is in motion. Give full
attention to driving and to the road. Pull off the road and park in a
safe place before performing detailed operations.
A safety screen will be displayed
each time the navigation system is
turned on as a reminder. Ensure
that you are familiar with the
system’s features and functionality,
including the following:
Do not turn the ignition key or start
the engine while the software is
updating.
Do not apply pressure to the display screen.
The navigation system is not a substitute for your personal judgement.
Route suggestions should not supersede local traffic regulations or safe
driving practices.
Do not follow route suggestions if they direct you to perform an unsafe
or illegal maneuver, would place you in an unsafe situation, or would
route you into an area that you consider unsafe.
Drivers should not rely on screen displays while their vehicle is in
motion. Let the voice guide you. If viewing is necessary, pull off the road
to a safe location.
Do not use the navigation system to locate emergency services.
For road safety reasons, the driver should program the system only when
the vehicle is stationary. Certain functions will therefore not operate
while the vehicle is in motion.
4
Page 5

Safety information
The map database CD-ROM does not reflect road detours, closures or
construction, road characteristics such as rough road surface, slope or
grade, weight or height restrictions, traffic congestion, weather or similar
conditions.
To use the system as effectively and safely as possible, obtain up-to-date
map database CD-ROMs whenever they become available.
Set the volume level so that you can hear directions clearly.
Do not disassemble or modify the system as this may lead to damage and
void your warranty. If a problem occurs, stop using the system
immediately and contact your Ford or Lincoln Mercury Dealer.
5
Page 6

Introduction
SYSTEM OVERVIEW
Your vehicle is equipped with a Vehicle Navigation Radio (VNR) which
allows you to listen to the radio, play CDs and also navigate the vehicle
using navigation CDs.
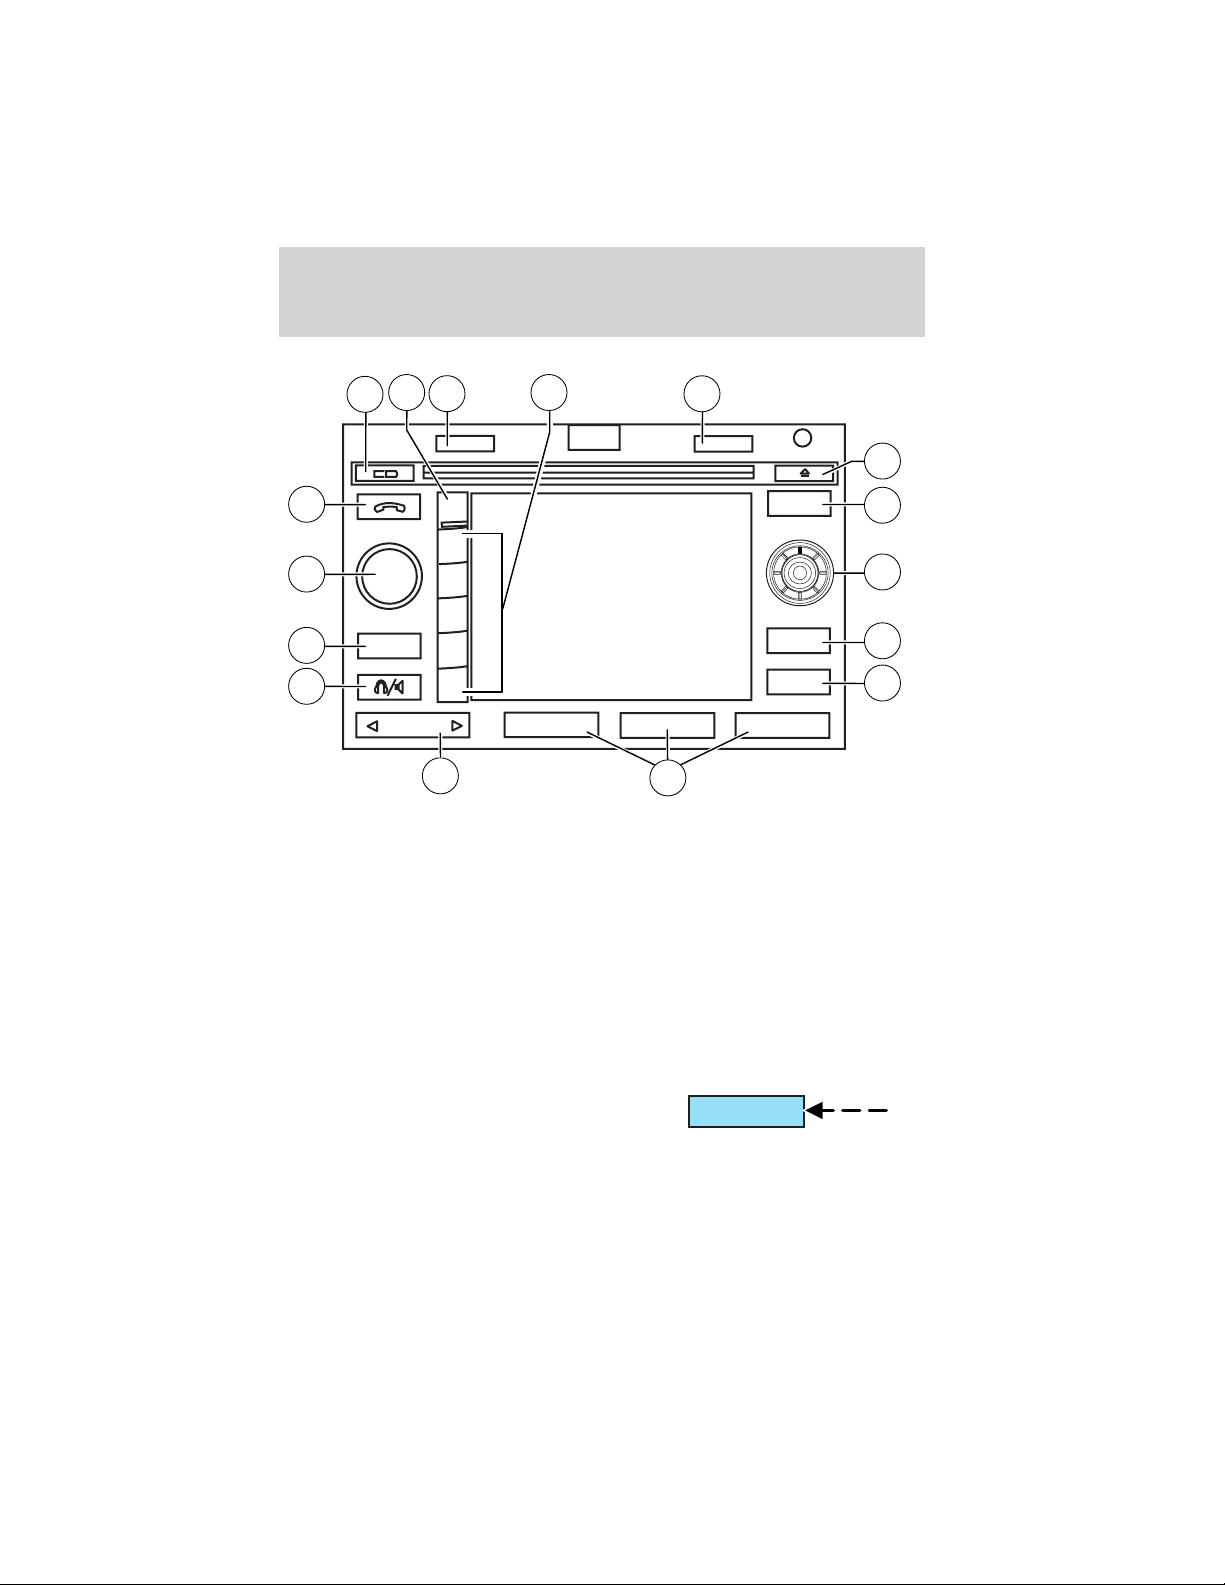
Your Vehicle Navigation Radio is equipped with many different features
and controls. The labeled controls on the front face of the system (which
are called out below) are known as hard keys. The five blank controls
located under the MENU control are called soft keys. These controls are
labeled on the screen and can change functionality depending on which
screen is activated in the display. The hard keys will be explained further
below and the soft keys will be described as needed in the rest of the
supplement.
Should you have any questions regarding your system, please feel free to
call the toll free assistance hotline at 1 (866) 847–8457.
6
Page 7
Introduction
16
1
HOME
NAV
12
13
PUSH
ON
14
15
HERE
MENU
11
10
AM/FM
9
SEEK 1
8
1. Home control
2. Eject control
3. Navigation control
4. Cursor control
5. Back control
6. Map control
7. Memory presets
8. Seek control
2
3
4
7
9. Headphone/speaker control
10. AM/FM control
11. ON/Volume control
12. Phone control
13. CD control
14. Menu control
15. Here control
16. Soft keys
BACK
MAP
5
6
Home
Press and hold to store the vehicle’s
current position as the ’home’
HOME
location in the navigation system
memory. Press HOME again to
provide the shortest time criteria route to return to home from the
current location.
2
3
4
5
6
7
Page 8
Introduction
Eject
The eject control works in audio and
navigation. Press the control to eject
an audio CD or a navigation CD.
Navigation (NAV)
Press the NAV control to enter into
navigation mode during radio or CD
playback. For more information on
using the navigation system, refer to
the Navigation features chapter.
Cursor control
This control is used in navigation
and audio mode. Press the control
up or down, left or right to access
different selections in the menus.
Press in the control to confirm your
selection.
Back
This control works in audio and
navigation mode. Press BACK to
access the previous screen.
NAV
BACK
Map
The MAP control works in all
modes. Press to show current
location.
Memory presets
The memory presets store favorite
AM/FM stations and allow you to
access various discs when in CD DJ
mode. Press and hold a preset
control until PRESET SAVED
appears in the display.
8
MAP
1
2
3
5
4
6
Page 9
Introduction
Seek
The SEEK control is used for
accessing stations in radio mode and
advancing tracks in CD mode.
Headphone/speaker
Press the control to enable Rear
Seat Control (RSC) mode. The
headphone/speaker or headphone
icon will appear in the display. Press
the control again to disable RSC control mode (the icon will appear with
a red slash through it).
When in RSC mode, Dual Play mode can be enabled and disabled by the
RSC, or by pressing Preset 2 and 4 simultaneously on the Navigation
radio system. The system is in Dual Play mode if both the Headphone
and Speaker icons are present, and in just RSC mode if only the
Headphone icon is present.
AM/FM
Press to listen to the AM or FM
frequency band (AM, FM1, FM2).
Pressing AM/FM in Navigation mode
will return you to the audio screen.
SEEK
AM/FM
On/volume
Press the ON control to turn on the
VNR system. Press again to turn the
system off.
Turn the control to adjust the audio
volume levels. To adjust the voice
output levels from the navigation
system, adjust the volume levels
only during voice output.
PUSH
ON
PUSH
ON
9
Page 10
Introduction
Phone (if equipped)
The phone control works in audio
mode and allows you to operate a
factory-installed cellular phone
through the audio system. If not
equipped with a factory-installed phone, NO PHONE will appear in the
display when pressed.
CD
Press to enter CD mode or to begin
play of a CD that is already loaded
in the system.
Menu
The MENU control works in audio
and navigation mode. Press to
access various menus in both
modes.
Here
The HERE control works in
navigation mode. Press the control
to identify the current location of
the vehicle.
MENU
HERE
10
Page 11
Audio features
AUDIO FEATURES
Your Vehicle Navigation Radio has many features including a full range of
audio functions.
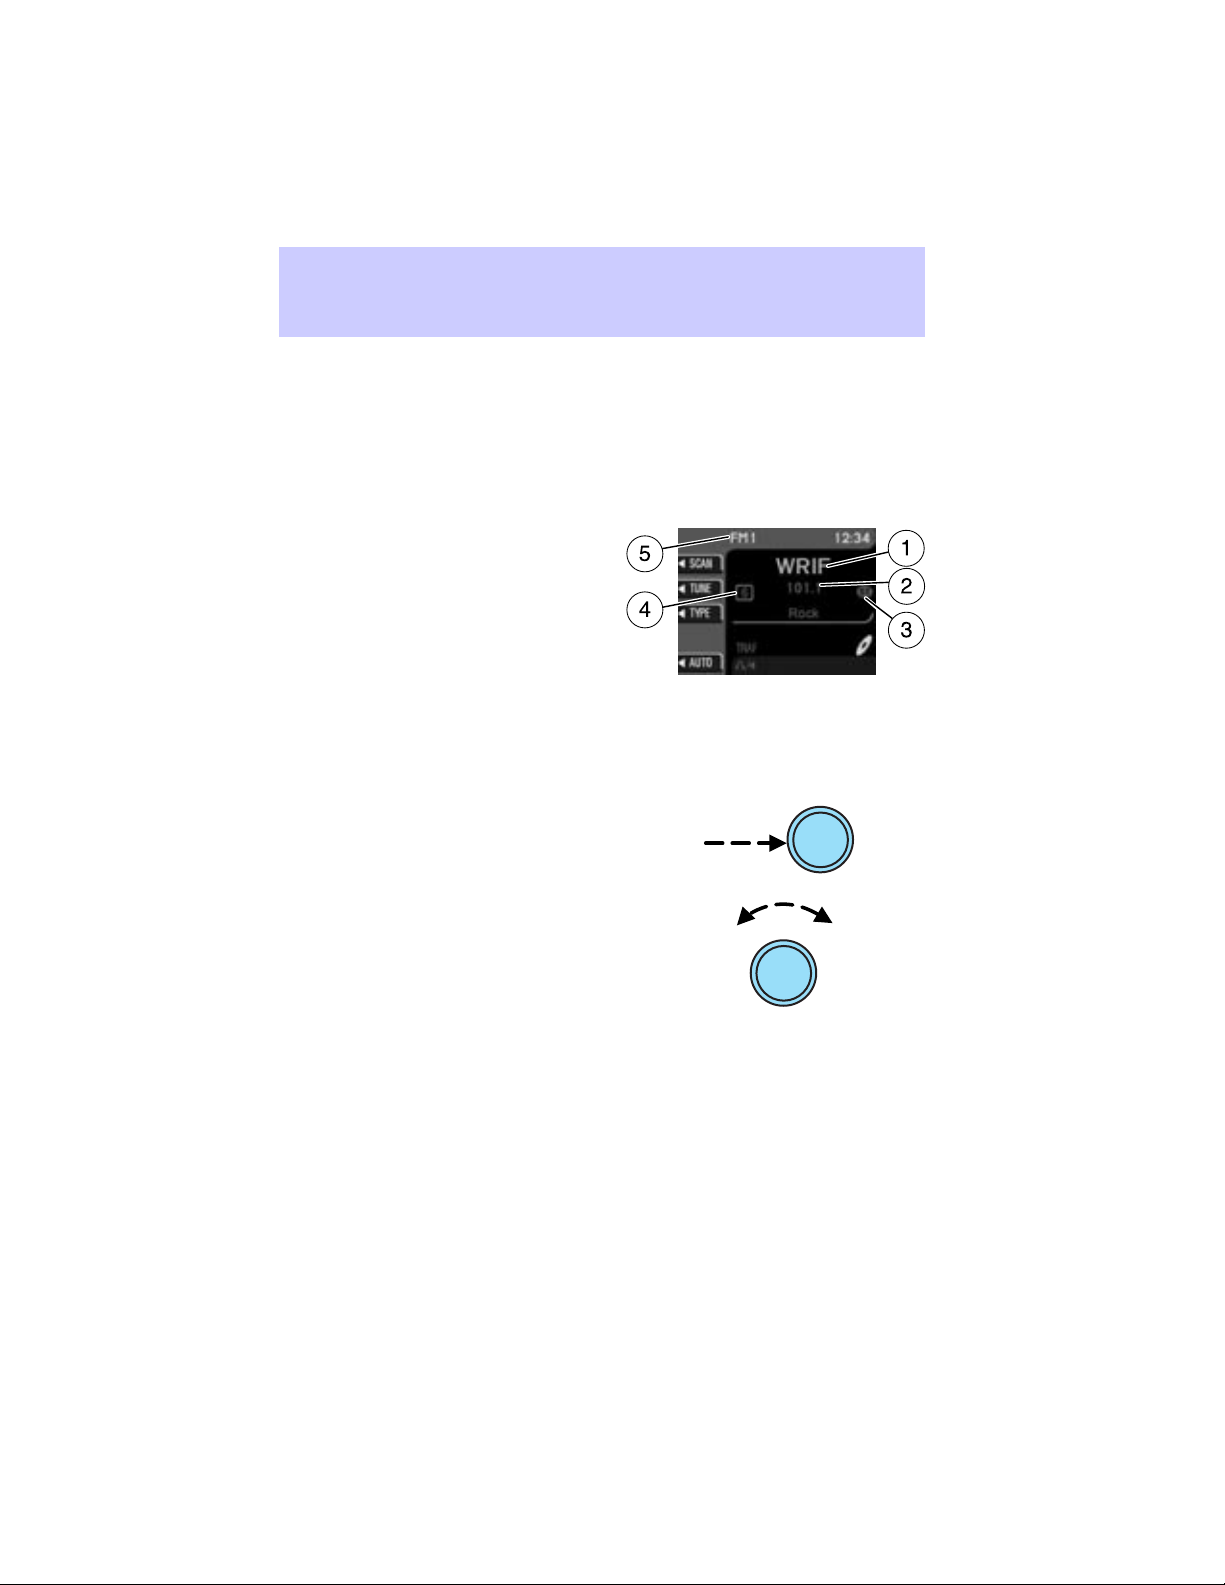
Audio screen display
When in audio mode, there are various indicators which will appear on
the display.
1. Station name
2. Station frequency
3. Stereo indicator
4. Preset selected
5. Band selected
If the navigation system is activated during radio or CD playback, audio
output continues but route guidance screens will appear in the display.
VOLUME/POWER CONTROL
Press the control to turn the
audio/navigation system on or off.
PUSH
ON
Turn the control to raise or lower
volume. The levels will be displayed
on the screen.
PUSH
ON
To adjust the navigation voice
output level, adjust the volume
control only when the navigation
system is speaking. Otherwise, it will adjust the radio levels.
11
Page 12
Audio features
Automatic volume control (AVC)
With this feature, radio volume changes automatically with vehicle speed
to compensate for road and wind noise. To engage the AVC feature:
1. Press the MENU control.
MENU
2. Select AUDIO OPTIONS.
3. Select AVC, TRAFFIC, DSP.
4. Select AVC.
5. Use the cursor control to increase
or decrease the levels. The higher
the level selected, the greater the
compensation. The levels will be
shown in the display. Decrease all
the way to the left to turn AVC off.
AM/FM SELECT
The AM/FM control works in radio,
CD and navigation modes.
AM/FM
AM/FM select in radio mode
This control allows you to select AM or FM frequency bands. Press the
control to switch between AM, FM1 or FM2 memory preset stations.
12
Page 13

Audio features
AM/FM select in CD mode
Press to stop CD play and begin radio play.
Radio reception factors:
• Distance/strength. The further an FM signal travels, the weaker it is.
The listenable range of the average FM station is approximately 40 km
(24 miles). This range can be affected by “signal modulation.” Signal
modulation is a process radio stations use to increase their
strength/volume relative to other stations.
• Terrain. Hills, mountains and tall buildings between your vehicle’s
antenna and the radio station signal can cause FM reception problems.
Static can be caused on AM stations by power lines, electric fences,
traffic lights and thunderstorms. Moving away from an interfering
structure (out of its “shadow”) returns your reception to normal.
• Station overload. Weak signals are sometimes captured by stronger
signals when you pass a broadcast tower. A stronger signal may
temporarily overtake a weaker signal and play while the weak station
frequency is displayed.
AM/FM select in navigation mode
Press once when in navigation mode to return to the audio screen (while
the navigation function continues to work in the background). Press
again to enter AM/FM mode where you are able to make frequency band
adjustments.
CD SELECT
To begin CD play (if a CD is already
loaded), press the CD control. The
first track of the disc will begin
playing. After that, CD play will
begin where it stopped last. Press the CD control again to toggle
between CD, CD DJ, DVD/Video (or DVD/Aux Mode), if equipped with
DVD Rear seat entertainment system.
If a navigation CD is in the head unit and you press CD, the system will
automatically search for an audio CD in the CD DJ and begin play if it is
present.
13
Page 14

Audio features
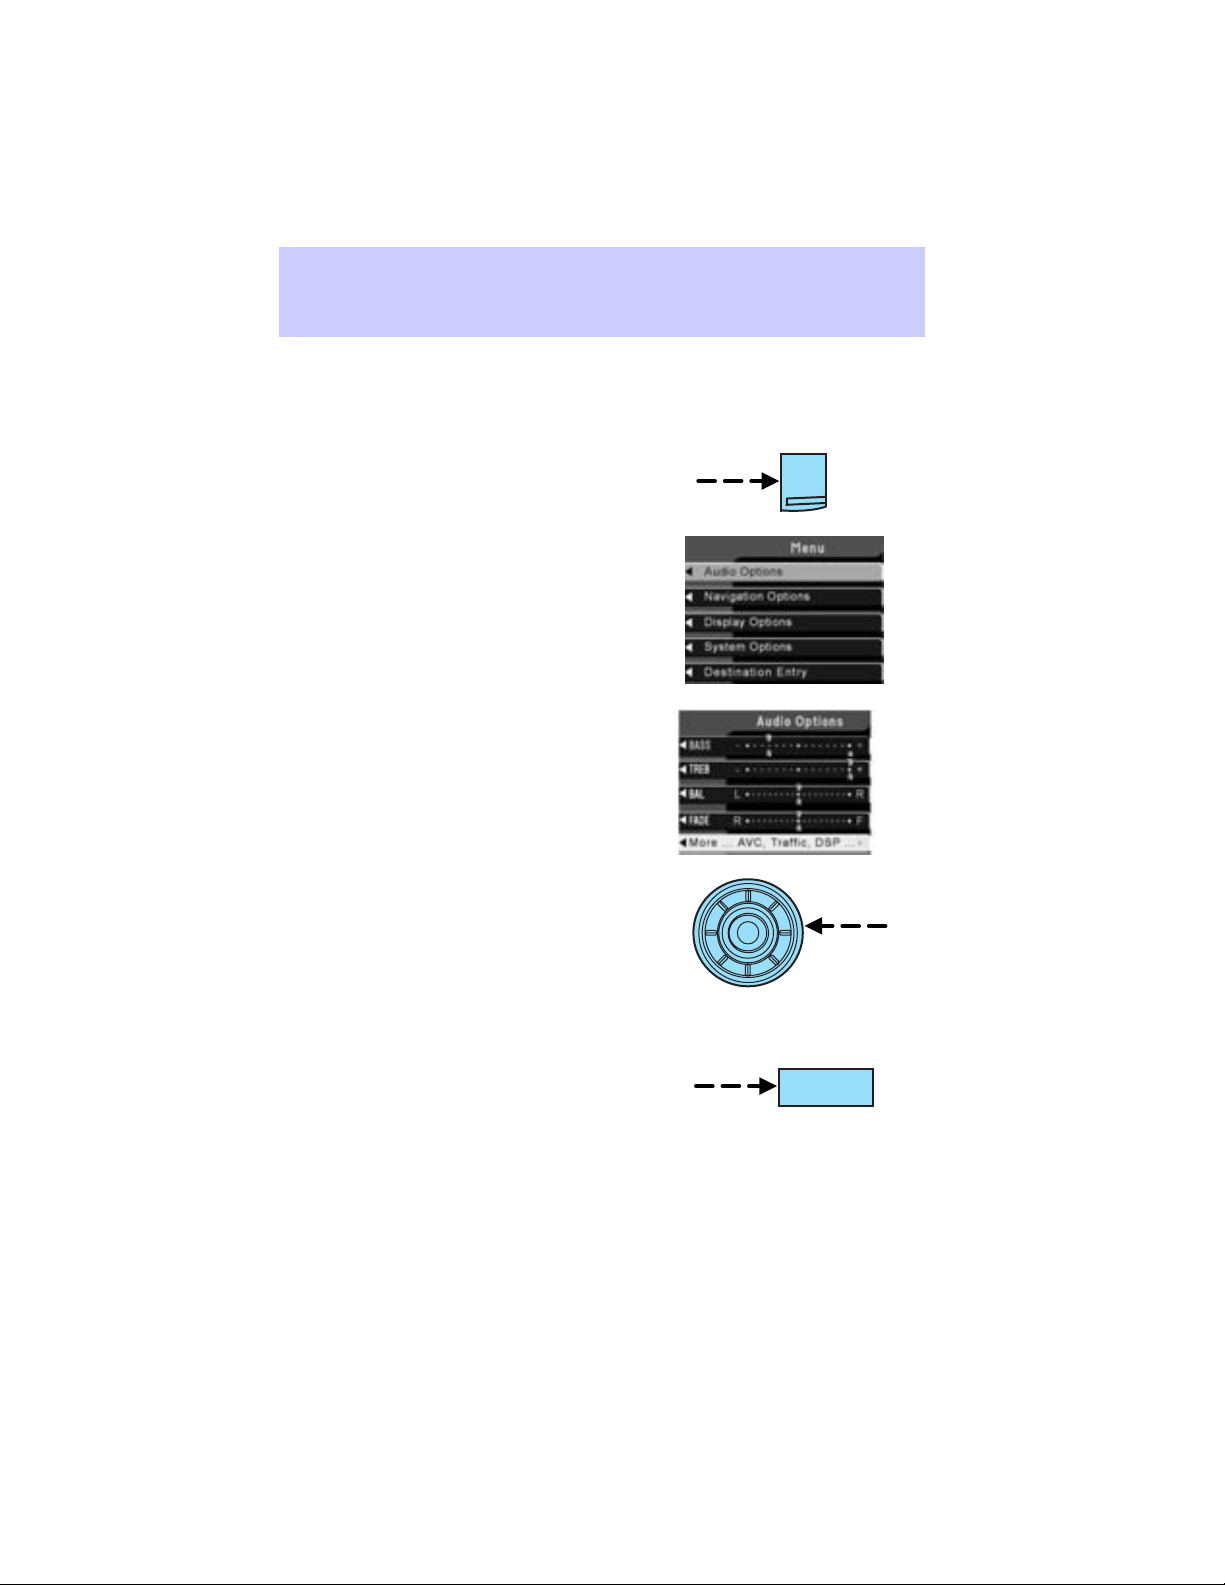
ADJUSTING THE LEVELS
1. Press the MENU control.
MENU
2. Select the AUDIO OPTIONS soft
key.
3. Select BASS, TREB, BAL or
FADE.
The bass adjust allows you to
increase or decrease the audio
system’s bass output.
The treble adjust control allows you
to raise or lower the audio system’s
treble output.
Speaker sound can be adjusted between the front and rear speakers
using the fade feature.
The balance feature allows sound distribution to be adjusted between the
right and left speakers.
4. Use the cursor control to increase
or lower the bass and treble levels
or to adjust the sound between the
front and rear or between the left
and right speakers.
DSP (DIGITAL SIGNAL PROCESSING)
The digital signal processing (DSP) feature allows you to change the
signal mode to suit your listening tastes.
Press the soft key to turn the feature on or off.
This feature can be accessed by selecting the menu option “More, AVC,
Traffic, DSP..” within the “Audio Options” menu.
14
Page 15
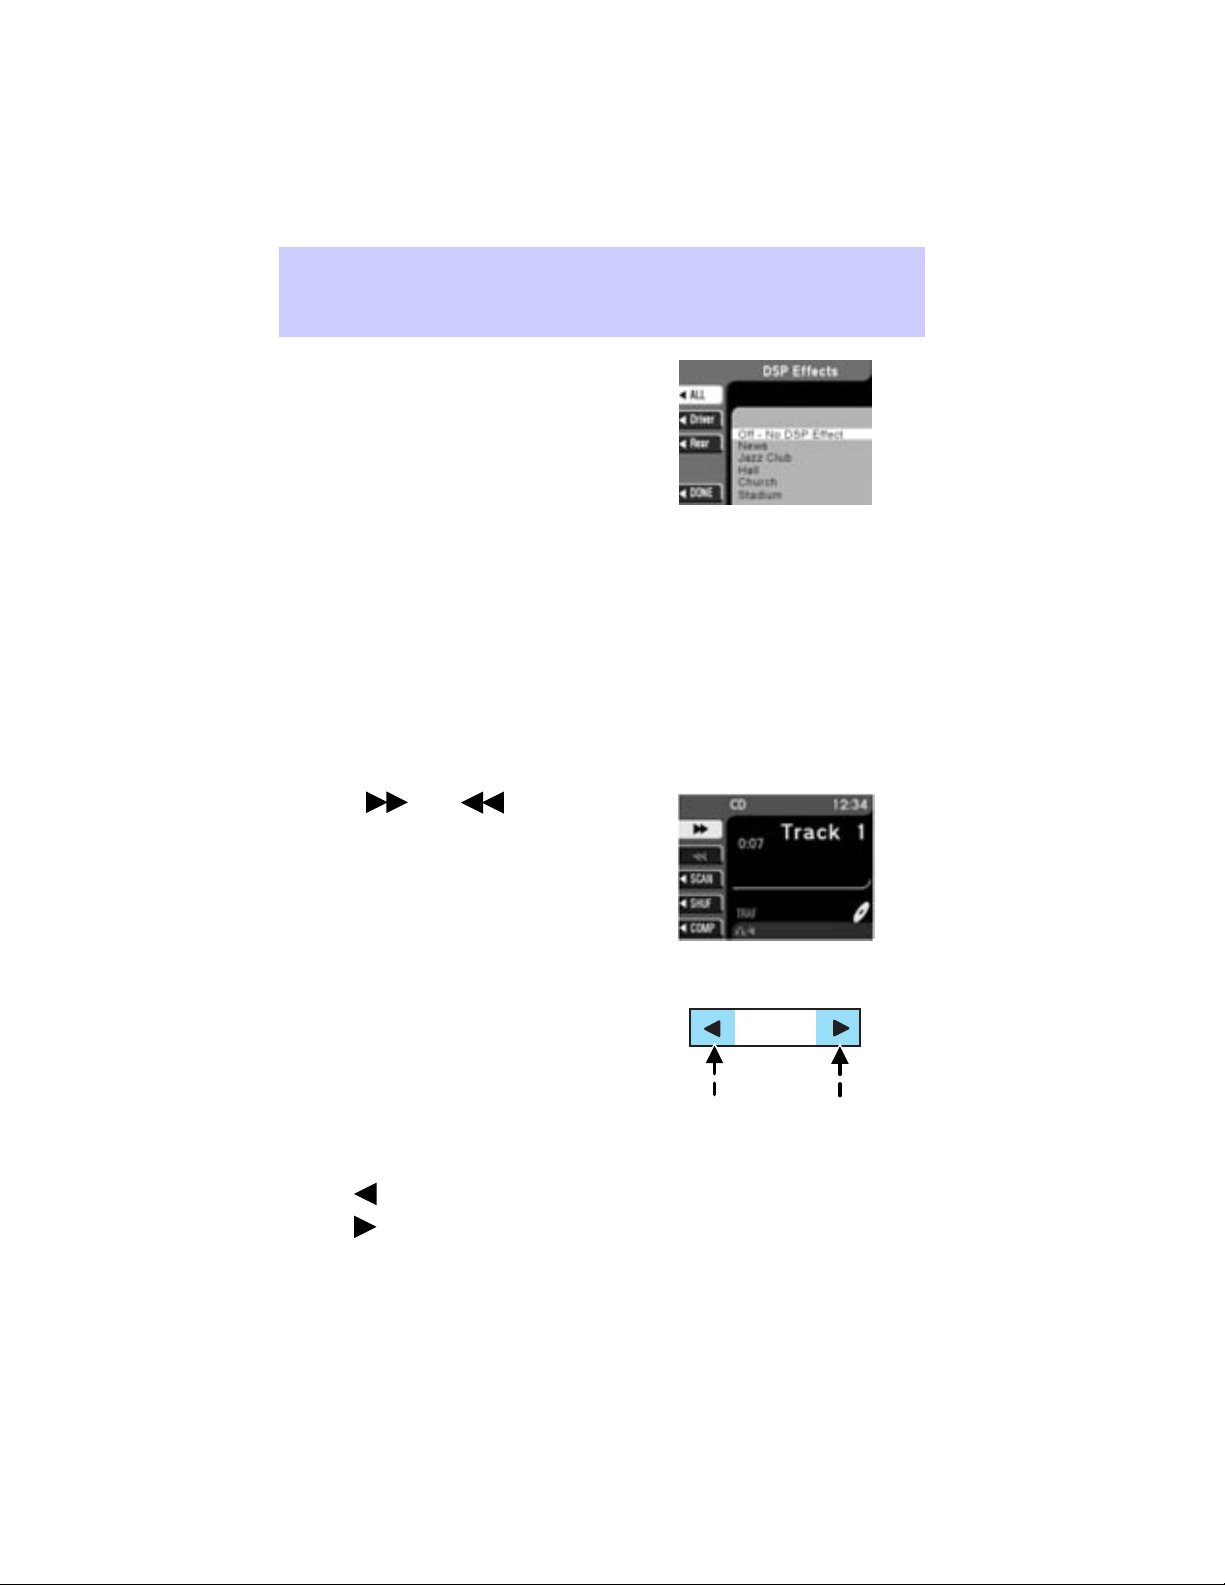
Audio features
You can then select the following
signal modes:
• JAZZ CLUB — jazz club with
clearly reflected sounds
• HALL — rectangular concert hall
capacity of about 2,000
• CHURCH — church with a high
vault
• STADIUM — outdoor stadium with a capacity of about 30,000
• NEWS —”voice-only” type of sound with a limited audio band
This system has three ’occupancy modes’ of listening:
• Driver — Optimizes audio playback for the drivers seat position.
• All — Optimizes audio playback to be similar for ALL seating
positions.
• Rear — Optimizes the audio playback for rear seat passengers.
REWIND/FAST FORWARD
Press the
to fast forward or rewind a CD
track.
and controls
SEEK FUNCTION
The SEEK control works in all
modes.
Seek in radio mode
• Press
• Press to find the next listenable station up the frequency band.
to find the next listenable station down the frequency band.
SEEK
15
Page 16

Audio features
Seek in CD or CD DJ mode
• Press
selection has been playing for three seconds or more and you
press
beginning.
• Press
the last track has been completed, the first track of the current disc
will automatically replay.
Seek in navigation mode
to seek to the previous track of the current disc. If a
, the CD changer will replay that selection from the
to seek forward to the next track of the current disc. After
• Press
or to access the next audio station if in radio mode, and
next track if in CD mode.
RADIO STATION MEMORY PRESET
The radio is equipped with six station memory preset controls. These
controls can be used to select up to six preset AM stations and twelve
FM stations (six in FM1 and six in FM2).
The presets will also allow you to access CDs which are loaded in the CD
DJ. When in CD mode, simply press the preset number which
corresponds to the desired disc.
Setting memory preset stations
1. Select the frequency band with the AM/FM select control.
2. Select a station. Refer to Tune adjust or Seek function for more
information on selecting a station.
3. Press and hold a memory preset
1
2
3
5
4
control until PRESET SAVED
appears on the display.
Autoset memory preset
Autoset allows you to set strong radio stations without losing your
original manually set preset stations. This feature is helpful on trips
when you travel between cities with different radio stations.
6
16
Page 17

Audio features
Starting autoset memory preset
1. Select a frequency band using the AM/FM select controls.
2. Press the AUTO control.
3. When the first six strong stations
are filled, the station stored in
memory preset control 1 will start
playing.
If there are less than six strong
stations available on the frequency
band, the remaining memory preset
controls will all store the last strong station available.
Any preset stored via the presets directly (pressing and holding) in this
mode are temporary.
A message will indicate whenever a temporary preset is stored or
recalled. This mode is active while the AUTO softkey is highlighted.
To deactivate autoset and return to your audio system’s manually set
memory stations, press the AUTO control again.
TUNE ADJUST
The tune feature works in radio mode.
Tune adjust in radio mode
• Select the TUNE soft key.
• Press SEEK to go up
down
manually.
the frequency band
or
STEREO INDICATOR
Whenever a stereo signal is received in radio mode, the stereo indicator
(ST) will appear in the display.
17
Page 18

Audio features
SCAN FUNCTION
Press the soft key next to SCAN for
a brief sampling of all listenable
stations on the selected frequency.
Press again to disable scan and
remain on the current station.
PROGRAM TYPE (PTY) SELECTIONS
Some FM stations transmit program
type codes which can be used to
locate different stations transmitting
programs of a certain type.
Press the soft key next to TYPE to
access a list of available program
types.
Use the cursor control to select the
desired program type. The system will search for and begin playing that
program type if available. During a seek or scan and for 10 seconds after
a station is found, pressing the seek up/down or scan will initiate another
search. If the desired type cannot be found, ’Not Found’ appears in the
display and the audio system returns to the original station.
TRAFFIC INFORMATION
The Traffic information soft key can be accessed under menu option
“MORE, AVC, TRAFFIC, DSP...” within the “AUDIO OPTIONS” menu.
Select the TRAF soft key to select traffic information broadcast from
certain stations which will automatically interrupt radio or CD playback
at a preset volume level. The default Traffic volume can be adjusted with
the slider bar using the cursor input. Moving the position to the left most
position will turn this feature off.
The display TRAF will appear in Orange if the feature is enabled, but
there is no broadcast traffic program available.
Traffic information not available in most U.S. markets.
18
Page 19

COMPRESSION
The compression feature will boost
quieter music and lower louder
music to minimize the need for
volume adjustments.
When in CD or CD DJ mode, press
COMP to engage or disengage the
compression feature.
SHUFFLE
When in CD or CD DJ mode, press
SHUF to engage and disengage the
shuffle feature. All tracks on the
current disc will be played in
random order.
Audio features
19
Page 20

Navigation features
The route guidance navigation system in your audio unit will not function
unless a navigation CD-ROM is inserted.
Ensure that you follow highway code restrictions and do not take
any risks. For example, if you are unable to make a U-turn,
continue on your journey. The navigation system will recalculate
your route to get you back to an appropriate road to your
destination.
For road safety reasons, information should only be entered
when the vehicle is stationary.
NAVIGATION SCREEN DISPLAY
When in navigation mode, there will
be various indicators on the screen
to help you in operating your
system.
1. Direction to destination
2. Distance to final destination
3. Estimated time to destination
4. Current directional heading and
GPS signal strength (color)
5. Vehicle icon (current vehicle position)
6. ZOOM
7. PAN
8. DETOUR
9. VOICE
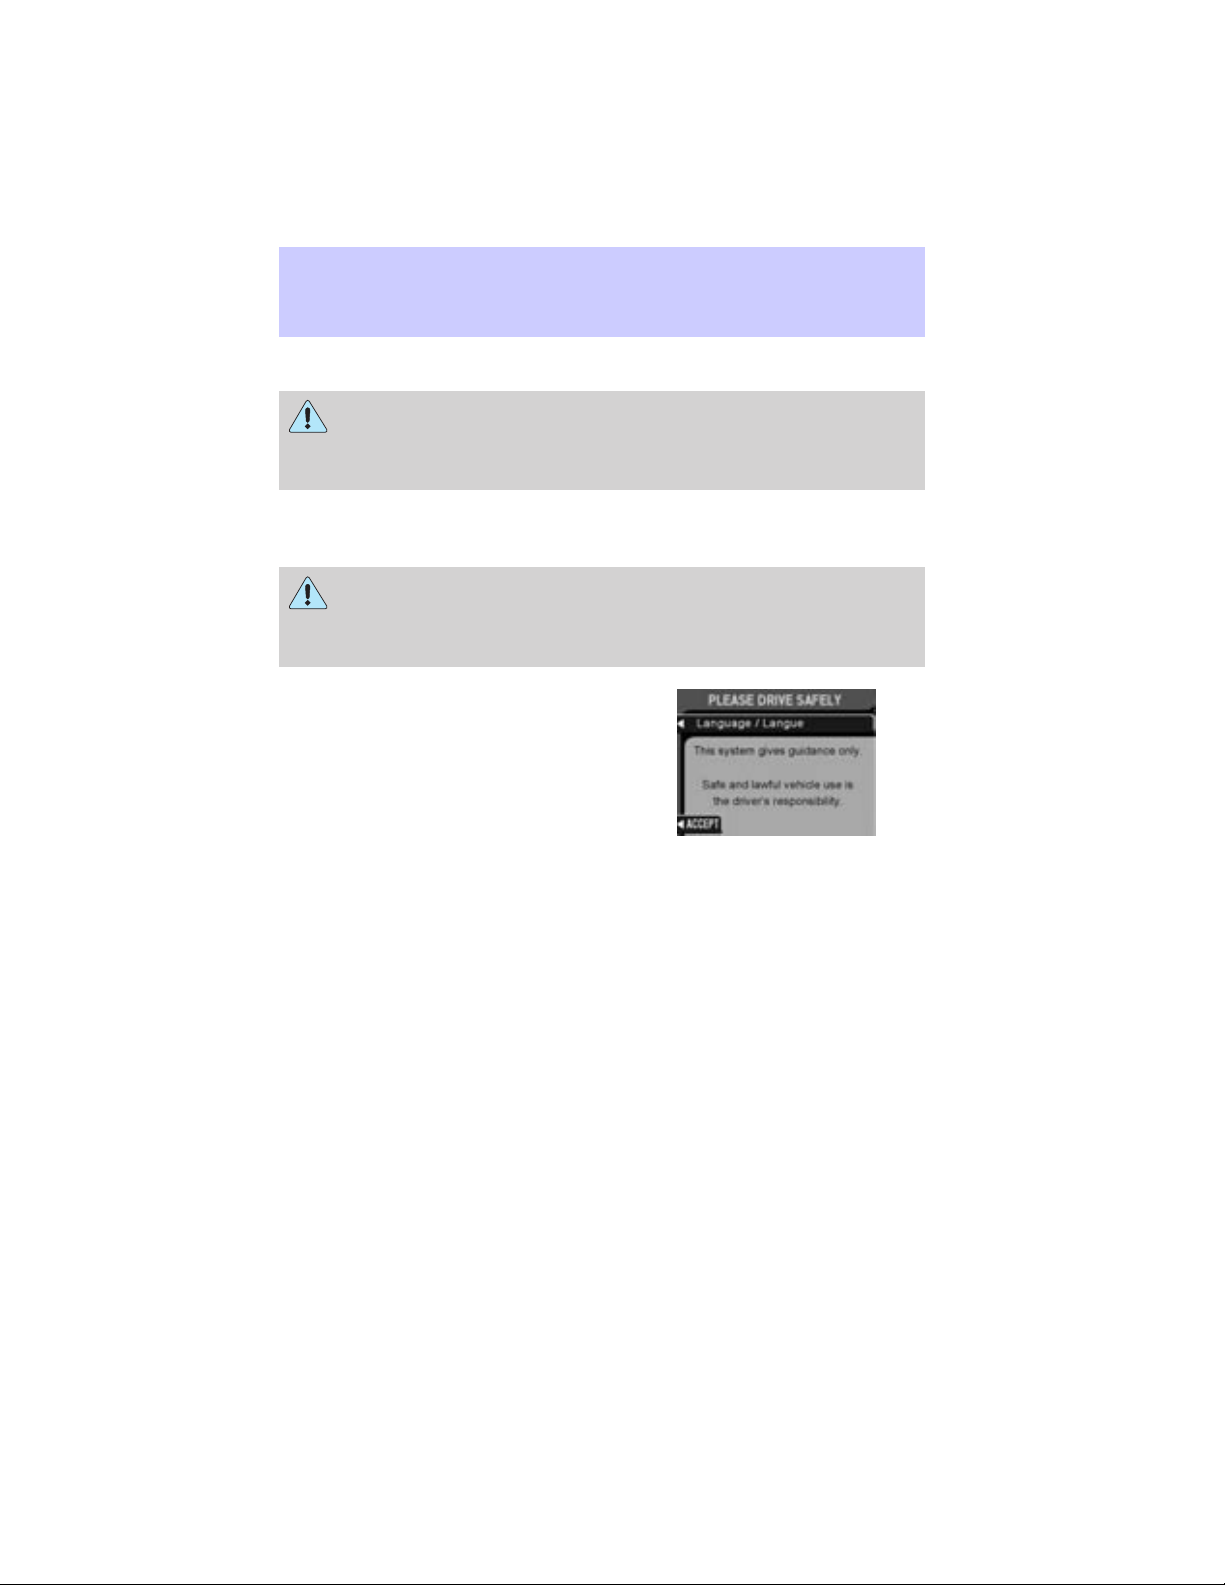
Please drive safely
This screen may appear on your
VNR display. Press the soft key next
to the display to select the desired
language. Press the control next to
ACCEPT to confirm your selection.
20
Page 21

Navigation features
PRINCIPLES OF GPS (GLOBAL POSITIONING SYSTEM)
OPERATION
Your Vehicle Navigation System directs you based on information derived
from satellites, road maps stored on the CD-ROM, sensors in your vehicle
and the desired destination. The system compiles all necessary
information to guide you to your selected destination. Space satellites
determine the vehicle’s current location and transmit position and time
signals to your car.
If the vehicle has been parked for a long period of time, the navigation
function may be temporarily unresponsive. The navigation system will
operate reliably again once GPS reception is available in a few minutes.
Limited GPS reception
System performance may be adversely affected if GPS reception is
interrupted or interference occurs over a distance of several miles. The
following are possible causes for GPS reception being interrupted. If the
vehicle is:
• in multi-story parking garages
• in tunnels and under bridges
• in between high buildings
• by forests or tree-lined avenues
• in heavy rain showers and thunderstorms
• in valleys and in mountainous regions
The GPS signal strength may vary. The directional heading indicator at
the bottom of the screen might change color to indicate this signal
strength. The colors are as follows:
• Green — A clear GPS signal is being received.
• Yellow — The GPS signal is partially blocked.
• Red — The GPS signal is unavailable and may be temporarily blocked.
TO ENTER NAVIGATION MODE
Press NAV to access the navigation
system menu.
NAV
21
Page 22

Navigation features
Use the cursor control, or the
corresponding soft key to confirm
your selection.
If you select the wrong item, press
the BACK control to return to the
previous screen. Or, press NAV to
return to the main Destination
Entry menu and start again.
MAP DISPLAY INFORMATION
When using the navigation system,
the map display screen will appear
to guide you to your location. On
the screen, you are able to make the
following choices:
• VOICE — Press to repeat the last
voice prompt.
• DETOUR — Press to select a
detour from your current navigation route.
• PAN — Press to move the current view of the map.
• ZOOM — Press to adjust the area covered on the map display.
SELECTING A DESTINATION
Press NAV to access the destination
entry menu.
NAV
22
Page 23

Navigation features
From this menu, you may select
from the following options:
• Address/Intersection— Use to
select a destination based on a
known street address or
intersection.
• Point of interest— Use to
select a destination that is a point
of interest location (i.e., airport, restaurant, hospital).
• Previous destination — Use to select a destination from among the
last 50 entered destinations
• Address book — Use to select a destination from previously stored
entries.
Address / Intersection and Point of Interest selections are not
available while the vehicle is in motion.
Address/intersection
Use the soft keys to select
’Address/Intersection’ from the
Destination Entry menu. The next
two options available are:
• Town/City Name— Select this
option if you know the town or
city name.
• Street Name— Select if you
know the street address but are uncertain of the city.
The next two options are:
• Address range — Select the numerical address of the destination.
• Intersection — Select the intersection closest to the destination.
23
Page 24

Navigation features
Points of interest (POI)
This destination option enables you
to specify a particular place, such as
an airport or gas station. Use the
soft keys to select ’Points of
Interest’. In this next menu, you will
have the following options:
• By Category— Lists POIs by categories, such as airports, gas
stations, etc. Use the cursor control to select and confirm choice.
• By Name— A keyboard display enables you to spell out the first four
letters of the desired POI. A slight time delay will occur if large
numbers of letter options are available.
• By Category & Name — Lists categories, then allows you to spell
out the first four letters of your destination.
After making these selections, three further options are displayed:
• Show All—Lists entries in alphabetical order.
• Sort by Distance— Lists the closest POI entries to the vehicle’s
current location.
• Within a Town/City — Lists entries for a specific city in alphabetical
order.
Certain categories may not be available in some areas and POIs may not
all be listed. Up to date information also depends upon using the latest
CD-ROM available.
Previous destination
The last 50 destinations entered into
the navigation system are
automatically stored in the system’s
memory.
Use the soft key to select ’Previous
Destination’. The address of each
stored destination will appear.
The previous origin information is
also stored in this location. This stores the location where the vehicle
last started off from and is updated each time the vehicle completes a
journey.
24
Page 25

Navigation features
Deleting a previous destination
• Use the cursor control to select
the destination to be deleted.
• Press DELETE.
A confirmation screen will appear
before the deletion is complete.
Entering a destination using the keyboard or lists
After selecting the desired choice
from the Destination Entry menu,
there are two main ways to enter
your destination in the VNR system,
by using the keyboard or by
scrolling through the system’s
listing.
Keyboard — the keyboard display enables you to spell out a town, city,
street or point of interest.
• Use the cursor control to highlight the desired character(s)
• Push in the control to confirm the selection. A highlight bar will
automatically begin searching the current files for that listing.
• To move back to previously selected characters, press DELETE.
List — Your VNR system shows a list of town/cities, streets or points of
interest and a highlight bar indicates the line selected. You may choose
any of these for a destination.
• Press LIST to enter list mode.
• Use the cursor control to scroll through the selections.
• Press in the cursor control to confirm the selection.
25
Page 26

Navigation features
SELECTING ROUTE CRITERIA
Once you have selected a
destination, select from the
following route criteria:
1. Shortest time route — Creates a driving route which minimizes
driving time taking into consideration things such as speed limits,
number of turns, etc.
2. Shortest distance — Creates a driving route the shortest distance
from the current location.
3. Avoid toll roads — Creates a driving route which avoids toll roads
where possible.
4. Avoid freeways — Creates a driving route which avoids major
freeways where possible.
5. Use freeways — Creates a route which uses freeways where possible.
Route calculation
Once the route criteria is selected, the navigation system automatically
calculates a route to the selected destination. The route appears on the
display screen and a voice prompt provides instructions.
ROUTE CALCULATION DISPLAY SCREEN
This screen will appear for a few seconds while the navigation system is
calculating your route.
26
Page 27

Navigation features
Please proceed
Once the route is calculated, ’Please
Proceed’ is displayed with a map on
the display. Also included in the
display:
• the planned route is shown in
pink
• major roadways are shown in blue
• other streets are shown in white
• your vehicle location is shown as a pink/yellow triangle
• the arrow at the foot of the screen points to your destination
You are able to choose from three viewing options in this display:
• PLAN — Press this soft key to scroll through your entire route. This
option is only available prior to beginning the journey.
• PAN — Press this soft key, then use the cursor control to pan up,
down, left or right on the map. This option is only available when the
vehicle is not in motion.
• ZOOM — Press this soft key multiple times (or use the cursor input)
to select the desired zoom level on the map. The zoom level is shown
at the bottom of the screen.
Guide display
Once your vehicle is moving along
the highlighted route, the Guide
display screen will automatically
appear. This screen shows your next
turn as voice prompts direct you on
the route. The screens and voice
prompts are continually updated to
correspond with your vehicle
location. To disengage the voice prompts, refer to Navigation
preferences in the System Options Chapter.
The voice volume level may be adjusted by turning the volume control
during a voice prompt only.
On the Guide display screen, there are two display functions which are
available if needed:
• VOICE — Press to repeat the current voice prompt.
27
Page 28

Navigation features
• DETOUR — Press to select a detour. For more information on
detours, refer to Detours, interruptions and route changes in this
chapter.
• CANCEL — Press to cancel the guide display.
While in the Guide display screen, the cursor input can be used to
preview future/up coming maneuvers. This can be done by pressing
down on the cursor input to go to the ’next’ maneuver instruction, and
pressing up to go to the ’previous’ maneuver. Pressing the NAV control at
any time will set you back to the current maneuver/turn instruction.
True view
As you approach an intersection, the
Guide display screen will
automatically change to a close-up
view (True view) of the junction.
The close-up view will automatically
return to the Guide display screen
once a turn has been completed.
Arrival
When you approach your
destination, the destination indicator
will appear on the map display
screen as a circular icon. When you
arrive, the name and address of
your destination will be displayed.
NAVIGATION SCREEN DISPLAY
The address book feature allows you
to store up to 50 alphabetical
destinations. To store an address:
1. Once in navigation mode, select
’Address book’.
2. Confirm the selection.
Stored addresses will appear in the
display. If no entries exist, an empty address book screen is shown.
Use the cursor control to select the desired entry.
28
Page 29

Navigation features
Adding, deleting or editing the address book
Note: These features are not available when the vehicle is in motion.
1. Ensure that you are in navigation
mode.
2. Select Address book.
3. Confirm selection.
4. Press the DELETE soft key to
delete the current entry.
5. Press the ADD soft key to add an
additional entry.
6. Press the EDIT soft key to edit
the current entry.
• Use the cursor control to select a
letter.
• Push the control to add a letter
to the name. If you make a
mistake, you can press the
DELETE soft key.
• Press the DONE soft key to save your entry under the name you
spelled.
Storing the current car position in the address book
If you are at a location you would
like to store in the address book,
such as a new restaurant:
• Select ADDRESS BOOK from the
Destination Entry menu.
• Press the ADD soft key.
• Press the CURRENT LOCATION
soft key.
• Assign a name to the entry as described in Adding, deleting or
editing the address book above.
• Press the DONE soft key to save your entry under the name you
chose.
29
Page 30

Navigation features
CURRENT LOCATION
To access your current location,
press HERE when in navigation
mode. Your current location and the
name/distance to the next/last
intersection are displayed.
Press NAV to return to a guidance display. Press MAP to return to a map
display.
DETOURS, ROUTE INTERRUPTIONS AND CHANGES
If need be, your navigation system
can easily and quickly find the most
efficient detour around road
construction, unexpected traffic or
undesirable roads.
Detour options
You may engage the detour option
when in the Guide display, True
view or Map display screens.
Press the control next to DETOUR
to activate.
Use the soft keys to select and enter
your new route criteria. Press the
key to confirm selection. The
following options are available:
• AVOID CURRENT ROAD — Updates your route to avoid the road
which you are on currently.
• AVOID NEXT ROAD — Updates your route to avoid the next road
planned on your journey.
• DETOUR (X) MILES — Provides a detour from the current route for
the noted distance. Use the cursor control to indicate the distance
which needs to be avoided. The range available is based on the length
of your original route.
• AVOID SPECIFIC ROAD — Avoids a specific road on your planned
route.
HERE
30
Page 31

Navigation features
Route interruptions
In the course of your destination, you may decide to temporarily leave
your planned route for gas, food, etc. If you turn off the ignition, the
option to continue the route guidance will be displayed when the ignition
is turned on again. Use the cursor control to select from one of the
following options:
• ’Resume route— The navigation
system displays the ’Select Route
Criteria’ screen. Refer to
Selecting Route Criteria earlier
in this chapter.
• ’Cancel route’- Press to return to
the main menu.
If the ignition is not turned off,
simply continue along your highlighted route.
Route changes or cancellations
To cancel or change your current
route:
• Press BACK, then select ’Cancel
Guidance’ or
• Press the CANCEL soft key.
31
Page 32

DVD functionality
DVD FUNCTIONALITY (IF EQUIPPED)
Your vehicle may be equipped with a DVD Rear seat entertainment
system. Your Vehicle Navigation Radio (VNR) System allows you to have
control over the DVD player as well.
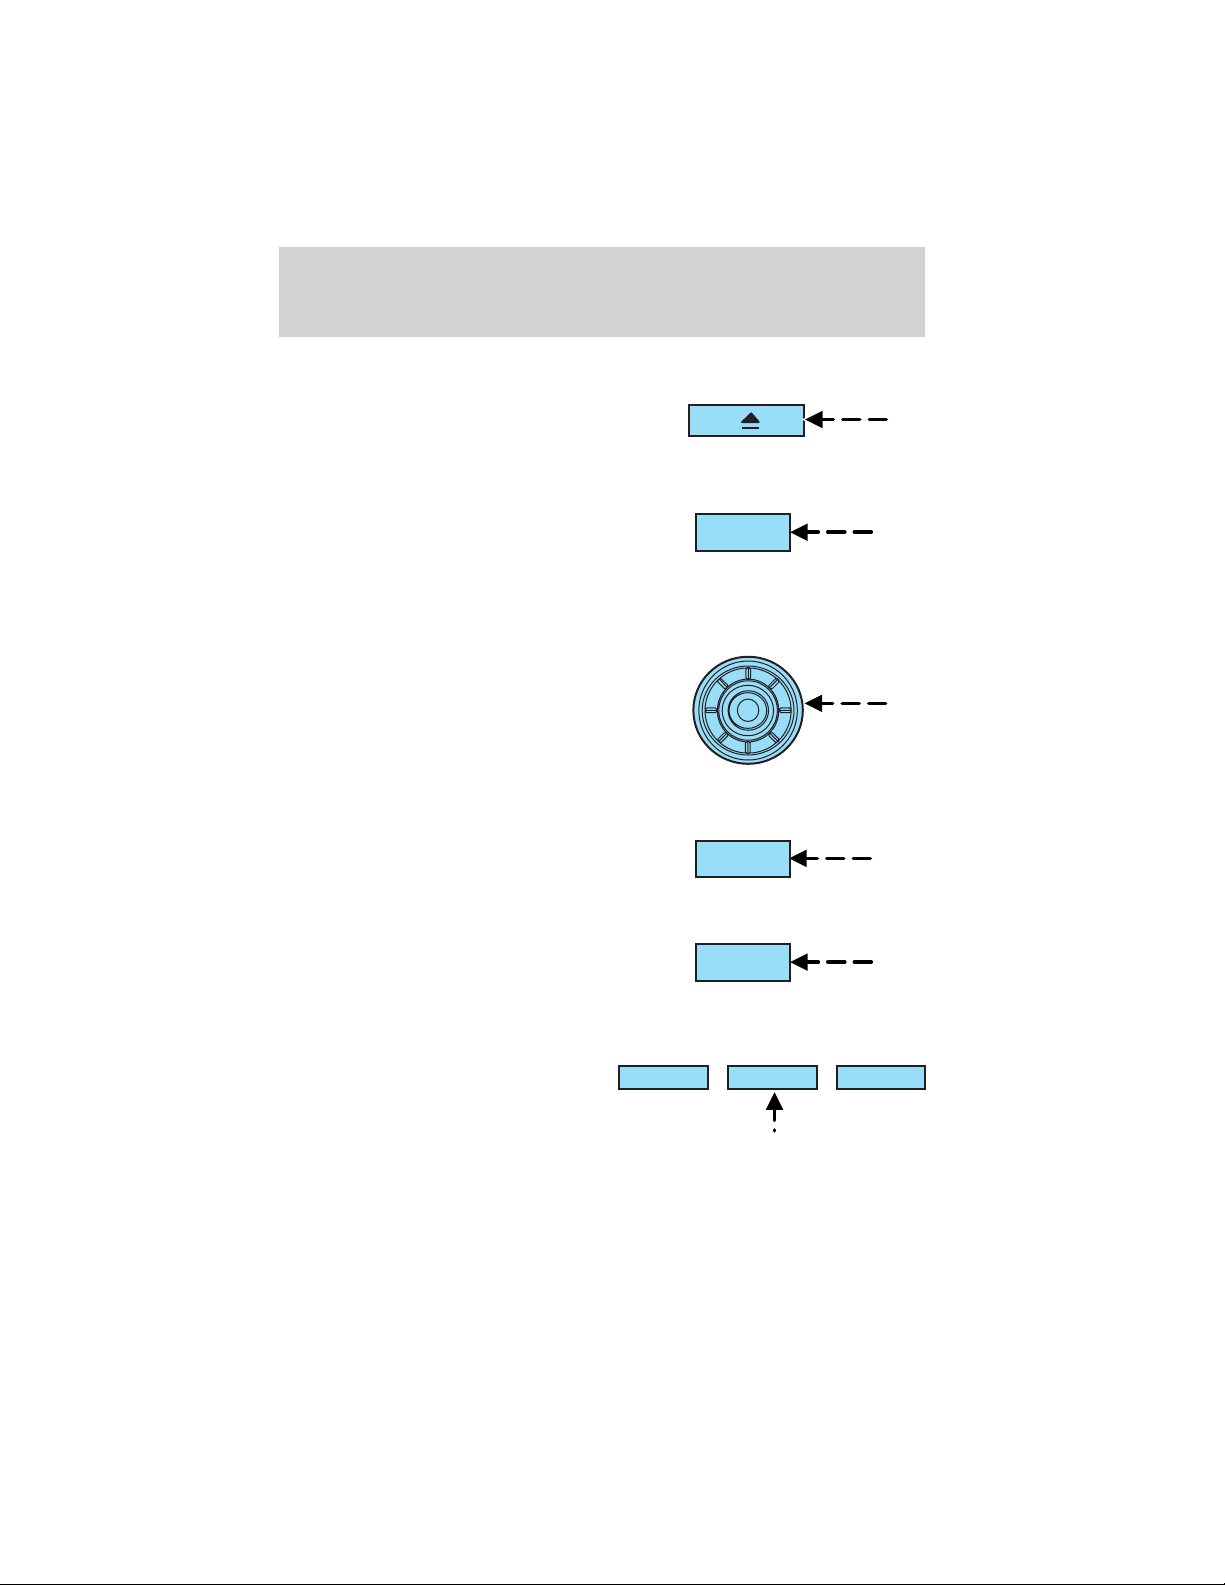
The VNR system will display DVD
status messages in the radio display.
The soft keys are PLAY/PAUSE,
EJECT and STOP/AUX.
Press the CD control until DVD
appears in the display.
(EJECT) — Press to change playing medias. / Press to stop DVD
and eject the DVD disc.
(PLAY) / II (PAUSE) — Press to play/pause the DVD. If in play
mode, the DVD will pause when pressed. If in pause mode, the DVD will
play when pressed.
(STOP) / AUX — If a DVD movie is playing, press to stop. If a movie
is not playing, press to activate AUX mode.
For further information on your DVD system, refer to the Owner’s
Guide.
32
Page 33

Rear seat controls
REAR SEAT CONTROLS
Your vehicle is equipped with rear seat controls, which allow the rear
seat passengers to operate and listen to a different playing media than
the front seat passengers. To engage the rear seat controls from the VNR
system:
• Press the headphone/speaker icon
on the VNR system. The
headphone icon illuminates in the
display indicating the system has
enabled Rear Seat Control mode. A subsequent press of this button
will disable rear seat control (headphone/speaker icon on display will
appear with a red slash through it).
When RSC is active, pressing presets 2 and 4 simultaneously on the radio
will enable Dual Play mode (or the RSC can enable Dual Play mode by
pressing the
and the rear speakers mute. In this mode, the rear passengers may
adjust the volume and other levels using the rear seat control.
Additionally in Dual Play mode, the front and rear seat passengers can
listen to the same playing media. However, rear seat passengers listen to
the media over their headphones (thereby being able to adjust the
volume) and the front seat passengers listen via the front seat speakers.
Press the headphone/speaker control again to disengage the rear seat
controls (and Dual Play mode). The system returns to Single Play mode.
Front and rear speakers will play the selected media.
For further information on the rear seat controls, refer to Rear Seat
Controls in the Entertainment Chapter of your Owner’s Guide.
/ button). The front speakers play the selected media
33
Page 34

Display options
DISPLAY SETTINGS
This feature can be accessed by
selecting “Display Options” within
the Main Menu.
Use the cursor control to select one
of the following options:
• ’Mode’—auto (automatic), day
or night display settings.
• ’Brightness’—provides manual adjustment for screen brightness.
• ’Turn display off’—Select turn the display off. Press any button to
turn the display back on again.
34
Page 35

System options
NAVIGATION MODE
You are able to make various
adjustments in navigation mode. To
view the options, press the control
next to ’Option Menu’ to select from
the following options:
Navigation options
Once in the navigation preference
menu, you may select from the
following options:
• VOICE — Select to turn the voice
output on or off and to adjust the
volume level.
• MAP — Choose between ’Heading
up’ to put your direction of travel
toward the top of the screen, or ’North up’ to ensure that North is
always at the top of the screen.
• UNITS — Press to select from miles or kilometers
Language
Select ’Language’ from the Option
menu.
Use the cursor control to select and
enter the desired voice and text
language.
SETTING THE CLOCK
Your vehicle may be equipped with an instrument panel mounted clock.
For instructions on setting your clock, refer to Clock in the Driver
controls chapter of your Owner’s Guide.
35
Page 36

System options
If your vehicle is not equipped with an instrument panel mounted clock,
your clock is in your VNR system. To set the clock:
1. Access the CLOCK screen.
2. Press the ADJUST control to
select the hours or minutes to set.
3. Use the cursor control to increase
or decrease the hours or minutes.
4. Press DONE to set the time.
5. Select the SET soft key to
synchronize/set the minutes and
seconds to GPS time. The hours will remain at the user set value.
You may choose to set the clock to a 12 or 24 hour display.
36
Page 37

CD DJ
CD DJ INFORMATION
Your vehicle is equipped with a CD DJ (CD changer). It may be located
in the center console or on the passenger’s side of the front console.
Radio power must be turned on to play the CDs in the CD DJ. The
magazine may be stored in the glove box when not being used.
The CD magazine may be inserted or ejected with the radio power off.
ONLY use the magazine supplied with the CD DJr, other types will
damage the unit.
Keep the CD DJ door closed. Coins and foreign objects will damage the
CD player and void your audio system warranty.
The CD magazine does not have to be full (all 6 disks) for the CD DJ to
function.
CD units are designed to play commercially pressed 12 cm
(4.75 in) audio compact discs only. Due to technical
incompatibility, certain recordable and re-recordable compact
discs may not function correctly when used in Ford CD players.
Irregular shaped CDs, CDs with a scratch protection film
attached, and CDs with homemade paper (adhesive) labels should
not be inserted into the CD player. The label may peel and cause
the CD to become jammed. It is recommended that homemade
CDs be identified with permanent felt tip marker rather than
adhesive labels. Ball point pens may damage CDs. Please contact
your dealer for further information.
If your CD DJ is located in the center console under the arm rest:
Slide the door to access the CD DJ
magazine.
37
Page 38

CD DJ
Press to eject the magazine.
1. Pull the lever to remove a CD
tray from the magazine.
2. Insert one disc into each CD tray
of the magazine (up to 6 discs).
Ensure that the label side is facing
up.
If you pull too hard on the disc
holder, the disc holder may come
completely out of the magazine. If
this happens, reinsert the disc
holder back into the magazine.
3. Insert each CD tray, with the disc
loaded, all the way into the CD
magazine.
38
Page 39

CD DJ
4. Insert the CD magazine into the
CD DJ.
5. Slide the door to the left to close.
Use only compact discs containing
this mark.
If your CD DJ is located on the passenger’s side of the front
console:
Press the front of the CD DJ to
access the magazine.
H
S
U
P
39
Page 40

CD DJ
Press to eject the magazine.
Pull the lever to remove a CD tray
from the magazine.
Insert one disc into each CD tray of
the magazine. Ensure that the label
side is facing up.
If you pull too hard on the disc
holder, the disc holder may come
completely out of the magazine. If
this happens, reinsert the disc
holder back into the magazine.
D
E
S
O
L
C
R
O
O
D
P
E
E
K
F
W
I
N
I
A
N
I
S
C
T
S
E
H
I
E
N
R
T
G
R
T
H
T
E
U
E
A
I
P
L
N
C
A
H
T
B
H
C
E
I
O
L
S
M
S
D
U
P
I
A
R
R
C
F
E
A
T
C
C
D
T
E
I
I
S
O
C
N
Insert each CD tray, with the disc
loaded, all the way into the CD
magazine.
40
Page 41

CD DJ
Insert the CD magazine into the CD
DJ.
D
E
S
O
L
C
R
O
O
D
P
E
E
K
Use only compact discs containing
this mark.
The magazine does not need to be full for the CD DJ to operate.
Radio power must be turned on to play the CDs in the CD DJ. The
magazine may be stored in the glove compartment when not being used.
The CD magazine may be inserted or ejected with the radio power off.
Ensure that the disc holder is
evenly inserted and at the same
level as the magazine (A). The unit
will not operate if the disc holder is
not inserted at the same level (B).
A
CD DJ information screen
The CD DJ screen will display
various such as:
• Track selected
• Elapsed time
• Selected disc
• Volume level
• On-screen selections
B
41
Page 42

CD DJ
CD DJ playback
With a navigation CD inserted into
the audio unit, press CD for CD DJ
playback. Without a navigation CD
inserted into the audio unit, press
CD until CD DJ appears in the display.
If playback is selected and the CD DJ is empty or the magazine is
missing or incorrectly inserted, NO DISC (S) will appear in the display.
If the selected CD is missing, NO DISC is displayed and the unit selects
the next available disc. The audio unit remembers which discs are
available, so it will not select a disc that it knows is missing. Instead, NO
DISC appears in the display and the current disc remains selected.
If the selected CD is damaged or upside down, CHECK DISCS and the
disc number are displayed. The unit then selects the next available disc.
During normal operations, CDs and tracks are played sequentially in
ascending order. Playback continues at track one if the end of a disc is
reached and with CD DJ playback, disc one will follow disc six.
Rewind/fast forward feature
When in CD DJ mode, press and
hold the
search forward or in reverse on the
current disc.
or control to
Scan feature
When in CD DJ mode, press SCAN
for a brief sampling of all tracks on
the current CD. Press again to
disengage the feature and listen to
the selected song.
42
Page 43

CD DJ
Shuffle mode
When in CD DJ mode, press SHUF
to engage and disengage the shuffle
feature. The tracks will be played in
random order. The unit will play all
the tracks on the selected disc and
then move onto the other discs and
play the tracks in random order.
Compression
The compression feature will boost quieter music and lower louder music
to minimize the need for volume adjustments.
When in CD DJ mode, press COMP
to engage or disengage the
compression feature.
43
Page 44

General information
FEDERAL COMMUNICATION COMMISSION (FCC) COMPLIANCE
Changes or modifications not approved by Ford or Lincoln Mercury could
void user’s authority to operate the equipment. This equipment has been
tested and found to comply with the limits for a Class B digital device,
pursuant to Part 15 of the FCC Rules. These limits are designed to
provide reasonable protection against harmful interference in a
residential installation. This equipment generates, uses and can radiate
radio frequency energy and, if not installed and used in accordance with
the instructions, may cause harmful interference to radio
communications.
However, there is no guarantee that interference will not occur in a
particular installation. If this equipment does cause harmful interference
to radio or television reception, which can be determined by turning the
equipment off and on, the user is encouraged to consult the dealer or an
experienced radio/TV technician for help.
CLEANING THE DISPLAY
Do not spray cleaning fluid directly onto the unit. Instead, spray onto a
soft cloth and gently wipe the unit. Only recommended products should
be used.
Do not clean any part of the system with benzene, paint thinner or any
other solvent.
Do not spill liquids of any kind onto the unit.
The navigation system utilizes a database stored in a special format on a
CD. It is recommended always to use the latest update of this map CD.
• The navigation system will only work with CDs specifically intended
for your navigation system.
• Always store the map CDs in their protective cases when not in use.
ORDERING ADDITIONAL MAP CDS
If you wish to order additional maps, or report possible problems with
your current map CD, please call Navigation Technologies at (888)
NAV-MAPS, (888–628–6277) toll-free or write
Navigation Technologies
P.O. Box 543442
Chicago, IL 60654–0442
Website — www.navtech.com
44
Page 45

General information
LATEST MAP CDS
The traffic network is constantly changing due to new roads, traffic
restrictions, etc. Therefore, it is not always possible to exactly match the
digital CD map with the current roadways. To help with accuracy, always
use the latest version of the map CD for navigation.
Updated CDs are available through Navigation Technologies.
454647
Page 46

Page 47

Page 48

48
 Loading...