

LightSpeed Technologies TOPCAT ACCESS WITH ACTIVATE DAILY Operation Instructions Manual
TOPCAT ACCESS WITH ACTIVATE
DAILY OPERATION INSTRUCTIONS
ENSURE THE SYSTEM IS POWERED ON
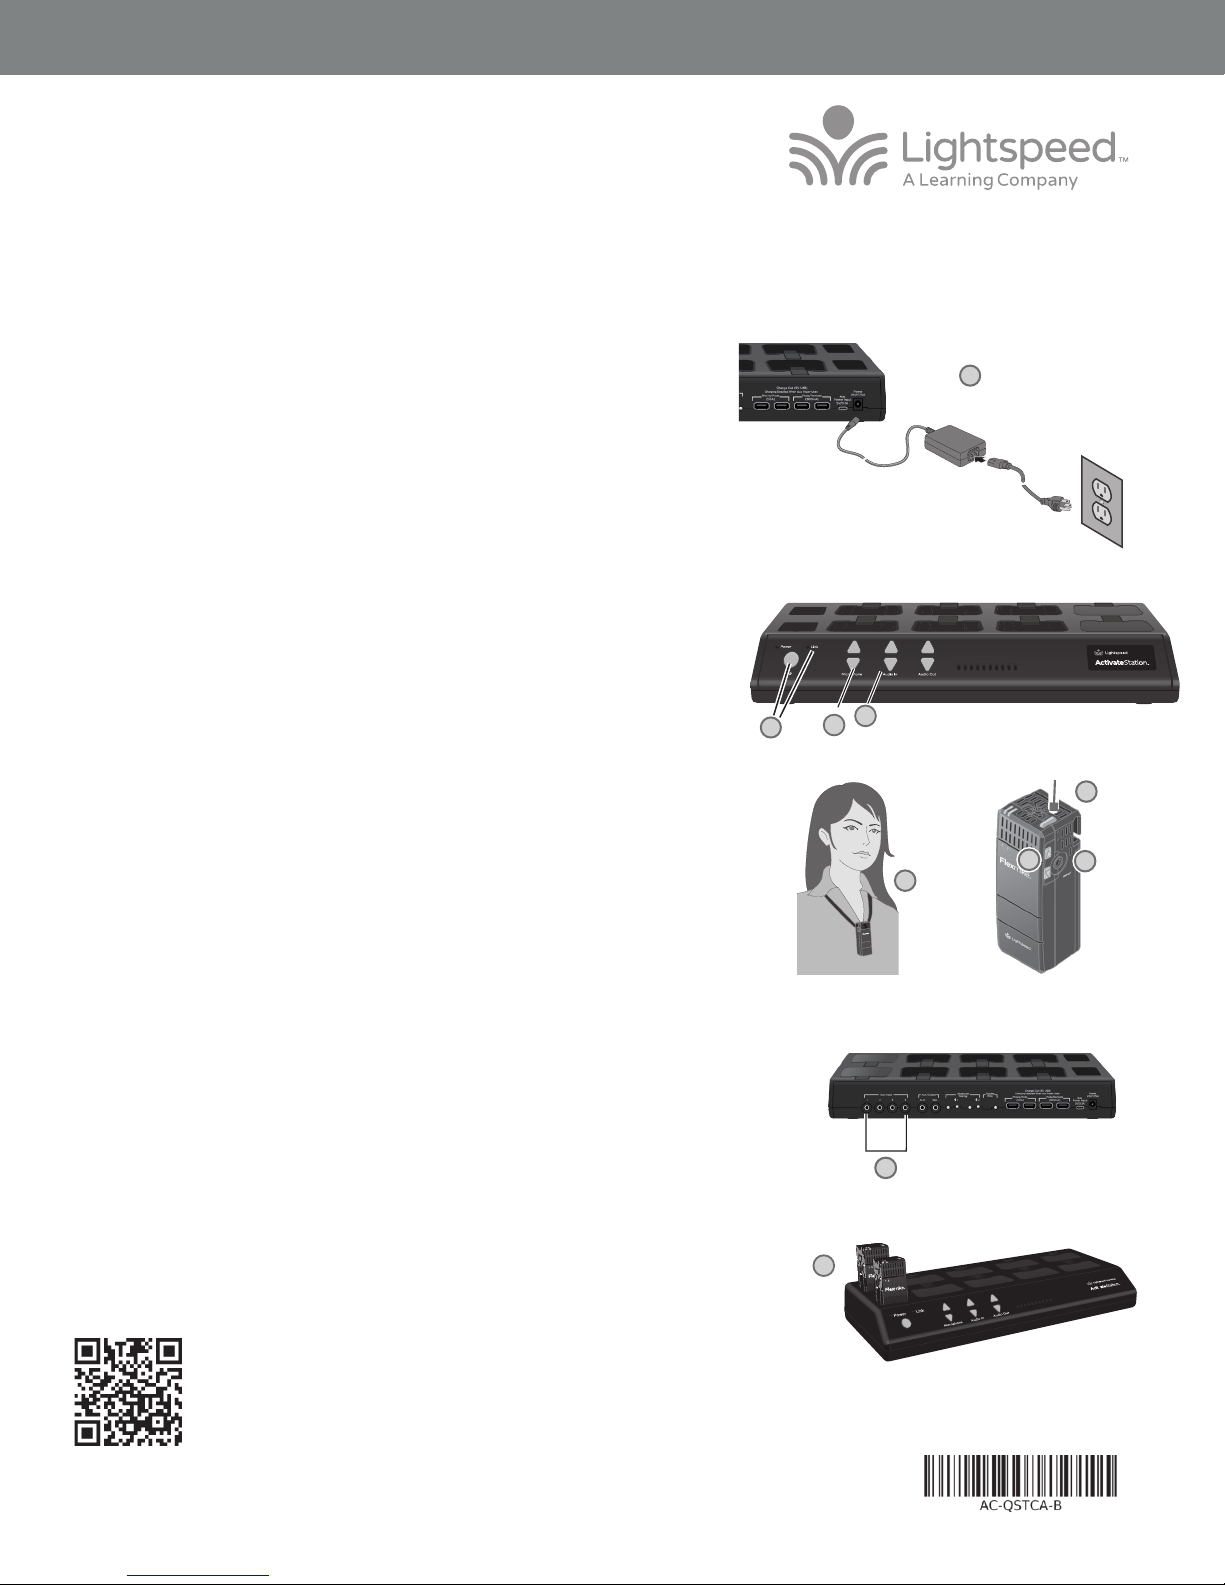
1. Locate the 24V power supply and power cable and connect the AC power cord into
the DC power supply. Insert the DC connector into the DC Power jack on the back
and plug the AC power cord into an electrical outlet.
2. Press the Activate Station power button to power on the Topcat. When powered
on, the blue LED on the speaker panel will glow.
USING THE FLEXMIKE
3. Remove microphone from charger and place the microphone around your neck.
Ensure the top of the microphone is at the collarbone.
4. Press the power/mute button. The teacher status will turn blue, indicating the
microphone is active.
5. Microphone volume may be adjusted at the microphone by using the UP/
DOWN buttons on the side of the Flexmike. It may also be adjusted by using the
Microphone volume buttons on the front of the Activate.
USE ACTIVATE STATION AS A WIRELESS AUDIO LINK
6. Plug your external audio equipment (for example, laptop), into one of the input jacks on
the back of the Activate labeled “Aux Input” using a 3.5mm patch cable.
7. Adjust volume at the audio source. If necessary, further volume adjustment may be
made using the Audio In volume buttons on the front of the Activate.
8. In addition, you may use the “Input” jack on the side of the Flexmike or the Sharemike
for audio integration.
1
7
2
5
Power / Mute
4
5
3
8
CHARGE FLEXMIKE NIGHTLY
9. Place the Flexmike into the charger. The power button light will glow red and the Mic
status light will glow blue. When a Flexmike is fully charged, the power button light on
the mic will change to green.
For futher instructions on capturing audio and video using the Activate App, and for complete
operating instructions, go to www.lightspeed-tek.com/TCA-usermanual (or scan the 2D
barcode below).
Lightspeed Technologies
www.lightspeed-tek.com / 800.732.8999 / 503.684.5538
QS0539US01-3
2
6
9
TOPCAT WITH MEDIA CONNECTOR
DAILY OPERATION INSTRUCTIONS
ENSURE THE SYSTEM IS POWERED ON
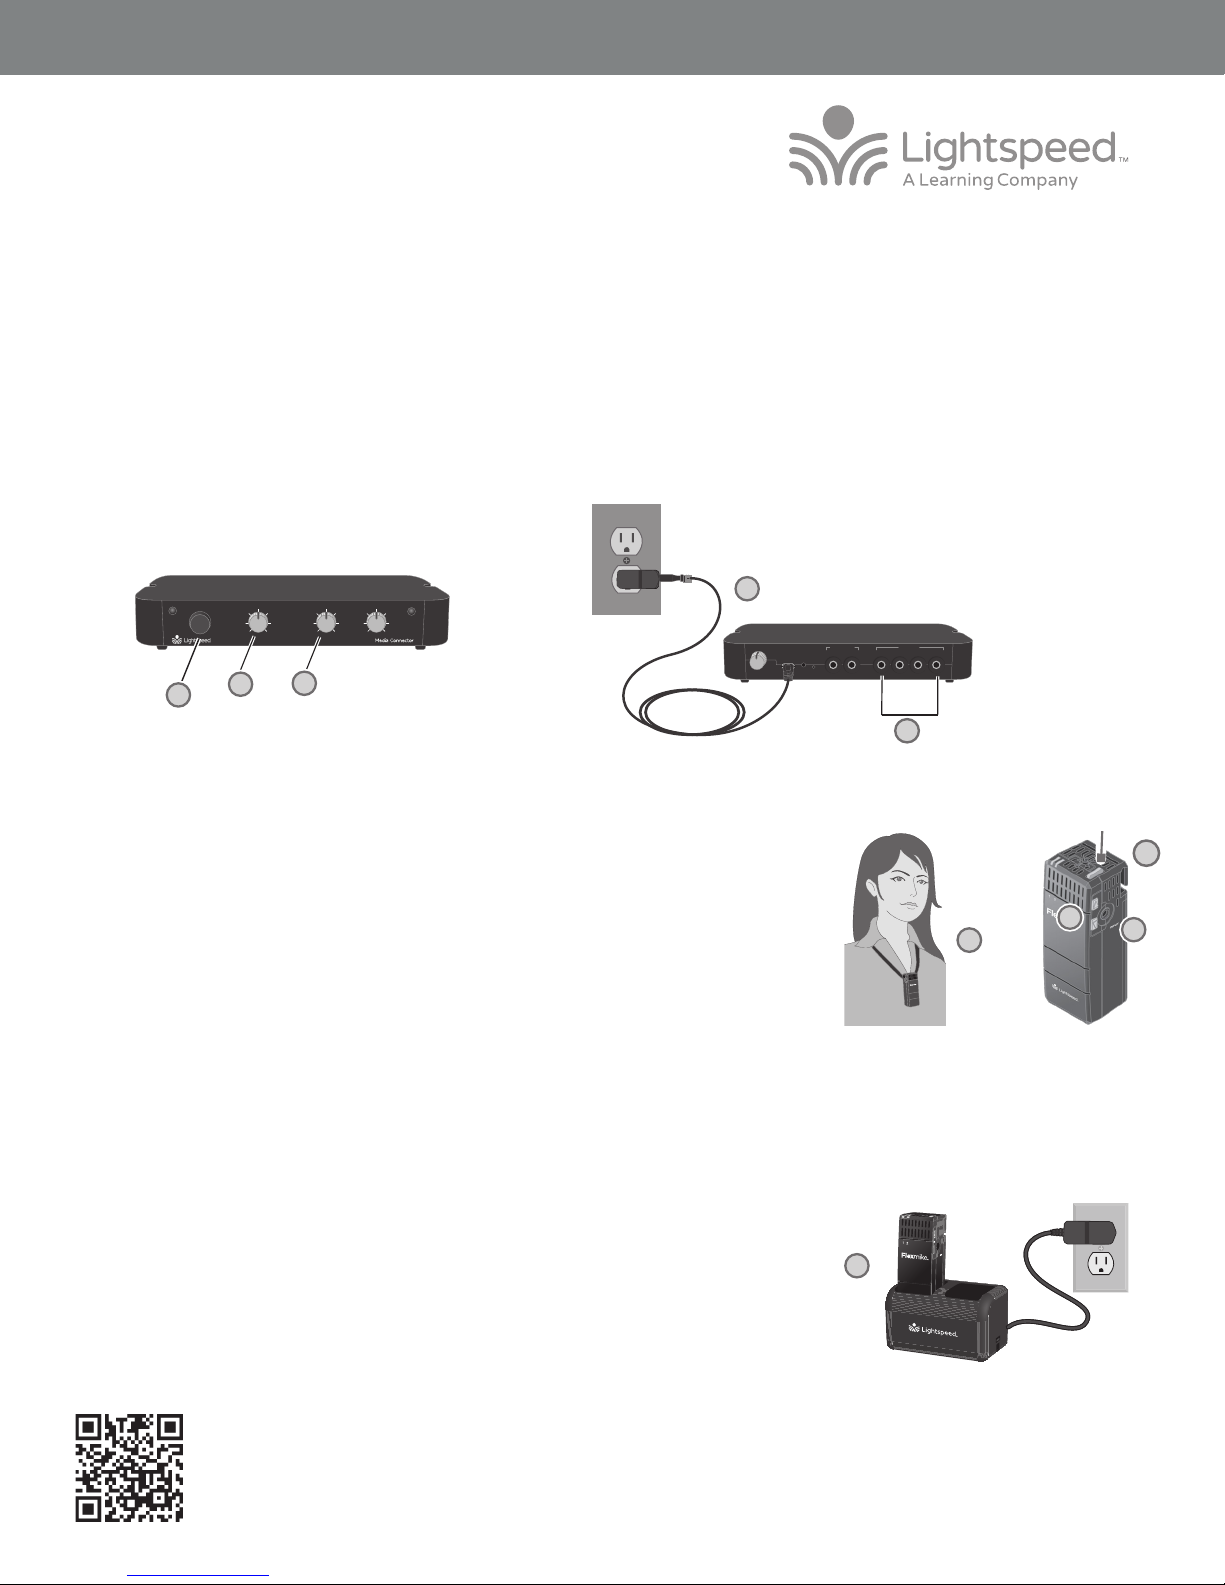
1. If the optional Media Connector is present, ensure it is powered on by plugging in the power cord to the USB power adapter and then
plug the power adapter into an outlet.
2. When powered on, the blue LED on the speaker panel will glow. The Topcat does not need to be powered o at the end of day. If
desired, you may power down the Topcat by powering down the Media Connector.
POWER
MIN
2
5
AUDIO INMICROPHONE AUDIO OUT
MAX MIN MAX MIN MAX
7
LINK
1
TREBLE BASS
USING THE FLEXMIKE
3. Remove microphone from charger. The microphone will default to the Mute position,
the teacher status will turn to red. Place the microphone around your neck. Ensure the
top of the microphone is at the collarbone.
4. Press the power/mute button. The teacher status will turn blue, indicating the
microphone is active.
5. Microphone volume may be adjusted at the microphone by using the UP/DOWN buttons
on the side of the Flexmike. It may also be adjusted by using the MICROPHONE volume
knob on the front of the Media Connector.
USE THE MEDIA CONNECTOR AS A WIRELESS AUDIO LINK
6. Plug your external audio equipment (for example, laptop), into one of the input jacks on the
back of the Media Connector labeled “Aux Input” using a 3.5mm patch cable.
7. Adjust volume at the audio source. If necessary, further volume adjustment may be made
using the Audio In volume buttons on the front of the Media Connector.
8. If no Media Connector is present, you may connect an audio source using a 3.5mm patch
cable to the Input jack on the side of a second Flexmike.
TONE
1
USB POWER
REGISTER
5V/1.5A
AUDIO INAUDIO OUT
1 4
322
6
2
Power / Mute
4
5
3
8
CHARGE FLEXMIKE NIGHTLY
9. Place the Flexmike into the cradle charger. The power button light will glow red and the Mic
status light will glow blue. When Flexmike is fully charged, the power button light on the mic
will change to green.
For complete operating instructions go to www.lightspeed-tek.com/TCA-usermanual (or scan
the 2D barcode below).
9
 Loading...