Lifescan FASTTAKE Manual
C O M P A C T B L O O D G L U C O S E M O N I T O R I N G S Y S T E M
Owner’s Booklet

FastTake
COMPACT BLOOD GLUCOSE MONITORING SYSTEM
Owner’s Booklet
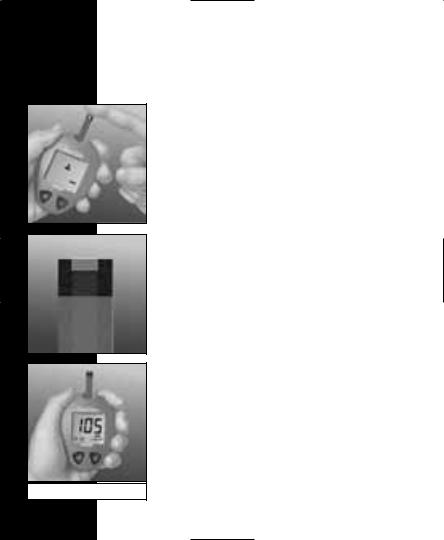
TEST SUMMARY
This summary is intended only for quick reference and not as a substitute for the OneTouch® FastTake® Owner’s Booklet.
Please read the entire booklet before you begin testing.
1.Insert test strip. Meter turns on automatically.
2.Apply sample. Touch a small drop of blood (1.5 microlitres) to the TOP WHITE EDGE of the test strip.
3.Hold the blood drop to the TOP WHITE EDGE of the test strip until blood has completely filled the confirmation window.
4.Accurate results in just 15 seconds.
(Example)
ii

Dear OneTouch® FastTake® System Owner:
You have chosen one of the best blood glucose monitoring systems available today. Inside this booklet is everything you must know about using the OneTouch® FastTake® System. Read it carefully and thoroughly before you begin testing.
Your OneTouch® FastTake® System provides you with accurate, plasma-calibrated test results. This feature makes it easier for you and your doctor to compare your meter results with laboratory results. If you’ve been using a blood glucose meter that doesn’t give plasma-calibrated test results, you may notice that your results with the OneTouch® FastTake® System will be about 12% higher.
Blood glucose monitoring plays an important role in diabetes control. A long-term study showed that keeping blood glucose levels close to normal can reduce the risk of diabetes complications by up to 60%.* The results you get with the OneTouch® FastTake® System can help you and your healthcare professional monitor and adjust your treatment plan to gain better control of your diabetes.
A warranty registration card is included with your OneTouch® FastTake® System. Please complete it and mail it to us. If you prefer to fill out a warranty card online, please visit www.LifeScan.com
*American Diabetes Association position statement on the Diabetes Control and Complications Trial (1993).
iii

The OneTouch® FastTake® System is intended for use outside the body (in vitro diagnostic use). It should be used only for testing glucose (sugar) and only with fresh capillary whole blood samples. It should not be used for the diagnosis of diabetes or for the testing of newborns.
CAUTION: Before using any product to test your blood sugar (blood glucose), read all instructions and practice the test. Do all quality control checks as directed and consult with a diabetes healthcare professional. These recommendations apply to all blood glucose monitoring systems and are supported by the American Association of Diabetes Educators, the American Diabetes Association, and the U.S. Food and Drug Administration.
iv

Important Information
•Severe dehydration and excessive water loss may cause false low results. If you believe you are suffering from severe dehydration, consult a healthcare professional immediately.
•Test results below 60 mg/dL (3.3 mmol/L) mean low blood glucose (hypoglycemia). Test results greater than 240 mg/dL (13.3 mmol/L) mean high blood glucose (hyperglycemia). If you get results below 60 mg/dL or above 240 mg/dL, and do not have symptoms, first repeat the test. If you have symptoms
or continue to get results that fall below 60 mg/dL or above 240 mg/dL, follow the treatment advice of your healthcare professional.
•If you are experiencing symptoms that are not consistent with your blood glucose test results AND you have followed all instructions described in the OneTouch® FastTake® Owner’s Booklet, call your healthcare professional.
•A red blood cell count (hematocrit) that is very high (above 55%) or very low (below 30%) can cause false results.
v

Table of Contents
GETTING STARTED . . . . . . . . . . . . . . . . . . . . . . . . . 1
The OneTouch® FastTake®
Blood Glucose Monitoring System . . . . . . . . . 1
OneTouch® FastTake® Blood Glucose Meter . 2
BEFORE TESTING . . . . . . . . . . . . . . . . . . . . . . . . . 8 Checking the Display . . . . . . . . . . . . . . . . . . . . 8 Coding the Meter . . . . . . . . . . . . . . . . . . . . . . . 8 Checking the System with
OneTouch® Ultra® Control Solution . . . . . . . . 11
TESTING YOUR BLOOD . . . . . . . . . . . . . . . . . . . . 17
Getting a Drop of Blood . . . . . . . . . . . . . . . . . 18
Fingertip Blood Sampling . . . . . . . . . . . . . . . 21
Arm Blood Sampling (“Alternate Site”) . . . . 22
Step-by-Step Test Procedure . . . . . . . . . . . . 26
Used Lancet Disposal . . . . . . . . . . . . . . . . . . 28
Special Messages . . . . . . . . . . . . . . . . . . . . . 29
USING THE METER MEMORY . . . . . . . . . . . . . . .30
vi

VIEWING TEST RESULTS
ON A PERSONAL COMPUTER . . . . . . . . . . . . . . .33 Data Downloading . . . . . . . . . . . . . . . . . . . . .33
COMPARING METER
AND LABORATORY RESULTS . . . . . . . . . . . . . . . 34
SETTING UP THE METER . . . . . . . . . . . . . . . . . . .36
Setting the Date, Time,
and Unit of Measurement . . . . . . . . . . . . . . .36
CARING FOR YOUR METER . . . . . . . . . . . . . . . . . 40
Maintenance . . . . . . . . . . . . . . . . . . . . . . . . . 40
Batteries . . . . . . . . . . . . . . . . . . . . . . . . . . . . . 41
DISPLAY MESSAGES
AND PROBLEM-SOLVING GUIDE . . . . . . . . . . . . 44
SPECIFICATIONS . . . . . . . . . . . . . . . . . . . . . . . . . 54
GUARANTEE . . . . . . . . . . . . . . . . . . . . . . . . . . . . 55
vii
viii

GETTING STARTED
The OneTouch® FastTake® Blood Glucose Monitoring System
The OneTouch® FastTake® Blood Glucose Monitoring System consists of three main products: the OneTouch® FastTake® Blood Glucose Meter, OneTouch® FastTake® Test Strips (sold separately), and OneTouch® Ultra® Control Solution. These products have been designed, tested, and proven to work together as a system to produce accurate blood glucose test results. Use only OneTouch® FastTake® Test Strips and OneTouch® Ultra® Control Solution with the OneTouch® FastTake® Blood Glucose Meter.
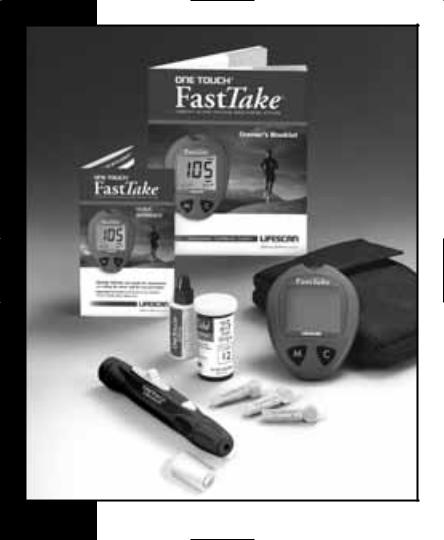
Your OneTouch® FastTake® System includes:
•OneTouch® FastTake® Meter
•OneTouch® FastTake® Test Strips
(test strips sold separately)
•OneTouch® Ultra® Control Solution
•OneTouch® UltraSoft™ Adjustable Blood Sampler
•OneTouch® UltraClear™ Cap
•OneTouch® UltraSoft™ Lancets
•Owner’s Booklet
•Sporty Carrying Case
•Quick Reference Guide
•Warranty Registration Card
•Logbook
•Two pre-installed 1.5 V (#357 or equivalent) silver oxide batteries
1
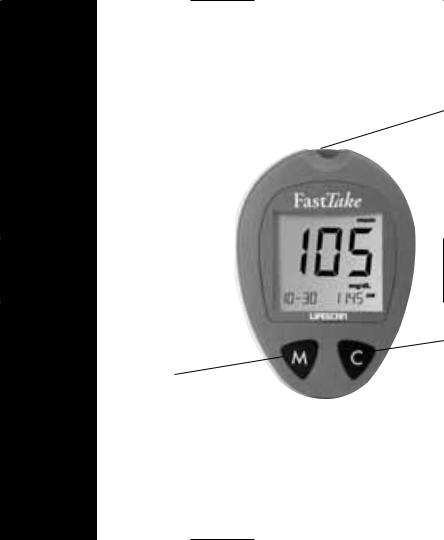
OneTouch® FastTake® Blood Glucose Meter
DISPLAY 
Your test results are displayed here. The large, easy-to-read display guides you through the test using symbols and simple messages.
M BUTTON
The M (Mode) button is used to set up the meter, enter the memory mode, and turn the meter on and off.
2

TEST/DATA PORT
The test/data port is where you insert the OneTouch® FastTake® Test Strip for testing. The meter will turn on automatically when you insert a test strip. The test/data port also accepts the OneTouch® FastTake® Adapter, which can be used to help download your test results to a computer for further analysis using OneTouch™ Diabetes Management Software.
C BUTTON
The C (Change) button is used to change the date and time, code number, and unit of measurement, as well as to indicate control solution tests and to review test results while in the memory mode.
3

OneTouch® FastTake® Meter Display Segments
CTL
Indicates a control solution test result.
CODE
Appears with the code number of the test strips currently in use.
BLOOD DROP SYMBOL
This symbol tells you when to apply the sample.
BATTERY SYMBOL
Appears when batteries are low or must be replaced.
4
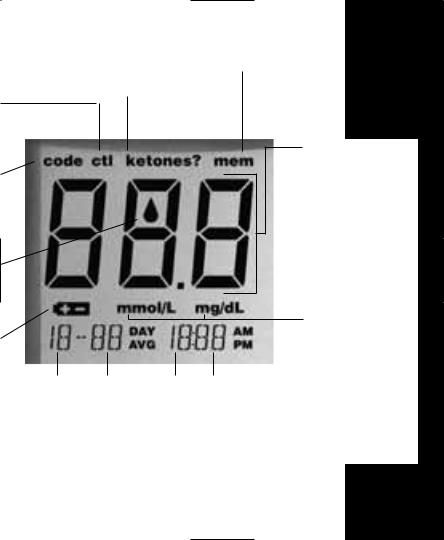
KETONES?
Appears when a blood glucose test result falls between 240 and
600 mg/dL
MEM
Indicates a test result stored in memory.
TEST RESULT AREA
Test results are displayed here. (A decimal point appears when the unit of measurement is millimoles per litre.)
UNITS OF MEASUREMENT
Depending upon how the meter is
MONTH DAY HOUR MINUTES set, either mmol/L or
mg/dL will appear with the test result.
5
OneTouch® FastTake® Test Strips (sold separately)
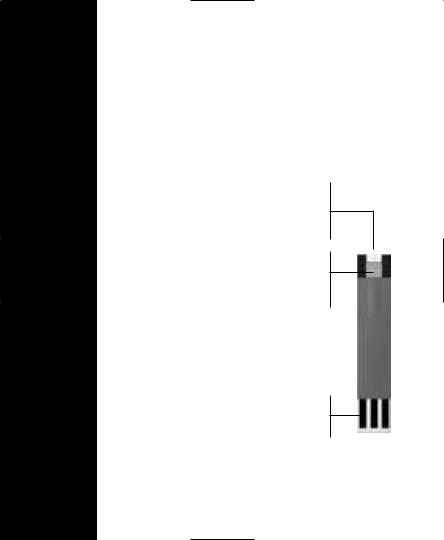
The OneTouch® FastTake® Blood Glucose Monitoring System measures the amount of sugar (glucose) in whole blood. Blood is applied to the TOP WHITE EDGE of the OneTouch® FastTake® Test Strip. The test strip automatically draws the blood into the reaction cell where the reaction takes place.
The OneTouch® FastTake® Test Strip consists of the following parts:
Top White Edge
This is where you apply a drop of blood.
Confirmation Window
This is where you confirm if enough blood has been applied to the top white edge.
Contact Bars
This end of the test strip is inserted into the meter.
See pages 17–29, Testing Your Blood, for complete instructions.
6

Important Test Strip Information
•Store the test strip package in a cool, dry place below 86°F (30°C). Keep away from direct sunlight and heat. Do not refrigerate.
•Store your test strips in their original vial only; do not transfer them to a new bottle or any other container.
•After removing a OneTouch® FastTake® Test Strip from the vial, immediately replace the vial cap and close it tightly.
•With clean, dry hands, you may touch the test strip anywhere on its surface when removing it from the vial or inserting it into the meter.
•Use each test strip immediately after removing it from the vial.
•Write the discard date on the vial label when you first open it. Discard remaining OneTouch® Ultra® Test Strips and the vial three months after first opening date.
•Apply only OneTouch® Ultra® Control Solution or a blood sample to the top white edge. Applying other substances to the top white edge will cause inaccurate results.
•Do not use test strips beyond the expiration date printed on the package since they may cause inaccurate results.
•Do not bend, cut, or alter a OneTouch® FastTake® Test Strip in any way.
WARNING: Keep the test strip vial away from children; the cap is a choking hazard. Also, the cap contains a pouch filled with drying agents that may be harmful if inhaled or swallowed and may cause skin or eye irritation.
7
BEFORE TESTING
Checking the Display
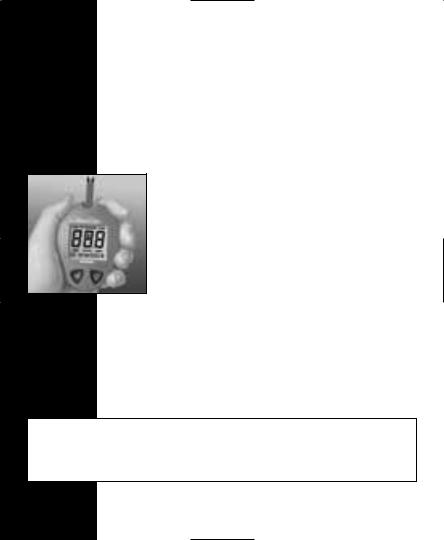
Each time you insert a test strip into the OneTouch® FastTake® Meter or turn the meter on, all segments of the display will appear briefly. This tells you that the system is performing several self-checks and allows you to confirm that all display segments are working properly. (See pages 4 and 5 for all display segments.)
Coding the Meter
Code numbers are used to calibrate the OneTouch® FastTake® Test Strips with the OneTouch® FastTake® Meter for accurate results. You must code the meter before using it for the first time and then every time you change to another vial of OneTouch® FastTake® Test Strips. Each time you test, check that the code number on the meter display matches the code number on the test strip vial.
CAUTION: If the code number displayed on the meter does not match the number printed on the vial, test results may be inaccurate.
8
STEP 1 Enter the Code Mode.
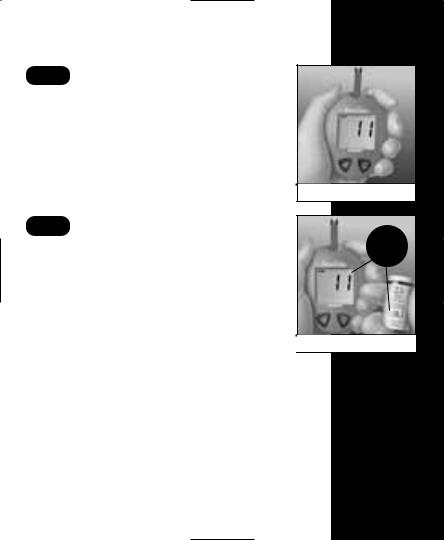
Start with the meter turned off. Insert a OneTouch® FastTake® Test Strip to turn on the meter. All segments of the display will appear followed by the date and time. Next, the code number will appear on the display for three seconds.
STEP 2 Match the Code Numbers.
Compare the code number on the meter display with the code number on the test strip vial. If the two code numbers match, you may begin testing. If they do not match, follow Step 3. When you first use the meter, three dashes (Q) will appear, showing that there is no code stored in the memory.
(Example)
(Example)
9
(Example)
(Example)
STEP 3 Code the Meter.
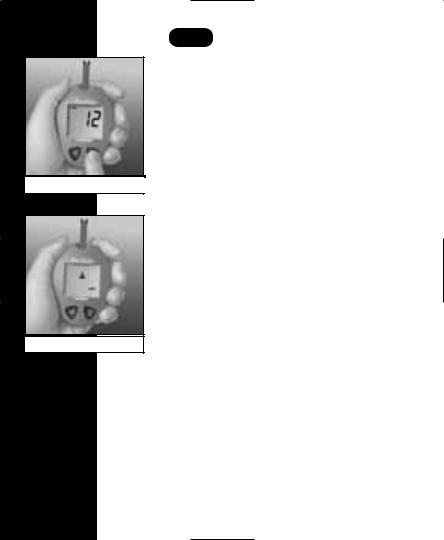
Press the C button to select the correct code. Each time you press and release the C button, the number will increase by one. To move faster, simply press and hold the C button. After you have selected the correct code number, it will flash for three seconds and then appear solid for three seconds. Then the R symbol will appear, indicating that the OneTouch® FastTake® System is ready for testing.
10
Checking the System with OneTouch® Ultra® Control Solution
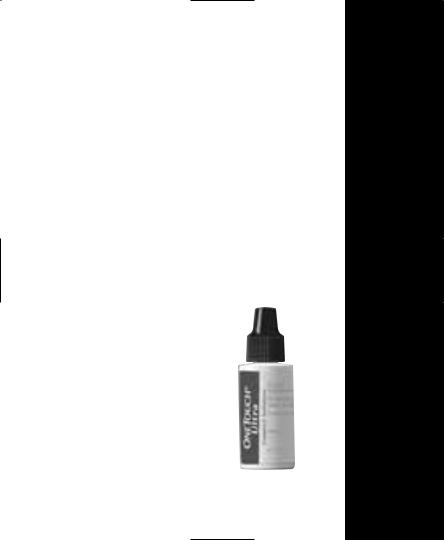
OneTouch® Ultra® Control Solution is used to check that the meter and test strips are working together as a system and that you are performing the test correctly. It is very important that you do this simple check routinely to make sure you get accurate results.
OneTouch® Ultra® Control Solution contains a known amount of glucose that reacts with OneTouch® FastTake® Test Strips. Compare your control solution test results with the expected range printed on the test strip vial label.
Control solution should be used to:
•Practice the test procedure.
•Make sure your meter and test strips are working together properly.
•Ensure you are performing the test correctly.
11
 Loading...