How it Works
Log In / Sign Up
Buy Points
How it Works
FAQ
Contact Us
Questions and Suggestions
Users
LG
Loading...
S
SJ6
36
SJ6B
4
SJ7
56
SJ7S
2
SJ8
67
SJ8S
12
SJ9
67
sk-07c
sk-07h. sk-09h
sk-09c
SK1
49
SK10Y
66
sk-12c
sk-12h
sk-18c
SK-18H
2
SK-19H
SK1D
22
sk-24c
SK3E
2
SK4D
20
SK5
67
SK5R
35
SK5Y
9
SK6
24
SK6F
29
SK6FF
SK6RF
SK6Y
6
SK8
59
SK8000PUA
SK8Y
14
SK95
SK9Y
51
SK-D19C
SK-D21C
SK-D21H
SKSDR360GS
SKSDR480SIS
SKSDW2401S
SKSDW2402P
SKSFD3604P
3
SKSFD3613S
2
SKSFJ800P
SKSGR360GS
SKSIT3601G
SKSMC2401S
SKSOV2411S
SKSPK185CS
SKSPK245CS
SKSPK305CS
SKSPK360FS
SKSWK185LS
SKSWK245LS
SKSWK245RS
SK-T30H
SL10Y
33
SL10YG
25
sl1200mk2
SL122CR
SL182CR
SL2GLC-01P
SL3D
SL4
23
SL4F
2
SL4R
3
SL4Y
49
SL5R
24
SL5Y
75
SL5YF
2
SL6Y
35
SL6YF
34
SL7Y
33
SL7YF
6
SL8Y
42
SL8YG
31
SL8YGA
2
SL9Y
35
SL9YG
29
SLB570C LGENT
Slim Portable DVD Writer
2
SLM3D
SM20B
SM20S
SM20W
SM282CE
2
SM8600PUA
SM9070PUA
Smart BP620
Smart TV
SMB-007
SMB776C
SMC250USB
2
SMW5570
SN05ACR
SN05DLG-2
SN05DLX
SN05DVX
SN05ICE
SN05ICEX
Loading...
Loading...
Nothing found
SKSPK245CS
Owner’s Manual
124 pgs
8.1 Mb
0
Table of contents
Loading...
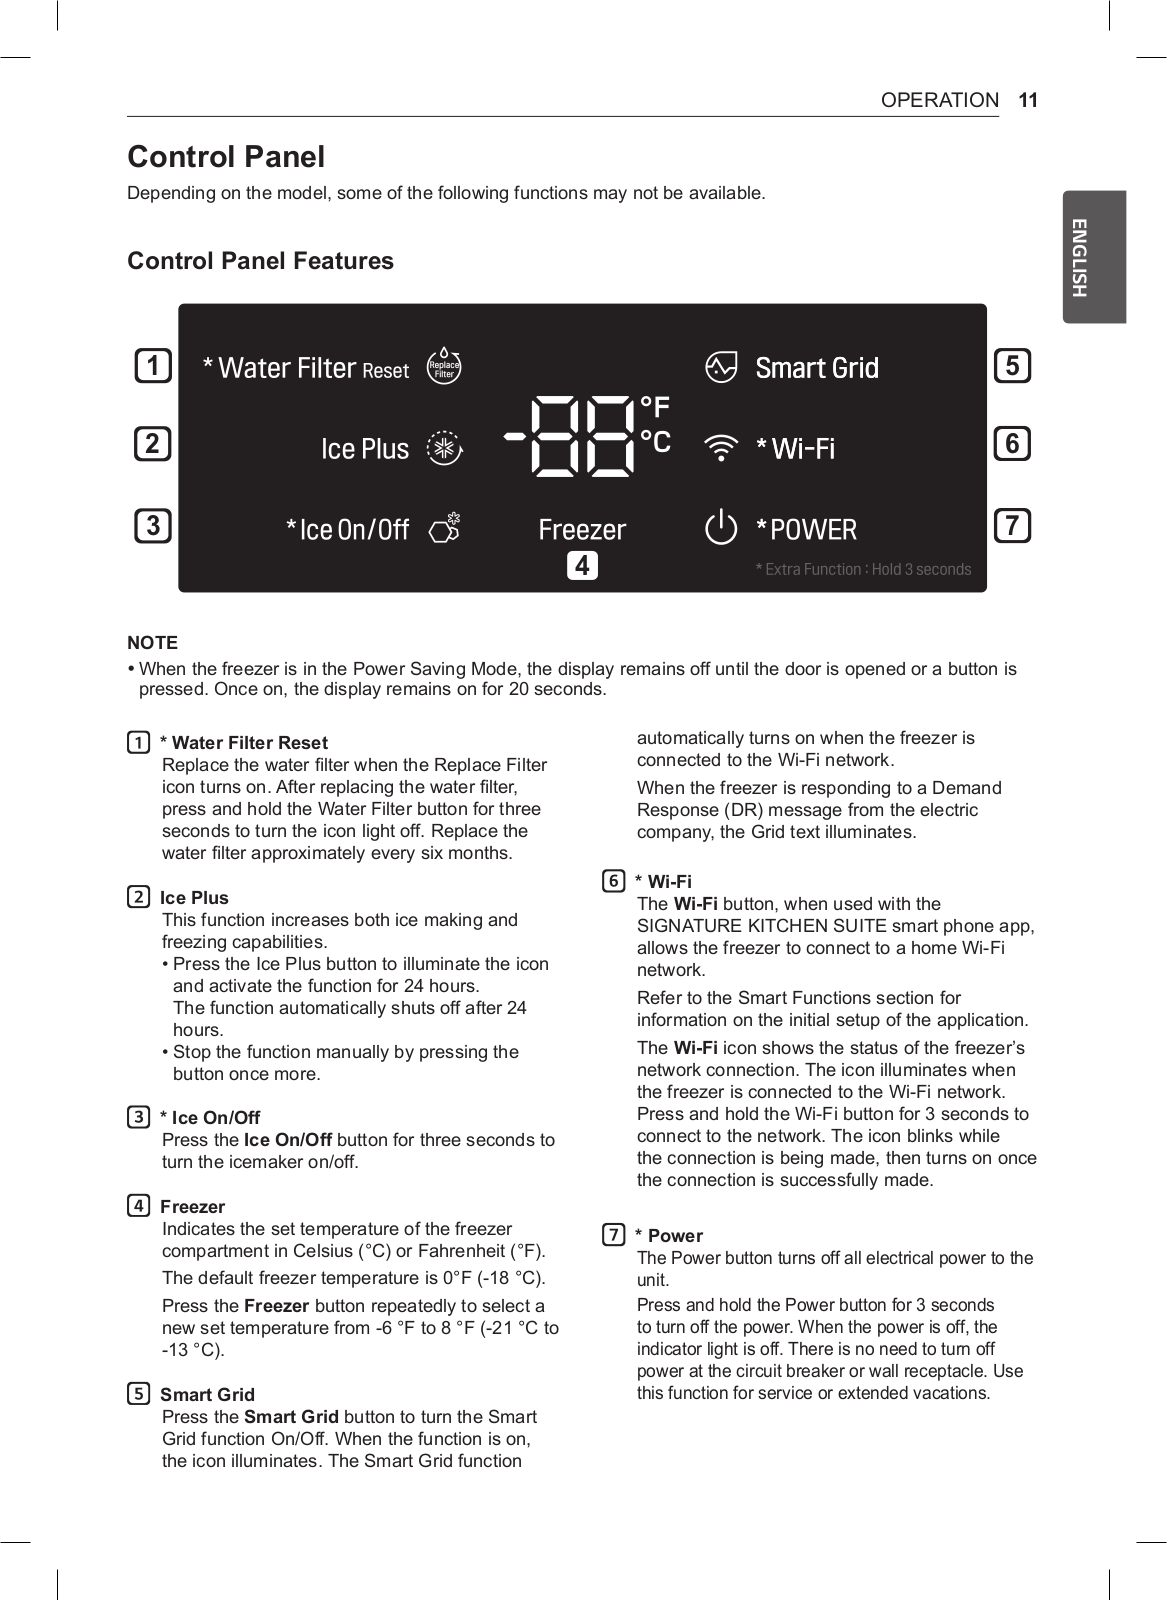
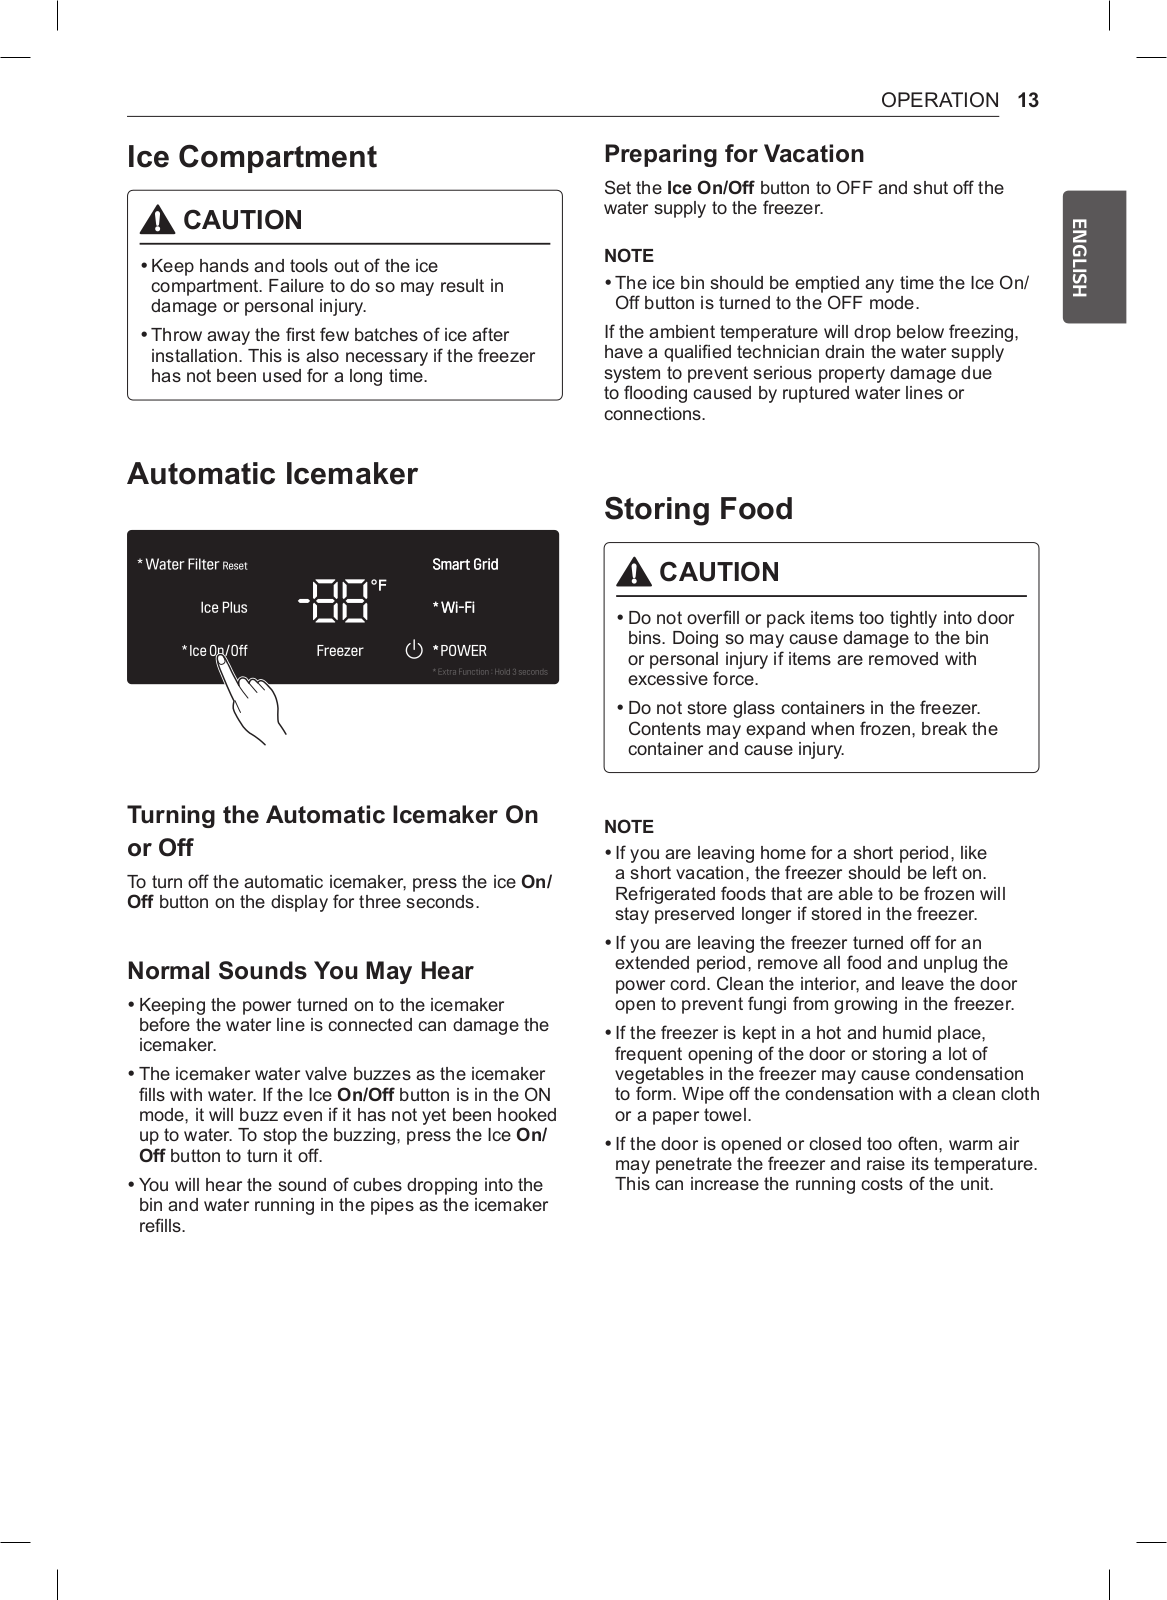
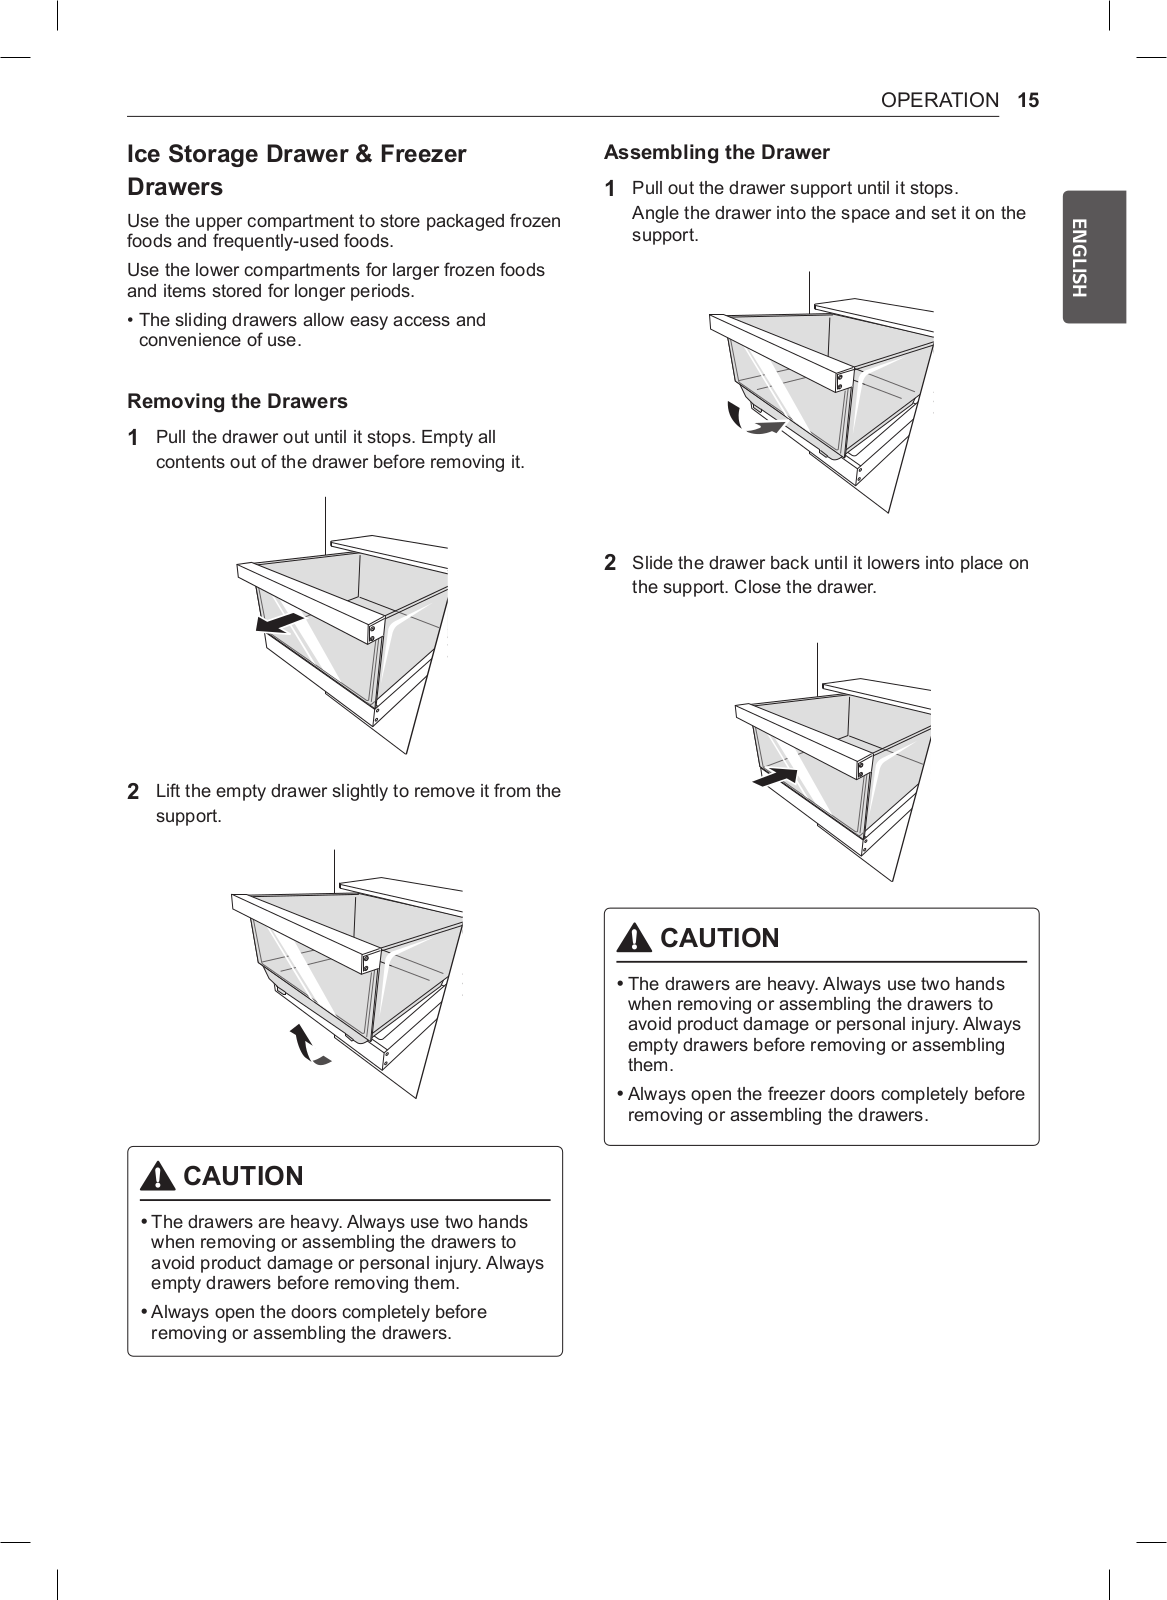
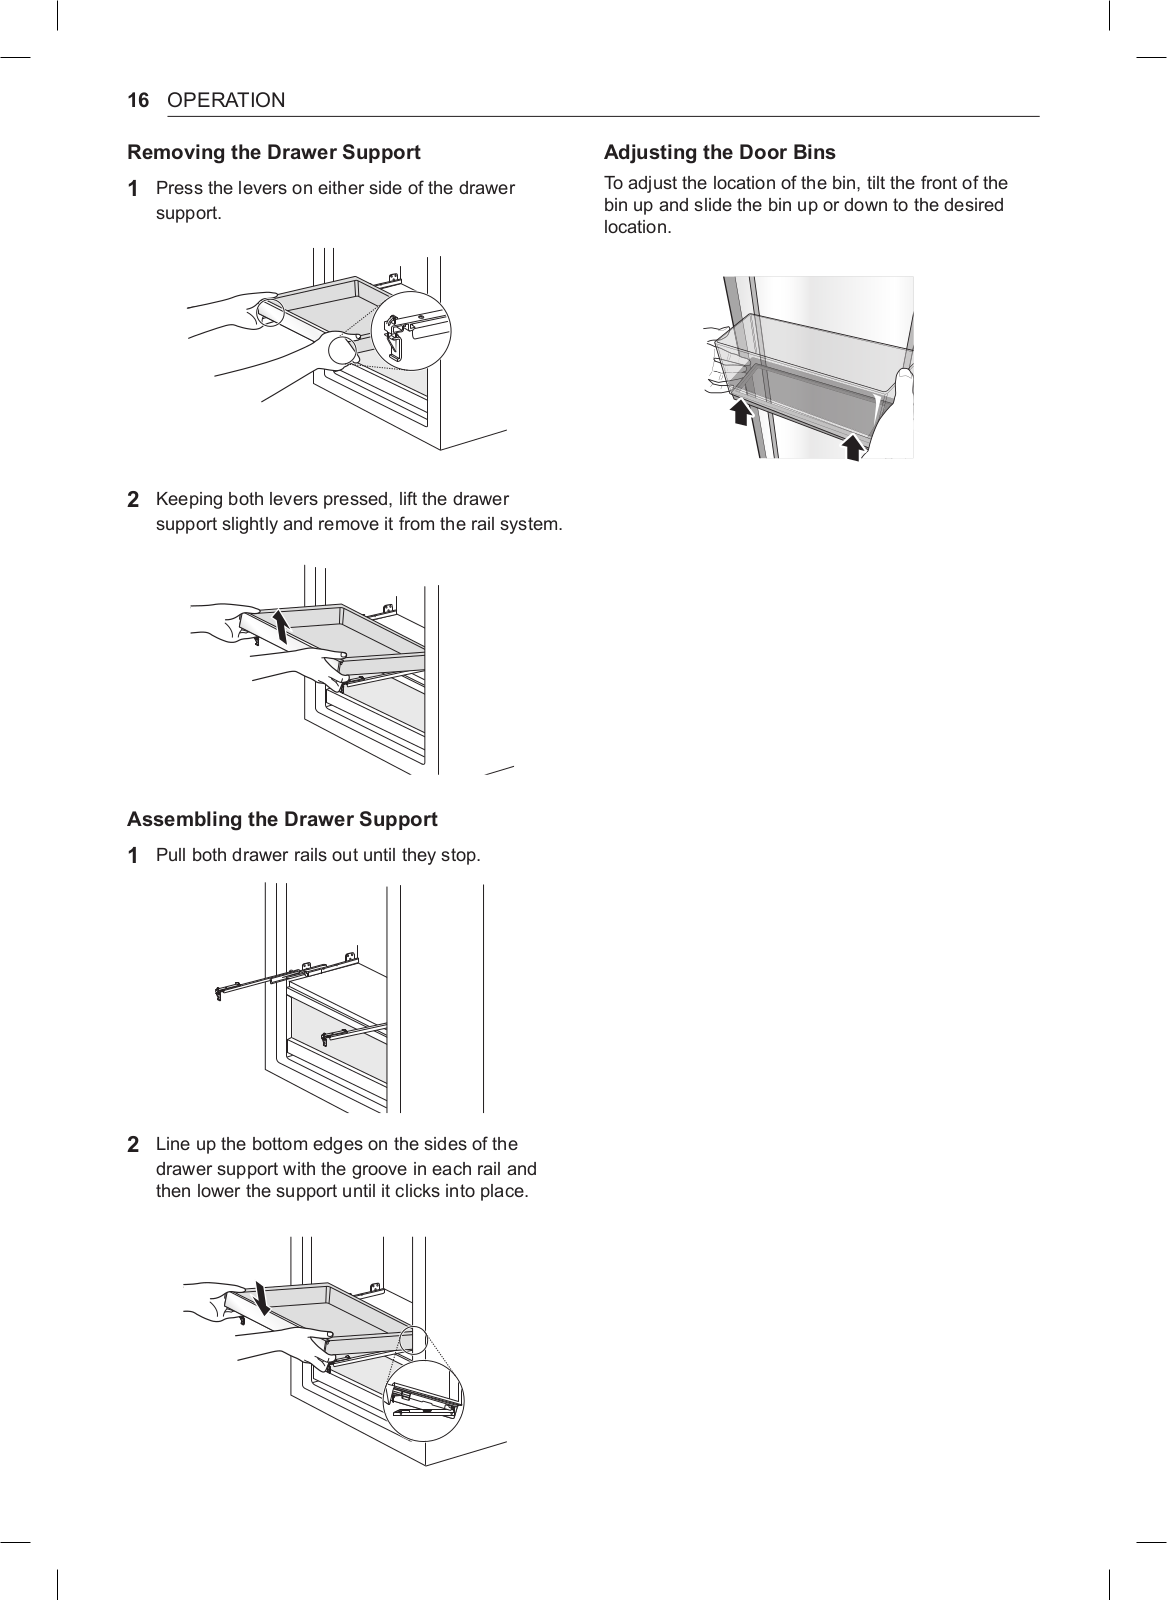
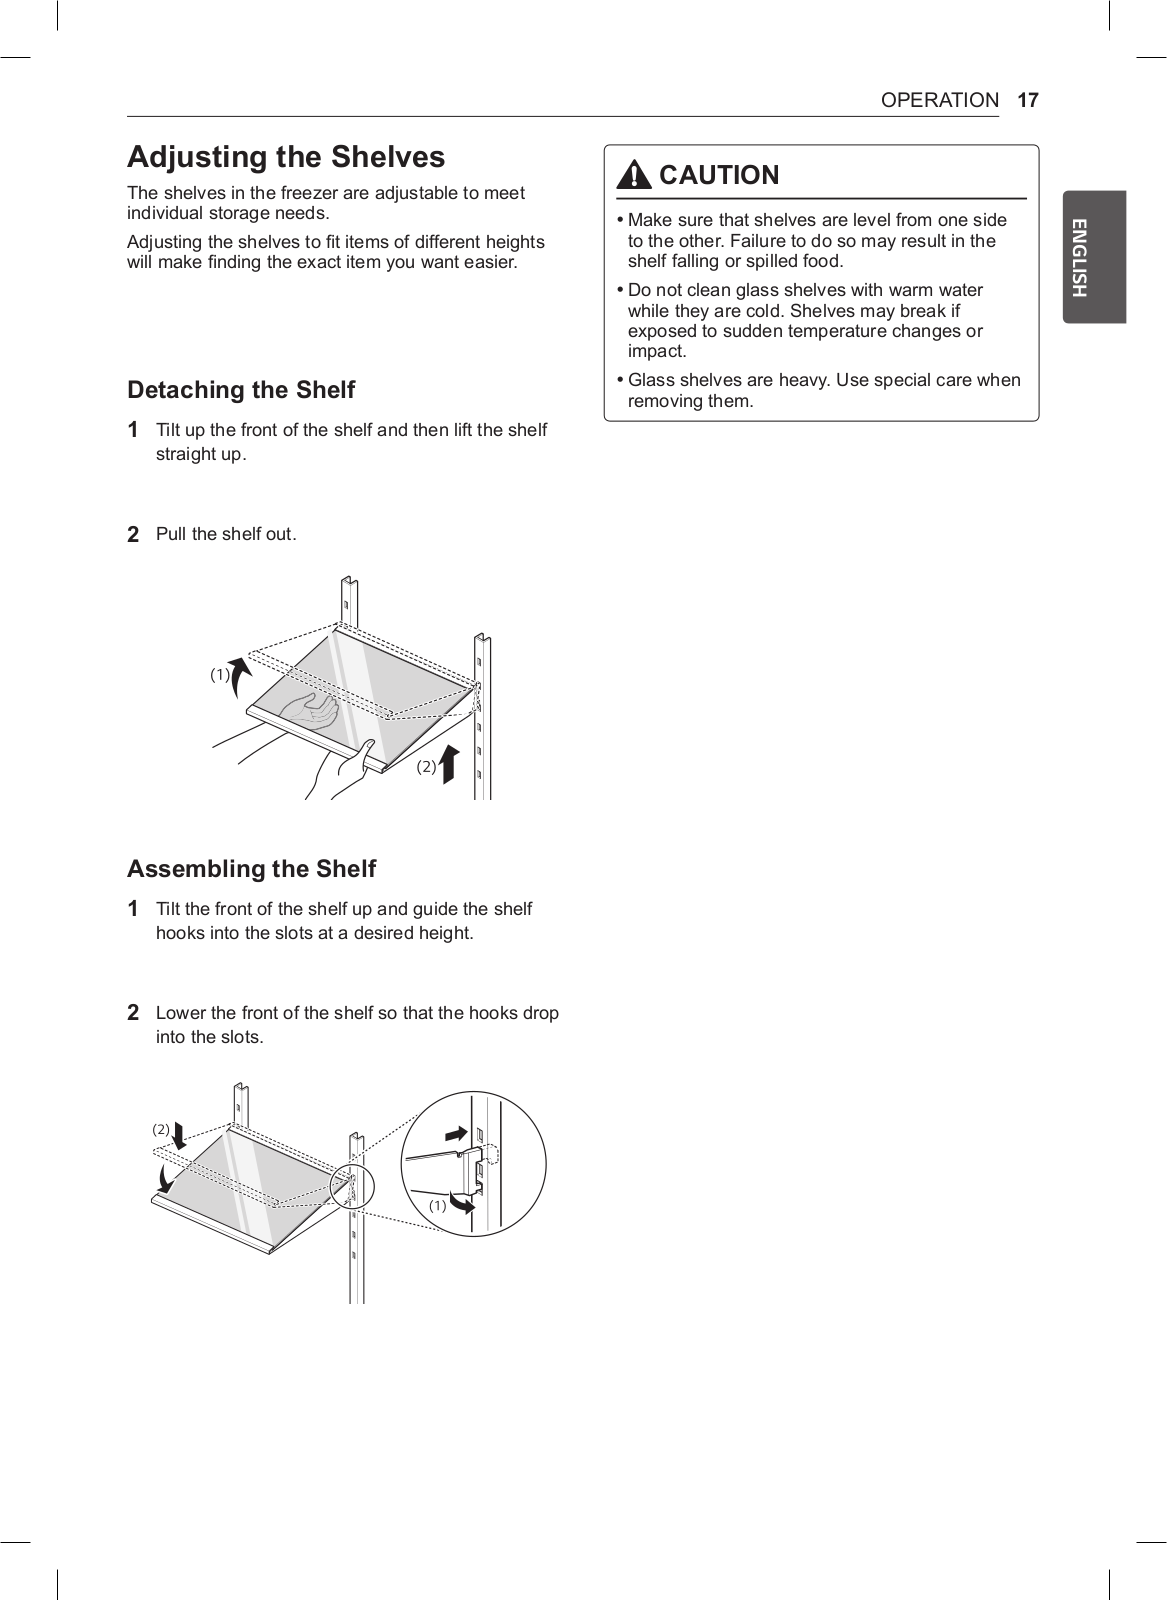
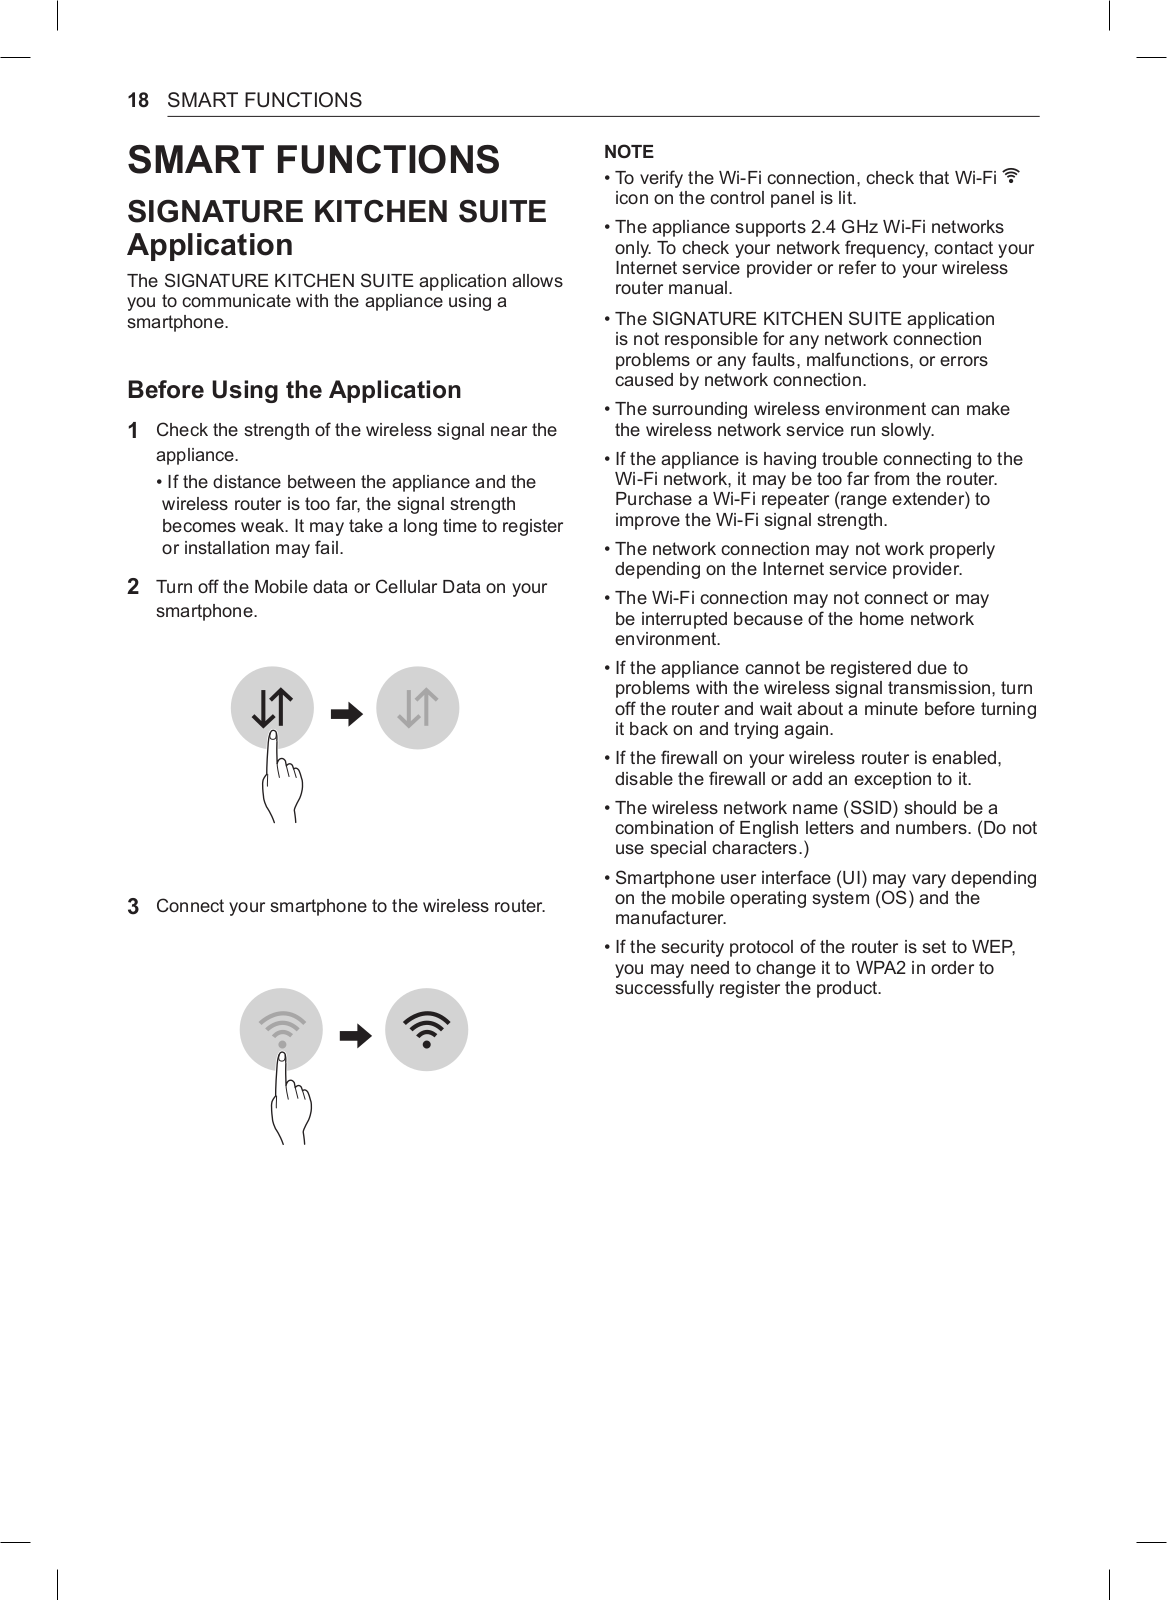
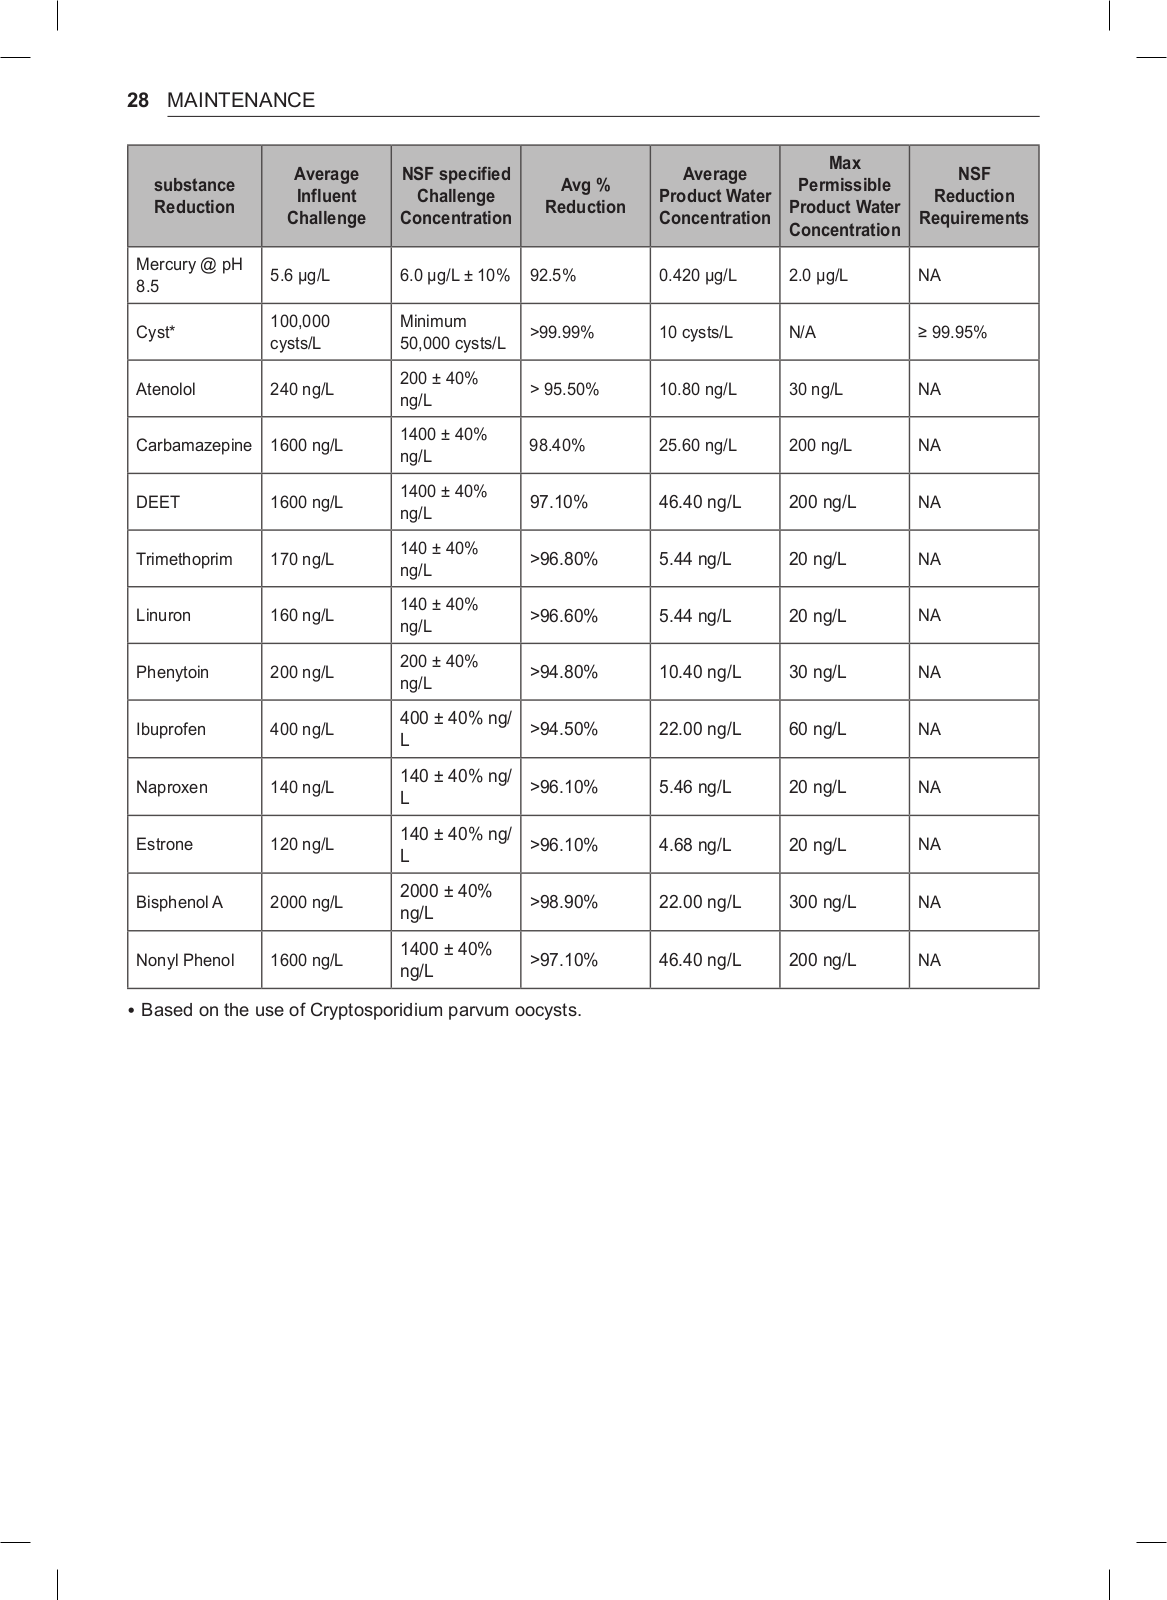
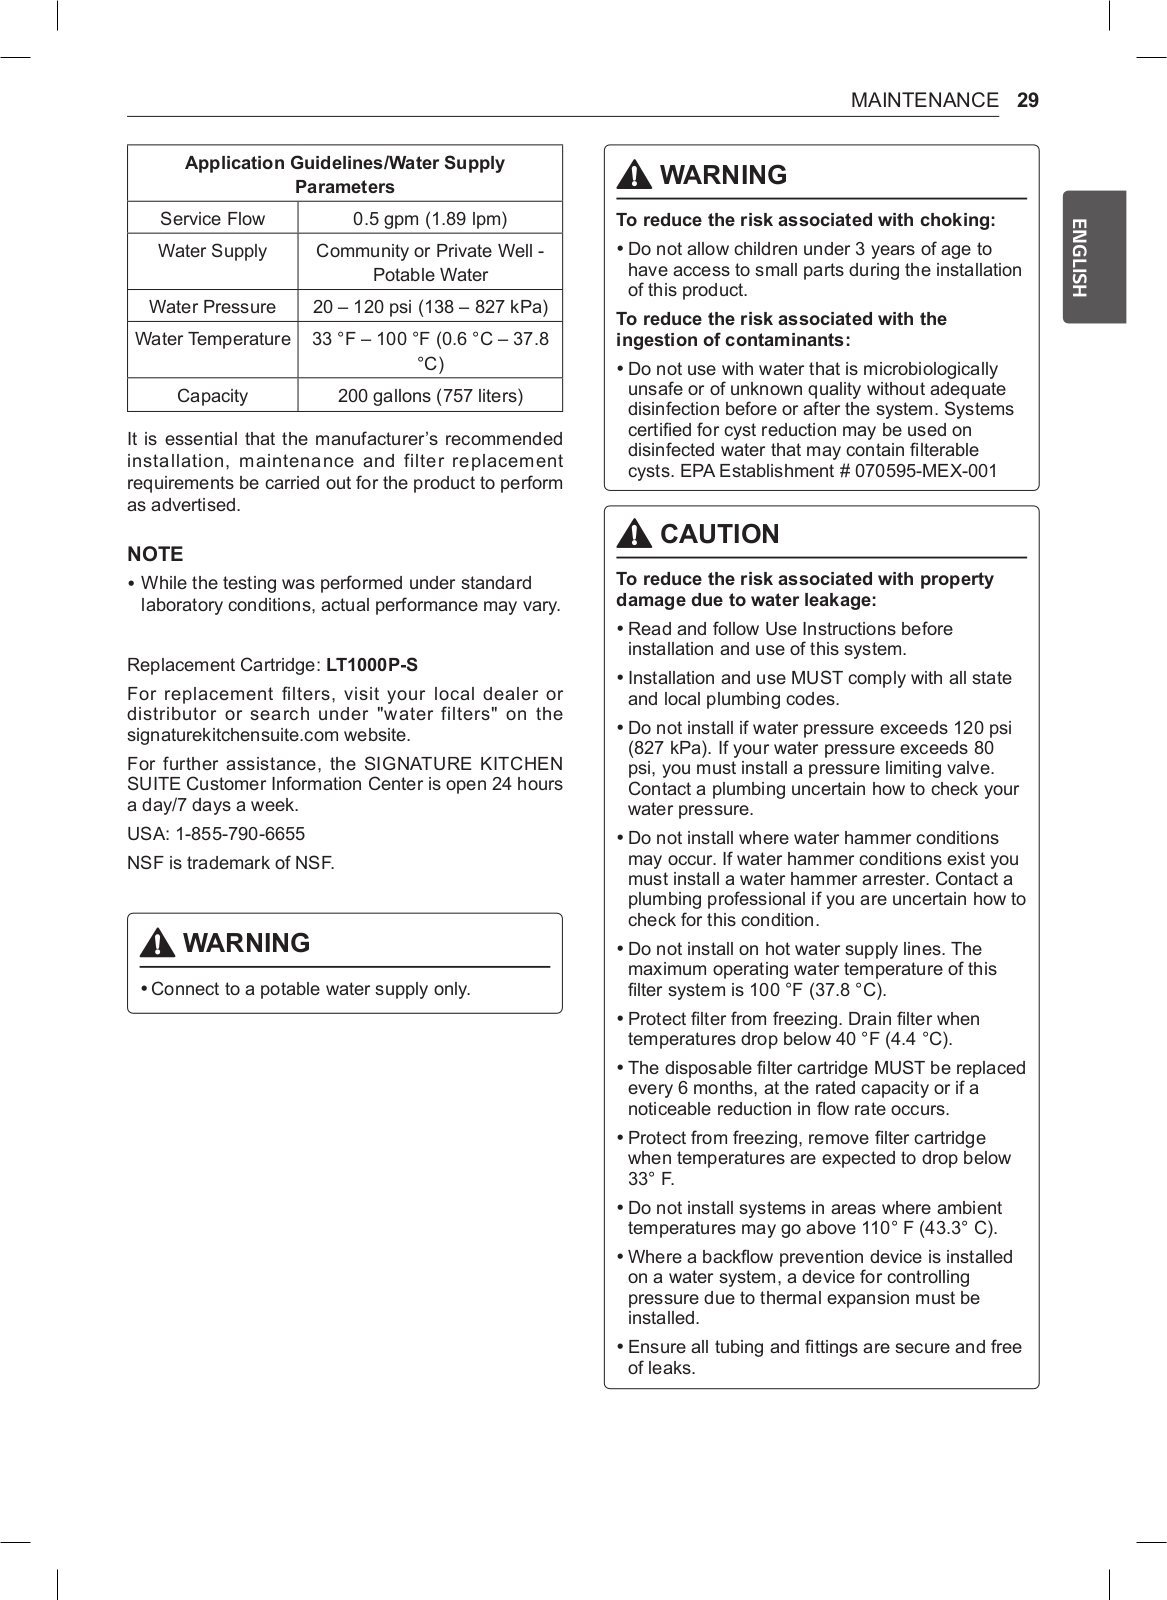
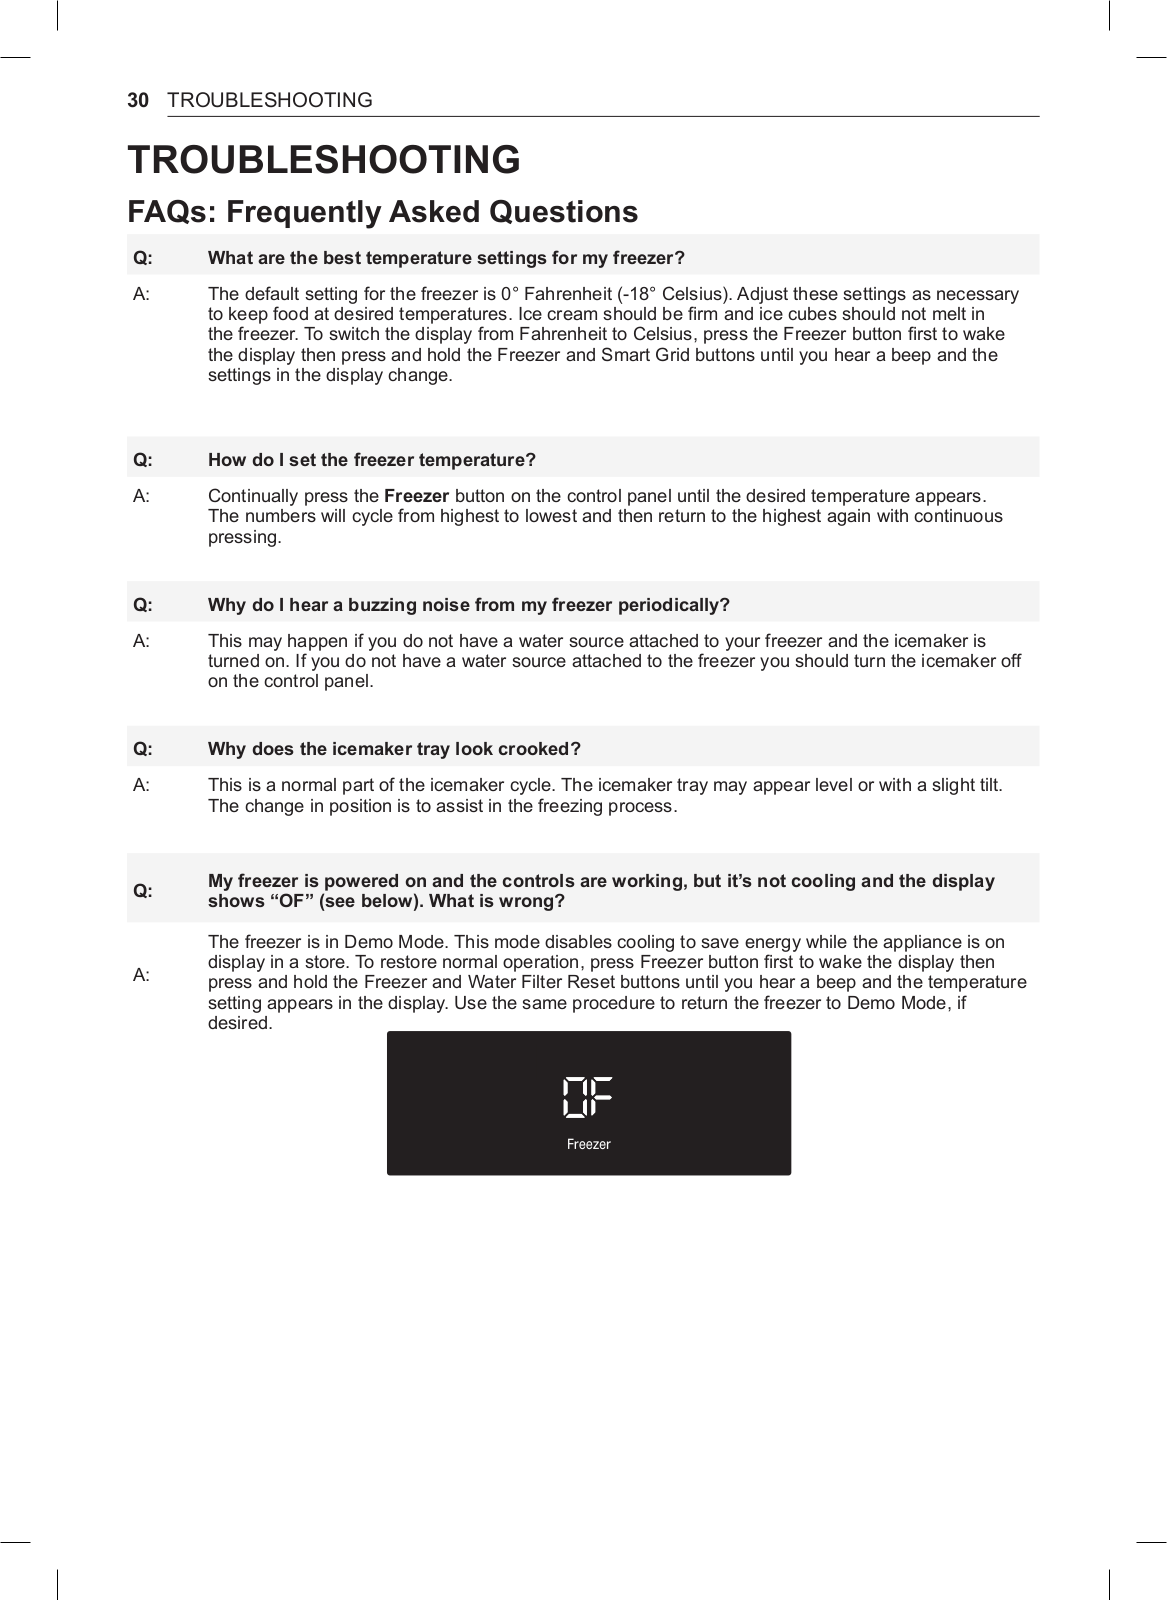
LG SKSPK245CS Owner’s Manual
...
LG Owner’s Manual
Download
Specifications and Main Features
Frequently Asked Questions
User Manual
Download
Loading...
+
94
hidden pages
Unhide
You need points to download manuals.
1 point = 1 manual.
You can buy points or you can get point for every manual you upload.
Buy points
Upload your manuals
 Loading...