How it Works
Log In / Sign Up
Buy Points
How it Works
FAQ
Contact Us
Questions and Suggestions
Users
LG
Loading...
P
PH300W
2
PH30JG
23
PH30JG.AEK
PH30N
14
PH3G
11
PH4
26
PH450U
2
PH450UG
20
PH450UGV
2
PH4R
4
PH510PG
12
PH550
7
PH550G
22
PH550GV
8
PHLLA
PHLTA
PHLTB
PHNFP14A0
Phoenix
Phoenix 3
Phoenix Plus
PHONE 150
phones
Photon19Vision
PI485
3
PICOCELLBTS
PIVD100R
PJ2
10
PJ250R
PJ2B
2
PJ3
8
PJ3B
PJ8B
3
PJ9
14
PJS9W
PK3
42
PK3L
PK3W
11
PK5
41
PK5L
PK5W
4
PK7
42
PK750
PK7L
2
PK7-N
2
PK7W
7
PK950N
PL2
37
PL2B
11
PL2B.DCISLLK
PL2C
2
PL2.DCISLLK
PL2M
2
PL2P
12
PL2P.DCISLLK
PL2S
2
PL2S.DCISLLK
PL2W
8
PL2W.DCISLLK
PL-43A82T
3
PL-48A82T
3
PL5
47
PL-53A82T
3
PL5.DCISLLK
PL5W
8
PL5W.DCISLLK
PL7
44
PL7.DCISLLK
PL7W
9
PL7W.DCISLLK
Plasma
2
Plasma One Point Repair 2004
Plasma PDP
PLASMA TV
20
PLDC-P005A_CKD
PLDE-P008A
PL-F860
PLMB186CC
PLMB186KC
PLNWKB000
11
PL-S860
PM01122-A
PM05SP
PM07SP
PM09EP
2
PM09SP
2
PM1
5
PM12EP
PM12SP
7
PM18SP
PM19BA
PM20GA
PM225
4
PM-325
4
PM5
4
PM7
4
PM9700
PM97-Z
PMBD3620
4
PMBD3630
3
Loading...
Loading...
Nothing found
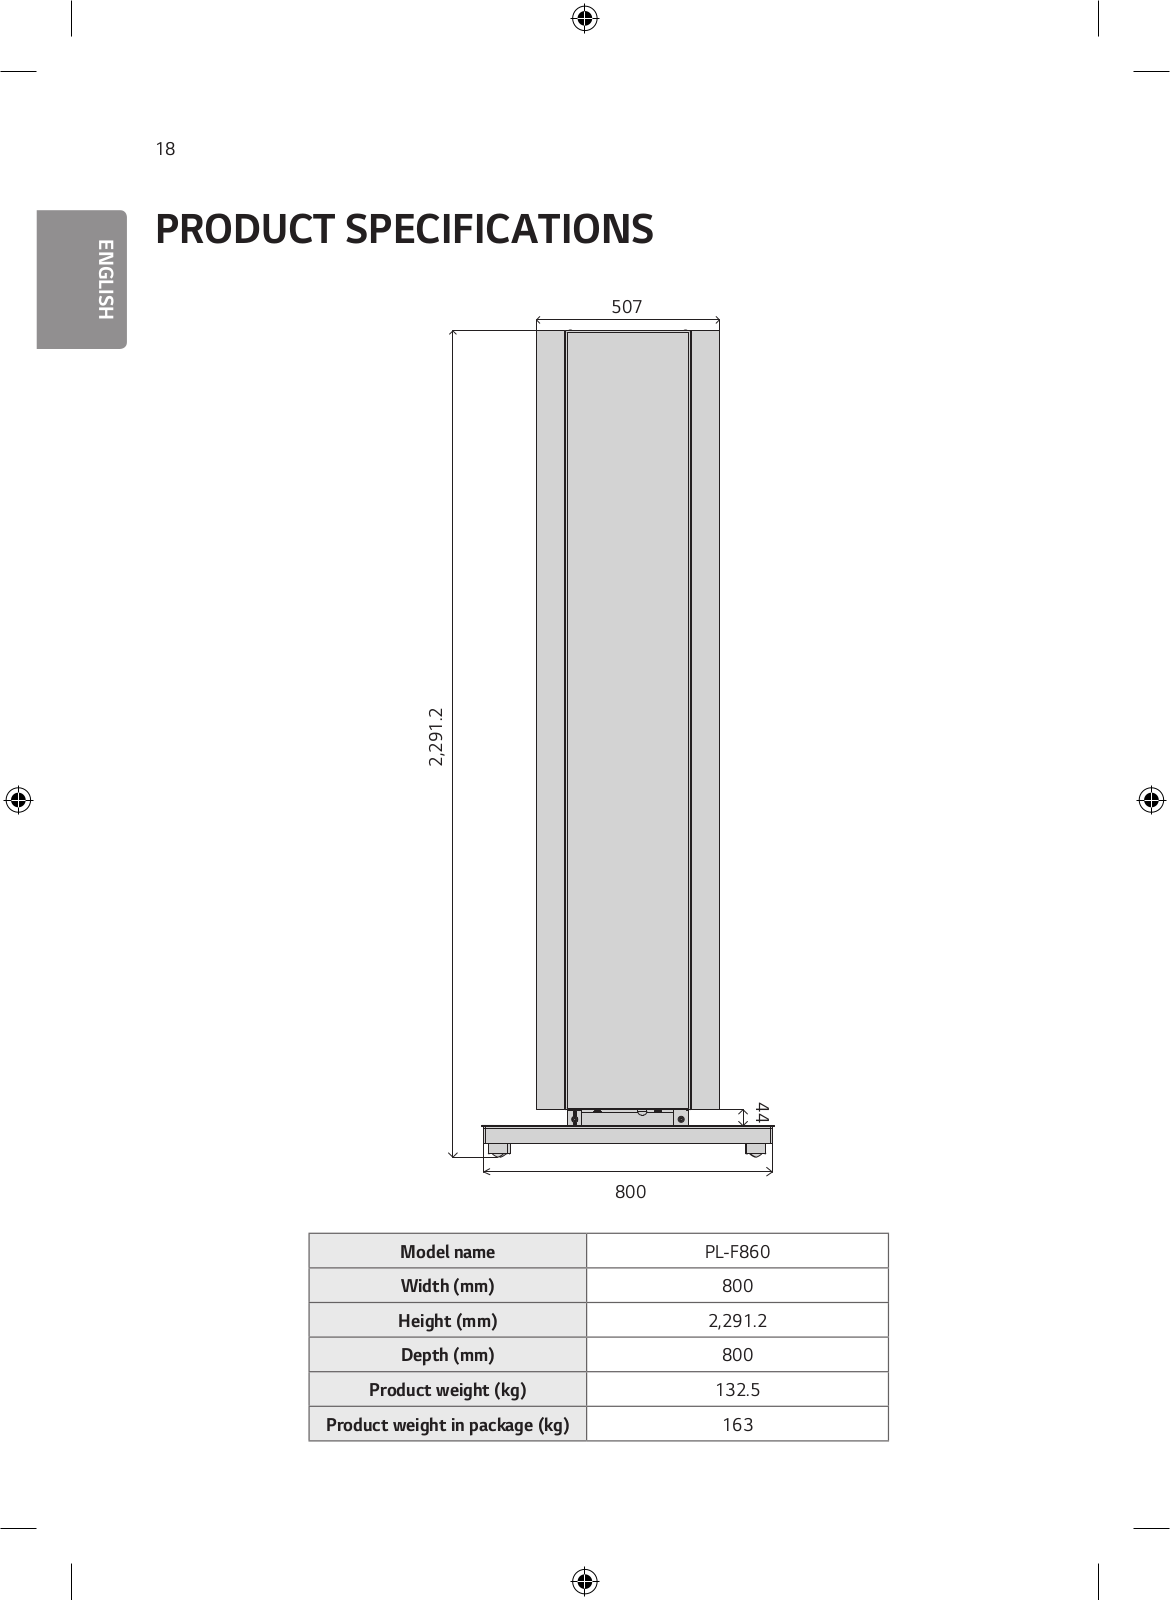
PL-F860
Owner’s Manual
60 pgs
36.32 Mb
0
Table of contents
Loading...
LG PL-F860 Owner’s Manual
...
LG Owner’s Manual
Download
Specifications and Main Features
Frequently Asked Questions
User Manual
Download
Loading...
+
42
hidden pages
Unhide
You need points to download manuals.
1 point = 1 manual.
You can buy points or you can get point for every manual you upload.
Buy points
Upload your manuals
 Loading...