

Page 1

Owner's Manual
DLP PROJECTOR
Please read this manual carefully before operating
your projector and retain it for future reference.
PG60G
P/NO : MFL67868401 (1306-REV01)
www.lg.com
Page 2
2
LICENSES
LICENSES
Supported licenses may differ by model. For more information about licenses,
visit www.lg.com.
Manufactured under license from Dolby Laboratories.
“Dolby “and the double-D symbol are trademarks of Dolby
Laboratories.
ABOUT DIVX VIDEO: DivX® is a digital video format created by
DivX, LLC, a subsidiary of Rovi Corporation. . This is an official
DivX Certified® device that plays DivX video. Visit divx.com for
more information and software tools to convert your files into
DivX video.
ABOUT DIVX VIDEO-ON-DEMAND: This DivX Certified®
device must be registered in order to play purchased DivX
Video-on-Demand (VOD) movies. To obtain your registration
code, locate the DivX VOD section in your device setup menu.
Go to vod.divx.com for more information on how to complete
your registration.
“DivX Certified® to play DivX® video up to HD 1080p, including
premium content.”
“DivX®, DivX Certified® and associated logos are trademarks
of Rovi Corporation or its subsidiaries and are used under
license.”
“Covered by one or more of the following U.S. patents :
7,295,673; 7,460,668; 7,515,710; 7,519,274”
The terms HDMI and HDMI High-Definition Multimedia Interface,
and the HDMI logo are trademarks or registered trademarks of
HDMI Licensing LLC in the United States and other countries.
This device meets the EMC requirements for home appliances (Class B) and is
intended for home usage. This device can be used in all regions.
NOTE
Image shown may differ from your projector.
y
Your projector’s OSD (On Screen Display) may differ slightly from that shown in
y
this manual.
Page 3
SAFETY INSTRUCTIONS
WARNING/CAUTION
RISK OF ELECTRIC SHOCK
DO NOT OPEN
SAFETY INSTRUCTIONS
3
Please take note of the safety instructions to prevent any potential accident
or misuse of the projector.
Safety precautions are given in two forms, i.e. Warning and Caution as detailed below.
y
WARNING:
CAUTION:
Read the owner's manual carefully and keep it to hand.
y
to the presence of uninsulated
“dangerous voltage” within the
product’s enclosure that may be of
sufficient magnitude to constitute a
risk of electric shock to persons.
operating and maintenance
(servicing) instructions in the literature
accompanying the appliance.
WARNING/CAUTION
- TO REDUCE THE RISK OF FIRE
AND ELECTRIC SHOCK, DO NOT
EXPOSE THIS PRODUCT TO RAIN
OR MOISTURE.
Failure to follow the instructions may cause serious injury and even death.
Failure to follow the instructions may cause injury to persons or damage
to the product.
Read these instructions.
WARNING/CAUTION
RISK OF ELECTRIC SHOCK
DO NOT OPEN
Keep these instructions.
Heed all warnings.
Follow all instructions.
The lightning flash with
arrowhead symbol, within
Indoor Installation
an equilateral triangle, is
intended to alert the user
WARNING
Do not place the projector in direct
y
sunlight or near heat sources such as
radiators, fires, stoves, etc.
- This may cause a fire.
Do not place flammable materials
y
The exclamation point within
an equilateral triangle is
intended to alert the user to
the presence of important
such as aerosols near the projector.
- This may cause a fire.
Do not allow your children to cling to
y
or climb up to the projector.
- The projector may fall down and
cause personal injury or death.
Do not place the projector directly on
y
a carpet, rug or place where ventilation is restricted such as a book shelf
or closet.
- This may cause the projector's internal temperature to rise and cause
a fire.
Do not place the projector close to
y
sources of steam or oil such as a
humidifier or kitchen counter.
- This may cause a fire hazard or an
electric shock.
ENGLISH
Page 4

4
SAFETY INSTRUCTIONS
Do not place the projector where it
y
might be exposed to excessive dust.
- This may cause a fire.
Do not use the projector in a damp
y
place such as a bathroom where it is
likely to get wet.
- This may cause a fire or an electric
shock.
Do not allow a tablecloth or curtain to
y
block the vents.
- This may cause the internal temperature of the projector to rise and
cause a fire.
The distance between the projector
y
and the wall should be more than 30
cm for ventilation purposes.
- Otherwise, this may cause the internal temperature of the projector to
rise and cause a fire.
CAUTION
When installing the projector on a
y
table, be careful not to place it near
the edge.
- The projector may fall causing injury
to persons or damage to the projector. Make sure that you use a stand
suitable for the size of projector.
Turn off the projector, disconnect the
y
power supply and remove all connec
tions before moving the projector.
- A damaged cord may cause a fire
or an electric shock.
Do not install the projector on an
y
unstable or vibrating surface such as
a vibrating shelf or tilted surface.
- It may fall and cause injury.
Be careful not to tip the projector over
y
when connecting external devices to
the projector.
- This may cause injury to persons or
damage to the projector.
Power
WARNING
The ground wire should be connect-
y
ed.
- Inappropriate earth grounding may
cause damage to the projector or
an electric shock when there is an
electrical surge.
If the projector must be installed at
a place where earth grounding is not
possible, purchase a circuit breaker
and connect the projector to its wall
outlet.
Do not ground the projector to the
gas pipe, water pipe, lightning rod or
telephone line, etc.
The power plug should be fully insert-
y
ed into the wall outlet.
- Unstable connection may cause a
fire.
Do not place heavy objects on the
y
power cord or place the cord underneath the projector.
- This may cause a fire or an electric
shock.
Never touch the power plug with a
y
wet hand.
- This may cause an electric shock.
Do not connect too many devices to
y
the same power extension.
- Overheating may cause a fire.
Remove dust or contaminants around
y
power plug pins or wall outlets.
- This may cause a fire.
To turn off the main power, remove
y
the power plug, which should be
positioned so it is easy to access for
operation.
Page 5

SAFETY INSTRUCTIONS
5
CAUTION
Hold the plug firmly when unplug-
y
ging.
- A broken wire in the cord may
cause a fire.
Ensure the power cord or plug is not
y
damaged, modified, severely bent,
twisted, pulled, sandwiched or heated.
Do not use a loose wall outlet.
- This may cause a fire or an electric
shock.
Keep the power cord away from any
y
heating devices.
- The cord coating may melt and
cause an electric shock.
Place the projector where people will
y
not trip over or tread on the power
cord or plug to protect the power
cord and plug from any damage.
- This may cause a fire hazard or an
electric shock.
Do not turn the projector on or off by
y
plugging in the power plug or unplugging it from the wall outlet.
(Do not use the power plug as a
switch.)
- This may cause an electric shock or
damage to the projector.
Do not insert a conductor into the
y
other side of the wall outlet while the
power plug is inserted into the wall
outlet.
In addition, do not touch the power
plug immediately after it is disconnected from the wall outlet.
- This may cause an electric shock.
Use only the official power cord which
y
is provided by LG Electronics, Inc. Do
not use other power cords.
- This may cause a fire or an electric
shock.
When in Use
WARNING
Do not place anything containing
y
liquid, such as a vase, flowerpot, cup,
cosmetics, chemicals, decorations or
candles, etc., on top of the projector.
- Possible fire, electric shock or falling
may cause physical injury.
In the event that there is a big im-
y
pact to the projector or the cabinet is
damaged, switch it off, unplug it from
the wall outlet and contact an authorized service center.
- Otherwise, this may cause a fire or
an electric shock.
Do not insert pieces of metal such as
y
coins, hairpins or metal debris, nor
flammable materials such as paper or
matches into the projector.
- This may cause a fire or an electric
shock.
In the event that liquid or a foreign
y
object falls into the projector, please
switch it off and unplug it from the
wall outlet and contact an LG Electronics Service Center.
- Otherwise, this may cause a fire or
an electric shock.
When replacing a battery of the re-
y
mote control, make sure a child does
not swallow the battery. Keep the battery out of reach of children.
- In the case of a battery being swallowed by a child, please consult a
doctor immediately.
Do not remove any covers except for
y
the lens cap. There is a high risk of
electric shock.
ENGLISH
Page 6

6
SAFETY INSTRUCTIONS
Do not look directly into the lens
y
when the projector is in use. The
strong light may damage your eyes.
When the lamp is on or has just been
y
turned off, avoid touching the air vent
or lamp because these will be very
hot.
If there is a gas leak, do not touch
y
the wall outlet. Open the window for
ventilation.
- A spark may cause a fire or burn.
Never touch the projector or power
y
cord during thunder or lightning.
- This may cause an electric shock.
Do not use the projector near an
y
electronic device which generates a
strong magnetic field.
Store the vinyl envelope used to pack
y
the projector in a safe place away
from children.
- It could cause suffocation if used
improperly.
Do not keep your hand on the projec-
y
tor for a long time when it is running.
When you play a game by connecting
y
a game console to a projector, it is
recommended that you maintain a
distance of more than four times the
diagonal length of the screen.
Make sure that the length of
y
connecting cable is long enough.
Otherwise, the product may fall
causing personal injury or damage to
the product.
CAUTION
Do not place a heavy object on the
y
projector.
- It may fall down and cause physical
injury.
Be careful to prevent the lens from
y
heavy impact during transportation.
Do not touch the lens.
y
The lens may be damaged.
Do not use any sharp tools on the
y
projector such as a knife or hammer,
because this may damage the casing.
In the event that no image appears
y
on the screen, switch the projector
off, unplug it from the wall outlet and
contact an authorized service center.
- Otherwise, this may cause a fire or
an electric shock.
Do not drop an object onto the pro-
y
jector or apply heavy pressure to it.
- This may cause injury to persons or
damage to the projector.
The distance between your eyes
y
and the screen must be around 5 7 times the diagonal length of the
screen.
- If you watch the screen at a close
distance for a long time, your eye
sight may become worse.
Page 7

SAFETY INSTRUCTIONS
7
Cleaning
WARNING
Do not spray the projector with water
y
when cleaning. Do not allow water to
go into the projector or do not allow it
to get wet.
- This may cause a fire or an electric
shock.
When there is smoke or a strange
y
smell coming out from the projector
or a foreign object falls into the projector, please switch it off and unplug
it from the power outlet and contact
an LG Electronics Service Center.
- If not, this may cause a fire or an
electric shock.
Use an air spray or soft cloth or
y
cotton swab moistened with a lens
cleaning chemical or alcohol to
remove dust or stains on the front
projection lens.
CAUTION
Contact your seller or the Service
y
Center once a year to clean the internal parts of the projector.
- If you do not clean the contaminated interior of the projector for a long
time, there may be a fire or damage
to the projector.
When cleaning plastic parts such as
y
the projector case, unplug the power
first and wipe with a soft cloth. Do
not spray with water or wipe with a
wet cloth. When cleaning the plastic
parts, such as the projector case,
do not use cleanser, automobile or
industrial shiner, abrasive or wax, benzene, alcohol, etc., which can damage
the product.
- This can cause fire, electric shock or
product damage (deformation, corrosion and damage).
ENGLISH
Page 8

8
SAFETY INSTRUCTIONS
OTHERS
WARNING
Only a qualified technician can disas-
y
semble or modify the projector. For
inspection, adjustment or repair, contact your seller or the Service Center.
- Otherwise, this may cause a fire or
an electric shock.
Dispose of the used battery properly.
y
- Otherwise, this may result in
explosion or fire.
The correct method of disposal may
y
vary depending on your country
or region. Dispose of the battery
pack according to the appropriate
instructions.
Do not throw or disassemble the
y
battery.
- Otherwise, this may result in fire or
explosion due to damage to the
battery.
Always use batteries approved and
y
certified by LG Electronics.
- Otherwise, this may result in fire or
explosion.
Store the battery away from metallic
y
objects, such as keys and paper clips.
Excess current may cause a rapid
y
increase in temperature, resulting in
fire or burns.
Do not store the battery near any
y
heat source, such as a heater.
- This may result in fire or damage
the product.
Do not store it at temperatures higher
y
than 60 °C or in high humidity.
Keep the battery out of reach of chil-
y
dren.
- This may result in personal injury or
damage to the product.
Make sure that the battery is installed
y
correctly.
Incorrect battery replacement may
y
cause fire.
CAUTION
Unplug the power cord if the projec-
y
tor is not used for a long period.
- Accumulated dust may cause
overheating, an electric shock from
corroded insulation and a fire from an
electrical surge.
Only use the specified type of battery.
y
- Otherwise, this may cause an electric shock caused by overheating
and leakage.
Page 9
Additional
SAFETY INSTRUCTIONS
9
information of the
manual
The owner’s manual in a PDF file format
is supplied on a CD. Install the Adobe
Acrobat Reader to view the owner’s manual
on your PC.
1 Insert the supplied CD. The web page
appears automatically.
2 Select language on the web page.
3 Click Model name on the web page.
4 View the owner’s manual.
NOTE
yIf the web page does not appear
automatically, access My computer
and then click LG and index.htm to
view
ENGLISH
- This DLP Projector is a Risk Group 2
device that meets safety standard IEC
62471 standard.
Risk Group 2
CAUTION. Possibly hazardous
optical radiation emitted from
this product. DO not stare at
operating lanp. May be harmful
to the eye.
Page 10

10
CONTENTS
TABLE OF CONTENTS
LICENSES 2
SAFETY INSTRUCTIONS 3
ADDITIONAL INFORMATION
OF THE MANUAL 9
PREPARATION 11
Accessories 11
Optional Extras 12
Parts and Components 13
Installation 14
- Installation Precautions 14
- Connecting an adapter 14
- Projection Distance per
Screen Size 15
- Using the Lens Hood 16
- Using the Cradle scene 16
- Connecting a battery 17
- How to Install the Projector On a
Tripod 18
- Kensington Security System 18
REMOTE CONTROL 19
- Using the Input List 25
- Blank Function 26
Using the Quick Menu 26
ENTERTAINMENT 27
Wireless Display Setup (Notebook) 27
Wireless Display Setup
(Moblie phone) 27
MY MEDIA 28
- Connecting USB Storage Devices 28
- MOVIE LIST 30
CUSTOMIZING SETTINGS 31
SETUP Menu 31
MAKING CONNECTIONS 32
Connecting to an HD Receiver, DVD
Player or VCR 33
- HDMI Connection 33
Connecting to a PC 33
- RGB Connection 33
Connecting to the AV INPUT 34
- Component Connection 35
Connecting to Headphones 35
MHL Connection 36
USING THE PROJECTOR 21
Watching the Projector 21
- Turning on the Projector 21
- Focus and Position of the Screen
Image 21
- Watching the Projector 21
- Using the battery 22
- Battery using time information 22
Using Additional Options 24
- Adjusting Aspect Ratio 24
- Using the Keystone
Function 25
MAINTENANCE 36
Cleaning the Projector 36
- Cleaning the Lens 36
- Cleaning the Projector Case 36
SPECIFICATIONS 37
Page 11
PREPARATION
219'4
/76'
+0276
81.7/'
2#)'
#761
$.#0-
':+6ꕯ
ꕣ
5'66+0)5 3/'07
56+..
1-
4#6+1
75$
*'.2 -';5 -';5
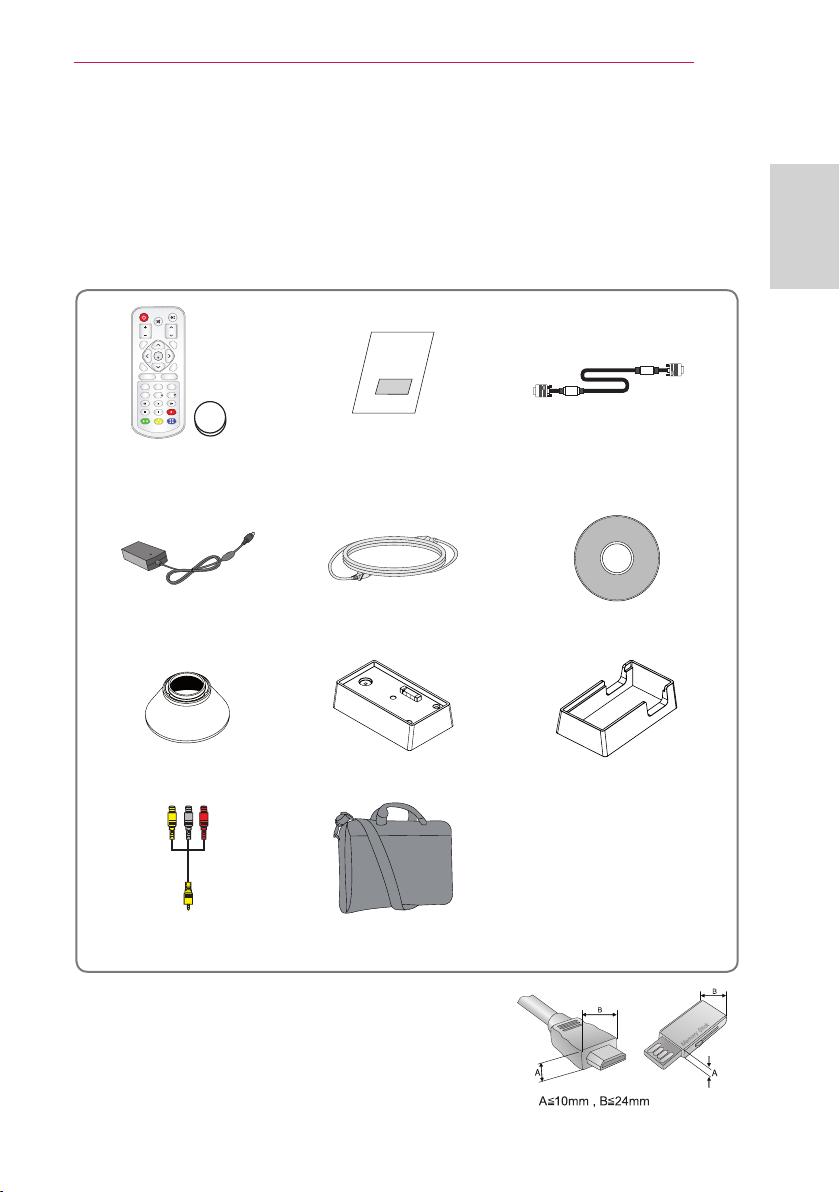
Accessories
Check enclosed accessories.
The picture may be different from an actual product.
Remote Control
Coin Battery
(CR 2032)
Adapter Power Cord Owner's Manual CD
Owner's Manual RGB Cable
PREPARATION
11
ENGLISH
Hood Battery Cradle
Composite video cable Bag
When connecting a cable to the HDMI or USB port,
y
it may not be connected properly if the size of jack to
the USB/HDMI port is too big. Use a standard sized
jack.
Page 12
12
PREPARATION
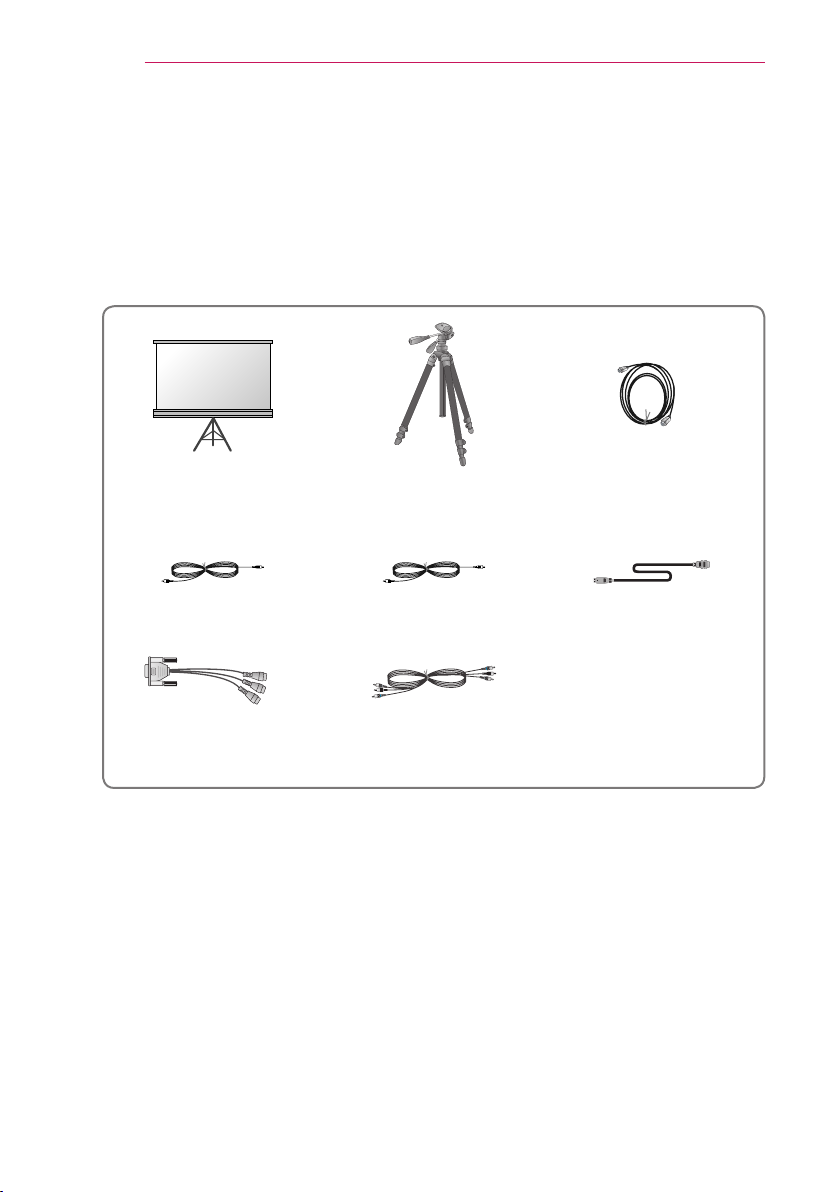
Optional Extras
To purchase optional extras, visit an electronics store or online shopping site or contact
the retail store where you purchased the product.
Without prior notice, optional extras are subject to change in order to improve the performance of the product, and new accessories may be added.
Projector Screen Tripod HDMI Cable
Video Cable Audio Cable MHL Cable
RGB to Component Cable Component Cable
Page 13
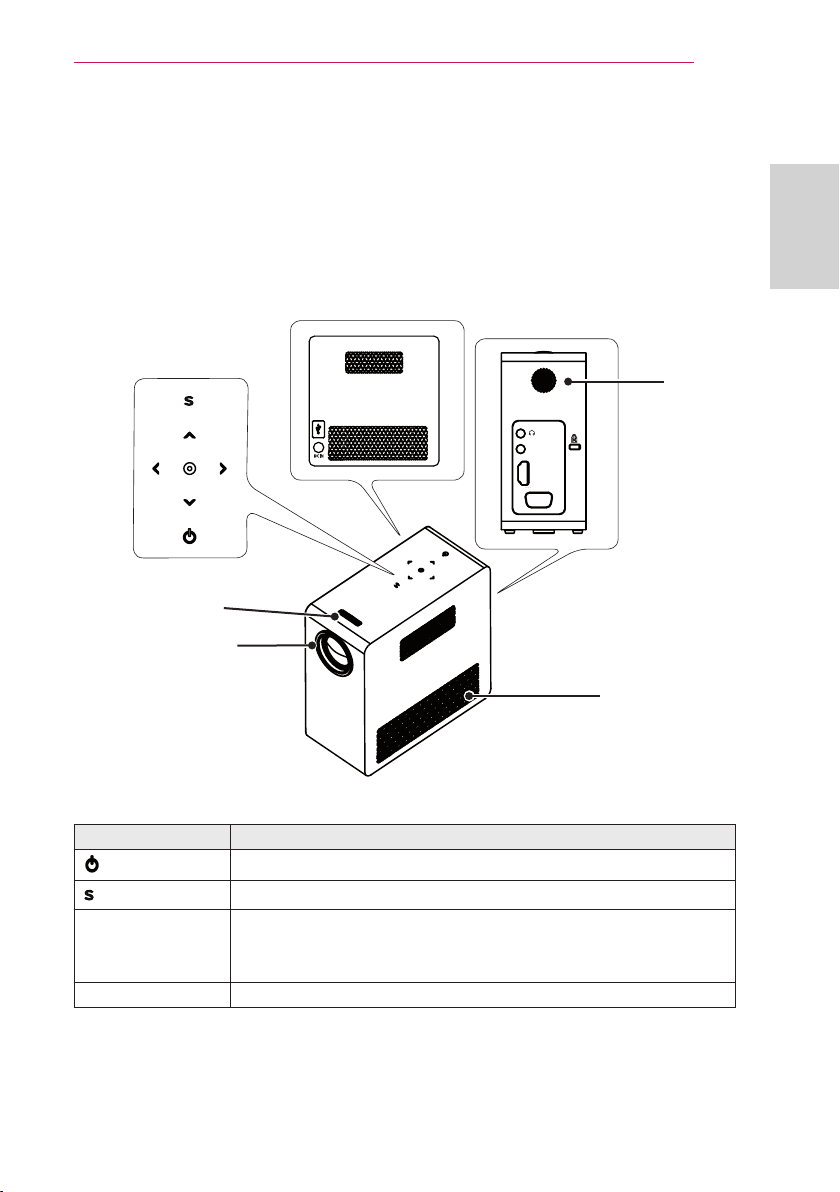
Parts and Components
HDMI/DVI
RGB IN
A/V IN
PREPARATION
13
* The projector is manufactured using high-precision technology. You may, however,
see tiny black dots and/or bright colored dots (red, blue or green) that continuously
appear on the projector screen. This is a normal result of the manufacturing process
and does not indicate a malfunction. When powered on, the LED of the control panel
turns on.
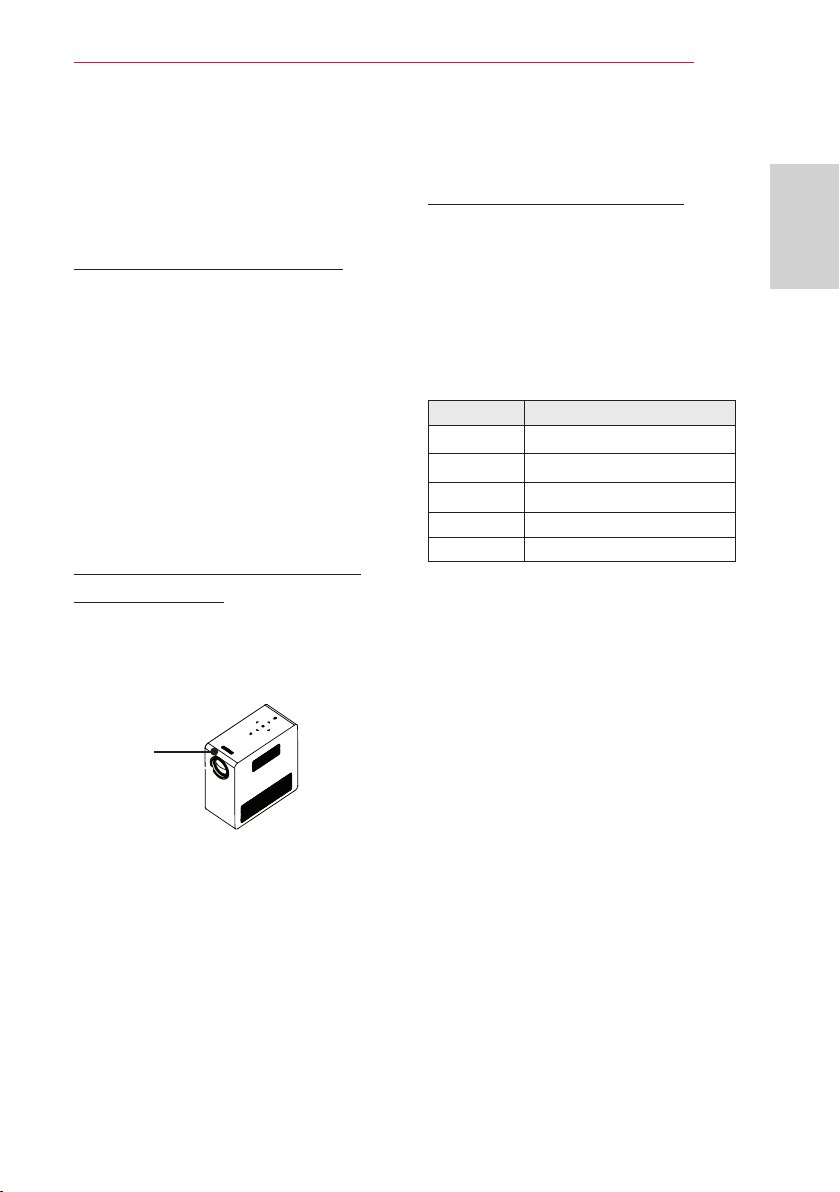
Left
Control Panel
DC IN
Back
Speaker
A/V IN
HDMI/DVI
RGB IN
Focus Ring
2
Lens
1
Vent
ENGLISH
Button Description
(Power)
(Settings)
Turns the projector on or off.
Selects or closes menus.
Moves between menus and changes the settings.
∧, ∨, <, >
(<, > button : The volume can be adjusted according to the
input mode)
ꔉ(OK) Checks present mode and saves function changes.
1 Due to the high temperature air coming out of the vents, do not get close to the
vents.
2 Do not touch the lens when using the projector. The lens may be damaged.
Page 14
14
PREPARATION
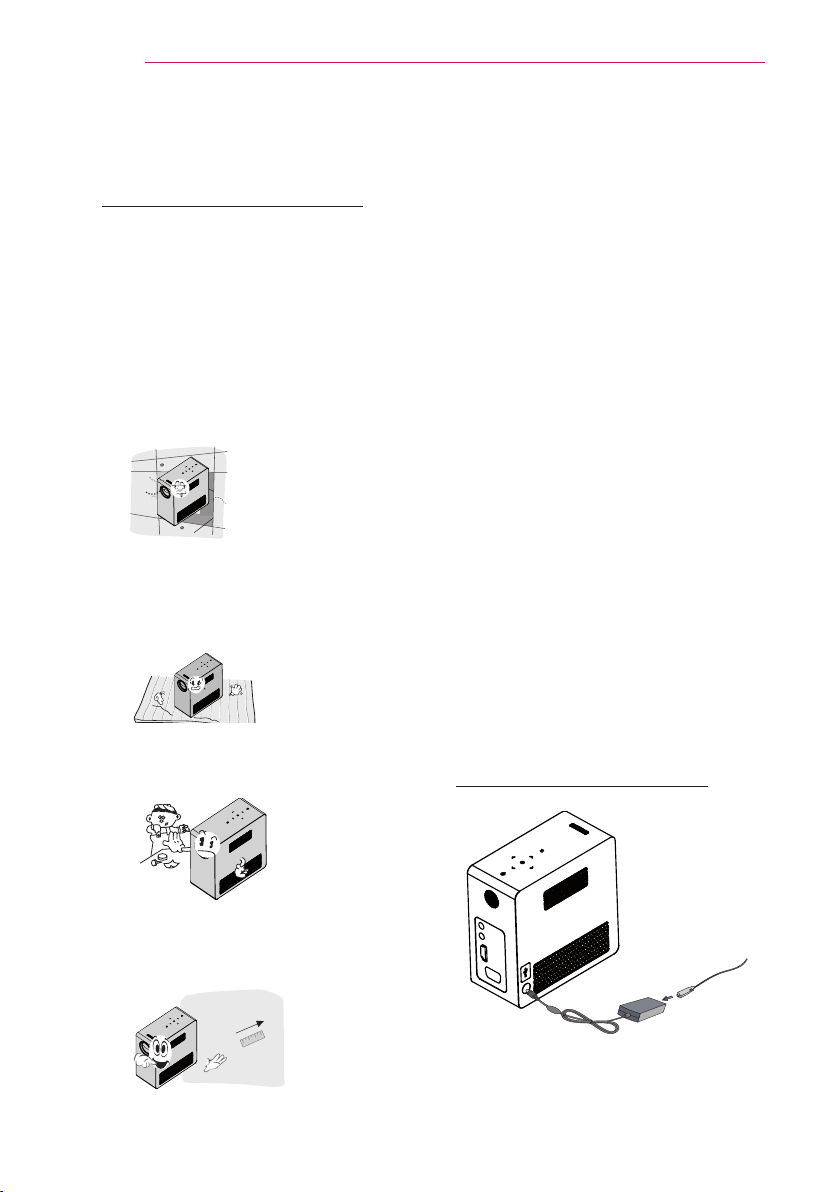
Installation
Installation Precautions
Place the projector in a well-ventilat-
y
ed environment.
- To prevent internal heat from building up, install the projector in a wellventilated place.
Do not place anything near the projector as this may block the air vents.
If the air vents are blocked, the internal temperature will increase.
- Do not place the projector on a
carpet or rug. Do not block any vents
on the bottom
on a leveled solid surface
- Be sure to prevent foreign objects
such as paper debris from entering
the projector.
and use the projector
.
Do not place the projector in a hot or
y
humid environment.
- Do not place the projector in a hot,
cold or humid environment.
Do not place the projector in a place
y
where it will easily attract dust.
- This may cause a fire.
Do not remove any covers except for
y
the lens cap. There is a high risk of
electric shock.
The projector is manufactured using
y
high-precision technology. You may,
however, see tiny black dots and/
or bright colored dots (red, blue or
green) that continuously appear on
the projector screen. This is a normal
result of the manufacturing process
and does not indicate a malfunction.
The remote control may not work
y
in an environment where a lamp
equipped with electronic ballasts or
a three-wavelength fluorescent lamp
is installed. Replace the lamp with an
internationally standardized lamp for
the remote control to work normally.
Connecting an adapter
- Leave an adequate open area (30
cm, 11.8 inch or more) around the
projector.
Connect the DC adapter plug to the power
input jack on the projector.
Page 15
PREPARATION
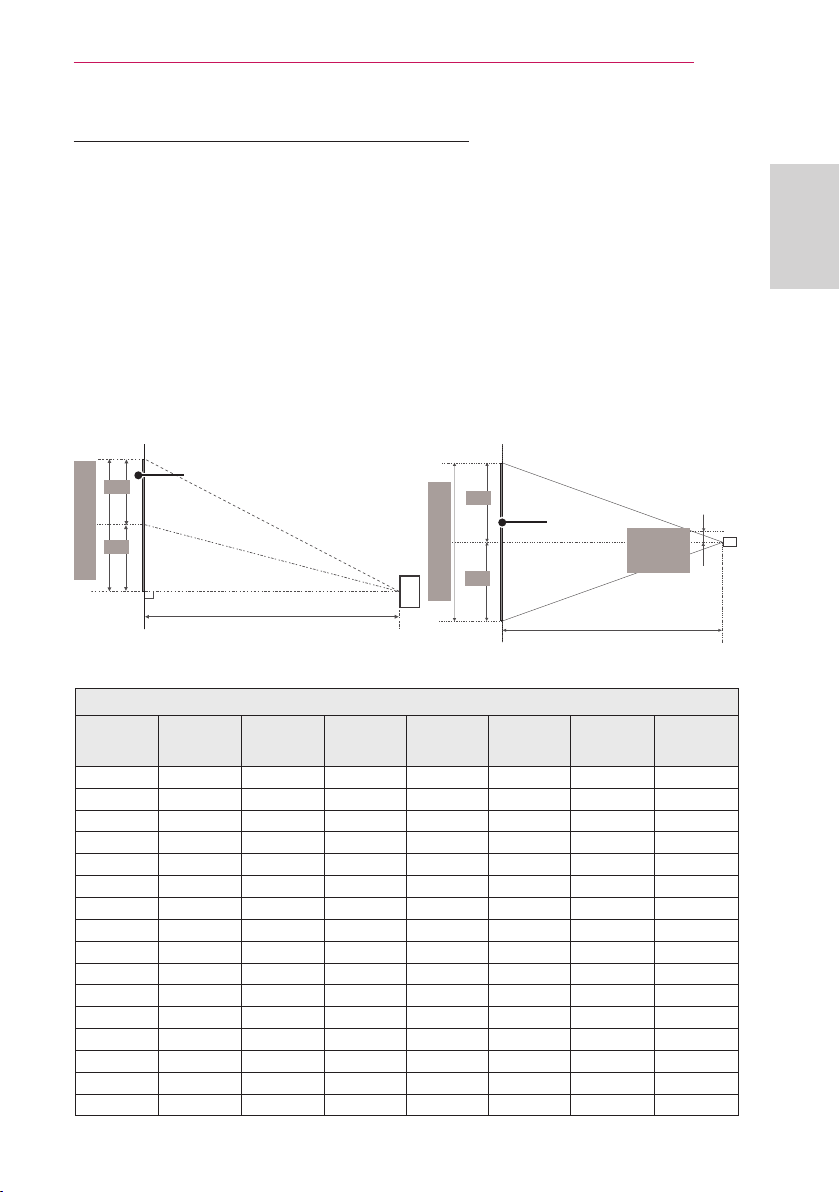
Projection Distance per Screen Size
1 Place the projector on a sturdy, level surface, together with the PC or audio/video
source.
2 Place the projector at an appropriate distance from the screen. The distance be-
tween the projector and the screen determines the actual size of the image.
3 Position the projector so that the lens is set at a right angle to the screen. If the
projector is not set at a right angle, the image on the screen will be tilted and the
image quality will be poor. If the screen image is crooked, use the Keystone function.
4 Connect the power cords of the projector and the connected devices to the wall
outlet.
Ratio of upward projection: 100 %
15
ENGLISH
Screen Height (X)
X/2
X/2
DISPLAY
Projection distance (D)
Screen Width (Y)
Y/2
DISPLAY
Y/2
Projection distance (D)
30 mm
(1.1 inch)
16:10 Screen
Screen Size
(mm)
2032 80 1723 67.8 1077 42.4 2599 102.3
2286 90 1938 76.2 1212 47.7 2925 115.1
2540 100 2154 84.8 1347 53.0 3252 128.0
Screen Size
(inch)
635 25 538 21.1 337 13.2 803 31.6
762 30 646 25.4 404 15.9 966 38.0
889 35 754 29.6 471 18.5 1130 44.4
1016 40 861 33.8 539 21.2 1293 50.9
1143 45 969 38.1 606 23.8 1456 57.3
1270 50 1077 42.4 673 26.4 1619 63.7
1397 55 1185 46.6 741 29.1 1783 70.1
1524 60 1292 50.8 808 31.8 1946 76.6
1651 65 1400 55.1 875 34.4 2109 83.0
1778 70 1508 59.3 943 37.1 2272 89.4
1905 75 1615 63.5 1010 39.7 2436 95.9
2159 85 1831 72.1 1145 45.0 2762 108.7
2413 95 2046 80.5 1279 50.3 3089 121.6
Screen
Width (Y)
(mm)
Screen
Width (Y)
(inch)
Screen
Height (X)
(mm)
Screen
Height (X)
(inch)
Projection
Distance
(D) (mm)
Projection
Distance
(D) (inch)
Page 16
16
DC IN
PREPARATION
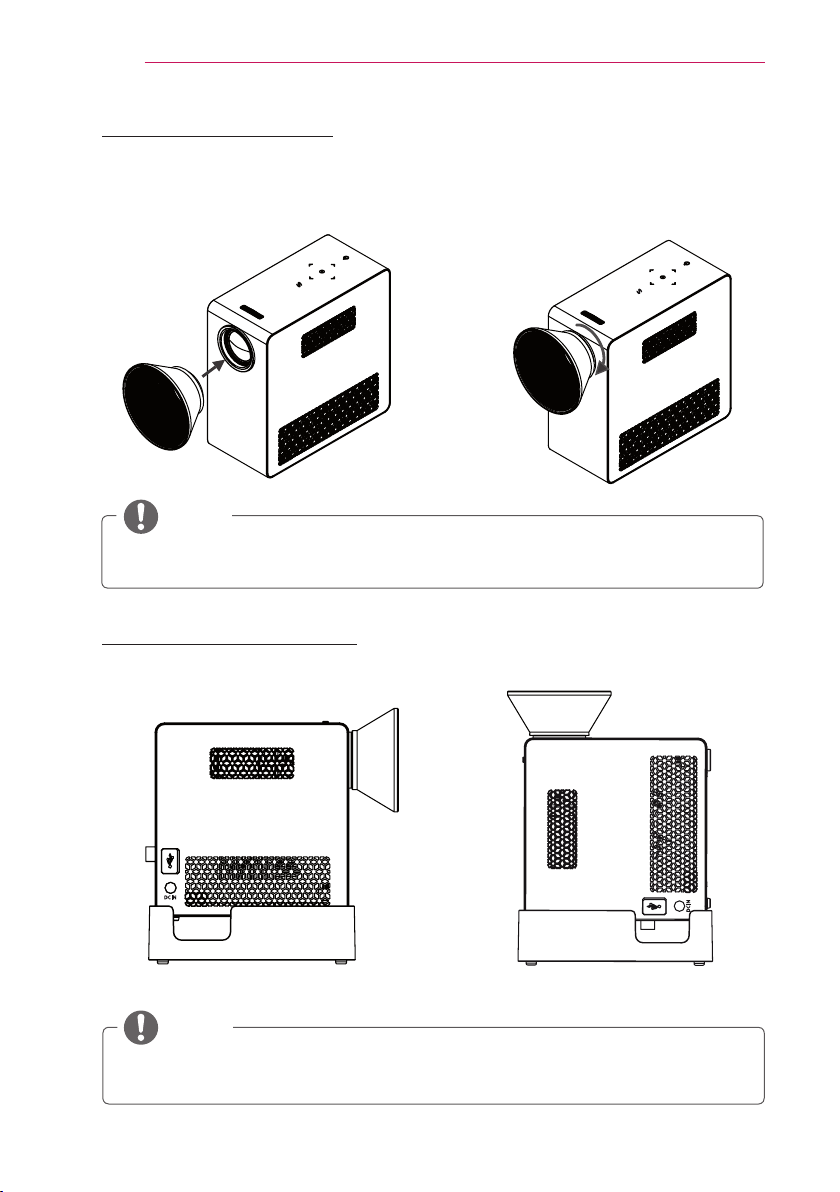
Using the Lens Hood
Turn the lens hood as shown by the arrow.
⇒
NOTE
yBe careful not to use excessive force when mounting the lens hood. Failure to do so
may damage the product.
Using the Cradle scene
DC IN
Normal Scene
NOTE
yWhen projecting images onto the ceiling, you must only use the provided angle-type
antenna cable and USB storage device.
Top Scene
DC IN
Page 17
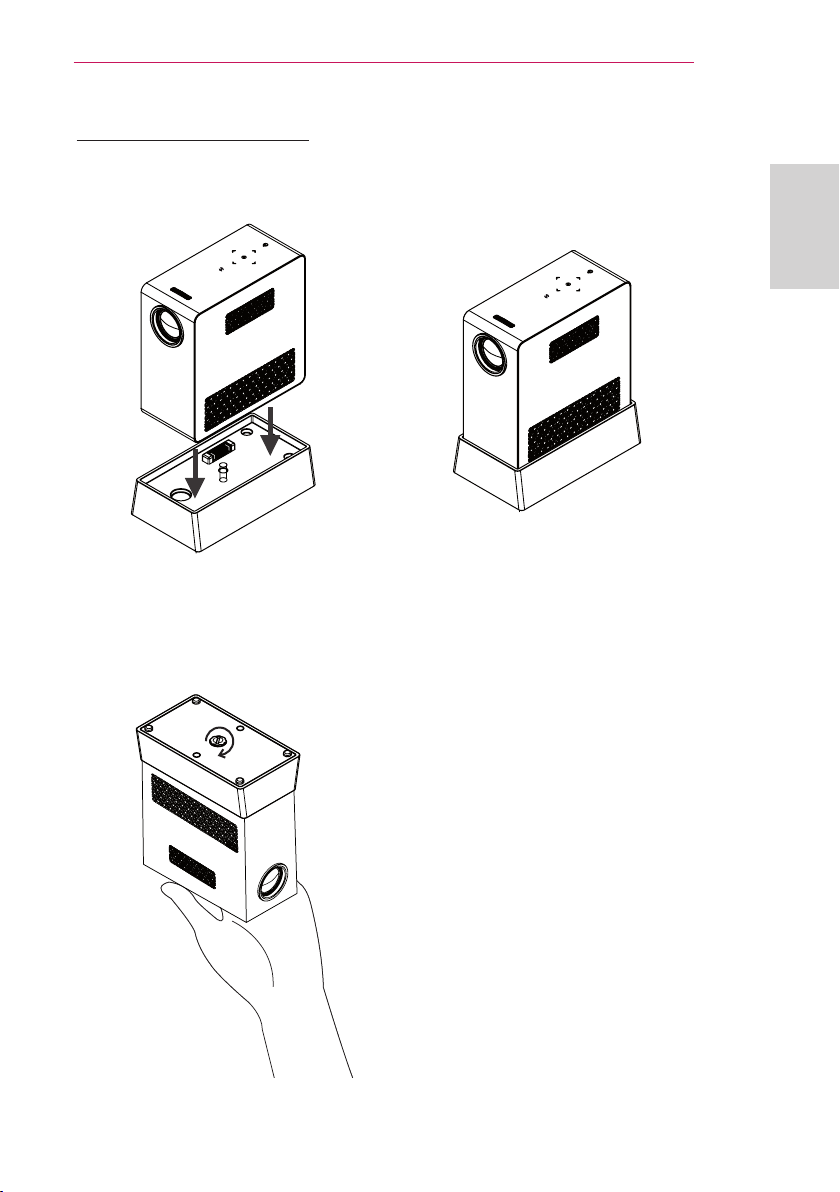
Connecting a battery
PREPARATION
17
1. Assemble the projector as shown.
2. Turn the knob as shown by the arrow.
ENGLISH
⇒
Page 18
18
PREPARATION
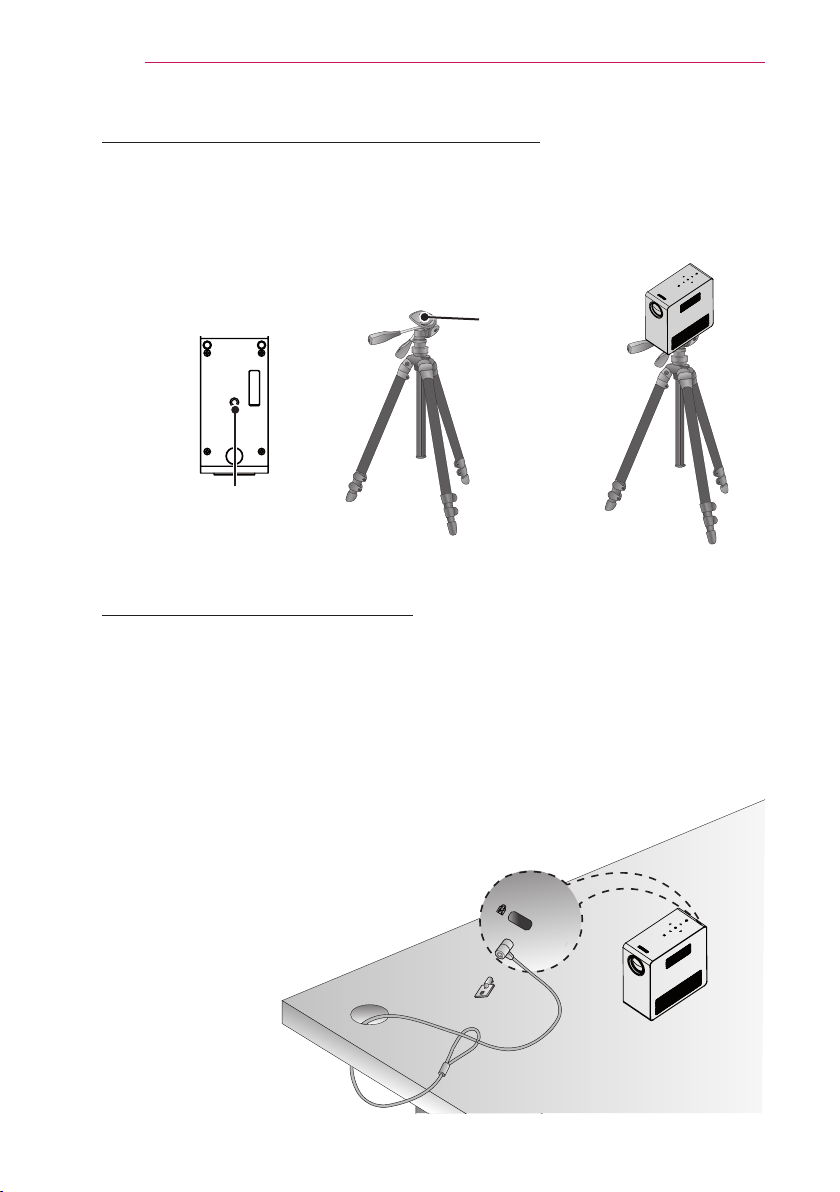
How to Install the Projector On a Tripod
You can install this projector on a camera tripod as shown below.
y
When stabilizing the tripod, we recommend using a locking bolt of standard size 4.5
y
mm (0.1 inch) or less. The maximum size allowed for the locking bolt is 5.5 mm (0.2
inch). (If it is longer than the maximum allowed size, it may damage the projector.)
Bottom side of the
projector
The projector is connected
to this part.
+
Tripod
Bolt used to attach
the projector
⇒
Kensington Security System
This projector has a Kensington Security System Connector on the panel. Connect a
y
Kensington Security System cable as below.
For detailed installation and use of the Kensington Security System, refer to the
y
user’s guide included with the Kensington Security System set.
The Kensington Security System is an optional item.
y
What is Kensington?
y
Kensington is a company that sells security systems that prevent expensive electronic equipment such as a computer or laptop from being stolen.
Internet Homepage: http://www.kensington.com
Page 19
REMOTE CONTROL
219'4
/76'
+0276
81.7/'
2#)'
#761
$.#0-
':+6ꕯ
ꕣ
5'66+0)5 3/'07
56+..
1-
4#6+1
75$
*'.2 -';5 -';5
①
②
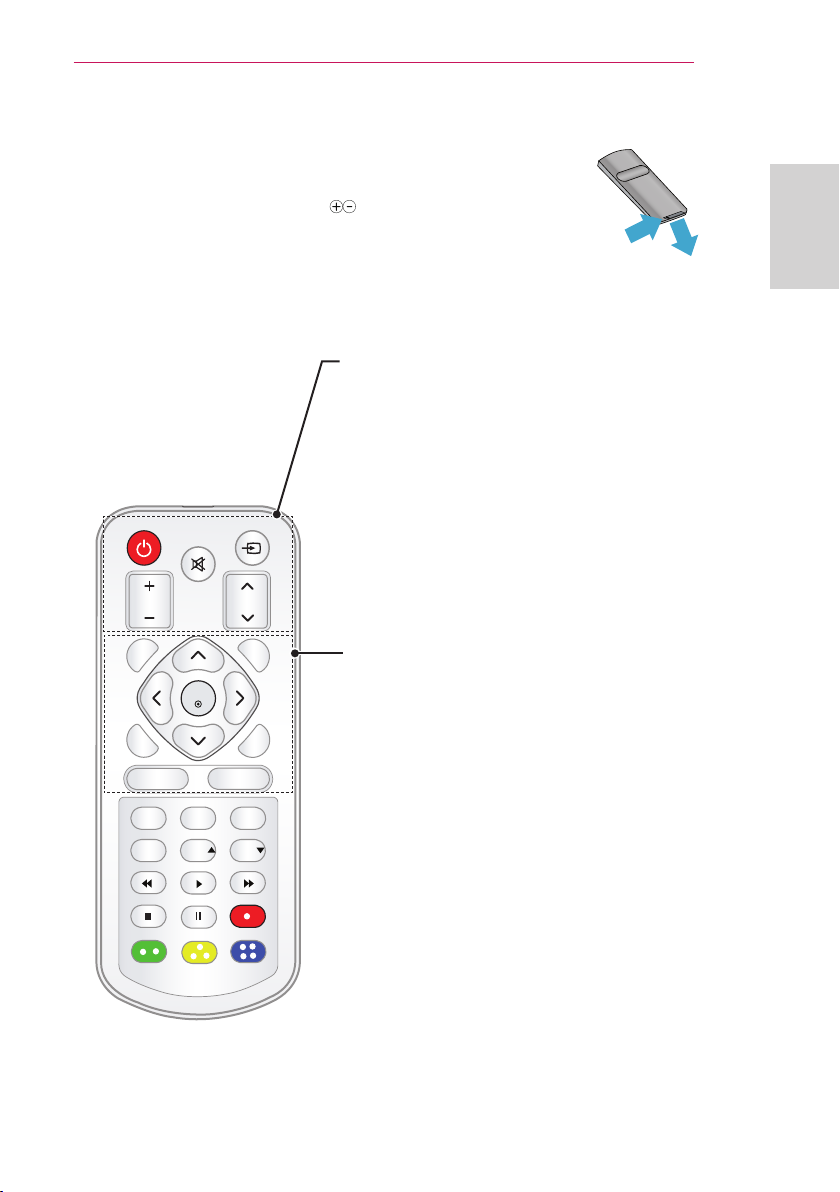
REMOTE CONTROL
19
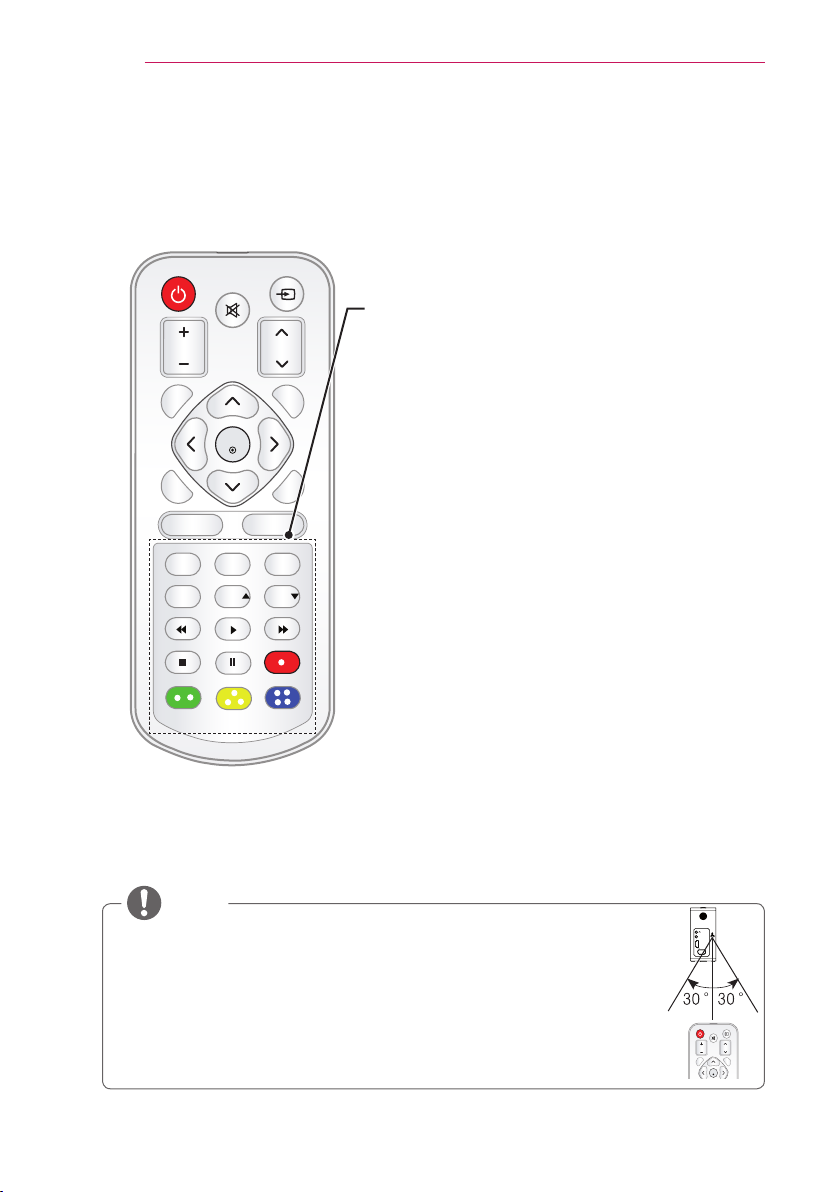
Open the battery cover on the back of the remote control and insert the
specified batteries as per instructions . The same type of batteries must
be used.
ENGLISH
POWER
Turns the projector on or off.
INPUT
Changes the input source.
MUTE
Mutes all sounds.
VOLUME +, -
Adjusts the volume level.
PAGE
Moves to the previous/next page.
AUTO
Automatically adjusts the RGB-PC input image.
BLANK
Turns the projector screen on or off.
Up/Down/Left/Right Buttons
Sets the function or moves the cursor.
OK ꔉ
Checks present mode and saves function changes.
EXIT
Clears all on-screen displays and returns to
projector viewing.
ꕣ
Returns to the previous level.
SETTINGS
Selects or closes menus.
Q.MENU
Accesses the quick menu.
Page 20
20
219'4
/76'
+0276
81.7/'
2#)'
#761
$.#0-
':+6ꕯ
ꕣ
5'66+0)5 3/'07
56+..
1-
4#6+1
75$
*'.2 -';5 -';5
219'4
/76'
+0276
81.7/'
2#)'
#761
$.#0-
1-
REMOTE CONTROL
STILL
Freezes the moving image.
(Available in any mode other than USB mode.)
RATIO
Resizes an image.
USB
Accesses USB mode.
HELP
Enables the self-diagnosis.
KEY.S ,
Adjusts Keystone.
Playback Control Buttons
Controls playback of MY MEDIA.
Color buttons
Access special functions in some menus.
NOTE
When using the remote control, the optimal remote range is less than
y
3 meters (9.8 feet) (left/right) and within a 30 degree arc of the IR receiver.
For seamless operation, do not block the IR receiver.
y
When you carry the remote control in the portable bag, make sure that the buttons
y
on the remote control are not pressed by the projector, cables, documents or any
other accessories in the bag. Otherwise, it may significantly reduce the battery life.
A/V IN
HDMI/DVI
RGB IN
Page 21
USING THE PROJECTOR
HDMI/DVI
RGB IN
A/V IN
USING THE PROJECTOR
21
Watching the Projector
Turning on the Projector
1 Connect the power cord correctly.
2 After waiting for a moment, press
the POWER button on the remote
control or the control panel.
(The light on the control panel will be
turned on.)
3 In the Language Selection screen,
select a language.
4 Select an input signal by using the
INPUT button on the remote control.
Focus and Position of the Screen Image
When an image appears on the screen,
check if it is in focus and fits the screen
properly.
Focus ring
Watching the Projector
ENGLISH
1 In Standby mode, press the POWER
button to turn the projector on.
2 Press the INPUT button and select
the input signal you want.
3 Control the projector using the fol-
lowing buttons while watching projector.
Button Description
VOL -, + Adjusts the volume level.
MUTE Mutes all sounds.
Q.MENU Accesses the quick menu.
RATIO Resizes an image.
KEY.S , Adjusts Keystone.
4 To turn the projector off, press the
POWER button.
To adjust the focus of the image,
y
rotate the focus ring.
To adjust the focus ring, be careful
y
not to touch the keys on the control
panel.
Page 22
22
USING THE PROJECTOR
Using the battery
Low battery! The projector will turn
off soon
* It is displayed when the battery is running out..
* As your bettery is low, the projector will be turned off in a minute.
Battery using time information
Status Time and Display
Charging About 3 hours
Standard Usage
Hours
Battery Level
Indicator
About 2 hour
(Available battery using time
approximately 1 hour 30 mins
when Energy Saving mode set to
Max)
Step 1 Step 2 Step 3 Step 4
* If you do not use the projector for long periods of time, remove the battery from the
projector and store it separately.
It is recommended to charge the battery to 40 - 50 percent for long-term storage.
* The battery is automatically recharged when the projector is connected to a power
supply.
* Charge the battery fully when you first use the projector.
* The battery standard usage time given in the manual is based on measurements
taken by LG; the actual time may vary depending on usage.
* Battery usage time may vary depending on broadcast type, operating temperature,
period of use, and user preferences.
* As the battery is consumable, its lifetime gradually decreases. When the battery’s
life is reduced by half, replace it with a new battery from an LG Electronics customer
center.
* In battery mode, energy saving mode is disabled.
* Do not charge the battery using any equipment other than that supplied with the
product. This may damage the battery or cause a fire.
Page 23

USING THE PROJECTOR
23
* Dispose of the used battery appropriately. Failure to do so may result in an
explosion or fire. Methods for disposing of batteries vary depending on your country
or region. Ensure the battery is disposed of in accordance with applicable laws and
regulations.
* Do not throw or disassemble the battery. Damage to the battery may result in fire or
an explosion.
* Always use a battery that is approved and certified by LG Electronics, Inc. Failure to
do so may result in an explosion or fire.
* Store the battery away from metallic objects, such as keys and paper clips. Overcur-
rent may cause a rapid increase in temperature, resulting in fire or burns.
* Do not store the battery near any heat source, such as a heater. This may cause a
fire or malfunction.
* Do not store the battery in temperatures higher than 60°C or in a humid place.
Failure to do so may result in an explosion or fire.
* Keep away from children. Failure to do so may result in personal injury and damage to
the product.
* Make sure that the battery is connected correctly. Failure to do so may result in an
explosion or fire.
* If the battery leaks or smells, remove it from the projector immediately and contact an
LG Electronics customer center.
* The battery contains lithium-ion, so please handle with care. Failure to do so may
result in an explosion or fire.
* Danger of explosion if battery is incorrectly replaced. Replace only with the same or
equivalent type.
ENGLISH
Page 24
24
USING THE PROJECTOR
Using Additional Options
Adjusting Aspect Ratio
You can adjust the aspect ratio of the
picture by pressing RATIO while watch-
ing projector.
NOTE
Available options may vary depend-
y
ing on the input signal.
You can also change the image size
y
by pressing Q.MENU or
SETTINGS.
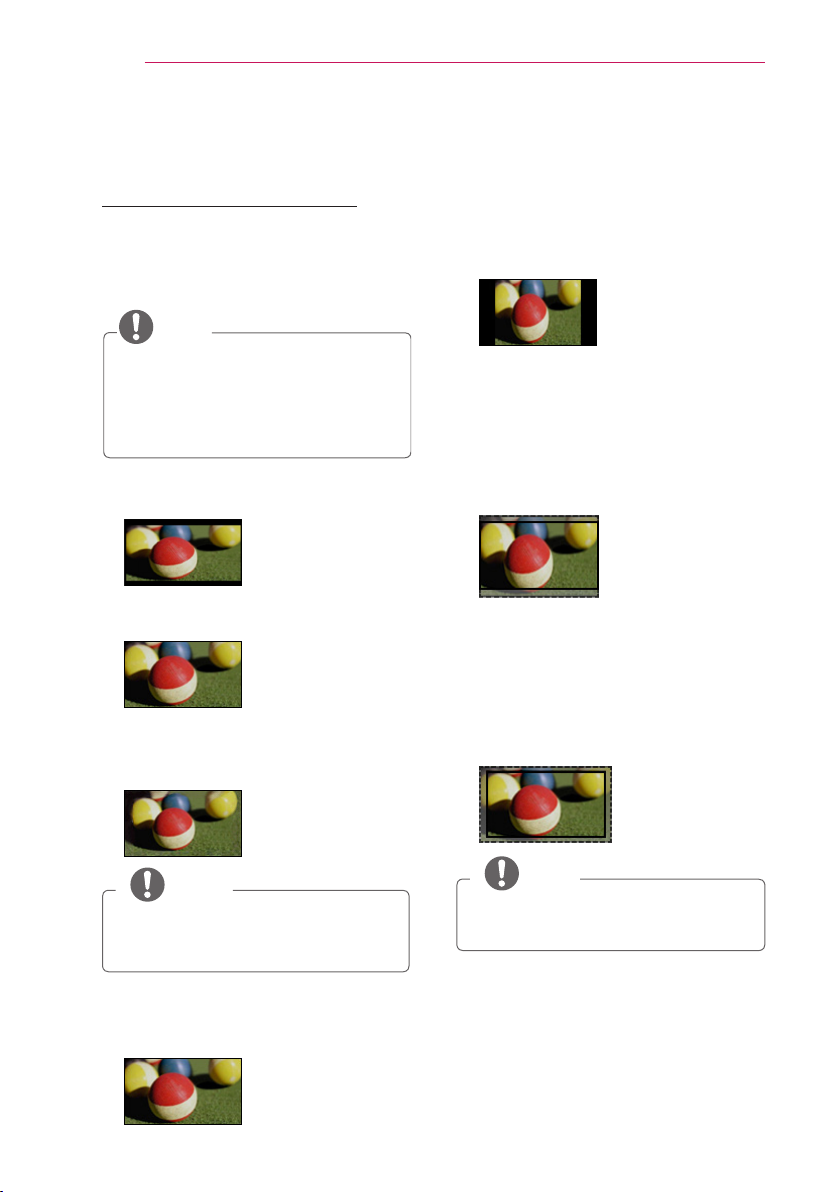
- 16:9: Resizes images to fit the
screen width.
- FULL: Changes to the full screen
regardless of the aspect ratio.
- Just Scan: Displays video images in
the original size without cutting off
the edges.
- 4:3: Resizes images to the 4:3
aspect ratio.
- Zoom: Enlarges an image to fit the
screen width. The top and bottom of
the image may be truncated.
Press the or
y
or out of the image.
Press the or
y
the image.
button to zoom in
button to move
- Cinema Zoom 1 : Formats an image
to the cinemascope ratio, 2.35:1. It
ranges from 1 to 16.
Press the or
y
or out of the image.
Press the or
y
the image.
button to zoom in
button to move
Just Scan
NOTE
If you select Just Scan, you may see
y
image noises at the edge or edges
of the screen.
- Set By Program: Displays images in
the same aspect ratio as the original
image.
Set By Program
NOTE
If you enlarge or reduce an image,
y
the image may be distorted.
Page 25
USING THE PROJECTOR
25
Using the Keystone Function
To prevent the screen image from
becoming trapezoidal, Keystone adjusts
the top and bottom width of the image
if the projector is not set at a right angle
to the screen.
Because the Keystone function may
cause inferior screen image quality, use
this function only when it is not possible
to set up the projector at an optimal
angle.
•Keystone 0
- +
CLOSE
1 Press the SETTINGS button.
2 Press the rbutton to
select O
button.
PTION
and press the OK
3 Press the r button to
select Keystone and press the OK
button.
4 Press the or button to adjusted
Keystone.
Keystone can be adjusted from
y
-40 to 40.
5 Press the OK button after
adjustment.
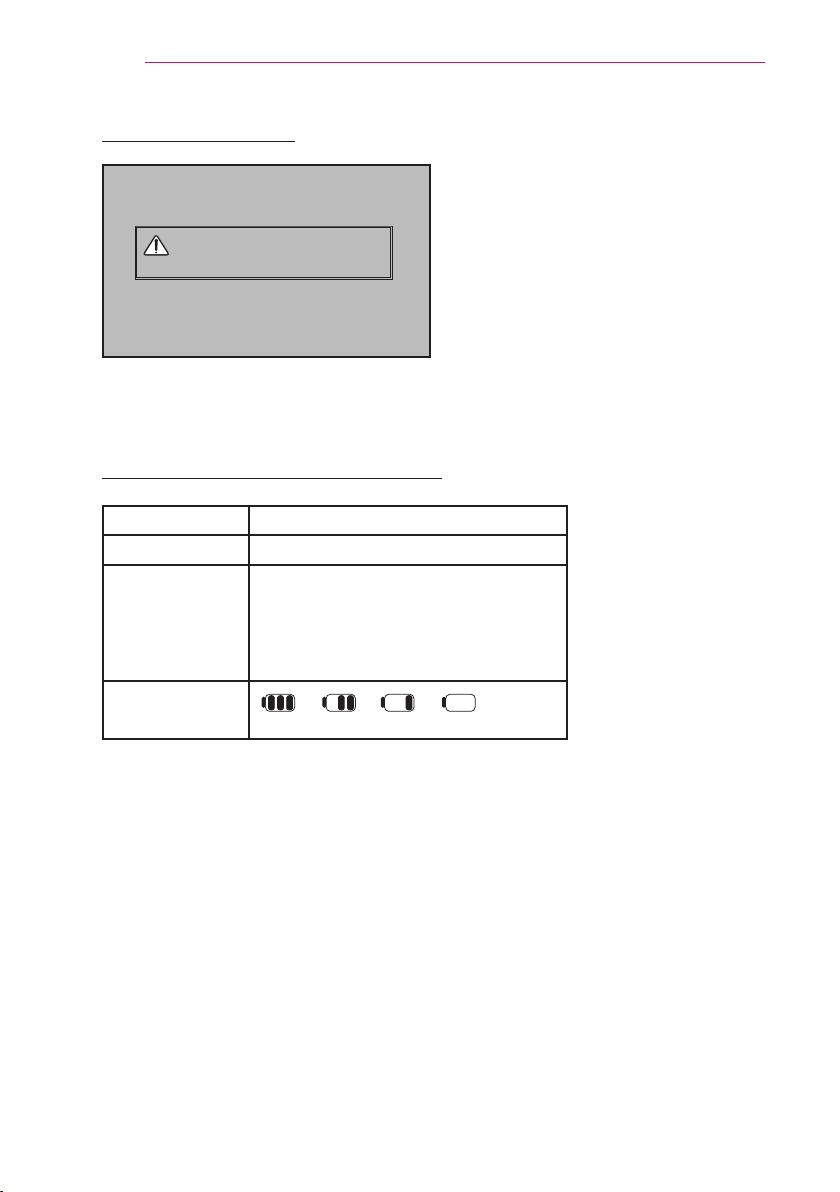
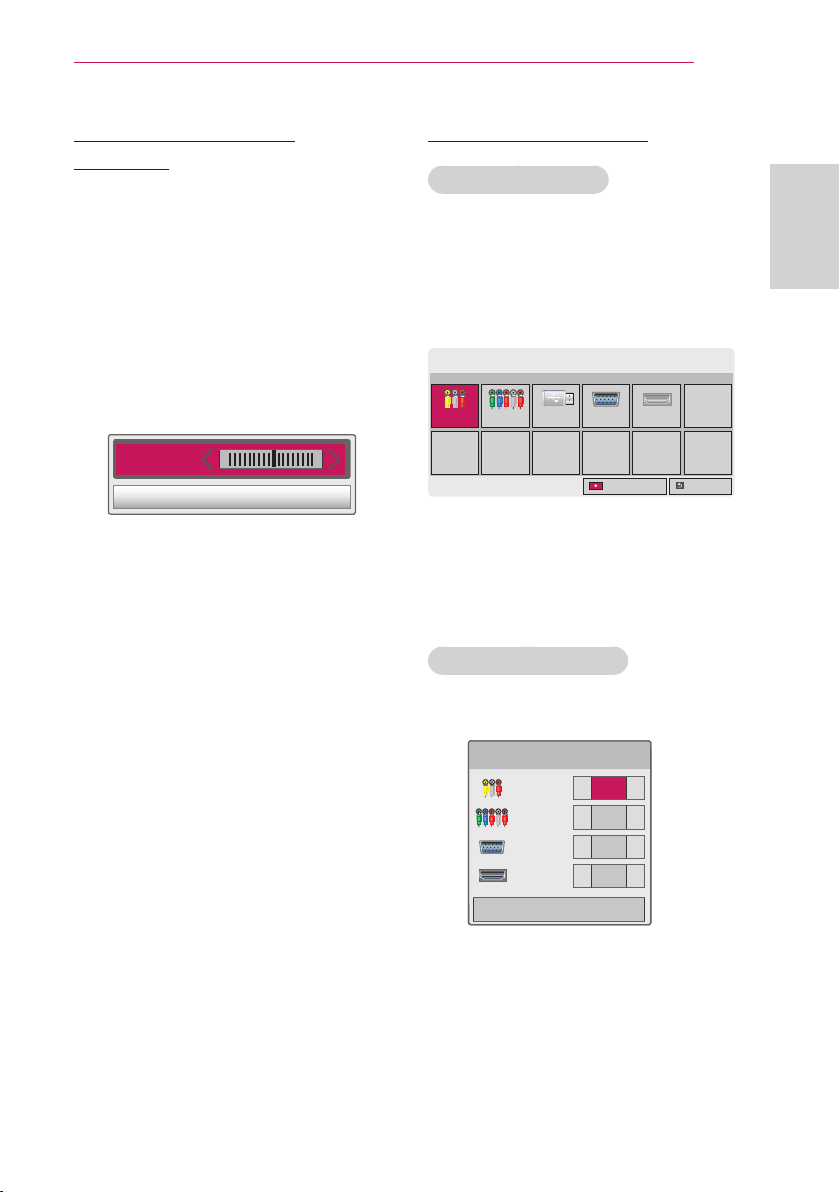
Using the Input List
Using the Input List
1 Press the INPUT button to access
the input sources.
- The connected input mode appears
first. However, AV / Component
input is always activated.
Input List
AV Component USB RGB-PC HDMI
2
Select an input signal using the INPUT
button and the projector is switched
only to the connected input mode. You
can use the rbutton to
switch between all the input modes.
ꔂMoveꔉOK
ExitInput Label
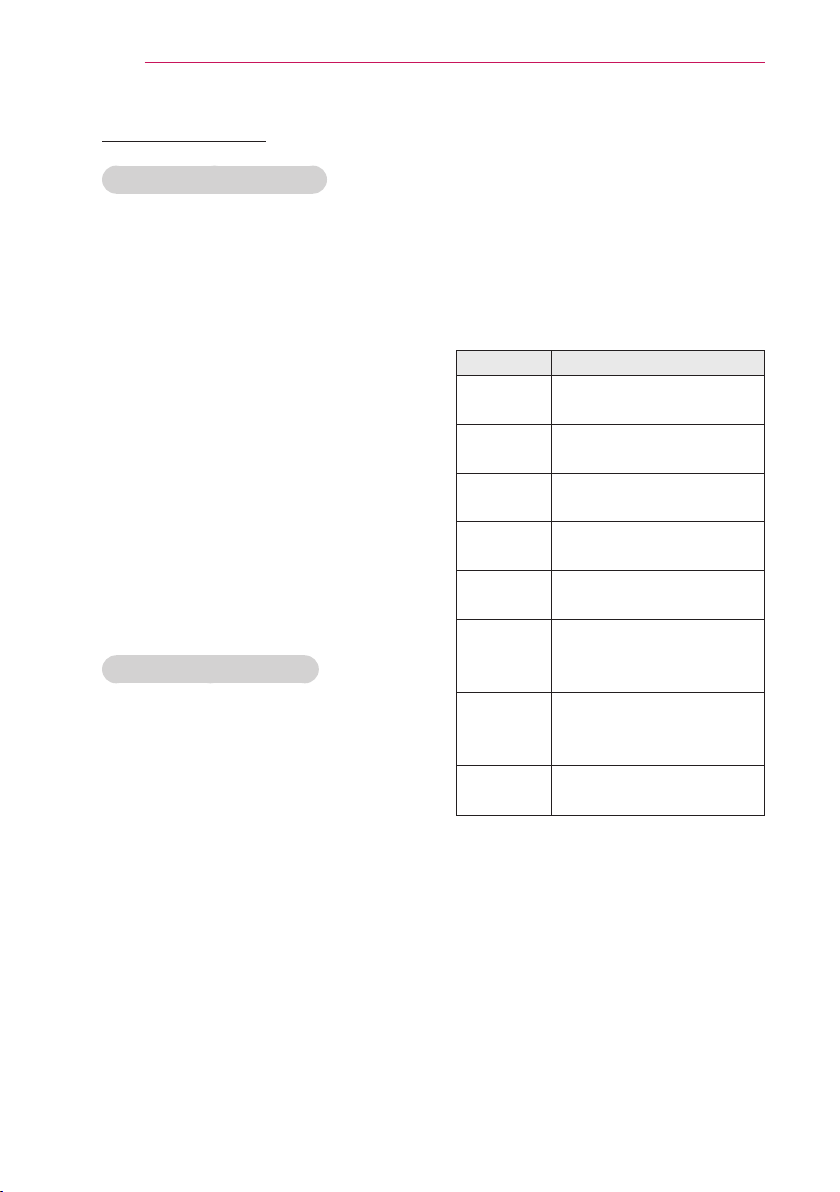
Adding an Input Label
Displays which devices are connected to
which input ports.
Input Label
AV
Component
RGB-PC
HDMI
◀ ▶
◀ ▶
◀ ▶
◀ ▶
Close
1 Press the INPUT button to access
the input sources.
2 Press the RED button.
3 Use the or button to scroll to
one of the input sources.
4 Use the orbutton to select one
of the input labels.
ENGLISH
Page 26
26
USING THE PROJECTOR
Blank Function
Using the Blank Function
This function may be effective when you
need to draw attention during a meeting
or training.
1 Press the BLANK button, and the
screen is covered by the background
color.
You can change the background
color by referring to "Selecting a
Blank Image".
2 Press any button to clear the blank
function.
To cover the screen temporarily, press
the BLANK button on the remote
control.
Do not block the lens with any object
while the projector is running.
It may become overheated and deformed or even cause a fire.
Selecting a Blank Image
1 Press the SETTINGS button.
2 Press the rbutton to
select O
button.
PTION
and press the OK
3 Press the r button to
select B
OK button.
LANK IMAGE
and press the
4 Use the button to move to
the setting or option you want and
press the OK button.
Using the Quick Menu
You can customize frequently used
menus.
1 Press Q.MENU to access the quick
menus.
2 Press theorbutton to scroll
through the following menus and
pressOK.
Menu Description
Aspect
Ratio
Picture
Mode
Energy
Saving
Clear
Voice II
Sound
Mode
Sleep
Timer
PJT Mode Turns the projected image
USB
Device
3 Press the or button to
scroll through the following menus.
Changes the aspect ratio
(see 24 page)
Changes the picture
mode.
Adjusts the brightness.
Makes the voice from the
projector crisp and clear.
Sets the sound mode.
Sets the Projector to be
turned off at the specified
time.
upside down or flips it
horizontally.
Disconnects a USB
device.
Page 27
ENTERTAINMENT
1SPQFSUJFT )FMQ
'PVGTUGEWTKV[EQFG
7KLVLVWKHILUVWWLPH\RXĜUHFRQQHFWLQJWR/*:L'L3URMHFWRU
3OHDVHHQWHUVHFXULW\FRGH\RXVHHRQ\RXU3URMHFWRUVFUHHQ
&RQWLQXH
&DQFHO
ENTERTAINMENT
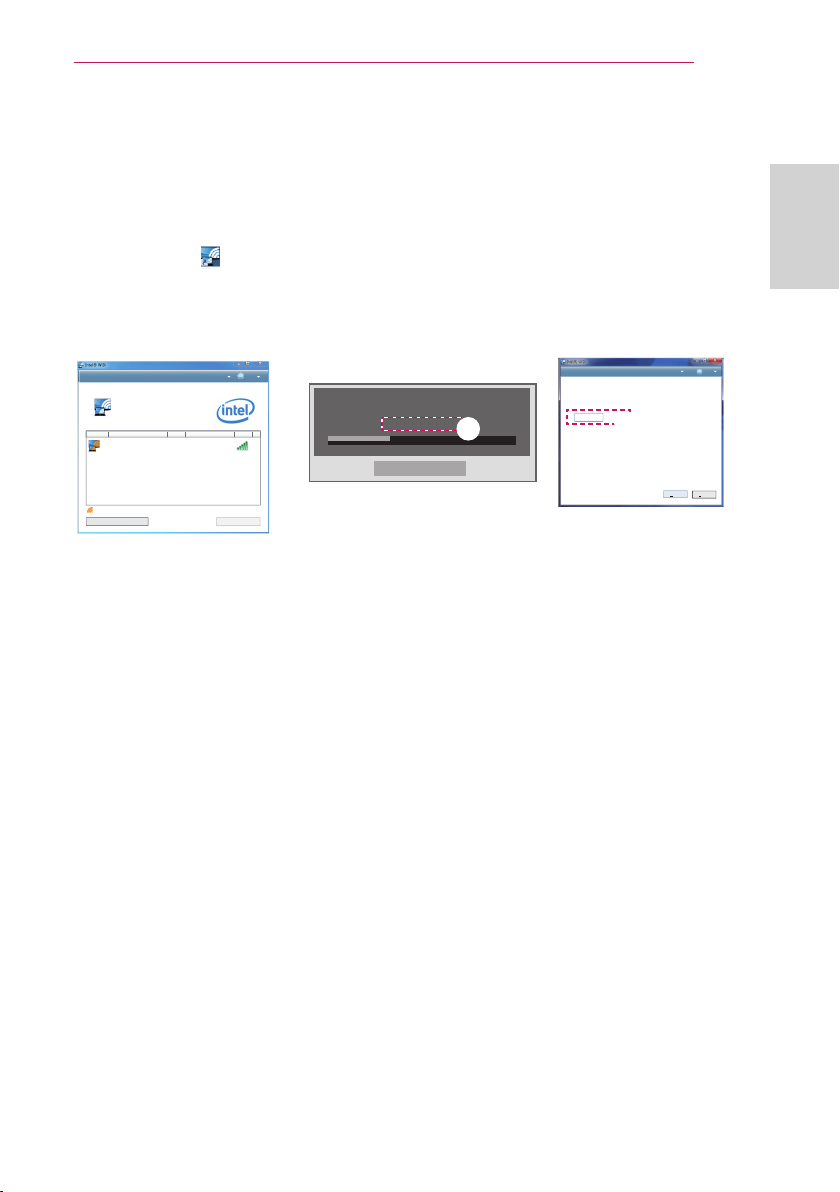
Wireless Display Setup (Notebook)
1 Run the WiDi( ) program on your notebook.
2 After running the WiDi program on your notebook, a list will show all available devices that
were detected. In the list, select the Projector you want and click Connect.
Enter the number shown() on the screen () and then click Continue.
$POOFDUFEBEBQUFS
zaGuGGU
%FUFDUFEBEBQUFST
{GGGGGGGGGGuGGGGGGGGGGGGGGGGGGGGGGGGGGGGGGGGGGGGGGGpkGGGGGGGGGGGGtGGGGGGGGGGGGGGGGGGGGGGGGGGGGGz
snG~kGw km^Y ujGZUW
1SPQFSUJFT )FMQ
Request connection
To connect, enter the PIN
My PIN********
Cancel
Remain: 92 second(s)
27
ENGLISH
3 The Notebook screen will appear on the projector screen soon. Note that the wireless
Wireless Display Setup (Moblie phone)
1 Run the Wireless Display program on your mobile phone.
2 After running the Wireless Display program on your mobile phone, a list will show all available
3 In the list, select the Projector you want and click Connect. If you need to enter the PIN
4 The mobile phone screen will appear on the projector screen soon. Note that the wireless
* For more information on Intel WiDi, visit http://intel.com/go/WiDi.
* If you change the input signal while watching in Wireless Display mode, the Wireless
* Some menus may not work while Using Wireless Display.
,QGLFDWHVDQDGDSWHU\RXKDYHSUHYLRXVO\FRQQHFWHGWR
zGGG
&RQQHFW
Projector Screen Notebook Screen
connection speed will affect the quality of the video displayed on the notebook.
If the connection is poor, the Wireless Display connection may be lost or quality of the video
may be poor.
devices that were detected.
number, Enter the number on the screen and then click Continue.
connection speed will affect the quality of the video displayed on the mobile phone.
If the connection is poor, the Wireless Display connection may be lost or quality of the video
may be poor.
Display connection will be disabled.
Page 28
28
ENTERTAINMENT
MY MEDIA
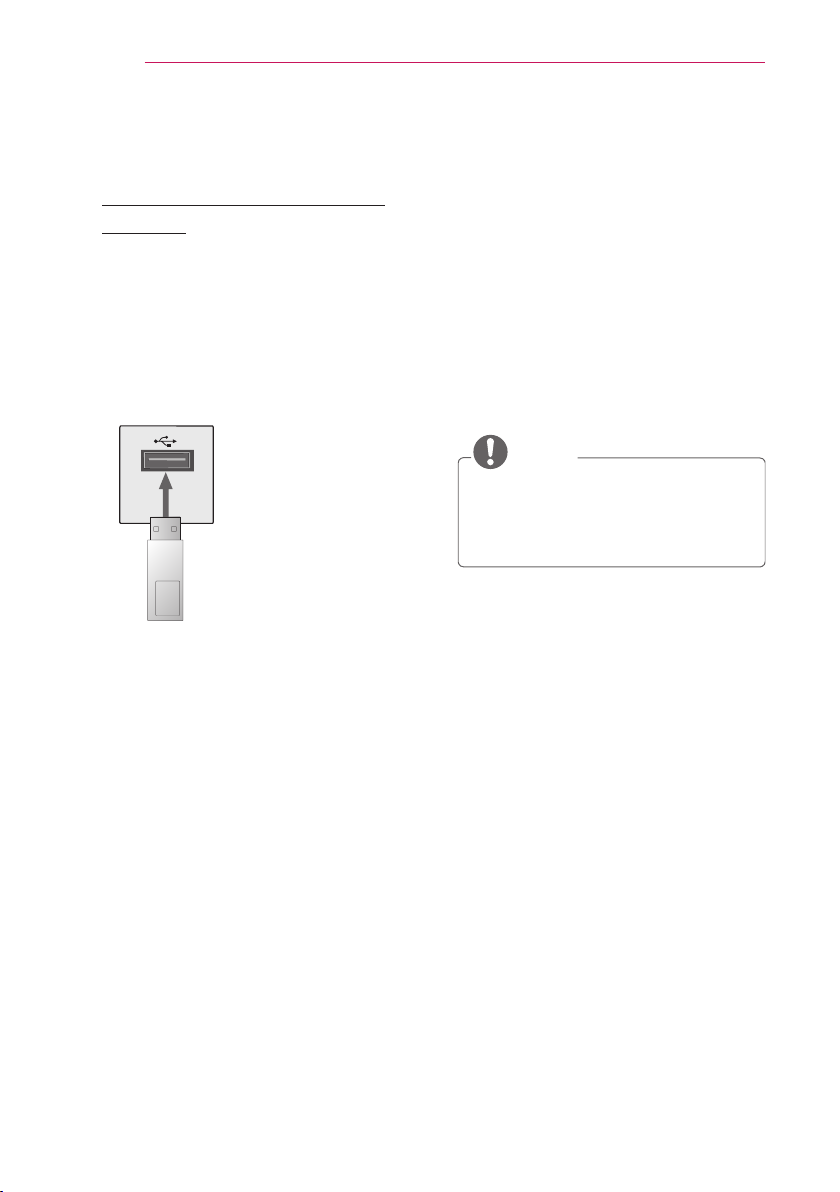
Connecting USB Storage Devices
Connect a USB flash drive as shown
below.
When a USB storage device is connected, the USB adjustment screen appears.
You cannot write or delete data on the
USB storage device.
USB flash drive
To disconnect the USB storage device,
1 Press the Q.MENU button.
2 Use the orbutton to move to
USB Device and press the OK
button.
3 Remove the USB device.
NOTE
After the USB storage device is
y
disconnected, it cannot be read.
Remove the USB storage device
and connect it again.
Page 29

Tips for Using USB Devices
Only a USB storage device is recog-
y
nizable.
USB hubs are not supported.
y
A USB storage device which uses its
y
own driver may not be recognized.
The recognition speed of a USB
y
storage device will depend on each
device.
If a normal USB device does not
y
work, disconnect and reconnect it.
Please do not turn off the projector
or unplug the USB device when the
connected USB device is working.
The USB device or stored files may
be damaged.
Please do not connect the USB stor-
y
age device that has been manipulated on the PC. The projector may
not operate properly or fail to play
files. Use a USB storage device which
contains normal music, photo, video
or document files.
Please only use a USB storage device
y
formatted as a FAT16, FAT32 or NTFS
file system provided by Windows. In
case a storage device formatted as a
different utility program is not supported by Windows, it may not be
recognized.
Please connect power to a USB stor-
y
age device which requires an external
power supply. If not, the device may
not be recognized.
ENTERTAINMENT
Please connect a USB storage device
y
with a cable provided by the USB
manufacturer. When you use a cable
that is not provided by a USB manufacturer or an excessively long cable,
the device may not be recognized.
Some USB devices may not be sup-
y
ported or will not work properly.
If the length of a folder or file is too
y
long, the folder or file may not be
recognized properly.
The files in a USB storage device are
y
sorted in the same way as Windows
XP. Up to 100 English characters for
a file name are allowed.
The data of a USB device may be
y
damaged, so it is recommended to
backup any important files. Because
a user is responsible for data management, the manufacturer is not
responsible.
It is recommended to use a USB
y
flash drive which is 32 GB or less
and a USB hard disk which is 1 TB or
less. Any device with more than the
recommended capacity may not work
properly.
If a USB storage device is not working
y
properly, disconnect it and connect it
again.
If a USB external hard disk with the
y
power saving function does not work,
turn the hard disk off and on again to
make it work properly.
USB storage devices below USB 2.0
y
are supported as well. However, they
may not work properly in the movie
list.
29
ENGLISH
Page 30

30
ENTERTAINMENT
MOVIE LIST
In the Movie List, you can watch movies stored on the connected USB device.
Tips for Playing Video Files
Some subtitles created by a user may
y
not work.
Some special characters are not
y
supported in subtitles.
HTML tags are not supported in
y
subtitles.
Time information in a subtitle file
y
should be arranged in ascending
order to play the subtitle properly.
Changing font and color in subtitles
y
is not supported.
A language which is not specified
y
in the subtitle languages is not
supported.
Subtitle files of 1 MB or larger are not
y
supported.
The screen may suffer temporary
y
interruptions (image stoppage, faster
playback, etc.) when the audio language is changed.
A damaged video file may not be
y
played properly or some functions
may not be available.
Video files created with some encod-
y
ers may not be played properly.
Either audio or video may only be
y
supported depending on the video or
audio packet structure of a video file.
Video files with higher resolution than
y
the maximum supported for each
frame may not be played properly.
Video files in formats other than the
y
ones specified above may not be
played properly.
Streaming files which include GMC
y
(Global Motion Compensation) or
Qpel (Quarterpel Motion Estimation)
is not supported.
Up to 10,000 sync blocks are sup-
y
ported in the subtitle file.
Seamless playback is not guaranteed
y
for files encoded level 4.1 or higher in
H.264/AVC.
DTS audio codec is not supported.
y
Video files larger than 30 GB (Giga-
y
bytes) are not supported.
Playing a video via a USB connection
y
that does not support high speed
may not work properly.
A video file and its subtitle file must
y
be located in the same folder. A video
file name and its subtitle file name
must be identical in order to display
the subtitle properly.
While watching a video using the
y
movie list function, you cannot adjust
the picture mode.
Trick Mode does not support other
y
functions than ꕙif video files do not
have index information.
When playing a video file using net-
y
work, the Trick mode is limited to 2X
speed.
Video file names that contain special
y
characters may not be playable.
Page 31

CUSTOMIZING SETTINGS
31
CUSTOMIZING SETTINGS
SETUP Menu
1 Press the SETTINGS button.
2 Use the r button to select a desired item and press theOK button.
3 Use the r button to set up a desired item and press theOK button.
4 When you finished, press EXIT.
Menu Description
PICTURE Adjusts the image quality for optimal viewing.
AUDIO Adjusts the sound quality and volume level.
TIME Sets the time and time-related features.
OPTION Customizes the general settings.
INPUT Selects the desired input source.
ENGLISH
MY MEDIA Accesses photo, music, movie, and document files.
Page 32

32
HDMI/DVI
RGB IN
A/V IN
ANTENNA
IN
MAKING CONNECTIONS
MAKING CONNECTIONS
You can connect various external devices to the ports on the projector.
Computer/Notebook VideoDVD
Digital Device
USB
Headphones
HDMI - Page 33
Component - Page 35
Input(AV) - Page 34
RGB - Page 33
USB Devices - Page 28
Headphones - Page 35
Game Console
Page 33

MAKING CONNECTIONS
HDMI/DVI
RGB IN
A/V IN
USB
HDMI/DVI
HDMI/DVI
RGB IN
A/V IN
A/V IN
RGB IN
A/V IN
33
Connecting to an HD Receiver, DVD Player or VCR
Connect an HD receiver, DVD Player or
VCR to the projector and select an appropriate input mode.
HDMI Connection
With an HDMI cable, you can enjoy high
quality picture and sound. Press the
INPUT button on the remote control to
select HDMI.
Accessories
Connecting to a PC
The projector supports Plug & Play.
A PC will automatically recognize the
projector and requires no driver to be
installed.
RGB Connection
Connect the PC output and the PC
video input port of the projector with the
RGB cable.
For audio signal, connect the PC and the
projector with an optional audio cable.
Accessories
RED
WHITE
YELLOW
ENGLISH
WHITE
RED
Optional
Extras
+'0,
+'0,
Optional
Extras
$8',2287
Optional
Extras
5*%2873&
Page 34

34
HDMI/DVI
RGB IN
A/V IN
HDMI/DVI
RGB IN
A/V IN
A/V IN
RGB IN
A/V IN
A/V IN
MAKING CONNECTIONS
RGB Connection
You can connect the audio cable without
using a gender as shown in the illustration above.
Connecting to the AV INPUT
Connect the output ports of an external
device and the AV INPUT port of the
projector. Press the INPUT button to
select AV.
$8',2287
Optional
Extras
5*%2873&
Optional
Extras
YELLOW
YELLOW
WHITE
WHITE
Accessories
RED
RED
WHITE
YELLOW
$9287
Optional
Extras
RED
/HIW 5LJKW
$8',2287
Page 35

MAKING CONNECTIONS
HDMI/DVI
RGB IN
A/V IN
HDMI/DVI
RGB IN
A/V IN
RGB IN
A/V IN
A/V IN
35
Component Connection
You can enjoy vivid images when you
connect an external device with a RGB
IN port to the component port of the
projector. Press the INPUT button on
the remote control to select Component.
YELLOW
Optional
Extras
GREEN
WHITE
WHITE
BLUE
Accessories
GREEN
RED
GREEN
RED
RED
WHITE
BLUE
BLUE
RED
Optional
Extras
RED
RED
Optional
Extras
Connecting to Headphones
You can listen to the audio through a
headphone.
Optional
Extras
ENGLISH
% 35 5LJKW
$9287
/HIW< 3
$8',2287
Page 36

36
IN
2
(MHL)
IN 2 (MHL)
HDMI/DVI
RGB IN
A/V IN
ANTENNA
IN
HDMI/DVI
A/V IN
ANTENNA
IN
MAINTENANCE
MHL Connection
Mobile High-definition Link (MHL) is
an interface for transmitting digital
audiovisual signals from mobile phones
to television sets.
MHL passive
cable
Optional
Extras
Mobile phone
NOTE
yConnect the mobile phone to
the HDMI IN port to view the
phone screen on the Projector.
yThe MHL passive cable is
needed to connect the Projector
and a mobile phone.
yThis only works for the MHL-
enabled phone.
MAINTENANCE
Clean your projector to keep it in optimum condition.
Cleaning the Projector
Cleaning the Lens
If there is any dust or staining on the
lens surface, you must clean the lens.
Use an air spray or a cleaning cloth to
clean the lens.
To remove dust or stains, use an air
spray or apply a small amount of cleaning agent onto a swab or soft cloth to
lightly rub the lens.
Please be aware that liquid may flow
onto the lens if the product is sprayed
directly onto the lens.
Cleaning the Projector Case
To clean the projector case, first unplug
the power cord.
To remove dust or stains, use only a dry,
lint-free, nonabrasive cloth to polish the
lens.
Do not use alcohol, benzene, thinners
or other chemicals, which may damage
the case.
Page 37

SPECIFICATIONS
SPECIFICATIONS
37
MODELS PG60G (PG60G-JE)
Resolution (Pixel) 1280 (Horizontal) × 800 (Vertical)
Aspect ratio 16:10 (Horizontal:Vertical)
Panel size (mm) 11.623 (0.4 inch)
Projection distance
(Video size)
Ratio of upward
projection
Working range of the
remote control
Video input
AC-DC Adaptor 19.5 V , 4.62 A (Adaptor Input 100 ~ 240 @ 50 Hz/60 Hz)
Audio Output 3 W MONO
Height (mm)
Width (mm) 60 (2.3 inch)
Depth (mm)
Weight (kg) 0.68 (1.4 Ibs)
USB Device 5 V, 0.5 A (Max.)
Temperature
Operation 0 °C - 40 °C (32 °F - 104 °F)
Operation
environment
Storage -20 °C - 60 °C (-4 °F - 140 °F)
Relative Humidity
Operation 0 % - 80 %
Storage 0 % - 85 %
0.80 m - 3.25 m (63.5 cm - 254.0 cm)
31.4 inch - 127.9 inch (25 inch - 100 inch)
100 %
3 m (118.1 inch)
NTSC M / PAL-B, D, G, H, I / PAL M / PAL N / PAL 60 / SECAM
125 (without foot) (4.9 inch)
127.5 (with foot) (5.0 inch)
125 (without foot) (4.9 inch)
131 (with foot) (5.1 inch)
ENGLISH
Page 38

38
SPECIFICATIONS
Supported Monitor Display
Horizontal
Resolution
640 x 350 31.468 70.09
720 x 400 31.469 70.08
640 x 480 31.469 59.94
800 x 600 37.879 60.31
1024 x 768 48.363
1152 x 864 54.348 60.053
1280 x 800 49.68 60
1360 x 768 47.712 60.015
1280 x 1024 63.981 60.020
1400 x 1050 65.317 59.979
1680 x 1050 65.3 60
If an invalid signal is input into the
y
Frequency
(kHz)
projector, it will not be displayed
properly on the screen or a message
such as No Signal or Invalid
be displayed.
The projector supports the DDC1/2B type
y
as the Plug & Play function (Auto-recognition of PC monitor).
PC synchronization signal types sup-
y
ported: Separate type synchronization.
In PC mode, 1280 x 800 is recommend-
y
ed for the best picture quality.
Vertical
Frequency
(Hz)
60.00
119.99
Mode will
HDMI/DVI-DTV/WiDi
supported mode
Horizontal
Resolution
720 x 480 31.469
720 x 576 31.25 50
1280 x 720 37.5
1920 x 1080 33.72
Frequency
(kHz)
31.5
44.96
45
33.75
28.125
26.97
27
33.716
33.75
56.25
67.43
67.5
Frequency
Vertical
(Hz)
59.94
60
50
59.94
60
59.94
60
50
23.97
24
29.976
30.00
50
59.94
60
Page 39

SPECIFICATIONS
39
Open Source Software Information
To obtain the source code under GPL,
LGPL, MPL and other open source licenses, that is contained in this product,
please visit http://opensource.lge.com .
In addition to the source code, all referred license terms, warranty disclaimers and copyright notices are available
for download.
LG Electronics will also provide open
source code to you on CD-ROM for a
charge covering the cost of performing
such distribution
(such as the cost of media, shipping
and handling) upon email request to
opensource@lge.com. This offer is valid
for three (3) years from the date on
which you purchased the product.
Wireless Specifications
(TWFM-B006D)
Standard IEEE802.11a/b/g/n
Frequency
Range
Output Power
(Max.)
2400 MHz to 2483.5 MHz
5150 MHz to 5250 MHz
5725 MHz to 5850 MHz
(For Non EU)
802.11a: 11 dBm
802.11b: 14 dBm
802.11g: 10.5 dBm
802.11n - 2.4 GHz: 11 dBm
802.11n - 5 GHz: 12.5 dBm
Component port connecting
information
Signal
480i / 576i
480p / 576p o
720p / 1080i o
1080p
Component
o
o
(50 Hz / 60 Hz only)
ENGLISH
Because the band channel used by
y
the country could be different, the
user cannot change or adjust the
operating frequency and this product
is set for the regional frequency table.
Page 40

The model and serial number of the projector are located on the back or on the side
of the projector. Record them below should
you ever need service.
MODEL
SERIAL
Page 41

Manuel d'utilisation
PROJECTEUR DLP
Veuillez lire attentivement ce guide avant de mettre en service
votre projecteur et conservez-le afin de pouvoir vous y référer
ultérieurement.
PG60G
www.lg.com
Page 42

2
LICENCES
LICENCES
Les licences prises en charge peuvent varier d'un modèle à l'autre. Pour plus
d'informations sur les licences, consultez le site www.lg.com.
Fabriqué sous licence de Dolby Laboratories. Dolby et le symbole
double-D sont des marques commerciales de Dolby Laboratories.
À PROPOS DES VIDÉOS DIVX: DivX® est un format de vidéo
numérique créé par DivX, LLC, filiale de Rovi Corporation. . Votre
appareil est officiellement certifié par DivX (DivX Certified®), ce
qui vous permet de lire des vidéos DivX. Rendez-vous sur divx.
com pour obtenir plus d'informations ainsi que des logiciels
permettant de convertir vos fichiers au format DivX.
À PROPOS DE LA VIDÉO À LA DEMANDE DIVX: ce
périphérique DivX Certified® doit être enregistré pour pouvoir
lire des vidéos à la demande DivX. Pour obtenir le code
d'enregistrement, accédez à la section DivX VOD (Vidéo à la
demande DivX) du menu de réglage de l'appareil. Les instructions
d'enregistrement sont disponibles sur le site vod.divx.com.
DivX Certified® pour la lecture de vidéos DivX® jusqu'en HD
1080p, y compris le contenu Premium.
DivX®, DivX Certified® et leurs logos respectifs sont des marques
déposées de Rovi Corporation ou de ses filiales; leur utilisation
est régie par une licence.
«Couverture par un ou plusieurs des brevets américains
suivants:
7,295,673; 7,460,668; 7,515,710; 7,519,274”
The terms HDMI and HDMI High-Definition Multimedia Interface,
and the HDMI logo are trademarks or registered trademarks of
HDMI Licensing LLC in the United States and other countries.
Cet appareil est conforme aux normes CEM pour l'électroménager (ClasseB)
pour un usage domestique. Cet appareil peut être utilisé dans toutes les régions.
REMARQUE
L'image proposée peut différer de l'aspect réel de votre projecteur.
y
L'affichage à l'écran de votre projecteur peut être légèrement différent de ce qui
y
est indiqué sur le manuel.
Page 43

CONSIGNES DE SÉCURITÉ
WARNING/CAUTION
RISK OF ELECTRIC SHOCK
DO NOT OPEN
CONSIGNES DE SÉCURITÉ
Veuillez noter les consignes de sécurité afin d'éviter tout risque d'accident ou
d'utilisation incorrecte du projecteur.
Ces consignes vous sont présentées sous deux titres: «Avertissement» et
y
«Attention» comme expliqué ci-dessous.
AVERTISSEMENT:
ATTENTION:
Lisez le manuel d'utilisation avec soin et gardez-le à portée de main.
y
WARNING/CAUTION
RISK OF ELECTRIC SHOCK
DO NOT OPEN
Le symbole de l'éclair en
forme de flèche dans un
triangle équilatéral signale à
l'utilisateur la présence
dans la coque de l'appareil d'une
tension dangereuse et non isolée
pouvant être d'amplitude suffisante
pour constituer un risque
d'électrocution.
Le symbole du point
d'exclamation dans un
triangle équilatéral signale à
l'utilisateur la présence
d'instructions d'utilisation et
d'entretien importantes dans la
documentation accompagnant
l'appareil.
AVERTISSEMENT/ATTENTION
- AFIN DE RÉDUIRE LE
RISQUE D'INCENDIE ET
D'ÉLECTROCUTION, N'EXPOSEZ
PAS L'APPAREIL À LA PLUIE OU À
L'HUMIDITÉ.
le non-respect de cette instruction peut entraîner des blessures
graves ou même la mort.
Le non-respect de ces instructions peut entraîner des blessures ou
endommager
le produit.
Lisez ces consignes.
Conservez ces consignes.
Tenez compte de tous les
avertissements.
Suivez toutes les instructions.
Installation en intérieur
AVERTISSEMENT
Ne placez pas le projecteur sous
y
la lumière directe du soleil ni près
de sources de chaleur telles qu'un
radiateur, un feu de cheminée ou une
cuisinière.
- Le non-respect de cette consigne
peut provoquer un incendie.
Ne placez pas de matières
y
inflammables telles que des aérosols
sur le projecteur ou près du projecteur.
- Le non-respect de cette consigne
peut provoquer un incendie.
Ne laissez pas vos enfants de
y
s'accrocher ou monter sur le projecteur.
- Le projecteur peut tomber et
entraîner des blessures ou la mort.
Ne placez pas le projecteur directement
y
sur une moquette, un tapis ou un
endroit où la ventilation est limitée (une
étagère ou une armoire par exemple).
- La température interne du projecteur
risque d'augmenter, ce qui peut
provoquer un incendie.
Ne placez pas le projecteur à proximité
y
d'une source de vapeur ou d'huile telle
qu'un humidificateur, ou sur un plan de
travail de cuisine.
- Le non-respect de cette consigne
peut provoquer un incendie ou une
électrocution.
3
Français
Page 44

4
CONSIGNES DE SÉCURITÉ
Ne placez pas le projecteur dans
y
un endroit exposé à une quantité
excessive de poussière.
- Le non-respect de cette consigne
peut provoquer un incendie.
N'utilisez pas le projecteur dans les
y
lieux humides, tels qu'une salle de
bain ou tout autre lieu susceptible
d'être humide.
- Le non-respect de cette consigne
peut provoquer un incendie ou une
électrocution.
Assurez-vous que les évents
y
d'aération du projecteur ne sont pas
obstrués par une nappe ou un rideau.
- La température interne du projecteur
risque d'augmenter, ce qui peut
provoquer un incendie.
Pour une bonne aération, la distance
y
entre le projecteur et le mur doit être
d'au moins 30cm.
- Le non-respect de cette consigne
peut entraîner une augmentation
excessive de la température interne
du projecteur et provoquer un
incendie.
ATTENTION
Si vous installez le projecteur sur une
y
table, veillez à ne pas le positionner
près du bord.
- Le projecteur risquerait de tomber,
ce qui pourrait provoquer des
blessures ou endommager l'appareil.
Utilisez uniquement un support
adapté à la taille du projecteur.
Mettez le projecteur hors tension,
y
débranchez l'alimentation et tous les
câbles avant de déplacer le projecteur.
- Un cordon endommagé peut
provoquer un incendie ou une
électrocution.
Ne placez pas le projecteur sur une
y
surface instable ou soumise à des
vibrations, telle qu'une étagère instable
ou un plan incliné.
- Il risquerait de tomber et de
provoquer des blessures.
Veillez à ne pas faire basculer le
y
projecteur lorsque vous raccordez un
appareil externe.
- Le non-respect de cette consigne
peut entraîner des blessures ou
endommager l'appareil.
Power (Marche-Arrêt)
AVERTISSEMENT
Le câble de mise à la terre doit être
y
branché.
- En cas de surtension, une mauvaise
mise à la terre peut endommager
le projecteur ou présenter un risque
d'électrocution. Lorsque le projecteur
doit être installé à un endroit où la
terre n'est pas possible, achetez
un coupe-circuit et connectez le
projecteur à sa prise murale. Ne
mettez pas le projecteur à la terre sur
une conduite de gaz, une conduite
d'eau, un paratonnerre, une ligne
téléphonique, etc.
La fiche d'alimentation doit être
y
entièrement insérée dans la prise
murale.
- Une connexion instable peut
provoquer un incendie.
Ne placez pas d'objets lourds sur le
y
cordon d'alimentation. Ne placez pas
le cordon sous le projecteur.
- Le non-respect de cette consigne
peut provoquer un incendie ou une
électrocution.
Ne touchez jamais la fiche
y
d'alimentation avec les mains
mouillées.
- Le non-respect de cette consigne
peut provoquer une électrocution.
Ne branchez pas un trop grand
y
nombre de dispositifs sur une même
rallonge d'alimentation.
- Une surchauffe peut provoquer un
incendie.
Nettoyez la poussière ou les
y
contaminants autour des tiges de la
fiche d'alimentation ou des prises
murales.
- Le non-respect de cette consigne
peut provoquer un incendie.
Pour couper l'alimentation principale,
y
débranchez la prise d'alimentation.
Celle-ci doit être positionnée de façon
à être facilement accessible.
Page 45

CONSIGNES DE SÉCURITÉ
5
ATTENTION
Maintenez fermement la fiche
y
d'alimentation lorsque vous la
débranchez.
- Un fil coupé dans le cordon peut
provoquer un incendie.
Vérifiez que le cordon d'alimentation
y
ou la fiche n'est pas endommagé,
modifié, plié, tordu, tiré, écrasé ou
chauffé. N'utilisez pas une prise
murale lâche.
- Le non-respect de cette consigne
peut provoquer un incendie ou une
électrocution.
Gardez le cordon d'alimentation à
y
distance des installations émettant de
la chaleur.
- Le revêtement du cordon peut
fondre et présenter un risque
d'électrocution.
Placez le projecteur à un endroit où
y
il n'existe pas un risque de trébucher
ou de marcher sur le cordon
d'alimentation ou sur la prise pour
éviter tout dommage.
- Le non-respect de cette consigne
peut provoquer un incendie ou une
électrocution.
Ne mettez pas le projecteur sous/
y
hors tension en branchant et en
débranchant le cordon d'alimentation
de la prise (n'utilisez pas le cordon
d'alimentation comme interrupteur).
- Le non-respect de cette consigne
peut provoquer une électrocution ou
endommager le projecteur.
N'insérez pas de conducteur sur l'autre
y
côté de la prise murale pendant que la
fiche d'alimentation est branchée sur
la prise murale. En outre, ne touchez
pas la fiche d'alimentation juste après
l'avoir débranchée de la prise murale.
- Le non-respect de cette consigne
peut entraîner une électrocution.
Utilisez uniquement le cordon
y
d'alimentation fourni par LG
Electronics, Inc. N'utilisez aucun autre
cordon d'alimentation.
- Le non-respect de cette consigne
peut provoquer un incendie ou une
électrocution.
En cours d'utilisation
AVERTISSEMENT
Ne placez aucun objet pouvant
y
contenir un liquide, tel qu'un pot de
fleurs, une tasse, des cosmétiques, des
produits chimiques, des décorations
ou une bougie sur le ojecteur.
- Le non-respect de cette consigne
peut provoquer un incendie,
une électrocution ou la chute du
projecteur pouvant entraîner des
blessures.
Si le projecteur subit un impact violent
y
ou que son boîtier est endommagé,
éteignez-le, débranchez-le de la prise
murale et contactez un centre de
réparation agréé.
- Le non-respect de cette consigne
peut provoquer un incendie ou une
électrocution.
N'insérez pas d'objets métalliques
y
tels que des pièces de monnaie,
des épingles à cheveux ou des
débris métalliques, ni des matières
inflammables telles que du papier ou
des allumettes dans le projecteur.
- Le non-respect de cette consigne
peut provoquer un incendie ou une
électrocution.
Si un liquide ou un corps étranger
y
pénètre dans le projecteur, éteignez-le
et débranchez-le de la prise murale et
contactez un centre de réparation LG
Electronics.
- Le non-respect de cette consigne
peut provoquer un incendie ou une
électrocution.
Lors du remplacement d'une batterie
y
de la télécommande, veillez à ce qu'un
enfant ne puisse pas avaler la batterie.
Ne laissez pas la batterie à portée des
enfants.
- Si un enfant avale une batterie,
consultez immédiatement votre
médecin.
Ne retirez aucun couvercle excepté le
y
cache de l'objectif.
Français
Page 46

6
CONSIGNES DE SÉCURITÉ
Ne regardez pas directement dans
y
l'objectif lorsque le projecteur est en
cours d'utilisation. Vous risqueriez de
vous abîmer la vue.
Lorsque la lampe du projecteur est
y
allumée ou vient d'être éteinte, évitez
de toucher l'évent d'aération ou la
lampe car ils sont brûlants.
En cas de fuite de gaz, ne touchez pas
y
la prise murale. Ouvrez la fenêtre pour
aérer.
- Une étincelle peut provoquer un
incendie ou des brûlures.
Ne jamais toucher le projecteur ou
y
le cordon d'alimentation pendant un
orage.
- Le non-respect de cette consigne
peut provoquer une électrocution.
N'utilisez pas le projecteur près d'un
y
appareil électronique générant un fort
champ magnétique.
Rangez la poche en vinyle utilisée
y
pour emballer le projecteur hors de
portée des enfants.
- Une mauvaise utilisation présente un
risque d'asphyxie.
Ne gardez pas les mains sur le
y
projecteur de façon prolongée lorsqu'il
est en cours d'utilisation.
Lorsque vous jouez à un jeu vidéo en
y
branchant votre console sur un projecteur, nous vous recommandons de
respecter une distance supérieure à
quatre fois la longueur de la diagonale
de l'écran.
Assurez-vous que la longueur du
y
câble de connexion est suffisante. À
défaut, l'appareil risque de tomber. Il
pourrait alors provoquer une blessure
ou être endommagé.
ATTENTION
Ne placez pas d'objets lourds sur le
y
projecteur.
- Il risquerait de tomber et de
provoquer des blessures.
Évitez que l'objectif ne soit soumis à
y
un choc violent lors du déplacement
de l'objectif.
Évitez de toucher l'objectif. Vous
y
risqueriez d'endommager l'objectif.
N'utilisez pas d'outils pointus tels
y
qu'un couteau ou un marteau sur le
projecteur car cela endommagerait le
boîtier.
Si aucune image n'apparaît à l'écran,
y
éteignez le projecteur, débranchez-le
de la prise électrique et contactez un
centre de service agréé.
- Le non-respect de cette consigne
peut provoquer un incendie ou une
électrocution.
Évitez de faire tomber un objet sur
y
le projecteur ou d'exercer une forte
pression sur celui-ci.
- Le non-respect de cette consigne
peut entraîner des blessures ou
endommager l'appareil.
La distance séparant vos yeux et
y
l'écran doit être équivalente à 5 à
7fois la diagonale de l'écran.
- Le fait de regarder un écran de trop
près pendant une longue période de
temps peut provoquer des troubles
de la vue.
Page 47

CONSIGNES DE SÉCURITÉ
7
Nettoyage
AVERTISSEMENT
Ne vaporisez pas d'eau sur le
y
projecteur lors de son nettoyage. Ne
laissez pas d'eau pénétrer dans le
projecteur et ne le mouillez pas.
- Le non-respect de cette consigne
peut provoquer un incendie ou une
électrocution.
Si de la fumée ou une odeur étrange
y
s'échappe du projecteur, ou qu'un
corps étranger pénètre dans le
projecteur, éteignez-le, débranchezle de la prise électrique et contactez
votre centre de service LG Electronics.
- Le non-respect de cette consigne
peut provoquer un incendie ou une
électrocution.
Utilisez un nettoyant à air comprimé
y
ou un chiffon doux légèrement
imprégné d'un détergent neutre et
d'eau pour retirer la poussière ou les
taches sur l'objectif.
ATTENTION
Contactez votre revendeur le centre
y
de service une fois par an pour faire
faire un nettoyage des composants
internes du projecteur.
- Le non-respect de cette consigne
peut provoquer un incendie ou
endommager le projecteur.
Lors du nettoyage des composants
y
plastique tels que le boîtier du
projecteur, débranchez d'abord le
cordon d'alimentation et essuyez le
composant à l'aide d'un chiffon doux.
Ne vaporisez pas d'eau et n'utilisez pas
de chiffon mouillé. Lors du nettoyage
des composants plastique tels que le
boîtier du projecteur, n'utilisez jamais
un nettoyant, un produit lustrant pour
voitures ou industriel, un abrasif ou de
la cire, du benzène, de l'alcool, etc., qui
risqueraient d'endommager le produit.
- Le non-respect de cette
consigne peut entraîner un risque
d'incendie, d'électrocution ou
d'endommagement du produit
(déformation, corrosion ou
dommage).
Français
Page 48

8
CONSIGNES DE SÉCURITÉ
Divers
AVERTISSEMENT
Seul un technicien qualifié peut
y
démonter ou modifier le projecteur.
Pour toute opération de contrôle, de
réglage ou de réparation, contactez
votre revendeur ou le centre de service.
- Le non-respect de cette consigne
peut provoquer un incendie ou une
électrocution.
Conformez-vous aux règles de mise
y
au rebut applicables pour la batterie
usagée.
- Le non-respect de cette consigne
risque de provoquer une explosion
ou un incendie.
La méthode de mise au rebut peut
y
varier selon votre pays ou votre région.
Veuillez respecter les instructions
relatives à la mise au rebut de la
batterie.
Ne jetez pas et n'essayez pas de
y
démonter la batterie.
- Le non-respect de cette consigne
risque de provoquer un incendie ou
une explosion suite aux dommages
causés à la batterie.
Utilisez toujours une batterie
y
approuvée et certifiée par LG
Electronics.
- Le non-respect de cette consigne
risque de provoquer un incendie ou
une explosion.
Ne stockez pas la batterie à proximité
y
d'objets métalliques tels que des clés
ou des trombones.
Un excès de courant peut provoquer
y
une rapide augmentation de la
température et causer un incendie.
Ne stockez pas la batterie à proximité
y
d'une source de chaleur telle qu'un
radiateur.
- Le non-respect de cette consigne
risque de provoquer un incendie ou
d'endommager le produit.
Ne stockez pas la batterie à une
y
température supérieure à 60 °C, ni
dans des conditions de forte humidité.
Ne laissez pas la batterie à portée des
y
enfants.
- Le non-respect de cette consigne
peut entraîner des blessures ou endommager le produit.
Assurez-vous que la batterie est
y
correctement installée.
L'utilisation d'une batterie de rem-
y
placement non appropriée risque de
provoquer un incendie.
ATTENTION
Débranchez le projecteur si vous ne
y
l'utilisez pas pendant une longue
période.
- Une accumulation de poussière
peut provoquer une surchauffe, une
électrocution due à une corrosion de
l'isolation ou un incendie dû à une
surtension.
Utilisez uniquement le type de piles
y
spécifié.
- Le non-respect de cette consigne
peut provoquer une électrocution
due à une surchauffe ou une fuite de
liquide.
Page 49

Affichage
du manuel
d’utilisation
Le manuel d’utilisation au format PDF se
trouve sur le CD fourni avec votre produit.
Vous devez installer Adobe Acrobat Reader
pour pouvoir lire le manuel d’utilisation sur
votre PC.
1 Insérez le CD fourni. La page Web
s’affiche automatiquement.
2 Sélectionnez la langue sur la page
Web.
3 Cliquez sur le nom du modèle sur la
page Web.
4 Consultez le manuel d’utilisation.
REMARQUE
ySi la page Web n’apparaît pas
automatiquement, allez dans Poste
de travail, sélectionnez LG, puis
cliquez sur le fichier index.htm pour
afficher le manuel d’utilisation.
CONSIGNES DE SÉCURITÉ
9
Français
- This DLP Projector is a Risk Group 2
device that meets safety standard IEC
62471 standard.
Risk Group 2
CAUTION. Possibly hazardous
optical radiation emitted from
this product. DO not stare at
operating lanp. May be harmful
to the eye.
Page 50

10
SOMMAIRE
Sommaire
LICENCES 2
CONSIGNES DE SÉCURITÉ 3
AFFICHAGE DU MANUEL
D’UTILISATION 9
PRÉPARATION 11
Accessoires 11
Suppléments en option 12
Pièces et composants 13
Installation 14
- Précautions d'installation 14
- Branchement d'un adaptateur 14
- Distance de projection par taille
d'écran 15
- Utilisation du capuchon de
l'objectif 16
- Utilisation de la scène Station 16
- Branchement d'une batterie 17
- Installation du projecteur sur un
trépied 18
- Système de sécurité Kensington 18
TÉLÉCOMMANDE 19
UTILISATION DU
PROJECTEUR 21
Utilisation du projecteur 21
- Mise sous tension du projecteur 21
- Mise au point et position de l'image
à l'écran 21
- Utilisation du projecteur 21
- Utilisation de la batterie 22
- Information sur le temps d'utilisation
de la batterie 22
Utilisation d'options supplémentaires 24
- Utilisation de la fonction Taille de
l'écran 24
- Utilisation de la fonction Keystone 25
- Utilisation de la liste des sources 25
- Fonction Absence d'image 26
Utilisation des raccourcis 26
DIVERTISSEMENT 27
Réglage Wireless Display-Affichage
sans fil (Ordinateur portable) 27
Réglage Wireless Display-Affichage
sans fil (Téléphone portable) 27
MES MÉDIAS 28
- Connexion de périphériques de
stockage USB 28
- VIDÉO 30
PERSONNALISATION DES
PARAMÈTRES 31
Menu CONFIGURATION 31
ÉTABLISSEMENT DE
CONNEXIONS 32
Raccordement à un récepteur HD, un
lecteur DVD ou un magnétoscope 33
- Connexion HDMI 33
Connexion à un PC 33
- Connexion RVB 33
Connexion au port AV INPUT 34
- Connexion Composants 35
Branchement d'un casque 35
Connexion MHL 36
MAINTENANCE 36
Nettoyage du projecteur 36
- Nettoyage de l'objectif 36
- Nettoyage du boîtier du
projecteur 36
SPÉCIFICATIONS 37
Page 51

PRÉPARATION
219'4
/76'
+0276
81.7/'
2#)'
#761
$.#0-
':+6ꕯ
ꕣ
5'66+0)5 3/'07
56+..
1-
4#6+1
75$
*'.2 -';5 -';5
Accessoires
Vérifiez les accessoires inclus.
L'aspect réel du produit peut différer de l'illustration.
TélécommandePile
bouton
(CR 2032)
Chargeur Cordon d'alimentation CD - Manuel d'utilisation
Manuel d'utilisation Câble RGB
PRÉPARATION
11
Français
Capuchon Batterie Support
Câble vidéo composite Sac
Lorsque vous connectez un câble au port HDMI ou
y
USB, il est possible qu'il ne soit pas correctement
connecté si la taille de la prise est trop grande pour le
port USB/HDMI. Utilisez une prise de taille standard.
Page 52

12
PRÉPARATION
Suppléments en option
Pour l'achat de suppléments en option, adressez-vous à un magasin de matériel
électronique, rendez-vous sur un site d'achat en ligne ou contactez le revendeur auprès
duquel vous avez acheté ce produit.
Les suppléments en option peuvent être modifiés et de nouveaux accessoires peuvent
être ajoutés sans préavis, dans le but d'améliorer les performances du produit.
Écran du projecteur Trépied Câble HDMI
Câble vidéo Câble audio Câble MHL
Câble RGB vers
Composant
Câble de composant
Page 53

PRÉPARATION
HDMI/DVI
RGB IN
A/V IN
Pièces et composants
* Ce projecteur est fabriqué selon une technologie de haute précision. Toutefois, il
est possible que de minuscules points noirs et/ou points lumineux (rouge, bleu ou
vert) s'affichent continuellement sur l'écran du projecteur. Ce phénomène est dû au
processus de fabrication et n'indique pas un défaut de fonctionnement. Lors de la
mise sous tension, la LED du panneau de commande s'allume.
Gauche
Panneau de commande
Retour
Haut-parleurs
13
Français
DC IN
A/V IN
HDMI/DVI
RGB IN
Anneau de
mise au point
Objectif
2
1
Évent
Boutons Description
(Alimentation)
(Paramètres)
Permet d'éteindre ou d'allumer le projecteur.
Sélectionne ou ferme les menus.
Permet de se déplacer dans les menus et de modifier les
∧, ∨, <, >
paramètres.
(Touche <, >: permet d'ajuster le volume en fonction du mode
de saisie.)
ꔉ(OK)
1 En raison de la température élevée de l'air sortant des évents, ne vous approchez pas
trop des évents.
2 Ne touchez pas l'objectif lorsque vous utilisez le projecteur. Vous risqueriez
Vérifie le mode actuel et enregistre les modifications
apportées aux fonctions.
d'endommager l'objectif.
Page 54

14
PRÉPARATION
Installation
Précautions d'installation
Placez le projecteur dans un
y
environnement bien aéré.
- Pour empêcher l'accumulation
de chaleur interne, installez le
projecteur dans un endroit bien
aéré. Ne placez aucun objet près du
projecteur, afin de ne pas bloquer
les évents d'aération. Ce blocage
provoquerait l'augmentation de la
température interne.
- Ne placez pas le projecteur sur une
moquette ou un tapis. N'obstruez
pas les évents d'aération du bas
placez le projecteur sur une surface
solide et plane
- Veillez à ce qu'aucun corps étranger
(bout de papier, par exemple) ne
pénètre dans le projecteur.
.
et
Ne placez pas le projecteur dans un
y
environnement chaud ou humide.
- Ne placez pas le projecteur dans
un environnement chaud, froid ou
humide.
Ne placez pas le projecteur à un
y
endroit où il est susceptible d'attirer
de la poussière.
- Le non-respect de cette consigne
peut provoquer un incendie.
Ne retirez aucun couvercle excepté le
y
cache de l'objectif.
Ce projecteur est fabriqué selon
y
une technologie de haute précision.
Toutefois, il est possible que de
minuscules points noirs et/ou
points lumineux (rouge, bleu ou
vert) s'affichent continuellement sur
l'écran du projecteur. Ce phénomène
est lié au processus de fabrication
et n'indique pas un défaut de
fonctionnement.
La télécommande risque de ne
y
pas fonctionner avec une lampe
à ballast électronique ou une
lampe à trois longueurs d'onde.
Remplacez la lampe par une
lampe standard internationale pour
que la télécommande fonctionne
normalement.
Branchement d'un adaptateur
- Laissez un espace (30cm ou plus)
autour du projecteur.
Branchez l'adaptateur CC sur la prise
d'alimentation du projecteur.
Page 55

PRÉPARATION
15
Distance de projection par taille d'écran
1 Placez le projecteur, ainsi que le PC ou la source audio/vidéo, sur une surface stable
et plate.
2 Placez le projecteur à une distance appropriée de l'écran. La distance entre le
projecteur et l'écran détermine la taille de l'image.
3 Positionnez le projecteur de façon que l'objectif soit à angle droit par rapport à
l'écran. Si le projecteur n'est pas placé à angle droit, l'image à l'écran est inclinée
et offre une qualité médiocre. Si l'image à l'écran est déformée, utilisez la fonction
Keystone.
4 Branchez les cordons d'alimentation du projecteur et des périphériques connectés à
la prise murale.
Taux de projection vers le haut: 100 %
Français
Hauteur de l'écran (X)
X/2
X/2
Taille de l'écran
(mm)
1524 1292 808 1946
1778 1508 943 2272
1905 1615 1010 2436
2032 1723 1077 2599
2159 1831 1145 2762
2286 1938 1212 2925
2413 2046 1279 3089
2540 2154 1347 3252
AFFICHAGE
Distance de projection (D)
Largeur de l'écran (Y)
Y/2
AFFICHAGE
Y/2
Distance de projection (D)
30 mm
Écran 16:10
Largeur de l'écran (Y)
(mm)
635 538 337 803
762 646 404 966
889 754 471 1130
1016 861 539 1293
1143 969 606 1456
1270 1077 673 1619
1397 1185 741 1783
1651 1400 875 2109
Hauteur de l'écran (X)
(mm)
Distance de projection
(D) (mm)
Page 56

16
DC IN
PRÉPARATION
Utilisation du capuchon de l'objectif
Tournez le capuchon de l'objectif comme indiqué par la flèche.
⇒
REMARQUE
yVeillez à ne pas appliquer une force excessive lors de la fixation du capuchon de
l'objectif. Le non-respect de cette instruction pourrait endommager le produit.
Utilisation de la scène Station
DC IN
Scène normale
REMARQUE
yLors de la projection d'images au plafond, vous devez uniquement utiliser le câble
d'antenne coudé fourni et un périphérique de stockage USB.
Scène supérieure
DC IN
Page 57

Branchement d'une batterie
1. Montez le projecteur comme illustré.
⇒
PRÉPARATION
17
Français
2. Tournez la molette comme indiqué par la
flèche.
Page 58

18
PRÉPARATION
Installation du projecteur sur un trépied
Vous pouvez installer ce projecteur sur un trépied d'appareil photo, comme illustré
y
ci-dessous.
Lorsque vous stabilisez le trépied, il est recommandé d'utiliser un boulon de
y
verrouillage d'une taille standard de 4,5mm ou moins. La taille maximale autorisée
pour le boulon de verrouillage est 5,5mm (s'il dépasse la longueur maximale
autorisée, il risque d'endommager le projecteur).
Partie inférieure du
projecteur
Le projecteur est connecté
à cette pièce.
+
Trépied
Boulon utilisé pour
fixer le projecteur
⇒
Système de sécurité Kensington
Ce projecteur est équipé d'un connecteur pour système de sécurité Kensington
y
situé sur le panneau. Connectez un câble pour système de sécurité Kensington
comme indiqué ci-dessous.
Pour connaître le détail de l'installation et de l'utilisation du système de sécurité
y
Kensington, reportez-vous au guide de l'utilisateur fourni avec le système.
Le système de sécurité Kensington est un accessoire en option.
y
Qu'est-ce que Kensington?
y
Kensington est une entreprise qui vend des systèmes de sécurité destinés à
protéger les équipements électroniques coûteux comme des PC ou des ordinateurs
portables contre le vol. Page d'accueil Internet: http://www.kensington.com
Page 59
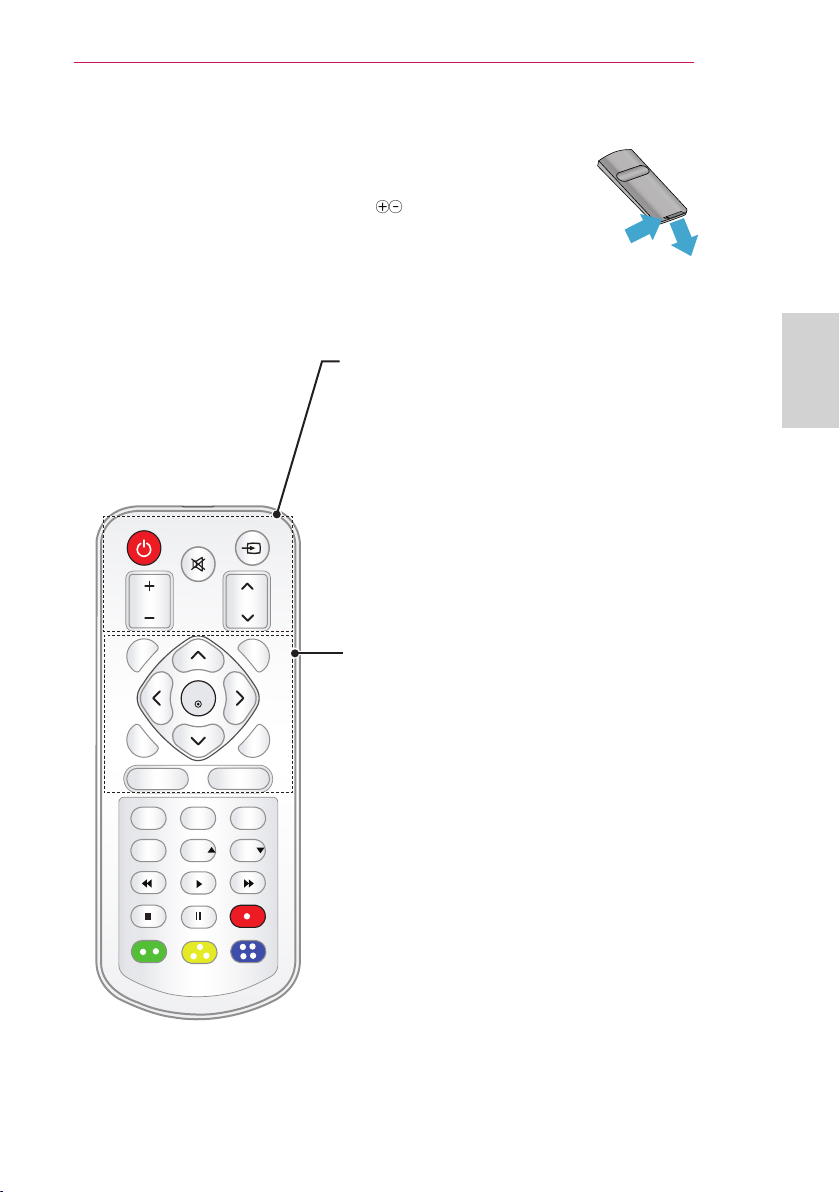
TÉLÉCOMMANDE
219'4
/76'
+0276
81.7/'
2#)'
#761
$.#0-
':+6ꕯ
ꕣ
5'66+0)5 3/'07
56+..
1-
4#6+1
75$
*'.2 -';5 -';5
①
②
Ouvrez le couvercle de la batterie au dos de la télécommande et insérez
les batteries spécifiées selon les instructions . Vous devez utiliser des
batteries identiques.
POWER
Permet d'éteindre ou d'allumer le projecteur.
INPUT
Permet de changer la source d'entrée.
MUTE
Permet de couper tous les sons.
VOLUME +, -
Permet de régler le niveau du volume.
PAGE
Permet de passer à l'écran précédent ou suivant.
TÉLÉCOMMANDE
19
Français
AUTO
Règle automatiquement l'image d'entrée RGB-PC.
BLANK
Permet d'éteindre ou d'allumer l'écran du projecteur.
Touches Haut/Bas/Gauche/Droite
Permet de sélectionner une fonction ou de déplacer le
curseur.
OK ꔉ
Vérifie le mode actuel et enregistre les modifications
apportées aux fonctions.
EXIT
Efface tout ce qui est affiché à l'écran et revient au
visionnage du projecteur.
ꕣ
Permet de revenir au niveau précédent.
SETTINGS
Sélectionne ou ferme les menus.
Q.MENU
Permet d'accéder au menu rapide.
Page 60

20
219'4
/76'
+0276
81.7/'
2#)'
#761
$.#0-
':+6ꕯ
ꕣ
5'66+0)5 3/'07
56+..
1-
4#6+1
75$
*'.2 -';5 -';5
219'4
/76'
+0276
81.7/'
2#)'
#761
$.#0-
1-
TÉLÉCOMMANDE
STILL
Fige l'image en mouvement.
(Disponible dans tous les modes excepté USB).
RATIO
Redimensionne une image.
USB
Permet d'accéder au mode USB.
HELP
Permet un diagnostic automatique.
KEY.S ,
Permet de régler la fonction Keystone.
Touches de commande de lecture
Contrôle la lecture de MES MÉDIAS.
Boutons de couleur
Ces touches permettent d'accéder à des fonctions spéciales
dans certains menus.
REMARQUES
Lorsque vous utilisez la télécommande, la plage de distance optimale est
y
inférieure à 3mètres (gauche/droite) et se situe dans un arc de 30degrés du
récepteur IR.
Pour un fonctionnement optimal, ne bloquez pas le récepteur IR.
y
Lorsque vous transportez la télécommande dans le sac portable, assurez-vous
y
que les touches n'appuient pas contre le projecteur, les câbles, des documents
ou d'autres accessoires contenus dans le sac. Cela pourrait en effet réduire
considérablement la durée de vie des batteries.
A/V IN
HDMI/DVI
RGB IN
Page 61
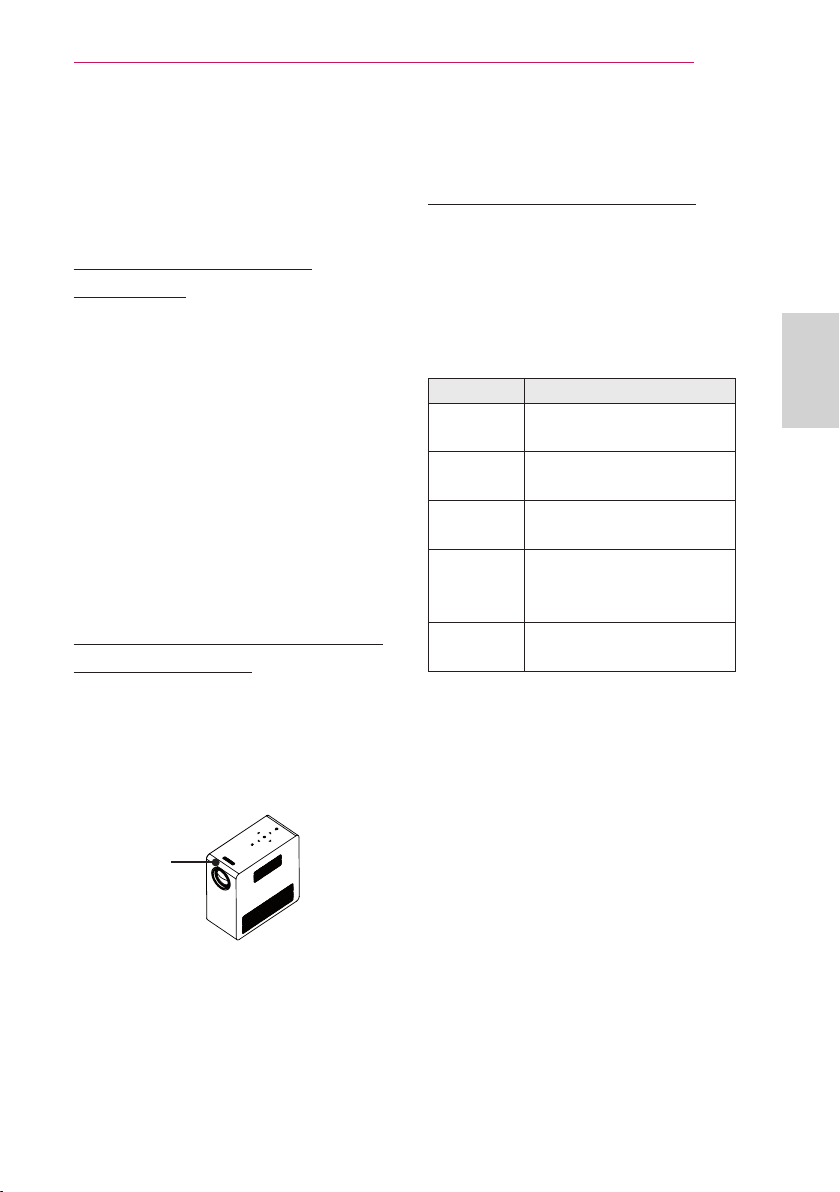
UTILISATION DU PROJECTEUR
HDMI/DVI
RGB IN
A/V IN
UTILISATION DU PROJECTEUR
21
Utilisation du projecteur
Mise sous tension du projecteur
1 Raccordez d'abord le cordon
d'alimentation correctement.
2 Au bout d'un moment, appuyez sur la
touche POWER de la télécommande
ou du panneau de commande. (Le
témoin lumineux du panneau de
commande s'allume.)
3 Sélectionnez une langue dans l'écran
Sélection de la langue.
4 Sélectionnez un signal d'entrée à
l'aide de la touche INPUT de la télécommande.
Mise au point et position de l'image à l'écran
Lorsqu'une image s'affiche à l'écran,
vérifiez que sa mise au point est
bonne et que sa taille est correctement
adaptée à l'écran.
Utilisation du projecteur
1 En mode veille, appuyez sur la touche
POWER pour allumer le projecteur.
2 Appuyez sur la touche INPUT pour
sélectionner le signal d'entrée voulu.
3 Contrôlez le projecteur à l'aide des
touches suivantes.
Boutons Description
VOL -, +
MUTE
Q.MENU
RATIO
KEY.S ,
Permet de régler le
niveau du volume.
Permet de couper tous
les sons.
Permet d'accéder au
menu rapide.
Permet de
redimensionner une
image.
Permettent de régler la
fonction Keystone.
4 Pour éteindre le projecteur, appuyez
sur la touche POWER.
Français
Anneau de
mise au point
Pour régler la mise au point de
y
l'image, tournez l'anneau de mise
au point.
Pour régler l'anneau de mise au
y
point, veillez à ne pas appuyer sur
les touches du panneau de commande.
Page 62

22
UTILISATION DU PROJECTEUR
Utilisation de la batterie
Batterie faible! Le projecteur va
bientôt s'éteindre
* L'icône réapparaît lorsque la batterie est faible.
* Lorsque la batterie est faible, le projecteur s'éteint en une minute.
Information sur le temps d'utilisation de la batterie
État Durée et affichage
Charge Environ 3heures
Usage normal
Heures
Niveau de la batterie
Indicateur
Environ 2 heures
(Le temps de batterie disponible est d'environ 1 h 30
lorsque le mode Économie d'énergie est défini sur le maximum)
Step 1 Step 2 Step 3 Step 4
* Lorsque vous n'utilisez pas le projecteur pendant une longue période, retirez la bat-
terie et entreposez-la séparément. Pour le stockage à long terme, il est recommandé
de charger la batterie à 40 - 50 pour cent.
* La batterie se recharge automatiquement lorsque le projecteur est reconnecté à une
prise murale.
* Rechargez complètement la batterie lors de la première utilisation du projecteur.
* La durée d'utilisation standard de la batterie donnée pour information dans le manuel est es-
timée selon les tests effectués par LG. La durée réelle peut varier selon l'utilisation.
* La durée d'utilisation de la batterie peut varier selon le type de diffusion, la température de fonc-
tionnement, la durée d'utilisation et les préférences utilisateur.
* Avec le temps, les performances de la batterie peuvent diminuer. Lorsque la durée d'autonomie
de la batterie est réduite de moitié, remplacez-la par une autre batterie LGElectronics; pour ce
faire, contactez le centre clientèle.
* En mode batterie, le mode économie d'énergie est désactivé.
* Ne rechargez pas la batterie avec un autre équipement que celui fourni avec le produit. Cela
pourrait endommager la batterie ou provoquer un incendie.
* Conformez-vous aux règles de mise au rebut applicables pour la batterie usagée. Tout manque-
ment à cette consigne peut entraîner une explosion ou un incendie. Les règles de mise au rebut
varient selon les pays et les régions.
Page 63

UTILISATION DU PROJECTEUR
* Assurez-vous que la batterie est mise au rebut conformément aux lois et règlements applica-
bles.
* Ne jetez pas et n'essayez pas de démonter la batterie. Une batterie endommagée pourrait en-
traîner un incendie ou une explosion.
* Utilisez toujours une batterie approuvée et certifiée par LG Electronics, Inc. Le non-respect de
cette instruction pourrait entraîner une explosion ou un incendie.
* Ne stockez pas la batterie à proximité d'objets métalliques tels que des clés ou des trombones.
Un excès de courant peut provoquer une rapide augmentation de la température et causer un
incendie.
* Ne stockez pas la batterie à proximité d'une source de chaleur telle qu'un radiateur. Le non-
respect de cette consigne peut provoquer un incendie ou un dysfonctionnement.
* Ne stockez pas la batterie à une température supérieure à 60°C, ni dans des conditions
d'humidité. Tout manquement à cette consigne peut entraîner une explosion ou un incendie.
* Ternir hors de portée des enfants. Le non-respect de cette instruction pourrait endommager le
produit ou entraîner des blessures.
* Assurez-vous que la batterie est correctement connectée. Tout manquement à cette consigne
peut entraîner une explosion ou un incendie.
* Si la batterie fuit ou dégage une quelconque odeur, retirez-la du projecteur et contactez le cen-
tre clientèle LG Electronics.
* La batterie contient du lithium-ion, veillez à la manipuler avec précaution. Tout manquement à
cette consigne peut entraîner une explosion ou un incendie.
* Risque d'explosion en cas de remplacement de la batterie par un modèle inadéquat. Remplacez
la batterie uniquement avec un modèle identique ou équivalent.
23
Français
Page 64

24
UTILISATION DU PROJECTEUR
Utilisation d'options supplémentaires
Utilisation de la fonction Taille de l'écran
Vous pouvez régler le format d'affichage
de l'image en appuyant sur RATIO
lorsque le projecteur diffuse l'image.
- 4:3: permet de redimensionner les
images au format4:3.
REMARQUE
Les paramètres peuvent varier en
y
fonction du signal d'entrée.
Vous pouvez également modifier
y
la taille de l'image en appuyant sur
Q.MENU ou SETTINGS.
- 16:9: permet de redimensionner les
images en fonction de la largeur de
l'écran.
- Plein écran: passe au mode plein
écran quel que soit le format de
l'image.
- Signal original: affiche les images
vidéo dans la taille d'origine sans
couper les bords.
Signal original
REMARQUES
Si vous sélectionnez Signal original,
y
des bruits de l'image peuvent
s'afficher à la limite de l'écran.
- Format original: affiche les images
dans le même format que l'image
originale.
- Zoom: agrandit une image pour
l'adapter à la largeur de l'écran. Le
haut et le bas de l'image peuvent
être tronqués.
Appuyez sur la touche ou
y
effectuer un zoom avant ou arrière
sur l'image.
Appuyez sur la touche ou
y
déplacer l'image.
- Zoom Cinéma 1: Affiche l'image
selon le ratio cinémascope 2.35:1. Il
varie de 1 à 16.
Appuyez sur la touche ou
y
effectuer un zoom avant ou arrière
sur l'image.
Appuyez sur la touche
y
déplacer l'image.
REMARQUES
Si vous agrandissez ou réduisez
y
l'image, celle-ci peut être déformée.
ou
pour
pour
pour
pour
Format original
Page 65

UTILISATION DU PROJECTEUR
25
Utilisation de la fonction Keystone
Pour éviter que l'image ne devienne
trapézoïdale, la fonction Keystone règle
la largeur du haut et du bas de l'image
si le projecteur n'est pas positionné à
angle droit par rapport à l'écran.
Étant donné que la fonction Keystone
peut entraîner une qualité d'image
inférieure, n'utilisez cette fonction que
lorsqu'il est impossible de positionner le
projecteur selon un angle optimal.
•Keystone 0
- +
Fermer
1 Appuyez sur la touche SETTINGS.
2 Utilisez la touche oupour
sélectionner O
la touche OK.
PTION
et appuyez sur
3 Appuyez sur la touche ou
pour sélectionner Keystone, puis
appuyez sur la touche OK.
4 Appuyez sur la touche ou pour
régler la fonction Keystone.
Keystone peut être réglé entre
y
- 40 et 40.
5 Appuyez sur la touche OK une fois le
réglage terminé.
Utilisation de la liste des sources
Utilisation de la liste des sources
1 Appuyez sur INPUT pour accéder
aux sources d'entrée.
- Le mode de source connecté
s'affiche en premier. Cependant,
la source AV/Composant est
toujours activée.
Liste des sources
AV Composant USB RGB HDMI
2
Sélectionnez un signal d'entrée à
l'aide de la touche INPUT pour faire
basculer le projecteur uniquement
sur le mode de la source connectée.
Utilisez la touche oupour
basculer d'un mode à l'autre.
ꔂDép.ꔉOK
SortieLabels des sources
Ajout de labels des sources
Permet d'afficher les appareils qui sont
connectés aux ports d'entrée.
Labels des sources
AV
Composant
RGB
HDMI
◀ ▶
◀ ▶
◀ ▶
◀ ▶
Fermer
1 Appuyez sur INPUT pour accéder
aux sources d'entrée.
2 Appuyez sur la touche RED.
3 Utilisez la touche ou pour faire
défiler les sources d'entrée.
4 Utilisez la touche oupour
sélectionner l'un des labels de
sources.
Français
Page 66

26
UTILISATION DU PROJECTEUR
Fonction Absence d'image
Utilisation de la fonction Absence
d'image
Cette fonction peut être utile lorsque
vous voulez attirer l'attention de votre
public lors d'une réunion ou d'une
formation.
1 Appuyez sur la touche BLANK,
et l'écran se remplit de la couleur
d'arrière-plan. Pour changer la
couleur d'arrière-plan, reportez-vous
à la section "Sélection d'une absence
d'image".
2 Appuyez sur n'importe quel bouton
pour effacer la fonction Absence
d'image.
Pour recouvrir provisoirement l'écran,
appuyez sur la touche BLANK de
la télécommande. Ne bloquez pas
l'objectif avec un objet pendant le
fonctionnement du projecteur. Il
risquerait de surchauffer et de se
déformer, voire de provoquer un
incendie.
Sélection d'une absence d'image
1 Appuyez sur la touche SETTINGS.
2 Utilisez la touche ,ou
pour sélectionner
appuyez sur la touche OK.
OPTION
et
3 Appuyez sur la touche ou
pour sélectionner A
puis appuyez sur la touche OK.
bsence d'image
4 Utilisez la touche pour
accéder au paramètre ou à l'option
voulu, puis appuyez sur la touche OK.
Utilisation des raccourcis
Vous pouvez personnaliser les menus
que vous utilisez fréquemment.
1 Appuyez sur Q. MENU pour accéder
aux menus rapides.
2 Appuyez sur la toucheoupour
faire défiler les menus suivants, puis
appuyez surOK.
Menu Description
Format de
l'image
Préréglages
d'image
Économie
d'énergie
Voix nette II
Préréglages
du son
Minuterie
d'arrêt
Mode PJT
Appareil USB
3 Appuyez sur la touche
,
ou pour faire défiler les menus
suivants.
Permet de modifier
le format de l'image.
(see 24 page)
Modifie les préréglages d'image.
Règle la luminosité.
Rend la voix provenant
du projecteur claire et
nette.
Définit les préréglages
du son.
Le projecteur s'éteint à
l'heure prédéfinie.
Retourne l'image
projetée ou la fait basculer horizontalement.
Déconnecte un
périphérique USB.
Page 67

DIVERTISSEMENT
1SPQFSUJFT
)FMQ
'PVGTUGEWTKV[EQFG
7KLVLVWKHILUVWWLPH\RXĜUHFRQQHFWLQJWR/*:L'L3URMHFWRU
3OHDVHHQWHUVHFXULW\FRGH\RXVHHRQ\RXU3URMHFWRUVFUHHQ
&RQWLQXH
&DQFHO
27
DIVERTISSEMENT
Réglage Wireless Display-Affichage sans fil
(Ordinateur portable)
1 Exécutez le programme WiDi( ) sur votre ordinateur portable.
2
Une fois le programme WiDi lancé, une liste de tous les périphériques
s'affiche. Dans la liste, sélectionnez votre projecteur et cliquez sur Connecter.
Saisissez les affichés () sur l'écran () puis cliquez sur Continuer.
$POOFDUFEBEBQUFS
zaGuGGU
%FUFDUFEBEBQUFST
{GGGGGGGGGGuGGGGGGGGGGGGGGGGGGGGGGGGGGGGGGGGGGGGGGGpkGGGGGGGGGGGGtGGGGGGGGGGGGGGGGGGGGGGGGGGGGGz
snG~kGw km^Y ujGZUW
,QGLFDWHVDQDGDSWHU\RXKDYHSUHYLRXVO\FRQQHFWHGWR
zGGG
1SPQFSUJFT )FMQ
&RQQHFW
Demande de connexion
Pour vous connecter, saisissez le code PIN
Mon code PIN********
Annuler
Reste: 92seconde(s)
Écran du projecteur
3 L'écran de l'ordinateur portable s'affiche sur l'écran du projecteur. Il est à noter que
la connexion sans fil affectera la qualité de la vidéo affichée sur l'ordinateur portable.
Si la connexion est faible, une perte de la connexion Intel WiDi ou une baisse de la
qualité de la vidéo est possible.
détectés
Écran de l'ordinateur
portable
Français
Réglage Wireless Display-Affichage sans fil
(Téléphone portable)
1 Exécutez le programme WiDi( ) sur votre Téléphone portable.
2
3 Dans la liste, sélectionnez votre projecteur et cliquez sur Connecter. Saisissez
4 L'écran de Téléphone portable s'affiche sur l'écran du projecteur. Il est à noter que
* Pour plus d'informations sur Intel WiDi, rendez-vous sur http://intel.com/go/WIDI
* Si vous modifiez le signal d'entrée alors que l'appareil est toujours en mode WiDi,
* Certains menus ne fonctionnent pas en mode Wireless Display.
Une fois le programme WiDi lancé, une liste de tous les périphériques
détectés
s'affiche.
affichés sur l'écran puis cliquez sur Continuer.
la connexion sans fil affectera la qualité de la vidéo affichée sur Téléphone portable.
Si la connexion est faible, une perte de la connexion Intel WiDi ou une baisse de la
qualité de la vidéo est possible.
la connexion WiDi sera désactivée.
Page 68

28
DIVERTISSEMENT
MES MÉDIAS
Connexion de périphériques de stockage USB
Connectez une Périphérique de
stockage USB comme illustré
ci-dessous.
Lorsqu'un périphérique de stockage
USB est connecté, l'écran de réglage
USB s'affiche. Vous ne pouvez pas
écrire ni supprimer des données sur le
périphérique de stockage USB.
Périphérique de
stockage USB
Pour débrancher le périphérique de
stockage USB,
1 Appuyez sur la touche Q.MENU.
2 Utilisez la touche oupour
passer à l'appareil USB et appuyez
sur la touche OK.
3 Retirez le périphérique USB.
REMARQUES
Lorsque le périphérique de stockage
y
USB est déconnecté, ses données
ne peuvent plus être lues. Retirez le
périphérique de stockage USB, puis
reconnectez-le.
Page 69

Conseils pour l'utilisation de
périphériques USB
Seul un périphérique de stockage
y
USB peut être détecté.
Les ports USB ne sont pas pris en
y
charge.
Un périphérique de stockage USB
y
qui utilise son propre pilote peut ne
pas être détecté.
La vitesse de reconnaissance d'un
y
périphérique de stockage USB varie
en fonction du périphérique.
Si un périphérique USB normal
y
ne fonctionne pas, déconnectez-le,
puis reconnectez-le. Veuillez ne pas
éteindre le projecteur ni débrancher
le périphériqueUSB pendant le
fonctionnement de ce dernier. Il se
peut que le périphérique USB ou les
fichiers stockés soient endommagés.
Ne connectez pas un périphérique
y
de stockage USB qui a été manipulé
sur le PC. Le projecteur peut ne pas
fonctionner correctement ou être
incapable de lire les fichiers. Utilisez
un périphérique de stockage USB
contenant des fichiers musique,
photo, vidéo ou document normaux.
Utilisez un périphérique de stockage
y
USB formaté selon le système de
fichiers FAT16, FAT32 ou NTFS fourni
par Windows. Si un périphérique
de stockage formaté comme un
programme utilitaire n'est pas pris en
charge par Windows, il est possible
qu'il ne soit pas détecté.
Veuillez brancher sur le secteur
y
tout périphérique de stockageUSB
nécessitant une alimentation externe.
Autrement, le périphérique risque de
ne pas être détecté.
DIVERTISSEMENT
Connectez un périphérique de
y
stockage USB à l'aide d'un câble
fourni par le fabricant USB. Si
vous utilisez un câble non fourni
par un fabricant USB ou un câble
excessivement long, le périphérique
risque de ne pas être reconnu.
Certains périphériques USB peuvent
y
ne pas être pris en charge ou ne pas
fonctionner correctement.
Si un dossier ou un fichier est trop
y
long, il est possible qu'il ne soit pas
reconnu.
Les fichiers contenus sur un
y
périphérique de stockage USB sont
triés de la même façon que sur
WindowsXP. Le nom de fichier peut
comporter jusqu'à 100caractères
anglais.
Les données d'un périphérique USB
y
pouvant être endommagées, il est
recommandé de sauvegarder tous les
fichiers importants. Les utilisateurs
sont responsables de la gestion des
données et non le constructeur.
Il est recommandé d'utiliser une
y
Périphérique de stockage USB
de 32Go ou moins et un disque
dur USB de 1To ou moins. Un
périphérique dépassant la capacité
recommandée risque de ne pas
fonctionner correctement.
Si un périphérique de stockage USB
y
ne fonctionne pas correctement,
déconnectez-le puis reconnectez-le.
Si un disque dur externe USB doté
y
de l'option Économie d'énergie ne
fonctionne pas, éteignez-le puis
rallumez-le.
Les périphériques de stockage USB
y
d'une version antérieure à USB2.0
sont également pris en charge.
Ils peuvent cependant ne pas
fonctionner correctement en mode
vidéo.
29
Français
Page 70

30
DIVERTISSEMENT
VIDÉO
Vidéo vous permet de regarder des films enregistrés sur le périphérique USB connecté.
La diffusion de fichiers au format
Conseils pour la lecture des fichiers
vidéo
Certains sous-titres créés par
y
l'utilisateur peuvent ne pas
fonctionner.
Les sous-titres ne prennent pas en
y
charge certains caractères spéciaux.
Les balises HTML ne sont pas prises
y
en charge dans les sous-titres.
Les temps indiqués dans un fichier
y
sous-titre doivent être présentés par
ordre croissant pour que les soustitres s'affichent correctement.
Les modifications de police et de
y
couleur ne sont pas prises en charge.
Les langues qui ne sont pas
y
spécifiées dans les langues de soustitre ne sont pas prises en charge.
Les fichiers de sous-titres de 1Mo ou
y
plus ne sont pas pris en charge.
L'écran peut subir des interruptions
y
momentanées (arrêt d'image,
lecture rapide, etc.) au moment du
changement de langue.
Il est possible qu'un fichier vidéo
y
endommagé ne soit pas lu
correctement, ou que certaines
fonctions ne soient pas disponibles.
Les fichiers vidéo réalisés avec
y
certains encodeurs peuvent ne pas
être lus correctement.
Il est possible que seul l'audio ou la
y
vidéo soit pris(e) en charge, selon la
structure du paquet vidéo ou audio
du fichier vidéo.
Les vidéos dont la résolution est
y
supérieure à la taille maximale prise
en charge risquent de ne pas être
lues correctement.
Il est possible que les fichiers vidéo
y
présentant un format différent de
ceux indiqués ici ne soient pas lus
correctement.
y
GMC (Global Motion Compensation)
ou Qpel (Quarterpel Motion Estimation) n'est pas prise en charge.
Jusqu'à 10000 blocs synchro sont
y
pris en charge dans le fichier de
sous-titres.
La lecture continue n'est pas garantie
y
pour les fichiers codés de niveau 4.1
ou plus dans H.264/AVC.
Le codec audio DTS n'est pas pris en
y
charge.
Les fichiers vidéo supérieurs à 30Go
y
(Gigaoctets) ne sont pas pris en
charge.
La lecture d'une vidéo via une con-
y
nexion USB non compatible avec le
haut débit peut ne pas s'effectuer
correctement.
Le fichier vidéo et son fichier de
y
sous-titres doivent se trouver dans le
même dossier. Le fichier vidéo et le
fichier de sous-titres associé doivent
porter le même nom pour que les
sous-titres puissent être lus.
Quand vous regardez un film avec la
y
fonction Vidéo, vous ne pouvez pas
modifier les préréglages d'image.
Le mode Astuce ne prend pas en
y
charge d'autres fonctions que ꕙsi
les dossiers vidéo ne comportent pas
d'informations d'index.
Lorsque vous regardez un fichier
y
vidéo à l'aide du réseau, le mode
Astuce est limité à la vitesse2X.
Les noms des fichiers vidéo conten-
y
ant des caractères spéciaux peuvent
ne pas être lisibles.
Page 71

PERSONNALISATION DES PARAMÈTRES
31
PERSONNALISATION DES
PARAMÈTRES
Menu CONFIGURATION
1 Appuyez sur la touche SETTINGS.
2 Utilisez la touche ou pour configurer un élément souhaité, puis appuyez
sur la toucheOK.
3 Utilisez la touche ou pour configurer un élément souhaité, puis appuyez
sur la toucheOK.
4 Lorsque vous avez terminé, appuyez sur EXIT.
Menu Description
IMAGE Règle la qualité de l'image pour un visionnage optimal.
AUDIO Règle la qualité du son et le niveau sonore.
Français
HEURE Configure l'horloge et les fonctions liées à l'horloge.
OPTION Permet de personnaliser les paramètres généraux.
SOURCE Sélectionne la source d'entrée souhaitée.
MES MÉDIAS
Permet d'accéder aux fichiers de photo, musique, vidéo et
document.
Page 72

32
HDMI/DVI
RGB IN
A/V IN
ANTENNA
IN
ÉTABLISSEMENT DE CONNEXIONS
ÉTABLISSEMENT DE CONNEXIONS
Vous pouvez connecter plusieurs périphériques externes aux ports du projecteur.
Ordinateur
/Ordinateur portable
Périphérique
numérique
VidéoDVD
USB
Casque
HDMI- Page 33
Composantes - Page 35
Entrée (AV) - Page 34
RGB- Page 33
Appareils USB - Page 28
Casque - Page 35
Console de jeux
Page 73

ÉTABLISSEMENT DE CONNEXIONS
HDMI/DVI
RGB IN
A/V IN
USB
HDMI/DVI
HDMI/DVI
RGB IN
A/V IN
A/V IN
RGB IN
A/V IN
33
Raccordement à un récepteur HD, un lecteur DVD ou un magnétoscope
Raccordez un récepteur HD, un lecteur
DVD ou un magnétoscope au projecteur
et sélectionnez le mode d'entrée
approprié.
Connexion HDMI
Avec un câble HDMI, vous bénéficiez
d'une image et d'un son de haute
qualité. Appuyez sur la touche INPUT
de la télécommande pour sélectionner
HDMI.
Accessoires
Connexion à un PC
Le projecteur prend en charge la
fonction Plug and Play. Votre PC
reconnaît automatiquement le
projecteur et ne nécessite l'installation
d'aucun pilote.
Connexion RVB
Connectez la sortie PC au port d'entrée
vidéo PC du projecteur à l'aide du câble
RGB. Pour le signal audio, connectez
le PC au projecteur à l'aide d'un câble
audio facultatif.
Accessoires
BLANC
ROUGE
JAUNE
Français
ROUGE
En option
Suppléments
En option
Suppléments
BLANC
$8',2287
5*%2873&
En option
Suppléments
+'0,
+'0,
Page 74

34
HDMI/DVI
RGB IN
A/V IN
HDMI/DVI
RGB IN
A/V IN
A/V IN
RGB IN
A/V IN
A/V IN
ÉTABLISSEMENT DE CONNEXIONS
Connexion RVB
Vous pouvez connecter le câble audio
sans connecteur mâle, comme illustré
ci-dessus.
Connexion au port AV INPUT
Connectez les ports de sortie du
périphérique externe au port AV INPUT
du projecteur. Appuyez sur la touche
INPUT pour sélectionner AV.
Accessoires
$8',2287
En option
Suppléments
5*%2873&
En option
Suppléments
JAUNE
JAUNE
BLANC
BLANC
ROUGE
ROUGE
JAUNE
$9287
BLANC
/HIW 5LJKW
En option
Suppléments
ROUGE
$8',2287
Page 75

ÉTABLISSEMENT DE CONNEXIONS
HDMI/DVI
RGB IN
A/V IN
HDMI/DVI
RGB IN
A/V IN
RGB IN
A/V IN
A/V IN
35
Connexion Composants
Vous pourrez profiter d'images d'une
grande luminosité lorsque vous
branchez un périphérique externe doté
d'un port RGB IN au port de composant
du projecteur. Appuyez sur la touche
INPUT de la télécommande pour
sélectionner Composant.
JAUNE
BLANC
BLANC
Accessoires
ROUGE
VERT
ROUGE
VERT
BLEU
BLEU
En option
Suppléments
ROUGE
ROUGE
Branchement d'un casque
Vous pouvez utiliser un casque pour
écouter le son.
En option
Suppléments
Français
En option
Suppléments
VERT
ROUGE
BLEU
$9287
BLANC
% 35 5LJKW
/HIW< 3
ROUGE
$8',2287
En option
Suppléments
Page 76

36
HDMI/DVI
RGB IN
A/V IN
ANTENNA
IN
HDMI/DVI
A/V IN
ANTENNA
IN
IN
2
(MHL)
IN 2 (MHL)
MAINTENANCE
Connexion MHL
Mobile High-definition Link (MHL) est
une interface qui permet de transmettre
des signaux audiovisuels numériques
depuis des téléphones portables vers
des téléviseurs.
Câble passif
MHL
En option
Suppléments
MAINTENANCE
Nettoyez votre projecteur afin de le
conserver dans un état optimal.
Nettoyage du projecteur
Nettoyage de l'objectif
Si la surface de l'objectif présente de
la poussière ou des taches, nettoyez
l'objectif.
Utilisez un nettoyant à air comprimé ou
un chiffon de nettoyage fourni avec le
produit pour nettoyer l'objectif.
Pour nettoyer les taches ou la poussière,
utilisez un nettoyant à air comprimé ou
appliquez une petite quantité d'agent de
nettoyage sur un tampon applicateur ou
un chiffon doux et essuyez légèrement
l'objectif.
Ne vaporisez pas directement sur
l'objectif pour éviter que le liquide ne
s'infiltre dans l'objectif.
Téléphone portable
REMARQUE
yConnectez le téléphone portable
au port d'entrée HDMI pour
afficher l'écran du téléphone sur
le projecteur.
yLe câble passif MHL sert à
connecter le projecteur à un
téléphone portable.
yCette fonctionnalité est
uniquement disponible sur les
téléphones prenant en charge la
connexionMHL.
Nettoyage du boîtier du projecteur
Pour nettoyer le boîtier du projecteur,
débranchez d'abord le câble
d'alimentation.
Pour nettoyer la poussière ou les taches
sur l'objectif, utilisez uniquement un
chiffon non pelucheux doux et sec.
N'utilisez pas d'alcool, de benzène, de
solvant ni d'autres détergents chimiques
car ils risqueraient d'endommager le
boîtier.
Page 77

SPÉCIFICATIONS
MODÈLES PG60G (PG60G-JE)
Résolution (Pixel) 1280 (Horizontal)×800 (Vertical)
Format image 16:10 (Horizontal:Vertical)
Taille du panneau
(mm)
Distance de
projection (Taille de
la vidéo)
Taux de projection
vers le haut
Portée de la
télécommande
Entrée vidéo
Adaptateur CA-CC
Sortie audio 3W MONO
Hauteur (mm)
Largeur (mm) 60
Profondeur (mm)
Poids (kg) 0.68
Appareil USB 5V, 0,5A (max.)
couleur
Fonctionnement 0°C à 40°C
Environnement de
fonctionnement
Stockage -20°C à 60°C
Humidité relative
Fonctionnement 0 % - 80 %
Stockage 0 % - 85 %
0,80 m - 3,25m (63,5 cm - 254,0cm)
NTSC M/PAL-B, D, G, H, I/PAL M/PAL N/PAL 60/SECAM
19,5 V , 4,62 A (Entrée adaptateur 100 ~ 240 à 50
11.623
100 %
3 m
Hz/60 Hz)
125 (sans le pied)
127,5 (avec le pied)
125 (sans le pied)
131 (avec le pied)
SPÉCIFICATIONS
37
Français
Page 78

38
SPÉCIFICATIONS
Moniteurs pris en charge
Fréquence
Résolution
640x350 31.468 70.09
720x400 31.469 70.08
640x480 31.469 59.94
800x600 37.879 60.31
1024x768 48.363
1152x864 54.348 60.053
1280x800 49.68 60
1360x768 47.712 60.015
1280x1024 63.981 60.020
1400x1050 65.317 59.979
1680x1050 65.3 60
Si un signal non pris en charge
y
horizontale
(kHz)
est entré dans le projecteur, il ne
s'affiche pas correctement à l'écran
ou le message «Aucun signal» ou
«Format invalide»
Le projecteur prend en charge le type de
y
signal DDC1/2B comme fonction Plug &
Play (reconnaissance automatique des
moniteurs de PC).
Types de signal de synchronisation
y
ordinateur pris en charge: synchronisation
séparée.
En mode PC, 1280 x 800 est
y
recommandé pour offrir la meilleure
qualité d'image.
Fréquence
verticale
(Hz)
60.00
119.99
s'affiche.
HDMI/DVI-DTV/WiDi
mode pris en charge
Fréquence
Résolution
720x480 31.469
720x576 31.25 50
1280x720 37.5
1920x1080 33.72
horizontale
(kHz)
31.5
44.96
45
33.75
28.125
26.97
27
33.716
33.75
56.25
67.43
67.5
Fréquence
verticale
(Hz)
59.94
60
50
59.94
60
59.94
60
50
23.97
24
29.976
30.00
50
59.94
60
Page 79

SPÉCIFICATIONS
39
Informations sur les logiciels libres
Pour obtenir le code source sous la
licence publique générale, la licence
publique générale limitée, la licence
publique Mozilla ou les autres licences
open source de ce produit,
rendez-vous sur http://opensource.lge.
com.
En plus du code source, tous les termes
de la licence, ainsi que les exclusions de
responsabilité et les droits d'auteur, sont
disponibles au téléchargement.
LG Electronics propose également un
code libre sur un CD-ROM pour une
somme couvrant les frais de distribution
(coût du support, d'expédition et de
manutention) sur demande par e-mail
à opensource@lge.com. La validité de
cette offre est de trois (3) ans à partir de
la date d'achat du produit.
appareils sans fil Spécifications
concernant les (TWFM-B006D)
Standard IEEE802.11a/b/g/n
Plage de
fréquence
Puissance en
sortie
(maximum)
De 2400 à 2483,5MHz
De 5150 à 5250MHz
De 5725 à 5850MHz
(En dehors de l'UE)
802.11a: 11dBm
802.11b: 14dBm
802.11g: 10,5dBm
802.11n - 2,4 GHz: 11dBm
802.11n - 5 GHz: 12,5dBm
Connexion du port composantes
non valides
Signal
480i / 576i
480p / 576p o
720p / 1080i o
1080p
Mode
o
o
(50 Hz / 60 Hz
uniquement)
Français
Comme le canal de bande utilisé
y
varie d'un pays à l'autre, l'utilisateur
ne peut pas modifier ou régler la
fréquence de fonctionnement. Ce
produit est réglé conformément au
tableau de fréquences régionales.
Page 80

Le modèle et le numéro de série du projecteur figurent à l'arrière ou sur le côté du
projecteur. Inscrivez-les ci-dessous pour
référence ultérieure.
MODÈLE
NUMÉRO DE SÉRIE
Page 81

Benutzerhandbuch
DLP PROJECTOR
Lesen Sie sich diese Anleitung vor Gebrauch aufmerksam durch,
und bewahren Sie sie zur späteren Verwendung auf.
PG60G
www.lg.com
Page 82

2
LIZENZEN
LIZENZEN
Die unterstützten Lizenzen sind von Modell zu Modell verschieden. Weitere Informationen zu den Lizenzen erhalten Sie unter www.lg.com.
Hergestellt unter Lizenz von Dolby Laboratories. Dolby und
das Doppel-D-Symbol sind Marken der Dolby Laboratories.
ÜBER DIVX-VIDEO: DivX® ist ein digitales Videoformat der Firma DivX, LLC, einem Tochterunternehmen der Rovi Corporation. . Dieses Gerät ist offiziell DivX Certified® zur Wiedergabe
von DivX-Videos. Weitere Informationen und Software-Tools
zum Konvertieren von Dateien in das DivX-Format finden Sie
unter divx.com.
ÜBER DIVX VIDEO-ON-DEMAND: Dieses DivX Certified®
Gerät muss registriert werden, damit Sie gekaufte DivX Videoon-Demand-Inhalte (VOD) wiedergeben können. Um einen
Registrierungscode zu erhalten, rufen Sie im Einstellungsmenü des Geräts den Bereich „DivX VOD“ auf. Weitere Informationen darüber, wie Sie Ihre Registrierung abschließen, finden
Sie unter vod.divx.com.
„DivX Certified® zur Wiedergabe von DivX®-Videos bis zu HD
1080p, einschließlich Premium-Inhalte.“
„DivX®, DivX Certified® sowie die entsprechenden Logos sind
Marken der Rovi Corporation oder ihrer Tochterunternehmen
und werden unter Lizenz verwendet.”
„Geschützt durch eines oder mehrere der folgenden USPatente:
7,295,673; 7,460,668; 7,515,710; 7,519,274”
HDMI und HDMI High-Definition Multimedia Interface und das
HDMI-Logo sind Marken oder eingetragene Marken von HDMI
Licensing LLC in den Vereinigten Staaten und anderen Ländern.
Dieses Gerät erfüllt die EMC-Richtlinie für Haushaltsgeräte (KlasseB) und
wurde für den Heimgebrauch entwickelt. Dieses Gerät kann in allen Regionen
verwendet werden.
HINWEIS
Die Abbildung kann von Ihrem Projektor abweichen.
y
Das OSD-Menü (am Bildschirm angezeigtes Menü) Ihres Projektors kann sich
y
leicht von dem in diesem Handbuch beschriebenen Menü unterscheiden.
Page 83

SICHERHEITSHINWEISE
WARNING/CAUTION
RISK OF ELECTRIC SHOCK
DO NOT OPEN
SICHERHEITSHINWEISE
Bitte beachten Sie die Sicherheitshinweise. Dadurch vermeiden Sie Unfälle
und die unsachgemäße Nutzung des Projektors.
Hinweise zu Sicherheitsvorkehrungen werden in Form von „ACHTUNG“ und
y
„VORSICHT“ gemäß den folgenden Punkten erteilt.
ACHTUNG:
VORSICHT:
Lesen Sie das Benutzerhandbuch sorgfältig durch, und halten Sie es griffbereit.
y
Nichteinhaltung der Anweisungen kann zu schweren Verletzungen und
sogar zum Tod führen.
Die Nichteinhaltung der Anweisungen kann zu Verletzungen von
Personen oder Beschädigung
des Produkts führen.
3
WARNING/CAUTION
RISK OF ELECTRIC SHOCK
DO NOT OPEN
Das Blitzsymbol in einem
gleichschenkligen Dreieck
soll den Benutzer darauf
aufmerksam machen, dass
im Gehäuse des Gerätes eine nicht
isolierte „gefährliche Spannung“
vorhanden ist, sodass die Gefahr eines
Stromschlags besteht.
Das Ausrufezeichen in
einem gleichschenkligen
Dreieck soll den Benutzer
darauf aufmerksam machen,
dass die dem Gerät beiliegende
Dokumentation wichtige Betriebsund Wartungsanweisungen enthält.
WARNUNG/VORSICHT
- DAS GERÄT WEDER REGEN NOCH
FEUCHTIGKEIT AUSSETZEN. ES
BESTEHT BRAND- BZW. STROMSCHLAGGEFAHR.
Lesen Sie diese Sicherheitshinweise.
Bewahren Sie diese Sicherheitshinweise
gut auf.
Befolgen Sie alle Warnhinweise.
Halten Sie sich an alle Anweisungen.
Innenraum-Aufstellung
WARNUNG
Stellen Sie den Projektor niemals
y
an einem Ort mit direkter Sonneneinstrahlung oder in der Nähe von
Wärmequellen, wie z. B. Heizungen,
Kaminen oder Öfen, auf.
- Es besteht Brandgefahr.
Bewahren Sie keine brennbaren Stoffe
y
wie Sprays in der Nähe des Projektors
auf.
- Andernfalls besteht Brandgefahr.
Lassen Sie nicht zu, dass sich Kinder
y
an den Projektor hängen oder daran
klettern.
- Der Projektor kann herunterfallen,
was zu Verletzungen oder zum Tod
führen kann.
Stellen Sie den Projektor nicht direkt
y
auf einen Teppich, Läufer oder an
andere Stellen, wo die Belüftung eingeschränkt ist, z.B. Bücherregal oder
Einbauschrank.
- Andernfalls kann sich die Innentemperatur des Projektors erhöhen
und einen Brand verursachen.
Der Projektor darf nicht in der Nähe
y
von Wasserdampf- oder Öldunstquellen, wie einem Luftbefeuchter oder
einer Küchenarbeitsfläche, verwendet
werden.
Deutsch
Page 84

4
SICHERHEITSHINWEISE
- Es besteht Brand- oder Stromschlaggefahr.
Stellen Sie den Projektor an einem
y
möglichst staubfreien Ort auf.
- Andernfalls besteht Brandgefahr.
Betreiben Sie den Projektor nicht an
y
feuchten Orten, wie z. B. in einem
Badezimmer.
- Andernfalls besteht Brand- oder
Stromschlaggefahr.
Achten Sie darauf, dass weder Tisch-
y
decken noch Vorhänge die Belüftungsöffnungen verdecken.
- Andernfalls erhöht sich die Innentemperatur des Projektors, was einen
Brand auslösen kann.
Der Abstand des Projektors zur Wand
y
sollte zwecks ausreichender Belüftung mindestens 30cm betragen. -
Andernfalls erhöht sich die Innentemperatur des Projektors, was einen
Brand auslösen kann.
VORSICHT
Wenn Sie den Projektor auf einem
y
Tisch aufstellen, achten Sie darauf,
dass er nicht zu dicht an der Kante
steht.
- Der Projektor könnte herunterfallen,
was zu Verletzungen und Schäden
am Gerät führen könnte. Stellen Sie
sicher, dass der Ständer, den Sie
verwenden möchten, groß genug für
den Projektor ist.
Schalten Sie den Projektor aus, tren-
y
nen Sie ihn vom Netzanschluss, und
ziehen Sie alle Stecker ab, bevor Sie
den Projektor an einen anderen Ort
transportieren.
- Bei einem beschädigten Netzkabel
besteht Brand- und Stromschlaggefahr.
Stellen Sie den Projektor nicht auf
y
eine instabile, vibrierende oder schräge Oberfläche auf.
- Der Projektor könnte herunterfallen
und Verletzungen verursachen.
Achten Sie darauf, dass der Projek-
y
tor beim Anschließen von externen
Geräten nicht umkippt.
- Dies kann zu Verletzungen oder
Schäden am Projektor führen.
Stromversorgung
WARNUNG
Das Erdungskabel muss angeschlos-
y
sen werden.
- Eine unsachgemäße Erdung kann
bei einer elektrischen Überspannung Schäden am Projektor oder
einen elektrischen Schlag verursachen. Wenn der Projektor an einem
Ort aufgestellt werden soll, an dem
keine Erdung möglich ist, erwerben
Sie einen Überlastungsschalter und
verbinden Sie den Projektor mit der
entsprechenden Steckdose. Erden
Sie den Projektor nicht an einer
Gas- oder Wasserleitung, einem
Blitzableiter, einer Telefonleitung usw.
Der Netzstecker muss vollständig in
y
die Steckdose gesteckt werden.
- Eine instabile Verbindung kann ein
Feuer auslösen.
Stellen Sie keine schweren Gegen-
y
stände auf das Netzkabel. Und stellen
Sie den Projektor nicht auf das Netzkabel.
- Andernfalls besteht Brand- oder
Stromschlaggefahr.
Berühren Sie den Netzstecker nie-
y
mals mit feuchten Händen.
- Andernfalls besteht Stromschlaggefahr.
Schließen Sie nicht zu viele Geräte
y
gleichzeitig an ein Verlängerungskabel an.
- Eine Überhitzung kann Feuer auslösen.
Beseitigen Sie Staub oder Verunrei-
y
nigungen um die Steckerstifte und
Wandsteckdosen.
- Andernfalls besteht Brandgefahr.
Um die Stromversorgung auszu-
y
schalten, ziehen Sie den für einen
einfachen Zugriff positionierten Netzstecker heraus.
Page 85

SICHERHEITSHINWEISE
5
VORSICHT
Ziehen Sie das Kabel nur am Netz-
y
stecker heraus.
- Ein beschädigter Draht im Kabel
kann Feuer auslösen.
Stellen Sie sicher, dass weder Strom-
y
kabel noch Steckdose beschädigt,
manipuliert, stark geknickt, verdreht,
verzogen, zusammengedrückt oder
erwärmt wurden. Verwenden Sie keine
lockere Steckdose.
- Andernfalls besteht Brand- oder
Stromschlaggefahr.
Halten Sie das Netzkabel fern von
y
jeglichen Heizgeräten.
- Die Ummantelung des Stromkabels
könnte schmelzen, und es besteht
Stromschlaggefahr.
Stellen Sie den Projektor an einem
y
Ort auf, an dem niemand über das
Stromkabel oder den Stecker stolpern
kann, so dass das Stromkabel oder
der Stecker nicht beschädigt werden
können.
- Es besteht Brand- oder Stromschlaggefahr.
Schalten Sie den Projektor nicht ein
y
oder aus, indem Sie den Netzstecker
einstecken oder ziehen. (Verwenden
Sie das Stromkabel nicht als Ein- und
Aus-Schalter.)
- Es besteht Brand- oder Stromschlaggefahr.
Berühren Sie das Ende des Netz-
y
kabels nicht mit einem leitenden
Gegenstand, während der Netzstecker mit der Steckdose verbunden ist.
Berühren Sie außerdem niemals den
Netzstecker direkt nach dem Abziehen aus der Wandsteckdose.
- Andernfalls besteht Stromschlaggefahr.
Verwenden Sie nur das offizielle
y
Stromkabel, das von LG Electronics,
Inc. bereitgestellt wird. Andere Stromkabel dürfen nicht verwendet werden.
- Andernfalls besteht Brand- oder
Stromschlaggefahr.
Während des Betriebs
WARNUNG
Stellen Sie keine Behälter mit Flüssig-
y
keiten wie Vasen oder Blumentöpfe,
Tassen, Kosmetikartikel, Chemikalien,
Dekorationsartikel oder Kerzen usw.
auf den Projektor.
- Es besteht Brand- oder Stromschlaggefahr, die Gegenstände können herunterfallen und Verletzungen
verursachen.
Im Fall von Stoßeinwirkungen auf den
y
Projektor oder Beschädigungen am
Gehäuse muss der Projektor ausgeschaltet, der Netzstecker gezogen
und ein autorisierter Kundendienst
kontaktiert werden.
- Andernfalls besteht Brand- und
Stromschlaggefahr.
Führen Sie keine Metallteile wie
y
Münzen, Haarklemmen oder ähnliches und keine brennbaren Stoffe
wie Papier oder Streichhölzer in den
Projektor ein.
- Andernfalls besteht Brand- oder
Stromschlaggefahr.
Sollten Flüssigkeiten in den Projektor
y
eindringen oder Fremdkörper in den
Projektor fallen, muss der Projektor ausgeschaltet, der Netzstecker
gezogen und der LG ElectronicsKundendienst kontaktiert werden.
- Andernfalls besteht Brand- und
Stromschlaggefahr.
Achten Sie darauf, dass beim Aus-
y
tausch der Batterien aus der Fernbedienung die Batterien nicht von
Kindern verschluckt werden. Bewahren Sie Batterien und Akkus außerhalb der Reichweite von Kindern auf.
- Falls ein Kind eine Batterie verschlucken sollte, verständigen Sie sofort
einen Arzt.
Entfernen Sie außer der Objektivab-
y
deckung keine weiteren Abdeckungen. Ansonsten besteht erhöhte
Stromschlaggefahr.
Deutsch
Page 86

6
SICHERHEITSHINWEISE
Sehen Sie bei eingeschaltetem Pro-
y
jektor niemals direkt in das Objektiv.
Das starke Licht kann Ihre Augen
beschädigen.
Bei eingeschalteter Lampe oder
y
kurz nach dem Ausschalten sollten
Belüftung und Lampe nicht berührt
werden, da diese sehr heiß werden.
Im Fall von freigesetztem Gas berüh-
y
ren Sie auf keinen Fall die Steckdose.
Öffnen Sie zur Belüftung das Fenster.
- Ein Funken kann einen Brand oder
eine Verbrennung auslösen.
Berühren Sie während eines Gewit-
y
ters niemals den Projektor oder das
Stromkabel.
- Andernfalls besteht Stromschlaggefahr.
Verwenden Sie den Projektor nicht in
y
der Nähe eines elektronischen Geräts,
das ein starkes Magnetfeld erzeugt.
Bewahren Sie die Vinylverpackung
y
des Projektors außerhalb der Reichweite von Kindern auf.
- Andernfalls besteht Erstickungsgefahr.
Berühren Sie den Projektor nicht über
y
eine längere Zeit, wenn dieser eingeschaltet ist.
Wenn Sie ein Spiel spielen, bei dem
y
Sie eine Spielkonsole mit einem
Projektor verbinden, wird ein Abstand
von mehr als viermal die Anzeigendiagonale empfohlen.
Stellen Sie sicher, dass das Verbin-
y
dungskabel lang genug ist. Andernfalls könnte das Gerät herunterfallen
und Verletzungen oder einen Geräteschaden verursachen.
VORSICHT
Stellen Sie keinen schweren
y
Gegenstand auf den Projektor.
- Er kann herunterfallen und schwere
Verletzungen verursachen.
Achten Sie darauf, dass das Objektiv
y
während des Transports nicht
beschädigt wird.
Berühren Sie niemals das Objektiv.
y
Das Objektiv könnte beschädigt
werden.
Verwenden Sie keine scharfen
y
Werkzeuge wie Messer oder Hammer
für den Umgang mit dem Projektor,
dadurch kann das Gehäuse beschädigt werden.
Erscheint kein Bild auf der Projekti-
y
onsfläche, schalten Sie den Projektor
aus, ziehen Sie den Netzstecker, und
kontaktieren Sie einen autorisierten
Kundendienst.
- Andernfalls besteht Brand- und
Stromschlaggefahr.
Lassen Sie keine Gegenstände auf
y
den Projektor fallen, und üben Sie
keinen festen Druck aus.
- Dies kann zu Verletzungen oder
Schäden am Projektor führen.
Der Abstand zwischen Ihren Au-
y
gen und der Projektionsfläche sollte
ungefähr 5bis 7mal so lang sein wie
die Diagonale der Projektionsfläche.
- Wenn Sie über einen längeren Zeitraum in einem zu geringen Abstand
auf die Bildwand sehen, kann dies
Ihre Sehstärke beeinträchtigen.
Page 87

SICHERHEITSHINWEISE
7
Reinigung
WARNUNG
Besprühen Sie den Projektor zur
y
Reinigung auf keinen Fall mit Wasser. Lassen Sie kein Wasser in den
Projektor eindringen, und achten Sie
darauf, dass der Projektor trocken
bleibt.
- Andernfalls besteht Brand- oder
Stromschlaggefahr.
Wenn vom Projektor Rauch oder un-
y
gewöhnliche Gerüche ausgehen oder
Fremdkörper in den Projektor gefallen sind, schalten Sie den Projektor
aus, ziehen Sie den Netzstecker und
kontaktieren Sie den LG ElectronicsKundendienst.
- Andernfalls besteht Brand- oder
Stromschlaggefahr.
Verwenden Sie zur Reinigung des
y
Objektivs ein Druckluftspray, weiches
Tuch oder einen mit Objektivreinigungsflüssigkeit oder Alkohol getränkten Baumwolltupfer, um Staub
oder Flecken von der vorderen Linse
des Projektionsobjektivs zu entfernen.
VORSICHT
Nehmen Sie einmal im Jahr Kontakt
y
zu Ihrem Kundendienst auf, um die
Innenteile des Projektors reinigen zu
lassen.
- Wird das verschmutzte Innere des
Projektors über einen längeren
Zeitraum nicht gereinigt, besteht
Brandgefahr oder der Projektor kann
beschädigt werden.
Ziehen Sie vor der Reinigung der
y
Kunststoffteile (z.B. des Gehäuses)
zuerst den Netzstecker. Verwenden
Sie ein weiches Tuch. Benutzen Sie
weder Sprühflaschen noch nasse
Tücher. Verwenden Sie für die Reinigung der Kunststoffteile wie dem
Projektorgehäuse keine Reinigungsflüssigkeiten oder Kfz- bzw. Industriereiniger, aggressive Mittel oder
Wachs, Benzol, Alkohol usw. Diese
Mittel können das Gerät beschädigen.
- Es besteht Brand- und Stromschlaggefahr oder das Risiko, dass
das Gerät beschädigt wird (Verformungen, Korrosion).
Deutsch
Page 88

8
SICHERHEITSHINWEISE
SONSTIGES
WARNUNG
Nur ein qualifizierter Techniker darf
y
den Projektor zerlegen oder Änderungen am Gerät vornehmen. Setzen Sie sich mit Ihrem Händler oder
Kundendienst in Verbindung, wenn
eine Inspektion oder eine Reparatur
durchgeführt werden muss.
- Andernfalls besteht Brand- und
Stromschlaggefahr.
Leere Batterien müssen ordnungsge-
y
mäß entsorgt werden.
- Andernfalls kann es zu einer Explosion oder einem Brand kommen.
Die Entsorgungsart kann sich je nach
y
Land und Region unterscheiden. Der
Akkusatz muss gemäß den entsprechenden Anweisungen entsorgt
werden.
Werfen Sie den Akku nicht, und
y
bauen Sie ihn nicht auseinander.
- Andernfalls kann es aufgrund eines
Akkuschadens zu einem Brand oder
einer Explosion kommen.
Benutzen Sie immer von LG Elect-
y
ronics genehmigte und zertifizierte
Akkus.
- Andernfalls kann es zu einem Brand
oder einer Explosion kommen.
Lagern Sie den Akku nicht in der
y
Nähe von Metallobjekten wie Schlüsseln oder Büroklammern.
Überstrom kann einen schnellen
y
Anstieg der Temperatur verursachen,
der zu einem Brand oder Verbrennungen führen kann.
Lagern Sie den Akku nicht in der
y
Nähe von Wärmequellen wie Heizgeräten.
- Dies kann zu einem Brand führen
oder das Gerät beschädigen.
Lagern Sie den Akku nicht bei
y
Temperaturen über 60°C oder bei
hoher Luftfeuchtigkeit.
Bewahren Sie Batterien und Akkus
y
außerhalb der Reichweite von Kindern auf.
- Andernfalls können Verletzungen
verursacht oder das Gerät beschädigt werden.
Stellen Sie sicher, dass der Akku ord-
y
nungsgemäß eingesetzt wurde.
Falscher Austausch von Batterien und
y
Akkus kann zu Bränden führen.
VORSICHT
Ziehen Sie den Netzstecker, wenn der
y
Projektor längere Zeit nicht in Gebrauch ist.
- Ein Einstauben des Geräts kann zu
Überhitzung führen, korrodierte Isolierungen können einen Stromschlag
hervorrufen, und bei elektrischer
Überspannung besteht Brandgefahr.
Verwenden Sie nur den angegebenen
y
Akkutyp.
- Andernfalls besteht durch Überhitzung oder auslaufende Akkus
Stromschlaggefahr.
Page 89

Zusätzliche Informationen im Handbuch
Das Benutzerhandbuch wird im PDFFormat auf CD zur Verfügung gestellt.
Installieren Sie Adobe Acrobat Reader,
um das Benutzerhandbuch auf dem PC
anzuzeigen.
1 Legen Sie die mitgelieferte CD ein.
Die Webseite wird automatisch
angezeigt.
2 Wählen Sie auf der Webseite die
Sprache aus.
3 Klicken Sie auf der Webseite auf den
Modellnamen.
4 Zeigen Sie das Benutzerhandbuch
an.
SICHERHEITSHINWEISE
9
Deutsch
HINWEIS
yWird die Webseite nicht automatisch
angezeigt, gehen Sie zu„ Mein
Computer“, und klicken Sie dann
auf „LG“ und index.htm, um das
Benutzerhandbuch anzuzeigen.
- This DLP Projector is a Risk Group 2
device that meets safety standard IEC
62471 standard.
Risk Group 2
CAUTION. Possibly hazardous
optical radiation emitted from
this product. DO not stare at
operating lanp. May be harmful
to the eye.
Page 90

10
INHALTSVERZEICHNIS
INHALTSVERZEICHNIS
LIZENZEN 2
SICHERHEITSHINWEISE 3
ZUSÄTZLICHE INFORMATIONEN IM HANDBUCH 9
VORBEREITUNG 11
Zubehör 11
Sonderzubehör 12
Teile und Komponenten 13
Installation 14
- Hinweise zum Aufstellen des
Projektors 14
- Anschluss eines Adapters 14
- Projektionsabstand nach
Anzeigeformat 15
- Verwenden der Streulichtblende 16
- Verwenden des Cradle 16
- Anschluss eines Akkus 17
- Aufstellen des Projektors auf dem
Stativ 18
- Kensington-Sicherheitssystem 18
FERNBEDIENUNG 19
VERWENDEN DES
PROJEKTORS 21
Verwenden des Projektors 21
- Einschalten des Projektors 21
- Positionieren und Scharfstellen des
Bilds 21
- Verwenden des Projektors 21
- Verwenden des Akkus 22
- Zeitliche Informationen zur
Verwendung des Akkus 22
Verwenden von Zusatzoptionen 24
- Einstellen des Bildformats 24
- Verwenden der Trapez-Funktion 25
- Verwenden der INPUT-Liste 25
- Funktion BLANK (Leeres Bild) 26
Verwenden des
Schnellmenüs (Q.MENU) 26
UNTERHALTUNG 27
Wireless Display Setup (Notebook) 27
Wireless Display Setup (Mobiltelefon) 27
MEINE MEDIEN 28
- Anschließen von
USB-Speichergeräten 28
- FILMLISTE 30
BENUTZERKONFIGURATION 31
Menü SETUP 31
HERSTELLEN VON
VERBINDUNGEN 32
Anschluss an einen HD-Empfänger,
DVD-Player oder VCR 33
- HDMI-Anschluss 33
Anschluss eines PCs 33
- RGB-Anschluss 33
Anschluss an AVINPUT 34
- Komponenten-Anschluss 35
Anschluss von Kopfhörern 35
MHL-Anschluss 36
WARTUNG 36
Reinigen des Projektors 36
- Reinigen des Objektivs 36
- Reinigung des Projektorgehäuses 36
TECHNISCHE DATEN 37
Page 91

VORBEREITUNG
219'4
/76'
+0276
81.7/'
2#)'
#761
$.#0-
':+6ꕯ
ꕣ
5'66+0)5 3/'07
56+..
1-
4#6+1
75$
*'.2 -';5 -';5
Zubehör
Überprüfen Sie das zum Lieferumfang gehörende Zubehör.
Die Abbildungen können vom eigentlichen Produkt abweichen.
Fernbedienung Knopf-
batterie
(CR 2032)
Netzgerät Netzkabel CD mit Benutzerhandbuch
Benutzerhandbuch RGB-Kabel
VORBEREITUNG
11
Deutsch
Streulichtblende Akku Cradle (Ladeschale)
Composite-Videokabel Tasche
Beim Anschluss eines Kabels am HDMI- oder USB-
y
Anschluss kann es zu Problemen kommen, wenn die
Buchse zu groß für den HDMI- oder USB-Anschluss
ist. Verwenden Sie einen Stecker in Standardgröße.
Page 92

12
VORBEREITUNG
Sonderzubehör
Die optionalen Zubehörteile können Sie in einem Elektronikfachgeschäft, in einem
Online-Shop oder bei dem Einzelhändler, bei dem Sie das Produkt gekauft haben,
erwerben.
Optionale Zubehörteile zur Produktverbesserung können ohne vorherige Ankündigung
geändert und neue Zubehörteile hinzugefügt werden.
Projektorleinwand Stativ HDMI-Kabel
Videokabel Audiokabel MHL-Kabel
RGB-zu-Komponenten-
Kabel
Komponenten-Kabel
Page 93

VORBEREITUNG
HDMI/DVI
RGB IN
A/V IN
Teile und Komponenten
* Der Projektor wurde mit hochpräzise arbeitender Technologie gefertigt. Dennoch
erscheinen auf der Projektionsfläche möglicherweise permanent kleine schwarze und/
oder helle Punkte (rot, blau, grün). Dies ist keine Fehlfunktion, sondern ein durch das
Herstellungsverfahren bedingter, normaler Effekt. Beim Einschalten beginnt die LED
des Bedienfelds zu leuchten.
Links
Zurück
13
Bedienfeld
Lautsprecher
DC IN
A/V IN
HDMI/DVI
RGB IN
Fokusring
Objektiv
2
Belüftung
1
Taste Funktion
(Ein/Aus)
(Einstellungen)
Schaltet den Projektor ein und aus.
Ein-/Ausblenden der Menüs
Navigiert zwischen Menüs und ändert die Einstellungen.
∧, ∨, <, >
(Tasten <, >: Die Lautstärke kann abhängig vom Eingangsmodus
verändert werden.)
ꔉ(OK)
1 Halten Sie Abstand zu den Belüftungsöffnungen, da durch diese heiße Luft nach
außen befördert wird.
2 Berühren Sie während des Projektorbetriebs niemals das Objektiv. Das Objektiv
Zum Auswählen der aktuellen Einstellung und zum Speichern
von Änderungen.
könnte beschädigt werden.
Deutsch
Page 94

14
VORBEREITUNG
Installation
Hinweise zum Aufstellen des Projektors
Stellen Sie den Projektor in einer gut
y
belüfteten Umgebung auf.
- Um zu verhindern, dass sich das
Innere des Projektors erwärmt, stellen Sie den Projektor an einem gut
belüfteten Ort auf. Stellen Sie keine
anderen Gegenstände in der Nähe
des Projektors auf, da sonst die Belüftungsöffnungen verdeckt werden
können. Werden die Belüftungsöffnungen verdeckt, erhöht sich die
Innentemperatur des Projektors.
- Stellen Sie den Projektor nicht auf
Teppichen oder Vorlegern auf.
Verdecken Sie nicht die Belüftungsöffnung auf der Unterseite des
Projektors
Projektor auf einer ebenen, festen
Oberfläche auf
, und stellen Sie den
.
Stellen Sie den Projektor nicht in einer
y
heißen oder feuchten Umgebung auf.
- Stellen Sie den Projektor nicht in
einer heißen, kalten oder feuchten
Umgebung auf.
Stellen Sie den Projektor an einem
y
möglichst staubfreien Ort auf.
- Andernfalls besteht Brandgefahr.
Entfernen Sie außer der Objektivab-
y
deckung keine weiteren Abdeckungen. Ansonsten besteht erhöhte
Stromschlaggefahr.
Der Projektor wurde mit hochpräzise
y
arbeitender Technologie gefertigt.
Dennoch erscheinen auf der Projektionsfläche möglicherweise permanent kleine schwarze und/oder helle
Punkte (rot, blau, grün). Dies ist keine
Fehlfunktion, sondern ein durch das
Herstellungsverfahren bedingter, normaler Effekt.
Die Fernbedienung funktioniert u.U.
y
nicht, falls eine Lampe mit elektronischem Vorschaltgerät bzw. mit
drei Wellenlängen verwendet wird.
Tauschen Sie die Lampe durch eine
international genormte Lampe aus,
sodass die Fernbedienung störungsfrei funktioniert.
- Achten Sie darauf, dass keine
Fremdkörper wie Papierstückchen
oder ähnliches in den Projektor
gelangen.
- Halten Sie nach allen Seiten des
Geräts einen angemessenen
Abstand (mindestens 30cm).
Anschluss eines Adapters
Schließen Sie den Netzgerätestecker an die
Netzeingangsbuchse am Projektor an.
Page 95

VORBEREITUNG
15
Projektionsabstand nach Anzeigeformat
1 Stellen Sie den Projektor auf eine stabile, ebene Fläche neben den PC oder neben
die Audio/Video-Quelle.
2 Stellen Sie den Projektor mit ausreichendem Abstand zur Projektionsfläche auf. Der
Abstand zwischen dem Projektor und der Projektionsfläche ist maßgeblich für die
tatsächliche Bildgröße.
3 Richten Sie den Projektor so aus, dass das Objektiv rechtwinklig zur Projektionsflä-
che abstrahlt. Trifft das Licht nicht senkrecht auf die Projektionsfläche auf, erscheint
das Bild geneigt, und die Bildqualität wird beeinträchtigt. Ist das Bild verzerrt, verwenden Sie die Trapez-Funktion.
4 Schließen Sie die Netzkabel des Projektors und der verbundenen Geräte an einer
Netzsteckdose an.
Verhältnis der nach oben gerichteten Projektion: 100%
Anzeigehöhe (X)
X/2
X/2
ANZEIGE
Anzeigebreite (Y)
Y/2
ANZEIGE
Y/2
30mm
Deutsch
Projektionsabstand (D)
Projektionsabstand (D)
Anzeige 16:10
Bildwandformat
(mm)
635 538 337 803
762 646 404 966
889 754 471 1130
1016 861 539 1293
1143 969 606 1456
1270 1077 673 1619
1397 1185 741 1783
1524 1292 808 1946
1651 1400 875 2109
1778 1508 943 2272
1905 1615 1010 2436
2032 1723 1077 2599
2159 1831 1145 2762
2286 1938 1212 2925
2413 2046 1279 3089
2540 2154 1347 3252
Anzeigebreite (Y)
(mm)
Anzeigehöhe (X)
(mm)
Projektionsabstand (D)
(mm)
Page 96

16
VORBEREITUNG
Verwenden der Streulichtblende
Drehen Sie die Streulichtblende in Pfeilrichtung.
⇒
HINWEIS
yZiehen Sie die Streulichtblende nicht zu fest an. Dies könnte das Gerät beschädigen.
Verwenden des Cradle
Normales Projizieren
HINWEIS
yVerwenden Sie beim Projizieren an die Decke ausschließlich das mitgelieferte
Winkelantennenkabel und USB-Speichergerät.
Projektion nach oben
Page 97

Anschluss eines Akkus
1. Montieren Sie den Projektor wie in der Abbildung gezeigt.
⇒
2. Drehen Sie den Knopf in Pfeilrichtung.
VORBEREITUNG
17
Deutsch
Page 98

18
VORBEREITUNG
Aufstellen des Projektors auf dem Stativ
Sie können diesen Projektor, wie in der Abbildung unten gezeigt, auf einem
y
Kamerastativ montieren.
Zur Stabilisierung des Stativs sollte eine Fixierschraube mit einer Standardgröße von
y
max. 4,5mm verwendet werden. Die maximal mögliche Länge der Fixierschraube
beträgt 5,5mm. (Wenn die Schraube länger ist, kann der Projektor beschädigt
werden.)
Unterseite des Projektors
An diesem Teil wird der
Projektor befestigt.
+
Stativ
Schraube zur
Befestigung des
Projektors
⇒
Kensington-Sicherheitssystem
Der Projektor besitzt am Anschlussfeld einen Anschluss für das Kensington-Sicher-
y
heitssystem. Schließen Sie das Kensington-Sicherheitskabel wie abgebildet an.
Installations- und Bedienungshinweise finden Sie in der Bedienungsanleitung zum
y
Kensington-Sicherheitssystem.
Das Kensington-Sicherheitssystem ist Sonderzubehör.
y
Was ist Kensington?
y
Kensington ist ein Unternehmen, das Sicherheitssysteme vertreibt, die teure
elektronische Ausrüstungen wie Computer oder Laptops vor Diebstahl schützen.
Homepage im Internet: http://www.kensington.com
Page 99

FERNBEDIENUNG
219'4
/76'
+0276
81.7/'
2#)'
#761
$.#0-
':+6ꕯ
ꕣ
5'66+0)5 3/'07
56+..
1-
4#6+1
75$
*'.2 -';5 -';5
①
②
Öffnen Sie das Batteriefach auf der Rückseite der Fernbedienung, und
legen Sie die Batterien des angegebenen Typs wie beschrieben ein .
Verwenden Sie zwei Batterien des gleichen Typs.
POWER
Schaltet den Projektor ein und aus.
INPUT
Ändert die Eingangsquelle.
MUTE
Stellt den Ton aus.
VOLUME+, -
Regelt die Lautstärke.
PAGE
Springt zur vorherigen/nächsten Seite.
FERNBEDIENUNG
19
Deutsch
AUTO
Passt den RGB-PC-Bildeingang automatisch an.
BLANK
Schaltet die Projektoranzeige ein und aus.
Tasten nach oben/nach unten/nach links/nach rechts
Legt die Funktionen oder Bewegungen des Cursors fest.
OK ꔉ
Zum Auswählen der aktuellen Einstellung und zum
Speichern von Änderungen.
EXIT
Blendet alle Bildschirmmenüs aus und ruft das
Projektor-Bild auf.
ꕣ
Zurück zur vorherigen Ebene.
SETTINGS
Ein-/Ausblenden der Menüs
Q.MENU
Öffnet das Schnellmenü.
Page 100

20
219'4
/76'
+0276
81.7/'
2#)'
#761
$.#0-
':+6ꕯ
ꕣ
5'66+0)5 3/'07
56+..
1-
4#6+1
75$
*'.2 -';5 -';5
219'4
/76'
+0276
81.7/'
2#)'
#761
$.#0-
1-
FERNBEDIENUNG
STILL
Friert das Bild ein.
(In jedem Modus bis auf den USB-Modus verfügbar)
RATIO
Ändert die Bildgröße.
USB
Zugriff auf USB-Modus.
HELP
Aktiviert die Selbstdiagnose.
KEY.S ,
Stellt die Trapez-Funktion ein.
Steuerungstasten für Wiedergabe
Steuert die Wiedergabe von MEINE MEDIEN.
Farbige Tasten
Zum Zugriff auf Sonderfunktionen in manchen Menüs.
HINWEIS
Der optimale Abstand für die Verwendung der Fernbedienung beträgt max.
y
3m (links/rechts), außerdem sollte der Winkel zum IR-Empfänger 30Grad
nicht überschreiten.
Für einen reibungslosen Betrieb müssen Sie darauf achten, dass der IR-
y
Empfänger nicht durch Gegenstände verdeckt wird.
Achten Sie beim Transport der Fernbedienung in der Tragetasche darauf, dass die
y
Tasten nicht durch den Projektor, die Kabel, die Bedienungsanleitung oder andere
Zubehörteile gedrückt werden. Ansonsten könnte sich die Lebensdauer der Batterien erheblich verkürzen.
A/V IN
HDMI/DVI
RGB IN
 Loading...