

Page 1
LG-P936UserGuide
This guide helps you get started using your phone.
If you need more information, please visit www.lg.com/ca_en.
•Someofthecontentsofthismanualmaynot
applytoyourphone.Thisdependsonyourphone’s
softwareandyourserviceprovider.
•Thishandsetisnotrecommendedforthevisually
impairedbecauseofitstouchscreenkeyboard.
•Copyright©2012LGElectronics,Inc.Allrights
reserved.LGandtheLGlogoareregistered
trademarksofLGGroupanditsrelatedentities.All
othertrademarksarethepropertyoftheirrespective
owners.
•Google™,Maps™,Gmail™,YouTube™,Talk™
andAndroidMarket™aretrademarksofGoogle,
Inc.
English
Page 2
Your Phone
To turn on the phone, press and hold the Power/Lock Key for 3 seconds.
To turn off the phone, press the Power/Lock Key for 3 seconds and touch Power off and OK to
confirm.
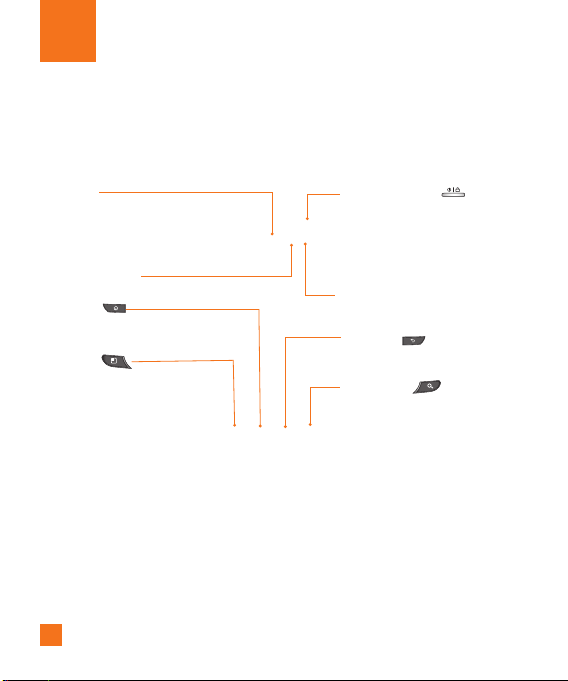
Front View
Earpiece
Proximity Sensor
Home Key
- Returns to the Home screen
from any screen.
Menu Key
- Displays available options for
the current screen.
n
Warning
Placing a heavy object on the phone or sitting on it can damage its LCD and touch screen
functionalities. Do not cover the LCD’s proximity sensor with a protective film.
This can cause the sensor to malfunction.
n
TIPS
- Press the Menu Key whenever you open an application to check what options are available.
- This phone does not support video calls.
- If your phone has errors when you use it or you cannot turn it on, remove the battery, install it
again and turn it on after 5 seconds.
12
Power/Lock Key
- Powers your phone on/off by
pressing and holding the key.
- Turns your screen on and off
and locks it.
Front Camera Lens
Back Key
- Returns to the previous screen.
Search Key
- Search the web and contents
in your phone.
Page 3
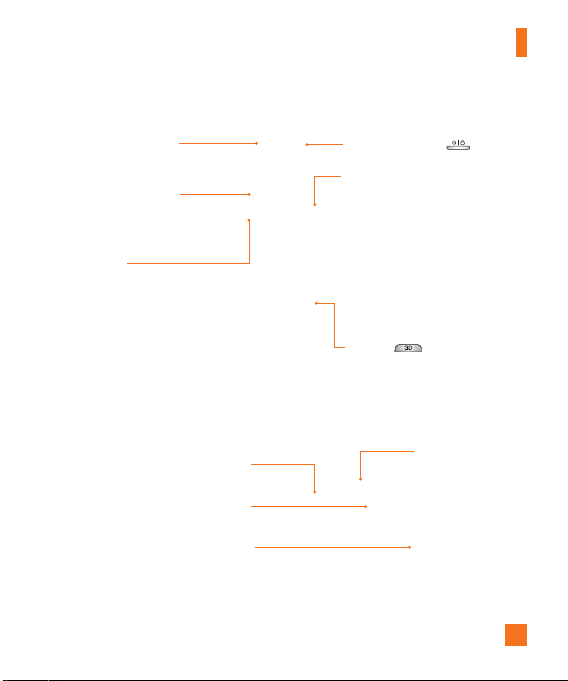
Side View
3.5mm Headset Jack
USB
HDMI Slot
- Connect an HDMI cable from
the HDMI port on your phone
to an HDMI port on your TV.
Rear View
Back Camera Lens
SIM Card Slot
Your Phone
Power/Lock Key
Volume Keys
- From the Home screen:
Controls ringer volume.
- During a call: Controls your
earpiece volume.
- When playing a track:
Controls volume
continuously.
3D Key
- Easy to access 3D Space
directly.
microSD
Card Slot
Battery
13
Page 4

Getting Started
Installing the SIM card and
battery
Before you can start exploring your new phone,
you’ll need to set it up. To insert the SIM card
and battery:
Hold the phone on your hand firmly. With the 1
other hand, firmly press your thumb on the
back and lift off the battery cover with your
forefinger using the fingertip cutout at the
top of the phone.
Slide the SIM card into the SIM card slot. 2
Make sure the gold contact area on the card
is facing downwards.
14
Insert the battery into place by aligning the 3
gold contacts on the phone and the battery.
Replace the back cover of the phone (as 4
demonstrated below). Apply a steady
downward pressure until the battery cover
clicks into place.
Page 5

Getting Started
Charging your phone
Plug the USB cable (as shown below) into the
phone's accessory/charger port. Make sure the
‘B’ side is facing upwards.
n
NOTE
The battery must be fully charged initially
to improve battery lifetime.
n
NOTE
Your phone has an internal antenna. Be
careful not to scratch or damage this
rear area, as that will cause loss of
performance.
Installing the microSD card
To store multimedia files, such as images
taken using the camera, you must insert a
microSD card into your phone.
To insert a microSD card:
n
NOTE
This device supports up to a 32GB microSD
card.
Turn the phone off before inserting or 1
removing the microSD card. Remove the
battery cover.
15
Page 6

Getting Started
Slide the slot protector upwards to unlock 2
it and flip it open. Then insert the microSD
card into the slot. Make sure the gold
contact area is facing downwards.
16
Flip the slot protection down to close it. 3
Then slide the slot protection downwards to
lock it and replace the battery cover.
Page 7

n
Warning
Do not insert or remove the microSD card
when the phone is on. Otherwise, it may
damage the microSD card as well as your
phone, and the data stored on the microSD
card may be corrupted.
Getting Started
Formatting the microSD card
Your microSD card may already be formatted.
If it isn’t, you must format it before you can
use it.
n
NOTE
All files on the card are deleted when you
format the microSD card.
From the Home screen, press the 1
Key
.
Settings
Touch 2
Touch 3
Touch 4
confirm.
Touch 5
If you set an unlock pattern, enter it and 6
touch
then be formatted and ready to use.
n
NOTE
If there is content on your microSD card,
the folder structure may be different after
formatting since all the files will have been
deleted.
.
SD card & phone storage
Unmount SD card
Format SD card
Erase Everything.
Menu
and OK to
(twice).
The card will
.
17
Page 8

Getting Started
Switching between and
Exiting Applications
Multi-tasking is easy with Android because
open applications keep running even when you
open another application. There is no need to
quit an application before opening another. Use
and switch among several open applications.
Android manages each application, stopping
and starting them as needed, to ensure that
idle applications don’t consume resources
unnecessarily.
Switching between applications
- Press and hold the Home Key. A list of
recently used applications will be displayed.
Then touch the application you want to
access.
To stop/exit an application
From the Home screen, press the 1
Key
and touch
Settings > Applications
Manage applications
Touch the desired application and touch 2
Force stop
to exit.
Menu
.
>
18
Page 9

Your Home screen
P936
Touch-screen tips
Here are some tips on how to navigate around
your phone.
Touch -
To choose a menu/option or open an
application, touch it.
Touch and hold -
or grab an object you want to move, touch
and hold it.
Drag -
drag across the touch screen.
Flick -
flick across the touch screen (drag quickly and
release).
n
NOTE
• To select an item, touch the center of the
icon.
• Do not to press too hard; the touch screen
is sensitive enough to pick up a light, firm
touch.
• Use the tip of your finger to touch the option
you want. Be careful not to touch any other
keys or icons.
To open an options menu
To scroll through a list or move slowly,
To scroll through a list or move quickly,
Proximity sensor
When receiving and making calls, this sensor
automatically turns the backlight off and locks
the touch keypad by sensing when the phone
is near your ear. This extends battery life and
prevents the touch keypad from activating
unintentionally during calls.
Lock your phone
When you are not using the LG P930, press
the Power/Lock Key to lock your phone. This
helps prevent accidental presses and saves
battery power.
Also, if you do not use the phone for a while,
the Home screen or other screen you are
viewing, is automatically replaced with the
lock screen after 30 seconds of inactivity
to conserve the battery and prevent pocket
dialing.
Menu
To wake up your phone, press the
Home, Back, Search
lock screen will appear. Touch the lock icon
and drag your finger to the right to unlock
your Home screen. The last screen you were
working on opens.
n
NOTE
- The automatic screen timeout can be
configured manually in Settings.
- If there are any programs running when you
lock the phone, they may still be running in
or
Power Keys
,
. The
19
Page 10
Your Home screen
lock mode. It is recommended that you exit
all programs before entering the lock mode to
avoid unnecessary charges. (e.g., phone call,
web access and data communications)
Setting an unlock pattern:
your own unlock pattern by connecting four or
more dots.
To unlock the phone, draw the pattern you set
on the screen.
n
Caution
If there are more than 5 pattern drawing errors
in a row, you will be required to wait for 30
seconds to retry.
You can draw
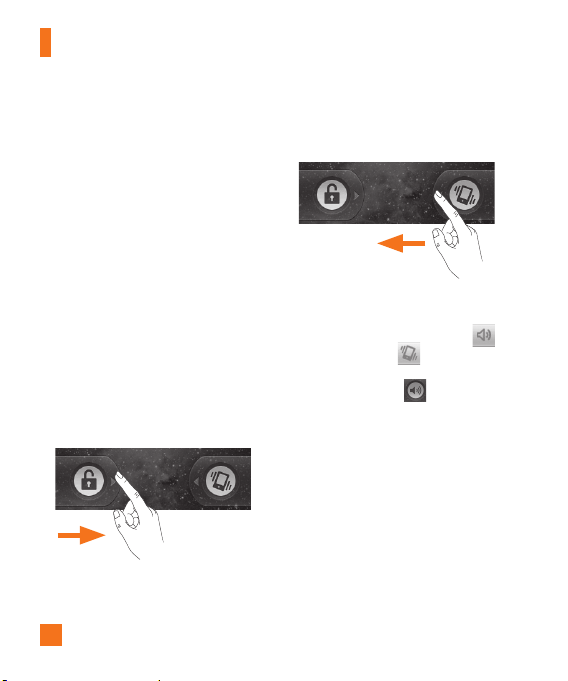
Unlock screen
Whenever your phone is not in use, it will
return to the lock screen. Slide your finger from
left to right to unlock the screen.
20
When the screen is locked, you can quickly
turn off your ringer and put the phone in silent
mode, by sliding finger from right to left.
Silent Mode
To set phone to silent when screen is unlocked,
open the Notifications panel and touch .
The icon will change to . To take it off
Silent, touch button again or, if the lock screen
is displayed, simply drag to the left.
Home
Simply swipe your finger to the left or right to
view the different panels.
You can also customize each panel with
shortcuts, folders, and wallpapers. You can
also customize each panel with widgets, which
are shortcuts to your favorite applications.
n
NOTE
On your LG Home screen, you can view quick
keys at the bottom of the screen. The quick
Page 11
Your Home screen
keys provide easy, one-touch access to the
functions you use the most.
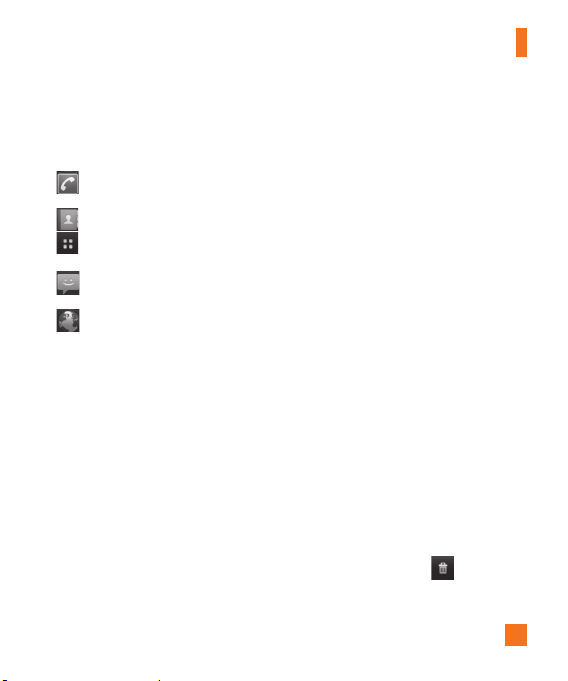
Quick Keys
Touch the
Phone
keypad to make a call.
Touch to open your Contacts list.
Touch the
to view all your installed applications.
Touch the
messaging application.
Touch to open your phone's web browser.
icon to bring up the
Applications Launcher Key
Messaging
icon to access the
Adding shortcuts and widgets
to your Home screen
You can customize your Home screen by adding
quick access elements, such as shortcuts,
widgets, or folders to it.
Shortcuts
•
•
•
: Add application, web
bookmark, contact, email, and music playlist
shortcuts to the Home screen.
Widgets
: Add dynamically updating
widgets to your Home screen to allow quick
access to applications without opening the
full application.
Folders
: Add folders to organize contacts
and shortcuts.
To do so, use the following steps:
From the Home screen, press the 1
Key
and touch
Add
empty part of the Home screen.
Add to Home screen
On the 2
touch the type of item you want to add.
For example, touch
and touch the folder you wish to add to the
Home screen.
You will see a new icon on the Home 3
screen. Drag it to the desired location on the
desired panel and release your finger from
the screen.
n
TIP
To add a preloaded application or an
application you have downloaded from the
Android Marketplace to the Home screen,
simply touch and hold the icon you want in
the Application Launcher to add to the Home
screen.
n
TIP
To delete an application icon from the Home
screen, touch and hold the shortcut icon you
want to delete and drag to at the bottom
of the screen.
. Or touch and hold an
Folders
Menu
menu,
from the list
21
Page 12
22
n
TIP
You cannot delete the preloaded applications.
(Only their icons can be deleted from the
screen).
Getting back to a recently
used application
Press and hold the 1
Home Key.
The screen
will display the icons of applications that
you have used recently.
Touch an icon to open its application or 2
press the
Back Key
to return to the current
application.
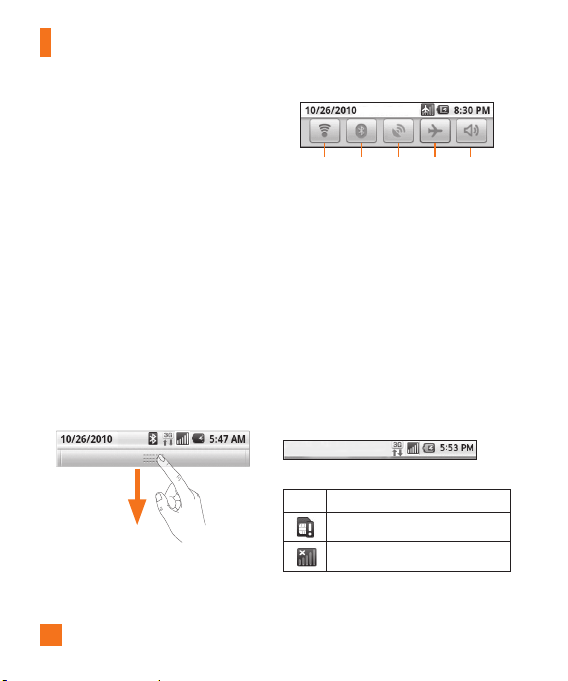
Notifications panel
The Notifications panel runs across the top of
your screen.
Ring
Airplane
Mode
GPS
Bluetooth
Wi-Fi
Touch and slide the Notifications panel
down with your finger. Or, from the Home
screen, press the
Menu Key
and touch
Notifications
. From here, you can check and
manage Wi-Fi, Bluetooth, GPS, Airplane mode,
Ringer and view other notifications.
Viewing the Status Bar
The Status Bar uses different icons to display
phone information, such as signal strength,
new messages, battery life, and active
Bluetooth and data connections.
Below is a table explaining the meaning of
icons you are likely to see in the Status Bar.
[Status Bar]
Icon Description
No SIM card is installed
No signal
Your Home screen
Page 13

23
Icon Description
Connected to a Wi-Fi network
A wired headset is connected
Call forwarded
Call on hold
Speakerphone is on
Phone microphone is muted
Missed call
Bluetooth is on
Connected to a Bluetooth device
System warning
Alarm is set
New voicemail
Airplane mode is set
Silent mode is set
Vibrate mode is set
Icon Description
No microSD card installed
Battery is fully charged
Battery is charging
Data in
Data out
Data in and out
The phone is connected to a PC via
USB cable
Downloading data
Uploading data
GPS is on
GPS is receiving location data
USB tethering is active
Mobile Hotspot is active
Your Home screen
Page 14
Your Home screen
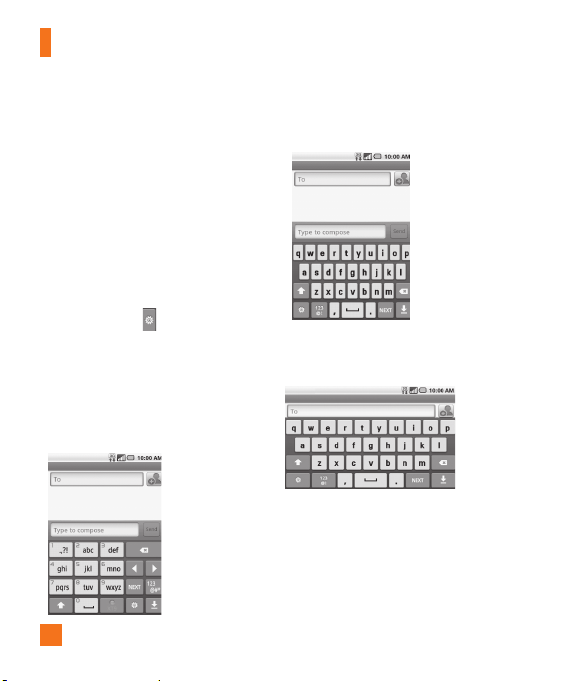
Onscreen Keyboard
You can also enter text using the onscreen
keyboard. The onscreen keyboard displays
automatically on the screen when you need to
enter text. To manually display the keyboard,
simply touch a text field where you want to
enter text.
There are two types of keypad that you can
use, the Phone keypad and the QWERTY
keypad.
n
TIP
To switch between the Qwerty Keypad and
Phone Keypad, touch
Then touch the keypad you wish to use.
The Phone keypad allows you to enter
letters by touching the key labeled with the
desired letters, similar to how you would on
a traditional 12 key phone. You may have to
touch a key up to four times to type the desired
letter or number.
24
and Keypad types.
The QWERTY keypad shows a letter for each
key, similar to on a computer keyboard.
You can also use this keypad in landscape
mode. Turn phone to a horizontal position to
use the landscape QWERTY keypad.
Page 15
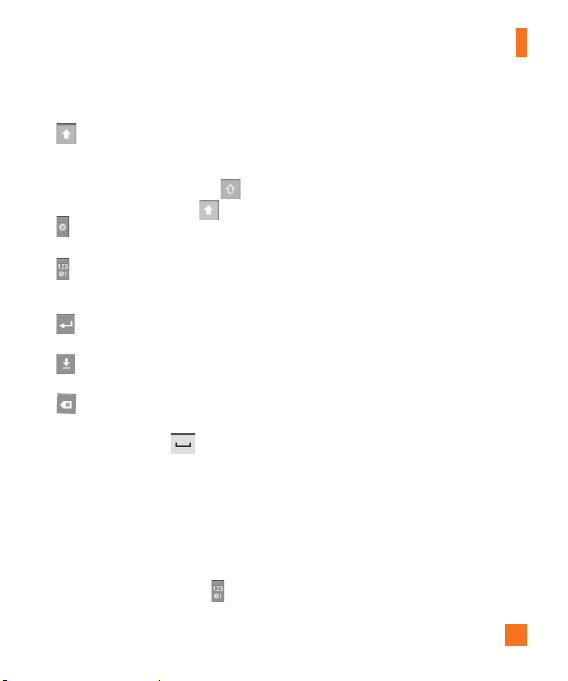
Entering text
Shift Key -
next letter you type. Double-tap for all
caps.The colored circle on the button tells
you if uppercase is locked on or if it is
just on for one character .
Setting Key-
keyboard settings.
Number and Symbols Key -
change to 123 Mode and enter numbers
and symbols.
Enter Key-
entering text.
Hide Keypad Key -
keypad from the screen.
Delete Key-
entered.
To enter a space, touch
Touch once to capitalize the
Allows you to set the
Touch to
Adds another line when
Removes the
Deletes any text you have
.
123 Mode
This mode allows you to enter numbers
in a text message (a telephone number,
for example) more quickly. Touch the keys
corresponding to the required digits before
manually switching back to the appropriate
text entry mode by touching the key.
Your Home screen
n
TIP
You can also change your input method when
typing between LG keyboard and Android
Keyboard. To do so, press and hold a text
field. Select
and make your selection.
Input Method
from the menu
Entering accented letters
When you select French or Spanish as the text
entry language, you can enter special French or
Spanish characters (e.g., “á”).
From Phone Keypad
After the corresponding letter character
disappears, press the same key repeatedly
until you see the special character you want.
From Qwerty keyboard
To input the accent, press and hold the “á” key.
After the accented character appears, touch
it to enter it.
25
Page 16

Google Account Set-up
The first time you open a Google application on
your phone, you will be required to sign in with
your existing Google account. If you do not
have a Google account, you will be prompted
to create one.
Creating your Google account
From the Home screen, touch the 1
Applications Launcher Key
Gmail
>
Touch2
Gmail™ setup wizard.
Touch a text field to open the keyboard and 3
enter your name and username for your
Google account. When you finish entering
the text, you can move to the next text field
by touching
When you’re finished entering your name 4
and username, touch
will communicate with Google servers and
check for username availability.
Enter and re-enter your password. Then 5
follow the instructions and enter the
required and optional information about
the account. Wait while the server creates
your account.
Next > Create
Next
on the keyboard.
26
Next
.
to start the
. Your phone
Signing into your Google
account
Enter your email address and password, 1
then touch
Sign in
.
After signing in, you can use Gmail™ and 2
take advantages of Google services on your
phone.
Once you have set up your Google 3
account, your phone will be automatically
synchronized with your Google account on
the web. (Depending on your synchronization
settings.)
After signing in, your phone will sync with your
Google services, such as Gmail
Google Calendar, and Picasa photo albums.
You can also use Google MapsTM, download
applications from Android Market™, back
up your settings to Google servers, and take
advantage of other Google services on your
phone.
TM
, Contacts,
Page 17

IMPORTANT
• Some applications, such as Calendar,
work only with the first Google Account
you add. If you plan to use more than one
Google Account with your phone, be sure
to sign into the one you want to use with
such applications first. When you sign in,
your contacts, Gmail messages, Calendar
events, and other information from these
applications and services on the web are
synchronized with your phone. If you don’t
sign into a Google Account during setup,
you will be prompted to sign in or to create
a Google Account the first time you start an
application that requires one, such as Gmail
or Android Market™.
• If you want to use the backup feature to
restore your settings to this phone from
another phone that was running Android
release 2.0 or later, you must sign into your
Google Account, during setup. If you wait
until after setup is complete, your settings
will not be restored.
• If you have an enterprise account through
your company or other organization, your IT
department may have special instructions on
how to sign into that account.
Google Account Set-up
27
Page 18
Calls
Making a call
Touch 1
to open the keypad.
Enter the number on the keypad. To delete a 2
digit, touch the
Touch the 3
To end a call, touch the 4
n
TIP
To enter “+” to make international calls,
touch and hold down .
Clear
icon
Call
icon to make a call.
End
.
icon .
Calling your contacts
Touch 1
to open your contacts.
Scroll through the contact list or touch the2
Search
box and enter the first letter(s) of
the contact you want to call.
In the list that is displayed, touch the contact 3
you want to call.
In the Contact Info screen, touch the phone 4
number you wish to call.
28
Answering and rejecting a
call
When the screen is locked
When your phone rings, drag the
to the right.
Decline
Drag the
an incoming call. Drag the Send msg bar
upwards if you want to send a message to the
caller. If the caller is unknown, this Send msg
bar is not available.
icon to the left to reject
When the screen is unlocked
When your phone rings, touch the
icon . Touch
an incoming call.
Touch the Send msg bar upwards if you want
to send a message to the caller. If the caller is
unknown, the Send msg bar is not available.
Decline
icon to reject
Adjusting the In-call volume
To adjust the In-call volume during a call, use
the volume up and down keys on the right side
of the phone.
Answer
Answer
icon
Page 19
Calls
Making a second call
During your initial call, touch 1 .
Then enter the number you want to call.
Dial the number or search your contacts.2
Call
Touch the 3
Both calls will be displayed on the call 4
screen. Your initial call will be locked and
put on hold.
Touch 5
To end active calls, touch 6
no active call, it will end the call on Hold.
To end all calls at the same time, press the
Menu Key
n
NOTE
You will be charged for each call you make.
icon to connect the call.
to toggle between calls or touch
to make a conference call.
End
. If there is
and touch
End all calls.
Viewing your call logs
From the Home screen, touch
Call log tab.
View a complete list of all dialed, received,
and missed voice calls.
n
TIP
Touch any single call log entry to view the
date, time, and duration of the call.
n
TIP
Press the Menu Key, then touch Clear call
log to delete all the recorded items.
and the
Call settings
You can configure phone call settings, such
as call forwarding, and other special features
offered by your carrier.
From the Home screen, press the 1
Key
Touch 2
and touch
Settings
Call settings
Menu
.
.
29
Page 20
Contacts
You can add contacts on your phone and
synchronize them with the contacts in your
Google Account or other accounts that
support syncing contacts.
Searching for a contact
Touch 1
to open your contacts.
Search Key and enter the
Press the 2
contact name using the keypad.
Adding a new contact
Touch 1 and enter the new contact’s
number. Press the Menu Key, touch
Add to contacts and then Create new
contact.
If you want to add a picture to the new 2
contact, touch
photo or Select photo from gallery.
Select the contact type by touching 3
Touch a category of contact information 4
and enter the details about your contact.
Done to save the contact entry.
Touch 5
30
. Choose from Ta ke
Favorite Contacts
You can classify frequently called contacts
as favorites.
To add a contact to your favorites
From the Home screen, touch1
your contacts.
Touch a contact to view its details.2
Touch the star to the right of the contact’s 3
name. The star turns gold.
To remove a contact from your
favorites list
From the Home screen, touch 1
your contacts.
Groups tab and touch
Touch the 2
Favorites.
Touch a contact to view its details.3
Touch the gold star to the right of the 4
.
contact’s name. The star turns grey
and the contact is removed from your
favorites.
to open
to open
Page 21

AT&T Address Book (AAB)
AT&T Address Book (AAB) is an application
that automatically syncs your contacts to
an online address book for safekeeping!
When you first turn on the phone or change
your SIM card and touch Contacts, the AAB
application is displayed after copying the
SIM card information to your phone.
After signing up for this service, your
information is synced on a regular basis.
You can find more information on this
service and access your online address book
at www.att.com/addressbook. You can find
the synchronization menu for the service
by pressing the
Settings > Accounts & sync > AT&T
Address Book.
Menu Key and touching
Contacts
31
Page 22

Messaging/Email
Messaging
Your phone combines SMS and MMS into one
intuitive, easy-to-use menu.
Threaded box
Messages (SMS and MMS) exchanged with
another party can be displayed in chronological
order so that you can conveniently see an
overview of your conversation.
Sending a message
Touch the 1 icon on the Home screen,
then touch
New message
message.
Enter a contact name or phone number in 2
To
field. As you enter the contact name,
the
matching contacts appear. You can touch
a suggested recipient. You can also add
multiple contacts.
n
NOTE
You will be charged for a text message for
every person you send the message to.
Touch the text field to start entering your 3
message.
Menu Key
Press the 4
menu. Choose from
to create a new
to open the options
Call, Attach, Insert
,
Discard, Templates, All
Smiley
threads
.
Send
to send your message.
Touch 5
The message screen opens, with your 6
message after your name. Responses
appear on the screen. As you view and send
additional messages, a message thread is
created.
n
Warning
The 70-character limit may vary from
country to country depending on how the
SMS is coded and the language used in the
message.
n
Warning
If an image, video, or audio file is added to
an SMS message, it will be automatically
converted into an MMS message and you
will be charged accordingly.
n
NOTE
When you get an SMS message during a
call, there will be an audible notification.
32
Page 23

Messaging/Email
Using smilies
Liven up your messages using smilies.
When writing a new message, press the
Menu Key,
then touch
Insert Smiley
.
Changing your message
settings
Your phone's message settings are predefined,
so you can send messages immediately.
You can change the settings based on your
preferences.
Email
You can use the
Email from providers other than Gmail. The
Email application supports the following
account types: POP3, IMAP and Microsoft
Exchange ActiveSync (for Enterprise users).
To open the Email application
] From the Home screen, touch
The first time you open the
a setup wizard opens to help you add an Email
account.
Email
application to read
Email
Email
.
application,
Email Accounts screen
The Accounts screen
The Accounts screen lists your Combined Inbox
and each of your Email accounts.
Open the Email application. If you’re not on 1
the Account screen, press the
and touch
Accounts
- Touch to open your Combined Inbox,
with messages sent to all of your accounts.
- Touch to open a list of just your starred
messages.
- Touch the folder icon to open a specific
account’s folders.
You can touch an account to view its Inbox. The
account from which you send Email by default
is indicated with a checkmark.
Your Combined Inbox
If you have configured Email to send and
receive Email from more than one account, you
can view all messages sent to all accounts in
your Combined Inbox.
Email
Touch 1
From the Inbox, press the 2
touch
.
Accounts
.
.
Menu Key
Menu Key
and
33
Page 24

Messaging/Email
Touch 3
Combined Inbox
screen). Messages in the Combined Inbox
are color coded along their left sides, by
account, using the same colors that are used
for your accounts on the Accounts screen.
Only your account’s most recent Email are
downloaded to your phone. To download more
(earlier) Email messages, touch
messages
at the bottom of the Email list.
(on the Accounts
Load more
Reading Your Messages
Touch the message you want to read. The
message opens in a screen that includes
information about who sent it, the date it was
sent, and other related information.
Responding to a Message
You can reply to it, forward it or even just
delete it.
To delete a message
] While reading a message, touch the
button.
OR
] While reading a message, press the
Key
and touch
Delete
.
34
Delete
Menu
For many types of accounts, deleted messages
are moved to a Trash folder, so you can retrieve
them in case they were deleted by mistake.
Other options
] To reply the message, touch the message
you received from the Inbox and touch the
Reply button.
] Touch and hold the recieved message until
the pop-up appears. From the pop-up,
you can reply, forward, delete and mark
messages as read or unread.
Composing and Sending Email
To compose and send a message
While in the 1
Menu Key
Enter an address for the message’s intended 2
recipient. As you enter text, matching
addresses are offered from your Contacts.
Separate multiple addresses with commas.
Press the 3
Cc/Bcc
addresses.
Enter the text of the message. 4
Press the 5
send a photo with the message.
Email
application, press the
and touch
Compose
Menu Key
and touch
and touch
Add
Attach
to copy other contacts or Email
Menu Key
.
to
Page 25

Touch the 6
Send
button.
Saving and Accessing Draft Messages
If you’re not ready to send the message, touch
the
Save as draft
Drafts folder. Touch a draft message in the
Drafts folder to resume working on it. Your
message will also be saved as a draft if you
touch the
it. Touch the Discard button to abandon and
delete a message, including any saved drafts.
If you are not connected to a network (for
example, if you are working in airplane mode)
the messages that you send are stored in
your Outbox folder until you are connected to
a network again. If it contains any pending
messages, the Outbox is displayed on the
Accounts screen.
n
NOTE
Please note that messages sent using a
Microsoft Exchange account will not be saved
on the phone; they will, however, be saved on
the Exchange server itself.
If you want to see your sent messages in
the Sent folder, you will often need to open
the Sent folder and touch Refresh from the
options menu.
button to save it in the
Back Key
before sending
Messaging/Email
Working with Account Folders
Each account has Inbox, Outbox, Sent, and
Drafts folders. Depending on the features
supported by your account’s service provider,
you may have additional folders.
Adding and Editing Email
Accounts
To add an Email account
From the Accounts screen, press the 1
Key
and touch
Add account
Touch the type of account you would like to 2
add and enter your Email account settings.
Enter a name for the account, confirm how 3
you want your name to appear in outgoing
mail, then touch the
Done
To change an account’s settings
Open the Accounts screen. 1
Touch and hold the account you want to edit. 2
In the menu that opens, touch
settings
.
To delete an Email account
Open the Accounts screen. 1
Touch and hold the account you want to 2
delete.
Menu
.
button.
Account
35
Page 26

Messaging/Email
Touch 3
Remove account
that opens.
OK
Touch the 4
confirm that you want to delete the account.
button in the dialog box to
in the menu
Social Networking
With your phone, you can enjoy social
networking and manage your micro-blog in
on-line communities. You can update your
current status, upload photos, and view your
friends’ status updates in real-time.
You can add your Facebook and Twitter
accounts to your phone. If you don’t have an
account, you can visit their sites to set one up.
n
NOTE
Additional costs may be incurred when
connecting and using online services.
Check your data charges with your network
provider.
Adding an account to your
phone
From the Home screen, touch the 1
Applications Launcher Key to view your
installed applications and choose any social
networking application you want to use. If
36
you don't have an account yet, touch Sign
up now and create an account.
Enter your email address and password 2
that you set up for your social networking
account, then touch
n
NOTE
If you add a social networking widget on
your Home screen, the widget will show
your status when your phone receives
updates from the network.
You can also access the social community
directly by touching the widget.
Log in
.
Viewing and updating your
status
Open the social networking application you 1
want to update.
You can see the current status of your social 2
application, such as Twitter or Facebook.
You can update your status with comments 3
or upload photos.
n
TIP
You can use information about friends only
in your social network(s) or sync all data
to Contacts.
Page 27

Syncing accounts on your
phone
You can sync information from your social
networking accounts with your Contacts and
other functions on your phone, if applicable.
From the Home screen, press the
and touch
Settings > Accounts & sync
Add account
want to synchronize and enter the necessary
information.
. Choose the account you
Menu Key
Removing accounts on your
phone
From the Home screen, press the
and touch
Settings
Touch the account(s) you want to delete, then
touch
Remove account
>
Menu Key
Accounts & sync
(twice).
.
Messaging/Email
37
Page 28

Camera
Getting to know the viewfinder
Brightness
– This defines and controls of the amount of sunlight entering the image.
Slide the brightness indicator along the bar, towards “-” for a lower brightness image, or
towards “+” for a higher brightness image.
Zoom
– Zoom in or zoom out. Alternatively you can use the Volume Keys.
Camera Lens Switch
back one.
Settings
– Touch this icon to open the settings menu. See
Flash
– Allows you turn on the flash when taking a photo in a dark place.
n
NOTE
You need to insert a microSD card first to take a picture. Without inserting a microSD card, you
will not be able to take a picture nor save the picture you had taken.
n
NOTE
You can close all the shortcut options to give a clearer viewfinder screen. Just touch the center
of the screen once. To recall the options, touch the screen again.
38
- Allows you to switch the camera lens between front one and
3D Camera -
Video mode
Capture
Gallery
Touch to switch to 3D camera shoot
mode.
– Slide this icon down to switch to
video mode.
– Allows you to take a photo.
– This enables you to access your saved
photos and videos within the camera
mode. Simply touch and your gallery will
appear on the screen.
Using the advanced settings
.
Page 29

Camera
Using the focus mode
You can select the following focus mode
options:
Auto Focus
automatically.
Macro
extreme close-ups. If you are trying to take a
close-up shot but the focus box remains red,
try turning the macro mode on.
Face tracking
take a photo, your camera detects and focuses
on human faces automatically.
Manual
– Set the camera to focus
– Macro mode allows you to take
– If you set Face tracking and
– Set the camera to focus manually.
Taking a photo
From the Home screen, touch 1
Holding the phone horizontally, point the 2
lens towards the subject you want to
photograph.
Touch and hold the capture button lightly, 3
and a focus box will appear in the center of
the viewfinder screen.
Position the phone so you can see the 4
subject in the focus box.
Camera
.
When the focus box turns green, the camera 5
has focused on your subject.
Release the capture button.6
Once you’ve taken the photo
Your captured photo will appear on the screen.
Touch to share your photo as
Share
Bluetooth, Email, Facebook,
Gmail, Messaging, Picasa or
Twitter
.
n
NOTE
Additional charges may apply when MMS
messages are sent while roaming.
Touch to use the image as
Set as
Rename
or
Wallpaper
icon
Touch to edit the name of the
selected picture.
Touch to delete the image.
Touch to take another photo immediately.
Your current photo will be saved.
Touch to view the Gallery of your saved
photos.
Contact
.
39
Page 30

Camera
Using the advanced settings
In the viewfinder, touch to open the
advanced options.
You can change the camera settings by
scrolling the list. After selecting the option,
Back key
touch the
Image size
pixels) of the picture you take. Select a pixel
value from the following options:
(2048x1536), 2M (1600x1200), 1M
(1280x960), VGA (640x480),
QVGA (320x240)
ISO
– The ISO rating determines the sensitivity
of the camera’s light sensor. The higher the
ISO, the more sensitive the camera will be.
This is useful under darker conditions. Select
from ISO values of
White balance
Incandescent, Sunny, Fluorescent
Cloudy
.
Color effect
new photo.
n
NOTE
You can change a color picture to black and
white or sepia, but you cannot change a blackand-white or sepia picture to color.
40
.
– Touch to set the size (in
3.2M
.
Auto, 400,200
– Choose from
– Choose a color tone for your
Auto
and
,
100
, and
Timer
– The self-timer allows you to set a
delay after the shutter is pressed. Select
3 secs., 5 secs.
you want to be included in a photo.
Shot mode
, or
10 secs.
– Choose from
This is ideal if
Normal,
Continuous shot, Smile shot, Beauty
shot, Art shot, Panorama, Face effect
and
Cartoon.
Image Quality
Fine
sharper the photo. However, the file size will
increase as a result, which means you’ll be
able to store fewer photos in the memory.
Auto review
it will display the picture that was just taken
automatically.
Shutter sound
.
shutter sounds.
Tag location
location-based services. Take pictures
wherever you are and tag them with the
location. If you upload tagged pictures to a
blog that supports geotagging, you can see the
pictures displayed on a map.
n
NOTE
This function is only available when GPS
is active.
– Choose from
, and
Normal
. The finer the quality, the
– If you set Auto review on,
– Select one of the four
– Activate to use your phone’s
Super fine
Off
,
,
Page 31

Reset
– Restore all camera default
settings.
– Touch whenever you want to know how
a function operates. This will provide you a
quick guide.
n
TIP
When you exit the camera, all settings
will return to their defaults, except image
size and image quality. Any non-default
settings must be reset, such as color tone
and ISO. Check these before you take your
next photo.
n
TIP
The settings menu is superimposed over the
viewfinder, so when you change elements
of the image color or quality, you will see
a preview of the image change behind the
settings menu.
Viewing your saved photos
You can access your saved photos from within
the camera mode. Just touch and your
Gallery will be displayed.
n
TIP
Flick left or right to view other photos or
videos.
Camera
– Touch to see slide show.
– Touch to share the contents or delete.
More
for the following options below.
Touch
Details
- View information about the
photo.
Set as
- Set the photo as a
icon
or
Wallpaper
Crop
-Crop your photo. Move your
finger across the screen to select the
area.
Rotate
- You can rotate the photo left
or right.
Contact
.
Adjusting the volume when
viewing a video
To adjust the volume of a video while it is
playing, use the Volume Keys on the right side
of the phone.
Setting a photo as wallpaper
Touch the photo you want to set as 1
wallpaper to open it.
Touch the screen to open the options menu.2
Menu
>
More
>
Set as
Touch 3
Wallpaper
.
>
41
Page 32

Video camera
Getting to know the viewfinder
Brightness
Zoom
Camera Lens Switch
– This defines and controls of the amount of sunlight entering the
image. Slide the brightness indicator along the bar, towards “-” for
a lower brightness image, or towards “+” for a higher brightness
image.
– Zoom in or zoom out. Alternatively you can use the Volume Keys.
- Allows you to switch the camera lens between front
one and back one.
3D Camera -
Camera mode
Record
Gallery
Settings
– Touch this icon to open the settings menu. See
settings
.
Flash
– Allows you turn on the flash when taking a photo in a dark place.
42
Touch to switch to 3D video
camera recording mode.
– Slide this icon up to
switch to camera mode.
– Allows you to start recording.
– This enables you to access your
saved photos and videos from
within the video camera mode.
Simply touch and your Gallery will
appear on the screen.
Using the advanced
Page 33

Video camera
Shooting a video
From the Home screen, touch 1
slide the camera mode button to change to
Video mode. The icon will change to .
The video camera’s viewfinder will appear 2
on the screen.
Holding the phone horizontally, point the 3
lens towards the subject of the video.
Touch the record button once to start 4
recording.
REC will appear at the bottom of the 5
viewfinder with a timer showing the
length of the video.
Touch 6 on the screen to stop recording.
Camera
and
After recording a video
A still image representing your video will
appear on the screen.
Play
Touch to play the video.
Share
Touch to share your video via
Bluetooth, Email, Gmail
Messaging,
n
NOTE
Additional charges may apply when MMS
messages are downloaded while roaming.
or
,
YouTube.
Touch to edit the name of the
Rename
selected video.
Touch to record another video right away.
Your current video will be saved.
Touch to delete the video you just
recorded. Confirm by touching OK. The
viewfinder will reappear.
Touch to view the Gallery of your saved
videos.
Using the advanced settings
Using the viewfinder, touch to open the
advanced options.
Adjust the video camera settings by scrolling
the list. After selecting the option, touch the
Back key
.
White balance
any the white areas in your video are realistic.
To enable your camera to adjust the white
balance correctly, you may need to determine
the light conditions. Choose from
Incandescent, Sunny, Fluorescent
Cloudy
Color effect
your new view.
– The white balance ensures
.
– Choose a color tone to use for
Auto
,
, and
43
Page 34

Video camera
Duration
– Set a duration limit for your video.
Choose between
the recording time and share the video as
an MMS.
If you set Video Duration as MMS, the video
size will be set as 176x144 automatically and
you cannot change the size. You can change
the size only if you choose Normal.
Video Quality
Fine
Audio recording
video without sound.
Auto review
it will play back the video you just recorded
automatically.
Reset
settings.
– Touch whenever you want to know how
a function operates. This will provide you a
quick guide.
n
TIP
You can change a video shot in color to
black and white or sepia, but you cannot
change a black-and-white or sepia video
to color.
Normal
and
MMS
to limit
– Choose from
and
Normal.
– If you turn Auto review on,
– Restore all video camera default
– Choose
Super fine
Mute
to record a
Watching your saved videos
In the viewfinder, touch 1 .
Your Gallery will appear on the screen.2
Touch a video to play it automatically.3
,
44
Page 35

Multimedia
You can store multimedia files to a microSD
card to have easy access to all your image
and video files.
Applications Launcher Key,
Touch the
then touch Gallery.
n
NOTE
Make sure you install a microSD card into
the phone to save photos and access all your
pictures. Without a microSD card, the phone
will not display any photos or videos unless
you have them stored in a Picasa album.
View mode
When you open the Gallery, your photos
will be presented in Folder view. Once you
open a folder, your photos will be in Grid
view. When you touch a photo from Grid
view, it will be displayed in Full view.
Timeline view
The phone's Gallery provides a timeline
view of your photos and videos. From the
Grid view mode,drag to the right.
The date you took your photos will be
displayed starting with the most recent.
If you select a specific date, all the photos
you took on that day will be grouped over
a white background.
My Images options menu
Touch a photo and press the Menu Key
twice to see the following available
options: Share, Delete, Details, Set as,
Crop and Rotate Right/Left.
Sending a photo
To send a photo, touch and hold the 1
photo you want.
Share and choose from
Touch 2
Bluetooth, Email, Gmail, Messaging,
Twitter, Facebook or Picasa.
When you choose 3 Email, Gmail or
Messaging, your photo will be attached
to a message, which you can then write
and send normally.
n
TIP
If you have a social networking account
set up on your phone, you can share
your photo with that social networking
community.
45
Page 36

Multimedia
Sending a video
To send a video, touch and hold the 1
video you want.
Share and choose from
Touch 2
Bluetooth, Email, Gmail, Messaging,
or YouTube.
When you choose 3
Email, Gmail or
Messaging, your video will be attached
to a message, which you can then write
and send normally.
Using an image
Choose images to use as wallpaper or
identify callers.
Touch and hold a photo, then touch 1
More >
Set as.
Choose from2 Contact icon or
Wallpaper.
Viewing a slideshow
To view a slideshow of your photos, open
the Gallery and touch a photo. Once the
photo is displayed, touch the screen to see
the menu. Touch
slideshow of all your photos.
46
Slideshow
to begin the
View photo details
You can view a photo’s detailed
information, such as the name, date, time,
size, and type.
While viewing a photo, touch
Menu >
More > Details.
Transferring files using USB
mass storage devices
To transfer files using a USB device:
Connect the phone to a PC using a USB 1
cable.
If you haven't installed the LG Android 2
Platform Driver on your PC, you need to
change the settings manually. From the
Home screen, press the
touch Settings > SD card & phone
storage > Mass storage only.
Turn on USB storage.
Touch 3
You can view the mass storage content 4
on your PC and transfer the files.
n
NOTE
You need to insert the microSD card first.
Without an microSD card, you cannot use
USB mass storage.
Menu Key
and
Page 37

n
NOTE
If you installed the LG Android Platform
Driver, you will see a pop up saying,
'Turn on USB storage' immediately after
connecting the phone to the PC.
Music
Your phone has a music player that lets
you play all your favorite tracks. To access
the music player from the Home screen,
touch the
Applications Launcher Key
and touch
Music
.
How to save music/video files
to the phone
Connect your phone to the PC using
the USB cable.
You'll receive a notification that the USB is
connected. Touch
OK
. Then open the folder you wish to view
from your computer.
If you did not install the LG Android Platform
Driver on your PC, you need set it manually.
For more information, refer to 'Transferring
files using mass storage devices' .
Turn on USB storage
>
Multimedia
Save music or video files from the PC
to the phone's removable storage.
- You may copy or move files from the PC to
the phone's removable storage using a card
reader.
- If there is a video file with a subtitle file
(.smi file with the same name as the video
file), place them in the same folder to display
the subtitle automatically when playing the
video file.
- When downloading music or video files,
copyright must be secured. Please note that a
corrupted file or file with a wrong extension
may cause damage to the phone.
How to play music/video files
on the phone
Playing music/video files
Locate the file you want in the Gallery and
touch it to play it.
Playing a song
From the Home screen, touch the 1
Applications Launcher Key and touch
Music.
Songs tab.
Touch the 2
47
Page 38

Multimedia
Touch the song you want to play.3
to pause the song.
Touch 4
to skip to the next song.
Touch 5
to go back to the beginning
Touch 6
of the song. Touch twice to go
back to the previous song.
To change the volume while listening to
music, press the up and down Volume
Keys on the right side of the phone.
To display the options for a song, touch
and hold any song in the list. You will
see the following options:
Play, Add
to playlist, Use as phone ringtone,
Delete, Details, and Search.
Working with Playlists
You can create playlists to organize your
music files into sets of songs, which
you can play in the order you set or in a
shuffle.
To create a playlist
When viewing a list of songs in the 1
library, touch and hold the first song you
want to add to the new playlist.
Touch 2
48
Add to playlist
.
Touch3 New.
Enter a name for the playlist, then touch 4
Save
.
The new playlist is added to the
Playlists library.
You can also add the song that is
playing in the Playback screen as the
first song in a playlist by pressing the
Menu Key, then touching Add to
playlist or touching
to save all the songs in an album that
you're playing as a playlist.
Save as playlist
To remove a song from a
playlist
Open a playlist.1
Touch and hold the song you want to 2
remove, then touch
playlist or when viewing the currently
playing playlist, press the Menu Key,
then touch
the songs from the current playlist.
Remove from
Clear playlist
to remove all
Page 39

To rename or delete a
playlist
Open the 1
Playlist
library.
Touch and hold the playlist to display 2
the options menu, then touch
Rename
.
n
NOTE
Music file copyrights may be protected
by international treaties and national
copyright laws. Therefore, it may be
necessary to obtain permission or a
licence to reproduce or copy music. In
some countries, national laws prohibit
private copying of copyrighted material.
Before downloading or copying the file,
please check the national laws of the
relevant country concerning the use of
such material.
Delete
Multimedia
or
49
Page 40

Google applications
About Google applications
Google applications, including mobile
versions of Gmail, Google Talk, Google
Calendar, and Google Maps, are loaded on
your phone.
First, set up a Google account. Then enter 1
your user name and password and sign in.
After signing in, your contacts, email, 2
and calendar in your Google account will
automatically synchronize with your phone.
Google Maps™
To open Google Maps and view
your location
Touch 1
Maps
Launch screen.
Touch the My location 2
the map.
The map centers on a blue dot that
indicates your location. A blue circle around
the dot indicates that your actual location is
within the circle.
To get an address and additional
information for a location
] Touch and hold a location on the map. A
balloon with the address and a thumbnail
50
on the Home screen or in the
icon
on
from Street View (if available) opens over
the location.
] Touch the balloon to access additional
options.
To view map, satellite, or traffic
layers
] Touch the Layers icon on the map
and select a layer option. You can choose
from Traffic, Satellite, Terrain, Latitude, or
More Layers.
Searching For Locations and
Places
You can search for a location and view it on
a map. You can also search for places on
the map that you're viewing.
To search for a location
While viewing a map, press the 1 Menu Key
and touch Search or press the Search Key.
In the search box, enter the place 2
you're looking for. You can enter an
address, a city, or a type of business or
establishment. For example, “theater in
New York”.
Touch the Search icon. 3
Markers with letter labels indicate
search matches on the map.
Page 41

Getting Directions
To get directions
While viewing a map, press the 1 Menu Key
and touch
Directions
.
Enter a starting point in the first text box and 2
your destination in the second text box.
To reverse directions, press the
and touch Reverse Start & End.
Touch the icon for car, public transit, bicycling, 3
or walking directions.
Go
.
The directions to your
Touch 4
destination appear in a list.
To view turn-by-turn directions in a list
You can view each turn in your route as a
list of written directions.
When viewing a list of directions, touch
the
Navigate icon to view turn-by-turn
directions in Navigation View.
To search for locations along your route
You can search for businesses, points of
interest, and other features along your
route. When you search while navigating,
your results include locations along your
route, rather than locations that are near
your current location.
Menu Key
Google applications
]
Press the Search Key and search for
locations of interest.
The results are displayed as markers
along your route; the first result is
labeled. You can use the left and right
arrow buttons to move from result to
result, zoom in and out, or touch a label
for more information about the marker.
]
When you're finished, touch the
Navigation icon to return to Navigation
View.
Starred Places
Starred Places bookmarks your favorite
places, such as addresses or local businesses,
to be able to find them quickly later.
To view Starred Places
While viewing a map, press the
touch Starred Places.
Menu Key
Clear Map
Clear any information, such as routes and
search results, from the map.
To clear a map
While viewing a map, press the
touch Clear Map.
Menu Key
and
and
51
Page 42

Google applications
Latitude
Finding Your Friends with Google
TM
Latitude
Google Latitude lets you and your friends
view each others' locations on maps and get
directions to your friends' locations using
Google Latitude. Your location is not shared
automatically. It is by invitation only.
You must join Latitude and then invite your
friends to view your location or accept
invitations from your friends.
To join Latitude
] While viewing a map, press the
and touch
Join Latitude
The first time you join Latitude, you're
prompted to accept or reject the Google
privacy policy. After you've joined Latitude,
the Join Latitude item changes to
Latitude
.
To open Latitude
After you join Latitude, you can open it to find
your friends and view their updates.
] While viewing a map, press the
and touch
Latitude
.
52
Menu Key
.
Menu Key
To invite friends to share their
locations
After you join Latitude, you can start sharing
your location with your friends. Only friends
whom you have explicitly invited or accepted
can see your location.
Open Latitude, press the 1 Menu Key and touch
Add friends
Touch 2
email address
Touch 3
screen. If your friends already use Latitude,
they receive an email request and a notification
on Latitude. If they have not yet joined
Latitude, they receive an email inviting them to
sign in to Latitude with their Google Account.
.
Select from Contacts
in the menu that opens.
Add friends
at the bottom of the
or
Places
To find places
Touch the
Places
to find different venues, such as gas stations,
coffee shops, bars, restaurants, etc.
Once you select a category, you will see a list
of closest matches, including their distance,
compass bearing, description and even user
reviews. You can customize your own location
search categories, and even add the Places
icon to your Home screen.
icon while in Google Maps
Add via
Page 43

Google applications
n
Tip
While viewing a map, press the Menu Key
and touch More for the following options:
Labs, Cache Settings, Help, Terms,
Privacy & Notices and About.
Market™
Android Market™ lets you browse through
and download thousands of fun and useful
applications and games. You can check other
users' comment regarding an application
or you can post your own comments. If you
install applications and games from Android
Market™, they appear in the phone's menu
below the preloaded applications, and you can
find them by scrolling down with your finger.
You can open downloaded applications from
the Market by pressing the
touching
My apps
To download applications and games
From the Android Market home page, touch 1
a category near the top of the screen.
Scroll to view subcategories and touch the 2
one you want to explore.
Touch an application to open its details 3
screen, or further sort the subcategory by
Top paid, Top free,
touching
.
Menu Key
or
Just in
and
Touch the application you desire to install. 4
The descriptions and the prices of the
application will be displayed.
price
Touch the 5
the screen for paid applications. For free
applications, touch the
applications will then be downloaded and
installed.
n
NOTE
To purchase a paid app, you’ll need to set up a
payment method with Google Checkout™. You
have the option to use a credit card or charge
to your carrier bill.
n
NOTE
When you want to exit a game or application,
use the Home or Back Key, which will return
you to the Home screen. Or select Menu (or
Options) within the game or application and
select Exit. (Exit option may vary by game/
application). Ending applications that continue
to run in the background (after going back to
the Home screen) will help conserve battery
life and reduce unwanted data usage.
.
button at the top right of
FREE
button. The
53
Page 44

Google applications
Gmail™
Gmail™ can be configured when you first
set up your phone. Depending on your
synchronization settings, Gmail™ on your
phone is automatically synchronized with
your Gmail™ account on the web.The inbox
conversations list is your default Gmail™ view.
Menu Key,
Press the
send or receive new email and to synchronize
your email with your Gmail™ account on the
web. Press the
additional options:
to labels, Search
Menu Key
Press the
>
Add account
account. You can also change the settings by
pressing the
>
Settings
54
then touch
Refresh
Menu Key
for the following
Compose, Accounts, Go
and
More
.
and touch
to add another Gmail
Menu Key
from any screen within an account.
Accounts
and touching
More
Google Talk™
Google Talk™ is Google’s instant messaging
program. It lets you communicate with other
people who also use Google Talk™.
Menu Key
Press the
available options.
All friends
to
communicate with.
Add friend
Search
chat with or any chat records that contain the
word(s) you entered.
Sign Out
you touch the Talk icon from the Home screen,
you will be signed in automatically if you
activate
Automatically sign in
Settings
settings.
More
close all the current chats,
of friends you have invited to chat, or
to view a list of friends you have blocked.
for the following
– Displays all friends you can
– Send invitations to chat.
– It searches for contacts to
– Sign out from chat. When
– Allows you to adjust various
– Choose from
Close all chats
Invites
Changing Google Talk Settings
You can configure Google Talk to send you a
notification of each message that you receive
in a chat and also to sound a ringtone or
.
to see a list
Blocked
to
Page 45

Google applications
vibrate the phone.
You can also configure Google Talk to sign you
in automatically when you turn on your phone,
and you can set whether the mobile indicator
is displayed next to your name in other
people's Friends lists.
To configure notifications for
new Google Talk messages
From the Friends list, press the 1
then touch
Settings
IM notifications
Checkmark 2
notification in the Status Bar when a new
chat message arrives.
Select ringtone
Touch 3
ringtone that will ring to notify you of a
new chat.
Vibrate
Touch 4
setting when you receive a notification of
a new chat.
to choose the vibration
Menu Key,
.
to receive a
to choose a
To show or hide the mobile
indicator to friends
From the Friends list, press the 1
then touch
Checkmark or uncheck 2
Settings
Menu Key,
.
Mobile indicator
If Mobile indicator is checkmarked, your
friends see an outline of an Android
to your name in their Friends list when you
are signed into Google Talk on an Android
phone.
To set whether you sign into
Google Talk automatically
From the Friends list, press the 1
then touch
Settings
Checkmark or uncheck 2
in
. When Automatically sign in is checked,
you are signed into Google Talk when you
turn on your phone.
.
Automatically sign
To set Google Talk to change
your status
From the Friends list, press the 1
then touch
Settings
.
Checkmark or uncheckmark 2
away-status
When Automatic away-status is
checkmarked, your status will automatically
be changed to Away when the screen is
turned off.
.
.
TM
Menu Key,
Menu Key
Automatic
next
,
55
Page 46

Utilities
Setting the alarm
From the Home screen, touch the 1
Applications Launcher Key
Clock
.
To add a new alarm, touch 2
Touch 3
Add alarm
After you set the time, the phone will let
you know how much time is left before the
alarm sounds.
Set 4
Repeat, Ringtone
Label
Press the 5
or adjust the alarm settings.
and set the alarm time.
to name the alarm. Touch
Menu Key
and touch
.
or
Vibrate
Done
to add another alarm
Using the calculator
From the Home screen, touch the 1
Applications Launcher Key
Calculator
.
Touch the number keys to enter numbers.2
For simple calculations, touch the function 3
you want (+, –, x, or ÷), followed by =.
For more complex calculations, press the 4
Menu Key,
touch the
then choose an option.
56
and touch
Advanced panel
Adding an event to your
calendar
n
NOTE
You must create a Google account to use
Calendar.
From the Home screen, touch the 1
Applications Launcher Key
Calendar
.
and add
To view an event, touch the date. If you 2
want to add an event, touch and hold a date,
.
then touch
Touch the3
What
name. Check the date and enter the start
and end time you want your event to begin
and finish.
Touch the 4
Where
To add a note to your event, touch the 5
Description
To repeat the event, set 6
Reminders
Touch 7
Done
calendar. A colored square in the calendar
,
will mark all days that have saved events.
An alarm will sound at the event start time
if you set it.
and touch
New event
.
field and enter the event
field to enter the location.
field and enter the details.
Repetition
, if necessary.
to save the event in the
, and set
Page 47

Utilities
Changing your calendar view
From the Home screen, touch the 1
Applications Launcher Key
Calendar
.
Press the 2
Menu Key
Week, Agenda,
or
and touch
Month
.
and touch
Day,
ThinkFree Office
With ThinkFree Office, you can create, view
and edit document files in an email or on a
microSD card inserted in your device. The
ThinkFree Office application supports the
following file formats: txt, doc, docx, xls, xlsx,
ppt, pptx, pdf.
Create a New Document
From the Home screen, touch the1
Applications Launcher Key
ThinkFree Office
Touch 2
Accept
(This is necessary only when you launch this
application for the first time.)
Touch the 3
documents on your microSD card.
Press the 4
start a new document.
Touch the type of document and enter a 5
name for the document, then touch
>
Activate now
My Docs
Menu Key
.
>
>
Close
tab for folders and
, then touch
New
OK
to
.
Enter contents in the document using the 6
tools at the bottom of the screen.
When you're done working on the document, 7
press the
Menu Key
Save as
then press the
n
NOTE
To save without exiting, simply touch
the bottom of the screen and continue working
on the document.
, touch
and enter a new document name),
Back Key
to exit.
View and edit a document on your
device
From the Home screen, touch the 1
Applications Launcher Key >
ThinkFree Office
Touch the 2
documents on your microSD card.
Touch the document you want to view or edit. 3
.
If it's not in the root directory, touch the folder
where it's stored, then touch the document
name to open it.
n
NOTE
You can also open an attachment in an email
by touching the attachment in the message.
The document opens for you to view. If you 4
want to edit it, press the
touch
Edit
My Docs
.
.
tab for folders and
Menu Key
File
>
Save
Save
,
then
(or
at
57
Page 48

Utilities
] To move between pages or pan through
the document, scroll in the corresponding
direction.
] To change the zoom level, press the
Key
, touch
Zoom
level you want.
] Use the toolbar at the bottom of the screen
to make edits to the document (Word, text,
or Excel file).
] Press the
options such as search, preferences, and
more.
When you're finished editing, touch 5
then press the
, then touch the zoom
Menu Key
Back Key
for additional menu
Menu
Save
to exit.
ThinkFree Office document tools
The ThinkFree Office application has a toolbar
that appears automatically when you create a
document. To display the toolbar in an existing
document, press the
Edit
. Touch a toolbar icon and corresponding
tools display in a bar beneath it for you to
touch and use. Left and right arrows on the
toolbar indicate that you can scroll horizontally
for more icons. Scrolling works independently.
While a tool is selected (for example the
Select text tool ), you can scroll the toolbar
to touch an other toolbar icon (for example
the clipboard tool to copy the text you just
Menu Key
, then touch
58
selected). Touch the toolbar icon again to close
tool options.
The tools in the toolbar vary depending on the
document type.
Manage documents online
From the Home screen, touch the 1
Applications Launcher Key >
ThinkFree Office
Touch the 2
ThinkFree Office online account.
Enter your user name and password to 3
access your account, then touch
,
View and manage your documents on the 4
server as desired.
Online tab
.
for access to your
Voice Search
You can search by voice and complete other
voice actions, such as calling or texting a
contact, sending an email, creating a note or
getting directions with just a simple touch of
the Voice Search icon.
From the Home screen, touch the 1
Applications Launcher Key
Search
.
Wait for the "2
say your query.
Speak now
" prompt, then
Sign In
>
Voice
.
Page 49

Utilities
Available commands include:
- Send text
- Navigate to
- Call
- Send email
- Map of
- Go to
- Note to self
- Directions to
For a "Go to" web query, the search results 3
will be displayed in the web browser. Touch
the result you want or continue searching.
Voice Dialer
You can search for and dial a contact by
speaking, rather than by manually dialing
a contact.
]
This feature may be unavailable
depending on your region.
]
Your device can recognize only American
English commands.
]
Recognized languages may vary
depending on your region.
To place a call by speaking
From the Home screen, touch the 1
Applications Launcher Key
Dialer
.
>
Voice
Call
" or "
Dial
Say "2
the name of the contact to call.
If Voice Dialer finds a match, it dials the
contact's default number.
" followed followed by
Voice recorder
Use the voice recorder to record voice memos
or other audio files.
Recording a sound or voice
From the Home screen, touch the 1
Applications Launcher Key
Voice Recorder
Touch 2
Touch 3
n
NOTE
Touch Go to list to access your voice
recordings. You can listen to the saved
recordings.
.
to begin recording.
to end recording.
and touch
Sending the voice recording
Once you have finished recording, you can 1
send the audio clip by pressing the
Key
and touching
Choose from 2
and
Messaging
Gmail
will be added to a message that you can
write and send normally.
Share
Bluetooth, Email, Gmail
. When you select
or
Messaging,
Menu
.
Email,
the voice recording
59
Page 50

Utilities
Using Car Home
You can use the Car Home application whether
or not you have a phone car dock (the optional
accessory.)
] Insert the phone into the car dock.
OR
] Touch the
From the Car Home application, you can
access Navigate, Voice Search, Music, Phone,
Contacts, Map, Settings, and the Brightness
settings.
Car Home
Launch screen.
icon in the
60
Page 51

The Web
Browser
The Browser gives you a fast, full-color world
of games, music, news, sports, entertainment,
and much more, right on your mobile phone.
n
NOTE
Additional charges apply when connecting
to these services and downloading content.
Check data charges with your network
provider.
Using the Web browser
You phone comes with a full HTML web
browser that allows you to look at webpages
similarly to how you would on a computer.
From the Home screen, touch 1
Scroll up and down the screen to navigate 2
and touch links to open them. Double-tap on
the screen to zoom in; double-tap again to
zoom back out.
To visit another website, touch the web
address bar
the page, enter an address, and touch
.
at the top of
.
Using options
Press the Menu Key to view the following
options:
New window – Open a new window.
Bookmarks – Displays your bookmarks
and allows you to add new ones. You can
also view a list of your most visited sites
and your web browsing history.
Windows – Displays all your open
windows.
Refresh – Touch to refresh the web
page.
Forward – Used in conjunction with
the Back Key. This allows you to go back
and forth between web pages without
opening multiple windows.
More
• Add bookmark – Add the current
web page as bookmarks.
• Find on page – Use this feature to
find a specific word or phrase on a
web page.
• Select text – Allows you to copy text
from the web page.
• Page info – Displays information for
the current web page.
• Share page – Allows you to share the
web page with your friends and family.
• Downloads – Displays your download
history.
• Settings – Allows you to configure
browser settings.
61
Page 52

The web
n
TIP
To return to the previous web page, press the
Back key.
Accessing bookmarks
Press the 1 Menu Key and touch
Bookmarks.
To access the bookmark, simply touch the 2
bookmark.
Adding bookmarks
Press the 1
Menu Key
Bookmarks
• From
Thumbnail view
enter a name and URL, and touch OK.
• From
List view
enter a name and URL, and touch OK.
and touch
.
, touch
, touch
Add
,
Add bookmark
Changing the Browser settings
Press the Menu Key and touch More >
Settings
.
,
62
Page 53

Settings
Wireless & networks
This menu allows you to manage Wi-Fi and
Bluetooth connections, portable hotspot
and data tethering ,airplane mode and VPN
connections.To access this menu, from the
Home Screen, press
Settings > Wireless and networks
Menu Key
and touch
.
Airplane mode
Airplane mode allows you to quickly turn off all
wireless connections.
Wireless & networks
From the 1
touch the
Airplane mode
it on (a green checkmark will appear).
Touch again to turn it off.2
OR
From the Home Screen, swipe the Status Bar 1
down to open the Notifications panel.
to turn on Airplane mode.
Touch 2
Touch again to turn it off.3
screen,
checkbox to turn
Bluetooth
Using Bluetooth
From the 1
Wireless & networks
touch
Bluetooth
setting.
Touch 2
devices
Touch the name of the device you wish to 3
pair with, and then touch
connect.
n
TIP
Please consult documentation included with
Bluetooth device for information on pairing
mode and passcode (typically 0 0 0 0 – four
zeroes).
to turn on the Bluetooth
Bluetooth settings
.
How to send data from your phone via
Bluetooth
You can send data via Bluetooth by running a
corresponding application, not from Bluetooth
menu, unlike regular mobile phones.
Sending pictures:
*
application and touch a picture. Then touch
Menu > Share
Bluetooth is turned on and touch
devices
send data to from the list.
Open the Gallery
>
Bluetooth
. Then touch the device you want to
>
Pair
. Check if
screen,
Scan for
to pair and
Scan for
63
Page 54

Settings
*
Exporting contacts:
application. Touch the contact you want
to share, press the
Share
>
Bluetooth
turned on and touch
Then touch the device you want to send data
to from the list.
Sending multi-selected contacts:
*
the Contacts application. To select more
than one contact, press the
touch
Multiselect
want to send or press the
touch
Select all.
Bluetooth.
and touch
the device you want to send data to from
the list.
Connecting to FTP (Only the FTP
*
Open the Contacts
Menu Key
and touch
. Check if Bluetooth is
Scan for devices
Menu Key
. Touch the contacts you
Menu Key
Then touch
Check if Bluetooth is turned on
Scan for devices
and
Share >
. Then touch
server is supported on this handset):
From the Home screen, press the Menu
Key and touch Settings > Wireless &
networks > Bluetooth settings. Make sure
Bluetooth is turned on. Touch Discoverable
to place a checkmark and make the phone
visible to other Bluetooth devices. Then
search for other devices. Find the service you
want and connect to the FTP server.
64
n
TIP
The supported Bluetooth version is Bluetooth
2.1 EDR and certified by Bluetooth SIG. It is
compatible with other Bluetooth SIG certified
.
devices.
- If you want to search for this phone from
other devices,from the Home screen,
Open
press the Menu Key and touch Settings
> Wireless & networks > Bluetooth
and
settings. Make sure Bluetooth is turned on.
Touch Discoverable to place a checkmark
and make the phone visible to other
Bluetooth devices for 120 seconds.
- Supported profiles are SDAP, HFP, HSP, OPP,
PBAP (server), FTP (server), A2DP, AVRCP,
and DUN.
Wi-Fi
To use Wi-Fi on your phone, you need
access to a wireless access point, or
"hotspot." Some access points are open
and you can simply connect to them.
Others are hidden or implement other
security features, so you must configure
your phone in order to connect to them.
You get free access to AT&T WiFi Hot
Spots at thousands of locations across
Page 55

Settings
the country with Wi-Fi, without wireless
data charges.
To locate AT&T WiFi hotspots nearby,
open the AT&T Hot Spots application in
the Application Launcher or visit
www.attwifi.com
Turn on Wi-Fi
From the Home Screen , open the
Notifications panel and touch
Wi-Fi on.
OR
Press the
Menu Key and touch Settings
> Wireless & networks > Wi-Fi .
to turn
To connect to a Wi-Fi
Network
Turn off Wi-Fi when you're not using it to
extend the life of your battery.
To turn Wi-Fi on and connect to a Wi-Fi
network
From the Home screen, press the 1
Key
and touch
Settings
networks > Wi-Fi settings
Wi-Fi
Touch 2
for available Wi-Fi networks.
to turn it on and begin scanning
>
Wireless &
.
Menu
A list of available Wi-Fi networks will
-
be displayed. Secured networks are
indicated by a lock icon.
Touch a network to connect to it.3
- If the network is open, you are prompted
to confirm that you want to connect to
that network by touching
- If the network is secured, you are
prompted to enter a password or
other credentials. (Ask your network
administrator for details).
The Status Bar at the top of your screen 4
will display an icon that indicates your
Wi-Fi status.
n
TIP
If you are not in range of a Wi-Fi network
and use a 3G connection, additional data
charges may apply.
n
NOTE
Access to the Internet and a wireless
router required. As an added
convenience, AT&T has shipped certain
smartphones with Wi-Fi enabled as a
default setting. Leaving Wi-Fi enabled
when not connected to a Wi-Fi network
may affect battery charge. Qualifying
data plan required.
Connect
.
65
Page 56

Settings
n
NOTE
This device supports WEP, WPA/
WPA2-PSK and 802.1x EAP. security. If
your Wi-Fi service provider or network
administrator sets encryption for network
security, enter the key in the pop-up
window. If encryption is not set, this popup window will not be shown. You can
obtain the key from your Wi-Fi service
provider or network administrator.
Data Tethering
You can use your phone to provide a data
connection to a computer by activating
data tethering and connecting them with
a USB cable.
To tether your phone with your computer
using the USB
Connect your phone to your computer with 1
a USB cable.
From the Home screen, press the 2
Key
and touch
Settings
networks > Tethering & portable
hotspot > USB tethering
A green check mark will appear, indicating 3
that the function is activated.
66
>
Wireless &
.
Menu
n
NOTE
- Data Tethering requires an appropriate
DataPro data plan. Devices connected by
tethering use data from your DataPro plan.
Plans are not unlimited and significant
charges may be incurred if the included
data allowance is exceeded. Performance
may vary depending on the number of
devices connected and other factors.
- You cannot access your phone's microSD
card on your computer when using USB
tethering.
Mobile Hotspots
You can also use your smartphone to
provide a mobile broadband connection
for up to 4 other devices. Create a hotspot
and share your connection.
To use tethering, attach the device you 1
want to tether to your phone with a USB
cable and touch
hotspot > USB tethering
& networks screen.
To create a portable hotspot, touch 2
Tethering & portable hotspot
Portable Wi-Fi hotspot
& networks screen. Set a password upon
first use.
Tethering & portable
in the Wireless
>
in the Wireless
Page 57

n
NOTE
Mobile Hotspots requires an appropriate
DataPro data plan. Devices connected to
your Mobile Hotspot use data from your
DataPro plan. Plans are not unlimited and
significant charges may be incurred if the
included data allowance is exceeded.
Performance may vary depending on the
number of devices connected and other
factors. If you do not use a password,
others will be able to use your Mobile
Hotspot connection.
Call settings
You can set Fixed Dialing Numbers,
Voicemail
and
including
TTY mode, Send Messages,
Call forwarding, Call duration
Other call settings
Additional settings
.
and
Sound
Adjust sound, notification default settings and
vibrate mode. You can also manage audible
and Haptic feedback.
Haptic feedback
soft keys and on certain user interface
interactions.
– Vibrate when pressing
Settings
Display
Brightness
– Adjust the brightness of the
screen.
Auto-rotate screen
orientation automatically when you rotate
the phone.
Animation
Screen timeout
the screen automatically turns off.
– Set to switch
– Set to allow animations.
– Set the time delay before
Location & security
Use wireless networks
wireless networks, your phone will determine
your approximate location by using Wi-Fi and
mobile networks. When you check this option,
you’re asked whether you consent to allowing
Google to use your location when providing
these services.
Use GPS satellites
satellites, your phone will be determine your
location to street-level accuracy.
Set up screen lock
to secure your phone. Opens a set of screens
that guide you through drawing a screen
unlock pattern. You can set a PIN or Password
instead of a Pattern or leave it as None.
– If you check Use
– If you check Use GPS
– Set an unlock pattern
67
Page 58

Settings
When you turn on your phone or wake up the
screen, you're prompted to draw your unlock
pattern to unlock the screen.
Screen lock timer
time before the screen lock is enabled.
Set up Sim card lock
lock or change SIM PIN.
Visible passwords
passwords as you type them or deselect to
hide passwords as you type them.
Select device administrators
remove administrators.
Use secure credentials
access secure certificates
Install from SD card
encrypted certificates from your microSD card.
Set password
storage password.
Clear storage
all contents and reset its password
- Set the amount of idle
– Set up SIM card
– Select to show
– Add or
– Allows you to
– Choose to install
– Set or change the credential
- Clear credential storage of
68
Using the Unlock Pattern, PIN,
or Password
Set an unlock Pattern, PIN, or Password to
secure your phone. To set the screen lock,
follow the process below.
Menu Key
, touch
Settings
Press the
Location & security
lock
and select between
Password
n
Warning
Take precautions when using an Unlock
Pattern, PIN, or Password. It is very
important that you remember the screen
unlock information you set. You are
allowed 5 attempts to enter your screen
unlock information. If you used up all 5
opportunities, you will have to wait 30
seconds to attempt unlocking the phone
again.
>
Set up screen
Pattern, PIN or
.
>
Page 59

Settings
When you can’t recall your Unlock
Pattern, PIN, or Password:
If you logged into a Google account on the
phone and failed to use the correct pattern
5 times, touch Forgot Pattern? You will
be required to sign in with your Google
account and prompted to create a new
unlock pattern.
If you haven’t created a Google account
on the phone or you forgot your PIN or
Password, you need to perform a hard
reset.
n
Caution
If you perform a hard reset, all user
applications and user data will be deleted.
Please remember to back up any important
data before performing a hard reset.
Turn the power off.1
Press and hold the following keys at the 2
same time for 10 seconds: Power/Lock Key +
Home Key + Up Volume Key.
When the power turns on, release the keys.3
Applications
You can manage applications.
Manage Applications
remove installed applications.
Running services
services
Development
development.
– Manage and
- Check currently running
– Set options for application
Accounts & sync
Allows you to enable Background data, Autosync and synchronize or add new accounts.
Privacy
Allows you to perform a Factory data reset. Be
careful as this will erase all your data.
SD card & phone storage
Allows you to check total available microSD
card and internal phone storage space. You
can also unmount the microSD card to safely
remove it or format it.
69
Page 60

Settings
Search
Touch
Google search
Google search settings.
Adjust Searchable items so you can get
necessary information effectively . Choose
Web, Apps, Contacts, Messaging
from
Search, Music, Twitter
You can also clear shortcuts to recently chosen
search suggestions.
and you can adjust
or
Voice Search
.
Language & keyboard
Select language and customize the input
method and keyboard settings.
Voice input & output
Set Voice recognizer settings and use the Textto-Speech settings to configure the Android
text-to-speech synthesiser, for applications that
can take advantage of it.
Accessibility
Use the Accessibility settings to configure any
accessibility plug-ins you have installed on
your phone.
n
NOTE
Requires additional plug-ins to become
selectable.
Date and time
Set date, time, time zone and date and time
formats.
About phone
View legal information, and check phone
status and software versions.
70
Page 61

Software update
Phone Software update
This feature allows you to update the
firmware of your phone to the latest version
conveniently from the internet without the
need to visit a service center.
For more information on how to use this
function, please visit:
http://update.lgmobile.com or
http://www.lg.com/common/ index.jsp.
As the mobile phone firmware update requires
the user’s full attention for the duration of the
update process, please make sure to check all
instructions and notes that appear at each step
before proceeding. Please note that removing
the USB cable or battery during the upgrade
may seriously damage your mobile phone.
DivX Mobile
ABOUT DIVX VIDEO: DivX® is a digital video
format created by DivX, Inc. This is an official
DivX Certified® device that plays DivX video.
Visit www.divx.com for more information and
software tools to convert your files into DivX
video.
ABOUT DIVX VIDEO-ON-DEMAND: This DivX
®
device must be registered in order to
Certified
play purchased DivX Video-on-Demand (VOD)
movies. To obtain your registration code, locate
the DivX VOD section in your device Settings
menu. Go to vod.divx.com for more information
on how to complete your registration.
DivX Certified® to play DivX® video up
to 320 x 240.
DivX®, DivX Certified® and associated logos
are trademarks of DivX, Inc. and are used
under license.
71
Page 62

For Your Safety
Important Information
This user guide contains important information
on the use and operation of this phone. Please
read all the information carefully for optimal
performance and to prevent any damage
to or misuse of the phone. Any changes or
modifications not expressly approved in this
user guide could void your warranty for this
equipment. Any changes or modifications
not expressly approved by the manufacturer
could void the user’s authority to operate the
equipment.
Before You Start
Safety Instructions
WARNING! To reduce the possibility of
electric shock, do not expose your phone to
high humidity areas, such as the bathroom,
swimming pool, etc.
Always store your phone away from heat.
Never store your phone in settings that may
expose it to temperatures less than 32°F or
greater than 104°F, such as outside during
extreme weather conditions or in your car on
a hot day. Exposure to excessive cold or heat
will result in malfunction, damage and/or
catastrophic failure.
74
Be careful when using your phone near
other electronic devices. RF emissions
from your mobile phone may affect nearby
in adequately shielded electronic equipment.
You should consult with manufacturers of any
personal medical devices such as pacemakers
and hearing aides to determine if they are
susceptible to interference from your mobile
phone. Turn off your phone in a medical facility
or at a gas station. Never place your phone
in a microwave oven as this will cause the
battery to explode.
IMPORTANT! Please read the TIA SAFETY
INFORMATION before using your phone.
Safety Information
Read these simple guidelines. Breaking the
rules may be dangerous or illegal. Further
detailed information is given in this user guide.
]
Page 63

For Your Safety
0.39 inches(1cm)
0.39 inches(1cm)
0.39 inches(1cm)
The design of this phone complies with
the FCC guidelines and these international
standards.
CAUTION
Use only the supplied and approved antenna.
Use of unauthorized antennas or modifications
could impair call quality, damage the phone,
void your warranty and/or result in violation
of FCC regulations. Do not use the phone with
a damaged antenna. If a damaged antenna
comes into contact with skin, a minor burn
may result. Contact your local dealer for a
replacement antenna.
Body-worn Operation
This device was tested for typical body-worn
operations with the back of the phone kept
0.79 inches (2cm) between the user’s body
and the back of the phone. To comply with
FCC RF exposure requirements, a minimum
separation distance of 0.79 inches (2cm) must
be maintained between the user’s body and
the back of the phone. Third-party belt-clips,
holsters, and similar accessories containing
metallic components should not be used.
Body-worn accessories that cannot maintain
0.79 inches (2cm) separation distance between
the user's body and the back of the phone,
76
and have not been tested for typical bodyworn operations may not comply with FCC RF
exposure limits and should be avoided.
FCC Part 15 Class B Compliance
This device and its accessories comply with
part 15 of FCC rules. Operation is subject
to the following two conditions: (1) This
device and its accessories may not cause
harmful interference, and (2) this device and
its accessories must accept any interference
received, including interference that may
cause undesired operation.
Part 15.105 statement
This equipment has been tested and found
to comply with the limits for a class B
digital device, pursuant to Part 15 of the FCC
Rules. These limits are designed to provide
reasonable protection against harmful
interference in a residential installation.
This equipment generates uses and can
radiate radio frequency energy and, if not
installed and used in accordance with the
instructions, may cause harmful interference
to radio communications. However, there is no
guarantee that interference will not occur in a
particular installation.
Page 64

For Your Safety
If this equipment does cause harmful
interference or television reception, which
can be determined by turning the equipment
off and on, the user is encouraged to try to
correct the interference by one or more of the
following measures:
] Reorient or relocate the receiving antenna.
] Increase the separation between the
equipment and receiver.
] Connect the equipment into an outlet on
a circuit different from that to which the
receiver is connected.
] Consult the dealer or an experienced radio/
TV technician for help.
Cautions for Battery
]
77
 Loading...