

LG OLW480B Owner’s Manual

Installation Manual
Wall Mounting
Bracket
Please read the Safety Precautions carefully before using this product.
After reading this manual, keep it in an easily accessible location for future reference.
OLW480B
*MFL68484554*
(1712-REV00)
www.lg.com
Copyright © 2017 LG Electronics Inc. All Rights Reserved.
ENGLISH
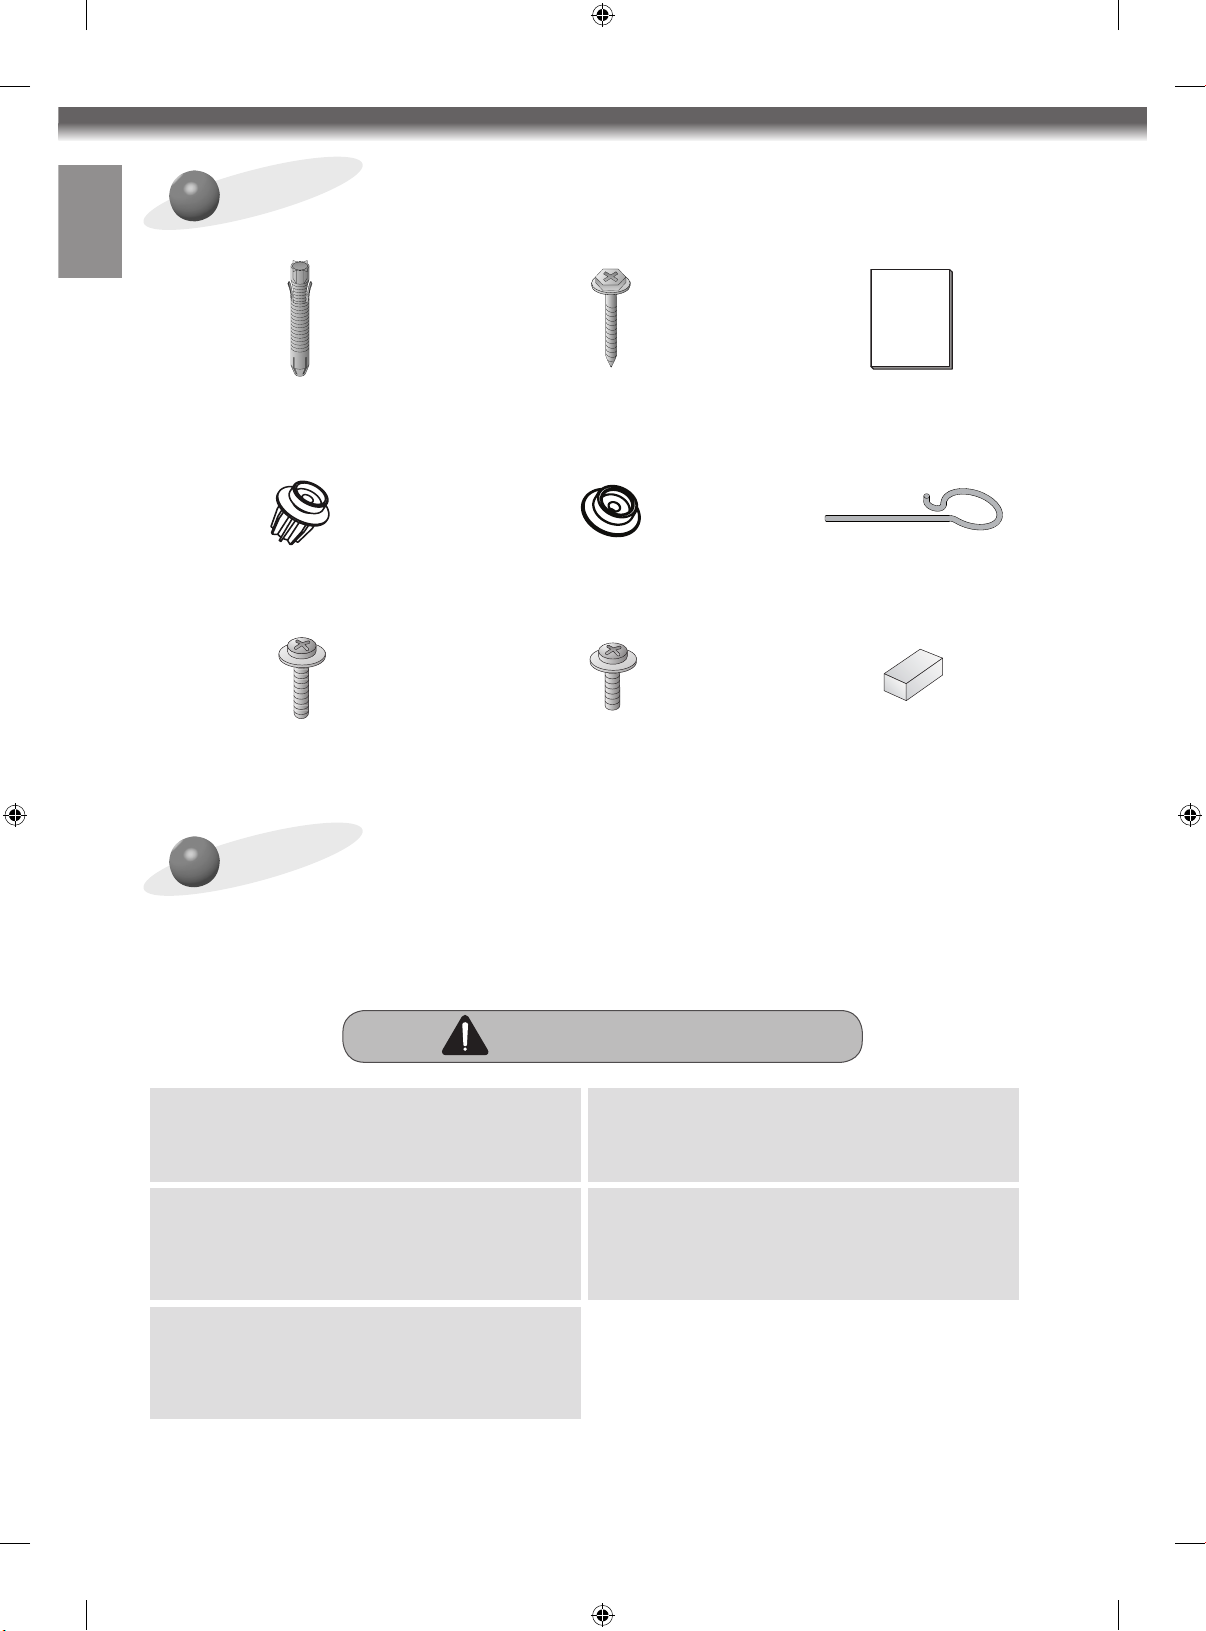
Accessories
Wall Mounting Anchor
6 EA
Guide Spacer A
4 EA
Guide Spacer Screw A
4 EA
(M6 x L45)
Wall Mounting Screw
6 EA
Guide Spacer B
4 EA
Guide Spacer Screw B
4 EA
(M6 x L18)
Installation Manual
Lock Spring
2 EA
Set Protection Cushion
4 EA
Safety Precautions
- If you are a professional installer, please read this manual carefully before installing the product.
- After installing the product according to the manual, ensure that the user also reads the manual carefully and
keeps it to hand.
After reading the manual, please make sure the user keeps it in an easily accessible location for future reference.
The product should be installed by a professional
installer designated by the retailer.
Installing the product without a professional installer
is dangerous and may cause injury.
When moving or replacing the product after
installation, contact a professional installer
designated by the retailer.
If an unqualified person moves or installs the product,
safety hazards may arise.
Make sure you do not hang the power cable or
signal cable on the back of your TV when installing
the TV on the wall.
The cables may be damaged, resulting in fire, electric
shock, or damage to the product.
2
Warning
The product should be installed where its weight
can be fully supported.
If the product is installed on a weak surface, it may
fall, causing injury.
Do not hang on the product or subject it to impact
after it is installed.
The product may fall and cause injury.

ENGLISH
Caution
Follow the instructions in this Installation Manual
to properly install the product.
If you do not follow the instructions in the Installation
Manual the product may be installed incorrectly and
cause serious injury or damage the product.
Check whether the wall is strong enough to hold
the product before installation, and use the
anchors and screws provided when installing.
If you use anchors or screws other than those
specified by the manufacturer, they may not be able
to hold the weight of the product, and this may cause
safety hazards.
Do not clean the product with wet towels or place
heaters or humidifiers underneath it.
Moisture entering the product or steam and heat may
result in fire, electric shock, or damage to the product.
Remove the power cord from the outlet before
installation.
Otherwise, it may cause electric shock or fire.
Make sure that you use the cable gender provided,
as other cables may damage the product connector
by causing friction between the product and the
wall. (May vary by model.)
To install the product or adjust its height after
installation, four or more people are needed.
If you try to handle the product alone, it may fall and
cause injury or damage to the product.
When drilling holes in your walls, make sure you
use a drill and drill bit with the specified diameter.
Make sure that you also follow the instructions
regarding the depth of the holes.
Otherwise, the product may be installed incorrectly
and cause safety hazards.
Keep the product away from sprinklers, detectors,
high-tension wires, power sources, or places where
vibrations or shock from impact are likely to occur.
Wear work gloves when installing the product and
do not use your bare hands.
Otherwise, this may cause injury.
Before Installation
* Do not use this product for purposes other than to install TVs on walls.
* Be careful when installing and using the wall mount to avoid product damage and safety hazards.
* You can easily install the wall mount by following the instructions in the Installation Manual.
* If the instructions in the manual are unclear, stop installing and contact a service center.
If you are still having problems understanding the instructions after contacting a service center, seek a professional
installer to install the product for you.
* Individuals with mechanical or architectural experience may find it easier to understand this manual and install the
product even if they are not professional installers.
* It is recommended that you install this product only on concrete walls. Issues that may arise due to installation on
other materials (walls made of wood, plywood, bricks, etc.) will not be covered.
* Only install the product on vertical walls.
Do not install the product on walls at angles outside of the normal range, on severely slanted walls, or on the ceiling.
Issues that may occur as a result of installing the product on severely slanted walls or on the ceiling will not be
covered.
* Check that the accessories provided with the product are all included before installing. Any damage to or loss of
accessories after the inner packaging has been opened will not be covered.
* Make sure that the accessories are kept out of the reach of children to prevent safety hazards such as suffocation due
to the swallowing of small parts.
* Make sure that all screws are fully tightened.
Applying excessive force to the screws may damage your wall, affect product performance, or cause damage to the
product.
* Make sure that the installed TV does not exceed the specified tensile load and that no external force is applied to it.
* To prevent any safety hazards, take care when handling tools during the installation.
<Tools Necessary for Installation>
Phillips screwdriver (manual or electric), 8 mm spanner, leveler, drill, Ø 8 mm drill bit for concrete or Ø 4 mm drill bit for
steel
3
ENGLISH
Installation Instructions
- The images may differ from the actual product.
- Please consult a professional when installing the wall mount.
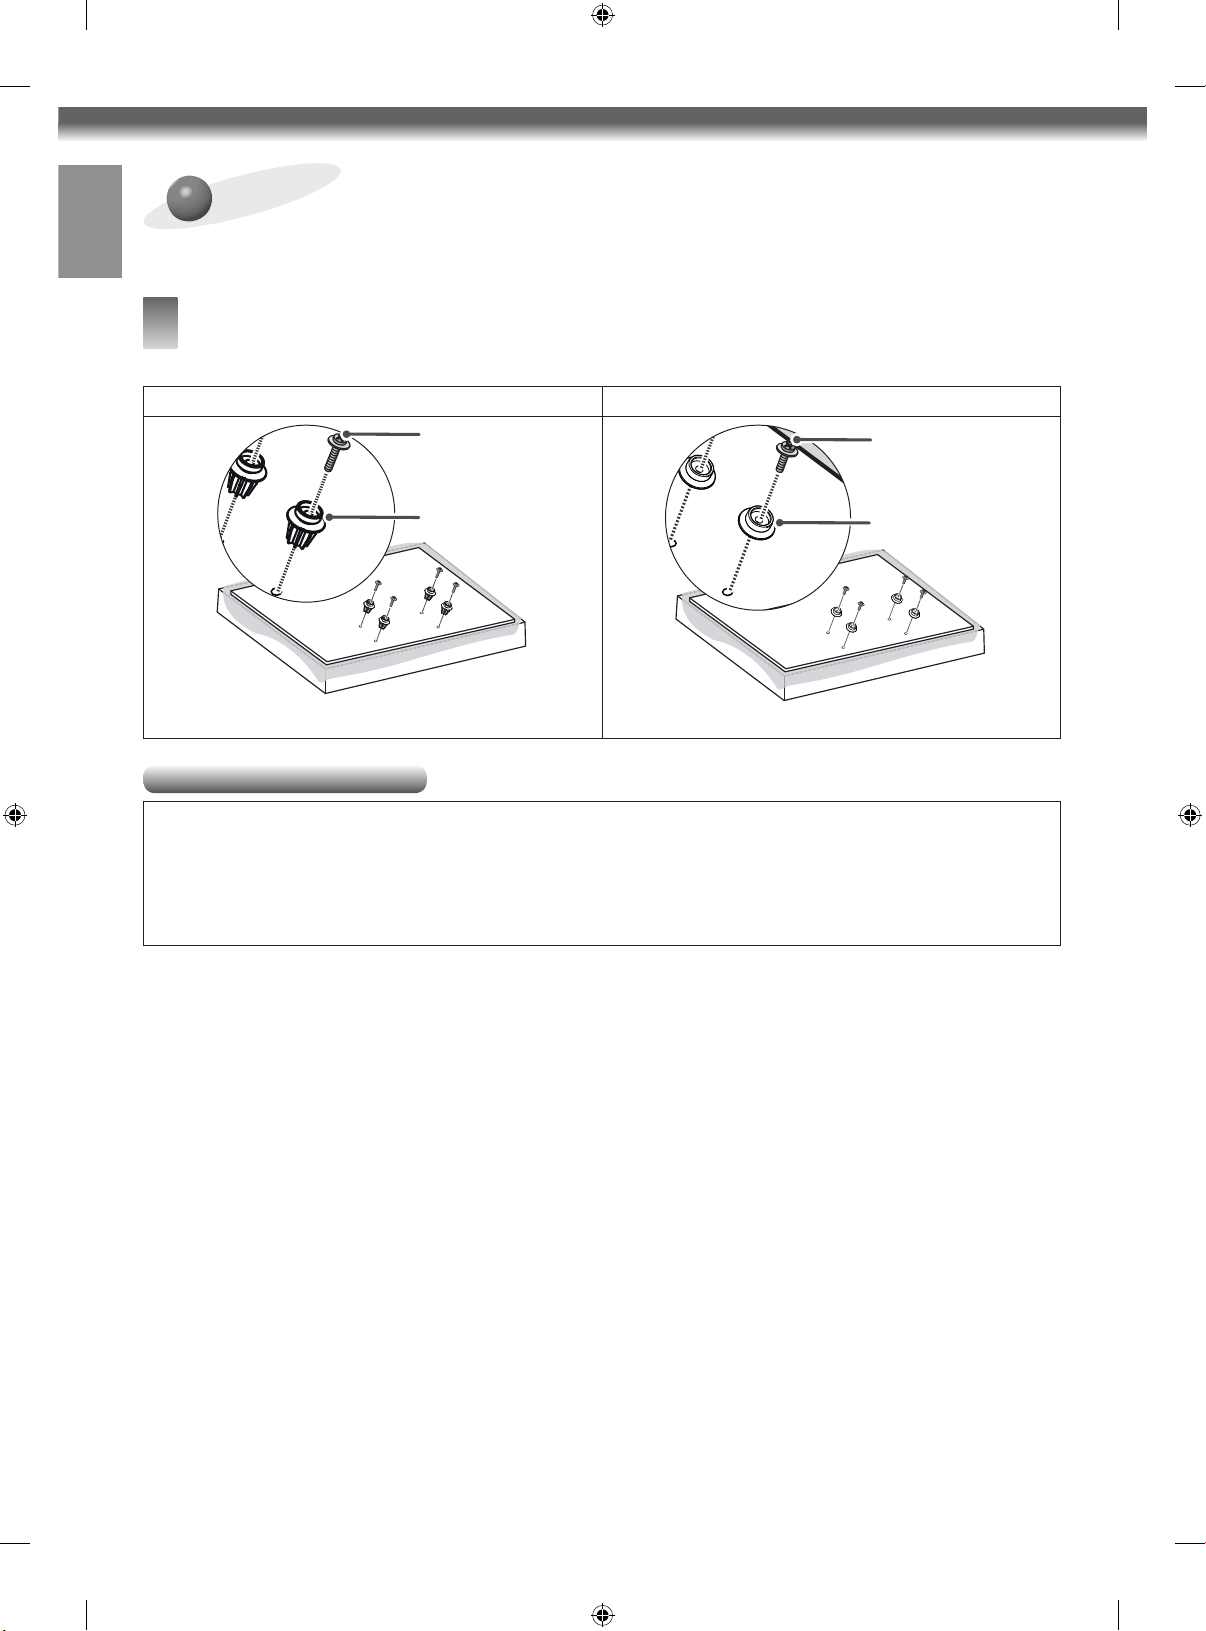
1
Attaching the Guide Spacers
- If the screws cannot be fully tightened on the guide spacers, check the length of the screws.
VESA Size 300x300 Model VESA Size 400x200, 300x200 Models
Guide Spacer
Screw A
Guide Spacer
Screw B
Guide Spacer A
Guide Spacer B
Instructions
1. Remove any screws that are already fastened to the parts to be attached to the wall mount.
2. Fix the guide spacers and the guide spacer screws in order as shown in the image.
- Place the product on a table with the screen facing down. Make sure that you place it on a flat surface with a soft
cloth or a cushion to protect the screen.
- Fix the guide spacer to the set with the screws. Tighten the screws until the set, the guide spacers, and the
screws are securely attached.
- Use a Phillips screwdriver (manual or electric) to tighten the screws.
4
 Loading...