

Page 1

OWNER’S MANUAL
Safety and Reference
Please read this manual carefully before operating your set
and retain it for future reference.
OLED65GXPSA
OLED65GXPDA
*MFL71689242*
(2007-REV02)
OLED77GXPSA
OLED77GXPDA
www.lg.com
Copyright © 2020 LG Electronics Inc. All Rights Reserved.
Page 2
Important Safety Instruction
• Read these instructions.
ENGLISH_index
• Keep these instructions.
• Heed all warnings.
• Follow all instructions.
• Do not use this apparatus near water.
• Clean only with dry cloth.
• Do not block any ventilation openings. Install in accordance with the manufacturer’s instructions.
• Do not install near any heat sources such as radiators, heat registers, stoves, or other apparatus (including ampliers) that produce heat.
• Do not defeat the safety purpose of the polarized or grounding-type plug. A polarized plug has two blades with one wider than the other. A
grounding type plug has two blades and a third grounding prong. The wide blade or the third prong are provided for your safety. If the provided
plug does not t into your outlet, consult an electrician for replacement of the obsolete outlet.
• Protect the power cord from being walked on or pinched particularly at plugs, convenience receptacles, and the point where they exit from the
apparatus.
• Only use attachments/accessories specied by the manufacturer.
• Use only with the cart, stand, tripod, bracket, or table specied by the manufacturer, or sold with the apparatus. When a cart is used, use caution
when moving the cart/apparatus combination to avoid injury from tip-over.
• Unplug this apparatus during lightning storms or when unused for long periods of time.
• Refer all servicing to qualied service personnel. Servicing is required when the apparatus has been damaged in any way, such as power-supply
cord or plug is damaged, liquid has been spilled or objects have fallen into the apparatus, the apparatus has been exposed to rain or moisture,
does not operate normally, or has been dropped.
2
Page 3
Warning! Safety
Instructions
CAUTION
RISK OF ELECTRIC SHOCK
DO NOT OPEN
CAUTION: TO REDUCE THE RISK OF ELECTRIC SHOCK, DO NOT
REMOVE COVER (OR BACK). NO USER-SERVICEABLE PARTS INSIDE.
REFER TO QUALIFIED SERVICE PERSONNEL.
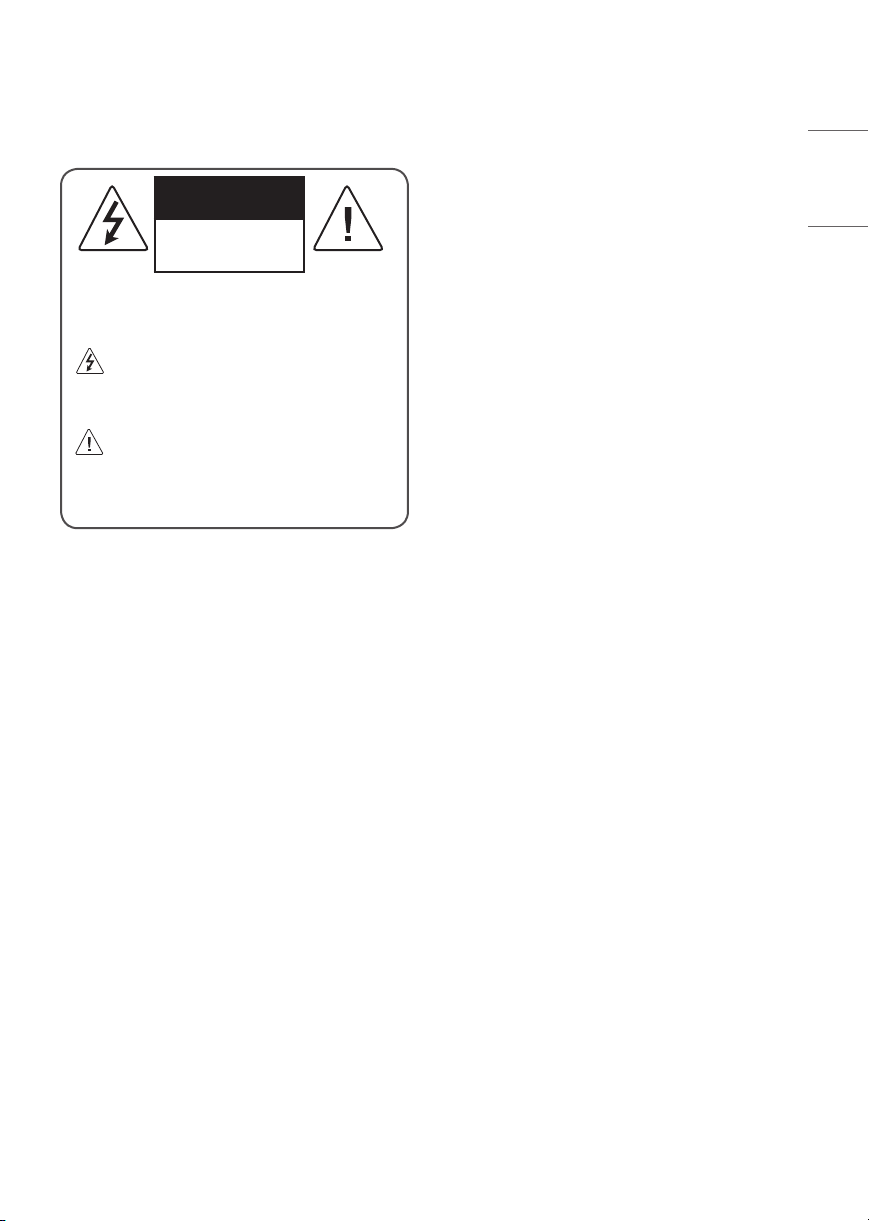
The symbol is intended to alert the user to the presence of
uninsulated “dangerous voltage” within the product’s
enclosure that may be of sucient magnitude to constitute a risk
of electric shock to persons.
The symbol is intended to alert the user to the presence of
important operating and maintenance (servicing)
instructions in the literature accompanying the device.
WARNING: TO REDUCE THE RISK OF FIRE AND ELECTRIC SHOCK, DO
NOT EXPOSE THIS PRODUCT TO RAIN OR MOISTURE.
• TO PREVENT THE SPREAD OF FIRE, KEEP CANDLES OR OTHER ITEMS
WITH OPEN FLAMES AWAY FROM THIS PRODUCT AT ALL TIMES.
• Do not place the TV and/or remote control in the following
environments:
- Keep the product away from direct sunlight.
- An area with high humidity such as a bathroom
- Near any heat source such as stoves and other devices that
produce heat.
- Near kitchen counters or humidiers where they can easily be
exposed to steam or oil.
- An area exposed to rain or wind.
- Do not expose to dripping or splashing and do not place objects
lled with liquids, such as vases, cups, etc. on or over the
apparatus (e.g., on shelves above the unit).
- Near ammable objects such as gasoline or candles, or expose
the TV to direct air conditioning.
- Do not install in excessively dusty places.
Otherwise, this may result in re, electric shock, combustion/
explosion, malfunction or product deformation.
• Ventilation
- Install your TV where there is proper ventilation. Do not install in
a conned space such as a bookcase.
- Do not install the product on a carpet or cushion.
- Do not block or cover the product with cloth or other materials
while unit is plugged in.
• Take care not to touch the ventilation openings. When watching
the TV for a long period, the ventilation openings may become hot.
• Protect the power cord from physical or mechanical abuse, such as
being twisted, kinked, pinched, closed in a door, or walked upon.
Pay particular attention to plugs, wall outlets, and the point where
the cord exits the device.
• Do not move the TV whilst the Power cord is plugged in.
• Do not use a damaged or loosely tting power cord.
• Be sure do grasp the plug when unplugging the power cord. Do
not pull on the power cord to unplug the TV.
• Do not connect too many devices to the same AC power outlet as
this could result in re or electric shock.
• Disconnecting the Device from the Main Power
- The power plug is the disconnecting device. In case of an
emergency, the power plug must remain readily accessible.
• Do not let your children climb or cling onto the TV. Otherwise, the
TV may fall over, which may cause serious injury.
• Outdoor Antenna Grounding (Can dier by country):
If an outdoor antenna is installed, follow the precautions below.
An outdoor antenna system should not be located in the vicinity
of overhead power lines or other electric light or power circuits,
or where it can come in contact with such power lines or circuits
as death or serious injury can occur.
Be sure the antenna system is grounded to provide some
protection against voltage surges and built-up static charges.
Section 810 of the National Electrical Code (NEC) in the U.S.A.
provides information with respect to proper grounding of the
mast and supporting structure, grounding of the lead-in wire
to an antenna discharge unit, size of grounding conductors,
location of antenna discharge unit, connection to grounding
electrodes and requirements for the grounding electrode.
Antenna grounding according to the National Electrical Code,
ANSI/NFPA 70
ENGLISH_index
3
Page 4

• Grounding (Except for devices which are not grounded.)
- TV with a three-prong grounded AC plug must be connected to
a three-prong grounded AC outlet. Ensure that you connect the
ENGLISH_index
earth ground wire to prevent possible electric shock.
• Never touch this apparatus or antenna during a lightning storm.
You may be electrocuted.
• Make sure the power cord is connected securely to the TV and wall
socket if not secured damage to the Plug and socket may occur and
in extreme cases a re may break out.
• Do not insert metallic or inammable objects into the product. If a
foreign object is dropped into the product, unplug the power cord
and contact the customer service.
• Do not touch the end of the power cord while it is plugged in. You
may be electrocuted.
• If any of the following occur, unplug the product
immediately and contact your local customer service.
- The product has been damaged.
- If water or another substance enters the product (like an AC
adapter, power cord, or TV).
- If you smell smoke or other odors coming from the TV
- When lightning storms or when unused for long periods of time.
Even the TV is turned o by remote control or button, AC power
source is connected to the unit if not unplugged in.
• Do not use high voltage electrical equipment near the TV (e.g., a
bug zapper). This may result in product malfunction.
• Do not attempt to modify this product in any way without written
authorization from LG Electronics. Accidental re or electric shock
can occur. Contact your local customer service for service or repair.
Unauthorized modication could void the user’s authority to
operate this product.
• Use only an authorized attachments / accessories approved by
LG Electronics. Otherwise, this may result in re, electric shock,
malfunction, or product damage.
• Never disassemble the AC adapter or power cord. This may result in
re or electric shock.
• Handle the adapter carefully to avoid dropping or striking it. An
impact could damage the adapter.
• To reduce the risk of re or electrical shock, do not touch the TV
with wet hands. If the power cord prongs are wet or covered with
dust, dry the power plug completely or wipe dust o.
• Batteries
- Store the accessories (battery, etc.) in a safe location out of the
reach of children.
- Do not short circuit, disassemble, or allow the batteries to
overheat. Do not dispose of batteries in a re. Batteries should
not be exposed to excessive heat.
- Caution: Risk of re or explosion if the battery is replaced by an
incorrect type.
• Moving
- When moving, make sure the product is turned o, unplugged,
and all cables have been removed. It may take 2 or more people
to carry larger TVs. Do not press or put stress on the front panel
of the TV. Otherwise, this may result in product damage, re
hazard or injury.
• Keep the packing anti-moisture material or vinyl packing out of the
reach of children.
• Do not allow an impact shock, any objects to fall into the product,
and do not drop anything onto the screen.
• Do not press strongly upon the panel with a hand or a sharp object
such as a nail, pencil, or pen, or make a scratch on it. It may cause
damage to screen.
• Cleaning
- When cleaning, unplug the power cord and wipe gently with a
soft/dry cloth. Do not spray water or other liquids directly on the
TV. Do not clean your TV with chemicals including glass cleaner,
any type of air freshener, insecticide, lubricants, wax (car,
industrial), abrasive, thinner, benzene, alcohol etc., which can
damage the product and/or its panel. Otherwise, this may result
in electric shock or product damage.
4
Page 5
Preparing
C
Optional Extras
• When the TV is turned on for the rst time after being shipped
from the factory, initialization of the TV may take approximately
one minute.
• Image shown may dier from your TV.
• Your TV’s OSD (On Screen Display) may dier slightly from that
shown in this manual.
• The available menus and options may dier from the input source
or product model that you are using.
• New features may be added to this TV in the future.
• The device must be easily accessed to a location outlet near the
access. Some devices are not made by turning on / o button,
turning o the device and unplugging the power cord.
• The items supplied with your product may vary depending upon
the model.
• Product specications or contents of this manual may be changed
without prior notice due to upgrade of product functions.
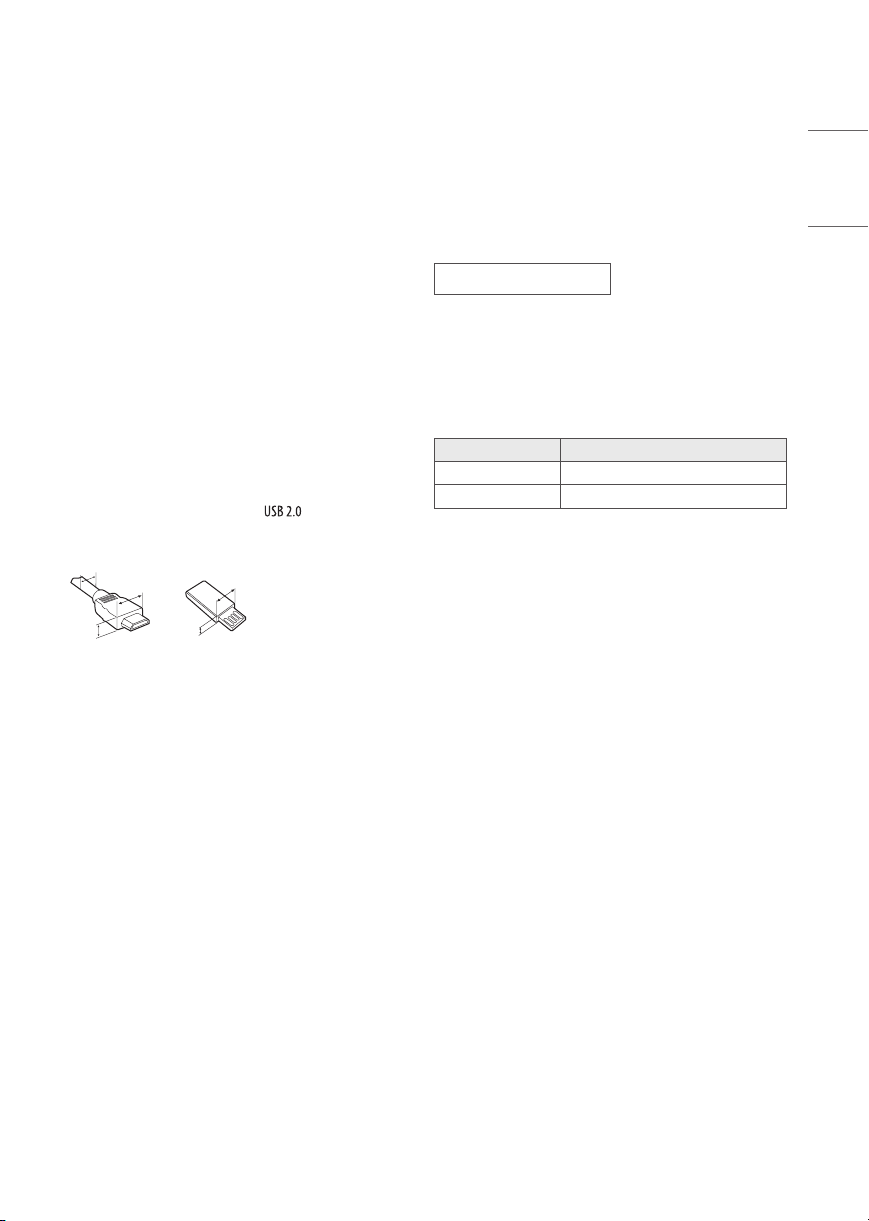
• For an optimal connection, HDMI cables and USB devices should
have bezels less than 8 mm thick, 18 mm width and 8 mm a wire
diameter.
• Use an extension cable that supports or higher if the USB
cable or USB ash drive does not t into your TV’s USB port.
B
A
B
A
* A ≦ 8 mm
* B ≦ 18 mm
* C ≦ 8 mm
Optional extras can be changed or modied for quality improvement
without any notication. Contact your dealer for buying these items.
These devices work only with certain models. The model name or
design may be changed due to the manufacturer’s circumstances or
policies.
Magic Remote Control
MR20GA
Check whether your TV model supports Bluetooth in the Wireless
Module Specication to verify whether it can be used with the Magic
Remote.
Stand
(Depending upon model)
Stand Model
AN-GXDV65 OLED65GX*
AN-GXDV77 OLED77GX*
ENGLISH_index
• Use a certied cable with the HDMI logo attached. If you do not use
a certied HDMI cable, the screen may not display or a connection
error may occur.
• Recommended HDMI cable types (3 m or less)
- Ultra High Speed HDMI®/™ cable
• When attaching the stand to the TV set, place the screen facing
down on a cushioned table or at surface to protect the screen
from scratches.
• Make sure to wring any excess water or cleaner from the cloth.
• Do not spray water or cleaner directly onto the TV screen.
• Make sure to spray just enough of water or cleaner onto a dry cloth
to wipe the screen.
5
Page 6
Wall Mounting Bracket
A
B
(Depending upon model)
Make sure to use screws and wall mount bracket that meet the VESA
ENGLISH_index
standard. Standard dimensions for the wall mount kits are described in
the following table.
Model OLED65/77GX*
VESA (A x B) (mm) 300 x 300
Standard screw M6
Number of screws 4
Wall mount bracket OLW480B
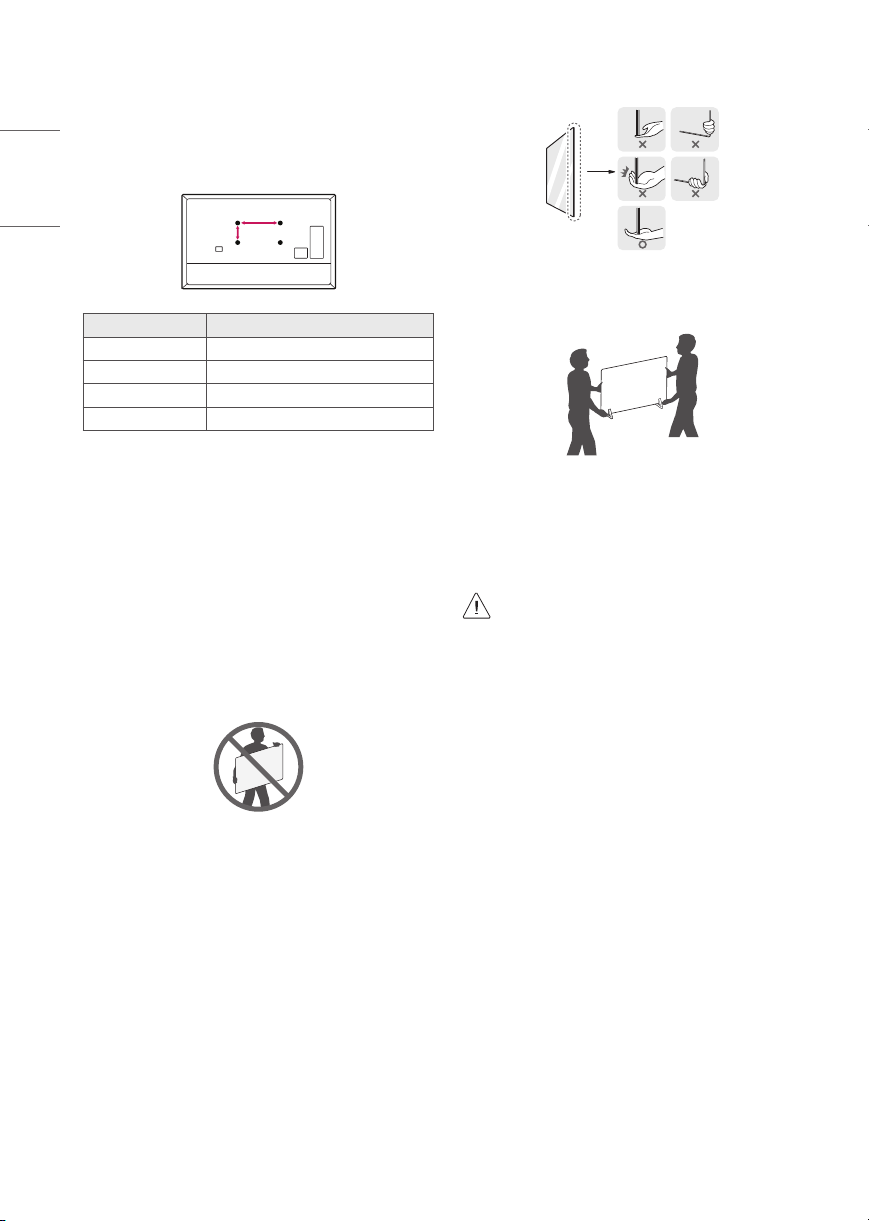
• Hold the side and bottom of the TV frame rmly. Make sure not to
hold the transparent part, speaker, or speaker grill area.
• Use at least two people to move a large TV.
• When transporting the TV by hand, hold the TV as shown in the
following illustration.
Lifting and moving the TV
When moving or lifting the TV, read the following to prevent the TV
from being scratched or damaged and for safe transportation regardless
of its type and size.
• It is recommended to move the TV in the box or packing material
that the TV originally came in.
• Before moving or lifting the TV, disconnect the power cord and all
cables.
• When holding the TV, the screen should face away from you to
avoid damage.
• When transporting the TV, do not expose the TV to jolts or excessive
vibration.
• When transporting the TV, keep the TV upright; never turn the TV
on its side or tilt towards the left or right.
• When handling the TV, be careful not to damage the protruding
buttons.
• Avoid touching the screen at all times, as this may result
in damage to the screen.
• D o not place the product on the oor with its front facing
down without padding. Failure to do so may result in
damage to the screen.
• When attaching the stand to the TV set, place the screen
facing down on a cushioned table or at surface to
protect the screen from scratches.
6
Page 7
Mounting on the Table
1 Lift and tilt the TV into its upright position on a table.
• Leave a minimum of 10 cm space from the wall for proper
ventilation.
10 cm
10 cm
(Depending upon model)
2 Connect the power cord to a wall outlet.
• D o not apply foreign substances (oils, lubricants, etc.) to
the screw parts when assembling the product. (Doing so
may damage the product.)
• If you install the TV on a stand, you need to take actions
to prevent the product from overturning. Otherwise, the
product may fall over, which may cause injury.
• D o not use any unapproved items to ensure the safety
and lifespan of the product.
• Any damages or injuries by using unapproved items are
not covered by the warranty.
• Make sure that the screws are fastened tightly. (If they
are not fastened securely enough, the TV may tilt forward
after being installed.)
• When installing on a cabinet or a shelf using a stand,
make sure its width is greater than that of the TV.
• D o not fasten the screws with excessive force otherwise
they may strip and become loose.
10 cm
10 cm
10 cm
Securing TV to the Wall
ENGLISH_index
(Depending upon model)
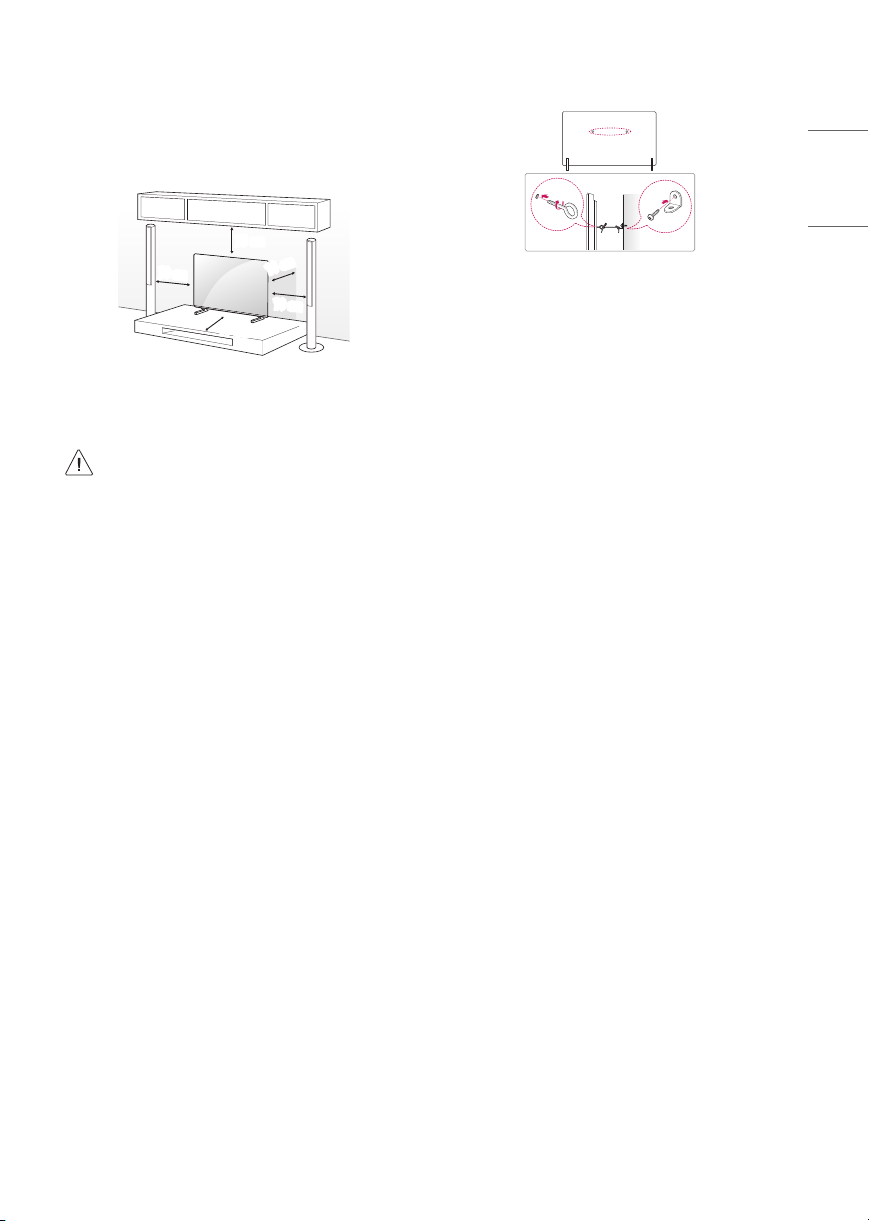
1 Insert and tighten the eye-bolts, or TV brackets and bolts on the back
of the TV.
• If there are bolts inserted at the eye-bolts position, remove the
bolts rst.
2 Mount the wall brackets with the bolts to the wall. Match the
location of the wall bracket and the eye-bolts on the rear of the TV.
3 Connect the eye-bolts and wall brackets tightly with a sturdy rope or
cable. Make sure to keep the rope parallel to the at surface.
• Use a platform or cabinet that is strong and large enough to
support the TV securely.
• Brackets, bolts and ropes are optional. You can obtain additional
accessories from your local dealer.
7
Page 8

Mounting to the Wall
An optional wall mount can be used with your LG Television. Consult
with your local dealer for a wall mount that supports the VESA
ENGLISH_index
standard used by your TV model. Carefully attach the wall mount
bracket at the rear of the TV. Install the wall mount bracket on a solid
wall perpendicular to the oor. If you are attaching the TV to other
building materials, please contact qualied personnel to install the
wall mount. Detailed instructions will be included with the wall mount.
We recommend that you use an LG brand wall mount. The LG wall
mount is easy to adjust or to connect the cables. When you do not use
LG’s wall mount bracket, use a wall mount bracket where the device is
adequately secured to the wall with enough space to allow connectivity
to external devices. If you are using a non-adjustable mount, attach the
mount to the wall. Attach the cables to the TV rst, then attach the TV
to the mount.
10 cm
10 cm
(Depending upon model)
• Remove the stand before installing the TV on a wall
mount by performing the stand attachment in reverse.
• For more information of screws and wall mount bracket,
refer to the Separate purchase.
• If you intend to mount the product to a wall, attach VESA
standard mounting interface (optional parts) to the back
of the product. When you install the set to use the wall
mounting bracket (optional parts), x it carefully so as
not to drop.
• When mounting a TV on the wall, make sure not to install
the TV by hanging the power and signal cables on the
back of the TV.
• D o not install this product on a wall if it could be exposed
to oil or oil mist. This may damage the product and cause
it to fall.
• When installing the Full Contact Wall Mount, the TV may
not be contacted rmly against the wall due to some wall
conditions.
10 cm
10 cm
10 cm
For more information, watch the installation video
on your smart device.
Precautions for Safety
(Except for OLW480B)
• Professional installers should read this manual carefully to ensure
proper installation.
• Professional installers should forward this manual to customers
after installation and encourage them to read and store it in a
convenient place for future reference.
After reading the installation manual, keep it in a convenient place
for future reference.
• Ask a professional installer appointed by the store for
installation of the product.
Installation by someone other than a professional installer
is extremely dangerous and may result in personal injury.
• Do not install the product in an unstable site that cannot
withstand its weight.
If the installation site lacks sucient rigidity, the product
may fall and cause personal injury.
• Contact a professional installer appointed by the store prior
to moving or replacing the product after installation.
Installation is a technical task and safety issues may arise
if an individual attempts to install or move the product
personally.
• Do not hang on the product or subject it to severe impact
after installation.
Doing so may cause the product to fall and cause personal
injury.
• When installing the product on a wall, do not hang the
power line or signal cables from the back of the TV.
This can damage the cords, resulting in a re, electrical
shock or malfunction of the product.
• Be sure to wear work gloves when installing the product.
- Installing with unprotected hands may result in injury.
8
Page 9

• Install the product according to the instructions in the
installation manual.
Failure to install the product according to the instructions
in the installation manual can result in serious personal
injury or product damage.
• Be sure to have at least two people when installing the
product or adjusting the product’s height.
Attempting to perform installation or adjustments
personally may result in personal injury or damage to the
product.
• Make sure a wall is available prior to proceeding with
installation. Make use of the anchors and screws provided
with the product.
Use of any unauthorized anchors or screws may not
support the product's weight, which poses safety risks.
• When drilling in the wall for installation, be sure to use
drill bits and drills of the specied diameter. Follow the
instructions for the hole depth.
Drilling and installing the product in ways other than
specied in the installation manual may result in an
unstable installation and potential safety issues.
• Do not wipe the product with a wet towel or use any
heating equipment or humidier under the place where
the product is installed.
Liquid water or vapor may enter the product and excessive
heat may cause re, electric shock, or malfunction.
• Do not install the product near a re sprinkler or detector,
a place where vibration or shock may occur or near a highvoltage wire or power source.
• Unplug the product’s power cord from the wall outlet
before installing.
Installing the product while the power cord is plugged in
may result in electric shock or re.
• Do not install the product with bare hands. Be sure to wear
work gloves.
Attempting installation without work gloves may cause
personal injury.
• Connect the product with the supplied cable. Use of an
unauthorized cable may result in damage by friction with
the wall. Make sure to use the supplied cable gender. ( This
may vary by model.)
Before Installation
(Except for OLW480B)
• Do not use the product for any purpose other than installing the
TV on a wall.
• Avoid product damage and safety accidents caused by careless
installing or use of improper or unauthorized wall mount.
• Follow the instructions in the installation manual for a convenient
installation of the wall mount.
• Immediately discontinue installation and contact the service center
if you cannot fully understand the installation process.
Use a professional installer if any installation issues remain after
the inquiry.
• Installation of this product on a concrete wall or wood stud is
recommended. Installation of this product on other surfaces
(Dry wall, plywood, bricks, etc.) is not recommended. Improper
installation may result in the product falling.
• Install the product only on a vertical wall.
Do not install on a tilted wall that exceeds building standards or on
the heavily titled wall or ceiling.
LG is not responsible for problems caused by improper installation
of the product, e.g., heavily tilted walls and ceilings.
• Check the enclosed accessories before installation. We are not
responsible for any lost or damaged accessories after the inner
packaging is opened.
• When an infant or small child swallows the enclosed accessories,
various safety accidents such as choking may occur. Keep the
enclosed accessories out of the reach of infants and children.
• When tightening screws, tighten until fully snug.
Avoid using excessive force when tightening the screws. Doing
so may damage the wall and product or reduce the rigidity or
performance of the product.
• Avoid installing a TV that exceeds the specied tensile load, and do
not allow any external force to be applied to the product.
• Avoid accidents by using work tools with care during installation.
Tools for Installation
• “+” shaped screwdriver (manual or electric) / level / drill / Ø 8 mm
drill bit for concrete or Ø 4 mm drill bit for steel
ENGLISH_index
9
Page 10
Securing TV to the Wall
(Except for OLW480B)
ENGLISH_index
• Please use the TV close to the wall after installation.
How to x anchors and screws
(Except for OLW480B)
Please make sure that:
• Check that the material and thickness of the wall and nishing
material comply with the installation manual. Before beginning
the mounting process, you must be sure the wall is able to support
the weight of the TV.
• Should use the enclosed anchors and screws on crack-free concrete
walls.
• Never install the product on a plasterboard or wall made of paper
or medium-density berboard (MDF). When it is necessary to
install the product on such wall, anchor screws must be fastened
to retaining walls (concrete) or wood Stud inside the nishing
material.
• The wall mount should be attached to a stud.This usually will not
be a problem, but depending on individual circumstances, there
may be cases when the ability to mount into a studis not possible.
In this case, there are a variety of drywall anchors, such as toggle
bolts, which may provide a solution.If using drywall anchors,
please be sure the anchors and the wall have the ability to support
the weight of your TV. Please note that the supplied anchors may
not be the correct ones for your individual situation, so you should
check with a local professional.
• Other unspecied walls must be capable of supporting pullout
loads of over 70kgf (686N) and shear loads of over 100kgf (980N)
per fastener.
• Use an Ø 8mm drill bit for concrete and a hammer (impact) drill or
Ø 4mm drill bit for wood stud to drill holes.
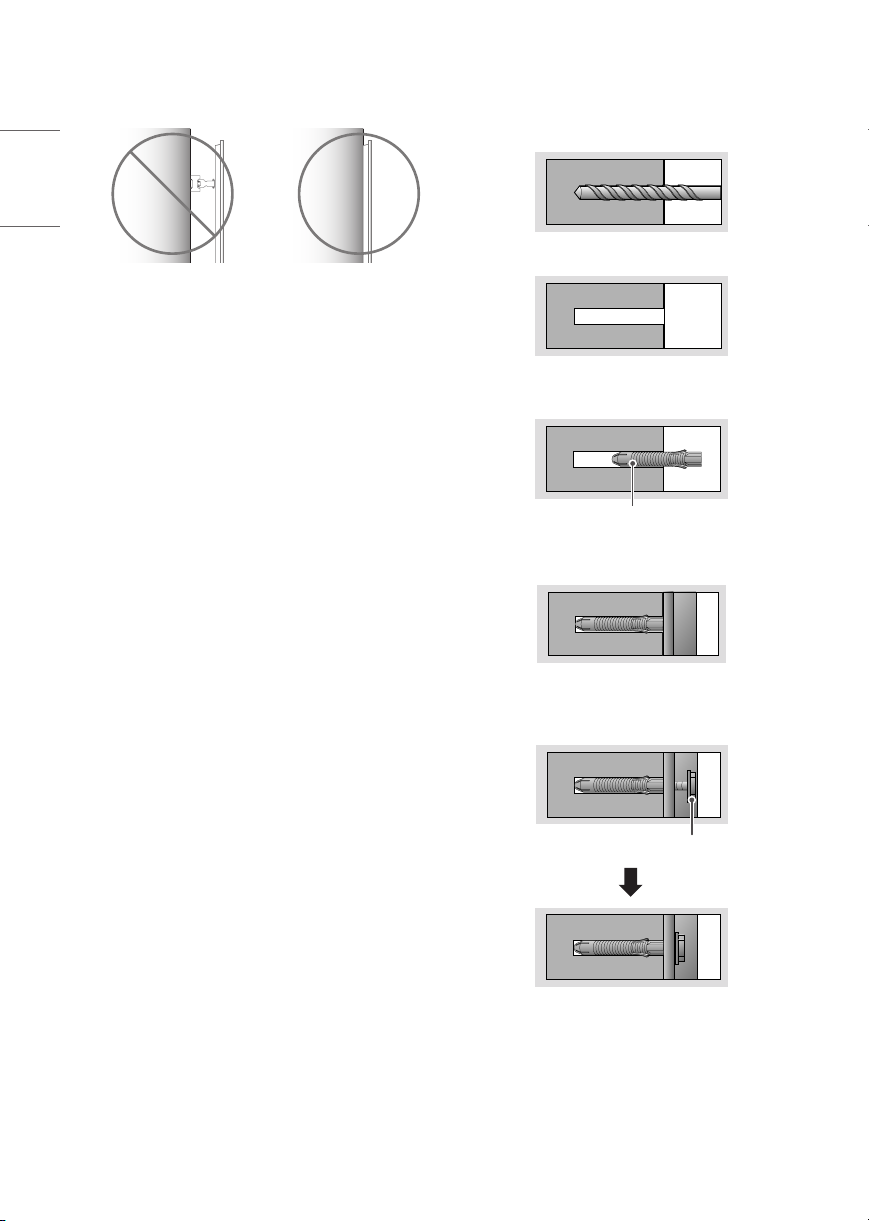
(For installation on concrete wall)
1 Drill holes in anchor locations with a drill bit of Ø 8 mm to a
depth of 80 mm to 100 mm.
2 Clean the drilled holes.
3 Insert the enclosed anchors for xing the wall mount into the
holes. (Use a hammer when inserting anchors.)
Wall mounting anchor
4 Push the wall mount support closely toward the wall to match
the hole locations.
5 Tighten screws for xing the wall mount to the holes. At this
time, tighten the screws to a torque of between 45 kgf/cm to
60 kgf/cm.
Wall mounting screw
10
Page 11
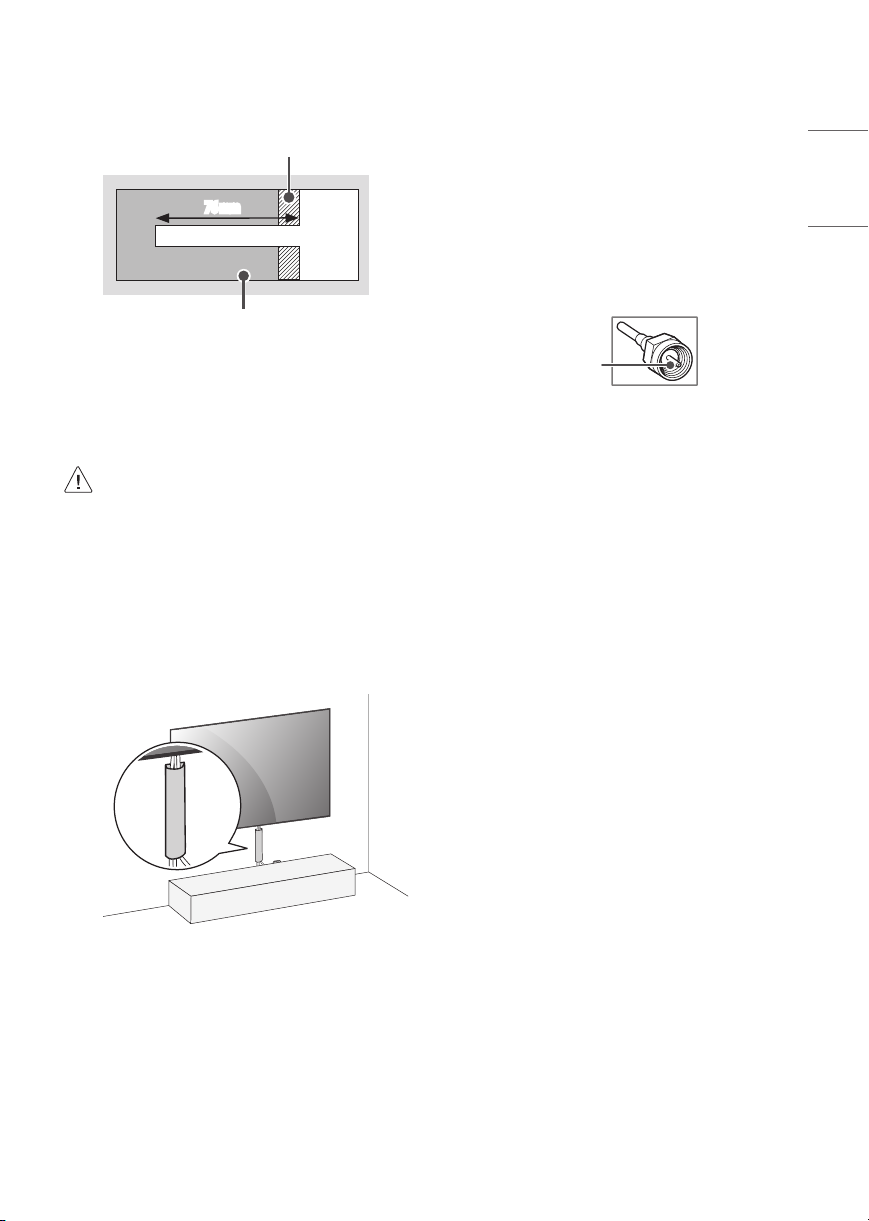
(For installation on wood stud)
Use the Ø 4 mm drill bit for wood to drill holes with the depth of
76mm. (Clean the drilled hole.)
Drywall
Connections
You can connect various external devices to the TV. For more
information on external device’s connec tion, refer to the manual
provided with each device.
ENGLISH_index
76 mm
Wood stud
Without using the wall mounting anchor, fasten the wall mounting
screw directly to the wood stud.
After Installation
• When connec ting additional cables from the sides, we
recommend holding the centre of the TV horizontally or
vertically and pulling the product to make sure there is
sucient distance from the wall before connecting.
• When connec ting additional cables from the bottom, we
recommend releasing the TV from the wall mount before
connecting.
• Use cable management systems to arrange the
cables at the bottom of the TV as shown below. Cable
managements are not provided with the product, so
purchase them separately.
(For example)
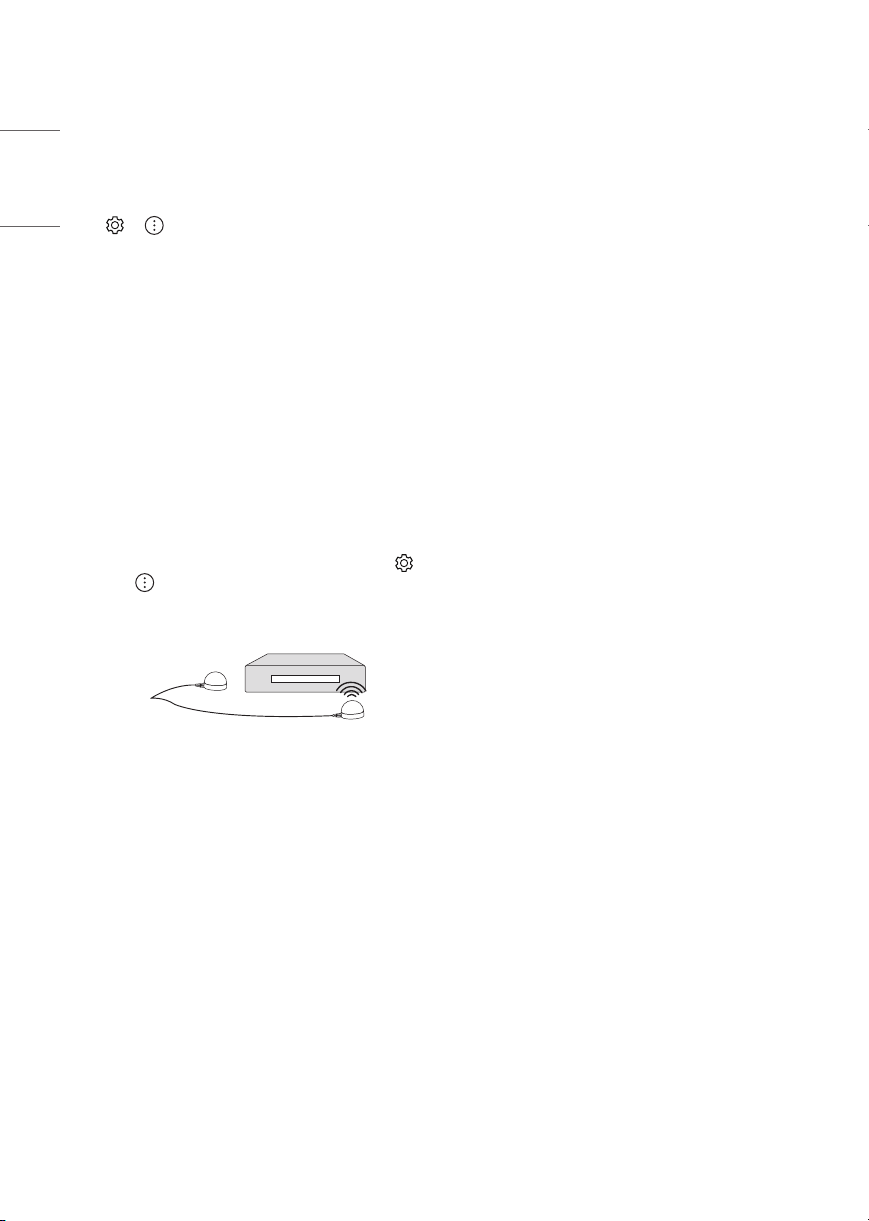
Antenna/Cable
Connect an antenna, cable, or cable box to watch TV while referring to
the following. The illustrations may dier from the actual items and an
RF cable is optional.
• Make sure not to bend the copper wire of the RF cable.
Copper wire
• Complete all connections between devices, and then connect the
power cord to the power outlet to prevent damage to your TV.
• To improve the picture quality in a poor signal area, purchase a
signal amplier.
• Use a signal splitter to use 2 TVs or more.
• If the antenna is not installed properly, contact your dealer for
assistance.
• DTV Audio Supported Codec (Depending upon country): MPEG,
AAC, HE-AAC, Dolby Digital, Dolby Digital Plus
• This TV cannot receive ULTRA HD (3840 x 2160 pixels) broadcasts
directly because the related standards have not been conrmed.
Other connections
Connect your TV to external devices. For the best picture and audio
quality, connect the external device and the TV with the HDMI cable.
• After installing the product, be sure to use it adhered to
the wall.
- Using the product while it is not adhered to the wall
may damage or shake the product.
11
Page 12
HDMI
• When connec ting the HDMI cable, the product and external devices
should be turned o and unplugged.
• Supported HDMI Audio format: (Depending upon model)
ENGLISH_index
True HD (48 kHz),
Dolby Digital / Dolby Digital Plus (32 kHz, 44.1 kHz, 48 kHz),
PCM (32 kHz, 44.1 kHz, 48 kHz, 96 kHz, 192 kHz)
• → → [Picture] → [Additional Settings] → [HDMI Ultra
HD Deep Color]
- On: Support 4K @ 50/60Hz (4:4:4, 4:2:2, 4:2:0), 4K @ 100/120Hz
(4:4:4, 4:2:2, 4:2:0)
- O: Support 4K @ 50/60Hz (4:2:0)
If the device connected to Input Port also supports ULTRA HD Deep
Color, your picture may be clearer. However, if the device doesn’t
support it, it may not work properly. In that case, change the TV’s
[HDMI ULTRA HD Deep Color] setting to o.
IR Blaster
• Control the set-top box (cable/satellite/IP/OTT), Blu-ray/DVD
player, soundbar, game consoles, etc., using the IR Blaster.
(Depending upon country)
- Connect the IR Blaster cable to the TV’s IR Blaster port.
- Place both ends (one or two) of the IR Blaster in front of the
external device as shown in the picture below.
- Use universal control settings to control the device. Go to
→ → [Connection] → [Device Connection Settings] →
[Universal Control Settings].
- Secure the IR Blaster with the 3M tape provided.
External Devices
Supported external devices are: Blu-ray player, HD receivers, DVD
players, VCRs, audio systems, USB storage devices, PC, gaming devices,
and other external devices.
• If you record a TV program on a Blu-ray/DVD recorder or VCR, make
sure to connect the TV signal input cable to the TV through a DVD
recorder or VCR. For more information about recording, refer to the
manual provided with the connected device.
• The external device connections shown may dier slightly from
illustrations in a manual.
• Connect external devices to the TV regardless about the order of
the TV port.
• If you connect a gaming device to the TV, use the cable supplied
with the gaming device.
• Refer to the external equipment’s manual for operating
instructions.
• In PC mode, there may be noise associated with the resolution,
vertical pattern, contrast or brightness. If noise is present, change
the PC output to another resolution, change the refresh rate to
another rate or adjust the brightness and contrast on the [Picture]
menu until the picture is clear. Depending upon the graphics card,
some resolution settings may not allow the image to be positioned
on the screen properly.
• Some USB Hubs may not work. If a USB device connected through
a USB Hub is not detected, connect it directly to the USB port on
the TV.
• When connecting via a wired LAN, it is recommended to use a CAT
7 cable.
12
Page 13
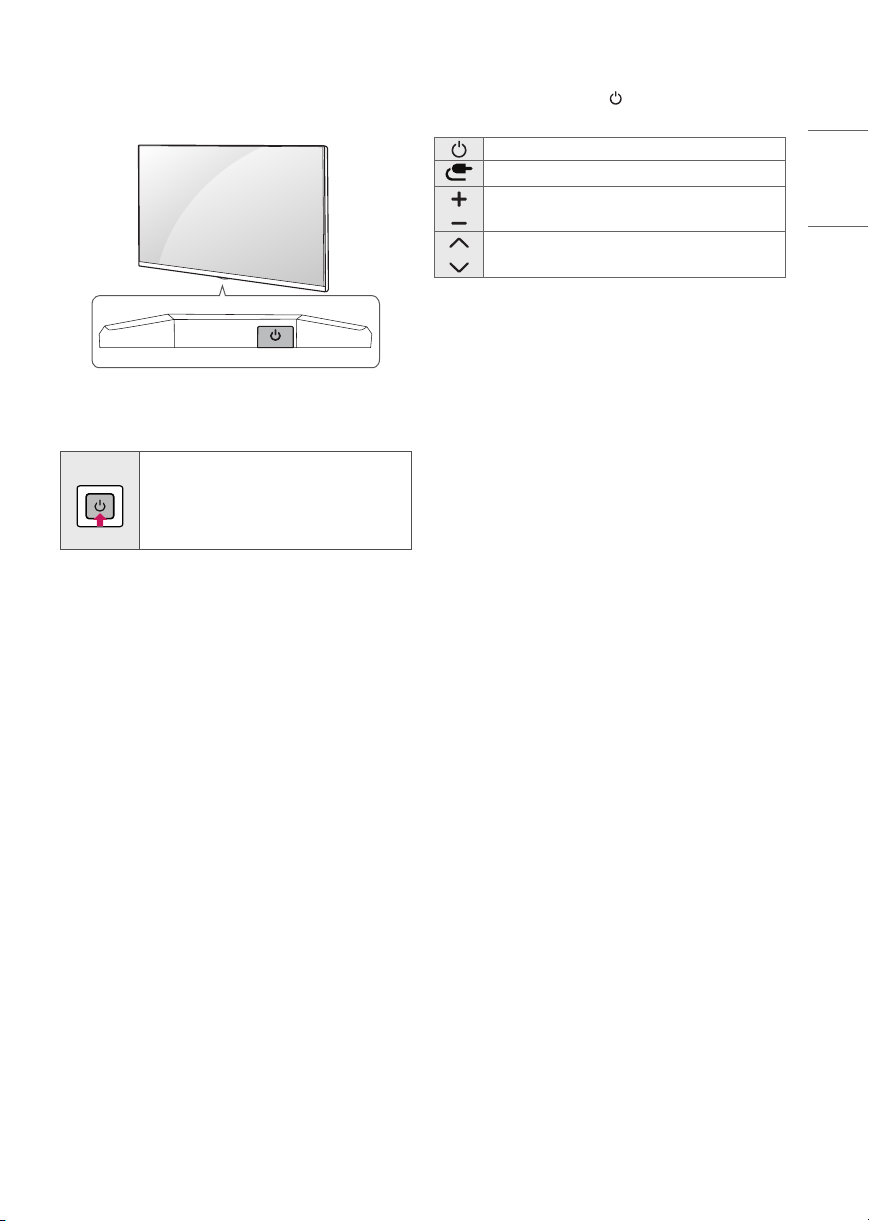
Using Button
You can simply operate the T V functions, using the button.
Basic functions
Power On (Press)
Power O 1 (Press and Hold)
Menu Control (Press 2)
Menu Selection (Press and Hold 3)
1 All running apps will close, and any recording in progress will stop.
2 You can access and adjust the menu by pressing the button when
TV is on.
3 You can use the function when you access menu control.
Adjusting the menu
When the TV is turned on, press the button one time. You can adjust
the Menu items using the button.
Turns the power o.
Changes the input source.
Adjusts the volume level.
Scrolls through the saved channels.
ENGLISH_index
13
Page 14
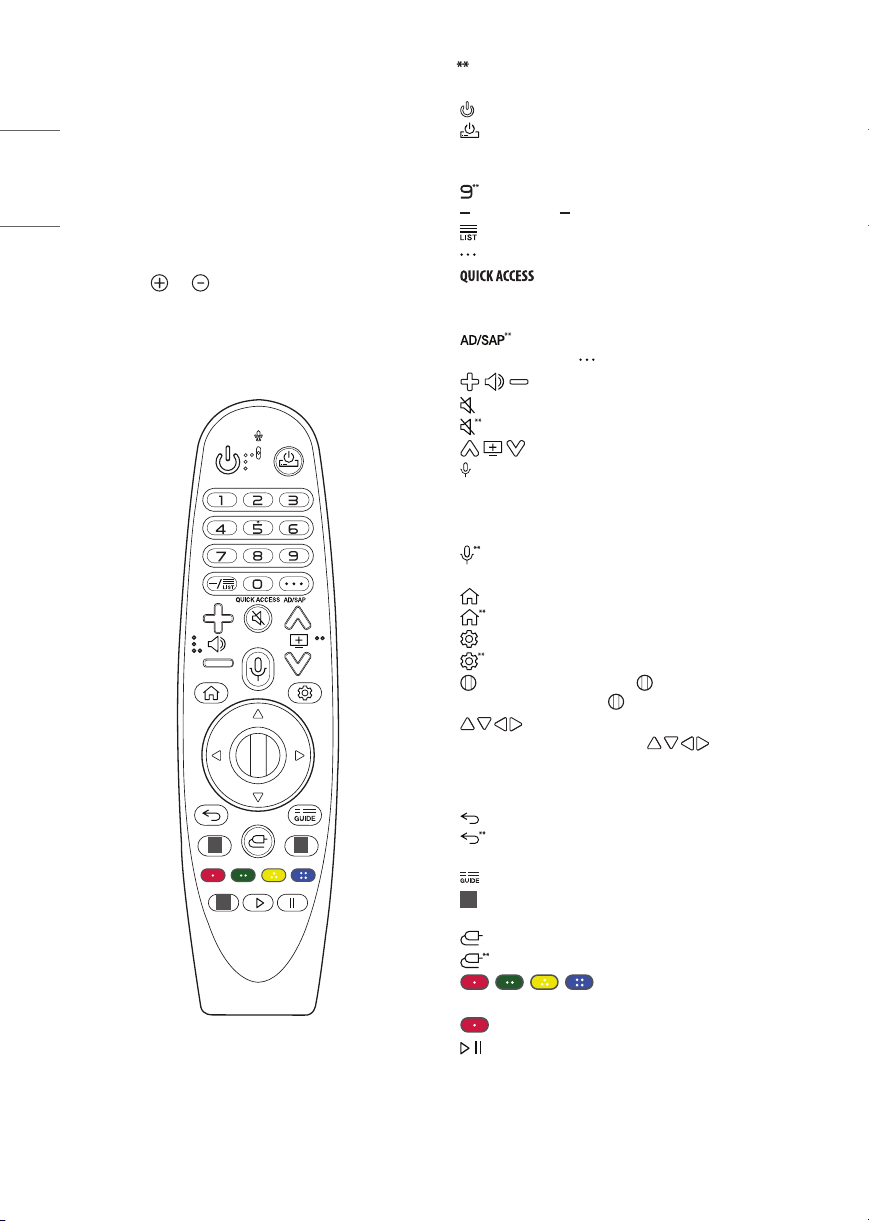
Using Magic Remote
Control
ENGLISH_index
(Depending upon model)
The descriptions in this manual are based on the buttons on the remote
control. Please read this manual carefully and use the TV correctly.
When the message [Magic Remote battery is low. Please change the
battery.] is displayed, replace the batteries.
To install batteries, open the battery cover, replace batteries (1.5 V AA)
matching the and ends to the label inside the compartment,
and close the battery cover. Be sure to point the magic remote toward
the remote control sensor on the TV. To remove the batteries, perform
the installation actions in reverse. This remote uses infrared light. When
in use, it should be pointed in the direction of the TV’s remote sensor.
1 1
1
(Some buttons and services may not be provided depending upon
models or regions.)
To use the button, press and hold for more than 1 second.
(Power) Turns the TV on or o.
(STB Power) You can turn your set-top box on or o by adding
the set-top box to the universal remote control for your TV.
Number buttons Enters numbers.
Accesses the [Quick Help].
(DASH) Inserts a between numbers such as 2-1 and 2-2.
Accesses the saved channels list.
(More Actions) Displays more remote control functions.
**
Edits QUICK ACCESS.
- QUICK ACCESS is a feature that allows you to enter a specied app
or Live TV directly by pressing and holding the number buttons.
SAP (Secondary Audio Program) feature can also be
enabled by pressing the button.
Adjusts the volume level.
(MUTE) Mutes all sounds.
(MUTE) Accesses the [Accessibility] menu.
Scrolls through the saved channels.
(Voice recognition) Network connection is required to use the
voice recognition function.
Check for recommended content. (Some recommended services may
not be available in some countries.)
(Voice recognition) Speak while pressing and holding the
button to use the voice recognition feature.
(HOME) Accesses the Home menu.
(HOME) Shows the previous history.
(Q. Settings) Accesses the Quick Settings.
(Q. Settings) Displays the [All Settings] menu.
Wheel (OK) Press the center of button to select a menu. You
can change channels by using button.
(up/down/left/right) Press the up, down, left or right
button to scroll the menu. If you press buttons while the
pointer is in use, the pointer will disappear from the screen and Magic
Remote will operate like a general remote control. To display the
pointer on the screen again, shake Magic Remote to the left and right.
(BACK) Returns to the previous level.
(BACK) Clears on-screen displays and returns to last input
viewing.
Displays the program event according to time scheduler.
Streaming Service buttons Connects to the Video Streaming
1
Service.
(INPUT) Changes the input source.
(INPUT) Accesses the [Home Dashboard].
, , , These access special functions in some
menus.
**
Runs the record function.
, (Control buttons) Controls media contents.
14
Page 15
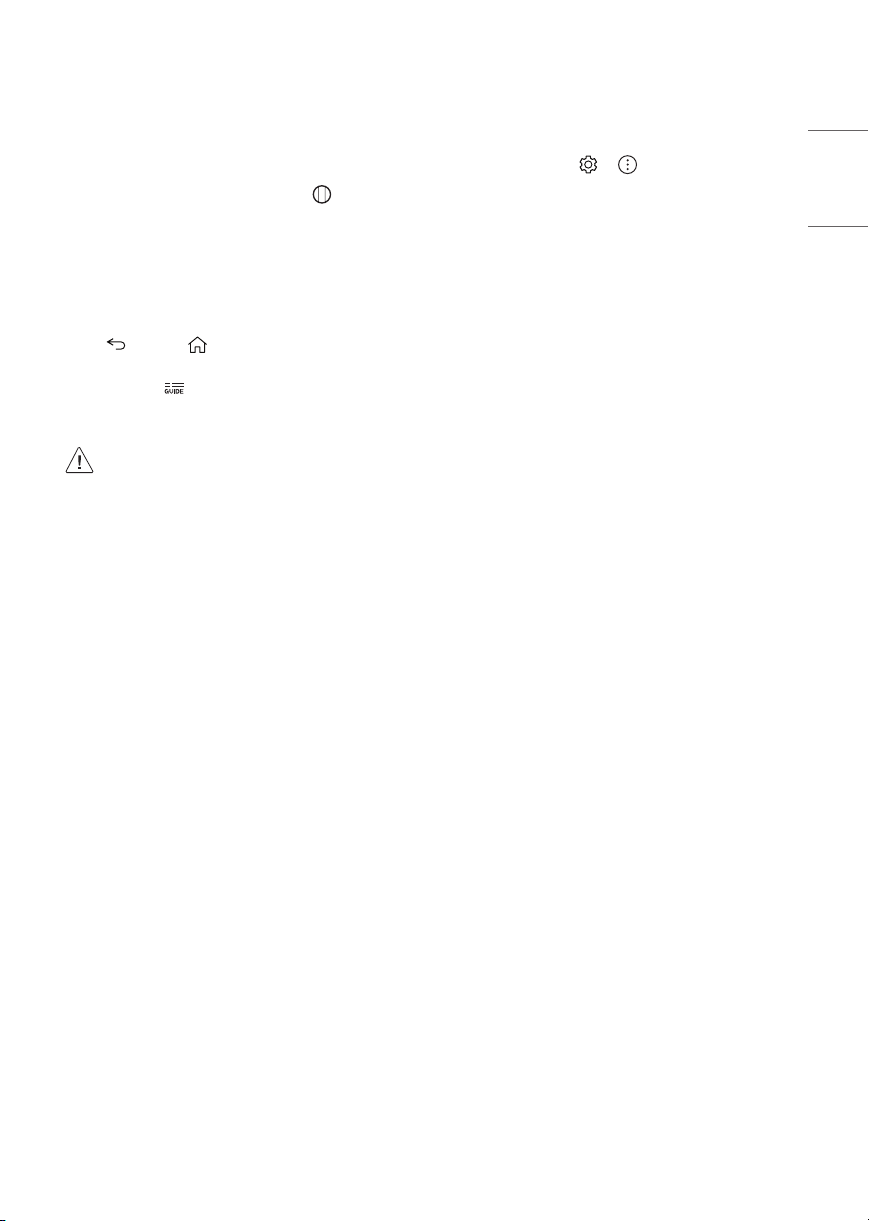
Registering Magic Remote Control
User Guide
How to register the Magic Remote Control
To use the Magic Remote, rst pair it with your TV.
1 Put batteries into the Magic Remote and turn the TV on.
2 Point the Magic Remote at your TV and press the Wheel (OK) on
the remote control.
* If the TV fails to register the Magic Remote, try again after turning
the TV off and back on.
How to deregister the Magic Remote
Control
Press the (BACK) and (HOME) buttons at the same time, for
ve seconds, to unpair the Magic Remote with your TV.
* Press and hold the button for more than 5 seconds to disconnect
and re-register the Magic Remote at the same time.
• It is recommended that an Access Point (AP) be located
more than 0.2 m away from the TV. If the AP is installed
closer than 0.2 m, the Magic remote control may not
perform as expected due to frequency interference.
• D o not mix new batteries with old batteries. This may
cause the batteries to overheat and leak.
• Failure to match the correct polarities of the battery
may cause the battery to burst or leak, resulting in re,
personal injury, or ambient pollution.
• This apparatus uses batteries. In your community there
might be regulations that require you to dispose of these
batteries properly due to environmental considerations.
Please contact your local authorities for disposal or
recycling information.
• B atteries inside or inside the product shall not be
exposed to excessive heat such as sunshine, re or the
like.
For more information about this TV, read the USER GUIDE embedded in
the product.
• To open the USER GUIDE → → [Support] → [User
Guide]
Troubleshooting
Cannot control the TV with the remote control.
• Check if anything such as tape has been placed over the receiver.
• Check if there is any obstacle between the product and the remote
control.
• Replace the batteries with new fresh ones.
No image display and no sound is produced.
• Check if the product is turned on.
• Check if the power cord is connected to a wall outlet.
• Check if there is a problem in the wall outlet by connecting other
products.
The TV turns o suddenly.
• Check the power control settings. The power supply may be
interrupted.
• Check if the auto-o function is activated in the settings menu.
• If there is no signal while the TV is on, the TV will turn o
automatically after 15 minutes of inactivity.
ENGLISH_index
15
Page 16

Abnormal Display
• If the TV feels cold to the touch, there may be a small icker when
it is turned on. This is normal; there is nothing wrong with T V.
ENGLISH_index
Some minute dot defects may be visible on the screen, appearing
as tiny red, green, or blue spots. However, they have no adverse
eect on the TV’s performance. Avoid touching the screen or
holding your nger(s) against it for long periods of time. Doing so
may produce some temporary distortion eects on the screen.
• This panel is an advanced product that contains millions of pixels.
In a very few cases, you could see ne dots on the screen while
you’re viewing the TV. Those dots are deactivated pixels and do not
aect the performance and reliability of the TV.
Generated Sound
• Cracking noise A cracking noise that occurs when watching or
turning o the TV is generated by plastic thermal contraction due
to temperature and humidity. This noise is common for products
where thermal deformation is required.
• Electrical circuit humming/panel buzzing A low level noise is
generated from a high-speed switching circuit, which supplies a
large amount of current to operate a product. It varies depending
upon the product. This generated sound does not aect the
performance and reliability of the product.
• Make sure to wring any excess water or cleaner from
the cloth.
• D o not spray water or cleaner directly onto the TV screen.
• Make sure to spray just enough of water or cleaner onto a
dry cloth to wipe the screen.
16
Page 17

Specications
Product specications may be changed without prior notice due to upgrade of product functions.
(Depending upon country)
Broadcasting Specifications
Model OLED65GXPSA, OLED77GXPSA OLED65GXPDA, OLED77GXPDA
Digital Analog Digital Analog
Television system SBTVD (ISDBT) NTSC / PAL-M / PAL-N DVB-T / T2 NTSC / PAL-M / PAL-N
VHF 2 - 13
Program coverage
External antenna
impedance
Frequency Range Output Power (Max.)
2,400 to 2,483.5 MHz
5,150 to 5,725 MHz
5,725 to 5,850 MHz
Frequency Range Output Power (Max.)
2,400 to 2,483.5 MHz 9 dBm
As band channels can vary per country, the user cannot change or adjust the operating frequency. This product is congured for the regional
frequency table.
For consideration of the user, this device should be installed and operated with a minimum distance of 20 cm between the device and the body.
FCC ID: BEJLGSBWAC94 / IC: 2703H-LGSBWAC94
UHF 14 - 69
DTV 2 - 69
CATV 1 - 135
75 Ω
Wireless module (LGSBWAC94) Specifications
Wireless LAN (IEEE 802.11a/b/g/n/ac)
Bluetooth
VHF 2 - 13
UHF 14 - 69
DTV 2 - 69
CATV 1 - 125
17.5 dBm
18 dBm
18 dBm
ENGLISH_index
17
Page 18

Environment condition
Operating Temperature 0 °C to 40 °C
ENGLISH_index
• The energy information provided on the product is shown in accordance with the applicable regulations of each respective country, (Depending
upon the country).
- The Energy consumption was measured in accordance with IEC 62087.
• The actual energy consumption depends on the usage environment, (Example: content watched, TV settings, etc.).
• For information of the power supply and power consumption, refer to the label attached to the product.
- The typical power consumption is measured in accordance with IEC 62087 or each country’s energy regulations.
* On some models, the label is inside the external device connection terminal cover.
* Depending upon the model or country, the typical power consumption may not be on label.
Operating Humidity Less than 80 %
Storage Temperature -20 °C to 60 °C
Storage Humidity Less than 85 %
18
Page 19

Open Source Software
Notice Information
To obtain the source code under GPL, LGPL, MPL, and other open source
licenses, that is contained in this product, please visit http://opensource.
lge.com.
In addition to the source code, all referred license terms, warranty
disclaimers and copyright notices are available for download.
LG Electronics will also provide open source code to you on CD-ROM
for a charge covering the cost of performing such distribution (such
as the cost of media, shipping, and handling) upon email request to
opensource@lge.com.
This oer is valid for a period of three years after our last shipment of
this product. This oer is valid to anyone in receipt of this information.
Licenses
ENGLISH_index
(Magic Remote supported models only)
19
Page 20

Important Information for
Preventing Image Retention
ENGLISH_index
OLED is a self-emissive technology, which brings many signicant
benets to image quality and performance. As with any self-emitting
display, it is possible for users of OLED TVs to experience temporary
image retention under certain conditions, such as when displaying a
static image on the screen for a long time. LG OLED T Vs incorporate
dedicated functions that protect the screen from possible image
retention.
If a static image persists on screen, screen brightness is automatically
reduced in specic areas of, or across the entire screen. Once the static
image disappears, screen brightness will automatically return to its
prior setting. This is not a product malfunction.
Examples of Images that may Cause
Image Retention
• Still images or xed images containing certain information
that are displayed uninterrupted on the screen, such as channel
numbers, station logos, program titles, news or movie subtitles,
and headlines.
• Fixed menu or icons for video game consoles or broadcasting
set-top boxes.
• Black bars shown on the left, right, top, or bottom of the screen,
such as in images with a 4:3 or 21:9 ratio.
Recommended Measures for
Preventing Image Retention
• Avoid watching a video displaying an image as listed above for
extended periods of time.
• Adjust your TV settings as below when turning on a video
exhibiting an image as listed above for extended periods of time.
- → → [Picture] → [Picture Mode Settings] →
[Picture Mode] → [Eco]
- → → [Picture] → [Picture Mode Settings] → [OLED
LIGHT] → Adjust to lower value
- → → [Picture] → [OLED Screen Saver] → [Logo
Luminance Adjustment] → [High]
• Turn o the menu bar of an external device, such as a set-top
box, to prevent long-term display of the menu bar of such device.
(Please refer to the manual of the applicable external device for
instructions.)
• Adjust the settings as below when watching a video constantly
showing black bars on the left, right, top or bottom, in order to
remove the black bars.
- → → [Picture] → [Aspect Ratio Settings] → [Aspect
Ratio] → [Vertical Zoom] or [4-Way Zoom]
Information on Functions
Supporting Image Quality in
Relation to Temporary Image
Retention
• LG OLED TVs provide a feature called Pixel Refresher, which helps to
prevent temporary image retention.
• When the accumulated television viewing time reaches 2,000
hours or more (this is equivalent to watching TV for ve hours a
day over the course of a year), Pixel Refresher will be automatically
activated once your TV is turned o. When turning o your TV, a
notice will appear on the screen informing the activation of Pixel
Refresher. This feature will run for an hour while your TV is turned
o. A horizontal line may appear at the top or bottom of the screen
when the process is almost nished.
• You may also manually activate Pixel Refresher via the TV menu:
→ → [Pic ture] → [OLED Screen Saver] → [Pixel
Refresher].
• Whenever you watch your T V for more than four cumulative hours,
Pixel Refresher will be automatically activated for a few minutes
once your TV is turned o. (Note: Pixel Refresher will not be
activated if the power cord of your TV is not plugged in or the main
power is o.)
20
Page 21

Regulatory
WARNING!
Never place a television set in an unstable location. A television set may
fall, causing serious personal injury or death. Many injuries, particularly
to children, can be avoided by taking simple precautions such as:
• Using cabinets or stands recommended by the manufacturer of the
television set.
• Only using furniture that can safely support the television set.
• Ensuring the television set is not overhanging the edge of the
supporting furniture.
• Not placing the television set on tall furniture (for example,
cupboards or bookcases) without anchoring both the furniture and
the television set to a suitable support.
• Not placing the television set on cloth or other materials that may
be located between the television set and supporting furniture.
• Educating children about the dangers of climbing on furniture to
reach the television set or its controls.
If your existing television set is being retained and relocated, the same
considerations as above should be applied.
Symbols
Refers to alternating current (AC).
Refers to direct current (DC).
Refers to class II equipment.
Refers to stand-by.
Refers to “ON” (power).
Refers to dangerous voltage.
ENGLISH_index
21
Page 22

ENGLISH_index
22
Page 23

ENGLISH_index
23
Page 24

The model and serial number of the product are located
on the back and on one side of the product.
Record them below in case you ever need service.
Model
Serial No.
Page 25

MANUAL DEL USUARIO
Seguridad y Consultas
Lea atentamente este manual antes de poner en marcha
el equipo y consérvelo para futuras consultas.
OLED65GXPSA
OLED65GXPDA
OLED77GXPSA
OLED77GXPDA
www.lg.com
Copyright © 2020 LG Electronics Inc. Todos los derechos reservados.
Page 26

Instrucciones de Seguridad Importantes
• Lea estas instrucciones.
• Conserve estas instrucciones.
• Preste atención a las advertencias.
• Siga todas las instrucciones.
• No use el aparato cerca del agua.
• Limpie únicamente con un paño seco.
ESPAÑOL
• No tape ni bloquee las aberturas de ventilación. Realice la instalación siguiendo las instrucciones del fabricante.
• No instale el producto cerca de fuentes de calor como radiadores, rejillas de calefacción central, estufas u otro tipo de aparatos que emitan calor
(incluidos los amplicadores).
• No anule el propósito de seguridad del enchufe polarizado o del enchufe a tierra. Un enchufe polarizado tiene dos clavijas, una más ancha que
la otra. Un enchufe a tierra tiene dos clavijas y un tercer terminal de puesta a tierra. La clavija ancha o el terminal de puesta a tierra se proveen
para proteger al usuario. Si el enchufe del equipo no entra en la toma, consulte a un electricista para cambiar el tomacorriente.
• Asegúrese de que el cable de alimentación esté protegido para evitar que lo pisen o aplasten, especialmente en los enchufes, los tomacorrientes
o el punto de salida desde el aparato.
• Use únicamente los accesorios recomendados por el fabricante.
• Use el producto únicamente en mesas portátiles, pies, trípodes, soportes o mesas indicados por el fabricante o provistos con el aparato. Al
emplear una mesa portátil, tenga cuidado al moverla con el aparato encima, para evitar daños por caídas.
• Desenchufe el aparato durante tormentas eléctricas o si no planea usarlo durante un periodo prolongado.
• Consulte todas las cuestiones de servicio de mantenimiento al personal de servicio calicado. El servicio es necesario cuando el aparato sufre
algún tipo de daño, por ejemplo, cuando un cable de suministro eléctrico o un conector está dañado, se derrama líquido o se cae un objeto
dentro del aparato, el aparato se expone a la lluvia o a la humedad, no funciona en forma normal o sufre una caída.
2
Page 27

¡Advertencia! Instrucciones
de seguridad
PRECAUCIÓN
RIESGO DE CHOQUE
ELÉCTRICO
NO ABRIR
PRECAUCIÓN: PARA REDUCIR EL RIESGO DE DESCARGAS
ELÉCTRICAS, NO QUITE LA CUBIERTA (O LA PARTE POSTERIOR). EL
USUARIO NO PUEDE CAMBIAR NI REPARAR LOS COMPONENTES
INTERNOS. CONSULTE ÚNICAMENTE AL PERSONAL DE SERVICIO
CALIFICADO.
El símbolo tiene como n alertar al usuario sobre la
presencia de voltaje peligroso sin aislamiento dentro del
compartimiento del producto que puede tener la potencia
suciente como para representar un riesgo de descargas
eléctricas para los usuarios.
El símbolo tiene como n alertar al usuario sobre la
presencia de instrucciones importantes de funcionamiento
y mantenimiento (servicio) en la documentación que se incluye
con el dispositivo.
ADVERTENCIA: PARA REDUCIR EL RIESGO DE INCENDIOS O
DESCARGAS ELÉCTRICAS, NO EXPONGA EL PRODUCTO A LA
LLUVIA O LA HUMEDAD.
• PARA EVITAR UN INCENDIO, MANTENGA LAS VELAS U OTROS
ELEMENTOS CON FUEGO LEJOS DEL PRODUCTO EN TODO MOMENTO.
• No ubique el TV o el control remoto en ninguno de los
siguientes ambientes:
- Mantenga el aparato alejado de la luz solar directa.
- Áreas con alto nivel de humedad, como lo puede ser un baño
- Cerca de fuentes de calor como estufas u otros dispositivos que
emitan calor.
- Cerca del mostrador de la cocina o de humidicadores ya que
pueden estar expuestos a vapor o aceites.
- Áreas expuestas a lluvia o viento.
- No exponga el producto a ningún tipo de goteo ni salpicaduras,
y no coloque sobre o por encima del televisor (por ejemplo, en
estantes que pudieran encontrarse arriba de la unidad) ningún
tipo de objeto que contenga líquido, como oreros, tazas, etc.
- No deje el producto cerca de objetos inamables, como
gasolina o velas, ni exponga el televisor a un sistema de aire
acondicionado de forma directa.
- No lo instale en lugares con demasiado polvo.
No seguir estas indicaciones podría provocar un incendio,
una descarga eléctrica, una combustión o explosión, fallas o
deformaciones del producto.
• Ventilación
- Instale el televisor en un lugar con ventilación adecuada. No
lo coloque en un lugar cerrado como, por ejemplo, un estante
para libros.
- No instale el producto en alfombras o cojines.
- No bloquee o cubra el producto con paño u otros materiales
mientras esté conectado.
• Procure no tocar las aberturas de ventilación. Si se utiliza el
producto por un tiempo prolongado, las aberturas de ventilación
pueden calentarse.
• Proteja el cable de alimentación de daños físicos o mecánicos, es
decir, que no se tuerza, doble, deforme, que no quede atrapado al
cerrar una puerta y que no lo pisen. Preste especial atención a los
enchufes, tomacorrientes de la pared y al punto de salida del cable
en el aparato.
• No mueva el televisor mientras el cable de alimentación esté
conectado.
• No utilice un cable de alimentación que esté dañado o suelto.
• Al desenchufar el cable, asegúrese de hacerlo desde el enchufe. No
tire del cable de alimentación para desenchufar el televisor.
• No conecte demasiados dispositivos al mismo tomacorriente de ca
dado que podría provocar incendios o descargas eléctricas.
• Desconexión del dispositivo de la alimentación principal
- El conector de alimentación es el dispositivo de desconexión.
En caso de emergencia, el conector de alimentación debe ser
de fácil acceso.
• No deje que los niños se trepen o se aferren al TV. De lo contrario,
el TV puede caerse y provocar lesiones graves.
• Puesta a tierra con una antena exterior (puede variar según
el país):
Si instala una antena exterior, tome las siguientes precauciones.
El sistema de antena exterior no debe instalarse cerca de las
líneas eléctricas de trasmisión aérea, cerca de ningún otro
circuito de alimentación o luz eléctrica, ni en ningún lugar
donde pudiera entrar en contacto con este tipo de cables
eléctricos o circuitos, dado que podría provocar daños graves o
incluso la muerte.
Asegúrese de que el sistema de antena tenga una puesta a
tierra como protección contra sobretensiones y acumulaciones
de cargas estáticas. La Sección 810 del Código Nacional de
Electricidad (NEC) de los Estados Unidos establece la forma de
realizar una puesta a tierra correcta del mástil, de la estructura
de soporte, del cable de bajada a una unidad de descarga de
la antena, el tamaño de los conductores de puesta a tierra, la
ubicación de la unidad de descarga de la antena, y la conexión
y los requisitos de los electrodos de puesta a tierra. Puesta a
tierra de la antena según el Código Nacional de Electricidad,
ANSI/NFPA 70
ESPAÑOL
3
Page 28

• Puesta a tierra (Excepto dispositivos sin conexión a tierra.)
- El televisor con un conector de ca de conexión a tierra de tres
clavijas debe conectarse a un tomacorriente de ca de conexión a
tierra de tres clavijas. Asegúrese de conectar el cable de conexión
a tierra para evitar posibles descargas eléctricas.
• Nunca toque el aparato o la antena durante una tormenta eléctrica.
Podría electrocutarse.
• Asegúrese de que el cable de alimentación esté conectado de
ESPAÑOL
manera segura al televisor y al enchufe de pared. De no ser así,
podría dañarse el enchufe y el conector y, en casos extremos,
podría producirse un incendio.
• No inserte objetos metálicos o inamables en el producto. Si
un objeto extraño ingresa al producto, desenchufe el cable de
alimentación y póngase en contacto con el centro de atención al
cliente.
• No toque el extremo del cable de alimentación mientras esté
enchufado. Podría electrocutarse.
• Si ocurre lo siguiente, desenchufe el producto de inmediato
y póngase en contacto con el centro de atención al cliente
local.
- Se dañó el producto.
- Si el agua u otra sustancia entra al producto (como un adaptador
de ca cable de alimentación, o la TV).
- Si huele humo u otros olores que provienen de la TV
- Si hay tormentas eléctricas o cuando no se utiliza por un largo
período de tiempo.
Incluso si el televisor se apaga con el control remoto o el botón, la
fuente de alimentación de ca permanece conectada a la unidad al
menos que se desenchufe.
• No utilice equipo de alto voltaje cerca del televisor (por ejemplo,
un eliminador de insectos eléctrico). Esto puede causar que el
producto funcione mal.
• No intente modicar este producto de ninguna manera sin
autorización previa por escrito de LG Electronics. Puede provocar
un incendio o una descarga eléctrica por accidente. Póngase en
contacto con el centro de atención al cliente local para obtener
servicio técnico o reparaciones. La modicación sin autorización
podría anular la autoridad del usuario para operar este producto.
• Utilice solo accesorios/acoplamientos aprobados por LG Electronics.
No seguir estas indicaciones podría provocar un incendio, una
descarga eléctrica, fallas o daños en el producto.
• Nunca desarme el adaptador de ca o el cable de alimentación. Esto
podría provocar un incendio o descargas eléctricas.
• Maneje el adaptador cuidadosamente para evitar dejarlo caer o
golpearlo. Un golpe podría dañar el adaptador.
• Para reducir el riesgo de incendio o descarga eléctrica, no toque
el televisor con las manos mojadas. Si las clavijas del cable de
alimentación están mojadas o cubiertas de polvo, seque el conector
de alimentación por completo o retire el polvo.
• Baterías
- Guarde los accesorios (baterías, etc.) en un lugar seguro lejos del
alcance de los niños.
- No provoque un corto circuito, desarme o permita que las
baterías se recalienten. No arroje las baterías al fuego. No debe
exponer las baterías al calor excesivo.
- Precaución: Existe riesgo de incendio o explosión si se reemplaza
la batería por un tipo incorrecto.
• Traslados
- Cuando lo traslade, asegúrese de que el aparato esté apagado,
desenchufado y que no quede ningún cable conectado. Es
posible que se necesiten 2 o más personas para trasladar los
televisores de gran tamaño. No ejerza presión sobre el panel
frontal del televisor. No seguir estas indicaciones podría resultar
en un daño al producto, peligro de incendio o lesiones.
• Mantenga el material de embalaje contra la humedad y el
embalaje de vinilo fuera del alcance de los niños.
• No permita que se golpee el producto, que algún objeto se caiga
dentro de él y no golpee la pantalla con nada.
• No ejerza demasiada presión sobre el panel con la mano o un
objeto loso, como un clavo, un lápiz o una lapicera, ni raye la
supercie. Puede causar daños en la pantalla.
• Limpieza
- Cuando lo limpie, desenchufe el cable de alimentación y limpie
con cuidado con un paño suave y seco. No rocíe el televisor
con agua u otros líquidos directamente. No limpie el televisor
con productos químicos como limpiador de cristales, cualquier
tipo de ambientador, insecticida, lubricantes, cera (automóvil,
industrial), abrasivo, diluyente, benceno, alcohol, etc., que
pueden dañar el producto y / o su panel. Podría causar daños al
producto o una descarga eléctrica.
4
Page 29

Preparación
C
Complementos opcionales
• Cuando se enciende la TV por primera vez después de ser
enviada desde la fábrica, la inicialización de la TV puede tardar
aproximadamente un minuto.
• La imagen puede ser diferente a la de su televisor.
• El OSD (On Screen Display, Despliegue En la Pantalla) de su TV
puede ser un poco diferente que este manual.
• Los menús y las opciones disponibles pueden variar según la fuente
de entrada que utilice.
• Es posible que se agreguen nuevas funciones a este televisor en
el futuro.
• El dispositivo debe estar cerca de un tomacorriente. Algunos
dispositivos no cuentan con un botón de apagado/encendido, para
apagar el dispositivo desconecte el cable de alimentación.
• Los artículos suministrados con el producto adquirido pueden
variar según el modelo.
• Es posible que cambien las especicaciones del producto o el
contenido del manual sin previo aviso, debido a las actualizaciones
de las funciones del producto.
• Para que la conexión sea óptima, los cables HDMI y los dispositivos
USB tienen que tener biseles que no superen los 8 mm de espesor,
los 18 mm de ancho y los 8 mm de diámetro del cable.
• Utilice un cable de extensión que sea compatible con o
superior en caso de que el cable USB o la tarjeta de memoria USB
no encajen en el puerto USB del TV.
B
A
B
A
* A ≦ 8 mm
* B ≦ 18 mm
* C ≦ 8mm
Los complementos opcionales se pueden cambiar o modicar para
mejorar la calidad, sin necesidad de aviso previo. Para adquirir estos
elementos, comuníquese con su distribuidor. Estos dispositivos solo
funcionarán en ciertos modelos. Es posible que el nombre o el diseño
del modelo hayan cambiado, debido a las circunstancias o políticas del
fabricante.
ESPAÑOL
Control Remoto Mágico
MR20GA
Verique que su modelo de televisor admita Bluetooth en las
especicaciones de módulo inalámbrico para asegurarse de que puede
utilizarse con el Remoto Mágico.
Soporte
(Según el modelo)
Soporte Modelo
AN-GXDV65 OLED65GX*
AN-GXDV77 OLED77GX*
• Utilice un cable certicado con el logotipo de HDMI adjunto. Si
no utiliza un cable HDMI certicado, es posible que la pantalla no
muestre imágenes o que ocurra un error de conexión.
• Tipos de cable HDMI recomendados (3 m o menos)
- Cable HDMI®/™ de velocidad ultra alta
• Al instalar la base del televisor, ponga la pantalla hacia abajo sobre
una mesa acolchada o una supercie plana para evitar rayas.
• Asegúrese de estrujar el exceso de agua o limpiador del paño.
• No rocíe agua o limpiador directamente en la pantalla de la
televisión.
• Asegúrese de rociar suciente agua o limpiador en un paño seco
para limpiar la pantalla.
5
Page 30

Soporte de pared
A
B
(Según el modelo)
Asegúrese de utilizar tornillos y soportes de pared que cumplan con el
estándar VESA. En la tabla siguiente se detallan las dimensiones de los
conjuntos de montaje de pared.
ESPAÑOL
Modelo OLED65/77GX*
VESA (A x B) (mm) 300 x 300
Tornillo estándar M6
Cantidad de
tornillos
Soporte de pared OLW480B
4
• Sostenga con rmeza la parte lado e inferior del marco del
televisor. Asegúrese de no sostenerlo por la parte transparente, por
la bocina o por el área de rejillas de las bocinas.
• Utilizar al menos dos personas para mover un televisor grande.
• Al transportar el televisor con las manos, sosténgalo como se indica
en esta ilustración.
Levantamiento y traslado
de su TV
Si desea levantar o trasladar el televisor, lea las instrucciones a
continuación para no rayar o dañar el aparato, y para transportarlo de
forma segura, independientemente del tamaño o tipo de aparato.
• Se recomienda trasladar el televisor en la caja o el material de
empaque en el que lo recibió al comprarlo.
• Antes de mover o levantar el televisor, desconec te el cable de
alimentación y el resto de los cables.
• Cuando sostenga la televisión, la pantalla debe estar orientada
lejos de usted para evitar algún daño.
• Al transportar el televisor, no lo someta a sacudones o vibración
excesiva.
• Al transportar el televisor manténgalo en posición vertical, nunca
lo apoye sobre uno de los costados, ni lo incline hacia la derecha o
la izquierda.
• Cuando manipule la televisión, tenga cuidado de no dañar los
botones salientes.
• No toque la pantalla. De lo contrario, podría dañarla.
• No coloque el producto en el piso con la parte frontal
hacia abajo sin una almohadilla. Al hacerlo puede causar
daños a la pantalla.
• Al instalar la base del televisor, ponga la pantalla hacia
abajo sobre una mesa acolchada o una supercie plana
para evitar rayas.
6
Page 31

Montar sobre una mesa
1 Levante el televisor y déjelo en posición vertical sobre la mesa.
• Deje un espacio mínimo de 10 cm entre el televisor y la pared para
asegurar una ventilación adecuada.
Sujeción del televisor a la pared
10 cm
10 cm
(Según el modelo)
2 Conecte el cable de alimentación al tomacorriente de la pared.
• No aplique sustancias ex trañas (aceites, lubricantes, etc.)
a las piezas de los tornillos para el montaje del producto.
(Se podría dañar el producto.)
• S i instala la televisión en un soporte, debe tomar medidas
para evitar que el producto se vuelque. De lo contrario, el
producto puede caerse y provocar lesiones.
• No use ningún producto no autorizado para garantizar la
seguridad y la vida útil del producto.
• Ningún daño o lesiones por el uso de elementos no
autorizados están cubiertos por la garantía.
• A segúrese de que los tornillos estén completamente
ajustados. (Si no están lo sucientemente ajustados, el TV
puede inclinarse hacia delante después de instalarse.)
• Cuando instale el producto en un armario o un estante
utilizando una base, asegúrese de que el ancho de esta
base sea mayor a la del televisor.
• No ajuste los tornillos con demasiada fuerza, de lo
contrario, se pueden desgastar y aojar.
10 cm
10 cm
10 cm
ESPAÑOL
(Según el modelo)
1 Inserte y ajuste los tornillos de ojo del televisor en su parte posterior.
• En caso de que haya tornillos insertados, primero retírelos.
2 Utilice los tornillos para colocar los soportes correspondientes en
la pared. Haga coincidir la ubicación del soporte de pared y los
cáncamos de la parte posterior de la televisión.
3 Conecte los tornillos de ojo y los soportes con un cordón fuerte y
ajústelos con rmeza. Asegúrese de mantener el cordón en posición
horizontal a la supercie plana.
• Utilice una plataforma o un armario que sea lo sucientemente
fuerte y grande para sostener el televisor de manera segura.
• Los soportes, los tornillos y los cordones son opcionales. Puede
solicitar otros accesorios a través de su distribuidor local.
7
Page 32

Montaje en la pared
Se puede usar un soporte de pared opcional con el televisor LG. Consulte
al distribuidor local para adquirir un soporte de pared que cumpla con
el estándar VESA que usa su modelo de TV. Cuidadosamente coloque
el soporte de pared en la parte posterior del TV. Instale el soporte de
pared en una pared sólida, perpendicular al piso. Si va a instalar el
TV sobre otros materiales de construcción, póngase en contacto con
personal técnico calicado para instalar el soporte de pared. El soporte
ESPAÑOL
de pared incluirá instrucciones detalladas. Recomendamos que use un
soporte de pared de marca LG. El soporte de pared LG hace que sea fácil
ajustar o conectar los cables. Cuando no utilice el soporte de montaje de
pared LG, por favor, utilice un soporte de montaje de pared en el que el
dispositivo esté debidamente sujeto a la pared con el espacio suciente
para permitir la conectividad con dispositivos externos. Si utiliza un
soporte no ajustable, instale el soporte en la pared. Primero, conecte los
cables a la TV, luego instale la T V en el soporte.
10 cm
10 cm
(Según el modelo)
• Antes de montar el televisor en la pared, retire la base,
realizando la instalación de ésta en orden inverso.
• Para obtener más información sobre los tornillos y el
soporte de montaje en pared, consulte la sección de
compras por separado.
• S i desea montar el producto en una pared, instale la
interfaz de soporte estándar VESA (piezas opcionales)
en la parte posterior del producto. Cuando instale el
producto para usar la interfaz de montaje en pared
(piezas opcionales), fíjelo con cuidado para que no se
caiga.
• Cuando monte la televisión en la pared, no la instale
colgándola por los cables de señal y alimentación que se
encuentran en su parte posterior.
• No instale este producto en una pared si podría ser
expuesto a aceite o vapor de aceite. Esto podría dañar el
producto y hacer que se caiga.
• Cuando se instala el Sopor te de pared de contacto
completo, es posible que el televisor no tenga un
contacto rme con la pared debido a las condiciones
de esta.
10 cm
10 cm
10 cm
Para obtener más información, mire el video de
instalación en su dispositivo inteligente.
Precauciones de seguridad
(Excepto OLW480B)
• Los instaladores profesionales deben leer atentamente este manual
para garantizar una instalación correcta.
• Luego de la instalación, los instaladores profesionales deben
remitir este manual a los clientes y recomendarles que lo lean y
guarden en un lugar accesible para consultar en un futuro.
Después de leer el manual de instalación, guárdelo en un lugar
accesible para consultar en un futuro.
• Solicite que un instalador profesional designado por la
tienda realice la instalación del producto.
La instalación realizada por otra persona que no sea un
instalador profesional es sumamente peligrosa y puede
producir lesiones personales.
• No instale el producto en un lugar inestable que no pueda
soportar el peso.
Si el lugar de instalación no es lo sucientemente rígido, el
producto podría caerse y ocasionar lesiones personales.
• Póngase en contacto con un instalador profesional
designado por la tienda antes de mover o reemplazar el
producto luego de la instalación.
La instalación es una tarea técnica, por lo que pueden
surgir problemas de seguridad si una persona intenta
instalar o mover el producto por su cuenta.
• No se cuelgue del producto ni lo someta a fuertes impactos
luego de la instalación.
Si lo hace, podría hacer que el producto se caiga y
ocasionar lesiones personales.
• Cuando instale el producto en la pared, no cuelgue los
cables de señal y alimentación desde la parte posterior
del televisor.
Esto puede dañar los cables y provocar un incendio, una
descarga eléctrica o un mal funcionamiento del producto.
• Asegúrese de usar guantes de trabajo cuando instale el
producto.
- Si instala el producto sin protección en las manos,
podrían producirse lesiones.
8
Page 33

• Instale el producto según las instrucciones del manual de
instalación.
Si no se instala el producto según las instrucciones del
manual de instalación, se pueden producir lesiones
personales o daños en el producto.
• Asegúrese de tener al menos dos personas al instalar o al
ajustar la altura del producto.
Si se intenta realizar la instalación o los ajustes por cuenta
propia, se pueden producir lesiones personales o daños en
el producto.
• Asegúrese de que haya una pared disponible antes de
proceder con la instalación. Utilice los anclajes y tornillos
suministrados con el producto.
Los anclajes y tornillos no autorizados podrían no soportar
el peso del producto, lo que supone un riesgo para la
seguridad.
• Cuando taladre en la pared para la instalación, asegúrese
de utilizar brocas y taladros del diámetro especicado. Siga
las instrucciones para la profundidad del oricio.
Si se taladra y se instala el producto de forma distinta
a la especicada en el manual de instalación, se puede
producir una instalación inestable y posibles problemas
de seguridad.
• No limpie el producto con un paño mojado ni utilice
ningún equipo de calefacción o humicador debajo del
lugar donde se instaló el producto.
El agua en estado líquido o el vapor puede entrar en el
producto y el calor excesivo podría provocar un incendio,
una descarga eléctrica o un mal funcionamiento.
• No instale el producto cerca de un rociador o detector
de incendios, un lugar en donde se puedan producir
vibraciones o golpes, o cerca de un cable de alto voltaje o
fuente de alimentación.
• Desconecte el cable de alimentación del tomacorriente
antes de la instalación.
Si se instala el producto con el cable de alimentación
conectado, se podrían provocar descargas eléctricas o
incendios.
• No instale el producto con las manos descubiertas.
Asegúrese de usar guantes de trabajo.
Si se intenta realiza la instalación sin guantes de trabajo, se
podrían producir lesiones personales.
• Conecte el producto con el cable suministrado. El uso de
un cable no autorizado puede provocar daños debidos a la
fricción con la pared. Asegúrese de usar el tipo de conexión
que se suministra (puede variar según el modelo).
Antes de la instalación
(Excepto OLW480B)
• No utilice el producto para otro n que no sea instalar el televisor
en la pared.
• Evite daños en el producto e incidentes de seguridad causados por
la instalación descuidada o el uso de montaje de pared inadecuado
o no autorizado.
• Siga las instrucciones del manual de instalación para realizar una
instalación adecuada del montaje de pared.
• Interrumpa la instalación de inmediato y póngase en contacto con
el centro de servicio si no puede comprender del todo el proceso
de instalación.
Llame a un instalador profesional si continúan los problemas de
instalación después de la consulta.
• Se recomienda la instalación de este producto en una pared
de hormigón o en una viga de madera. No se recomienda la
instalación de este producto en otras supercies (panel de yeso,
madera contrachapada, ladrillos, etc.). La instalación incorrecta
podría provocar la caída del producto.
• Instale el producto solo en una pared vertical.
No instalar en una pared inclinada que exceda las normas de
construcción ni en una pared muy inclinada o en el techo.
LG no es responsable de los problemas ocasionados por la
instalación incorrecta del producto, p.ej., en paredes muy
inclinadas o techos.
• Verique que todos accesorios estén incluidos antes de la
instalación. No nos hacemos responsables por ningún accesorio
dañado o faltante una vez que se abra el embalaje interior.
• Cuando un bebé o un niño pequeño traga los accesorios incluidos,
pueden producirse varios accidentes de seguridad, como la asxia.
Mantenga los accesorios incluidos fuera del alcance de los bebés
y niños.
• Al apretar los tornillos, ajústelos completamente.
Trate de no ajustar demasiado los tornillos. Si lo hace, puede dañar
la pared y el producto, o reducir la rigidez o rendimiento de este.
• Evite instalar un televisor que exceda la carga de tracción y no
permita que se aplique ninguna fuerza externa al producto.
• Evite accidentes mediante el uso cuidadoso de las herramientas de
trabajo durante la instalación.
Herramientas para la instalación
• Destornillador en forma de “+” (manual o eléctrico) / nivel / taladro
/ broca de8mm para hormigón o broca de 4mm para acero
ESPAÑOL
9
Page 34

Sujeción del televisor a la pared
(Excepto OLW480B)
(Para la instalación en pared de hormigón)
1 Taladre oricios en la ubicación del anclaje con una broca de
8mm de diámetro a una profundidad de entre 80mm y 100mm.
ESPAÑOL
• Utilice el televisor cerca de la pared después de la instalación.
Cómo jar anclajes y tornillos
(Excepto para OLW480B)
Asegúrese de lo siguiente:
• Verique que el material, el espesor de la pared y el material
de acabado cumplan con el manual de instrucciones. Antes de
comenzar el proceso de instalación, debe asegurarse de que la
pared pueda soportar el peso del televisor.
• Debe utilizar los anclajes y tornillos incluidos en paredes de
concreto-libres de suras.
• No instale el producto en un panel de yeso o en una pared hecha de
papel o de bra de densidad media (MDF). Cuando sea necesario
instalar el producto en este tipo de pared, los tornillos de anclaje
deben estar sujetos a muros de contención (hormigón) o a una viga
de madera dentro del material de acabado.
• El soporte de pared debe colocarse en una viga. En general, esto no
es un problema, pero dependiendo de cada situación individual,
puede haber casos en los que no sea posible instalarlo en una viga.
En este caso, hay una gran variedad de anclajes para paneles de
yeso, como los anclajes mariposa, que podrían ofrecer una solución.
Si utiliza anclajes para paneles de yeso, asegúrese de estos y la
pared puedan soportar el peso del televisor. Tenga en cuenta que
los anclajes proporcionados pueden no ser los correctos para su
situación individual, por lo que le recomendamos consultar con un
profesional local.
• Otras paredes no especicadas deben ser capaces de soportar
cargas de tracción de más de 70kgf (686N) y cargas de corte de
más de 100kgf (980N) por sujetador.
• Utilice una broca de 8mm de diámetro para el hormigón y un
taladro percutor (de impacto) o una broca de 4mm de diámetro
para vigas de madera cuando desee taladrar oricios.
2 Limpie los oricios taladrados.
3 Inserte los anclajes incluidos para jar el montaje de pared en los
oricios (utilice un martillo para insertar los anclajes).
Anclaje para soporte de pared
4 Empuje el soporte de pared muy cerca de la pared para que
coincida con las ubicaciones de los oricios.
5 Ajuste los tornillos para jar el montaje de pared en los oricios.
En este momento, ajuste los tornillos con una fuerza de torsión
de 45kgf/cm a 60kgf/cm.
Tornillo para soporte de pared
10
Page 35

(Para la instalación en vigas de madera)
Utilice la broca de 4mm de diámetro para vigas de madera cuando
desee taladrar oricios de 76mm de profundidad (Limpie el oricio
taladrado).
Panel de yeso
Conexiones
Se pueden conectar dispositivos externos al TV. Para más información
acerca de la conexión de dispositivos externos, diríjase al manual que
viene con cada dispositivo.
76mm
Viga de madera
Sin usar el anclaje para soporte de pared, ajuste el tornillo para soporte
de pared directamente en la viga de madera.
Después de la instalación
• Cuando conecte cables adicionales desde los laterales,
le recomendamos que sujete el centro del televisor
horizontal o verticalmente y que jale del producto para
garantizar que esté a una distancia apropiada de la pared
antes de la conexión.
• Cuando conecte cables adicionales desde la par te inferior,
le recomendamos sacar el televisor del montaje de pared
antes de conectarlos.
• Utilice los sistemas de tendido de cables para acomodar
los cables debajo del televisor como se muestra a
continuación. Los tendidos de cables no vienen con el
producto, por lo tanto, cómprelos por separado.
(Por ejemplo)
Antena/cable
Para ver televisión, conecte una antena, un cable o una caja de cable.
Las ilustraciones pueden diferir de los elementos reales y el cable RF
es opcional.
• Asegúrese de no doblar el alambre de cobre del cable de RF.
Alambre de cobre
• Primero conecte todos los dispositivos entre sí y luego conecte el
cable de alimentación al tomacorriente, para que el televisor no
resulte dañado.
• Para mejorar la calidad de la imagen en una zona con poca señal,
compre un amplicador de señal.
• Utilice un divisor de señal para usar 2 televisores o más.
• Si la antena no está instalada correctamente, póngase en contacto
con su distribuidor para obtener ayuda.
• Códec compatible con Audio DTV (Según del país): MPEG, AAC,
HE-AAC, Dolby Digital, Dolby Digital Plus
• Esta televisión no puede recibir transmisiones ULTRA HD
(3840x2160píxeles) directamente, ya que los estándares
relacionados no han sido conrmados.
Otras conexiones
Conecte su TV a dispositivos externos. Para tener una mejor calidad de
imagen y audio, conecte el dispositivo externo y el televisor con el cable
HDMI tal como se muestra.
ESPAÑOL
• D espués de instalar el producto, asegúrese de usarlo
adherido a la pared.
- Es posible que el producto se dañe o golpee si se
utiliza sin estar adherido a la pared.
11
Page 36

HDMI
• Cuando conecte el cable HDMI, el producto y los dispositivos
externos deben estar apagados y desenchufados.
• Formato de audio HDMI admitido : (Según el modelo)
True HD (48 kHz),
Dolby Digital / Dolby Digital Plus (32 kHz / 44,1 kHz / 48 kHz),
PCM (32 kHz / 44,1 kHz / 48 kHz / 96 kHz / 192 kHz)
• → → [Imagen] → [Conguraciones Adicionales] →
ESPAÑOL
[HDMI ULTRA HD Deep Color]
- Encendido: Compatible con 4K a 50/60Hz (4:4:4, 4:2:2, 4:2:0),
4K a 100/120Hz (4:4:4, 4:2:2, 4:2:0)
- Apagado: Compatible con 4K a 50/60Hz (4:2:0)
Si el dispositivo conectado al puerto de entrada también es
compatible con ULTRA HD Deep Color, la imagen se verá más nítida.
Sin embargo, si el dispositivo no es compatible, no funcionará de
manera correcta. En ese caso, desactive la conguración [HDMI
ULTRA HD Deep Color] del televisor.
Emisor de IR
• Controle el decodicador (cable/satélite/IP/OTT), reproductor
Blu-ray/DVD, barra de sonido, consolas de juegos, etc. con el emisor
de IR. (Según del país)
- Conecte el cable del emisor de IR al puerto del emisor de IR del
televisor.
- Ubique ambos extremos (uno o dos) del emisor de IR frente al
dispositivo externo como se muestra en la imagen que está a
continuación.
- Utilice la conguración de control remoto universal para
manejar el dispositivo. Vaya a → → [Conexión] →
[Conguración de Conexión de Dispositivo] → [Conguración de
Control Remoto Universal].
- Fije el emisor de IR con la cinta 3M provista.
Dispositivos externos
Los dispositivos externos compatibles son: Reproductores de Blu-ray,
receptores de HD, reproductores de DVD, VCR, sistemas de audio,
dispositivos de almacenamiento USB, PC, dispositivos de juegos y otros
dispositivos externos.
• Si graba un programa de televisión en una grabadora de Blu-ray/
DVD o VCR, asegúrese de conectar el cable de entrada de señal
al TV a través de la grabadora de DVD o VCR. Para obtener
más información acerca de la grabación, consulte el manual
proporcionado con el dispositivo conectado.
• Las conexiones de dispositivos externos que se muestran pueden
ser levemente diferentes de las ilustraciones en el manual.
• Conecte los dispositivos externos al televisor independientemente
del orden del puerto del aparato.
• Si conecta un dispositivo de juego al televisor, utilice el cable
provisto con un dispositivo de juego.
• Consulte el manual del equipo externo para ver las instrucciones de
funcionamiento.
• En el modo PC, es posible que haya ruido asociado con la
resolución, los patrones verticales, el contraste o el brillo. Si se
producen ruidos, cambie la resolución de la salida de la PC, cambie
la frecuencia de actualización o ajuste el brillo y el contraste en
el menú [Imagen] hasta que la imagen mejore. En función de
la tarjeta gráca, es posible que algunas conguraciones de la
resolución no permitan que la imagen se ubique en la pantalla de
forma correcta.
• Es posible que algunos concentradores USB no funcionen. Si no se
detecta un dispositivo USB conectado a través de un concentrador
USB, conéctelo directamente al puerto USB de la televisión.
• Cuando se conecta a través de una red LAN por cable, se
recomienda utilizar un cable CAT 7.
12
Page 37

Uso del botón
Puede operar la televisión con el botón.
Funciones básicas
Encendido (Presionar)
Apagado 1 (Mantener presionado)
Control de menú (Presionar 2)
Selección de menú (Mantener presionado 3)
1 Todas las aplicaciones en ejecución se cerrarán y cualquier grabación
en curso se detendrá.
2 Si presiona el botón cuando la televisión está encendida, puede
acceder al menú y ajustarlo.
3 Puede utilizar la función cuando accede al control de menú.
Ajuste del menú
Mientras la televisión está encendida, presione una vez el botón .
Puede ajustar los elementos del menú con los botones.
Apagar alimentación.
Cambia la fuente de entrada.
Ajusta el nivel del volumen.
ESPAÑOL
Permite desplazarse por los canales guardados.
13
Page 38

Uso del Control Remoto
Mágico
(Según el modelo)
Las descripciones en este manual se basan en los botones en el control
remoto. Lea atentamente este manual y siga las instrucciones de uso.
Cuando se muestra el mensaje "[Batería del Control Remoto Mágico
ESPAÑOL
está baja. Por favor cambie la batería.]", reemplace la batería.
Para instalar las baterías, abra la tapa de las baterías, coloque otras
(AA 1,5Vcc) y haga coincidir los extremos y con la etiqueta
que se encuentra dentro del compartimiento. A continuación, cierre
la tapa. Asegúrese de que el control remoto mágico apunte hacia el
sensor correspondiente del TV. Para retirar las baterías, realice la acción
de instalación a la inversa. Este control remoto utiliza luz infrarroja. Al
usarlo, es necesario apuntarlo en dirección al sensor remoto del TV.
1 1
1
(Algunos botones y servicios pueden no proporcionarse dependiendo de
los modelos o regiones.)
14
Para utilizar el botón, mantenga presionado durante más
de un segundo.
(Encendido) Enciende o apaga el TV.
(ENCENDIDO DEL DECODIFICADOR) Para encender o apagar su
decodicador, agréguelo al control remoto universal de la televisión.
Botones Numerales Permiten introducir números.
Permite acceder a [Ayuda rápida].
(GUIÓN) Inserta un entre los números, por ejemplo, 2-1 y 2-2.
Permite acceder a la lista de canales guardados.
(Más acciones) Muestra más funciones del control remoto.
**
Permite editar ACCESO RÁPIDO.
- ACCESO RÁPIDO es una función que le permite ingresar a
una aplicación en particular o al Menú en vivo al mantener
presionados los botones numéricos.
La función SAP (Programa de audio secundario) también se
puede habilitar si se mantiene presionada la tecla.
Ajusta el nivel del volumen.
(SILENCIO) Silencia todos los sonidos.
(SILENCIO) accede al menú [Accesibilidad].
Permite desplazarse por los canales guardados.
(Reconocimiento de voz) Se requiere una conexión de red para
utilizar la función de reconocimiento de voz.
Eche un vistazo al contenido recomendado. (algunos servicios
recomendados pueden no estar disponibles en algunos países).
(Reconocimiento de voz) Hable mientras mantiene presionado
el botón para usar la función de reconocimiento de voz.
(HOME) Permite acceder al menú Home.
(HOME) Muestra el historial anterior.
(Configuraciones rápidas) Permite acceder a Conguraciones
Rápidas.
(Configuraciones rápidas) Muestra el menú [Todos los
ajustes].
Rueda (OK) Presione el centro del botón para seleccionar un
menú. Puede cambiar los canales utilizando el botón .
(arriba/abajo/izquierda/derecha) Presione los
botones arriba, abajo, izquierda o derecha para desplazarse por el
menú. Si presiona los botones mientras el puntero está
en uso, éste desaparecerá de la pantalla y el Control Remoto Mágico
funcionará como un control remoto común. Para ver el puntero en la
pantalla nuevamente, agite el Control Remoto Mágico a la izquierda
y a la derecha.
(ATRÁS) Permite volver al nivel anterior.
(ATRÁS) Limpia la visualización en pantalla y vuelve a la última
vista de entrada.
Muestra el evento del programa según la hora programada.
Botones para servicios de transmisión Se conecta al servicio
1
de transmisión de video.
(ENTRADA) Accesar a las fuentes de entrada.
(ENTRADA) Permite acceder a [Panel del hogar].
, , , Estos accesos de funciones especiales son
usados en algunos menús.
**
Permite grabar.
, (Botones de control) Controla contenido de medios.
Page 39

Registro del Control Remoto Mágico
Guía del usuario
Cómo registrar el Control Remoto Mágico
Para utilizar el Control Remoto Mágico, primero emparéjelo con su TV.
1 Coloque las baterías en el Control Remoto Mágico y encienda la TV.
2 Apunte el Control Remoto Mágico hacia la TV y presione el botón
Rueda (OK) en el control remoto.
* Si no puede registrar el Control Remoto Mágico, inténtelo
nuevamente después de apagar y volver a encender la TV.
Cómo cancelar el registro del Control
Remoto Mágico
Presione los botones (ATRÁS) y (HOME) al mismo tiempo,
durante cinco segundos, para desemparejar el Control Remoto Mágico
con su TV.
* Mantenga presionado el botón por más de 5 segundos para
descontectar y volver a registrar el Control Remoto Mágico a la vez.
• S e recomienda ubicar el punto de acceso (AP) a más
de 0,2 metros de distancia del televisor. Si el punto de
acceso instalado es menor que 0,2 metros, el Control
Remoto Mágico no funcionará como se espera debido a la
interferencia de frecuencias.
• No mezcle las baterías nuevas con las usadas. Esto podría
provocar el recalentamiento y la ltración de las baterías.
• Introducir las baterías sin hacer coincidir su polaridad
puede causar ltraciones o quemar la batería, lo que
podría provocar un incendio, lesiones en personas o
contaminación ambiental.
• Este aparato usa baterías. Puede ser que en su
comunidad existan normativas que requieren que
deseche estas baterías de forma correcta debido a las
consideraciones ambientales. Póngase en contacto con
la autoridad local para obtener información acerca del
desecho o reciclaje.
• Las baterías dentro del producto no deben exponerse a
calor excesivo como luz solar, fuego, entre otras.
Para obtener más información sobre este TV, lea la GUÍA DEL USUARIO
que se adjunta al producto.
• Para abrir la GUÍA DEL USUARIO → → [Asistencia] →
[Guía del usuario]
Solución de problemas
No se puede controlar el televisor con el control remoto.
• Compruebe si puso cualquier cosa sobre el receptor, como por
ejemplo cinta adhesiva.
• Compruebe que no haya ningún obstáculo entre el producto y el
control remoto.
• Sustituya las baterías por unas nuevas.
No se muestra ninguna imagen ni se emite sonido.
• Compruebe si el producto está encendido.
• Compruebe si el cable de alimentación está conectado a la toma
de la pared.
• Conecte otros productos para comprobar si hay un problema con la
toma de la pared.
El televisor se apaga de repente.
• Compruebe la conguración del control de energía. Es posible que
el suministro eléctrico se interrumpa.
• Verique si la función de apagado automático está activada en la
conguración relacionada al tiempo.
• Si no hay señal mientras el televisor está encendido, este se
apagará automáticamente después de 15 minutos de inactividad.
ESPAÑOL
15
Page 40

Visualización anormal
• Si siente que el televisor está frío al tocarlo, es posible que ocurra
un pequeño parpadeo cuando lo prenda. Se trata de algo normal
y no signica que el televisor esté dañado. También es posible
que aparezcan pequeños puntos en la pantalla, de color rojo,
verde o azul. Sin embargo, no afectan el rendimiento del televisor.
No toque la pantalla ni coloque los dedos sobre ella durante
mucho tiempo. Esto podría producir algunos efectos de distorsión
ESPAÑOL
temporales en la pantalla.
• Este panel es un producto avanzado que contiene millones de
píxeles. En raras ocasiones, es posible que note la presencia de
pequeños puntos en la pantalla mientras mira televisión. Estos
puntos son píxeles desactivados y no afectan el rendimiento ni la
abilidad del televisor.
Reproducción de ruidos
• Crujidos Es posible que se produzcan crujidos cuando esté mirando
televisión o al apagar el televisor; se trata de un ruido generado
por la contracción térmica del plástico debido a la temperatura y la
humedad. Este ruido es común en productos donde se requiere la
deformación térmica.
• Zumbidos en el circuito eléctrico o el panel Se trata de un
ruido de bajo nivel, generado por un circuito de conmutación de
alta velocidad, que suministra una gran cantidad de corriente para
que un producto pueda funcionar. Varía según cada producto. Este
ruido no afecta el rendimiento ni la abilidad del producto.
• A segúrese de estrujar el exceso de agua o limpiador del
paño.
• No rocíe agua o limpiador directamente en la pantalla
de la televisión.
• A segúrese de rociar suciente agua o limpiador en un
paño seco para limpiar la pantalla.
16
Page 41

Especicaciones
Las especicaciones del producto pueden cambiar sin previo aviso debido a las actualizaciones de las funciones de los productos.
(Según del país)
Especificaciones de transmisión
Modelo OLED65GXPSA, OLED77GXPSA OLED65GXPDA, OLED77GXPDA
Digital Analógica Digital Analógica
Sistema de televisión SBTVD (ISDBT) NTSC / PAL-M / PAL-N DVB-T / T2 NTSC / PAL-M / PAL-N
VHF 2 - 13
Cobertura de programas
Impedancia de la antena
externa
Rango de frecuencias Potencia de salida (máxima)
2400 a 2483,5MHz
5150 a 5725MHz
5725 a 5850MHz
Rango de frecuencias Potencia de salida (máxima)
2400 a 2483,5MHz 9 dBm
Debido a que las bandas de canales pueden variar según el país, el usuario no puede cambiar o ajustar la frecuencia operativa. Este producto está
congurado para la tabla de frecuencias regional.
Para que el usuario tenga en cuenta, este dispositivo solo se debe instalar y utilizar a una distancia mínima de 20cm entre el dispositivo y el
cuerpo.
FCC ID: BEJLGSBWAC94 / IC: 2703H-LGSBWAC94
UHF 14 - 69
DTV 2 - 69
CATV 1 - 135
75 Ω
Módulo inalámbrico LG (LGSBWAC94) Especificación
Inalámbrico LAN (IEEE 802.11a/b/g/n/ac)
Bluetooth
VHF 2 - 13
UHF 14 - 69
DTV 2 - 69
CATV 1 - 125
17,5 dBm
18 dBm
18 dBm
ESPAÑOL
17
Page 42

Condición de ambiente
Temperatura de funcionamiento 0 °C a 40 °C
Humedad de funcionamiento Menos de 80 %
Temperatura de almacenamiento -20 °C a 60 °C
Humedad de almacenamiento Menos de 85 %
• La información de energía proporcionada en el producto se muestra de acuerdo con la regulación aplicable en cada respectivo país,
ESPAÑOL
(Dependiendo del país).
- El consumo de energía se midió de acuerdo con la norma IEC 62087.
• El consumo de energía real depende del entorno de uso (ejemplo: El contenido que se visualiza, la conguración del televisor, etc.).
• Para obtener más información sobre la fuente de alimentación y el consumo de energía, consulte la etiqueta adherida al producto.
- El consumo de energía típico se mide de acuerdo con la norma IEC 62087 o con las regulaciones de energía de cada país.
* En algunos modelos, la etiqueta está dentro de la tapa de los terminales de conexión de dispositivos externos.
* Según el modelo o el país, es posible que no se muestre el consumo de energía típico en la etiqueta.
* Chile: El consumo de energía típico = Potencia modo activo/ Potencia típica
18
Page 43

Software de código abierto
Para obtener el código fuente bajo GPL, LGPL, MPL y otras licencias de
código abierto que contiene este producto, visite
http://opensource.lge.com.
Además del código fuente, se pueden descargar los términos de la
licencia, las anulaciones de la garantía y los avisos de derechos de autor.
LG Electronics también le proporcionará el código abierto en un CD-ROM
por un costo que cubra los gastos de dicha distribución (como el costo
del medio, del envío y de la manipulación) una vez realizado el pedido
por correo electrónico a la dirección opensource@lge.com.
Esta oferta es válida solo durante un período de tres años después de
que se envíe el último cargamento de este producto. Esta oferta es
válida para todo aquel que reciba esta información.
Licencias
ESPAÑOL
(Únicamente el modelo compatible de Magic Remote)
19
Page 44

Información importante
para evitar la retención de
imágenes
OLED es una tecnología de emisiones automáticas, que ofrece muchas
ventajas en cuanto a la calidad y el rendimiento de las imágenes.
Como con cualquier pantalla de emisiones automáticas, los usuarios de
ESPAÑOL
televisores OLED pueden experimentar retención temporal de la imagen
en determinados momentos, como cuando se muestra una imagen
estática en pantalla por un período prolongado. Los televisores OLED
de LG incorporan funciones dedicadas que protegen la pantalla de una
posible retención de imagen.
Si una imagen estática persiste en la pantalla, el brillo de esta se
reduce de forma automática en ciertas áreas o en su totalidad. Una vez
que la imagen estática desaparece, el brillo de la pantalla volverá a
su conguración previa de forma automática. Esto no signica que el
producto funcione mal.
Ejemplos de imágenes que pueden
causar retención de imagen
• Las imágenes jas o congeladas con cierta información que se
muestren en forma ininterrumpida en la pantalla, como los
números de canales, los logos de estaciones, los títulos de películas,
subtítulos de películas o noticias y titulares.
• Menús o íconos jos de consolas de videojuegos o decodicadores.
• Barras negras que se muestran en la parte izquierda, derecha,
superior o inferior de la pantalla, como en las imágenes con
relación de aspecto 4:3 o 21:9.
Medidas recomendadas para evitar
la retención de imagen
• Evite mirar videos que muestren imágenes como las que se
detallan arriba durante períodos prolongados.
• Ajuste su televisor como se detalla debajo al encender un video
que muestre imágenes como las que se detallan arriba durante
períodos prolongados.
- → → [Imagen] → [Conguración para el modo de
imagen] → [Modo de Imagen] → [Eco]
- → → [Imagen] → [Conguración para el modo de
imagen] → [LUZ OLED] → Congurar en el valor más bajo
- → → [Imagen] → [Protector de Pantalla OLED] →
[Ajuste de luminancia del logo] → [Alto]
• Apague la barra de menú del dispositivo externo, como un
decodicador, para evitar que dicha barra se muestre por un
tiempo largo. (Consulte el manual del dispositivo externo
correspondiente para ver las instrucciones).
• Congure tal como se muestra a continuación al mirar un video que
muestra barras negras en forma constante en la parte izquierda,
derecha, superior o inferior, para quitar las barras negras.
- → → [Imagen] → [Conguración de Relación de
Aspecto] → [Relación de Aspecto] → [Zoom vertical] o [Zoom
de 4 direcciones]
Información sobre las funciones
que ofrecen calidad de imagen en
relación con la retención temporal
de imagen
• Los televisores OLED de LG poseen una función llamada Optimizar
Píxeles, que ayuda a evitar la retención temporal de la imagen.
• Si el tiempo de uso acumulado del televisor alcanza o supera las
2000 horas (esto equivale a mirar televisión cinco horas al día
durante un año), Optimizar Píxeles se activará de forma automática
cuando se apague el televisor. Cuando lo apague, aparecerá
un aviso en la pantalla que le informará sobre la activación de
Optimizar Píxeles. Esta función se ejecutará durante una hora
mientras el televisor se encuentre apagado. Es posible que aparezca
una línea horizontal en la parte superior o inferior de la pantalla
cuando el proceso esté a punto de nalizar.
• También puede activar Optimizar Píxeles de forma manual
mediante el menú del televisor: → → [Imagen] →
[Protector de Pantalla OLED] → [Optimizar Píxeles].
• Siempre que mire su televisor durante más de cuatro horas
acumuladas, Pixel Refresher se activará automáticamente durante
unos minutos una vez que se apague el televisor. (Nota: Optimizar
Píxeles no se activará si el cable de alimentación del televisor no
está conectado o si no hay corriente eléctrica.)
20
Page 45

Regulación
¡ADVERTENCIA!
Nunca coloque una televisión en un lugar inestable. Se puede caer y
provocar lesiones graves o la muerte. Puede evitar muchas lesiones,
especialmente en niños, con tan solo tomar simples precauciones,
como:
• Usar los gabinetes o soportes recomendados por el fabricante de
la televisión.
• Apoyar la televisión solamente sobre muebles que soporten su
peso.
• Asegurarse de que la televisión no quede colgando al borde del
mueble.
• No colocar la televisión sobre un mueble alto (por ejemplo,
despensas o estantes) sin anclar tanto el televisor como el mueble
a un soporte adecuado.
• No colocar telas u otros materiales debajo de la televisión cuando
se apoya sobre el mueble.
• Enseñar a los niños los peligros de escalar el mueble para alcanzar
la televisión o sus controles.
Si va a conservar su televisión y reubicarla, debe tener en cuenta las
mismas consideraciones anteriores.
Símbolos
Se reere a la corriente alterna (ca).
Se reere a la corriente continua (cc).
Se reere a los equipos clase II.
Se reere al modo de espera.
Se reere a "ENCENDIDO" (alimentación).
Se reere a voltaje peligroso.
ESPAÑOL
21
Page 46

ESPAÑOL
22
Page 47

ESPAÑOL
sello del
comercio
23
Page 48

Los números de modelo y de serie del producto se
encuentran ubicados en su parte posterior.
Regístrelos en el siguiente espacio por si alguna vez
necesita recurrir al servicio técnico.
Modelo
N.º de serie
 Loading...