

Page 1

ENGLISH
OWNER’S MANUAL
DOCKING SPEAKER
MUSIC IN STYLE
Please read this manual carefully before operating
your set and retain it for future reference.
ND3520
www.lg.com
ND3520-NM.BUSALLK_1755_ENG.indd 1 2012-09-05 2:34:40
Page 2
1 Getting Started
Getting Started2
Safety Information
1
Getting Started
CAUTION: TO REDUCE THE RISK OF ELECTRIC
SHOCK DO NOT REMOVE COVER (OR BACK) NO
USER-SERVICEABLE PARTS INSIDE REFER SERVICING
TO QUALIFIED SERVICE PERSONNEL.
enclosure that may be of sucient magnitude to
constitute a risk of electric shock to persons.
in the literature accompanying the product.
WARNING: This product contains chemicals known
to the State of California to cause cancer and birth
defects or other reproductive harm. Wash hands
after handling.
WARNING: TO PREVENT FIRE OR ELECTRIC SHOCK
HAZARD, DO NOT EXPOSE THIS PRODUCT TO RAIN
OR MOISTURE.
WARNING: Do not install this equipment in a
conned space such as a book case or similar unit.
NOTICE : For safety marking information including
product identication and supply ratings, please
refer to the main label on the bottom of the
apparatus.
CAUTION
RISK OF ELECTRIC SHOCK
DO NOT OPEN
This lightning ash with arrowhead
symbol within an equilateral triangle
is intended to alert the user to the
presence of uninsulated dangerous
voltage within the product’s
The exclamation point within an
equilateral triangle is intended
to alert the user to the presence
of important operating and
maintenance (servicing) instructions
CAUTION concerning the Power Cord
Most appliances recommend they be placed upon a
dedicated circuit;
That is, a single outlet circuit which powers only
that appliance and has no additional outlets or
branch circuits. Check the specication page of this
owner’s manual to be certain. Do not overload wall
outlets. Overloaded wall outlets, loose or damaged
wall outlets, extension cords, frayed power cords, or
damaged or cracked wire insulation are dangerous.
Any of these conditions could result in electric
shock or re. Periodically examine the cord of your
appliance, and if its appearance indicates damage
or deterioration, unplug it, discontinue use of the
appliance, and have the cord replaced with an exact
replacement part by an authorized service center.
Protect the power cord from physical or mechanical
abuse, such as being twisted, kinked, pinched,
closed in a door, or walked upon. Pay particular
attention to plugs, wall outlets, and the point where
the cord exits the appliance. To disconnect power
from the mains, pull out the mains cord plug. When
installing the product, ensure that the plug is easily
accessible.
This device is equipped with a portable battery or
accumulator.
Safety way to remove the battery or the battery
from the equipment: Remove the old battery
or battery pack, follow the steps in reverse order
than the assembly. To prevent contamination of
the environment and bring on possible threat
to human and animal health, the old battery or
the battery put it in the appropriate container at
designated collection points. Do not dispose of
batteries or battery together with other waste.
It is recommended that you use local, free
reimbursement systems batteries and accumulators.
The battery shall not be exposed to excessive heat
such as sunshine, re or the like.
CAUTION: The apparatus shall not be exposed to
water (dripping or splashing) and no objects lled
with liquids, such as vases, shall be placed on the
apparatus.
ND3520-NM.BUSALLK_1755_ENG.indd 2 2012-09-05 2:34:40
Page 3
Getting Started 3
FCC Compliance Statement
This device complies with part 15 of the FCC
rules. Operation is subject to the following two
conditions:
(1) This device may not cause harmful interference,
and
(2) This device must accept any interference
received, including interference that may cause
undesired operation.
NOTE: This equipment has been tested and found
to comply with the limits for a Class B digital device,
pursuant to Part 15 of the FCC Rules. These limits are
designed to provide reasonable protection against
harmful interference in a residential installation. This
equipment generates, uses, and can radiate radio
frequency energy and, if not installed and used
in accordance with the instructions, may cause
harmful interference to radio communications.
However, there is no guarantee that interference
will not occur in a particular installation.
If this equipment does cause harmful interference
to radio or television reception, which can be
determined by turning the equipment o and
on, the user is encouraged to try to correct the
interference by one or more of the following
measures:
yReorient or relocate the receiving antenna.
yIncrease the separation between the equipment
and receiver.
yConnect the equipment into an outlet on a
circuit dierent from that to which the receiver is
connected.
yConsult the dealer or an experienced radio/TV
technician for help.
CAUTION: Any changes or modications not
expressly approved by the party responsible for
compliance could void the user’s authority to
operate this equipment.
FCC RF Radiation Exposure Statement : This
equipment complies with FCC radiation exposure
limits set forth for an uncontrolled environment.
This equipment should be installed and operated
with minimum distance 20 cm between the
radiator and your body. End users must follow the
specic operating instructions for satisfying RF
exposure compliance. This transmitter must not be
co-located or operating in conjunction with any
other antenna or transmitter.
CAUTION: Regulations of the FCC and FAA prohibit
airborne operation of radio-frequency wireless
devices because their signals could interfere with
critical aircraft instruments.
Responsible Party :
LG Electronics USA, Inc.1000 Sylvan Avenue
Englewood Clis, NJ 07632
TEL. : +1-800-243-0000
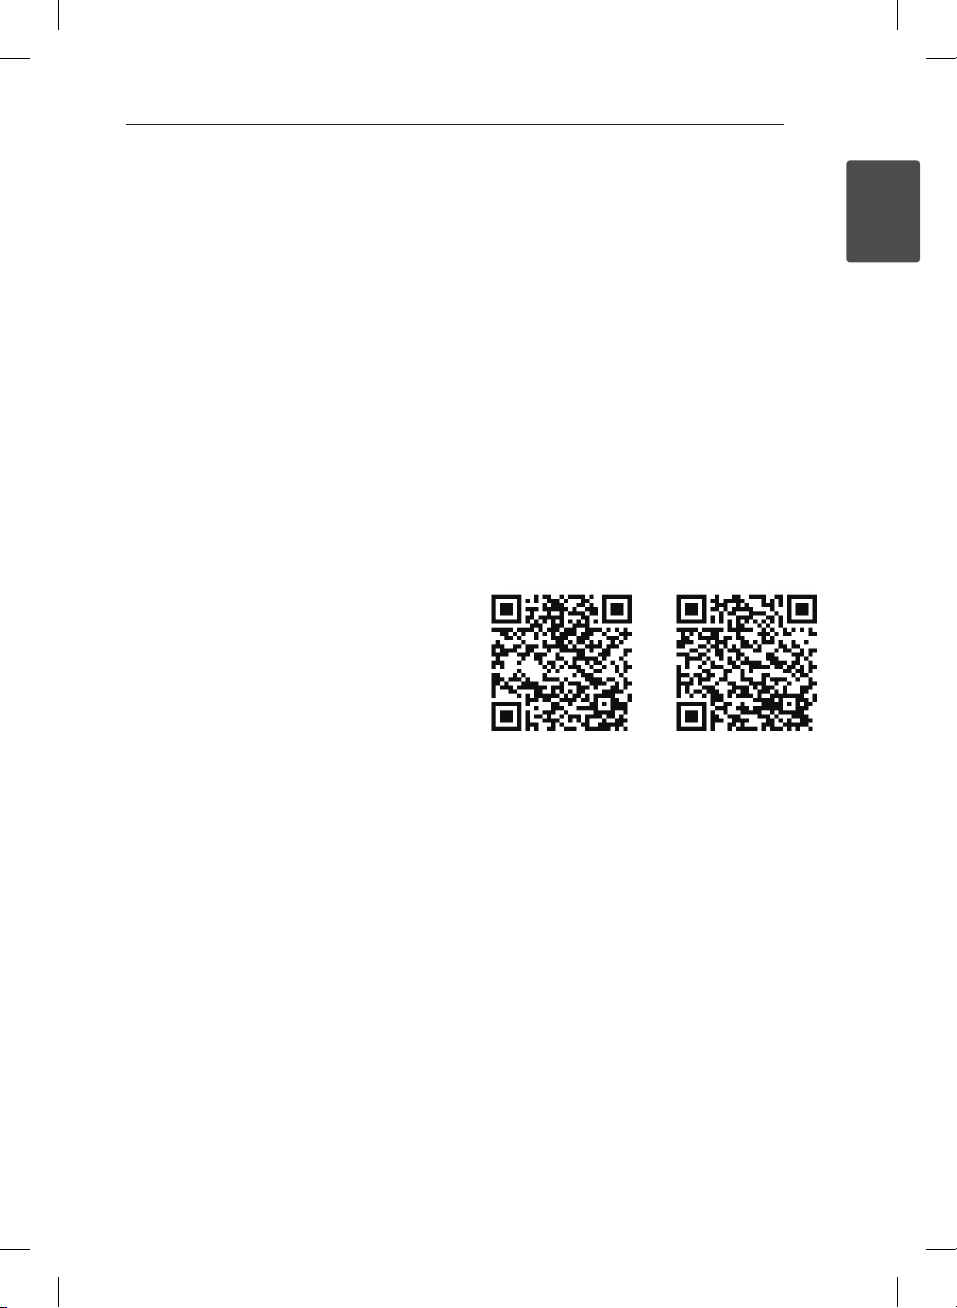
LG Bluetooth Remote
You can control this player with your iPhone or
Android phone via Bluetooth. This player and your
phone must be connected to Bluetooth. Visit “ Apple App Store” or “Google Android Market (Google
Play Store)” . And use this QR code to search for “LG
Bluetooth Remote” app. For detailed information,
refer to the 18 page.
(Android OS)
(Apple iOS)
1
Getting Started
ND3520-NM.BUSALLK_1755_ENG.indd 3 2012-09-05 2:34:41
Page 4

Getting Started4
IMPORTANT SAFETY
INSTRUCTIONS
1
Getting Started
1. Read these instructions.
2. Keep these instructions.
3. Heed all warnings.
4. Follow all instructions.
5. Do not use this apparatus near water.
6. Clean only with dry cloth.
7. Do not block any ventilation openings. Install in
accordance with the manufacturer’s instructions.
8. Do not install near any heat sources such
as radiators, heat registers, stoves, or other
apparatus (including amplifiers) that produce
heat.
9. Do not defeat the safety purpose of the
polarized or grounding-type plug. A polarized
plug has two blades with one wider than the
other. A grounding type plug has two blades
and a third grounding prong. The wide blade or
the third prong are provided for your safety. If
the provided plug does not fit into your outlet,
consult an electrician for replacement of the
obsolete outlet.
10. Protect the power cord from being walked on
or pinched particularly at plugs, convenience
receptacles, and the point where they exit from
the apparatus.
11. Only use attachments/accessories specified by
the manufacturer.
12. Use only with the cart, stand, tripod, bracket, or
table specified by the manufacturer, or sold with
the apparatus. When a cart is used, use caution
when moving the cart/apparatus combination
to avoid injury from tip-over.
13. Unplug this apparatus during lightning storms
or when unused for long periods of time.
14. Refer all servicing to qualified service personnel.
Servicing is required when the apparatus has
been damaged in any way, such as power-supply
cord or plug is damaged, liquid has been spilled
or objects have fallen into the apparatus, the
apparatus has been exposed to rain or moisture,
does not operate normally, or has been dropped.
ND3520-NM.BUSALLK_1755_ENG.indd 4 2012-09-05 2:34:41
Page 5

Table of Contents
Table of Contents 5
1 Getting Started
2 Safety Information
6 Main Features
6 – Made for iPod/iPhone
6 – Portable In
6 – USB Playback
6 – Time Sync
6 – Bluetooth
6 Accessories
6 Introduction
6 – Symbol Used in This Manual
7 Playable File
7 – MP3/ WMA File Requirement
7 – Compatible USB Devices
7 – USB Device Requirement
8 Remote Control
9 Front Panel
9 Back Panel
10 Top Panel
11 Connecting the AC Adapter
11 How to Attach the Ferrite Core (For EMI
Only)
2 Operating
12 Basic Operations
12 – iPod/iPhone Operations
12 – Compatible iPod/iPhone
13 – USB Operation
14 – Turning Off the Sound Temporarily
14 – Resume Playback
14 – Playing Repeatedly Or Randomly
14 – Mood Lighting
14 – Auto Power Down
15 Sound Adjustment
15 – Setting the Sound Mode
15 Listening to Music from Your External
Device
16 Setting the Clock
16 Using a Bluetooth Wireless Technology
17 – Listening to Music of a Bluetooth
Device
18 – Using Bluetooth App
3 Troubleshooting
20 Troubleshooting
4 Appendix
21 Trademarks and Licenses
22 Specifications
23 Handling the Unit
1
2
3
4
ND3520-NM.BUSALLK_1755_ENG.indd 5 2012-09-05 2:34:41
Page 6
Getting Started6
Main Features
Made for iPod/iPhone
1
Enjoys music from iPod/iPhone with simple
Getting Started
connection.
Portable In
Listens to music from your portable device.
USB Playback
Enjoys music from USB with simple connection.
Time Sync
Sets your unit’s clock automatically by using your
iPod/iPhone and Bluetooth device. (LG Bluetooth
Remote app)
Bluetooth
Enjoys music from Bluetooth device with simple
connection.
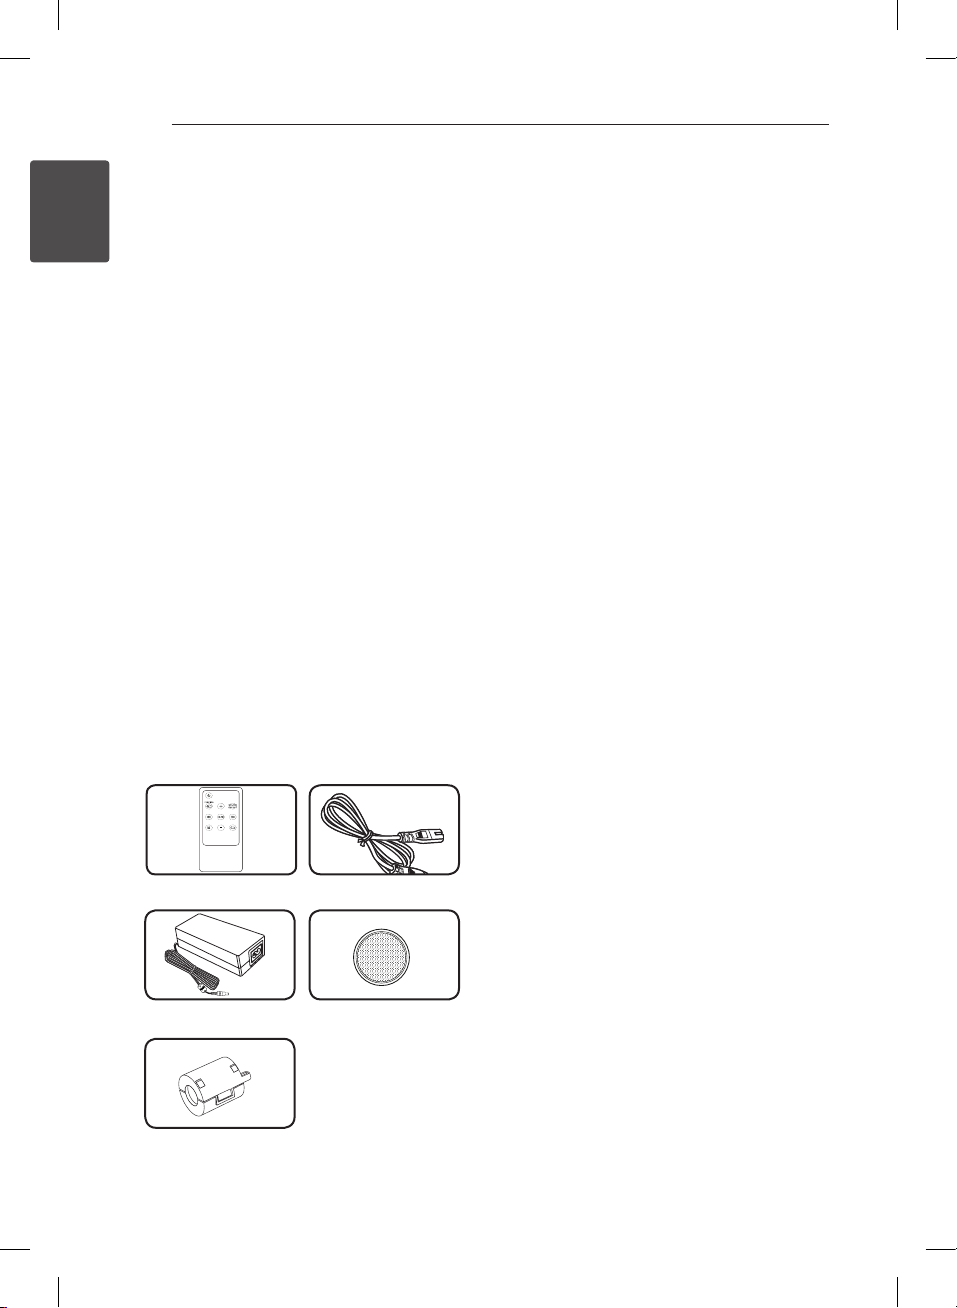
Accessories
Please check and identify the supplied accessories.
Introduction
Symbol Used in This Manual
Note
,
Indicates special notes and operating features.
Caution
>
Indicates cautions for preventing possible damages
from abuse.
Remote control (1) Power cord (1)
AC adapter (1) Battery (1)
Ferrite core (1)
ND3520-NM.BUSALLK_1755_ENG.indd 6 2012-09-05 2:34:42
Page 7

Getting Started 7
Playable File
MP3/ WMA File Requirement
MP3/ WMA le compatibility with this unit is limited
as follows :
ySampling frequency : within 32 to 48 kHz (MP3),
within 32 to 48 kHz (WMA)
yBit rate : within 32 to 320 kbps (MP3),
40 to 192 kbps (WMA)
yMaximum les : Under 999
yMaximum folders : Under 99
yFile extensions : “.mp3”/ “.wma”
Compatible USB Devices
MP3 Player : Flash type MP3 player.
y USB Flash Drive :
Devices that support USB1.1.
yThe USB function of this unit does not support all
USB devices.
USB Device Requirement
y Devices which require additional program
installation when you have connected it to a
computer, are not supported.
yDo not extract the USB device while in operation.
yFor a large capacity USB, it may take longer than a
few minutes to be searched.
yTo prevent data loss, back up all data.
yIf you use a USB extension cable or USB hub, the
USB device is not recognized.
yUsing NTFS le system is not supported. (Only
FAT(16/ 32) le system is supported.)
yThis unit is not supported when the total number
of les is 1 000 or more.
yExternal HDD, Card readers, Locked devices, or
hard type USB devices, mobile phone are not
supported.
yUSB port of the unit can not be connected to PC.
The unit cannot be used as a storage device.
ySome USB may not work with this unit.
yTo charge your iPod/iPhone and smartphone
through USB port, turn the unit on.
yYou can’t charge iPad although the unit is on.
yDepending on the kinds of smartphones, you
may not charge your smartphone.
1
Getting Started
ND3520-NM.BUSALLK_1755_ENG.indd 7 2012-09-05 2:34:42
Page 8
Getting Started8
Remote Control
1
Getting Started
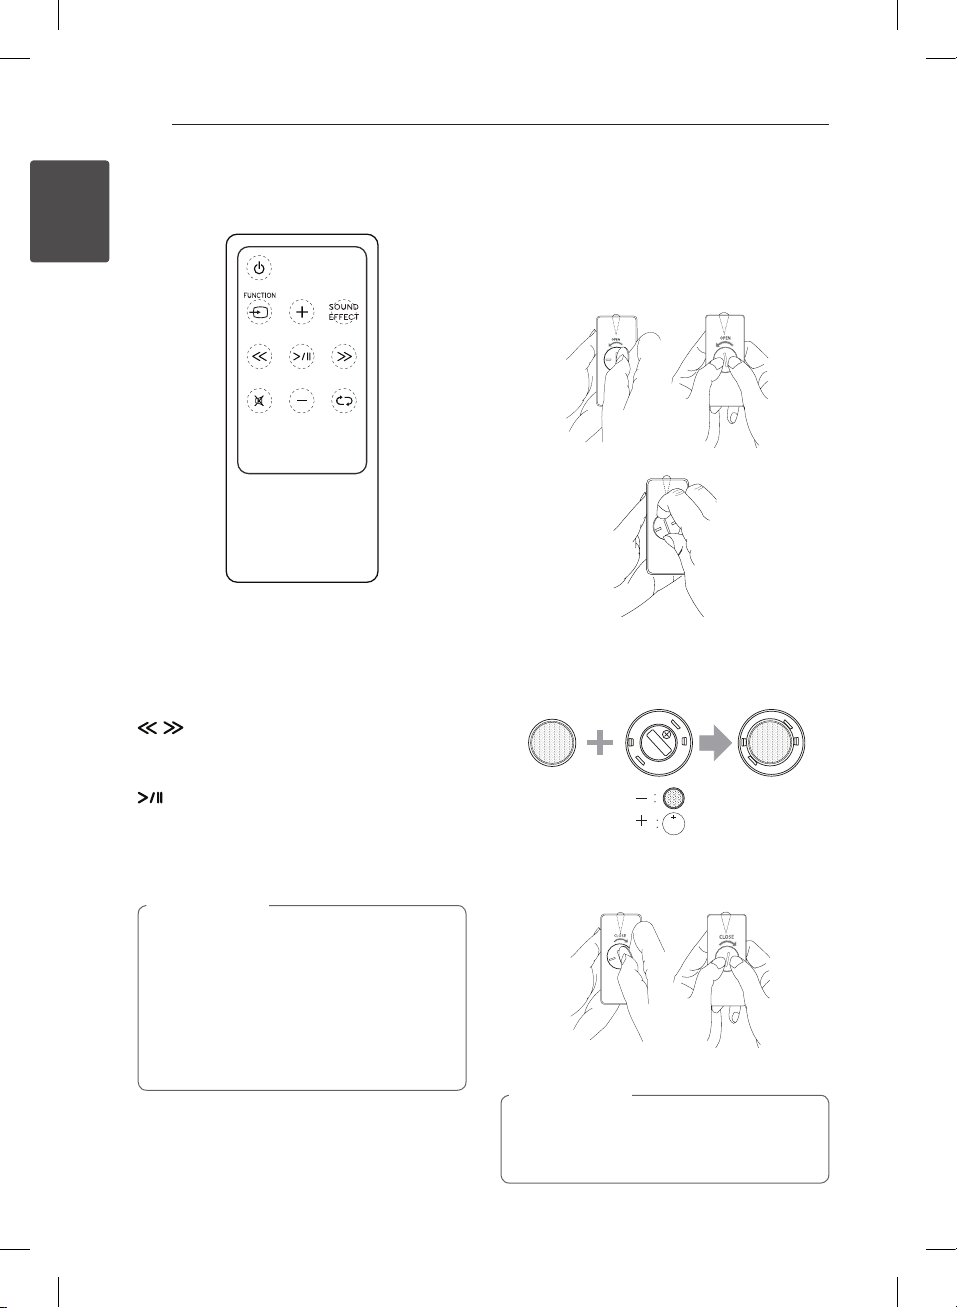
(Power): Switches the unit ON or OFF.
1
FUNCTION : Selects the function and input
P
source.
+/- (Volume) : Adjusts speaker volume.
SOUND EFFECT : Chooses sound impressions.
/ (Skip/Search) :
-Skips Fast backward or Forward.
-Searches for a section within a file.
(Play/Pause) : Starts playback./Pauses playback.
: Mutes the sound.
@
: Selects a play mode. (ONE/DIR/ALL/
h
RAND(RANDOM)/OFF.
Caution
>
The battery used in this device may present a
re or chemical burn hazard if mistreated. Do
not recharge, disassemble, incinerate, or heat
above 100 °C (212 °F). Replace the battery part
no. CR2025 only. Use of another battery may
present a risk of re or explosion. Dispose of
used battery. Keep battery away from children.
Do not disassemble or dispose of in re.
Battery Installation
You have two ways to open the battery
compartment.
1. Turn the battery compartment
counterclockwise by using a coin or your finger.
Then take the battery compartment out.
Coin Finger
2. Insert and fix the battery with the plus (+)
facing in the same direction as the plus (+) on
the battery compartment.
3. Put the battery compartment on the remote
control and turn it clockwise to close.
Coin Finger
Caution
>
If you have long nail, do not open the battery
compartment by using your nger. Or else,
your nail would be broken.
ND3520-NM.BUSALLK_1755_ENG.indd 8 2012-09-05 2:34:43
Page 9

Front Panel
Getting Started 9
1
Getting Started
(Power)
a 1
Turns on the unit and switches to standby
mode.
VOL. (+/-)
b
Adjusts speaker volume.
Display Window
c
Back Panel
USB Port
a
Plays music le by connecting the USB device.
PORT. IN (3.5 mm)
b
Listens to music from your portable device.
DC IN12 V 01.5 A (AC adapter input)
c
F (Function)
d
Selects the function and input source.
(IPOD/BT/PORT/USB)
e
(Mood Lightness)
Adjusts the LED brightness.
ND3520-NM.BUSALLK_1755_ENG.indd 9 2012-09-05 2:34:44
Page 10

Getting Started10
Top Panel
1
Getting Started
iPod/iPhone Dock
a
Connects an iPod/iPhone.
Speaker
b
ND3520-NM.BUSALLK_1755_ENG.indd 10 2012-09-05 2:34:44
Page 11

Getting Started 11
Connecting the AC Adapter
1. Connect the supplied AC power cord to the AC
adapter.
2. Connect the AC adapter cable to DC IN adapter
input.
3. Plug the AC power cord into an AC outlet. Then
the unit goes into standby mode.
Caution
>
Only use the AC adapter supplied with this
device. Do not use a power supply from
another device or manufacturer. Using any
other power cable or power supply may cause
damage to the device and void your warranty.
How to Attach the Ferrite Core (For EMI Only)
You must ax the core (supplied with the model
you purchased) in order to reduce or eliminate
electrical interference.
1. Pull the stopper [a] of the ferrite core to open.
2. Wind the portable cables once on the ferrite
core.
3. Close the ferrite core until it clicks.
1
Getting Started
ND3520-NM.BUSALLK_1755_ENG.indd 11 2012-09-05 2:34:44
Page 12

Operating12
Basic Operations
iPod/iPhone Operations
You can enjoy the sound from your iPod/iPhone
through this unit.
1. Connect the iPod/iPhone firmly. If you turn
2
Operating
this unit on, your iPod/iPhone is automatically
turned on and starts recharging .
2. Press PFUNCTION or F to select IPOD
function.
To Do this
Pauses or
restart
Skip
Search
During playback, press /
to go to the next le or to return
to the beginning of the current
le.
During playback, Press twice
briey to step back to the
previous le.
Press and hold / during
playback and release it at the
point you want to listen to.
Press .
Compatible iPod/iPhone
y The unit supports the models as follows ;
iPod touch
iPod classic
iPod nano
iPhone 4S
iPhone 4
iPhone 3GS
iPhone 3G
Depending on your iPod/iPhone’s
software version, you may not control your iPod/
iPhone from the unit.
Depending on your iPod/iPhone device, you may
not control your iPod/iPhone from the unit.
ND3520-NM.BUSALLK_1755_ENG.indd 12 2012-09-05 2:34:45
Page 13

Note
,
yIf this unit displays an error message “ERR”,
below reasons may have caused an error.
- Your iPod/iPhone is not connected firmly.
- This unit recognizes your iPod/iPhone as
an unknown device.
- Your iPod/iPhone is exceptionally low in
power.
The battery needs to be charged.
/
If you charge the battery while iPod/
/
iPhone is extremely low in power, it
may take longer to be charged.
yDepending on your iPod/ iPhone ’s software
version, it may not be possible to control
your iPod/iPhone from this unit. We
recommend installing the latest software
version.
yIf you use an application, make a call, or
send and receive SMS text message, etc. on
iPod touch or iPhone, disconnect it from
iPod/iPhone dock of this unit and then use
it.
yIf you have a problem with your iPod/
iPhone, please visit www.apple.com/
support.
yIn standby mode, you can charge your iPod/
iPhone by connecting it to iPod/iPhone
Dock.
yYou may need additional operation for iPod
touch or iPhone, for example “unlock” by
draging the slider.
Operating 13
USB Operation
1. Connect the USB device to the USB port.
2. Select the USB function by pressing
FUNCTION or F.
P
Note
,
Removing the USB Device from the unit.
1. Choose a different function/mode.
2. Remove the USB device from the unit.
To Do this
Play
Pause
Skipping to
the next/
previous le
Searching
for a section
within a le
Press .
During playback, press .
During playback, press / to
go to the next le or to return to
the beginning of the current le.
During playback, Press twice
briey to step back to the previous
le.
Press and hold / during
playback and release it at the point
you want to listen to.
2
Operating
ND3520-NM.BUSALLK_1755_ENG.indd 13 2012-09-05 2:34:45
Page 14

2
Operating
Operating14
Note
,
yDuring playback, if you turn the unit o
and on, the last le you listened to plays
normally.
yDuring playback, If you change the function
mode, and return back to the previous
function mode, the last le you listened to
plays normally.
yIf you play MP3 le over an hour, the
playback time will not be displayed.
yUSB Folders/Files are recognized as below.
ROOT FOLDER
FOLDER 1
FOLDER 2
FILE 1
FILE 2
FOLDER3
FOLDER4
FILE 3
FILE 4
FOLDER5
FOLDER6
FILE 5
FILE 6
FILE 7
FOLDER7
FOLDER8
FILE 11
FILE 12
FILE 13
FILE 14
FILE
FILE 8
FILE 9
FILE 10
yIf there is no le in a folder, the folder will
not appear.
yFolders will be presented as the following
order;
ROOT
FOLDER1 FOLDER3 FOLDER7
FOLDER8 FOLDER5 FOLDER6
yFile will be played from $ le No.1 to $ le
No.14 one by one.
yFiles and folders will be presented in order
recorded and may be presented dierently
according to the record circumstances.
y*ROOT : the rst screen you can see when a
computer recognize the USB is “ROOT”
Turning Off the Sound Temporarily
Press @to mute the sound. You can mute
the sound in order, for example, to answer the
telephone. And “MUTE” will appear in the display
window. To cancel mute function, press @ again
or adjust volume level by pressing +/-(Volume).
Resume Playback
The unit memorizes the point where you pressed
. Press to resume playback.
Playing Repeatedly Or Randomly
Press
played back repeatedly or randomly. (ONE/DIR/ALL/
RAND(RANDOM)/OFF)
repeatedly. Then the current le will be
h
Mood Lighting
You can adjust the LED brightness by pressing .
As you press repeatedly, the LED brightness will
get dark.
Press 5 times. Then the display window will also
become darker. Press one more time to return
to the brightest LED.
The Number of
Times
The Changed Part
LED Brightness -
1-3 4 5
Becomes
dark by half.
Returns
Mood Lighting
(On The
Bottom)
Becomes
dark
gradually.
-
to the
previous
state.
Auto Power Down
This unit will be o itself to save electronic
consumption in the case main unit is not connected
to external device and is not used for 25 minutes.
So does this unit after six hours since Main unit has
been connected to other device using analog input.
ND3520-NM.BUSALLK_1755_ENG.indd 14 2012-09-05 2:34:45
Page 15

Operating 15
Sound Adjustment
Setting the Sound Mode
This system has a number of pre-set sound elds.
You can select a desired sound mode by using
SOUND EFFECT.
The displayed items for the Equalizer may be
dierent depending on sound sources and eects.
On Display Description
POP
CLASSIC
JAZZ
ROCK
BYPASS
Maybe you need to reset the sound mode,
after switching the input, sometimes even
after the sound le is changed.
This program lends an
enthusiastic atmosphere to the
sound, giving you the feeling
you are at an actual rock pop,
jazz or classic concert.
You can enjoy the sound
without equalizer eect.
Note
,
Listening to Music from Your External Device
The unit can be used to play the music from many
types of external device. (Portable cable is not
supplied as an accessory with this unit.)
2
Operating
1. Connect the external device to the PORT.IN
connector of the unit.
2. Turn the power on by pressing 1.
3. Select the PORT(PORTABLE) function by
pressing PFUNCTION or F.
4. Turn the external device on and start playing it.
ND3520-NM.BUSALLK_1755_ENG.indd 15 2012-09-05 2:34:46
Page 16

Operating16
Setting the Clock
You have two ways to set the clock.
Setting the Clock by Synchronizing Your iPod/
iPhone
Connect the iPod/iPhone rmly. Then the clock
setting in the display window will be synchronized
with your iPod/iPhone.
2
After the unit is synchronized with your iPod/
Operating
iPhone for clock setting, there will be a time
dierence between the iPod/iPhone and the unit .
In standby mode, the clock won’t be synchronized
with your iPod/iPhone.
Note
,
Check the current time on iPod/iPhone
is correct or not. If not, reset it correctly
depending on present time. Wrong time
on the iPod/iPhone may result in the time
dierence between your iPod/iPhone and the
unit.
Setting the Clock by Connecting the BT.App
Set time you desired on Bluetooth device and
connect the Bluetooth device to your unit via BT.
app. Then the clock setting in the display window
will be synchronized with the Bluetooth device
automatically.
Using a Bluetooth Wireless Technology
About Bluetooth
Bluetooth® is wireless communication technology
for short range connection.
The available range is within 10 meters.
(The sound may be interrupted when the
connection interfered by the other electronic wave
or you connect the bluetooth in the other rooms.)
Connecting individual devices under Bluetooth®
wireless technology does not incur any charges. A
mobile phone with Bluetooth® wireless technology
can be operated via the Cascade if the connection
was made via Bluetooth® wireless technology.
Available Devices : Mobile phone, MP3, Laptop,
PDA.
Bluetooth Profiles
In order to use Bluetooth wireless technology,
devices must be able to interpret certain proles.
This unit is compatible with following prole.
A2DP (Advanced Audio Distribution Prole)
Note
,
• If you do not set the clock on your iPod/
iPhone, the unit will not be able to
synchronize the clock with your iPod/
iPhone.
• If you unplug the cord from an outlet, the
clock setting you set won’t be stored.
• If you connect iPod/iPhone and BT app for
clock setting, BT app will be synchronized
rst.
• If you synchronize the unit with your BT
device for clock by using BT app, you can
set 12 - Hour Time (ex - PM 11 : 00) or 24 Hour Time (ex - 23 : 00). (Android O/S only)
ND3520-NM.BUSALLK_1755_ENG.indd 16 2012-09-05 2:34:46
Page 17

Listening to Music of a Bluetooth Device
Before you start the pairing procedure, make
sure the Bluetooth feature is turned on in to your
Bluetooth device. Refer to your Bluetooth device’s
user guide. Once a pairing operation is performed,
it does not need to be performed again.
1. Select the Bluetooth function by using the
FUNCTION or F.
P
Appears “BT” and “BT READY” in the display
window.
2. Operate the Bluetooth device and perform the
pairing operation. When searching for this unit
with the Bluetooth device, a list of the devices
found may appear in the Bluetooth device
display depending on the type of Bluetooth
device.Your unit appears as “LG AUDIO ND3520”.
3. Enter the PIN code.
PIN code : 0000
4. When this unit successfully is connected with
your Bluetooth device, Bluetooth LED of this
unit lights up and appears “PAIR”.
Note
,
Depending on the Bluetooth device type,
some device have a dierent pairing way.
5. Listen to music.
To play a music stored on your Bluetooth device,
refer to your Bluetooth device’s user guide.
Note
,
ySound from the main set can be distorted
if you raise the volume of Bluetooth device
up to two-thirds or more.
yWhen you use the bluetooth function,
adjust the volume of a bluetooth device to
a proper level to listen to.
Operating 17
Note
,
yAfter searching for this unit on your
Bluetooth device, pair the Bluetooth device
with this unit. Then play the le you want.
yThe sound may be interrupted when
the connection interfered by the other
electronic wave.
yYou cannot control the Bluetooth device
with this unit.
yPairing is limited one Bluetooth device per
one unit and multi-pairing is not supported.
yAlthough the distance between your
Bluetooth and the set is less than 10m, there
are obstacles between both, your Bluetooth
device cannot be connected.
yDepending on the type of the device,
you may not be able to use the Bluetooth
function.
yYou can enjoy wireless system using phone,
MP3, Notebook, etc..
yWhen not connected the Bluetooth, “BT”
and “BT READY” appears on the display
window.
yThe Electrical malfunction due to devices
using same frequency such as Medical
equipment, Microwaves or wireless
LAN devices, the connection will be
disconnected.
yWhen someone stands and interrupts
communication between Bluetooth device
and the player, the connection will be
disconnected.
yIf the gotten away of the distance between
Bluetooth and the unit, the sound quality
is lower and lower. The connection will
disconnect when the space between the
Bluetooth and the unit gets out of the
operating range of Bluetooth.
yThe device with Bluetooth wireless
technology is disconnected, if you turn o
the main unit or put the device away from
the main unit more than 10m.
yIf the Bluetooth device is disconnected, you
should connect the Bluetooth device to
your unit.
2
Operating
ND3520-NM.BUSALLK_1755_ENG.indd 17 2012-09-05 2:34:46
Page 18

Operating18
Using Bluetooth App
About LG Bluetooth Remote App
LG Bluetooth Remote app bring a suite of new
features to your unit. To enjoy more features, you
are recommended to download and install free “ LG
Bluetooth Remote”.
Install “ LG Bluetooth Remote App”
2
onto Your Bluetooth Device
Operating
1. Install “ LG Bluetooth Remote app” by using QR
code. Use the scaning software to scan the QR
code.
2. Tap an icon for installation.
3. Tap an icon for downloading.
Install “ LG Bluetooth Remote App”
by Docking Your iPod/iPhone onto
Your Player
1. Connect your iPod/iPhone to iPod/iPhone Dock.
The display for downloading “LG Bluetooth
Remote” will be linked automatically. (iOS O/S
only)
2. Tap an icon for installation.
3. Tap an icon for downloading.
Install “ LG Bluetooth Remote App”
through “ Apple App Store” or
“Google Android Market”
1. Tap the Apple App Store icon or Google Android
Market(Google Play Store) icon.
2. In the search bar, type in the “LG Bluetooth
Remote” and search it.
3. In the search result list, find and tap “LG Bluetooth
Remote” to start downloading Bluetooth app.
4. Tap an icon for installation.
5. Tap an icon for downloading.
Note
,
yMake sure that your powered Bluetooth
device is connected to the Internet.
y Make sure that your powered Bluetooth
device is equipped with “ Apple App Store”
or “Google Android Market(Google Play
Store)”
(Android OS)
Note
,
yMake sure that your powered Bluetooth
device is connected to the Internet.
y Make sure that your powered Bluetooth
device has a scanning software application.
If you don’t have one, download one from
“Google Android Market(Google Play Store)”
and “ Apple App Store” .
ND3520-NM.BUSALLK_1755_ENG.indd 18 2012-09-05 2:34:46
(Apple iOS)
Activate Bluetooth with LG
Bluetooth Remote App
LG Bluetooth Remote app helps to connect your
powered bluetooth device to the unit.
1. Tap LG Bluetooth Remote app icon on the screen
to open LG Bluetooth Remote app application,
and go to the main menu.
2. Tap [Setting] and select the unit you want.
3. If you want to get more information to operate,
tap [Setting] and [Help].
Page 19

Note
,
yIf you place your iPod/iPhone into the dock of
this unit whlie your iPod/iPhone is connected
to this unit by Bluetooth connection, the
Bluetooth connection is deactivated.
yIf this unit is BT mode and you connect your
iPod/iPhone to this unit after connecting
your iPod/iPhone to this unit by Bluetooth
connection, the function is automatically
switched to IPOD mode. Then if you
disconnect your iPod/iPhone from this unit,
it is automatically connected to this unit by
Bluetooth connection.
yThe Bluetooth connection of iPod/iPhone is
not activated whlie iPod/iPhone is placed into
the dock of this unit.
yWhile using Bluetooth, you may not operate
BT app. Disconnect Bluetooth device you have
connected before to use BT app properly.
yIf you use Bluetooth app for operation,
there would be some dierences between
Bluetooth app and the supplied remote
control. Use the supplied remote control as
necessary.
yIf you operate BT app with Bluetooth device
connected, the Blutooth connection you
have connected before may be disconnected.
(Depending on the smartpone’s O/S, this
process has a dierence.)
yDepending on the Bluetooth device, BT.app
may not work.
yIn Bluetooth function, if you use BT app, the
supplied remote control may not work.
yWhen using BT app for remote control, the
operation may dier from the supplied
remote control.
yAccording to the smartphone’s operating
system, you have some dierences for BT
app’s operation.
yWhen your Bluetooth device have been
already connected with other unit, disconnect
the Bluetooth connection rst. Then you can
control your player through BT app.
yThe connection you’ve made may be
disconnected if you select other application
or change the setting of the connected
device via “LG Bluetooth Remote” app. In such
a case, please check the connection status.
Operating 19
2
Operating
ND3520-NM.BUSALLK_1755_ENG.indd 19 2012-09-05 2:34:47
Page 20

3 Troubleshooting
Troubleshooting20
Troubleshooting
Problem Correction
No Power.
No sound.
The remote control does
3
not work properly.
Troubleshooting
iPod/iPhone does not
work.
Clock does not displayed.
yPlug in the power cord.
yCheck the condition by operating other electronic devices.
Press PFUNCTION or F and then check the selected function.
yOperate the remote control within about 23 ft (7 m).
yRemove the obstacle in the path of the remote control and the unit.
yReplace the battery with new one.
Connect iPod/iPhone to the unit correctly.
yConnect iPod/iPhone to the unit correctly.
yConnect your mobile phone to your unit through BT.app.
ND3520-NM.BUSALLK_1755_ENG.indd 20 2012-09-05 2:34:47
Page 21

4 Appendix
Trademarks and Licenses
“Made for iPod” and “Made for iPhone” mean
that an electronic accessory has been designed
to connect specically to iPod or iPhone
respectively, and has been certied by the
developer to meet Apple performance standards.
Apple is not responsible for the operation of
this device or its compliance with safety and
regulatory standards.
Please note that the use of this accessory with
iPod, iPhone may aect wireless performance.
Appendix 21
4
Appendix
Bluetooth® wireless technology is a system which
allows radio contact between electronic devices
within a max. range of 10 meters.
Connecting individual devices under Bluetooth®
wireless technology does not incur any charges.
A mobile phone with Bluetooth® wireless
technology can be operated via the Cascade if
the connection was made via Bluetooth® wireless
technology.
The Bluetooth® word mark and logos are owned
by the Bluetooth® SIG, Inc. and any use of such
marks by LG Electronics is under license.
Other trademarks and trade names are those of
their respective owners.
ND3520-NM.BUSALLK_1755_ENG.indd 21 2012-09-05 2:34:47
Page 22

Appendix22
Specifications
General
AC adapter requirements DC 12 V 01. 5 A, 100 - 240 V, 50/ 60 Hz
Power consumption 18 W
Dimensions (W x H x D) 160 X 44 X 160 mm
Net Weight (Approx.) 660 g
Operating temperature 5 °C to 35 °C (41 °F to 95 °F)
Operating humidity 5 % to 90 %
Inputs
PORT. IN 500 mV (3.5 mm stereo jack)
USB
USB Version USB 1.1
4
Appendix
Bus Power Supply USB : DC 5 V 0 500 mA, iPod/iPhone : DC 5 V 0 1 A
Amplier
Output Power 4 W + 4 W (8 Ω at 1 kHz)
T.H.D 10 %
Speakers
Type built-in
Impedance Rated 8 Ω
Rated Input Power 4 W
Max. Input Power 8 W
yDesign and specications are subject to change without notice.
ND3520-NM.BUSALLK_1755_ENG.indd 22 2012-09-05 2:34:47
Page 23

Handling the Unit
When Shipping the Unit
Please save the original shipping carton and
packing materials. If you need to ship the unit, for
maximum protection, re-pack the unit as it was
originally packed at the factory.
Keeping the Exterior Surfaces Clean
Do not use volatile liquids such as insecticide spray
near the unit.
Wiping with strong pressure may damage the
surface.
Do not leave rubber or plastic products in contact
with the unit for a long period of time.
Cleaning the Unit
To clean the player, use a soft, dry cloth. If the
surfaces are extremely dirty, use a soft cloth lightly
moistened with a mild detergent solution. Do not
use strong solvents such as alcohol, benzine, or
thinner, as these might damage the surface of the
unit.
Appendix 23
4
Appendix
ND3520-NM.BUSALLK_1755_ENG.indd 23 2012-09-05 2:34:47
Page 24

LG Customer Information Center
1-800-243-0000 USA, Consumer
1-888-865-3026 USA, Commercial
Register your product Online!
www.lg.com
Printed in Indonesia
ND3520-NM.BUSALLK_1755_ENG.indd 24 2012-09-05 2:34:48
 Loading...