

Page 1
MTNL / BSNL (Toll Free)
Prefix STD Code
Owner’s Manual
Please read this manual carefully and
thoroughly before operating this unit.
MC-8048WR
TM
M I C R O W A VE O VE N S
Page 2

Contents / fo"k; lwph
Contents / fo"k; lwphContents / fo"k; lwph
Safety Precautions / lqj{kk lkoèkkfu;k¡ 3
Unpacking & Installing/How the Microwave works / vou dks [kksyuk o yxkuk@voj dh dk;Z iz.kkyh 4
Control Panel/Child Lock / dUVªksy iSuy@pkbYM ykWd 5
Micro Power Cooking & Power Level / ekbØks ikoj }kjk Hkkstuk idkuk / ikoj Lrj 6
Food characteristics & Microwave Cooking / Hkkstu dh fof'k"Vrk,¡ o ekbØksoso }kjk Hkkstu idkuk 7
Two stage Cooking/Grill Cooking / nks pj.kksa esa Hkkstu idkuk@fxzy dqfdax 8
Convection Cooking / dUosD'ku }kjk Hkkstu idkuk 9
Combination Cooking / dkWEchus'ku }kjk Hkkstu idkuk 10~11
Quick Start/ Various Cook Functions @ fDod LVkVZ/ fofHkUu dqd dk;Ziz.kkfy;ka 12
Indian Cuisine / Hkkjrh; O;atu 13~15
Breakfast / czsdQkLV 16~17
Snacks / LuSDl 17~18
Child's Favourite / cPpksa dh euilUn 19~21
Tandoor Se.. / rUnwj ls -- 21~25
Sweet Corner / LohV dkWuZj 25~27
Utility Corner / lqfo/kk dkWuZj 28
Rotisserie/Three recipes for starter / jksVsljh@uofl[kq, ds fy, rhu O;atu 29
Clean your Oven/Cookware used in Microwave / vou dks lkQ djuk@ekbØksoso vou esa iz;qDr gksus okys crZu 30
Plug Wiring Information/Technical Specifiations / Iyx-rkj ds ckjs esa lwpuk o rduhdh fof'k"Vrk,¡ 31
List of Authorised Service Centers / vf/kÑr lfoZl dsUæksa dh lwph
2
Page 3

Safety Precautions / lqj{kk lko/kkfu;k¡
Safety Precautions / lqj{kk lko/kkfu;k¡
1. Do not attempt to tamper with, or make any adjustments or repairs to the door, control panel, safety interlock switches or any
other part of the oven. Repairs should only be undertaken by a qualified service technician.
vou ds njokts] fu;U=k.k iSuy] lqj{kk rkys ;k fdlh Hkh nwljs Hkkx ls NsM+[kkuh u djsa] ejEer u djsa ;k rkyesy(adjustment) cSBkus dk
iz;Ru u djsaA ejEer o lfoZl fdlh dq'ky rduhf'k;u ls gh djk;saA
2. Do not operate the oven when empty (except Pre-heat Mode). It is best to leave a glass of water in the oven when not in use.
The water will safely absorb all microwave energy, if the oven is accidentally started.
vou dks dHkh [kkyh u pyk;sa ¼Pre-heat Mode ds vykok½A tc vou dk iz;ksx u dj jgs gksa] rks ,d dk¡p ds fxykl esa ikuh Hkj dj]
vou ds vUnj j[k nsaA vUtkus esa vou pkyw gks tkus ij ikuh ekbØks rjaxksa dh ÅtkZ dks lks[k (absorb) ysxkA
3. Do not operate the oven with a kitchen towel, a napkin or any other obstruction between the door and the front edges of the
oven.
vou ds njokts esa >kM+u] uSifdu] rkSfy;k vkfn dh #dkoV gksus ij vou dHkh u pyk;sAA
4. Do not use recycled paper products.
vou esa dkxt ;k v[kckjksa ds mRiknuksa dk dHkh iz;ksx u djsaA
5. Do not rinse the turntable by placing it in water just after cooking.
Hkkstu idkus ds rqjUr ckn gh dk¡p dh Vªs dks ikuh ds uhps u j[ksaA
6. Be certain to place the oven so the front of the door is 8 cm or more behind the edge of the surface on which it is placed.
vou j[krs le; bl ckr dk fo'ks"k è;ku j[ksa fd vou dk ckgjh fdukjk] Vscy lrg dsx fdukjksa ls de ls de 8 cm vUnj gksaA
7. Do not cook eggs in their shell.
v.Mksa dks fNyds lesr u idk;saA
8. Do not attempt deepfat frying in your oven.
vou esa ryus dk iz;Ru u djsaA
9. Remove the plastic wrapping from food before defrosting.
fMÝkWfLVax ls igys Hkkstu ij yxk;k x;k IykfLVd dk vkoj.k (cling film) gVk nsaA
10. If smoke is observed, switch off or disconnected the oven from the power supply and keep the oven door closed.
vou esa ls èkq¡vk fudyus ij mldk lEcUèk fctyh ls dkV nsa vkSj njoktk cUn j[ksaA
11. Only allow children to use the oven without supervision when adequate instructions have been given so that the child is able to
use the oven in a safe way and understands the hazards of improper use.
cPpksa dks viuh fuxjkuh ds fcuk] vou rHkh iz;ksx djus nsa] tc mUgsa lkjs funsZ'k iwjh rjg ls le>k fn;s x;s gksaA cPpk vou dk mi;ksx
iwjh lkoèkkuh ls djsxk vkSj [krjksa ls cpk jgsxkA
12. Liquids or other foods must not be heated in sealed containers.
rjy [kk| inkFkZ dHkh Hkh cUn fMCcksa esa xeZ u djsaA
13. Always use gloves when removing dish from oven.
fM'k dks vou ls ckgj fudkyrs le; nLrkuksa dk bLrseky djsaA
14. Do not cover the ventillation slots.
osUVhys'ku LyksV~l dks u <dsaA
15. Never use metal or metal trimmed utensils in your microwave oven. (refer Cookware Selection Table at page 16)
ekbØksoso vou esa dHkh Hkh ,sls crZuksa dk iz;ksx u djsa tks /kkrq ds cus gksa ;k muesa /kkrq fdlh Hkh :i esa bLrseky dh xbZ gksA
¼Ñi;k ist 16 ij dqdosvj lySD'ku Vscy ns[ksa½
Warning/
Always allow food to stand after being cooked by microwaves and check the temperature of them
before consumption. Especially contents of feeding bottles and baby food jars.
psrkouh
lw{e rjaxksa }kjk Hkkstu idk;s tkus ds ckn dqN le; ds fy;s <d dj vo'; NksM+ nsaA Hkkstu [kkus ls igys mlds
rkieku dh tk¡p vo'; dj ysaA cPpksa ds Hkkstu o nw/k esa fo'ks"k lko/kkuh cjrsaA
3
Page 4
Unpacking & Installing / vou dks [kksyuk o yxkuk
Unpacking & Installing / vou dks [kksyuk o yxkuk
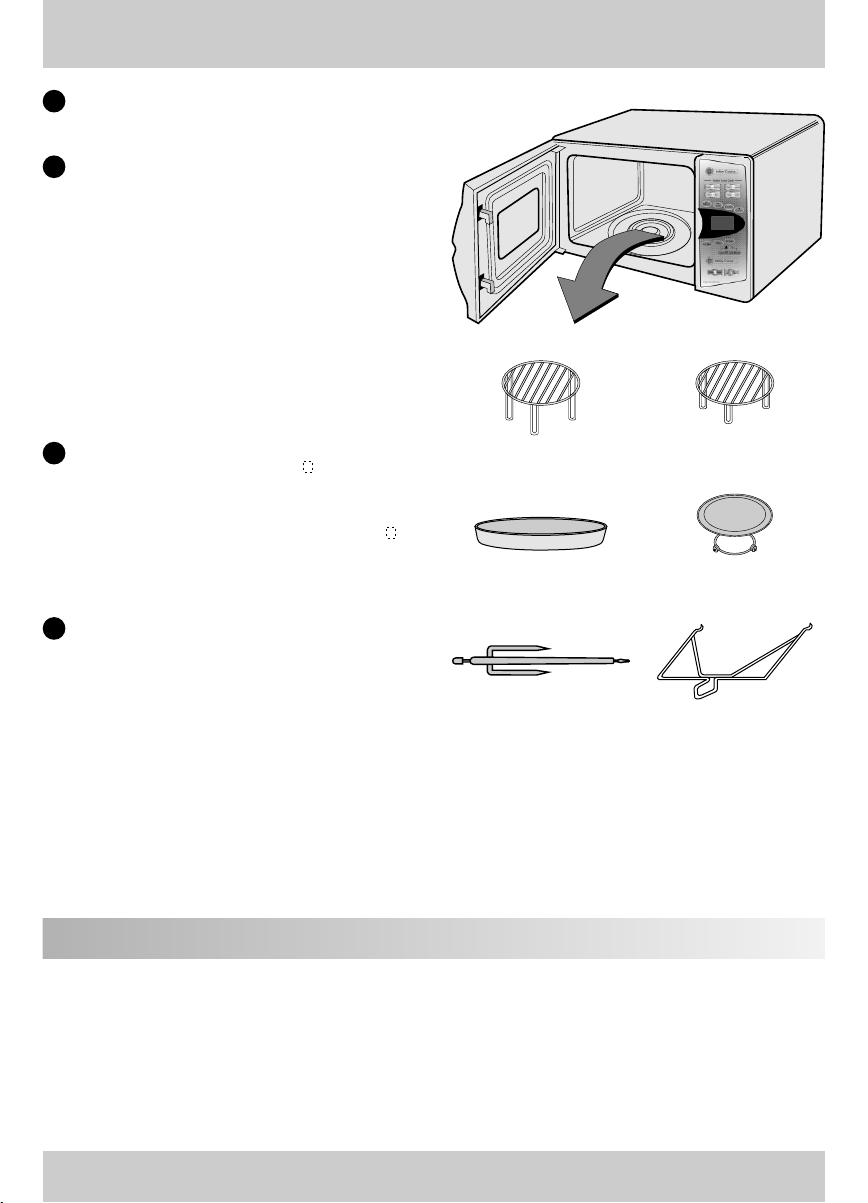
Unpack your oven and place it on a flat level surface.
1
vou dks fMCcs esa ls fudky dj ,d lery (flat) lrg ij j[ksaA
Place the oven on the levelled location of your choice with
2
more than 85cm height but make sure there is at least 30 cm
of space on the top and 10cm at the rear for proper
ventilation. The front of the oven should be at least 8cm from
the edge of the surface to prevent tipping. An exhaust outlet
is located on top or side of the oven. Blocking the outlet can
damage the oven.
vou dks bfPNr Å¡pkbZ ij j[ksaa tks yxHkx 85 ls-eh- ls vfèkd
Å¡pkbZ gks] ijUrq 30 ls-eh- Åij vkSj 10 ls-eh- txg ihNs vo';
NksM+h xbZ gks rkfd gok dk ?kqeko lgh :i ls gks ldsA vou dh
ckgjh Hkkx] lrg ds fdukjksa ls de ls de 8 ls-eh- vUnj dh vksj
gks rkfd vou ds myVus dk Hk; u gksA gok dh fudklh dk ekxZ]
vou dh Åijh-ckgjh lrg ij cuk;k x;k gSA bl ekxZ ds vo#)
gksus ij vou dks {kfr igq¡p ldrh gSA
Plug your oven into a standard household socket. Switch on
3
all the icons glow. Press Stop button, glows. If your oven
does not work properly, unplug it from the electrical socket
and then plug it back in.
HIGH RACK / ^gkbZ* jSd LOW RACK / ^yks* jSd
vou dk Iyx fdlh lkekU; ?kjsyw lkWdsV esa yxk;saA fLop nck;sa]
lkjs fpUg mTtofyr gks tk,axsA Stop cVu nck;sa] fpUg
vk,xkA ;fn vkidk vou lgh :i ls dke u dj jgk gks] rks
mldk Iyx fudky dj nksckjk lkWdsV esa MkysaA
METAL TRAY / eSVy Vªs ROTATING RING
jksVsfVax fjax
Open your oven door by pulling the DOOR HANDLE. Place
4
the ROTATING RING inside the oven and place the GLASS
TRAY on top.
vou-}kj [kksyus ds fy;s ßMksj gS.MyÞ dk iz;ksx djsaA ?kweus okyh
fjax dks vou esa j[ksa vkSj mlds Åij Xykl@dk¡p dh xksy Vªs
j[ksaA
How the Microwave Oven works / ekbØksoso vou dh dk;Z iz.kkyh
How the Microwave Oven works / ekbØksoso vou dh dk;Z iz.kkyh
Microwaves are a form of energy similar to radio and television waves and ordinary daylight. Normally, microwaves spread
outwards as they travel through the atmosphere and disappear without effect. Microwave ovens, however, have a magnetron
which is designed to make use of the energy in microwaves. Electricity, supplied to the magnetron tube, is used to create
microwave energy.
lw{e rjaxsa ,d izdkj dh ÅtkZ gSa tks jsfM;ks rjaxksa vkSj lkekU; izdk'k rjaxksa ds leku xfr gksrh gSaA lkekU;r% ;s lw{e rjaxsa ok;qe.My esa
pkfyr gksrs le; ckgjh vksj QSyrh gSa vkSj fcuk dksbZ izHkko Mkys Lor% gh lekIr gks tkrh gSaA ijUrq ekbØksoso vouksa esa eSXusVªksu (magnetron)
bl izdkj yxk;k x;k gS fd og lw{e rjaxksa dh ÅtkZ dk iz;ksx dj ldsA eSXusVªksu dks nh xbZ fo|qr rjaxksa dh ÅtkZ esa ifjofrZr gks tkrh gSA
ROTESSERIE BAR
jksVsljh ckj
ROTESSERIE BAR HANDLE
jksVsljh ckj gSfUMy
4
Page 5
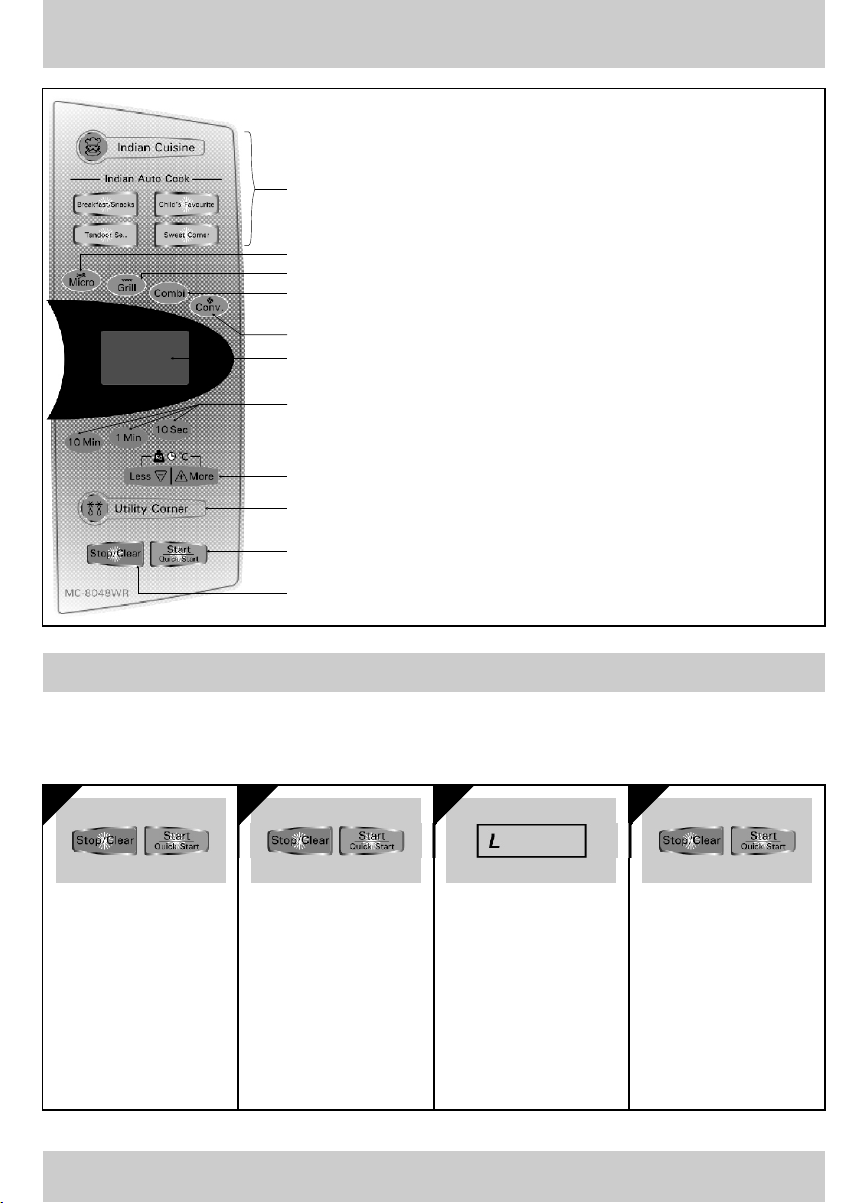
Control Panel / dUVªksy iSuy
Control Panel / dUVªksy iSuy
To select and cook preset recipes at different weights.
[kkus ds fofHkUu otuksa ij vk/kkfjr iwoZ fuf'pr O;atuksa dks pquus vkSj idkus ds fy,A
To cook food with 5 levels of Microwave Power.
ekbØksoso ikWoj ds 5 Lrjksa ij [kkuk cukus ds fy,A
Makes food Brown & Crisp / [kkus dks Hkwjk vkSj dqjdqjk cukrk gSA
Cooks with Micro & Grill, Micro & Convection function simultaneously. /
ekbØksoso ,oa fxzy] ekbØksoso ,oa dUoSD'ku fØ;kvksa }kjk lkFk-lkFk [kkuk idkrk gSA
For Optimum browning of food / [kkus dks vf/kdre Hkwjk djus ds fy,A
Display Panel / fMLIys iSuy
Set Cook Time at multiples of (10 min / 1 min / 10 sec).
izfr (10 fe- / 1 fe- / 10 lS-) ds vUrjky ij [kkuk idkus dk le; fu/kkZfjr djsaA
Increase/decrease Weight/Time/Temp. during Cook Process.
[kkuk cukus ds nkSjku otu@le;@rkieku de ;k T;knk djrk gSA
To set Keepwarm, steam clean and auto defrost (Veg. & Non veg.) functions.
dhiokeZ] LVhe Dyhu ,oa vkWVksfMÝkWLV ¼ost rFkk ukWu ost½ dk;ks± dks lSV djus ds fy,A
‘Start’ begin Cook operations,
^LVkVZ* [kkuk cukus dh izfØ;k 'kq: djrk gSA
To Stand By / Stop Cook functionality
^LVS.M ckbZ* [kkuk cukus dh izfØ;k dks jksdrk gSA
Child Lock / pkbYM ykWd
Child Lock / pkbYM ykWd
Your oven has a safety feature that prevents accidental running of the oven. Once the child lock is set, you will be unable to use any
functions and no cooking can take place. However your child can still open the oven door !
vkids vou esa fo'ks"k lqj{kk O;oLFkk gS tks vou dks vutkus esa pyus ugha nsrhA ^pkbYM ykWd* yxkus ij vou pkyw gh ugha gksxkA ijUrq cPpk
ckgjh }kj vo'; [kksy ik;sxkA
1 2 3 4
P r es s S TO P / C L E A R /
STOP/CLEAR nck;saA
Press and hold STOP/ CLEAR
until “L” appears on the display
and BEEP sounds.
STOP/CLEAR cVu rc rd nck
dj j[ksa tc rd ^fMLIys iSuy* ij
“L” u vk tk;s vkSj ^chi* u lqukbZ
nsA
The CHILD LOCK is now set. /
vc ^pkbYM ykWd* yx x;k gSA
The time will disappear on the
display if you have set the clock.
;fn ?kM+h dh ^lSfVax* dh gqbZ gS rks
^iSuy* ij le; vn`'; gks tk;sxkA
“L” appears on the display to
let you know that CHILD
LOCK is set.
iSuy ij “L” vk,xk rkfd vkidks
irk jgs fd pkbYM ykWd yxk gSA
5
To cancel CHILD LOCK press
and hold STOP/CLEAR until “L”
disappears. You will hear BEEP
when it’s released.
pkbYM ykWd dks [kksyus ds fy;s
STOP/CLEAR rc rd nck
dj j[ksa tc rd “L” vn`'; u gks
tk;s vkSj chi lqukbZ u nsaA vkidk
lqj{kk rkyk vc [kqy x;k gSA
Page 6
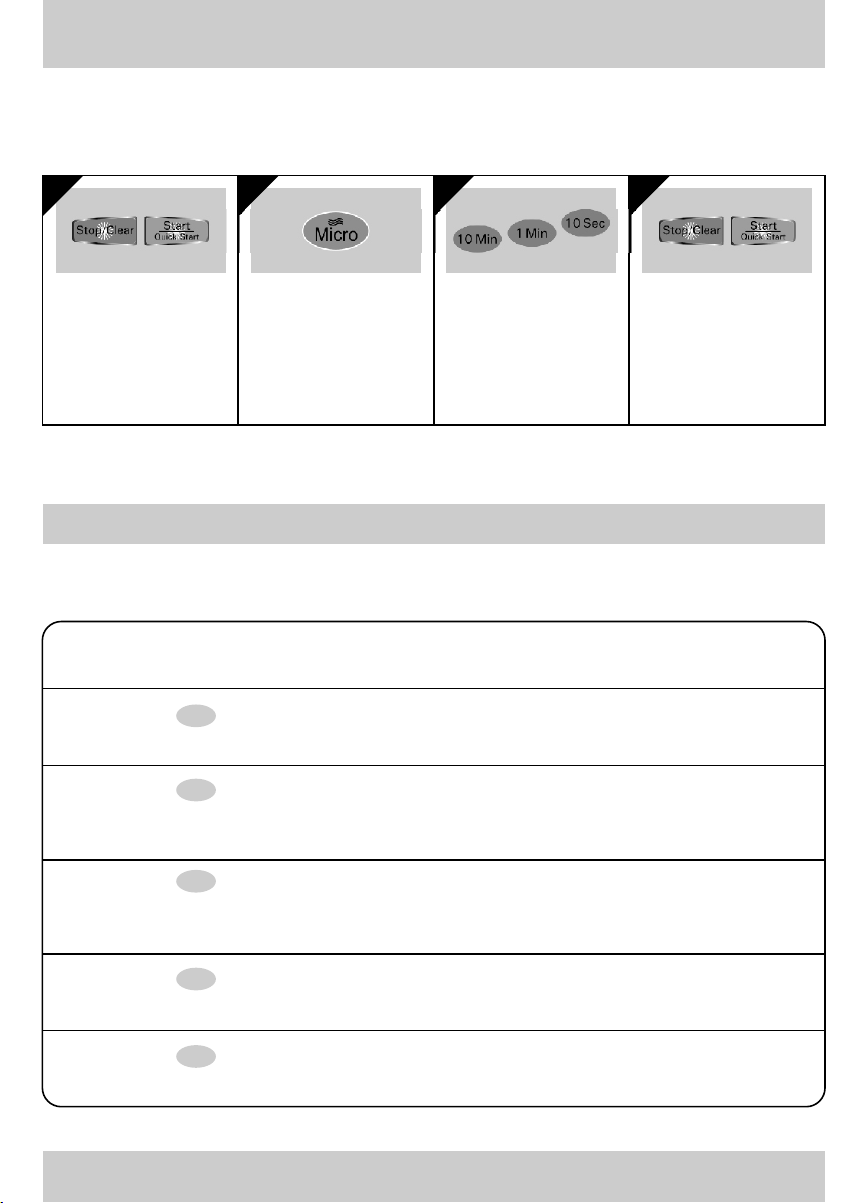
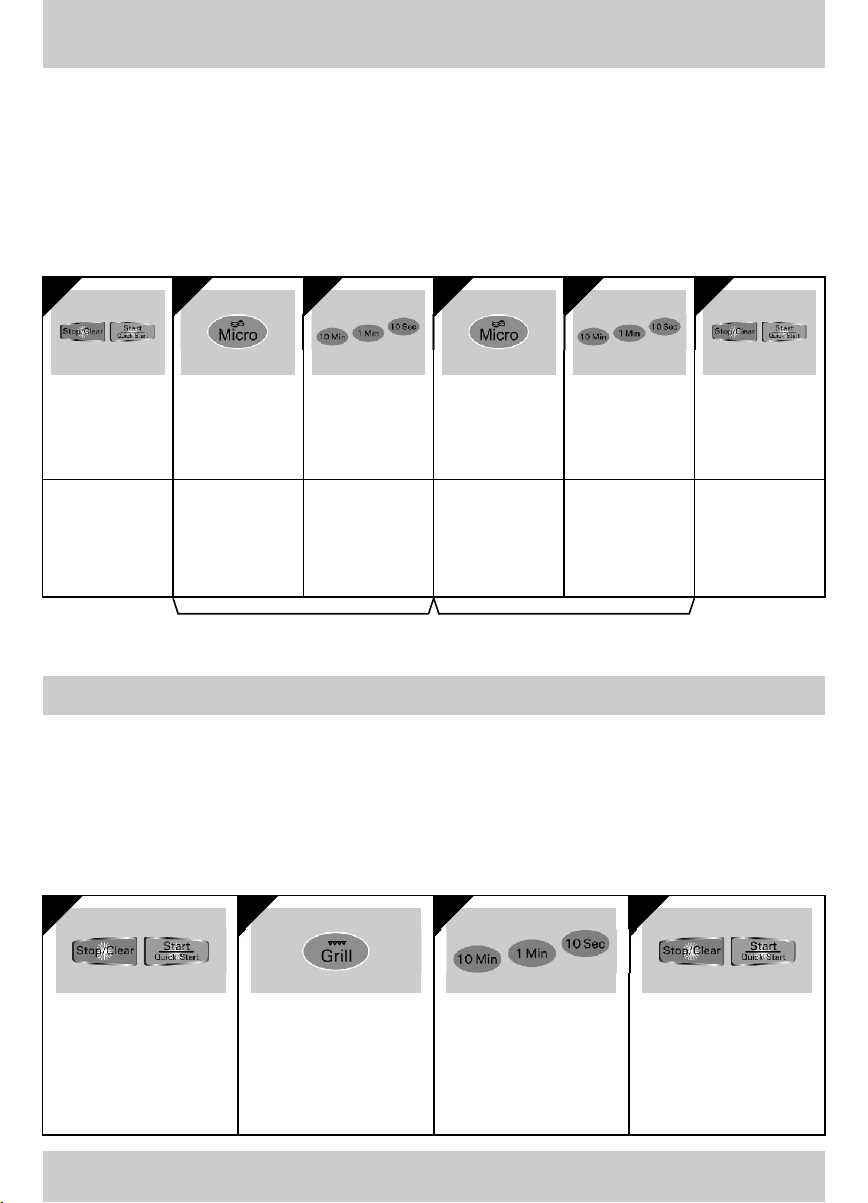
Micro Power Cooking / ekbØks ikoj dqfdax iz.kkyh
Micro Power Cooking / ekbØks ikoj dqfdax iz.kkyh
Your oven has five microwave power settings. High power is automatically selected but repeated presses of the MICRO key will
select a different power level.
vkids vou esa 5 ikoj Lrj gSaA mPpre ikoj Lrj dk pquko Lor% gh gks tkrk gS] ijUrq ckj-ckj ^ekbØks* cVu nck dj fofHké ikoj Lrjksa dk
pquko fd;k tk ldrk gSA
1 2 3 4
Press STOP/CLEAR
STOP/CLEAR nck;saA
Se lec t Micr o Po we r Le vel
(180W, 360W, 540W, 720W,
900W)
Refer Power Level Table given
below.
ekbØks ikoj Lrj (180W, 360W,
540W, 720W, 900W) pqusaA
Set Cooking Time
(:10 Sec to 99:50 Min)
[kkuk idkus dk le; (:10 Sec to
99:50 Min) lSV djsaA
Press Start
Start nck,aA
uhps nh xbZ Power Level Table
ns[ksaA
Power Level / ikoj Lrj
Power Level / ikoj Lrj
Your microwave oven is equipped with 5 power levels to give you maximum flexibility and control over cooking
vkidk ekbØksoso vou 5 ikoj Lrjksa ls ySl gS rkfd Hkkstu vkids vuqdwy o bPNkuqokj id ldsA
uhps nh xbZ lkj.kh esa [kk| inkFkks± ds uke o Hkkstu idkus ds mi;qä ikoj Lrj fn;s tk jgs gSaA
POWER
ikoj
HIGH
MAX
mPpre
MEDIUM
HIGH
e/;e mPp
MEDIUM
e/;e
Press MICRO button
ekbØks cVu nck;sa
times
1
ckj
times
2
ckj
times
3
ckj
USE
ç;ksx
ê Boil Water / ikuh mckyuk
ê Cook poultry pieces, fish, vegetables / eqxkZ] eNyh o lfCt;k¡ idkuk
ê Cook tender cuts of meat / ek¡l ds ueZ VqdM+s idkuk
ê All reheating / Hkkstu nksckjk xeZ djuk
ê Roast meat and poultry / ek¡l o eqxkZ Hkwuuk
ê Cook mushrooms and shellfish / e'k:e o [kksy okyh eNyh idkuk
ê Cook foods containing cheese and eggs / Hkkstu ftlesa v.Ms o pht+ Mkyh xbZ gksa
ê Bake cakes and scones / dsd o ^Ldksu* csd djuk
ê Prepare eggs / v.Ms idkuk
ê Cook custard / dLVMZ idkuk
ê Prepare rice, soup / pkoy o lwi idkuk
% Wattage
% okVst++
P-HI/900W/HI/100%
P-80/720W/MED-HI/80%
P-60/540W/MED/60%
DEFROST/
MEDIUM LOW
Mh ÝkWLV@e/;e U;wu
LOW
U;wure
times
4
ckj
times
5
ckj
ê All thawing / lHkh izdkj ds [kk| inkFkks± dks lkekU; rkieku ij ykuk
ê Melt butter and chocolate / pkWdysV o eD[ku fi?kyuk
ê Cook less tender cuts of meat / ek¡l ds de uje VqdM+s idkuk
ê Soften butter & cheese / eD[ku o pht+ dks uje djuk
ê Soften ice cream / vkblØhe dks uje djuk
ê Raise yeast dough / vkVs esa [kehj mBkuk
P-40/360W/MED-LOW/40%
P-20/180W/LOW/20%
6
Page 7

Food characterstics & Microwave cooking / [kk| inkFkks± dh fo'ks"krk,a vkSj ekbZØksoso }kjk idkus dh çfØ;k
Food characterstics & Microwave cooking / [kk| inkFkks± dh fo'ks"krk,a vkSj ekbZØksoso }kjk idkus dh çfØ;k
Factors which affect Microwave in the following stages of cooking
ikd fofèk ds fuEufyf[kr Lrjksa ij ekbØks rjaxksa dks izHkkfor djus okys dkjd
I. BEFORE COOKING
1. Density of food / [kk| inkFkks± dk ?kuRo
Light, porous food such as cakes and breads cook more quickly than heavy, dense foods such as roasts and casseroles.
gYds o jaèkzksa (pores) okys Hkkstu dks] tSls dsd] czsM vkfn] idus esa de le; yxrk gS] ijUrq vfèkd ?kuRo okys Hkkjh [kk| inkFkks± tSls
^jksLV* vkSj ^dSljksy* vkfn esa vfèkd le; yxrk gSA
2. Height of food / [kk| inkFkks± dh Å¡pkbZ
The upper portion of tall food, particularly roasts, will cook more quickly than the lower portion.
[kk| inkFkks± ds cM+s VqdM+ksa ds Åijh fdukjs] fo'ks"kdj ek¡l ds] uhps ds Hkkx ls] de le; esa id tkrs gSaA
3. Bone and fat content of food / [kk| inkFkks± esa olk (fat) o gìh dh ek=kk
Bones conduct heat and fat cooks more quickly than meat.
gfì;k¡ m"ek lapkfyr djrh gSa vkSj olk (fat) idus esa] ek¡l ls de le; ysrk gSA
4. Quantity of food / [kk| inkFkZ dh ek=kk
The more food you place in the oven, the longer the cooking time.
vou esa j[kh xbZ Hkkstu dh ek=kk ftruh c<+sxh mruh Hkkstu idus ds le; esa o`f) gksxhA
5. Shape of food / [kk| inkFkZ dk vkdkj-izdkj
Microwaves penetrate only about 2 cm into food, the interior portion of thick foods are cooked as the heat generated on the
outside travels inward. Only the outer edge of food is cooked by microwave energy; the rest is cooked by conduction.
ekbØks rjaxsa Hkkstu dks dsoy 2 cm vUnj rd gh Hksn ldrh gSaA blls eksVk ;k pkSM+k [kk| inkFkZ] ckgjh lrg ds fudV okys [k.Mksa ls
lapkfyr m"ek }kjk gh idrk gSA [kk| ds dsoy ckgjh fdukjs gh ekbØks rjaxksa dh ÅtkZ ls idrs gSa] ckdh dk Hkkx m"ek ds lapkyu }kjk gh
idrk gSA
II. DURING COOKING
1. Covering / vkoj.k
A cover traps heat and steam which causes food to cook more quickly.
<Ddu] Hkki o m"ek dks vUnj gh jksd dj j[krk gSA blls Hkkstu tYnh idrk gSA
2. Browning / Hkwjk ;k dqjdqjk djuk
Meats and poultry that are cooked fifteen minutes or longer will brown lightly in their own fat.
ek¡l ;k eqxsZ ds VqdM+s] ftUgsa 15 fe0 ls vfèkd le; ds fy;s idk;k x;k gks] viuh gh pchZ esa Hkwjs gks tk;saxsA
3. Arranging and spacing / Hkkstu dks rjrhc ls j[kuk o [kkyh LFkku NksM+uk
It will heat more evenly if if placed in the oven on equal distance apart, preferably in a circular pattern. Never stack foods on top
of one another.
le:i ls xeZ djus ds fy;s] vou esa leku nwjh ij xksykbZ esa j[ksaA Hkkstu dks dHkh Hkh <sjh ds :i esa u j[ksaA
4. Stirring / fgykuk
Stir in order to spread and redistribute heat. Always stir from the outside towards the centre as the outside of the food heats
first.
Å"ek dks QSykus vkSj iqufoZrfjr djus ds fy, [kkus dks fgyk,aA ges'kk ckgj ls vanj dh rjg Nksyuk pkfg, D;ksafd ckgj dk inkFkZ igys
xeZ gksrk gSA
5. Turning over / iyVuk
Large, tall foods such as roots and whole chickens should be turned so that the top and bottom will cook evenly.
[kkus ds cM+s vkSj yEcs VqdM+ksa tSls tM+sa ,oa lEiw.kZ fpdu( dks iyV dj Hkwuus ls lekurk ykbZ tk ldrh gSA
6. Shielding / <duk
Strips of aluminium foil (which block microwaves) can be placed over the corners or edges of square and rectangular foods to
prevent those portions from overcooking.
,Y;wehfu;e QkWby dk bLrseky inkFkZ ds tyus dks cpkrh gSA
III. AFTER COOKING
1. Standing time / LVsf.Max Vkbe
Foods are often allowed to stand for 3 to 10 minutes after being removed from the microwave oven. Usually the foods are
covered during standing time to retain heat unless they are supposed to be dry in texture (some cakes and biscuits, for
example). Standing allows foods to finish cooking and also helps flavour blend and develop.
O;atu idus ds ckn 3 ls 10 feuV <ddj j[kuk idus dh izfØ;k lekIr djus esa enn djrk gSA bl vofèk dks LVSf.Max Vkbe dgrs gSaA
;g O;atu ds :i dks cjdjkj j[kus esa ennxkj gksrk gSA
7
Page 8
Two stage Cooking / nks pj.kksa esa Hkkstu idkuk
Two stage Cooking / nks pj.kksa esa Hkkstu idkuk
During two stage cooking the oven door can be opened and food checked. Close the oven door and press START and the cooking
stage will continue.
nks pj.kksa esa Hkkstu idkrs le; vki vou [kksy dj Hkkstu tk¡p ldrs gSaA vou dk }kj cUn djsa vkSj ^LVkVZ* nck nsaA Hkkstu idkus dh izfØ;k
iqu% vkjEHk gks tk;sxhA
At the end of stage 1, BEEP sounds and stage 2 commences.
pj.k 1 lekIr gksus ij chi ctsxh vkSj pj.k 2 'kq: gks tk,xkA
Should you wish to clear the programme press STOP/CLEAR twice.
;fn vki funsZ'k feVkuk pkgsa rks STOP/CLEAR nks ckj nck nsaA
e.g. Kheer (Rice 50g, Milk 2 cup, Sugar 3 tsp.) / mnkgj.k ds fy, [khj ¼pkoy 50 xzk] nw/k 2 di] phuh 3 pEep½
1 2 3 4 5 6
Press Stop/Clear
Stop/Clear nck,aA
Grill Cooking / fxzy }kjk Hkkstu idkuk
Grill Cooking / fxzy }kjk Hkkstu idkuk
This model is fitted with a QUARTZ GRILL, so preheating is not needed.
Select Micro Power
Level (180W, 360W,
540W, 720W, 900W)
ekbØks ikoj Lrj
(180W, 360W, 540W,
720W, 900W) pqusaA
For mak ing Khe er
(Set Power Level PHI)
[khj cukus ds fy,
ikoj Lrj P-HI ij lSV
djsaA
STAGE - 1 STAGE - 2
Set Cooking Time
(:10 Sec to 99:50 Min)
[kkuk idkus dk le;
(:10 Sec to 99:50 Min)
lSV djsaA
For mak ing Khe er
(Set Cook Time 6:00
Min)
[khj cukus ds fy,
6:00 fe- dk le; lSV
djsaA
Select Micro Power
Level (180W, 360W,
540W, 720W, 900W)
ekbØks ikoj Lrj
(180W, 360W, 540W,
720W, 900W) pqusaA
For mak ing Khe er
(Set Po we r Lev el
P-60)
[khj cukus ds fy,
ikoj Lrj P-60 ij lSV
djsaA
Set Cooking Time
(:10 Sec to 99:50 Min)
[kkuk idkus dk le;
(:10 Sec to 99:50 Min)
lSV djsaA
For mak ing Khe er
(Set Cook Time 12:00
Min)
[khj cukus ds fy,
12:00 fe- dk le; lSV
djsaA
bl e'khu esa ^DokVZ~t fxzy* dk iz;ksx fd;k x;k gS ftls igys ls xeZ djus dh dksbZ vko';drk ugha gksrhA
This feature will allow you to brown and crisp food quickly.
;g fxzy vkids [kk| inkFkks± dks 'kh?kz Hkwjk o dqjdqjk dj nsxhA
The grill rack can be used in two positions - high or low, depending on food type and size.
fxzy jSd vki nks fLFkfr;ksa esa iz;ksx dj ldrs gSa & yks ;k gkbZA bldk p;u [kk| inkFkks± ds vkdkj-izdkj ij fuHkZj djsxkA
The grill rack (high rack) must be used during grill cooking.
fxzy dqfdax djrs le; fxzy jSd ¼gkbZ½ vo'; iz;ksx djsaA
1 2 3 4
Press Start
Start nck,aA
Press STOP/CLEAR
STOP/CLEAR nck;saA
Press Grill mode
fxzy eksM nck,aA
Set Cooking Time
(:10 Sec to 99:50 Min)
[kkuk idkus dk le; (:10 Sec to
99:50 Min) lSV djsaA
8
Press Start
Start nck,aA
Page 9

Convection Cooking / dUosD'ku }kjk Hkkstu idkuk
Convection Cooking / dUosD'ku }kjk Hkkstu idkuk
The convection oven has a temperature range of 40 °C and 100 °C~250 °C (180 °C is automatically available when convection
mode is selected).
dUoSD'ku vou esa rkieku lhek 40 °C vkSj 100 °C ~ 250 °C gS (180 °C Lor% lSV gS tc dUoSD'ku lSV djrs gS)A
The oven has a ferment function at the oven temperature of 40 °C. You may wait until the oven is cool because you cannot use a
ferment function if the oven temperature is over 40 °C.
vou esa ngh tekus dh lqfo/kk gSA vki vou ds BaMk gksus rd izrh{kk djsa D;ksafd 40 °C ls Åij rkieku gksus ij ngh ugha tek ldrsA
Your oven will take a few minutes to reach the selected temperature. Once it has reached correct temperature, your oven will BEEP
to let you know that it has reached the correct temperature. Then place your food in your oven; then tell your oven to start cooking.
vkidk vou fuf'pr rkieku ij igq¡pus esa dqN feuV ysxkA tc ;g fuf'pr rkieku ij igq¡psxk rks chi ctsxh vkSj vkidks irk yxsxk fd
vou esa lgh rkieku gSA vc vki vou esa Hkkstu jf[k, vkSj idkuk 'kq: dhft,A
1. To preheat./ igys xeZ djus ds fy,
1 2 3 4
Press STOP/CLEAR
STOP/CLEAR nck;saA
Press Conv.
Conv. nck;saA
Press ‘More/Less’ key to set
Temperature (40°C to 250°C)
rkieku (40°C to 250°C) lSV
Press Start to Preheat
Start nck,aA
djus ds fy, ‘More/Less’ cVu
nck,aA
If you do not set a temperature your oven will automatically select 180 °C. The cooking temperature can be changed by turning the
Dial key.
;fn vki dksbZ rkieku ugha pqurs rks vou Lor% gh 180 °C pqusxkA idkus dk rkieku Dial ?kqekdj cnyk tk ldrk gSA
The convection rack (low rack) must be used during convection cooking.
dUoSD'ku jSd dk iz;ksx dUoSD'ku dqfdax ds le; vo'; djsaA
2. To cook/ [kkuk idkus ds fy,
1 2 3 4 5
Press STOP/CLEAR
STOP/CLEAR nck;saA
Press Conv.
Conv. nck;saA
Press ‘More/Less’ key to
set Temperature (40°C to
250°C)
rkieku (40°C to 250°C)
lSV djus ds fy,
‘More/Less’ cVu nck,aA
Set Cooking Time
(:10 Sec to 99:50 Min)
[kkuk idkus dk le; (:10
Sec to 99:50 Min) lSV
djsaA
Press Start
Start nck,aA
9
Page 10
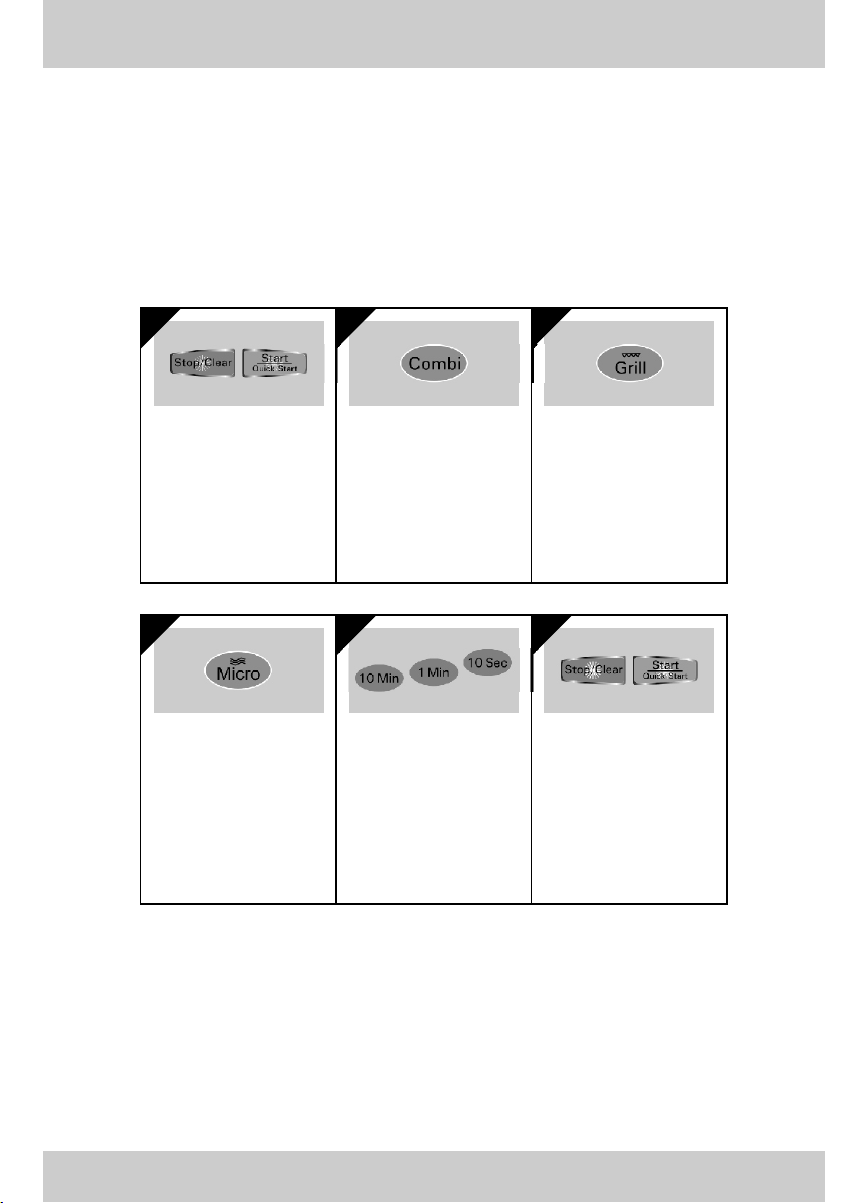
Combination Cooking / dkWfEcus'ku }kjk Hkkstu idkuk
Combination Cooking / dkWfEcus'ku }kjk Hkkstu idkuk
Your oven has a combination cooking feature which allows you to cook food with heater and microwave at the same time
alternately. This generally means it takes less time to cook your food.
vkids vou esa ;g lqfoèkk bl fy;s iznku dh xbZ gS rkfd vki blds iz;ksx ls Hkkstu dks ghVj o ekbØksoso }kjk ,d gh le; esa ckjh ckjh ls
idk ldsaA lkekU;r% bldk vFkZ gksrk gS fd Hkkstu idus esa yxus okys le; dh cprA
You can set three kinds of micro power level (20%, 40% and 60%) in combi mode.
vki dkWEch eksM esa rhu izdkj ds ekbØks ikoj Lrj ( 20%, 40% vkSj 60%) pqu ldrs gSaA
1. GRILL COMBINATION / fxzy dkWfEcus'ku
1 2 3
Press STOP/CLEAR
STOP/CLEAR nck;saA
Press Combi.
Combi nck;saA
4 5 6
Press Micro to select Micro
Power Level (180W, 360W,
540W).
ekbØks ikoj Lrj (180W, 360W,
540W) pquus ds fy, ekbØks
nck,aA
Set Cooking Time
(:10 Sec to 99:50 Min)
[kkuk idkus dk le; (:10 Sec to
99:50 Min) lSV djsaA
Press Grill mode
fxzy eksM nck,aA
Press Start
Start nck,aA
Be careful when removing your food because the container will be hot !
Hkkstu dks vou ls fudkyrs le; lkoèkkuh cjrsa] D;ksafd crZu xeZ gks ldrk gSA
10
Page 11

Combination Cooking / dkWfEcus'ku }kjk Hkkstu idkuk
Combination Cooking / dkWfEcus'ku }kjk Hkkstu idkuk
Your oven has a combination cooking feature which allows you to cook food with heater and microwave at the same time
alternately. This generally means it takes less time to cook your food.
vkids vou esa ;g lqfoèkk bl fy;s iznku dh xbZ gS rkfd vki blds iz;ksx ls Hkkstu dks ghVj o ekbØksoso }kjk ,d gh le; esa ckjh ckjh ls
idk ldsaA lkekU;r% bldk vFkZ gksrk gS fd Hkkstu idus esa yxus okys le; dh cprA
2. CONVECTION COMBINATION / dUosD'ku dkWfEcus'ku
1 2 3 4
Press STOP/CLEAR
STOP/CLEAR nck;saA
Press Combi.
Combi nck;saA
5 6 7
Press Micro to select Micro
Power Level (180W, 360W,
540W).
ekbØks ikoj Lrj (180W, 360W,
540W) pquus ds fy, ekbØks
nck,aA
Set Cooking Time
(:10 Sec to 99:50 Min)
[kkuk idkus dk le; (:10 Sec to
99:50 Min) lSV djsaA
Press Conv.
Conv. nck;saA
Press Start
Start nck,aA
Press ‘More/Less’ key to set
Temperature (100°C to 250°C)
rkieku (100°C to 250°C) lSV
djus ds fy, ‘More/Less’ cVu
nck,aA
Be careful when removing your food because the container will be hot !
Hkkstu dks vou ls fudkyrs le; lkoèkkuh cjrsa] D;ksafd crZu xeZ gks ldrk gSA
11
Page 12

Quick Start / fDod LVkVZ
Quick Start / fDod LVkVZ
The Quick Start allows you to set 30 seconds interval of HIGH Power Cooking with a touch of 'Quick Start' key.
fDod LVkVZ cVu nck dj 30 lSds.M ds vUrjky esa gkbZ ikoj ij Hkkstu idk ldrs gSaA
1 2
Press STOP/CLEAR
STOP/CLEAR nck;saA
During Quick Start Cooking, you can extend the cooking time by repeatedly pressing the Quick Start key.
Note :
Press ‘Start/Quick Start’ key.
‘Start/Quick Start’ cVu nck;saA
dsoy Quick Start button dks ckj&ckj nckdj fDod LVkVZ ds nkSjku idkus dk le; c<+k;k tk ldrk gSA
Various Cook Functions / fofHkUu dqd dk;Ziz.kkfy;ka
Various Cook Functions / fofHkUu dqd dk;Ziz.kkfy;ka
Please follow the given steps to operate cook functions (
Indian Cuisine, Utility Corner / Breakfast, Snacks, Child's
Favourite, Tandoor Se..., Sweet Corner, Indian Cuisine, Utility Corner
COOK
MODE
STEP-1
STEP-2
STEP-3
STEP-4
COOK
MODE
STEP-1
STEP-2
Breakfast (bF), Snacks (Sn), Child's Favourite (CC),
Tandoor Se... (tS), Sweet Corner (SC)
Press Stop/Clear Press Stop/Clear Press Stop/Clear
Press (bF, Sn) & (CC, tS, SC)
to select Category
from (1~4) & (1~8) respectively
Press More/Less
to set Weight
Press Start Press Start Press Start
Breakfast (bF), Snacks (Sn), Child's Favourite (CC),
Tandoor Se... (tS), Sweet Corner (SC)
Stop/Clear nck,a Stop/Clear nck,a Stop/Clear nck,a
(1~4) & (1~8) Js.kh ds
) in your Microwave. Ñi;k vius ekbØksoso dh fofHkUu dk;Ziz.kkfy;ka (
O;atu pquus ds fy,
Øe'k% (bF, Sn) & (CC, tS, SC) nck,a
STEP-3
otu fu/kkZfjr djus ds
fy, More/Less nck,aA
Breakfast, Snacks, Child's Favourite, Tandoor Se..., Sweet Corner,
) dks pykus ds fy, uhps fn;s x;s pj.kksa dk vuqlj.k djsaA
Indian Cuisine (IC) Utility Corner (UC)
Press IC
to select Category
from (1~8)
Press More/Less
to set Weight
Indian Cuisine (IC) Utility Corner (UC)
(1~8) Js.kh ds
O;atu pquus ds fy,
IC nck,a
otu fu/kkZfjr djus ds
fy, More/Less nck,aA
Press UC
to select Category
from (1~4)
Press More/Less
to set Weight for UC-3, 4
(1~4) Js.kh ds
O;atu pquus ds fy,
UC nck,a
otu fu/kkZfjr djus ds
fy, More/Less nck,aA
STEP-4
Note / fVIi.kh %
While cooking you can extend the cooking time at any point by pressing MORE/LESS key. There is no need to stop the cooking
process.
Start nck,a Start nck,a Start nck,a
tc vki Hkkstu idk jgs gksa] rks dsoy MORE/LESS cVu nck dj gh le; esa ifjorZu fd;k tk ldrk gSA Hkkstu idkus dh izfØ;k dks jksdus
dh dksbZ vko';drk ugha gSA
12
Page 13

Indian Cuisine / Hkkjrh; O;atu
Indian Cuisine / Hkkjrh; O;atu
Category Weight Limit Utensil Instructions
IC-1 Upma 0.1 ~ 0.3 kg Microwave
IC-2 Biryani 0.1 ~ 0.3 kg Microwave
IC-3
Kadi Pakoda
0.1 ~ 0.3 kg Microwave
safe bowl
safe bowl
safe bowl
Suji 0.1 kg 0.2 kg 0.3 kg
Oil 2 tbsp
Water 200 ml 400 ml 600 ml
Salt & Sugar To taste
Onion 1 no. 2 nos. 2 nos.
Green Chilli 2 nos. 3 nos. 3 nos.
Rai, Jeera, Hing, Curry
Leaves, Urad Dal
Method : 1. In Microwave Safe Bowl put oil, jeera, rai, urad dal, hari mirch,
fof/k % 1.
Basmati Rice 0.1 kg 0.2 kg 0.3 kg
Water 200 ml 400 ml 600 ml
Ghee 1 tbsp
Laung, Elaichi, Dalchini,
Black Pepper, Tej Patta,
Salt & Sugar
Mix Vegetables (Gobhi, Mutter, Gajar, French
Beans etc.)
Method : 1. In Microwave Safe Bowl put oil add laung, Dlachini, Elaichi,
fof/k % 1.2.ekbØksoso lsQ ckmy esa rsy Mkysa] rnksijkUr ykSax] nkyphuh] byk;ph]
Curd 0.1 kg 0.2 kg 0.3 kg
Water 200 ml 300 ml 400 ml
Salt, Sugar & Green Chilli
Besan
Red Chilli Powder
Haldi
Ghee
Rai, Jeera, Hing, Curry Leaves
Method : 1. In Microwave Safe Bowl add ghee, rai, jeera, green chilli, Select
fof/k % 1.
curry leaves and suji, select Menu then press Start.
2.
When beep, add onion, stir well and keep inside and press Start.
3.
When beep, add water, sugar & salt to taste, lemon juice mix well
and keep inside press Start to cook stand for 5 minutes. Garnish
with hara dhania and bhujiya.
ekbØksoso lsQ ckmy esa rsy] thjk] jkbZ] mM+n nky] gjh fepZ] djh ds
iÙks ,oa lwth Mkysa] ehuw pqudj LVkVZ nck,aA
2.
^chi* lqukbZ nsus ij I;kt Mkysa] vPNh rjg fgyk,a vkSj vUnj gh jgus nsa
rFkk LVkVZ nck,aA
3.
^chi* lqukbZ nsus ij Loknkuqlkj ikuh] phuh ,oa ued] uhacw jl Mkydj
vPNh rjg feyk,a] vUnj j[ksa] LVkVZ nck,a vkSj 5 feuV rd idus nsaA
gjk /kfu;k vkSj Hkqft;k ds lkFk ltk,aA
½ Cup 1 Cup 1½ Cup
Tej patta and Kali Mirch, add mix vegetables and soaked rice
select menu and press Start.
2. When beep add water & salt mix well cover it press start, stand in
5 mints serve hot with raita & saled.
rst iÙkk vkSj dkyhfepZ Mkysa vkSj fQj fefJr lfCt;ka vkSj Hkhxs gq,
pkoy Mkydj ehuw pqusa rFkk LVkVZ nck,aA
^chi* lqukbZ nsus ij ikuh vkSj ued Mkydj vPNh rjg feyk,a rFkk
<ddj LVkVZ nck,a] 5 feuV rd vUnj jgus nsaA jk;rk vkSj lykn
ds lkFk xeZ&xeZ ijkslsaA
50 gm 75 gm 100 gm
1 tbsp 1½ tbsp 2 tbsp
menu and press Start.
2.
When beep, add Curd, water, haldi, salt & sugar, 1 tsp besan,
press Start.
3.
Take besan add salt, ajwain, red chilli powder, little oil to it and
make a soft dough and make small balls from it.
4.
When beep, add these balls to kadhi mixture and press start.
Serve hot with rice.
ekbØksoso lsQ ckmy esa ?kh] jkbZ] thjk] gjh fepZ Mkysa] ehuw pqudj LVkVZ nck,aA
2.
^chi* lqukbZ nsus ij ngh] ikuh] gYnh] ued] phuh rFkk 1 pEep cslu Mkysa
vkSj LVkVZ nck,aA
3.
cslu ysdj mlesa ued] vtokbu] yky fepZ ikmMj] FkksM+k lk rsy feyk,a
vkSj ,d eqyk;e MQ cukdj mlls NksVs&NksVs ckWYl cuk ysaA
4.
^chi* lqukbZ nsus ij bu ckWYl dks d<+h ds feJ.k esa Mkysa vkSj LVkVZ nck,aA
pkoy ds lkFk xeZ&xeZ ijkslsaA
3 tbsp
As per your taste
2 tbsp
To taste
To taste
To taste
To taste
To taste
4 tbsp
3 tbsp
13
Page 14

Indian Cuisine / Hkkjrh; O;atu
Indian Cuisine / Hkkjrh; O;atu
Category Weight Limit Utensil Instructions
IC-4 Kadai
Paneer
0.1 ~ 0.3 kg Microwave
safe bowl
Paneer 0.1 kg 0.2 kg 0.3 kg
Onion Paste 3 tbsp
Tomato Puree 1½ tbsp 2 tbsp 3 tbsp
Ginger-Garlic Paste,
Salt & Sugar
Red Chilli Powder, Halid
Kasuri Methi, Garam Masala
Butter
Fresh Cream
Method : 1. In Microwave Safe Bowl take oil, onion paste, ginger garlic paste,
fof/k %
mix well and press start.
2. When beep, add tomato puree, butter, fresh cream, haldi, red chilli
powder, garam masala, kasuri methi, salt, sugar and paneer cubes,
mix well and press start, garnish with hara dhania and serve hot.
1.
ekbØksoso lsQ ckmy esa rsy] I;kt] vnjd vkSj yglqu isLV Mkydj vPNh
rjg feyk;sa vkSj LVkVZ nck,aA
2.
^chi* lqukbZ nsus ij VksesVks I;wjh] eD[ku] rktk Øhe] gYnh] yky fepZ
ikmMj] xeZ elkyk] dlwjh eSFkh] ued] 'kdj vkSj iuhj ds VqdM+s Mkysa]
vPNh rjg feyk;sa vkSj LVkVZ nck,aA gjk /kfu;k ds lkFk ltk,a vkSj
xeZ&xeZ ijkslsaA
1½ tbsp
1 tbsp
4 tbsp
To taste
To taste
2 tbsp
1½ tbsp
5 tbsp
3 tbsp
2 tbsp
IC-5 Dal Tadka 0.2 kg Microwave
IC-6
Idli
0.1 ~ 0.3 kg Microwave
safe bowl
safe idli
steamer
Dal (soaked for 1 hour) 0.2 kg
Water 300 ml
Oil 2 tbsp
Rai, Jeera, Kasuri Methi,
Hara Dhania, Hing, Haldi
Geen Chilli
Salt To taste
Method : 1. Take 200 gms dal in Microwave Safe bowl, add Water, Haldi & Hing.
2. Select menu press start to cook.
3. When beep take another bowl add oil, jeera, hari mirch, curry leaves,
select menu & start
4. When beep add dal, salt, dhania jeera powder, hara dhania, kasuri
fof/k % 1.
Rawa 0.1 kg 0.2 kg 0.3 kg
Curds 1/2 cup 1 cup 1½ cup
Water As required
Fruit Salt
Soda bicarb
Cashew nuts, Salt, Curry
leaves, Green Chilli Powder
Method : 1. Mix Rawa, Curd, Fruit salt, Soda bi-carb, roasted cashewnuts,
fof/k % 1.
methi (optional) lemon juice select menu & press start to cook.
ekbØksoso lsQ ckmy esa 200 xzke nky ysa vkSj ikuh] gYnh rFkk ghax MkysaA
2.
ehuw pqudj idkus ds fy, LVkVZ nck,aA
3.
^chi* lqukbZ nsus ij nwljk ckmy ysa] mlesa rst] thjk] gjh fepZ] djh iÙkk
yssa] ehuw pqudj LVkVZ nck,aA
4.
^chi* lqukbZ nsus ij nky] ued] /kfu;k&thjk ikmMj] gjk /kfu;k] dlwjh
eSFkh ¼oSdfYid½ uhacw jl Mkysa] ehuw pqudj LVkVZ nck,aA
1/2 tsp 3/4 tsp 1 tsp
1/4 tsp 1/4 tsp
curry leaves, green chilli and salt to make a thick batter.
Pour in greased MICROWAVE SAFE Idli steamer select menu
and press start.
jok] ngh] ÝwV lkYV] lksMk ckbdkcZ] rys gq, dktw] dj iÙkk] gjh fepZ
vkSj ued feyk;sa rFkk ,d eksVk lk xksyk cuk ysaA mls xzhl fd;s gq,
ekbZØksoso lsQ bMyh LVhej esa j[ksaA ehuw pqudj LVkVZ nck,aA
As per taste
To taste
1/2 tsp
14
Page 15

Indian Cuisine / Hkkjrh; O;atu
Indian Cuisine / Hkkjrh; O;atu
Category Weight Limit Utensil Instructions
IC-7 Sambhar 0.2 kg Microwave
safe bowl
Arhar Dal (Soaked for 2 hrs) 0.2 kg
Oil 2 tbsp
Onion chopped 1 medium
Tomato chopped 1 medium
Mixed Vegetables chopped -
Drumsticks, ghiya, Brinjals,
Red Pumpkin
Boiled Water 4 cup
Imli pulp, Green Chilli, Sambhar
Masala, Salt, Gud
Method : 1. Soak dal for 2 hours, In Microwave Safe Bowl take dal, haldi,
fof/k %
onion, green chilli, tomato, mix vegetables and boiled water.
Select menu and press start.
2.
For Tadka : In another Microwave Safe Bowl take oil, add rai,
hing, curry leaves, dhania, red chilli. Select menu and press
start.
3.
Mash dal very well and add to tadka. Add imli pulp sambhar
masala, gud and some water (if required). Press start. Stand for
5 mins. Garnish with coconut and hara dhania and serve with Idli.
1.
nky dks 2 ?k.Vs fHkxks,aA ekbØoso lsQ ckmy esa nky] gYnh] I;kt] gjh
fepZ] VekVj ysaA fefJr lfCt;ksa vkSj mcys gq, ikuh dks vPNh rjg
feyk,aA ehuw pqusa vkSj LVkVZ nck,aA
2.
rM+dk ds fy, % ,d nwljs ekbØksoso lsQ ckmy esa rsy ysaA mlesa jkbZ]
ghax] djh iÙkk] /kfu;k] yky fepZ MkysaA ehuw pqudj LVkVZ nck,aA
3.
nky dks vPNh rjg dqpysa vkSj mlesa rM+dk yxk ysaA fQj beyh] lk¡Hkj
elkyk] xqM+ vkSj vko';drkuqlkj ikuh feyk,aA LVkVZ nck,aA 5 feuV rd
idus nsaA ukfj;y vkSj gjk /kfu;k ls ltk,a vkSj bMyh ds lkFk ijkslsaA
1 cup
As per your taste
IC-8 Chilli
Chicken
0.1 ~ 0.3 kg Microwave
safe bowl
Boneless Chicken 0.3 kg
Oil 2 tbsp
Shimla Mirch 1 no.
Chilli Souce
Soya Souce
Vinegar
Salt, Sugar & Kali Mirch
Method : 1. In Microwave Safe Bowl take oil, bone less chicken pieces,
fof/k % 1.2.ekbØksoso lsQ ckmy esa rsy] cksuySl fpdu ds VqdM+s] dVh gqbZ vnjd]
chopped ginger garlic, soya sauce & cover it, select menu and
press start.
2. When beeps add chopped onion, chopped capsicum, chopped
green chilli, vinegar, salt, sugar, kali mirch and 2 tsp cornflour
dissolved with 1/4 cup cold water place it in Microwave without
cover and press start.
yglqu] lks;k lkWl j[kdj <+d nsaA ehuw pqusa vkSj LVkVZ nck,aA
^chi* lqukbZ nsus ij dVh gqbZ I;kt] f'keyk fepZ] gjh fepZ ,oa fljdk]
ued] dkyh fepZ vkSj ,d pkSFkkbZ BaMs ikuh esa ?kqyk gqvk eDdk dk vkVk
MkysaA bldks fcuk <ds vkWou esa j[ksa vkSj LVkVZ nck,aA
0.1 kg
1 tbsp
1/2 no.
1/2 tbsp
1/2 tbsp
1/2 tbsp
0.2 kg
1½ tbsp
1 no.
1/2 tbsp
1/2 tbsp
1/2 tbsp
As per your taste
3/4 tbsp
1 tbsp
1 tbsp
15
Page 16

Breakfast/czsdQkLV
Breakfast/czsdQkLV
Category Weight Limit Utensil Instructions
bF-1 Poha 0.1 ~ 0.3 kg Microwave
safe bowl
Poha 0.3 kg
Oil 3 tbsp
Onion Chopped 1 cup
Green Chilli
Rai, Jeera, Hing, Haldi
Curry Leaves
Grated Coconut and
Hara Dhania
Method : 1. In Microwave Safe Bowl put oil, rai, jeera, green chilli, curry leaves,
fof/k %
select menu & press start.
2.
When beep add chopped onion, haldi powder & hing, press start.
3.
When beep add washed poha, salt & sugar to taste mix well and
press start. Garnish with cocobnut and hara dhania serve hot.
1.
ekbØksoso lsQ ckmy esa rsy] jkbZ] thjk] gjh fepZ] djh iÙkk MkysaA ehuw
pqudj LVkVZ nck,aA
2.
^chi* lqukbZ nsus ij dVh gqbZ I;kt] gYnh ikmMj ,oa ghax Mkysa vkSj
LVkVZ nck,aA
3.
^chi* vkus ij /kqyk gqvk iksgk] ued vkSj Loknkuqlkj 'kDdj Mkydj
vPNh rjg feyk,a vkSj LVkVZ nck,aA ukfj;y vkSj gjs /kfu;k ds lkFk
ltk,a vkSj xeZ&xeZ ijkslsaA
0.1 kg
1 tbsp
1/2 cup
2 nos.
0.2 kg
2 tbsp
1 cup
3 nos.
For Tempering (Tadka)
For Garnishing
4 nos.
bF-2 Daliya 0.1 ~ 0.3 kg Microwave
bF-3 Sprouts 0.1 ~ 0.3 kg Microwave
safe bowl
glass safe bowl
Dalia 0.3 kg
Sugar or Gud 200 gms
Water + Milk 600 ml
Ilaichi Powder, Nutmeg,
Kishmish & Cashewnuts
Method : 1. In Microwave Safe Bowl take dalia mix with ghee select menu &
fof/k % 1.2.ekbØksoso lsQ ckmy esa nfy;k ysa vkSj ?kh Mkydj feyk,aA ehuw pqudj
Moong Sprout 0.3 kg
Water 300 ml
Salt, Chat Masala,
Hara Dhania
Chopped Onion
Chopped Tomato
Method : 1. In Microwave Safe Bowl add sprouts, water and salt, select menu &
fof/k % 1.2.ekbØksoso lsQ ckmy esa LizkmV] ikuh vkSj ued Mkysa rFkk ehuw pqudj
press start.
2. When beep add water, gud/sugar, elaichi powder/nutmeg powder,
kismis kaju and cover it select menu & press start stand for 5 mints.
Note : If you are using gud for sweetness then add nutmeg powder
and use elaichi powder when adding sugar for sweetness.
LVkVZ nck,aA
^chi* lqukbZ nsus ij ikuh] xqM+@'kDdj] byk;ph ikmMj@uVeSx ikmMj]
fd'kfe'k ,oa dktw Mkysa vkSj <ddj ehuw pqusa vkSj LVkVZ nck,aA
uksV % ;fn vki feBkl ds fy, xqM+ bLrseky dj jgs gSa rks uVeSx ikmMj
Mkysa vkSj tc feBkl ds fy, phuh Mkysa rks byk;ph ikmMj dk bLrseky
djsaA
press start.
2. When cooking ends, take it out and strain add chopped onion,
chopped tomatoes, hara dhania, chat masala and serve.
LVkVZ nck,aA
id tkus ij mUgsa ckgj fudkydj fupksM+ ysaA dVh gqbZ I;kt ,oa
VekVj] gjk /kfu;k vkSj pkV elkyk Mkysa vkSj ijkslsaA
0.1 kg
75 gms
200 ml
1/2 tsp
0.1 kg
150 ml
2 tbsp
2 tbsp
0.2 kg
150 gms
400 ml
1 tsp
0.2 kg
200 ml
As per your taste
3 tbsp
3 tbsp
1 tsp
4 tbsp
4 tbsp
16
Page 17

Breakfast/czsdQkLV
Breakfast/czsdQkLV
Category Weight Limit Utensil Instructions
bF-4 Parantha 0.2 kg High Rack
Snacks/LuSDl
Snacks/LuSDl
+
Metal Tray
Parantha Dough 0.2 kg
Stuffing : Alu, Muli, Methi,
Paneer, whichever you like.
Oil/Ghee 2 tbsp
Method : 1. Select menu keep metal tray on high rack. press start.
2.
When beep keep paratha on tawa and brush with oil press start.
3.
When beep turn parantha and press start serve hot with chutney
fof/k % 1.
or raita.
ehuw pqusaA eSVy Vªs gkbZ jSd ij j[ksaA LVkVZ nck,aA
2.
^chi* lqukbZ nsus ij ijkaBk ros ij Mkysa vkSj ?kh yxkdj LVkVZ nck,aA
3.
^chi* lqukbZ nsus ij ijkaBk dks iyVsa vkSj LVkVZ nck,aA pVuh ;k jk;rk
ds lkFk xeZ&xeZ ijkslsaA
Category Weight Limit Utensil Instructions
Sn-1 Tea/Coffee 0.1 ~ 0.3 kg Microwave
Sn-2 Tomato
Soup
0.1 ~ 0.3 kg Microwave
safe bowl
safe bowl
TEA / COFFEE
Milk 100 ml
Water 50 ml
(Not for Coffee)
Sugar 1 tbsp
Tea Bags 1 no.
Instant Coffee 1 tsp
Tea
Method :
1. In Microwave Safe Bowl take milk, water & suger select menu
& press start
2. Take it out and dip tea bag in it.
fof/k %
1.
ekbØksoso lsQ ckmy esa nw/k] ikuh vkSj phuh ysaA ehuw pqudj LVkVZ nck,aA
2.
bls ckgj fudkysa vkSj mlesa Vh cSx dks Mqcks,aA
Coffee
Method :
fof/k %
Chopped Tomato 0.1 kg
Chopped Onion 1 tsp
Chopped Carrot 1/2 tsp
Chopped Ginger Garlic 1/2 tsp
Butter 1 tbsp
Water 100 ml
Salt, Sugar, Kali Mirch
Powder, Garam Masala
Water
Method : 1. In Microwave Safe Bowl take chopped tomatoes, chopped onion,
fof/k % 1.2.ekbØksoso lsQ ckmy esa dVs gq, VekVj] I;kt] xktj] vnjd] yglqu]
In Microwave Safe Bowl take milk, sugar & instant coffee
1.
powder, select menu and press start.
ekbØksoso lsQ ckmy esa nw/k] phuh vkSj bULVsaV dkWQh ikmMj ysaA
1.
ehuw pqudj LVkVZ nck,aA
chopped carrot, chopped ginger, chopped garlic, butter and water,
select menu and press start.
2. When beeps blend it strain and salt, sugar, kali mirch powder and
pinch of garam masala select menu and press start garnish with
chopped hara dhania, cream & bread crutons, serve hot.
eD[ku vkSj ikuh ysaA ehuw pqusa vkSj LVkVZ nck,aA
^chi* lqukbZ nsus ij ued] phuh] dkyh fepZ ikmMj vkSj ,d pqVdh
xeZ elkyk Mkydj CySaM djsaA ehuw pqudj LVkVZ nck,aA dVs gq, gjs
/kfu;k] Øhe vkSj czSM ds VqdM+ksa ls ltk,a vkSj xeZ&xeZ ijkslsaA
As per your taste
200 ml
50 ml
2 tbsp
2 nos. 3 nos.
2 tsp 3 tsp
0.2 kg
2 tsp
1/2 tsp
1/2 tsp 1 tsp
1 tbsp 1½ tbsp
100 ml 150 ml
As per your taste
To garnish
300 ml
50 ml
3 tbsp
0.3 kg
2 tsp
1 tsp
17
Page 18

Snacks/LuSDl
Snacks/LuSDl
Category Weight Limit Utensil Instructions
Sn-3 Dhokla 0.1 ~ 0.3 kg Microwave
safe flat dish
Basen 0.1 kg
Warm Water 50 ml
Curds 2 tbsp
Green Chilli & Ginger
Paste
Salt & Sugar
Fruit Salt
Method : 1. Grease the Microwave Safe Flat Dish with little oil, mix besan curd,
fof/k % 1.2.ekbØksoso lsQ ¶ySV fM'k esa FkksM+k rsy yxkdj fpduk dj ysaA cslu] ngh]
sugar, salt, water, ginger-green chilli paste, yellow colour fruit salt
together.
2. Pour the mixture in greased dish select menu & press start, when
ready pour tempering over it and cover it 5 mints, cut it into pieces,
garnish with grated coconut and hara dhaniya and serve with
sauce or chutney.
phuh] ued] ikuh] vnjd ,oa gjh fepZ dh isLV] ihys jax dk ÝwV lkYV
lcdks ,d lkFk feyk ysaA
rsy yxh gqbZ fM'k esa bl feJ.k dks Mkysa] ehuw pqusa vkSj LVkVZ nck,aA tc
rS;kj gks tk, rks mlds Åij rM+dk Mkysa vkSj mls 5 feuV rd <dk
jgus nsa] VqdM+ksa esa dkV ysa] f?kls gq, ukfj;y vkSj gjs /kfu;k ls ltk,a
vkSj lkWl ;k pVuh ds lkFk ijkslsaA
1 tsp
1 tsp 1½ tsp
0.2 kg
75 ml
3 tbsp
1½ tsp 2 tsp
To taste
0.3 kg
100 ml
4 tbsp
2 tsp
Sn-4 Oat Biscuit 0.3 kg Low Rack &
Metal Tray
Maida
Sugar to taste
Butter
Baking Powder
Method : 1. In a bowl sieve 100 gms maida, baking powder, beat butter &
fof/k % 1.
sugar till fluffy.
2.
Add essence and oat flakes. Mix all the ingredients to make a
soft dough. Roll it and cut into cookies.
3.
Place the cookies on flat metal tray and place it on the low rack
and keep inside the oven.
4.
Select menu, press start, preheat will appear.
5.
When beep sounds, open door, place cookies on rack, press
start again.
6.
Allow to cool before removing the cookies.
,d ckmy esa 100 xzke eSnk] csfdax ikmMj dks NkusaA eD[ku vkSj phuh
dks >kxnkj gksus rd QSaVsaA
2.
fQj mlesa vdZ vkSj vksV ¶ySDl MkysaA lHkh phtksa dks vPNh rjg
feyk,a vkSj ,d eqyk;d MQ cuk ysaA blds jksy cuk,a vkSj dkVdj
dqdht+ cuk ysaA
3.
bu dqdht+ dks ¶ySV eSVy Vªs ij j[ksa vkSj mls yks jSd ij j[kdj vksou
ds vUnj j[k nsaA
4.
ehuw pqudj LVkVZ nck,a] izhghV fn[kkbZ nsxkA
5.
tc ^chi* lqukbZ ns] njoktk [kksysa] dqdht+ dks jSd ds Åij j[ksa vkSj
nqckjk ls LVkVZ nck,aA
6.
dqdht+ dks fudkyus ls igys mudks BaMk gksus nsaA
0.1 kg
80 gms
0.1 kg
1/4 tsp
18
Page 19

Child’s Favourite/cPpksa dh euilUn
Child’s Favourite/cPpksa dh euilUn
Category Weight Limit Utensil Instructions
CC-1 Omlette 0.1 ~ 0.3 kg Microwave
safe flat dish
For 100 gm
Eggs
Chopped Onion
Chopped Tomato
Chopped Green Chilli
Oil
Chopped Hara Dhania
Salt & Kali Mirch
Method : 1. Beat the eggs add chopped onion, chopped tomatoes, green chilli,
fof/k % 1.
hara dhania, salt & paper to taste.
2. Apply some oil to MICROWAVE SAFE flat dish add egg mixture
select menu & press start.
3. When beep turn the omlette & press start serve hot.
v.Mksa dks QSaVdj mlesa dVh gqbZ I;kt] VekVj] gjh fepZ] gjk /kfu;k]
Loknkuqlkj ued vkSj fepZ MkysaA
2.
ekbØksoso lsQ ¶ySV fM'k esa FkksM+k lk rsy yxkdj v.Mksa dk feJ.k MkysaA
ehuw pqusa vkSj LVkVZ nck,aA
3.
tc ^chi* lqukbZ ns rks vkWeysV dks iyV nsa vkSj LVkVZ nck,aA xeZ&xeZ
ijkslsaA
1 nos.
1/4 cup
1/4 cup
1 nos.
1/2 tbsp
1 tbsp
200 gm
2 nos.
1/2 cup
1/2 cup
2 nos.
1 tbsp
1 tbsp
As per your taste
300 gm
3 nos.
3/4 cup
3/4 cup
3 nos.
1½ tbsp
1 tbsp
CC-2 Noodles 0.1 ~ 0.3 kg Microwave
CC-3 Sweet
Corn
0.1 ~ 0.3 kg Microwave
safe bowl
safe bowl
Noodles 0.1 kg
Water 100 ml 200 ml 300 ml
Oil 1 tsp
Vinegar 1/2 tsp
Soya Souce 1/2 tsp
Chilli Souce 1/2 tsp
Mix Vegetables Cabbage, Capsicum,
Carrot, French Beans etc.
Salt, Sugar, Kali Mirch
Powder
Method : 1. In Microwave Safe Bowl take noodles, water, oil, select menu &
fof/k % 1.
Sweet Corn 0.1 kg
Water 50 ml
Salt, Sugar, Butter,
Chat Masala, Kali Mirch
Powder.
Method : 1. In Microwave Safe Bowl take sweet corn with water, press start.
press start.
2. When beep, strain noodles & pure cold water over it. In Microwave
Safe Bowl put some oil and finely chopped vegetables, add vinegar,
soyasauce, chilli sauce, MSG salt & paper to taste press start.
3. Add noodles and mix well press start serve hot.
ekbØksoso lsQ ckmy esa uwMYl] ikuh] rsy Mkysa] ehuw pqudj LVkVZ nck,aA
2.
tc ^chi* lqukbZ ns rks uwMYl dks fupksM+sa vkSj Åij ls BaMk ikuh MkysaA
ekbØksoso lsQ ckmy esa FkksM+k lk rsy vkSj ckjhd dVh gqbZ lfCt;ka Mkysa]
fQj Loknkuqlkj fljdk] lks;k lkWl] fpyh lkWl] ,e,lth lkYV vkSj fepZ
Mky nsaA LVkVZ nck,aA
3.
vc uwMYl Mkysa vkSj vPNh rjg feykdj LVkVZ nck,aA xeZ&xeZ ijkslsaA
2. Strain sweet corns and add some chat masala, salt, kali mirch,
lemon juice and butter to it serve hot.
1/2 cup 1/2 cup 1 cup
0.2 kg
2 tsp
1 tsp
1 tsp 1 tsp
1 tsp 1 tsp
As per your taste
0.2 kg
75 ml
As per your taste
0.3 kg
3 tsp
1 tsp
0.3 kg
100 ml
fof/k % 1.2.ekbØksoso lsQ ckmy esa ikuh ds lkFk LohV dkWuZ ysa] LVkVZ nck,aA
LohV dkWuZ fupksM+sa vkSj mlesa dqN pkV elkyk] ued] dkyh fepZ] uhacw
dk jl vkSj eD[ku Mkysa] xeZ&xeZ ijkslsaA
19
Page 20

Child’s Favourite/cPpksa dh euilUn
Child’s Favourite/cPpksa dh euilUn
Category Weight Limit Utensil Instructions
CC-4 Pizza 0.3 kg Low rack
CC-5 Burger 0.1 ~ 0.3 kg Metal tray &
CC-6 Cake 0.3 kg Metal cake tin
High rack
+
Low rack
Pizza base
Topping
Mix Vegetables Tomato, Capsicum, Onion
Grated Cheese 1/2 cup
Oregano & Chilli flakes (Optional) As per your taste
Method : 1. Keep low rack inside and press start to preheat.
2. Pizza topping on Pizza base, spread chopped vegetables on it.
Sprincle some greated Cheese over it place Pizza on rack,
fof/k % 1.2.yks jSd vkWou ds vUnj j[ksa vkSj xeZ djus ds fy, LVkVZ nck,aA
Boiled vegetables Potato, Cauliflower,
Carrots, Green peas
Corn Flour
Bread Crumbs 1/2 cup
Ginger-Garlic paste 1/2 tsp 1/2 tsp 1 tsp
Chilli Paste
Garam Masala
Lemon juice, Salt, Sugar
Method : 1. 1.Mix smashed potato, boiled vegetables, bread crumbs, ginger,
fof/k % 1.2.elys gq, vkyw] mcyh gqbZ lfCt;ka] czSM ds VqdM+s] vnjd yglqu dh isLV]
Maida
Butter
Powdered Sugar
Eggs
Baking powder
Vanila essence
Method : 1. Sieve maida with baking powder beat makhkhan with sugar add
fof/k % 1.
press start
iht+k csl ds Åij VkWfiaXl j[ksaA mlds Åij dVh gqbZ lfCt;ksa dks
QSyk,aA fQj dqN dlk gqvk pht+ fNM+dsaA vc iht+k dks jSd ds Åij
j[ksa vkSj LVkVZ nck,aA
0.1 kg 0.2 kg 0.3 kg
1/2 tsp
1/2 tsp
garlic paste, salt, pinch of garam masala, green chilli paste, lemon
juice together, make tikki from it and roll it in cornflour by keeping
in metal tray drop some oil on it. Select menu & press start.
2. When beep turn tikki to crisp another side press start. Cut the
burger bun horizontally apply butter & sauce. Place tikki, cheese
slice, letuce (optional) between burger halves and close it properly.
press start, serve hot.
ued] ,d pqVdh xeZ elkyk] gjh fepZ dh isLV] uhacw jl dks ,d lkFk
feyk ysa] blls fVDdh cuk,a vkSj eSVy Vªs ij j[krs gq, eDdk ds
vkVs ls yisV nsa] mlds Åij FkksM+k lk rsy MkysaA ehuw pqusa vkSj LVkVZ
nck,aA
^chi* lqukbZ nsus ij fVDdh dks dqjdqjk cukus ds fy, nwljh fn'kk esa iyVsa]
LVkVZ nck,aA cxZj dh fVfd;k dks horizontally dkVdj eD[ku vkSj
lkWl yxk,aA cxZj ds v/kZHkkxksa ds chp fVDdh] pht+ Lykbl] ysVwl
¼oSdfYid½ j[ksa vkSj mls Bhd ls cUn dj nsaA LVkVZ nck,a] xeZ&xeZ ijkslsaA
eggs, beat well add essence mix maida in it keep on adding milk
and water till the tin is filled to the brim, grease the metal cake tin
with makhkhan and pour the cake mixture in it. keep on low rack
and press start.
eSnk dks csfdax ikmMj ds lkFk NkusaA eD[ku dks phuh ds lkFk QSaVsaA
v.Mk Mkysa] vPNh rjg QSaVsa] b=k Mkysa] blesa eSnk Mkysa] nw/k vkSj ikuh
rc rd Mkyrs jgsa tc rd fVu fdukjs rd u Hkj tk,A eSVy dsd fVu
dks eD[ku yxkdj fpduk dj ysa vkSj dsd feJ.k dks blds vUnj Mky
nsaA yks jSd ds Åij j[ksa vkSj LVkVZ nck,aA
1 Big Pizza base
3 tbsp
1 cup
2 to 3 tablespoon
1 cup 1 cup
1/2 tsp
1/2 tsp
As per your taste
1 tsp
1 tsp
100 gm
100 gm
100 gm
2 nos.
1 tsp
1 tsp
20
Page 21

Child’s Favourite/cPpksa dh euilUn
Child’s Favourite/cPpksa dh euilUn
Category Weight Limit Utensil Instructions
CC-7 Sandwich 0.1 ~ 0.3 kg High Rack
CC-8 Roast
Peanut
0.1 ~ 0.3 kg Microwave
safe flat
glass dish
Bread Slices
Butter
Souce/Spread
Chopped Vegetables Onion, Tomato, Capsicum
Grated Cheese
Salt & Kali Mirch
Method : 1. Apply butter on bread slice (both slices).
2.
Keep bread slices on high rack select menu & start.
3.
When beep spread sauce on one side and layer with chopped
vegetables. sprinkle cheese on the top press start (use high rack)
fof/k % 1.
Peanuts 0.1 kg 0.2 kg 0.3 kg
Method : 1. In Microwave Safe Flat dish take peanuts select menu &
stand for 2 mints.
czSM ds nksuksa rjQ eD[ku yxk,aA
2.
vc czSM dh Lykblksa dks gkbZ jSd ij j[ksa] ehuw pqusa vkSj LVkVZ nck,aA
3.
^chi* lqukbZ nsus ij czSM ds ,d rjQ lkWl yxk,a vkSj ,d irZ dVh
gqbZ lfCt;ksa dh yxk nsa vkSj lcls Åij pht+ fNM+d nsa] LVkVZ nck,a]
2 feuV rd #ds jgsaA
press start.
2. When beep stir it again press start to roast.
Note : In this way you can roast Cashewnuts & Almonds
0.1 kg
1 tbsp
1½ tbsp
2 tbsp 4 tbsp
2 tbsp 4 tbsp 6 tbsp
fof/k % 1.2.ekbØksoso lsQ ¶ySV fM'k esa ew¡xQyh ysa] ehuw pwusa vkSj LVkVZ nck,aA
^chi* lqukbZ nsus ij mudks fQj fgyk,a] Hkwuus ds fy, LVkVZ nck,aA
0.2 kg
2 tbsp
3 tbsp
As per your taste
0.3 kg
4 tbsp
4 tbsp
6 tbsp
Tandoor Se.../ranwj ls---
Tandoor Se.../ranwj ls---
Category Weight Limit Utensil Instructions
tS-1 Paneer
Tikka
0.1 ~ 0.3 kg High Rack &
Metal Tray
Paneer 100 gm 200 gm 300 gm
For Marinate
Hung Curd 2 tbsp 3 tbsp 4 tbsp
Ginger-Garlic Paste 1 tbsp 1½ tbsp 1½ tbsp
Salt, Red Chilli pd.
Garam Masala
Lemon Juice
Red Colour (edible)
Oil
Method : 1. Mix all the ingredients of marinate thoroughly.
2. Add paneer pieces into it and keep for 1/2 hr. in refrigerator.
3. Keep the pieces in metal tray on high rack, apply little oil on it.
4. Press Start by selecting the desired weight.
5. Turn the pieces when there is beep and press start.
fof/k % 1.
eSjhusV djus okyh lHkh phtksa dks vPNh rjg ls feyk ysaA
2.
fQj mlesa iuhj ds VqdM+ksa dks Mkysa vkSj 1/2 ?kaVs ds fy, jsfÝtjsVj esa j[ksaA
3.
mlds ckn mu VqdM+ksa dks gkbZ jSd ij eSVy Vªs esa j[ksa vkSj FkksM+k lk rsy
yxk nsaA
4.
,fPNd otu pqudj LVkVZ nck,aA
5.
chi lqukbZ nsus ij VqdM+ksa dks iyV nsa vkSj LVkVZ nck,aA
To taste
1 tbsp
1 pinch
1 tbsp
21
To taste
1 tbsp
1 pinch
1 tbsp
To taste
2 tbsp
1 pinch
2 tbsp
Page 22

Tandoor Se.../ranwj ls---
Tandoor Se.../ranwj ls---
Category Weight Limit Utensil Instructions
tS-2 Tandoori
Sabzi
0.2 kg Microwave
safe glass bowl
+
High rack
+
Metal tray
Mix Vegetables Bhindi, Cauliflower, Brinjals,
Mushrooms, Potato, Paneer cubes
Onion Paste 1 cup
Ginger-Garlic Paste
Tomato Puree
Red Chilli powder, Haldi,
Garam Masala, Salt
Oil 3~4 tbsp
Hara Dhania For garnishing
Method : 1. In Microwave Safe Glass Bowl take oil, onion paste & ginger garlic
fof/k % 1.
paste select menu and press start.
2. When beep add vegetables, red chili powder, haldi, garam masala,
chat masala salt, and Tamoto puree, mix well & press start.
3. Transfer this mixture to metal tray, spread evenly on tawa. keep
tawa on high rack & press start serve hot with tandoori nan.
ekbØksoso lsQ Xykl ckmy esa rsy] I;kt vkSj vnjd&yglqu dh isLV
ysa] ehuw pqudj LVkVZ nck,aA
2.
^chi* lqukbZ nsus ij lfCt;ka] yky fepZ ikmMj] gYnh] xeZ elkyk] pkV
elkyk] ued vkSj VksesVks I;wjh Mkysa] vPNh rjg feyk,a vkSj LVkVZ nck,aA
3.
bl feJ.k dks eSVy Vªs ij foLFkkfir dj nsa] ros ij leku :i ls QSyk
nsaA ros dks gkbZ jSd ij j[ksa vkSj LVkVZ nck,aA rUnwjh uku ds lkFk
xeZ&xeZ ijkslsaA
(cut into medium size pieces)
0.2 kg
1 tsp
1/2 cup
As per your taste
tS-3 Veg Kebab 0.1 ~ 0.3 kg Metal Tray &
High Rack
Boiled Vegetables Potato, Cauliflower,
Carrots, Green Peas
Cornflour 2 to 3 tablespoon
Bread Crumbs
Ginger Garlic Paste
Chilli Paste
Garam Masala 1/4 tsp
Lemon Juice,
Salt, Sugar
Method : 1. Mix Boiled vegetables & strained chana dal, ginger garlic paste,
fof/k % 1.
garam masala, dhania jeera powder, salt red chilli powder, bread
crumbs & hara dhania together, apply little oil to your palms and
shape as desired like tikki balls, cutlet rolls brush with little oil.
2. Keep metal tray on high rack place kababs on it select menu
& press start keep on turning at beeps.
3. Serve with chutney & salad.
mcyh gqbZ lfCt;ka vkSj fupksM+h gqbZ puk nky] vnjd yglqu isLV] xeZ
elkyk] /kfu;k thjk ikmMj] ued] yky fepZ ikmMj] czSM ds VqdM+s]
vkSj gjk /kfu;k ,d lkFk feyk ysaA viuh gFksfy;ksa ij FkksM+k lk rsy
yxk ysa vkSj fVDdh ds xksys dh ,fPNd vkÑfr nsa] NksVs&NksVs VqdM+s
dj ysa rFkk FkksM+k rsy yxk nsaA
2.
eSVy Vªs gkbZ jSd ij j[ksa] ml ij d+ckc j[ksa] ehuw pqusa vkSj LVkVZ
nck,a vkSj ^chi* gksus ij iyVrs jgsaA
3.
pVuh vkSj lykn ds lkFk ijkslsaA
0.1 kg
1 tbsp
1/2 tsp
1/2 tsp
0.2 kg
1½ tbsp
1/2 tsp
1 tsp
1/2 tsp
As per your taste
0.3 kg
2 tbsp
1½ tsp
1½ tsp
1/2 tsp
22
Page 23

Tandoor Se.../ranwj ls---
Tandoor Se.../ranwj ls---
Category Weight Limit Utensil Instructions
tS-4 Murg
Tandoori
0.1 ~ 0.3 kg
Metal Tray &
High Rack
Chicken pieces (boneless) 0.1 kg
For marinate hung curd
Ginger Garlic Paste
Salt, Red Chilli Powder,
Garam Masala &
Chat Masala
Oil
Lemon Juice
Eatable Red Colour
Method : 1. Wash chicken pieces & mix with all the ingredients of marinate.
fof/k % 1.
Keep for one hour in refrigerator.
2. Arrange chicken pieces on greased metal tray apply little oil on
each piece. Keep the metal tray on high rack select menu &
press start.
3. When beep turn the piece, press start.
fpdu ds VqdM+ksa dks /kks,a vkSj eSjhusV lHkh rRoksa ds lkFk feyk,aA ,d
?k.Vs ds fy, jsfÝtjsVj ds vUnj j[ksaA
2.
fpdu ds VqdM+ksa dks rsy yxs eSVy Vªs ij O;ofLFkr djsaA gj ,d VqdM+s
ij FkksM+k rsy yxk ysaA vc eSVy Vªs dks gkbZ jSd ij j[ksa] ehuw pqusa vkSj
LVkVZ nck,aA
3.
^chi* lqukbZ nsus ij VqdM+ksa dks iyVsa] LVkVZ nck,aA
2 tbsp
1 tsp
1 tbsp
1 tbsp
0.2 kg
3 tbsp
1½ tsp
As per your taste
1 tbsp
1½ tbsp
Pinch
0.3 kg
4 tbsp
2 tsp
2 tbsp
2 tbsp
tS-5 Fish
Tandoori
0.1 ~ 0.3 kg Metal Tray &
High Rack
Fish Fillets 0.1 kg
For marinate hung curd
Lemon juice
Ginger Garlic Paste
Salt, Red Chilli Powder,
Haldi, Garam Masala &
Chat Masala
Eatable Red Colour A pinch
Method : 1. Wash the fish fillets, mix all the ingredients of marinate and coat
fof/k % 1.
this mixture to fish filets evenly keep for one hour in refrigerator.
2. Arrange the fish fillets on greased metal tray. Apply little oil on
each piece. Keep the metal tray on high rack. Select menu and
press start.
3. When beep turn the pieces and press start.
eNyh ds VqdM+ksa dks /kks,a] eSjhusV ds lHkh rRoksa dks vPNh rjg feyk,a
vkSj eNyh VqdM+ksa ij leku :i ls yisV nsa rFkk ,d ?k.Vs ds fy,
jsfÝtjsVj ds vUnj j[k nsaA
2.
eNyh ds VqdM+ksa dks rsy yxs eSVy Vªs ij O;ofLFkr djsaA izR;sd VqdM+s
ij FkksM+k&FkksM+k rsy yxk ysaA eSVy Vªs dks gkbZ jSd ij j[k nsaA ehuw pqusa
vkSj LVkVZ nck,aA
3.
^chi* lqukbZ nsus ij VqdM+ksa dks iyVsa vkSj LVkVZ nck,aA
1 tbsp 1½ tbsp 2 tbsp
1 tsp
1 tsp
0.2 kg
1½ tsp
1½ tsp
As per your taste
0.3 kg
2 tsp
2 tsp
23
Page 24

Tandoor Se.../ranwj ls---
Tandoor Se.../ranwj ls---
Category Weight Limit Utensil Instructions
tS-6 Mutton
Tikka
0.1 ~ 0.3 kg Microwave
safe glass bowl,
Metal Tray &
High Rack
Mutton boneless pieces 0.1 kg
For marinate hung curd
Ginger Garlic Paste
Salt, Red Chilli Powder,
Haldi, Garam Masala &
Chat Masala
Oil 1 tbsp
Lemon juice
Eatable Red Colour A pinch
Method : 1. Wash the mutton pieces & mix with ginger garlic paste, curd,
fof/k %
salt, lemon juice, garam masala, chat masala & red chilli powder
and keep this mixture in Refrigerator for one hour.
2. In Microwave Safe Bowl take this mixture. Select menu & press
start to cook.
3. When beep, arrange the cooked mutton pieces (without gravy) on
greased metal tray. Apply some oil on each mutton piece. Keep the
metal tray on high rack. Press start.
4. When beep turn the pieces and press start. Serve with nan or roti.
1.
eVu ds VqdM+ksa dks /kks,a vkSj vnjd yglqu isLV] ngh] ued] uhacw jl]
xeZ elkyk] pkV elkyk rFkk yky fepZ ikmMj ds lkFk vPNh rjg
feyk ysa vkSj bl feJ.k dks ,d ?k.Vs ds fy, jsfÝtjsVj esa j[k nsaA
2.
fQj bl feJ.k dks ekbØksoso lsQ ckmy esa MkysaA ehuw pqudj LVkVZ nck,aA
3.
^chi* lqukbZ nsus ij ids gq, eVu ds VqdM+ksa ¼fcuk rjh½ dks rsy yxs eSVy
Vªs ij O;ofLFkr djsaA izR;sd VqdM+s ij FkksM+k lk rsy yxk,aA fQj eSVy Vªs
dks gkbZ jSd ij j[kdj LVkVZ nck,aA
4.
^chi* lqukbZ nsus ij VqdM+ksa dks iyV nsa vkSj LVkVZ nck,aA uku ;k jksVh ds
lkFk ijkslsaA
2 tbsp 3 tbsp 4 tbsp
1 tsp
1 tsp
0.2 kg
1½ tsp
As per your taste
1 tbsp
1½ tsp
0.3 kg
2 tsp
2 tbsp
2 tsp
tS-7 Keema
Kabab
0.1 ~ 0.3 kg Microwave
safe glass bowl,
Metal Tray &
High Rack
Keema 0.1 kg
Boiled Potato
Ginger Garlic Paste 1 tsp
Red Chilli Powder, Salt
Haldi, Garam Masala
Cornflour
Lemon Juice
Oil
Method : 1. In Microwave Safe Bowl take Keema, add ginger garlic paste and
fof/k %
salt, mix it well select menu & press start.
2. Mash the potato and mix with keema and remaining ingredients.
Mix well and make kebabs.
3. When beep, place on greased metal tray, apply oil on each kebab.
Keep the tray on high rack, press start.
4. When beep turn kebabs and press start.
1.
ekbØksoso lsQ ckmy esa dhek ysdj mlesa vnjd yglqu isLV vkSj ued
Mkysa] vPNh rjg feyk,a] ehuw pqudj LVkVZ nck,aA
2.
vkyw elydj dhek ,oa ckdh phtksa ds lkFk feyk,aA vPNh rjg feykdj
dckc cuk,aA
3. ^chi* lqukbZ nsus ij rsy yxs eSVy Vªs ij j[ksaA izR;sd dckc ij FkksM+k
rsy yxk,aA Vªs dks gkbZ jSd ij j[kdj LVkVZ nck,aA
4.
^chi* lqukbZ nsus ij dckc dks iyV nsa vkSj LVkVZ nck,aA
1 no. 2 nos. 3 nos.
1 tsp
1 tbsp
0.2 kg
1½ tsp
As per your taste
As required
1½ tsp
2 tbsp
0.3 kg
2 tsp
2 tsp
3 tbsp
24
Page 25

Tandoor Se.../ranwj ls---
Tandoor Se.../ranwj ls---
Category Weight Limit Utensil Instructions
tS-8 Chicken
Legs
Sweet Corner/LohV dkWuZj
Sweet Corner/LohV dkWuZj
0.1 ~ 0.3 kg Metal Tray &
High Rack
Chicken Legs 0.1 kg
For marinate hung curd
Ginger Garlic Paste 1 tsp
Salt, Red Chilli Powder,
Garam & Chat Masala
Oil and Lemon juice 1 tsp
Eatable Red Colour A pinch
Method : 1. Wash chicken pieces & mix with all the ingredients of marinate
fof/k %
(as listed in table).
2. Keep for one hour in refrigerator.
3. Apply little oil on each piece & arrange chicken pieces on greased
metal tray.
4.
Keep the metal tray on high rack. Select menu and press start.
5.
When beep sounds, open the door, turn the pieces and press
start.
1.
fpdu ds VqdM+ksa dks /kks,a vkSj eSjhusV ds lHkh rRoksa ds lkFk feyk,a
¼tSlk fd rkfydk esa fn;k x;k gS½
2.
,d ?k.Vs ds fy, jsfÝtjsVj ds vUnj j[ksaA
3.
izRs;d VqdM+s ij FkksM+k rsy yxk,a vkSj fpdu ds VqdM+ksa dks rsy yxs
eSVy Vªs ij O;ofLFkr djsaA
4.
eSVy Vªsd dks gkbZ jSd ij j[ksaA ehuw pqudj LVkVZ nck,aA
5.
tc ^chi* lqukbZ ns rks njoktk [kksydj VqdM+ksa dks iyV nsa vkSj LVkVZ
nck,aA
2 tsp 3 tsp 4 tbsp
0.2 kg
1½ tsp
As per your taste
2 tsp
0.3 kg
2 tsp
2 tsp
Category Weight Limit Utensil Instructions
SC-1 Suji Halwa 0.1 ~ 0.3 kg Microwave
safe bowl
Suji 0.1 kg
Ghee
Water
Sugar
Cashewnuts, Kishmish,
Kesar Elaichi Powder
Lemon juice
Oil
Method : 1. In Microwave Safe Bowl take Suji, add ghee mix it together select
fof/k %
menu & press start.
2. When beep stir it and press start.
3. Add water, sugar, cashewnuts, kishmish, kesar, Elaichi powder,
mix it well and press start.
1.
ekbØksoso lsQ ckmy esa lwth ysa] ?kh Mkydj ,d lkFk feyk,aA ehuw
pqudj LVkVZ nck,aA
2.
^chi* lqukbZ nsus ij bldks fgyk,a vkSj LVkVZ nck,aA
3.
ikuh] phuh] dktw] fd'kfe'k] dslj byk;ph ikmMj Mkydj vPNh rjg
feyk,a vkSj LVkVZ nck,aA
2 tbsp 3 tbsp 4 tbsp
1 tsp
1 tsp
1 tsp
1 tsp
25
0.2 kg
1½ tsp
1½ tsp
As per your taste
1½ tsp
1½ tsp
0.3 kg
2 tsp
2 tsp
2 tsp
2 tsp
Page 26

Sweet Corner/LohV dkWuZj
Sweet Corner/LohV dkWuZj
Category Weight Limit Utensil Instructions
SC-2 Besan
Laddu
SC-3 Kalakand 0.1 ~ 0.3 kg Microwave
SC-4 Barfi 0.1 ~ 0.3 kg Microwave
SC-5 Payasum 0.1 ~ 0.3 kg Microwave
0.1 ~ 0.3 kg Microwave
safe bowl
safe bowl
safe bowl
safe bowl
Besan 0.1 kg
Ghee
Powder Sugar 50 gm
Elaichi Powder
Method : 1. In Microwave Safe Bowl take Beasn and ghee. Select menu and
fof/k %
Grated Paneer 0.1 kg
Milkmaid
Milk Powder 1 tbsp
Cornflour
Elaichi Powder 1/2 tsp 1 tsp 1 tsp
Method : 1. In Microwave Safe Bowl take grated paneer, milkmaid, milk
fof/k %
Khoya 0.1 kg
Powdered Sugar
Elaichi Powder 1 tbsp
Milk Powder
Method : 1. In Microwave Safe Bowl mix all the ingredients. Select menu.
fof/k %
Rice (soaked for 1 hour) 0.1 kg
Milk + Water
Sugar 75 gms
Elaichi Powder, Kesar,
Dry fruits
Method : 1. In Microwave Safe Bowl take ghee, soaked rice, milk, water and
fof/k %
press start.
2. When beep. Stir it press start.
3. Allow to cool. Add powdered sugar and elaichi powder. Mix it well
and make a ladoo.
1.
ekbØkoso lsQ ckmy esa cslu vkSj ?kh ysaA ehuw pqusa vkSj LVkVZ nck,aA
2.
^chi* lqukbZ nsus ij bls fgyk,a vkSj LVkVZ nck,aA
3.
BaMk gksus nsaA cwjk vkSj byk;ph ikmMj MkysaA vPNh rjg feyk,a vkSj
yM~Mw cuk,aA
powder, cornfloor, Elaichi powder, kesar. Mix well select menu
and press start.
2. When beep. Mix it again and press start.
3. Garnish with dry fruits when set cut into pieces.
1.
ekbØkoso lsQ ckmy esa dlk gqvk iuhj] feYdesM] feYd ikmMj] eDdk
dk vkVk vkSj byk;ph ikmMj vkSj dslj ysaA vPNh rjg feyk,a] ehuw
pqusa vkSj LVkVZ nck,aA
2.
^chi* lqukbZ nsus ij bls nqckjk feyk,a vkSj LVkVZ nck,aA
3.
lw[ks esoksa ds lkFk ltk,a vkSj te tkus ds ckn bls VqdM+ksa esa dkVsaA
Press start.
2. When beep mix well and again press start.
3. Pour this mixture in greased flat dish let it cool and cut into pieces.
1.
ekbØkoso lsQ ckmy esa lHkh phtksa dks feyk,aA ehuw pqusa] LVkVZ nck,aA
2.
^chi* lqukbZ nsus ij bls nqckjk feyk,a vkSj LVkVZ nck,aA
3.
bl feJ.k dks ?kh yxh gqbZ piVh fM'k esa Mkysa] BaMk gksus nsa vkSj
VqdM+ksa esa dkVsaA
cover it. Select menu and press start.
2. When beep add more milk, sugar, dry fruits, kesar, elaichi powder.
Mix well and press start. Stand for 5 mins. sprinkle kewada jal on it.
Serve hot or chilled.
1.
ekbØkoso lsQ ckmy esa ?kh] Hkhxs gq, pkoy] nw/k] ikuh ysa vkSj <d nsaA
ehuw pqusa vkSj LVkVZ nck,aA
2.
^chi* lqukbZ nsus ij vkSj nw/k] phuh] lw[ks esos] dslj rFkk byk;ph ikmMj
MkysaA vPNh rjg feyk,a vkSj LVkVZ nck,aA 5 feuV rd #dsaA mlds Åij
dsoM+k ty fNM+dsaA xeZ ;k BaMk ijkslsaA
3 tbsp 5 tbsp 7 tbsp
1/2 tsp
50 gms 100 gms
1/2 tsp
50 gms 100 gms
1/2 tsp
100 ml
0.2 kg
100 gm
1 tsp
0.2 kg
2 tbsp
1 tsp
0.2 kg
2 tbsp
1 tsp
0.2 kg
200 ml
150 gms
As per your taste
0.3 kg
150 gm
1 tsp
0.3 kg
200 gms
3 tbsp
1 tsp
0.3 kg
200 gms
3 tbsp
1 tsp
0.3 kg
300 ml
200 gms
26
Page 27

Sweet Corner/LohV dkWuZj
Sweet Corner/LohV dkWuZj
Category Weight Limit Utensil Instructions
SC-6 Shahi
Tukda
Kheer
SC-7
0.1 ~ 0.3 kg Microwave
0.1 ~ 0.3 kg Microwave
safe glass bowl
& High Rack
safe bowl
Bread Slices 0.1 kg
Milkmaid
Milk 25 ml
Sugar
Badam, Pista Pieces 2 tbsp 3 tbsp 4 tbsp
Kesar-Elaichi Powder As per your taste
Method : 1. Arrange bread slices on high rack. Select menu & press start.
2. When beep turn slices press start.
3.
Mix Milkmaid, milk, sugar, dry fruits and kesar elaichi powder in
Microwave Safe Flat Dish. Pour the mixture on slices and press start.
fof/k %
Semiya (roasted) 0.1 kg
Hot Milk
Sugar 75 gms
Badam, Pista Pieces
Kesar & Elaichi Powder 2 tbsp 3 tbsp 4 tbsp
Method : 1. In Microwave Safe Bowl take semiya, add hot milk, sugar, mix well.
fof/k %
Serve hot semiya.
1.
gkbZ jSd ij czSM Lykbflt dks O;ofLFkr djsaA ehuw pqusa vkSj LVkVZ nck,aA
2.
^chi* lqukbZ nsus ij Lykbflt dks iyV nsa vkSj LVkVZ nck,aA
3.
feYdesM] nw/k] phuh] lw[ks esos vkSj dslj byk;ph ikmMj dks ekbØksoso
lsQ ¶ySV fM'k esa vPNh rjg feyk,aA bl feJ.k dks Lykbflt ds Åij
Mkysa vkSj LVkVZ nck,aA xeZ&xeZ lsfe;ka ijkslsaA
Select menu. Press start.
2. When beep add Badam Pista pieces, Kesar Elaichi Powder mix well
and press start. Stand for 5 mins, serve hot or chilled.
1.
ekbØkoso lsQ ckmy esa lsfe;ka ysa] xeZ nw/k] phuh Mkysa] vPNh rjg
feyk,aA ehuw pqudj LVkVZ nck,aA
2.
^chi* lqukbZ nsus ij cknke] fiLrk ds VqdM+s] dslj byk;ph ikmMj Mkysa]
vPNh rjg feyk,a vkSj LVkVZ nck,aA 5 feuV rd #ds jgsaA xeZ ;k BaMk
ijkslsaA
50 ml
1 tbsp
100 ml
2 tbsp
0.2 kg
100 ml 150 ml
50 ml
2 tbsp
0.2 kg
200 ml
150 gms
3 tbsp
0.3 kg
100 ml
3 tbsp
0.3 kg
300 ml
200 gms
4 tbsp
SC-8 Phirni 0.1 ~ 0.3 kg Microwave
safe bowl
Rice 0.1 kg
(soaked in milk for 1 hour)
Hot Milk
Sugar 75 gms
Kesar
Elaichi Powder 1/4 tsp 1/2 tsp 1 tsp
Pista Pieces 2 tbsp 3 tbsp 4 tbsp
Method : 1. Blend soaked rice with milk. Pour this to Microwave Safe Bowl
fof/k %
add hot milk. Select menu & press start.
2. When beep add sugar, kesar & Elaichi Powder mix well. press start.
3. Take it out, stir it and press start. Stand for 5 mins. When cool,
decorate with pista pieces and serve.
1.
Hkhxs gq, pkoyksa dks nw/k ds lkFk feyk ysaA fQj bls ekbØksoso lsQ ckmy
esa Mky] xeZ nw/k feyk,aA ehuw pqusa vkSj LVkVZ nck,aA
2.
^chi* lqukbZ nsus ij phuh] dslj] byk;ph ikmMj Mkysa] vPNh rjg feyk,a]
LVkVZ nck,aA
3.
fQj bls ckgj fudkysa] fgyk,a vkSj LVkVZ nck,aA 5 feuV rd #ds jgsaA
tc BaMk gks tk,] fiLrs ds VqdM+ksa ls ltk,a vkSj ijkslsaA
100 ml 200 ml
1/4 tsp
0.2 kg
150 gms
1/2 tsp
0.3 kg
300 ml
200 gms
1 tsp
27
Page 28

Utility Corner/lqfo/kk dkWuZj
Utility Corner/lqfo/kk dkWuZj
Category Weight Limit Utensil Instructions
UC-1 Keep warm - Microwave
safe bowl
Method : 1. Any cooked food with cover (Rice, Dal, Sabzi, Halwa, Upma etc.)
fof/k %
Select menu & press start
1. <dk gqvk dksbZ Hkh O;atu ¼pkoy] nky] lCth] gyok] miek bR;kfn½
ehuw pqusa vkSj LVkVZ nck,aaA
UC-2 Steam
clean
UC-3 Auto
Defrost
UC-4 Auto
Defrost
- Microwave
0.2 ~ 0.5 kg Microwave
0.5 ~ 1.0 kg Microwave
safe bowl
safe bowl
safe bowl
Method : 1. Take water in bowl, add vinegar & lemon juice in it, select menu &
fof/k %
Veg - (Paneer, Green Peas, Corn etc.)
Method : 1. Take in Microwave Safe Bowl, select menu and press start.
fof/k %
Non-Veg - (Chicken, Mutton etc.)
Method : 1. Take in Microwave Safe Bowl, select menu and press start.
fof/k %
press start.
2 When over wipe with soft and clean napkin.
1.
ckmy esa ikuh ysdj mlesa fljdk vkSj uhacw jl Mkysa] ehuw pqusa vkSj
LVkVZ nck,aA
1.
eqyk;e vkSj lkQ rkSfy;s ls gh iksaNsaA
2 When beep turn the food.
1.
ekbØksoso lsQ ckmy esa ysdj ehuw pqusa vkSj LVkVZ nck,aA
2.
^chi* lqukbZ nsus ij [kkus dks iyV nsaA
2 When beep turn the food.
1.
ekbØksoso lsQ ckmy esa ysdj ehuw pqusa vkSj LVkVZ nck,aA
2.
^chi* lqukbZ nsus ij [kkus dks iyV nsaA
28
Page 29

Rotisserie / jksVsljh
Rotisserie / jksVsljh
Never operate the oven at microwave and combination mode with rotisserie bar in the cavity when oven is empty.
[kkyh vksou esa jksVsljh ckj yxkdj ekbØksoso o dkWEchus'ku eksM esa dHkh u pyk;saA
1. Position the food on the spit, ensuring that the rotisserie bar runs
centrally through the food. And tie the food with thread to the bar if
necessary.
Hkkstu dks jksVsljh ckj dh lyk[kksa esa yxk,a vkSj ;fn vko';d gks rks /kkxs
ls cka/ksaA è;ku jgs fd jksVsljh ckj Hkkstu ds dsUæ ls xqt+jsA
2. Insert the end of the rotisserie bar (D) into the rotisserie jaw (A) on
the left side of the oven wall. Push it to the left, rotating the rotisserie
A
Rotisserie-Jaw
Rotisserie-Holder
C
D
E
F
B
bar slightly until the rotisserie-bar fits into the rotisserie jaw (A).
jksVsljh ckj dk fdukjk (D) vksou dh cka;h nhokj ij jksVsljh [kk¡ps (A) esa
yxk;saA cka;h rjQ gYdk nck;sa tc rd jksVsljh ckj jksVsljh [kk¡ps (A) esa u
Q¡l tk,A
3. Support the other end of the rotisserie bar (E) on the hollow of the
rotisserie holder (B).
jksVsljh ckj dk nwljk fdukjk (E) jksVsljh gksYMj (B) ds [kkyh Hkkx esa j[ksaA
4. Carefully place the heat proof glass ware in the microwave oven, on
top of the glass turntable.
VuZ Vscy ds Åij ekbØksoso vksou esa Å"ekjks/kd dk¡p ds crZu /;ku ls
j[ksaA
Three recipes for starter / uofl[kq, ds fy, rhu O;atu
Three recipes for starter / uofl[kq, ds fy, rhu O;atu
NOTE : The time variation during Cooking of recipe depends upon the ingredients, method adopted & type of food category.
O;atu cukus ds nkSjku] le; ifjorZu [kkus ds rÙo ;k va'k] cukus dh fof/k vkSj [kkus dh Js.kh ij fuHkZj djrk gSA
1 2 3
1. ROASTED PAPAD : Apply little
amount of water evenly on the
both side of papad. Put the papad
on tissue paper on glass tray
properly arranged. Use quick
st ar t se le ct 0.5 -1 .5 minute
depending on no. of papad. After
Roasting remove papad stand for
a minute to gain its crispyness.
Hkqus gq, ikiM+ & ikiM+ ds nksuksa rjQ
dks xhyk djsaA ikiM+ dks fV'kw isij ds
Åij j[kdj dk¡p dh Vªs ij j[ksA
ikiM+ dh la[;k ij quick start dks
0.5-1.5 fe0 ds fy, j[ksaA ,d fe0 ds
fy, Hkqus gq, ikiM+ dks blds dqjdqjs
gksus rd j[ksaA
2. POP CORN : Place the pop corn
bag to the glass tray properly as
instructed on packing. Use Quick
start to set 3~4 minutes. remove
the bag after poping sound has
stopped. Take care that bag
corners do not touch sides while
rotating.
(Note: Attend poping process
carefully. Do not overheat as
cause flash fire.)
POP CORN : Pop Corn dk cSx
dk¡p dh Vªs ij j[ksaA quick start dks
3~4 fe0 ds fy, j[ksaA cSx dks gVk ysa
tc rd Hkquus dh vkokt [kRe gks
tk,A /;ku j[ksa fd cSx ds fdukjs dks
u Nq,saA
uksV & Hkquus dh fØ;k dks /;kuiqoZd
ns[ksaA T;knk u Hkqus D;ksafd blesa vkx
yx ldrh gSA
29
3. FRENCH FRIES : Brush Sliced
potato fingers with oil and spread
potato product out on the metal
tray on glass tray. Use Grill
Combination for 3 Minutes at 40%
Microwave power. Then change
the layer of potato and again cook
f o r 3 M in u t es o n sa m e
co mbi nat io n . A ft e r co o ki ng
remove from the oven and let
stand for 1 to 2 Minutes.
ÝsUp ÝkbZt & dVs gq, vkyw dks rsy
ls xhyk djsA dk¡p dh Vªs ij /kkrq dh
Vªs j[kdj Åij vkyw ds mRiknksa dks
QSyk nsaA 40% ekbØksoso ikoj ij
fxzy dksEcksus'ku 3 feuV ds fy, lSV
djsaA 3 feuV ds ckn vkyw dh rg dks
cnyas vkSj fQj 3 feuV ds fy,
idk;saA idus ds ckn vksou ls
fudky ysaA 1~2 feuV rd cuk ds
j[ksaA
Page 30

Clean your Oven / vou dks lkQ djuk
Clean your Oven / vou dks lkQ djuk
1 Keep the inside of the oven clean
Food spatters or spilled liquids stick to oven walls and between seal and door surface. It is best to wipe up spillovers with a
damp cloth right away. Crumbs and spillovers will absorb microwave energy and lengthen cooking times. Use a damp cloth to
wipe out crumbs that fall between the door and the frame. It is important to keep this area clean to assure a tight seal. Remove
energy spatters with a soapy cloth then rinse and dry. Do not use harsh detergent or abrasive cleaners. The glass tray can be
washed by hand or in the diswahser.
vou dh njkt (cavity) dks lkQ j[ksaA [kk| inkFkZ dh NhaVsa ;k ty inkFkZ dk fxjuk vke ckr gS blfy, njkt dks xhys diM+s ls lkQ
djsaA njoktk vanj dh rjQ ls iwjh rjg lkQ j[kuk pkfg, ftlls mlds can gksus esa dksbZ ijs'kkuh u gksA
2 Keep the outside of the oven clean / vou dks ckgj ls lkQ j[kuk
Clean the outside of your oven with soap and water then with clean water and dry with a soft cloth or paper towel. To prevent
damage to the operating parts inside the oven, the water should not be allowed to seep into the ventilation openings. To clean
control panel, open the door to prevent oven from accidentally starting, and wipe a damp cloth followed immediately by a dry
cloth. Press STOP/CLEAR after cleaning.
igys xhys diM+s ls lkQ djds rqjar lw[ks diM+s ls iksaN ysuk pkfg,A lQkbZ esa lkcqu dk bLrseky dj ldrs gSa ijarq ikuh vanj u tk,]
bldh lkoèkkuh j[ksaA
3 If steam accumulates inside or around the outside of the oven door, wipe the panels with a soft cloth. This may occur when the
microwave oven is operated under high humidity conditions and in no way indicates a malfunction of the unit.
njokts ij teh Hkki dks uje diM+s ls iksaN ysuk pkfg,A
4 The door and door seals should be kept clean. Use only warm, soapy water, rinse then dry thoroughly.
DO NOT USE ABRASIVE MATERIALS, SUCH AS CLEANING POWDERS OR STEEL AND PLASTIC PADS.
Metal parts will be easier to maintain if wiped frequently with a damp cloth.
njoktk vkSj mlds iqtsZ iwjh rjg ls lkQ j[ksaA
dHkh Hkh nkusnkj ikmMj lk l[r oLrq ls lQkbZ u djsaA
vanj ls lkQ djus ds fy, xhyk diM+k bLrseky djuk vklku rjhdk gSA
Cookware to use in Microwave Oven / ekbØksoso vou esa iz;qDr gksus okys crZu
Cookware to use in Microwave Oven / ekbØksoso vou esa iz;qDr gksus okys crZu
Cookware should be such that it allows the Microwave to pass through. If not the waves will get reflected or absorbed thus no
cooking would take place. Shape & size are again important.[kkuk idkus okys crZu ,sls gksus pkfg, ftuesa ls ekbØksoso izokfgr gks ldsaA
;fn ugha] rks ekbØksoso ijkofrZr ;k la;qDr gks tk;sxh ftlls [kkuk ugha id ldsxkA crZu dh vkÑfr vkSj vkdkj cgqr gh egRoiw.kZ gSaA
COOKWARE SELECTION TABLE
Cookware Microwave Grill Combination
Metal Cookware painted with metallic paints
Glazed / partly glazed pottery
Polystyrene, Melamine, Multilayer container
Aluminium foil
Aluminium foil container
Recycled paper / glued paper product
Oven proof glass, Glass, Ceramic stoneware
Plastic microwave cookware
Cling film, Butter paper
No
No
No
For Shielding
No
No
Yes
Yes (If recommended
by Manufacturer)
Yes
Yes
No
No
For Shielding
For Shielding
No
Yes
No
No
Not recommended
No
No
Yes
Yes
No
Yes
No
No
30
Page 31

Plug wiring information/Technical Specifications / ok;fjax rFkk rduhdh tkudkjh
Plug wiring information/Technical Specifications / ok;fjax rFkk rduhdh tkudkjh
Warning /
psrkouh
This appliance must be earthed / ;g ;U=k vFkZ fd;k tkuk pkfg,
The wires in this mains lead are coloured in accordance with the following codes / esUl (mains) ikoj dkWMZ dk jax fuEu
funsZ'kkuqlkj gksrk gSs &
BLUE/BLACK ~ Neutral BROWN/RED ~ Live GREEN & YELLOW/GREEN ~ Earth
As the colours of the wires in the mains lead of this appliance may not correspond with the coloured markings identifying
with the terminals in your plug proceed as follows / ok;fjax djus dk funsZ'k %
The wire which is coloured BLUE/BLACK must be connected to the terminal which is marked with the letter N or Coloured
BLACK.
BLUE/BLACK jax ds ok;j dk dusD'ku Iyx ds ‘N’ fiu ls
The wire which is coloured BROWN/RED must be connected to the terminal which is marked with the letter L or coloured
RED.
BROWN/RED jax ds ok;j dk dusD'ku Iyx ds ‘L’ fiu ls
The wire which is coloured GREEN & YELLOW or GREEN must be connected to the terminal which is marked with the
letter E or
GREEN & YELLOW/GREEN jax ds ok;j dk dusD'ku Iyx ds ‘E’ ls
Technical Specification / rduhdh tkudkjh
MC-8048WR
Power Input / ikoj buiqV 230 V AC / 50 Hz
Output / vkmViqV 900 W (IEC705 rating standard)
Microwave Frequency / ekbØksoso fÝDosUlh 2450 MHz
Outside Dimension / ckgjh eki 530 mm(W) X 500 mm(D) X 322 mm(H)
Power Consumption / ikoj datEi'ku
Microwave / ekbØksoso 1350 Watt
Grill / fxzy 1250 Watt
Combination / dkWEchus'ku 2650 Watt
Convection / duosD'ku 1350 Watt
RF Output / vkj,Q vkmViqV 900 Watt
31
Page 32

P/No. : MFL06577703
LG Electronics
 Loading...