

LG M3800S, M2900S-BN - - 29"" LCD Flat Panel Display, M3800S-BN - - 38"" LCD Flat Panel Display User Manual

Make sure to read the
Safety Precautions
before using the product.
Keep the User's Guide(CD) in an accessible place for future reference.
See the label attached on the product and give the information to your dealer when you ask
for service.
M2900S
M3800S
User’s Guide

1. Slide off the battery cover.
2. Insert the batteries with correct polarity (+/-).
3. Close the battery cover.
• Dispose of used batteries in the recycle bin to prevent environmental pollution.
Inserting batteries into remote control.
1
Using the Remote Control
Name of the Remote Control Buttons
•
Menu Button
OSD On/ Off
Sub OSD Menu out
•
buttons
OSD Menu Navigation
•
buttons
Select OSD Menu Item.
: Decrement Value
: Increment Value
•
Auto Button
Automatic adjustment function
(Operational for the analog signal only)
•
Power On/Off Button
•
Source
Button
Select input source
(RGB, DVI)
CR2025
•
button
Zoom Hot key
(Normal Zoom Full)
* Only OSD menu off
SOURCE
MENU
ZOOM
2
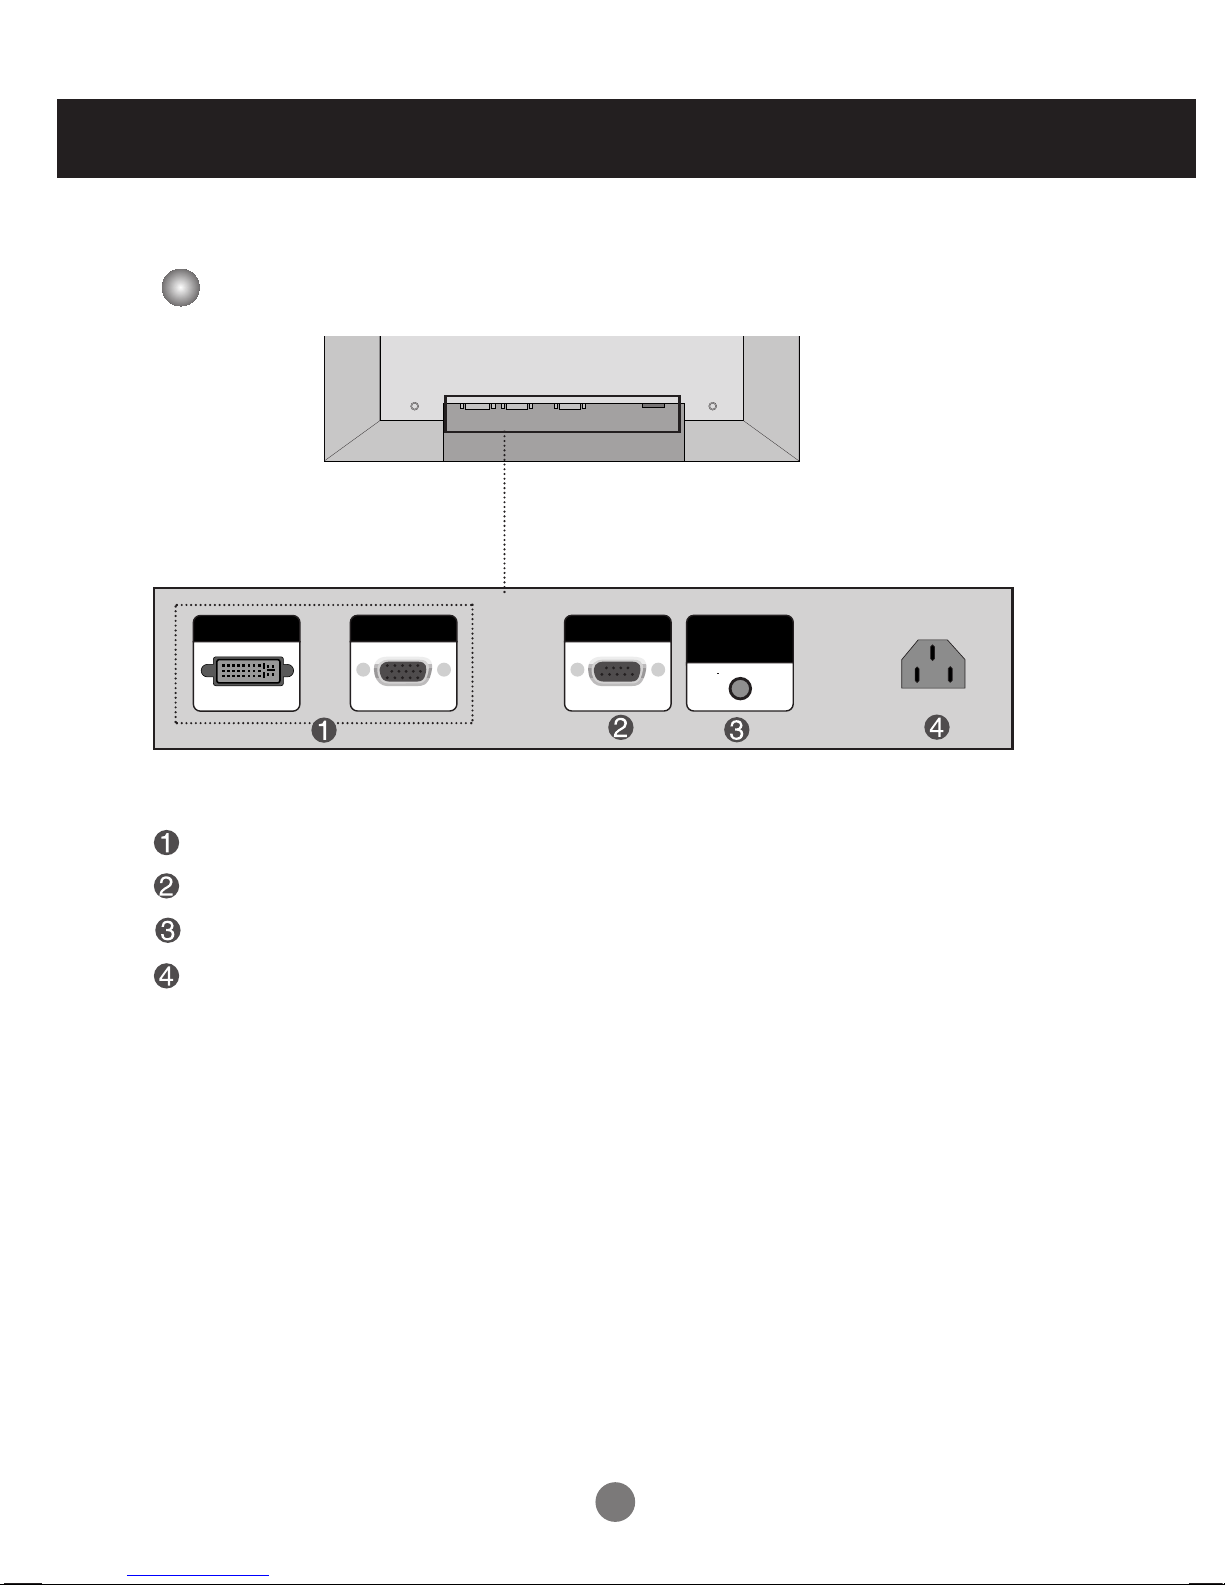
Name and Function of the Parts
Rear View
DVI, RGB Ports
RS-232C Serial Port
Wired Remote Control Port
Power Connector : Connect the power cord
* The product image in the user’s guide could be different from the actual image.
DVI IN
RGB IN
RS-32C IN
REMOTE
CONTROL IN
AC-IN
3
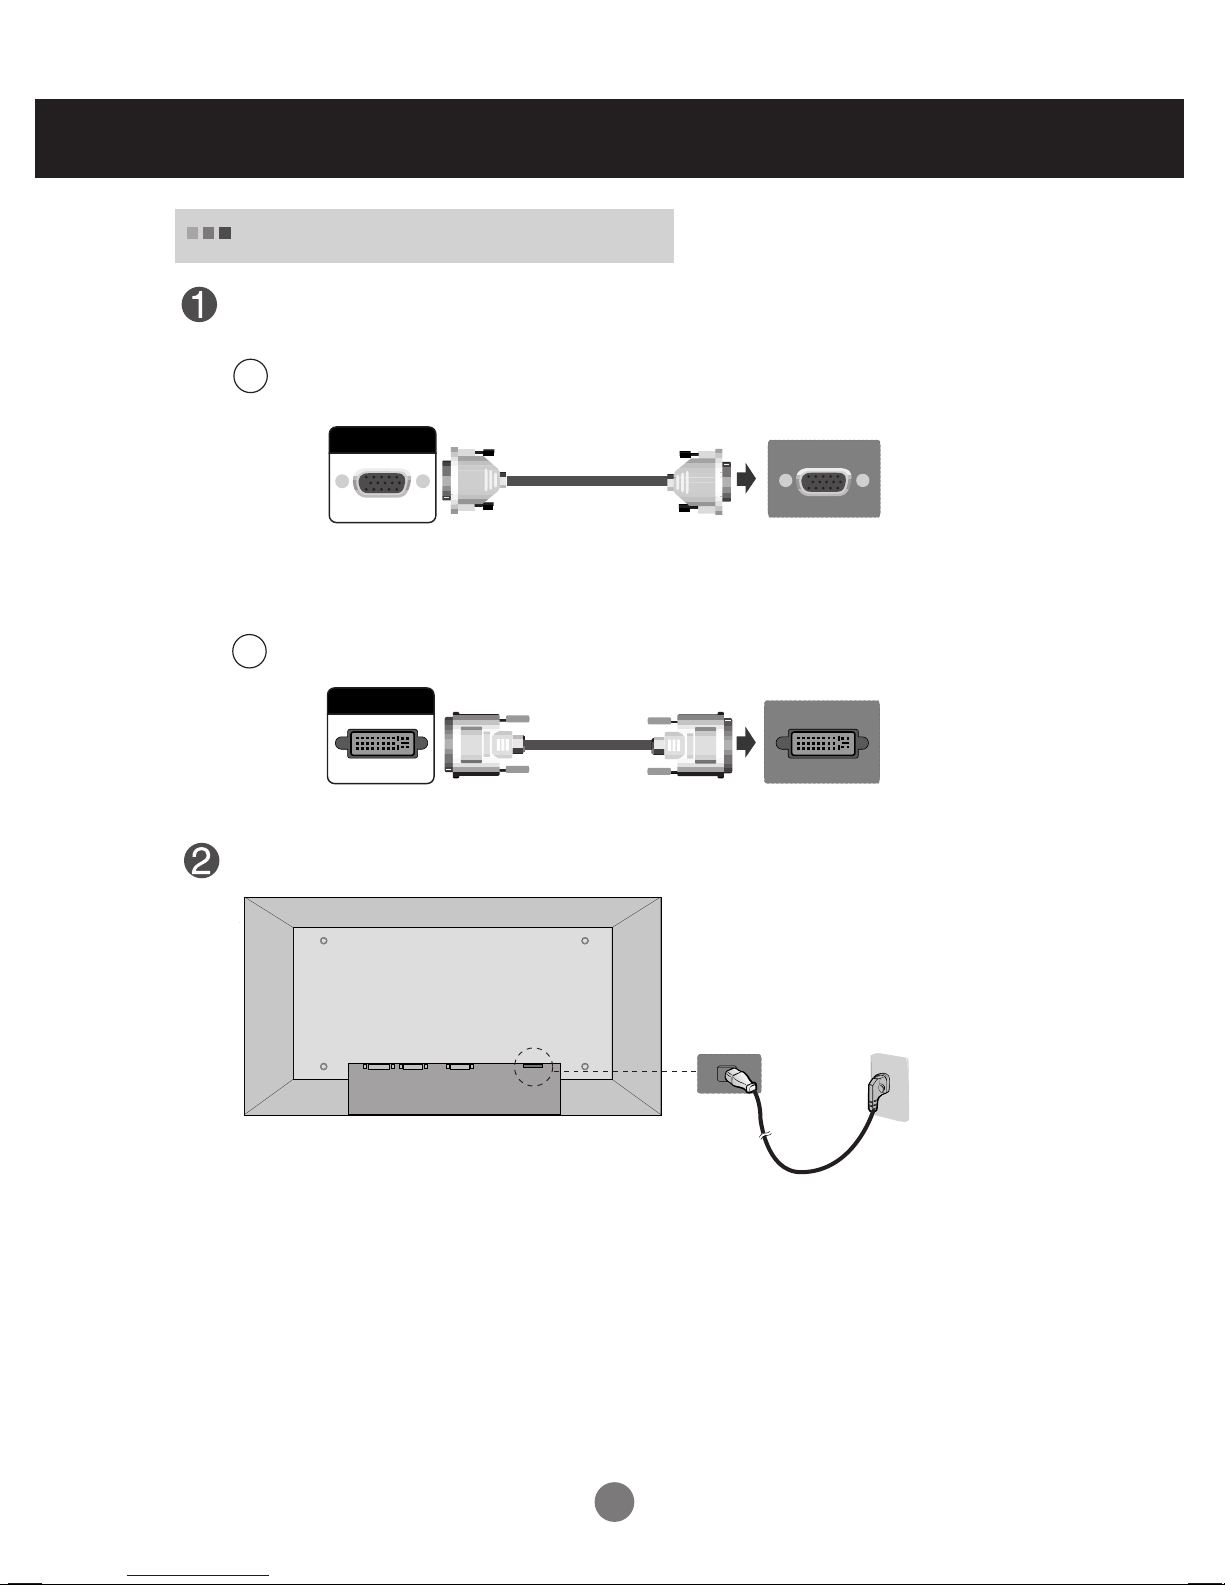
First of all, see if the computer, product and the peripherals are turned off.
Then, connect the signal input cable.
When connecting with the D-Sub signal input cable. (RGB)
Rear side of the product.
Connecting to External Devices
Connect the power cord.
B
A
When Connecting to your PC
PC
PC
Rear side of the product.
Rear side of the product.
When connecting with the DVI signal input cable.
RGB IN
DVI IN
4
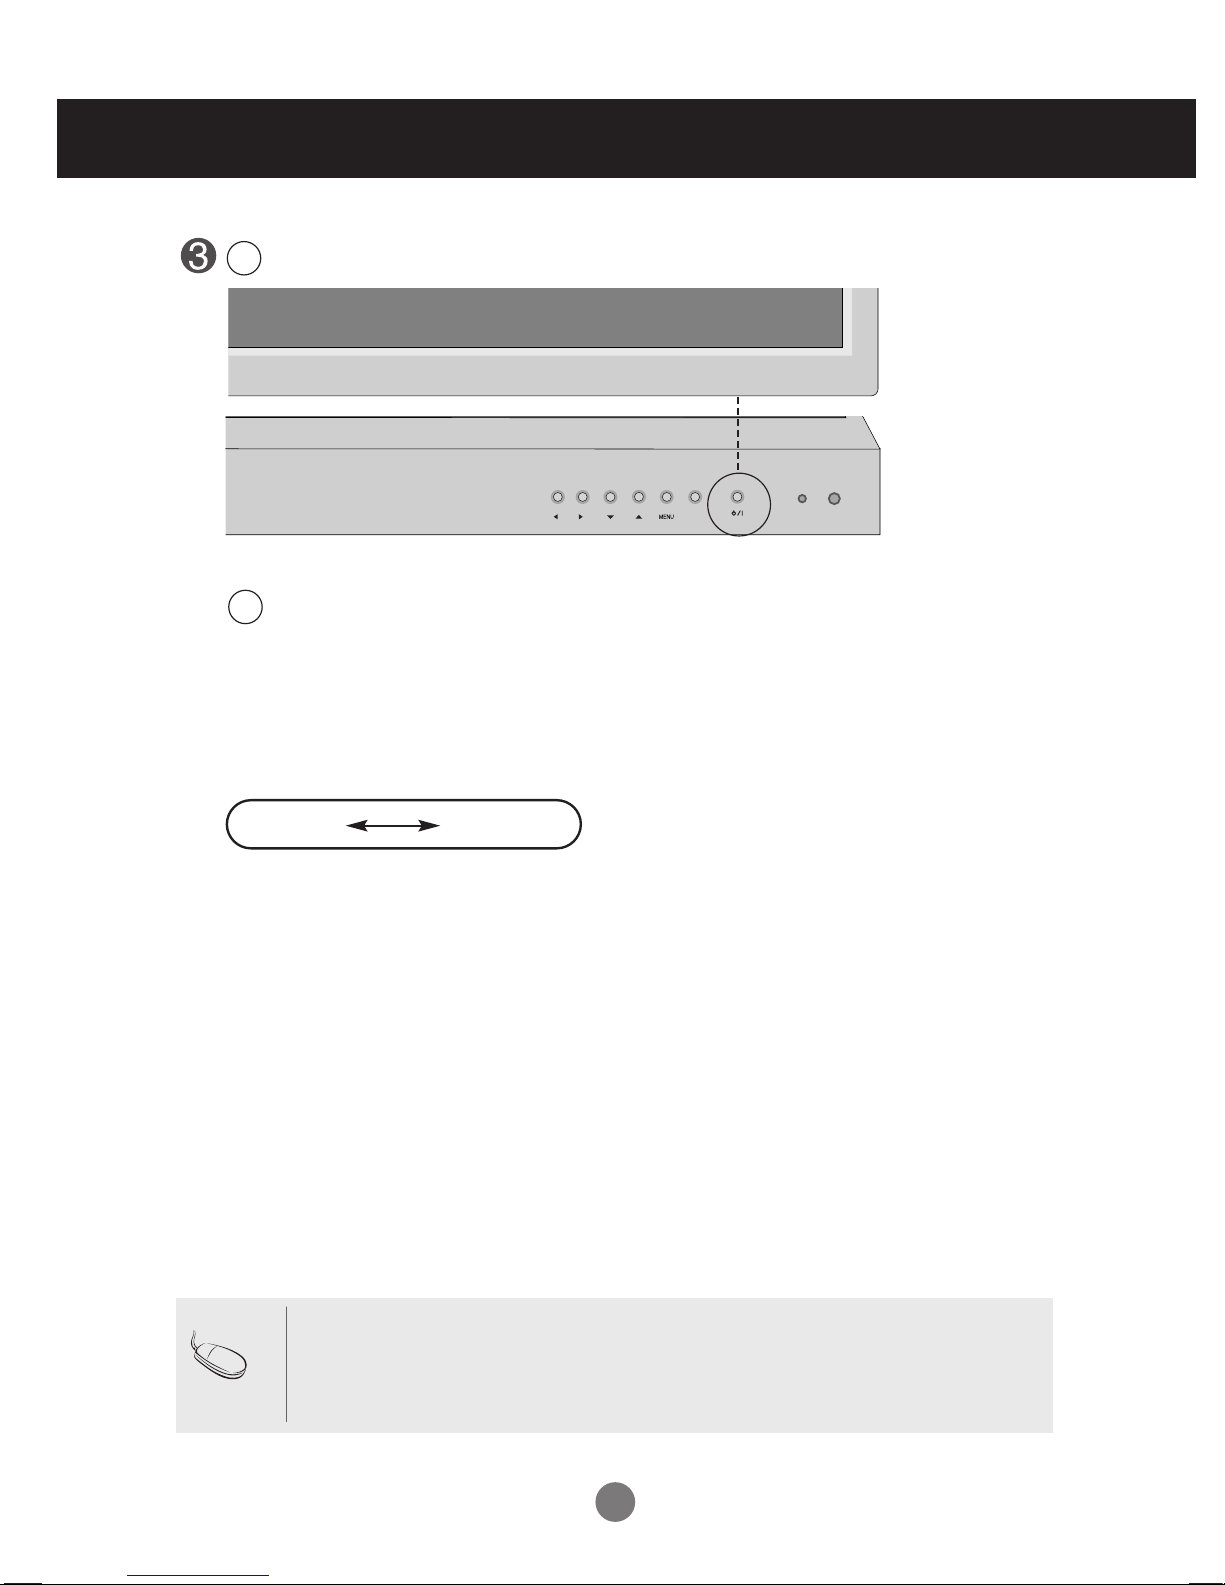
To change input source
Press the SOURCE button on the remote control to select the input signal.
Or, press the SOURCE button on the bottom of the product.
•
How to connect to two computers.
Connect the signal cables (
DVI and D-Sub) to each computer.
Press the SOURCE button on the remote control to select the computer to use.
•
Directly connect to a grounded power outlet or power strip (three prong connector.)
Note
Turn on power by pressing the power button on the product.
Turn on the PC.
Connecting to External Devices
2
1
Power button
DVI signal D-Sub signal
SOURCE
ON/OFF
Zoom

5
VESA FDMI wall Mounting
This product supports a VESA FDMI compliant mounting interface. These mounts are purchaed
separately and not available from LG. Refer to the instructions included with hte mount for more info.
Connecting to External Devices
6
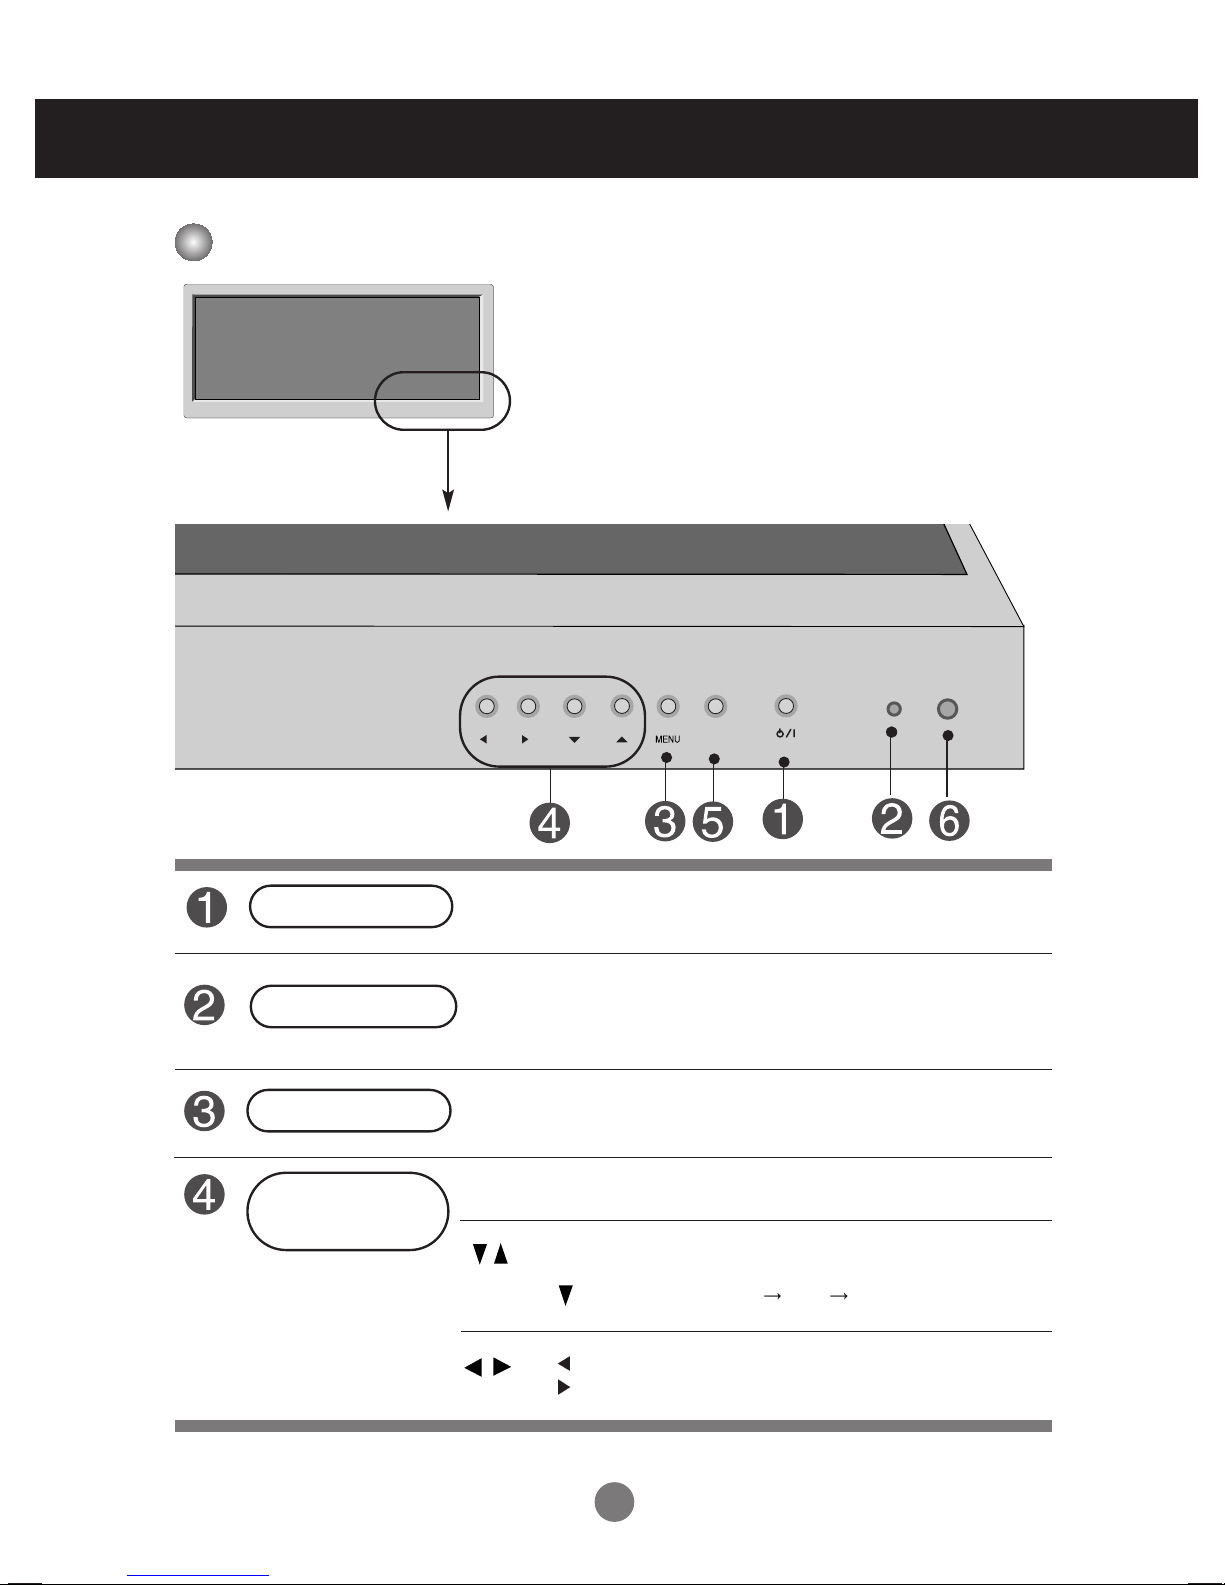
User Menus
Screen Adjustment options
• Press this button to turn on the power. Press this button again to
turn it off.
• This Indicator lights up green when the display operates normally(on
mode). If the display is in sleep (Energy Saving) mode, this indicator
color changes to amber.
Power Button
OSD Menu Navigation up and down
• Use this button to show/hide the OSD (On Screen Display) menu
screen.
MENU Button
• Use
this
button to select an icon or adjust the setting in the OSD screen.
OSD Select /
Adjust Button
Power Indicator
: Select Menu Item, Decrement Value
: Select Menu Item, Increment Value
: Zoom Hot key (Normal Zoom Full)
Zoom
Zoom
SOURCE
ON/OFF

7
• This is where the unit receives signals from the remote control.
Screen Adjustment options
SOURCE Button
IR Receiver
User Menus
To change input source depending on connected signal.
Press the SOURCE button on the remote control to select the
input signal.
Or, press the SOURCE button on the bottom of the product.
DVI signal D-Sub signal
Digital signal
15-pin D-Sub analog signal

8
User Menus
OSD Menu
Icon Function Description
PICTURE
Adjusts screen brightness, contrast and color that you prefer.
Note
OSD(On Screen Display)
The OSD function enables you to adjust the screen status conveniently since it provides
graphical presentation.
OSD
Adjusts the OSD image.
TIMER
Adjusts the timer options.
ZOOM
Adjusts the screen size.
9
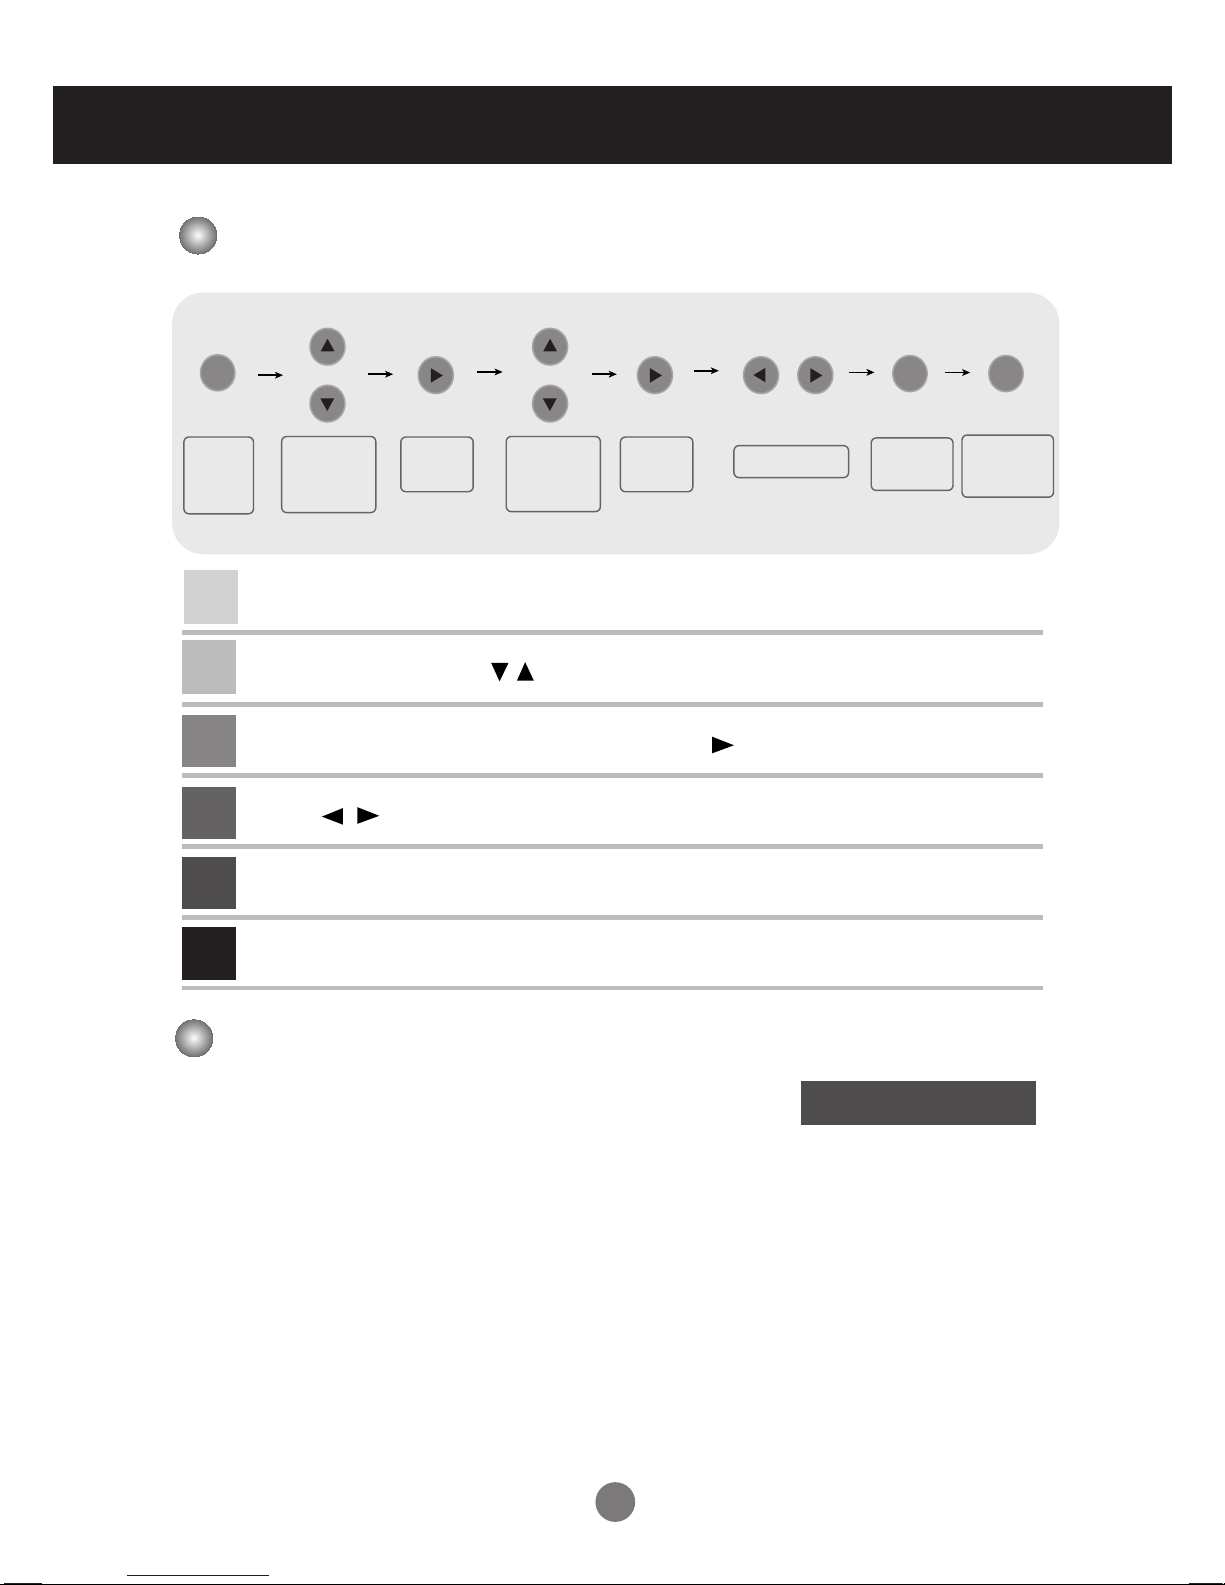
How to adjust the OSD (On Screen Display) screen
MENU
MENUMENU
•
Use the remote control to adjust the OSD screen.
How to adjust the screen automatically
Press the AUTO button on a remote Control in the PC analog signal.
Then optimal screen settings will be selected that fit into the current
mode. If adjustment is not satisfactory, you can adjust the screen
manually.
Press the MENU Button, then the main menu of the OSD appears.
To access a control, use the Buttons.
When the icon you want becomes highlighted, press the Button.
Use the Buttons to adjust the item to the desired level.
Accept the changes by pressing the MENU Button.
Exit the OSD by pressing the MENU Button.
1
2
3
4
5
6
Pops up
the menu
screen
Move where
you want to
adjust
Move where
you want to
adjust
Select a
menu icon
Select a
menu icon
Adjust the status
Save
adjustment
Exit from the
menu screen.
User Menus
Auto-Adjust
 Loading...