

Page 1
Page 2
Before Operation
7
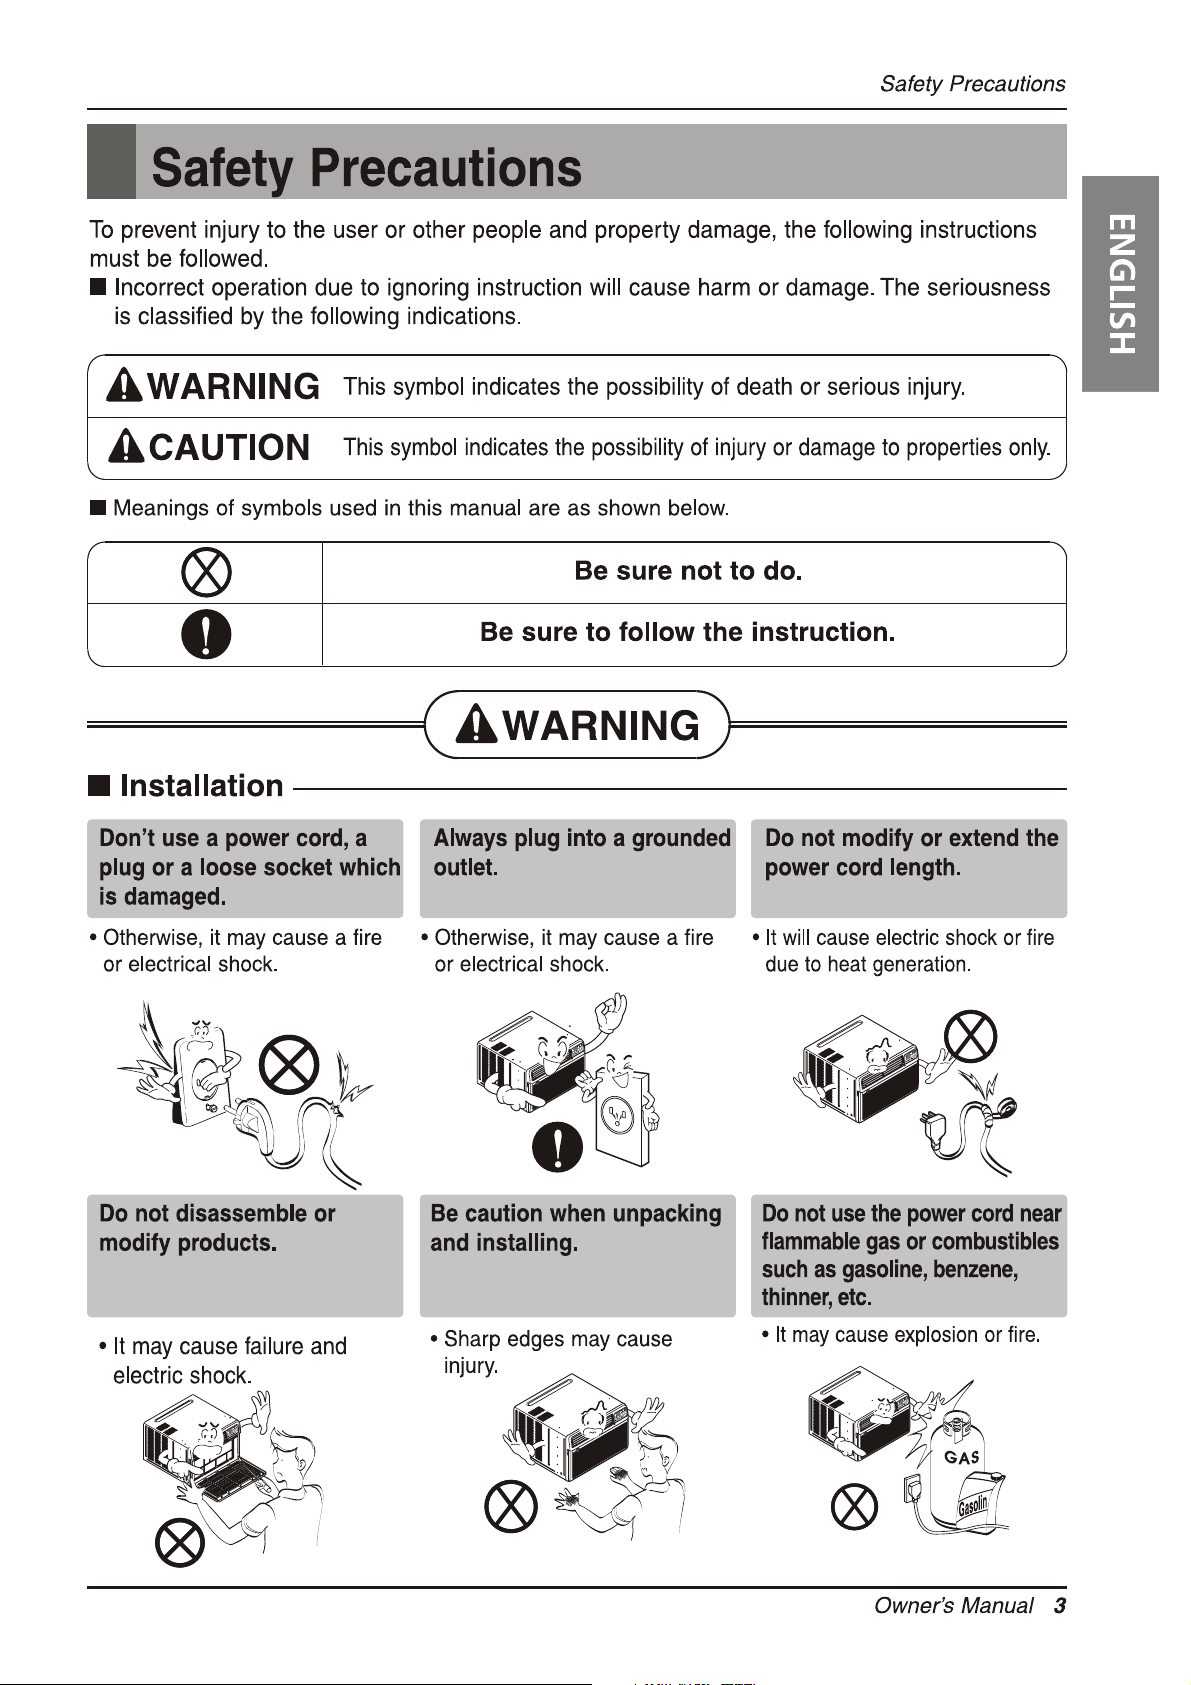
Page 3
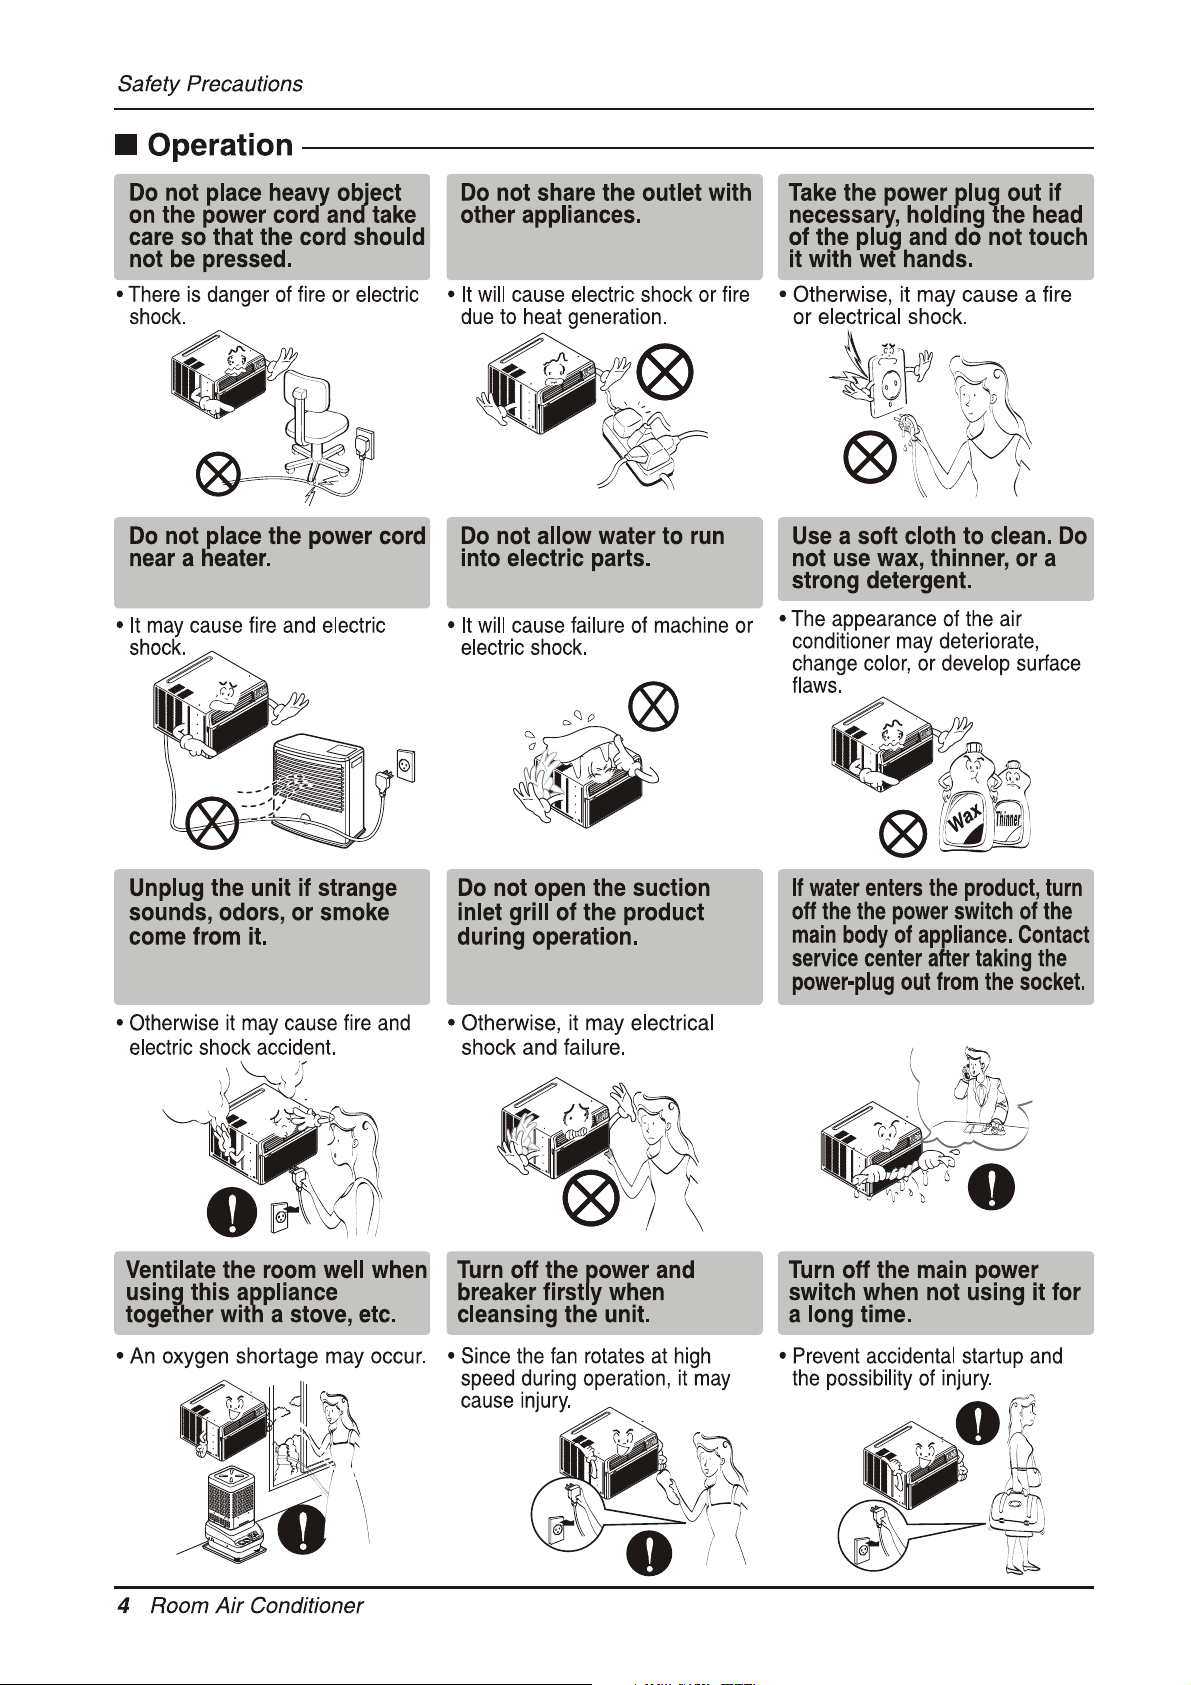
Page 4
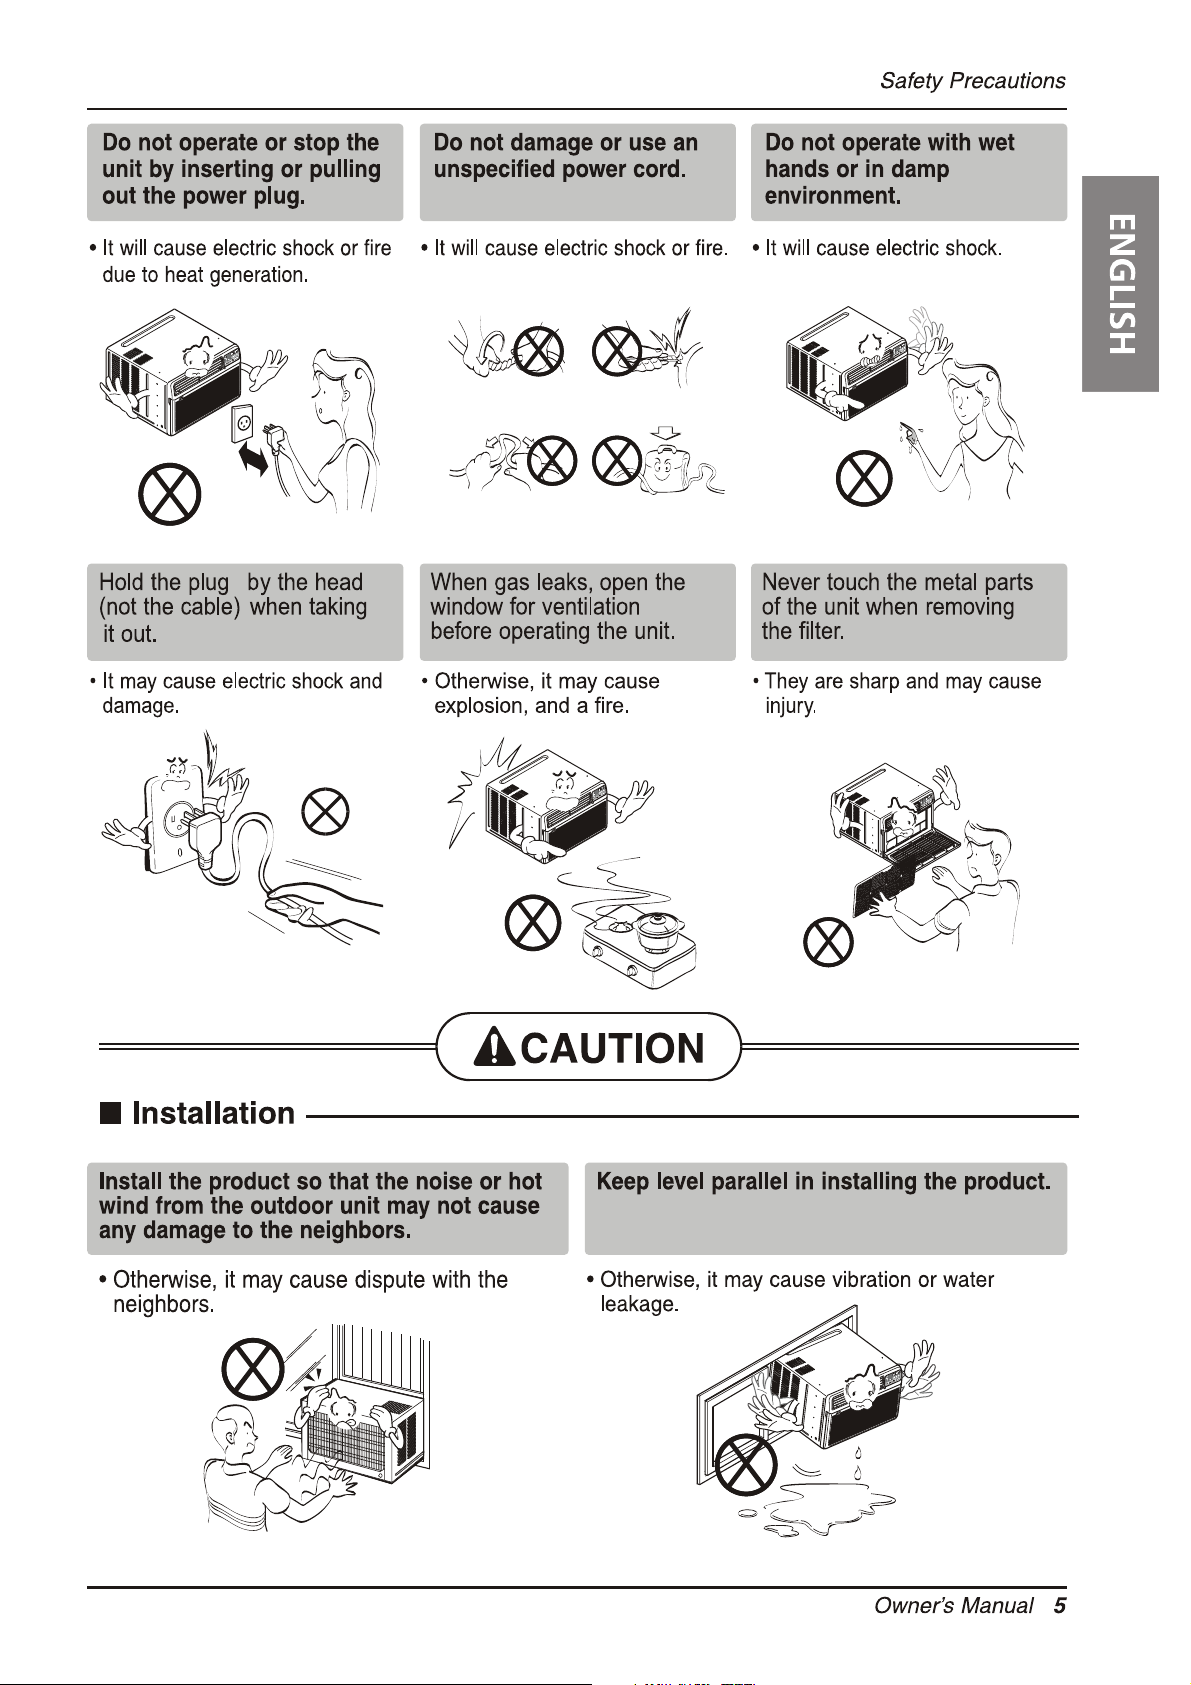
Page 5
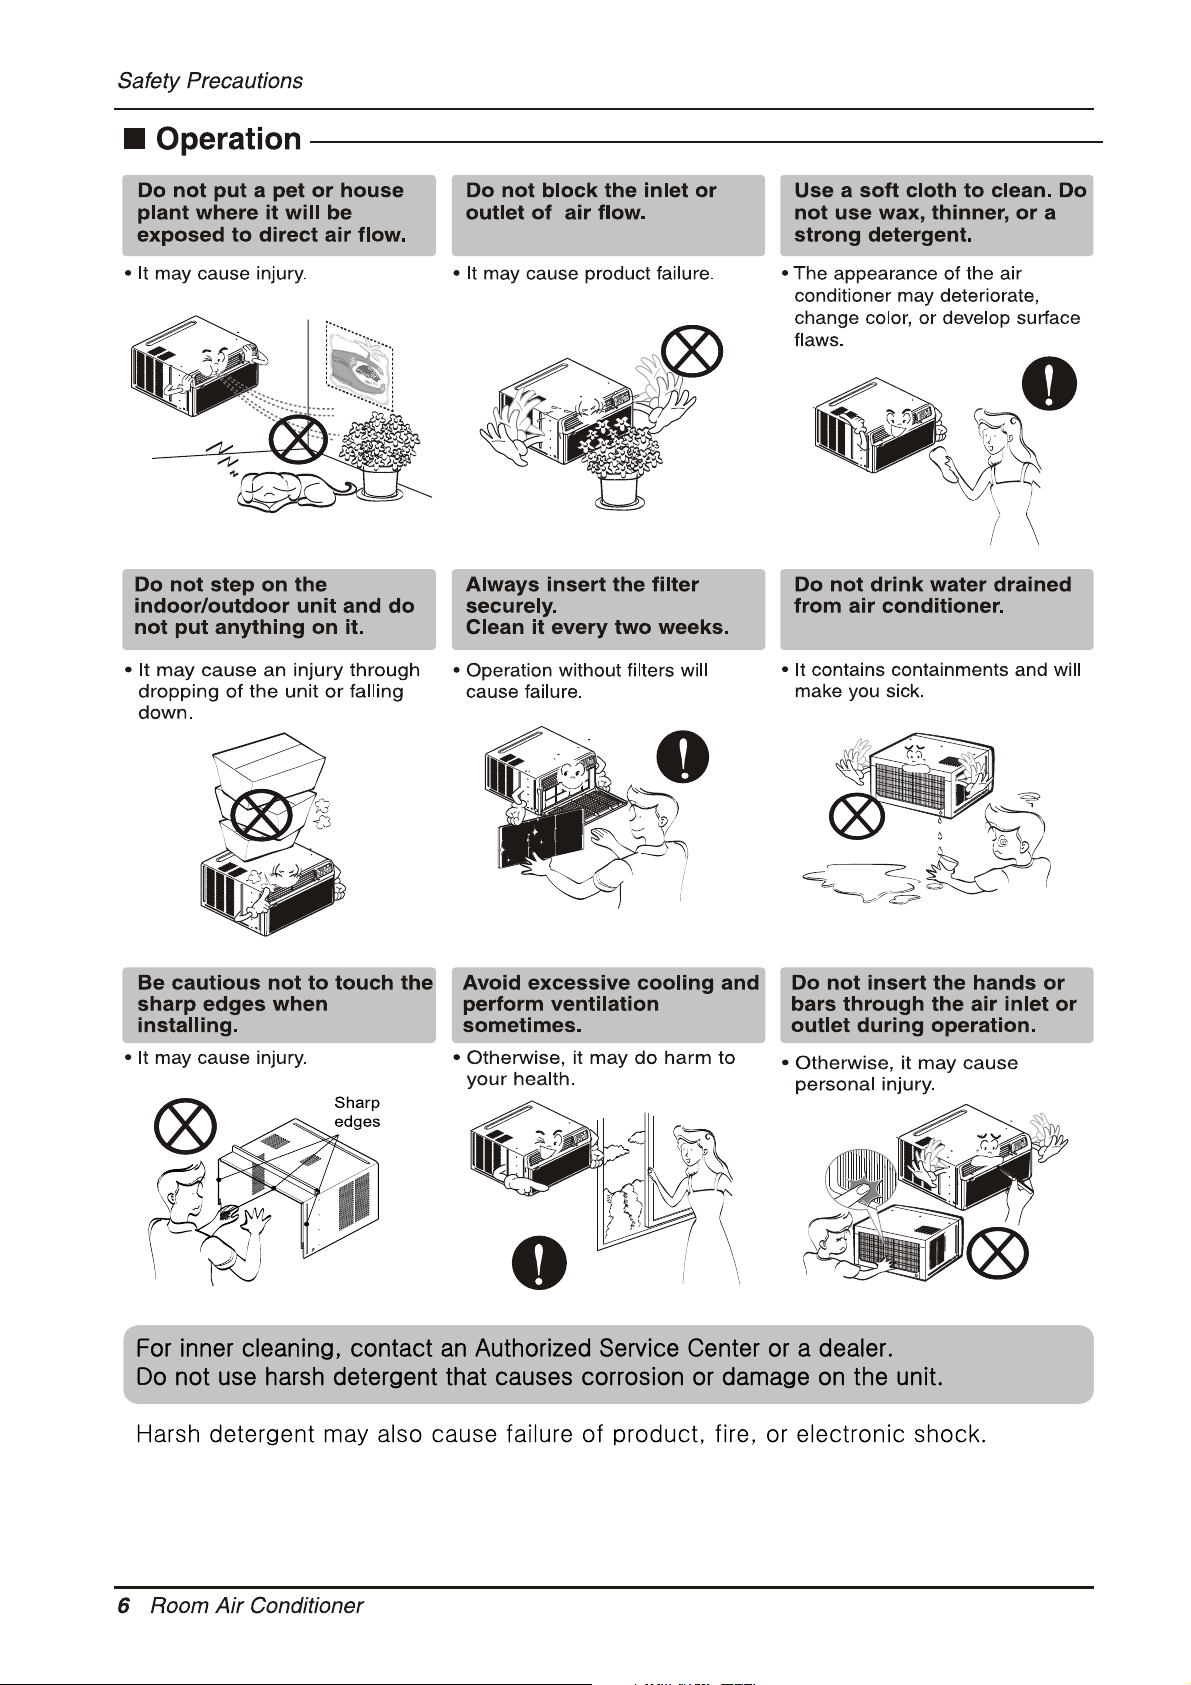
Page 6
Page 7
Page 8

NOTE: Your air conditioner may differ from the one shown.
Page 9

Page 10

Page 11

Parts supplied:
Check that all parts are included in parts package.
A
B
E
C
A. Top channel
B. Foam seal
C. Side brackets (2)
D.Window lock bracket
” screws (3)
E.
F.
” screws (9)
G. Side curtains (2)
H.Side curtain frames (2)
I. Remote control
D
F
G
H
I
Gather the required tools and parts before starting installation.
Read and follow the instructions provided with any tools listed here.
Tools needed
Phillips head screwdriver
Flat-blade screwdriver
Scissors
Level
Tape measure
Cordless drill and 1/8” bit
Pencil
Pliers
Location Requirements
IMPORTANT: Observe all governing codes and ordinances.
Check the location where the air conditioner will be installed.
Make sure you have everything necessary for correct installation.
The location should provide:
5000-8000 BTU:Grounded electrical outlet within 6 ft (183 cm)
of where the power cord exits the air conditioner.
NOTE: Do not use an extension cord.
NOTE: Do not use an adapter plug.
Free movement of air in room to be cooled.
A large enough opening for the air conditioner. Installation
parts are supplied for double-hung windows.
Adequate wall support for weight of air conditioner. Air
conditioner weighs 44 lbs to 70 lbs (20.0 kg to 31.8 kg).
NOTE: Cabinet louvers must not be obstructed. Air must be able
to pass freely through the cabinet louvers.
Socket wrench and sockets
Adjustable wrench
A
A. Cabinet louvers
Page 12

Window Installation
Window opening measurements:
MODEL
Dimension
A(inch) Min
A(inch) Max
B(inch) Min
8000 BTU
25”(63.5cm)
36”(91.4cm)
13
”(34cm)
Unpack the Air Conditioner
Remove Packaging Materials
NOTE:The air conditioner must set upright for
one hour before operating.
Remove and dispose of/recycle packaging
materials. Remove tape and glue residue from
surfaces before turning on the air conditioner.
Rub a small amount of liquid dish soap over the
adhesive with your fingers.Wipe with warm
water and dry.
Do not use sharp instruments,rubbing alcohol,
flammable fluids,or abrasive cleaners to
remove tape or glue.These products can
damage the surface of your air conditioner.
Handle the air conditioner gently.
A. Width
B. Height
A
B
Prepare Air Conditioner for Installation
Install Top Channel
1. Place the top channel on the top of the air
conditioner, lining up the holes in the top
channel with the holes in the top of the air
conditioner.
2. Using three
channel to the air conditioner.
NOTE: Your model may differ from the one
shown.
” screws,attach the top
A
A. ” screws
B. Top channel
B
Page 13

Install Side Curtains
NOTE: Attach curtains to the air conditioner before
placing the air conditioner in window.
1. Place the tabbed side of the side curtain in the
track on the right-hand side of the air
conditioner cabinet.
A
3. Slide the side curtain frame into the top
channel on the top of the air conditioner and
the track on the bottom of the air conditioner.
B
A. Tabbed side of side curtain
B. Lock edge side of side curtain
2. Slide the side curtain down the track until the
curtain is aligned with the top and bottom of
the air conditioner cabinet.
4. Slide the side curtain frame as close to the
air conditioner as necessary to lock the side
curtain to the frame.
5. Repeat above steps for the left-hand side
curtain and frame.
Prepare the Window for Installation
1. Measure the width of the window opening.
2. Mark the center line on the inside windowsill.
A. Width of window opening
B. Center line
B
A
Page 14

Positioning the Air Conditioner
NOTES:
Handle the air conditioner gently.
Be sure your air conditioner does not fall out of
the opening during installation or removal.
The place where the power cord exits the air
conditioner should be no more than 6 ft (183 cm)
from a grounded outlet.
Do not block the louvers in the front panel.
Do not block the louvers on the outside of the
air conditioner.
1. Tilt the air conditioner about 1/2” down towards
the outside for proper condensate water
drainage.Center the air conditioner in the
window. Lower the window sash behind the top
channel to hold the cabinet in place.
NOTE: Your model may differ from the one shown.
3. Slide the side bracket over the screw.
4. Tighten the screw. The side bracket should
be resting on the windowsill.
B
A
C
A. Side curtain against window channel
B. Window sash behind top channel
C. Bottom channel in behind windowsill
2. Loosen the screw on the right-hand side of the
air conditioner cabinet near the bottom.
5. Use
the holes in the side bracket and windowsill.
6. Using two
7. Repeat for side bracket installation on the
left-hand side of the air conditioner.
” drill bit to drill a starter hole through
” screws, attach the side
bracket to the windowsill.
Page 15

Attach Side Curtains to Window
5. Use a
the bottom hole in the side curtain and into
the window frame.
” drill bit to drill a starter hole through
channel.
2. Use a
the top hole in the side curtain and into the
window sash.
3. Insert one of the
hole of the lefthand curtain and into the
window sash.
4. Repeat for the right-hand curtain.
” drill bit to drill a starter hole through
” screws through the top
Top View
Completing the Installation
6. Insert one of the
bottom hole of the left-hand curtain and into
the window frame.
7. Repeat for the right-hand curtain.
” screws through the
Bottom View
1. Insert the foam seal behind the top of the
lower window sash and against the glass of
the upper window.
A
B
A. Top of lower window sash
B. Foam seal
2. Place the window lock bracket as shown. Use a
” drill bit to drill a starter hole through the hole
in the window lock bracket and into the upper
window.
3. Attach the window lock bracket to the upper
window with one
window in place.
screw to secure the
”
A
4. After installation is complete, check that the
unit is tilting downward toward the outside,
for proper condensate drainage.Plug into a
grounded 3 prong outlet.
5. Press RESET on the power supply cord.
See “Electrical Requirements.”
B
Page 16

POWER
Operation starts when this button is pressed and stops when
you press the button again.
FAN SPEED SELECTOR
For increased power while cooling,select a higher fan speed.
3 steps:High
Med
Low.
ON/OFF TIMER
Please refer to page 18 in details
OPERATION MODE SELECTOR
a. Press MODE until you see the indicator light glow for the
desired setting.
b. Choose Fan, Cool, Energy Saver or Dehum.
Fan—Only the fan runs. Press SPEED to select High, Med
or Low fan speed. The display shows the current room
temperature.
Cool—Cools the room. Press SPEED to select High, Med
or Low fan speed. Press the TEMP/TIME up or down
arrow button to adjust the temperature.
Energy Saver—Fan runs only when cooling is needed.
The fan will have a running delay for 1 or 2 min after the
cooling stops. Press SPEED to select High, Med or Low
fan speed.Because the fan does not circulate the room
air continuously, less energy is used, but the room air
is not circulated as often.
Dehum—Dries the room. The air conditioner automatically
selects the temperature.
REMOTE CONTROLLER
Page 17

TEMPERATURE CONTROL
Press the TEMP/TIME up arrow button to raise the temperature. Each time you press or
hold the TEMP/TIME uparrow button, the temperature will go up 1ºF until it reaches
86°F (30°C).
Press the TEMP/TIME down arrow button to lower the temperature. Each time you press or hold
the TEMP/TIME down arrow button, the temperature will go down 1ºF until it reaches 61°F (16°C).
REMOTE CONTROL SENSOR
NOTE:Press timer nine times continuously within 5 seconds,then buzzer will sound 4 times
that means blackout compensation function works. After that,it needs 5 seconds
continuous conduction time,then blackout.
CAUTION
The Remote Controller will not function properly if strong light strikes the sensor window
of the air conditioner or if there are obstacles between the Remote Controller and the air
conditioner.
NOTE: One CR2025 battery (included) powers the remote control. Replace battery after
6 months of use, or when the remote control starts to lose power.
Power
Press ON/OFF to turn on/off the air conditioner.
Mode
Press MODE to choose Fan, Cool,Energy saver or Dehum.
Speed
Press SPEED to choose High, Med or Low.
Temperature
Press the TEMP/TIME up arrow button to raise the temperature. Each time you press or
hold the TEMP/TIME up arrow button, the temperature will go up 1ºF until it reaches
86°F (30°C).
Press the TEMP/TIME down arrow button to lower the temperature. Each time you press
or hold the TEMP/TIME down arrow button, the temperature will go down 1ºF until it
reaches 61°F (16°C).
Page 18

Timer
To set the Timer for a 1-hour to 24-hour delay before the air conditioner is turned
off (the air conditioner must be On):
1. Press TIMER. T
2. Press the TEMP/TIME up or down arrow button to change the delay time from 1 hour
to 24 hours.
3. After 5 seconds, Timer OFF indicator light on the air conditioner control panel will
remain on.
be on/off.
To set Timer to turn on the air conditioner, keeping previous settings:
1. Turn on the air conditioner.
2.
Press TIMER. T
3.
Press the TEMP/TIME up or down arrow button to change the delay time from 1 hour
be on/off.
to 24 hours.
After 5 seconds, Timer On indicator light on the air conditioner control panel will remain
4.
on.
To set Timer to turn on the air conditioner, changing the previous settings:
1. Turn on the air conditioner.
2. Adjust the mode to Fan or Cool or Energy Saver.
3. For Fan, Cool or Energy Saver mode, adjust the fan speed to High, Med or Low.
4. Adjust the temperature between 61ºF and 86ºF (16ºC and 30ºC).
NOTE: In Fan mode, the temperature cannot be set.
5. Press TIMER. Timer On indicator light on the air conditioner
will show remaining hours before the air conditioner will turn on.
6. Press the TEMP/TIME up or down arrow button to change the delay time from 1 hour to 24 hours.
7. Timer On indicator light on the air conditioner control panel will remain on.
To clear Timer delay program:
NOTE: Air conditioner can be either on or off.
1. Press TIMER once after it has been programmed. Display on the air conditioner control panel will
show remaining time.
2. While the display is showing the remaining time, press TIMER untill Timer indicator light turns off.
be on/off.
To see or change the remaining time (in hours):
Timer Off :
1. Press TEMP/TIME once after it has been programmed.Display on the air conditioner control panel
will show remaining time.
2. While the display is showing the remaining time, press the TEMP/TIME up or down arrow button
to increase or decrease the time.
3. After 5 seconds, the display on the air conditioner control panel will show the current room
temperature.
Timer On :
1. Display on the air conditioner control panel will show remaining time.
2. While the display is showing the remaining time, press the TEMP/TIME up or down arrow button to
increase or decrease the time.
Page 19

A
A. 4-Way Air Flow
Normal Sounds
When your air conditioner is operating normally, you may hear sounds such as:
Droplets of water hitting the condenser, causing a pinging or clicking sound. The water
droplets help cool the condenser.
Air movement from the fan.
Clicks from the thermostat cycle.
Vibrations or noise due to poor wall or window construction.
A high-pitched hum or pulsating noise caused by the modern
Page 20

Your new air conditioner is designed to give you many years of dependable service. This
section tells you how to clean and care for your air conditioner properly.
Cleaning theAir Filter
filter helps remove dust, lint, and other particles
from the air and is important for best cooling and
operating efficiency.Check the filter every 2 weeks
to see whether it needs cleaning.
Note:Do not operate the air conditioner without the
filter in place.
1. Turn off the air conditioner.
2. Remove the air filter by opening the front panel
and removing the air filter.
filter is very dirty, wash it in warm water with a
mild detergent. Do not wash the air filter in the
A
B. Front panel
B
5. Close the front panel.
6. Turn on the air conditioner.
Cleaning the Front Panel
1. Turn off the air conditioner.
2. Clean the front panel with a soft, damp cloth.
3. Air dry the front panel completely.
4. Turn on the air conditioner.
Annual Maintenance
Your air conditioner needs annual maintenance to help ensure steady, top performance throughout the
year. Call your local authorized dealer to schedule an annual checkup. The expense of an annual
inspection is your responsibility.
Page 21

Page 22

/*(/(&7521,&6,1&
6\OYDQ$YH(QJOHZRRG&OLIIV1-
/*&XVWRPHU,QIRUPDWLRQ&HQWHU
5HJLVWHU\RXUSURGXFW2QOLQH!
ZZZOJDSSOLDQFHVFRP
 Loading...